Panasonic of North America TXANP07VKA1 802.11 Transceiver User Manual End Product Manual
Panasonic Corporation of North America 802.11 Transceiver End Product Manual
UserManual.wiki
>
Panasonic of North America
>
TXANP07VKA1 User Manual
>
End Product Manual
Contents
1.
End Product Manual
2.
Installation Manual Revised
End Product Manual
Navigation menu
Upload a User Manual
Namespaces
Wiki Guide
HTML
PDF
Info
Views
User Manual
Discussion / Help
Navigation
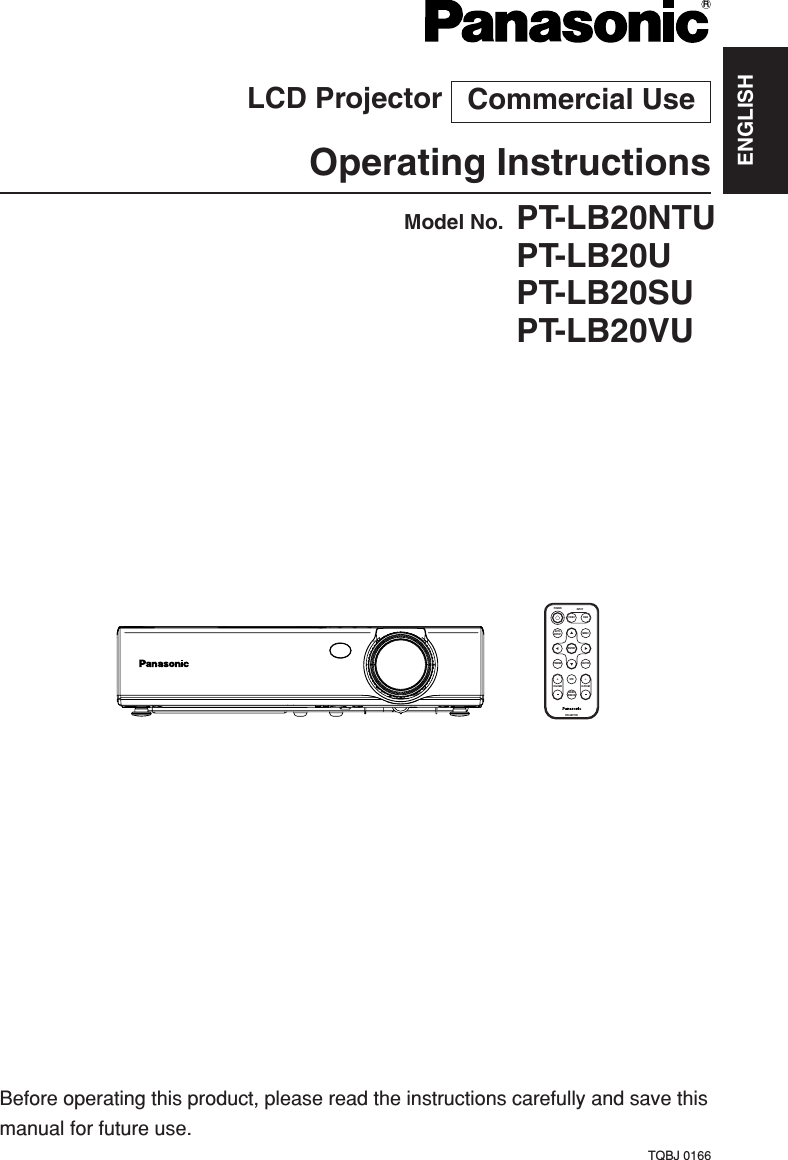
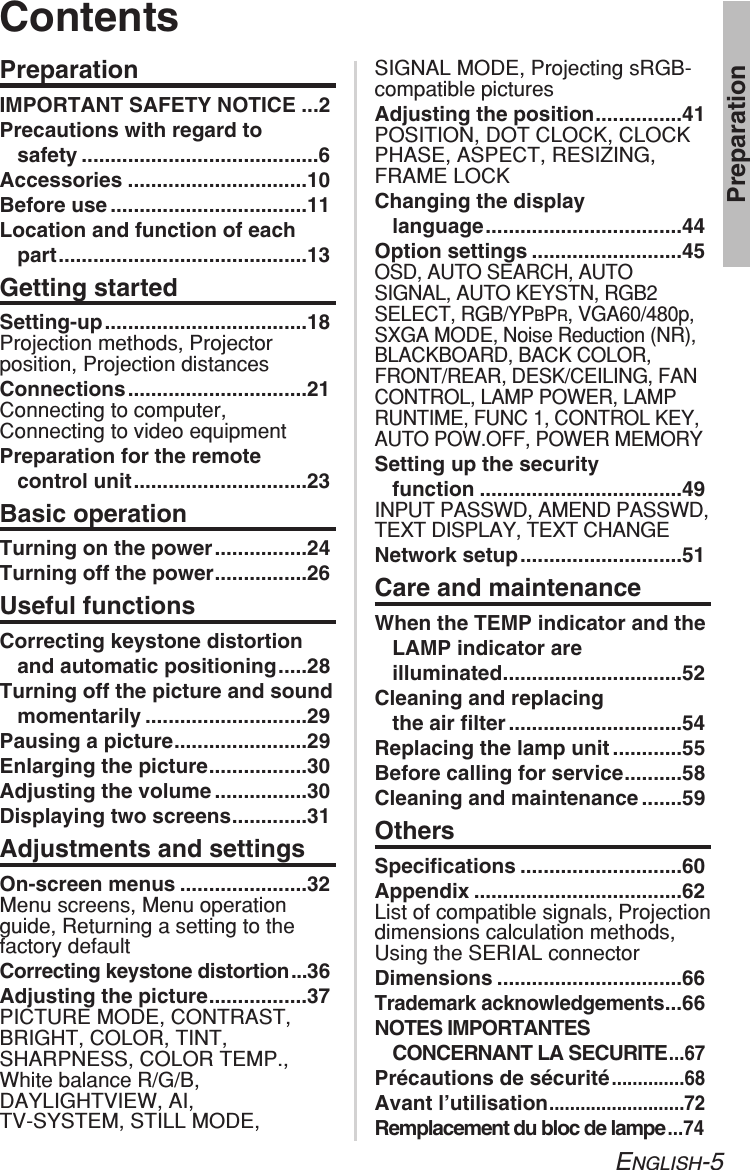
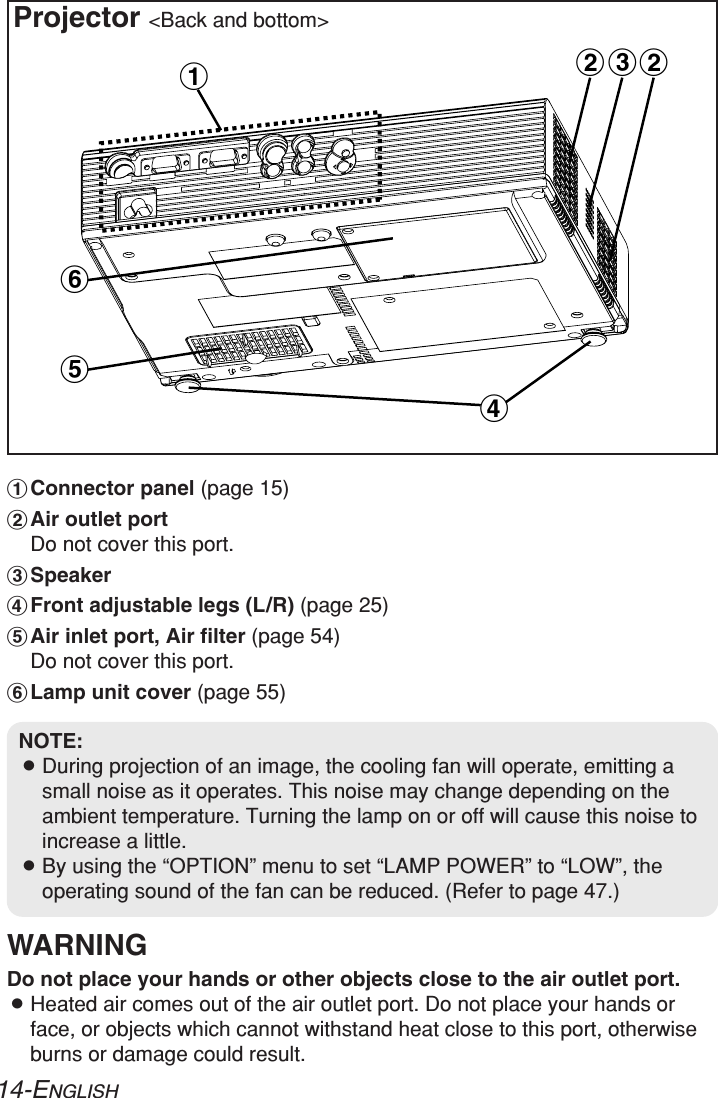
![10-ENGLISHCard remote control unit(N2QADC000008 x1)Power cord(K2CG3DR00006 x 1)Carrying bag(TPEP013-1 x 1)Lithium battery forremote control unit(CR2025 x1)RGB signal cable [1.8 m (5´10˝),K1HA15DA0002 x1]AccessoriesCheck that all of the accessories shown below have been included with yourprojector.ENTERFREEZESHUTTERINDEXWINDOWPROJECTORVOLUME D.ZOOMSTDAUTOSETUPVIDEOINPUTPOWERRGBMENUCD-ROM* (TQBH9007 x1)*PT-LB20NTU onlyNOTICE:BThis product has a High Intensity Discharge (HID) lamp that contains asmall amount of mercury. It also contains lead in some components.Disposal of these materials may be regulated in your community due toenvironmental considerations. For disposal or recycling informationplease contact your local authorities, or the Electronics IndustriesAlliance: <http://www.eiae.org.>](https://usermanual.wiki/Panasonic-of-North-America/TXANP07VKA1.End-Product-Manual/User-Guide-520316-Page-10.png)


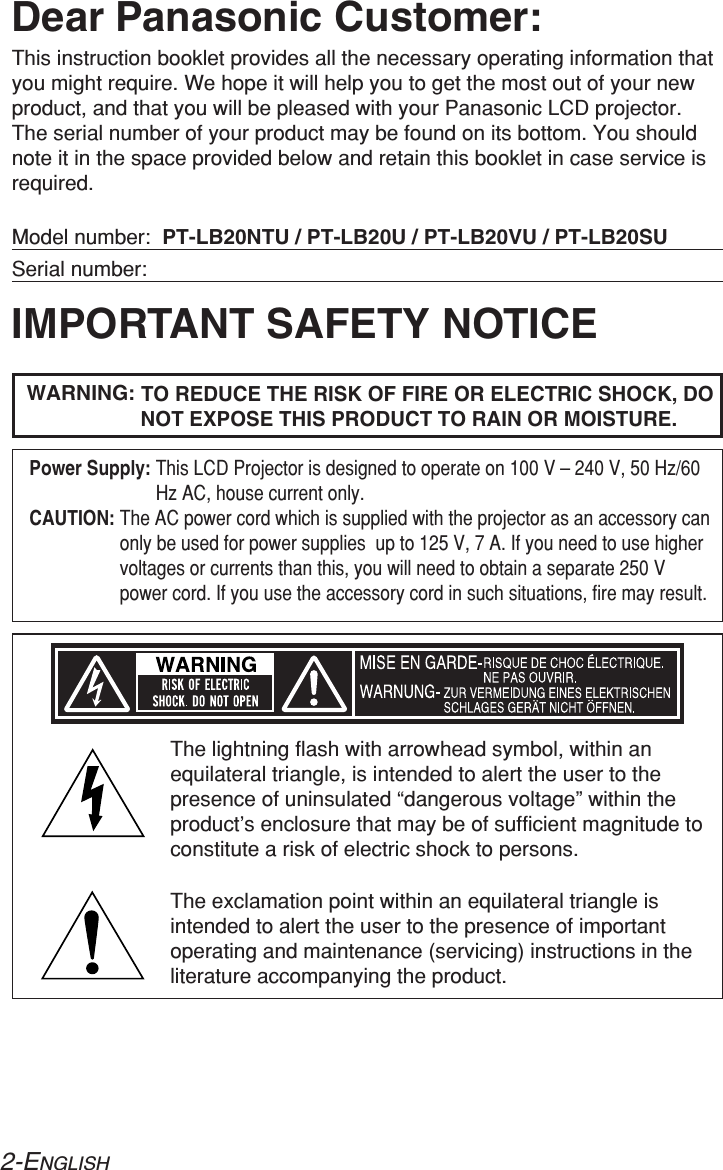
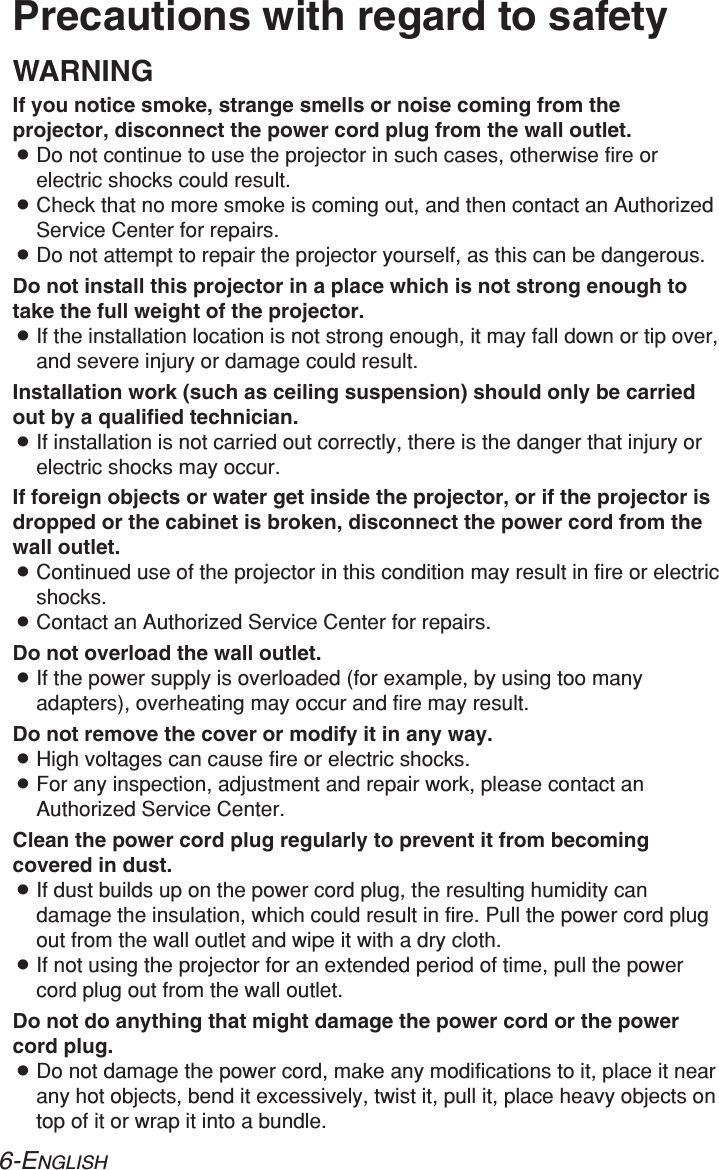
![50-ENGLISHTEXT DISPLAYYou can set text to be displayed atthe bottom of the projected image atall times.ON“TEXT DISPLAY” is enabled.OFF“TEXT DISPLAY” is disabled.TEXT CHANGEThe text which is displayed when“TEXT DISPLAY” is set to “ON” canbe changed.Press the ENTER button to displaythe “TEXT CHANGE” screen.#Press the F, G, Iand Hbuttons to select the characters,then press the ENTER button.(You can enter 22 characterscontinuously.)CSelect “BS” to delete acharacter.$Press the F, G, Iand Hbuttons to select “OK”, then pressthe ENTER button.CSelect “Cancel” to cancel thechange.NOTE:BThe entered password willappear as . It will not bedisplayed on the screen.BIf you enter the wrongpassword, the letters“PASSWORD” and “NEW” willbecome red. Enter the correctpassword again.BS OKCancel TEXT CHANGE ABCDEFGHIJKLMNO PQRSTUVWXYZ;:,. abcdefghijklmno pqrstuvwxyz/+−* 0123456789 _@[]](https://usermanual.wiki/Panasonic-of-North-America/TXANP07VKA1.End-Product-Manual/User-Guide-520316-Page-50.png)
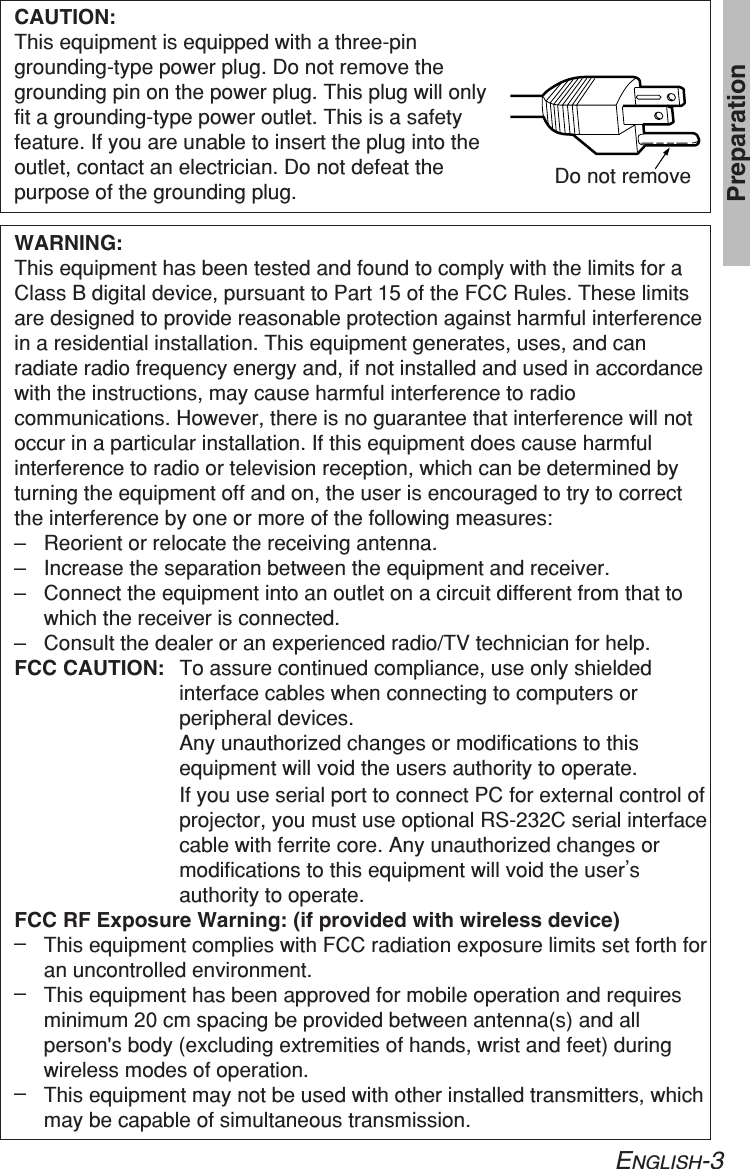
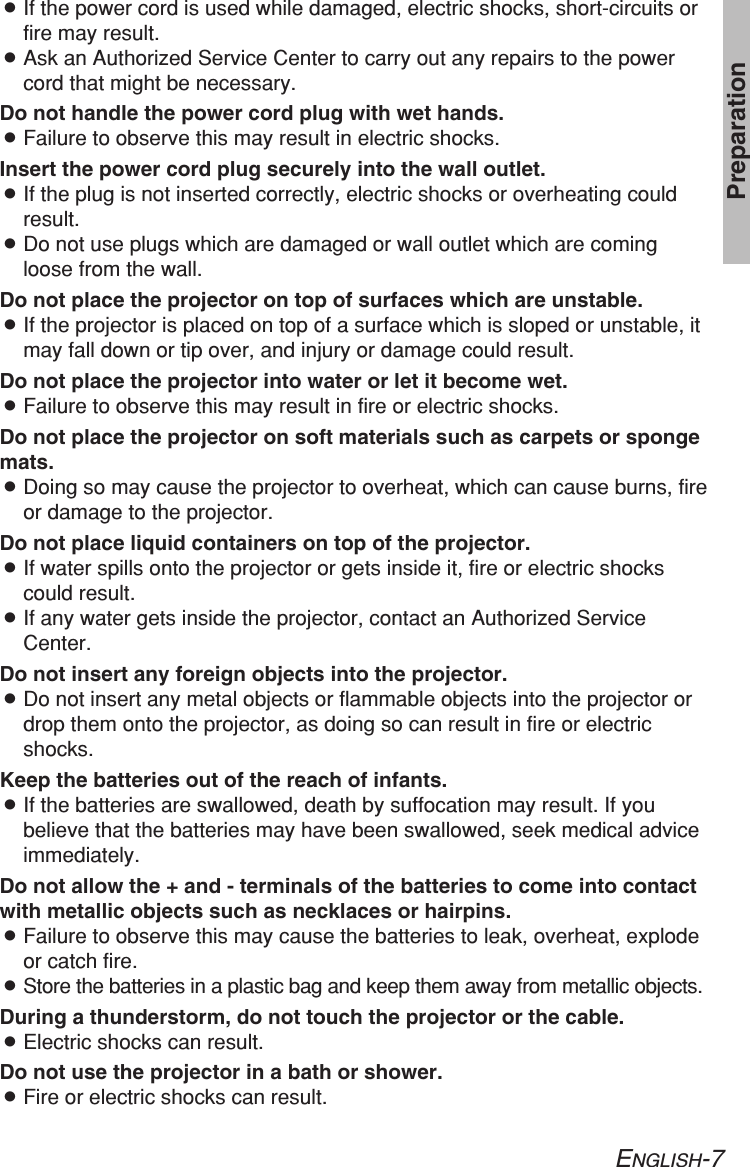
![52-ENGLISHWhen the TEMP indicator and theLAMP indicator are illuminatedThere are two indicators on the control panel of the projector which giveinformation about the operating condition of the projector. These indicatorsilluminate or flash to warn you about problems that have occurred inside theprojector, so if you notice that one of the indicators is on, turn off the powerand check the table below for the cause of the problem.ProblemIndicatordisplayThe surrounding temperature orthe temperature inside theprojector has become unusuallyhigh.Illuminated (red)(Lamp unit on)BThe ventilation holes may be covered.BThe ambient temperature in the place of use may be too high.BThe air filter may be blocked.BUncover the ventilation holes.BSet up the projector in a place where the temperature isbetween 0 °C (32 °F) and 40 °C (104 °F) and the humidity isbetween 20% and 80% (with no condensation). [If you set the“FAN CONTROL” to “HIGH” (page 47), set up the projector in aplace where the temperature is between 0 °C (32 °F) and 35 °C(95 °F) and the humidity is between 20% and 80% (with nocondensation).]BDisconnect the power cord by following the procedure on page26, and then clean the air filter. (Refer to page 54.)PossiblecauseRemedyThe surrounding temperature orthe temperature inside theprojector has becomedangerously high, causing thelamp unit to automatically shutoff.Flashing (red)(Lamp unit off)TEMP indicatorLAMP indicatorTEMP indicator](https://usermanual.wiki/Panasonic-of-North-America/TXANP07VKA1.End-Product-Manual/User-Guide-520316-Page-52.png)
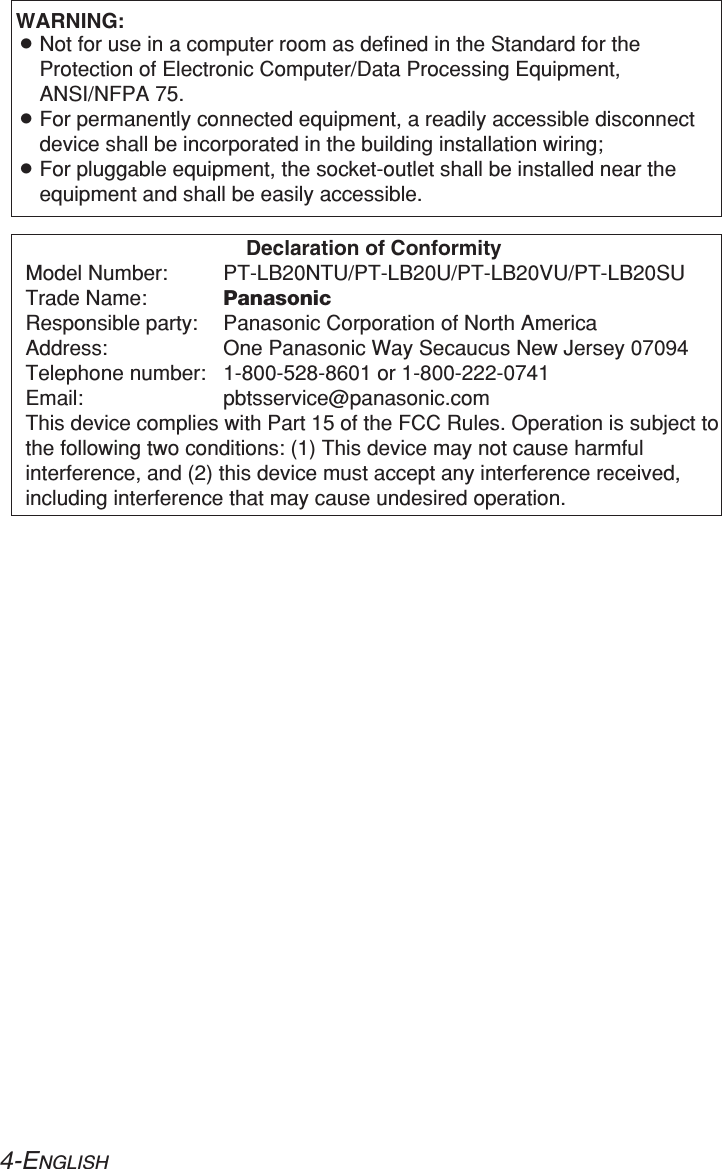
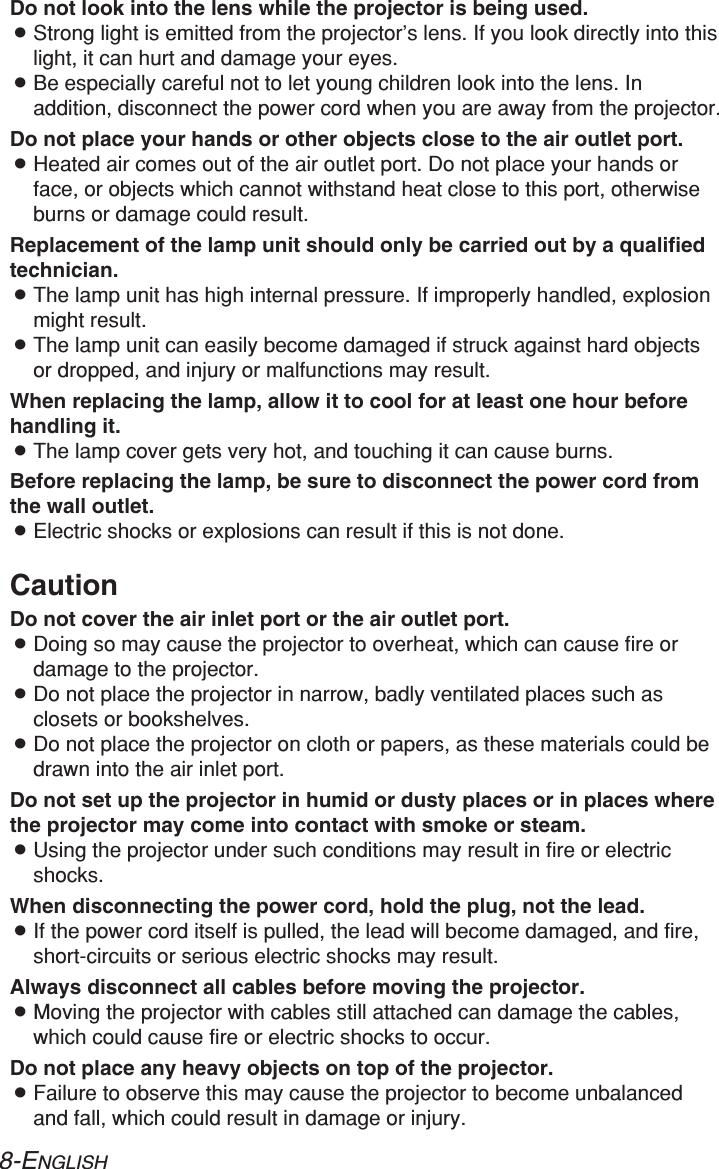
!['Install the lamp unit cover, andthen use a Phillips screwdriverto securely tighten the lampunit cover fixing screws.(Connect the power cord.)Press the POWER button sothat a picture is projected ontothe screen.*Press the MENU button todisplay the “MAIN MENU”, andthen press the For Gbuttonto select “OPTION”.ENGLISH-57Care and maintenance+Press the ENTER button todisplay the “OPTION” menu, andthen press the For Gbutton toselect “LAMP RUNTIME”.,Press and hold the ENTERbutton for approximately 3seconds.The “LAMP RUNTIME” willchange to “TIME RESET[POWER OFF]”.-Turn off the power anddisconnect the power cord.This will reset the cumulativeusage time for the lamp unit to “0”.Refer to page 26 for details onhow to turn off the power. MENUKEYSTONEPICTUREPOSITIONINDEX WINDOWSHUTTERVOLUMELANGUAGEOPTIONSECURITYNETWORKSELECT ENTER EXIT OPTION ▲BACK COLOR BLUEFRONT/REAR FRONTDESK/CEILING DESKFAN CONTROL STANDARDLAMP POWER HIGHTIME RESET [POWER OFF]FUNC 1 DAYLIGHTCONTROL KEY ONAUTO POW.OFF DISABLEPOWER MEMORY ON SELECT RETRNNOTE:BBe sure to install the lamp unitand the lamp unit coversecurely. If they are not securelyinstalled, it may cause theprotection circuit to operate sothat the power cannot be turnedon.NOTE:BIf the MENU button is pressed,the lamp time resetting screenwill be cancelled.NOTE:BIf the power cord wasdisconnected during projectionwhen the projector was usedthe last time, projection willstart after the power cord isconnected (when “POWERMEMORY” in the “OPTION”menu is set to “ON”). Refer topage 48 for details. OPTION ▲BACK COLOR BLUEFRONT/REAR FRONTDESK/CEILING DESKFAN CONTROL STANDARDLAMP POWER HIGHLAMP RUNTIME 1820HFUNC 1 DAYLIGHTCONTROL KEY ONAUTO POW.OFF DISABLEPOWER MEMORY ON SELECT RETRN](https://usermanual.wiki/Panasonic-of-North-America/TXANP07VKA1.End-Product-Manual/User-Guide-520316-Page-57.png)
![ENGLISH-59Care and maintenanceThe picture doesnot displaycorrectly.Picture fromcomputer doesnot appear.Problem Possible causeBThe signal format (“TV-SYSTEM”) may not be setcorrectly.BThere may be a problem with the video tape orother signal source.BA signal which is not compatible with the projectormay be being input.BThe cable may be too long.BThe external video output for the laptop computermay not be set correctly.(You may be able to change the external outputsettings by pressing the [Fn]+[F3] or [Fn]+[F10]keys simultaneously. The actual method variesdepending on the type of computer, so refer to thedocumentation provided with your computer forfurther details.)BIf an RGB INPUT indicator is turned off, the videosignals may not be output from the computer.B“RGB2 SELECT” in the “OPTION” menu is set to“OUTPUT” when the signals are input to RGB2IN/1 OUT connector.Page40 –62 ––1646Before carrying out cleaning and maintenance, besure to disconnect the power cord plug from thewall outlet.Wipe the cabinet with a soft, dry cloth.If the cabinet is particularly dirty, soak the cloth in water with a small amountof neutral detergent in it, squeeze the cloth very well, and then wipe thecabinet. After cleaning, wipe the cabinet dry with a dry cloth. If using achemically-treated cloth, read the instructions supplied with the cloth beforeuse.Do not wipe the lens with a cloth that is dusty or which produces lint.If any dust or lint gets onto the lens, such dust or lint will be magnified andprojected onto the screen. Use a blower to clean any dust and lint from thelens surface, or use a soft cloth to wipe off any dust or lint.Cleaning and maintenance](https://usermanual.wiki/Panasonic-of-North-America/TXANP07VKA1.End-Product-Manual/User-Guide-520316-Page-59.png)
![60-ENGLISHSpecificationsPower supply: 100 V - 240 V ~, 50 Hz/60 HzPower consumption: 220 W [During standby (when fan isstopped): Approx. 4 W]Amps: 2.5 A - 1.3 ALCD panel:Panel size (diagonal):PT-LB20NTU/PT-LB20U/PT-LB20SU:0.7 type (17.78 mm)PT-LB20VU: 0.6 type (15.24 mm)Aspect ratio: 4:3Micro lens array: AvailableDisplay method: 3 transparent LCD panels (RGB)Drive method: Active matrix methodPixels:PT-LB20NTU/PT-LB20U/PT-LB20VU:786 432 (1 024 x 768) x 3 panelsPT-LB20SU: 480 000 (800 x 600) x 3 panelsLens: Manual zoom (1 - 1.2) / Manual focusPT-LB20NTU/PT-LB20U/PT-LB20VU: F 1.7 - 1.9 f 21.5 mm - 25.8 mmPT-LB20SU: F 1.8 - 2.1 f 22.0 mm - 26.2 mmLamp: UHM lamp (155 W)Luminosity:PT-LB20NTU/PT-LB20U/PT-LB20SU: 2 000 lmPT-LB20VU: 1 600 lmScanning frequency (for RGB signals):Horizontal scanning frequency: 15 kHz - 91 kHzVertical scanning frequency: 50 Hz - 85 HzDot clock frequency: Less than 100 MHzYPBPRsignals: 480i, 576i, 480p, 576p, 1 080/60i, 1 080/50i, 720/60pColor system: 7 (NTSC/NTSC 4.43/PAL/PAL-M/PAL-N/PAL60/SECAM)Projection size: 838.2 mm - 7 620 mm (33˝ - 300˝)Throw distance:PT-LB20NTU/PT-LB20U: 1.1 m - 10.7 m (3´7˝ - 35´1˝)PT-LB20SU: 1.1 m - 11.0 m (3´7˝ - 36´1˝)PT-LB20VU: 1.4 m - 12.7 m (4´7˝ - 41´8˝)Optical axis shift:PT-LB20NTU/PT-LB20U/PT-LB20SU: 6:1 (fixed)PT-LB20VU: 12:1 (fixed)Screen aspect ratio: 4:3Installation: Front/Rear/Ceiling/Desk (menu selection)Speaker: 4 cm x 3 cm oval x 1Max. usable volume output: 1 W (mono)Wireless LAN (PT-LB20NTU only):IEEE802.11 b/g](https://usermanual.wiki/Panasonic-of-North-America/TXANP07VKA1.End-Product-Manual/User-Guide-520316-Page-60.png)
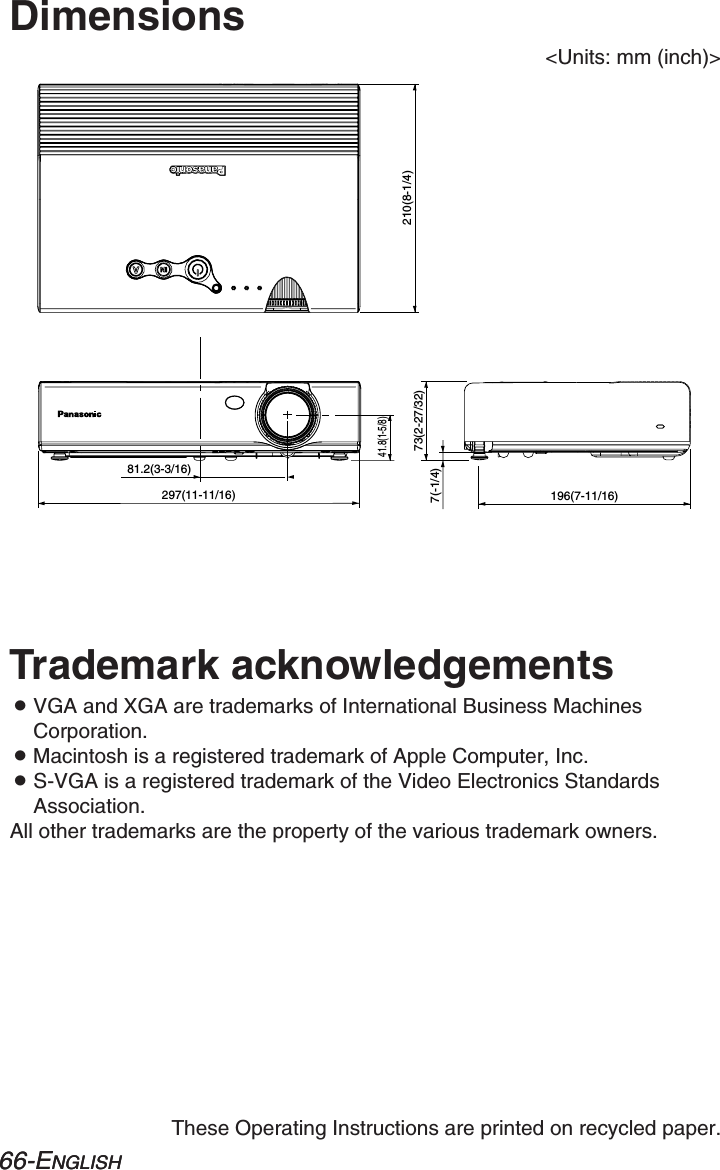
![ENGLISH-61OthersConnectorsRGB IN/OUT: Dual line, D-sub HD 15-pin (female)(One line is available for input and output,selectable using an on-screen menu)During YPBPRinput/output:Y: 1.0 V [p-p] (Including sync), 75 ΩPB, PR: 0.7 V [p-p], 75 ΩDuring RGB input/output:R.G.B.: 0.7 V [p-p], 75 ΩG.SYNC: 1.0 V [p-p], 75 ΩHD, VD: TTL, automatic positive/negative polaritycompatibleVIDEO IN: Single-line, RCA pin jack, 1.0 V [p-p], 75 ΩS-VIDEO IN: Single-line, Mini DIN 4-pinY 1.0 V [p-p], C 0.286 V [p-p], 75 ΩAUDIO IN: Single-line, RCA pin jack x 2 (L-R)0.5 V [rms] SERIAL: DIN 8-pin RS-232C compatibleCabinet: Moulded plastic (PC/ABS)Dimensions:Width: 297 mm (11-11/16˝)Height: 73 mm (2-27/32˝)Length: 210 mm (8-1/4˝)Weight:PT-LB20NTU: 2.2 kg(4.9 lbs.)PT-LB20U/PT-LB20SU/PT-LB20VU: 2.1 kg(4.6 lbs.)Operating environment:Temperature: 0 °C - 40 °C (32 °F - 104 °F)[When the “FAN CONTROL” is set to“HIGH” (page 47): 0 °C - 35 °C (32 °F - 95 °F)]Humidity: 20% - 80% (no condensation)Certifications: UL60950, C-ULFCC Class B<Remote control unit>Power supply: 3 V DC (Lithium CR2025 battery x1)Operating range: Approx. 7 m (23´) (when operated directlyin front of signal receptor)Weight: 18 g(0.6 ozs.) (including battery)Dimensions:Width: 40 mm (1-9/16˝)Length: 6.5 mm (-1/4˝)Height: 86 mm (3-3/8˝)<Options>Ceiling bracket ET-PKB30Wireless remote control unit ET-RM300Serial adapter ET-ADSER(DIN 8-pin/D-sub 9-pin)](https://usermanual.wiki/Panasonic-of-North-America/TXANP07VKA1.End-Product-Manual/User-Guide-520316-Page-61.png)


![76-FRANÇAIS+Appuyer sur la touche ENTERpour faire apparaître le menu“OPTION”, puis appuyer sur latouche Fou Gpoursélectionner “DURÉE LAMPE”.,Maintenir la touche ENTERenfoncée pendant environ 3secondes.“DURÉE LAMPE” changera à“INIT COMPT [POWER OFF]”.-Couper l’alimentation et débrancherle cordon d’alimentation.Le temps d’utilisation total du blocde lampe est alors remis à zéro.Pour plus de détails concernantla mise hors tension, sereporter à la page 26.'Installer le couvercle du bloc delampe, puis utiliser un tournevisPhillips pour resserrerfermement les vis de fixation ducouvercle du bloc de lampe.(Brancher le cordon d’alimentation.)Appuyer sur la touche POWERpour projeter une image surl’écran.*Appuyer sur la touche MENUpour faire apparaître le “MENUPRINCIPAL”, puis appuyer surla touche Fou Gpoursélectionner “OPTION”.REMARQUE:BS’assurer de bien installer lebloc de lampe et le couvercledu bloc de lampe. S’ils ne sontpas bien installés, cela peutdéclencher le circuit deprotection et le projecteur nepourra pas être allumé.REMARQUE:BSi le cordon d’alimentation aété débranché pendant laprojection lorsque le projecteura été utilisé la fois précédente,la projection s’enclencheraaprès qu’on ait branché lecordon d’alimentation (lorsque“MEMOIRE ALIM” dans lemenu “OPTION” est réglé sur“OUI”). Pour plus de détails, sereporter à la page 48.REMARQUE:BSi la touche MENU est pressée,l’écran de remise à zéro de ladurée de lampe sera annulé. OPTION ▲COULEUR FOND BLEUINSTALLATION FAÇADESOL/PLAFOND SOLVENTILATEUR STANDARDPUIS.LAMPE FORTEDURÉE LAMPE 1820HFONCTION 1 DAYLIGHTTOUCHE CTRL OUIARRET AUTO INACTIFMEMOIRE ALIM OUI SÉL. ESC OPTION ▲COULEUR FOND BLEUINSTALLATION FAÇADESOL/PLAFOND SOLVENTILATEUR STANDARDPUIS.LAMPE FORTEINIT COMPT [POWER OFF]FONCTION 1 DAYLIGHTTOUCHE CTRL OUIARRET AUTO INACTIFMEMOIRE ALIM OUI SÉL. ESC MENUCOR TRAPIMAGEPOSITIONRÉGL FENETREOBTURATEURVOLUMELANGAGEOPTIONSÉCURITÉRESEAUSÉL. VALID SORT.](https://usermanual.wiki/Panasonic-of-North-America/TXANP07VKA1.End-Product-Manual/User-Guide-520316-Page-76.png)