Pioneer K045 CD RDS RECEIVER User Manual DEH P8400BH EN
Pioneer Corporation CD RDS RECEIVER DEH P8400BH EN
Pioneer >
Contents
- 1. User Manual_DEH-P8400BH(EN)
- 2. User Manual_DEH-P9400BH(EN)
User Manual_DEH-P8400BH(EN)


Before you start
Information to User 2
The Safety of Your Ears is in Your
Hands 3
About this unit 3
After-sales service for Pioneer
products 3
In case of trouble 3
Visit our website 3
Demo mode 4
About this manual 4
Operating this unit
Head unit 4
Remote control 4
Set up menu 5
Basic operations 5
Use and care of the remote control 6
Menu operations identical for function
settings/audio adjustments/initial
settings/lists 6
Tuner 7
CD/CD-R/CD-RW and USB storage
devices 8
iPod 9
Using Pandoraâ10
Audio adjustments 11
Using Bluetooth wireless technology 12
Initial settings 14
Other functions 16
Available accessories
Bluetooth Audio 18
Bluetooth telephone 19
XM tuner 22
SIRIUS Satellite Radio tuner 23
Installation
Connections 25
Installation 26
Installing the microphone 28
Additional information
Troubleshooting 29
Error messages 29
Handling guidelines 31
Compressed audio compatibility (disc,
USB) 32
iPod compatibility 33
Sequence of audio files 33
Bluetooth profiles 33
Copyright and trademark 33
Specifications 34
Thank you for purchasing this PIONEER
product
To ensure proper use, please read through this
manual before using this product. It is especially
important that you read and observe WARN-
INGs and CAUTIONs in this manual. Please
keep the manual in a safe and accessible place for
future reference.
FCC ID: AJDK045
MODEL NO.: DEH-P8400BH
IC: 775E-K045
This device complies with Part 15 of FCC
Rules and Industry Canada licence-exempt
RSS standard(s). Operation is subject to the
following two conditions: (1) this device may
not cause interference, and (2) this device
must accept any interference, including inter-
ference that may cause undesired operation
of this device.
This transmitter must not be co-located or op-
erated in conjunction with any other antenna
or transmitter.
The antenna for Bluetooth cannot be removed
(or replaced) by user.
This equipment complies with FCC/IC radia-
tion exposure limits set forth for an uncon-
trolled environment and meets the FCC radio
frequency (RF) Exposure Guidelines in Sup-
plement C to OET65 and RSS-102 of the IC
radio frequency (RF) Exposure rules. This
equipment has very low levels of RF energy
that it deemed to comply without maximum
permissive exposure evaluation (MPE). But it
is desirable that it should be installed and op-
erated keeping the radiator at least 20 cm or
more away from person’s body (excluding ex-
tremities: hands, wrists, feet and ankles).
MODEL NO.: DEH-P7400HD
This device complies with Part 15 of the FCC
Rules. Operation is subject to the following
two conditions:
(1) this device may not cause harmful interfer-
ence, and (2) this device must accept any in-
terference received, including interference
that may cause undesired operation.
Information to User
Alteration or modifications carried out with-
out appropriate authorization may invalidate
the user’s right to operate the equipment.
Contents
2
Section
Before you start
En
01
Note
This equipment has been tested and found
to comply with the limits for a Class B digital
device, pursuant to Part 15 of the FCC Rules.
These limits are designed to provide reason-
able protection against harmful interference
in a residential installation. This equipment
generates, uses and can radiate radio fre-
quency energy and, if not installed and used
in accordance with the instructions, may
cause harmful interference to radio commu-
nications. However, there is no guarantee
that interference will not occur in a particu-
lar installation. If this equipment does cause
harmful interference to radio or television re-
ception, which can be determined by turning
the equipment off and on, the user is encour-
aged to try to correct the interference by one
or more of the following measures:
- Reorient or relocate the receiving antenna.
- Increase the separation between the equip-
ment and receiver.
- Connect the equipment into an outlet on a
circuit different from that to which the re-
ceiver is connected.
- Consult the dealer or an experienced radio/
TV technician for help.
The Safety of Your Ears is in
Your Hands
Get the most out of your equipment by playing it
at a safe level—a level that lets the sound come
through clearly without annoying blaring or dis-
tortion and, most importantly, without affecting
your sensitive hearing. Sound can be deceiving.
Over time, your hearing “comfort level”adapts to
higher volumes of sound, so what sounds “nor-
mal”can actually be loud and harmful to your
hearing. Guard against this by setting your
equipment at a safe level BEFORE your hearing
adapts.
ESTABLISH A SAFE LEVEL:
!Set your volume control at a low setting.
!Slowly increase the sound until you can hear
it comfortably and clearly, without distortion.
!Once you have established a comfortable
sound level, set the dial and leave it there.
BE SURE TO OBSERVE THE
FOLLOWING GUIDELINES:
!Do not turn up the volume so high that you
can’t hear what’s around you.
!Use caution or temporarily discontinue use
in potentially hazardous situations.
!Do not use headphones while operating a
motorized vehicle; the use of headphones
may create a traffic hazard and is illegal in
many areas.
About this unit
The tuner frequencies on this unit are allocated
for use in North America. Use in other areas
may result in poor reception.
WARNING
Handling the cord on this product or cords asso-
ciated with accessories sold with the product
may expose you to chemicals listed on proposi-
tion 65 known to the State of California and
other governmental entities to cause cancer and
birth defect or other reproductive harm. Wash
hands after handling.
CAUTION:
USE OF CONTROL OR ADJUSTMENT OR
PERFORMANCE OF PROCEDURES
OTHER THAN THOSE SPECIFIED HEREIN
MAY RESULT IN HAZARDOUS RADIATION
EXPOSURE.
CAUTION:
THE USE OF OPTICAL INSTRUMENTS
WITH THIS PRODUCT WILL INCREASE
EYE HAZARD.
CAUTION
!Do not allow this unit to come into contact
with liquids. Electrical shock could result.
Also, damage to this unit, smoke, and over-
heating could result from contact with
liquids.
!Always keep the volume low enough to hear
outside sounds.
!Avoid exposure to moisture.
!If the battery is disconnected or discharged,
any preset memory will be erased.
Important (Serial number)
The serial number is located on the bottom of
this unit. For your own security and conven-
ience, be sure to record this number on the en-
closed warranty card.
Note
Function setting operations are completed even
if the menu is cancelled before the operations
are confirmed.
After-sales service for
Pioneer products
Please contact the dealer or distributor from
where you purchased this unit for after-sales
service (including warranty conditions) or any
other information. In case the necessary infor-
mation is not available, please contact the com-
panies listed below:
Please do not ship your unit to the companies at
the addresses listed below for repair without ad-
vance contact.
U.S.A.
Pioneer Electronics (USA) Inc.
CUSTOMER SUPPORT DIVISION
P.O. Box 1760
Long Beach, CA 90801-1760
800-421-1404
CANADA
Pioneer Electronics of Canada, Inc.
CUSTOMER SATISFACTION DEPARTMENT
340 Ferrier Street
Unit 2
Markham, Ontario L3R 2Z5, Canada
1-877-283-5901
905-479-4411
For warranty information please see the Limited
Warranty sheet included with this unit.
In case of trouble
Should this unit fail to operate properly, please
contact your dealer or nearest authorized
PIONEER Service Station.
Visit our website
http://www.pioneerelectronics.com
in Canada
English
Before you start
3
Section
Before you start
En
01
http://www.pioneerelectronics.ca
!Learn about product updates (such as firm-
ware updates) for your product.
!Register your product to receive notices
about product updates and to safeguard pur-
chase details in our files in the event of loss
or theft.
!Access owner’s manuals, spare parts infor-
mation, service information, and much
more.
Demo mode
Important
!Failure to connect the red lead (ACC) of this
unit to a terminal coupled with ignition
switch on/off operations may lead to battery
drain.
!Remember that if the feature demo contin-
ues operating when the car engine is turned
off, it may drain battery power.
The demo starts automatically if you do not oper-
ate this unit within about 30 seconds since it
was last operated or if the ignition switch is set
to ACC or ON while it is turned off. To cancel the
demo mode, press and hold ( /DISP). Press
and hold ( /DISP) again to start. You can also
deactivate demo mode in the initial settings. Se-
lect Demonstration (demo display setting) and
turn off the demo display. For details, refer to Ini-
tial settings on page 14.
About this manual
!In the following instructions, USB memories
and USB audio players are collectively re-
ferred to as “USB storage device”.
!In this manual, iPod and iPhone will be re-
ferred to as “iPod”.
Head unit
(DEH-P8400BH)
1 2
a
456
78d c b
3
9
Part Part
1SRC/OFF 8
AUX input jack
(3.5 mm stereo
jack)
2(list) 9/
3LEVER aMULTI-CONTROL
(M.C.)
4Disc loading slot b/DISP
5h(eject) cBAND/(iPod)
6PHONE (phone/
on hook) dMIX
7Detach button
(DEH-P7400HD)
1 2
a
456
78d c b
3
9
Part Part
1SRC/OFF 8
AUX input jack
(3.5 mm stereo
jack)
2(list) 9/
3LEVER aMULTI-CONTROL
(M.C.)
4Disc loading slot b/DISP
5h(eject) cBAND/(iPod)
6CLOCK dMIX
7Detach button
CAUTION
Use a Pioneer USB cable when connecting the
USB audio player/USB memory device as devi-
ces connected to the unit directly will protrude
out, which is dangerous.
Do not use unauthorized products.
Remote control
Remote controller buttons marked with the
same numbers as on the unit operate in the
same way as the corresponding unit button re-
gardless of button name.
(DEH-P8400BH)
e
k
i
1
cf
b
hj
g
Before you start
4
Section
Operating this unit
En
01
02
Part Operation
eVOLUME Press to increase or decrease
volume.
fMUTE Press to mute. Press again to
unmute.
ga/b/c/d
Press to perform manual seek
tuning, fast forward, reverse
and track search controls.
Also used for controlling func-
tions.
h
While operating the phone,
press to end a call or reject an
incoming call.
iePress to pause or resume play-
back.
j
Press to start talking on the
phone while operating a
phone.
kLIST/
ENTER
Press to display the disc title,
track title, folder, or file list de-
pending on the source.
While in the operating menu,
press to control functions.
(DEH-P7400HD)
e
k
i
1
cf
b
hj
g
Part Operation
eVOLUME Press to increase or decrease
volume.
fMUTE Press to mute. Press again to
unmute.
ga/b/c/d
Press to perform manual seek
tuning, fast forward, reverse
and track search controls.
Also used for controlling func-
tions.
hAUDIO Press to select an audio func-
tion.
iePress to pause or resume play-
back.
jFUNC-
TION
Press to select functions.
Press and hold to recall the ini-
tial setting menu when the
sources are off.
kLIST/
ENTER
Press to display the disc title,
track title, folder, or file list de-
pending on the source.
While in the operating menu,
press to control functions.
Set up menu
When you turn the ignition switch to ON after in-
stallation, set up menu appears on the display.
You can set up the menu options below.
1 After installation of this unit, turn the
ignition switch to ON.
SET UP appears.
2 Turn M.C. to switch to YES.
#If you do not operate for 30 seconds, the set up
menu will not be displayed.
#If you prefer not to set up at this time, turn M.C.
to switch to NO.
If you select NO, you cannot set up in the set up
menu.
3 Press M.C. to select.
4 Perform the following procedures to set
the menu.
To proceed to the next menu option, you need to
confirm your selection.
Language select (multi-language)
1Turn M.C. to select the desired language.
English—Français—Español
2Press M.C. to confirm the selection.
Calendar (setting the date)
1Turn M.C. to change the year.
2Press M.C. to select day.
3Turn M.C. to change the day.
4Press M.C. to select month.
5Turn M.C. to change the month.
6Press M.C. to confirm the selection.
Clock (setting the clock)
1Turn M.C. to adjust hour.
2Press M.C. to select minute.
3Turn M.C. to adjust minute.
4Press M.C. to confirm the selection.
Contrast (display contrast setting)
1Turn M.C. to adjust the contrast level.
0to 15 is displayed as the level is increased or
decreased.
2Press M.C. to confirm the selection.
Demonstration (demo display setting)
1Turn M.C. to set the demo display to off.
2Press M.C. to confirm the selection.
Quit appears.
5 To finish your settings, turn M.C. to select
YES.
#If you prefer to change your setting again, turn
M.C. to switch to NO.
6 Press M.C. to select.
Notes
!Because demonstration mode is the function
for displaying at stores, do not use this func-
tion while driving.
!You can set up the menu options in the initial
settings. For details about the settings, refer
to Initial settings on page 14.
!You can cancel set up menu by pressing
SRC/OFF.
Basic operations
Important
!Handle gently when removing or attaching
the front panel.
!Avoid subjecting the front panel to excessive
shock.
!Keep the front panel out of direct sunlight
and high temperatures.
!To avoid damaging the device or vehicle inte-
rior, remove any cables and devices attached
to the front panel before detaching it.
English
Operating this unit
5
Section
Operating this unit
En
02
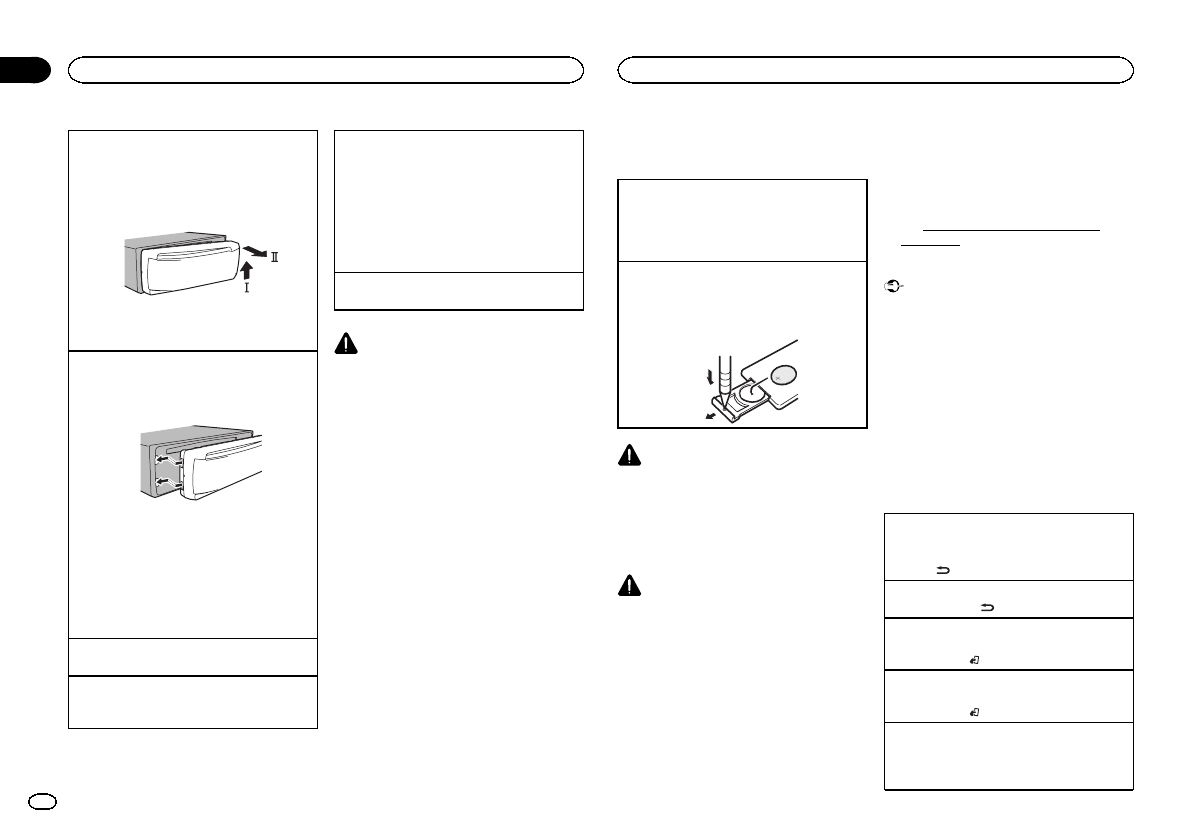
Removing the front panel to protect your unit from
theft
1Press the detach button to release the front
panel.
2Push the front panel upward (M) and then pull
it toward (N) you.
3Always keep the detached front panel in a pro-
tection device such as a protection case.
Re-attaching the front panel
1Slide the front panel to the left.
Make sure to insert the tabs on the left side of
the head unit into the slots on the front panel.
2Press the right side of the front panel until it is
firmly seated.
If you cannot attach the front panel to the
head unit successfully, make sure that you are
placing the front panel onto the head unit cor-
rectly. Forcing the front panel into place may
result in damage to the front panel or head
unit.
Turning the unit on
1Press SRC/OFF to turn the unit on.
Turning the unit off
1Press and hold SRC/OFF until the unit turns
off.
Selecting a source
1Press SRC/OFF to cycle between:
XM (XM tuner)—SIRIUS (SIRIUS tuner)—
TUNER (tuner)—CD (CD player)—USB (USB
storage device)/iPod (iPod connected using
USB input)—Pandora (Pandora)—EXT (exter-
nal unit 1)—EXT (external unit 2)—AUX1
(AUX1)—AUX2 (AUX2)—BT Audio (BT audio)
—TEL (BT telephone)
Adjusting the volume
1Turn M.C. to adjust the volume.
CAUTION
For safety reasons, park your vehicle when re-
moving the front panel.
Notes
!When this unit’s blue/white lead is con-
nected to the vehicle’s auto-antenna relay
control terminal, the vehicle’s antenna ex-
tends when this unit’s source is turned on.
To retract the antenna, turn the source off.
!If plug and play is on and either an iPhone or
iPod touch is connected, it may take time for
your source to switch. Refer to
USB plug&play (plug and play) on page 15.
!TEL (BT telephone) is available on DEH-
P7400HD only when a Bluetooth adapter (e.
g. CD-BTB200) is connected to the unit.
Use and care of the remote
control
Using the remote control
1Point the remote control in the direction of the
front panel to operate.
When using for the first time, pull out the film
protruding from the tray.
Replacing the battery
1Slide the tray out on the back of the remote
control.
2Insert the battery with the plus (+) and minus
(–) poles aligned properly.
WARNING
!Keep the battery out of the reach of children.
Should the battery be swallowed, consult a
doctor immediately.
!Batteries (battery pack or batteries installed)
must not be exposed to excessive heat such
as sunshine, fire or the like.
CAUTION
!Use one CR2025 (3 V) lithium battery.
!Remove the battery if the remote control is
not used for a month or longer.
!There is a danger of explosion if the battery is
incorrectly replaced. Replace only with the
same or equivalent type.
!Do not handle the battery with metallic tools.
!Do not store the battery with metallic ob-
jects.
!If the battery leaks, wipe the remote control
completely clean and install a new battery.
!When disposing of used batteries, comply
with governmental regulations or environ-
mental public institutions’rules that apply in
your country/area.
!“Perchlorate Material –special handling may
apply.
See www.dtsc.ca.gov/hazardouswaste/
perchlorate. (Applicable to California,
U.S.A.)”
Important
!Do not store the remote control in high tem-
peratures or direct sunlight.
!The remote control may not function properly
in direct sunlight.
!Do not let the remote control fall onto the
floor, where it may become jammed under
the brake or accelerator pedal.
Menu operations identical
for function settings/audio
adjustments/initial settings/
lists
Returning to the previous display
Returning to the previous list/category. (the folder/
category one level higher.)
1Press /DISP.
Turning the demo display on or off
1Press and hold /DISP.
Returning to the ordinary display
Canceling the initial setting menu
1Press BAND/.
Returning to the ordinary display from the list/cat-
egory
1Press BAND/.
Selecting a function or list
1Turn M.C. or LEVER.
!In this manual, “Turn M.C.”is used to describe
the operation used to select a function or list.
Operating this unit
6
Section
Operating this unit
En
02
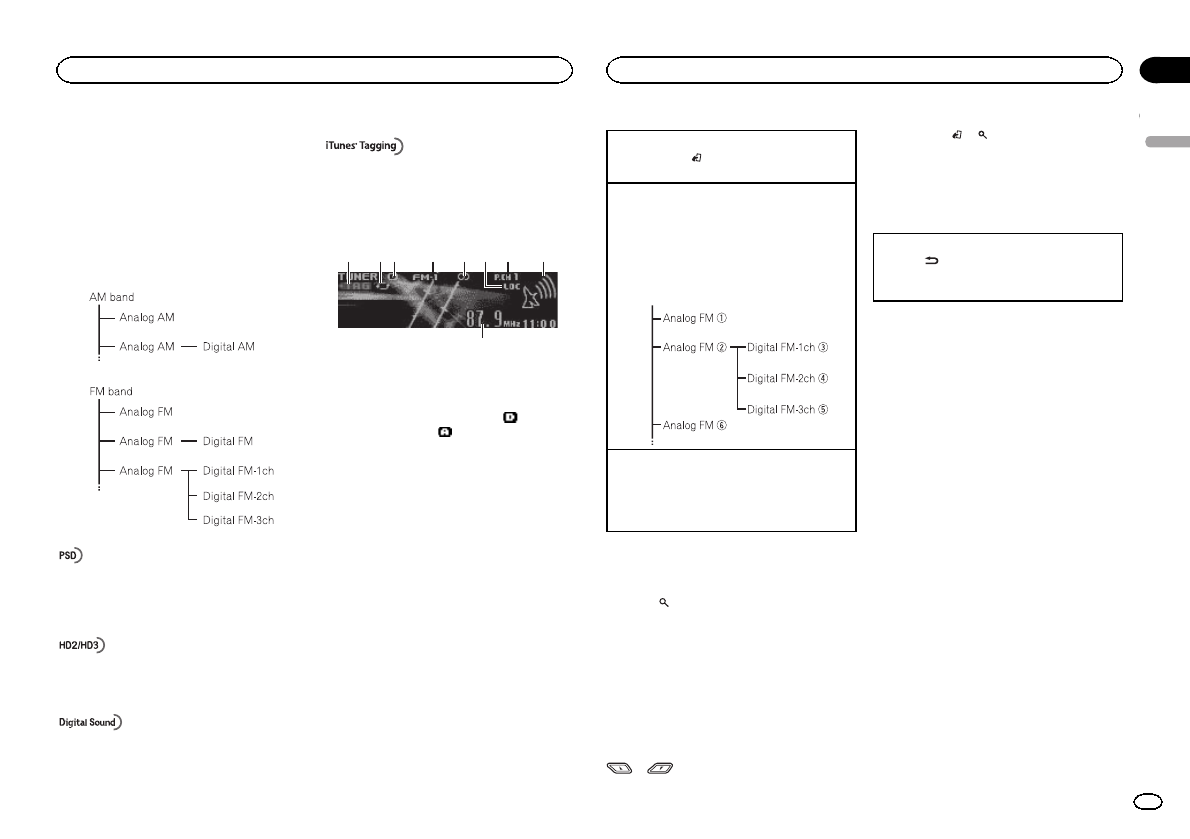
Tuner
About HD Radioäbroadcasting
HD Radioäbroadcasting is high quality audio
and data services. HD Radio broadcasting is
brought to you by your local FM/AM stations.
HD Radio broadcasting features the following:
!High quality audio
!FM multicasting
!Data services
Program Service Data: Contributes to the superior user
experience of HD Radio Technology. Presents song name,
artist, station IDs, HD2/HD3 Channel Guide, and other rel-
evant data streams.
Adjacent to traditional main stations are extra local FM
channels. These HD2/HD3 Channels provide new, original
music as well as deep cuts into traditional genre.
Digital, CD-quality sound. HD Radio Technology enables
local radio stations to broadcast a clean digital signal.
AM sounds like today’s FM and FM sounds like a CD.
iTunesâTagging provides you the opportunity to discover
a wide range of content and the means to “tag”that con-
tent for later review and purchase from the iTunesâStore.
Basic operations
9
1 5 7432 8
6
1TAG indicator
2Tags transferring indicator
3Signal reception status indicator
When digital signal is received, is dis-
played. Otherwise, is displayed.
4Band indicator
55(stereo) indicator
6LOC indicator
Appears when local seek tuning is on.
7Preset number indicator
8Signal level indicator
9Frequency indicator
Selecting a band
1Press BAND/until the desired band (FM-1,
FM-2,FM-3 for FM or AM) is displayed.
Manual tuning (step by step)
1Turn LEVER.
!When an analog station is received, tuning
down operation is conducted within the
analog broadcasting. (6d2)
!If a digital broadcast is not yet received,
tuning-up operation tunes in the next ana-
log station. (2d6)
Seeking
1Turn and hold down LEVER.
!While turning and holding down LEVER,
you can skip stations. Seek tuning starts
as soon as you release LEVER.
Storing and recalling stations
for each band
1 Press (list).
The preset screen is displayed.
2 Use M.C. to store the selected frequency
in the memory.
Turn to change the preset number. Press and
hold to store.
3 Use M.C. to select the desired station.
Turn to change the station. Press to select.
#You can also change the station by pressing
or .
#Press BAND/or (list) to return to the ordi-
nary display.
Switching the display
Desired information can be displayed while tag
information has been broadcasting.
Selecting the desired text information
1Press /DISP.
Frequency or program service name—song
title and artist name
Using iTunes tagging
This function can be operated with the following
iPod models.
—iPod touch 4th generation
—iPod touch 3rd generation
—iPod touch 2nd generation
—iPod touch 1st generation
—iPod classic 160GB
—iPod classic 120GB
—iPod classic
—iPod nano 6th generation
—iPod nano 5th generation
—iPod nano 4th generation
—iPod nano 3rd generation
—iPhone 4
—iPhone 3GS
—iPhone 3G
—iPhone
However, tag information can be stored in this
unit even while other iPod models are used.
The song information (tag) can be saved from
the broadcasting station to your iPod. The songs
will show up in a playlist called “Tagged playlist”
in iTunes the next time you sync your iPod. Then
you can directly buy the songs you want from
the iTunes Store.
!The tagged songs and the song that you can
buy from the iTunes Store may be different.
Make sure to confirm the song before you
make the purchase.
English
Operating this unit
7
Section
Operating this unit
En
02
Storing the tag information to this unit
1Tune in to the broadcast station.
2Press and hold M.C. if TAG is indicated in the
display while desired song is broadcasting.
!While storing the tag data on this unit,
TAG flashes.
Storing the tagged information to your iPod
1Connect the iPod to this unit and transfer this
unit’s tag information to the iPod.
Function settings
1 Press M.C. to display the main menu.
2 Turn M.C. to change the menu option
and press to select FUNCTION.
3 Turn M.C. to select the function.
After selecting, perform the following proce-
dures to set the function.
BSM (best stations memory)
BSM (best stations memory) automatically stores
the six strongest stations in the order of their sig-
nal strength.
1Press M.C. to turn BSM on.
To cancel, press M.C. again.
Local (local seek tuning)
Local seek tuning lets you tune in to only those
radio stations with sufficiently strong signals for
good reception.
1Press M.C. to select the desired setting.
FM: OFF—Level 1—Level 2—Level 3—Level
4
AM: OFF—Level 1—Level 2
The highest level setting allows reception of
only the strongest stations, while lower levels
allow the reception of weaker stations.
Seek mode (seek mode)
Seek tuning setting can be changed between digi-
tal station seek (Seek HD) and all station seek
(Seek ALL) depending on the reception status.
1Press M.C. to select your favorite setting.
Seek ALL—Seek HD
Blending (reception mode)
If a digital broadcast reception condition gets
poor, this unit automatically switches to the ana-
log broadcast of the same frequency level. If this
function is set to on, the tuner switches between
digital broadcast and analog broadcast automati-
cally. If this function is off, reception will be con-
ducted within an analog broadcast.
1Press M.C. to turn this function on or off.
Note
If Seek mode is set to Seek HD and Blending is
set to off, the tuner cannot receive broadcasts.
In this case, the seek mode or reception mode is
changed automatically as follows:
!When Seek mode is set to Seek HD, if you
switch Blending from on to off, Seek mode is
changed to Seek ALL.
!When Blending is set to off, if you switch
Seek mode from Seek ALL to Seek HD,
Blending is changed to on.
CD/CD-R/CD-RW and USB
storage devices
Basic operations
75 64
32
1
1Bit rate/sampling frequency indicator
Shows the bit rate or sampling frequency of
the current track (file) when the compressed
audio is playing.
!When playing back VBR (variable bit
rate)-recorded AAC files, the average bit
rate value is displayed. However, depend-
ing on the software used to decode AAC
files, VBR may be displayed.
2Folder number indicator
Shows the folder number currently playing
when the compressed audio is playing.
3Track number indicator
4PLAY/PAUSE indicator
5S.Rtrv indicator
Appears when Sound Retriever function is
on.
6Song time (progress bar)
7Play time indicator
Playing a CD/CD-R/CD-RW
1Insert the disc into the disc loading slot with
the label side up.
Ejecting a CD/CD-R/CD-RW
1Press h(eject).
Playing songs on a USB storage device
1Use a Pioneer USB cable to connect the USB
storage device to the unit.
!Plug in the USB storage device using the USB
cable.
Stopping playback of files on a USB storage de-
vice
!You may disconnect the USB storage device at
any time.
Selecting a folder
1Press or .
Selecting a track
1Turn LEVER.
Fast forwarding or reversing
1Turn and hold down LEVER to the right or left.
Returning to root folder
1Press and hold BAND/.
Switching between compressed audio and CD-DA
1Press BAND/.
Switching between playback memory devices
You can switch between playback memory devices
on USB storage devices with more than one Mass
Storage Device-compatible memory device.
1Press BAND/.
!You can switch between up to 32 different
memory devices.
Notes
!When playing compressed audio, there is no
sound during fast forward or reverse.
!Disconnect USB storage devices from the
unit when not in use.
Displaying text information
Selecting the desired text information
1Press /DISP.
Notes
!Depending on the version of iTunes used to
write MP3 files to a disc or media file types,
incompatible text stored within an audio file
may be displayed incorrectly.
!Text information items that can be changed
depend on the media.
Selecting and playing files/
tracks from the name list
1 Press (list) to switch to the file/track
name list mode.
Operating this unit
8
Section
Operating this unit
En
02
2 Use both LEVER and M.C. to select the de-
sired file name (or folder name).
Changing the file or folder name
1Turn LEVER.
Playing
1When a file or track is selected, press M.C.
Viewing a list of the files (or folders) in the se-
lected folder
1When a folder is selected, press M.C.
Playing a song in the selected folder
1When a folder is selected, press and hold M.C.
Function settings
1 Press M.C. to display the main menu.
2 Turn M.C. to change the menu option
and press to select FUNCTION.
3 Turn M.C. to select the function.
After selecting, perform the following proce-
dures to set the function.
Play mode (repeat play)
1Press M.C. to select a repeat play range.
CD/CD-R/CD-RW
!Disc repeat –Repeat all tracks
!Track repeat –Repeat the current track
!Folder repeat –Repeat the current folder
USB audio player/USB memory
!All repeat –Repeat all files
!Track repeat –Repeat the current file
!Folder repeat –Repeat the current folder
Random mode (random play)
1Press M.C. to turn random play on or off.
Pause (pause)
1Press M.C. to pause or resume.
Sound Retriever (sound retriever)
Automatically enhances compressed audio and
restores rich sound.
1Press M.C. to select the desired setting.
1—2—OFF (off)
OFF (off)—1—2(MIXTRAX)
1is effective for low compression rates, and 2
is effective for high compression rates.
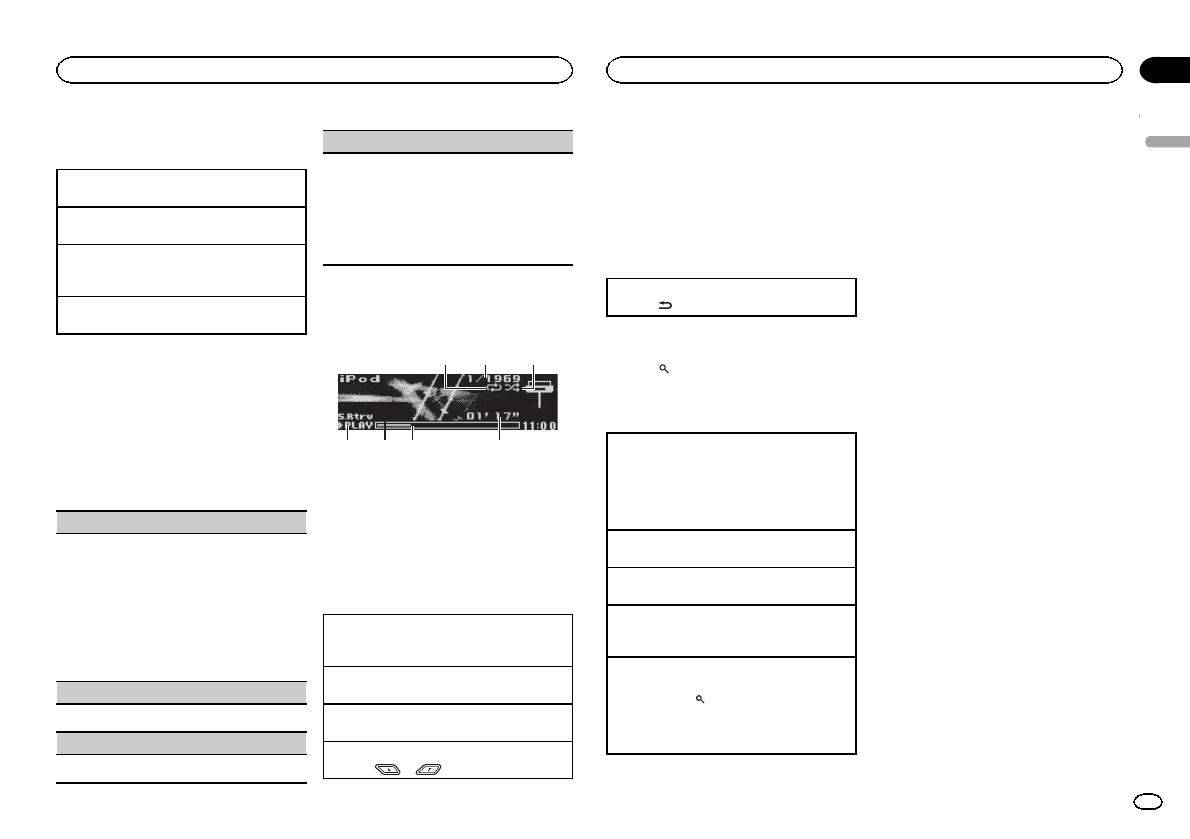
iPod
Basic operations
75 64
3
2
1
1Repeat indicator
2Song number indicator
3Shuffle indicator
4PLAY/PAUSE indicator
5S.Rtrv indicator
Appears when Sound Retriever function is
on.
6Song time (progress bar)
7Play time indicator
Playing songs on an iPod
1Connect an iPod to the USB cable using an
iPod Dock Connector.
Selecting a track (chapter)
1Turn LEVER.
Fast forwarding or reversing
1Turn and hold down LEVER to the right or left.
Selecting an album
1Press or .
Notes
!The iPod cannot be turned on or off when the
control mode is set to AUDIO.
!Disconnect headphones from the iPod be-
fore connecting it to this unit.
!The iPod will turn off about two minutes after
the ignition switch is set to OFF.
Displaying text information
Selecting the desired text information
1Press /DISP.
Browsing for a song
1 Press (list) to switch to the top menu
of the list search.
2 Use M.C. to select a category/song.
Changing the name of the song or category
1Turn M.C.
Playlists (playlists)—Artists (artists)—Albums
(albums)—Songs (songs)—Podcasts (pod-
casts)—Genres (genres)—Composers (com-
posers)—Audiobooks (audiobooks)
Playing
1When a song is selected, press M.C.
Viewing a list of songs in the selected category
1When a category is selected, press M.C.
Playing a song in the selected category
1When a category is selected, press and hold
M.C.
Searching the list by alphabet
1When a list for the selected category is dis-
played, press to switch to alphabet search
mode.
2Turn M.C. to select a letter.
3Press M.C. to display the alphabetical list.
Notes
!You can play playlists created with the PC ap-
plication (MusicSphere). The application will
be available on our website.
!Playlists that you created with the PC appli-
cation (MusicSphere) are displayed in abbre-
viated form.
Playing songs related to the
currently playing song
You can play songs from the following lists.
•Album list of the currently playing artist
•Song list of the currently playing album
•Album list of the currently playing genre
1 Press and hold M.C. to switch to link play
mode.
2 Turn M.C. to change the mode; press to
select.
!Artist –Plays an album of the artist currently
being played.
!Album –Plays a song from the album cur-
rently being played.
!Genre –Plays an album from the genre cur-
rently being played.
The selected song/album will be played after the
currently playing song.
Notes
!The selected song/album may be canceled if
you operate functions other than link search
(e.g. fast forward and reverse).
!Depending on the song selected to play, the
end of the currently playing song and the be-
ginning of the selected song/album may be
cut off.
Operating this unit’s iPod
function from your iPod
You can listen to the sound from your iPod appli-
cations using your car’s speakers, when APP is
selected.
English
Operating this unit
9
Section
Operating this unit
En
02

This function is not compatible with the follow-
ing iPod models.
—iPod with video
—iPod nano 1st generation
APP Mode is compatible with the following iPod
models.
!iPod touch 4th generation (software version
4.1 or later)
!iPod touch 3rd generation (software version
3.0 or later)
!iPod touch 2nd generation (software version
3.0 or later)
!iPod touch 1st generation (software version
3.0 or later)
!iPod nano 6th generation (software version
1.0 or later)
!iPod nano 5th generation (software version
1.0.2 or later)
!iPhone 4 (software version 4.1 or later)
!iPhone 3GS (software version 3.0 or later)
!iPhone 3G (software version 3.0 or later)
!iPhone (software version 3.0 or later)
1Press BAND/to switch the control mode.
!iPod –This unit’s iPod function can be
operated from the connected iPod.
!APP –Play back the sound from your
iPod applications.
!AUDIO –This unit’s iPod function can be
operated from this unit.
Function settings
1 Press M.C. to display the main menu.
2 Turn M.C. to change the menu option
and press to select FUNCTION.
3 Turn M.C. to select the function.
After selecting, perform the following proce-
dures to set the function.
Play mode (repeat play)
1Press M.C. to select a repeat play range.
!Repeat One –Repeat the current song
!Repeat All –Repeat all songs in the se-
lected list
Shuffle mode (shuffle)
1Press M.C. to select your favorite setting.
!Shuffle Songs –Play back songs in the se-
lected list in random order.
!Shuffle Albums –Play back songs from a
randomly selected album in order.
!Shuffle OFF –Cancel random play.
Shuffle all (shuffle all)
1Press M.C. to turn shuffle all on.
To turn off, set Shuffle mode in the FUNC-
TION menu to off.
Link play (link play)
1Press M.C. to display the setting mode.
2Turn M.C. to change the mode; press to select.
For details about the settings, refer to Playing
songs related to the currently playing song on
the previous page.
Pause (pause)
1Press M.C. to pause or resume.
Audiobooks (audiobook speed)
1Press M.C. to select your favorite setting.
!Faster –Playback at a speed faster than
normal
!Normal –Playback at normal speed
!Slower –Playback at a speed slower than
normal
Sound Retriever (sound retriever)
1Press M.C. to select the desired setting.
1—2—OFF (off)
OFF (off)—1—2(MIXTRAX)
1is effective for low compression rates, and 2
is effective for high compression rates.
Notes
!Switching the control mode to iPod pauses
song playback. Operate the iPod to resume
playback.
!The following functions are still accessible
from the unit even if the control mode is set
to iPod/APP.
—Pausing
—Fast forward/reverse
—Track up/down
!When the control mode is set to iPod/APP,
only Pause or Sound Retriever is available.
!The browse function cannot be operated
from this unit.
Using Pandoraâ
IMPORTANT:
Requirements to access the Pandora music
service using the Pioneer car audio/video prod-
ucts:
!iPhone (first generation), iPhone 3G, iPhone 3GS,
iPhone 4G, iPod touch 1G, iPod touch 2G, iPod
touch 3G or iPod touch 4G (firmware version 3.0
or later).
Certain firmware versions for the iPod touch and
iPhone may not be compatible with the Pandora
application. If this appears to be the case, please
update the firmware to a version that is compati-
ble with Pandora.
!Latest version of the Pandora application for the
iPhone, downloaded to your device. (Search
Apple iTunes App Store for “Pandora”).
!Current Pandora account (Free account and paid
accounts available from Pandora; create a free
account online at
http://www.pandora.com/register or through the
Pandora application for the iPhone).
!iPhone Data Plan.
Note: If the Data Plan for your iPhone does not
provide for unlimited data usage, additional
charges from your carrier may apply for accessing
the Pandora service via 3G and/or EDGE net-
works.
!Connection to the Internet via 3G, EDGE or Wi-Fi
network.
!Optional Pioneer adapter cable connecting your
iPhone to the Pioneer car audio/video products.
Limitations:
!Access to the Pandora service will depend on the
availability of a cellular and/or Wi-Fi network for
purposes of allowing your iPhone to connect to
the Internet.
!Pandora’s service is currently only available in
the U.S.
!Ability of the Pioneer car audio/video products to
access the Pandora service is subject to change
without notice and could be affected by any of
the following: compatibility issues with future
firmware versions of iPhones; compatibility is-
sues with future firmware versions of the
Pandora application for the iPhone; changes to
the Pandora music service by Pandora; discontin-
uation of the Pandora music service by Pandora.
!Certain functionality of the Pandora service is not
available when accessing the service through the
Pioneer car audio/video products, including, but
not limited to, creating new stations, deleting sta-
tions, emailing current stations, buying tracks
from iTunes, viewing additional text information,
logging in to Pandora, and adjusting Cell Net-
work Audio Quality.
Pandora Internet radio is a music service not af-
filiated with Pioneer. More information is avail-
able at http://www.pandora.com.
Operating this unit
10
Section
Operating this unit
En
02
You can play the Pandora by connecting your
iPod which was installed the Pandora applica-
tion.
Basic operations
64 53
1 2
1Thumbs Up/Thumbs Down indicator
2QuickMix indicator
3PLAY/PAUSE indicator
4S.Rtrv indicator
Appears when Sound Retriever function is
on.
5Song time (progress bar)
6Play time indicator
Playing tracks
1Connect an iPod to the USB cable using an
iPod Dock Connector.
2Start up the Pandora application installed on
the iPod.
Giving a Thumbs Up
1Press to give a “Thumbs Up”for the
track currently playing.
Giving a Thumbs Down
1Press to give a “Thumbs Down”for the
track currently playing and to skip to the next
track.
Skipping tracks
1Turn LEVER to the right.
Displaying text information
Selecting the desired text information
1Press /DISP.
Selecting and playing the
QuickMix/station list
1 Press (list) to switch to the QuickMix/
station list mode.
2 Use M.C. to select the QuickMix or de-
sired station.
Changing the sort order
1Press (list).
!ABC –You can sort the items in the list alpha-
betically
!DATE –You can sort the items in the list in
order of the dates on which the items were
created
Changing QuickMix or stations
1Turn M.C.
Playing
1When QuickMix or the station is selected,
press M.C.
Function settings
1 Press M.C. to display the main menu.
2 Turn M.C. to change the menu option
and press to select FUNCTION.
3 Turn M.C. to select the function.
After selecting, perform the following proce-
dures to set the function.
Bookmark (bookmark)
1Press M.C. to store track information.
Pause (pause)
1Press M.C. to pause or resume.
Sound Retriever (sound retriever)
1Press M.C. to select the desired setting.
1—2—OFF (off)
OFF (off)—1—2(MIXTRAX)
1is effective for low compression rates, and 2
is effective for high compression rates.
Audio adjustments
1
1Audio display
Shows the audio adjustment status.
1 Press M.C. to display the main menu.
2 Turn M.C. to change the menu option
and press to select AUDIO.
3 Turn M.C. to select the audio function.
After selecting, perform the following proce-
dures to set the audio function.
Fader/Balance (fader/balance adjustment)
1Press M.C. to display the setting mode.
2Press M.C. to cycle between fader (front/rear)
and balance (left/right).
3Turn M.C. to adjust the front/rear speaker bal-
ance.
!The front/rear speaker balance cannot be
adjusted when the rear output setting is
Rear SP :S/W. Refer to S/W control (rear
output and subwoofer setting) on page 15.
4Turn M.C. to adjust the left/right speaker bal-
ance.
Preset EQ (equalizer recall)
1Press M.C. to display the setting mode.
2Turn M.C. to select an equalizer curve.
Powerful—Natural—Vocal—Custom1—Cus-
tom2—Flat—Super bass
G.EQ (equalizer adjustment)
You can adjust the currently selected equalizer
curve setting as desired. Adjusted equalizer curve
settings are stored in Custom1 or Custom2.
!A separate Custom1 curve can be created for
each source. If you make adjustments when a
curve other than Custom2 is selected, the
equalizer curve settings will be stored in Cus-
tom1.
!ACustom2 curve that is common for all sour-
ces can be created. If you make adjustments
when the Custom2 curve is selected, the Cus-
tom2 curve will be updated.
1Recall the equalizer curve you want to adjust.
2Press M.C. to display the setting mode.
3Press M.C. to cycle between equalizer band
and level.
4Turn M.C. to select the equalizer band to ad-
just.
100Hz—315Hz—1.25kHz—3.15kHz—8kHz
Turn M.C. to adjust the equalizer curve.
+6 to –6is displayed as the equalizer curve is
increased or decreased.
English
Operating this unit
11
Section
Operating this unit
En
02
Loudness (loudness)
Loudness compensates for deficiencies in the low-
frequency and high-frequency ranges at low vol-
ume.
1Press M.C. to display the setting mode.
2Press M.C. to turn loudness on or off.
3Turn M.C. to select the desired setting.
Low (low)—Mid (mid)—High (high)
Subwoofer1 (subwoofer on/off setting)
This unit is equipped with a subwoofer output
which can be turned on or off.
1Press M.C. to display the setting mode.
2Press M.C. to turn subwoofer output on or off.
3Turn M.C. to select the phase for the sub-
woofer output.
Turn M.C. to the left to select reverse phase,
and Reverse appears in the display. Turn M.C.
to the right to select normal phase, and Nor-
mal appears in the display.
Subwoofer2 (subwoofer adjustment)
The cut-off frequency and output level can be ad-
justed when the subwoofer output is on.
Only frequencies lower than those in the selected
range are outputted from the subwoofer.
1Press M.C. to display the setting mode.
2Press M.C. to cycle between the cut-off fre-
quency and the output level for the subwoofer.
3Turn M.C. to select the cut-off frequency.
50Hz—63Hz—80Hz—100Hz—125Hz
4Turn M.C. to adjust the output level for the sub-
woofer.
The subwoofer level increases or decreases
each time you turn M.C. +6 to –24 is displayed
as the level is increased or decreased.
Bass Booster (bass boost)
1Press M.C. to display the setting mode.
2Turn M.C. to select a desired level.
0to +6 is displayed as the level is increased or
decreased.
HPF (high pass filter adjustment)
When you do not want low sounds from the sub-
woofer output frequency range to play from the
front or rear speakers, turn on the HPF (high pass
filter). Only frequencies higher than those in the
selected range are output from the front or rear
speakers.
1Press M.C. to display the setting mode.
2Press M.C. to turn high pass filter on or off.
3Turn M.C. to select the cut-off frequency.
50Hz—63Hz—80Hz—100Hz—125Hz
SLA (source level adjustment)
SLA (Source level adjustment) lets you adjust the
volume level of each source to prevent radical
changes in volume when switching between sour-
ces.
!When selecting FM as the source, you cannot
switch to SLA.
!Settings are based on the FM volume level,
which remains unchanged.
!The AM volume level can also be adjusted with
this function.
1Press M.C. to display the setting mode.
2Turn M.C. to adjust the source volume.
Adjustment range: +4 to –4
Using Bluetooth wireless
technology
!Only for DEH-P8400BH
Using Bluetooth telephone
Important
!Since this unit is on standby to connect with
your cellular phone via Bluetooth wireless
technology, using it without the engine run-
ning can drain the battery power.
!Operations may vary depending on the kind
of cellular phone.
!Advanced operations that require attention
such as dialing numbers on the monitor,
using the phone book, etc., are prohibited
while driving. Park your vehicle in a safe
place when using these advanced opera-
tions.
Setting up for hands-free phoning
Before you can use the hands-free phoning
function you must set up the unit for use with
your cellular phone.
1Connection
Operate the Bluetooth telephone connection
menu. Refer to Connection menu operation on
this page.
2Function settings
Operate the Bluetooth telephone function
menu. Refer to Phone menu operation on page
14.
Basic operations
Making a phone call
!Refer to Phone menu operation on page 14.
Answering an incoming call
1When a call is received, press M.C.
Ending a call
1Press PHONE.
Rejecting an incoming call
1When a call is received, press PHONE.
Answering a call waiting
1When a call is received, press M.C.
Switching between callers on hold
1Press M.C.
Canceling call waiting
1Press PHONE.
Adjusting the other party’s listening volume
1Turn LEVER while talking on the phone.
!When private mode is on, this function is not
available.
Turning private mode on or off
1Press BAND/while talking on the phone.
Switching the information display
1Press /DISP while talking on the phone.
Notes
!If private mode is selected on the cellular
phone, hands-free phoning may not be avail-
able.
!The estimated call time appears in the dis-
play (this may differ slightly from the actual
call time).
Connection menu operation
Important
!Be sure to park your vehicle in a safe place
and apply the parking brake when perform-
ing this operation.
!Connected devices may not operate properly
if more than one Bluetooth device is con-
nected at a time (e.g. a phone and a separate
audio player are connected simultaneously).
1 Press and hold PHONE to display the con-
nection menu.
#You cannot operate this step during a call.
2 Turn M.C. to select the function.
After selecting, perform the following proce-
dures to set the function.
Operating this unit
12
Section
Operating this unit
En
02
Device list (connecting or disconnecting a device
from the device list)
!When no device is selected in the device list,
this function is not available.
1Press M.C. to display the setting mode.
2Turn M.C. to select the name of a device you
want to connect/disconnect.
!Press and hold M.C. to switch the
Bluetooth device address and device
name.
3Press M.C. to connect/disconnect the selected
device.
Once the connection is established, Con-
nected is displayed.
Delete device (deleting a device from the device
list)
!When no device is selected in the device list,
this function is not available.
1Press M.C. to display the setting mode.
2Turn M.C. to select the name of a device you
want to delete.
!Press and hold M.C. to switch the
Bluetooth device address and device
name.
3Press M.C. to display Delete YES.
4Press M.C. to delete a device information from
the device list.
!While this function is in use, do not turn off
the engine.
Add device (connecting a new device)
1Press M.C. to start searching.
!To cancel, press M.C. while searching.
!If this unit fails to find any available cellular
phones, Not found is displayed.
2Turn M.C. to select a device from the device
list.
!Press and hold M.C. to switch the
Bluetooth device address and device
name.
3Press M.C. to connect the selected device.
!To complete the connection, check the de-
vice name (Pioneer BT Unit). Enter the
PIN code on your device if necessary.
!PIN code is set to 0000 as the default. You
can change this code.
!6-digit number appears on the display of
this unit. Once the connection is estab-
lished, this number disappears.
!If you are unable to complete the connec-
tion using this unit, use the device to con-
nect to the unit.
!If three devices are already paired, Device
Full is displayed and it is not possible to
perform this operation. In this case, delete
a paired device first.
Special device (setting a special device)
Bluetooth devices that are difficult to establish a
connection with are called special devices. If your
Bluetooth device is listed as a special device, se-
lect the appropriate one.
1Press M.C. to display the setting mode.
!If three devices are already paired, Device
Full is displayed and it is not possible to
perform this operation. In this case, delete
a paired device first.
2Turn M.C. to display a special device. Press to
select.
3Turn M.C. to display this unit’s device name,
Bluetooth device address and PIN code.
4Use a device to connect to this unit.
!To complete the connection, check the de-
vice name (Pioneer BT Unit) and enter the
PIN code on your device.
!PIN code is set to 0000 as the default. You
can change this code.
Auto connect (connecting to a Bluetooth device
automatically)
1Press M.C. to turn automatic connection on or
off.
Visibility (setting the visibility of this unit)
To check the availability of this unit from other de-
vices, Bluetooth visibility of this unit can be turned
on.
1Press M.C. to turn the visibility of this unit on
or off.
!While setting Special device, Bluetooth
visibility of this unit is turned on tempora-
rily.
Pin code input (PIN code input)
To connect your device to this unit via Bluetooth
wireless technology, you need to enter a PIN code
on your device to verify the connection. The default
code is 0000, but you can change it with this func-
tion.
1Press M.C. to display the setting mode.
2Turn M.C. to select a number.
3Press M.C. to move the cursor to the next posi-
tion.
4After inputting PIN code, press and hold M.C.
!After inputting, pressing M.C. returns you
to the PIN code input display, and you can
change the PIN code.
Device INFO (Bluetooth device address display)
1Press M.C. to display the setting mode.
2Turn M.C. left to switch to the Bluetooth device
address.
Turning M.C. right returns to the device name.
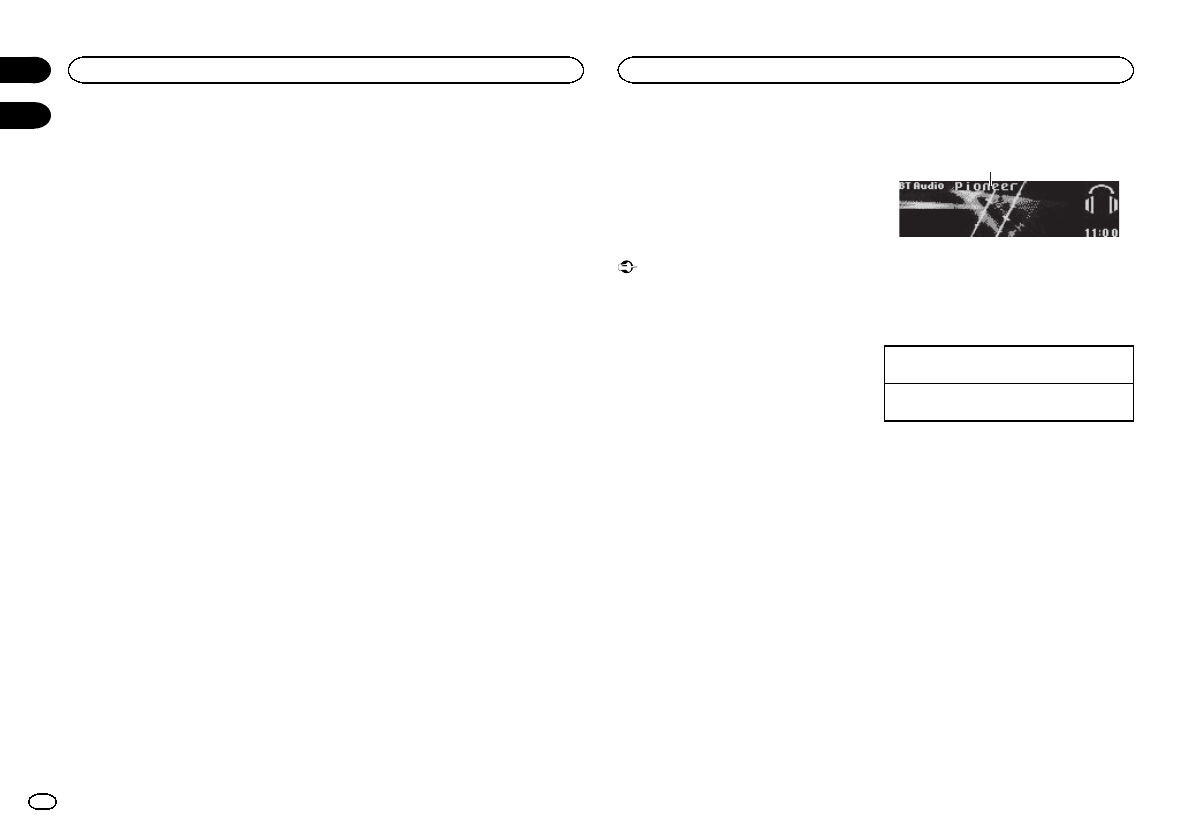
Bluetooth Audio
!Only for DEH-P8400BH
Important
!Depending on the Bluetooth audio player
connected to this unit, the available opera-
tions will be limited to the following two lev-
els:
—A2DP profile (Advanced Audio Distribution
Profile): You can only playback songs on your
audio player.
—AVRCP profile (Audio/Video Remote Control
Profile): You can perform playback, pause
playback, select songs, etc.
!Since there are a number of Bluetooth audio
players available on the market, available op-
erations will vary extensively. When operating
your player with this unit, refer to the instruc-
tion manual that came with your Bluetooth
audio player as well as this manual.
English
Operating this unit
13
Section
Operating this unit
En
02
!Information related to a song (such as the
elapsed playing time, song title, song index,
etc.) cannot be displayed on this unit.
!As the signal from your cellular phone may
cause noise, avoid using it when you are lis-
tening to songs on your Bluetooth audio
player.
!When a call is in progress on the cellular
phone connected to this unit via Bluetooth
wireless technology, the sound of the
Bluetooth audio player connected to this unit
is muted.
!When the Bluetooth audio player is in use,
you cannot connect to a Bluetooth telephone
automatically.
!Playback continues even if you switch from
your Bluetooth audio player to another
source while listening to a song.
Setting up for Bluetooth audio
Before you can use the Bluetooth audio function
you must set up the unit for use with your
Bluetooth audio player. This entails establishing
a Bluetooth wireless connection between this
unit and your Bluetooth audio player, and pair-
ing your Bluetooth audio player with this unit.
Basic operations
1
1Device name
Shows the device name of the connected
Bluetooth audio player.
Fast forwarding or reversing
1Turn and hold down LEVER to the right or left.
Selecting a track
1Turn LEVER.
Starting playback
1Press BAND/.
Function settings
1 Press M.C. to display the main menu.
2 Turn M.C. to change the menu option
and press to select FUNCTION.
3 Turn M.C. to select the function.
After selecting, perform the following proce-
dures to set the function.
Play (play)
1Press M.C. to start playback.
Stop (stop)
1Press M.C. to stop the playback.
Pause (pause)
1Press M.C. to turn pause on.
Phone menu operation
!Only for DEH-P8400BH
Important
Be sure to park your vehicle in a safe place and
apply the parking brake when performing this
operation.
1 Press PHONE to display the phone menu.
2 Turn M.C. to select the function.
After selecting, perform the following proce-
dures to set the function.
Missed calls (missed call history)
Dialed calls (dialed call history)
Received calls (received call history)
1Press M.C. to display the phone number list.
2Turn M.C. to select a name or phone number.
3Press M.C. to make a call.
!To display details about the contact you se-
lected, press and hold M.C.
PhoneBook (phone book)
!The phone book in your cellular phone will be
transferred automatically when the phone is
connected to this unit.
!Depending on the cellular phone, the phone
book may not be transferred automatically. In
this case, operate your cellular phone to trans-
fer the phone book. The visibility of this unit
should be on. Refer to Visibility (setting the
visibility of this unit) on the previous page.
1Press M.C. to display SEARCH (alphabetical
list).
2Turn M.C. to select the first letter of the name
you are looking for.
!Press and hold M.C. to select the desired
character type.
3Press M.C. to display a registered name list.
4Turn M.C. to select the name you are looking
for.
5Press M.C. to display the phone number list.
6Turn M.C. to select a phone number you want
to call.
7Press M.C. to make a call.
Phone Function (phone function)
You can set Auto answer,Ring tone and PH.B.
Name view from this menu. For details, refer to
Function and operation on this page.
Function and operation
1 Display Phone Function.
Refer to Phone Function (phone function) on
this page.
2 Press M.C. to display the function menu.
3 Turn M.C. to select the function.
After selecting, perform the following proce-
dures to set the function.
Auto answer (automatic answering)
1Press M.C. to turn automatic answering on or
off.
Ring tone (ring tone select)
1Press M.C. to turn the ring tone on or off.
PH.B.Name view (phone book name view)
1Press M.C. to switch between the lists of
names.
Initial settings
1
1Function display
!Shows the function status.
1 Press and hold SRC/OFF until the unit
turns off.
2 Press M.C. and hold until the initial set-
ting menu appears in the display.
Operating this unit
14
Section
Operating this unit
En
02
3 Turn M.C. to select the initial setting.
After selecting, perform the following proce-
dures to set the initial setting.
Language select (multi-language)
For your convenience, this unit equips multiple
language display. You can select the language
best suited to your first language.
1Press M.C. to select the language.
English—Français—Español
Calendar (setting the date)
1Press M.C. to select the segment of the calen-
dar display you wish to set.
Year—Day—Month
2Turn M.C. to set the date.
Clock (setting the clock)
1Press M.C. to select the segment of the clock
display you wish to set.
Hour—Minute
2Turn M.C. to adjust the clock.
EngineTime alert (elapsed time display setting)
This setting allows you to measure the length of
time that elapses from when the machine is
turned on and display the amount of elapsed time
per set period.
Also, you will hear alarm.
1Press M.C. to select your favorite setting.
OFF—15Minutes—30Minutes
USB plug&play (plug and play)
This setting allows you to switch your source to
USB/iPod/Pandora automatically.
1Press M.C. to turn the plug and play function
on or off.
!ON –When a USB storage device/iPod is
connected, depending on the type of de-
vice, the source is automatically switched
to USB/iPod/Pandora when you turn on
the engine. If you disconnect your USB
storage device/iPod, this unit’s source is
turned off.
!OFF –When USB storage device/iPod is
connected, the source is not switched to
USB/iPod/Pandora automatically. Please
change the source to USB/iPod/Pandora
manually.
Warning tone (warning tone setting)
If the front panel is not detached from the head
unit within four seconds of turning off the ignition,
a warning tone sounds. You can turn off the warn-
ing tone.
1Press M.C. to turn the warning tone on or off.
AUX1/AUX2 (auxiliary input setting)
Activate this setting when using an auxiliary de-
vice connected to this unit.
1Press M.C. to turn auxiliary setting on or off.
Dimmer (dimmer setting)
To prevent the display from being too bright at
night, the display is automatically dimmed when
the car’s headlights are turned on. You can turn
the dimmer on or off.
1Press M.C. to turn dimmer on or off.
Contrast (display contrast setting)
1Turn M.C. to adjust the contrast level.
0to 15 is displayed as the level is increased or
decreased.
S/W control (rear output and subwoofer setting)
This unit’s rear output (rear speaker leads output
and RCA rear output) can be used for full-range
speaker (Rear SP :F.Range) or subwoofer (Rear
SP :S/W) connection. If you switch the rear output
setting to Rear SP :S/W, you can connect a rear
speaker lead directly to a subwoofer without using
an auxiliary amp.
1Press M.C. to switch the rear output setting.
!When no subwoofer is connected to the
rear output, select Rear SP :F.Range (full-
range speaker).
!When a subwoofer is connected to the rear
output, select Rear SP :S/W (subwoofer).
!Even if you change this setting, there will be
no output unless you turn the subwoofer out-
put on (refer to Subwoofer1 (subwoofer on/off
setting) on page 12).
!If you change this setting, subwoofer output in
the audio menu will return to the factory set-
tings.
!Both rear speaker lead outputs and RCA rear
output are switched simultaneously in this set-
ting.
Demonstration (demo display setting)
1Press M.C. to turn the demo display on or off.
Ever-scroll (scroll mode setting)
When ever scroll is set to ON, recorded text infor-
mation scrolls continuously in the display. Set to
OFF if you prefer the information to scroll just
once.
1Press M.C. to turn the ever scroll on or off.
BT AUDIO (Bluetooth audio activation)
!This function is available on the DEH-P7400HD
only when a Bluetooth adapter (e.g. CD-BTB200)
is connected to the device.
You need to activate the BT Audio source in order
to use a Bluetooth audio player.
1Press M.C. to turn the BT Audio source on or
off.
Clear memory (resetting the Bluetooth wireless
technology module)
!This function is not available for DEH-P7400HD.
Bluetooth device data can be deleted. To protect
personal information, we recommend deleting
this data before transferring the unit to other per-
sons. The following settings will be deleted.
!phone book entries on the Bluetooth tele-
phone
!preset numbers on the Bluetooth telephone
!registration assignment of the Bluetooth tele-
phone
!call history of the Bluetooth telephone
!information of the connected Bluetooth tele-
phone
!PIN code of the Bluetooth device
1Press M.C. to show the confirmation display.
YES is displayed. Clearing memory is now on
standby.
If you do not want to reset phone memory, turn
M.C. to display CANCEL and press to select.
2Press M.C. to clear the memory.
Cleared is displayed and the settings are de-
leted.
!While this function is in use, do not turn
off the engine.
Pin code input (PIN code input)
English
Operating this unit
15
Section
Operating this unit
En
02

!This function is not available for DEH-P8400BH.
To connect your cellular phone to this unit via
Bluetooth wireless technology, you need to enter a
PIN code on your phone to verify the connection.
The default code is 0000, but you can change it
with this function.
With some Bluetooth audio players, you may be
required to enter the Bluetooth audio player PIN
code in advance to set this unit for a connection.
!You can only operate this function when
Bluetooth adapter (e.g. CD-BTB200) is con-
nected to this unit.
1Turn M.C. to select a number.
2Press M.C. to move the cursor to the previous
or next position.
3After entering the PIN code (up to eight digits),
press and hold down M.C.
The PIN code can be stored in the memory.
!Pressing M.C. again on the same display
returns you to the PIN code input display to
allow you to change the PIN code.
BT Version info. (Bluetooth version display)
!This function is available on the DEH-P7400HD
only when a Bluetooth adapter (e.g. CD-BTB200)
is connected to the device.
You can display the system versions of this unit
and of Bluetooth module.
1Press M.C. to display the information.
!Turning M.C. or LEVER cycles between the
system version of this unit and that of the
Bluetooth module.
S/W UPDATE (updating the software)
!This function is not available for DEH-P7400HD.
This function is used to update this unit with the
latest software. For information on the software
and updating, refer to our website.
!Never turn the unit off while the software is
being updated.
1Press M.C. to display the data transfer mode.
Follow the on-screen instructions to finish up-
dating the software.
Other functions
Using an AUX source
Up to two auxiliary devices such as VCR or port-
able devices (sold separately) can be connected
to this unit. When connected, auxiliary devices
are automatically read as AUX sources and as-
signed to AUX1 or AUX2. The relationship be-
tween AUX1 and AUX2 sources is explained
below.
About AUX1 and AUX2
There are two methods to connect auxiliary devi-
ces to this unit.
AUX1 source:
When connecting auxiliary device using a stereo
mini plug cable
%Insert the stereo mini plug into the AUX
input jack.
For more details, refer to the installation man-
ual.
This auxiliary device is automatically set to
AUX1.
AUX2 source:
When connecting an auxiliary device using an IP-
BUS-RCA Interconnector (sold separately)
%Use an IP-BUS-RCA Interconnector such
as the CD-RB20/CD-RB10 (sold separately) to
connect this unit to an auxiliary device fea-
turing RCA output.
For more details, refer to the IP-BUS-RCA Inter-
connector owner’s manual.
This auxiliary device is automatically set to
AUX2.
#This type of connection can only be made if the
auxiliary device has RCA outputs.
Selecting AUX as the source
%Press SRC/OFF to select AUX as the
source.
#AUX cannot be selected unless the auxiliary set-
ting is turned on. For more details, refer to AUX1/
AUX2 (auxiliary input setting) on the previous page.
Using an external unit
An external unit refers to a Pioneer product,
such as those which will be available in the fu-
ture. Although incompatible as a source, the
basic functions of up to two external units can
be controlled with this unit. When two external
units are connected, the external units are auto-
matically allocated to external unit 1 or external
unit 2.
The basic operations of the external unit are ex-
plained below. The allocated functions will differ
depending on the connected external unit. For
details concerning these functions, refer to the
owner’s manual for the external unit.
Selecting the external unit as the source
%Press SRC/OFF to select EXT as the source.
Basic operations
The functions allocated to the following opera-
tions will differ depending on the connected ex-
ternal unit. For details concerning these
functions, refer to the owner’s manual for the
connected external unit.
%Press BAND/ .
%Press and hold BAND/ .
%Turn LEVER.
%Turn and hold down LEVER.
%Press or .
Using the functions allocated to 1 to
6 keys
1 Press (list).
2 Use M.C. to select Key 1 to Key 6.
Turn to change Key 1 to Key 6 and press.
Advanced operations
1 Press M.C. to display the main menu.
2 Use M.C. to select FUNCTION.
Turn to change the menu option. Press to select.
3 Turn M.C. to select the function.
Function1 (function 1)—Function2 (function 2)
—Function3 (function 3)—Function4 (function
4)—Auto/Manual (auto/manual)
4 Press M.C. to select the desired setting.
Using different entertainment
displays
You can enjoy entertainment displays while lis-
tening to each sound source.
Operating this unit
16
Section
Operating this unit
En
02

Advanced operations using the MIX
(MIXTRAX) button
MIXTRAX technology is used to add a variety of
sound effects between songs for arranging the
pauses between songs. It allows you to enjoy lis-
tening to music nonstop.
Connecting the currently playing song and the
next song together with sound effects
1Press MIX to turn the MIXTRAX function on or
off.
!This function is available only when a file on a
USB storage device or a song on an iPod is
being played.
!This function is not available when the control
mode is set to iPod/APP.
!Depending on the file/song, sound effects may
not be enabled for adding.
!When the MIXTRAX function is turned on, the
Sound Retriever setting is turned off. Refer to
Sound Retriever (sound retriever) on page 10.
Note
MIXTRAX includes a MIXTRAX Illumination fea-
ture that when switched on changes the illumi-
nated colors in time with the audio track. If you
find the feature distracting while driving, please
return MIXTRAX Illumination to the default set-
ting of “OFF”.
Switching the display background
according to the type of music
This function is available only when the MIX-
TRAX function is on. Refer to Connecting the cur-
rently playing song and the next song together
with sound effects on this page.
1 Press M.C. to display the main menu.
2 Turn M.C. to change the menu option
and press to select ENTERTAINMENT.
3 Turn M.C. to select the function.
4 Press M.C. to display the MIXTRAX.
5 Turn M.C. to change the display.
MIXTRAX—OFF
!When MIXTRAX is selected, the illumination
colors selected in Flashing Color are dis-
played.
!When OFF is selected, the illumination color
selected for the Background is displayed.
Switching the display indication
1 Press M.C. to display the main menu.
2 Turn M.C. to change the menu option
and press to select ENTERTAINMENT.
3 Turn M.C. to select the function.
4 Press M.C. to display the Background.
5 Turn M.C. to change the display.
Background visual—genre—background pic-
ture 1—background picture 2—background pic-
ture 3—background picture 4—simple display—
movie screen —calendar
#Genre display changes depending on the genre
of music.
#Genre display may not operate correctly depend-
ing on the application used to encode audio files.
Turning the clock display on or off
1 Press M.C. to display the main menu.
2 Turn M.C. to change the menu option
and press to select ENTERTAINMENT.
3 Turn M.C. to select the function.
4 Press M.C. to select the desired setting.
Clock display—elapsed time display—clock off
#You can switch the function by pressing CLOCK
(DEH-P7400HD only).
Selecting the illumination color
This unit is equipped with multiple-color illumi-
nation. You can select desired colors for the keys
and display of this unit. You also can customize
the colors you want to use.
Selecting the flashing color from the
illumination color list
You can change colors for the keys and display
of this unit according to the type of music.
!This function is available only when the MIX-
TRAX function is on. Refer to Connecting the
currently playing song and the next song to-
gether with sound effects on this page.
1 Press M.C. to display the main menu.
2 Turn M.C. to change the menu option
and press to select ILLUMI.
3 Turn M.C. to display Flashing Color and
press to select.
4 Turn M.C. to select the illumination color.
You can select one option from the following list.
!Changing the color according to the type of
music played (You can select from Color 1 to
Color 6 and Random.)
!Changing the color according to the level of
low sounds played (You can select from
Color 1 to Color 6 and Random.)
!OFF (No change.)
Selecting the key color from the
illumination color list
You can select desired colors for the keys of this
unit.
1 Press M.C. to display the main menu.
2 Turn M.C. to change the menu option
and press to select ILLUMI.
3 Turn M.C. to display Key and press to se-
lect.
4 Turn M.C. to select the illumination color.
You can select one option from the following list.
!30 preset colors (WHITE to ROSE)
!SCAN (cycle through all colors)
!3 sets of colors (WARM,AMBIENT,CALM)
!CUSTOM (customized illumination color)
Notes
!When SCAN is selected, the system auto-
matically cycles through the 30 preset colors.
!When WARM is selected, the system auto-
matically cycles through the warm colors.
!When AMBIENT is selected, the system au-
tomatically cycles through the ambient col-
ors.
!When CALM is selected, the system auto-
matically cycles through the calm colors.
!When CUSTOM is selected, the customized
color saved is selected.
Selecting the display color from the
illumination color list
You can select the desired colors for the display
of this unit.
1 Press M.C. to display the main menu.
2 Turn M.C. to change the menu option
and press to select ILLUMI.
3 Turn M.C. to switch to Display and press
to select.
4 Turn M.C. to select the illumination color.
You can select one option from the following list.
!30 preset colors (WHITE to ROSE)
!SCAN (cycle through all colors)
English
Operating this unit
17
Section
Operating this unit
En
02
!3 sets of colors (WARM,AMBIENT,CALM)
!CUSTOM (customized illumination color)
Note
For details about colors on the list, refer to Se-
lecting the key color from the illumination color
list on the previous page.
Selecting key and display color from
the illumination color list
You can select the desired colors for the keys
and display of this unit.
1 Press M.C. to display the main menu.
2 Turn M.C. to change the menu option
and press to select ILLUMI.
3 Turn M.C. to display Key & Display and
press to select.
4 Turn M.C. to select the illumination color.
You can select one option from the following list.
!30 preset colors (WHITE to ROSE)
!SCAN (cycle through all colors)
!3 sets of colors (WARM,AMBIENT,CALM)
Notes
!You cannot select CUSTOM in this function.
!Once you select a color in this function, col-
ors on the keys and display of this unit auto-
matically switch to the color you selected.
!For details about colors on the list, refer to
Selecting the key color from the illumination
color list on the previous page.
Customizing the illumination color
1 Press M.C. to display the main menu.
2 Turn M.C. to change the menu option
and press to select ILLUMI.
3 Turn M.C. to display Key or Display. Press
to select.
4 Press M.C. and hold until the customizing
illumination color setting appears in the dis-
play.
5 Press M.C. to select the primary color.
R(red)—G(green)—B(blue)
6 Turn M.C. to adjust the brightness level.
Adjustment range: 0to 60
#You cannot select a level below 10 for all three of
R(red), G(green), and B(blue) at the same time.
#You can also perform the same operation on
other colors.
Notes
!You cannot create a custom illumination
color when SCAN or a set of colors (WARM,
AMBIENT,orCALM) is selected.
!You can create custom illumination colors
for both Key and Display.
Switching the display indication
and button illumination
Display indication and button illumination can
be switched on or off.
%Press and hold MIX.
Pressing and holding MIX switches the display
indication and button illumination on or off.
#Even if the display indication is turned off, opera-
tion can be conducted. If operation is conducted
while the display indication is off, display will light
up for a few seconds and then turn off again.
Bluetooth Audio
!Only for DEH-P7400HD
If you connect a Bluetooth adapter (e.g. CD-
BTB200) to this unit, you can control Bluetooth
audio players via Bluetooth wireless technology.
!In some countries, CD-BTB200 is not sold on
the market.
Important
!Depending on the Bluetooth audio player
connected to this unit, the available opera-
tions will be limited to the following two lev-
els:
—A2DP profile (Advanced Audio Distribution
Profile): You can only playback songs on your
audio player.
—AVRCP profile (Audio/Video Remote Control
Profile): You can perform playback, pause
playback, select songs, etc.
!Operations may vary depending on the kind
of a Bluetooth audio player.
!Refer to the instruction manual that came
with your Bluetooth audio player as well as
this manual while operating your player on
this unit.
!Information related to a song (such as the
elapsed playing time, song title, song index,
etc.) cannot be displayed on this unit.
!As the signal from your cellular phone may
cause noise, avoid using it when you are lis-
tening to songs on your Bluetooth audio
player.
!When a call is in progress on the cellular
phone connected to this unit via Bluetooth
wireless technology, the sound of the
Bluetooth audio player connected to this unit
is muted.
!Playback continues even if you switch from
your Bluetooth audio player to another
source while listening to a song.
Basic operations
1
1Device name
Shows the device name of the connected
Bluetooth audio player (or Bluetooth adapt-
er).
Selecting a track
1Turn LEVER.
Fast forwarding or reversing
1Turn and hold down LEVER to the right or left.
Notes
!For details concerning operation, refer to the
Bluetooth adapter’s operation manual.
!Even though your audio player does not con-
tain a Bluetooth module, you can still control
it from this unit via Bluetooth wireless tech-
nology. To control your audio player using
this unit, connect a product featuring
Bluetooth wireless technology (available on
the market) to your audio player and connect
the Bluetooth adapter (e.g. CD-BTB200) to
this unit.
Function settings
1 Press M.C. to display the main menu.
2 Turn M.C. to change the menu option
and press to select FUNCTION.
3 Turn M.C. to select the function.
After selecting, perform the following proce-
dures to set the function.
Operating this unit
18
Section
Available accessories
En
02
03
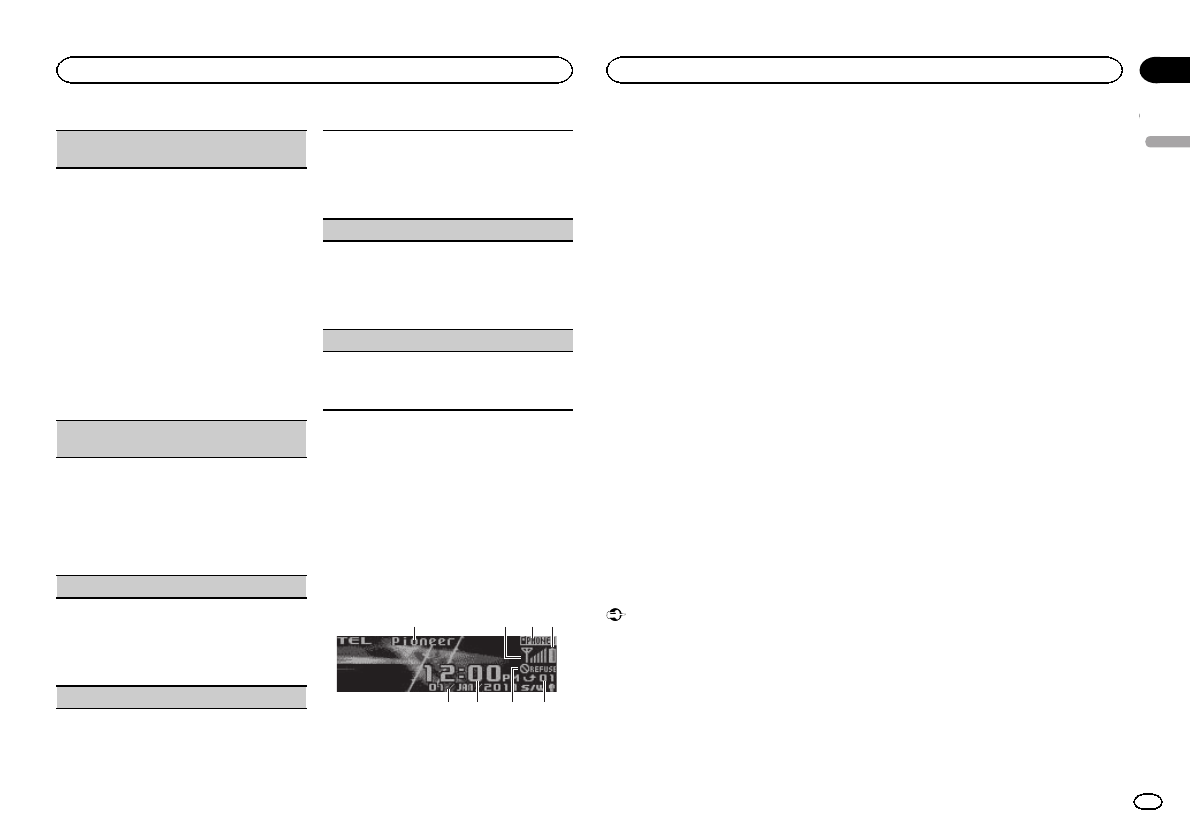
Connection open (Bluetooth audio player con-
nection)
!This function cannot be operated when a
Bluetooth audio player has already been con-
nected.
1Press M.C. to open the connection.
Always waiting is displayed. This unit is now
on standby for connection from Bluetooth
audio player.
!If your Bluetooth audio player is set ready
for Bluetooth wireless connection, connec-
tion to this unit is automatically estab-
lished.
!If your player requires a PIN code to estab-
lish a connection, look for the code on the
player or in its accompanying documenta-
tion. Refer to Pin code input (PIN code
input) on page 15.
Disconnect audio (Bluetooth audio player discon-
nection)
!This function cannot be operated when a
Bluetooth audio player is not connected.
1Press M.C. to disconnect the Bluetooth audio
player.
Disconnected is displayed. The Bluetooth
audio player is now disconnected from this
unit.
Play (song playback)
!This function cannot be operated when a
Bluetooth audio player is not connected.
!This function cannot be operated when a
Bluetooth audio player is connected via A2DP.
1Press M.C. to start playback.
Stop (stop playback)
!This function cannot be operated when a
Bluetooth audio player is not connected.
!This function cannot be operated when a
Bluetooth audio player is connected via A2DP.
1Press M.C. to stop the playback.
Pause (pause)
!This function cannot be operated when a
Bluetooth audio player is not connected.
!This function cannot be operated when a
Bluetooth audio player is connected via A2DP.
1Press M.C. to pause or resume.
Device info. (Bluetooth device address display)
1Press M.C. to display the information.
!Pressing M.C. toggles Bluetooth device
and address display on/off.
Bluetooth telephone
!Only for DEH-P7400HD
If you use a Bluetooth adapter (e.g. CD-BTB200),
you can connect a cellular phone featuring
Bluetooth wireless technology to this unit for
hands-free, wireless calls, even while driving.
!In some countries, CD-BTB200 is not sold on
the market.
Basic operations
6 85
1 3
7
24
1Device name
Shows the device name of the cellular
phone.
2Signal level indicator
!The level shown on the indicator may dif-
fer from the actual signal level.
3User number indicator
4Battery strength indicator
!The level shown on the indicator may dif-
fer from the actual battery strength.
!If the battery strength is not available,
nothing is displayed in the battery
strength indicator area.
5Calendar display
Shows the day, month and year (if connected
with a phone).
6Clock display
Shows the time (if connected with a phone).
7Automatic answering/Automatic rejecting in-
dicator
Shows AUTO when the automatic answering
function is on (for more details, refer to
Auto answer (automatic answering) on page
22).
Shows REFUSE when the automatic rejecting
function is on (for more details, refer to
Refuse calls (automatic rejecting) on page
22).
8Incoming call notice
Indicates that an incoming call has been re-
ceived and has not been checked yet.
!Not displayed for calls made when your
cellular phone is disconnected from this
unit.
Important
!Since this unit is on standby to connect with
your cellular phone via Bluetooth wireless
technology, using it without the engine run-
ning can drain the battery power.
!Advanced operations that require attention
such as dialing numbers on the monitor,
using the phone book, etc., are prohibited
while driving. Park your vehicle in a safe
place when using these advanced opera-
tions.
Notes
!The equalizer curve for the phone source is
fixed.
!When selecting the phone source, you can
only operate Fader/Balance (balance adjust-
ment) in the audio menu.
Setting up for hands-free phoning
Before you can use the hands-free phoning
function you must set up the unit for use with
your cellular phone. This entails establishing a
Bluetooth wireless connection between this unit
and your phone, registering your phone with
this unit, and adjusting the volume level.
English
Available accessories
19
Section
Available accessories
En
03
1Connection
For detailed instructions on connecting your
phone to this unit via Bluetooth wireless tech-
nology, see following section. Function and op-
eration on this page.
!To make best use of the technology, we rec-
ommend you register the phone to this
unit.
2Registration
To register your temporarily connected phone,
refer to Set phone (registering a connected cel-
lular phone) on the next page.
3Volume adjustment
Adjust the earpiece volume of your cellular
phone to your preference. The unit will record
the adjusted volume level as the default set-
ting.
!The volume of the caller’s voice and ring
tone may vary depending on the type of
cellular phone.
!If there is a large volume difference be-
tween the ring tone and caller’s voice, the
overall volume level may become unstable.
!Make sure to adjust the volume to a proper
level before disconnecting the cellular
phone from the unit. If the volume is
muted (zero level) on your cellular phone,
the volume level of your cellular phone re-
mains muted even after the cellular phone
is disconnected.
Making a phone call
Voice recognition
1Press BAND/and hold until Voice dial ap-
pears in the display.
Voice dial appears in the display. When Voice
dial ON is displayed, voice recognition func-
tion is now ready.
!If your cellular phone does not feature
voice recognition function, No voice dial
appears in the display and operation is not
possible.
2Say the name of your contact aloud.
Taking a phone call
Answering or rejecting an incoming call
Answering an incoming call
1When a call is received, press M.C.
!You can also operate this function by turn-
ing LEVER to the right.
Ending a call
1Turn LEVER to the left.
Rejecting an incoming call
1When you receive a call, turn LEVER to the
left.
Notes
!If private mode is selected on the cellular
phone, hands-free phoning may not be avail-
able.
!The estimated call time appears in the dis-
play (this may differ slightly from the actual
call time).
Operating a call waiting
Answering a call waiting
1When a call is received, press M.C.
!You can also operate this function by turn-
ing LEVER to the right.
Ending all calls
1Turn LEVER to the left.
Switching between callers on hold
1Press M.C.
!You can also operate this function by turn-
ing LEVER to the right.
Canceling call waiting
1Turn LEVER to the left.
Notes
!Turn LEVER left to end all calls including
calls waiting on the line.
!To end the call, both you and the other caller
must hang up your phones.
Function and operation
1 Press M.C. to display the main menu.
2 Turn M.C. to change the menu option
and press to select FUNCTION.
3 Turn M.C. to select the function.
After selecting, perform the following proce-
dures to set the function.
Search&Connect (searching for available cellular
phone)
!This function cannot be operated when a cellu-
lar phone is connected.
1Press M.C. to select the function.
2Press M.C. to search for available cellular
phones.
While searching, Searching flashes. When
available cellular phones featuring Bluetooth
wireless technology are found, device name or
Name not found (if names cannot be ob-
tained) is displayed.
!If this unit fails to find any available cellular
phones, Not found is displayed.
3Turn M.C. to select the name of the device you
want to connect.
4Press M.C. to connect the selected cellular
phone.
While connecting, Connecting flashes. To
complete the connection, check the device
name (Pioneer BT Unit) and enter the link
code on your cellular phone. If the connection
is established, Connected is displayed.
!PIN code is set to 0000 as the default. You
can change this code. Refer to
Pin code input (PIN code input) on page
15.
Connection open (connecting from cellular
phone)
!This function cannot be operated when a cellu-
lar phone is connected.
1Press M.C. to open the connection.
Disconnect phone (disconnecting a cellular
phone)
Available accessories
20
Section
Available accessories
En
03

!This function cannot be operated when the cel-
lular phone is not connected.
1Press M.C. to disconnect a cellular phone
from this unit.
After disconnection is completed, Discon-
nected is displayed.
Connect phone (connecting a registered cellular
phone)
!This function cannot be operated when a cellu-
lar phone is connected.
1Press M.C. to select the function.
2Turn M.C. to select a pairing assignment.
P1 (user phone 1)—P2 (user phone 2)—P3
(user phone 3)—G1 (guest phone 1)—G2
(guest phone 2)
!If the assignment is empty, No data is dis-
played and operation is not possible.
3Press M.C. to connect the selected cellular
phone.
While connecting, Connecting is displayed.
After the connection is completed, Connected
is displayed.
Set phone (registering a connected cellular
phone)
!This function cannot be operated when the cel-
lular phone is not connected or already con-
nected and registered.
1Press M.C. to select the function.
2Turn M.C. to select a pairing assignment.
P1 (user phone 1)—P2 (user phone 2)—P3
(user phone 3)—G1 (guest phone 1)—G2
(guest phone 2)
!As you select each assignment, you can
see whether or not a phone is already regis-
tered. If the assignment is empty, No data
is displayed. If the assignment is already
taken, the device name appears. To replace
an assignment with a new phone, first de-
lete the current assignment. Refer to
Delete device (deleting a registered cellular
phone).
3Press M.C. to register the currently connected
phone.
When registration is completed, Reg.Com-
pleted is displayed.
!If the registration fails, Reg.ERROR is dis-
played. In this case, return to step 1 and try
again.
Delete device (deleting a registered cellular
phone)
1Press M.C. to select the function.
2Turn M.C. to select a pairing assignment.
P1 (user phone 1)—P2 (user phone 2)—P3
(user phone 3)—G1 (guest phone 1)—G2
(guest phone 2)
!If the assignment is empty, No data is dis-
played and operation is not possible.
3Select the desired pairing assignment and
press M.C.
Delete YES is displayed. Deleting phone is
now on standby.
4Press M.C. to delete the phone.
After the phone is deleted, Deleted is dis-
played.
PH.B.Transfer (transferring entries to the phone
book)
The Phone Book can hold a total of 500 entries.
300 from User 1, 150 from User 2, and 50 from
User 3.
1Press M.C. to enter the phone book transfer
standby mode.
Transfer YES appears in the display.
2Press M.C. to show the confirmation display.
Transfer -/- appears in the display.
3Use the cellular phone to perform phone book
transfer.
Perform phone book transfer using the cellular
phone. For detailed instructions, refer to the in-
struction manual that came with your cellular
phone.
!The display indicates how many entries
have been transferred and the total number
to be transferred.
4Data transferred is displayed and phone book
transfer is completed.
PH.B.Name view (changing the phone book dis-
play order)
!This function cannot be operated when the cel-
lular phone is not connected or not registered.
!This function cannot be operated when the
registered guest phone is used.
!This function cannot be operated when a
Bluetooth telephone is connected via HSP
(head set profile).
1Press M.C. to change the name view order.
Inverted is displayed and the name view order
is changed.
Pressing M.C. repeatedly changes the name
view order between first and last name.
Clear memory (clearing memory)
!This function cannot be operated when the cel-
lular phone is not connected or not registered.
!This function cannot be operated when a
Bluetooth telephone is connected via HSP
(head set profile).
1Press M.C. to select the function.
2Turn M.C. to select an item.
PhoneBook (phone book)—Missed calls
(missed call history)—Dialed calls (dialled
call history)—Received calls (received call his-
tory)—Dial preset (preset phone numbers)—
All clear (delete all memory)
!If you want to clear all the Phone Book, di-
alled/received/missed call history list and
preset phone number, select All clear.
!If guest phone is connected to this unit via
Bluetooth wireless technology, Phone-
Book cannot be selected.
3Press M.C. to the right to select the item that
you want to delete from this unit.
Clear memory YES is displayed. Clearing
memory is now on standby.
4Press M.C. to clear the memory.
Cleared is displayed and data on the selected
item is cleared from this unit’s memory.
Number dial (making a call by entering phone
number)
English
Available accessories
21
Section
Available accessories
En
03

!This function cannot be operated when the cel-
lular phone is not connected.
!This function cannot be operated when a
Bluetooth telephone is connected via HSP
(head set profile).
!Be sure to park your vehicle in a safe place
and apply the parking brake when performing
this operation.
1Press M.C. to select the function.
2Turn M.C. to select a number.
3Press M.C. to move the cursor to the previous
or next position.
Up to 24 digits can be entered.
4When you finish entering the number, press
M.C.
5Press M.C. to make a call.
6To end the call, turn LEVER to the left.
Refuse calls (automatic rejecting)
!This function cannot be operated when a
Bluetooth telephone is connected via HSP
(head set profile).
1Press M.C. to turn automatic call rejection on
or off.
Auto answer (automatic answering)
1Press M.C. to turn automatic answering on or
off.
Ring tone (ring tone select)
1Press M.C. to turn the ring tone on or off.
Auto connect (automatic connection to a phone)
1Press M.C. to turn automatic connection on or
off.
If your cellular phone is ready for Bluetooth
wireless connection, connection to this unit is
automatically established.
Echo cancel (echo cancel and noise reduction)
1Press M.C. to turn echo canceling on or off.
Device info. (Bluetooth device address display)
1Press M.C. to select the function.
2Press M.C. to display the information.
!Pressing M.C. toggles Bluetooth device ad-
dress and device name on/off.
Using the phone book
Important
Be sure to park your vehicle in a safe place and
apply the parking brake when performing this
operation.
After finding the number you want to call in the
phone book, you can select the entry and make
the call.
1 Press (list) to display the Phone Book.
Phone book—Missed call—Dialled call—Re-
ceived call
2 Turn M.C. to select the first letter of the
name you are looking for.
3 Press M.C. to display entries.
The first three Phone Book entries starting with
that letter (e.g. “Ben”,“Brian”and “Burt”when
“B”is selected) will be displayed.
4 Turn M.C. to select a phone book entry
you want to call.
5 Press M.C. to display the detailed list for
the selected entry.
The phone number, name and genre (if as-
signed) of entries are displayed in the detailed
list.
#If several phone numbers are included in an
entry, select one by turning M.C.
#Turn M.C. if you want to go back and select an-
other entry.
6 Use M.C. to control the following func-
tions.
Perform the following procedures to set the
function.
Calling a number in the phone book
1Press M.C. to make a call.
2To end the call, turn LEVER to the left.
Editing phone numbers
You can edit the numbers of Phone Book entries.
Each phone number can be up to 24 digits long.
1Press and hold M.C. to display the number
input screen.
2Turn M.C. to move the cursor to the number
you want to change.
3Turn and hold down M.C. to change numbers.
4Press M.C. to store the new number.
Clearing a phone book entry
1Press and hold M.C. to display the number
input screen.
2Turn M.C. to switch to the clear memory
screen.
Edit number (number input screen)—Clear
memory (clear memory screen)
3Press M.C. to pull up the confirmation display.
Clear memory YES is displayed.
4Press M.C. to delete the Phone Book entry.
Cleared is displayed.
The Phone Book entry is deleted. The display
returns to Phone Book entry list.
Using the call history
Important
Be sure to park your vehicle in a safe place and
apply the parking brake when performing this
operation.
The 12 most recent calls made (dialled), received
and missed, are stored in the call history. You
can browse the call history and call numbers
from it.
1 Press (list) to display the list.
Phone book—Missed call—Dialled call—Re-
ceived call
#If no phone numbers are stored in the selected
list, No data is displayed.
2 Turn M.C. to select a phone number.
Turning M.C. to change the phone numbers
stored in the list.
#If the phone number is already in the phone
book, the corresponding name is displayed.
3 Press M.C. to display the detailed list.
Name and phone number are displayed in the
detailed list.
#If the number is already in the Phone Book then
the name is also displayed.
#Turning M.C. switches to the previous or next
phone number displayed in the detailed list.
4 Press M.C. to make a call.
#For an international call, press and hold M.C. to
add +to the phone number.
5 To end the call, turn LEVER to the left.
XM tuner
You can use this unit to control an XM satellite
digital tuner (GEX-P920XM), which is sold sepa-
rately.
!With this unit, you can operate two additional
functions: XM channel direct selection and
preset channel list.
Available accessories
22
Section
Available accessories
En
03
For details concerning operation, refer to the XM
tuner’s operation manuals. This section pro-
vides information on XM operations with this
unit which differs from that described in the XM
tuner’s operation manual.
Basic operations
2 31 4
5
1XM band indicator
2XM channel number indicator
3XM preset number indicator
4XM channel select setting indicator
Shows what channel select setting has been
selected. CH is displayed when
Channel number is selected, and CAT is dis-
played when Category is selected.
5XM text information
Shows the text information of broadcast
channel.
Select an XM band.
1Press BAND/.
!Band can be selected from XM-1,XM-2 or
XM-3.
Select a channel.
1Turn LEVER.
!By turning and holding down LEVER, you
can increase or decrease the channel
number continuously.
!You can also perform tuning from a de-
sired channel category. (Refer to Selecting
a channel from a channel category on this
page.)
Switching the XM display
1Press /DISP.
Storing and recalling broadcast
stations
You can easily store up to six stations for each
band as presets.
!Six stations for each band can be stored in
memory.
1 Press (list).
Preset screen is displayed.
2 Use M.C. to store the selected station in
memory.
Turn to change the preset number. Press and
hold to store.
3 Use M.C. to select the desired station.
Turn to change the station; press to select.
#You can also change the station by pushing
or or turning LEVER.
Function and operation
1 Press M.C. to display the main menu.
2 Use M.C. to select FUNCTION.
The function selection menu is displayed.
Turn to change the menu option. Press to select.
3 Turn M.C. to select the function.
After selecting, perform the following proce-
dures to set the function.
Channel mode (channel select mode setting)
You have two methods for selecting a channel: by
number and by category. When selecting by num-
ber, channels in any category can be selected. Se-
lect by category to narrow your search down to
only channels in a particular category.
1Press M.C. to change the channel select
mode.
Channel number (channel number select set-
ting)—Category (channel category select set-
ting)
Selecting a channel from a
channel category
1 Switch the channel select settings to
Category.
Refer to Channel mode (channel select mode
setting) on this page.
2 Push or to select the desired
channel category.
3 Turn LEVER to select the desired channel
from the selected channel category.
Displaying the Radio ID
1 Select the channel select settings to
Channel number.
Refer to Channel mode (channel select mode
setting) on this page.
2 Turn LEVER to select RADIO ID.
#If you select another channel, display of the ID
code is canceled.
#RADIO ID and the ID codes are repeatedly dis-
played one after the other.
SIRIUS Satellite Radio tuner
You can use this unit to control a SIRIUS Satellite
Radio tuner, which is sold separately.
When the SIRIUS tuner is used together with
this unit, some operations differ slightly from
those described in the SIRIUS operation man-
ual. This manual provides information on these
points. For all other information on using the
SIRIUS tuner, please refer to the SIRIUS opera-
tion manual.
Listening to SIRIUS Satellite Radio
2 31 4
5
1SIRIUS band indicator
2SIRIUS channel number indicator
3SIRIUS preset number indicator
4SIRIUS channel select setting indicator
Shows what channel select setting has been
selected. CH is displayed when
Channel number is selected, and CAT is dis-
played when Category is selected.
I.R is displayed during the Instant Replay
mode.
5SIRIUS channel name
Shows the channel name of broadcast chan-
nel.
Select a SIRIUS band.
1Press BAND/.
!Band can be selected from SR-1,SR-2 or
SR-3.
Select a channel.
1Turn LEVER.
!By turning and holding down LEVER, you
can increase or decrease the channel
number continuously.
!You can also perform tuning from a de-
sired channel category. (Refer to Selecting
a channel from a channel category on the
next page.)
English
Available accessories
23
Section
Available accessories
En
03
Switching the SIRIUS display
1Press /DISP.
Play time—Channel number—Channel name
—Category name—Artist name—Song title/
program title—Composer name
!The play time is displayed during Instant
Replay mode. Refer to Using the Instant
Replay function on this page.
!Play time display indicates the time in-
verted from the live broadcast. The play
time is displayed as a negative number.
Displaying the Radio ID
1Turn LEVER to select CH 000.
!To select CH 000, set the channel select set-
ting to Channel number. About the channel
select setting, refer to Channel mode (channel
select mode setting) on this page.
Note
It may take a few seconds before you can hear
anything while this unit acquires and processes
the satellite signal when you change the source
to a SIRIUS tuner or select a channel.
Storing and recalling broadcast
stations
You can easily store up to six stations for each
band as presets.
!Six stations for each band can be stored in
memory.
1 Press (list).
Preset screen is displayed.
2 Use M.C. to store the selected station in
memory.
Turn to change the preset number. Press and
hold to store.
The SIRIUS preset number you have selected
will flash and then remain lit. The selected sta-
tion has been stored in memory.
3 Use M.C. to select the desired station.
Turn to change the station; press to select.
#You can also change the station by pushing
or or turning LEVER.
Function and operation
1 Press M.C. to display the main menu.
2 Use M.C. to select FUNCTION.
The function selection menu is displayed.
Turn to change the menu option. Press to select.
3 Turn M.C. to select the function.
After selecting, perform the following proce-
dures to set the function.
Channel mode (channel select mode setting)
You have two methods for selecting a channel: by
number and by category. When selecting by num-
ber, channels in any category can be selected. Se-
lect by category to narrow your search down to
only channels in a particular category.
1Press M.C. to change the channel select
mode.
Channel number (channel number select set-
ting)—Category (channel category select set-
ting)
Game alert (game alert setting)
This system can alert you when games involving
your favorite teams are about to start. To use this
function you need to set up a game alert for the
teams in advance.
!To use this function, a Pioneer SIRIUS bus in-
terface (e.g. CD-SB10) is required.
!To use this function, a SIRIUS plug-and-play
unit with a Game Alert Function is required.
!For details, refer to the SIRIUS plug-and-play
unit’s manuals.
!You can also operate this function when a SIR-
PNR2 is connected to this unit.
!The Game Alert function is on at the default
setting.
!Once you select the teams, you need to turn
the Game Alert function on.
1Press M.C. to turn the Game Alert on or off.
!When a game of the selected team is about to
start (or is currently playing) on a different sta-
tion, Game alert info is displayed. Press and
hold M.C. to switch to that station, and you
can listen to that game.
Team setting (team setting)
1Press M.C. to select the function.
2Turn M.C. to select a desired league.
3Turn M.C. to select a desired team.
4Press M.C. to store the selected team in mem-
ory.
The game alert function is activated for that
team.
5Repeat these steps to select other teams.
!When FULL is displayed, additional teams
cannot be selected. In this case, first delete
a selected team and then try again.
Game info (game information)
If any games of the selected teams are currently
playing, you can display information on the games
and tune in to the broadcast channel.
You can display information on the games while
enjoying the sound from the station you are cur-
rently tuned in to. You can also tune in to the
broadcast channel when you wish to.
1Press M.C. to select the function.
2Turn M.C. to select a game.
!The game score will be updated automati-
cally.
3Press M.C. to switch to the other station and
listen to the game.
!If you have not selected any teams, NOT SET is
displayed.
!When games involving your favorite teams are
not currently playing, NO GAME is displayed.
Pause (pause)
During the Instant Replay mode, you can select
Pause (pause). Refer to Using the Instant Replay
function on this page.
1Press M.C. to pause or resume.
Selecting a channel from a
channel category
1 Select the channel select settings to
Category.
Refer to Channel mode (channel select mode
setting) on this page.
2 Push or to select the desired
channel category.
3 Turn LEVER to select the desired channel
from the selected channel category.
Using the Instant Replay function
The following functions can be operated in In-
stant Replay mode.
Available accessories
24
Section
Available accessories
En
03
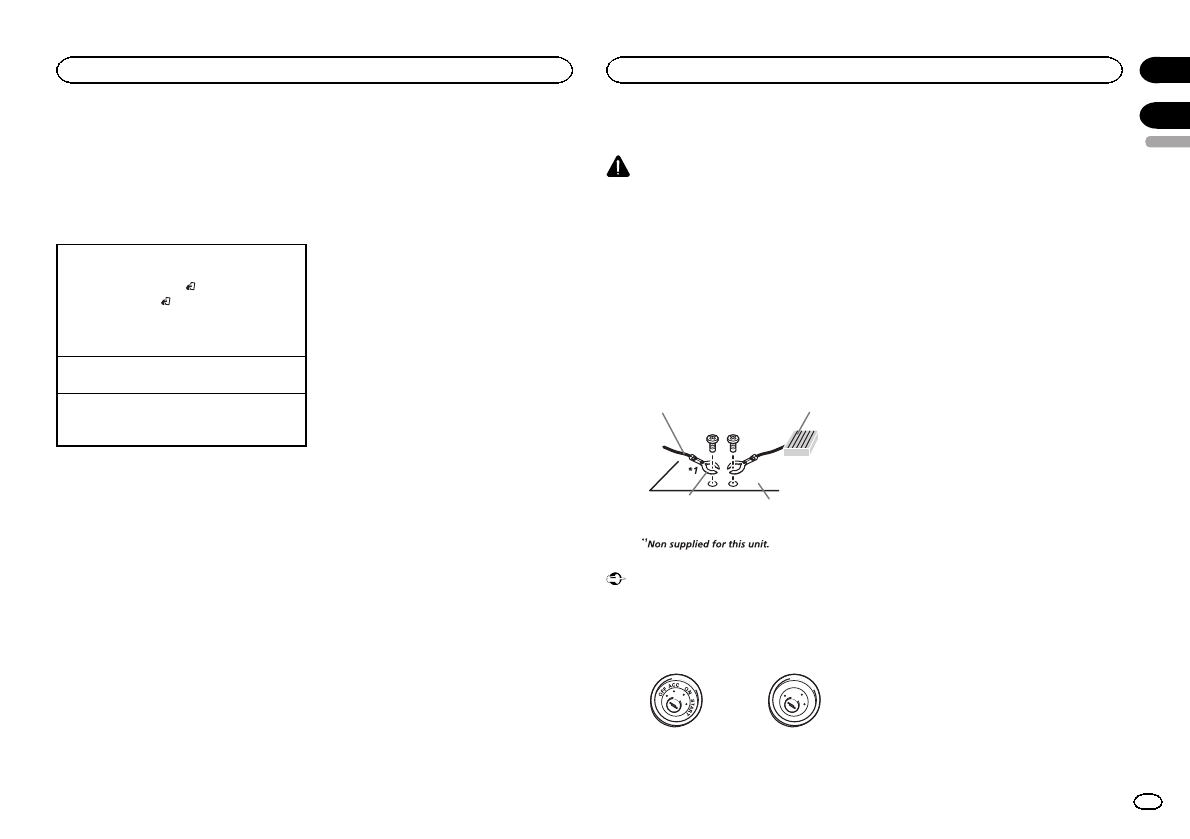
!To use this function, a Pioneer SIRIUS bus in-
terface (e.g. CD-SB10) is required.
!To use this function, a SIRIUS plug-and-play
unit with an Instant Replay Function is re-
quired.
!For details, refer to the SIRIUS plug-and-play
unit’s manuals.
Using Instant Replay mode
1When SIRIUS tuner is selected as the source,
press and hold BAND/.
!When BAND/is pressed, instant replay
mode is canceled.
!When another source is selected, instant
replay mode is canceled.
Select a track
1Turn LEVER.
Fast forward or reverse
1Turn and hold down LEVER for about one sec-
ond and then release.
Connections
WARNING
!Use speakers over 50 W (output value) and
between 4 Wto 8 W(impedance value). Do
not use 1 Wto 3 Wspeakers for this unit.
!The black cable is ground. When installing
this unit or power amp (sold separately),
make sure to connect the ground wire first.
Ensure that the ground wire is properly con-
nected to metal parts of the car’s body. The
ground wire of the power amp and the one of
this unit or any other device must be con-
nected to the car separately with different
screws. If the screw for the ground wire loos-
ens or falls out, it could result in fire, genera-
tion of smoke or malfunction.
Ground wire
Metal parts of car’s body
POWER AMP
Other devices
(Another electronic
device in the car)
Important
!When installing this unit in a vehicle without
an ACC (accessory) position on the ignition
switch, failure to connect the red cable to the
terminal that detects operation of the ignition
key may result in battery drain.
O
N
S
T
A
R
T
O
F
F
ACC position No ACC position
!Use this unit with a 12-volt battery and nega-
tive grounding only. Failure to do so may re-
sult in a fire or malfunction.
!To prevent a short-circuit, overheating or mal-
function, be sure to follow the directions
below.
—Disconnect the negative terminal of the bat-
tery before installation.
—Secure the wiring with cable clamps or adhe-
sive tape. Wrap adhesive tape around wiring
that comes into contact with metal parts to
protect the wiring.
—Place all cables away from moving parts,
such as the shift lever and seat rails.
—Place all cables away from hot places, such
as near the heater outlet.
—Do not connect the yellow cable to the battery
by passing it through the hole to the engine
compartment.
—Cover any disconnected cable connectors
with insulating tape.
—Do not shorten any cables.
—Never cut the insulation of the power cable of
this unit in order to share the power with
other devices. The current capacity of the
cable is limited.
—Use a fuse of the rating prescribed.
—Never wire the negative speaker cable directly
to ground.
—Never band together negative cables of multi-
ple speakers.
!When this unit is on, control signals are sent
through the blue/white cable. Connect this
cable to the system remote control of an ex-
ternal power amp or the vehicle’s auto-anten-
na relay control terminal (max. 300 mA
12 V DC). If the vehicle is equipped with a
glass antenna, connect it to the antenna
booster power supply terminal.
!Never connect the blue/white cable to the
power terminal of an external power amp.
Also, never connect it to the power terminal
of the auto antenna. Doing so may result in
battery drain or a malfunction.
English
Available accessories
25
Section
Installation
En
03
04
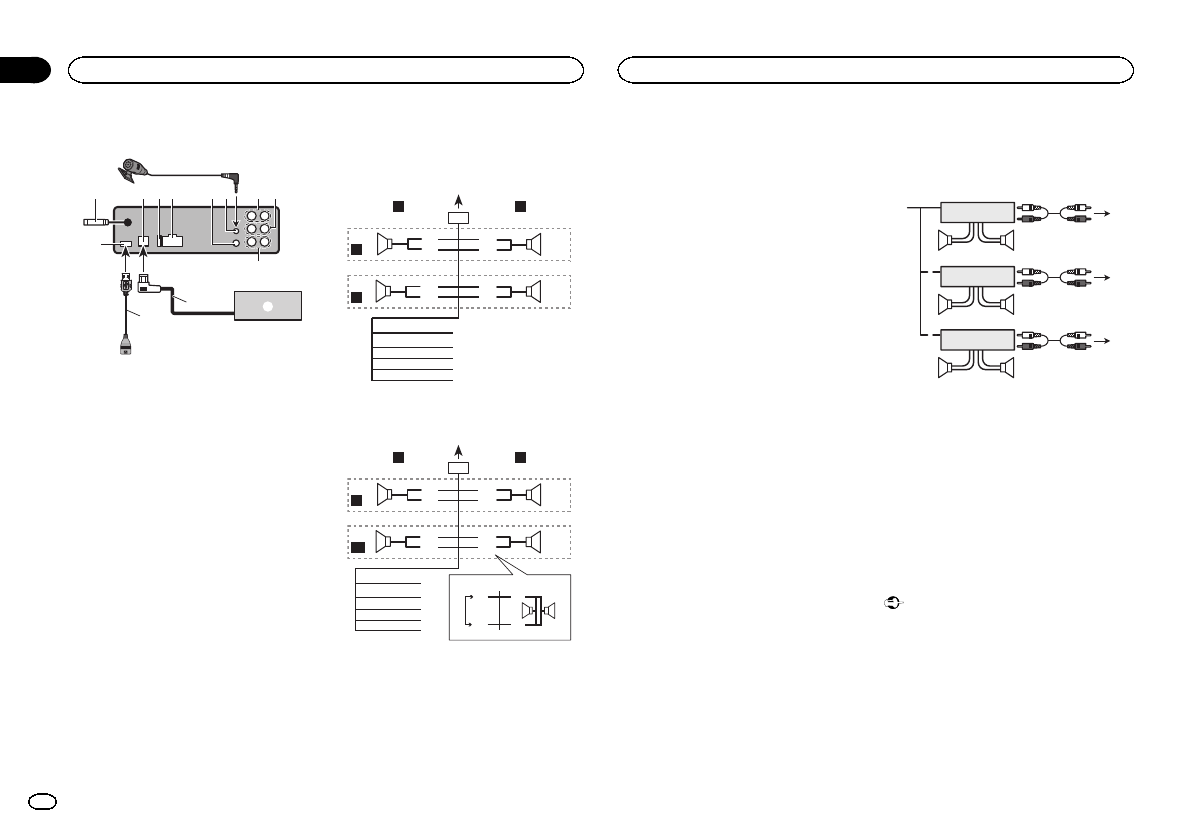
This unit
2 3 4 596 a
b
e
d
c
7
1
8
1USB port
2Antenna input
15 cm (5-7/8 in.)
3IP-BUS input (blue)
4Fuse (10 A)
5Power cord input
6Wired remote input
Hard-wired remote control adaptor can be
connected (sold separately).
7Microphone input (DEH-P8400BH only)
8Microphone (DEH-P8400BH only)
4 m (13 ft. 1 in.)
9Rear output
aFront output
bSubwoofer output
cUSB cable
1.5 m (4 ft. 11 in.)
dIP-BUS cable (sold separately)
ePioneer IP-BUS accessories (sold separately)
Power cord
Perform these connections when not connect-
ing a rear speaker lead to a subwoofer.
1
8
9
c
d
6
32
4
5
7
a
b
e
f
h
i
g
LR
F
R
Perform these connections when using a sub-
woofer without the optional amplifier.
1
8
9
c
d
6
32
4
7
a
b
a
b
e
f
i
g
h
LR
F
SW
j
k
d
c
l m
1To power cord input
2Left
3Right
4Front speaker
5Rear speaker
6White
7White/black
8Gray
9Gray/black
aGreen
bGreen/black
cViolet
dViolet/black
eBlack (chassis ground)
Connect to a clean, paint-free metal location.
fYellow
Connect to the constant 12 V supply termi-
nal.
gRed
Connect to terminal controlled by ignition
switch (12 V DC).
hBlue/white
Connect to system control terminal of the
power amp or auto-antenna relay control ter-
minal (max. 300 mA 12 V DC).
iOrange/white
Connect to lighting switch terminal.
jSubwoofer (4 W)
kWhen using a subwoofer of 70 W (2 W), be
sure to connect the subwoofer to the violet
and violet/black leads of this unit. Do not
connect anything to the green and green/
black leads.
lNot used.
mSubwoofer (4 W)× 2
Notes
!With a 2 speaker system, do not connect any-
thing to the speaker leads that are not con-
nected to speakers.
!Change the initial setting of this unit. Refer
to S/W control (rear output and subwoofer
setting) on page 15.
The subwoofer output of this unit is monau-
ral.
Power amp (sold separately)
Perform these connections when using the op-
tional amplifier.
1
1
3
2
4
55
3
2
6
77
1
3
2
8
99
1System remote control
Connect to Blue/white cable.
2Power amp (sold separately)
3Connect with RCA cables (sold separately)
4To Rear output
5Rear speaker
6To Front output
7Front speaker
8To subwoofer output
9Subwoofer
Installation
Important
!Check all connections and systems before
final installation.
!Do not use unauthorized parts as this may
cause malfunctions.
!Consult your dealer if installation requires
drilling of holes or other modifications to the
vehicle.
!Do not install this unit where:
—it may interfere with operation of the vehicle.
—it may cause injury to a passenger as a result
of a sudden stop.
Installation
26
Section
Installation
En
04
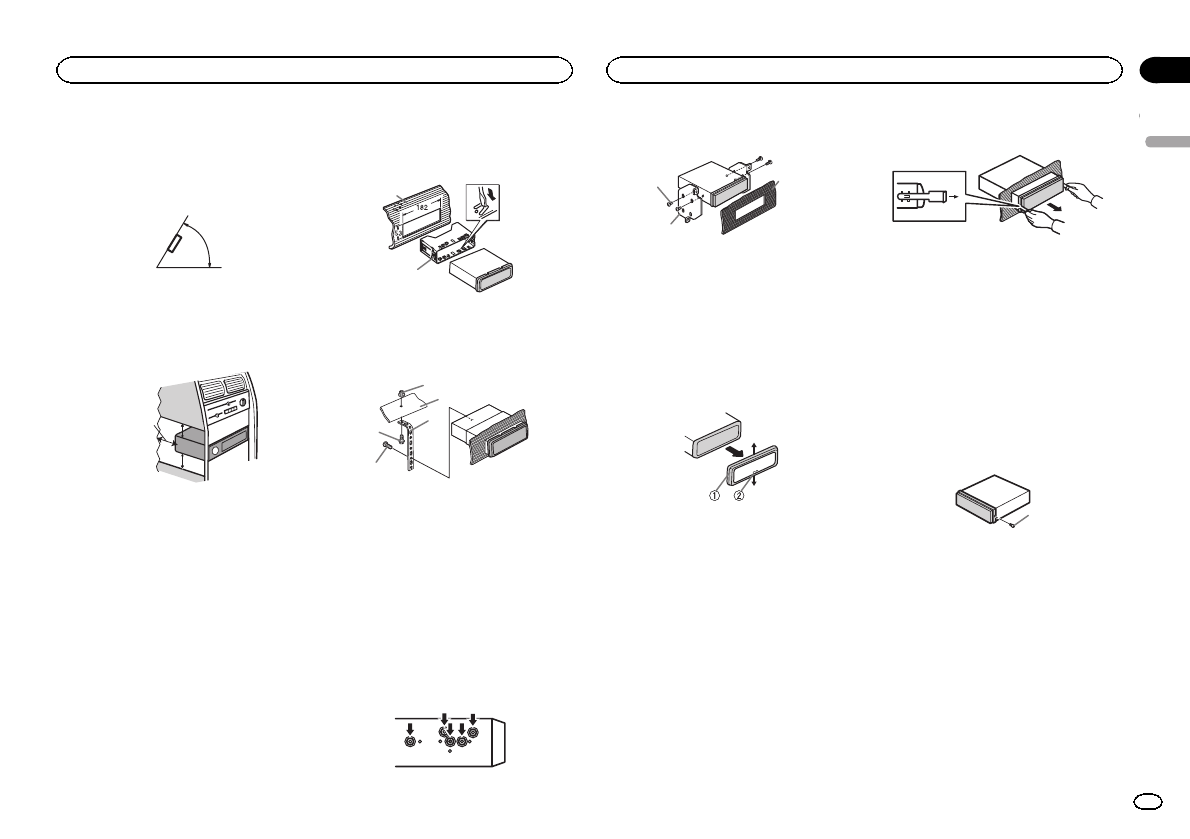
!The semiconductor laser will be damaged if
it overheats. Install this unit away from hot
places such as near the heater outlet.
!Optimum performance is obtained when the
unit is installed at an angle of less than 60°.
60°
!When installing, to ensure proper heat dis-
persal when using this unit, make sure you
leave ample space behind the rear panel and
wrap any loose cables so they are not block-
ing the vents.
5cmcm
Leave ample
space 5 cm
5 cm
DIN front/rear mount
This unit can be properly installed using either
front-mount or rear-mount installation.
Use commercially available parts when instal-
ling.
DIN Front-mount
1 Insert the mounting sleeve into the dash-
board.
For installation in shallow spaces, use the sup-
plied mounting sleeve. If there is enough space,
use the mounting sleeve that came with the ve-
hicle.
2 Secure the mounting sleeve by using a
screwdriver to bend the metal tabs (90°) into
place.
1
2
1Dashboard
2Mounting sleeve
3 Install the unit as illustrated.
1
2
3
4
5
1Nut
2Firewall or metal support
3Metal strap
4Screw
5Screw (M4 × 8)
#Make sure that the unit is installed securely in
place. An unstable installation may cause skipping
or other malfunctions.
DIN Rear-mount
1 Determine the appropriate position
where the holes on the bracket and the side
of the unit match.
2 Tighten two screws on each side.
1
2
3
1Screw
2Mounting bracket
3Dashboard or console
!Use either truss (5 mm × 8 mm) or flush sur-
face (5 mm × 9 mm) screws, depending on
the bracket screw holes.
Removing the unit
1 Remove the trim ring.
1Trim ring
2Notched tab
!Releasing the front panel allows easier ac-
cess to the trim ring.
!When reattaching the trim ring, point the
side with the notched tab down.
2 Insert the supplied extraction keys into
both sides of the unit until they click into
place.
3 Pull the unit out of the dashboard.
Removing and re-attaching the
front panel
You can remove the front panel to protect your
unit from theft.
Press the detach button and push the front
panel upward and pull it toward you.
For details, refer to Removing the front panel to
protect your unit from theft and Re-attaching the
front panel on page 6.
Securing the front panel
The front panel can be secured with the sup-
plied screw.
1
1Screw
English
Installation
27
Section
Installation
En
04

Installing the microphone
!Only for DEH-P8400BH
CAUTION
It is extremely dangerous to allow the micro-
phone lead to become wound around the steer-
ing column or shift lever. Be sure to install the
unit in such a way that it will not obstruct driv-
ing.
Note
Install the microphone in a position and orienta-
tion that will enable it to pick up the voice of the
person operating the system.
When installing the microphone
on the sun visor
1 Install the microphone on the micro-
phone clip.
1
2
1Microphone
2Microphone clip
2 Install the microphone clip on the sun
visor.
With the sun visor up, install the microphone
clip. (Lowering the sun visor reduces the voice
recognition rate.)
2
1
1Microphone clip
2Clamp
When installing the microphone
on the steering column
1 Install the microphone on the micro-
phone clip.
1
2
3
4
1Microphone
2Microphone base
3Microphone clip
4Fit the microphone lead into the groove.
#Microphone can be installed without using mi-
crophone clip. In this case, detach the microphone
base from the microphone clip. To detach the micro-
phone base from the microphone clip, slide the mi-
crophone base.
2 Install the microphone clip on the steer-
ing column.
1
2
3
1Double-sided tape
2Install the microphone clip on the rear side of
the steering column.
3Clamp
Adjusting the microphone angle
The microphone angle can be adjusted.
Installation
28
Section
Installation
En
04

Troubleshooting
Symptom Cause Action
The display
automatically
returns to the
ordinary dis-
play.
You did not per-
form any opera-
tion within
about 30 sec-
onds.
Perform operation
again.
The repeat
play range
changes un-
expectedly.
Depending on
the repeat play
range, the se-
lected range
may change
when another
folder or track is
being selected
or during fast
forwarding/re-
versing.
Select the repeat
play range again.
A subfolder is
not played
back.
Subfolders can-
not be played
when Folder re-
peat (folder re-
peat) is
selected.
Select another re-
peat play range.
NO XXXX ap-
pears when a
display is
changed (NO
TITLE, for ex-
ample).
There is no em-
bedded text in-
formation.
Switch the display
or play another
track/file.
No text informa-
tion can be ob-
tained
!Switch the
broadcast station.
!Operate this
unit in areas with
get good recep-
tion condition.
The display
screen
changes at
random.
Demo mode is
on.
!Press and hold
/DISP to cancel
demo mode.
!Turn off the
demo display set-
ting.
Symptom Cause Action
The display
screen
changes at
random in-
stead of dis-
playing the
clock continu-
ously even
with the clock
display turned
on.
Demo mode is
on.
!Press and hold
/DISP to cancel
demo mode.
!Turn off the
demo display set-
ting.
The display
screen
changes at
random even
with the dis-
play off
turned on.
Demo mode is
on.
!Press and hold
/DISP to cancel
demo mode.
!Turn off the
demo display set-
ting.
The unit is
malfunction-
ing.
There is inter-
ference.
You are using a
device, such as
a cellular
phone, that
transmits elec-
tric waves near
the unit.
Move electrical
devices that may
be causing the in-
terference away
from the unit.
Symptom Cause Action
The sound
from the
Bluetooth
audio source
is not played
back.
There is a call in
progress on a
Bluetooth con-
nected cellular
phone.
The sound will be
played back when
the call is termi-
nated.
A Bluetooth
connected cel-
lular phone is
currently being
operated.
Do not operate
the cellular phone
at this time.
A call was
made with a
Bluetooth con-
nected cellular
phone and then
immediately ter-
minated. As a
result, commu-
nication be-
tween this unit
and the cellular
phone was not
terminated
properly.
Reconnect the
Bluetooth con-
nection between
this unit and the
cellular phone.
Text informa-
tion cannot
be scrolled.
Display scroll-
ing is stopped
automatically
when the tem-
perature around
this unit is 50°F
or less.
Wait until it
warms back up.
Movie play-
back is
stopped and
the simple
display ap-
pears.
Movie playback
is stopped auto-
matically when
the temperature
around this unit
is 50°F or less.
Wait until it
warms back up.
Symptom Cause Action
Sound from
the iPod can-
not be heard.
The audio out-
put direction
may switch au-
tomatically
when the
Bluetooth and
USB connec-
tions are used
at the same
time.
Use the iPod to
change the audio
output direction.
Error messages
When you contact your dealer or your nearest
Pioneer Service Center, be sure to note the error
message.
CD player
Message Cause Action
ERROR-07,
11, 12, 17, 30
The disc is dirty. Clean the disc.
The disc is
scratched.
Replace the disc.
ERROR-10,
11, 12, 15,
17, 30, A0
There is an elec-
trical or me-
chanical error.
Turn the ignition
switch OFF and
back ON, or
switch to a differ-
ent source, then
back to the CD
player.
ERROR-15 The inserted
disc is blank.
Replace the disc.
ERROR-23 Unsupported
CD format.
Replace the disc.
English
Additional information
29
Appendix
Additional information
En

Message Cause Action
FORMAT
READ
Sometimes
there is a delay
between the
start of playback
and when you
start to hear any
sound.
Wait until the
message disap-
pears and you
hear sound.
NO AUDIO The inserted
disc does not
contain any
playable files.
Replace the disc.
SKIPPED The inserted
disc contains
DRM protected
files.
Replace the disc.
PROTECT All the files on
the inserted
disc are em-
bedded with
DRM.
Replace the disc.
USB storage device/iPod
Message Cause Action
NO DEVICE When plug and
play is off, no
USB storage de-
vice or iPod is
connected.
!Turn the plug
and play on.
!Connect a com-
patible USB stor-
age device/iPod.
FORMAT
READ
Sometimes
there is a delay
between the
start of playback
and when you
start to hear any
sound.
Wait until the
message disap-
pears and you
hear sound.
Message Cause Action
NO AUDIO There are no
songs.
Transfer the audio
files to the USB
storage device
and connect.
The connected
USB storage de-
vice has secur-
ity enabled.
Follow the USB
storage device in-
structions to dis-
able the security.
SKIPPED The connected
USB storage de-
vice contains
files embedded
with Windows
MediaäDRM 9/
10.
Play an audio file
not embedded
with Windows
Media DRM 9/10.
PROTECT All the files in
the USB storage
device are em-
bedded with
Windows Media
DRM 9/10.
Transfer audio
files not em-
bedded with
Windows Media
DRM 9/10 to the
USB storage de-
vice and connect.
NOT COM-
PATIBLE
The USB device
connected to is
not supported
by this unit.
!Connect a USB
Mass Storage
Class compliant
device.
!Disconnect
your device and
replace it with a
compatible USB
storage device.
Non-compatible
iPod
Disconnect your
device and re-
place it with a
compatible iPod.
Message Cause Action
CHECK USB The USB con-
nector or USB
cable has short-
circuited.
Check that the
USB connector or
USB cable is not
caught in some-
thing or dam-
aged.
The connected
USB storage de-
vice consumes
more than
500 mA (maxi-
mum allowable
current).
Disconnect the
USB storage de-
vice and do not
use it. Turn the
ignition switch to
OFF, then to ACC
or ON and then
connect only
compliant USB
storage devices.
The iPod oper-
ates correctly
but does not
charge.
Make sure the
connection cable
for the iPod has
not shorted out
(e.g., not caught
in metal objects).
After checking,
turn the ignition
switch OFF and
back ON, or dis-
connect the iPod
and reconnect.
Message Cause Action
ERROR-19 Communication
failed.
!Perform one of
the following op-
erations.
–Turn the ignition
switch OFF and
back ON.
–Disconnect the
USB storage de-
vice.
–Change to a dif-
ferent source.
Then, return to
the USB source.
!Disconnect the
cable from the
iPod. Once the
iPod’s main
menu is dis-
played, reconnect
the iPod and reset
it.
iPod failure. Disconnect the
cable from the
iPod. Once the
iPod’s main
menu is dis-
played, reconnect
the iPod and reset
it.
ERROR-23 USB storage de-
vice was not for-
matted with
FAT12, FAT16 or
FAT32.
USB storage de-
vice should be for-
matted with
FAT12, FAT16 or
FAT32.
Additional information
30
Appendix
Additional information
En
Message Cause Action
ERROR-16 The iPod firm-
ware version is
old.
Update the iPod
version.
iPod failure. Disconnect the
cable from the
iPod. Once the
iPod’s main
menu is dis-
played, reconnect
the iPod and reset
it.
STOP There are no
songs in the
current list.
Select a list that
contains songs.
Not found No related
songs.
Transfer songs to
the iPod.
Bluetooth device
Message Cause Action
ERROR-10 The power failed
for the
Bluetooth mod-
ule of this unit.
Turn the ignition
switch OFF and
then to ACC or
ON.
If the error mes-
sage is still dis-
played after
performing the
above action,
please contact
your dealer or an
authorized
Pioneer Service
Station.
Pandora
Message Cause Action
ERROR-19 Communication
failed.
Disconnect the
cable from the
iPod. Once the
iPod’s main
menu is dis-
played, reconnect
the iPod and reset
it.
Start up the
Pandora Ap-
plication
The Pandora ap-
plication has
not started run-
ning yet.
Start up the
Pandora applica-
tion from your
iPod/iPhone.
Try again
later
Unable to save
thumb rating.
Unable to save
BookMark.
Pandora system
is undergoing
maintenance.
Try again later.
Skip limit
reached
Skip limit
reached.
Do not exceed the
skip limit.
Check Appli-
cation
This version of
the Pandora ap-
plication is not
supported.
Connect an iPod/
iPhone that has a
compatible ver-
sion of the
Pandora applica-
tion installed.
Check Device Device error
message dis-
played in
Pandora Appli-
cation.
Unable to play
music from
Pandora.
Please check your
iPod/iPhone.
Message Cause Action
No Available
Station
No station
found.
Create a station
in the Pandora
application on
your iPod/iPhone.
No Active
Stations
No station se-
lected.
Select a station.
Handling guidelines
Discs and player
Use only discs that feature either of the following
two logos.
Use 12-cm discs. Do not use 8-cm discs or an
adapter for 8-cm discs.
Use only conventional, fully circular discs. Do not
use shaped discs.
Do not insert anything other than a CD into the
CD loading slot.
Do not use cracked, chipped, warped, or other-
wise damaged discs as they may damage the play-
er.
Unfinalized CD-R/RW discs cannot be played
back.
Do not touch the recorded surface of the discs.
Store discs in their cases when not in use.
Do not attach labels, write on or apply chemicals
to the surface of the discs.
To clean a CD, wipe the disc with a soft cloth out-
ward from the center.
Condensation may temporarily impair the player’s
performance. Let it rest for about one hour to ad-
just to a warmer temperature. Also, wipe any
damp discs off with a soft cloth.
Playback of discs may not be possible because of
disc characteristics, disc format, recorded applica-
tion, playback environment, storage conditions,
and so on.
Road shocks may interrupt disc playback.
When using discs that can be printed on label sur-
faces, check the instructions and the warnings of
the discs. Depending on the discs, inserting and
ejecting may not be possible. Using such discs
may result in damage to this equipment.
Do not attach commercially available labels or
other materials to the discs.
!The discs may warp making the disc unplay-
able.
!The labels may come off during playback and
prevent ejection of the discs, which may result
in damage to the equipment.
USB storage device
Connections via USB hub are not supported.
Do not connect anything other than a USB stor-
age device.
English
Additional information
31
Appendix
Additional information
En

Firmly secure the USB storage device when driv-
ing. Do not let the USB storage device fall onto the
floor, where it may become jammed under the
brake or accelerator pedal.
Depending on the USB storage device, the follow-
ing problems may occur.
!Operations may vary.
!The storage device may not be recognized.
!Files may not be played back properly.
!The device may generate noise in the radio.
iPod
To ensure proper operation, connect the dock con-
nector cable from the iPod directly to this unit.
Firmly secure the iPod when driving. Do not let the
iPod fall onto the floor, where it may become
jammed under the brake or accelerator pedal.
About iPod settings
!When an iPod is connected, this unit changes
the EQ (equalizer) setting of the iPod to off in
order to optimize the acoustics. When you dis-
connect the iPod, the EQ returns to the original
setting.
!You cannot set Repeat to off on the iPod when
using this unit. Repeat is automatically
changed to All when the iPod is connected to
this unit.
Incompatible text saved on the iPod will not be dis-
played by the unit.
DualDiscs
DualDiscs are two-sided discs that have a record-
able CD for audio on one side and a recordable
DVD for video on the other.
Since the CD side of DualDiscs is not physically
compatible with the general CD standard, it may
not be possible to play the CD side with this unit.
Frequent loading and ejecting of a DualDisc may
result in scratches on the disc. Serious scratches
can lead to playback problems on this unit. In
some cases, a DualDisc may become stuck in the
disc loading slot and will not eject. To prevent this,
we recommend you refrain from using DualDisc
with this unit.
Please refer to the information from the disc man-
ufacturer for more detailed information about
DualDiscs.
CAUTION
Do not leave discs, a USB storage device, or an
iPod in any place that is subject to high temper-
atures.
Compressed audio
compatibility (disc, USB)
WMA
File extension: .wma
Bit rate: 48 kbps to 320 kbps (CBR), 48 kbps to
384 kbps (VBR)
Sampling frequency: 32 kHz, 44.1 kHz, 48 kHz
Windows Media Audio Professional, Lossless,
Voice/DRM Stream/Stream with video: Not com-
patible
MP3
File extension: .mp3
Bit rate: 8 kbps to 320 kbps (CBR), VBR
Sampling frequency: 8kHz to 48 kHz (32kHz,
44.1 kHz, 48 kHz for emphasis)
Compatible ID3 tag version: 1.0, 1.1, 2.2, 2.3, 2.4
(ID3 tag Version 2.x is given priority over Version
1.x.)
M3u playlist: Not compatible
MP3i (MP3 interactive), mp3 PRO: Not compatible
WAV
File extension: .wav
Quantization bits: 8 and 16 (LPCM), 4 (MS
ADPCM)
Sampling frequency: 16 kHz to 48 kHz (LPCM),
22.05 kHz and 44.1kHz (MS ADPCM)
AAC
Compatible format: AAC encoded by iTunes
File extension: .m4a
Sampling frequency: 11.025 kHz to 48 kHz
Transmission rate: 16 kbps to 320 kbps, VBR
Apple Lossless: Not compatible
AAC file bought from the iTunes Store (.m4p file
extension): Not compatible
Supplemental information
Only the first 32 characters can be displayed as a
file name (including the file extension) or a folder
name.
This unit may not operate correctly depending on
the application used to encode WMA files.
There may be a slight delay at the start of playback
of audio files embedded with image data or audio
files stored on a USB storage device that has nu-
merous folder hierarchies.
Disc
Playable folder hierarchy: up to eight tiers (A prac-
tical hierarchy is less than two tiers).
Playable folders: up to 99
Playable files: up to 999
File system: ISO 9660 Level 1 and 2, Romeo, Joliet
Multi-session playback: Compatible
Packet write data transfer: Not compatible
Regardless of the length of blank sections be-
tween the songs from the original recording, com-
pressed audio discs play with a short pause
between songs.
USB storage device
Playable folder hierarchy: up to eight tiers (A prac-
tical hierarchy is less than two tiers).
Playable folders: up to 1 500
Playable files: up to 15 000
Playback of copyright-protected files: Not compati-
ble
Partitioned USB storage device: Only the first par-
tition can be played.
There may be a slight delay when starting play-
back of audio files on a USB storage device with
numerous folder hierarchies.
CAUTION
!Pioneer accepts no responsibility for data
lost on the USB storage device even if that
data is lost while using this unit.
Additional information
32
Appendix
Additional information
En
!Pioneer cannot guarantee compatibility with
all USB mass storage devices and assumes
no responsibility for any loss of data on
media players, smart phones, or other devi-
ces while using this product.
iPod compatibility
This unit supports only the following iPod models.
Supported iPod software versions are shown
below. Older versions may not be supported.
Made for
!iPod touch 4th generation (software version
4.1)
!iPod touch 3rd generation (software version
3.1.1)
!iPod touch 2nd generation (software version
2.1.1)
!iPod touch 1st generation (software version
1.1)
!iPod classic 160GB (software version 2.0.2)
!iPod classic 120GB (software version 2.0)
!iPod classic (software version 1.0)
!iPod with video (software version 1.2.3)
!iPod nano 6th generation (software version
1.0)
!iPod nano 5th generation (software version
1.0.1)
!iPod nano 4th generation (software version
1.0)
!iPod nano 3rd generation (software version
1.0)
!iPod nano 2nd generation (software version
1.1.3)
!iPod nano 1st generation (software version
1.3.1)
!iPhone 4 (software version 4.1)
!iPhone 3GS (software version 3.0)
!iPhone 3G (software version 2.0)
!iPhone (software version 1.1.1)
Depending on the generation or version of the
iPod, some functions may not be available.
Operations may vary depending on the software
version of iPod.
When using an iPod, an iPod Dock Connector to
USB Cable is required.
A Pioneer CD-IU51 interface cable is also avail-
able. For details, consult your dealer.
About the file/format compatibility, refer to the
iPod manuals.
Audiobook, Podcast: Compatible
CAUTION
Pioneer accepts no responsibility for data lost
on the iPod, even if that data is lost while this
unit is used.
Sequence of audio files
The user cannot assign folder numbers and
specify playback sequences with this unit.
Example of a hierarchy
Level 1 Level 2 Level 3 Level 4
01
02
03
04
05
: Folder
: Compressed
audio file
01 to 05: Folder
number
1to 6: Playback
sequence
Disc
Folder selection sequence or other operation
may differ depending on the encoding or writing
software.
USB storage device
Playback sequence is the same as recorded se-
quence in the USB storage device.
To specify the playback sequence, the following
method is recommended.
1Create a file name that includes numbers
that specify the playback sequence (e.g.,
001xxx.mp3 and 099yyy.mp3).
2Put those files into a folder.
3Save the folder containing files on the USB
storage device.
However, depending on the system environment,
you may not be able to specify the playback se-
quence.
For USB portable audio players, the sequence is
different and depends on the player.
Bluetooth profiles
In order to use Bluetooth wireless technology,
devices must be able to interpret certain pro-
files. This unit is compatible with the following
profiles.
!GAP (Generic Access Profile)
!SDP (Service Discovery Protocol)
!OPP (Object Push Profile)
!HFP (Hands Free Profile)
!HSP (Head Set Profile)
!PBAP (Phone Book Access Profile)
!A2DP (Advanced Audio Distribution Profile)
!AVP (Audio/Video Profile)
!AVRCP (Audio/Video Remote Control Profile)
1.0
Copyright and trademark
Bluetooth
The Bluetoothâword mark and logos are regis-
tered trademarks owned by Bluetooth SIG, Inc.
and any use of such marks by PIONEER COR-
PORATION is under license. Other trademarks
and trade names are those of their respective
owners.
iTunes
Apple and iTunes are trademarks of Apple Inc.,
registered in the U.S. and other countries.
MP3
Supply of this product only conveys a license for
private, non-commercial use and does not con-
vey a license nor imply any right to use this prod-
uct in any commercial (i.e. revenue-generating)
real time broadcasting (terrestrial, satellite,
cable and/or any other media), broadcasting/
streaming via internet, intranets and/or other
networks or in other electronic content distribu-
tion systems, such as pay-audio or audio-on-de-
mand applications. An independent license for
such use is required. For details, please visit
http://www.mp3licensing.com.
WMA
Windows Media is either a registered trademark
or trademark of Microsoft Corporation in the
United States and/or other countries.
This product includes technology owned by
Microsoft Corporation and cannot be used or
distributed without a license from Microsoft
Licensing, Inc.
iPod & iPhone
iPhone, iPod, iPod classic, iPod nano, and iPod
touch are trademarks of Apple Inc., registered in
the U.S. and other countries.
“Made for iPod”and “Made for iPhone”mean
that an electronic accessory has been designed
to connect specifically to iPod or iPhone, respec-
tively, and has been certified by the developer to
meet Apple performance standards. Apple is
not responsible for the operation of this device
or its compliance with safety and regulatory
standards. Please note that the use of this ac-
cessory with iPod or iPhone may affect wireless
performance.
English
Additional information
33
Appendix
Additional information
En

HD RadioäTechnology
HD Radio Technology manufactured under li-
cense from iBiquity Digital Corporation. U.S.
and Foreign Patents. HD Radioäand the HD,
HD Radio, and “Arc”logos are proprietary trade-
marks of iBiquity Digital Corp.
SAT Radio
The SAT RADIO READY mark indicates that the
Satellite Radio Tuner for Pioneer (i.e., XM tuner
and Sirius satellite tuner which are sold sepa-
rately) can be controlled by this unit. Please in-
quire to your dealer or nearest authorized
Pioneer service station regarding the satellite
radio tuner that can be connected to this unit.
For satellite radio tuner operation, please refer to
the satellite radio tuner owner’s manual.
!Everything worth listening to is on SiriusXM,
getting over 130 channels, including the
most commercial-free music, plus the best
sports, news, talk and entertainment. A Sir-
iusXM Vehicle Tuner and Subscription are re-
quired. For more information, visit
“http://www.siriusxm.com”
!Sirius, XM, SAT Radio Ready and all related
logos and marks are trademarks of Sirius XM
Radio, Inc. All rights reserved.
Pandora
Pandora is a registered trademark of Pandora
Media, Inc.
MIXTRAX
MIXTRAX is a trademark of the PIONEER COR-
PORATION.
Specifications
General
Power source ................... 14.4 V DC (10.8 V to 15.1 V al-
lowable)
Grounding system ............ Negative type
Maximum current consumption
................................... 10.0 A
Dimensions (W × H × D):
DIN
Chassis .............. 178mm × 50mm ×
165 mm
(7 in. × 2in. × 6-1/2 in.)
Nose .................. 188 mm × 58mm ×
18 mm
(7-3/8 in.× 2-1/4in.× 3/4 in.)
D
Chassis .............. 178mm × 50mm ×
165 mm
(7 in.× 2 in.× 6-1/2 in.)
Nose .................. 170 mm × 46mm ×
18 mm
(6-3/4 in.× 1-3/4in.× 3/4 in.)
Weight ............................. 1.2 kg (2.6 lbs)
Audio
Maximum power output ... 50 W × 4
50 W × 2/4 W+70W×1/2W
(for subwoofer)
Continuous power output
................................... 22W × 4 (50 Hz to 15000Hz,
5 % THD, 4 Wload, both chan-
nels driven)
Load impedance .............. 4 Wto 8 W×4
4Wto 8 W×2+2W×1
Preout maximum output level
................................... 4.0 V
Equalizer (5-Band Graphic Equalizer):
Frequency ................. 100Hz/315 Hz/1.25 kHz/
3.15 kHz/8 kHz
Gain ......................... ±12 dB
HPF:
Frequency ................. 50 Hz/63 Hz/80 Hz/100 Hz/
125 Hz
Slope ........................ –12 dB/oct
Subwoofer (mono):
Frequency ................. 50 Hz/63 Hz/80 Hz/100 Hz/
125 Hz
Slope ........................ –18 dB/oct
Gain ......................... +6dB to –24 dB
Phase ....................... Normal/Reverse
Bass boost:
Gain ......................... +12 dB to 0 dB
CD player
System ............................ Compact disc audio system
Usable discs .................... Compact disc
Signal-to-noise ratio ......... 94 dB (1kHz) (IHF-A network)
Number of channels ........ 2 (stereo)
MP3 decoding format ...... MPEG-1 & 2 Audio Layer 3
WMA decoding format ..... Ver. 7, 7.1, 8, 9, 10, 11, 12 (2ch
audio)
(Windows Media Player)
AAC decoding format ....... MPEG-4 AAC (iTunes encoded
only) (.m4a)
(Ver. 9.2 and earlier)
WAV signal format ........... Linear PCM & MS ADPCM
(Non-compressed)
USB
USB standard specification
................................... USB 2.0 full speed
Maximum current supply
................................... 1A
USB Class ....................... MSC (Mass Storage Class)
File system ....................... FAT12, FAT16, FAT32
MP3 decoding format ...... MPEG-1 & 2 Audio Layer 3
WMA decoding format ..... Ver. 7, 7.1, 8, 9, 10, 11, 12 (2ch
audio)
(Windows Media Player)
AAC decoding format ....... MPEG-4 AAC (iTunes encoded
only) (.m4a)
(Ver. 9.2 and earlier)
WAV signal format ........... Linear PCM & MS ADPCM
(Non-compressed)
FM tuner
Frequency range .............. 87.9 MHz to 107.9 MHz
Usable sensitivity ............. 9dBf (0.8 µV/75 W, mono, S/N:
30 dB)
Signal-to-noise ratio ......... 80 dB (digital broadcasting)
(IHF-A network)
Signal-to-noise ratio ......... 72 dB (analog broadcasting)
(IHF-A network)
Additional information
34
Appendix
Additional information
En

AM tuner
Frequency range .............. 530 kHz to 1710 kHz
Usable sensitivity ............. 25µV (S/N: 20 dB)
Signal-to-noise ratio ......... 80 dB (digital broadcasting)
(IHF-A network)
Signal-to-noise ratio ......... 62 dB (analog broadcasting)
(IHF-A network)
Bluetooth (DEH-P8400BH only)
Version ............................ Bluetooth 3.0 certified
Output power ................... +4 dBm Maximum
(Power class 2)
CEA2006 Specifications
Power output ................... 14 W RMS × 4 Channels (4 W
and ≦1 % THD+N)
S/N ratio .......................... 91 dBA (reference: 1 W into
4W)
Note
Specifications and the design are subject to
modifications without notice.
English
Additional information
35
Appendix
En

PIONEER CORPORATION
1-1, Shin-ogura, Saiwai-ku, Kawasaki-shi,
Kanagawa 212-0031, JAPAN
PIONEER ELECTRONICS (USA) INC.
P.O. Box 1540, Long Beach, California 90801-1540, U.S.A.
TEL: (800) 421-1404
PIONEER EUROPE NV
Haven 1087, Keetberglaan 1, B-9120 Melsele, Belgium/Belgique
TEL: (0) 3/570.05.11
PIONEER ELECTRONICS ASIACENTRE PTE. LTD.
253 Alexandra Road, #04-01, Singapore 159936
TEL: 65-6472-7555
PIONEER ELECTRONICS AUSTRALIA PTY. LTD.
5 Arco Lane, Heatherton, Victoria, 3202 Australia
TEL: (03) 9586-6300
PIONEER ELECTRONICS OF CANADA, INC.
340 Ferrier Street, Unit 2, Markham, Ontario L3R 2Z5, Canada
TEL: 1-877-283-5901
TEL: 905-479-4411
PIONEER ELECTRONICS DE MEXICO, S.A. de C.V.
Blvd.Manuel Avila Camacho 138 10 piso
Col.Lomas de Chapultepec, Mexico, D.F. 11000
TEL: 55-9178-4270
先鋒股份有限公司
台北市內湖區瑞光路407號8樓
電話:(02) 2657-3588
先鋒電子(香港)有限公司
香港九龍長沙灣道909號5樓
電話:(0852) 2848-6488
ã2011 PIONEER CORPORATION. All rights reserved.
ã2011 PIONEER CORPORATION. Tous droits de reproduction et de traduction réservés. Printed in China
Imprimé en Chine
<YRD5364-A/S> UC
<KYTZX> <11I00000>