Pismolabs Technology P1934 Industrial-Grade M2M Cellular Router User Manual Pepwave MAX
Pismo Labs Technology Limited Industrial-Grade M2M Cellular Router Pepwave MAX
Contents
- 1. Users Manual-1_rev.pdf
- 2. Users Manual-2_rev.pdf
Users Manual-1_rev.pdf
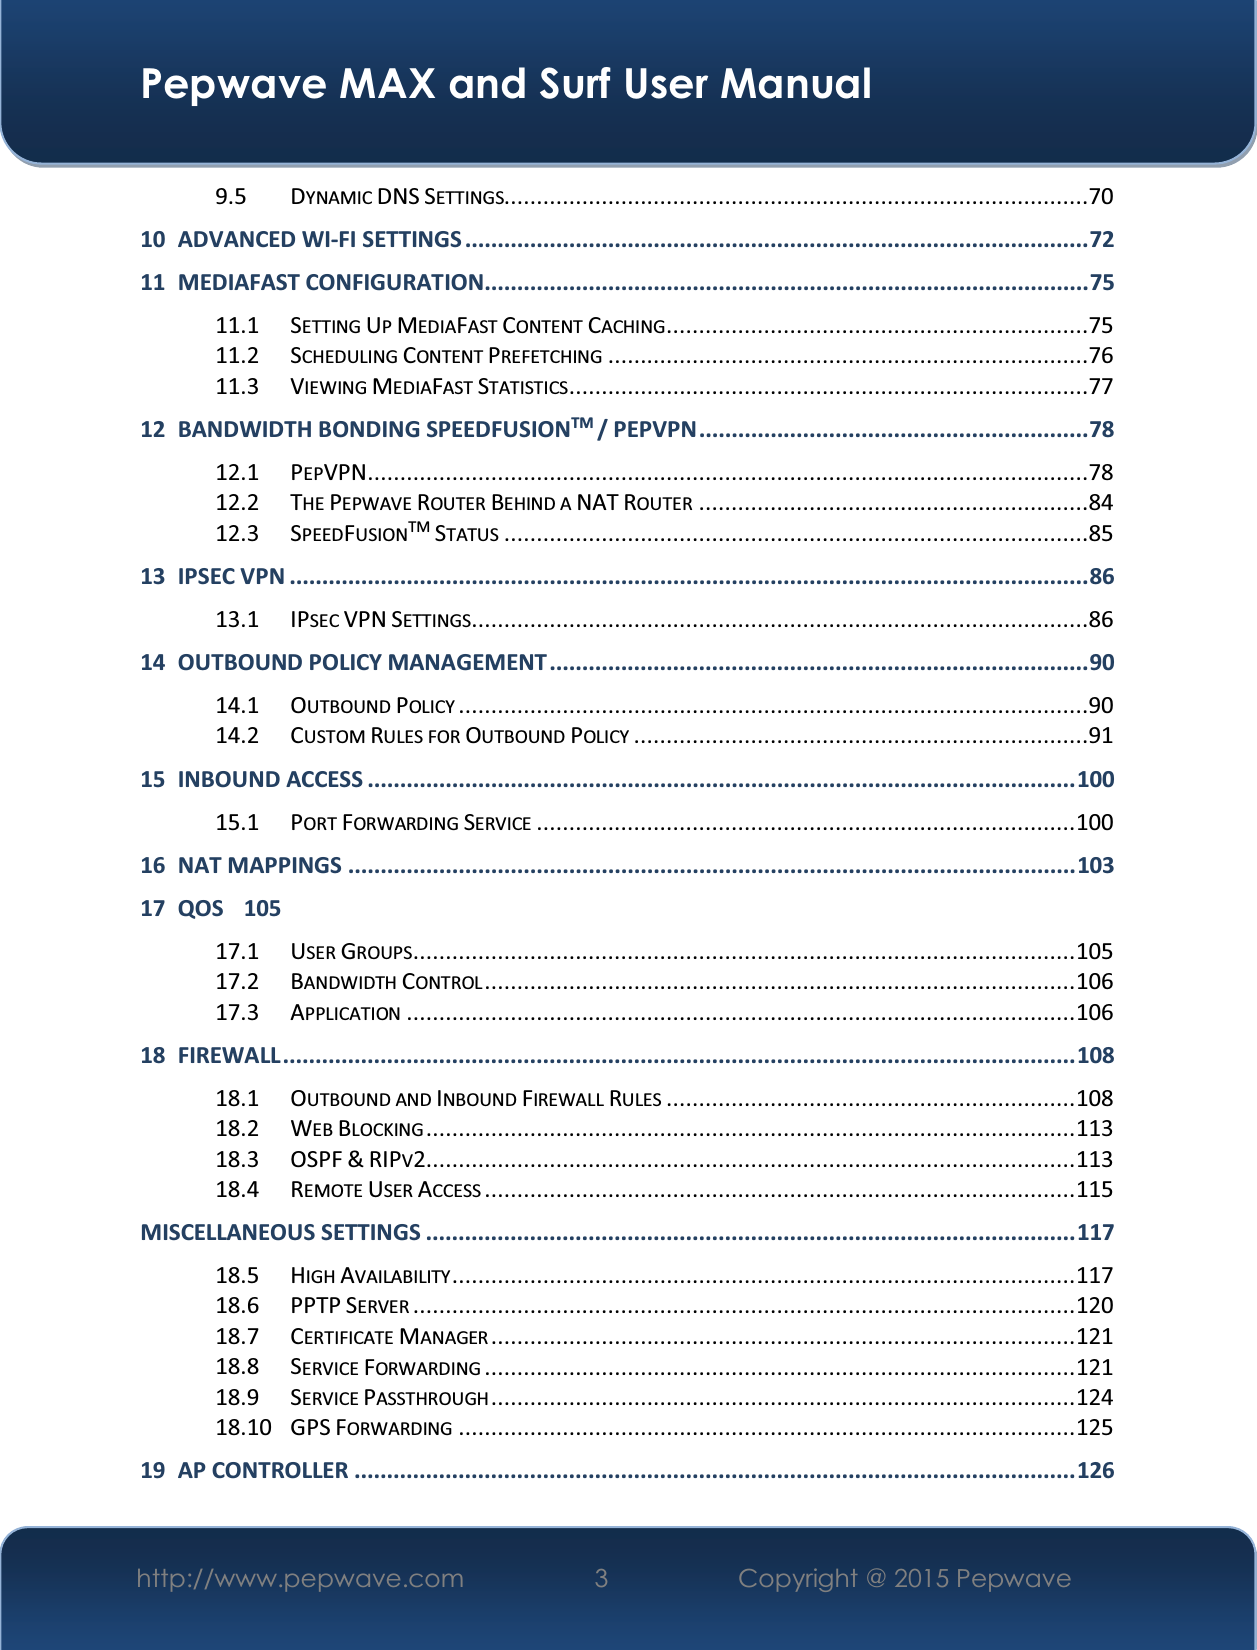


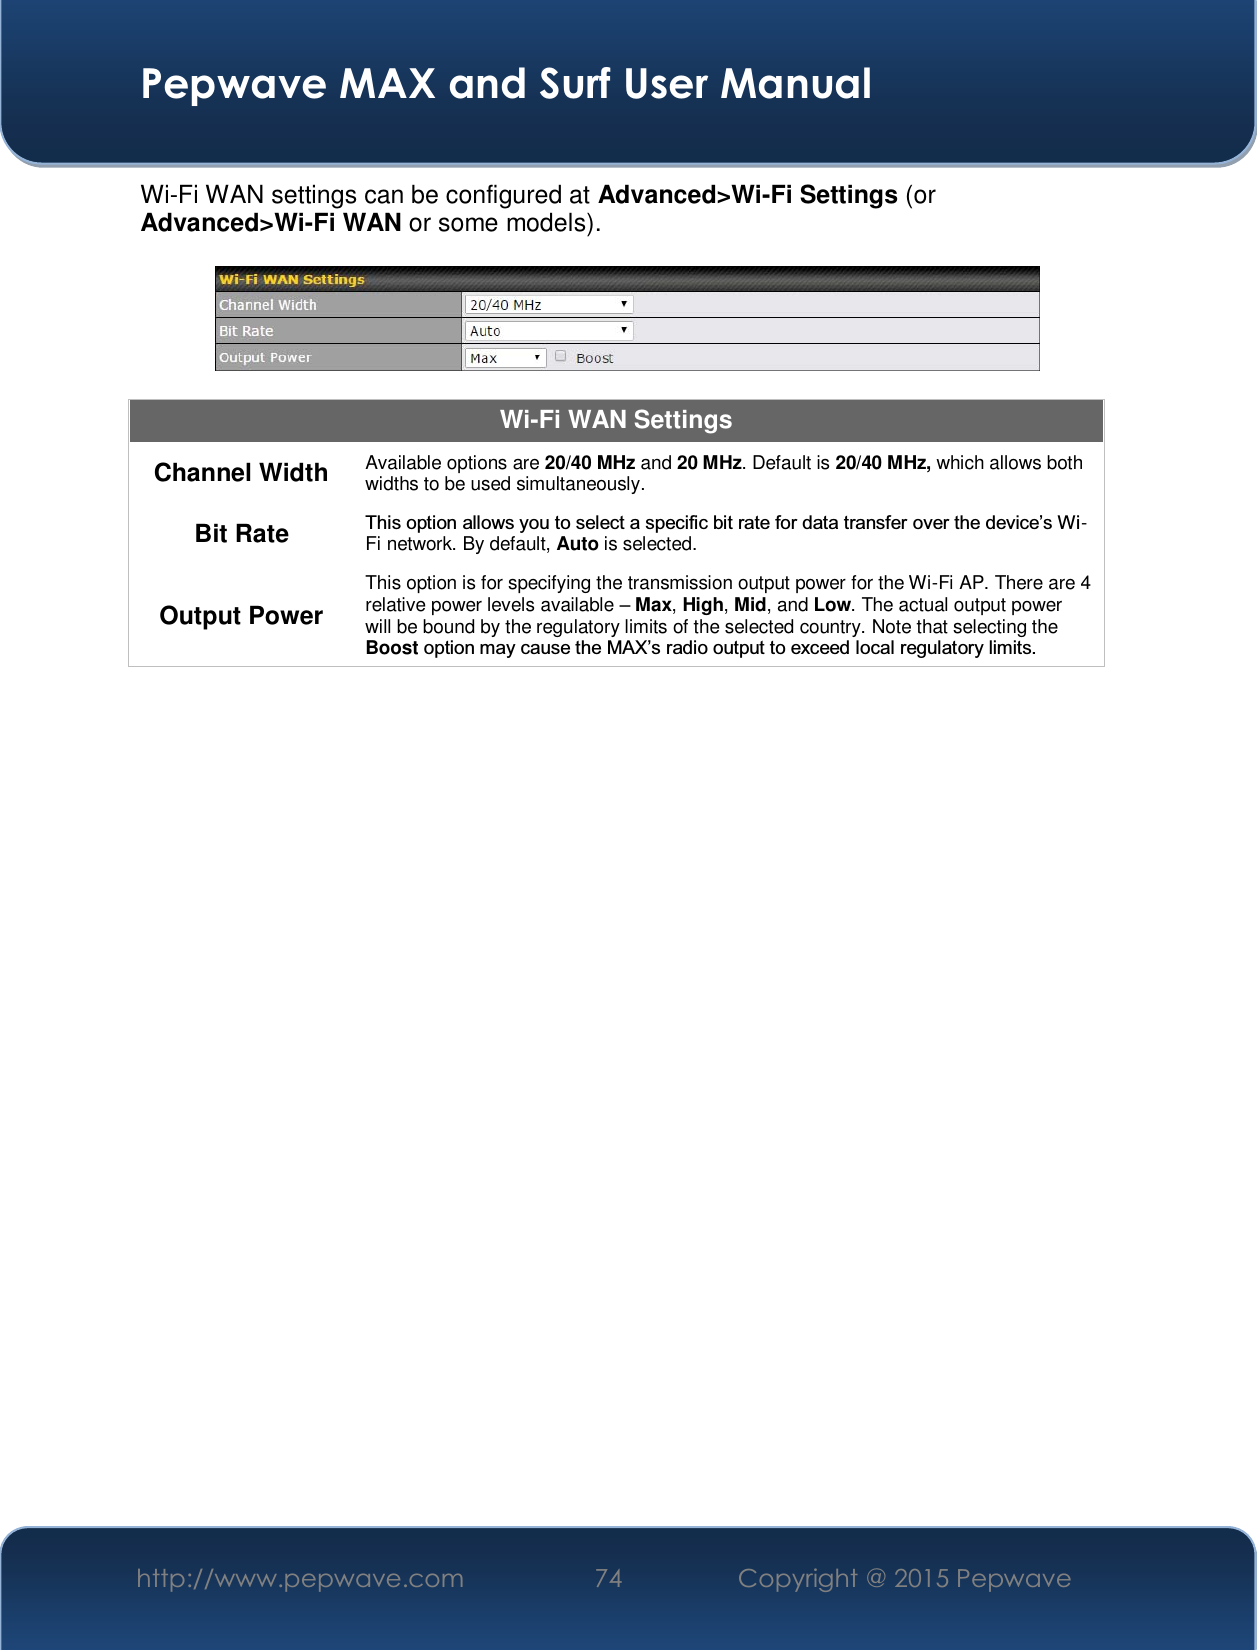
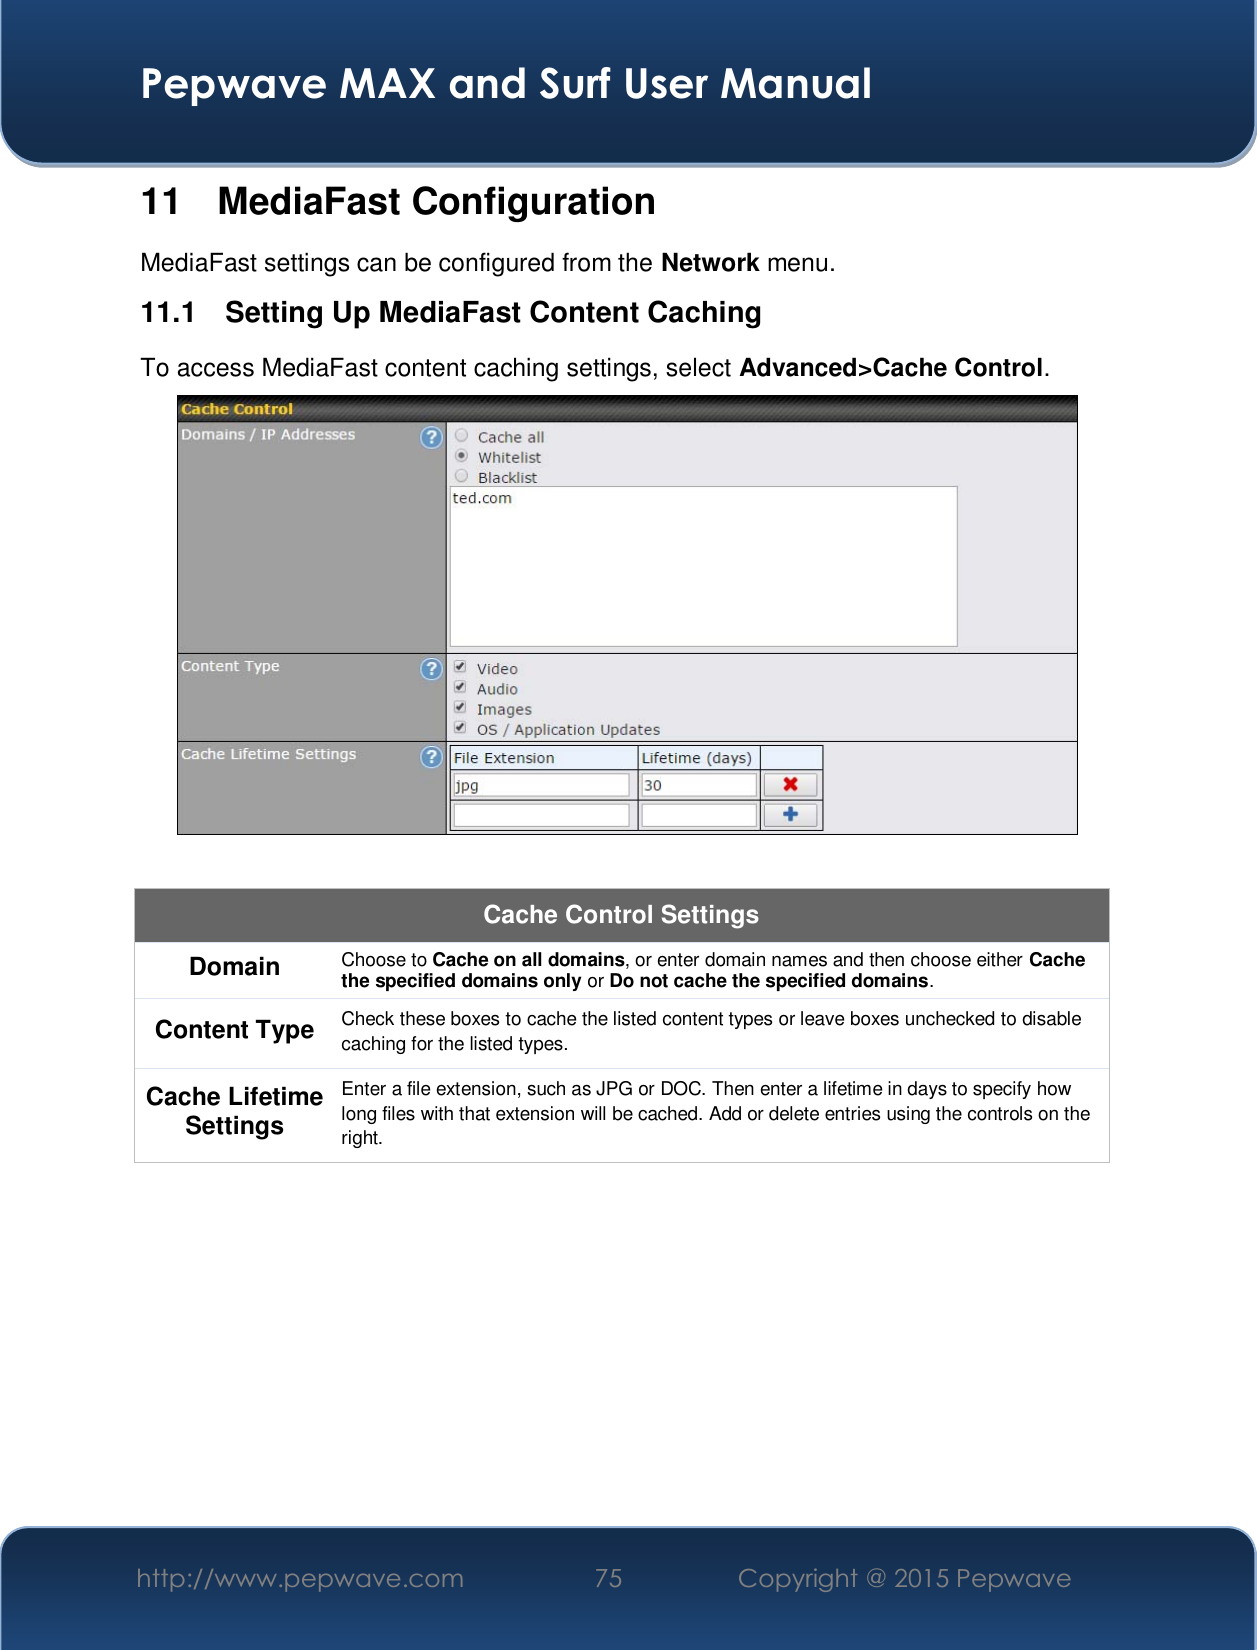
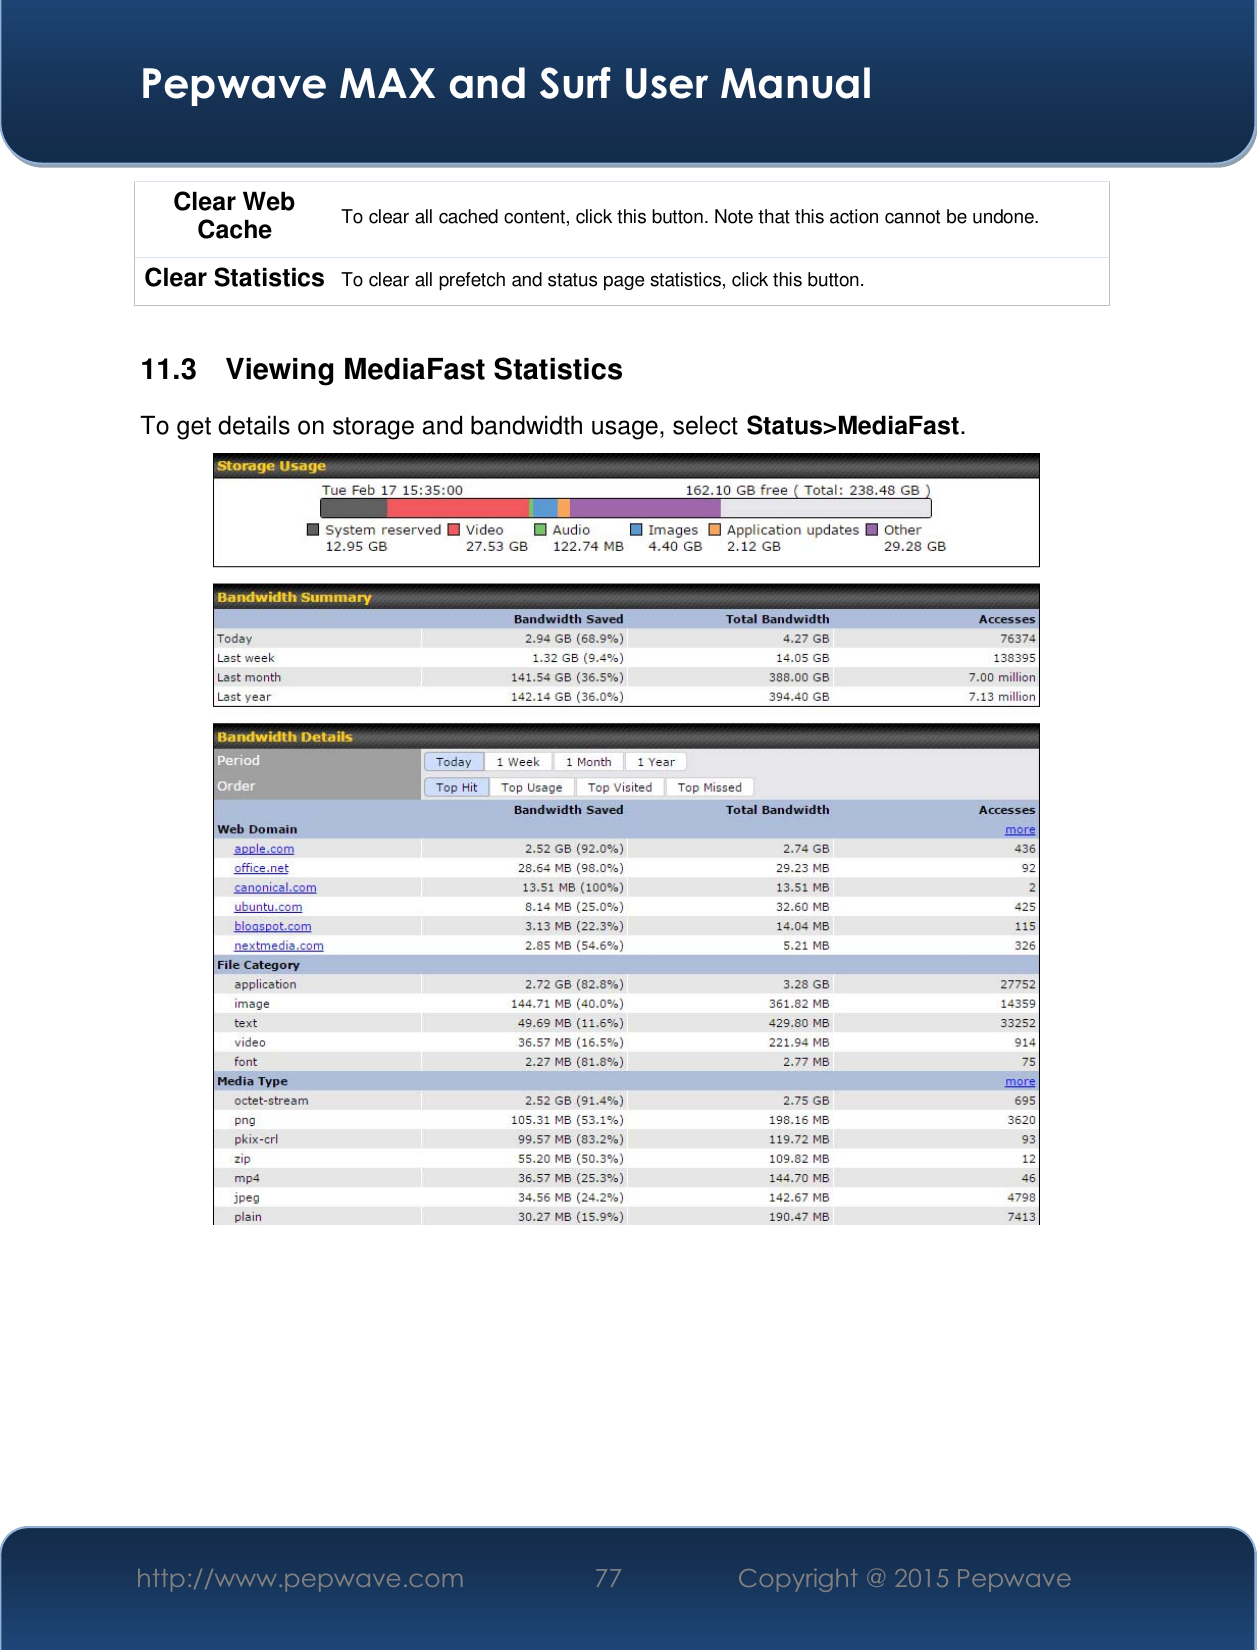
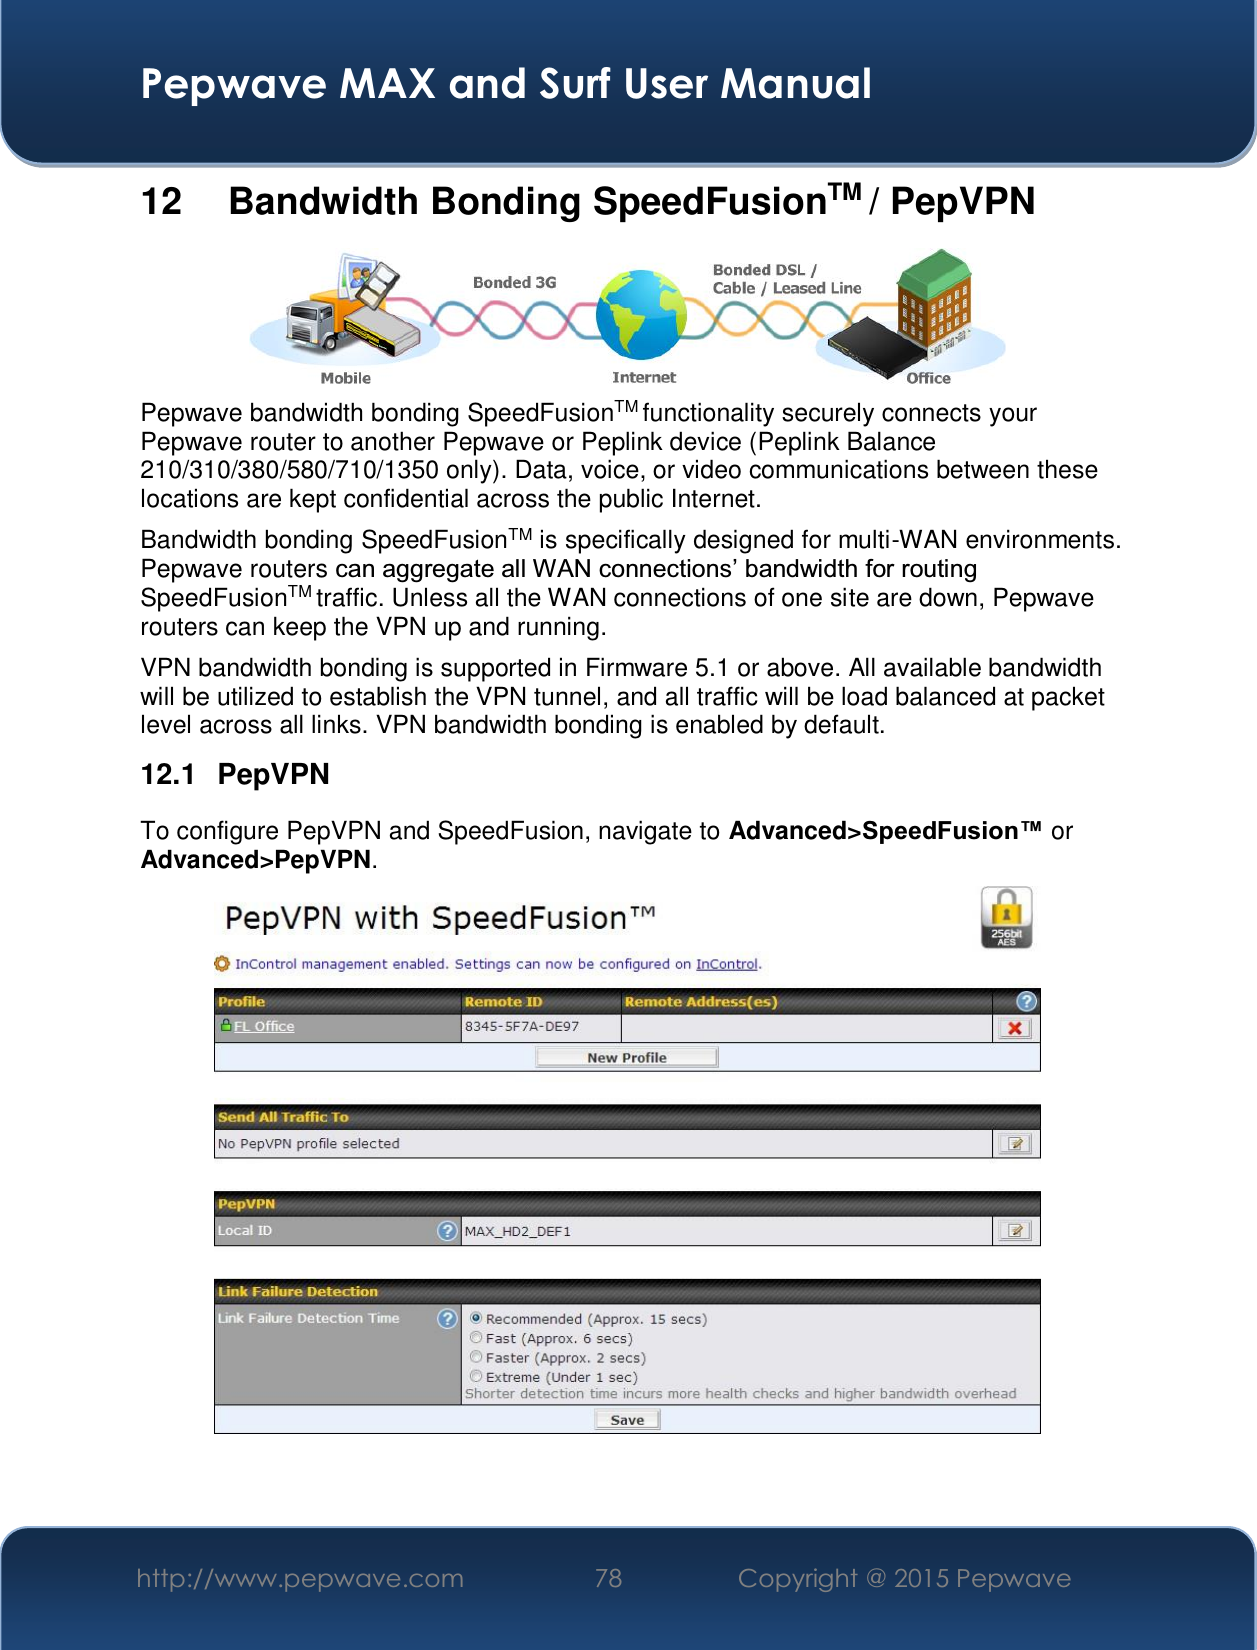
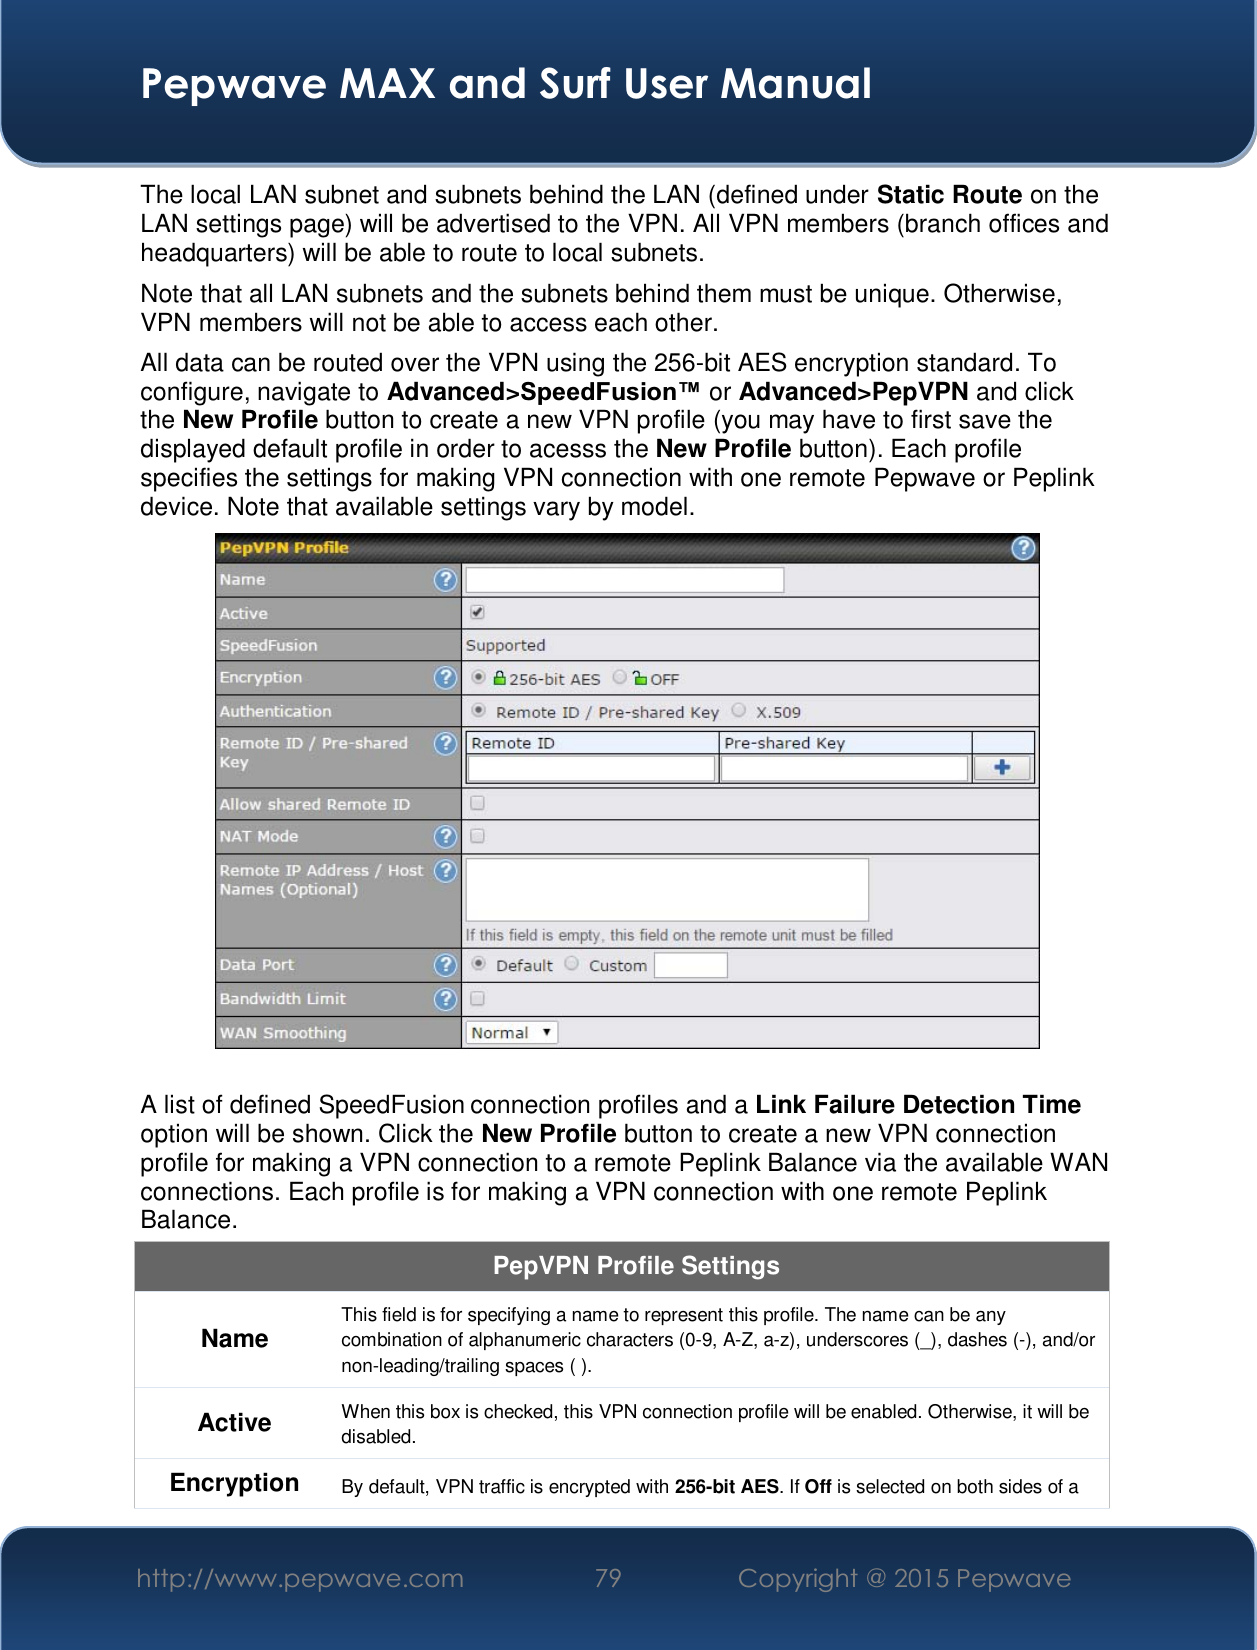
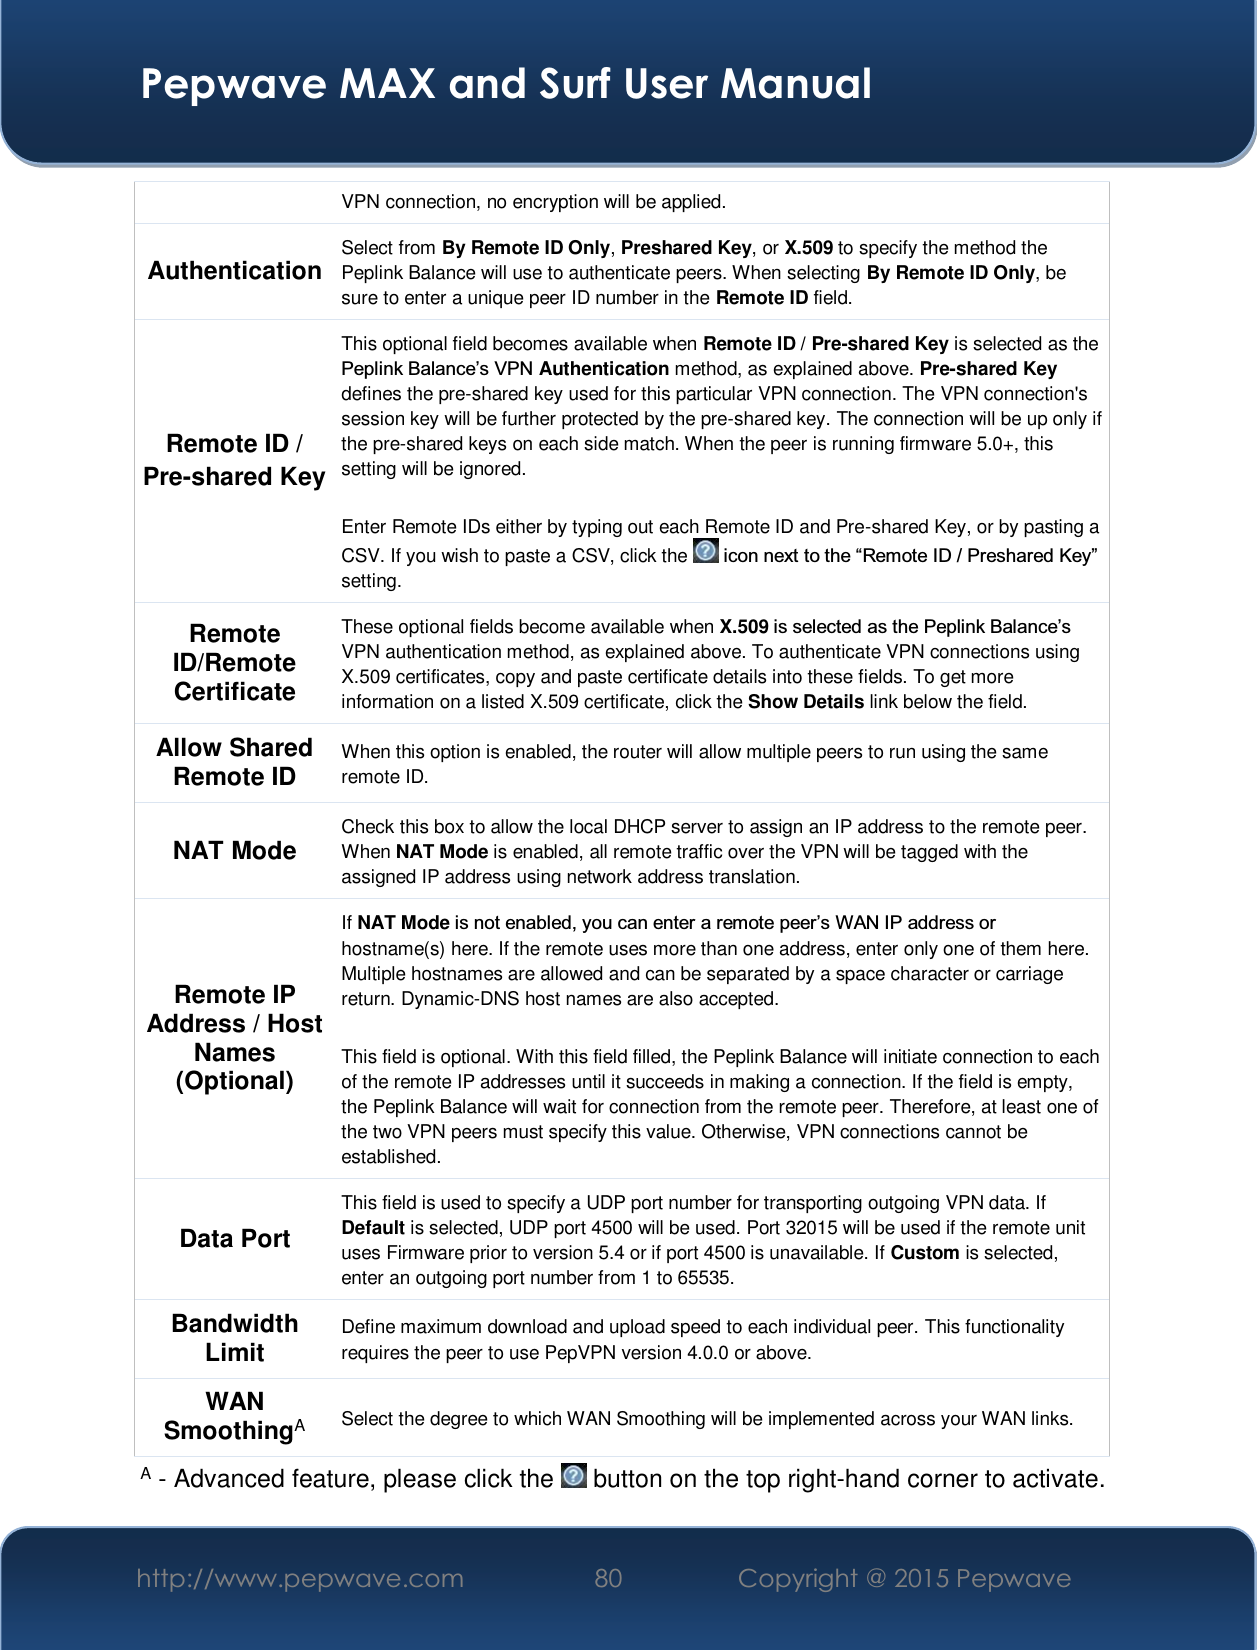
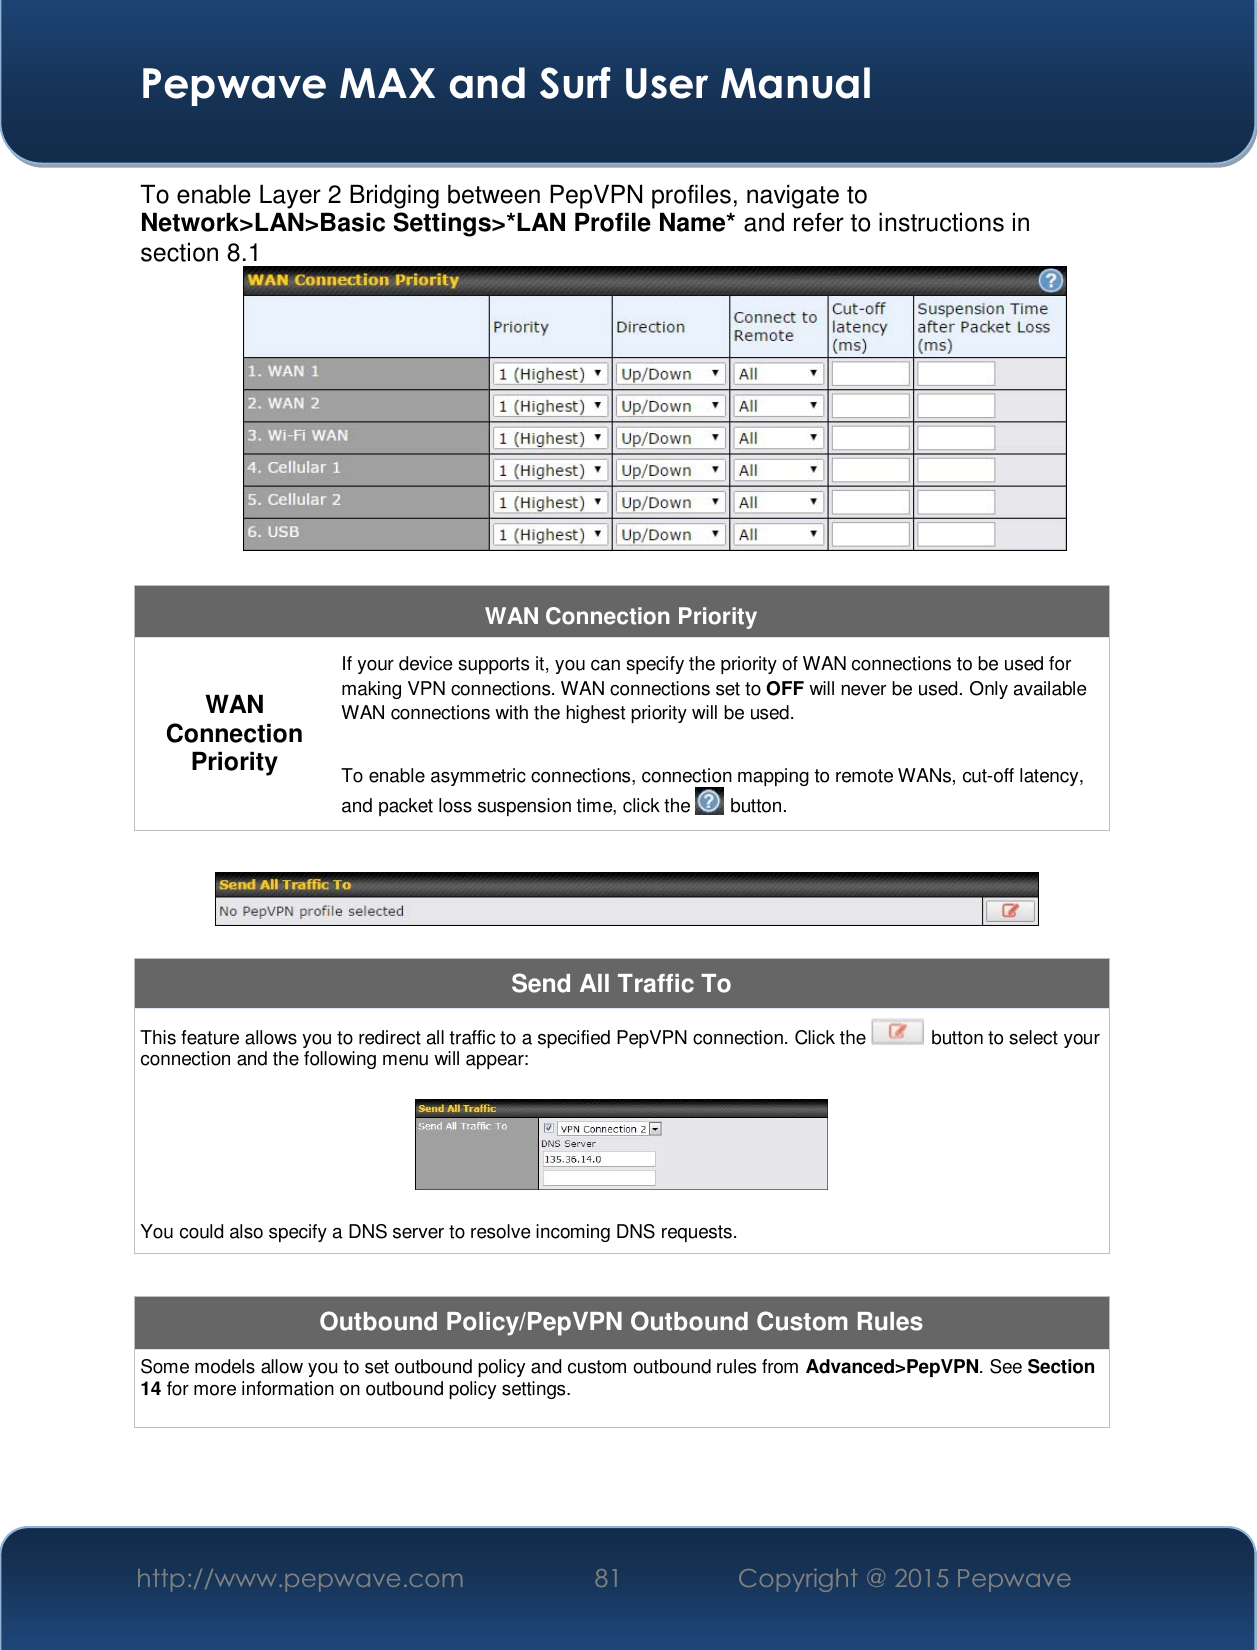
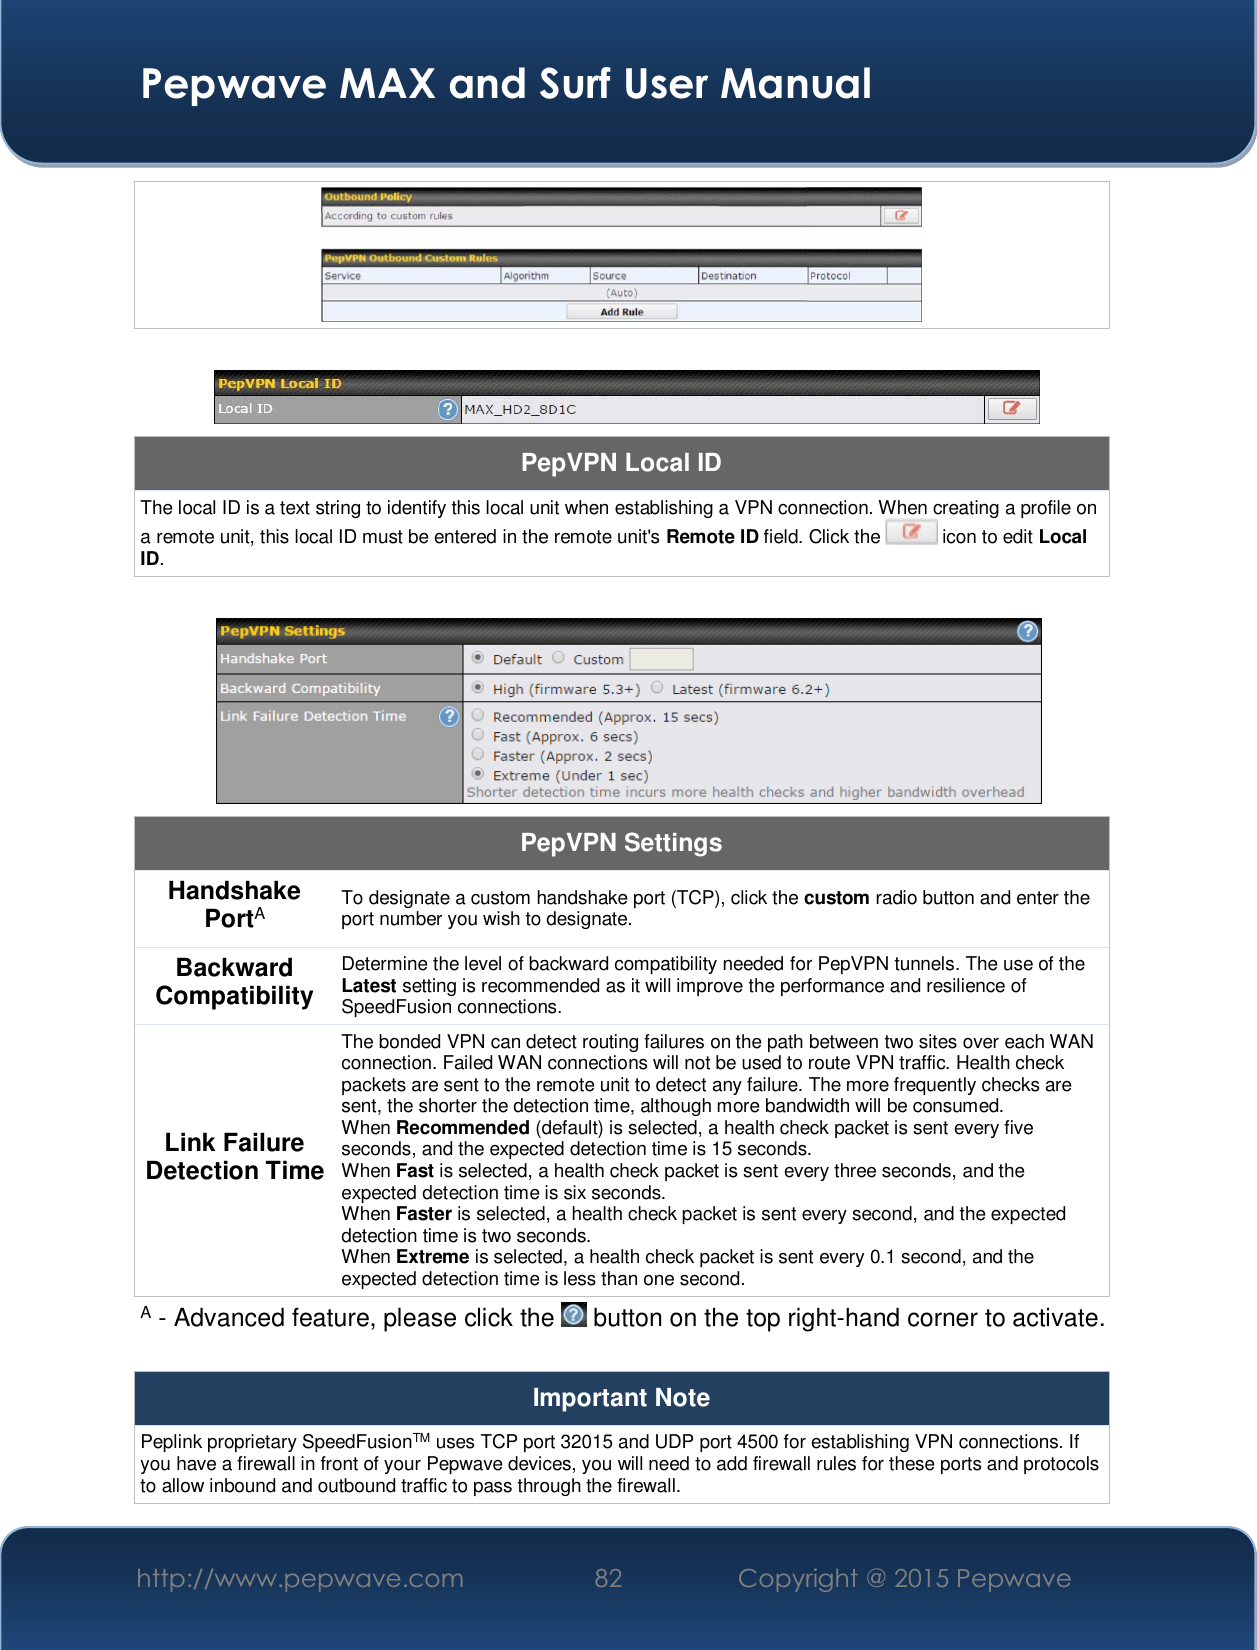
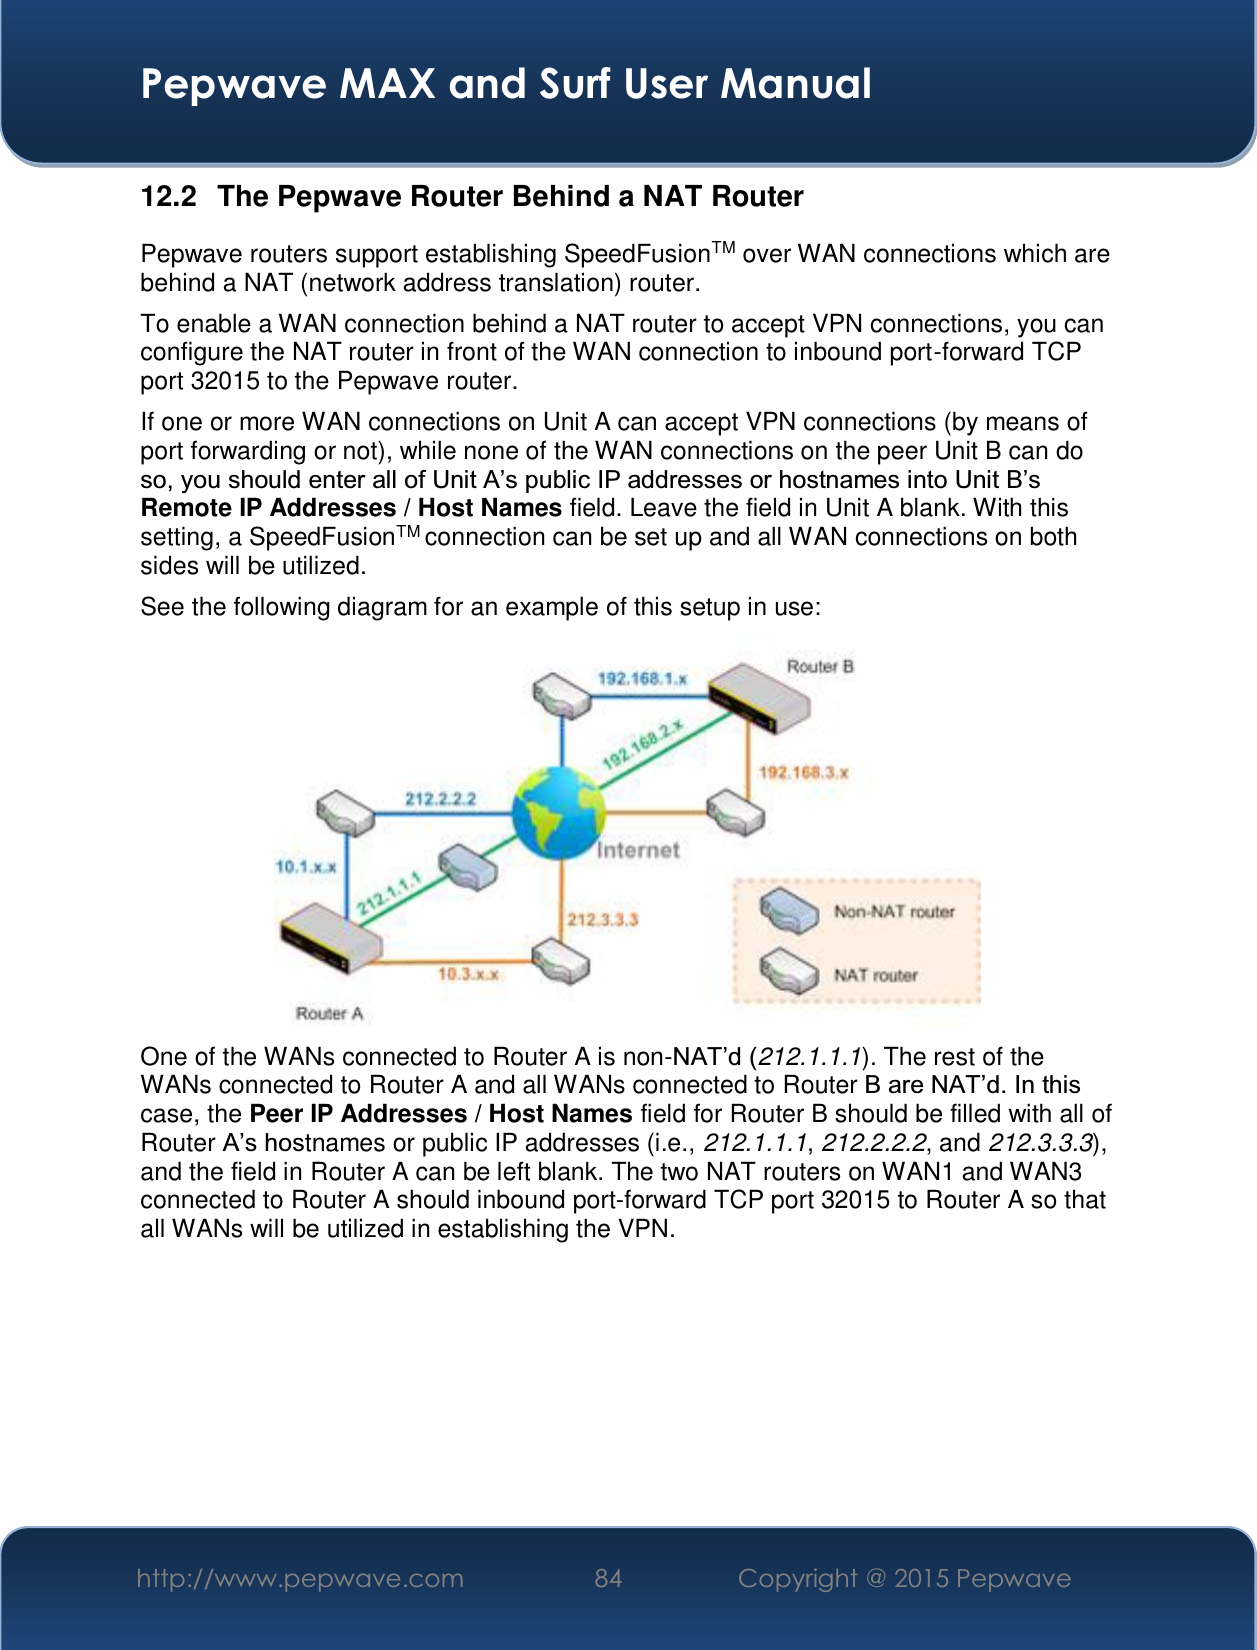
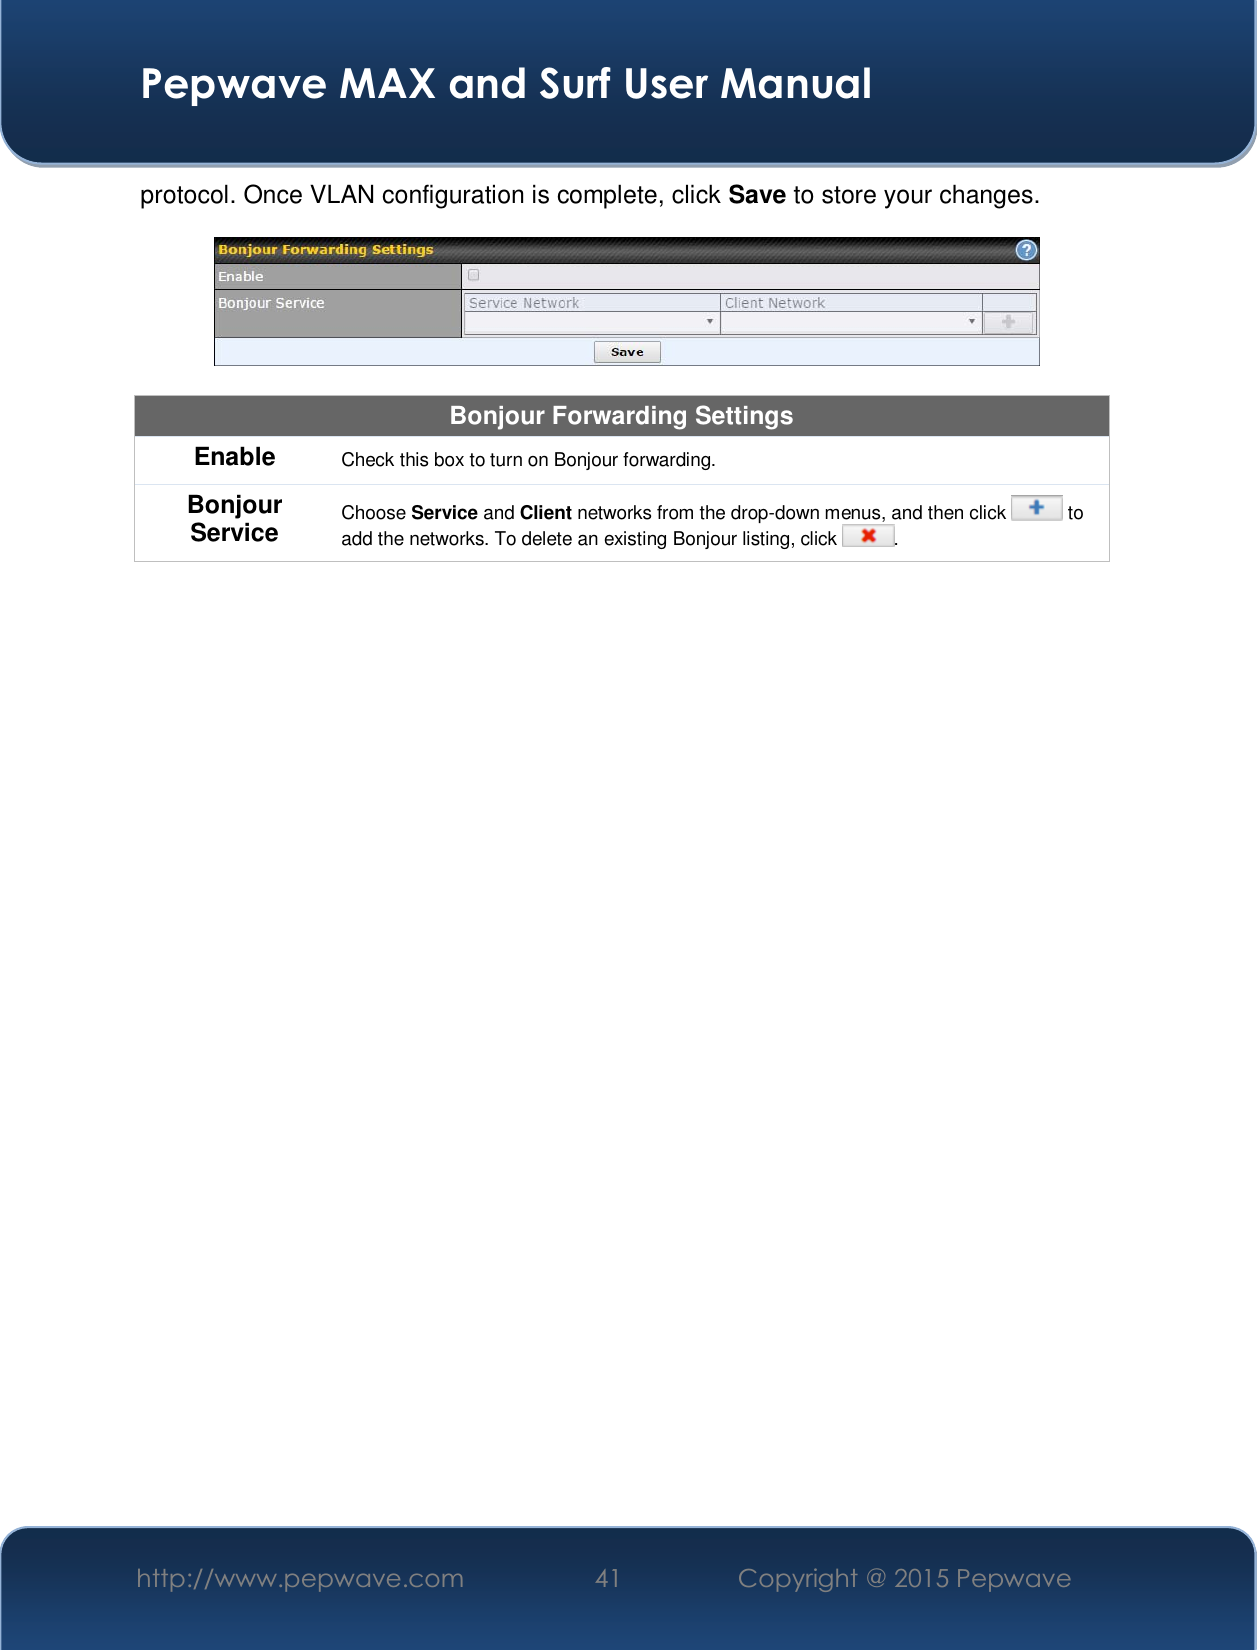
![Pepwave MAX and Surf User Manual http://www.pepwave.com 40 Copyright @ 2015 Pepwave DNS Proxy Settings Enable To enable the DNS proxy feature, check this box, and then set up the feature at Network>LAN>DNS Proxy Settings. A DNS proxy server can be enabled to serve DNS requests originating from LAN/PPTP/SpeedFusionTM peers. Requests are forwarded to the DNS servers/resolvers defined for each WAN connection. DNS Caching This field is to enable DNS caching on the built-in DNS proxy server. When the RSWLRQLVHQDEOHGTXHULHG'16UHSOLHVZLOOEHFDFKHGXQWLOWKHUHFRUGV¶77/KDVbeen reached. This feature can help improve DNS lookup time. However, it cannot return the most up-to-date result for those frequently updated DNS records. By default, DNS Caching is disabled. Include Google Public DNS Servers When this option is enabled, the DNS proxy server will also forward DNS requests to Google's Public DNS Servers, in addition to the DNS servers defined in each WAN. This could increase the DNS service's availability. This setting is disabled by default. Local DNS Records This table is for defining custom local DNS records. A static local DNS record consists of a host name and IP address. When looking up the host name from the LAN to LAN IP of the Pepwave router, the corresponding IP address will be returned. Press to create a new record. Press to remove a record. DNS Resolvers A Check the box to enable the WINS server. A list of WINS clients will be displayed at Network>LAN>DNS Proxy Settings>DNS Resolvers. This field specifies which DNS resolvers will receive forwarded DNS requests. If no WAN/VPN/LAN '16UHVROYHULVVHOHFWHGDOORIWKH:$1¶V'16UHVROYHUVZLOOEHVHOHFWHG If a SpeedFusionTM SHHULVVHOHFWHG\RXPD\HQWHUWKH931SHHU¶V'16UHVROYHUIP address(es). 4XHULHVZLOOEHIRUZDUGHGWRWKHVHOHFWHGFRQQHFWLRQV¶UHVROYHUV,Iall of the selected connections are down, queries will be forwarded to all resolvers on healthy WAN connections. A - Advanced feature, please click the button on the top right hand corner to activate. )LQDOO\LIQHHGHGFRQILJXUH%RQMRXUIRUZDUGLQJ$SSOH¶V]HURFRQILJXUDWLRQQHWZRUNLQJ](https://usermanual.wiki/Pismolabs-Technology/P1934.Users-Manual-1-rev-pdf/User-Guide-2693213-Page-40.png)
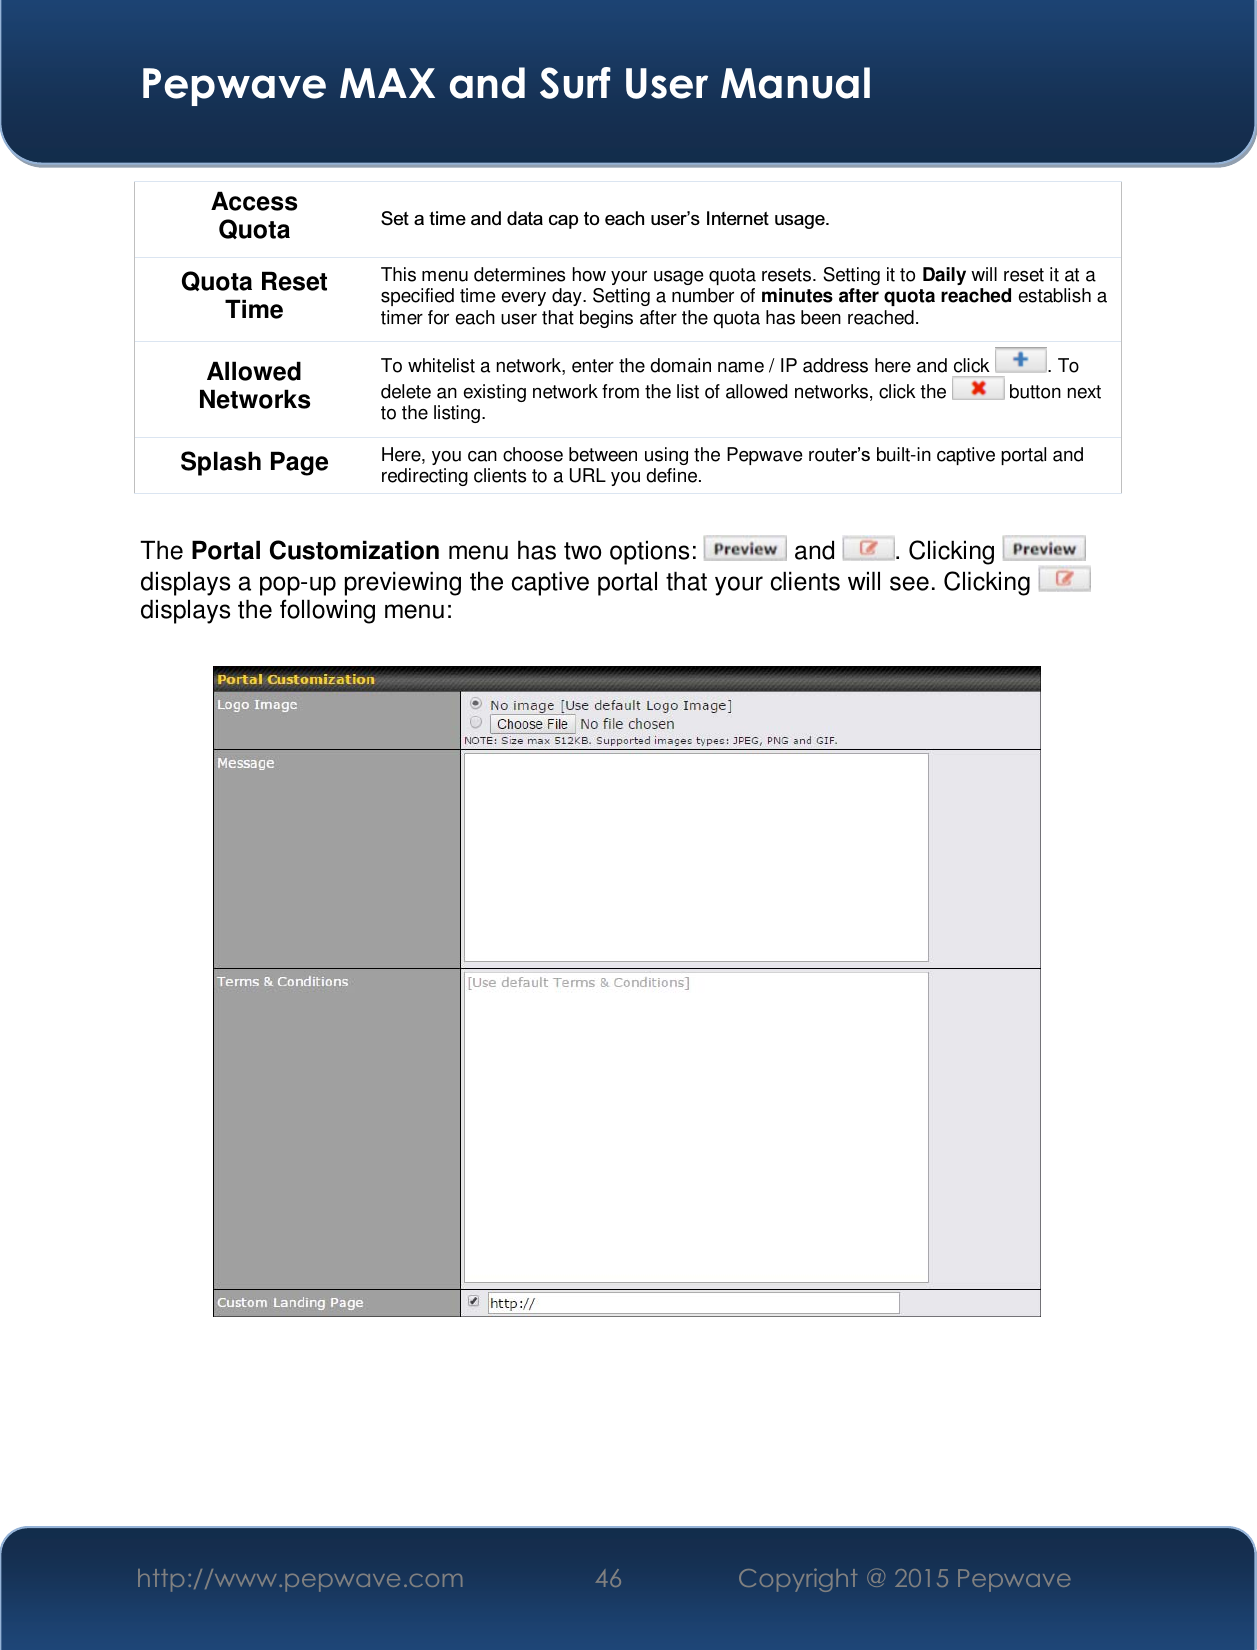
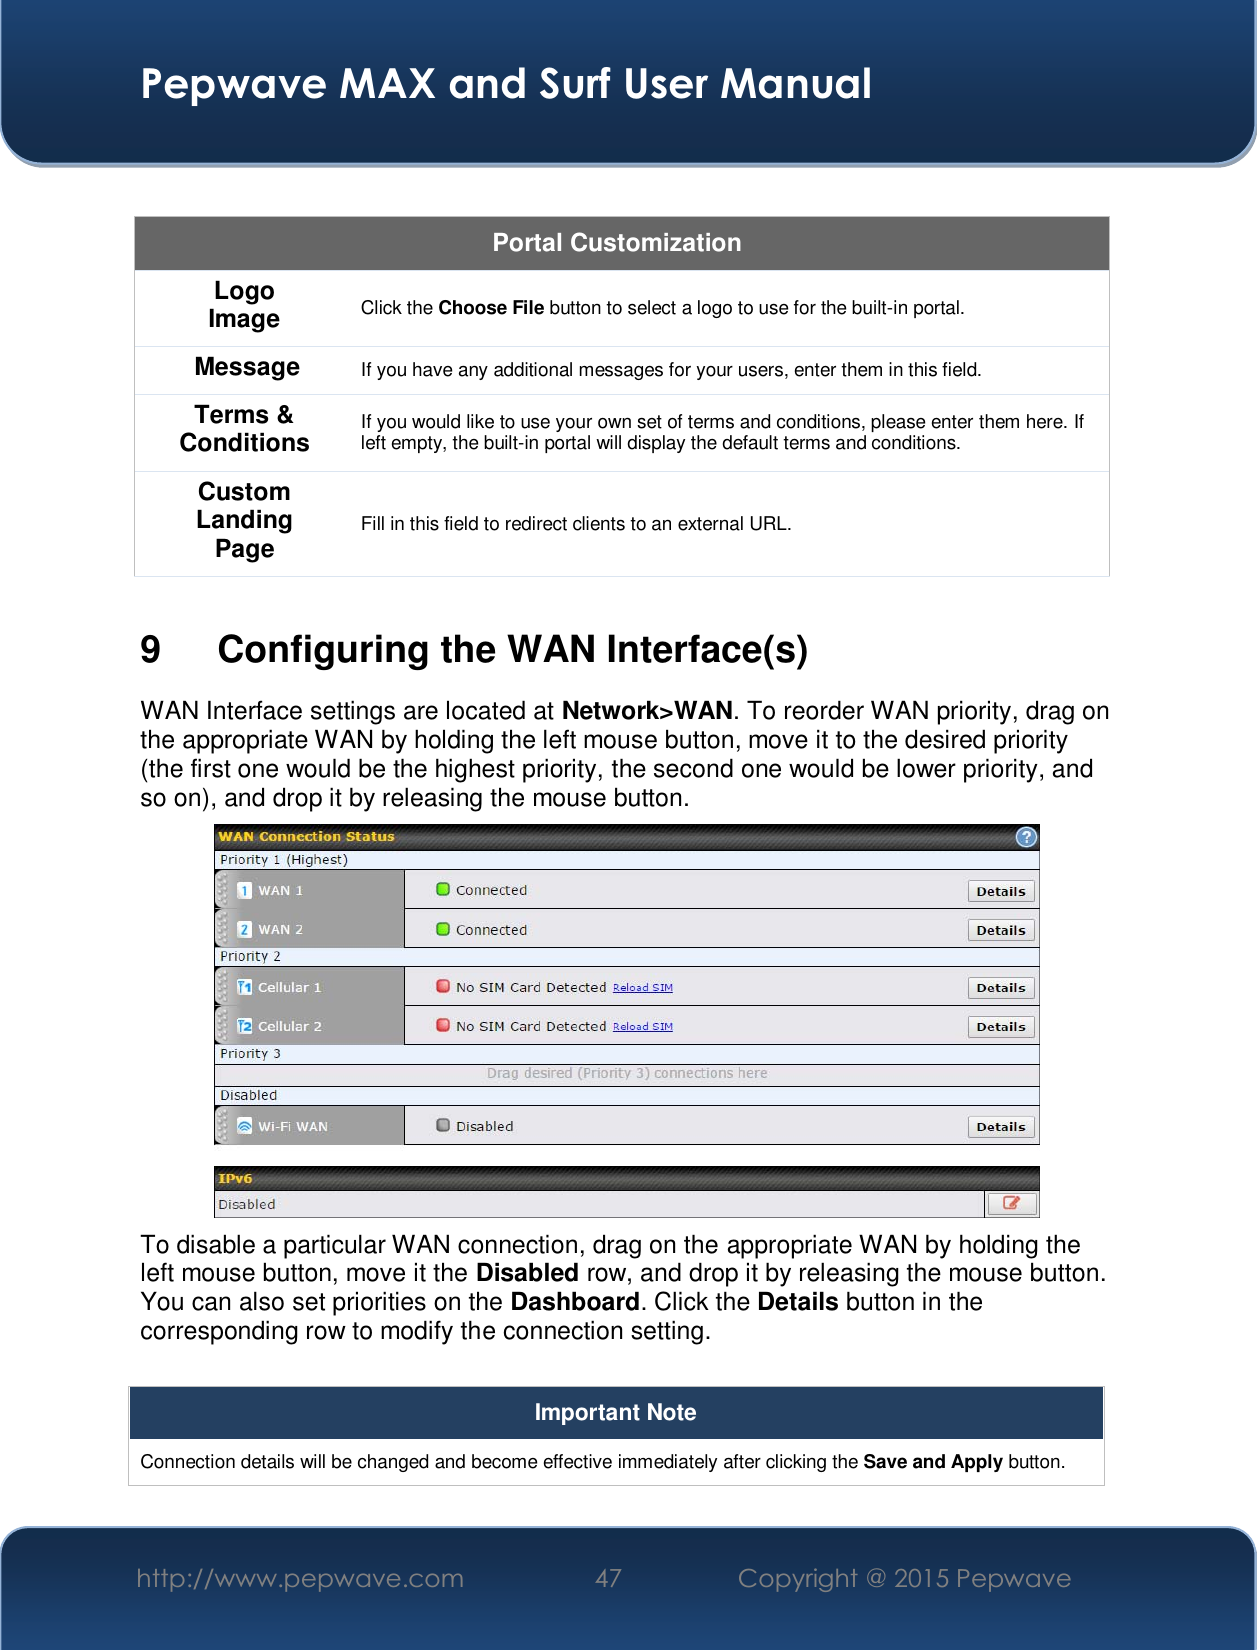
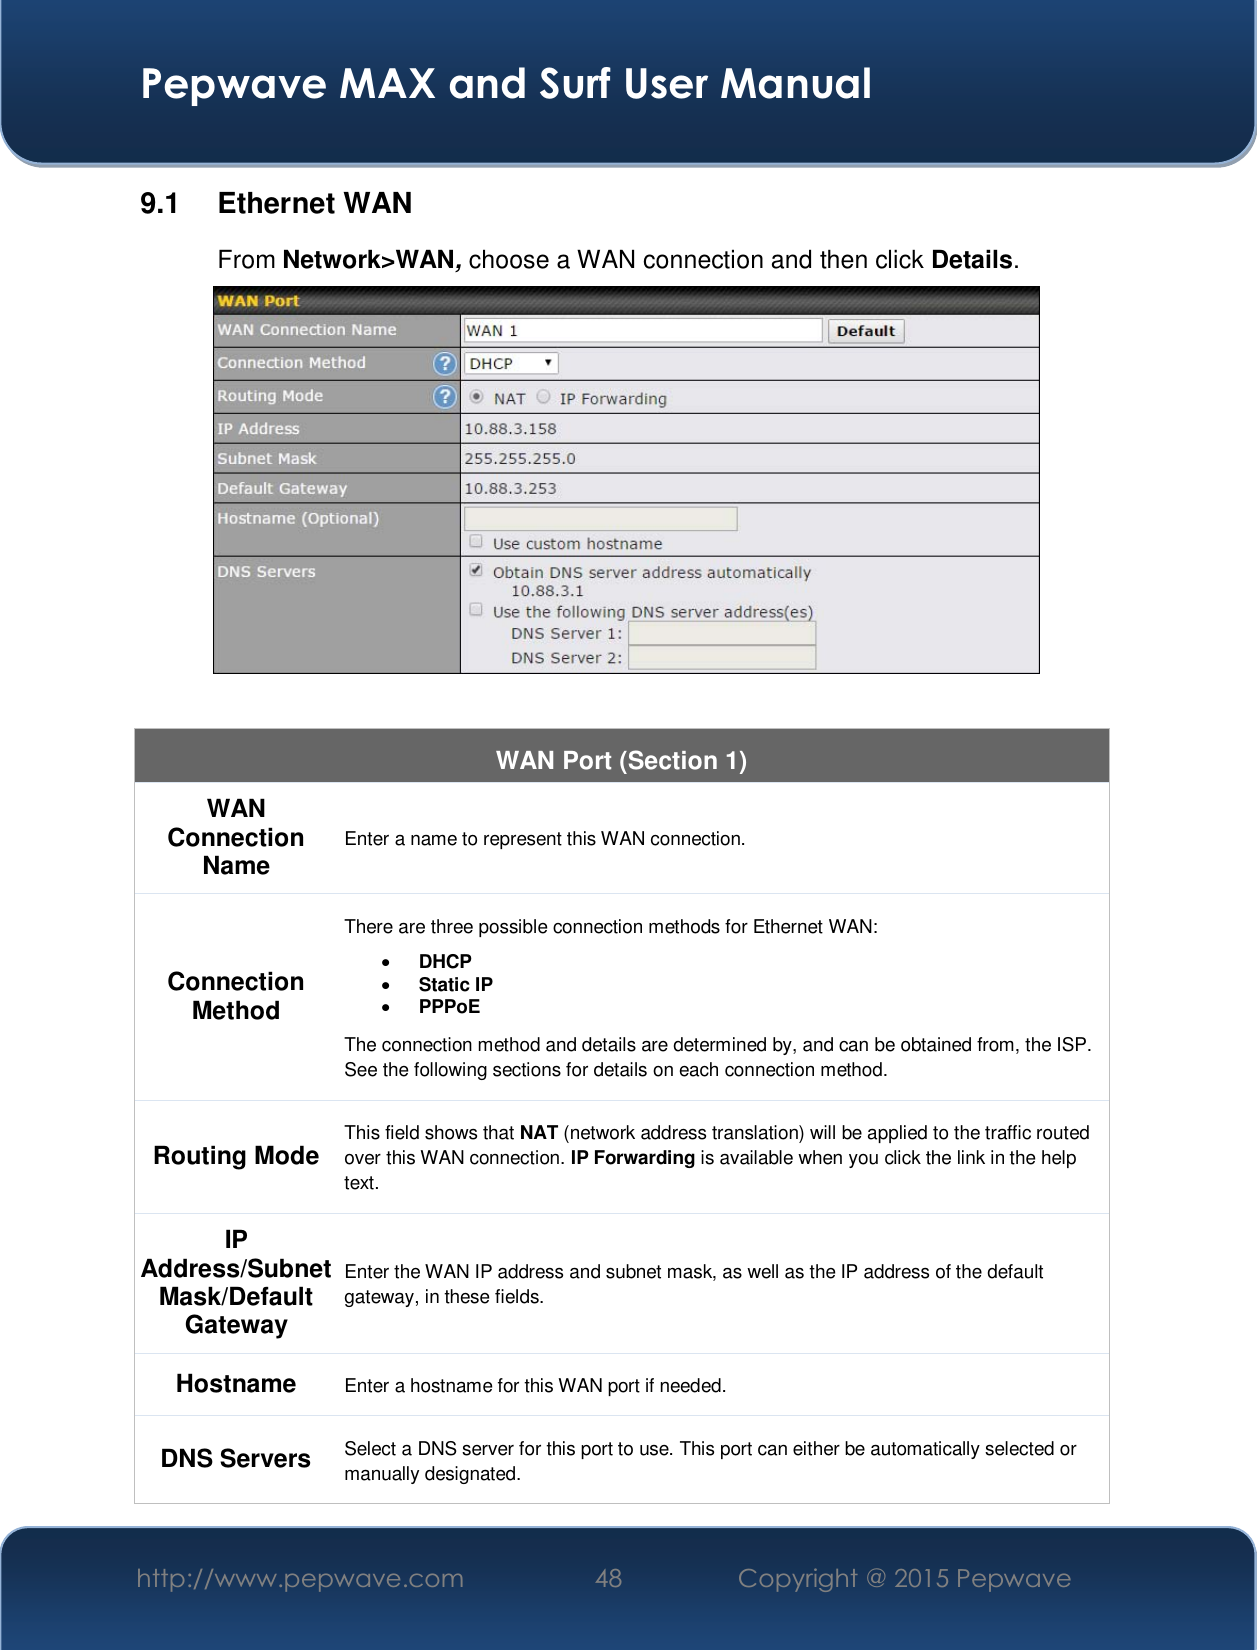
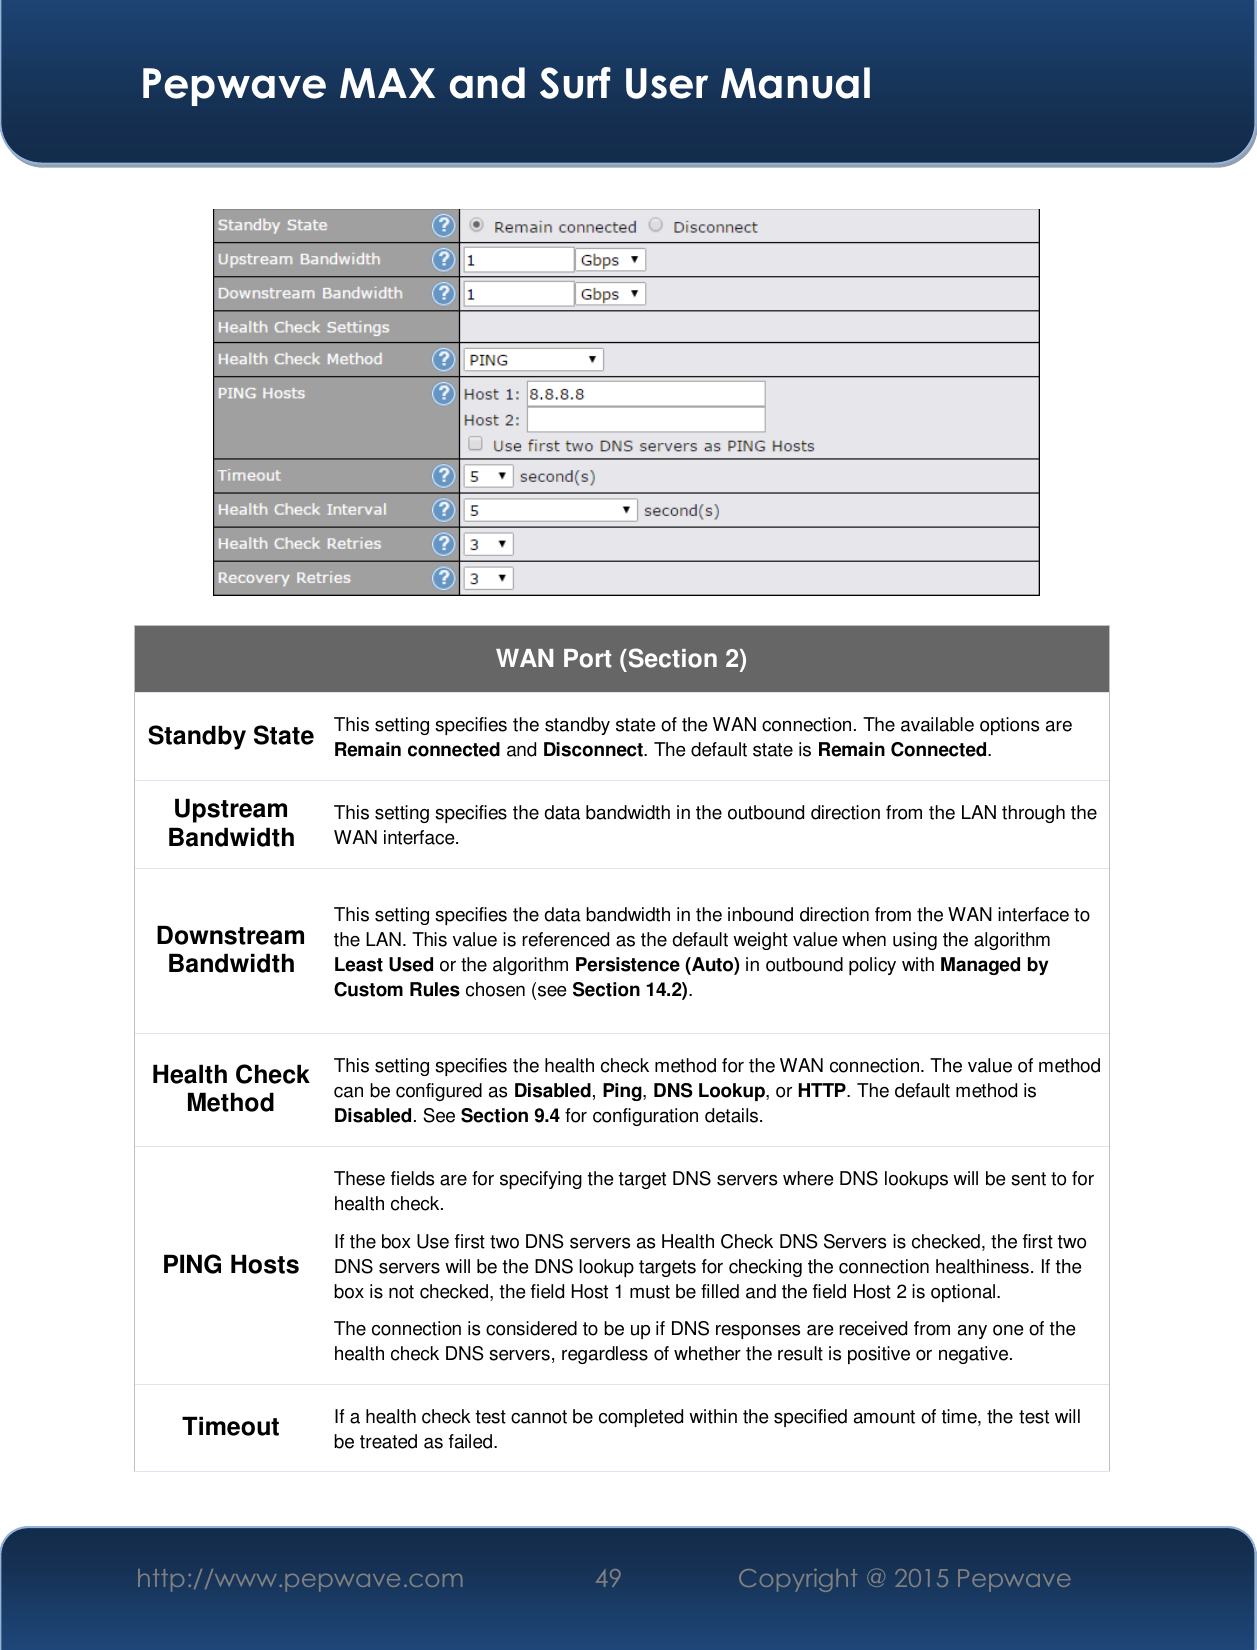
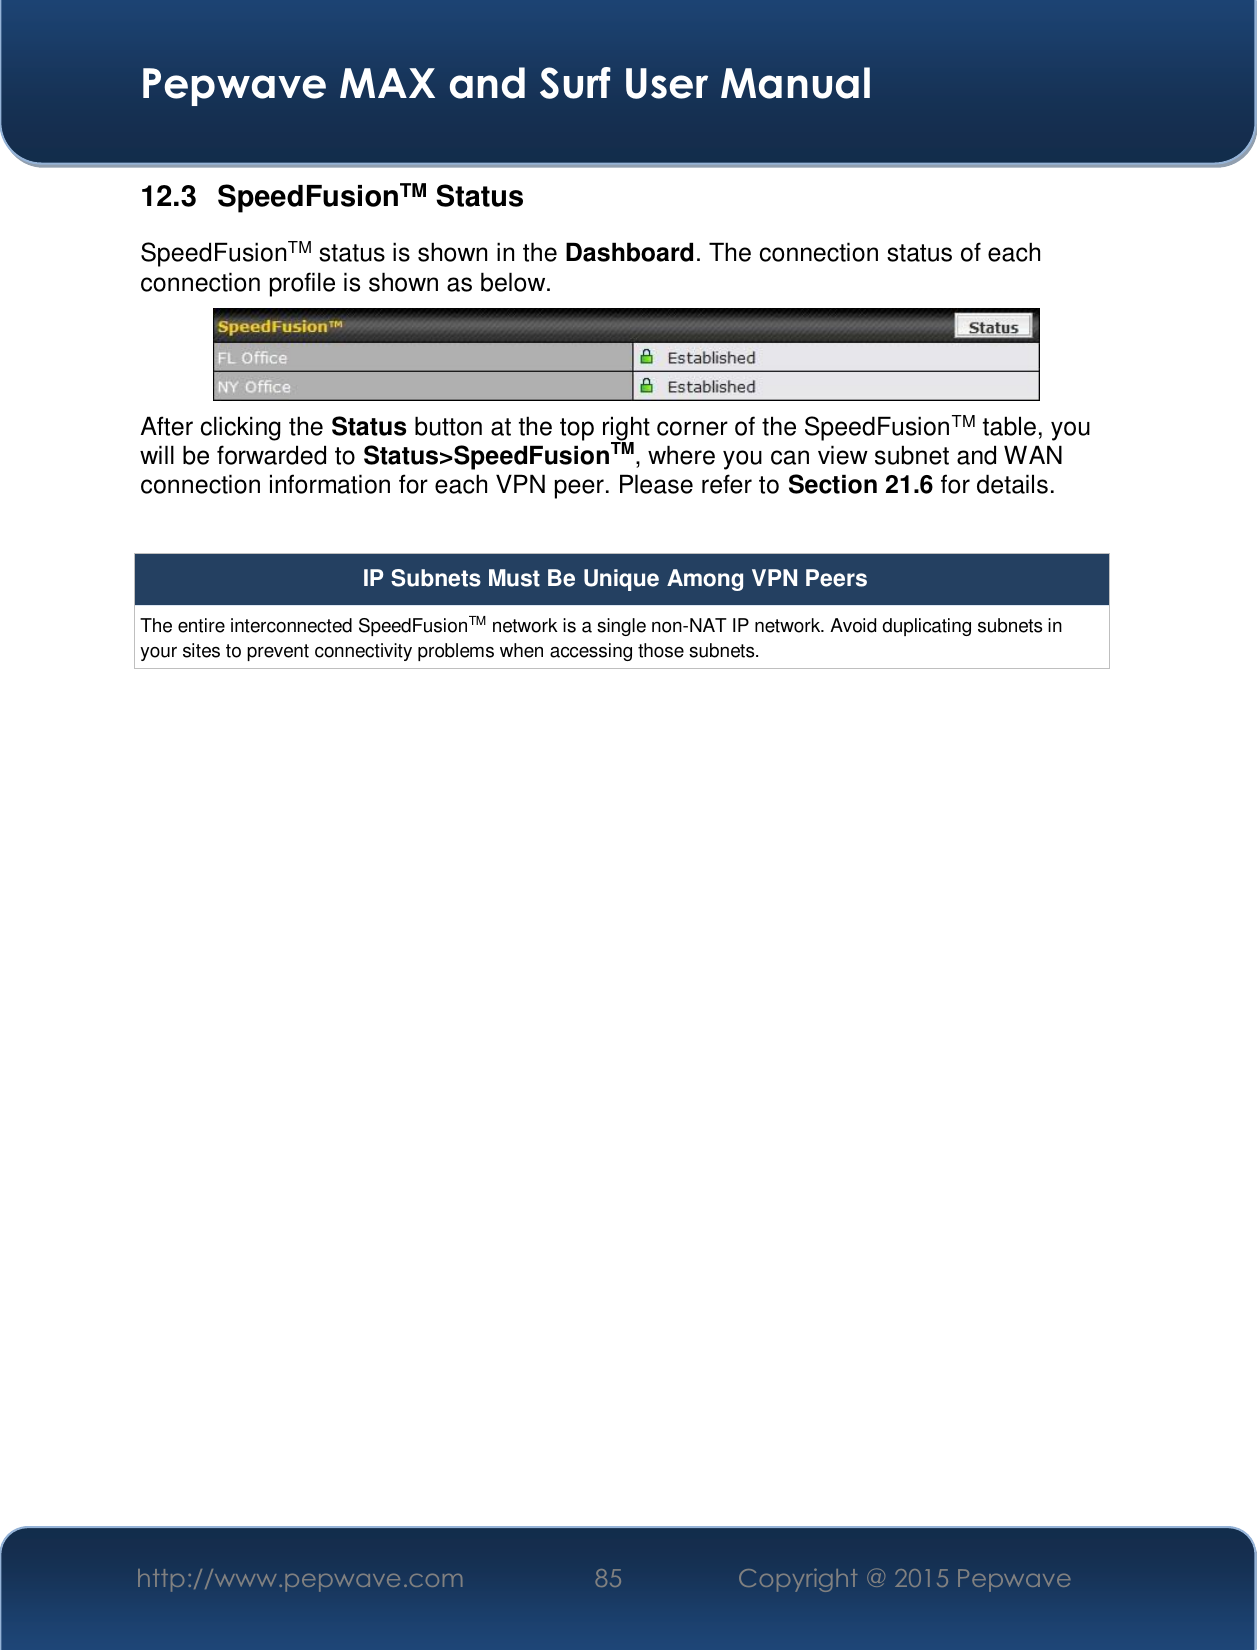
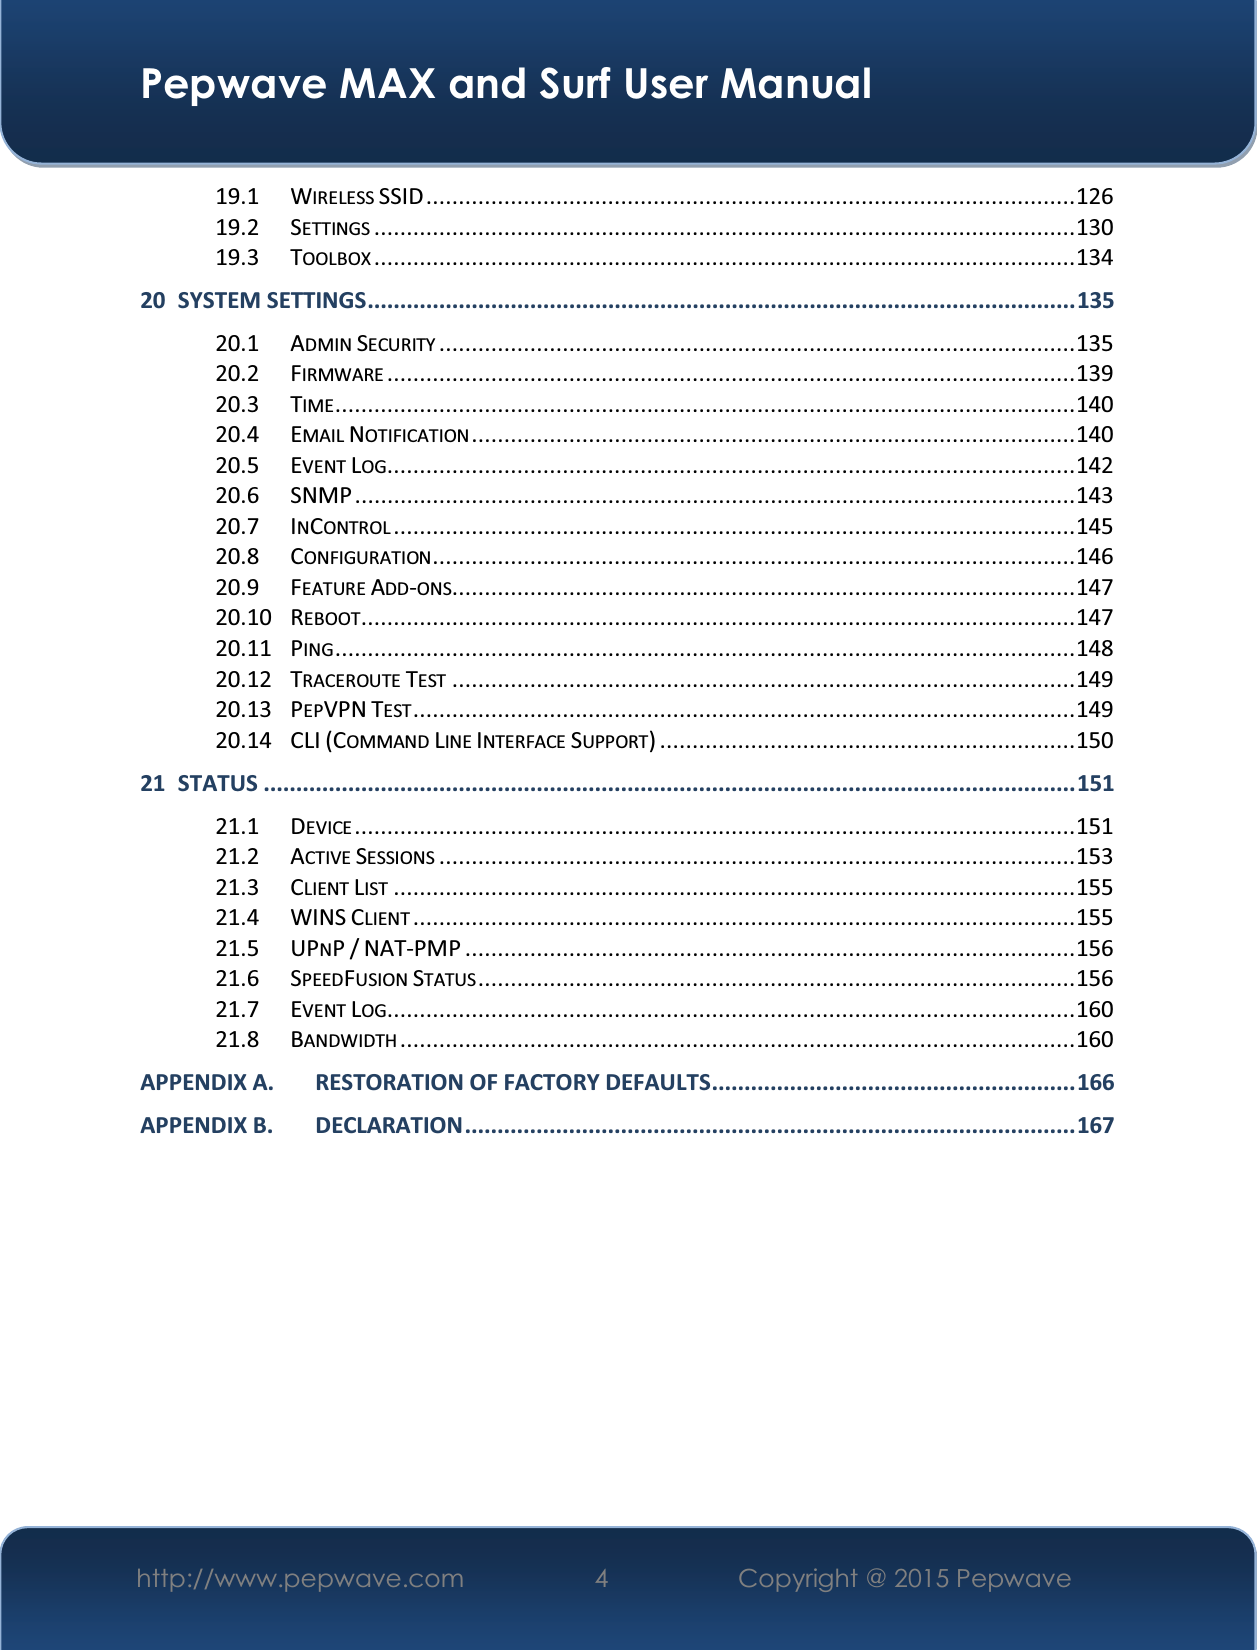
![Pepwave MAX and Surf User Manual http://www.pepwave.com 45 Copyright @ 2015 Pepwave 8.2 Captive Portal The captive portal serves as gateway that clients have to pass if they wish to access the internet using your router. To configure, navigate to Network>LAN>Captive Portal. Captive Portal Settings Enable Check Enable and then, optionally, select the LANs/VLANs that will use the captive portal. Hostname 7RFXVWRPL]HWKHSRUWDO¶VIRUPVXEPLVVLRQDQGUHGLUHFWLRQ85/HQWHUDQHZ85/LQWKLVfield. To reset the URL to factory settings, click Default. Access Mode Click Open Access to allow clients to freely access your router. Click User Authentication to force your clients to authenticate before accessing your router. RADIUS Server This authenticates your clients through a RADIUS server. After selecting this option, you will see the following fields: Fill in the necessary information to complete your connection to the server and enable authentication. LDAP Server This authenticates your clients through a LDAP server. Upon selecting this option, you will see the following fields: Fill in the necessary information to complete your connection to the server and enable authentication.](https://usermanual.wiki/Pismolabs-Technology/P1934.Users-Manual-1-rev-pdf/User-Guide-2693213-Page-45.png)