Quanzhou Wouxun Electronics WOUXUN03 Two-way Radio User Manual
Quanzhou Wouxun Electronics Co., Ltd. Two-way Radio Users Manual
Users Manual

Thanks for buying the KG-699E series transceiver.
This transceiver offers latest in design, multi-functionality,
stable behaviour and easy operation. We believe you will
be pleased with the high quality and dependable features
for all your communication needs.
Your two-way radio Complies with the following of RF energy exposure
standards and guidelines:
• United States Federal Communications Commission, Code of Federal Regulations; 47CFR part 2 sub-
part J
• American National Standards Institute (ANSI)/Institute of Electrical and Electronic Engineers (IEEE)
C95. 1-1992
• Institute of Electrical and Electronic Engineers (IEEE) C95. 1-1999 Edition
• International Commission on Non-Ionizing Radiation Protection (ICNIRP) 1998
Operational Instructions and Training Guidelines
To ensure optimal performance and compliance with the occupational/controlled environment RF energy
exposure limits in the above standards and guidelines, users should transmit no more than 50% of the
time and always adhere to the following procedures:
Transmit and Receive
To transmit (talk), push the Push-To-Talk (PTT) button; to receive, release the PTT button.
Hand-held radio operation
Hold the radio in a vertical position with the microphone 5 cm away from the lips and let the antenna
Professional FM Transceiver
User Safety, Training, and General Information
READ THIS IMPORTANT INFORMATION ON SAFE AND EFFICIENT OPERATION BEFORE USING
YOUR PORTABLE TWO-WAY RADIO.
NOTE !
The approved batteries supplied with this radio are rated for a 5-5-90 duty cycle (5% talk-5% listen-90%
standby), even though this radio complies with the FCC occupational RF exposure limits at duty cycles of up
to 50% talk.
Compliance with RF Energy Exposure Standards
Your two-way radio is designed and tested to comply with a number of national and
international standards and guidelines (listed below) regarding human exposure to radio frequency
electromagnetic energy. This radio complies with the IEEE (FCC) and ICNIRP exposure limits for
occupational/controlled RF exposure environment at duty cycles of up to 50% talk-50% listen and
should be used for occupational use only. In terms of measuring RF energy for compliance with the
FCC exposure guidelines, your radio radiates measurable RF energy only while it is transmitting
(during talking), not when it is receiving (listening) or in standby mode.
WARNING: It is important that the operator is aware of and understand hazards common to the
operation of any transceiver. Explosive environment(such as gases, dust, fumes, etc). Turn off your
transceiver while talking on fuel, or while parked in gasoline service stations.
If you require this machine to be developed or some changed, pleased connect with
or your dealer.
Notices to the User
• Government law prohibits the operation of unlicensed radio transmitters within the territories under
government control.
• Illegal operation is punishable by fine or imprisonment or both.
• Refer service to qualified technicians only.
FCC Caution:
This equipment has been tested and found to comply with the part 90 of the FCC Rules. These limits are
designed to provide reasonable protection against harmful interference in a residential installation.
This equipment generates, uses and can radiate radio frequency energy and, if not installed and used in
accordance with the instructions, may cause harmful interference to radio communications. However,
Professional FM Transceiver
Body-worn operation
Always place the radio in a approved clip, holder, holster, case, or body harness for this
product. Use of non- -approved accessories may exceed FCC RF exposure guidelines.
Antennas & Batteries
• Use only approved, supplied antenna or approved replacement
antenna.
• Unauthorized antennas, modifications, or attachments could damage the radio and may violate FCC
regulations.
• Use only approved, supplied batteries or approved replacement
batteries.
• Use of non- -approved batteries may exceed FCC RF exposure guidelines.
Approved Accessories
For a list of approved accessories, see the accessories page of this user manual or visit
the following website which lists approved accessories:http://www.wouxun.com
farther away from your head.

Measures:
• Reorient or relocate the receiving antenna.
• Increase the separation between the equipment and receiver.
• Connect the equipment into an outlet on a circuit different from that to which the receiver is connected.
• Consult the dealer or an experienced radio/TV technician for help.
FCC Licensing Requirements
Your radio must be properly licensed Federal Communications Commission prior to use. Your
Wireless dealer can assist you in meeting these requirements. Your dealer will program
each radio with your authorized frequencies, signaling codes, etc., and will be there to meet your
communications needs as your system expands.
there is no guarantee that interference will not occur in a particular installation. If this equipment does
cause harmfu l interference to radio or television reception, which can be determined by turning the
equipment off and on, the user is encouraged to try to correct the interference by one or more of the
following
Switch OFF the radio while refueling or parking at gas station.
Do not modify or adjust this radio without permission.
Do not expose the radio to direct sunlight over a long time, nor place it close to heating source.
Do not place the radio in excessively dusty, humid areas, nor on unstable surfaces.
Safety: It is important that the operator is aware of and understands hazards common to the operation
of any radio.
Precautions
Only qualified technicians are allowed to maintain this product.
Do not use the radio or charge a battery in explosive areas such as coal gas, dust, steam, etc.
CE Caution:
Hereby, declares that this Two-way radio is in compliance with the essential requirements
and other relevant provisions of Directive 1999/5/EC.
A copy of the DOC may be obtained through the following address.
Address: No.928 Nanhuan Road, Jiangnan High Technology Industrial Park, Quanzhou, Fujian 362000,
China
Professional FM Transceiver

Contents
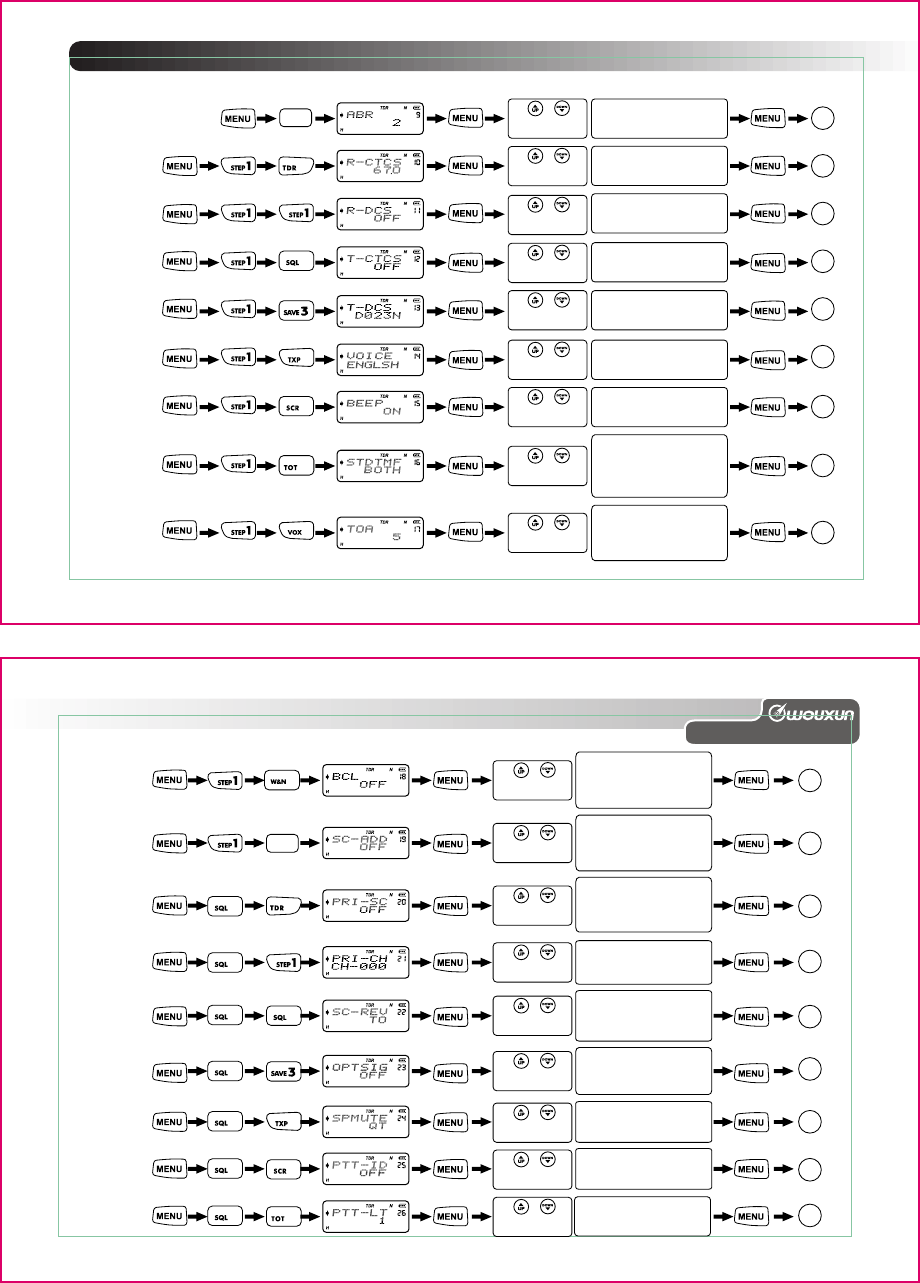
Setting auto backlight (ABR) ---- MENU 9
Setting receive CTCSS (R-CTCS) ---- MENU 10
Setting receive DCS (R-DCS) ---- MENU 11
Setting transmit CTCSS (T-CTCS) ---- MENU 12
Setting transmit DCS (T-DCS) ---- MENU 13
Setting voiceguide (VOICE) ---- MENU 14
Setting beepprompt function (BEEP) ---- MENU 15
Setting DTMF sidetone (DTMFST) ---- MENU 16
Setting transmit overtime alarm (TOA) ---- MENU 17
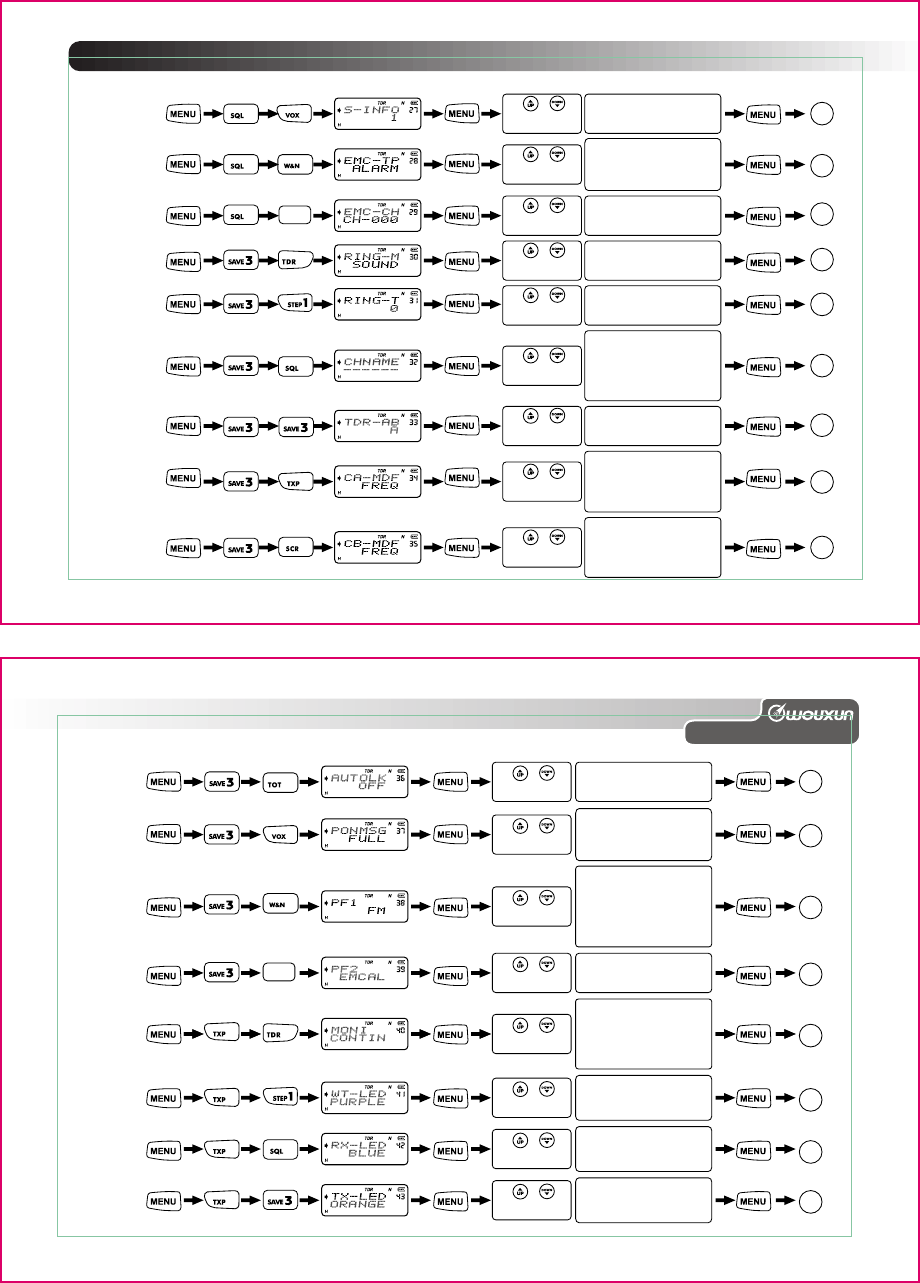
Busy channel lockout (BCL) ---- MENU 18
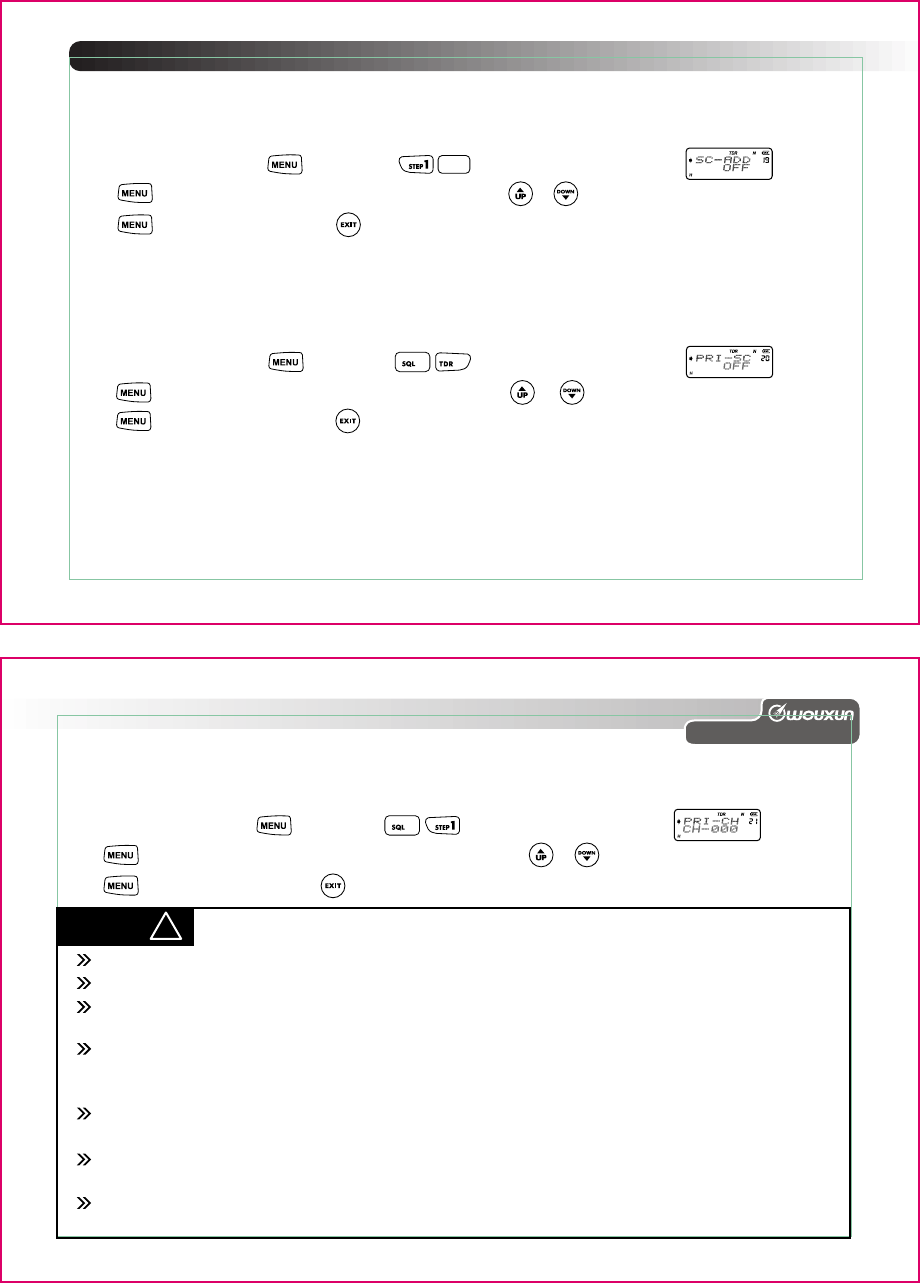
Adding channelscan (SC-ADD) ---- MENU 19
Priority scan function (PRI-SC) ---- MENU 20
Setting priority channel scan function (PRI-CH) ---- MENU 21
Setting scanmode (SC-REV) ---- MENU 22
Setting option signal (OPTSIG) ---- MENU 23
Setting mutemode (SPMUTE) ---- MENU 24
PTT ID (PTT-ID) ---- MENU 25
Setting ANI ID CODE transmit (PTT-ID) ---- MENU 26
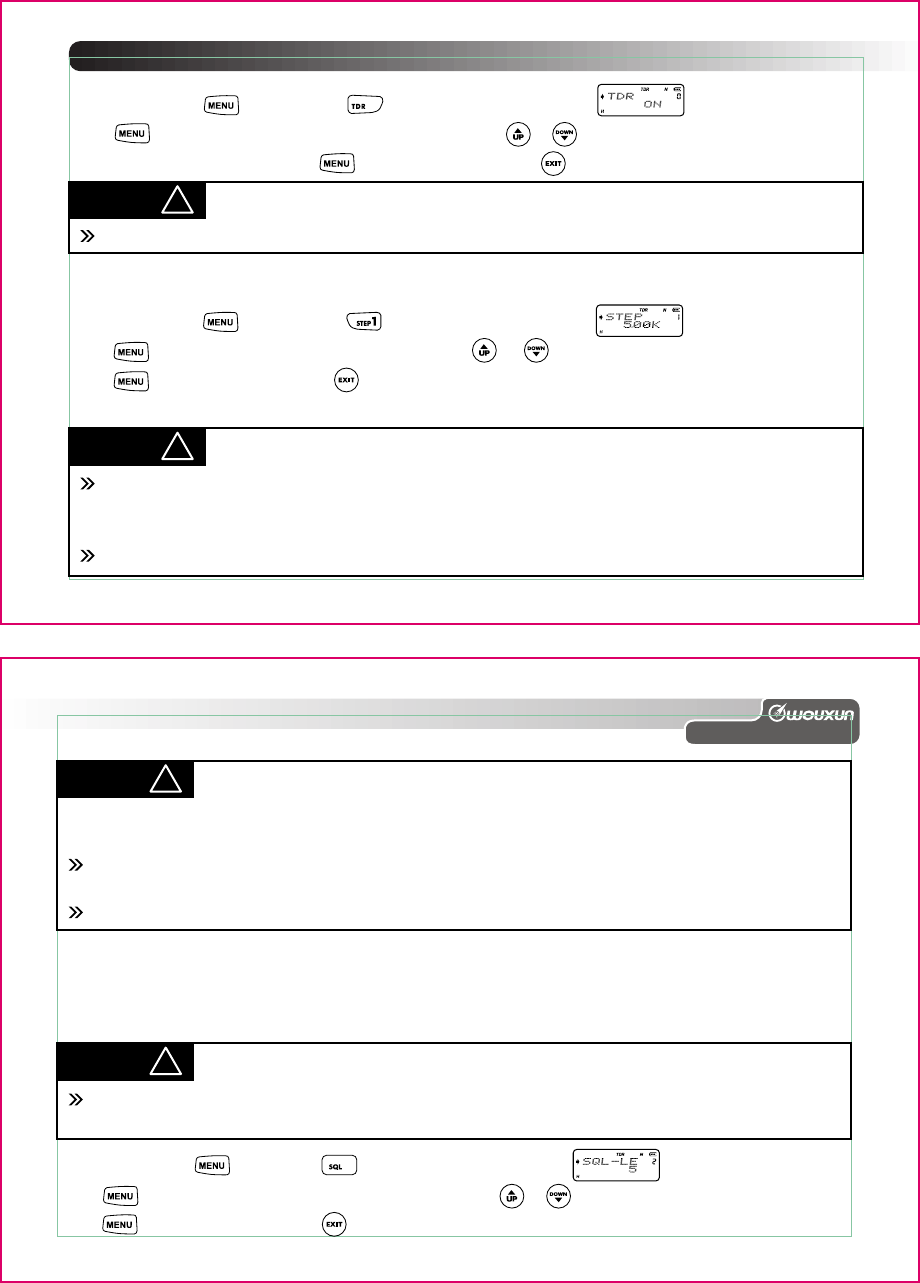
Setting signal information (S-INFO) ---- MENU 27
19-20
20
21
21
22
22
23
23-24
24
24
25
25
26
27
29-30
32
32-33
33
34
Professional FM Transceiver
Unpacking and checking of your equipment
Supplied accessories
Description of functions
Getting started
LCD display
Description of transceiver
Speed search
DTMF encoding
Switch working mode
Shortcut operation sheet
How to operate
Lock menu function
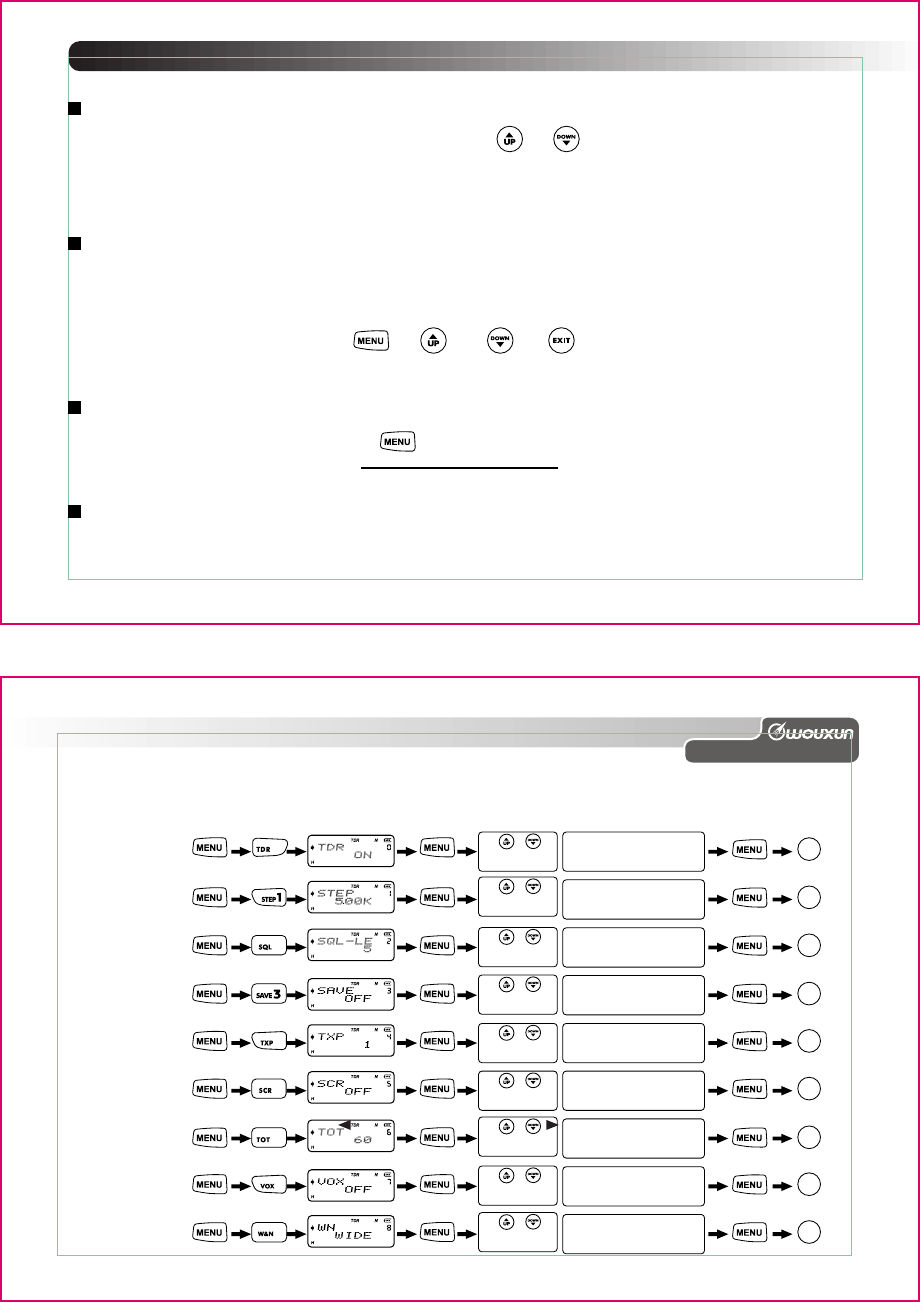
Setting dual standby (TDR) ---- MENU O
Setting channel step (STEP) ---- MENU 1
Setting squelch level (SQL-LE) ---- MENU 2
Setting batterypack savemode (SAVE) --- MENU 3
Selecting transmitpower (TXP) ---- MENU 4
Setting voice encrypt compress (SCR)--- MENU 5
Transmit over timer (TOT) ---- MENU 6
Setting VOX (VOX) ---- MENU 7
Setting wide and narrow bandwidth (WN) ---- MENU 8
1
1
2-3
4-7
4
5-6
7
7
7
8-13
14-55
14
14-15
15-16
16
17
17
18
18
19
19

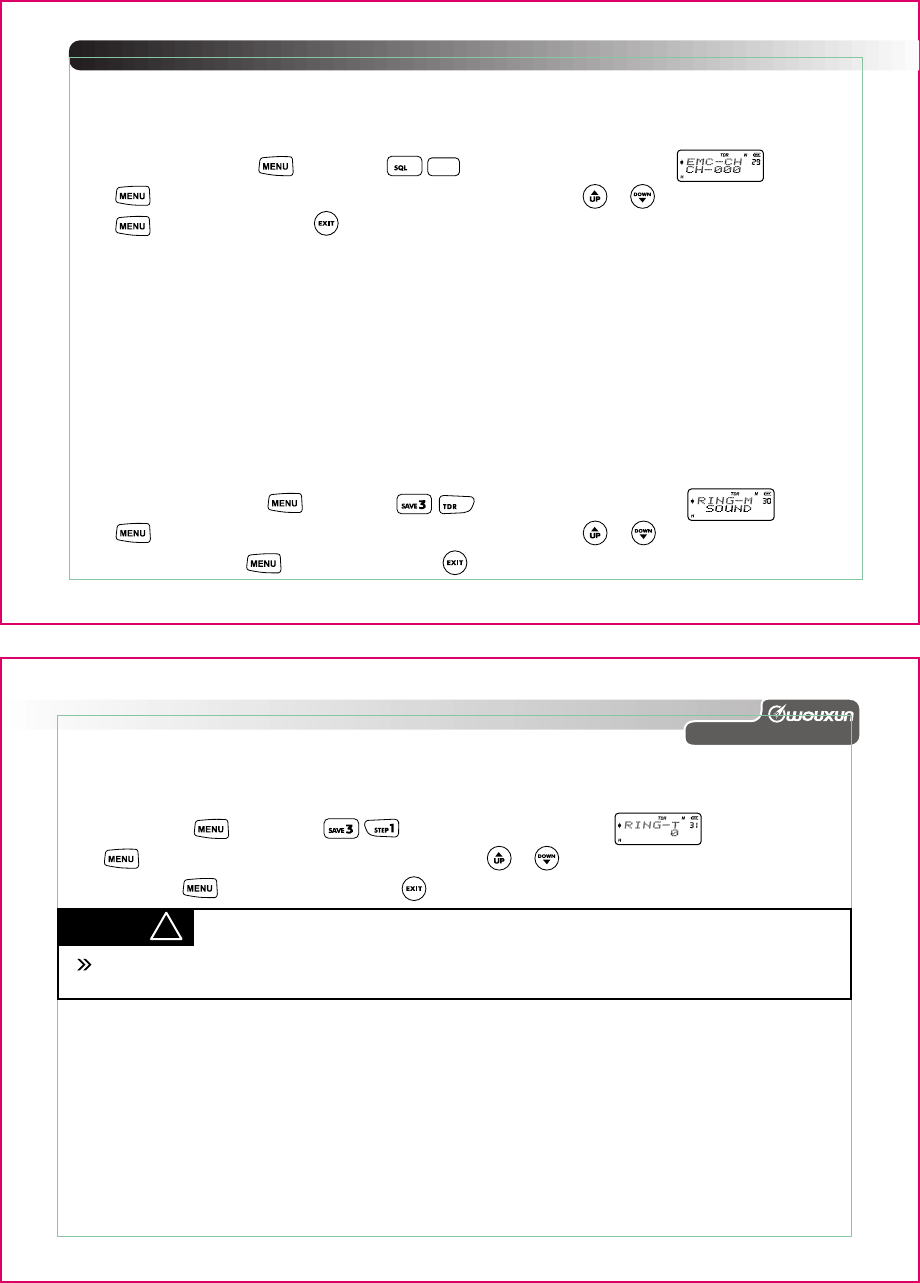
Emergency calling type (EMC-TP)---MENU 28
Emergency calling channel (EMC-CH)---MENU 29
Select ringmode (RING-M)---MENU 30
Setting ringtime(RING-T)---MENU 31
Edit channelname (CHNAME) ---- MENU 32
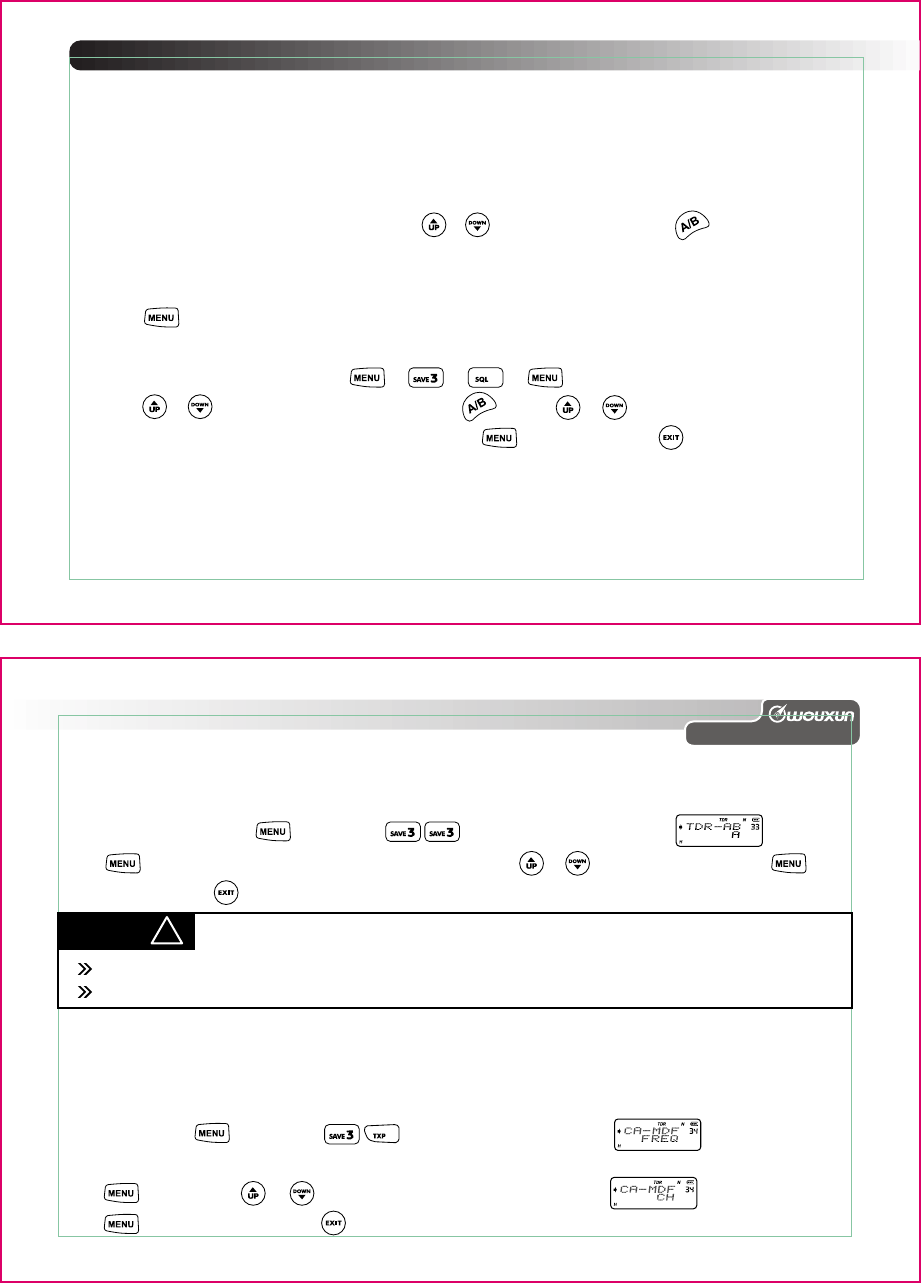
Setting transmit segment when in dual standby (TDR-AB) ---- MENU 33
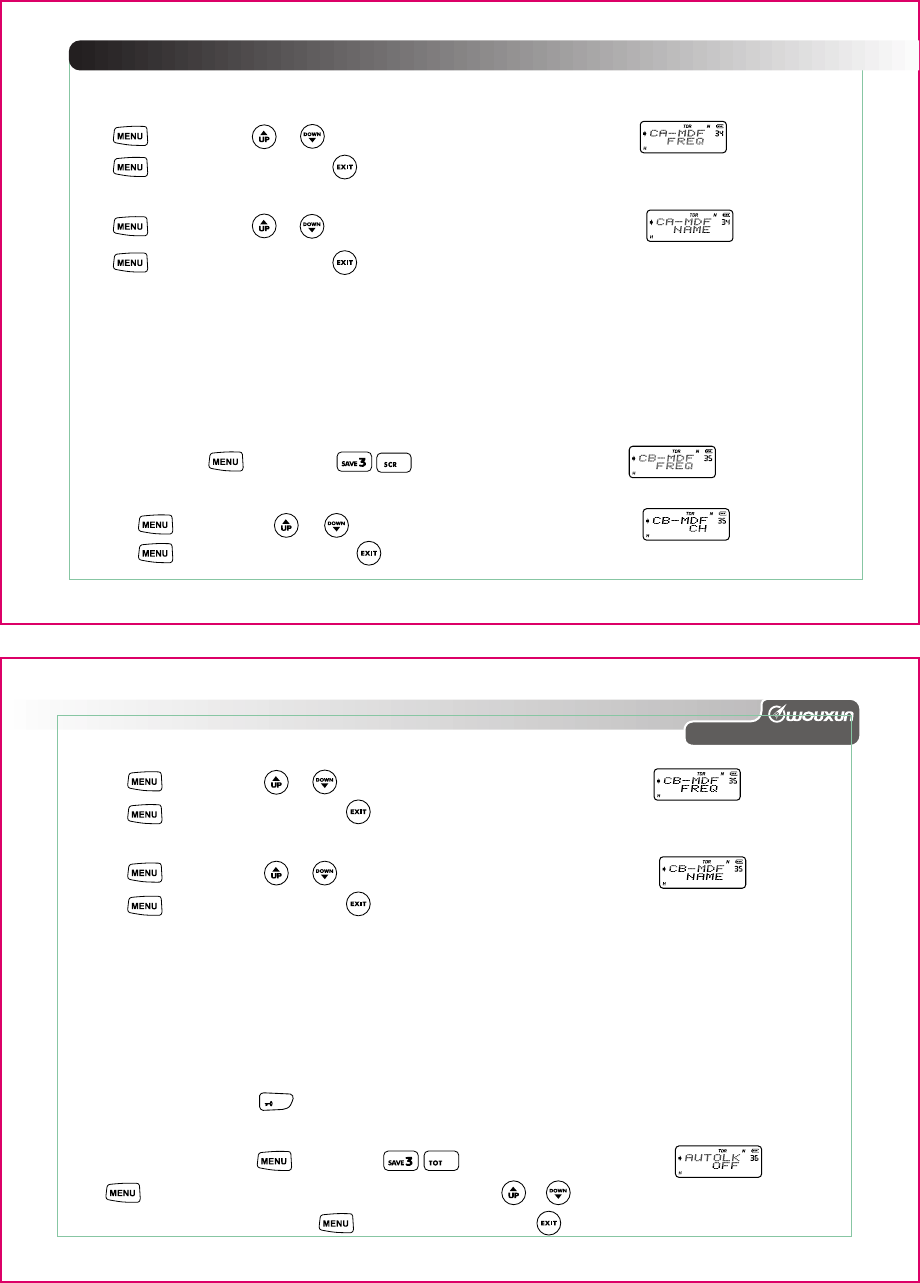
Setting A segment channel display mode (CA-MDF)---MENU 34
Setting B segment channel display mode (CB-MDF)---MENU 35
Setting keyboard lock (AUTOLK) ---- MENU36
Setting power on message (PONMSG) ---- MENU 37
Setting sidekey 1(PF1)---MNEU 38
Setting topkey (PF2) ---MENU 39
Define MONI key (MONI) ---- MENU 40
Selecting standby display color (WT-LED) ---- MENU 41
Selecting receive display color (RX-LED) ---- MENU 42
Selecting transmit display color (TX-LED) ---- MENU 43
Setting memory channel=setting co-channel and dis-channel (MEM-CH) ---- MENU 44
Delete channel (DEL-CH) ---- MENU 45
34
35
35
36
36-37
38
38-39
39-40
40-41
41
41-43
43-44
44-45
45
45
46
46-47
48
Contents
Setting frequencyshift direction (SFT-D) ---- MENU 46
Setting offsetfrequency (OFF-SET) ---- MENU 47
ANI CODE edit (ANI) ---- MENU 48
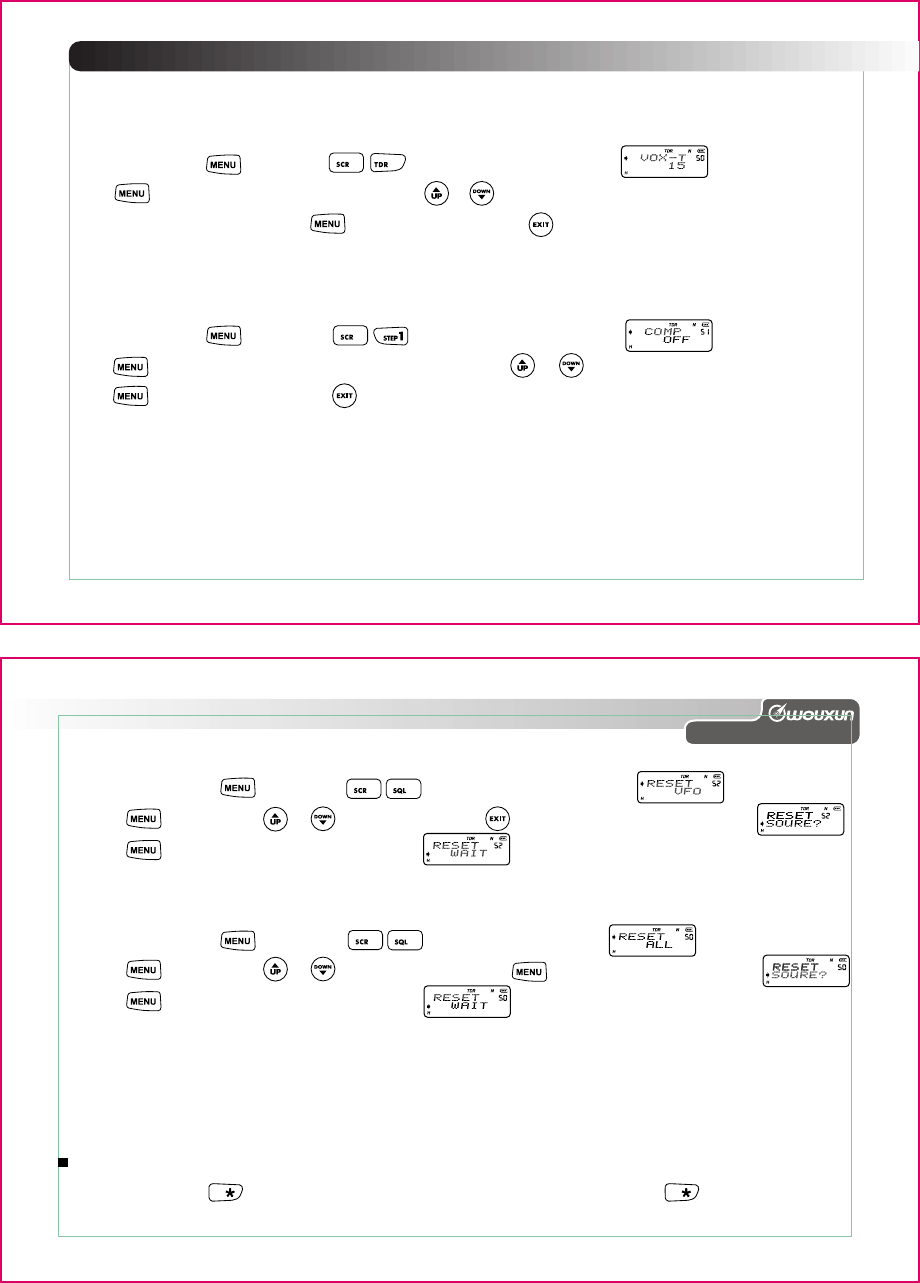
Setting VOX-T (VOXT) ----MENU 50
Companding (COMP) ----MENU 51
Setting reset (RESET) ---- MENU 52
Setting reverse frequency function
Lowvoltage batterypack voiceprompt
Setting transmit overtime prompt
Adding channelscan
Wireclone function
Programming repeater function
How to use your intelligentcharger
Trouble shooting
Technology parameter
Appendix 1 (CTCSS)
Appendix 2 (DCS)
Technology specification
Optional accessories
Announce
48
49-50
50
50-51
51
51-52
52
53
53
53
53
54-55
55
56-57
58-60
58
59-60
61
62
63
Professional FM Transceiver

1.
2.
3.
4.
5.
6.
7.
8.
9.
10.
11.
12.
13.
14.
15.
16.
17.
18.
19.
20.
21.
UHF: 406.125-469.975MHz
Output power: UHF: 4W/1W
200 memory channels
In frequency mode, VHF Dual frequencies or UHF Dual frequencies display and standby.
In channel mode, VHF Dual channels or UHF Dual channels display and standby.
DTMF encoding and decoding
5 tones (including 15 kinds standard)
2 tones
1750Hz burst tone
Priority scan
FM radio with frequency display
DCS/CTCSS of RX and TX can be set respectively
ANI (caller ID)
VOX
All calls, group calls and selective calls function
Calling ring function
Scrambler available
105 groups DCS / 50 groups CTCSS
Voiceguide (English/Chinese)
Wide/Narrow bandwidth selection (25KHz/12.5KHz)
Three color back light display.
Unpacking and checking of your equipment
01
02
Professional FM Transceiver
Description of functions
Carefully unpack the transceiver. We recommend that you identify the items in the following table
before discarding the packing material. If any items are missing or have been damaged during shipment,
please notify your dealer.
Supplied accessories
High gain antenna Li-ion batterypack
Switching adapter
Intelligent charger
Beltclip Handstrap User's manual Service card
Transceiver
A/B
MENU
789#
2
4560
VOX
SAVE
STEP
SQL
TXP SCR TOT TDR
W&N ABR
UP EXIT
DOWN
KG-699E
Professional FM Transceiver
SCAN
T-R
20.
21.
22.
23.
24.
25.
26.
27.
28.
29.
30.
31.
32.
33.
34.
35.
36.
37.
38.
39.
40.
41.
Channel name edit available.
Channel order, channel frequeny, channel name multi-display method
Reverse frequency function
Distant urgency alarm function
Multi scan function
Channel steps (5/6.25/10/12.5/25KHz)
High/Low power changeable when on transmitting.
Intelligentcharger ( Warning sound and dualcolor light)
TX/RX splitselection (0-99.950MHz)
Set frequencyshift direction
Stopwatchtimer function
Busy channel lockout
Multi display modes when power on (full screen / Batt-V / others)
Lowvoltage batterypack voiceprompt
Transmit overtime prompt
Keyboard lock (auto / manual)
Adding channelscan function
Programmable by computer
Menu / Channel reset
Wireclone function
Powersaving function
voice compress function
Description of functions
03
LCD display
On the display you will see various indicators that show what function you have selected. Sometimes
you may not recall what those indicators mean, or how to select them, in such a case, you can refer to
the table below.
Split
Batterypack status indicator
Menu order / Channel order
VOX
Menu order / Channel order
Keypadlock
CTCSS
DTMF-encoding and -decoding
DCS
High/Low power transmit
Busychannel light
Priority scan
Reverse frequency
Split
Note:
Batterypack capacity indicator (full)
Batterypack capacity spare indicator
Batterypack capacity is exhausted
Receive signal meter
Switch to desired
frequency
Dual standby indicator
Bandwidth indicator
Scrambler state
04
Professional FM Transceiver
Getting started
Getting started
05
Professional FM Transceiver
06
PTT (Push-To-Talk) key
Sidekey 1: radio/CALL/
NO-SUB/JP-PRI/JP-EMC
Sidekey 2: monitor
Speaker/ Microphonejacks
Batterylatches
789#
2
4560
KG-699E
Antenna
A channel receive and transmit light
Topkey: Distant urgency alarm
B channel receive and transmit light
Powerswitch / Volumecontrol
Functionkey Exitkey
Reverse frequency / Scankey
Numberkey Lockkey
Up /Downkey
Screen / LCD display
A or B channel switchkey
Channel switch
Description of transceiver (Double knob)
Getting started
07
Squelchlevel from 0-9
2 Setting squelch
level
ON: Turn on save function
1:1/1:2/1:3/1:4
OFF: Turn off save function
3 Setting batterypack
savemode
6-10: High power (5W).
1-5: Low power (1W)
4 Selecting transmit-
power
ON: Turn on scrambler.
OFF: Turn off scrambler.
5 Setting voice
encrypt compress
TOT has 40 levels in steps
of 15 seconds.
OFF: Turn off TOT.
6 Transmit over timer
VOX has levels from 1 to
10.
OFF: Turn off VOX.
7 Setting VOX
WIDE: 25KHz.
NARROW: 12.5KHz.
8 Setting bandwidth
5 kinds of channelstep
5K/6.25K/10K/12.5K/25K
1 Setting
channel step
0 Setting dual
standby
ON: Turn on dual standby
OFF: Turn off dual standby
P14
-15
P15
-16
P16
P17
P17
P18
P18
P19
P19
Enter
function set Screen
display Select
parameter Selectable
parameter-
explanation Confirm Back See
page
Function
order Function
name
Select parameter
Press or key
Select parameter
Press or key
Select parameter
Press or key
Select parameter
Press or key
Select parameter
Press or key
Select parameter
Press or key
Select parameter
Press or key
Select parameter
Press or key
Select parameter
Press or key
0
2
4
5
8
7
6
EXIT
EXIT
EXIT
EXIT
EXIT
EXIT
EXIT
EXIT
EXIT
DTMF encoding
This transceiver has DTMF encoding. By pressing the right number key on transmit you can choose
the right DTMF tone which you want to TX.
B C D
A
When setting each function or parameter, press the or key one time can speed search the
function or parameter.
Speed search
Switch working mode
Channel mode Frequency mode
+ POWER ON
If you want to transmit the 1750Hz burst tone, you just press PTT and sidekey 1 at the same time.
08
Professional FM Transceiver
Shortcut operation sheet
Shortcut operation sheet
09
Professional FM Transceiver
10
105 groups DCS
(D023N-D754N)
OFF: Turn off DCS
11 Setting
receive DCS
50 groups CTCSS
(67 -254.1Hz)
OFF: Turn off CTCSS
12 Setting
transmit CTCSS
105 groups DCS
(D023N-D754N)
OFF: Turn off DCS
13 Setting
transmit DCS
ENGLSH: English
OFF: Turn off voiceguide
14 Setting
voiceguide
ON: Turn on beepprompt
OFF: Turn off beepprompt
15 Setting
beepprompt
KEY: Turn on sidekey
ANI: Turn on ANI sidetone
BOTH: Turn on both sidekey
and ANI sidetone
OFF: Turn off all
ON: Turn on transmit
overtime alarm.
OFF: Turn off transmit
overtime alarm
9 Setting auto back
light
ON: Turn on auto
back light
OFF: Turn off auto back light
50 groups CTCSS
(67 -254.1Hz)
OFF: Turn off CTCSS
10 Setting
receive CTCSS
P19
-20
P20
P21
P21
P22
P22
P23
16 Setting
DTMF sidetone
P23
-24
17 Transmit
overtime alarm
P24
9
ABR
0
EXIT
EXIT
EXIT
EXIT
EXIT
EXIT
EXIT
EXIT
EXIT
Select parameter
Press or key
Select parameter
Press or key
Select parameter
Press or key
Select parameter
Press or key
Select parameter
Press or key
Select parameter
Press or key
Select parameter
Press or key
Select parameter
Press or key
Select parameter
Press or key
2
4
5
6
7
Select parameter
Press or key
ON: Turn on adding
channelscan.
OFF: Turn off adding
channelscan.
19 Adding
channelscan
P25
20 Setting
priority scan
function
21 Setting
priority channel
scan function
ON: Turn on priority
scan function.
OFF: Turn off priority
scan function.
Have 200 groups
channel can select
P25
P26
P27
24 Setting
mutemode
25 Transmit
PTT ID
4 kind of signals
WDTS/DTMF: Double tone signal
2TONES: 2TONES signal
5TONES: 5TONES signal
3 kinds of mutemode
QT/AND/OR
P32
P32
-33
22 Setting
scanmode
TO: Scan with time
CO: Scan with carrier wave
SE: Does not scan with
carrier wave
P28
-31
23 Setting
option signal
ON: Turn on busy
channel lockout.
OFF: Turn off busy
channel lockout.
18 Busy
channel lockout
P24
4 kinds of PTT ID
BOT/EOT/BOTH/OFF
26 Setting
ANI ID CODE
transmit
Permit transmit ANI delay
time from1-30, unit:100ms
0: Turn off manual transmit
P33
0
2
4
5
6
9
ABR
2
2
2
2
2
2
2
8
Select parameter
Press or key
Select parameter
Press or key
Select parameter
Press or key
Select parameter
Press or key
Select parameter
Press or key
Select parameter
Press or key
Select parameter
Press or key
Select parameter
Press or key
EXIT
EXIT
EXIT
EXIT
EXIT
EXIT
EXIT
EXIT
EXIT
Shortcut operation sheet
11
Professional FM Transceiver
12
4
0
2
9
ABR
8
2
2
5
7
2
31 Setting
ringtime
32 Edit
channelname
33 Setting
transmit
segment when
in dual standby
A: A segment
B: B segment
The channel name make
up of (A to B)26 letters,
(0-9)10 numbers,”?” or
“+” or “-“.
The length at least 6 bits.
P36
P36
-37
P38
P38
-39
200 groups calling channel
P35
P35
29 Emergency
calling channel
30 Select
ringmode
34 Setting A
segment channel
display mode
27 Setting
signal
information
15 groups signal
information
P34
28 Emergency
calling type
3 kinds of emergency alarm
ALARM: Field alarm
ENI: Distant alarm
BOTH: Field + distant alarm
P34
CH: Channel order display
FREQ: channelfrequency+
channelorder display.
NAME: channelname+
channelorder display
35 Setting
B segment
channel display
mode
P39
-40
CH: Channel order display
FREQ: channelfrequency+
channelorder display.
NAME: channelname+
channelorder display
4 kinds of ringmode
SOUND/BIV/BOTH/OFF
10 levels, 1 second differernt
0 menas turn off ringtime
prompt
EXIT
EXIT
EXIT
EXIT
EXIT
EXIT
EXIT
EXIT
EXIT
Select parameter
Press or key
Select parameter
Press or key
Select parameter
Press or key
Select parameter
Press or key
Select parameter
Press or key
Select parameter
Press or key
Select parameter
Press or key
Select parameter
Press or key
Select parameter
Press or key
Select parameter
Press or key
38 Setting
sidekey1(PF1)
P41
-43
37 Setting
power on
message
FULL: Full screen display
MSG:WELCOME.
BATT-V: Battery voltage
display
P41
P43
-44
39 Setting
topkey(PF2) EMCALL: Turn on alarm function.
CALL01-CALL15:
Signal calling key.
40 Define
MONI key
P44
-45
41 Setting
standy
display-color
P45
36 Setting
keyboard lock
ON: Turn on autolock
OFF: Turn off autolock
P40
-41
42 Setting
receive
display-color
43 Setting
transmit
display-color
FM: FM radio key.
CALL: Signal calling at present
NO-SUB: Delete receive
JP-PRI: Switch to priority scan
channel.
JP-EMC: Switch to emergency
calling mode.
CONTIN: Continual turn off
squelch diagram via keep press
MONI key one time.
PRESS: Continual turn off
squelch diagram via just press
MONI key one time.
BLUE: Blue backlight
ORANGE: Orange backlight
PURPLE: Purple backlight
OFF: Turn off backlight
BLUE: Blue backlight
ORANGE: Orange backlight
PURPLE: Purple backlight
OFF: Turn off backlight
BLUE: Blue backlight
ORANGE: Orange backlight
PURPLE: Purple backlight
OFF: Turn off backlight
P45
P46
4
4
4
4
6
0
2
9
ABR
8
7
EXIT
EXIT
EXIT
EXIT
EXIT
EXIT
EXIT
EXIT
Select parameter
Press or key
Select parameter
Press or key
Select parameter
Press or key
Select parameter
Press or key
Select parameter
Press or key
Select parameter
Press or key
Select parameter
Press or key

NOTE !
The KG-699E has dualfrequency display. In frequencymode it will display two different transmit and receive
frequency at the same time. In channelmode it will display the two different channels plus their parameters.
In frequency and channelmode you can switch to A and B segment by pressing the topkey left above the LCD.
Lock menu functions
If you don't need operate menu functions frequently, you can turn off it by KG-699E programming
software. The steps as following:
1. Set password of switching between channelmode and frequencymode.
2. Set workmode as channelmode.
3. Turn off operating menu function in channelmode.
When you want to use menu functions, input password which you have set, and switch to frequencymode,
then you can operate it.
Setting dualstandby (TDR) --- MENU O
This menu is to turn on/off dualstandby. When it is switched to ON, the radio will start standby between
A and B including their set parameters. Any channel or frequency has been received,then system will stay
on corresponding channel or frequency, until channel or frequency signal disappear.
Once signal has disappeared, system will return to standby and start to flicker "TDR".
Shortcut operation sheet
13
P46
-47
Select parameter
Press or key
44 Setting
memory channel
45 Delete
channel
46 Frequencyshift
direction
47 Offset
frequency
50 Setting
VOX-T
51 Setting
Companding
52 Setting
reset
P48
P48
P48
-50
P50
-51
P51
P51
-52
+: Positive offset
-: Negative offset.
OFF: Turn off frequencyshift
direction
From 0 to 99.950MHz can
be selectable
Total has 20 levels
Unit: 100ms
ON: Turn on COMP
OFF: Turn off COMP
VFO: Menu reset
ALL: All message reset
200 channels
200 channels
48 ANI CODE
edit (ANI)
P50
From 0 to 99.950MHz can
be selectable
Set by programming
software
4
5
5
5
4
4
4
4
0
2
8
7
5
6
4
Select parameter
Press or key
Select parameter
Press or key
Select parameter
Press or key
Select parameter
Press or key
Select parameter
Press or key
Select parameter
Press or key
Select parameter
Press or key
EXIT
EXIT
EXIT
EXIT
EXIT
EXIT
EXIT
EXIT
Setting reverse frequency function (See page 52)
All calls, group calls and selective calls
(See page 28-30)
High/Low power changeable when on
transmitting(See page 17) Lowvoltage batterypack voiceprompt (See page 53)
Wireclone function(See page 53)
Adding channelscan (See page 53)
Programming repeater function (See page 54-55)
Speed search / (See page 7)
DOWN
UP
14
Professional FM Transceiver
How to operate
How to operate
15
Professional FM Transceiver
16
NOTE !
transmit CTCSS and DCS, optional signal, channel bandwidth, encoding signal, mutemode,PTT transmit, voice
encrypt compress, busy channellockout, companding and adding channelscan.
In channelmode the next three settings are not available to change on A/B segment: channel step, frequency-
shift direction, offsetfrequency.
In channelmode setting voice encrypt compress is available to change A/B segment.
NOTE !
Standby time is set by auto-backlight. (See MENU 9)
0
In standby, press and number and the screen will display
Press enter, arrowhead aim at "ON" position, press / select ON turn on dualstandby or
OFF turn off dualstandby. Press to confirm, then press to return to standby.
NOTE !
In frequencymode you have thirteen different settings to choose from channel step, transmit output power,
voice encrypt compress, bandwidth,receive CTCSS and DCS, transmit CTCSS and DCS, optional signal, signal
encode, mutemode, frequencyshift direction, offsetfrequency on A/B.
In channelmode the next setting are not available to change: transmit output power, receive CTCSS and DCS,
Setting channel step (STEP) ---- MENU 1
In standby, press and number and the screen will display
Press enter, arrowhead aim at "5.00" and press / to select the channel step you desired.
Press to confirm, then press to return to standby.
This transceiver has the option of 5KHz, 6.25KHz, 10KHz, 12.5KHz and 25KHz steps.
NOTE !
This transceiver has steps from 0-9, which step 0 is always open squelch. From 1 to 9 gives different levels of
noise reduction.
Setting squelch level (SQL-LE ) --- MENU 2
Select the level of squelch so that you will have no difficulty receiving the desired signal. When you set
the level too high you will loose communication in a fringe area.
2
In standby, press + number and the screen will display
Press enter, arrowhead aim at "5" position by going / to select the desired squelch.
Press to confirm, then press to return to standby.
How to operate
17
Professional FM Transceiver
18
Setting batterypack savemode (SAVE)--- MENU3
In standby, press + number and the screen will display
Press enter, arrowhead aim at "OFF" position, press / select one of 1:1/ 1:2/1:3/1:4/OFF.
Press to confirm, then press to return to standby.
1:1/1:2/1:3/1:4 means the radio receive circuit turn on and off pulse ratio.
NOTE !
This transmitpower has 10 levels can be selected, this means it will higher and higher from 1 to 10.
High/Low power can be changed during transmit. Press PTT key and topkey at the same time, this will change
High/Low power.
Selecting transmitpower (TXP)--- MENU4
In frequencymode, press + number and the screen will display
Press enter, arrowhead aim at "1" position, press / and select the desired powerlevel.
Press to confirm, then press to return to standby.
4
NOTE !
To ensure effective communications the radio's must be set to the same voice encrypt.
SCR: Use the scrambler, it can encrypt the communication and make the transceiver who does not use
the scrambler can't hear clear what you are talking, meanwhile you also can't hear clear others, what
they are talking who does not use the scrambler.
In standby, press + number and the screen will display
Press enter, arrowhead aim at "OFF" position, press / and select OFF to switch off this
function or ON to turn on SCR. Press to confirm, then press to return to standby.
Setting voice encrypt compress (SCR)--- MENU 5
5
Transmit over timer (TOT) ---- MENU 6
The TOT is designed to prevent your radio to transmit too long. When the transceiver is exceeding the
preset time limit it will stop transmitting and give you a warning signal.
This transceiver can be set in 40 steps of 15 seconds, between 15 and 600 seconds.
In standby, press + and the screen will display
Press enter, arrowhead aim at "60" and press / to select the level you need when on transmit.
Press to confirm, then press to return to standby.
6
Professional FM Transceiver
20
How to operate
19
NOTE !
When level is too high the VOX needs more volume to get activated.
When scan or radio is in using, you can not use VOX function.
Setting VOX (VOX) ---- MENU 7
In standby, press + number and the screen will display
Press enter, arrowhead aim at "OFF" position, press / to select VOX OFF or to switch on
the 1 to 10 different sensitivity-levels. Press to confirm, then press to return to standby.
7
Setting wide and narrow bandwidth (WN) ---- MENU 8
In standby, press + number and the screen will display
Press enter, arrowhead aim at "WIDE" position , press / and you can select WIDE or
NARROW bandwidth. Press to confirm, then press to return to standby.
8
It means that the time of return to radio standby state after receive the signal.
In standby, press +number and the screen will display
Press enter, arrowhead aim at "2" position, press / key and select 1 to 5 to turn on auto
Setting auto backlight (ABR) ---- MENU 9
9
ABR
NOTE !
Time of auto backlight of this transceiver has 5 levels of which 1 second difference.
backlight or when you want to switch OFF backlight. Press to confirm, then press to return
to standby.
NOTE !
This transceiver has 50 groups different CTCSS tones, see appendix (1) CTCSS frequency sheet.
Sometimes may be you only want to hear the calling which comes from the specific individual or group,
then you can ignore some(can not hear from others who using the same frequency) calling through
CTCSS/DCS. Only when receive the same signal of CTCSS/DCS, the radio will release the mutemode.
In standby, press + number and the screen will display
Press enter, arrowhead aim at "OFF" position, press / and select OFF to switch off CTCSS
or use one of the tones between 67Hz and 254.1Hz. Press and confirm, then press to return
to standby.
Setting receive CTCSS (R-CTCS) ---- MENU 10
0
Professional FM Transceiver
22
How to operate
21
NOTE !
This transceiver has 105 groups different DCS codes, see appendix (2) DCS frequency sheet. And DxxxN
means positive code, DxxxI means negative code. The range of positive code is between D023N and D754N,
negative code is between D023I and D754I.
Setting receive DCS (R-DCS) ---- MENU 11
In frequencymode, press + number and the screen will display
Press enter, arrowhead aim at "OFF" position, press / and select OFF to switch off DCS or
one of the steps from D023N to D754I. Press to confirm, then press to return to standby.
NOTE !
This transceiver has 50 groups different CTCSS tones, see appendix (1) CTCSS frequency sheet.
Setting transmit CTCSS (T-CTCS) ---- MENU 12
In standby, press + number and the screen will display
Press enter, arrowhead aim at "OFF" position, press / and select OFF to switch off CTCSS
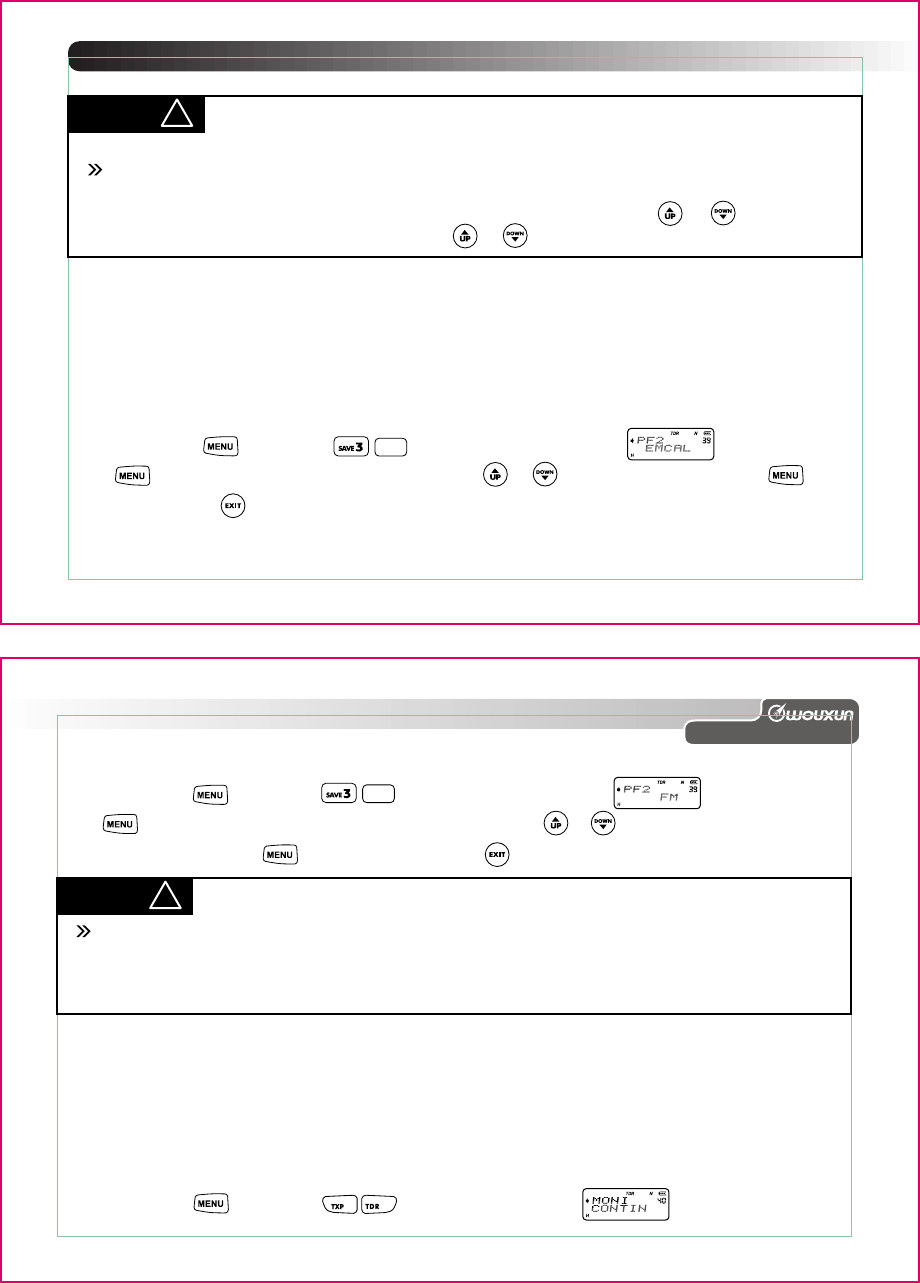
or use one of the tones between 67Hz and 254.1Hz. Press to confirm, then press to return
to standby.
2
NOTE !
This transceiver has 105 groups different DCS codes, see appendix (2) DCS frequency sheet. And DxxxN
means positive code, DxxxI means negative code. The range of positive code is between D023N and D754N,
negative code is between D023I and D754I.
Setting transmit DCS (T-DCS) ---- MENU 13
In frequencymode, press + number and the screen will display
Press enter, arrowhead aim at "OFF" position, press / and select OFF to switch off DCS or
one of the steps from D023N to D754I. Press to confirm, then press to return to standby.
NOTE !
If want to turn off all keypad voiceguide should turn off MENU15 and MENU14.
Setting voiceguide (VOICE) ---- MENU 14
In standby, press + number and the screen will display
Press enter, arrowhead aim at "ENG", press / key to either select English or OFF to switch
off the voiceguide. Press to confirm, then press to return to standby.
4
Professional FM Transceiver
24
How to operate
23
NOTE !
When MENU 14 is switched on, the voice guide gets priority.
Setting beepprompt function (BEEP) ---- MENU 15
Beepprompt is to tell you if the transceiver is operating well or has a malfunction.
We kindly advice you to switch on this function.
This function will inform you for any possible malfunction.
In standby, press + number and the screen will display
Press enter, arrowhead aim at "ON" then press / to switch on the beep or OFF when you
want to switch off the beep. Press to confirm, then press to return to standby.
5
Busy channel lockout (BCL) ---- MENU 18
This function is to prevent that interfere others who is on communicating. If the channel you have
selected which is using by other radio, at this time press PTT key, you can not transmit.
In frequencymode, press + number and the screen will display
Press enter, arrowhead aim at "OFF" position, press / and select between ON or OFF.
Press to confirm, then press to return to standby.
8
Setting DTMF sidetone (DTMFST) ---- MENU 16
DTMF sidetone gives you the opportunity to switch on or off the speaker when transmit DTMF.
The transceiver has 4 different options.
KEY: Switch on sidekey when transmitting.
ANI: Switch on the ANI sidetone when transmitting.
BOTH: Sidekey and ANI are both on.
OFF: Turn off all.
In standby, press + number and the screen will display
Press enter, arrowhead aim at "BOTH" position, press / and select one function of KEY/
ANI/BOTH/OFF. Press to confirm, then press to return to standby.
6
Setting transmit overtime alarm (TOA) ---- MENU 17
Transmit overtime alarm is the setting to alarm the user that he/she has reached the preset time and a
voiceprompt and light will flicker during transmit.
The transceiver can be set from 1 to 10 TOA in steps of 1 second.
In standby, press + number and the screen will display
Press enter, arrowhead aim at "5" position, press / to select OFF or to set 1 to 10 for the
overtime alarm. Press to confirm, then press to return to standby.
7
Professional FM Transceiver
26
How to operate
25
Priority scan function (PRI-SC) ---- MENU 20
When the transceiver is in non-priority frequencymode, it still check activity of the priority channel, once
there has an action at priority channel, the transceiver will auto work in the priority channel.
In frequencymode, press + number and the screen will display
Press enter, arrowhead aim at "OFF" position, press / to turn on or turn off.
Press to confirm, then press to return to standby.
20
Adding channelscan (SC-ADD) ---- MENU 19
This function ensure that whether frequency or channel be added to scan list or not.
In frequencymode, press + number and the screen will display
Press enter, arrowhead aim at "ON" position, press / and select ON or OFF.
Press to confirm, then press to return to standby.
9
ABR
NOTE !
This transceiver priority scan channel from 0 to 199 can selectable.
There is only dispaly a "S" on LCD screen, that means radio has startup priority channel scan.
Startup priority channel scan function needs two conditions:
1. Do priority channel scan switch on. 2. This function scan the channel which has been stored.
In frequencymode, channelmode or scanning, when transceiver detects a signal, it will transfer the priority
channel, after the signal disappeared 3 seconds if you don't do any operation, transceiver will back to
frequency and go on priority scan.
The speed of startup or resume priority scan is relative to the setting backlight. When if the backlight be set
as "1", then the speed of startup or resume priority scan will be the fastest.
When the priority channel which has been set parameter receive signal, if with the same frequency, then
radio can transfer the priority channel.
The transfered priority channel only be used to communcation, you can't do any other operation until radio
resumes frequency.
Setting priority channel scan function (PRI-CH) ---- MENU 21
This function means any channel which has been programmed can be set as priority scan channel.
In frequencymode, press + number and the screen will display
Press enter, arrowhead aim at "CH-000" position, press / select the desired channel.
Press to confirm, then press to return to standby.
2
How to operate
27
Professional FM Transceiver
28
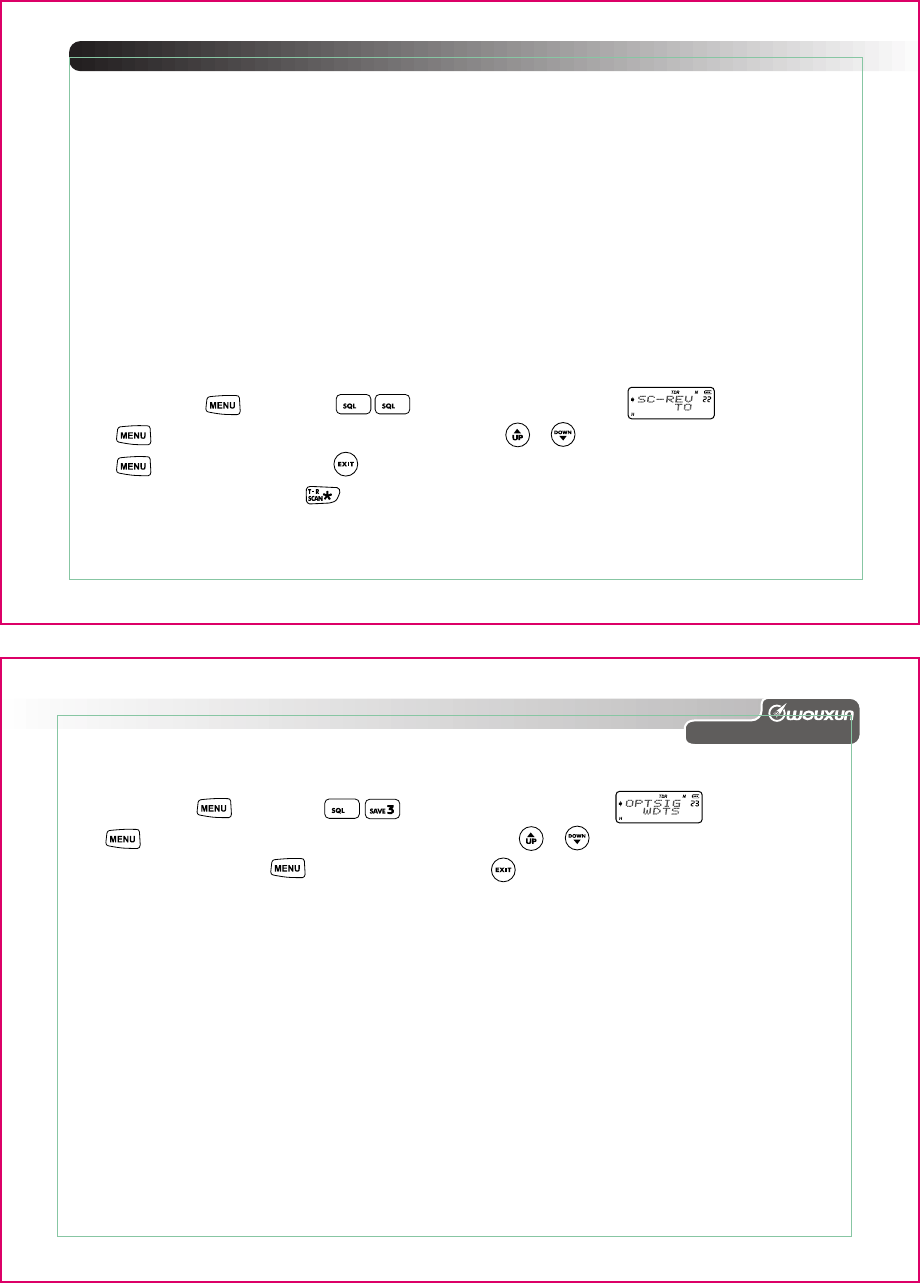
Setting scanmode (SC-REV) ---- MENU 22
This transceiver will stop scanning when detect the frequency(memory channel)
of signal.According to the method of restoring that you choose,the transceiver will
resume or stop scanning.
The transceiver has three scanmodes.
TO: After signal in channel disappears the transceiver will start scanning if without any operation within
5 seconds.
CO: After the transceiver stopped on a signal it will resume scanning again in 3 seconds when signal
disappears.
SE: Scanning will stop when receives a signal.
In standby, press + number and the screen will display
Press enter, arrowhead aim at "TO" position, press / and select TO, CO or SE.
Press to confirm, then press to return to standby.
Switch on scanning: Press the via keyboard.
2 2
Setting option signal (OPTSIG) ---- MENU 23
In standby, press + number and the screen will display
Press enter, arrowhead aim at "WDTS" position, press / select one kind of WDTS/DTMF
/2-TONES/5-TONES, Press to confirm, then press to return to standby.
All calls, group calls and selective calls
This transceiver has the functions of transmitting ANI,editing ANI and DTMF decoding, without by other
tool, it can accomplish the operation of all calls, group calls and selective calls.
How to program all calls, group calls and selective calls.
1. Program ANI
This transceiver has 3 kinds of method:
*. ANI-XXX
*. ANI-XXXX
*. ANI-XXXXX
XXX: Means can program 3 bits ANI ID CODE.
XXXX: Means can program 4 bits ANI ID CODE.
XXXXX: Means can program 5 bits ANI ID CODE.
2
How to operate
29
30
Professional FM Transceiver
3. Setting mutemode must be set as AND,the details see to the MENU (24)
4. Press PTT: Setting time according your need, the details see to the MENU (25)
5. Turn on ringtime alarm and set ringtime (Set when needed); The details see to the MENU (30) and
MENU (31)
6. Setting PTT-LT
In fact, you can choose the time of signal delay before transmit. The details see to the MENU (26)
NOTE !
Every transceiver in the group needs a unique ANI ID CODE.
Edit method: see to the MENU 48.
2. Setting all calls, group calls and selective calls.
NOTE !
Using any transceiver of group must be set turning on WDTS optional signal.
Setting WDTS optional signal, the details see to the MENU 23.
X XXXX
Grouplist A unique ANI ID CODE
1 to 9 groups From 0000 to 9999 maximum
This is how to build up ANI.
NOTE !
Every transceiver using in the group must be set the same frequency, channel and parameter.
NOTE !
This transceiver has ID memory function, after you used all calls, group calls or selective calls, then you want
to transmit again, the ID code is the same as last time you transmitted. If you want to transmit new ID code,
please press before transmitting.
This transceiver has difference of 3,4,5 bit. so all the ANI ID CODE in the group have better set the same bit.
When the bit of transmitter is lower than receive's, you can use the to make up, then you can go on
all calls, group calls or selective calls.
a. Using All calls
Press PTT to transmitting, after transmitting ANI ID CODE, input + directly by keyboard.
b. Using group calls
Press PTT to transmitting, after transmitting ANI ID CODE, input [group number] + + directly
by keyboard (Using three ID codes as an example).
c. Using selective calls
Press PTT to transmitting, after transmitting ANI ID CODE, input the ANI ID CODE you want to call by
keyboard.
#
#

How to operate
31
32
Professional FM Transceiver
DTMF, 2-TONES, 5-TONES.
1. When DTMF/2-TONES/5-TONES signaling is programmed in a frequency. Press PTT key to transmit
DTMF/2-TONES/5-TONES signal.
2. When DTMF/2-TONES/5-TONES is set in a channel , the preset functions will be activated only when
the matching DTMF/2-TONES/5-TONES signals are received.
3. Likewise, your signals will be received only by parties using the same DTMF/2-TONES/5-TONES.
4.Setting signal
*Using any one of transceiver must be set DTMF/2-TONES/5-TONES option signal, the details see to
the MENU (23).
*Setting sidetone the details see to the MENU (16), according your requirement to select.
*Mutemode should have set as AND, the details see to the MENU (24)
*Setting PTT transmit
Depend on your requirement to select one of the BOT/EOT/BOTH, the details see to the MENU (25)
*Setting S-INFO
The receiver's and the transmitter's signaling must be set the same.
*Setting PTT-LT
In fact, the signal can delay before transmitted, the details see to the MENU (26)
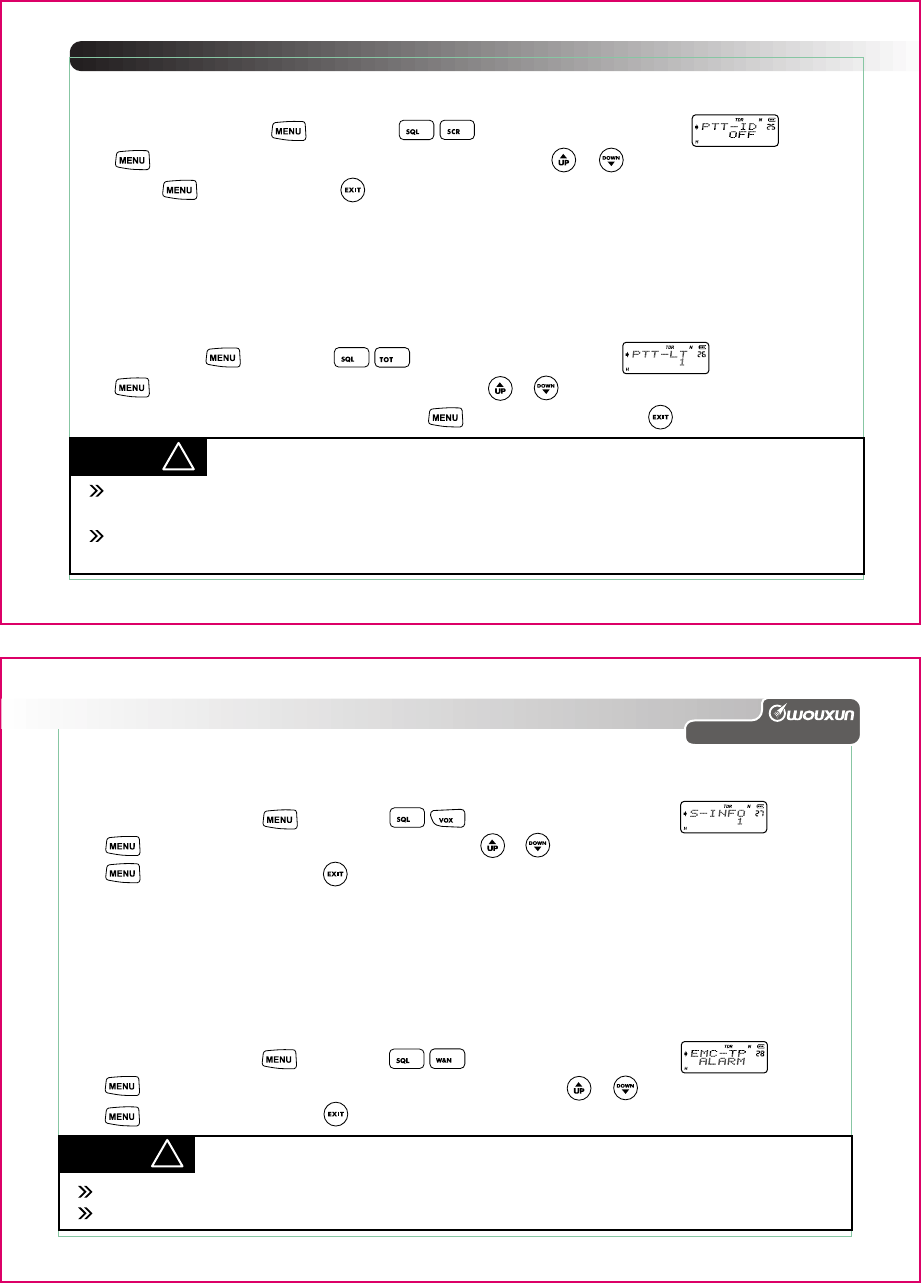
PTT ID (PTT-ID) ---- MENU 25
PTT ID means that the method of choosing the transmitting ID code.
*BOT: when press the PTT key, then radio transmits the ID code immediately.
*EOT: when release the PTT key, then radio transmits the ID code immediately.
*BOTH: when press or release the PTT key, then radio transmits the ID code immediately.
In frequencymode, press + number and the screen will display
Press enter, arrowhead aim at "QT" position, press / and select one of QT or AND or OR.
Press to confirm, press to return to standby.
2.
3.
1. QT: When the transceiver receives a signal and suited CTCSS tone it will switch on the speaker.
When transceiver has not be set a CTCSS tone, then receives a signal which can switch on
squelch it also can switch on speaker.
AND: When the transceiver receives a suited QT and DTMF signal it will switch on the speaker.
OR: When the transceiver receives a suited QT or AND signal it will switch on the speaker.
Setting mutemode (SPMUTE) ---- MENU 24
The mutemode is to turn on/off the speaker audio according to your optional signal setting.
This transceiver has three kinds of mode which can be selected.
24
How to operate
33
34
Professional FM Transceiver
Setting signal information (S-INFO) ---- MENU 27
Emergency calling type (EMC-TP)---MENU 28
This transceiver has 3 kinds function.
1. ALARM: Field alarm
2. ENI: Distant alarm
3. BOTH: Field + distant alarm
In frequency mode, press + number and the screen will display
Press key enter, arrowhead aim at “ALARM” position, press / select ALARM/ENI/BOTH
Press to confirm, then press to return to standby.
*OFF: The radio can’t transmits the ID code when turn off all.
In frequency mode, press + number and the screen will display
Press key enter, arrowhead aim at “OFF” position, press / select one of BOT/EOT/BOTH
/OFF. Press to confirm, press to return to standby.
5
2
NOTE !
When alarming, if this menu does not be set as "0", but be set one of the number between 1 and 30, then the
setting delayed time will be delayed to transmit signalcode and alarmcode.
When the frequency has set WDTS/DTMF /2-TONES/5-TONES signals, if this menu does not be set as "0", but
be set one of the number between 1 and 30, then the setting delayed time will be delayed to transmit signalcode.
Setting ANI ID CODE transmit (PTT-LT) ---- MENU 26
Setting ANI ID CODE on transmit is needed to send ANI everytime when you press your PTT key.
1-30: Permit transmit ANI delayed time from 1 to 30. Unit: 100ms
0: Do not delay to transmit ANI ID CODE
In standby, press + number and the screen will display
Press enter, arrowhead aim at "5" position, press / select 1 to 30 for delay transmit ANI
or OFF to switch off ANI delay transmit. Press to confirm, then press to return to standby.
6
2
This function means select information code which be used to program signal.
In frequency mode, press + number and the screen will display
Press enter, arrowhead aim at "1" position, press / select from 1 to 15.
Press to confirm, then press to return to standby.
7
2
NOTE !
In frequencymode or channelmode, only be set as ENI and BOTH, then can use the alarm channel to alarm.
In frequencymode or channelmode, if you do not set alarm channel, then it will alarm at the present frequency or channel.
28
How to operate
35
Professional FM Transceiver
36
Edit channelname (CHNAME) ---- MENU 32
1.
2.
3.
Channelname can be made up of 26 letters (A to Z), 10 numbers (0 to 9) or (?) (+) (-), with any of
the 3 last symbols.
Channelname can have a length of maximum of 6 bits or you can edit one of the bits from 1 to 6.
When you select the (-) symbol it means that the bit is blank.
Edit method
1. Via KG-699E software.
Setting ringtime(RING-T)---MENU 31
It will switch on the speaker when it is over the preset ring time.
In standby, press + number and the screen will display
Press enter, arrowhead aim at “0” position, press / to select the time of the ring between
0 and 10. Press to confirm, then press to return to standby.
Emergency calling channel (EMC-CH)---MENU 29
Select any channel which have set for emergency calling.
In standby mode, press + number and the screen will display
Press key enter, arrowhead aim at “CH-000” position, press / select the desired channel,
Press confirm, then press to return to standby.
29
ABR
Select ringmode (RING-M)---MENU 30
Setting calling ring means after the transceiver receive the matching signal, it will be announced from
the speaker.
This transceiver has 4 kinds ringmode can be selectable.
SOUND:Turn on ring
BIV: Turn on libration
BOTH: Turn on ring and libration
OFF: Turn off all.
In frequencymode, press + number and the screen will display
Press key enter, arrowhead aim at “SOUND” position, press / select one of SOUND/
BIV/BOTH/OFF. Press confirm, then press to return to standby.
0
NOTE !
This transceiver has 10 different steps of ringtime of which every step is 1 second difference, this means that
0 will switch off the ring.
How to operate
37
Professional FM Transceiver
38
Setting transmit segment when in dual standby (TDR-AB) ---- MENU 33
Edit Channelname
1.
2.
3.
At least one channel should have been stored.
The transceiver should be work in channelmode.
Enter the channelname edit menu, then press / to select character, press to select edit position.
2. Via keyboard of transceiver.
Edit step
If the transceiver works in frequencymode, set the workmode as NAME in the display then
press and power on again.
If the transceiver works in CH mode, then go through MENU 34 to set display to NAME.
Select the desired channel, press + + + and then the screen will display 6 rails,
press / and select character then press , press / again to select the second
character, after selecting the sixth character press to confirm, press to exit.
The screen will display the channelname and show the order of this channel on top right corner.
1.
2. 2
NOTE !
Setting this function you must turn on dualstandby at first.
When in dualstandby,press PTT to transmit A segment or B segment.
The transeiver will transmit on A segment or B segment when switch on the dualfrequency.
In frequencymode, press + number and the screen will display
Press enter, arrowhead aim at "A" position, then press / selected A or B. Press to
confirm, then press to return to standby.
Setting A segment channel display mode (CA-MDF)---MENU 34
This transceiver has three selectable display modes: channelorder display, channelfrequency
+ channelorder display, channelname + channelorder display.
In standby, press + number and the screen will display
4
1. Channelorder display mode
Press enter, press / select CH and the screen will display
Press to confirm, then press to exit.
39
How to operate
Professional FM Transceiver
40
Press to confirm, then press to exit.
Channelname display mode: To operate this function you need to edit the channelname first or it will
still display the channelorder. See details of channelname edit in MENU 32.
2.
3.
Channelfrequency + Channelorder display mode
Press enter, press / select FREQ and the screen will display
Press to confirm, then press to exit.
Channelname + Channelorder display mode
Press enter, press / select NAME and the screen will display
Setting B segment channel display mode (CB-MDF)---MENU 35
This transceiver has three selectable display modes: Channelorder, channelfrequency + channelorder
and channelname + channelorder.
In standby, press + number and the screen will display
5
1. Channelorder dispay mode
Press enter, press / select CH and the screen will display
Press to confirm, then press to return to standby.
2.
3.
Channelfrequency + Channelorder display mode
Press enter, press / selcet FREQ and the screen will display
Press to confirm, then press to return to standby.
Channelname + Channelorder display mode
Press enter, press / select NAME and the screen will display
Press to confirm, then press to return to standby.
Channelname display mode: To operate this function you need to edit the channelname first or it will
still display the channelorder. See details of channelname edit in MENU 32.
Setting keyboard lock (AUTOLK) ---- MENU36
The transceiver has two options, auto lock and manual lock.
AUTOLK: When you set autolock the keyboard will be locked within 15 seconds.
To release keyboard press for more than 2 seconds.
OFF: Turn off auto lock
In frequencymode, press + number and the screen will display
Press enter, arrowhead aim at "OFF" position, press / and select AUTO for autolock or
OFF to switch off autolock. Press to confirm, then press to return to standby..
#
6
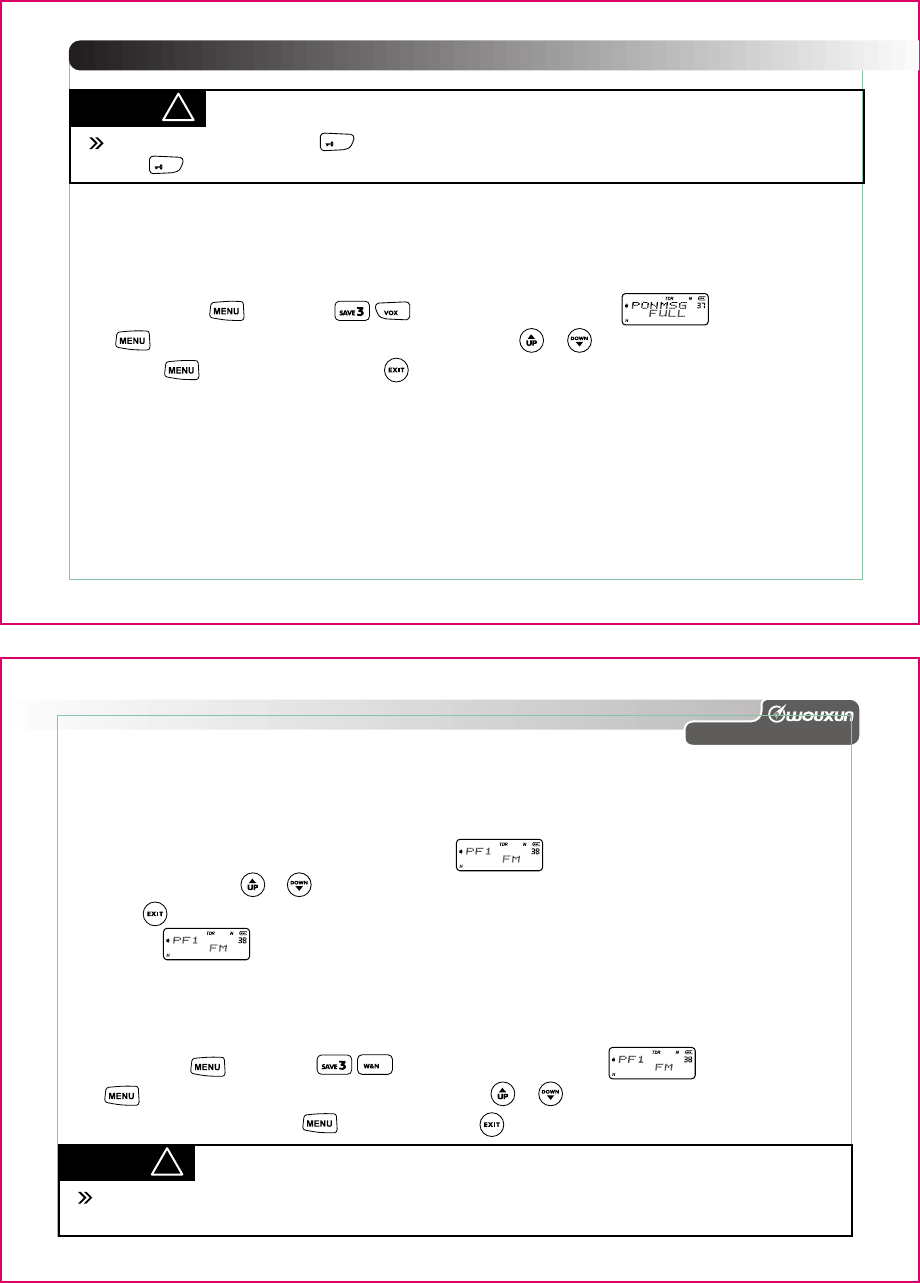
Setting sidekey 1(PF1)---MNEU 38
This transceiver sidekey 1 has 5 kinds function can be selected:
1.FM: FM radio key
2. CALL: Signal calling at present.
3. NO-SUB: Cancel receive DCS or CTCSS.
4. JP-PRI: Switch to priority scan channel.
41
How to operate
Professional FM Transceiver
42
NOTE !
Manual lock: In standby, press for more than 2 seconds will lock keyboard, release keyboard
press for more than 2 seconds.
#
#
Setting power on message (PONMSG) ---- MENU 37
Transceiver power on message:
FULL: Full display BATT-V: Display the current voltage of batterypack MSG: display "Best Wishes"
In standby, press + number and the screen will display
Press enter, arrowhead aim at "FULL" position, press / and select one of FULL/BATT-V/
MSG, Press to confirm, then press to return to standby.
7
NOTE !
When in FM radio, the present frequency or channel are still in standby, if transceiver receives a signal,it will
return to two-way radio, After the signal disappeared 5 seconds, it will auto return to FM radio. If you want
5. JP-EMC: Switch to emergency calling mode.
1. Select FM radio function.
In standby, press the sidekey 1 to switch on FM radio,this FM radio is frequency modulation, frequency
range is 87-108MHz, and the screen will display
a. In FM radio, press / or number key to select program.
b. Press , you can check the working frequency and channel, after 2 seconds the screen will
resume , the radio works in normally when you are on operation.
c. Press PTT, sidekey 2 and topkey, it will into the relevant operation.
When you want to turn off radio, press sidekey 1 again.
When you turn on the FM radio, you should install supplied antenna.
In standby, press +number and the screen will display
Press enter, arrowhead aim at "FM" position, press / and select one of the FM/CALL/
NO-SUB/JP-PRI/JP-EMC, press to confirm, press to return to standby.
8
How to operate
43
Professional FM Transceiver
44
NOTE !
to exit FM radio, please press sidedey 1 again.
You can use the software to edit the channel of FM radio, make the radio can display the frequency and
radio's name on LCD screen, after you have succeed in programming, press the sidekey 1 to turn on FM radio,
now you not only can use the channel knob to switch channel, but also can use / to switch.
If the radio don't have channel knob, you can use / to switch FM radio channel.
Signal calling key
In standby, press + number and the screen will display
Press enter, arrowhead aim at “EMCALL” position, press / select one of function from
CALL01 to CALL15, press to confirm, then press to return to standby.
Setting topkey (PF2) ---MENU 39
The topkey offers two kinds of function:
EMCALL: Start up alarm function
CALL01-CALL15:Signal calling key
Select EMCALL function
In standby, press + number and the screen will display
Press enter, arrowhead aim at “EMCALL”, press / and select EMCALL. Press and
confirm, then press to return to standby.
When you have selected EMCALL, in standby press the topkey and from your speaker an alarm will
sound and the red and green lamp will flicker at the same time. Press the topkey again to exit.
9
ABR
Define MONI key (MONI) ---- MENU 40
This function is defined for squelch diagram.
Total have 2 kinds function can be selected.
CONTIN: Should always press side key 2 all the time to persist turn off squelch diagram.
PRESS: Just need press side key 2 one time to persist turn off squelch diagram.
In standby, press + number and the screen display
40
NOTE !
CALL01-CALL15: Means the information code which has been set as calling signal, when PF2 has been set
as one kind of CALL01-CALL15, then press PF2 one time, meanwhile the LED A and B flicker each other.
When the information code of signal has been set as the same as others and other functions are also the
same, then press PTT you can communicate each other, also you can communicate when the LED is flickering.
9
ABR
How to operate
45
Professional FM Transceiver
46
Press enter, arrowhead aim at “CONTIN” position. Press / select CONTIN/PRESS
Press confirm, then press to return to standby.
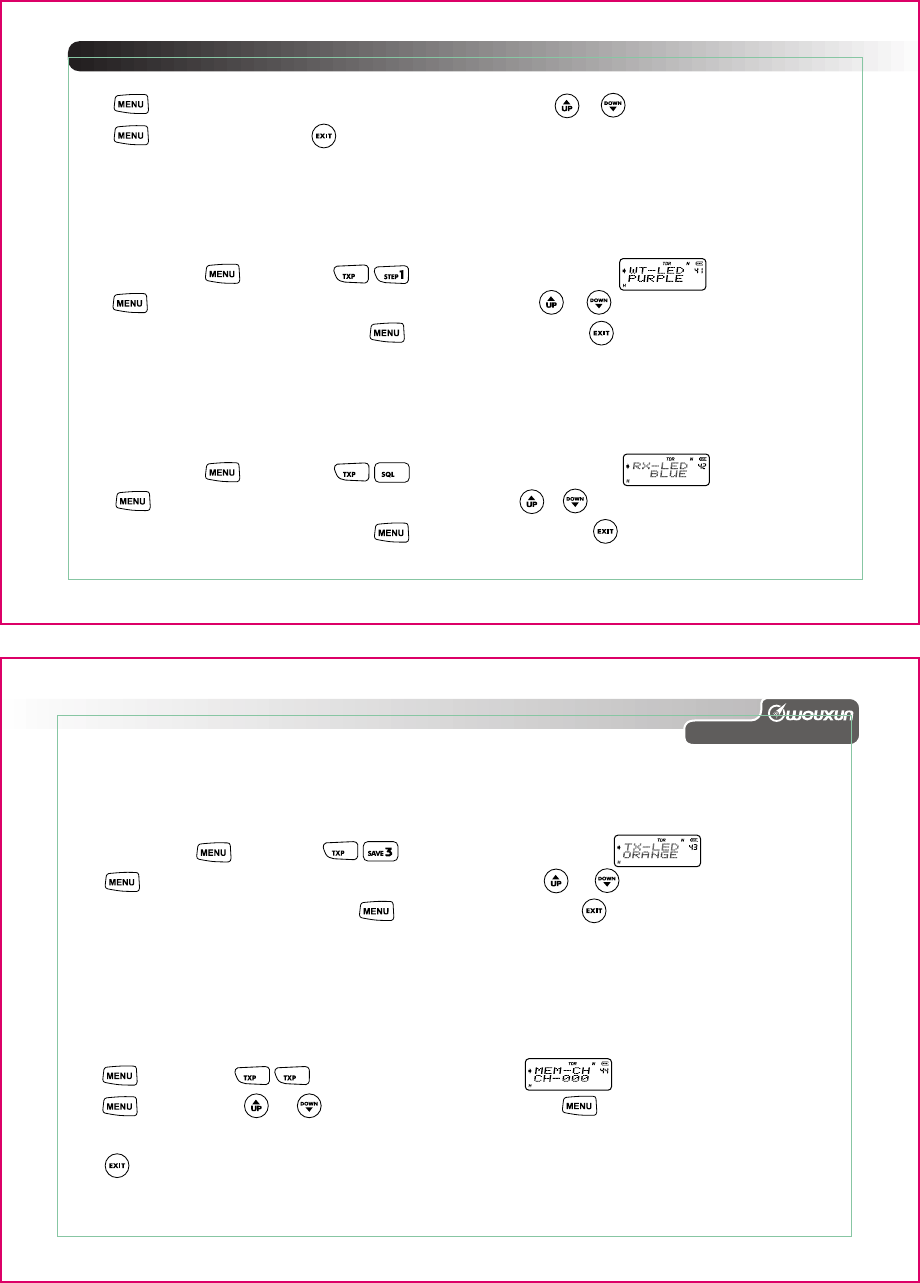
Selecting standby display color (WT-LED) ---- MENU 41
The transceiver has four colors available:
BLUE / ORANGE / PURPLE/OFF
In standby, press + number and the screen will display
Press enter, arrowhead aim at "PURPLE" position, press / and select the desired color of
BLUE / ORANGE / PURPLE/OFF. Press to confirm, then press to return to standby.
4
Selecting receive display color (RX-LED) ---- MENU 42
The transceiver has four colors available:
BLUE / ORANGE / PURPLE/OFF.
In standby, press + number and the screen will display
Press enter, arrowhead aim at "BLUE" position, press / and select the desired color of
BLUE / ORANGE / PURPLE/OFF. Press to confirm, then press to return to standby.
42
When transceiver works in frequencymode or in standby, input the frequency and any kind of parameter
what you want to store.
Press + number and the screen will display
Press enter, press / to select channel order, press to store and you will hear a
voiceprompt if it is stored.
Press to exit, at this moment the channel should be co-channel frequency channel.
When you need to store dis-channel, repeat the above procedure, after you stored, you will hear a
voiceprompt "store transmit".
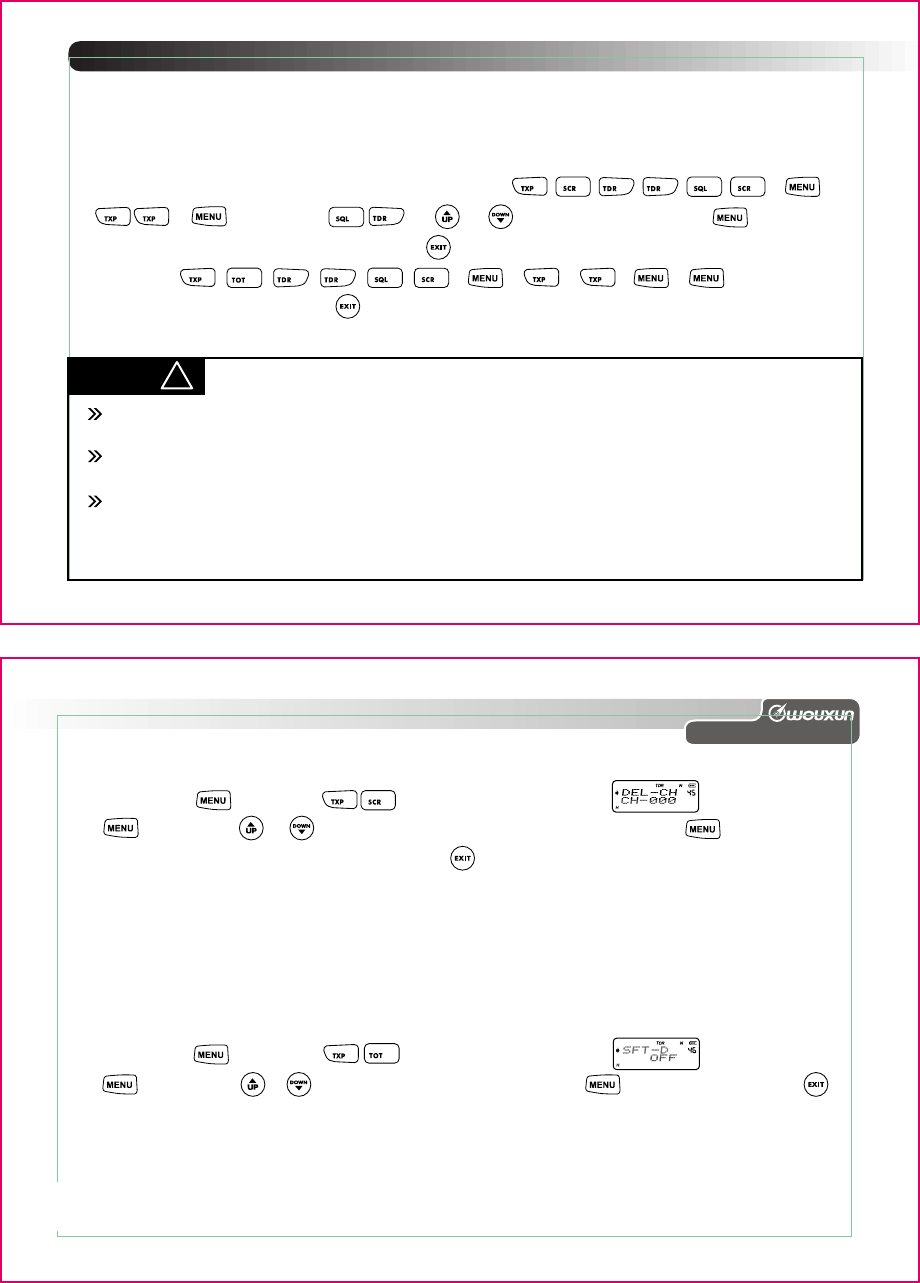
Setting memory channel=setting co-channel and dis-channel (MEM-CH) ----
MENU 44
4 4
Selecting transmit display color (TX-LED) ---- MENU 43
The transceiver has four colors available:
BLUE / ORANGE / PURPLE/OFF
In standby, press + number and the screen will display
Press enter, arrowhead aim at "ORANGE" position, press / and select the desired color of
BLUE / ORANGE / PURPLE/OFF. Press to confirm, then press to return to standby.
4
How to operate
47
Professional FM Transceiver
48
Offsetfrequency is the difference between the transmit and receive frequency. The transceiver offset
range can be from 0 to 99.950MHz.
Setting offsetfrequency (OFF-SET) ---- MENU 47
NOTE !
If you want to set CTCSS, D.C.S, W&N etc functions on parameter please setting before stored. Then it can
store with frequency in channel.
The transmitting only stored transmit frequency, if you want to store MENU function and parameter, please
store with the receiving.
If you want to store by manual, in frequencymode, and the channel should be vacant, then you can go on
operation of store receiving and transmitting or you can only go on the operation of storing transmitting.
If the channel is not vacant and you want to go on the operation of storing receiving and transmitting, you
should delete channel.
1.
2.
When the transceiver works in frequency mode, input , +
+ , then press or / key select CH-20, press key to confirm,
voice prompt will tell you it is stored, press to exit;
Then input + + + + + and voiceprompt
will tell you it is stored + press to exit.
The dis-channel is stored.
3.
Example:
You want 450.025MHz for receive and 460.025MHz for transmit and stored in CH-20, then act as
follows:
452
05
420
4
02
05
64 4
0
4
In standby, press + number and the screen will display
Press enter, press / to select the channel you want to delete, press to confirm.
The select channel and message are deleted, press to return to standby.
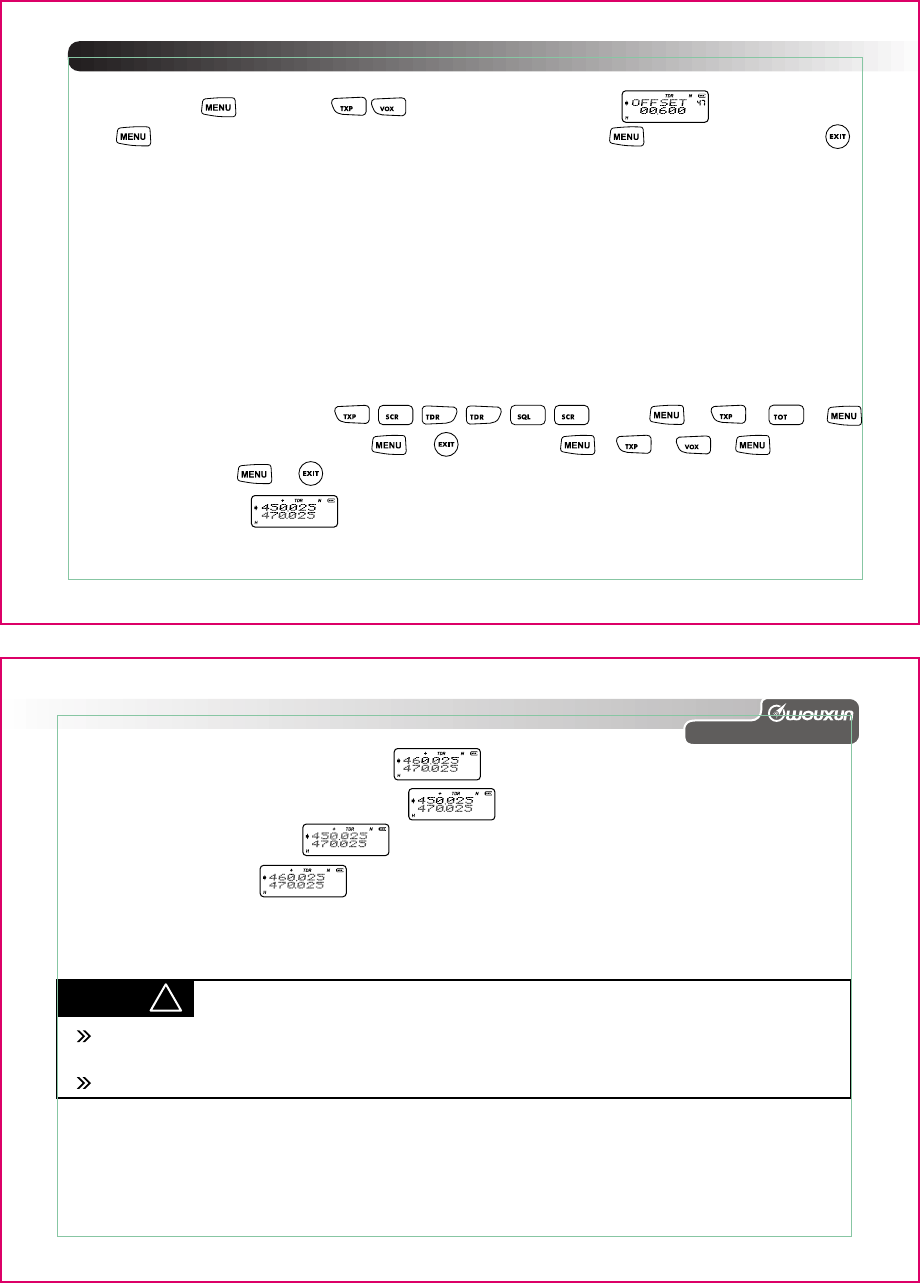
Delete channel (DEL-CH) ---- MENU 45
5
4
Frequencyshift means that:
Setting frequencyshift direction (SFT-D) ---- MENU 46
1.
2.
3.
The transmit frequency is higher than receive frequency. This is called positive offset (+)
The transmit frequency is lower than receive frequency. This is called negative offset.(-)
Turn off frequencyshift.
In standby, press + number and the screen will display
Press enter, press / and select one of +/-/OFF. Press to confirm, then press to
return to standby.
46
How to operate
49
When press PTT key the screen will display
When you release PTT the screen will display
Now the receiving frequency is
The transmit frequency is
Setting VOX-T (VOXT) ---- MENU 50
ANI CODE edit (ANI) ---- MENU 48
Any transceiver of group must edit different ANI code.
The purpose of setting VOX-T is to avoided the problem: When after transmitted, transceiver will return
to receivedmode immediately, but you can't ensure whether last part of calling can be transmitted or not,
so you can set a proper VOX-T then makes calling can be transmitted exactly.
NOTE !
Because this transceiver has different of 3 bits, 4 bits and 5 bits, so the length of ANI CODE must keep the
same as which used in group.
ANI CODE only can be programmed via KG-699E programming software.
Professional FM Transceiver
50
In standby press + number and the screen will display
Press enter, press number 0 to 9 to select offsetfrequency. Press to confirm, then press
to return to standby.
The frequencyshift direction and offsetfrequency can only be programmed when the transceiver works
in frequencymode, in order to let transmitting and receiving under different frequency.
47
Follow the next steps:
1.
2. Set working frequency.
Set frequencyshift direction and offsetfrequency.
Example: In frequencymode, the transceiver will work on receive frequency 450.025MHz and
transmit frequency will be 460.025MHz.
In frequencymode, order input , press + + +
and select positive offset (+); press + , then press + + + + numberkey
to select 10.000+ + and the frequencyshift direction plus offsetfrequency are complete.
The screen will display
452
0546
0
47
Professional FM Transceiver
52
51
How to operate
Setting reverse frequency function
When using reverse frequency function, the transceiver transmit-and receivefreuency will interchange
and the setting of CTCSS and/or DCS encode and decode will interchange.
Operating reverse frequency function:
In standby, press and this will turn on reverse frequency function, press again and this will
turn off reverse frequency function.
SCAN
T
-
RSCAN
T
-
R
Be careful, don't set VOX-T to a long time.
This transceiver total has 20 levels, unit: 100ms
In standby, press +number and the screen will display
Press enter, arrowhead aim at "5", press / and select one of level between 1 and 20 or 0
not allow delay transmit, press to confirm, then press to return to standby.
50
Companding (COMP) ---- MENU 51
COMP: Use voice compress technology to reduce the noise when on talking, make the voice clear.
In standby, press + number and the screen will display
Press enter, arrowhead aim at "OFF" position, press / to select ON or OFF.
Press to confirm, then press to return to standby.
5
The transceiver has a menu which resets VFO and ALL messages.
When you use RESET VFO all parameters of menu will return to factory default.
When you use RESET ALL all menu and channel parameters will return to factory default.
Setting reset (RESET) ---- MENU 52
All message reset (ALL):
In standby, press + number the screen will display
Press enter, press / and select ALL, press and the screen will display
Press again and the screen will display
When reset has worked well, the transceiver will auto power off and auto switch on again.
2.
52
1. MENU reset (VFO):
In standby, press + number and the screen will display
Press enter, press / select VFO, press key and the screen will display
Press again and the screen will display
When the reset has worked well the transceiver will auto power off and auto switch on again.
52
53
How to operate
Setting transmit overtime prompt
When transmitter works longer than preset time, the transceiver will announce "transmit overtime" by
voice and stops transmitting. If you want to transmit again, please press PTT. (Setting overtime prompt
please see MENU 6)
Adding channelscan
Edit method: Strictly via KG-699E programming software.
Only scan according programming list which have added channel scan on programming software.
Using wireclone
Switch sourceradio on,after you have
connected the targetradio to the sourceradio
via the cloningcable,push the [MONI] key
and the sourceradio starts cloning.
Targetradio
LED is flashing red during cloning.
LED goes out in case of successful cloning.
LED glows continuous red in case of cloning
failure.
LED is flashing green during cloning.
LED will switch OFF when cloning complete.
Wireclone function
Lowvoltage batterypack voiceprompt
When the batterypack has lowvoltage, the transceiver will sound "low batterypack"voice prompt.
Professional FM Transceiver
54
Programming repeater function
Most repeaters use standard or different splits and/or matching CTCSS/DCS or DTMF signals.
When you need to join a repeater, you need to set different parameters on receive and transmit.
Example: The repeater transmit frequency is 450.025MHz, CTCSS value is 67Hz, the receive frequency
is 460.025MHz, CTCSS value is 254.1Hz.
When the transceiver needs to join the repeater, you need to follow the following steps:
Set receive frequency, CTCSS value and transmitting CTCSS value and store this on appointed
channel, example channel 20. The transceiver in frequencymode, setting receive frequency is
460.025MHz, receiving CTCSS value is 254.1 Hz, transmitting CTCSS vallue is 67Hz, and store to
channel 20. The operation is as follows:
In frequencymode, order input + + + + + , + +
+ , press / and select CTCSS value 254.1 + + ; + + + ,
press / and select CTCSS value 67Hz + + , + + + +
+ + voice prompt receive store, press key.
1.
2. Setting transmitfrequency and store in appoint channel 20. The transceiver in
frequencymode, setting transmitfrequency as 450.025MHz, and store in channel 20.
4
02
05
60
2
2
4
0
4
55
How to operate
Professional FM Transceiver
56
Trouble shooting
Please check carefully if your transceiver has problems by following this chart.
If you maintain to have trouble you can reset your transceiver and very often this will eliminate your
problem.
Problem Possible Cause Possible Solution
Transceiver will not
switch on.
The receiverlight is
on and there is no
sound from the
speaker.
The powerswitch is not adjusted well.
Confirm if your CTCSS/DCS or DTMF
tone is the same as others.
Confirm if you use the right mutemode.
The batterypack is not adjust properly.
The batterypack maybe exhausted.
The batterypack is getting too old.
1.
2.
3.
Re-install the batterypack.
Charge the batterypack.
Change the batterypack.
1.
2.
3.
Turn the volumecontrol.
Reset the CTCSS/DCS.
Reset the mutemode.
1.
2.
3.
1.
2.
3.
There is no reception
Check if you have installed your antenna
right.
The signal you are receiving is very weak.
Install the supplied antenna.
Move the radio around till you
receive the desired signal or press
to reset and press again
to go to the right channel.
1.
2.
1.
2.
How to use your intelligentcharger
When the poweradapter is connected the intelligentcharger, the poweradapter should be plugged into
the matchingvoltage. The intelligentcharger will flicker once, then go into the standby mode which
means that you can charge the batterypack; When you plug in the batterypack, the intelligentcharger
will switch to red LED which means that it has being charged.
When the green light flickers, the batterypack is fully charged.
After you plug in the batterypack which the voltage is lower than 6V (it is lower than 6V if you can
not power on the transceiver), the red LED flickers which means that the batterypack is being trickle
charged by intelligentcharger and this will last about 10 minutes. When the light turns red, it will go
into the normal charge.
After you plug in the batterypack which the voltage is higher than 6V(it is higher than 6 V if you can
power on the transceiver), the red LED flickers, at this time, please confirm whether the batterypack is
plugged in right with intelligentcharger.
1.
2.
3.
4.
Press , turn on the power at the same time, the transceiver work in channel mode at this time,
press / select channel 20, the transceiver can join repeater.
3.
In frequencymode, order input + + + + + , + +
+ ; + + . Voiceprompt transmit store, press key.
02
054 4
20
45

Appendix 1
1
2
3
4
5
6
7
8
9
10
CTCSS
67.0
69.3
71.9
74.4
77.0
79.7
82.5
85.4
88.5
91.5
11
12
13
14
15
16
17
18
19
20
94.8
97.4
100.0
103.5
107.2
110.9
114.8
118.8
123.0
127.3
21
22
23
24
25
26
27
28
29
30
131.8
136.5
141.3
146.2
151.4
156.7
159.8
162.2
165.5
167.9
31
32
33
34
35
36
37
38
39
40
171.3
173.8
177.3
179.9
183.5
186.2
189.9
192.8
196.6
199.5
41
42
43
44
45
46
47
48
49
50
203.5
206.5
210.7
218.1
225.7
229.1
233.6
241.8
250.3
254.1
Problem Possible Cause Possible Solution
Keyboard and PTT
switch do not work.
The receivelight is on
and you can not
transmit.
If you have set transceiver to busychannel
lockout.
The keyboard is locked.
RADIO "mode" is switched on, see displayFM.
1.
2. Set keyboard to free.
Please exit RADIO mode.
1.
2.
Switch off busychannel
lockout.
You can not store
certain settings. In channel mode or frequency+channel
mode you cannot set parameters. Set transceiver to frequency
mode.
Autotransmit when
you are in standby. The VOX level is set too LOW. Switch off VOX or set VOX to
a HIGHER level.
During communication
you receive other
group(s) or receive
distorted signal.
The frequency and the CTCSS/DCS are
the same as other users. Change the setting of CTCSS/
DCS,frequency or channel.
57
Trouble shooting
Professional FM Transceiver
58
Technology parameter
Appendix 2
1
2
3
4
5
6
7
8
9
10
11
12
13
14
15
DCS
D023N
D025N
D026N
D031N
D032N
D036N
D043N
D047N
D051N
D053N
D054N
D065N
D071N
D072N
D073N
16
17
18
19
20
21
22
23
24
25
26
27
28
29
30
D074N
D114N
D115N
D116N
D122N
D125N
D131N
D132N
D134N
D143N
D145N
D152N
D155N
D156N
D162N
31
32
33
34
35
36
37
38
39
40
41
42
43
44
45
D165N
D172N
D174N
D205N
D212N
D223N
D225N
D226N
D243N
D244N
D245N
D246N
D251N
D252N
D255N
46
47
48
49
50
51
52
53
54
55
56
57
58
59
60
D261N
D263N
D265N
D266N
D271N
D274N
D306N
D311N
D315N
D325N
D331N
D332N
D343N
D346N
D351N
61
62
63
64
65
66
67
68
69
70
71
72
73
74
75
D356N
D364N
D365N
D371N
D411N
D412N
D413N
D423N
D431N
D432N
D445N
D446N
D452N
D454N
D455N
59
Technology parameter
76
77
78
79
80
81
DCS D462N
D464N
D465N
D466N
D503N
D506N
82
83
84
85
86
87
D516N
D523N
D526N
D532N
D546N
D565N
88
89
90
91
92
93
D606N
D612N
D624N
D627N
D631N
D632N
94
95
96
97
98
99
D645N
D654N
D662N
D664N
D703N
D712N
100
101
102
103
104
105
D723N
D731N
D732N
D734N
D743N
D754N
Professional FM Transceiver
60
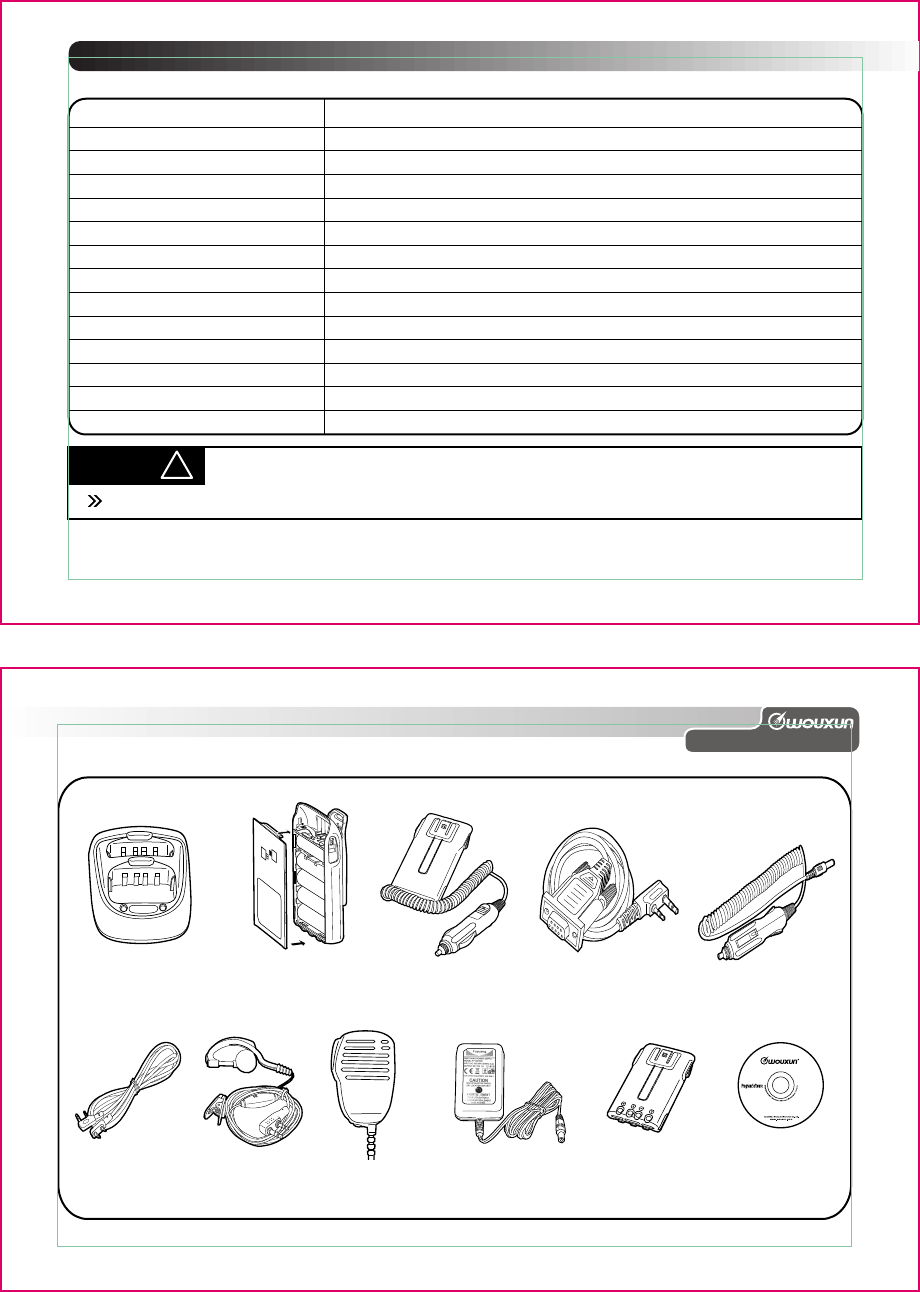
UHF: 406.125-469.975MHz
200 channels
7.4V DC
-30*(-22F) to +60*(140F)
Co-channel or Dis-channel simplex
UHF:4W
F3E(FM)
* ±5KHz
< -60dB
±5 ppm
< 0.2 µV
*700mW
250g
62 X 105 X 39 (mm) 2.44x4.13x1.54(inch)
Frequencyrange
Memorychannels
Voltage
Working temperature
Channels
Poweroutput
Mode
Maximum deviation
Adjacent channel power
Stability
Sensitivity
Audio output power
Weight
Size
NOTE !
Specifications are subject to change without notice.
Dual slot charger "AA" batterypack Programmingcable
Wireclonecable Headset
Eliminator
Speaker/MIC Programming
Software
1700mAh Li-ion
batterypackSwitching adapter
Carcharger
61
Technology specification
Professional FM Transceiver
62
Optional accessories

English Version:699E-A-0811-V1
endeavors to achieve the accuracy and completeness of
this manual,but is not liable for any possible omission and printing
errors.All the above specifications are subject to change by
without prior notice.
63
Announce