RM Acquisition 01003A GPS navigation User Manual DES 1496 TND 765 User Manual 0106 061915 JS indd
RM Acquisition LLC GPS navigation DES 1496 TND 765 User Manual 0106 061915 JS indd
UserManual.wiki
>
RM Acquisition
>
01003A User Manual
>
User Manual Part 2
Contents
1.
user manual part1
2.
User Manual Part 2
3.
user manual Part 3
4.
user manual part4
5.
user manual part2
6.
user manual part3
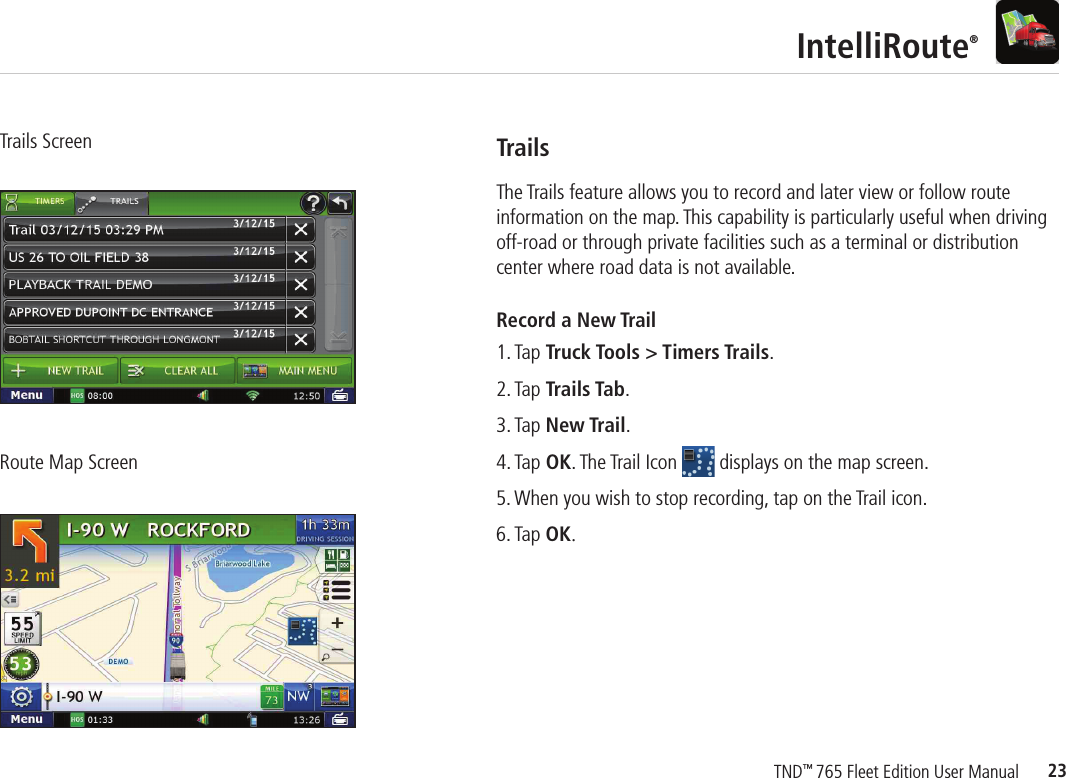
User Manual Part 2
Navigation menu
Upload a User Manual
Namespaces
Wiki Guide
HTML
PDF
Info
Views
User Manual
Discussion / Help
Navigation