Realtek Semiconductor RTL8192EHMC 802.11 b/g/n RTL8192E half miniCard User Manual unprotected UserMan 2 TX2 RTL8192EHMC Revised3
Realtek Semiconductor Corp. 802.11 b/g/n RTL8192E half miniCard unprotected UserMan 2 TX2 RTL8192EHMC Revised3
Contents
- 1. Manual
- 2. Users Manual
- 3. User manual 1 of 3
- 4. User manual 2 of 3
- 5. User manual 3 of 3
User manual 2 of 3

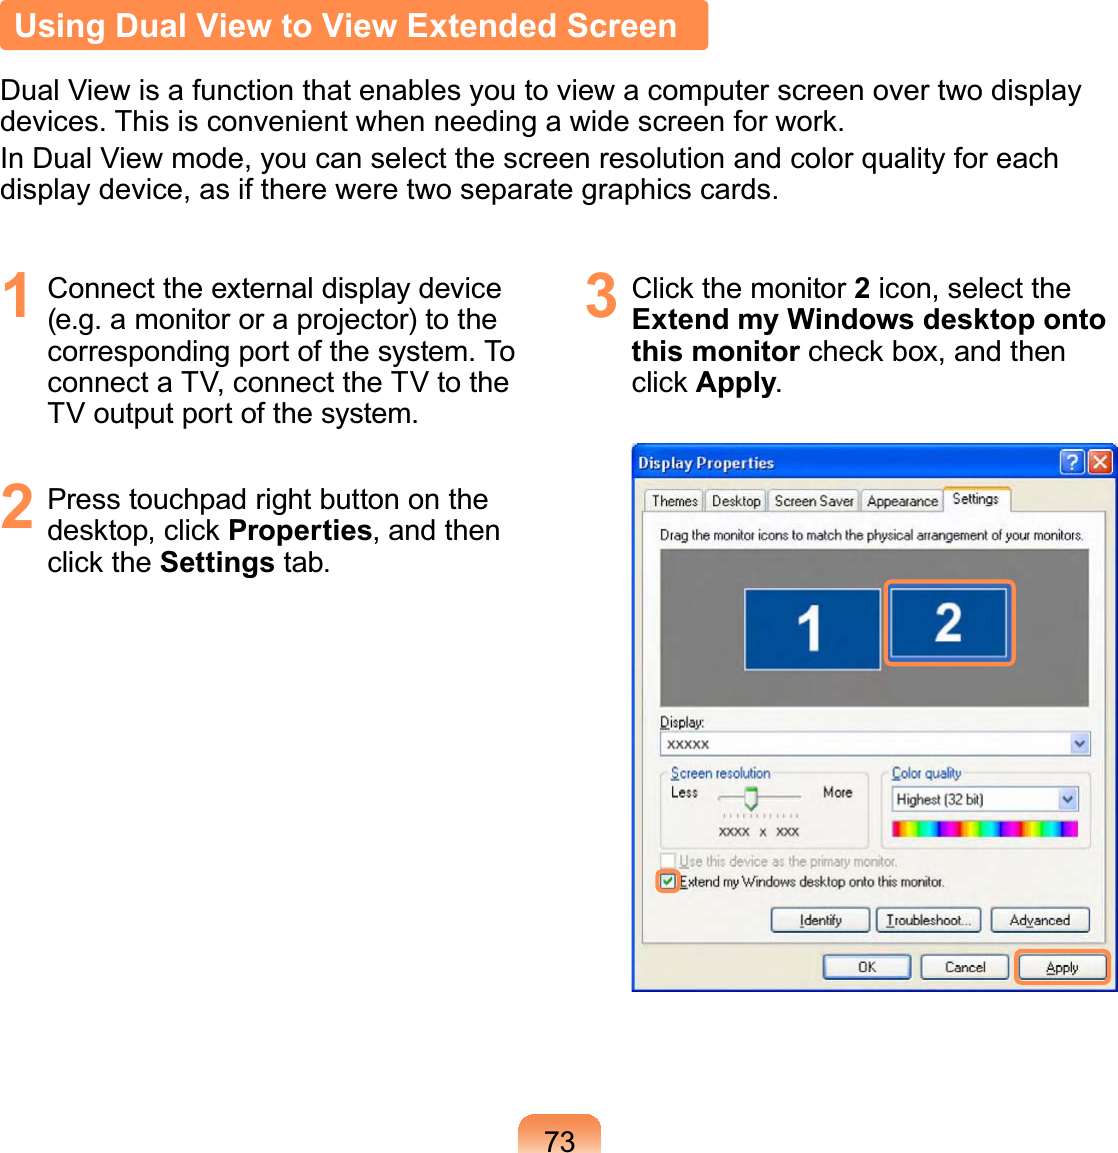
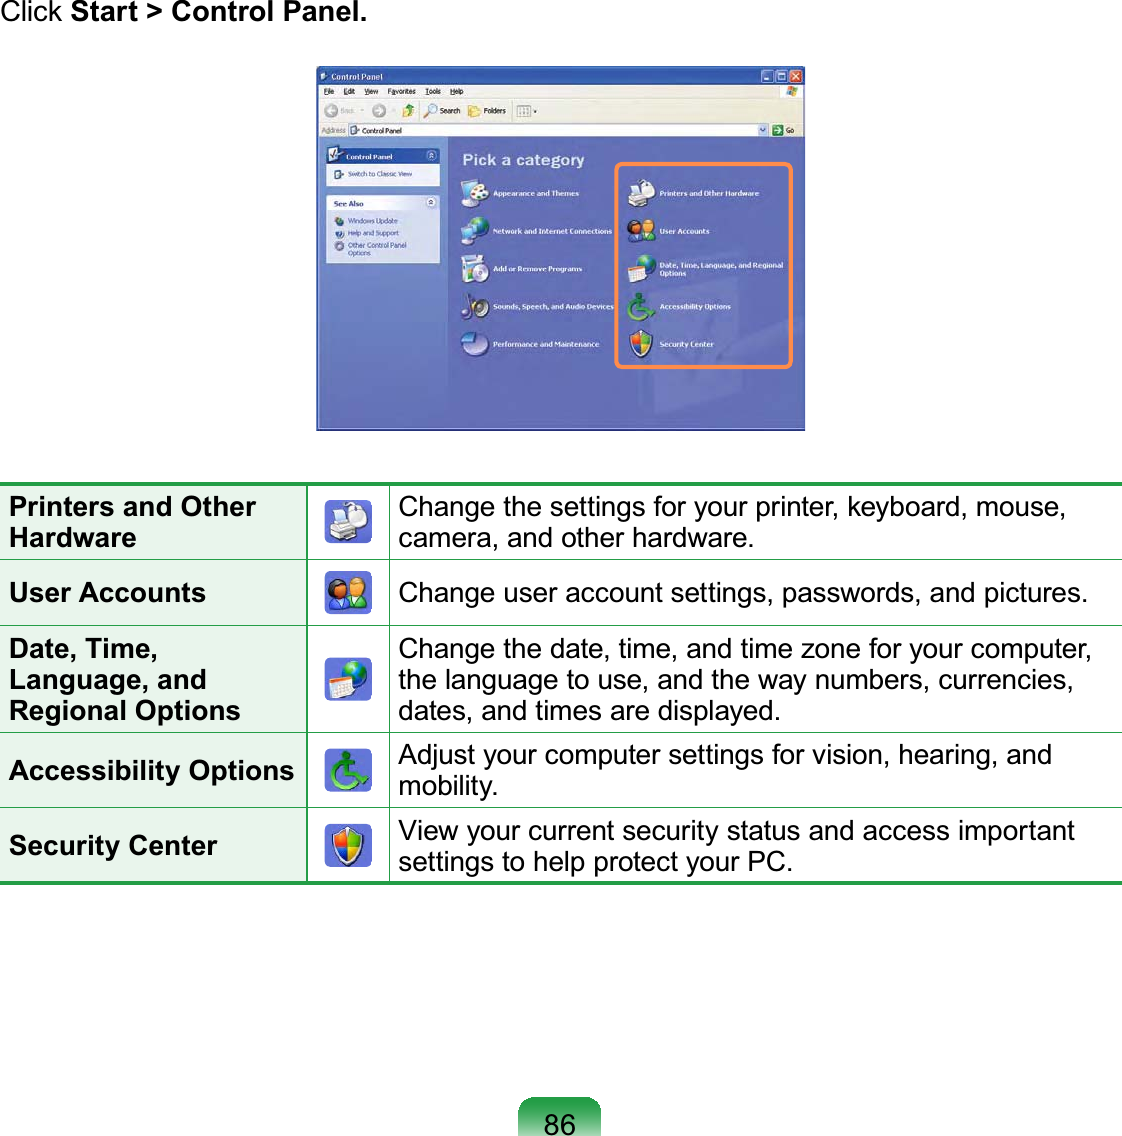
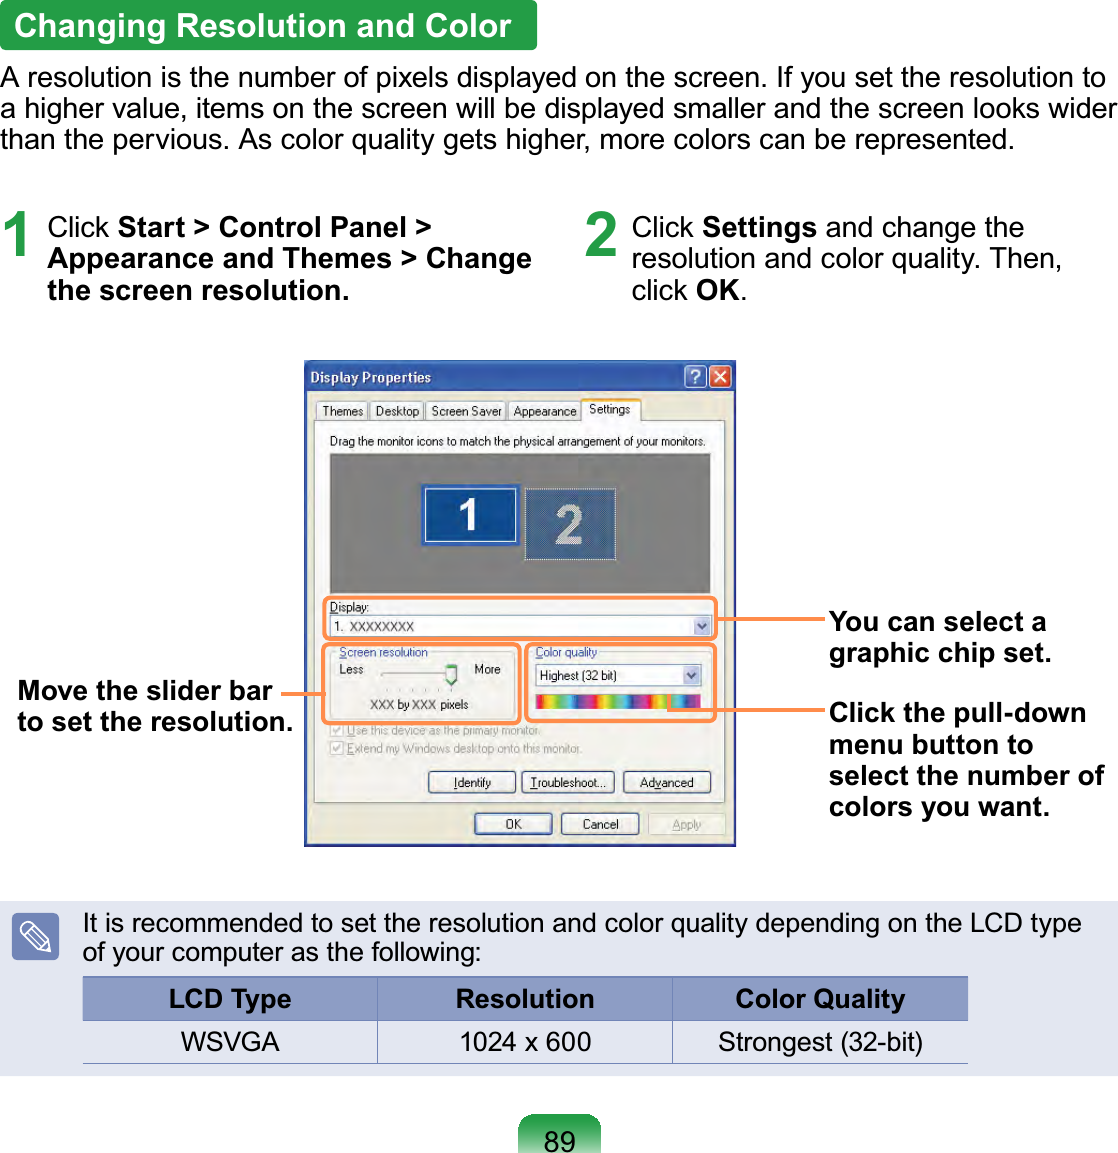
![744 When the configuration is complete, click Identify on the left side of Troubleshoot. The primary display device(the LCD) is indicated as 1, and the secondary display device is indicated as 2. Now you can view the screen through two monitors.1 : Primary 2 : Secondary When you use Dual View, configuring the LCD as the 'Primary' monitor is recommended. If the screen of the secondary display device is displayed at 1024x768 pixels, with 32bit colors, change the settings to the desired screen resolution and color quality in the [Display Properties] dialog box.Deactivating Dual View ModeClick the monitor 2 icon, clear the Extend my Windows desktop onto this monitor check box, and then click Apply.To move a window between display devices in Dual View modeClick the title bar of the window in the primary display device (1, the LCD), and drag it to the secondary display device (2). The window is moved to the secondary display device.](https://usermanual.wiki/Realtek-Semiconductor/RTL8192EHMC.User-manual-2-of-3/User-Guide-1118618-Page-4.png)