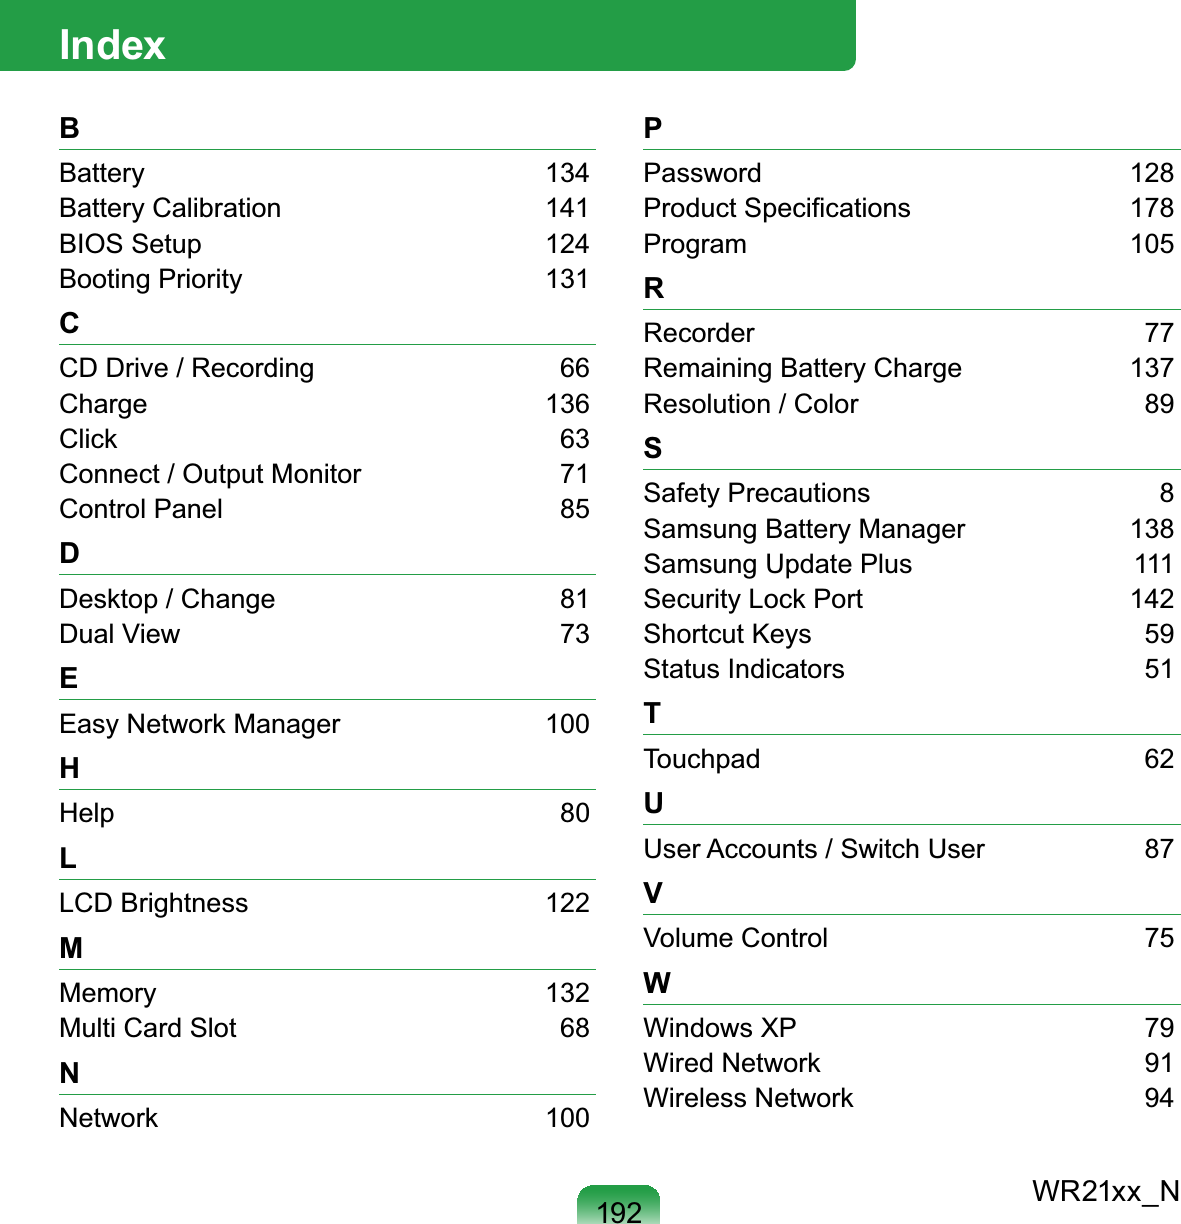
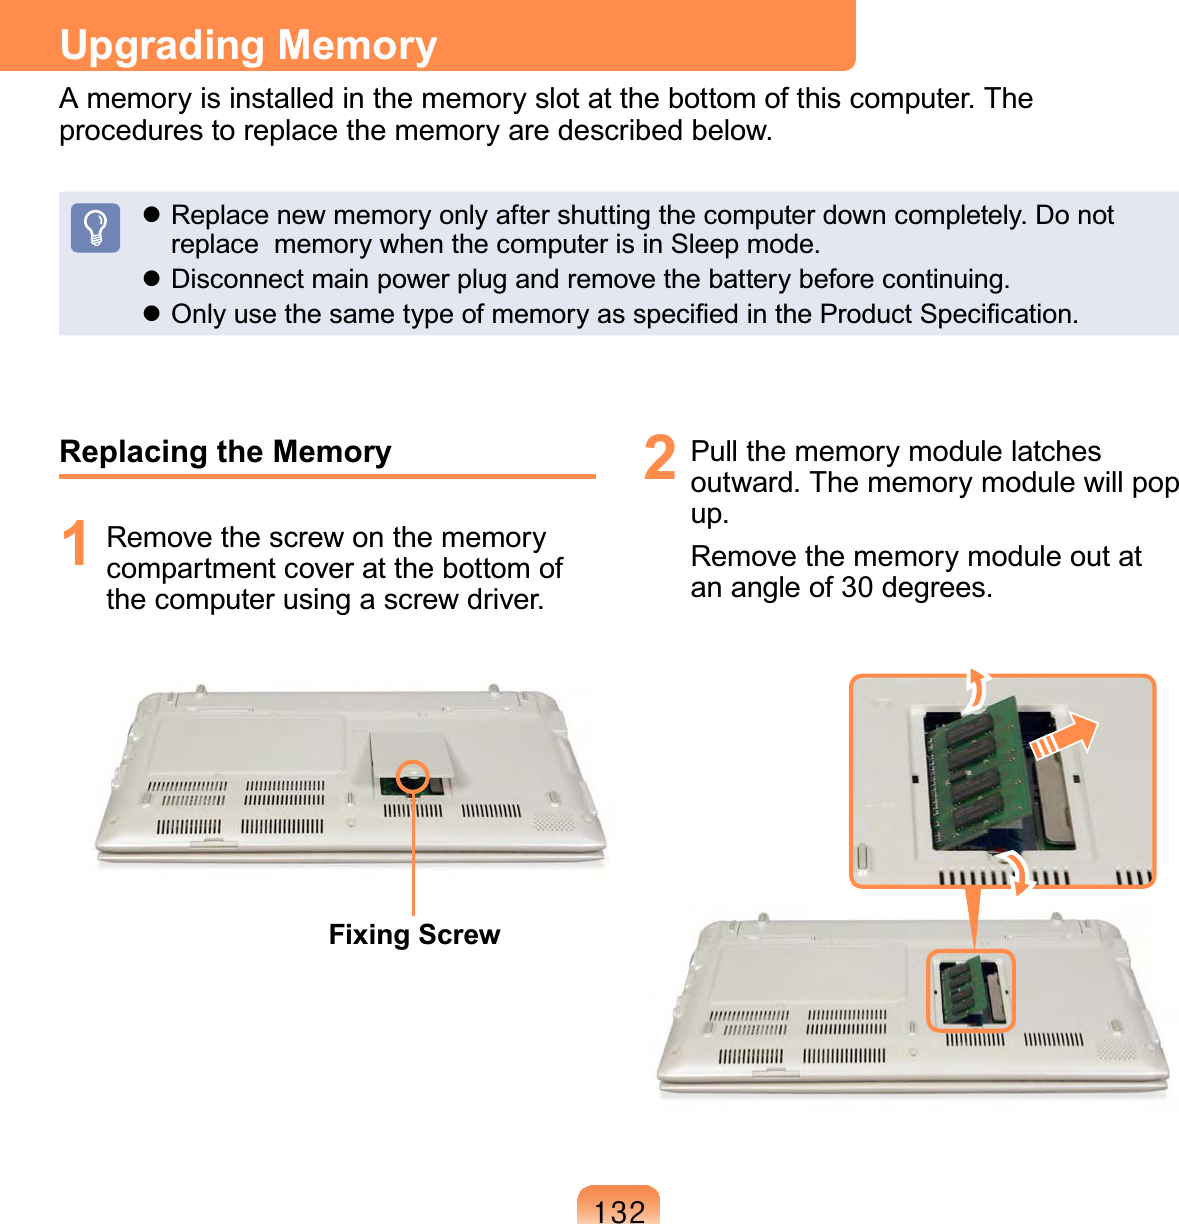
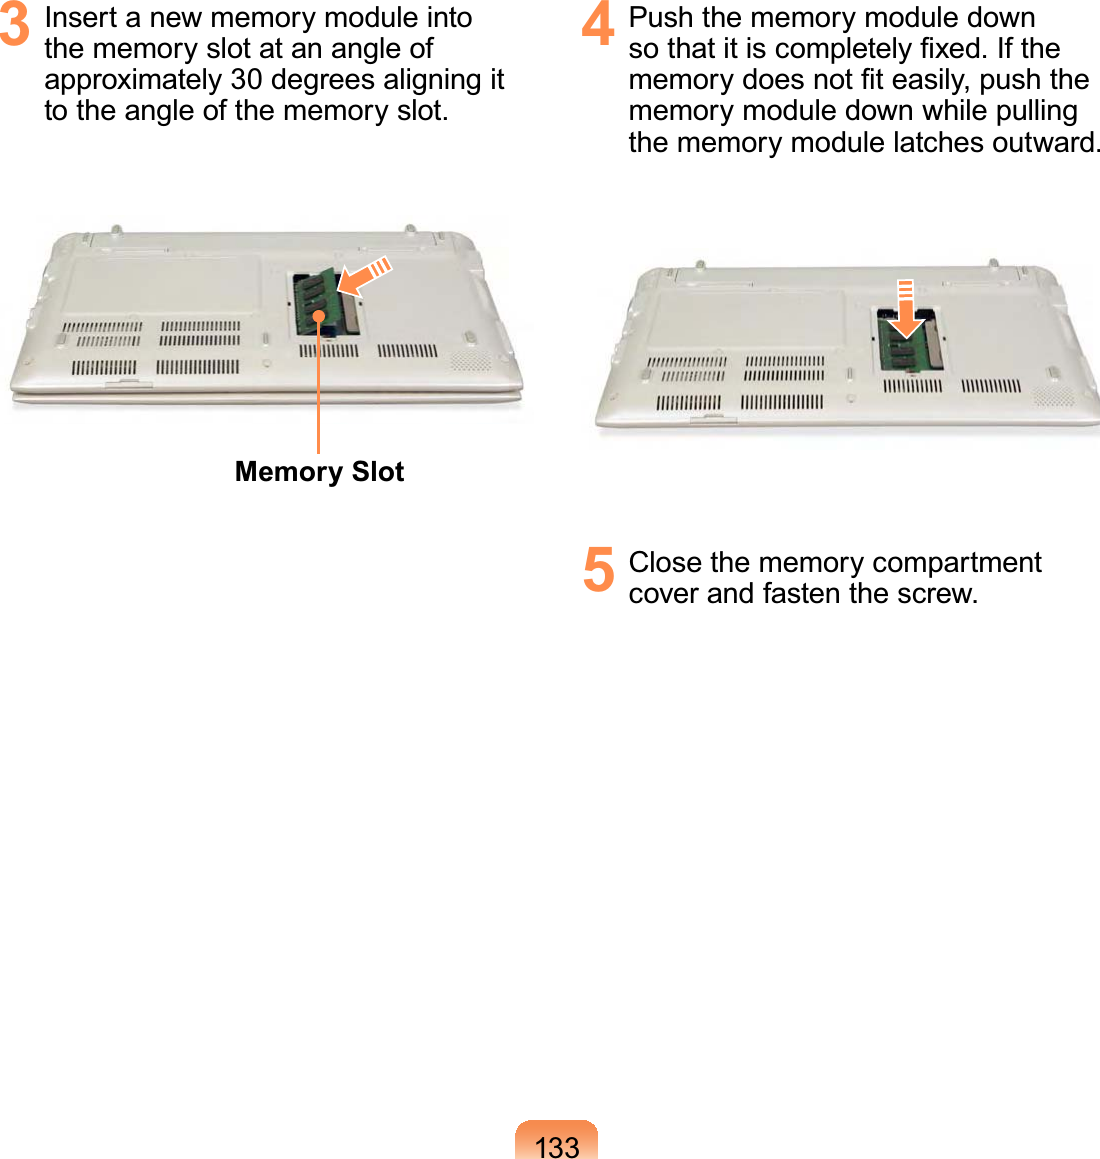
Realtek Semiconductor RTL8192EHMC 802.11 b/g/n RTL8192E half miniCard User Manual unprotected UserMan 3 TX2 RTL8192EHMC Revised3
Realtek Semiconductor Corp. 802.11 b/g/n RTL8192E half miniCard unprotected UserMan 3 TX2 RTL8192EHMC Revised3
Contents
- 1. Manual
- 2. Users Manual
- 3. User manual 1 of 3
- 4. User manual 2 of 3
- 5. User manual 3 of 3
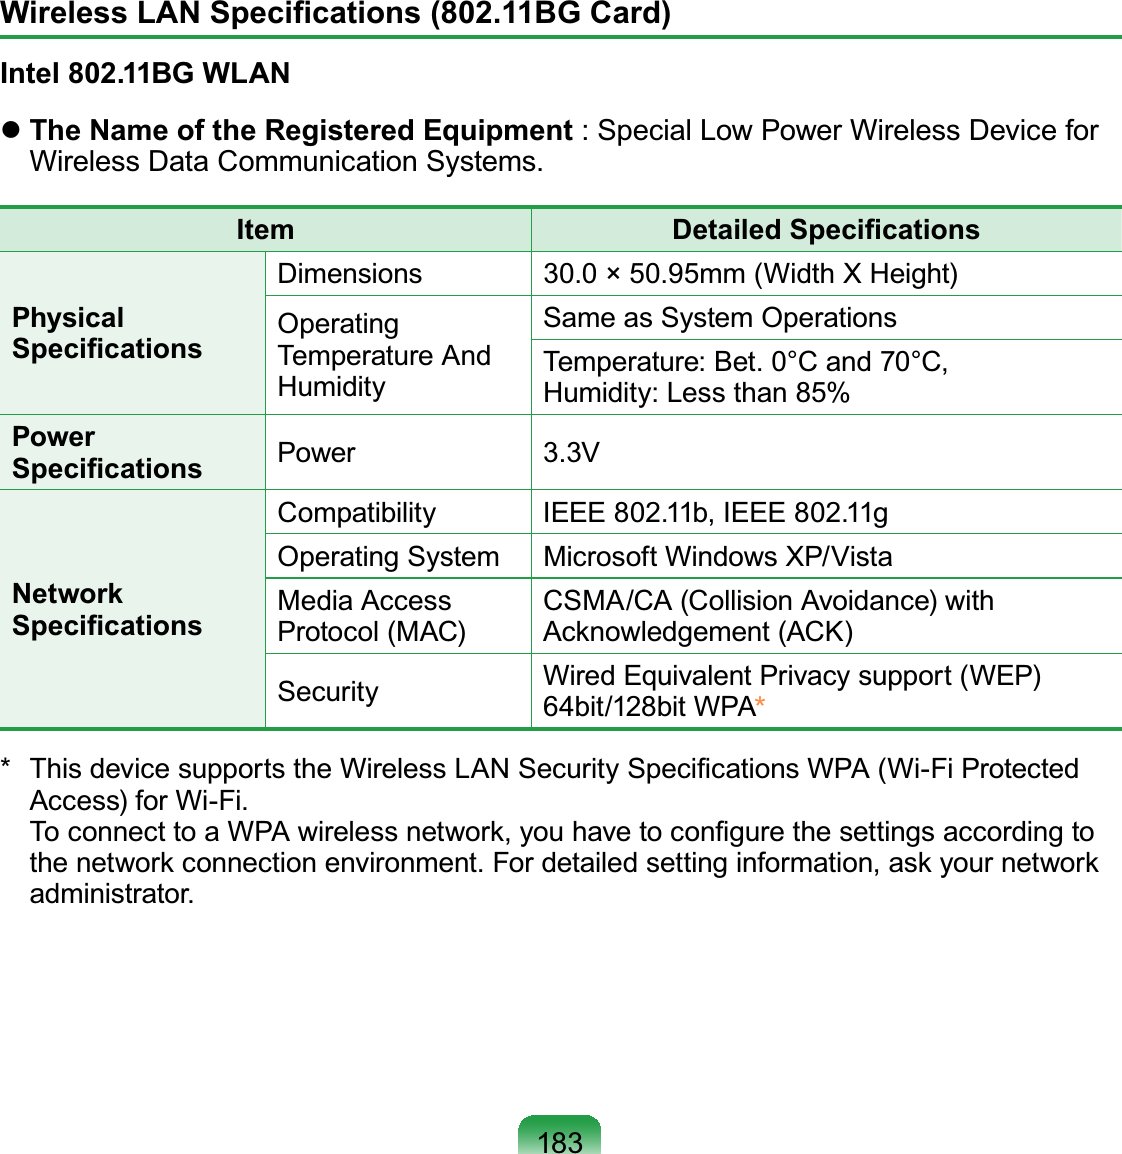
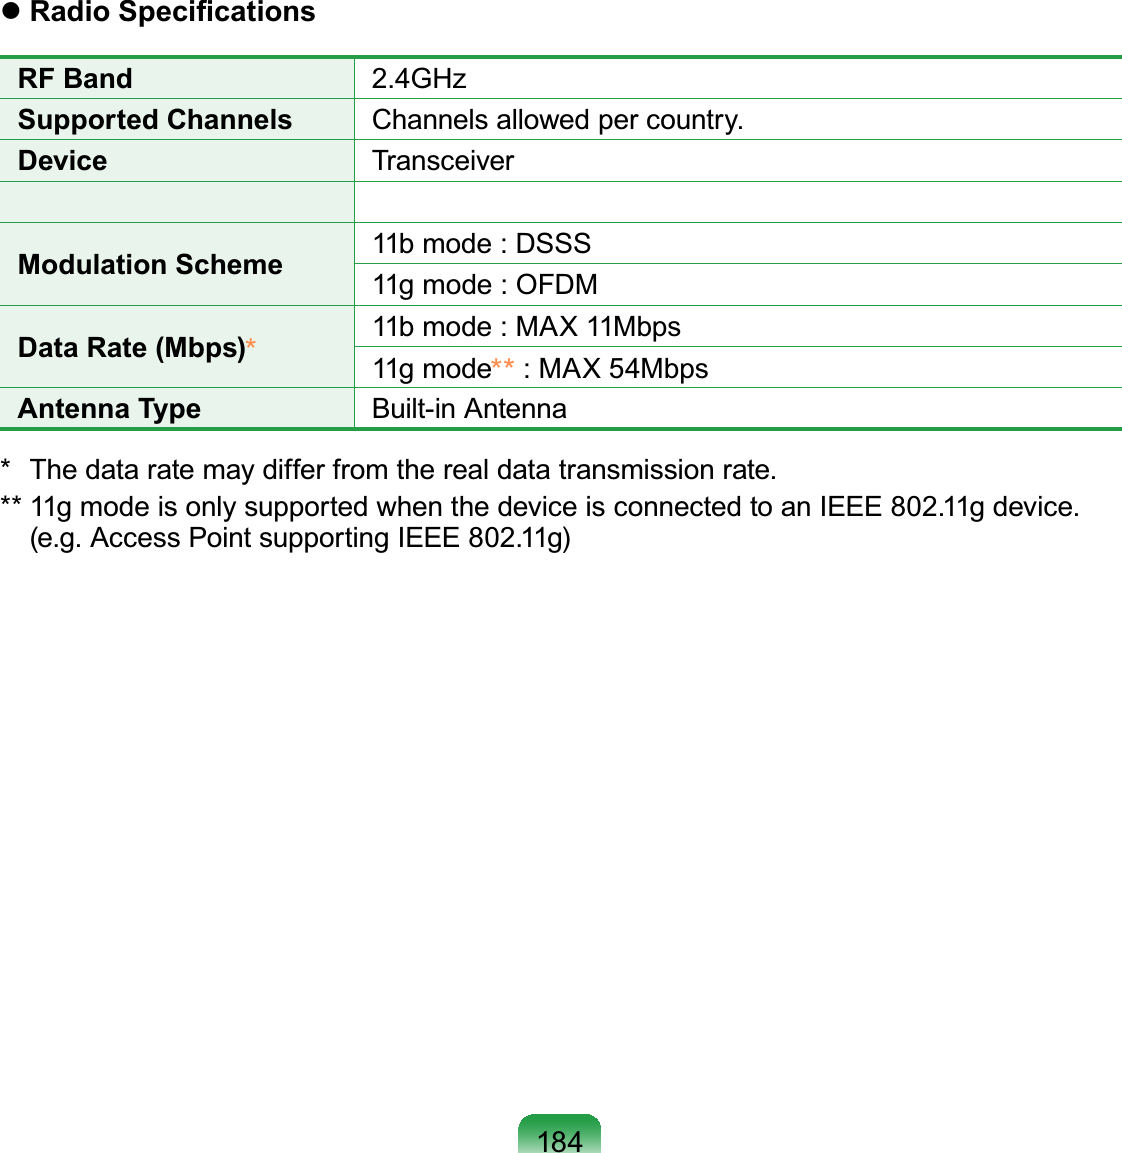
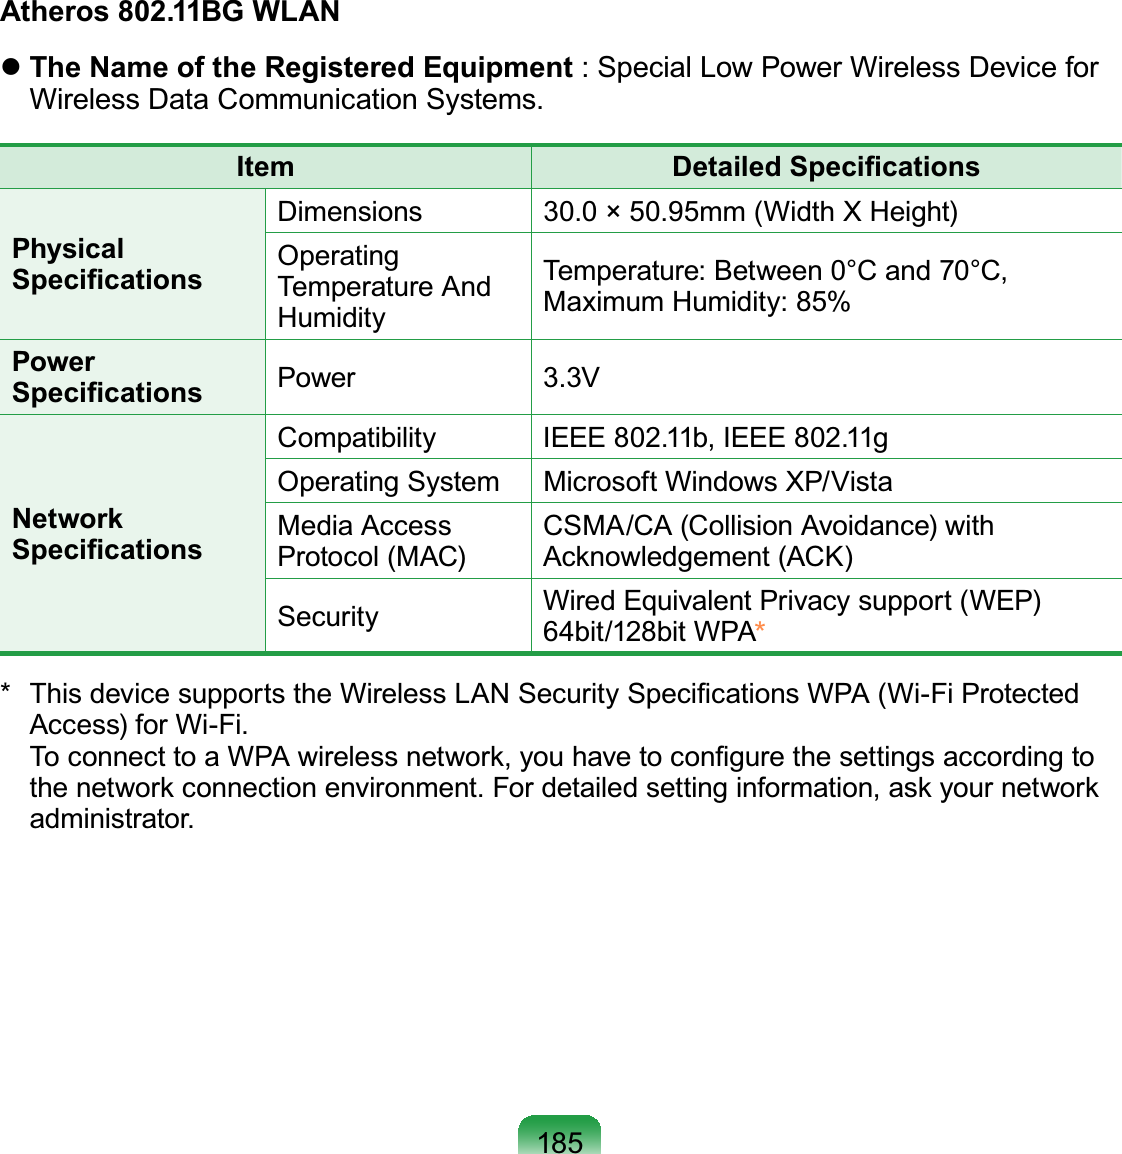
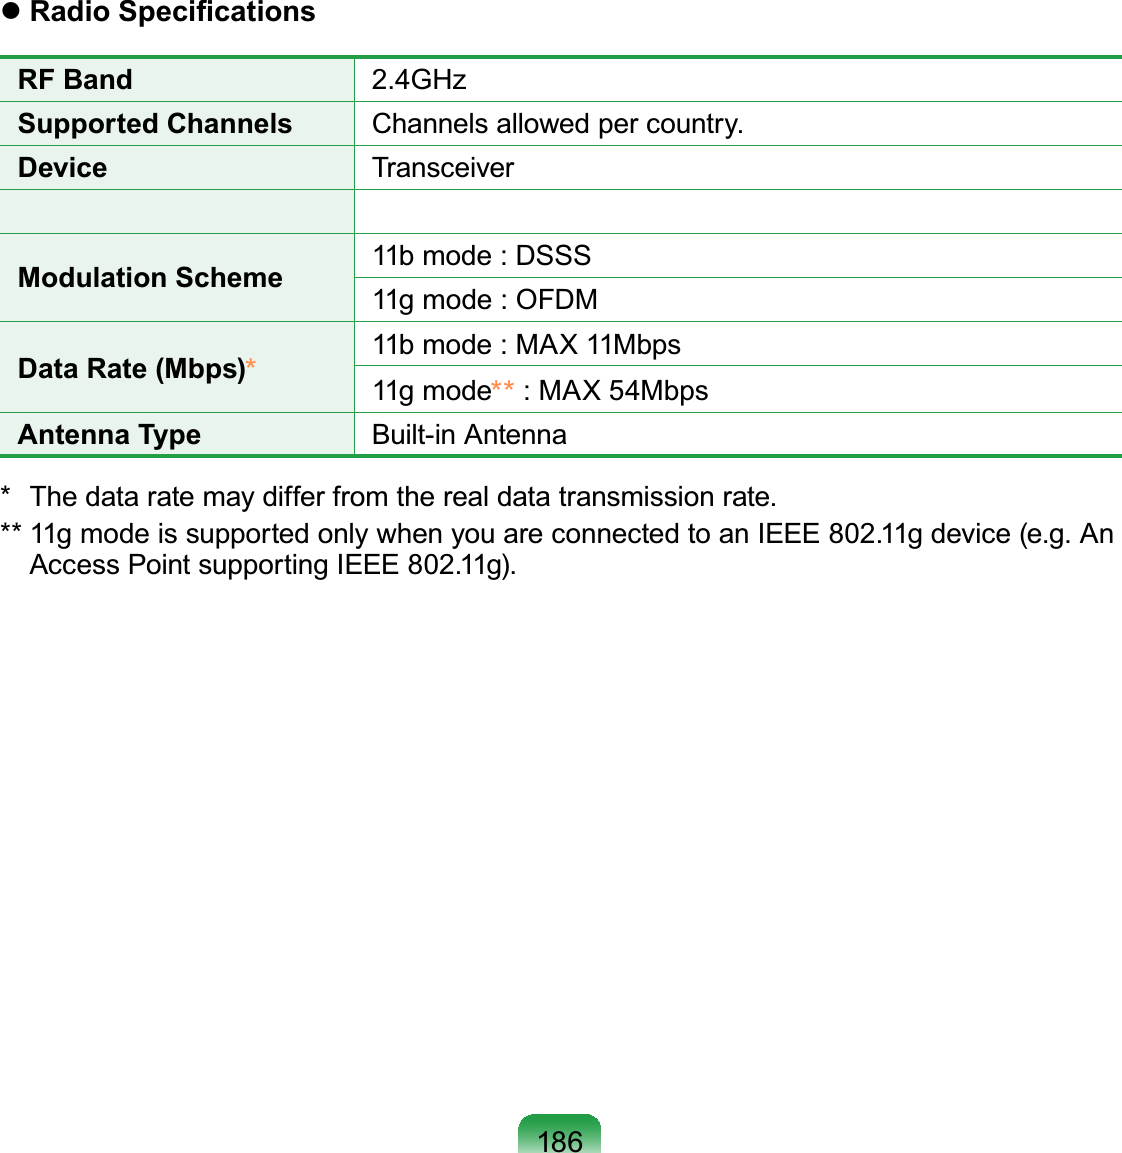
User manual 3 of 3
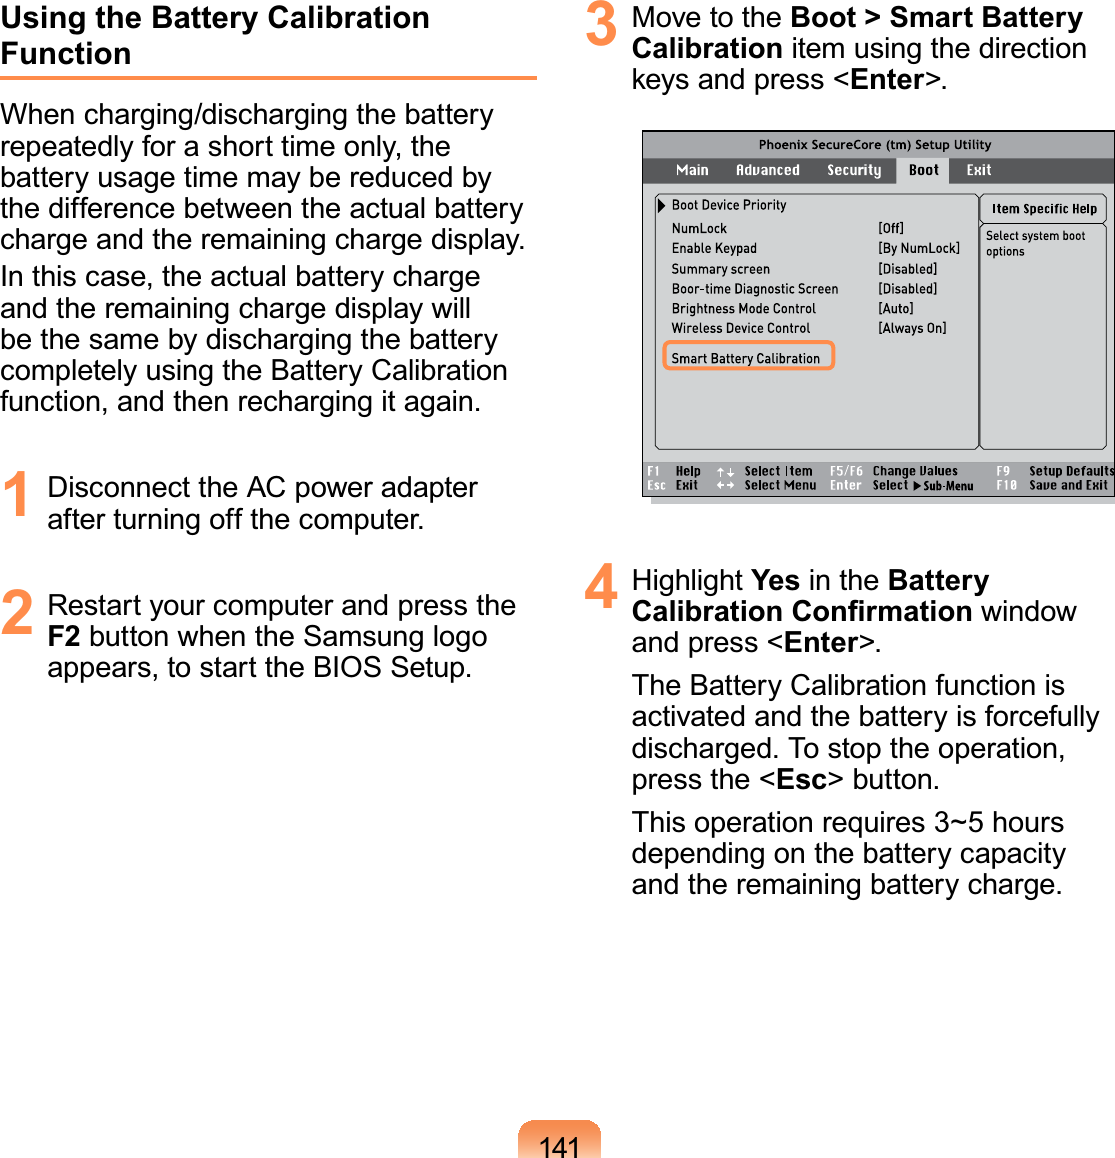
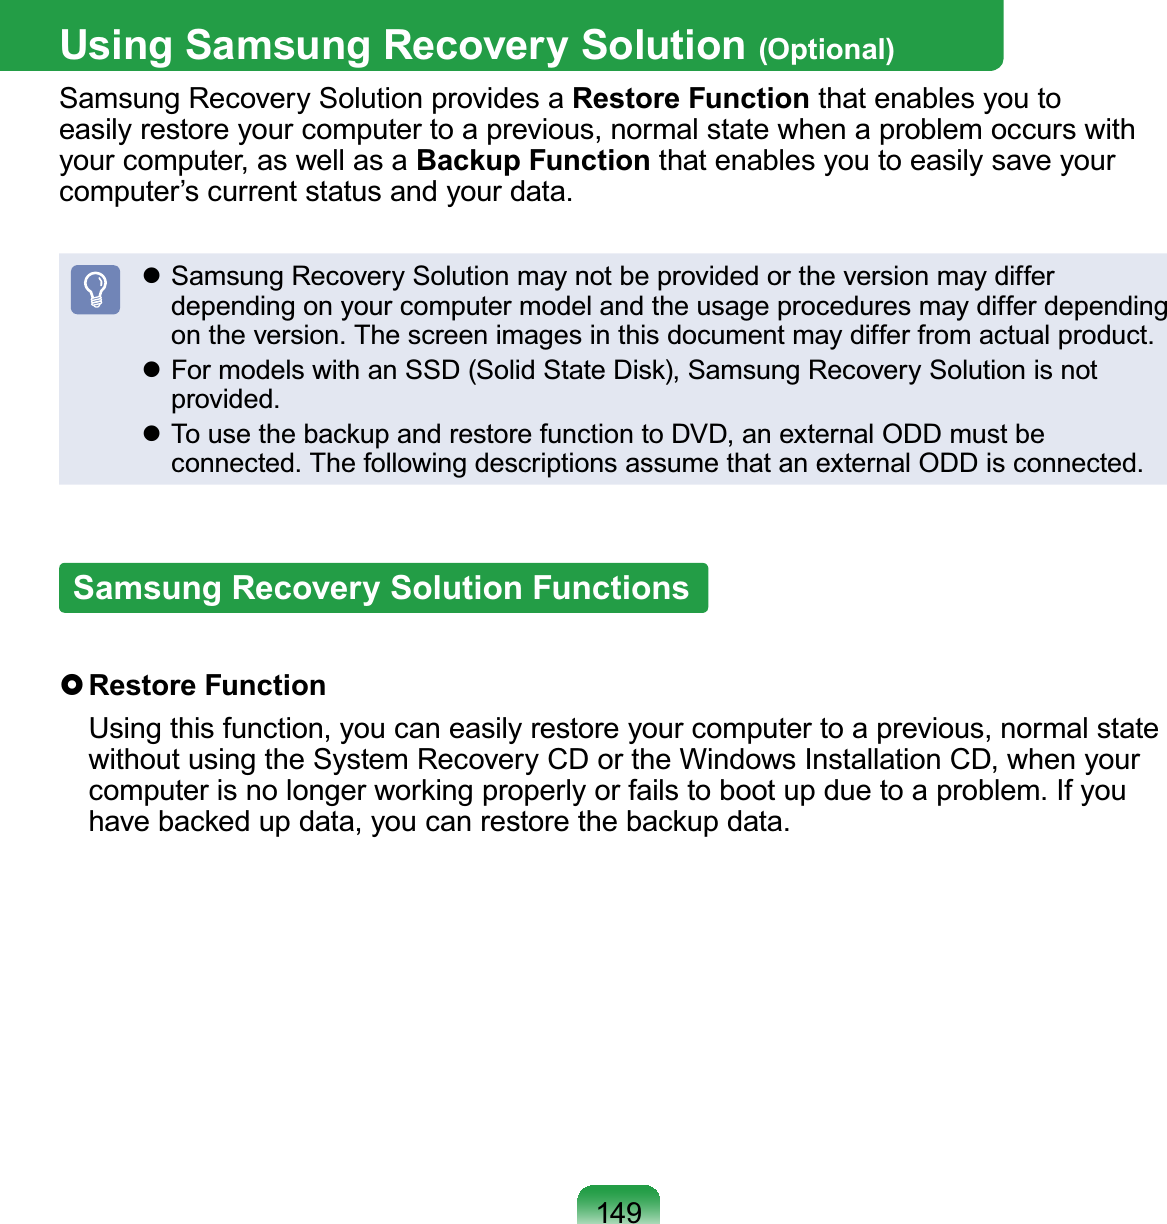
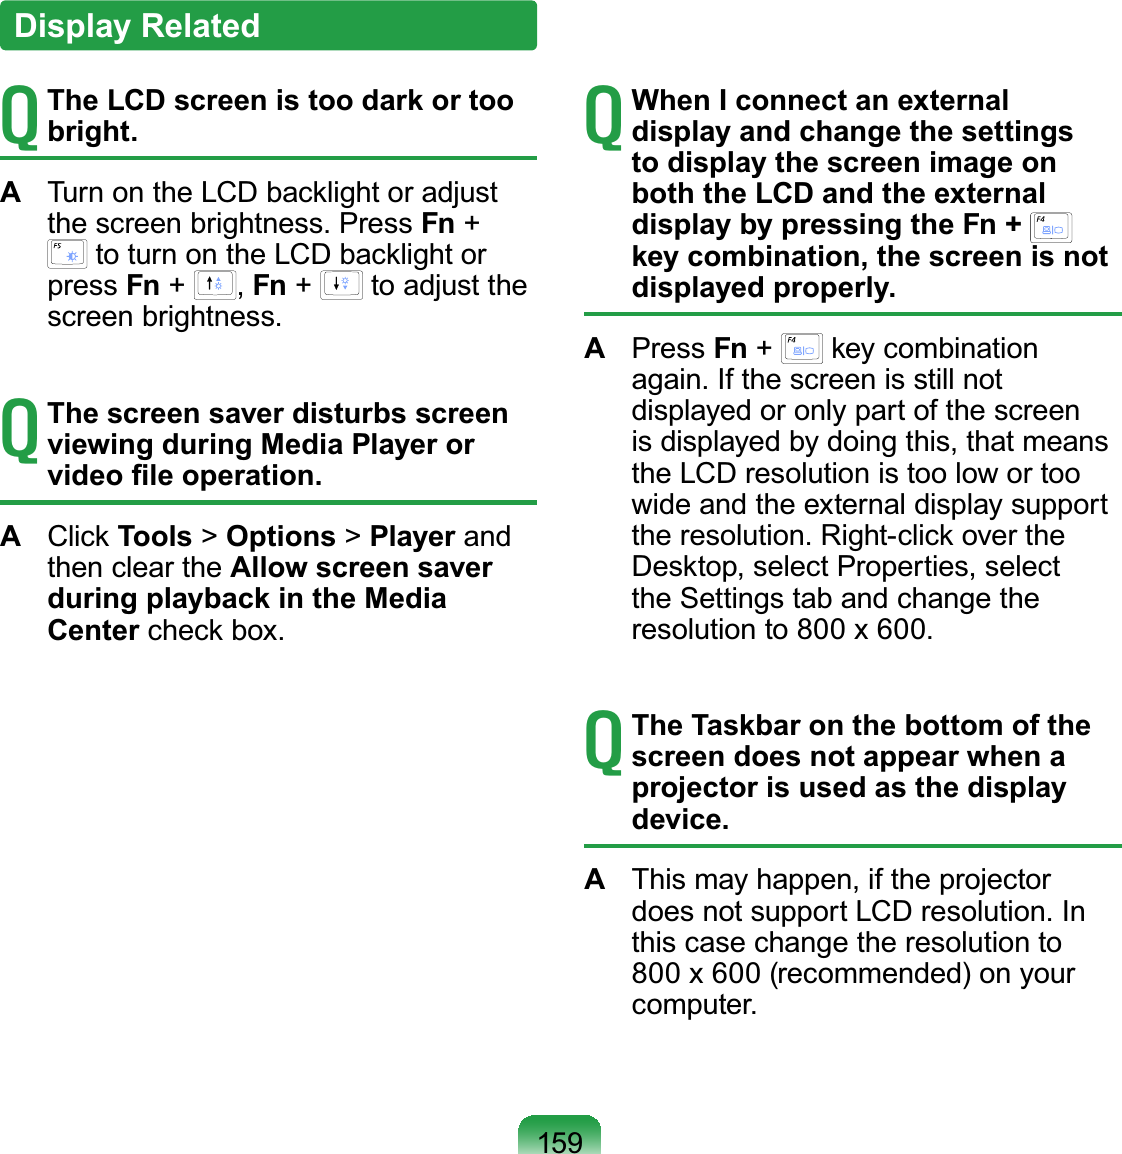
![4641 Select the Boot menu in the BIOS Setup.2 Press <Enter> on the Boot Device Priority item.PXE OPROM [Only with F12]3 Press the down key (↓) to move to the IDE HDD item and press the F6 key to move up to the top item.[Boot priority order] 1. USB CD : N/A 2. IDE HDD : XXXXXXXX 3. PCI BEV : N/A 4. USB FDD : N/A 5. USB KEY : N/A 6. USB HDD : XXXXXXXX 7. 8.[Excluded from boot order] - USB ZIP : N/A - USB LS120 : N/A - PCI SCSI : N/A - Other USB : N/A - PCI : N/ABoot Device Priority4 Press the F10 key to save the settings and exit Setup. The highest boot priority device is now set to the Hard Drive.Changing the Boot PriorityThis computer is configured to boot from an external-type ODD first.This chapter describes how to change the boot priority so that the computer boots from the hard disk drive first.](https://usermanual.wiki/Realtek-Semiconductor/RTL8192EHMC.User-manual-3-of-3/User-Guide-1118619-Page-1.png)
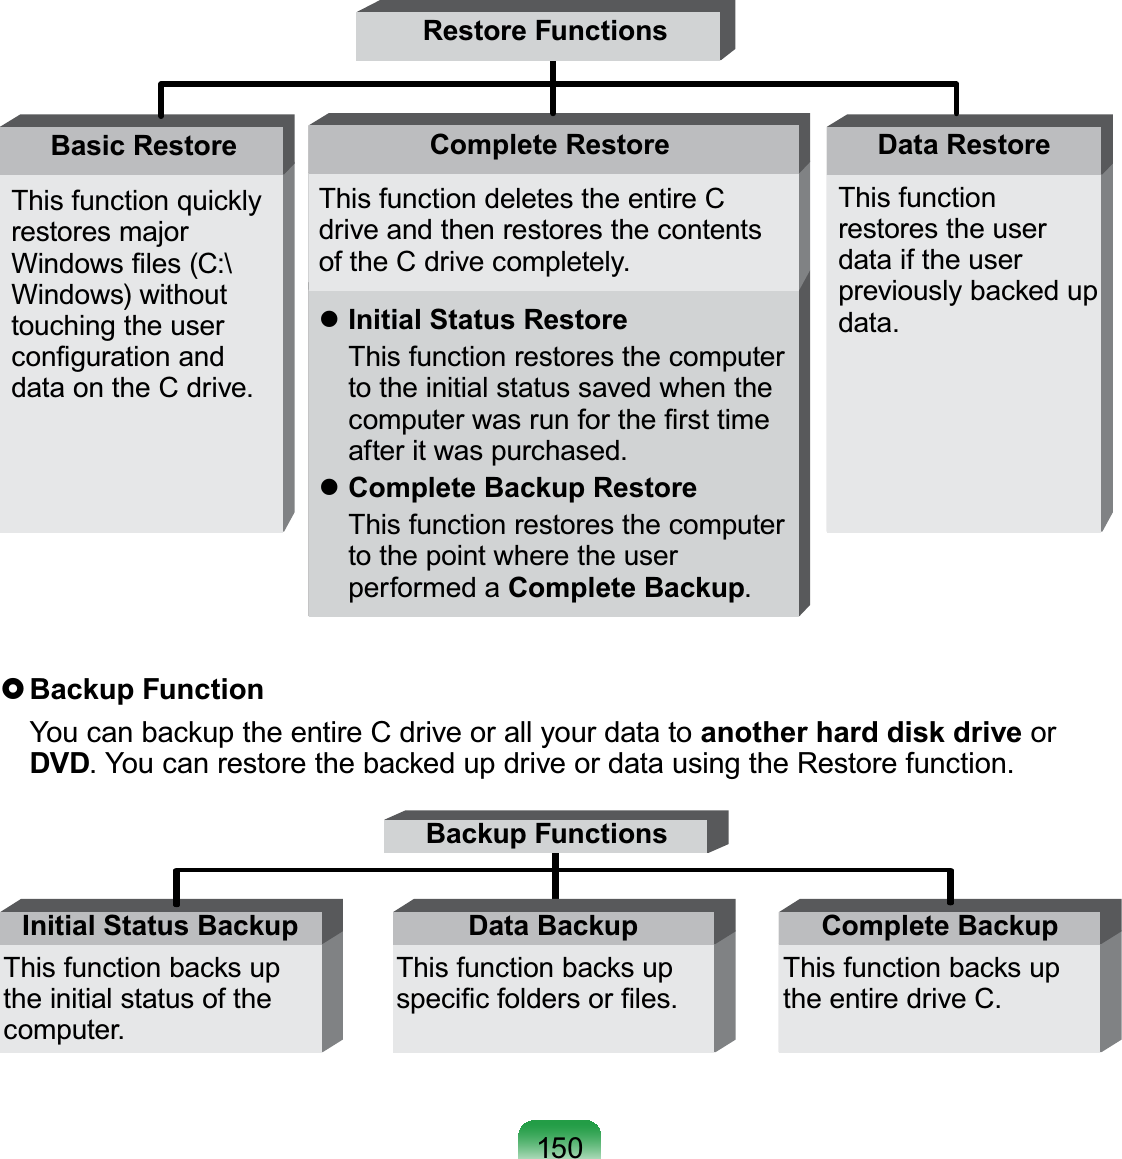


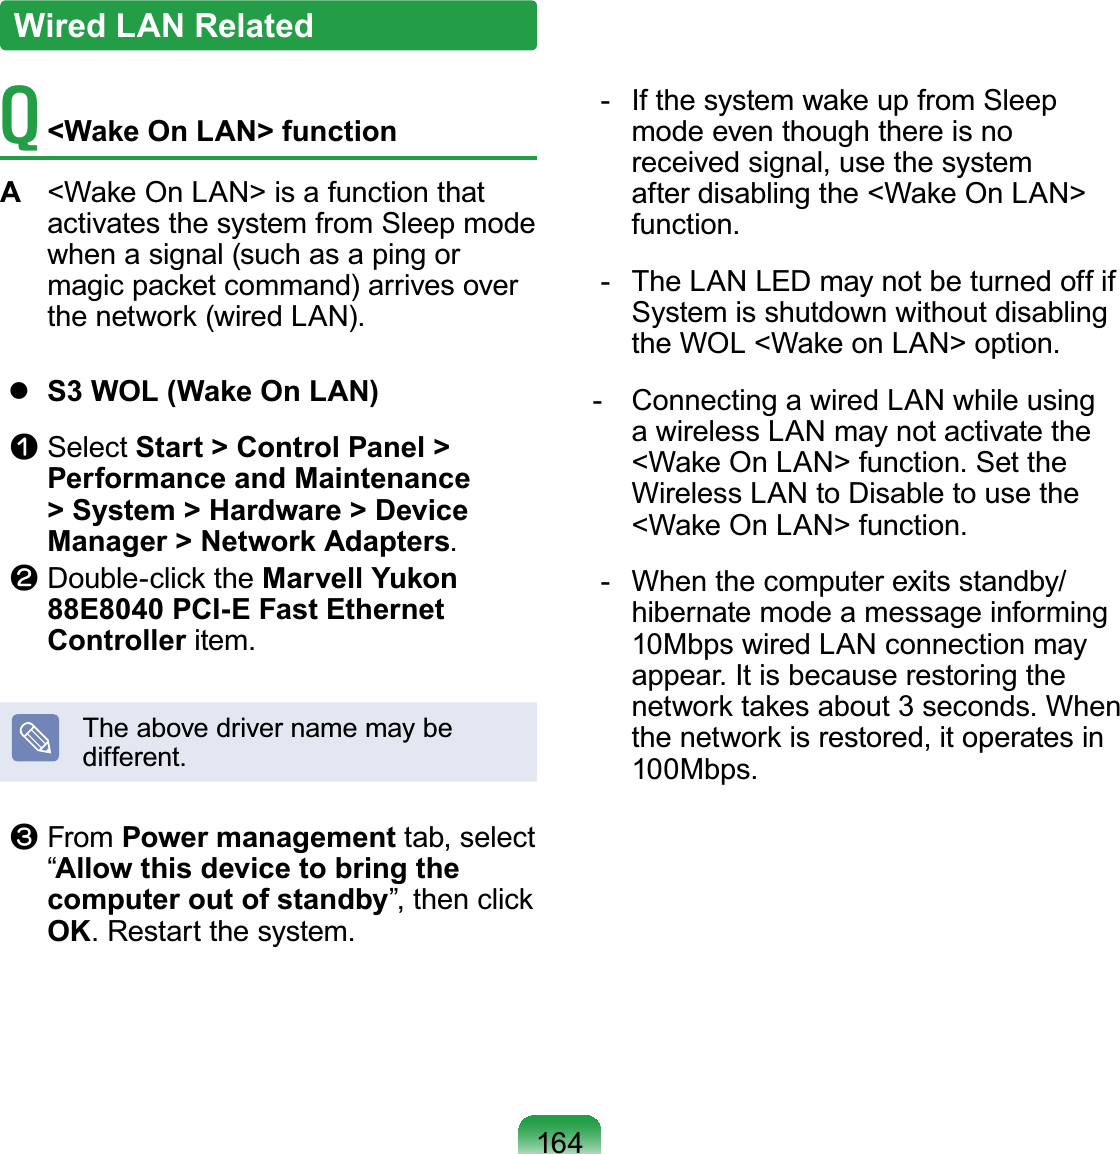
![169T After installing the Wireless LAN Setting program, the “AEGIS Protocol (IEEE 802.1x)” protocol appears in the [Local Area Connect Properties] window.A The protocol is a security authentication protocol that is automatically installed when the Wireless LAN Settings program is installed and does not affect the program operation.T (For Intel PROSet) Although I have turned the wireless LAN off using the Turn Off Wireless LAN button in PROSet, the Wireless LAN LED is still on.A This is normal. The Turn Off Wireless LAN button in PROSet just turns off the wireless LAN software. The wireless LAN hardware is not affected by this operation.T (For Intel PROSet) After installing PROSet, I cannot manage my wireless network in Windows.A When clicking Use Microsoft Client in the Tools menu of the PROSet, you can manage wireless network in Windows. Thereafter, if you wish to manage your wireless network, click Activate Intel PROSet/Wireless in the Tools menu of the PROSet.T Internet Connection or File Sharing doesn’t work, when I use Internet Connection Sharing or Ad Hoc.A You have to register the IP address allocated for Internet Connection Sharing or Ad Hoc as a ‘Trusted IP’ in McAfee SecurityCenter. Click McAfee SecurityCenter > Advanced menu > Configure > Internet and Network > Advanced > Trusted and Banned IPs, and register the IP address or IP address range as a Trusted IP address. The IP address range for DHCP is 10.0.0.1 ~ 10.255.255.254 if not specified.](https://usermanual.wiki/Realtek-Semiconductor/RTL8192EHMC.User-manual-3-of-3/User-Guide-1118619-Page-39.png)