Remotesolution RH60A Color LCD Touch Screen Universal Remote Control User Manual 01
Remote Solution Co., Ltd. Color LCD Touch Screen Universal Remote Control 01
UserManual.wiki
>
Remotesolution
>
RH60A User Manual
>
Users Manual II
Contents
1.
Users Manual
2.
Users Manual II
Users Manual II
Navigation menu
Upload a User Manual
Namespaces
Wiki Guide
HTML
PDF
Info
Views
User Manual
Discussion / Help
Navigation


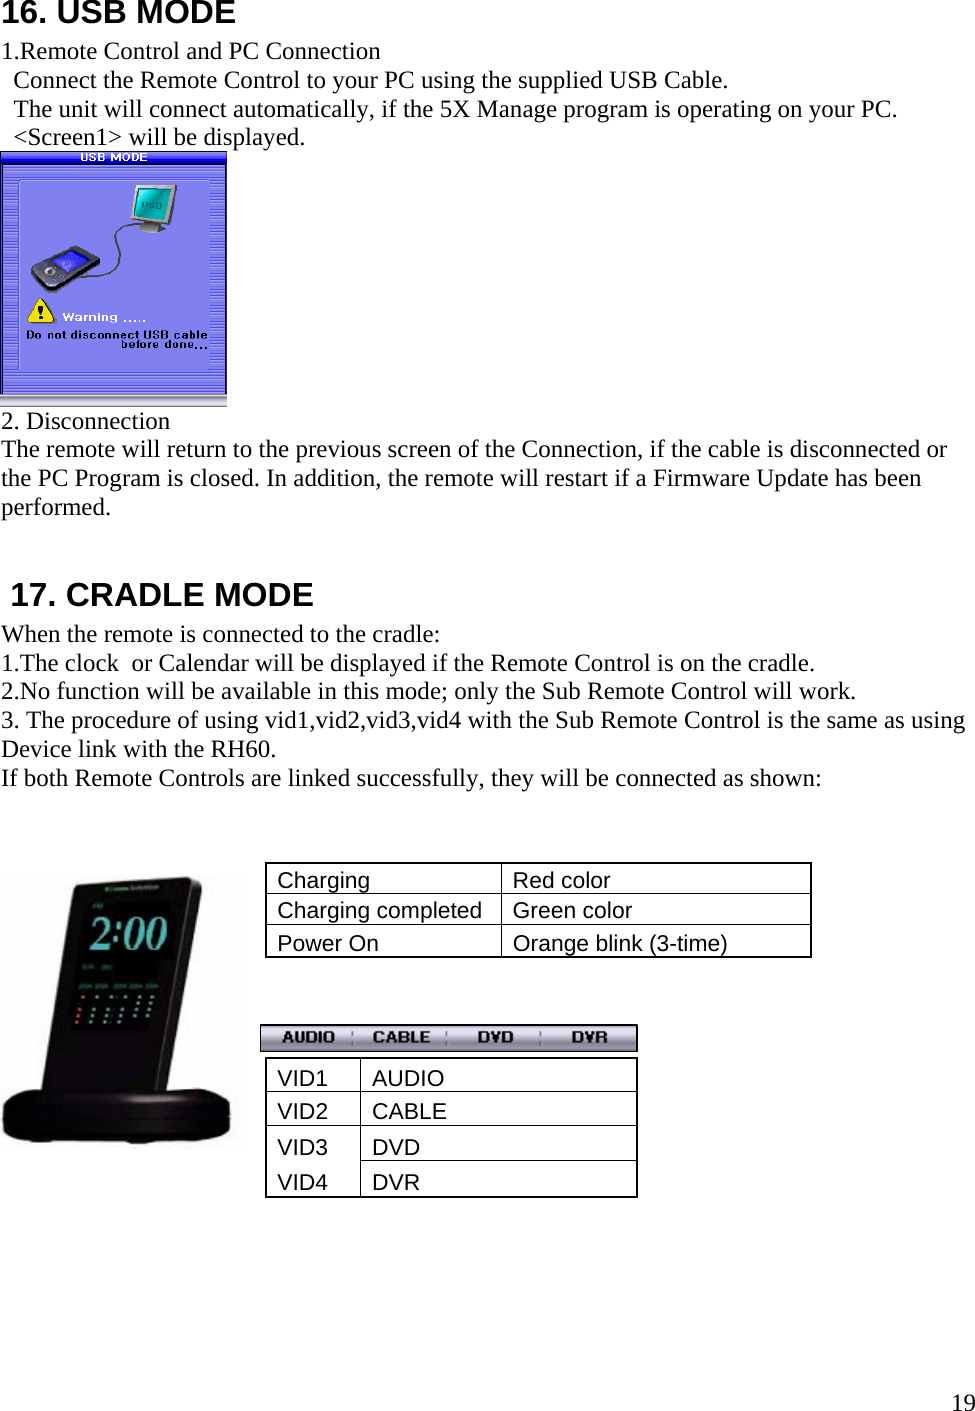
![How To Use? ( Main Remote) How To Use? ( Sub Remote) IR Signal Zigbee Signal IR Signal [Zigbee Converter] [Main Remote] 2.4 ㎓ IR Signal 2.4 ㎓ Zigbee Signal Zigbee Signal 2.4 ㎓ [Sub Remote] [Zigbee Converter] 22](https://usermanual.wiki/Remotesolution/RH60A.Users-Manual-II/User-Guide-638093-Page-23.png)
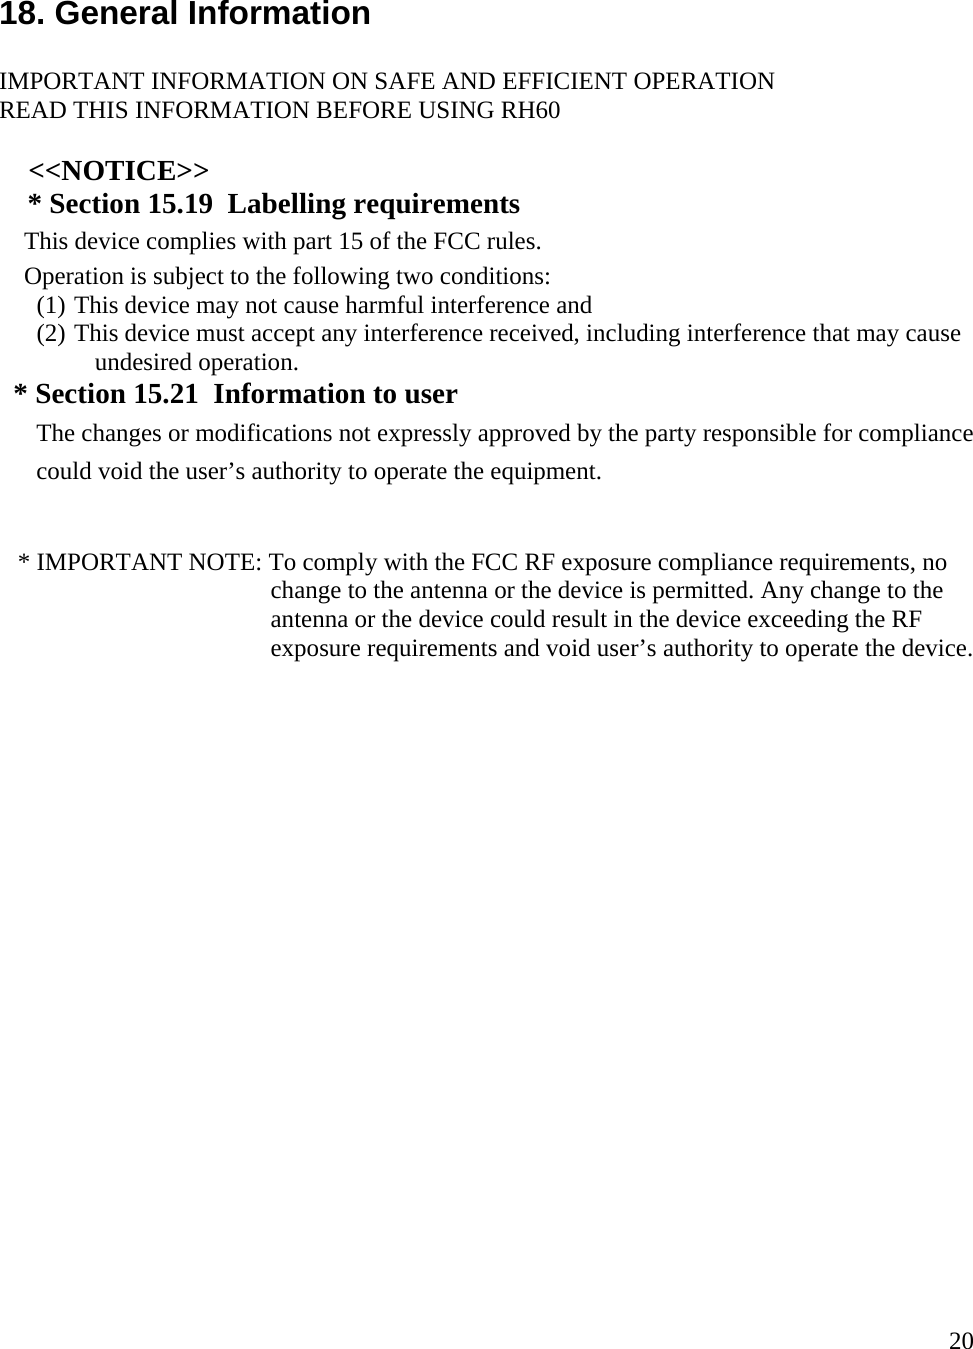
![Main Remote Specification Item Processor type 256 QFP Processor Hynix HMS30C7202 Processor 80MHz CPU Core ARM720T Memory controller 16&32 bit modes, LCD Controller Mono/Color STN , TFT LCD SoC USB Controller USB (Slave) 1.1 Flash memory 64Mb x 16bit or 128Mb x 16bit SDRAM 64Mb x 16bit Memory SRAM 8Mb x 16bit [JTAG Debug ] Touch panel Touch panel controller ADS7843 Touch key Touch sensor controller QT1080 External keys Touch wheel Touch slider controller QT510 LCD CCFL Controller MP1025 Backlight Key EL. Controller ZSP4403 IR Infrared Signal Transmitted Zigbee (RF) 2.4GHz [ IEEE® 802.15.4 Standard ]PC Interface USB Device USB 1.1 H/S Battery Rechargeable Li-Polymer 3.7V / 1600mA LCD Color LCD 3.9'' STN Color LCD(320 x 240) RUN MAX 500mA @ 3.7V IDLE TYP. 300mA @ 3.7V Operating current SLEEP MAX. 5mA @ 3.7V Operating voltage 3.0V ~ 6.0V IR MIN. 10m Operating Distance ZIGBEE(RF) MIN. 20m 23](https://usermanual.wiki/Remotesolution/RH60A.Users-Manual-II/User-Guide-638093-Page-24.png)