Restorative Therapies RT300-S Custom Controller w/Ipaq hx2100 PDA & Daughter PCB User Manual LB100108 RT300
Restorative Therapies Inc Custom Controller w/Ipaq hx2100 PDA & Daughter PCB LB100108 RT300
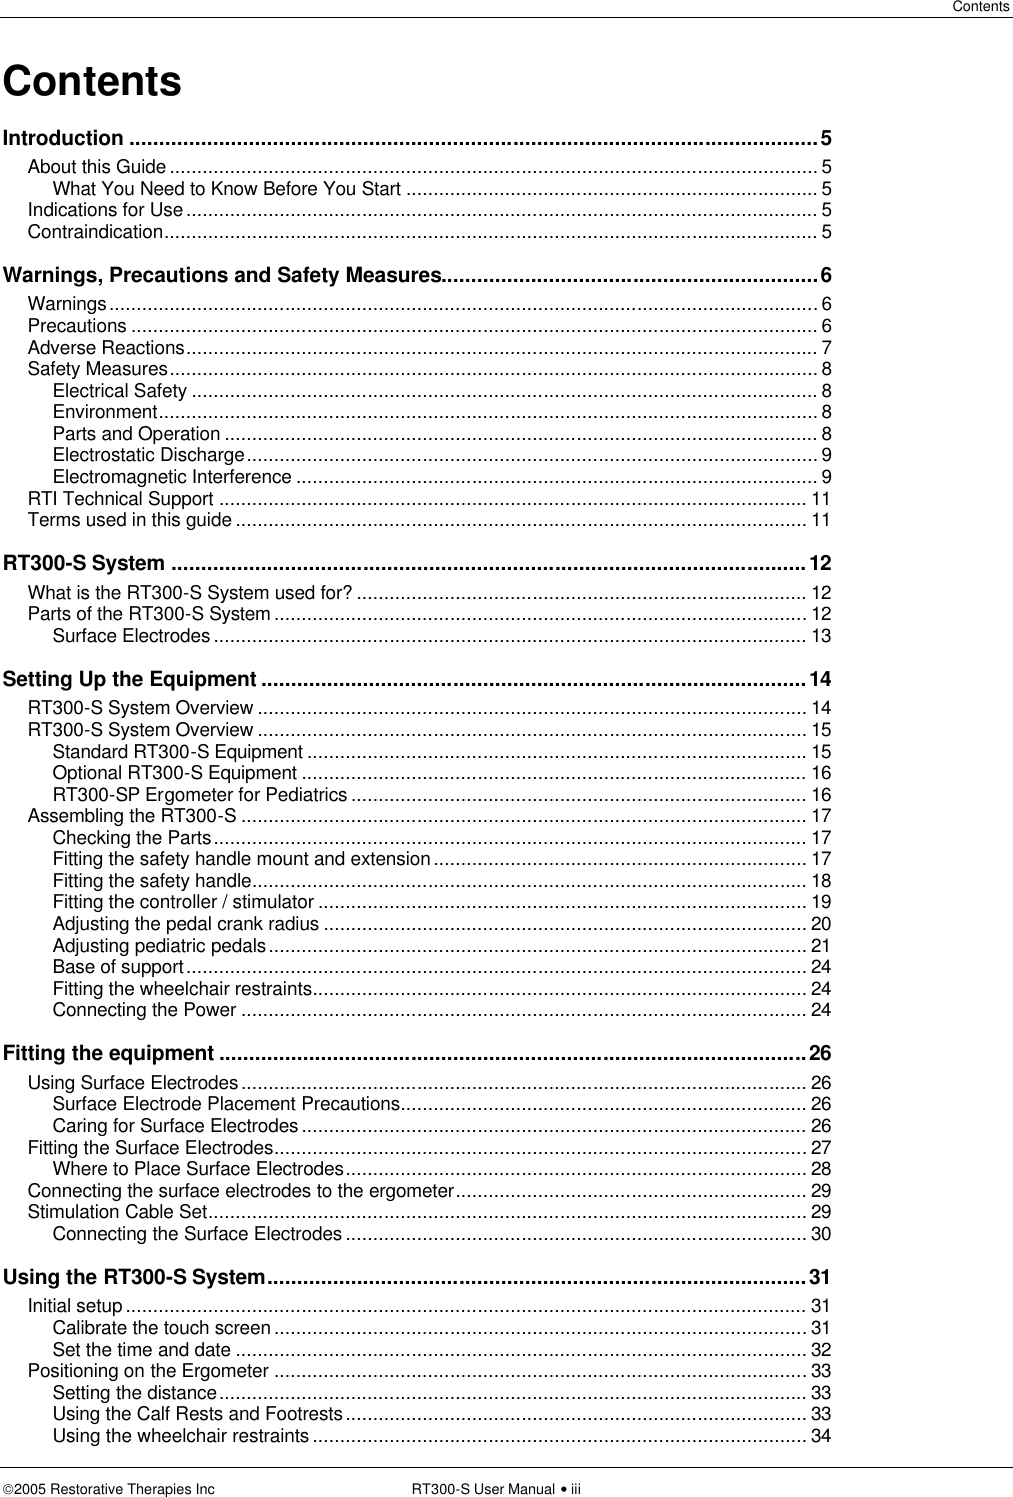
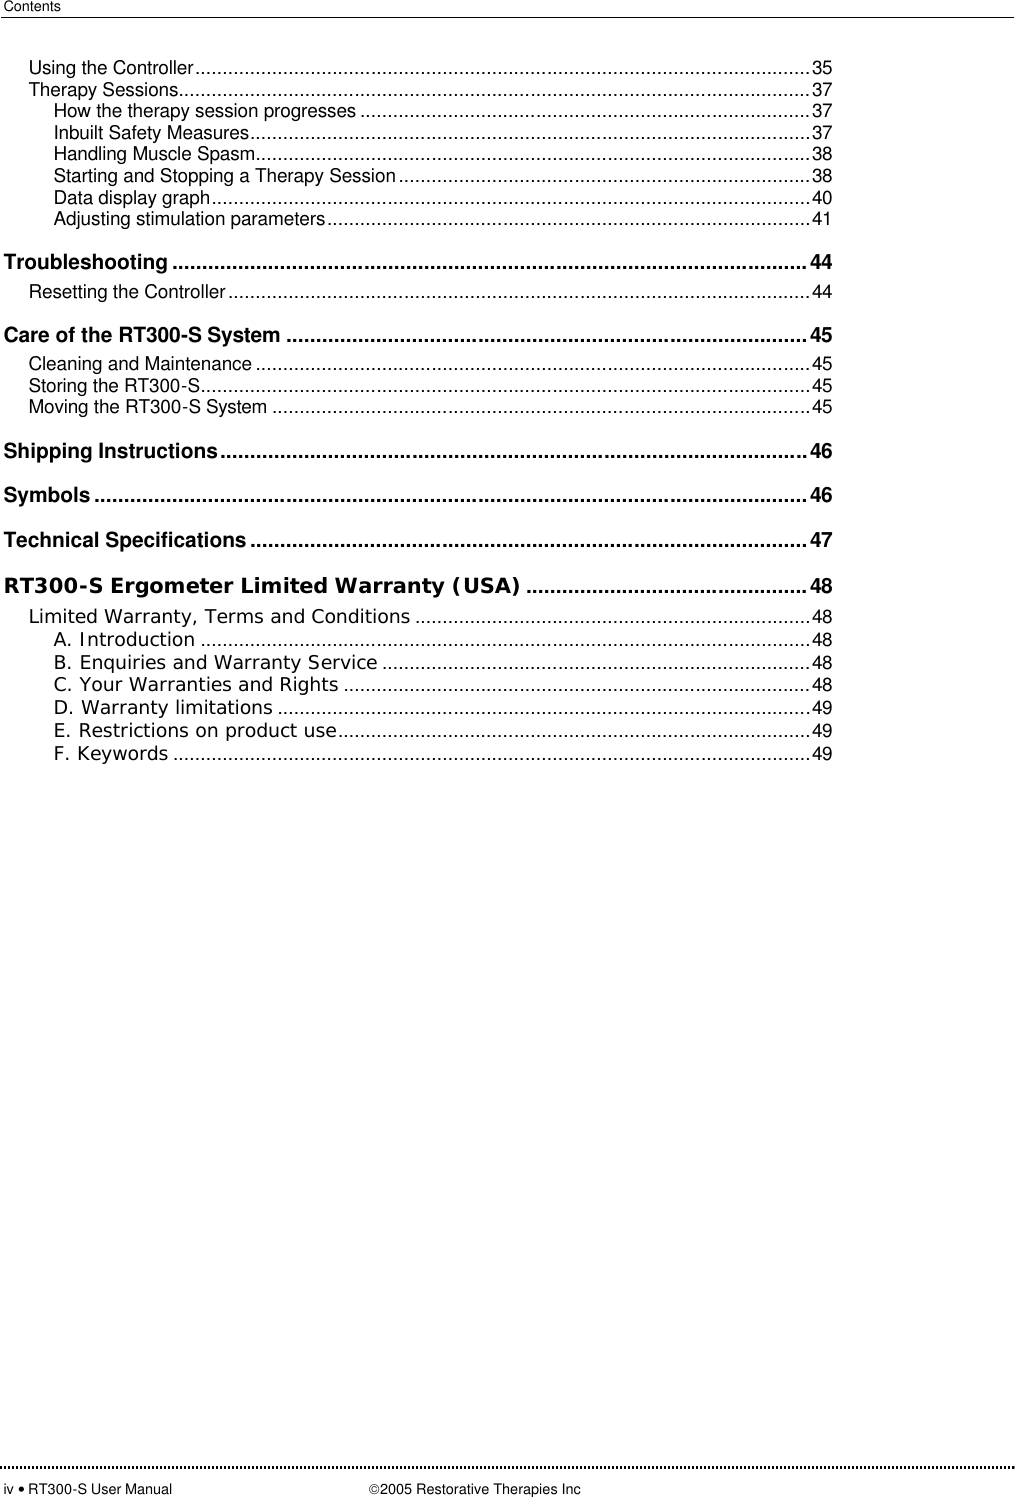
Contents
- 1. Users Manual 1 of 2
- 2. Users Manual 2 of 2
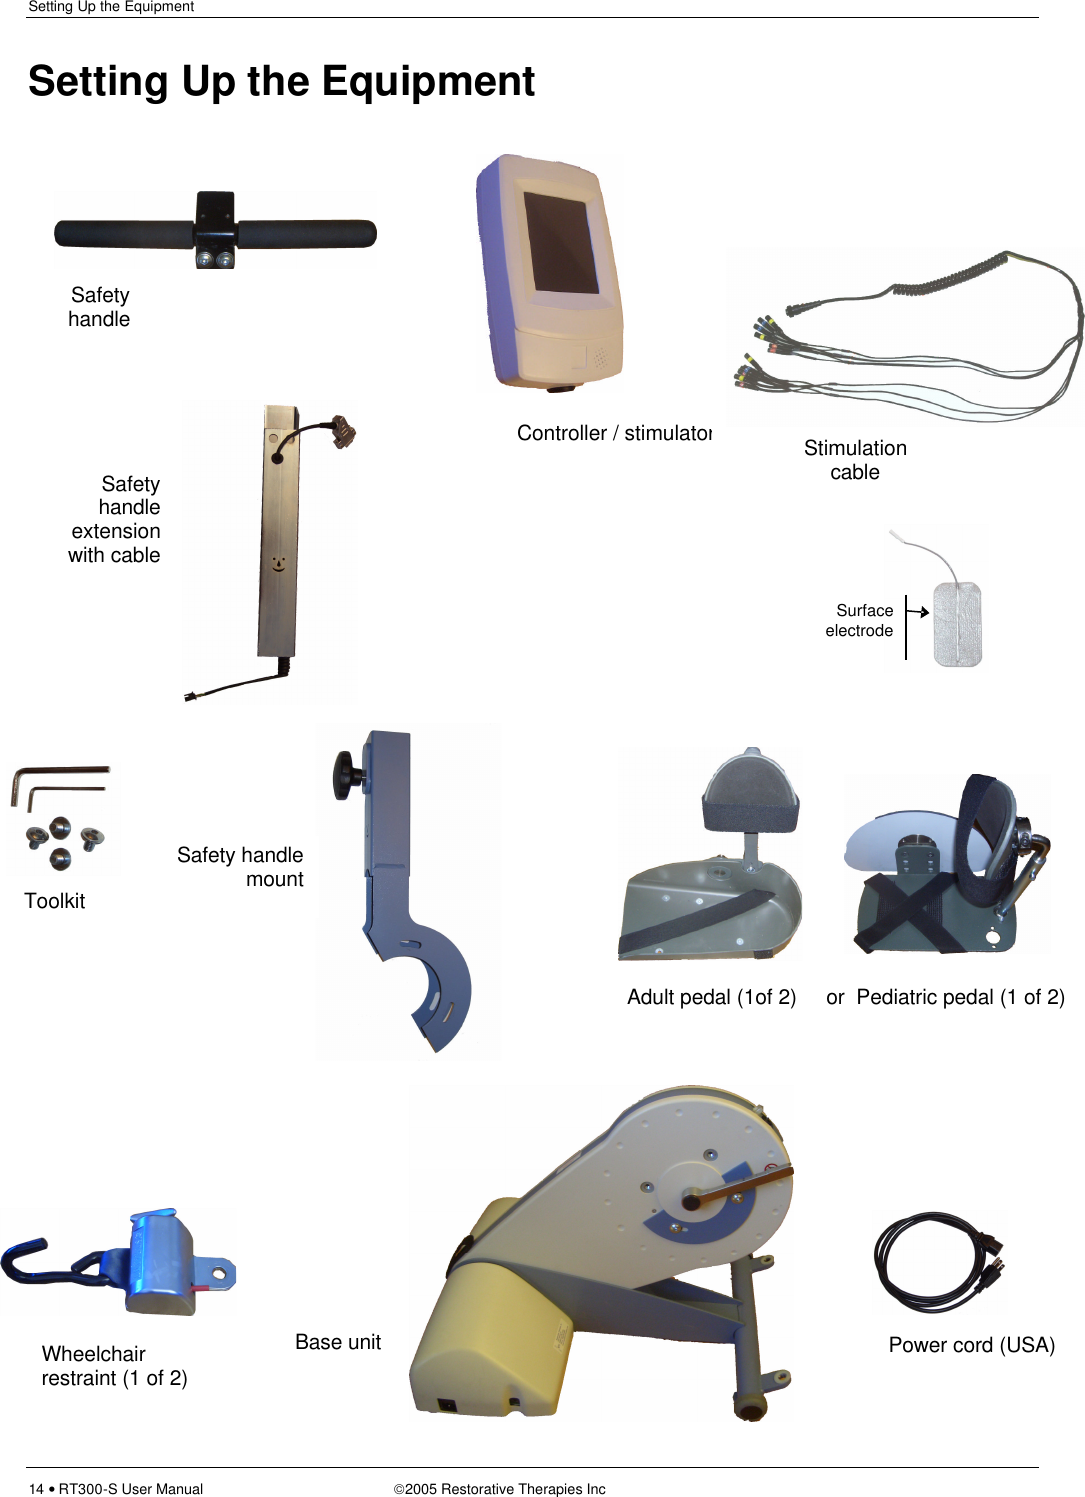
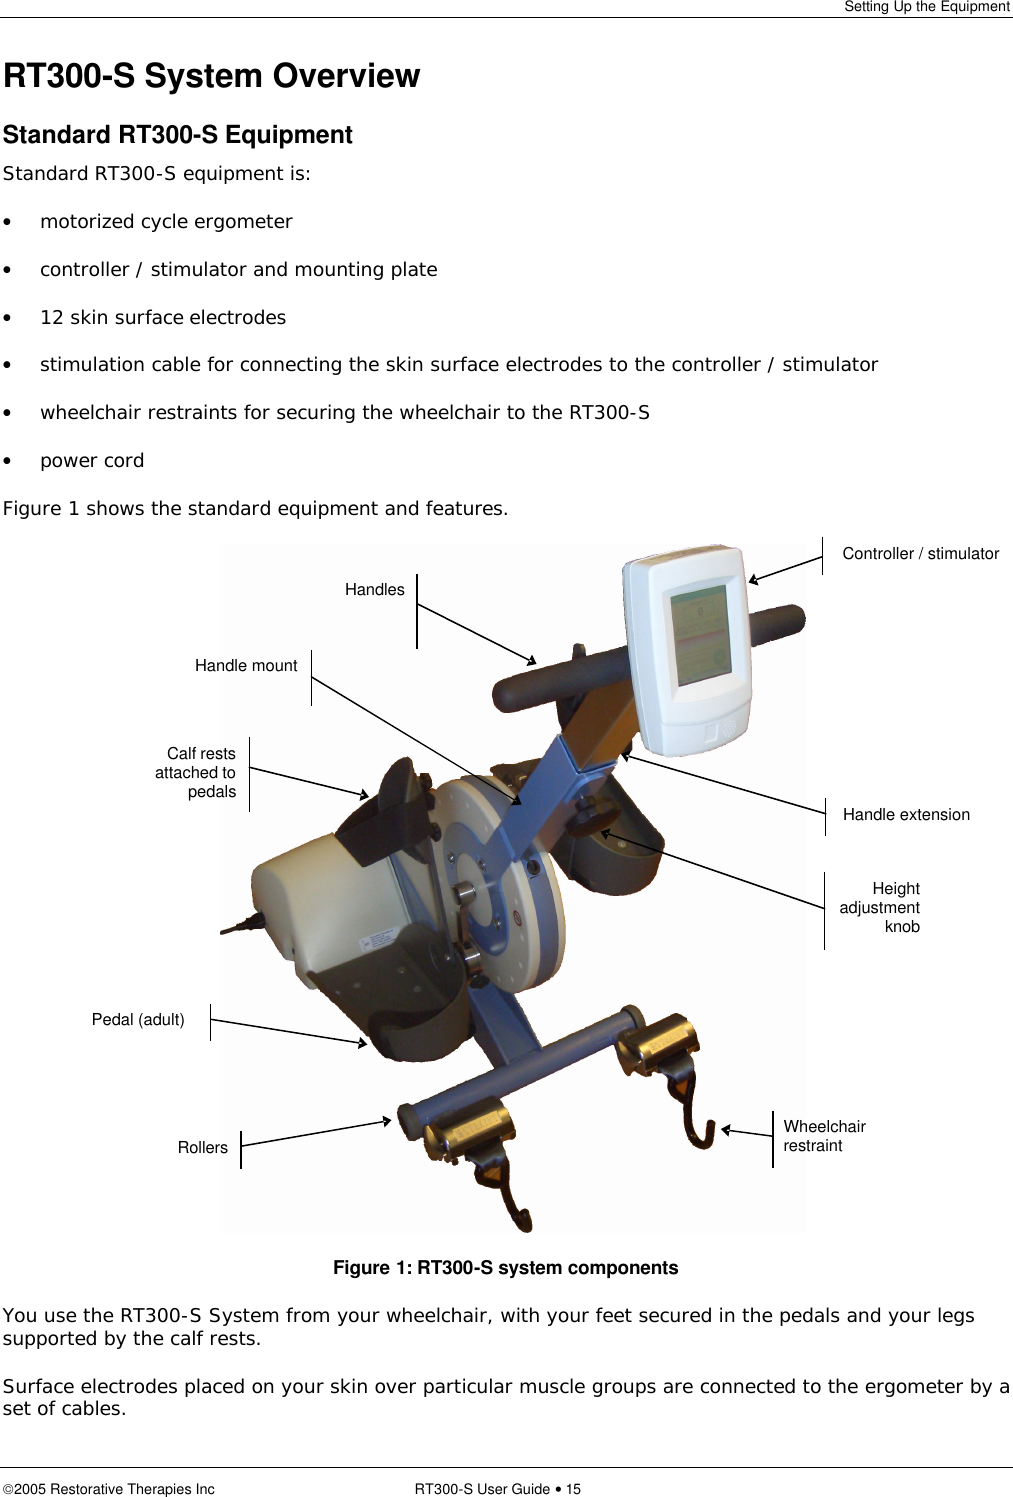
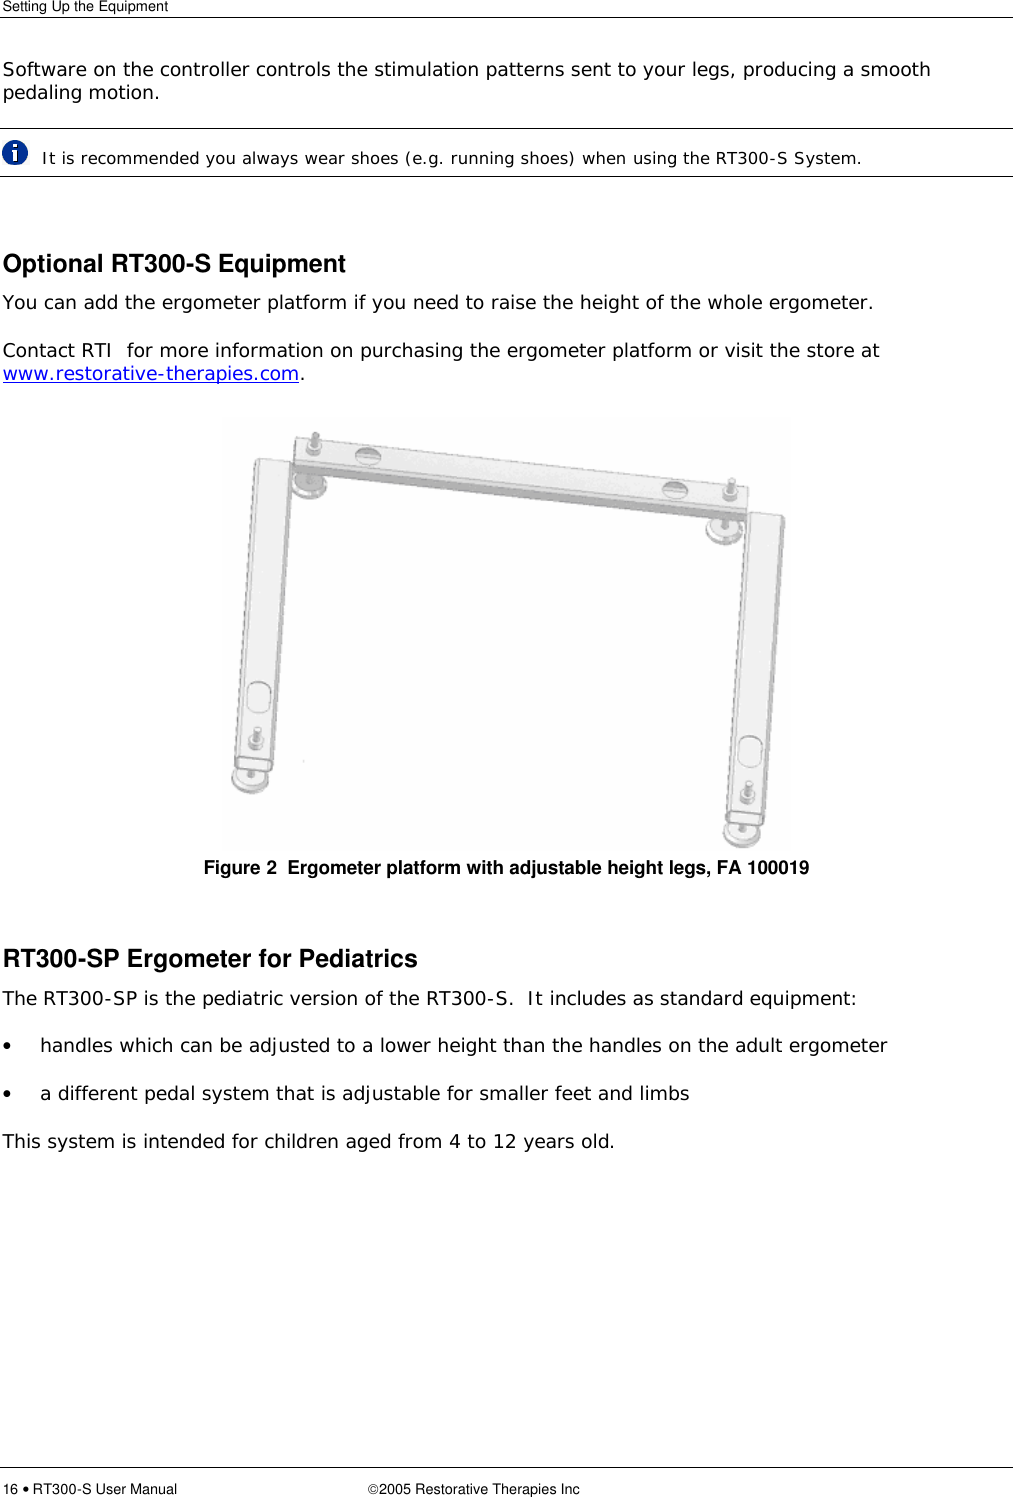
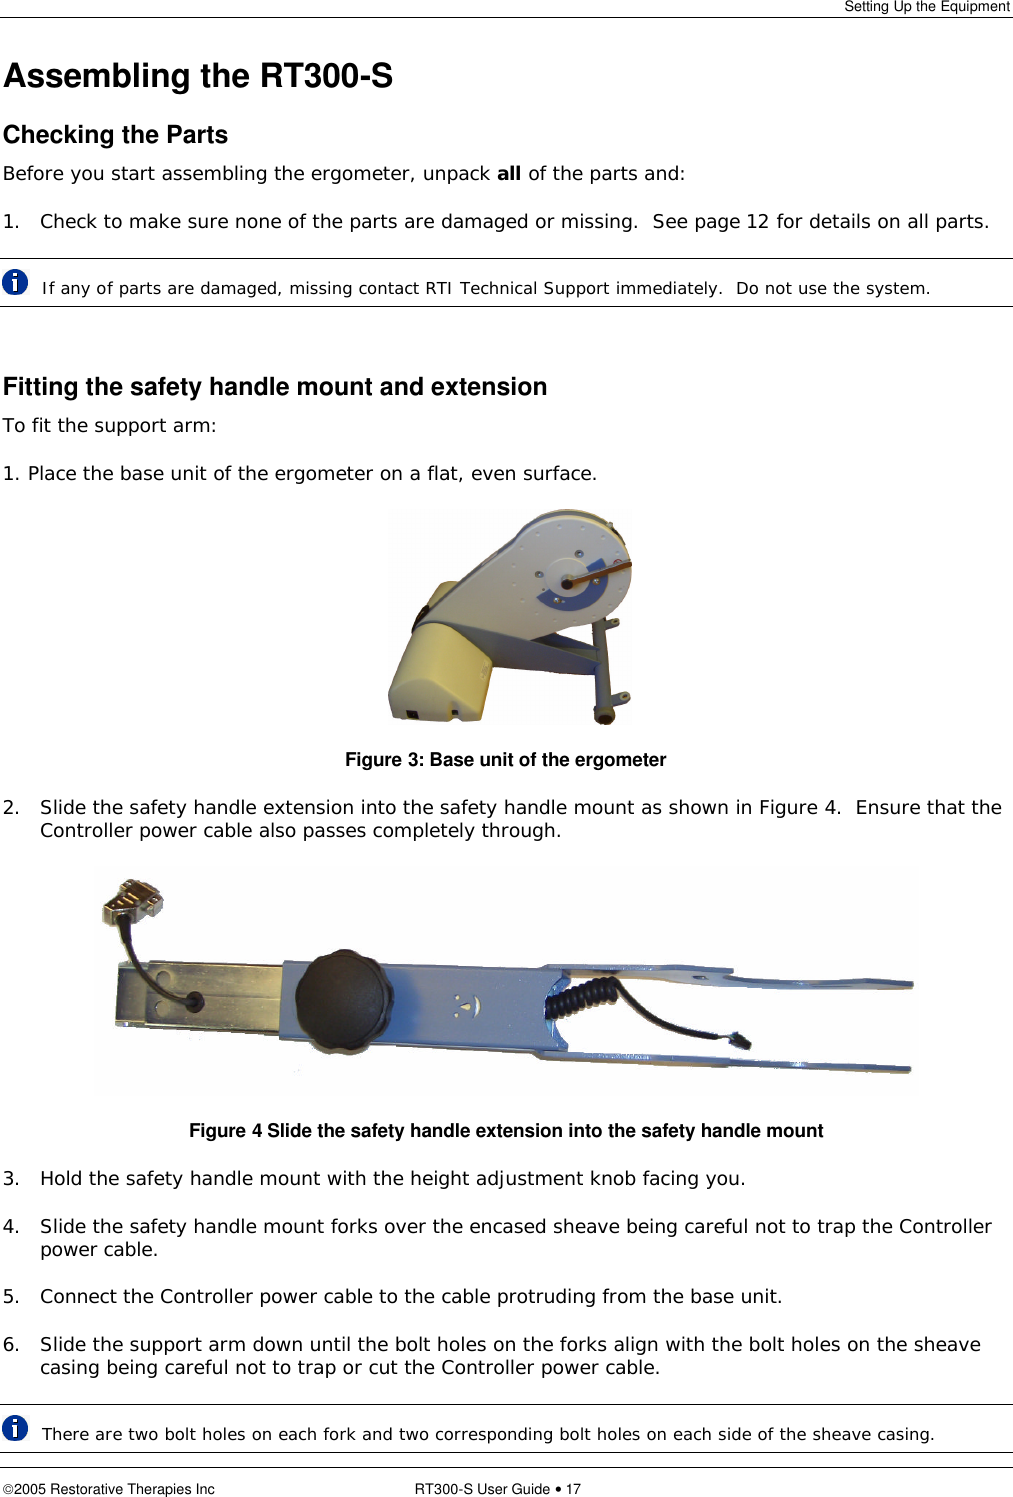
Users Manual 1 of 2

![RT300-S System User Guide Caution: Federal law restricts this device to sale by or on the order of a practitioner licensed by the law of the State in which he/she practices to use or order the use of the device. Part Number: LB100108 RV100608 Issue 7 [June 2005]](https://usermanual.wiki/Restorative-Therapies/RT300-S.Users-Manual-1-of-2/User-Guide-564639-Page-3.png)