Restorative Therapies RT300-S Custom Controller w/Ipaq hx2100 PDA & Daughter PCB User Manual LB100108 RT300
Restorative Therapies Inc Custom Controller w/Ipaq hx2100 PDA & Daughter PCB LB100108 RT300
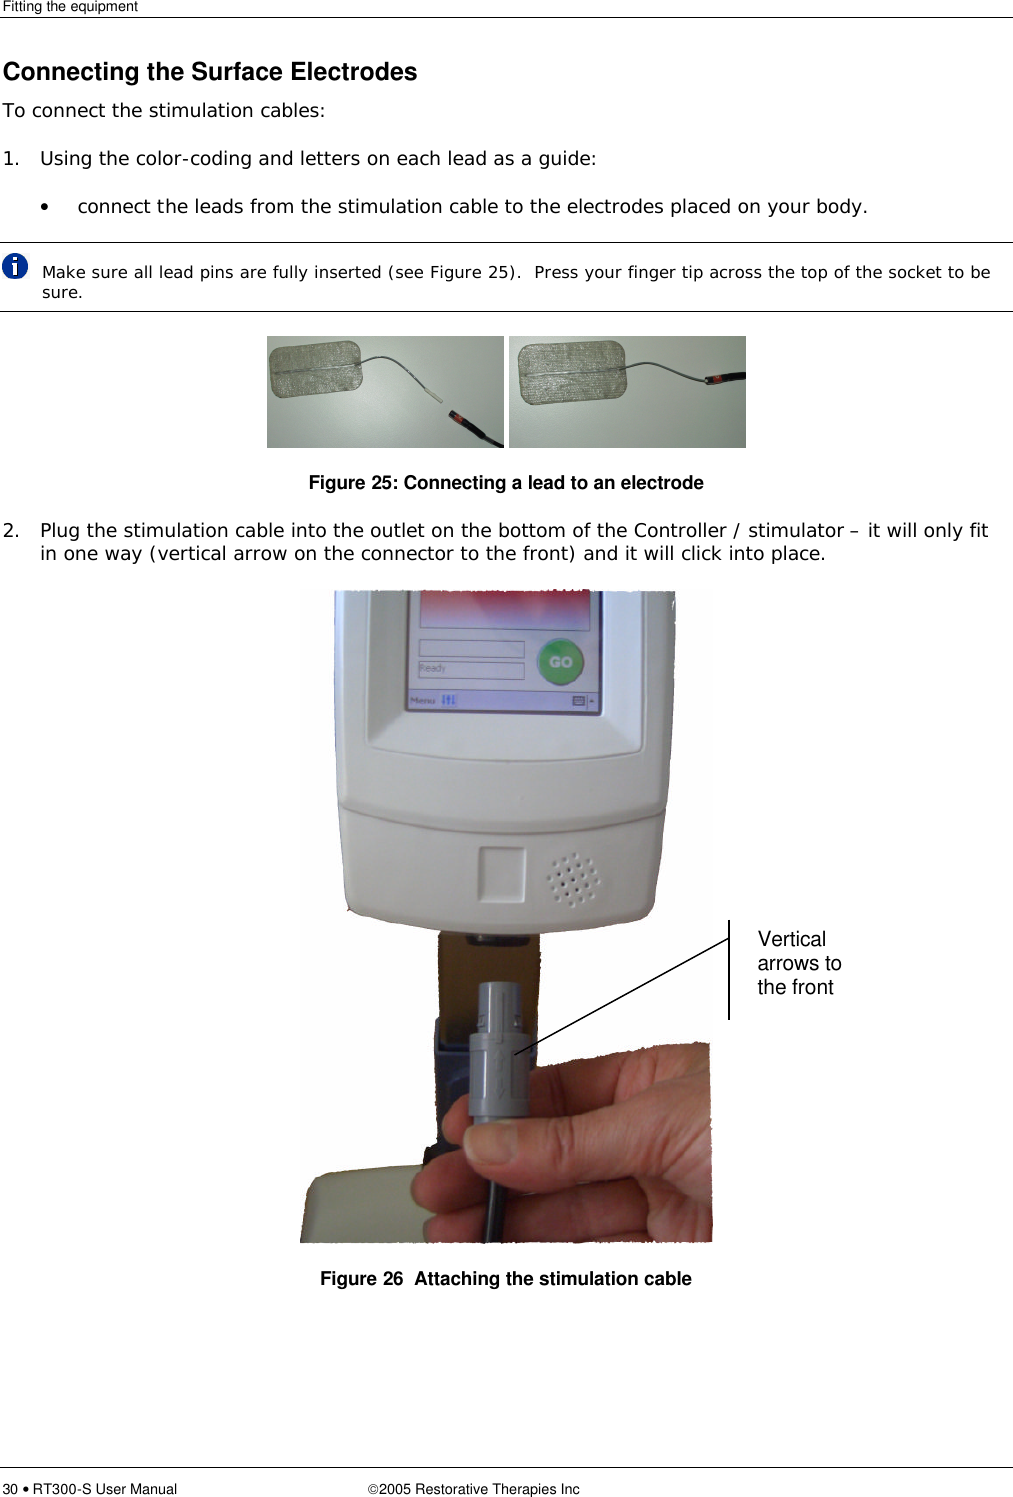
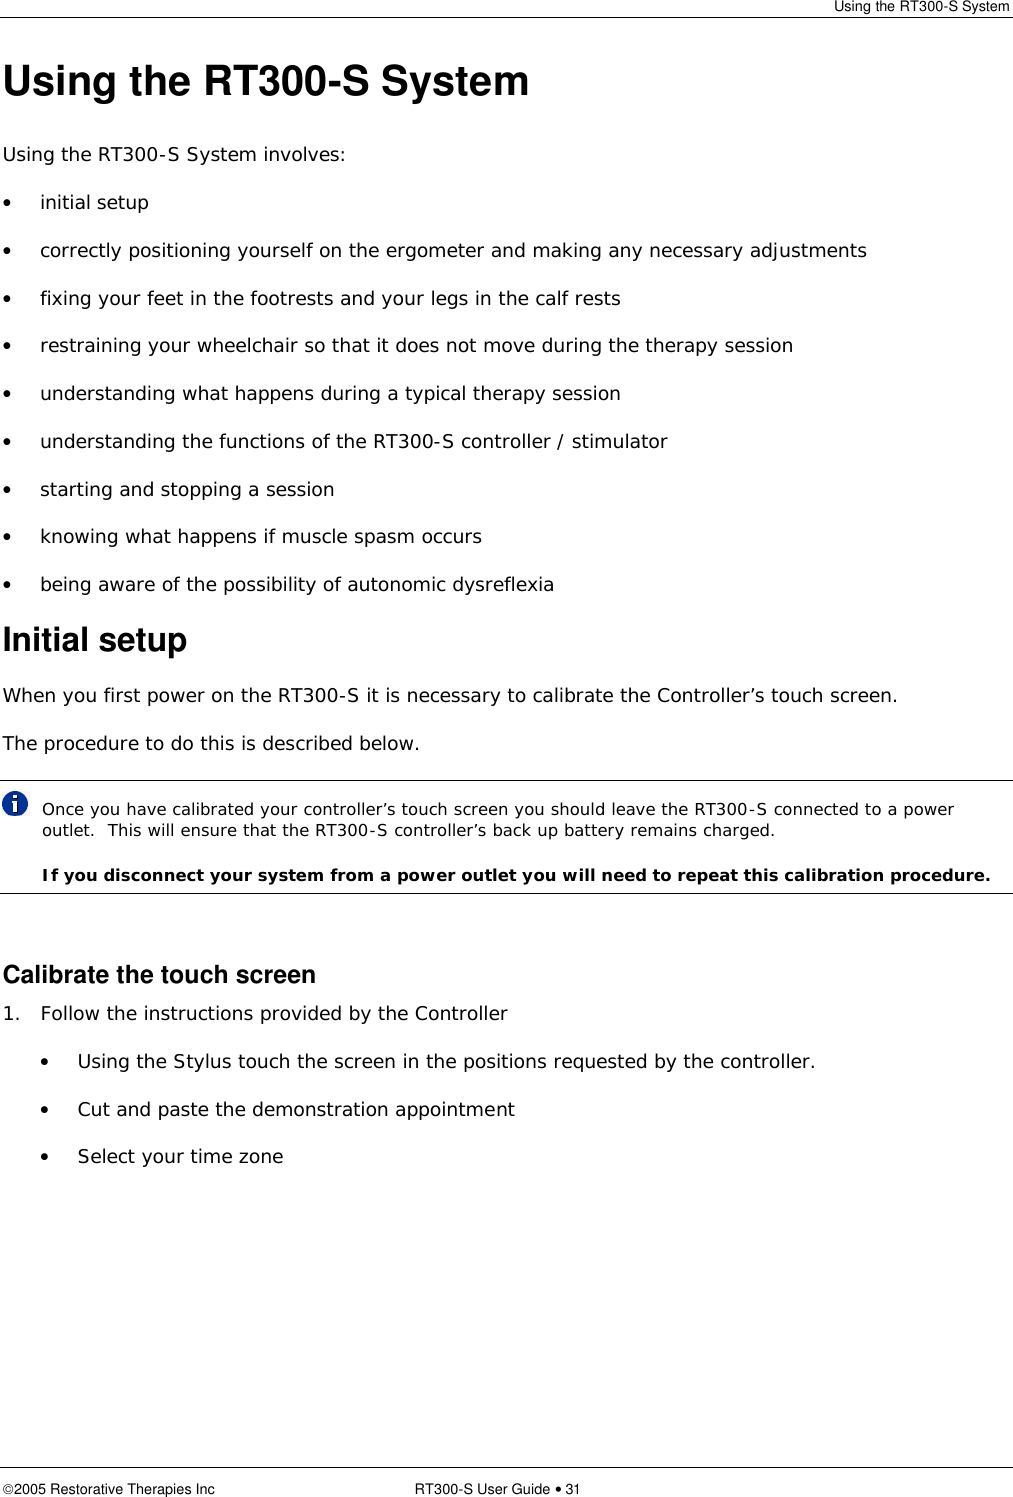
Contents
- 1. Users Manual 1 of 2
- 2. Users Manual 2 of 2
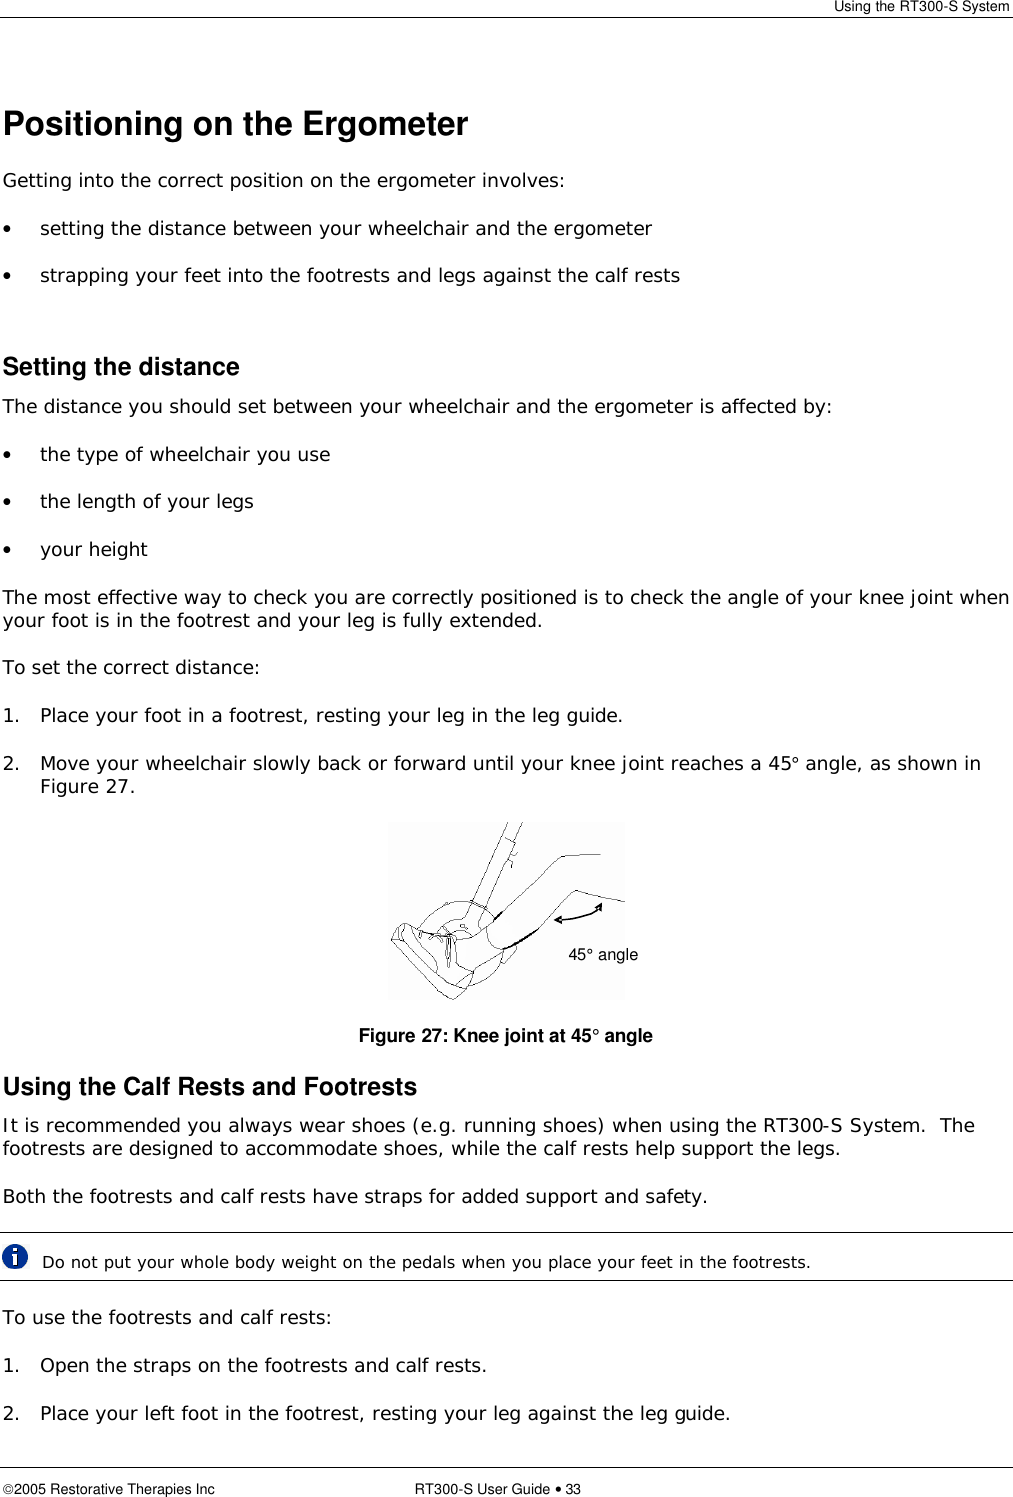
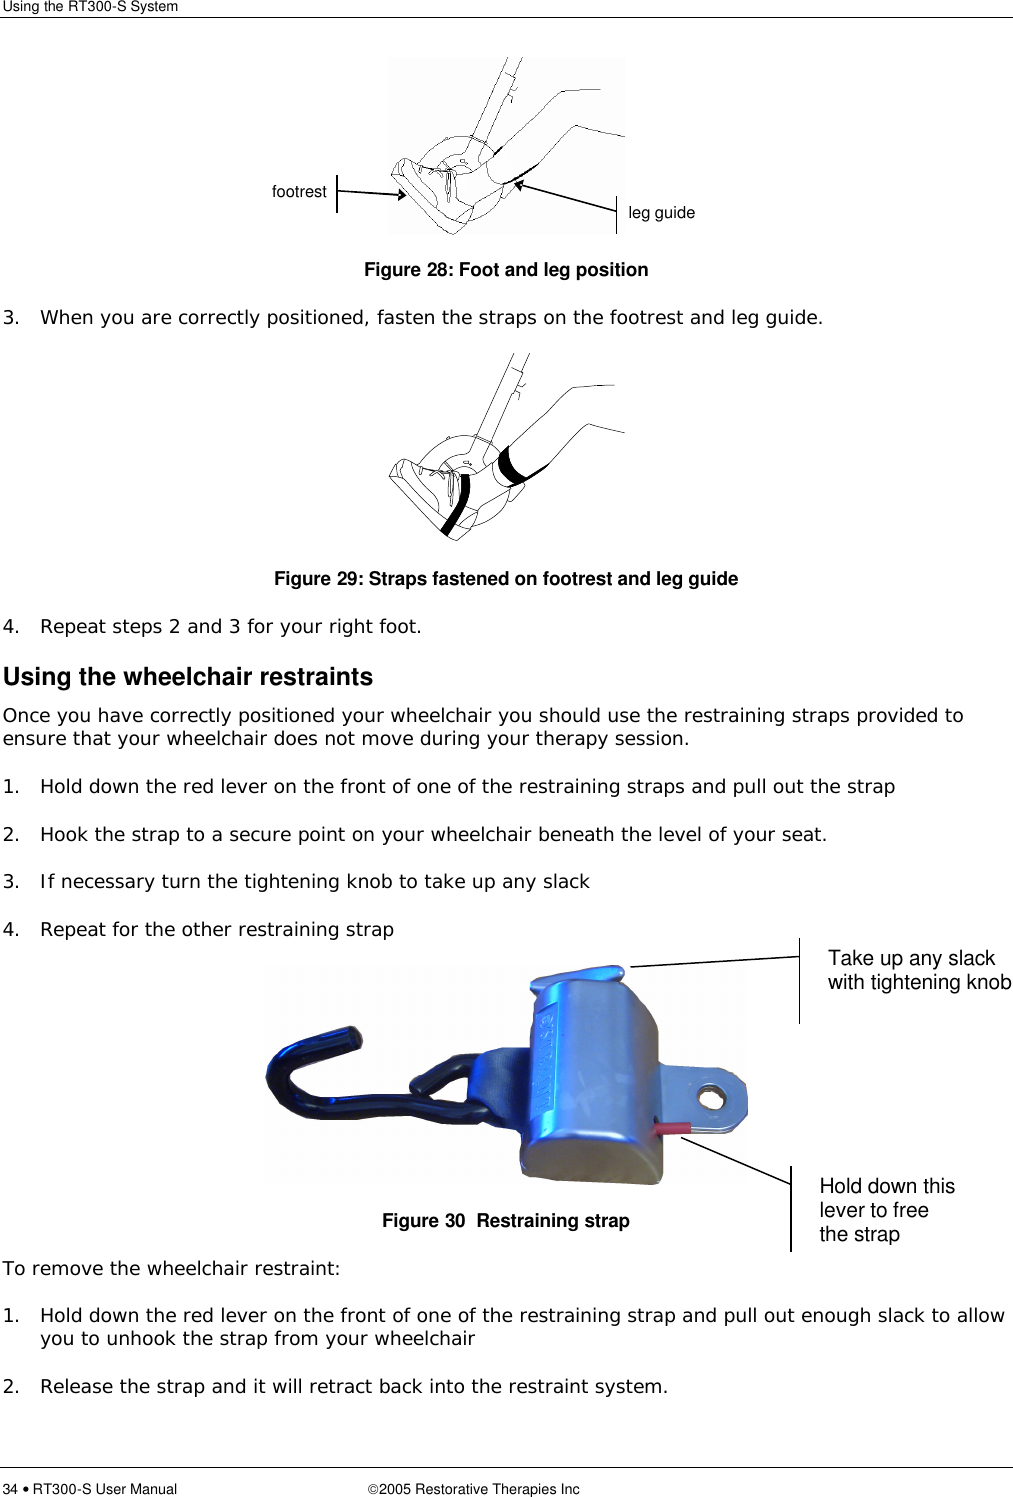
Users Manual 2 of 2