Ricoh PRSPC342DN1 Part15 Subpart B-Printer User Manual BBP PRSPC342DN1 4
Ricoh Company Ltd Part15 Subpart B-Printer BBP PRSPC342DN1 4
Ricoh >
Contents
- 1. BBP-PRSPC342DN1_User Manual 1
- 2. BBP-PRSPC342DN1_User Manual 2
- 3. BBP-PRSPC342DN1_User Manual 3
- 4. BBP-PRSPC342DN1_User Manual 4
- 5. BBP-PRSPC342DN1_User Manual 5
BBP-PRSPC342DN1_User Manual 4

Ready State After Printing
You can specify the state the printer return to after printing documents during Sleep Mode.
• Control Panel On
The printer does not return to Sleep Mode and the initial screen appears on the control panel.
• Cntrl Panel Off (EngySavg)
The printer returns to Sleep Mode.
Low Power Mode Level
Specify the Low Power Mode Level. Starting up time and power consumption will differ according
to this level.
Default: [Level 2]
• Level 1
• Level 2
When "Level 1" is specified, electricity consumption will be lower than that of normal stand by
state.
When "Level 2" is specified, this machine returns from stand-by mode within 30 seconds.
Stop Print at Output Limit
Select whether to stop printing when the number of printed sheets reaches the capacity number of
the output tray. Stopping will prevent overflow and mixing of sheets on the output tray.
To resume printing, remove the printed sheets from the output tray, and then press [Carry On] on
the control panel.
Printing stops when the maximum number is reached, even if the prints have been removed from the
output tray during the print run. The maximum number of sheets that can be printed at one time is
approximately 150.
If the maximum number of output sheets is reached while printing a particular type of list, printing
will be canceled without the machine displaying a message.
Default: [Inactive]
• Active
• Inactive
Bypass Print:64-90 mm
Select [Active] when printing on paper whose width is less than 90 mm. To print on paper of
another size, select [Inactive].
Default: [Inactive]
• Active
• Inactive
Function Details of the Printer Configuration Items (SP C340DN)
midas-p3_com_operating_instructions_gb_00208890_eng.xml 241
Draft 2016/01/18

B&W Print Priority
You can specify whether or not to reduce the consumption of color toner. When this function is
enabled, it may take longer to start printing a color page.
Default: [Off]
• On
• Off
Anti-Humidity
Select whether or not to reduce paper curl and print smearing when printing in a high-humidity
environment.
Anti-Humidity Setting
Default: [Off]
• On
• Off
Anti-Humidity Level
Default: [Level 1 (Weak)]
• Level 1 (Weak)
• Level 2 (Medium)
• Level 3 (Strong)
Print Compressed Data
You can specify whether or not to print compressed data. The supported compression format is
GZIP.
Default: [Off]
• On
• Off
Memory Usage
You can specify whether or not to use memory from Font Priority or Frame Priority.
Default: [Frame Priority]
• Font Priority
Allocates more memory to the PDL work area. Select this setting if printing fails due to
insufficient memory.
• Frame Priority
Allocates more memory for image processing. Select this setting to increase print speed.
Depending on the document you are printing, this setting might not be effective.
5. Configuring and Managing the Printer
242 midas-p3_com_operating_instructions_gb_00208890_eng.xml
Draft 2016/01/18
B&W Page Detect
You can specify whether to recognize black-and-white images by page or by document. The
black-and-white recognition function allows the printer to print monochrome images in
monochrome mode even if color printing is specified.
Default: [Per Job]
• Per Page
• Per Job
• Off
RAM Disk
If the hard disk is not installed for PDF Direct Print, select a value of 2 MB or higher.
Default: [4 MB]
• 0 MB
• 2 MB
• 4 MB
• 8 MB
• 16 MB
Auto E-mail Notify
You can specify whether or not to send an error message to a preset e-mail address when a printer
error occurs. After changing the setting, turn off the power of the printer briefly, and then turn it on
again. For information, see Web Image Monitor Help.
Default: [On]
• On
• Off
Main Pwr Off if Ntwrk Disc
xxxxxxx
Default: [On]
• On
• Off
Serial No. of Machine
You can check the serial number of the printer.
Print Settings (SP C340DN)
This section describes the parameters that can be set on [Print Settings].
Function Details of the Printer Configuration Items (SP C340DN)
midas-p3_com_operating_instructions_gb_00208890_eng.xml 243
Draft 2016/01/18
Machine Modes (SP C340DN)
Copies
You can specify the number of copies to print.
If the number of copies to print is specified by command or the printer driver, this setting is
overridden.
Default: 1
• 1 to 999
Page Size
You can specify the default paper size. The default paper size is used when the paper size is not
specified in the print data.
Default:
(mainly Europe and Asia)
A4
(mainly North America)
81/2 × 11
• (mainly Europe and Asia)
A4, A5, A6, B5 JIS, B6 JIS, C5 Env, C6 Env, DL Env, 81/2 × 14, 81/2 × 132/5, 81/2 × 13,
81/2 × 12, 81/2 × 11, 81/4 × 13, 8 × 13, 71/4 × 101/2, 51/2 × 81/2, 41/8 × 91/2,
37/8 × 71/2, 16K, Custom Size
• (mainly North America)
81/2 × 14, 81/2 × 132/5, 81/2 × 13, 81/2 × 11, 81/4 × 13, 8 × 13, 71/4 × 101/2, 51/2
× 81/2, 41/8 × 91/2, 37/8 × 71/2, A4, A5, A6, B5 JIS, B6 JIS, C5 Env, C6 Env, DL Env,
16K, Custom Size
Duplex
You can specify whether or not to print on both sides of a sheet. If you specify duplex printing, you
must also specify the binding method.
Default: [None]
• None
• Long Edge Bind
• Short Edge Bind
Rotate by 180 Degrees
You can specify whether or not to rotate the print image by 180 degrees.
Default: [Off]
• On
• Off
5. Configuring and Managing the Printer
244 midas-p3_com_operating_instructions_gb_00208890_eng.xml
Draft 2016/01/18

Blank Page Print
You can specify whether or not to print blank pages.
Default: [On]
• On
• Off
Letterhead Setting
You can specify whether or not to print on paper that has a fixed print side or print direction
(letterhead paper, for example). For details, see page 121 "Loading Orientation-Fixed Paper or
Two-Sided Paper".
Default: [Auto Detect]
• Off
The letterhead printing mode is disabled.
• Auto Detect
You can specify whether or not to print using letterhead mode whenever a page that has a
fixed print side or print direction is specified as the first page.
• On (Always)
Print with the letterhead printing mode regularly.
Tray Setting Priority
You can specify whether or not the paper size and type settings that are applied are those
specified using the control panel, printer driver, or print command.
Bypass Tray
You can specify whether or not the paper size and type settings applied for the bypass tray
are those specified using the control panel, printer driver, or print command.
Default: [Driver/Command]
• Driver/Command
When the source paper tray is specified for a print job, the paper settings specified using
the printer driver or by print command are applied, regardless of any settings specified
using the control panel.
• Machine Setting(s)
The paper settings specified on the printer's control panel are applied to all print jobs. An
error may occur if the paper settings specified using the printer driver or by print
command do not match those specified using the control panel.
• Machine Settg(s): Any Type
Printing is performed according to the paper size specified using the printer driver or
print command and the paper type specified on the machine. Regardless of the type of
Function Details of the Printer Configuration Items (SP C340DN)
midas-p3_com_operating_instructions_gb_00208890_eng.xml 245
Draft 2016/01/18

paper in the paper tray, you can print properly by specifying a paper type using the
printer driver or print command.
• Any Size/Type
If the printer's trays do not contain any paper to match the print job settings, printing can
be performed from the bypass tray with the job's settings applied.
• Any Custom Size/Type
If the printer's trays do not contain any paper to match the print job settings but custom
paper was specified using the printer driver or by print command, printing can be
performed from the bypass tray with the job's settings applied.
Trays 1 to 2
You can specify whether the paper size and type settings applied for Trays 1 to 4 are those
specified using the control panel, printer driver, or print command.
Default: [Machine Setting(s)]
• Driver/Command
• Machine Setting(s)
Tray Switching
You can specify whether or not the printer automatically switches paper trays when paper of the
specified size and type is not loaded in the driver-designated tray.
Default: [Off]
• On
• Off
Extend Auto Tray Switching
You can set the printer to switch paper trays automatically, regardless of whether the tray is
manually or automatically selected.
Default: [Off]
• On
• Off
PCL Char.Thickness Adjust.
Specify whether or not to thicken the typeface if characters appear blurred when printing through
the PCL 5c or PCL6 printer driver.
Default: [Off]
• On
• Off
5. Configuring and Managing the Printer
246 midas-p3_com_operating_instructions_gb_00208890_eng.xml
Draft 2016/01/18
PCL Menu (SP C340DN)
You can set conditions when using PCL for printing.
Orientation
Select the page orientation.
Default: [Portrait]
• Portrait
• Landscape
Form Lines
You can specify the number of lines per page from 5 to 128. The default paper size is used when
the paper size is not specified in the print data.
Default:
(mainly Europe and Asia)
64
(mainly North America)
60
Font Source
You can specify the location of the default font.
When you select [RAM], you can select only fonts downloaded to the printer RAM.
When you select [HDD], you can select only fonts downloaded to the hard disk.
When you select [SD Font Download], you can select only fonts downloaded to the SD card.
Default: [Resident]
• Resident
• RAM
• HDD
• SD
• SD Font Download
Font Number
You can specify the ID of the default font you want to use.
Default: 0
• 0 to 63 (Resident)
• 1 to X (Download; "X" is the number of downloaded fonts)
Function Details of the Printer Configuration Items (SP C340DN)
midas-p3_com_operating_instructions_gb_00208890_eng.xml 247
Draft 2016/01/18

Point Size
You can specify the point size you want to use for the default font between 4.00 to 999.75 in 0.25
increments. This setting is effective only for a variable-space font.
Default: 12.00 points
Font Pitch
You can specify the number of characters per inch you want to use for the default font between
0.44 to 99.99 in 0.01 increments. This setting is effective only for fixed-space fonts.
Default: 10.00 pitches
Symbol Set
You can specify the character set for the default font.
Default: [PC-8]
Available sets are as follows:
Roman-8, Roman-9, ISO L1, ISO L2, ISO L5, ISO L6, ISO L9, PC-775, PC-8, PC-8 D/N,
PC-850, PC-852, PC-858, PC8-TK, PC-1004, Win L1, Win L2, Win L5, Win Baltic, Desktop, PS
Text, MS Publ, Math-8, PS Math, Pifont, Legal, ISO 4, ISO 6, ISO 11, ISO 15, ISO 17, ISO 21,
ISO 60, ISO 69, Win 3.0, MC Text, UCS-2, PC-864, Arabic-8, Win Arabic, PC-866, PC-866U,
ISO Cyrillic, Win Cyrillic, PC-851, Greek-8, ISO Greek, PC-8 Greek, Win Greek, PC-862,
Hebrew-7, Hebrew-8, ISO Hebrew
Courier Font
You can select the type of courier font.
Default: [Regular]
• Regular
• Dark
Ext. A4 Width
You can specify whether or not to extend the width of the printable area of A4 sheets by reducing
side margins.
Default: [Off]
• On
• Off
Append CR to LF
You can specify whether or not to append a CR code to each LF code to print text data clearly.
Default: [Off]
• On
• Off
5. Configuring and Managing the Printer
248 midas-p3_com_operating_instructions_gb_00208890_eng.xml
Draft 2016/01/18

Resolution
You can specify the print resolution in dots per inch.
Default: [600dpi Fast]
• 600dpi Fast
• 600dpi Std.
• 1,200dpi (PCL 6 only)
PS Menu (SP C340DN)
You can set conditions when using PostScript for printing.
Job Timeout
You can specify how long the printer waits before canceling the current job when the job is
interrupted while being processed. If you select Use Machine Setting(s), enter a value between 0 to
999. (Default: 0)
Default: [Use Driver/Command]
• Use Driver/Command
• Use Machine Settings
Wait Timeout
You can specify how long the printer waits before it denies receiving a job when the printer cannot
determine when the job ends. If you select Use Machine Setting(s), enter a value between 0 to
999. (Default: 300)
Default: [Use Driver/Command]
• Use Driver/Command
• Use Machine Settings
Paper Selection Method
You can specify how the source tray will be selected by specifying the default value for
DeferredMediaSelection in PostScript.
Default: [Select Paper Tray]
• Auto Select
The default value for DeferredMediaSelection is "true". The source tray that matches the paper
setting specified in a print job will be selected.
• Select Paper Tray
The default value for DeferredMediaSelection is "false". The source tray will be selected
according to the media selection of PostScript Language Reference.
Function Details of the Printer Configuration Items (SP C340DN)
midas-p3_com_operating_instructions_gb_00208890_eng.xml 249
Draft 2016/01/18

Swtchg btwn 1&2 Sided Prnt
You can specify which side of the paper to print on when the PS command is used to perform
duplex printing and the "setpagedevice" command is entered.
Default: [Active]
• Active
Cancels duplex printing, and prints pages after the "setpagedevice" command has been
entered on the front side of paper.
• Inactive
Retains duplex printing, and prints pages after the "setpagedevice" command has been
entered on the back side of paper.
Data Format
You can select the data format from Binary Data or TBCP.
This setting is ineffective if a parallel or EtherTalk connection is used.
When binary data is sent from the printer driver when the printer is working with a parallel or USB
connection, the print job is canceled.
Default: [TBCP]
• Binary Data
• TBCP
When an Ethernet connection is used, the print job is canceled if:
• The printer driver data format is TBCP and the data format selected using the control panel is
Binary Data.
• The printer driver data format is binary and the data format selected using the control panel is
TBCP.
Resolution
You can specify the resolution.
Default: [600dpi Fast]
• 600dpi Fast
• 600dpi Std.
• 1200dpi
Toner Saving
You can specify whether or not to reduce toner consumption when printing. When this setting is
enabled, print quality may be degraded.
Default: [Off]
• On
• Off
5. Configuring and Managing the Printer
250 midas-p3_com_operating_instructions_gb_00208890_eng.xml
Draft 2016/01/18

Color Setting
You can specify the RGB setting.
Default: [Super Fine]
• None
• Fine
• Super Fine
Color Profile
You can specify the color profile.
Default: [Auto]
• Auto
• Presentation
• Solid Color
• Photographic
• User Setting
Process Color Model
You can specify the color model.
Default: [Color]
• Color
• Black and White
Orientation Auto Detect
You can specify orientation auto detect.
Default: [On]
• On
• Off
Gray Reproduction
You can specify how to print black or gray tones.
Default: [Black/Gray by K (Black)]
• Black/Gray by K (Black)
• Black by K (Black)
• CMY + K
• Blk/Gry by K(Blk)-TextOnly
• Black by K (Blk)-Text Only
• Black/Gray by K-Strong UCR
Function Details of the Printer Configuration Items (SP C340DN)
midas-p3_com_operating_instructions_gb_00208890_eng.xml 251
Draft 2016/01/18

PDF Menu (SP C340DN)
You can set conditions when using PDF for printing.
Change PDF Password
You can set the password for the PDF file printed using PDF Direct Print.
A password can be also set using Web Image Monitor, but in this case the password information is
sent through the network. If security is a priority, set the password using this menu from the control
panel.
PDF Group Password
This setting is not available on this printer.
Reverse Order Printing
You can set the printer to start printing from the last page of the document. Use this function when
prints come out face up in the output tray. This allows a printed document to be assembled in
sequential order.
Default: [Off]
• On
• Off
Resolution
You can specify the resolution for the PDF file executing PDF Direct Print.
Default: [600dpi Fast]
• 600dpi Fast
• 600dpi Std.
• 1200dpi
Toner Saving
You can specify whether or not to reduce toner consumption when printing. When this setting is
enabled, print quality may be degraded.
Default: [Off]
• On
• Off
Color Setting
You can specify the RGB setting.
Default: [Super Fine]
• None
• Fine
• Super Fine
5. Configuring and Managing the Printer
252 midas-p3_com_operating_instructions_gb_00208890_eng.xml
Draft 2016/01/18

Color Profile
You can specify the color profile.
Default: [Auto]
• Auto
• Presentation
• Solid Color
• Photographic
• User Setting
Process Color Model
You can specify the color model.
Default: [Color]
• Color
• Black and White
Orientation Auto Detect
You can specify orientation auto detect for the PDF file executing PDF Direct Print.
Default: [On]
• On
• Off
Security Options (SP C340DN)
This describes the parameters that can be set on [Security Options].
Extended Security
Specify whether or not to use the extended security functions. For details about the extended
security functions, see Security Guide.
Service Mode Lock
You can specify whether or not to prohibit entering service mode. This setting appears only when
the user has logged in as the machine administrator.
Default: [Off]
• On
• Off
Firmware Version
You can display the firmware version of the printer.
Function Details of the Printer Configuration Items (SP C340DN)
midas-p3_com_operating_instructions_gb_00208890_eng.xml 253
Draft 2016/01/18

Network Security Level
You can specify the network security level.
Default: [Level 0]
• Level 0
• Level 1
• Level 2
• FIPS 140
Auto Erase Memory Setting
You can specify whether or not to automatically delete the memory. When set to [On], specify the
overwrite times. To specify the number of memory overwrites, select [Random Numbers]. This
setting appears only when the optional hard disk is installed.
Default: [Off]
• On
HDDErase
• NSA
• DoD
• Random Numbers
Number of Erase: Between 1 to 9
• Off
Erase All Memory
You can delete all data inside the memory. When deleting memory, specify the overwrite times. To
specify the number of memory overwrites, select [Random Numbers]. This setting appears only
when the optional hard disk is installed.
Default: [Random Numbers]
HDDErase
• NSA
• DoD
• Random Numbers
Number of Erase: Between 1 to 9
Extend Auth.Mng.
For details about this function, see Security Guide.
Transfer Log Setting
You can specify whether or not to send log information to the log collection server.
Default: [Off]
5. Configuring and Managing the Printer
254 midas-p3_com_operating_instructions_gb_00208890_eng.xml
Draft 2016/01/18
• On (Only available from the log collection server.)
• Off
Machine Data Encryption
You can encrypt data stored on the hard disk. Select the data to be carried over to the hard disk
and not be reset.
• Format All Data
• CarryOver FileSys DataOnly
• Carry Over All Data
Collect Logs
You can specify whether or not to collect job logs, access logs, and eco-friendly logs.
Job Log
Default: [Inactive]
• Active
• Inactive
Access Log
Default: [Inactive]
• Active
• Inactive
Eco-friendly Logs
Default: [Inactive]
• Active
• Inactive
• For details, see Security Guide.
Device Setting Information (SP C340 DN)
xxxxxxxxxx
Host Interface (SP C340DN)
This section describes the parameters that can be set on [Host Interface].
I/O Buffer
You can select the size of the I/O buffer. Normally it is not necessary to change this setting.
Function Details of the Printer Configuration Items (SP C340DN)
midas-p3_com_operating_instructions_gb_00208890_eng.xml 255
Draft 2016/01/18

Default: [128 KB]
• 128 KB
• 256 KB
I/O Timeout
You can specify how many seconds the printer should wait before ending a print job. If printing
operation is frequently interrupted by data from other ports, you can increase the timeout period.
Default: [15 seconds]
• 10 seconds
• 15 seconds
• 20 seconds
• 25 seconds
• 60 seconds
Network
You can configure the network settings. For details, see page 90 "Configuration".
Machine IPv4 Address
You can specify whether to set the IPv4 address automatically or manually.
Default: [Auto-Obtain (DHCP)]
Auto-Obtain (DHCP)
When DHCP is set to On, the IPv4 address, subnet mask address, and gateway address
cannot be changed. To change them, set DHCP to Off. Contact your administrator for
information about the network configuration.
Specify
• IP Add.
Manually specify the IPv4 address.
Default: 11.22. 33.44
• Subnet M
Manually specify the subnet mask.
Default: 0.0.0.0
• Gateway
Manually specify the gateway address.
Default: 0.0.0.0
IPv6 Stateless Setting
You can specify whether to enable or disable stateless IPv6 address auto configuration.
Default: [Active]
5. Configuring and Managing the Printer
256 midas-p3_com_operating_instructions_gb_00208890_eng.xml
Draft 2016/01/18

• Active
• Inactive
DHCPv6 Configuration
You can configure the DHCPv6 settings.
DHCPv6 Setting
You can specify whether or not to enable DHCPv6.
Default: [Inactive]
• Active
• Inactive
Operation Mode
You can specify the operation mode for DHCPv6 when [DHCPv6 Config.] is set to
[Active].
Default: [Router Request]
• Router Request
• Obtain IP Address
• Do not obtain IP Address
DNS Server Address
You can specify how the DNS server address is specified when [DHCPv6 Config.] is set
to [Active].
Default: [Auto-Obtain (DHCPv6)]
• Auto-Obtain (DHCPv6)
• Specify
Ipsec
This is a security function. For details, contact your administrator.
Default: [Inactive]
• Active
• Inactive
Effective Protocol
You can specify the effective protocol.
IPv4
Default: [Active]
• Active
• Inactive
Function Details of the Printer Configuration Items (SP C340DN)
midas-p3_com_operating_instructions_gb_00208890_eng.xml 257
Draft 2016/01/18

IPv6
Default: [Inactive]
• Active
• Inactive
SMB
Default: [Active]
• Active
• Inactive
@Remote Service
Default: [Active]
• Active
• Inactive
Firmware Update (IPv4)
Default: [Active]
• Active
• Inactive
Firmware Update (IPv6)
Default: [Active]
• Active
• Inactive
Ethernet Speed
You can specify the network speed to operate the printer. If a communication error occurs
because of compatibility problems with the hub, select a speed suitable for your network
environment.
In order to reduce power consumption of network devices, the default Ethernet speed of the
printer does not exceed 100BASE-TX (100 Mbps). If you want to communicate using a higher
speed, select [Auto Select: Enable 1Gbps] to enable 1000BASE-T (1Gbps) communication.
Default: [Auto Select: Disable 1Gbps]
• Auto Select: Enable 1Gbps
• Auto Select: Disable 1Gbps
• 10Mbps Half Duplex
• 10Mbps Full Duplex
• 100Mbps Half Duplex
• 100Mbps Full Duplex
5. Configuring and Managing the Printer
258 midas-p3_com_operating_instructions_gb_00208890_eng.xml
Draft 2016/01/18

IEEE802.1X Auth.(Ethernet)
You can specify IEEE 802.1X Ethernet authentication. For details about IEEE 802.1X
authentication, see Security Guide.
Default: [Inactive]
• Active
• Inactive
Restr.IEEE802.1X Auth.Def.
You can restore the default IEEE 802.1X setting.
LAN Type
You can select Ethernet or Wireless LAN. This menu appears only when the optional wireless
LAN interface board is installed.
If Ethernet and Wireless LAN are both connected, the selected interface has priority.
Default: [Ethernet]
• Ethernet
• Wireless LAN
Permit SSL/TLS Comm.
You can set up encrypted communication for SSL/TLS. If you set to [Ciphertext Only], install
the SSL certificate for the printer.
Default: [Ciphertext Priority]
• Ciphertext Only
• Ciphertext Priority
• Ciphertext/Cleartext
Parallel Interface
You can configure the parallel interface settings. This menu appears when the IEEE 1284 interface
board is installed.
Parallel Timing
You can specify the parallel interface timing.
Default: [ACK outside]
• ACK inside
• ACK outside
• STB down
Parallel Comm. Speed
You can specify whether or not to use DMA transfer for receiving data.
Default: [High Speed]
Function Details of the Printer Configuration Items (SP C340DN)
midas-p3_com_operating_instructions_gb_00208890_eng.xml 259
Draft 2016/01/18

• High Speed
• Standard
Selection Signal Status
You can specify the selection signal level of the parallel interface.
Default: [High]
• High
• Low
Input Prime
You usually do not need to change this setting.
Default: [Inactive]
• Active
• Inactive
Bidirectional Comm.
You can specify whether or not to enable or disable bi-directional communication.
Default: [On]
• On
• Off
Wireless LAN Settings
You can configure the wireless LAN settings. This menu appears only when the optional wireless
LAN interface board is installed.
Wireless LAN Easy Setup
You can set up wireless LAN automatically using Wi-Fi Protected Setup.
Default: [Push Button Method]
• Push Button Method
• PIN Code Method
Communication Mode
You can specify the transmission mode for wireless LAN.
Default: [Infrastructure Mode]
• 802.11 Ad hoc
• Infrastructure
SSID Setting
You can specify the SSID settings to distinguish the access point in [Infrastructure] or [802.11
Ad hoc].
The characters that can be used are ASCII 0x20-0x7e (32 bytes).
5. Configuring and Managing the Printer
260 midas-p3_com_operating_instructions_gb_00208890_eng.xml
Draft 2016/01/18

Ad-hoc Channel
You can specify the channel to use when [802.11 Ad hoc] has been selected. Set the channel
that matches the type of the wireless LAN being used.
Default: [11]
• IEEE 802.11b/g Wireless LAN
Frequency range:
2412–2462 MHz (channels 1–11)
• IEEE 802.11a Wireless LAN
Frequency range:
5180–5240 MHz (channels 36, 40, 44, and 48)
• IEEE 802.11n Wireless LAN
Frequency range:
2412–2462 MHz (channels 1–11)
5180–5240 MHz (channels 36, 40, 44, and 48)
Security Method
You can specify whether or not to enable the encryption method and security type when the
encryption is enabled.
Default: [Off]
• Off
• WEP
Press [Details], and then enter the WEP key using hexadecimal and ASCII characters.
• WPA
Press [Details], and then select the Authentication Methods.
Select one of the following Authentication Methods:
WPA-PSK, WPA(802.1x), WPA2-PSK, WPA2
• WPA2
Press [Details], and then select the Authentication Method.
When you select WPA2, the Encryption Method is set to CCMP (AES) and cannot be
changed.
Select one of the following Authentication Methods:
WPA2-PSK, WPA2
When you select WPA2-PSK, enter a passphrase (from 8 to 63 characters).
Function Details of the Printer Configuration Items (SP C340DN)
midas-p3_com_operating_instructions_gb_00208890_eng.xml 261
Draft 2016/01/18
Direct Connection Settings
You can specify whether or not to enable the control panel can be used as a DHCP server.
When the client on a network starts, the information such as an IP address that is required for
network connection is assigned automatically.
Default: [OFF]
Configure all the following items to enable this function:
• Device name
Press [RENAME DEVICE] on the top right of the screen, and then enter the name of the
device connected to the client.
• Connection Password
Enter the password for connecting to a network.
• Display IPv4 Address
• Connection Status
Wireless LAN Signal
You can check the signal strength when using wireless LAN.
Restore Defaults
You can reset the wireless LAN settings to their default.
USB Settings
You can configure the communication parameters for computer-to-printer connection via USB.
USB Speed
Default: [Auto Select]
• Auto Select
• Full Speed
Fixed USB Port
Default: [Off]
• Level 1
• Level 2
• Off
• For details about how to configure the settings using Web Image Monitor, see Web Image Monitor
Help.
5. Configuring and Managing the Printer
262 midas-p3_com_operating_instructions_gb_00208890_eng.xml
Draft 2016/01/18
Language (SP C340DN)
You can select the display language for the menu. Available languages vary depending on the country
of purchase.
[English] (default), [French], [German], [Italian], [Spanish], [Dutch], [Norwegian], [Danish], [Swedish],
[Polish], [Portuguese], [Hungarian], [Czech], [Finnish], [Russian]
Extended Features (SP C340DN)
Use Web Image Monitor to configure extended features. For details, see Extended Feature Settings.
Memory Erase Status
You can display the status of remaining data in the memory.
• [Memory Erase Status] appears only when the optional hard disk is installed.
Press the [Menu] key, and then select the setting items using the [ ] or [ ] key.
1. Select [Memory Erase Status] Press [OK]
2. Check the current memory status Press [OK]
[Data to erase remaining.] : Data remains inside the memory.
[Currently no data to erase.] : No data remains inside the memory.
[Erasing data...] : Data is being deleted.
Function Details of the Printer Configuration Items (SP C340DN)
midas-p3_com_operating_instructions_gb_00208890_eng.xml 263
Draft 2016/01/18
Printer Configuration Items List (SP C342DN)
This section provides a list of available setting items in each menu and their defaults.
System Settings (SP C342DN)
The table below shows the list of setting items. For details about their functions, see page 286 "System
Settings"
General Features (SP C342DN)
Program/Change/Delete User Text
Panel Key Sound Lowest, Low, Medium (default), High, Off
Function Priority Home (default), Printer, Extended Feature
Screen Color Setting Blue-gray (default), Gray, Blue, Green, Red
Stop Print at Output Limited Active, Inactive (default)
Key Repeat Off, Normal (default), Repeat Time: Medium, Repeat Time: Long
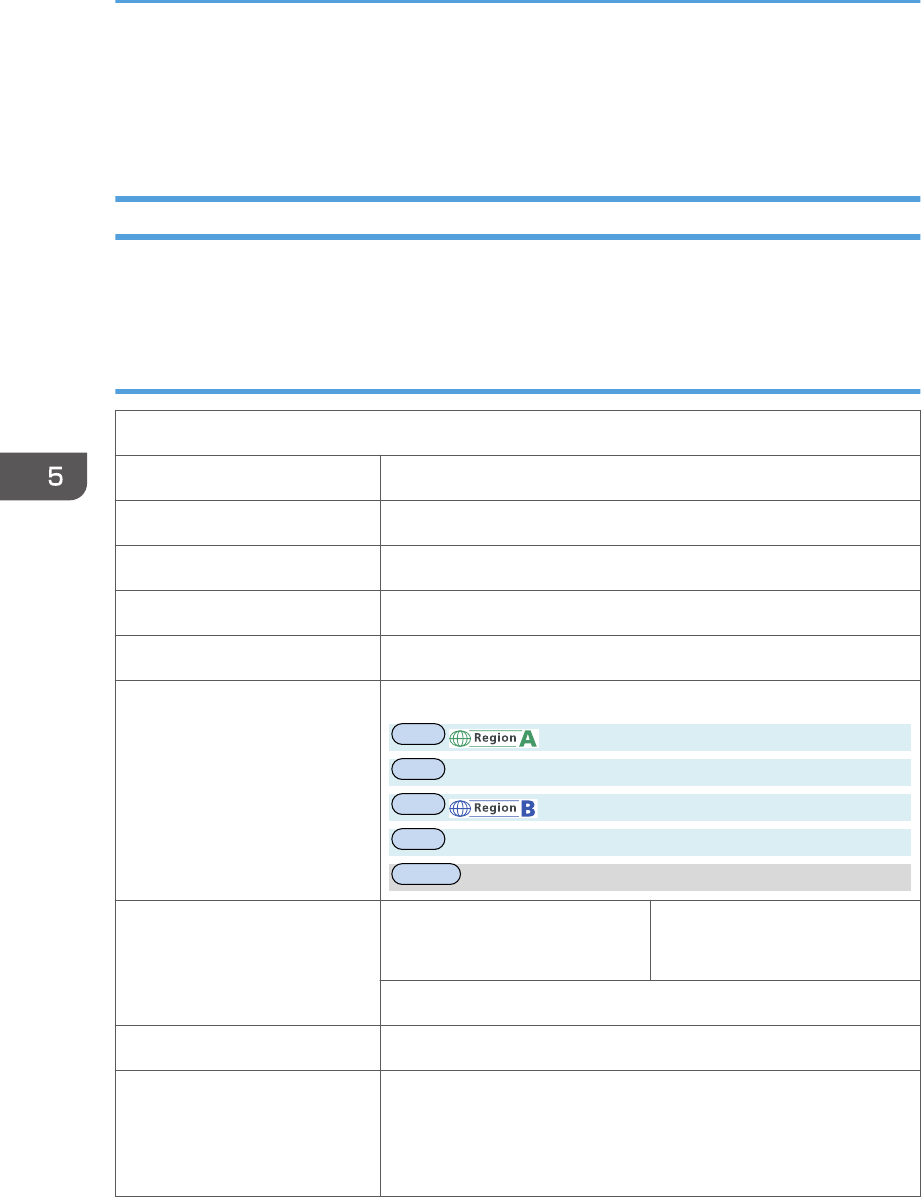
Measurement Unit Default:
engb
(mainly Europe and Asia)
engb
mm
engb
(mainly North America)
engb
inch
ch,kr,tw
mm
Check Status/Job List Display
Time
On (default) 10 to 999 seconds
Default: "15" second(s)
Off
Bypass Print: 64-90 mm Active, Inactive (default)
External Keyboard Off (default), English, German, Canadian French, Italian, Spanish,
Dutch, Portuguese, Polish, Czech, Swedish, Finnish, Hungarian,
Norwegian, Danish, Japanese, Simplified Chinese, Traditional
Chinese, Russian, Hangul, Catalan, Turkish
5. Configuring and Managing the Printer
264 midas-p3_com_operating_instructions_gb_00208892_eng.xml
Draft 2016/01/18
Compatible ID Active (default), Inactive
Program/Change USB Device List
Tray Paper Settings (SP C342DN)
Paper Tray Priority: Printer Tray 1 (default), Tray 2, Bypass Tray
Tray Paper Size: Trays 1–2 For details about available paper sizes, see page 106 "Paper Size
Specifications".
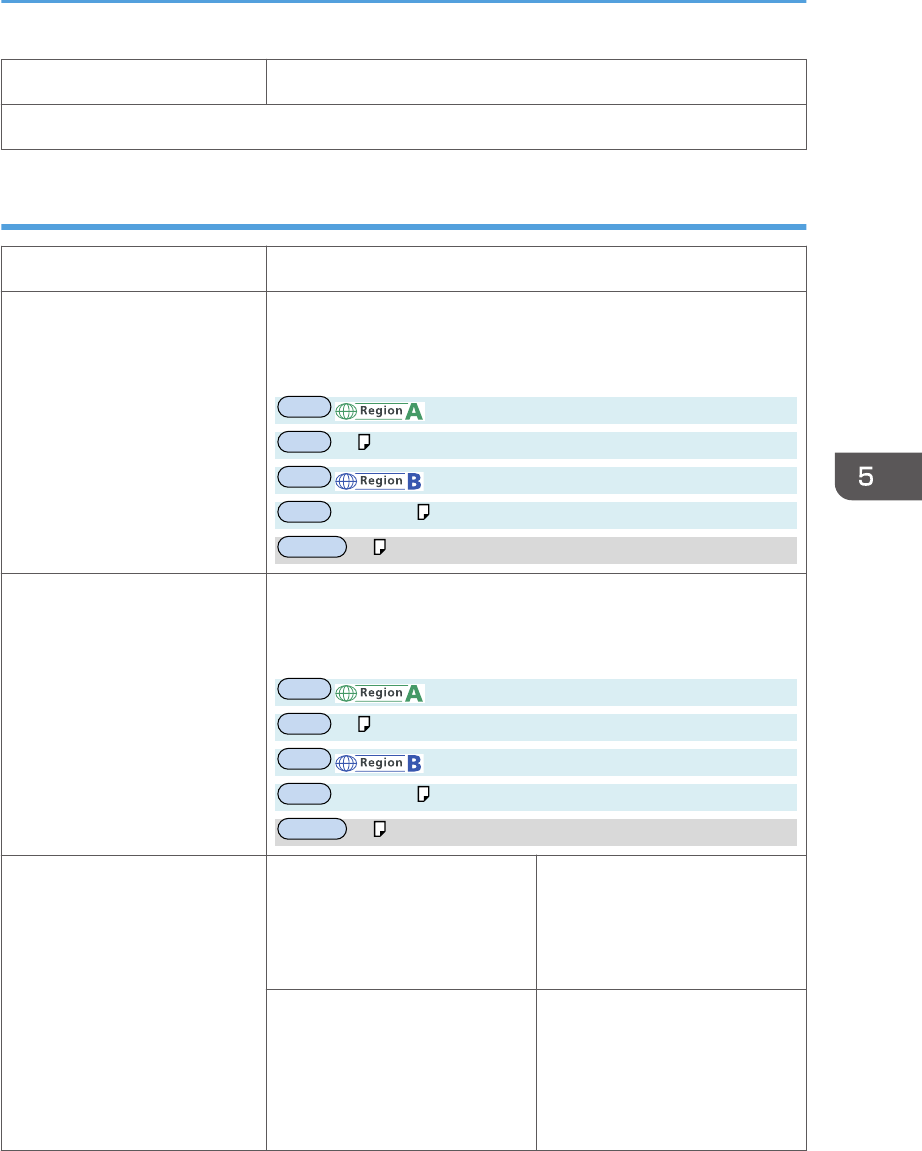
Default:
engb
(mainly Europe and Asia)
engb
A4
engb
(mainly North America)
engb
81/2 × 11
ch,kr,tw
A4
Printer Bypass Paper Size For details about available paper sizes, see page 106 "Paper Size
Specifications".
Default:
engb
(mainly Europe and Asia)
engb
A4
engb
(mainly North America)
engb
81/2 × 11
ch,kr,tw
A4
Paper Type: Bypass Tray Paper Type For details about available
paper types, see page 108
"Paper Type Specifications".
Default: Plain Paper
Paper Thickness For details about available
paper thickness, see page 108
"Paper Type Specifications".
Default: Plain Paper
66-90g/m2
Printer Configuration Items List (SP C342DN)
midas-p3_com_operating_instructions_gb_00208892_eng.xml 265
Draft 2016/01/18

Apply 2 sided For details about available 2-
sided setting, see page 108
"Paper Type Specifications".
Default: Yes
Apply Auto Paper Select Yes, No (default)
Paper Type: Trays 1–2 Paper Type For details about available
paper types, see page 108
"Paper Type Specifications".
Default: Plain Paper
Paper Thickness For details about available
paper thickness, see page 108
"Paper Type Specifications".
Default: Plain Paper
66-74g/m2
Apply 2 sided For details about available 2-
sided setting, see page 108
"Paper Type Specifications".
Default: Yes
Apply Auto Paper Select Yes, No (default)
Timer Settings (SP C342DN)
Sleep Mode Timer 1 to 60 minutes (in increments of 1 minute)
Default:"1" minute(s)
Low Power Mode Timer On (default) 1 to 60 minutes (in increments of
1 minute)
Default: "1" minute(s)
Off
Printer Auto Reset Timer On (default) 10 to 999 seconds (in
increments of 1 seconds)
Default: "60" second (s)
Off
5. Configuring and Managing the Printer
266 midas-p3_com_operating_instructions_gb_00208892_eng.xml
Draft 2016/01/18

Set Date
Set Time
Auto Logout Timer On (default) 10 to 999 seconds (in
increments of 1 seconds)
Default: "180" second (s)
Off
Fusing Unit Off Mode (Energy
Saving) On/Off
On (default) Exit Fusing Unit Off Mode
•On Printing (default)
• On Operating Control
Panel
Fusing Unit Off Mode Timer
• 10 seconds to 240 minutes
Default: "10" second (s)
Off
Weekly Timer Detailed Settings Daily, Day of the Week Weekly Timer Code
• On
•Off (default)
Weekly Timer Schedule
• Weekly Timer 1-6
Timer Suspension Period
• Start Date
• End Date
Inactive (default)
Interface Settings (SP C342DN)
Network
Machine IPv4 Address Auto-Obtain (DHCP) (default)
Specify IPv4 address
•11.22.33.44 (default)
Printer Configuration Items List (SP C342DN)
midas-p3_com_operating_instructions_gb_00208892_eng.xml 267
Draft 2016/01/18
Subnet mask
•0.0.0.0 (default)
IPv4 Gateway Address
Machine IPv6 Address Link-local Address, Manual Configuration Address, DHCPv6
Address, Stateless Address: 1-5
IPv6 Gateway Address
IPv6 Stateless Address
Autoconfiguration
Active (default), Inactive
DHCPv6 Configuration Active Operation Mode
•Router Request (default)
• Obtain IP Address
• Do not obtain IP Address
DNS Server Address
•Auto-Obtain (DHCPv6)
(default)
• Specify
Inactive (default)
DNS Configuration Auto-Obtain (DHCP) (default)
Specify DNS Server 1-3
•0.0.0.0 (default)
DDNS Configuration Active (default), Inactive
IPsec Active, Inactive (default)
Domain Name Auto-Obtain (DHCP) (default)
Specify Domain Name
WINS Configuration On (default) Primary WINS Server
•0.0.0.0 (default)
Secondary WINS Server
•0.0.0.0 (default)
Scope ID
Off
5. Configuring and Managing the Printer
268 midas-p3_com_operating_instructions_gb_00208892_eng.xml
Draft 2016/01/18
Effective Protocol IPv4 Active (default), Inactive
IPv6 Active, Inactive (default)
SMB Active (default), Inactive
@Remote Service Active (default), Inactive
Firmware Update (IPv4) Active (default), Inactive
Firmware Update (IPv6) Active (default), Inactive
SMB Computer Name
SMB Work Group
Ethernet Speed AutoSelct:Enable 1Gbps, AutoSelct:Disable 1Gbps (default),
10Mbps Half Duplex, 10Mbps Full Duplex, 100Mbps Half
Duplex, 100Mbps Full Duplex
LAN Type Ethernet (default), Wireless LAN
Ping Command
Permit SNMPv3
Communication
Encryption Only, Encryption/Cleartext (default)
Permit SSL/TLS Communication Ciphertext Only, Ciphertext Priority (default), Encryption/Cleartext
Host Name
Machine Name
IEEE 802.1X Authentication for
Ethernet
Active, Inactive (default)
Restore IEEE 802.1X Authentication to Defaults
USB Speed Auto Select (default), Full Speed
• [LAN Type] is displayed only when the optional Wireless LAN interface board is installed.
Parallel Interface
Parallel Timing ACK inside, ACK Outside (default), STB down
Parallel Communication Speed High Speed (default), Standard
Printer Configuration Items List (SP C342DN)
midas-p3_com_operating_instructions_gb_00208892_eng.xml 269
Draft 2016/01/18
Selection Signal Status High (default), Low
Input Prime Active, Inactive (default)
Bidirectional Communication On (default), Off
Signal Control Job Acceptance Priority (default), Printer Priority
• This menu appears only when the optional IEEE 1284 interface board is installed.
Wireless LAN
Communication Mode 802.11 Ad-hoc Mode, Infrastructure Mode (default)
SSID Setting
Ad-hoc Channel 11 (default), 36, 40, 44, 48
Security Method Off (default)
WEP WEP (Encryption) Key
WPA2 WPA2 Authent. Method
• WPA2, WPA2-PSK
Wireless LAN Easy Setup Push Button (default), Enrollee
Wireless LAN Signal
Restore Factory Defaults
• This menu appears only when the optional wireless LAN interface board is installed.
Print List
Print List
Email Settings (SP C342DN)
SMTP Server Server Name
Use Secure Connection (SSL) On, Off (default)
Port No. 1-65535
5. Configuring and Managing the Printer
270 midas-p3_com_operating_instructions_gb_00208892_eng.xml
Draft 2016/01/18
Default: 25
Off (default)
SMTP Authentication On User Name
Email Address
Password
Encryption
•Auto (default)
• On
• Off
Off (default)
POP before SMTP On Wait Time after Authent.
• 0-10,000 milliseconds (in
increments of 1
millisecond)
User Name
Email Address
Password
Reception Protocol POP3 (default), IMAP4, SMTP
POP3/IMAP4 Settings Server Name
Encryption Auto (default), On, Off
Administrator's Email Address
Email Communication Port POP3 1-65535
Default: 110
IMAP4 1-65535
Default: 143
Email Reception Interval On (default) 2-1440 minutes (in increments
of 1 minute)
Default: "15" minutes
Off
Email Storage in Server Off (default), All, Errors Only
Printer Configuration Items List (SP C342DN)
midas-p3_com_operating_instructions_gb_00208892_eng.xml 271
Draft 2016/01/18
Auto Email Notify On (default), Off
Administrator Tools (SP C342DN)
Address Book Management New Program Names, Auth. Info, Protection,
Add to Group
Change, Delete
Address Book: Program/
Change/Delete Group
New Program Names, Programmed User/
Group, Protection, Add to
Group
Change, Delete
Address Book: Change Order
Address Book: Edit Title
Address Book: Switch Title Title 1 (default), Title 2, Title 3
Backup/Restore: User Custom
Settings & Address Book
Back Up, Restore, Format, Obtain Memory Device Info
Auto Delete User in Address
Book
On, Off (default)
Delete All Data in Address
Book
xxxxxxxxx
Display/Print Counter Print Counter List
Display/Clear/Print Counter
per User
Printer Counter Print List for All Users, Clear for
All Users, Print List Per User,
Clear Per User
Printer Counter (2 sided,
Combined)
xxxxxxxx
Display/Clear Eco-friendly Counter
Display/Clear Eco-friendly Counter per User
Eco-friendly Counter Period/Administrator Message
Machine action when Limit is reached
5. Configuring and Managing the Printer
272 midas-p3_com_operating_instructions_gb_00208892_eng.xml
Draft 2016/01/18
Print Volume Use Limitation: Unit Count Setting
Print Volum. Use Limit.: Default Limit Value
Media Slot Use
User Authentication
Management
Off (default), User Code Authentication, Basic Authentication,
Windows Authentication, LDAP Authentication, Integration Server
Authentication
Enhanced Authentication Management
Administrator Authentication Management
Program/Change Administrator
Extended Security
Program/Change/Delete
LDAP Server
Program/Change Name, Server Name, Search
Base, Port Number, Use Secure
Connection (SSL),
Authentication, Search
Conditions
Delete
Sleep Mode Entry by Sleep
Mode Timer
Enable (default), Disable
Service Test Call
Notify Machine Status
Service Mode Lock
Firmware Version
Network Security Level
Auto Erase Memory Setting
Erase All Memory
Delete All Logs
Transfer Log Setting
Unauthorized Copy Prevention
Printing: Printer
Unauthorized Copy Prevention
Stg.
On, Off (default)
Printer Configuration Items List (SP C342DN)
midas-p3_com_operating_instructions_gb_00208892_eng.xml 273
Draft 2016/01/18
Compulsory Unathd. Copy
Preventn.
Driver / Command (default),
Driver/Command (Most
Settings), Machine Setting(s)
Unauthorized Copy Prevention
Type
Data Security for Copying,
Unathd. Copy Prev.: Patn.
(default)
Data Security for Copying Effect Text and Background (default),
Background Only
Unathd. Copy Prev. of Ptrn. Effct. Text and Background (default),
Background Only, Text Only,
Reverse Patterns(Text/
Background)
Mask Type for Pattern None (default), Type 1, Type 2,
Type 3, Type 4, Type 5, Type 6,
Type 7, Type 8, Type 9, Type
10
Pattern Color Black (default), Magenta, Cyan
Pattern Density Default: "3"
Text Selection Default: [Unauthorized Copy]
Program/Change User Text
PCL Fonts for Texts Default: [Arial]
PS Fonts for Texts Default: [Arial]
xxxxxxx
Point Size 50-300 points
Default: "70" points
Carriage Return Space 50-300 points
Default: "70" points
Text Angle 0-359 degrees
Default: "30" degrees
Repeat Text On, On: Rotate 180deg on
Return, Off (default)
5. Configuring and Managing the Printer
274 midas-p3_com_operating_instructions_gb_00208892_eng.xml
Draft 2016/01/18
Text Position Top Left, Top Center, Top Right,
Center (default), Bottom Left,
Bottom Center, Bottom Right
Fixed USB Port Off (default), Level 1, Level 2
Program/Change/Delete
Realm
Program/Change Realm Name, KDC Server
Name, Domain Name
Delete
Machine Data Encryption Settings
Program/Delete Device Certificate
Device Setting Information: Import Setting (Server)
Device Setting Information: Run Import (Server)
Device Setting Information: Export (Memry Strge Devc)
Device Setting Information: Import (Memry Strge Devc)
Energy Server Key to Change
Mode
Low Power Mode, Sleep Mode (default)
Compulsory Security
Stamp:Printer
Off (default)
On Date/Time, Printout User Name,
Machine ID, Machine IP
Address, Adjust Stamp Position
User's Own Customization
Display Supply Info Home Screen, Printer
Application Screen
On (default), Off
ECO Night Sensor Power Off Only (default), Power Off and On, Inactive
Timer to Turn Off 1 minute, 5 minutes, 30 minutes,
60 minutes, 120 minutes
(default)
Timer to Turn On 1 minute (default), 5 minutes,
30 minutes, 60 minutes, 120
minutes
Brightness Sensor Level Brightness Sensor Level to Turn
Off
Printer Configuration Items List (SP C342DN)
midas-p3_com_operating_instructions_gb_00208892_eng.xml 275
Draft 2016/01/18
•Default: "0" (0 to 15)
Brightness Sensor Level to Turn
On
•Default: "8" (0 to 15)
Select Switchable Languages None, Japanese, English, French, German, Italian, Spanish, Dutch,
Norwegian, Danish, Swedish, Polish, Portuguese, Hungarian,
Czech, Finnish, Simplified Chinese, Traditional Chinese, Russian,
Greek, Hangul, Catalan, Turkish, Brazilian Portuguese
Energy Saver Mode to Disable
Print Server
Disable Mode, Enable Mode (default)
Collect Logs Job Log, Access Log, Eco-
friendly Logs
Active, Inactive (default)
Central Management xxxxxx xxxxxx
Ready State After Printing Control Panel On, Control Panel OFF (Energy Saving) (default)
Shift to Power Off When Ntwk.
Disconnctd.
On, Off (default)
Printer Features (SP C342DN)
List / Test Print (SP C342DN)
The table below shows the list of setting items. For details about their functions, see page 313 "List /
Test Print".
Multiple Lists
Configuration Page
Error Log
Network Summary
Supply Info List
Menu List
Color Sample
PCL Configuration/Font Page
5. Configuring and Managing the Printer
276 midas-p3_com_operating_instructions_gb_00208892_eng.xml
Draft 2016/01/18
PS Configuration/Font Page
PDF Configuration/Font Page
Hex Dump
Data Management (SP C342DN)
Menu Protect Level 1, Level 2 (default), Off
List / Test Print Lock On, Off (default)
Delete All Temporary Print Jobs
Delete All Stored Print Jobs
Auto Delete Temporary Print
Jobs
On 1-200 hour(s) (in increments of
1 hour)
Default: "8" hours
Off (default)
Auto Delete Stored Print Jobs On (default) 1-180 day(s) (in increments of 1
day)
Default: "3" days
Off
Tray Parameters PCL Auto Select, Tray1, Tray2, Bypass Tray
Tray Parameters PS Tray1, Tray2, Bypass Tray
System (SP C342DN)
The table below shows the list of setting items. For details about their functions, see page 314 "System".
Print Error Report On, Off (default)
Store and Skip Errored Job On 1-999 page(s)
Default: "3" pages
Off
Printer Configuration Items List (SP C342DN)
midas-p3_com_operating_instructions_gb_00208892_eng.xml 277
Draft 2016/01/18
Auto Continue Off (default), Immediate, 1 minute, 5 minutes, 10 minutes,
15minutes
Memory Overflow Do not Print (default), Error Information
Auto Cancel Conf. for PDL Error
Job
Display, Do not Display (default)
Auto Cancel for Print Job(s) on
Error
On, Off (default)
Rotate by 180 Degrees On, Off (default)
Anti-Humidity Anti-Humidity Setting On, Off (default)
Anti-Humidity Level Level 1 (Weak) (Default), Level
2 (Medium), Level 3 (Strong)
Print Compressed Data On, Off (default)
Memory Usage Font Priority, Frame Priority (default)
Duplex Off (default), Long Edge Bind, Short Edge Bind
Copies 1 to 999 copies (in increments of 1)
Default: "1"
Blank Page Print On (default), Off
PCL Character Thickness
Adjustment
On, Off (default)
Spool Printing On, Off (default)
Jobs Not Printed As Machine
Was Off
Print When Machine On, Do not Print (default)
Restrict Direct Print Jobs Off (default), Automatcly. Store Jobs, Cncl All Direct Prt Jobs
Switch Initial Screen Job List (default), Print Jobs
Printer Language Auto (default), PCL, PS, PDF, XPS
Default Printer Language PCL (default), PS, PDF, XPS
Sub Paper Size Auto (default), Off
Paper Size Default:
engb
(mainly Europe and Asia)
5. Configuring and Managing the Printer
278 midas-p3_com_operating_instructions_gb_00208892_eng.xml
Draft 2016/01/18
engb
A4
engb
(mainly North America)
engb
81/2 × 11
ch,kr,tw
A4
Letterhead Setting Off, Auto Detect (default), On (Always)
Tray Setting Priority Paper Confirmation for Bypass
Tray
Display, Do not Display
(default)
Bypass Tray Driver/Command (default),
Machine Setting(s), Machine
Setting(s): Any Type, Any Size/
Type, Any Custom Size/Type
Trays 1 to 2 Driver/Command, Machine
Setting(s) (default)
Edge to Edge Print On, Off (default)
Tray Switching On, Off (default)
RAM Disk 0 MB, 2 MB, 4 MB (default), 8 MB, 16 MB
Extended Auto Tray Switching On, Off (default)
I/O Buffer 128 KB (default), 256 KB
I/O Timeout 10 seconds, 15 seconds (default), 20 seconds, 25 seconds, 60
seconds
PCL Menu (SP C342DN)
Orientation Portrait (default), Landscape
Form Lines 5 to 128 (in increments of 1)
Default:
engb
(mainly Europe and Asia)
engb
"64" lines
engb
(mainly North America)
engb
"60" lines
ch,kr,tw
"64" lines
Printer Configuration Items List (SP C342DN)
midas-p3_com_operating_instructions_gb_00208892_eng.xml 279
Draft 2016/01/18
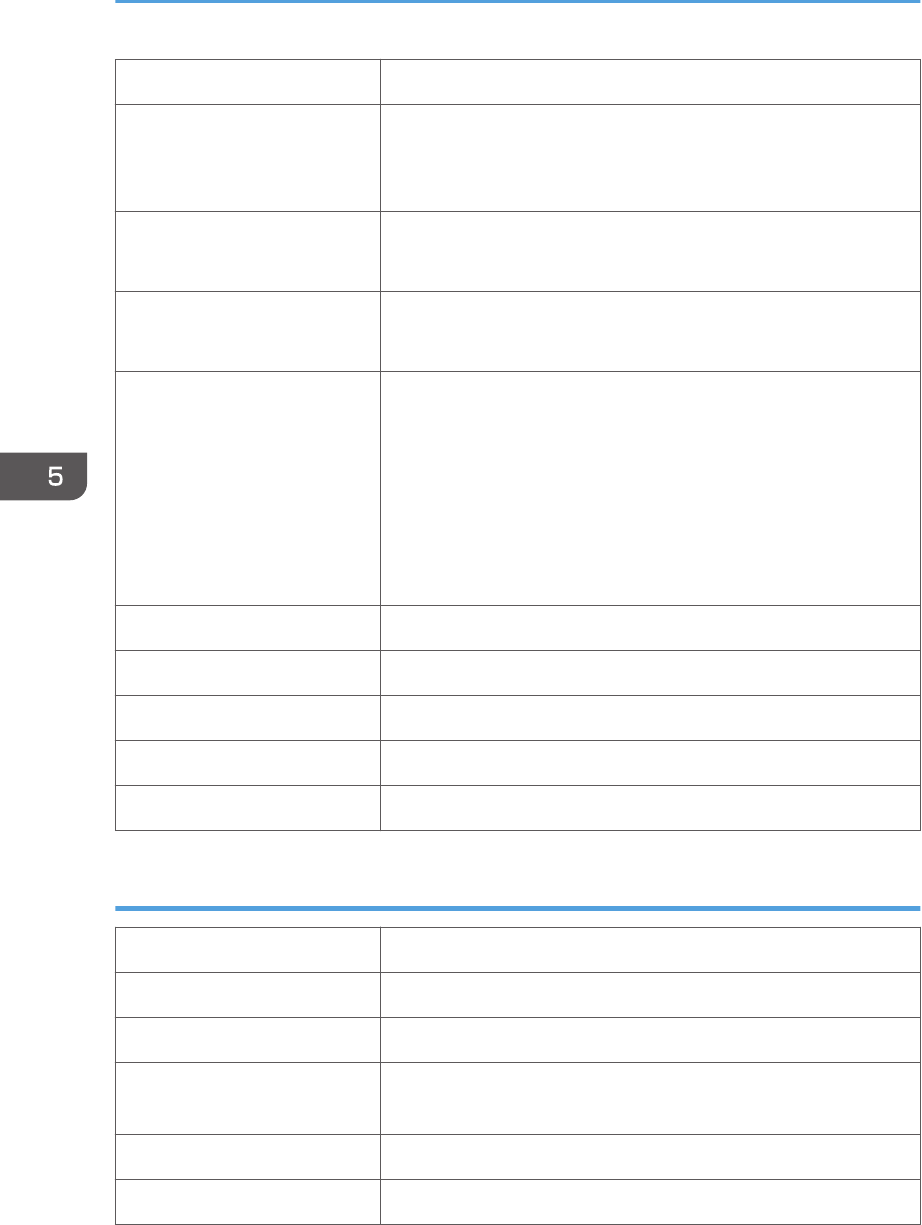
Font Source Resident (default), RAM, HDD, SD, SD Font Download
Font Number 0 to 63 (When [Font Source] is [Resident]) or 1 to X (When [Font
Source] is other than [Resident]; "X" is the number of fonts)
Default: "0" (1 when [Font Source] is other than [Resident])
Point Size 4 to 999.75 (in increments of 0.25)
Default: "12.00"
Font Pitch 0.44 to 99.99 (in increments of 0.01)
Default: "10.00"
Symbol Set Roman-8, Roman-9, ISO L1, ISO L2, ISO L5, ISO L6, ISO L9,
PC-775, PC-8 (default), PC-8 D/N, PC-850, PC-852, PC-858,
PC8-TK, PC-1004, Win L1, Win L2, Win L5, Win Baltic, Desktop,
PS Text, MS Publ, Math-8, PS Math, Pifont, Legal, ISO 4, ISO 6,
ISO 11, ISO 15, ISO 17, ISO 21, ISO 60, ISO 69, Win 3.0, MC
Text, UCS-2, PC-864, Arabic-8, Win Arabic, PC-866, PC-866U,
ISO Cyrillic, Win Cyrillic, PC-851, Greek-8, ISO Greek, PC-8
Greek, Win Greek, PC-862, Hebrew-7, Hebrew-8, ISO Hebrew
Courier Font Regular (default), Dark
Extend A4 Width On, Off (default)
Append CR to LF On, Off (default)
Resolution 600 dpi (Fast) (default), 600 dpi (Standard)
Toner Saving On, Off (default)
PS Menu (SP C342DN)
Job Timeout Use Driver/Command (default), Use Machine Settings
Wait Timeout Use Driver/Command (default), Use Machine Settings
Paper Selection Method Auto Select, Select Paper Tray (default)
Switching btwn. 1&2 Sided
Print
Active (default), Inactive
Data Format Binary Data, TBCP (default)
Resolution 600 dpi (Fast) (default), 600 dpi (Standard), 1200dpi
5. Configuring and Managing the Printer
280 midas-p3_com_operating_instructions_gb_00208892_eng.xml
Draft 2016/01/18
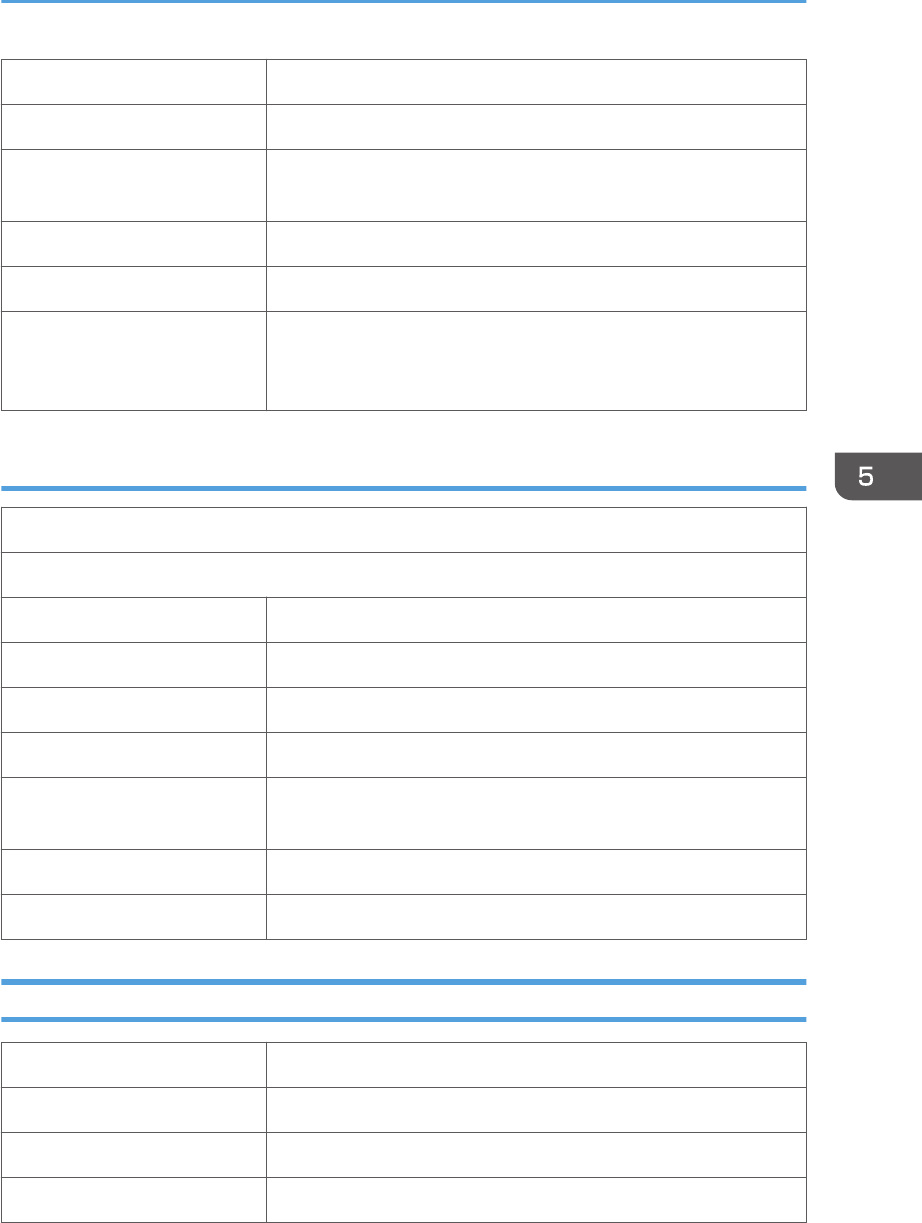
Toner Saving On, Off (default)
Color Setting Off, Fine, Super Fine (default)
Color Profile Auto (default), Presentation, Solid Color, Photographic, User
Setting
Process Color Model Color (default), Black & White
Orientation Auto Detect On (default), Off
Gray Reproduction Black/Gray by K (Black) (default), Black by K (Black), CMY + K,
Black/Gray by K(Black)-Text Only, Black by K (Black)-Text Only,
Black/Gray by K-Strong UCR
PDF Menu (SP C342DN)
Change PDF Password
PDF Group Password
Reverse Order Printing On, Off (default)
Resolution 600 dpi (Fast) (default), 600 dpi (Standard), 1200 dpi
Toner Saving On, Off (default)
Color Setting Off, Fine, Super Fine (default)
Color Profile Auto (default), Presentation, Solid Color, Photographic, User
Setting
Process Color Model Color (default), Black & White
Orientation Auto Detect On (default), Off
XPS Menu (SP C342DN)
Resolution 600 dpi (Fast) (default), 600 dpi (Standard)
Toner Saving On, Off (default)
Color Profile Auto (default), Text, Photographic, Graphics
Process Color Model Color (default), Black & White
Printer Configuration Items List (SP C342DN)
midas-p3_com_operating_instructions_gb_00208892_eng.xml 281
Draft 2016/01/18
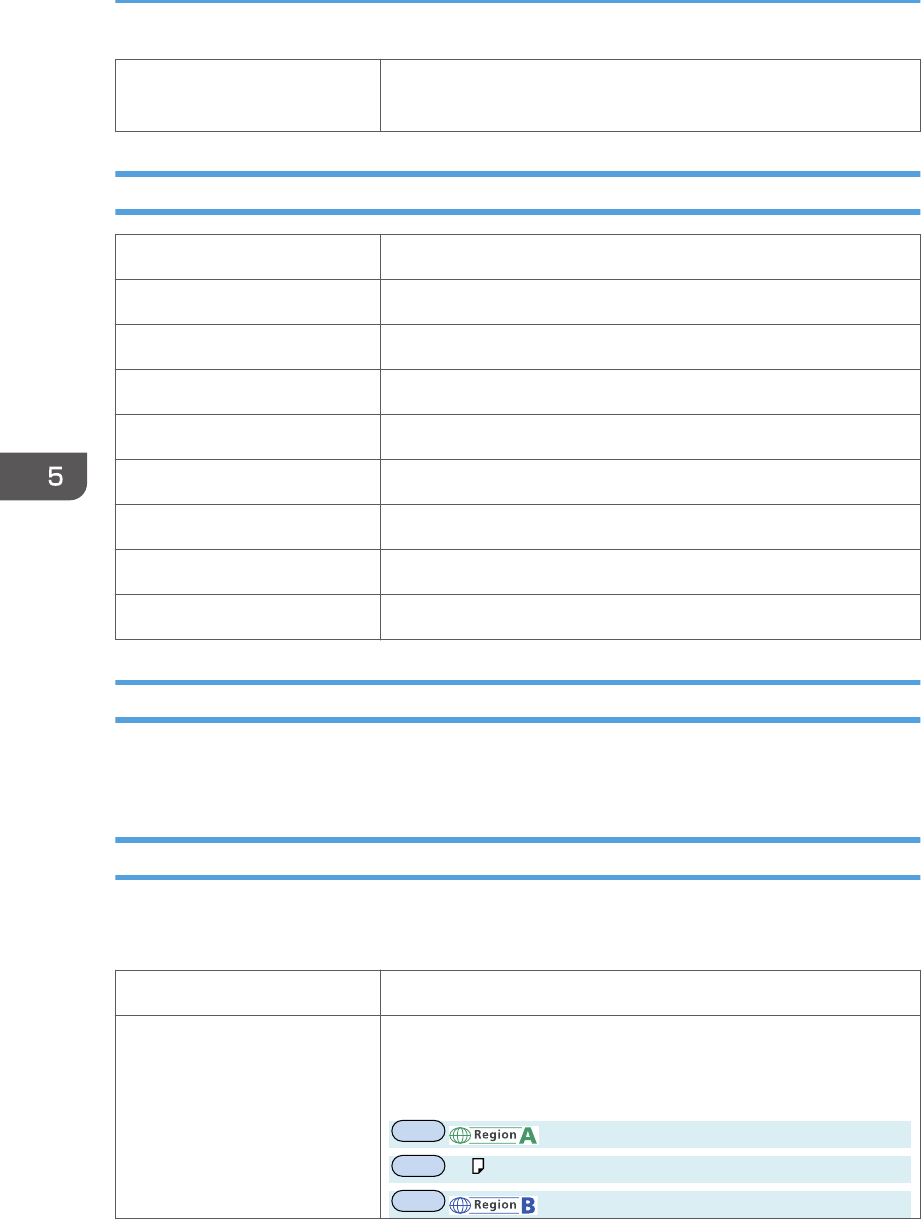
Gray Reproduction Black/Gray by K (Black) (default), Black by K (Black), CMY + K,
Black/Gray by K(Black)-Text Only, Black by K (Black)-Text Only
Extended Feature Settings (SP C342DN)
Startup Setting
Install
Uninstall
Extended Feature Info
Administrator Tools
Add.Program Startup Setting
Install Add.Program
Uninstall Add.Program
Add.Program Info
Address Book Mangmnt (SP C342DN)
You can configure [Address Book Management] in [Administrator Tools] under [System Settings]. For
details, see page 300 "Administrator Tools".
Tray Paper Settings (SP C342DN)
You can configure [Tray Paper Settings] under [System Settings]. For details, see page 287 "Tray Paper
Settings".
Paper Tray Priority: Printer Tray 1 (default), Tray 2, Bypass Tray
Tray Paper Size: Trays 1–2 For details about available paper sizes, see page 106 "Paper Size
Specifications".
Default:
engb
(mainly Europe and Asia)
engb
A4
engb
(mainly North America)
5. Configuring and Managing the Printer
282 midas-p3_com_operating_instructions_gb_00208892_eng.xml
Draft 2016/01/18
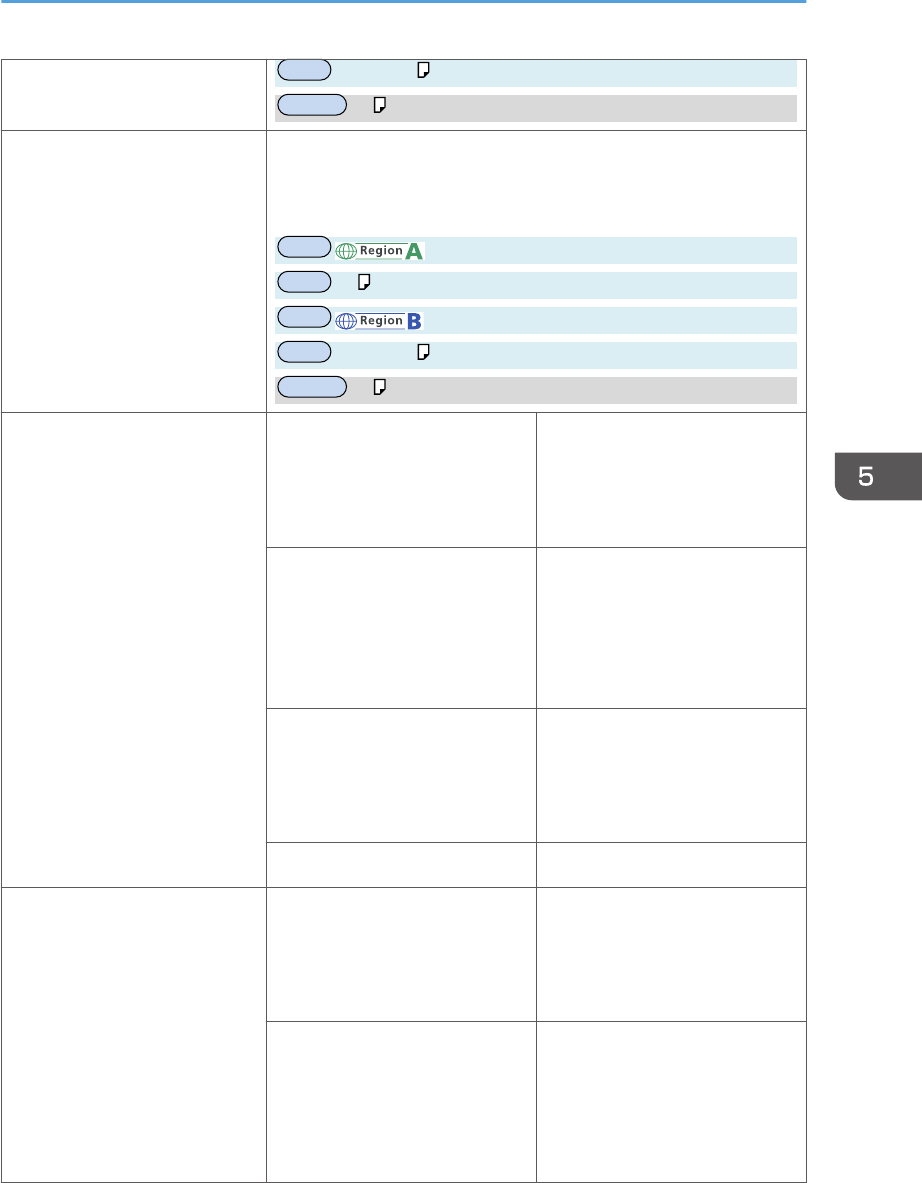
engb
81/2 × 11
ch,kr,tw
A4
Printer Bypass Paper Size For details about available paper sizes, see page 106 "Paper Size
Specifications".
Default:
engb
(mainly Europe and Asia)
engb
A4
engb
(mainly North America)
engb
81/2 × 11
ch,kr,tw
A4
Paper Type: Bypass Tray Paper Type For details about available
paper types, see page 108
"Paper Type Specifications".
Default: Plain Paper
Paper Thickness For details about available
paper thickness, see page 108
"Paper Type Specifications".
Default: Plain Paper
66-90g/m2
Apply 2 sided For details about available 2-
sided setting, see page 108
"Paper Type Specifications".
Default: Yes
Apply Auto Paper Select Yes, No (default)
Paper Type: Trays 1–2 Paper Type For details about available
paper types, see page 108
"Paper Type Specifications".
Default: Plain Paper
Paper Thickness For details about available
paper thickness, see page 108
"Paper Type Specifications".
Default: Plain Paper
66-74g/m2
Printer Configuration Items List (SP C342DN)
midas-p3_com_operating_instructions_gb_00208892_eng.xml 283
Draft 2016/01/18
Apply 2 sided For details about available 2-
sided setting, see page 108
"Paper Type Specifications".
Default: Yes
Apply Auto Paper Select Yes, No (default)
Edit Home (SP C342DN)
You can add shortcuts to frequently used embedded software applications in the [Home] screen. For
details, see page 31 "Customizing the [Home] Screen".
Remote Services (SP C342DN)
You can display the communication screen for @Remote Service. For details, see Security Guide.
Switch Display Language (SP C342DN)
The table below shows the list of setting items. For details about their functions, see page 327 "Switch
Display Language".
English (default), French, German, Italian, Spanish, Dutch, Norwegian, Danish, Swedish, Polish,
Portuguese, Hungarian, Czech, Finnish, Russian.
Maintenance: Print (SP C342DN)
Plain Paper Setting Plain Paper (default)
Replacement Alert Toner, Waste Toner Bottle,
Intermediate Transfer Unit,
Fusing Unit.
Notify Sooner, Normal
(default), Notify Later
Supply End Option Continue Printing (default), Stop Printing
Black & White Page Detect Per Page, Per Job (default)
Cleaning
Curl Prevention Active, Inactive (default)
5. Configuring and Managing the Printer
284 midas-p3_com_operating_instructions_gb_00208892_eng.xml
Draft 2016/01/18
Anti-droplet (2 Sided Print) Active, Inactive (default)
Anti-humidity (Image Dropout
Prevention)
Active, Inactive (default)
Black & White Print Priority On, Off (default)
B & W Low Speed Printing
(Thick Paper)
Active, Inactive (default)
Maintenance: Image (SP C342DN)
Color Regist. For details, see page 440 "Adjusting the Color Registration".
Color Calibrt. For details, see page 329 "Maintenance: Image".
Adjust Auto Density, Print Test Pattern 1, Print Test Pattern 2, Reset
Setting
Adjust Print Position Print Test Sheet Paper Trays 1–2, Bypass Tray,
Duplex Unit
Adjust Position Horizontal: Trays 1-2,
Horizontal: Bypass Tray,
Horizontal: Back Side
• -15.0 to +15.0 (in 0.34
mm increments)
Default: 0.0
Vertical: Trays 1–2, Vertical:
Bypass Tray, Vertical: Back Side
• 0 to +9.0 (in 0.3 mm
increments)
Default: 0.0
4 Color Graphic Mode Text Priority, Photo Priority (default)
Printer Configuration Items List (SP C342DN)
midas-p3_com_operating_instructions_gb_00208892_eng.xml 285
Draft 2016/01/18
Function Details of the Printer Configuration
Items (SP C342DN)
This section describes the information about the setting items in each menu.
System Settings
This section describes user tools under System Settings menu.
General Features
Program/Change/Delete User Text
You can register text phrases you often use when specifying settings, such as ".com" and "Regards".
You can register up to 40 entries.
Panel Key Sound
You can specify whether or not the beeper (key tone) sounds when a key is pressed.
Default: [Medium]
Function Priority
You can specify the mode to be displayed immediately after the operation switch is turned on, or
when System Reset mode is turned on.
Default: [Home]
Screen Color Setting
You can change the screen color.
Default: [Blue-gray]
Key Repeat
You can enable or disable repetition of an operation if a key on the screen or control panel is
pressed continuously.
Default: [Normal]
Measurement Unit
You can switch the measurement between [mm] and [inch] when you specify a custom size on the
control panel.
Default:
(mainly Europe and Asia)
[mm]
(mainly North America)
5. Configuring and Managing the Printer
286 midas-p3_com_operating_instructions_gb_00208911_eng.xml
Draft 2016/01/18
[inch]
Check Status/Job List Display Time
You can specify how long to display the System Status and Job List display for.
When the setting is [On], you can specify a display time between 10 and 999 seconds in 1 second
increments using the number keys.
Default: [On], "15" second(s)
External Keyboard
You can specify the layout of the external keyboard connected to the USB port.
Default: [Off]
Compatible ID
You can enable or disable the Compatible ID setting.
Default: [Active]
Tray Paper Settings
• If the specified paper size differs from the actual size of the paper loaded in the paper tray, a
misfeed might occur because the correct paper size was not detected.
Paper Tray Priority: Printer
You can specify the tray to supply paper for output.
Default: [Tray 1]
Tray Paper Size: Trays 1–2
You can specify the size of the paper loaded in the paper Trays 1–2. To specify a custom paper
size, press [Custom Size] and enter the horizontal and vertical dimensions of the paper.
The paper sizes to be set using the control panel.
For details about available paper sizes, see page 106 "Paper Size Specifications".
Only the installed trays appear on the screen.
Printer Bypass Paper Size
You can specify the size of the paper loaded in the bypass tray. For details about available paper
sizes, see page 106 "Paper Size Specifications".
Default: [81/2 × 11 ]
Paper Type: Bypass Tray
You can specify the type of the paper loaded in the bypass tray. For details about available paper
types, see page 108 "Paper Type Specifications".
• Paper Type
Function Details of the Printer Configuration Items (SP C342DN)
midas-p3_com_operating_instructions_gb_00208911_eng.xml 287
Draft 2016/01/18
Default: [Plain Paper]
• Paper Thickness
Default: [Plain Paper 66-90g/m2]
• Apply 2 sided
Default: [Yes]
• Apply Auto Paper Select
Default: [No]
Paper Type: Trays 1–2
You can specify the type of the paper loaded in the paper Trays 1–2. For details about available
paper types, see page 108 "Paper Type Specifications".
Only the installed trays appear on the screen.
• Paper Type
Default: [Plain Paper]
• Paper Thickness
Default: [Plain Paper]
• Apply 2 sided
Default: [Yes]
• Apply Auto Paper Select
Default: [No]
• In [Plain Paper Setting] in [Maintenance: Print], you can specify the thickness of the plain paper you
load. For details, see page 327 "Maintenance: Print".
Timer Settings
Sleep Mode Timer
After a specified period has passed, or the [Energy Saver] key is pressed, the printer enters Sleep
Mode in order to conserve energy.
Specify the time to elapse before Sleep Mode.
The time can be set from 1 to 60 minutes, using the number keys.
Default:"1" minute(s)
Depending on which Embedded Software Architecture application is installed on it, the printer
might take longer than indicated to enter Sleep Mode.
Printer Auto Reset Timer
You can specify the time to elapse before the printer function is reset.
5. Configuring and Managing the Printer
288 midas-p3_com_operating_instructions_gb_00208911_eng.xml
Draft 2016/01/18
The time can be set from 10 to 999 seconds, using the number keys.
Default: [On], "60" second(s)
Set Date
You can specify the date for the printer's internal clock using the number keys.
To change between year, month, and day, press [ ] and [ ].
Set Time
You can specify the time for the printer's internal clock using the number keys.
To change between hours, minutes and seconds, press [ ] and [ ].
(mainly Europe and Asia)
Enter the time using the 24-hour format (in 1 second increments).
(mainly North America)
Enter the time using the 12-hour format (in 1 second increments).
Auto Logout Timer
You can specify whether or not to automatically log out a user when the user does not operate the
printer for a specified period of time after logging in.
The time can be set from 60 to 999 seconds in one second increments, using the number keys.
Default: [On], "180" second(s)
Fusing Unit Off Mode (Energy Saving) On/Off
You can specify whether or not to use Fusing Unit Off mode.
Default: [Off]
• On
Turns on Fusing Unit Off mode. This setting further reduces power consumption, but the printer
may take longer to recover from Fusing Unit Off mode.
When you select [On], you can set [Exit Fusing Unit Off Mode] and [Fusing Unit Off Mode
Timer].
• Off
Turns off Fusing Unit Off mode.
Exit Fusing Unit Off Mode
You can specify the condition for the printer to exit Fusing Unit Off mode.
Default: [On Printing]
• On Printing
The printer exits Fusing Unit Off mode when printing is performed.
• On Operating Control Panel
The printer exits Fusing Unit Off mode when any key on the control panel is pressed.
Function Details of the Printer Configuration Items (SP C342DN)
midas-p3_com_operating_instructions_gb_00208911_eng.xml 289
Draft 2016/01/18

Fusing Unit Off Mode Timer
You can specify the period of time the printer waits before entering Fusing Unit Off mode.
The timer is reset if any key on the control panel is pressed or printing is performed.
Default: [10 seconds]
The Fusing Unit Off Mode Timer is reset when:
• A print is performed
• A cover is opened when [Exit Fusing Unit Off Mode] is set to [On Printing]
• Any key on the operating panel is pressed when [Exit Fusing Unit Off Mode] is set to [On
Operating Control Panel]
Weekly Timer
You can set the timer for the printer to turn off and on the main power or to enter and exit Sleep
mode every day or on specified days of the week.
To use Weekly Timer, the date and time of the internal clock must be set using the control panel. For
details, see page 288 "Timer Settings".
When Weekly Timer is set to [Daily] or [Day of the Week], the printer does not turn on even if
[ECO Night Sensor] is set to [Power Off and On] and the time for turning on the main power
specified in [Timer to Turn On] elapses.
Default: [Inactive]
• Daily
• Day of the Week
• Inactive
When [Daily] or [Day of the Week] is selected, you can specify the following:
Weekly Timer Code
To configure this setting, administrator authentication must be enabled. For details, see
Security Guide.
You can set a password (up to eight digits) for Weekly Timer. Once the password is set, the
screen requiring the password is displayed while the printer is turned off or in Sleep mode by
Weekly Timer. Enter the password to turn on the printer or recover the printer from Sleep
mode.
If you set Weekly Timer Code to [Off], you do not need to enter a password to recover the
printer.
Default: [Off]
Weekly Timer Schedule
You can specify when Weekly Timer takes effect (up to six settings).
5. Configuring and Managing the Printer
290 midas-p3_com_operating_instructions_gb_00208911_eng.xml
Draft 2016/01/18

Timer Suspension Period
You can specify the period when the printer does not turn on the main power with the Weekly
Timer settings.
During the period specified in [Timer Suspension Period], the Weekly Timer Code is canceled
at the time the printer turns on the main power with the Weekly Timer settings. If the printer is
turned off during the period specified in [Timer Suspension Period], the Weekly Timer setting
to turn on the main power is disabled until the printer is turned on manually.
Interface Settings
Network
Machine IPv4 Address
You can specify the printer's IPv4 network address.
Default: [Auto-Obtain (DHCP)]
When you select [Specify], enter the IPv4 address and subnet mask as "xxx.xxx.xxx.xxx" ("x"
indicates a number).
When you select [Specify], make sure that the IPv4 address is different from that of other
printers on the network.
The physical address (MAC address) also appears.
IPv4 Gateway Address
You can specify the gateway address for the router or host computer used as a gateway.
A gateway is a connection or interchange point between two networks.
Default: [0.0.0.0]
Machine IPv6 Address
You can display the printer's IPv6 network address.
• Link-local Address
The printer's specified link-local address appears.
• Manual Configuration Address
The printer's manually configured address appears.
• DHCPv6 Address
The printer's DHCPv6 address appears.
• Stateless Address: 1-5
The specified stateless address appears if [IPv6 Stateless Address Autoconfiguration] is
set to [Active].
IPv6 Gateway Address
You can display the printer's IPv6 gateway address.
Function Details of the Printer Configuration Items (SP C342DN)
midas-p3_com_operating_instructions_gb_00208911_eng.xml 291
Draft 2016/01/18

IPv6 Stateless Address Autoconfiguration
You can specify IPv6 Stateless Address Autoconfiguration.
Default: [Active]
DHCPv6 Configuration
You can specify the DHCPv6 setting. If you set to [Active], select "Operation Mode" from
[Router Request], [Obtain IP Address] or [Do not obtain IP Address], and also select "DNS
Server Address" from [Auto-Obtain (DHCPv6)] or [Specify].
Default: [Inactive]
DNS Configuration
You can configure settings for the DNS server. When you select [Specify], enter the DNS
Server IPv4 address as "xxx.xxx.xxx.xxx" ("x" indicates a number).
Default: [Auto-Obtain (DHCP)]
DDNS Configuration
You can specify the DDNS settings.
Default: [Active]
IPsec
You can specify the printer's IPsec setting. For details about this function, see Security Guide.
Default: [Inactive]
Domain Name
You can specify the domain name. When you select [Specify], enter the domain name using
up to 63 characters.
Default: [Auto-Obtain (DHCP)]
WINS Configuration
You can specify the WINS server settings. If [On] is selected, enter the WINS Server IPv4
address as "xxx.xxx.xxx.xxx" ("x" indicates a number). If DHCP is in use, specify a Scope ID.
Enter the Scope ID using up to 31 characters.
Do not enter "255.255.255.255" as the primary or secondary WINS server address.
Default: [On]
Effective Protocol
You can specify protocols to use in the network.
• IPv4
Default: [Active]
• IPv6
Default: [Inactive]
• SMB
5. Configuring and Managing the Printer
292 midas-p3_com_operating_instructions_gb_00208911_eng.xml
Draft 2016/01/18

Default: [Active]
• @Remote Service
Default: [Active]
• Firmware Update (IPv4)
Default: [Active]
• Firmware Update (IPv6)
Default: [Active]
SMB Computer Name
You can specify the SMB computer name.
Enter the computer name using up to 15 characters.
"*+,/:;<>=?[\]|. and spaces cannot be entered.
Do not set a computer name starting with RNP and rnp.
Only use uppercase letters for alphabets.
SMB Work Group
You can specify the SMB work group.
Enter the computer name using up to 15 characters.
"*+,/:;<>=?[\]|. and spaces cannot be entered.
Only use uppercase letters for alphabet.
Ethernet Speed
You can specify the network speed that the printer will use for Ethernet communication. If a
communication error occurs because of compatibility problems with the hub, select a speed
suitable for your network environment.
To reduce power consumption of network devices, the default Ethernet speed of the printer
does not exceed 100BASE-TX (100 Mbps). To communicate using a higher speed, select
[Auto Select: Enable 1Gbps] to enable 1000BASE-T (1Gbps) communication.
Default: [AutoSelct:Disable 1Gbps]
• AutoSelct:Enable 1Gbps
• AutoSelct:Disable 1Gbps
• 10Mbps Half Duplex
• 10Mbps Full Duplex
• 100Mbps Half Duplex
• 100Mbps Full Duplex
Function Details of the Printer Configuration Items (SP C342DN)
midas-p3_com_operating_instructions_gb_00208911_eng.xml 293
Draft 2016/01/18

LAN Type
When you have installed the Wireless LAN interface board, you can specify the method of
connection. If Ethernet and Wireless LAN are both connected, the selected interface has
priority.
Default: [Ethernet]
Ping Command
You can check the network connection with ping command using the given IPv4 address.
If you fail to connect to the network, check the following, and then retry the ping command.
• Make sure that "IPv4" in [Effective Protocol] is set to [Active].
• Check that the printer is connected to the network.
• There is a possibility that the same IPv4 address is used for the specified equipment.
Permit SNMPv3 Communication
You can set the encrypted communication of SNMPv3. If you select [Encryption Only], you
need to set an encryption password for the printer.
Default: [Encryption/Cleartext]
Permit SSL/TLS Communication
You can set the encrypted communication of SSL/TLS. If you select [Ciphertext Only], you
need to install the SSL certificate for the printer.
Default: [Ciphertext Priority]
Host Name
You can specify the host name. Enter the host name using up to 63 characters.
The following host names are unacceptable:
a host name starting with or ending with a hyphen
a host name in which hyphens are used consecutively
a host name starting with "RNP" or "rnp"
Machine Name
You can specify the printer name. Enter the printer name using up to 31 characters.
IEEE 802.1X Authentication for Ethernet
You can specify the IEEE 802.1X authentication for Ethernet. For details about IEEE 802.1X
authentication, see Security Guide.
Default: [Inactive]
Restore IEEE 802.1X Authentication to Defaults
You can return the IEEE 802.1X authentication settings to their defaults.
For details about IEEE 802.1X authentication, see Security Guide.
5. Configuring and Managing the Printer
294 midas-p3_com_operating_instructions_gb_00208911_eng.xml
Draft 2016/01/18

USB Speed
You can specify the communication parameters for computer-to-printer connection via USB.
Default: [Auto Select]
Parallel Interface
This menu appears only when the optional IEEE 1284 interface board is installed.
Parallel Timing
You can specify the timing for the control signal of the parallel interface. Normally, you do not
need to change this setting.
Default: [ACK Outside]
Parallel Communication Speed
You can specify the communication speed for the parallel interface. If the speed is too high,
data may not be transferred smoothly. If this happens, change the setting to [Standard].
Default: [High Speed]
Selection Signal Status
You can specify the level for the select signal of the parallel interface.
Default: [High]
Input Prime
You can specify whether to validate or invalidate the input prime signal upon reception.
Normally, you do not need to change this setting.
Default: [Inactive]
Bidirectional Communication
You can specify the printer's response mode to a status acquisition request when using a
parallel interface. If you experience problems using another manufacturer's printer, set this to
[Off]. When set to [Off], the bidirectional communication function will be disabled, and the
printer driver will not be installed under the Windows Auto Detect function.
Default: [On]
Signal Control
You can specify how to handle errors that occur during printing operation or facsimile
transmission from a computer.
Default: [Job Acceptance Priority]
Wireless LAN
You can configure the wireless LAN settings. This menu appears only when the optional wireless
LAN interface board is installed.
Communication Mode
You can specify the communication mode of the wireless LAN.
Function Details of the Printer Configuration Items (SP C342DN)
midas-p3_com_operating_instructions_gb_00208911_eng.xml 295
Draft 2016/01/18

Default: [Infrastructure Mode]
SSID Setting
You can specify the SSID settings to distinguish the access point in [Infrastructure Mode] or
[802.11 Ad-hoc Mode]. The characters that can be used are ASCII 0x20-0x7e (32 bytes).
Ad-hoc Channel
You can specify the channel to use when [802.11 Ad-hoc Mode] has been selected. Set the
channel that matches the type of the wireless LAN being used.
Default: [11]
• IEEE 802.11b/g Wireless LAN
Frequency range:
2412–2462 MHz (channels 1–11)
• IEEE 802.11a Wireless LAN
Frequency range:
5180–5240 MHz (channels 36, 40, 44, and 48)
• IEEE 802.11n Wireless LAN
Frequency range:
2412–2462 MHz (channels 1–11)
5180–5240 MHz (channels 36, 40, 44, and 48)
Security Method
You can specify whether or not to enable an encryption method and security type when
encryption is enabled.
Default: [Off]
• WEP
Press [WEP (Encryption) Key], and then enter the WEP key using hexadecimal and ASCII
characters.
• WPA2
Press [WPA2 Authent. Method], and then select the authentication method.
If you select WPA2, the encryption method is set to CCMP (AES) and cannot be
changed.
Select one of the following authentication methods:
WPA2-PSK, WPA2
If you select WPA2-PSK, enter a passphrase (from 8 to 63 characters).
• Off
5. Configuring and Managing the Printer
296 midas-p3_com_operating_instructions_gb_00208911_eng.xml
Draft 2016/01/18

Wireless LAN Easy Setup
You can set up wireless LAN automatically using Wi-Fi Protected Setup.
Default: [Push Button]
• Push Button
• Enrollee
Wireless LAN Signal
When using infrastructure mode, press [Wireless LAN Signal] to display the printer's radio
wave status.
Restore Factory Defaults
You can return the wireless LAN settings to their defaults.
Print List
You can print the printer's current network settings and network information.
Email Settings
SMTP Server
You can specify the SMTP server name. Enter the server name using up to 127 characters. Spaces
cannot be entered.
If DNS is in use, enter the host name. If DNS is not in use, enter the SMTP server IPv4 address.
Use Secure Connection (SSL)
If you set Use Secure Connection (SSL) to [On], the port number automatically changes to
"465".
Default: [Off]
Port No.
Enter the port number between 1 and 65535 using the number keys. The SMTP server shares
the same port number with the Direct SMTP server.
Default: [25]
SMTP Authentication
You can specify SMTP authentication (PLAIN, LOGIN, CRAMMD5, DIGEST-MD5). When sending
e-mail to an SMTP server, you can enhance the SMTP server security level using authentication that
requires entering the user name and password.
If the SMTP server requires authentication, set [SMTP Authentication] to [On], and then specify the
user name, password and encryption.
Default: [Off]
• On
Function Details of the Printer Configuration Items (SP C342DN)
midas-p3_com_operating_instructions_gb_00208911_eng.xml 297
Draft 2016/01/18

User Name
Enter the user name using up to 191 characters. Spaces cannot be entered. Depending
on the SMTP server type, "realm" must be specified. Add "@" after the user name, as in
"user name@realm".
Email Address
Enter the e-mail address using up to 128 characters.
Password
Enter the password using up to 128 characters. Spaces cannot be entered.
Encryption
• Auto
Use if the authentication method is PLAIN, LOGIN, CRAM-MD5, or DIGEST-MD5.
• On
Use if the authentication method is CRAMMD5 or DIGEST-MD5.
• Off
Use if the authentication method is PLAIN, or LOGIN.
• Off
POP before SMTP
You can specify POP authentication (POP before SMTP). When sending e-mail to an SMTP server,
you can enhance the SMTP server security level by connecting to the POP server for authentication.
If you set POP before SMTP to [On], specify the waiting time after authentication, user name, e-
mail address, and password. To enable POP server authentication before sending e-mail via the
SMTP server, set [POP before SMTP] to [On]. E-mail is sent to the SMTP server after the time
specified for [Wait Time after Authent.] has elapsed. If you select [On], enter the server name in
POP3/IMAP4 Settings. Also, check the POP3 port number in E-mail Communication Port.
Default: [Off]
• On
Wait Time after Authent.
Specify [Wait Time after Authent.] from zero to 10,000 milliseconds, in increments of
one millisecond.
Default: "300" msec.
User Name
Enter the user name using up to 191 characters. Spaces cannot be entered.
Email Address
Enter the e-mail address using up to 128 characters. Spaces cannot be entered.
5. Configuring and Managing the Printer
298 midas-p3_com_operating_instructions_gb_00208911_eng.xml
Draft 2016/01/18

Password
Enter the password using up to 128 characters. Spaces cannot be entered.
• Off
Reception Protocol
You can specify the Reception Protocol for receiving e-mails.
Default: [POP3]
POP3/IMAP4 Settings
You can specify the POP3/IMAP4 server name for receiving e-mails. The specified POP3/IMAP4
server name is used for [POP before SMTP].
Server Name
If DNS is in use, enter the host name. If DNS is not in use, enter the POP3/IMAP4 or server
IPv4 address. Enter the POP3/IMAP4 server name using up to 127 characters. Spaces
cannot be entered.
Encryption
You can specify the encryption method.
Default: [Auto]
• Auto
The password is automatically encrypted according to the POP/IMAP server settings.
• On
The password is encrypted.
• Off
The password is not encrypted.
Administrator's Email Address
You can specify the administrator's e-mail address using up to 128 characters.
Email Communication Port
You can specify the port numbers for receiving e-mails. The specified POP3 port number is used for
[POP before SMTP]. Enter a port number between 1 and 65535 using the number keys.
POP3
Default: [110]
IMAP4
Default: [143]
Email Reception Interval
You can specify the time interval for receiving e-mails via the POP3 or IMAP4 server. If [On] is
selected, the time can be set from 2 to 1440 minutes in increments of one minute.
Function Details of the Printer Configuration Items (SP C342DN)
midas-p3_com_operating_instructions_gb_00208911_eng.xml 299
Draft 2016/01/18

Default: [On], "15" minute(s)
Email Storage in Server
You can specify whether or not to store received e-mails on the POP3 or IMAP4 server.
Default: [Off]
Auto Email Notify
You can specify whether or not to send an error message to a preset e-mail address when an error
occurs in the printer. After changing the setting, turn off the power of the printer briefly, and then
turn it on again. For details, see page 343 "Printer Status Notification by E-mail".
Default: [On]
Administrator Tools
To change these settings, contact the administrator. It is recommended that you specify Administrator
Authentication before configuring Administrator Tools settings.
Address Book Management
You can add, change or delete information registered in the Address Book. For details about each
setting under "Address Book Management", see page 350 "Registering the Address Book".
You can register up to 1,000 users.
You can also register and edit names in the Address Book using Web Image Monitor.
For details about the [Print Volum. Use Limit.] setting under [Auth. Info], see Security Guide.
New Program
You can register names as well as user codes.
Names
You can register a name, key display, registration number, display priority, and title
selection.
Auth. Info
You can register a user code, and specify the functions available to each user code. You
can also register user names and passwords to be used when accessing an LDAP server.
User codes or user names and passwords registered here are also used for the print
volume use limitation function.
Protection
You can register a protection code.
Add to Group
You can register a user or group of users registered in the Address Book to a group.
Change
You can change names as well as user codes.
5. Configuring and Managing the Printer
300 midas-p3_com_operating_instructions_gb_00208911_eng.xml
Draft 2016/01/18

All Users
You can change information registered in the Address Book after selecting the user in [All
Users].
User Code
You can change information registered in the Address Book after selecting the user in
[User Code].
Delete
You can delete a name from the Address Book.
Address Book: Program/Change/Delete Group
Names registered in the Address Book can be added into a group. You can register up to 100
groups. For details on how to register names to a group, see page 358 "Registering Users to a
Group".
You can also register and manage groups in the Address Book using Web Image Monitor.
New Program
You can register groups.
Names
You can register a name, key display, registration number, display priority, and title
selection.
Programmed User/Group
You can check the names or groups registered in each group.
Protection
You can register a protection code.
Add to Group
You can put groups registered in the Address Book into a group.
Change
You can change a group from the Address Book.
Delete
You can delete a group from the Address Book.
Address Book: Change Order
You can change the order of registered names. For details about changing the order of the names
in the Address Book, see page 353 "Changing order of registered names".
Address Book: Edit Title
You can edit the title to easily find a user.
For details on how to edit titles, see page 354 "Editing titles".
Function Details of the Printer Configuration Items (SP C342DN)
midas-p3_com_operating_instructions_gb_00208911_eng.xml 301
Draft 2016/01/18

Address Book: Switch Title
You can specify a sorting title for user names from [Title 1] to [Title 3]. For details about sorting
titles, see page 352 "Registering User Information".
Default: [Title 1]
Backup/Restore: User Custom Settings & Address Book
Using an SD card, you can backup the printer's Address Book and user settings, and also restore
those backup data to the printer.
Restoring data overwrites Address Book data stored on the printer, and clears the counter of each
registered user of the printer.
You can also back up and restore the printer's Address Book using Web Image Monitor. For
details, see Web Image Monitor Help.
• Back Up
You can back up the printer's Address Book and user settings to an SD card.
• Restore
You can restore the backup copy of the Address Book and user settings from an SD card.
• Format
You can format an SD card.
• Obtain Memory Device Info
You can check the free space and contents of the SD card.
Auto Delete User in Address Book
If the maximum registerable limit for an account is reached and a new account is requested, the
oldest account can be deleted and a new account can be registered according to the user settings.
This new account is automatically registered to the Address Book and is not registered to the
Address Book manually.
Default: [Off]
Delete All Data in Address Book
You can delete all data in Address Book.
Display/Print Counter
You can view and print the number of prints.
Displays the number of prints for each function (Total, Printer, 2 Sided, Coverage).
• Print Counter List
Prints out a list of the number of prints made under each function.
5. Configuring and Managing the Printer
302 midas-p3_com_operating_instructions_gb_00208911_eng.xml
Draft 2016/01/18

Display/Clear/Print Counter per User
You can view, print, and reset the number of prints for each user code. For details about printing
the counter, see page 357 "Printing or clearing the counter for each user" and page 358 "Printing
or clearing the counter for all users".
The number of prints may differ from the counter values shown in Display/Print Counter.
Printer Counter
• Print List for All Users
You can print the counter value for all the users.
• Clear for All Users
You can reset the counter value for all the users.
• Print List Per User
You can print the counter value for each user.
• Clear Per User
You can reset the counter value for each user.
Display/Clear Eco-friendly Counter
For details about this function, see Security Guide.
Display/Clear Eco-friendly Counter per User
For details about this function, see Security Guide.
Eco-friendly Counter Period/Administrator Message
For details about this function, see Security Guide.
Machine Action When Limit is Reached
For details about this function, see Security Guide.
Print Volume Use Limitation: Unit Count Setting
For details about this function, see Security Guide.
Print Volum. Use Limit.: Default Limit Value
For details about this function, see Security Guide.
Media Slot Use
For details about this function, see Security Guide.
User Authentication Management
Default: [Off]
• Off
• User Code Authentication
Using User Code Authentication, you can limit the available functions and supervise their use.
When using User Code Authentication, register user codes.
Function Details of the Printer Configuration Items (SP C342DN)
midas-p3_com_operating_instructions_gb_00208911_eng.xml 303
Draft 2016/01/18

For details about Basic Authentication, Windows Authentication, LDAP Authentication, and
Integration Server Authentication, see Security Guide.
Function to Restrict:
Restrict Printer Functions
• Do not Restrict
• Color/Black&White
• Color
• PC Control
Restrict Other Functions
• Browser
Printer Job Authentication
• Entire
• Simple (Limitation)
• Simple (All)
• Basic Authentication
• Windows Authentication
• LDAP Authentication
• Integration Server Authentication
Enhanced Authentication Management
For details about this function, see Security Guide.
Administrator Authentication Management
For details about this function, see Security Guide.
Program/Change Administrator
For details about this function, see Security Guide.
Extended Security
You can specify whether or not to use the extended security functions. For details about the
extended security functions, see Security Guide.
Program/Change/Delete LDAP Server
You can program the LDAP server to find up e-mail destinations in the LDAP server Address Book
directly.
This function supports LDAP Version 2.0 and 3.0. Digest authentication can only be used under
LDAP Ver.3.0. For details about how to program the LDAP Server, see page 365 "Configuring the
LDAP Server".
5. Configuring and Managing the Printer
304 midas-p3_com_operating_instructions_gb_00208911_eng.xml
Draft 2016/01/18

Program/Change
You can program an LDAP server or change a programmed LDAP server.
• Name
• Server Name
• Search Base
• Port Number
• Use Secure Connection (SSL)
• Authentication
• Search Conditions
Delete
You can delete a programmed LDAP server.
Service Test Call
You can make a test call to the @Remote center. This function is available only if the @Remote
service is enabled and active. This function is unavailable when [Notify Machine Status] is in use.
Notify Machine Status
You can send notification of the printer's status to the @Remote center. This function is available
only if the @Remote service is enabled and active. This function is unavailable when [Service Test
Call] is in use.
Service Mode Lock
For details about this function, see Security Guide.
Firmware Version
You can check the version of the software installed in this printer.
Network Security Level
For details about this function, see Security Guide.
Auto Erase Memory Setting
For details about this function, see Security Guide.
Erase All Memory
For details about this function, see Security Guide.
Delete All Logs
For details about this function, see Security Guide.
Transfer Log Setting
For details about this function, see Security Guide.
Function Details of the Printer Configuration Items (SP C342DN)
midas-p3_com_operating_instructions_gb_00208911_eng.xml 305
Draft 2016/01/18

Unauthorized Copy Prevention Printing: Printer
Unauthorized Copy Prevention Stg.
Specify whether or not to enable the unauthorized copy prevention setting on the printer.
Default: [Off]
• On
• Off
Compulsory Unathd. Copy Preventn.
Select the unauthorized copy prevention setting to prioritize.
Default: [Driver / Command]
• Driver / Command
Prints documents using the settings specified in the printer driver or commands.
• Driver/Command (Most Settings)
Prints the background pattern by using the color and density specified on the printer. For
other items, the settings configured in the printer driver or commands are applied when
printing is performed.
• Machine Setting(s)
Prints documents using the settings specified on the printer regardless of the printer driver
settings.
Unauthorized Copy Prevention Type
Select the Unauthorized Copy Prevention type to use.
Default: [Unathd. Copy Prev.: Patn.]
• Data Security for Copying
If a printed document is copied or scanned using a copier or MFP that is installed with
the Copy Data Security unit, images in the document are covered with gray overprint.
• Unathd. Copy Prev.: Patn.
Embeds texts and background images for Unauthorized Copy Prevention for Pattern on
the printed document. When a printed document is copied or scanned, a text pattern
appears in the background of the document to prevent illegal copying.
Data Security for Copying Effect
Select data security effects for copying that will be applied to a copied or printed document.
Default: [Text and Background]
• Text and Background
• Background Only
5. Configuring and Managing the Printer
306 midas-p3_com_operating_instructions_gb_00208911_eng.xml
Draft 2016/01/18

Unathd. Copy Prev. of Ptrn. Effct.
Select unauthorized copy prevention effects for patterns that will be applied to the printed
document.
Default: [Text and Background]
• Text and Background
• Background Only
• Text Only
• Reverse Patterns(Text/Background)
Mask Type for Pattern
Select a pattern to be embedded in the background of a printed document.
Default: [None]
The available settings are as follows:
• None, Type 1, Type 2, Type 3, Type 4, Type 5, Type 6, Type 7, Type 8, Type 9, Type
10
Pattern Density
Select a density level for the background pattern.
Default: “3”
Text Selection
Enter a text to be embedded in the printed documents to prevent unauthorized copying.
Default: [Unauthorized Copy]
The available settings are as follows:
• Do not Specify, Unauthorized Copy, Illegal Copy, Void, Do not copy, Copy Restricted,
Copy Prohibited, Controlled Document, Confidential Document, In Confidence, In
Strictest Confidence, Confidential, User Name, File Name, Date & Time, User Name +
File Name, User Name + Date & Time, File Name + Date & Time, User Name+File
Name+Date & Time, User Text 1, User Text 2
“User Name” is the PC login user name.
Program/Change User Text
Register a text to be embedded for unauthorized copy prevention. Once registered, the text to
be used can be selected from [Text Selection].
PCL Fonts for Texts
Specify a font type to be used for the copy prevention text when using the PCL.
Default: [Arial]
PS Fonts for Texts
Specify a font type to be used for the copy prevention text when using PostScript 3.
Function Details of the Printer Configuration Items (SP C342DN)
midas-p3_com_operating_instructions_gb_00208911_eng.xml 307
Draft 2016/01/18

Default: [Arial]
Point Size
Specify a font size for the copy prevention text by entering a value between 50 and 300
points using the number keys.
Default: “70” points
Carriage Return Space
Specify line spaces between text by entering a value from 50 to 300 points using the number
keys. This setting is displayed if a value other than [Off] is specified for [Repeat Text].
Default: “70” points
Text Angle
Specify a text rotation angle. When a larger number is specified, the text is rotated
counterclockwise around the middle of the text string. Specify an angle between 0 to 359
degrees using the number keys.
Default: “30” degrees
Repeat Text
The text is printed downward from the upper left corner of the page. If [On: Rotate 180deg on
Return] is selected, each line of the text that is separated by a line feed will be rotated by 180
degrees.
Default: [Off]
• On
• On: Rotate 180deg on Return
• Off
Text Position
Specify where the text is inserted. This setting is displayed if 0 degrees is specified as the value
for [Text Angle] and [Off] is specified as the value for [Repeat Text].
Default: [Center]
The available settings are as follows:
• Top Left, Top Center, Top Right, Center, Bottom Left, Bottom Center, Bottom Right
Fixed USB Port
If this function is activated, you can avoid reinstalling the printer driver when connecting a
computer pre-installed with the driver to an identical printer model to this printer.
Default: [Off]
• Off
• Level 1
5. Configuring and Managing the Printer
308 midas-p3_com_operating_instructions_gb_00208911_eng.xml
Draft 2016/01/18

It is not necessary to install a new driver when the printer driver of this printer has already
been installed on the PC.
• Level 2
For details about this function, consult your administrator.
Program/Change/Delete Realm
You can program the realm to be used for Kerberos authentication. Be sure to set both the realm
name and KDC server name when programming a realm. For details about Program/Change/
Delete Realm, see page 368 "Configuring the Realm".
Program/Change
You can program a realm or change a programmed realm.
• Realm Name
• KDC Server Name
• Domain Name
Delete
You can delete a programmed realm.
Machine Data Encryption Settings
For details about this function, see Security Guide.
Program/Delete Device Certificate
You can program and delete a self-generated device certificate and also check status of the
certificate.
For details about this function, see Security Guide.
Device Setting Information: Import Setting (Server)
For details about this function, see Security Guide.
Device Setting Information: Run Import (Server)
For details about this function, see Security Guide.
Device Setting Information: Export (Memry Strge Devc)
For details about this function, see Security Guide.
Device Setting Information: Import (Memry Strge Devc)
For details about this function, see Security Guide.
Energy Server Key to Change Mode
xxxxx
Compulsory Security Stamp:Printer
You can specify whether or not to print security stamps on output documents using the printer
function. You can adjust where the stamps are printed. Available stamp settings : [Date/Time],
[Printout User Name], [Machine ID], [Machine IP Address], [Adjust Stamp Position]
Function Details of the Printer Configuration Items (SP C342DN)
midas-p3_com_operating_instructions_gb_00208911_eng.xml 309
Draft 2016/01/18

Default: [Off]
User's Own Customization
You can specify whether or not to allow logged-in users to display their own home screen. For
details about this function, see Security Guide.
Default: [Prohibit]
Display Supply Info
You can specify whether or not the amount of toner is displayed on the initial screen.
• Home Screen
Default: [On]
• Printer Application Screen
Default: [On]
ECO Night Sensor
The ECO Night Sensor (ambient light sensor) enables the printer to automatically turn off and on
the main power when changes in the ambient light level are detected.
You can specify how the printer performs when the ECO Night Sensor detects changes in the
ambient light level.
When Weekly Timer is set to [Daily] or [Day of the Week], the printer does not turn on even if
[ECO Night Sensor] is set to [Power Off and On] and the time for turning on the main power
specified in [Timer to Turn On] elapses.
Default: [Power Off Only]
• Power Off Only
The printer turns off the main power when the ECO Night Sensor detects a low ambient light
level.
• Power Off and On
The printer turns off the main power when a decrease in the ambient light level is detected. It
turns on the main power when an increase in the ambient light level is detected.
• Inactive
The ECO Night Sensor is disabled.
Timer to Turn Off
You can specify how long the printer waits to turn off the main power when the ECO Night
Sensor detects a low ambient light level.
The timer is reset when:
• The sensor detects changes in the ambient light level.
• Any key on the control panel is pressed or printing is performed.
• The main power switch is turned on.
5. Configuring and Managing the Printer
310 midas-p3_com_operating_instructions_gb_00208911_eng.xml
Draft 2016/01/18

• The printer configuration screen is displayed on the control panel.
• The printer settings are changed using Web Image Monitor.
• The printer settings are imported or exported.
• A program is downloaded.
• The printer resumes Fusing Unit Off mode.
• The printer enters Sleep mode.
Default: [120 minutes]
• 1 minute
• 5 minutes
• 30 minutes
• 60 minutes
• 120 minutes
Timer to Turn On
You can specify how long the printer waits before it turns on the main power when the ECO
Night Sensor detects an increase in the ambient light level.
The timer is reset when:
• The sensor detects changes in the ambient light level.
• The ECO Night Sensor setting is changed.
• The main power is turned on.
• The printer enters Sleep mode.
Default: [1 minute]
• 1 minute
• 5 minutes
• 30 minutes
• 60 minutes
• 120 minutes
Brightness Sensor Level
Brightness Sensor Level to Turn Off
You can set the brightness threshold for the sensor to turn off the main power.
Default: 0
• 0 (Dark) - 15 (Bright)
Level 0 (Very dark): Equivalent to a moonlit night
Level 5 (Dark): Equivalent to a dimly-lit room
Function Details of the Printer Configuration Items (SP C342DN)
midas-p3_com_operating_instructions_gb_00208911_eng.xml 311
Draft 2016/01/18
Level 7 (Dim): Equivalent to a room at sunset
Level 9 (Bright): Equivalent to a brightly lit room at night
Level 15 (Very bright): Equivalent to a sunlit room
Brightness Sensor Level to Turn On
You can set the brightness threshold for the sensor to turn on the main power.
Default: 8
• 0 (Dark) - 15 (Bright)
Level 0 (Very dark): Equivalent to a moonlit night
Level 5 (Dark): Equivalent to a dimly-lit room
Level 7 (Dim): Equivalent to a room at sunset
Level 9 (Bright): Equivalent to a brightly lit room at night
Level 15 (Very bright): Equivalent to a sunlit room
You can set a lower value for [Brightness Level toTurnOff] than the one for [Brightness
Level to TurnOn].
Brightness levels are based on ambient light. The actual brightness level may differ
depending on the environment in which the printer is used.
Select Switchable Languages
You can register up to five languages to be displayed on the control panel. Also, you can change
the display language using the display language switch on the [User Tools] screen.
Ready State After Printing
You can specify the state the printer return to after printing documents during Sleep Mode.
Default: [Off]
• On
The printer does not return to Sleep Mode and the [Home] screen appears on the control
panel.
• Off
The printer returns to Sleep Mode.
• Unauthorized copy prevention can be specified in Web Image Monitor and in the printer driver.
For details about how to configure the settings, see page 144 "Printing Documents that Are Not
Authorized for Duplication".
Printer Features
This section describes user tools under Printer Features menu.
5. Configuring and Managing the Printer
312 midas-p3_com_operating_instructions_gb_00208911_eng.xml
Draft 2016/01/18

List / Test Print
Multiple Lists
You can print the configuration page and error log, network summary and supply list.
Configuration Page
You can print the printer's current configuration values. For details, see page 100 "Interpreting the
Configuration Page".
Error Log
You can print error logs listing all errors that occurred during printing. The most recent 30 errors are
stored in the error log. If a new error is added when there are 30 errors already stored, the oldest
error is deleted. However, if the oldest error belongs to one of the following types of print jobs, it is
not deleted. Instead, it will be stored separately in error logs for each job type, up to a maximum of
30 for each log. You can check any of these print jobs for error log information.
• Sample Print
• Locked Print
• Hold Print
• Stored Print
The records of jobs canceled automatically and manually from the control panel can be printed.
Network Summary
You can print the network device status.
Supply Info List
You can print the supply status.
Menu List
You can print a menu list showing the printer's function menus.
Color Demo Page
You can print a color sample.
PCL Configuration / Font Page
You can print the current configuration and installed PCL font list.
PS Configuration / Font Page
You can print the current configuration and installed PostScript font list.
PDF Configuration / Font Page
You can print the current configuration and installed PDF font list.
Hex Dump
You can print in the Hex Dump mode.
Function Details of the Printer Configuration Items (SP C342DN)
midas-p3_com_operating_instructions_gb_00208911_eng.xml 313
Draft 2016/01/18

Data Management
Menu Protect
You can prevent unauthenticated users from changing the user tools. For details, see Security
Guide.
List / Test Print Lock
You can lock the [List / Test Print] items. For details, see Security Guide.
Delete All Temporary Print Jobs
You can delete all Sample Print, Locked Print, Hold Print files temporarily stored in this printer.
Delete All Stored Print Jobs
You can delete all Stored Print files stored in this printer.
Auto Delete Temporary Print Jobs
You can specify whether to automatically delete Sample Print, Locked Print, Hold Print files
temporarily stored in this printer. Hold Print files that have valid print time cannot be deleted
automatically.
Default: [Off]
If you select [On], you can set up to 200 hours for auto file deleting (Default: "8").
Auto Delete Stored Print Jobs
You can specify whether to automatically delete Stored Print files temporarily stored in this printer.
Default: [On], "3" day(s)
If you select [On], you can set up to 180 days for auto file deleting.
Tray Parameters (PCL)
You can configure settings to change paper tray parameters used for PCL printing. You can specify
the settings for the installed trays and the Auto Tray Select function.
Tray Parameters (PS)
You can configure settings to change paper tray parameters used for PostScript printing. You can
specify the settings for the installed trays only.
System
Print Error Report
You can specify whether the printer prints an error report when a printer or memory error occurs.
Default: [Off]
5. Configuring and Managing the Printer
314 midas-p3_com_operating_instructions_gb_00208911_eng.xml
Draft 2016/01/18

Auto Continue
You can specify whether or not the printer automatically continues to print after a system error
occurs. For details about how to configure this function, see page 172 "Executing form feed when
an error occurs".
Default: [Off]
Store and Skip Errored Job
A document is automatically stored in the printer if a print job is suspended due to an error. Despite
this error, the next document can be printed. This function can be used for Normal Print, Sample
Print, and Stored Print files. The job type can be specified in the "Job Type:" list of the printer driver.
For details, see page 176 "Printing Stored Documents".
Printing of the document that is stored in the printer can be resumed by operating the control panel.
For details, see page 183 "Printing of documents stored when print configuration errors occur".
The storage method differs depending on the type of the specified document. For details, see
page 174 "Storing jobs with errors automatically".
You can specify the number of pages to check for errors. Enter the number of pages between 1 to
999. (Default: "3")
When two or more pages is specified, the first page of a document may take longer to print.
Default: [Off]
Memory Overflow
You can specify whether or not to print a memory overflow report.
Default: [Do not Print]
Auto Cancel Conf. for PDL Err.Job
You can specify whether or not to cancel printing and display confirmation screen when an error
occurs because of restrictions related to the printer language, options, or security settings.
Default: [Do not Display]
Auto Cancel for Prt. Job(s) on Err.
When an error occurs, the printer cancels the print job with an error and the jobs received before
the error occurs. For details about setting this function, see page 173 "Automatically canceling
printing of jobs with errors".
Default: [Off]
Rotate by 180 Degrees
You can specify whether to rotate the print image 180 degrees relative to the paper orientation.
Default: [Off]
Anti-Humidity
Select whether or not to reduce paper curl and print smearing when printing in a high-humidity
environment.
Function Details of the Printer Configuration Items (SP C342DN)
midas-p3_com_operating_instructions_gb_00208911_eng.xml 315
Draft 2016/01/18

Anti-Humidity Setting
Default: [Off]
• On
• Off
Anti-Humidity Level
Default: [Level 1 (Weak)]
• Level 1 (Weak)
• Level 2 (Medium)
• Level 3 (Strong)
Print Compressed Data
You can specify whether to uncompress and extract compressed job data before printing it.
The supported compression format is GZIP.
Default: [Off]
Memory Usage
You can specify the amount of memory used in Font Priority or Frame Priority, according to paper
size or resolution.
Default: [Frame Priority]
Duplex
You can specify whether or not to print on both sides of each page.
Default: [Off]
Copies
You can specify the number of print sets. This setting is disabled if the number of pages to print has
been specified with the printer driver or another command.
The number of copies can be specified from 1 to 999 by increments of one.
Default: "1" copies
Blank Page Print
You can specify whether or not to print blank pages.
Default: [On]
Pages that match one of the following conditions are identified as blank.
• There are no images.
• There are images but they are outside the printable area.
• There are only blank characters.
5. Configuring and Managing the Printer
316 midas-p3_com_operating_instructions_gb_00208911_eng.xml
Draft 2016/01/18

PCL Char.Thickness Adjust.
Specify whether or not to thicken the typeface if characters appear blurred when printing through
the PCL 5c or PCL6 printer driver.
Default: [Off]
• On
• Off
Spool Printing
You can specify whether or not to complete spooling before starting to print. Spooling stores a print
job temporarily in the printer, and then prints it. This function is available only if the hard disk is
installed on the printer.
Default: [Off]
Jobs Not Printed As Machine Was Off
This function is available only if the hard disk is installed on the printer.
You can specify whether or not to print Hold Print files whose specified print time has already
passed when the printer's main power switch is turned on.
Default: [Do not Print]
• Print When Machine On
When the printer's main power is turned on, the printer automatically prints all the Hold Print
files stored in the printer whose specified print time has already passed.
• Do not Print
If there are Hold Print files whose specified print time has already passed when the printer's
power is turned on, the specified print time will be canceled and the files will be deleted
depending on the [Auto Delete Temporary Print Jobs] setting. For details, see page 314 "Data
Management".
Restrict Direct Print Jobs
This function is available only if the hard disk is installed on the printer.
When a print job is sent to the printer, you can specify whether to store the document in the printer
without printing it or cancel printing it. To prevent documents being left on the tray unattended, the
documents that have been stored automatically in the printer are not printed unless the control
panel is used to print them.
If a document is a Normal Print, Sample Print, or Stored Print file, it can be printed physically. The
job type can be specified in the "Job Type:" list of the printer driver. For details, see page 176
"Printing Stored Documents".
If [Automatcly. Store Jobs] is selected, the storage method differs depending on the type of the
specified document. For details, see page 172 "Preventing Documents from Being Left Unattended
or Taken By Mistake".
Default: [Off]
Function Details of the Printer Configuration Items (SP C342DN)
midas-p3_com_operating_instructions_gb_00208911_eng.xml 317
Draft 2016/01/18
• Off
• Automatcly. Store Jobs
Documents are automatically stored in the printer without being printed regardless of their
print settings.
• Cncl All Direct Prt Jobs
Printing is always canceled regardless of the print settings.
Switch Initial Screen
This function is available only if the hard disk is installed on the printer.
You can specify the screen to be displayed when [Printer] is pressed in the Home screen.
Default: [Job List]
• Job List
Displays the list of jobs.
• Print Jobs
Displays the lists of the document stored in the printer and the User IDs.
Printer Language
You can specify the printer language.
Default: [Auto]
Default Printer Language
You can set the default printer language if the printer cannot find the printer language
automatically.
Default: [PCL]
Sub Paper Size
You can specify whether A4 or Letter (81/2 ×11) size paper is automatically selected as the
default size when the job-specified size is unavailable.
Default: [Auto]
Page Size
You can specify the default paper size.
Default:
• (mainly Europe and Asia)
A4
• (mainly North America)
81/2 × 11
The paper size you can specify is as follows:
• (mainly Europe and Asia)
5. Configuring and Managing the Printer
318 midas-p3_com_operating_instructions_gb_00208911_eng.xml
Draft 2016/01/18

A4, A5, A6, B5 JIS, B6 JIS, C5 Env, C6 Env, DL Env, 81/2 × 14, 81/2 × 132/5, 81/2 × 13,
81/2 × 11, 81/4 × 13, 8 × 13, 71/4 × 101/2, 51/2 × 81/2, 41/8 × 91/2, 37/8 × 71/2,
16K, Custom Size
• (mainly North America)
81/2 × 14, 81/2 × 132/5, 81/2 × 13, 81/2 × 11, 81/4 × 13, 8 × 13, 71/4 × 101/2, 51/2
× 81/2, 41/8 × 91/2, 37/8 × 71/2, A4, A5, A6, B5 JIS, B6 JIS, C5 Env, C6 Env, DL Env,
16K, Custom Size
Letterhead Setting
You can specify whether or not to print on paper that has a fixed print side or print direction
(letterhead paper, for example). For details, see page 121 "Loading Orientation-Fixed Paper or
Two-Sided Paper".
Default: [Auto Detect]
• Off
The letterhead printing mode is disabled.
• Auto Detect
You can specify whether or not to print using letterhead mode whenever a page that has a
fixed print side or print direction is specified as the first page.
• On (Always)
Print with the letterhead printing mode regularly.
Tray Setting Priority
You can specify whether or not to give priority to the settings specified by the printer driver or
commands or to the ones made on the control panel for each tray when the printer receives print
data. Only the trays attached to the printer are displayed.
Paper Confirmation for Bypass Tray
You can specify whether or not to display the confirming screen for the paper size, type and
feed direction on the control panel when paper is fed from the bypass tray. If [Display] is
specified, you can check the print settings for the bypass tray before printing starts.
Default: [Do not Display]
• Display
• Do not Display
Bypass Tray
Default: [Driver/Command]
• Driver/Command
When the source paper tray is specified for a print job, the paper settings specified using
the printer driver or by print command are applied, regardless of the settings specified
using the control panel.
Function Details of the Printer Configuration Items (SP C342DN)
midas-p3_com_operating_instructions_gb_00208911_eng.xml 319
Draft 2016/01/18

• Machine Setting(s)
The paper settings specified on the printer's control panel are applied to all print jobs. An
error may occur if the paper settings specified using the printer driver or by print
command do not match those specified using the control panel.
• Machine Setting(s): Any Type
Printing is performed according to the paper size specified using the printer driver or
print command and the paper type specified on the machine. Regardless of the type of
paper in the paper tray, you can print properly by specifying a paper type using the
printer driver or print command.
• Any Size/Type
If the printer's trays do not contain any paper to match the print job settings, printing can
be performed from the bypass tray with the job's settings applied.
• Any Custom Size/Type
If the printer's trays do not contain any paper to match the print job settings but custom
paper is specified using the printer driver or by print command, printing can be
performed from the bypass tray with the job's settings applied.
Trays 1 to 2
Default: [Machine Setting(s)]
• Driver/Command
• Machine Setting(s)
Tray Switching
You can specify whether or not the printer automatically switches paper trays if paper of the
specified size and type is not loaded in the driver-specified tray.
Default: [Off]
RAM Disk
If the hard disk is not installed for PDF Direct Print, select a value of 2 MB or higher. This function is
displayed only if no hard disk is installed.
Default: [4 MB]
Extended Auto Tray Switching
You can specify whether or not to automatically switch to a suitable tray when the current tray runs
out of paper.
When [On] is set, the extended auto tray switching is priority, regardless of the printer driver
settings.
Default: [Off]
I/O Buffer
You can set the size of the I/O Buffer. Normally it is not necessary to change this setting.
5. Configuring and Managing the Printer
320 midas-p3_com_operating_instructions_gb_00208911_eng.xml
Draft 2016/01/18
Default: [128 KB]
I/O Timeout
You can set how many seconds the printer should wait before ending a print job. If data from
another port usually arrives in the middle of a print job, you should increase this timeout period.
Default: [15 seconds]
PCL Menu
Orientation
You can set the page orientation.
Default: [Portrait]
Form Lines
You can set the number of lines per page.
The number of lines can be specified from 5 to 128 by increments of one.
Default:
• (mainly Europe and Asia)
"64" lines
• (mainly North America)
"60" lines
Font Source
You can set the storage location of the default font.
Default: [Resident]
[RAM], [HDD], [SD], and [SD Font Download] can be selected only when fonts have been
downloaded to the printer.
Font Number
You can set the ID of the default font you want to use.
• When [Resident] is selected under [Font Source]:
The font number can be specified from 0 to 63 by increments of one.
Default: "0"
• When [RAM], [HDD], [SD], or [SD Font Download] is selected under [Font Source]:
The font number can be specified from 1 up to number of fonts stored on the printer.
Default: "1"
Point Size
You can set the point size you want to use for the selected font.
Function Details of the Printer Configuration Items (SP C342DN)
midas-p3_com_operating_instructions_gb_00208911_eng.xml 321
Draft 2016/01/18

The number of point sizes can be specified from 4.00 to 999.75 by increments of 0.25.
This setting is effective only with variable-space fonts.
Default: "12.00" points
Font Pitch
You can set the number of characters per inch for the selected font.
The number of characters per inch can be specified from 0.44 to 99.99 by increments of 0.01.
This setting is effective only with fixed-space fonts.
Default: "10.00" pitches
Symbol Set
You can specify the character set of the selected font. The available settings are as follows:
Roman-8, Roman-9, ISO L1, ISO L2, ISO L5, ISO L6, ISO L9, PC-775, PC-8, PC-8 D/N,
PC-850, PC-852, PC-858, PC8-TK, PC-1004, Win L1, Win L2, Win L5, Win Baltic, Desktop, PS
Text, MS Publ, Math-8, PS Math, Pifont, Legal, ISO 4, ISO 6, ISO 11, ISO 15, ISO 17, ISO 21,
ISO 60, ISO 69, Win 3.0, MC Text, UCS-2, PC-864, Arabic-8, Win Arabic, PC-866, PC-866U,
ISO Cyrillic, Win Cyrillic, PC-851, Greek-8, ISO Greek, PC-8 Greek, Win Greek, PC-862,
Hebrew-7, Hebrew-8, ISO Hebrew
Default: [PC-8]
Courier Font
You can specify a courier font type.
Default: [Regular]
Extend A4 Width
You can extend the printing area width (when printing on A4 sheet with PCL).
Default: [Off]
When the setting is [On], the width will be 81/2 inches.
Append CR to LF
When set to [On], a carriage return will follow each line feed: CR=CR, LF=CR-LF, FF=CR-FF.
Default: [Off]
Resolution
You can set the print resolution in dots per inch.
Default: [600 dpi (Fast)]
5. Configuring and Managing the Printer
322 midas-p3_com_operating_instructions_gb_00208911_eng.xml
Draft 2016/01/18

PS Menu
Job Timeout
You can specify how long the printer waits before canceling the current job when the job is
interrupted while being processed.
Default: [Use Driver/Command]
If you select [Use Machine Settings], enter a value between 0 and 999.
Default: "0"
When set to "0", the current job will not be canceled when interrupted.
Wait Timeout
You can specify how long the printer waits before it cancels receiving the job when the printer
cannot detect the end of the job.
Default: [Use Driver/Command]
If you select [Use Machine Settings], enter a value between 0 and 999.
Default: "300"
When set to "0", the print job will not be canceled when the end of the job cannot be detected.
Paper Selection Method
You can specify how the source tray will be selected by specifying the default value for
DeferredMediaSelection in PostScript.
Default: [Select Paper Tray]
• Auto Select
The default value for DeferredMediaSelection is "true". The source tray that matches the paper
setting specified in a print job will be selected.
• Select Paper Tray
The default value for DeferredMediaSelection is "false". The source tray will be selected
according to the media selection of PostScript Language Reference.
Switching between 1&2 Sided Print Functns.
You can specify which side of paper to print on when the PS command is used to perform duplex
printing, and the "setpagedevice" command is entered.
Default: [Active]
• Active
Cancels duplex printing, and prints pages after the "setpagedevice" command has been
entered on the front side of paper.
• Inactive
Retains duplex printing, and prints pages after the "setpagedevice" command has been
entered on the back side of paper.
Function Details of the Printer Configuration Items (SP C342DN)
midas-p3_com_operating_instructions_gb_00208911_eng.xml 323
Draft 2016/01/18

Data Format
You can specify a data format.
Default: [TBCP]
This setting is not effective when operating the printer with a parallel connection.
When operating the printer with a parallel connection, and also if the binary data is sent from the
printer driver, the print job is canceled.
Resolution
You can set the print resolution in dots per inch.
Default: [600 dpi (Fast)]
Toner Saving
You can specify whether or not to reduce toner consumption when printing. When this setting is
enabled, print quality may be degraded.
Default: [Off]
Color Setting
You can make an RGB setting.
Default: [Super Fine]
Color Profile
You can set the color profile.
Default: [Auto]
Process Color Model
You can specify the color model.
Default: [Color]
Orientation Auto Detect
You can specify whether or not to automatically detect the print data orientation.
Default: [On]
Gray Reproduction
You can specify how to print black or gray tones.
Default: [Black/Gray by K (Black)]
• Black/Gray by K (Black)
• Black by K (Black)
• CMY + K
• Black/Gray by K(Black)-Text Only
• Black by K (Black)-Text Only
• Black/Gray by K-Strong UCR
5. Configuring and Managing the Printer
324 midas-p3_com_operating_instructions_gb_00208911_eng.xml
Draft 2016/01/18

PDF Menu
Change PDF Password
You can set the password for the PDF file printed using PDF Direct Print.
[New Password] and [Confirm New Password] appear only when [Current Password] is set.
A password can be also set using Web Image Monitor, but in this case the password information is
sent through the network. If security is a priority, set the password using this menu from the control
panel.
PDF Group Password
This setting is not available on this printer.
Reverse Order Printing
You can specify whether the printer automatically prints in reverse order.
Default: [Off]
Resolution
You can set the print resolution in dots per inch.
Default: [600 dpi (Fast)]
Toner Saving
Reduces toner consumption when printing. When this setting is enabled, print quality may be
degraded.
Default: [Off]
Color Setting
You can make an RGB setting.
Default: [Super Fine]
Color Profile
You can set the color profile.
Default: [Auto]
Process Color Model
Specify the color model.
Default: [Color]
Orientation Auto Detect
You can specify whether or not to automatically detect the print data orientation.
Default: [On]
Function Details of the Printer Configuration Items (SP C342DN)
midas-p3_com_operating_instructions_gb_00208911_eng.xml 325
Draft 2016/01/18
XPS Menu
Resolution
You can set the print resolution in dots per inch.
Default: [600 dpi Fast]
• 600dpi Fast
• 600dpi Standard
Toner Saving
Reduces toner consumption when printing. When this setting is enabled, print quality may be
degraded.
Default: [Off]
Color Profile
You can set the color profile.
Default: [Auto]
Process Color Model
Specify the color model.
Default: [Color]
Gray Reproduction
You can specify how to print black or gray tones.
Default: [Black/Gray by K (Black)]
Extended Feature Settings
You can install, uninstall, and set up Extended Features. For details, see Extended Feature Settings.
Address Book Mangmnt
You can configure [Address Book Management] in [Administrator Tools] under [System Settings]. For
details, see page 300 "Administrator Tools".
Tray Paper Settings
You can configure [Tray Paper Settings] under [System Settings]. For details, see page 287 "Tray Paper
Settings".
5. Configuring and Managing the Printer
326 midas-p3_com_operating_instructions_gb_00208911_eng.xml
Draft 2016/01/18
Edit Home
You can add shortcuts to frequently used embedded software applications in the [Home] screen. For
details, see page 31 "Customizing the [Home] Screen".
Remote Services
You can display the communication screen for @Remote Service. For details, see Security Guide.
Switch Display Language
Every time you press the display language switch, the display language of the control panel toggles
through the languages registered in [Select Switchable Languages] in [Administrator Tools] under
[System Settings]. For details about how to change languages, see page 77 "Selecting the Display
Language". For details about how to register languages, see page 300 "Administrator Tools".
Maintenance: Print
Plain Paper Setting
You can specify the weight of plain paper when [Plain Paper] is selected for [Paper Type] in [Tray
Paper Settings] under [System Settings].
The paper weight can be set for each tray separately. For details about the actual paper weight,
see page 108 "Paper Type Specifications".
Default: [Plain Paper]
• Plain Paper
Replacement Alert
Use this function to specify the timing to notify user when supplies need to be replaced. Settings can
be made separately for Toner, Waste Toner Bottle, Intermediate Transfer Unit, Fusing Unit.
Default: [Normal]
• Notify Sooner
• Normal
• Notify Later
Supply End Option
You can specify whether or not to continue printing after the following components have exceeded
their recommended service life.
Default: [Continue Printing]
Function Details of the Printer Configuration Items (SP C342DN)
midas-p3_com_operating_instructions_gb_00208911_eng.xml 327
Draft 2016/01/18

• Continue Printing
• Stop Printing
Black & White Page Detect
You can specify whether to recognize black-and-white images by page or by document.
The black-and-white recognition function allows the printer to print monochrome images in
monochrome mode even if color printing is specified.
Default: [Per Job]
• Per Page
• Per Job
Cleaning
You can clear the intermediate transfer unit when white lines appear on printouts.
Curl Prevention
You can control the fuser temperature to prevent paper from curling. Enabling this function may
increase the print time and speed for first prints.
Also, the lifetime of the drum unit, intermediate transfer unit, and fusing unit becomes shorter than
their normal lifetime.
Default: [Inactive]
• Active
• Inactive
Anti-droplet (2 Sided Print)
You can specify whether or not to dry the duplex unit before printing to prevent partial dropouts of
printed images on the back sides of two-sided printouts. Enabling this function may increase the
print time for duplex printing of first prints. Also, the lifetime of the fusing unit becomes shorter than
their normal lifetime.
Default: [Inactive]
• Active
• Inactive
Anti-humidity (Image Dropout Prevention)
You can specify whether or not to prevent partial dropouts of printed images when printing in a
high humidity environment.
Default: [Inactive]
• Active
• Inactive
5. Configuring and Managing the Printer
328 midas-p3_com_operating_instructions_gb_00208911_eng.xml
Draft 2016/01/18

Black & White Print Priority
You can specify whether or not to reduce consumption of color toner. When this function is
enabled, it may take longer to start printing a color page.
Default: [Off]
• On
• Off
B & W Low Speed Printing (Thick Paper)
You can specify whether or not to lower the print speed of black-and-white pages on thick paper if
lateral streaks appear on the output. Enabling this setting prevents streaks from appearing on the
output by lowering the print speed.
If this function is enabled, the lifetime of the toner and drum unit becomes shorter than their normal
lifetime.
Default: [Inactive]
• Active
• Inactive
Maintenance: Image
Color Regist.
You can perform automatic adjustment of color registration. For details, see page 440 "Adjusting
the Color Registration".
Color Calibrt.
You can adjust the gradation of bright (highlighted parts) and medium areas (middle parts) for
printing. For details, see page 441 "Correcting the Color Gradation".
• Adjust Auto Density
You can print the gradation of auto density.
• Print Test Pattern 1
You can print gradation correction sheet 1.
• Print Test Pattern 2
You can print gradation correction sheet 2.
• Reset Setting
You can reset the gradation correction value to default.
Adjust Print Position
You can adjust the starting position of the printing page. For details, see page 445 "Adjusting
Printing Position".
Function Details of the Printer Configuration Items (SP C342DN)
midas-p3_com_operating_instructions_gb_00208911_eng.xml 329
Draft 2016/01/18

Print Test Sheet
You can print the registration test sheet.
Only the installed trays appear on the display panel.
• Paper Trays 1–2
• Bypass Tray
• Duplex Unit
Adjust Position
You can specify the start position for printing on a page.
Only the installed trays appear on the display panel.
• Horizontal: Trays 1-2
• Horizontal: Bypass Tray
• Horizontal: Back Side
• Vertical: Trays 1–2
• Vertical: Bypass Tray
• Vertical: Back Side
4 Color Graphic Mode
You can adjust levels of toner color overlap. If characters or lines blur, setting priority on text may
make them clearer. Under normal conditions, set priority on photos.
Default: [Photo Priority]
• Text Priority
• Photo Priority
5. Configuring and Managing the Printer
330 midas-p3_com_operating_instructions_gb_00208911_eng.xml
Draft 2016/01/18
Using a Print Server
This section explains how to configure the printer as a network printer.
Configuring a Print Server
This section explains how to configure the printer as a Windows network printer. The printer is
configured to enable use by network clients.
• To change printer properties in the [Printers and Faxes], [Printers], or [Devices and Printers]
window, log in to the file server as an administrator or member of the PowerUsers group.
1. On the [Start] menu, click [Devices and Printers].
For Windows Vista, click [Control Panel], and then click [Hardware and Sound] from [Printer] to
display the [Printer] window.
For Windows 8/8.1, click [Settings] on the Charm Bar, and then click [Control Panel]. When the
[Control Panel] window appears, click [View devices and printers].
For Windows 10, right-click the [Start] button on the desktop, and then click [Control Panel]. When
the [Control Panel] window appears, click [View devices and printers].
2. Right-click the icon of the printer you have added, and then click [Printer properties].
The printer properties appear.
For Windows Vista, right-click the icon of the printer you have added, click [Run as administrator],
and then click [Properties].
For Windows 8/8.1/10, right-click the icon of the printer you have added to select the printer,
and then click [Printer properties].
3. On the [Sharing] tab, click [Share this printer].
4. To share the printer with users of a different version of Windows, click [Additional
Drivers...].
If you have installed an alternative driver by selecting [Shared] during the printer driver installation,
this step can be ignored.
5. Click [OK], and then close the printer properties.
Using a Print Server
midas-p3_com_operating_instructions_gb_00198694_eng.xml 331
Draft 2016/01/18
Monitoring and Configuring the Printer
This section explains how to monitor and configure the printer.
Using Web Image Monitor
• You cannot configure the printer settings using Web Image Monitor from a computer connected to
the USB device server's network. Be sure to access Web Image Monitor from the printer's network.
Using Web Image Monitor, you can check the printer status and change settings.
Available operations
The following operations can be remotely performed using Web Image Monitor from a client
computer.
• Displaying printer status or settings
• Checking the print job status or history
• Interrupting currently printing jobs
• Resetting the printer
• Managing the Address Book
• Configuring printer settings
• Configuring network protocol settings
• Configuring security settings
Configuring the printer
To perform the operations from Web Image Monitor, TCP/IP is required. After the printer is
configured to use TCP/IP, operations from Web Image Monitor become available.
Recommended Web browser
• Windows:
Internet Explorer 6.0 or higher
Firefox 10 and 15 or higher
Google Chrome 19 or higher
• Mac OS:
Safari 3.0 or higher
Firefox 10 and 15 or higher
Google Chrome 19 or higher
5. Configuring and Managing the Printer
332 midas-p3_com_operating_instructions_gb_00198701_eng.xml
Draft 2016/01/18
Web Image Monitor supports screen reader software. We recommend JAWS 7.0 or a later
version.
• Display and operation problems may occur if you do not enable JavaScript and cookies, or if you
are using a non-recommended Web browser.
• If you are using a proxy server, change the Web browser settings. Contact your administrator for
information about the settings.
• We recommend using Web Image Monitor in the same network.
• If the printer is firewall-protected, it cannot be accessed from computers outside the firewall.
• If the printer under DHCP is used, the IP address may be changed automatically by the DHCP
server settings. Enable DDNS setting on the printer, and then connect using the printer's host name.
Alternatively, set a static IP address to the DHCP server.
• If the HTTP port is disabled, a connection to the printer using the printer's URL cannot be
established. SSL settings must be enabled on this printer. For details, contact your network
administrator.
• If Firefox is used, fonts and colors may be different, or tables may not appear properly configured.
• When using a host name under Windows Server 2003/2003 R2/2008/2008 R2/2012/2012
R2 with IPv6 protocol, perform host name resolution using an external DNS server. The host file
cannot be used.
• To use JAWS 7.0 under Web Image Monitor, you must be running Windows and Internet Explorer
6.0 or a later version.
• If you are using Internet Explorer 8.0 or higher, downloading will be slower than with other
browsers. To download faster with Internet Explorer 8.0 or higher, open the browser's [Internet
Options] menu and register the printer's URL as a trusted site, and then disable SmartScreen filter
for trusted sites. For details about these settings, see the Internet Explorer Help files.
• You can access Web Image Monitor more quickly by registering the printer's URL as a bookmark.
Note that the URL you register must be the URL of the top page, which is the page that appears
before login. If you register the URL of a page that appears after login, Web Image Monitor will
not open properly from the bookmark.
• If user authentication is activated, you must enter your login user name and password to use Web
Image Monitor. For Details, see page 333 "Displaying the top page".
• When you configure settings using Web Image Monitor, do not log in from the control panel. The
settings you have configured using Web Image Monitor may become invalid.
Displaying the top page
There are two modes available with Web Image Monitor: guest mode and administrator mode.
Displayed items may differ depending on the printer type.
Monitoring and Configuring the Printer
midas-p3_com_operating_instructions_gb_00198701_eng.xml 333
Draft 2016/01/18
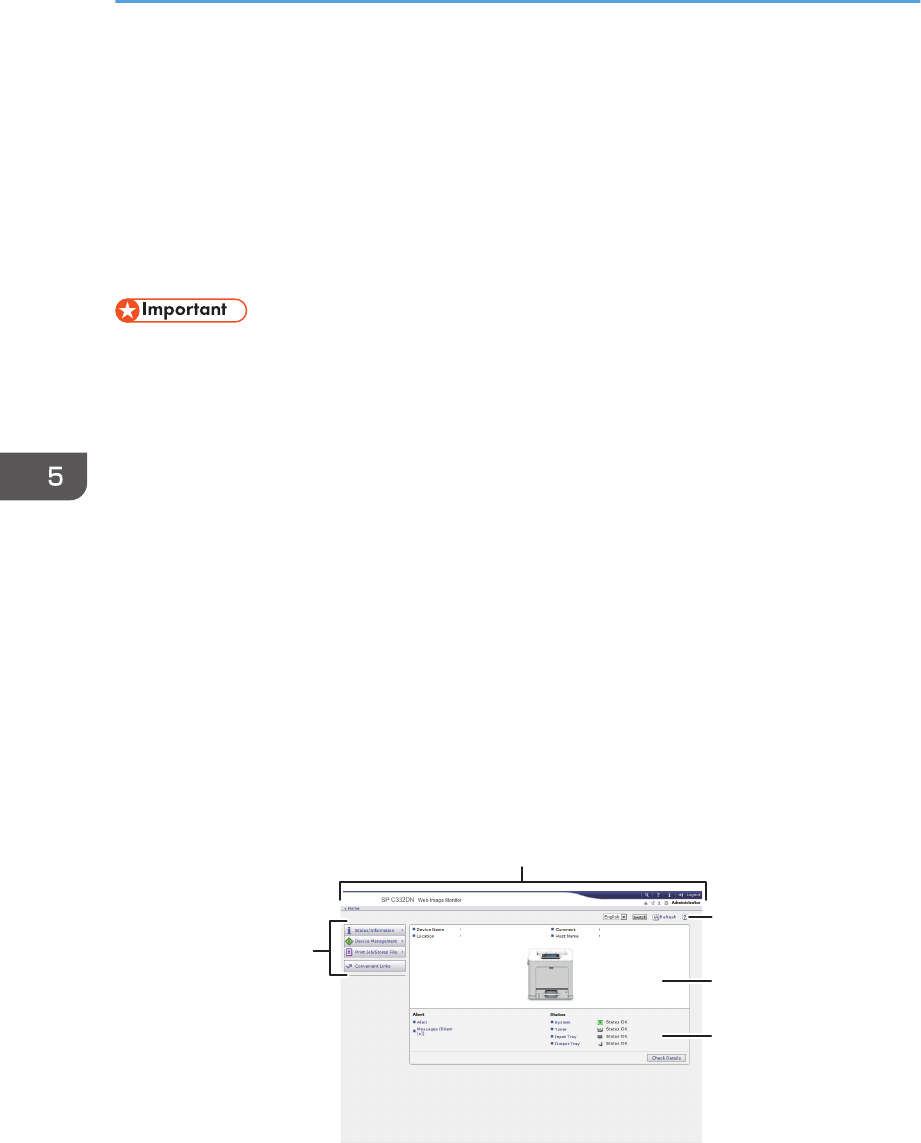
Guest mode
This mode requires no login to enter.
In the guest mode, the printer status, settings, and print job status can be viewed, but the printer
settings cannot be changed.
Administrator mode
This mode requires an administrator login to enter.
In the administrator mode, you can configure various printer settings.
• When entering an IPv4 address, do not begin segments with zeros. For example: If the address is
"192.168.001.010", you must enter it as "192.168.1.10".
1. Start your Web browser.
2. Enter "http://(printer's IP address or host name)/" in your Web browser's address bar.
The top page of Web Image Monitor appears.
If the printer's host name has been registered on the DNS or WINS server, you can enter it.
When setting SSL, a protocol for encrypted communication, under the environment in which server
authentication is issued, enter "https://(printer's IP address or host name)/".
3. To log in to Web Image Monitor in the administrator mode, click [Login] on the top page.
The window for entering the login user name and password appears.
4. Enter your login user name and password, and then click [Login].
For details about the login user name and password, contact your administrator.
Depending on the configuration of your Web browser, the login user name and password might be
saved. If you do not want to save them, configure your Web browser's settings so that this
information is not saved.
1
2
3
5
4
CZV305
5. Configuring and Managing the Printer
334 midas-p3_com_operating_instructions_gb_00198701_eng.xml
Draft 2016/01/18
1. Menu area
Displays the content of a selected menu item.
2. Header area
Displays the dialog box for switching to the user mode and administrator mode and the menu for each mode.
Also displays the link to Help and dialog box for keyword search.
3. Refresh/Help
(Refresh): Click at the upper right in the work area to update the printer information. Click the Web
browser's [Refresh] button to refresh the entire browser screen.
(Help): Use Help to view or download Help file contents.
4. Basic Information area
Displays the basic information of the printer.
5. Work area
Displays the contents of the item selected in the menu area.
List of setting items
The following tables show Web Image Monitor items that can be viewed or modified on a Web
browser depending on the selected mode.
Status/Information
• Device Info
Menu Guest mode Administrator mode
Functions Read Read
System Read Read
Version Read Read
Printer Language Read Read
• Status
Menu Guest mode Administrator mode
Alert Read Read
Messages Read Read
Status Read Read
Toner Read Read
Monitoring and Configuring the Printer
midas-p3_com_operating_instructions_gb_00198701_eng.xml 335
Draft 2016/01/18
Menu Guest mode Administrator mode
Input Tray Read Read
Output Tray Read Read
• Supplies
Menu Guest mode Administrator mode
Toner Read Read
Others Read Read
• Counter
Menu Guest mode Administrator mode
Total Read Read
Printer Read Read
Coverage Read Read
Other Function(s) Read Read
• Counter per User
Guest mode Administrator mode
None Read/Modify
• Display Eco-friendly Counter
Menu Guest mode Administrator mode
Eco-friendly Counter None Read/Modify
• Job
Menu Guest mode Administrator mode
Job List Read Read/Modify
Printer Read Read
• [Display Eco-friendly Counter] is displayed only SP C342DN.
5. Configuring and Managing the Printer
336 midas-p3_com_operating_instructions_gb_00198701_eng.xml
Draft 2016/01/18
Device Management
• Configuration
Device Settings
Menu Guest mode Administrator mode
System Read Read/Modify
Function Priority Read Read/Modify
Paper Read Read/Modify
User Paper Type Read Read/Modify
Date/Time Read Read/Modify
Timer Read Read/Modify
Logs None Read/Modify
Download Logs None Read/Modify
Email Read Read/Modify
Auto Email Notification None Read/Modify
On-demand Email
Notification None Read/Modify
User Authentication
Management None Read/Modify
Administrator Authentication
Management None Read/Modify
Program/Change
Administrator None Read/Modify
Print Volume Use Limitation None Read/Modify
LDAP Server None Read/Modify
Firmware Update None Read/Modify
Kerberos Authentication None Read/Modify
Device Setting Information:
Import Setting (Server) None Read/Modify
Monitoring and Configuring the Printer
midas-p3_com_operating_instructions_gb_00198701_eng.xml 337
Draft 2016/01/18
Menu Guest mode Administrator mode
Import Test None Read/Modify
Import/Export Device
Setting Information None Read/Modify
Eco-friendly Counter
Period/Administrator
Message
Read Read/Modify
Compulsory Security Stamp None Read/Modify
Unauthorized Copy
Prevention: Printer Read Read/Modify
Program/Change USB
Device List Read Read/Modify
• [Print Volume Use Limitation] can be read and modified only when User Authentication is
activated.
• [Logs] and [Download Logs] are displayed only for SP C340DN.
• [Function Priority], [Eco-friendly Counter Period/Administrator Message], and
[Compulsory Security Stamp] are displayed only for SP C342DN.
Printer
Menu Guest mode Administrator mode
Basic Settings Read Read/Modify
Tray Parameters (PCL) None Read/Modify
Tray Parameters (PS) None Read/Modify
PDF Group Password None Modify
PDF Fixed Password None Modify
PDF Temporary Password Read/Modify None
Virtual Printer Settings Read Read/Modify
5. Configuring and Managing the Printer
338 midas-p3_com_operating_instructions_gb_00198701_eng.xml
Draft 2016/01/18
Menu Guest mode Administrator mode
Permissions for Printer
Language to Operate File
System
Read Read/Modify
Interface
Menu Guest mode Administrator mode
Interface Settings Read Read/Modify
Wireless LAN Settings Read Read/Modify
Network
Menu Guest mode Administrator mode
IPv4 Read Read/Modify
IPv6 Read Read/Modify
SMB Read Read/Modify
SNMP None Read/Modify
SNMPv3 None Read/Modify
SSDP None Read/Modify
Bonjour Read Read/Modify
AirPrint Read Read/Modify
System Log Read Read
Security
Menu Guest mode Administrator mode
Network Security None Read/Modify
Access Control None Read/Modify
IPP Authentication None Read/Modify
SSL/TLS None Read/Modify
Monitoring and Configuring the Printer
midas-p3_com_operating_instructions_gb_00198701_eng.xml 339
Draft 2016/01/18
Menu Guest mode Administrator mode
ssh Read Read/Modify
Site Certificate None Read/Modify
Device Certificate None Read/Modify
IPsec None Read/Modify
User Lockout Policy None Read/Modify
IEEE 802.1X None Read/Modify
Extended Security Read Read/Modify
@Remote
Menu Guest mode Administrator mode
Setup RC Gate None Read/Modify
Update RC Gate Firmware None Read
RC Gate Proxy Server None Read/Modify
Webpage
Menu Guest mode Administrator mode
Webpage Read*1 Read/Modify
*1 Guest users can download a Help file only.
Extended Feature Settings
Menu Guest mode Administrator mode
Startup Setting None Read/Modify
Extended Feature Info None Read
Install None Read/Modify
Uninstall None Read/Modify
Administrator Tools None Read/Modify
5. Configuring and Managing the Printer
340 midas-p3_com_operating_instructions_gb_00198701_eng.xml
Draft 2016/01/18
Menu Guest mode Administrator mode
Additional Program Startup
Setting None Read/Modify
Install Additional Program None Read/Modify
Uninstall Additional Program None Read/Modify
Copy Extended Features None Read/Modify
Copy Card Save Data None Read/Modify
• Address Book
Guest mode Administrator mode
None Read/Modify
• Central Management
Guest mode Administrator mode
None Read/Modify
• Reset Printer Job
Guest mode Administrator mode
None Modify
• Reset the Machine
Guest mode Administrator mode
None Modify
• Device Home Management
Menu Guest mode Administrator mode
Edit Icons Read Read/Modify
Restore Default Icon Display None Modify
Home Screen Settings Read Read/Modify
• Screen Monitoring
Monitoring and Configuring the Printer
midas-p3_com_operating_instructions_gb_00198701_eng.xml 341
Draft 2016/01/18
Guest mode Administrator mode
None Modify
• [Device Home Management] and [Screen Monitoring] are displayed only for SP
C342DN.
Print job/Stored File
• Printer: Print Jobs
Guest mode Administrator mode
Read/Modify Read/Modify
• Some items do not appear depending on the security settings.
Displaying Web Image Monitor Help
When using Help for the first time, click the Help button ( ) to display the message prompting you
to select from displaying Help on-line or downloading Help.
• Click the Help button ( ) in the header area again to display the contents of Help.
• Click the Help button ( ) in the work area again to display the Help for the setting items in the
work area.
Viewing Help on our Web site
You can view the latest Help information.
Downloading and Checking Help
You can download Help to your computer. Using the Help URL, you can specify the path to the
local file to view Help without connecting to the Internet.
Downloading Help
1. In the "OS" list, select your operating system.
2. In the "Language" list, select a language.
3. Click [Download].
4. Download Help by following the instructions on the screen.
5. Store the downloaded compressed file in a given location, and then decompress the file.
5. Configuring and Managing the Printer
342 midas-p3_com_operating_instructions_gb_00198701_eng.xml
Draft 2016/01/18
To create a link for the Help button ( ), save the downloaded Help files on a Web
server.
Linking the URL of the downloaded Help
You can link the URL of the Help file on a computer or Web server to the Help button ( ).
1. Log in to Web Image Monitor in the administrator mode.
2. Click [Configuration] on the [Device Management] menu.
3. Under "Webpage", click [Webpage].
4. In the "Set Help URL Target" box, enter the URL of the Help file.
If you saved the Help file to "\\Server_A\HELP\EN", enter "file://Server_A/HELP/".
For example, if you saved the file to a Web server, and the URL of the index file is
"http:// a.b.c.d/HELP/EN/index.html", enter "http://a.b.c.d/HELP/".
5. Click [OK].
6. "Updating..." appears. Wait about one or two minutes, and then click [OK].
• If you save the Help files on your hard disk, you must access them directly. You cannot
link to them using the Help button ( ).
Printer Status Notification by E-mail
Whenever a paper tray becomes empty or paper is jammed, an alert e-mail is sent to the registered
addresses to send notification of the printer status.
For this notification, you can make the e-mail notification settings.
Notification timing and e-mail content can be set.
• Depending on your e-mail application, a phishing warning might appear after you receive an e-
mail message. To prevent phishing warnings appearing after you receive e-mail from a specified
sender, you must add the sender to the exclusion list of your e-mail application. For details about
how to do this, see your e-mail application's Help.
The e-mail notification functions you can set are as follows:
• Auto e-mail notification
The printer status information is automatically sent to the preregistered e-mail address. You must
specify in advance the requested information items and an e-mail address to receive the
information.
• On-demand e-mail notification
The printer status information is sent as a reply to a request e-mail from the administrator.
The information that can be sent by auto e-mail notification is as follows:
Monitoring and Configuring the Printer
midas-p3_com_operating_instructions_gb_00198701_eng.xml 343
Draft 2016/01/18

• Call Service
• Out of Toner
• Toner Almost Empty
• Paper Misfeed
• Cover Open
• Out of Paper
• Paper Tray Error
• Output Tray Full
• Unit Connection Error
• Waste Toner Bottle is Full
• Waste Toner Bottle is Almost Full
• File Storage Memory Full Soon
• Device Access Violation
• Replacement Required: Unit
• Replacement Required Soon: Unit
• Toner Almost Empty (Remaining Level Selectable)
1. Log in to Web Image Monitor in administrator mode.
For details, see page 333 "Displaying the top page".
2. Click [Configuration] on the [Device Management] menu.
3. Under "Device Settings", click [Email].
4. Configure the following settings:
• Administrator Email Address: Specify the administrator's e-mail address.
• Items in the Reception column: Make the necessary settings for sending and receiving e-mails.
• Items in the SMTP column: Configure the SMTP server. Check your mailing environment, and
then specify the necessary items. You can also perform mail authentication for the SMTP
server.
• Items in the POP before SMTP column: Configure the POP server. Check your mailing
environment, and then specify the necessary items. You can also perform mail authentication
for the POP server.
• Items in the POP3/IMAP4 column: Configure the POP3 or IMAP4 server. Check your mailing
environment, and then specify the necessary items.
• Items in the Email Communication Port column: Configure the port to be used for access to the
mail server.
• Items in the Email Notification Account column: Specify these items If you want to use e-mail
notification.
5. Configuring and Managing the Printer
344 midas-p3_com_operating_instructions_gb_00198701_eng.xml
Draft 2016/01/18
5. Click [OK].
6. Click [Logout].
7. Quit Web Image Monitor.
• For details about the settings, see Web Image Monitor Help.
Setting the account for e-mail notification
Before you use Auto E-mail Notification or On-demand E-mail Notification, set up an e-mail account to
be used for the function. Perform the following configuration task in Web Image Monitor:
1. Log in to Web Image Monitor in administrator mode.
For details, see page 333 "Displaying the top page".
2. Click [Configuration] on the [Device Management] menu.
3. Under "Device Settings", click [Email].
4. Configure the following settings in Email Notification Account:
• Email Notification E-mail Address: Enter the address using alphanumeric characters. This will
appear as the sender (From:) of the e-mail notification. Send requests for e-mail notification to
this address.
• Receive Email Notification: Specify whether or not to use on-demand e-mail notification.
• Email Notification User Name: Enter the specified user name for the e-mail account in "Email
Notification E-mail Address".
• Email Notification Password: Enter the specified password for the e-mail account in "Email
Notification E-mail Address".
5. Click [OK].
6. Click [Logout].
7. Quit Web Image Monitor.
• The user name and e-mail address that is already registered as the e-mail destination cannot be
specified as the recipient of e-mail notification.
Mail authentication
You can configure mail authentication to prevent illegal use of the mail server.
SMTP Authentication
Specify SMTP authentication settings.
Monitoring and Configuring the Printer
midas-p3_com_operating_instructions_gb_00198701_eng.xml 345
Draft 2016/01/18

When an e-mail is sent to the SMTP server, authentication is performed using the SMTP AUTH
protocol by prompting the mail originator to enter the user name and password. This prevents
illegal use of the SMTP server.
1. Log in to Web Image Monitor in administrator mode.
For details, see page 333 "Displaying the top page".
2. Click [Configuration] on the [Device Management] menu.
3. Under "Device Settings", click [Email].
4. Make the following settings in SMTP column:
• SMTP Server Name: Enter the IP address or host name of the SMTP server.
• SMTP Port No.: Enter the port number used when sending e-mail to the SMTP server.
• Use Secure Connection (SSL): Enable or disable SSL.
• SMTP Authentication: Enable or disable SMTP authentication.
• SMTP Auth. Email Address: Enter the e-mail address.
• SMTP Auth. User Name: Enter the SMTP account name.
• SMTP Auth. Password: Set or change the password for SMTP AUTH.
• SMTP Auth. Encryption: Specify whether or not to encrypt the password.
[Auto Select]: If the authentication method is PLAIN, LOGIN, CRAM-MD5, or DIGEST-
MD5.
[Active]: If the authentication method is CRAM-MD5 or DIGEST-MD5.
[Inactive]: If the authentication method is PLAIN or LOGIN.
5. Click [OK].
6. Click [Logout].
7. Quit Web Image Monitor.
POP before SMTP Authentication
Specify whether or not log in to the POP3 server before sending an e-mail.
1. Log in to Web Image Monitor in administrator mode.
For details, see page 333 "Displaying the top page".
1. Click [Configuration] on the [Device Management] menu.
2. Under "Device Settings", click [Email].
3. Configure the following settings in POP before SMTP column:
• POP before SMTP: Enable or disable POP before SMTP.
• POP Email Address: Enter the e-mail address.
• POP User Name: Enter the POP account name.
• POP Password: To set or change the POP password.
5. Configuring and Managing the Printer
346 midas-p3_com_operating_instructions_gb_00198701_eng.xml
Draft 2016/01/18
• Timeout setting after POP Auth.: Enter the time available before connecting to the SMTP
server after logging in to the POP server.
4. Click [OK].
5. Click [Logout].
6. Quit Web Image Monitor.
Auto e-mail notification
1. Log in to Web Image Monitor in administrator mode.
For details, see page 333 "Displaying the top page".
2. Click [Configuration] on the [Device Management] menu.
3. Under "Device Settings", click [Auto Email Notification].
The dialog box for configuring notification settings appears.
4. Configure the following settings:
• Notification Message: You can set this according to your needs. For example, you can
configure printer's location and the service representative's contact information.
• Items in the Groups to Notify column: E-mail notification addresses can be grouped as
required.
• Items in the Select Groups/Items to Notify column: Select groups for each notification type,
such as printer status and error.
To configure detailed settings for these items, click [Edit] next to "Detailed Settings of Each
Item".
5. Click [OK].
6. Click [Logout].
7. Quit Web Image Monitor.
• For details about the settings, see Web Image Monitor Help.
Contents of Auto e-mail notification
If any of the errors specified in [Auto Email Notification] occur, the printer sends an e-mail with the
following subject:
"Device Alert Notification: XXXXX (description of the error that has occurred)"
The body of the e-mail contains the error details and protocol setting information of the printer. Clear the
error according to the description.
If any of the following messages appears, contact your service representative:
Monitoring and Configuring the Printer
midas-p3_com_operating_instructions_gb_00198701_eng.xml 347
Draft 2016/01/18

• Functional Problem: Plotter
• Error: Trays 1–2
• Error: Address Book Data
• SD Card Authentication Failure
• Error: HDD Board
• Error: Ethernet Board
• Error: Parallel Interface
• Error: Wireless LAN Card
• Error: USB
• Error: Printer
When the error is cleared, the printer sends an e-mail with the following subject:
"Device Recovery Report: XXXXX (description of the error that has been cleared)"
On-demand e-mail notification
1. Log in to Web Image Monitor in administrator mode.
For details, see page 333 "Displaying the top page".
2. Click [Configuration] on the [Device Management] menu.
3. Under "Device Settings", click [On-demand Email Notification].
The dialog box for configuring notification settings appears.
4. Make the following settings:
• Notification Subject: Enter a text string to be added to the subject line of return e-mails.
• Notification Message: You can set this according to your needs, for example, the printer's
location and service representative contact information.
• Restriction to Device Status Info.: Specify whether or not to allow access to information such as
the printer settings and status.
• Items in the Receivable Email Address/Domain Name Settings column: Enter an e-mail
address or domain name to use for requesting information by e-mail and to receive a return e-
mail.
5. Click [OK].
6. Click [Logout].
7. Quit Web Image Monitor.
• For details about the settings, see Web Image Monitor Help.
5. Configuring and Managing the Printer
348 midas-p3_com_operating_instructions_gb_00198701_eng.xml
Draft 2016/01/18
Format of on-demand e-mail messages
To use "On-Demand E-mail Notification", you need to send a request e-mail with a particular format to
the printer.
Using your e-mail software, enter the following:
Format of the request e-mail
Item Description
To Enter the specified e-mail address in "Email Notification E-mail Address".
Subject Enter "requeststatus".
From Specify a valid e-mail address. The device information will be sent to the address
specified here.
• The e-mail message must be within 1 MB.
• The subject is not case sensitive.
• It is not necessary to enter the body text in the request e-mail.
• An e-mail transmission may not be complete if an e-mail is sent immediately after the printer is
turned on.
Monitoring and Configuring the Printer
midas-p3_com_operating_instructions_gb_00198701_eng.xml 349
Draft 2016/01/18
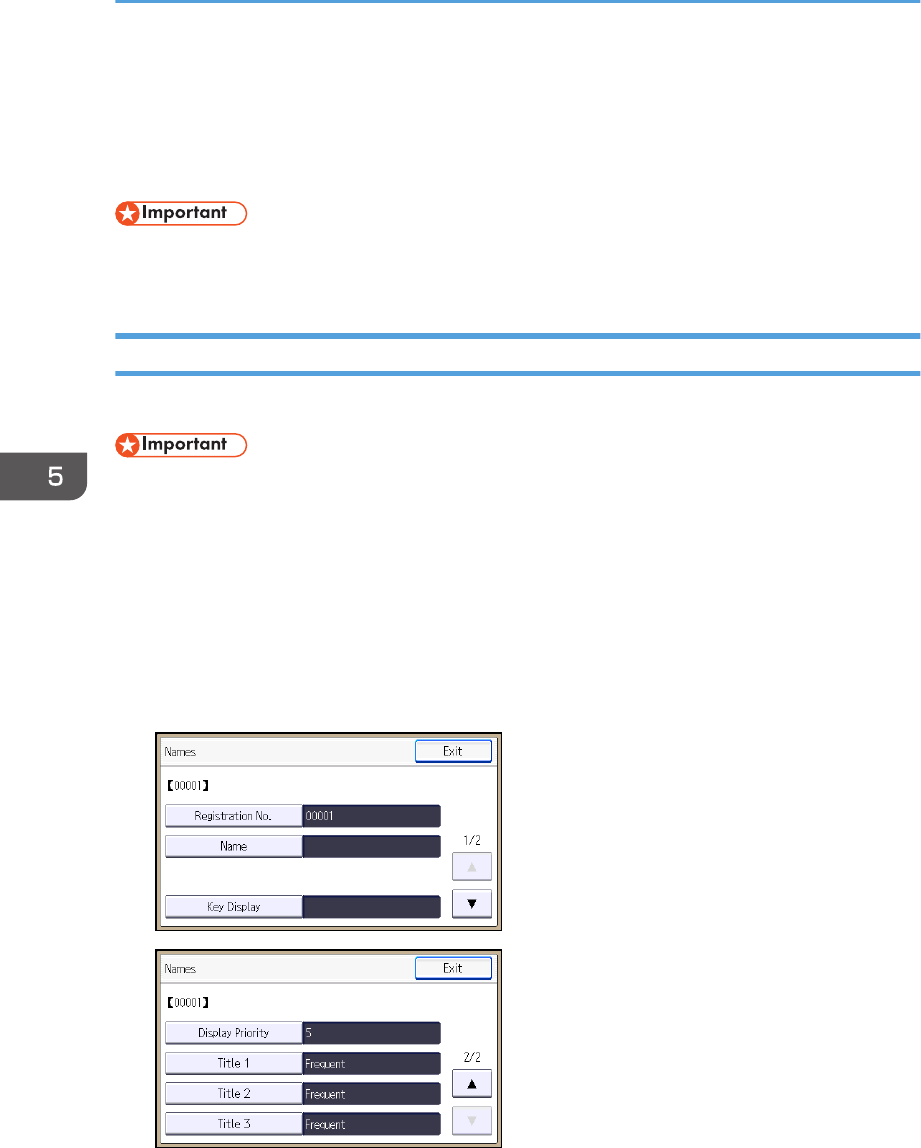
Registering the Address Book
This function is available for SP C342DN only.
This section explains how to register destinations and users to the Address Book.
• If you are using SP C340DN, set up the Address Book using Web Image Monitor. For details
about Web Image Monitor, see page 332 "Using Web Image Monitor".
Address Book
You can register user information such as user names and user codes to the Address Book.
• Address Book data is stored on the hard disk. It can be lost if there is a hard disk failure. The
manufacturer is not responsible for any damages resulting in data loss.
• If the Extended Security function is enabled, the printer may prevent general users from registering
destination addresses to the Address Book.
You can register and manage the following items to the Address Book:
Names
You can register user names and key displays. This is the basic information required for managing
users of the printer.
5. Configuring and Managing the Printer
350 midas-p3_com_operating_instructions_gb_00198713_eng.xml
Draft 2016/01/18
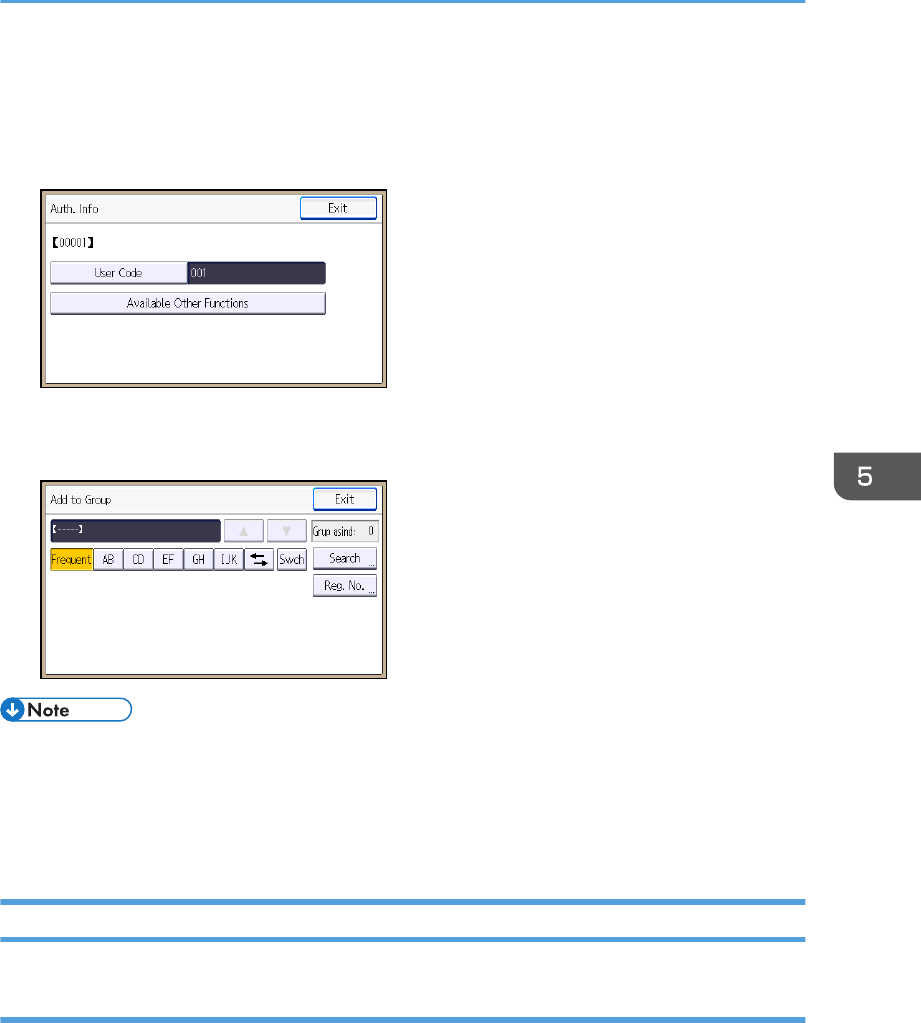
Auth. Info
You can register user codes to restrict particular functions to certain users and to monitor the usage
of each function. You can also register login user names and login passwords to be used when
accessing an LDAP server.
Add to Group
You can add registered users to a group for easier management.
• You can also use Web Image Monitor to register names to the Address Book.
• We recommend you back up the Address Book regularly. For details, see page 351 "Address
Book Backup and Restore".
• For details about using Web Image Monitor, see Web Image Monitor Help.
Address Book Backup and Restore
Backing up Address Book data
Follow the procedure below to save a copy of the printer's address book data:
1. Log in to Web Image Monitor as an administrator.
For details, see page 333 "Displaying the top page".
2. In the menu area, click [Address Book] on the [Device Management] menu.
3. Click [Maintenance].
Registering the Address Book
midas-p3_com_operating_instructions_gb_00198713_eng.xml 351
Draft 2016/01/18
4. Enter the encryption key and click [Backup].
Enter the encryption key that was set when the address book was encrypted. For details, contact
your administrator.
Restoring Address Book data
Follow the procedure below to restore previously saved Address Book data to the printer:
1. Log in to Web Image Monitor as an administrator.
For details, see page 333 "Displaying the top page".
2. In the menu area, click [Address Book] on the [Device Management] menu.
3. Click [Maintenance].
4. Click [Restore].
5. Select the file you want to restore by following the on-screen instructions.
6. Click [OK].
7. Confirm the message, and then click [OK].
8. Click [Back].
9. Click [Logout].
• Restoring the previous data will overwrite all Address Book data currently on the printer. Also, it will
reset all user counters.
Registering User Information
Register user information including user names.
You can register up to 1,000 names.
Registering names
This section explains how to register names.
1. Press the [User Tools] key, and then display the screen for registering user information.
[Address Book Mangmnt] [New Program] [Names]
2. Register user information.
• [Name]
Enter the name [OK]
5. Configuring and Managing the Printer
352 midas-p3_com_operating_instructions_gb_00198713_eng.xml
Draft 2016/01/18
• [Title 1], [Title 2] and [Title 3]
Select the key for the classification you want to use [OK]
The keys you can select are as follows:
• [Frequent]: Adds the user to the page that is displayed first.
• [AB], [CD], [EF], [GH], [IJK], [LMN], [OPQ], [RST], [UVW], [XYZ], [1] to [10]: Adds the user
to the list of items in the selected title.
You can select [Frequent] and one more key for each title.
3. Complete the setting.
[Exit] [OK]
Changing a registered name
1. Press the [User Tools] key, and then display the screen for changing information about
the Address Book.
[Address Book Mangmnt] [Change]
2. Select the user whose information you want to change.
[All Users] or [User Code] Press the name key of the user you want to change
You can search a user by the registered name or user code.
You can also specify a user by pressing [Reg. No.] and entering the registered number.
3. Edit the user information.
[Names] Select the item you want to change Change the user information [OK]
4. Complete the setting.
[Exit] [OK]
Changing order of registered names
1. Press the [User Tools] key, and then display the [Administrator Tools] screen.
[System Settings] [Administrator Tools]
Registering the Address Book
midas-p3_com_operating_instructions_gb_00198713_eng.xml 353
Draft 2016/01/18
2. Change the order of registered users.
[Address Book: Change Order] [All Users] or [User Code] Press the name key to be moved
Press the name key of the destination
You can also specify the name key to be moved and the destination by pressing [Reg. No.] and
entering the registered numbers.
• You can rearrange the order of the names on the same tab, but names cannot be moved across
different tabs. For example, you cannot move a name registered under the [Frequent] tab to the
[AB] tab.
Editing titles
1. Press the [User Tools] key, and then display the [Administrator Tools] screen.
[System Settings] [Administrator Tools]
2. Edit titles.
[Address Book: Edit Title] Press the title key you want to change Enter the new name [OK]
[OK]
Deleting a registered name
1. Press the [User Tools] key, and then display the screen for deleting a user from the
Address Book.
[Address Book Mangmnt] [Delete]
2. Select the user you want to delete.
[All Users] or [User Code] Press the name key of the user you want to delete
You can search a user by the registered name or user code.
You can also specify a user by pressing [Reg. No.] and entering the registered number.
3. Delete the selected user.
[Yes] [Exit]
5. Configuring and Managing the Printer
354 midas-p3_com_operating_instructions_gb_00198713_eng.xml
Draft 2016/01/18
Authentication Information
• The functions associated with each user code are the same. If you change or delete user codes,
management data and limits associated with that code become invalid.
• Register user codes to restrict and monitor users' performance on the printer.
• You can register up to 1,000 user codes.
• To automatically register a printer driver user code, select [PC Control] under "Printer" in "User
Code Authentication". To apply the user code set in User Tools, set the user codes registered to
User Tools for the printer driver. For details, see page 300 "Administrator Tools".
• For details about setting user codes for the printer driver, see the printer driver Help.
• For details about how to specify a user code, see Security Guide.
Registering a user code
1. Press the [User Tools] key, and then display the screen for changing information about
the Address Book.
[Address Book Mangmnt] [Change]
2. Select the user whose code you want to register.
[All Users] or [User Code] Press the name key of the user
You can search a user by the registered name or user code.
You can also specify a user by pressing [Reg. No.] and entering the registered number.
3. Register the user code.
[Auth. Info] [User Code] Enter the user code [OK]
4. Complete the setting.
[Exit] [OK]
• You can enter a one-to eight-digit user code.
• To register the name, see page 352 "Registering User Information".
Registering the Address Book
midas-p3_com_operating_instructions_gb_00198713_eng.xml 355
Draft 2016/01/18
Changing a user code
• Even if you change a user code, the counter value will not be cleared.
1. Press the [User Tools] key, and then display the screen for changing information about
the Address Book.
[Address Book Mangmnt] [Change]
2. Select the user whose code you want to change.
[All Users] or [User Code] Press the name key of the user
You can search a user by the registered name or user code.
You can also specify a user by pressing [Reg. No.] and entering the registered number.
3. Change the user code.
[Auth. Info] [User Code] Enter the user code [OK]
4. Complete the setting.
[Exit] [OK]
Deleting a user code
• After clearing the user code, the counter is automatically cleared.
1. Press the [User Tools] key, and then display the screen for changing information about
the Address Book.
[Address Book Mangmnt] [Change]
2. Select the user whose code you want to delete.
[All Users] or [User Code] Press the name key of the user
You can search a user by the registered name or user code.
You can also specify a user by pressing [Reg. No.] and entering the registered number.
5. Configuring and Managing the Printer
356 midas-p3_com_operating_instructions_gb_00198713_eng.xml
Draft 2016/01/18
3. Delete the user code.
[Auth. Info] [User Code] [Clear] [OK]
4. Complete the setting.
[Exit] [OK]
• To delete a name from the Address Book entirely, see page 352 "Registering User Information".
Displaying the counter for each user
1. Press the [User Tools] key, and then display the [Administrator Tools] screen.
[System Settings] [Administrator Tools]
2. Display the counter for each user.
[Display/Clear/Print Counter per User] [Printer Counter] or [Print Volume Use Cntr.]
The counter for each user code is displayed.
[Print Volume Use Cntr.] is displayed only when User Code Authentication is enabled.
3. Check the counter, and then press [Exit].
Printing or clearing the counter for each user
1. Press the [User Tools] key, and then display the [Administrator Tools] screen.
[System Settings] [Administrator Tools]
2. Select the user code whose counter you want to print or clear.
[Display/Clear/Print Counter per User] [Printer Counter] or [Print Volume Use Cntr.] Select
a user code from the left side of the display
You can select multiple user codes at a time.
[Print Volume Use Cntr.] is displayed only when User Code Authentication is enabled.
3. Print or clear the counter of the selected user.
• To print the counter:
Registering the Address Book
midas-p3_com_operating_instructions_gb_00198713_eng.xml 357
Draft 2016/01/18
Press [Print List] under "Per User" [Printer] or [Total Prints] [Start Printing]
• To clear the counter:
Press [Clear] under "Per User" [Printer], [Prt Volum Use], or [All Counters] [OK]
4. Press [Exit].
Printing or clearing the counter for all users
1. Press the [User Tools] key, and then display the [Administrator Tools] screen.
[System Settings] [Administrator Tools]
2. Print or clear the counter for all users.
• To print the counter:
[Display/Clear/Print Counter per User] [Printer Counter] or [Print Volume Use Cntr.]
Press [Print List] under "All Users" [Printer] or [Total Prints] [Start Printing]
• To clear the counter:
[Display/Clear/Print Counter per User] [Printer Counter] or [Print Volume Use Cntr.]
Press [Clear] under "All Users" [Printer], [Prt Volum Use], or [All Counters] [OK]
[Print Volume Use Cntr.] is displayed only when User Code Authentication is enabled.
Registering Users to a Group
You can register users to a group. To add users to a group, the group must be registered first.
• You can register up to 500 users to a group.
Registering a group
1. Press the [User Tools] key, and then display the screen for registering groups.
[System Settings] [Administrator Tools] [Address Book: Program/Change/Delete Group]
[New Program] [Names]
2. Register the group information.
• [Name]
Enter the group name [OK]
5. Configuring and Managing the Printer
358 midas-p3_com_operating_instructions_gb_00198713_eng.xml
Draft 2016/01/18
• [Title 1], [Title 2] and [Title 3]
Select the key for the classification you want to use [OK]
The keys you can select are as follows:
• [Frequent]: Adds the user to the page that is displayed first.
• [AB], [CD], [EF], [GH], [IJK], [LMN], [OPQ], [RST], [UVW], [XYZ], [1] to [10]: Adds the
group name to the list of items in the selected title.
You can select [Frequent] and one more key for each title.
3. Complete the setting.
[Exit] [OK]
Registering a user to a group
1. Press the [User Tools] key, and then display the screen for changing information about
the Address Book.
[Address Book Mangmnt] [Change]
2. Select the user you want to add to a group.
[All Users] or [User Code] Press the name key of the user you want to add to a group
You can search a user by the registered name or user code.
You can also specify a user by pressing [Reg. No.] and entering the registered number.
3. Add the selected user to a group.
[Add to Group] Select the group to which you want to add the user
The group key becomes highlighted, and the user is added to it.
4. Complete the setting.
[Exit] [OK]
Adding a group to another group
1. Press the [User Tools] key, and then display the screen for registering groups.
[System Settings] [Administrator Tools] [Address Book: Program/Change/Delete Group]
Registering the Address Book
midas-p3_com_operating_instructions_gb_00198713_eng.xml 359
Draft 2016/01/18
2. Select the group you want to add to another group.
[Change] Press the name key of the group you want to add to another group
You can search a group by the registered name.
You can also specify a group by pressing [Reg. No.] and entering the registered number.
3. Add the selected group to another group.
[Add to Group] Select the group to which you want to add the selected group
The group key becomes highlighted, and the group is added to it.
4. Complete the setting.
[Exit] [OK]
Checking users registered in a group
1. Press the [User Tools] key, and then display the screen for registering groups.
[System Settings] [Administrator Tools] [Address Book: Program/Change/Delete Group]
2. Select the group for which you want to check the registered users.
[Change] Press the name key of the group for which you want to check the registered users
[Programmed User/Group]
You can search a group by the registered name.
You can also specify a group by pressing [Reg. No.] and entering the registered number.
3. Check the registered users, and then close the screen.
[Exit] [OK]
Removing a user from a group
1. Press the [User Tools] key, and then display the screen for changing information about
the Address Book.
[Address Book Mangmnt] [Change]
5. Configuring and Managing the Printer
360 midas-p3_com_operating_instructions_gb_00198713_eng.xml
Draft 2016/01/18
2. Select the user you want to remove from a group.
[All Users] or [User Code] Press the name key of the user you want to remove from a group
You can search a user by the registered name or user code.
You can also specify a user by pressing [Reg. No.] and entering the registered number.
3. Remove the selected user from a group.
[Add to Group] Select the group from which you want to remove the user
The highlighted group key resumes normal display.
4. Complete the setting.
[Exit] [OK]
Removing a group from another group
1. Press the [User Tools] key, and then display the screen for registering groups.
[System Settings] [Administrator Tools] [Address Book: Program/Change/Delete Group]
2. Select the group you want to remove from another group.
[Change] Press the name key of the group you want to remove from another group
You can search a group by the registered name.
You can also specify a group by pressing [Reg. No.] and entering the registered number.
3. Select the group from which you want to remove the selected group.
[Add to Group] Select the group from which you want to remove the selected group
The highlighted group key resumes normal display.
4. Complete the setting.
[Exit] [OK]
Registering the Address Book
midas-p3_com_operating_instructions_gb_00198713_eng.xml 361
Draft 2016/01/18
Editing group information
1. Press the [User Tools] key, and then display the screen for registering groups.
[System Settings] [Administrator Tools] [Address Book: Program/Change/Delete Group]
2. Select the group for which you want to change the registered information.
[Change] Press the name key of the group for which you want to change the registered
information
You can search a group by the registered name.
You can also specify a group by pressing [Reg. No.] and entering the registered number.
3. Edit the group information.
[Names] Edit the group information
4. Complete the setting.
[Exit] [OK]
Deleting a group
1. Press the [User Tools] key, and then display the screen for registering groups.
[System Settings] [Administrator Tools] [Address Book: Program/Change/Delete Group]
2. Select the group you want to delete.
[Delete] Press the name key of the group you want to delete
You can search a group by the registered name.
You can also specify a group by pressing [Reg. No.] and entering the registered number.
3. Delete the selected group.
[Yes] [Exit]
Registering LDAP Authentication
This section explains how to register LDAP Authentication.
5. Configuring and Managing the Printer
362 midas-p3_com_operating_instructions_gb_00198713_eng.xml
Draft 2016/01/18
LDAP authentication
For each user registered to the Address Book, you can register a login user name and login password to
be used when accessing an LDAP server.
To use an LDAP server, you need to program it beforehand. For details, see page 365 "Configuring the
LDAP Server".
• When [Do not Specify] is selected for [LDAP Authentication], the User Name and Password that
you have specified in [Program/Change LDAP Server] of [Administrator Tools] settings are
applied. For details, see page page 365 "Configuring the LDAP Server".
• If User Authentication is specified, contact your administrator.
1. Press the [User Tools] key, and then display the screen for changing information about
the Address Book.
[Address Book Mangmnt] [Change]
2. Select the user for which you want to set up LDAP Authentication.
[All Users] or [User Code] Press the name key of the user
You can search a user by the registered name.
You can also specify a user by pressing [Reg. No.] and entering the registered number.
3. Set up LDAP Authentication for the selected user.
[Auth. Info] [LDAP Authentication] [Specify Other Auth. Info] Press [Change] under "Login
User Name" Enter the login user name [OK] Press [Change] under "Login Password"
Enter the password [OK] Enter the password again to confirm [OK]
• To register a user, see page 352 "Registering User Information".
Checking Which Functions Are Available
User Authentication can be used to restrict access to the printer by individuals and groups of users
according to the login user name and password.
Each individual or group of users can only use the functions made available to them by the administrator
according to the user authentication.
Functions Available to Users
Functions available to users are for using the printer's functions, such as printing and storing files.
Registering the Address Book
midas-p3_com_operating_instructions_gb_00198713_eng.xml 363
Draft 2016/01/18
If the available functions are restricted by user authentication, you can check which functions are
available to you by following the procedure below:
1. Press the [User Tools] key, and then display the screen for changing information about
the Address Book.
[Address Book Mangmnt] [Change]
2. Check the functions available for a specific user.
[All Users] or [User Code] Press the name key of the user for which you want to check
available functions [Auth. Info] [Available Printer Functions] or [Available Other Functions]
Check the functions available for the selected user [Exit]
5. Configuring and Managing the Printer
364 midas-p3_com_operating_instructions_gb_00198713_eng.xml
Draft 2016/01/18
Setting Up LDAP Authentication
This function is available for SP C342DN only.
• If you are using SP C340DN, set up the LDAP server using Web Image Monitor. For details about
Web Image Monitor, see page 332 "Using Web Image Monitor".
Configuring the LDAP Server
This section explains how to configure the LDAP server settings.
This function supports LDAP version 2.0 and 3.0.
Configure the LDAP server to use LDAP Authentication as a User Authentication method.
For details about LDAP Authentication, see the Security Guide.
Registering or changing the LDAP server
To use Kerberos Authentication, a realm must be registered beforehand. For details about registering a
realm, see page 368 "Configuring the Realm".
1. Press the [User Tools] key, and then display the [Administrator Tools] screen.
[System Settings] [Administrator Tools]
2. Select the LDAP server you want to register or change.
[Program/Change/Delete LDAP Server] [Program/Change] Select [*Not Programmed] or
the LDAP server you want to change
3. Enter the LDAP server name.
[Name] Enter the LDAP server name [OK]
4. Enter either the host name or IPv4 address of the LDAP server using up to 128 characters.
[Server Name] Enter either the host name or IPv4 address [OK]
5. Select a root folder to start a search.
[Search Base] Select a root folder to start a search [OK]
You can search for e-mail addresses registered to a selected folder.
Setting Up LDAP Authentication
midas-p3_com_operating_instructions_gb_00198743_eng.xml 365
Draft 2016/01/18
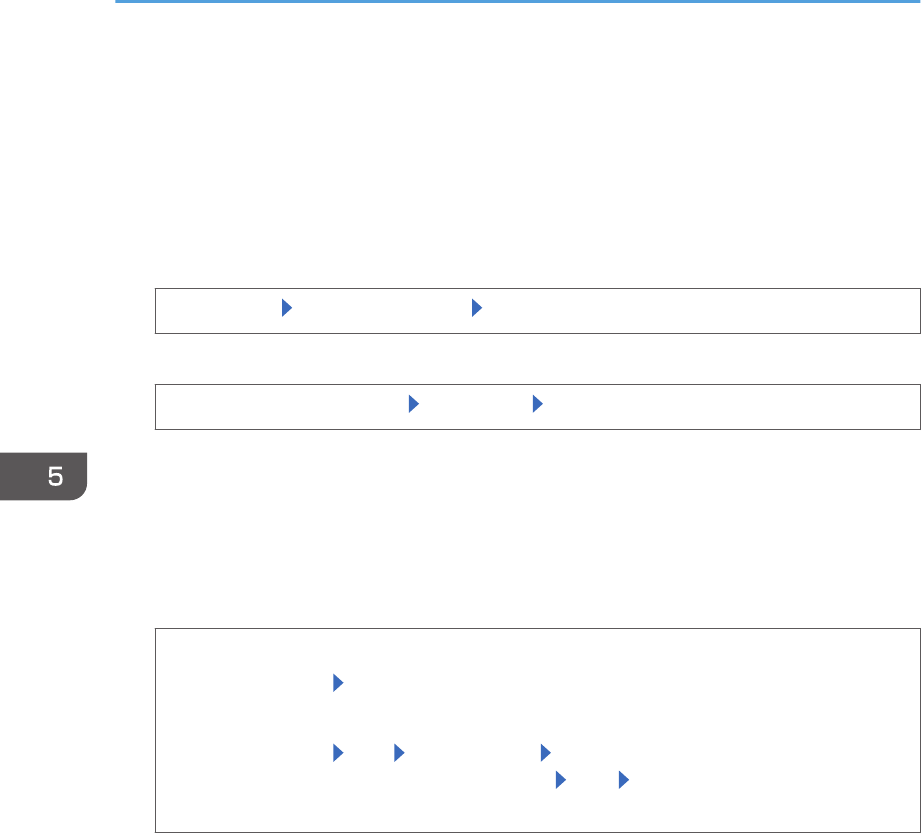
For example, if the search target is the sales department of ABC company, enter "dc=sales
department, o=ABC". (In this example, the description is for an active directory. "dc" is for the
organization unit, and "o" is for the company.)
Registering a search base may be required depending on your server environment. If it is required,
unspecified searches will result in an error.
Check your server environment and enter any required specifications.
6. Specify a port number for communicating with the LDAP server.
[Port Number] Enter the port number [OK]
7. Specify whether or not to use SSL when communicating with the LDAP server.
[Use Secure Connection (SSL)] [On] or [Off] [OK]
To use SSL, the LDAP server must support SSL.
If you set SSL to [On], the port number automatically changes to "636".
If you do not enable SSL, security problems may occur. To enable SSL, you must use the printer's
settings. For details, see Security Guide.
8. Select the authentication method for the LDAP server.
• If you do not want to use an authentication method:
[Authentication] [Off]
• If you want to use an authentication method:
[Authentication] [On] [Authentication] [Kerberos Authentication], [Digest
Authentication], or [Cleartext Authentication] [OK] Specify the authentication
information, such as user name and password, as necessary
The authentication settings must match your server's authentication settings. Check your server
settings before configuring this printer.
The administrator account can be used for authentication when you send a search request to the
LDAP server. Do not enter the administrator account name and password when using
authentication for each individual or search.
• [Kerberos Authentication]
An encrypted password is sent to the KDC server where authentication is performed.
• [Digest Authentication]
An encrypted password is sent to the LDAP server.
Digest Authentication is available with LDAP version 3.0 only.
• [Cleartext Authentication]
5. Configuring and Managing the Printer
366 midas-p3_com_operating_instructions_gb_00198743_eng.xml
Draft 2016/01/18
An unencrypted password is sent to the LDAP server.
Procedures for setting the user name differ depending on the server environment. Check your server
environment before configuring the setting.
Example: Domain Name\User Name, User Name@Domain Name, CN=Name, OU=Department
Name, DC=Server Name
You can also connect to the LDAP server using a user name and password stored in the Address
Book. For details, see page 363 "LDAP authentication".
9. Access the LDAP server to check that a proper connection is established, and then quit the
menu.
[Connection Test] [Exit] [OK]
Check that authentication works according to the authentication settings.
If the connection test fails, check your settings and try again.
This function does not check the search conditions or the search base.
10. Enter the attributes you want to use when searching for e-mail addresses.
[Search Conditions] [Name] or [Email Address] Enter the attributes you want to use when
searching for e-mail addresses [OK] [OK] [OK]
You can enter an attribute as a typical search keyword (up to 64 characters). Using the entered
attributes, the function searches the LDAP server's Address Book.
The attribute value may change depending on the server environment. Check that the attribute
value matches with your server environment before specifying it.
You can leave items blank, but you cannot leave attributes blank when searching for e-mail
addresses from the LDAP server Address Book.
Deleting the registered LDAP server
1. Press the [User Tools] key, and then display the [Administrator Tools] screen.
[System Settings] [Administrator Tools]
2. Select the LDAP server you want to delete.
[Program/Change/Delete LDAP Server] [Delete] Select the LDAP server to be deleted
3. Delete the selected LDAP server.
[Yes] [Exit]
Setting Up LDAP Authentication
midas-p3_com_operating_instructions_gb_00198743_eng.xml 367
Draft 2016/01/18
Configuring the Realm
This section explains how to specify the Realm settings.
A realm is the network area in which Kerberos authentication is used. After confirming the network
environment, specify the necessary items.
You can register up to 5 realms.
Registering or changing a Realm
1. Press the [User Tools] key, and then display the [Administrator Tools] screen.
[System Settings] [Administrator Tools]
2. Select the Realm setting you want to register or change.
[Program/Change/Delete Realm] [Program/Change] Select [*Not Programmed] or the
realm you want to change
3. Specify the Realm name.
[Realm Name] Enter the realm name [OK]
You can enter the host name instead of the Realm name.
4. Specify the KDC server name.
[KDC Server Name] Enter the KDC server name [OK]
You can enter the host name or IPv4 address instead of the KDC server name.
5. Specify the domain name.
[Domain Name] Enter the domain name [OK]
You can enter the host name instead of the domain name.
6. Complete the setting.
[OK] [Exit]
5. Configuring and Managing the Printer
368 midas-p3_com_operating_instructions_gb_00198743_eng.xml
Draft 2016/01/18
Deleting a Realm
1. Press the [User Tools] key, and then display the [Administrator Tools] screen.
[System Settings] [Administrator Tools]
2. Select the Realm setting you want to delete.
[Program/Change/Delete Realm] [Delete] Select the Realm setting you want to delete
3. Delete the selected Realm setting.
[Yes] [Exit]
Setting Up LDAP Authentication
midas-p3_com_operating_instructions_gb_00198743_eng.xml 369
Draft 2016/01/18

5. Configuring and Managing the Printer
370 midas-p3_com_operating_instructions_gb_00198743_eng.xml
Draft 2016/01/18
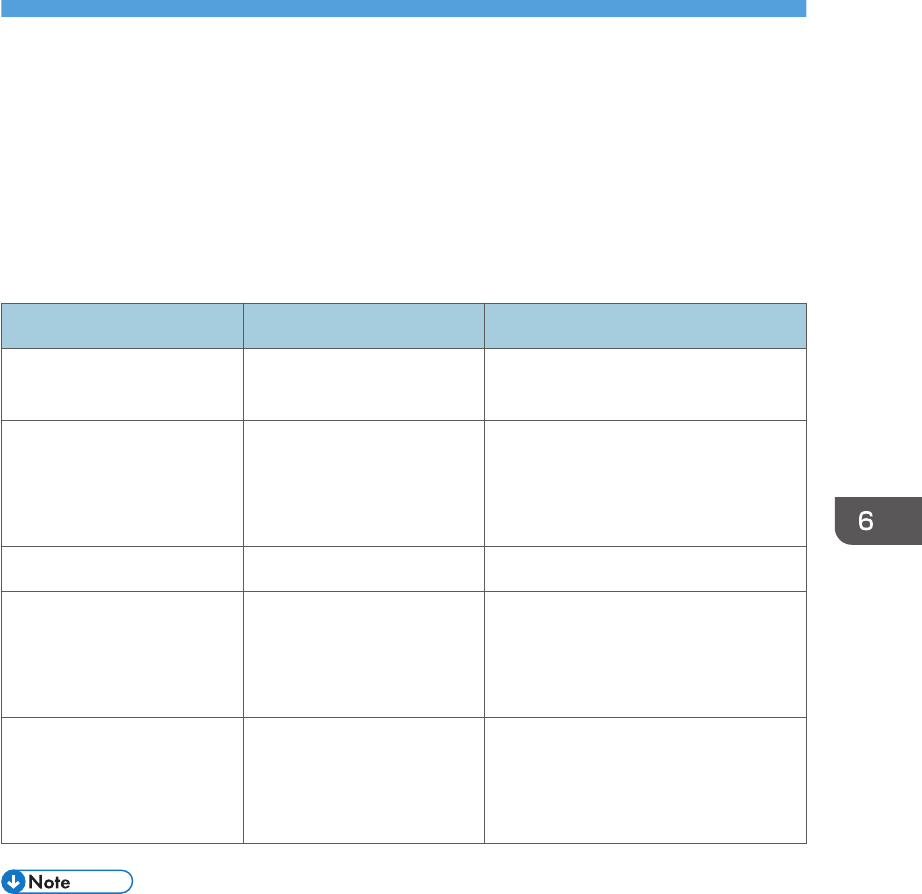
6. Troubleshooting
This chapter provides solutions to common problems and it also explains how to correct unwanted print
results.
When a Panel Tone Beeps
The following table describes various beep patterns that the printer produces to alert users about printer
conditions and the meaning of each beep pattern.
Beep pattern Meaning Causes
Single short beep Panel/screen input
accepted.
A control panel key was pressed.
Two long beeps Printer has warmed up. When the power is turned on or the
printer exits Sleep mode, the printer
has fully warmed up and is ready for
use.
Single long beep. Job completed. A Printer job has finished.
Four long beeps. Printer initialized. The screen is changing back to the
initial screen after the printer came out
of the energy-saving mode or was
reset.
Five short beeps repeated
five times.
Strong alert The printer requires user attention
because paper has jammed, the toner
needs replenishing, or other problems
have occurred.
• Beep alerts cannot be muted. If the printer's covers are opened and closed repeatedly within a
short space of time during an alert indicating a paper jam or insufficient toner, a beep alert might
continue, even after normal status has resumed.
• You can enable or disable beep alerts. For details, see:
• page 230 "General Settings (SP C340DN)"
• page 286 "General Features"
midas-p3_com_operating_instructions_gb_00198752_eng.xml 371
Draft 2016/01/18
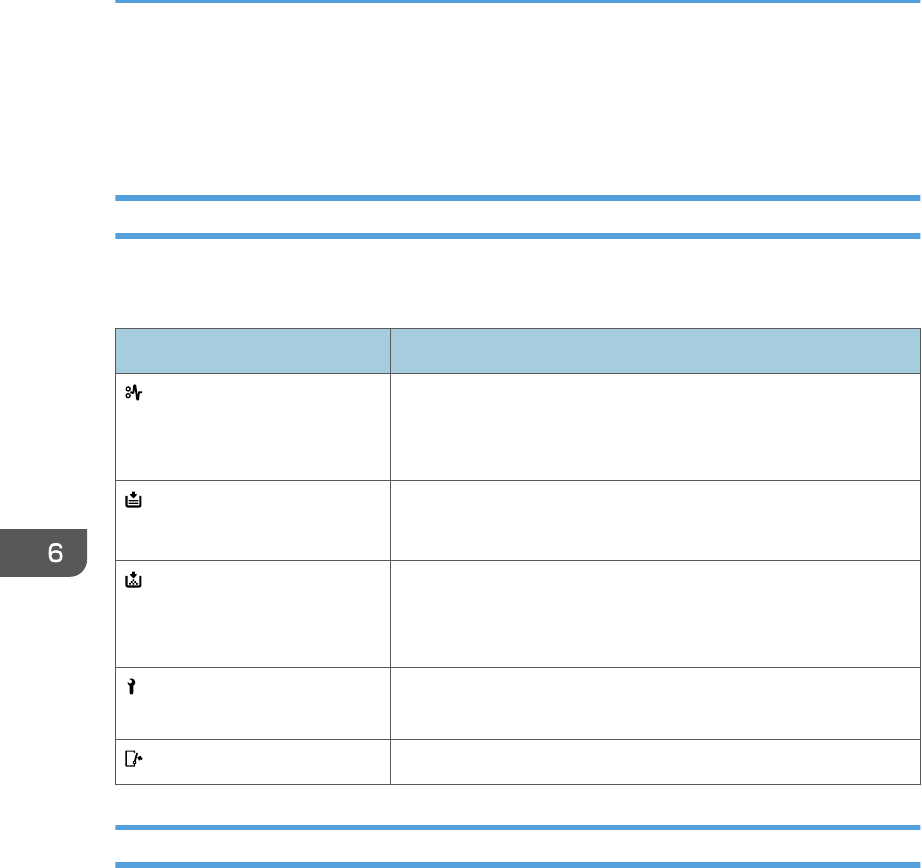
When Checking the Indicator Lamps, Status
Icons, and Messages on the Control Panel
Indicators
This section describes the indicators displayed when the printer requires the user to remove misfed
paper, to add paper, or to perform other procedures.
Indicator Status
: Paper Misfeed indicator Appears when a paper misfeed occurs.
For details about removing jammed paper, see page 420
"Removing Jammed Paper".
: Load Paper indicator Appears when paper runs out.
For details about loading paper, see page 105 "Loading Paper".
: Add Toner indicator Appears when toner runs out.
For details about adding toner, see page 449 "Replacing the
Print Cartridge".
: Service Call indicator Appears when the printer is malfunctioning or requires
maintenance.
: Cover Open indicator Appears when one or more covers of the printer are open.
Checking Printer Status and Settings
This function is available for SP C342DN only.
Maintnc. Info
You can check the following items under [Maintnc. Info]:
• Remaining Toner
Displays the amount of remaining toner.
• Paper Tray
Displays the paper type and size loaded into the paper tray.
• Output Tray Full
Displays whether the output tray is overloaded.
• Paper Misfeed
6. Troubleshooting
372 midas-p3_com_operating_instructions_gb_00198753_eng.xml
Draft 2016/01/18
Displays the state of and solutions for paper misfeeds.
• Cover Open
Indicates whether one or more covers of the printer are open.
Data Storage
You can check the following items under [Data Storage]:
• HDD Remaining Mem.
Displays the amount of available hard disk memory.
• HDD File(s)
Displays the total number of jobs stored on the hard disk.
• Print Job(s)
Displays the number of jobs for "Hold Print Job(s):", "Stored Print Job(s):", "Locked Print
Job(s):", and "Sample Print Job(s):".
Machine Adres Info
You can check the following items under [Machine Adres Info]:
• Machine IPv4 Address
Displays the printer's IPv4 address.
• Machine IPv6 Address
Displays the printer's IPv6 address.
1. Press the [Check Status] key, and then check the contents.
[Maintnc/MacInfo] tab Each key Check the contents [Exit]
• [Paper Misfeed], [Output Tray Full], and [Cover Open] appear on [Maintnc. Info] only when these
errors occur.
• Depending on the security settings, [Machine Adres Info] might not be displayed.
• For details about how to locate and remove misfeeds, see page 420 "Removing Jammed Paper".
When the Indicator Lamp for the [Check Status] Key Is Lit or Flashing
This function is available for SP C342DN only.
If an indicator for the [Check Status] key lights up, press the [Check Status] key to display the [Check
Status] screen. Check the status of the printer in the [Check Status] screen.
When Checking the Indicator Lamps, Status Icons, and Messages on the Control Panel
midas-p3_com_operating_instructions_gb_00198753_eng.xml 373
Draft 2016/01/18
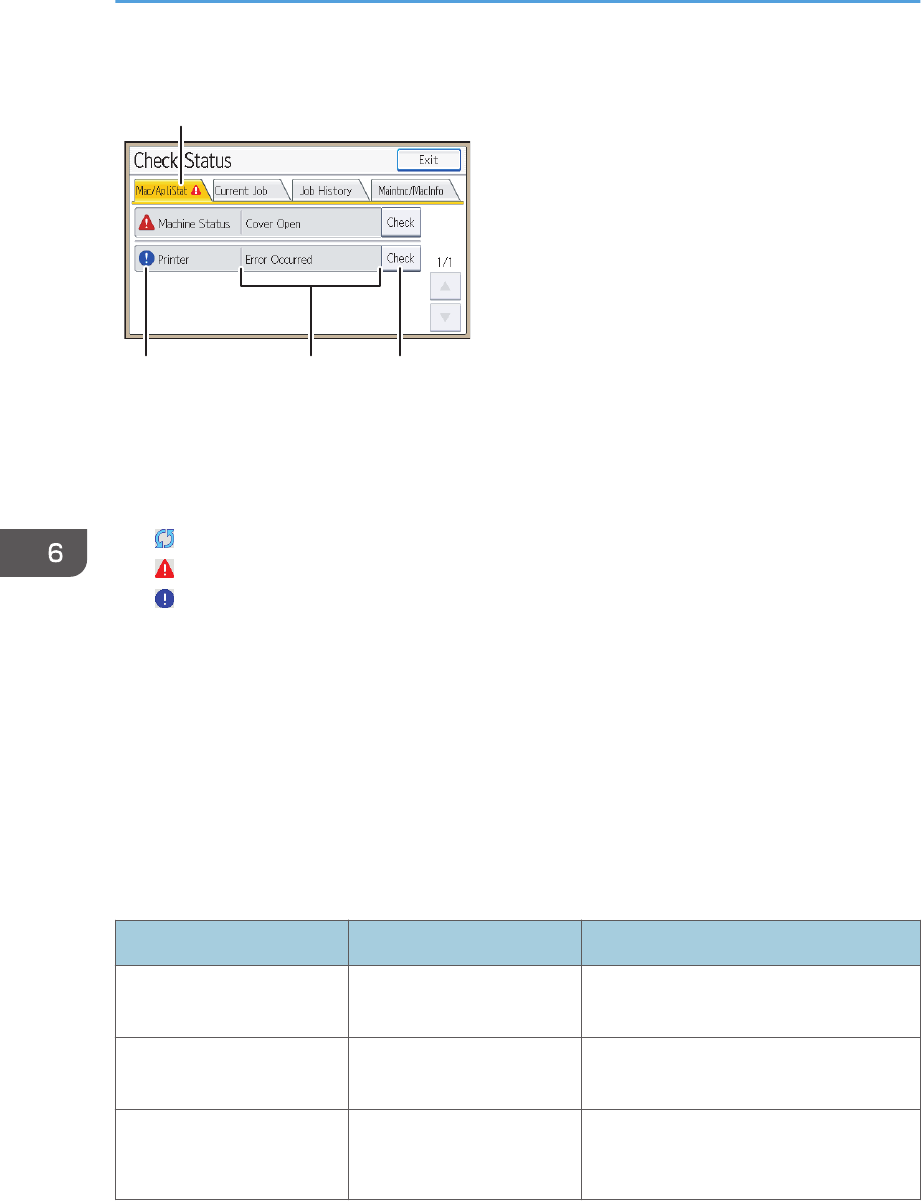
[Check Status] screen
1
243 CQT666
1. [Mac/ApliStat] tab
Indicates the status of the printer.
2. Status icons
The icons that can be displayed are described below:
: The printer function is performing a job.
: An error has occurred on the printer.
: An error has occurred in the printer function being used, or the printer function cannot be used because an
error has occurred on the printer.
3. Messages
Displays a message that indicates the status of the printer. This icon may also appear if the toner is running
low.
4. [Check]
If an error occurs, press [Check] to view details.
Pressing [Check] displays an error message or the printer screen. Check the error message displayed on the
printer screen and take the appropriate action. For details about error messages and their solutions, see
page 377 "When Messages Are Displayed".
The following table describes problems that cause the indicator to light:
Problem Cause Solution
Documents and reports do
not print out.
The paper output tray is full. Remove the prints from the tray.
Documents and reports do
not print out.
There is no paper left. Load paper. For details about loading
paper, see page 105 "Loading Paper".
An error has occurred. A function that has the
status "Error Occurred" in
Press [Check], and then check the
displayed message and take appropriate
action. For details about error messages
6. Troubleshooting
374 midas-p3_com_operating_instructions_gb_00198753_eng.xml
Draft 2016/01/18
Problem Cause Solution
the [Check Status] screen is
defective.
and their solutions, see page 377
"When Messages Are Displayed".
The printer is unable to
connect to the network.
A network error has
occurred.
• Press [Check], and then check the
displayed message and take
appropriate action. For details
about error messages and their
solutions, see page 377 "When
Messages Are Displayed".
• Check that the printer is correctly
connected to the network and that
the printer is correctly set. For details
about how to connect the network,
see page 291 "Interface Settings".
• For details about connecting to the
network, contact your administrator.
• If the indicator is still lit even after
trying to solve the problem as
described here, contact your service
representative.
When Checking the Indicator Lamps, Status Icons, and Messages on the Control Panel
midas-p3_com_operating_instructions_gb_00198753_eng.xml 375
Draft 2016/01/18

If USB Connection Fails
Problem Causes Solutions
The printer is not
automatically recognized.
The USB cable is not
connected properly.
Disconnect the USB cable, turn off the
printer, and then turn it on again. When
the printer has fully booted up, reconnect
the USB cable.
Windows has already
configured the USB
settings.
Check whether or not the
computer has identified the
printer as an unsupported
device.
Open Windows' Device Manager, and
then, under [Universal Serial Bus
controllers], remove any conflicting
devices. A [!] or [?] icon is displayed for
conflicting devices. Take care not to
accidentally remove required devices.
For details, see Windows Help.
6. Troubleshooting
376 midas-p3_com_operating_instructions_gb_00198756_eng.xml
Draft 2016/01/18
When Messages Are Displayed
This section describes the main messages that appear on the display panel and printed error logs and
reports. If other messages appear, follow their instructions.
Status Messages
Message Status
"@Remote Certif.
updating..."
The printer is updating the @Remote certificate. Turn the power off, and
then turn it on again.
"Calibrating..." The printer is calibrating the color. Wait a while.
"Energy Saver Mode" The printer is in Energy Saver mode. Press any key to recover to the
normal mode.
"Hex Dump Mode" In Hex Dump mode, the printer receives data in a hexadecimal format.
Turn off the printer after printing, and then turn it on again.
"Job Suspended" All jobs are suspended. Turn off the printer, and turn it on again to
resume the jobs.
"Offline" The printer is offline and cannot print.
"Please wait..." This message may appear for a few seconds. It means the printer is
initializing, replenishing toner, or performing maintenance operations.
Wait a while.
"Printing..." The printer is printing. Wait a while.
"Printing Suspended" Printing is suspended. To resume printing, press the [Suspend/Resume]
key.
"Ready" This is the default ready message. The printer is ready for use. No
action is required.
"Resetting Job" The printer is resetting the print job. Wait a while.
"Setting change..." The printer is applying the changes made to its settings. Wait a while.
"Waiting for print data..." The printer is waiting for the next data to print. Wait a while.
When Messages Are Displayed
midas-p3_com_operating_instructions_gb_00198757_eng.xml 377
Draft 2016/01/18
Message Status
"Calibrating..." The printer is calibrating the color. Wait a while.
"Hex Dump Mode" In Hex Dump mode, the printer receives data in a hexadecimal format.
Press [Job Reset] to cancel Hex Dump mode.
"Job suspended." Printing was temporarily suspended because [Job Operation] or the
[Suspended] key was pressed.
"Loading Toner..." The printer is loading the toner. Wait a while.
"Offline" The printer is offline.
"Please wait." This message might appear for a second or two while the printer is
preparing, performing initial adjustments, or adding toner. Wait a
while.
"Printing..." The printer is printing. Wait a while.
"Ready" This is the default ready message. The printer is ready for use. No
action is required.
"Resetting job..." The printer is resetting the print job. Wait until "Ready" appears on the
display panel.
"Setting change..." The printer is changing settings. You cannot use the control panel while
this message is displayed. Wait a while.
"Updating certif..." The @Remote certificate is being updated. Wait a while.
"Waitg. for prt.data" The printer is waiting for the next data to print. Wait a while.
Alert Messages (Displayed on the Control Panel)
Message Cause Solution
" (A) Remove paper from
Trays. Opn & cls Frt. Cov."
Open the front cover and remove
the jammed paper from the paper
feed path.
For details, see page 420
"Removing Jammed Paper".
6. Troubleshooting
378 midas-p3_com_operating_instructions_gb_00198757_eng.xml
Draft 2016/01/18
Message Cause Solution
" (B) Open Front Cover
and remove the paper."
Open the front cover and remove
the jammed paper from the
internal paper feed path.
For details, see page 420
"Removing Jammed Paper".
" (C) Open Front Cover
and remove the paper."
Open the front cover and remove
any jammed paper from the
output tray.
For details, see page 420
"Removing Jammed Paper".
" (Y) Remove misfeed in
Trays. Opn & cls Frt. Cov."
Open the front cover and remove
any jammed paper.
For details, see page 420
"Removing Jammed Paper".
" (Z) Open Front Cover
and remove the paper."
Open the front cover and remove
any jammed paper from the
paper duplex unit.
For details, see page 420
"Removing Jammed Paper".
" Out of toner" The color toner has run out.
Replace the toner cartridge.
For details, see page 449
"Replacing the Print Cartridge".
" Waste Toner Bottle full" Replace the waste toner bottle. For details, see page 451
"Replacing Other Consumables".
"Cannot
connect=>Comm.Serv.
Check proxy user/
password."
The proxy user name or password
is incorrect.
Check the proxy server settings,
and then change the user name
and/or password if they are
incorrect.
"Cannot connect with DHCP
server.(101/201)"
An IP address cannot be obtained
from the DHCP server.
Contact your network
administrator.
"Cannot print." The printer cannot print the sent
data.
Check that the file you want to
print is a supported file type.
Check the misfeeds and ask your
network administrator for help.
"Change (Tray name) to the
following settings:"
The size of the paper in the tray
does not match the paper size
specified in the printer driver.
Select a tray containing paper
that is the same size as the
specified paper size.
"Check network settings.
(103/203)"
The IP address setting is incorrect. Check the IP address, subnet
mask, and gateway address.
"Classification Code Error" A classification code is not
specified for the print job.
Enter a classification code using
the printer properties and print the
document again.
When Messages Are Displayed
midas-p3_com_operating_instructions_gb_00198757_eng.xml 379
Draft 2016/01/18

Message Cause Solution
"Connect
failed:WirelessCard Turn
power off, check card."
The printer cannot detect the
wireless LAN interface board.
Check that the board is supported
or installed correctly.
"Cover Open. Please close
the indicated cover."
A cover of the printer is open. Close the cover as indicated on
the control panel.
"Duplex mode is in off
position for (tray name)"
The duplex mode for the indicated
tray is not available.
You can use one-sided printing
only. Press [Change] to change
the tray's settings, press [JobReset]
to reset the job, or press [Form
Feed] to force printing.
"ECO Night Sensor did not
turn Power Switch off. Turn
switch off manually or to
use, press any key."
Auto power off by the [ECO
Night Sensor] function failed.
Turn off the power manually, or
press any key to use [ECO Night
Sensor] auto power off function.
"Ethernet Board Error" An error on the Ethernet is
detected.
Turn the printer off, and then turn it
on again. If the problem persists,
contact your sales or service
representative.
"Failed to connect to server
for Remote Diagnostics."
The printer cannot communicate
with Remote Communication
Gate.
Check the connection to the
Remote Server Gate.
"IPv6 Address already exists
Link-local
Address(109/209)"
The same IPv6 address is already
used.
Contact your network
administrator.
"IPv6 Address already exists
Stateless
Address(109/209)"
The same IPv6 address is already
used.
Contact your network
administrator.
"IPv6 Address already exists
Manual Config.
Address(109/209)"
The same IPv6 address is already
used.
Contact your network
administrator.
"Load paper in (tray name)
or [Cancel] to FormFeed."
There is no paper in the specified
tray.
Load the specified paper in the
tray, press [JobReset] to reset the
job. To print from the bypass tray
on paper whose width is less than
90 mm, cancel the print job, and
6. Troubleshooting
380 midas-p3_com_operating_instructions_gb_00198757_eng.xml
Draft 2016/01/18

Message Cause Solution
then, under [System], set [Bypass
Print: 64-90 mm] to [Active].
"May have exceeded max
no. of prints in output tray.
Print stopped. Check the
tray."
The output tray is full. Remove paper from the output
tray.
"Parallel I/F Error" The printer's self diagnostic test
failed due to a loopback error.
Replace the IEEE 1284 board
that caused the error.
"Printer Font Error." There are problems with the
printer's font file.
Turn the printer off, and then turn it
on again.
If the problem persists, contact
your sales or service
representative.
"Problem:Wireless board
Please call service."
The printer cannot detect a
wireless LAN interface board.
Check that the wireless LAN
interface board installed correctly.
If the problem persists, contact
your sales or service
representative.
"Replacement Alert Replace
Transfer Belt."
You need to replace the
intermediate transfer unit.
Contact your sales or service
representative to obtain a new
intermediate transfer unit.
"Replacemnt
Requird:IntTrans"
You need to replace the
intermediate transfer unit.
For details, see page 451
"Replacing Other Consumables".
"Replcmnt Requrd: Print
Cart"
The toner has run out, or the
photo conductor unit has reached
the end of its service life.
For details, see xxxxx "Replacing
the Print Cartridge".
"Replacmnt Rqrd:Fusing
Unit"
You need to replace the fusing
unit.
For details, see page 451
"Replacing Other Consumables".
"Replcmnt Rqrd
Soon:IntTrans"
You will need to replace the
intermediate transfer unit soon.
Contact your sales or service
representative to obtain a new
unit.
"Repl Requrd
Soon:FusingUnit"
You will need to replace the
fusing unit soon.
Contact your sales or service
representative to obtain a new
unit.
When Messages Are Displayed
midas-p3_com_operating_instructions_gb_00198757_eng.xml 381
Draft 2016/01/18

Message Cause Solution
"SD Card
authenticatn.failed"
Authentication from the SD card
failed.
Turn the printer off, and then turn it
on again. If the problem persists,
contact your sales or service
representative.
"Set the Fusing Unit
correctly."
The fusing unit may not be
installed correctly. Turn the printer
off and re-install the fusing unit.
If the message is still displayed
after re-installation, contact your
sales or service representative.
For details, see page 451
"Replacing Other Consumables".
"Set the Intermediate
Transfer Unit correctly."
The intermediate transfer unit may
not be installed correctly. Turn the
printer off and re-install the
intermediate transfer unit.
If the message is still displayed
after re-installation, contact your
sales or service representative.
For details, see page 451
"Replacing Other Consumables".
"Set the Print Cartridge
correctly."
The print cartridge may have not
been installed correctly.
Turn the printer off, and install the
print cartridge again.
"Set Waste Toner Bottle
correctly."
The waste toner bottle may not be
installed correctly. Turn the printer
off and re-install the waste toner
bottle.
If the message is still displayed
after re-installation, contact your
sales or service representative.
For details, see page 451
"Replacing Other Consumables".
"Output Tray is full. Remove
paper."
The output tray is full. Remove the paper.
"Supply order has failed." The automatic supply order failed. The message indicates the printer
tried to order the supplies.
"This NetBIOS name is
already in use.(108/208)"
The NetBIOS name specified for
the printer is already used by
another device on the network.
Contact your network
administrator.
6. Troubleshooting
382 midas-p3_com_operating_instructions_gb_00198757_eng.xml
Draft 2016/01/18
Message Cause Solution
"The same IPv4 Address
already exists.(102/202)"
The IPv4 address specified for the
printer is already used by another
device on the network.
Contact your network
administrator.
"The selected job has
already been printed or
deleted."
This message might appear if you
print or delete a job from Web
Image Monitor.
Press Exit on the message screen.
"USB has a problem. /
Please call service."
The printer has detected a USB
board failure.
Turn the printer off, and then turn it
on again. If the problem persists,
contact your sales or service
representative.
"Values set for IPv6/
Gateway addresses are
invalid.(110/210)"
The IPv6 address or gateway
address is invalid.
Check the network settings.
"WPA Auth. incomplete.
(211)"
WPA authentication could not be
completed.
Contact your network
administrator.
Message Cause Solution
"Cannot connect with the
wireless card. Turn the main
power switch off, then check
the card."
• The wireless LAN interface
board was not inserted when
the printer was turned on.
• The wireless LAN interface
board was pulled out after
the printer was turned on.
• The settings are not updated
although the unit is detected.
• Turn off the main power
switch, and then confirm the
wireless LAN interface board
is inserted correctly. For
details about installing the
board, contact your service
representative.
• If the message appears
again, contact your service
representative.
"Cannot print because both
the main and designation
(chapter) sheets are set to
the same paper tray. Press
[Job Reset] to cancel the
job."
The tray selected for other pages
is the same as the one for slip
sheets.
Reset the job. Be sure the tray you
select for slip sheets is not
providing paper for other pages.
When Messages Are Displayed
midas-p3_com_operating_instructions_gb_00198757_eng.xml 383
Draft 2016/01/18

Message Cause Solution
"Hardware Problem:
Ethernet"
An error has occurred in the
Ethernet interface.
Turn the main power switch off
and then back on again. If the
message appears again, contact
your service representative.
"Hardware Problem: HDD" An error has occurred in the hard
disk.
• Turn the main power switch
off and then back on again.
If the message appears
again, contact your service
representative.
• The hard disk may have not
been installed properly if
you have installed it yourself.
Check that it is properly
installed For details about
installing the unit, see
page 59 "Installing the Hard
Disk".
"Hardware Problem:
Parallel I/F"
An error has occurred in the IEEE
1284 interface board.
• Turn the main power switch
off and then confirm the IEEE
1284 interface board is
inserted correctly. For details
about installing the board,
see page 63 "Installing the
Interface Units".
• If the message appears
again, contact your service
representative.
"Hardware Problem: USB" An error has occurred in the USB
interface.
Turn the main power switch off
and then back on again. If the
message appears again, contact
your service representative.
"Hardware Problem:
Wireless Card"
(A "wireless LAN interface
board" is referred to as a
"wireless card".)
The wireless LAN interface board
can be accessed, but an error
was detected.
• Turn off the main power
switch, and then confirm the
wireless LAN interface board
is inserted correctly. For
details about installing the
board, see page 63
6. Troubleshooting
384 midas-p3_com_operating_instructions_gb_00198757_eng.xml
Draft 2016/01/18

Message Cause Solution
"Installing the Interface
Units".
• If the message appears
again, contact your service
representative.
"Load ppr blw in (Tray
name)."
The printer driver settings are
incorrect or the tray does not
contain paper of the size selected
in the printer driver.
Check that the printer driver
settings are correct, and then load
paper of the size selected in the
printer driver into the input tray.
For details about how to change
the paper size, see page 105
"Loading Paper".
"No toner. Replace Toner
Cartridge."
The toner has run out. Replace the
print cartridge.
For details, see page 449
"Replacing the Print Cartridge".
"No color toner. Color toner
is required to print in black
& white with the current
paper type. Replace the
color Print Cartridge or
press [Job Reset] to cancel
printing."
The color toner has run out.
Replace the print cartridge.
For details, see page 449
"Replacing the Print Cartridge".
"n ppr siz msmtch Select
new tray or use ppr size
below."
("n" is a tray name.)
The size of the paper in the tray
does not match the paper size
specified in the printer driver.
Select a tray containing paper
that is the same size as the
specified paper size.
"Problem: Printer Font Error" An error has occurred in the font
settings.
Contact your service
representative.
"Problems with the wireless
board. Please call service."
(A "wireless LAN interface
board" is referred to as a
"wireless board".)
The printer has detected a
wireless LAN interface board
failure.
If the message appears again,
contact your service
representative.
"Output Tray is full. Remove
paper."
The output tray is full. Remove the paper.
When Messages Are Displayed
midas-p3_com_operating_instructions_gb_00198757_eng.xml 385
Draft 2016/01/18

Message Cause Solution
"Replacement of Fusing Unit
is now necessary. Please
call service."
You need to replace the
intermediate fusing unit.
For details, see page 451
"Replacing Other Consumables".
"Fusing Unit must be
replaced now. Replace
Fusing Unit."
You need to replace the fusing
unit.
For details, see page 451
"Replacing Other Consumables".
"Replacement of Fusing Unit
will soon be necessary. A
new unit is required. Please
contact your local vendor."
You will need to replace the
fusing unit soon.
Contact your sales or service
representative to obtain a new
unit.
"Replacement of Transfer
Unit is now necessary.
Replace Transfer Unit."
You need to replace the
intermediate transfer unit.
For details, see page 451
"Replacing Other Consumables".
"Replacement of Transfer
Unit is now necessary.
Replace Transfer Unit."
You need to replace the
intermediate transfer unit.
For details, see page 451
"Replacing Other Consumables".
"Replacement of Transfer
Unit will soon be necessary.
A new unit is required.
Please contact your local
vendor."
You will need to replace the
intermediate transfer unit soon.
Contact your sales or service
representative to obtain a new
unit.
"Tray setg. do not match
spcfd siz&typ. Select new
tray or use siz&typ below."
The printer driver settings are
incorrect or the tray does not
contain paper of the size or type
selected in the printer driver.
• Check that the printer driver
settings are correct, and then
load paper of the size
selected in the printer driver
into the input tray. For details
about how to load paper,
see page 105 "Loading
Paper".
• Select the tray manually to
continue printing, or cancel
a print job. For details about
how to select the tray
manually, or cancel a print
job, see page 207 "If an
Error Occurs with the
6. Troubleshooting
386 midas-p3_com_operating_instructions_gb_00198757_eng.xml
Draft 2016/01/18
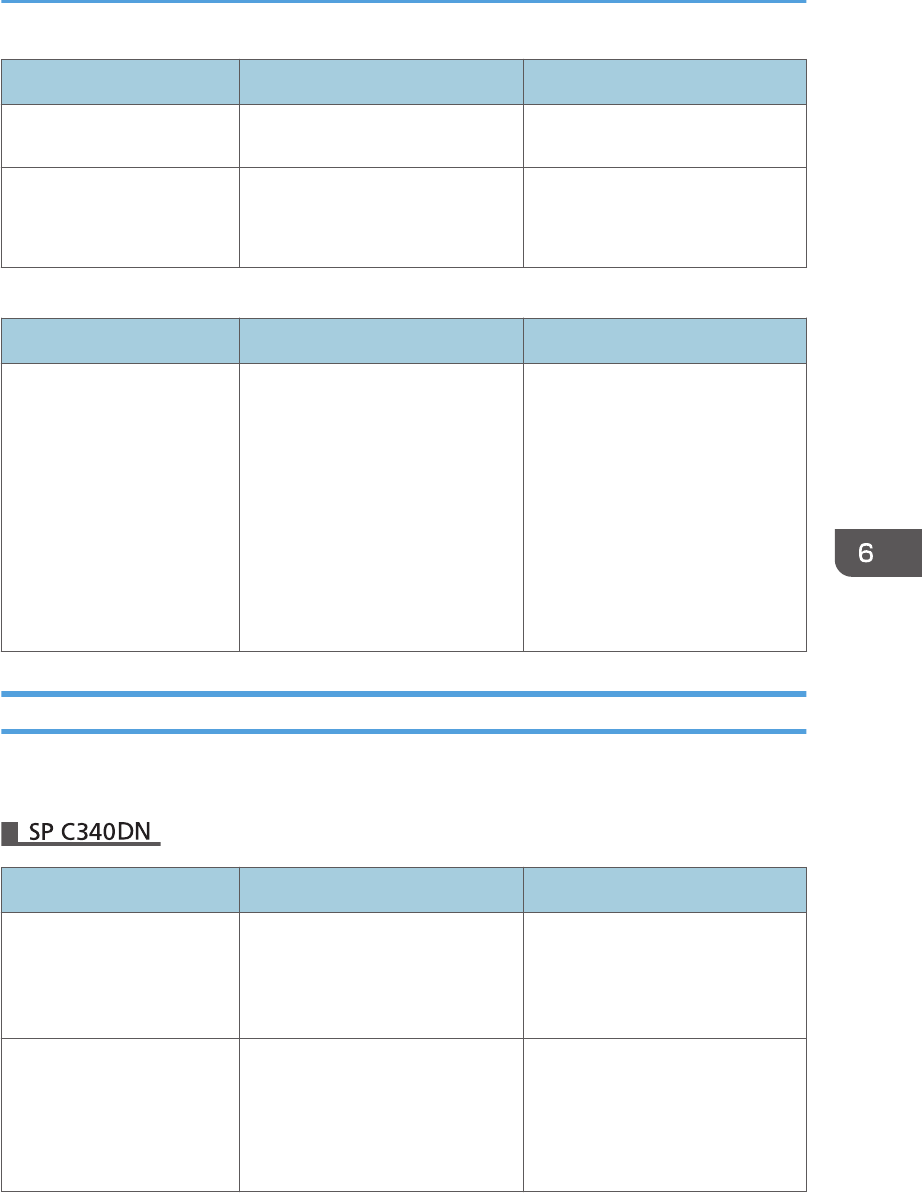
Message Cause Solution
Specified Paper Size and
Type".
"Waste Toner Bottle is full.
Replace the bottle."
The waste toner bottle is full. Replace the waste toner bottle.
For details, see page 451
"Replacing Other Consumables".
Messages during Direct print from a memory storage device
Message Causes Solutions
"Unable to access the
specified memory storage
device."
The memory device used cannot
be recognized.
For details about the
recommended memory devices
for the Direct printing function
from memory storage devices,
contact your service
representative. The USB flash
memory device that features
password protection or other
security features may not work
normally.
Alert Messages (Printed on Error Logs and Reports)
This section describes likely causes of and possible solutions for the error messages that are printed on
the error logs or reports.
Message Cause Solution
"Address book is in use." The printer currently cannot
perform authentication because
the Address Book is being used
by another function.
Wait a while, and then retry the
operation.
"Auto-user prog. failed." Automatic registration of
information for LDAP
Authentication or Windows
Authentication failed because the
Address Book is full.
For details about the automatic
registration of user information,
see Security Guide.
When Messages Are Displayed
midas-p3_com_operating_instructions_gb_00198757_eng.xml 387
Draft 2016/01/18
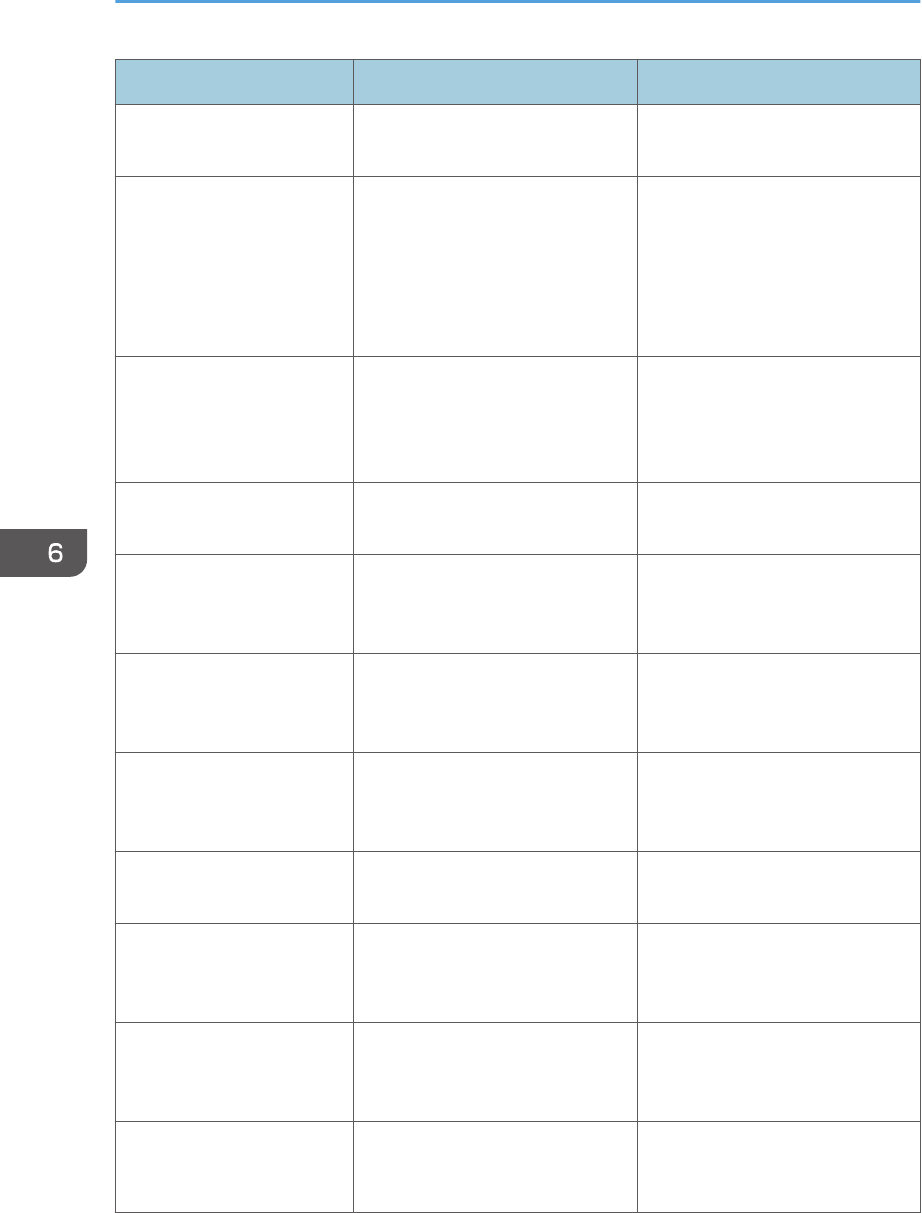
Message Cause Solution
"Cannot print." You have no privileges to print the
PDF file you want to print.
Contact the owner of the
document.
"Classification Code Error" The classification code is not
specified with the printer driver.
Select [Optional] for the
classification code. For details
about how to specify classification
code settings, see page 149
"Registering Classification
Codes".
"Collate cancelled." Collate was canceled. Turn the printer off, and then turn it
on again. If the message appears
again, contact your service
representative.
"Collate: Page max." The amount of free memory is
insufficient to perform collating.
Reduce the number of pages to
be printed.
"Command Error." An RPCS command error
occurred.
Check that the communication
between a device and the printer
is working correctly.
"Compressed Data Error" The printer detected corrupt
compressed data.
Check that the program you used
to compress the data is
functioning correctly.
"Duplex cancelled." Duplex printing was canceled. Change the setting for "Duplex
Tray" in [Paper Input] to enable
duplex printing for the paper tray.
"Error occured. Prntd/
Cncld."
An error occurred during printing,
but it was ignored.
Check the print settings.
"Excd Prt Vol Use max
count."
Printing was canceled because
the print maximum number was
reached.
Contact your user administrator.
"Excd Prt Vol Use max
count."
Maximum number of user codes
that can be registered has been
reached.
Delete unnecessary user codes.
"File System Error." PDF direct printing could not be
performed because the file system
could not be obtained.
Turn the printer off, and then turn it
on again. If the message appears
6. Troubleshooting
388 midas-p3_com_operating_instructions_gb_00198757_eng.xml
Draft 2016/01/18

Message Cause Solution
again, contact your service
representative.
"File System Full." The PDF file cannot be printed
because the capacity of the file
system is full.
Delete all unnecessary files from
the hard disk, or decrease the file
size sent to the printer.
"Function use denied." The print job was cancelled
because of one of the following:
• The user does not have
privileges to print.
• No privileges to print are
assigned to the entered user
name or user code, or
• A wrong password was
specified for the user name.
Enter the user name or user code
with privileges to print, or enter
the correct password for the user
name.
"I/O buffer overflow." An input buffer overflow occurred. • Select [Font Priority] for
[Memory Usage] in
[System].
• In [I/O Buffer] under the
[Host Interface] menu, set the
maximum buffer size to a
larger value.
• Reduce the number of files
being sent to the printer.
"No response from server." A timeout occurred while the
printer was connecting to the
server for LDAP Authentication or
Windows Authentication.
Check the status of the server.
"Paper Size Error" Printing was canceled because
the specified paper size cannot
be fed from the tray.
Check the available paper size.
"Paper Type Error" The printer does not recognize the
paper type specified using the
printer driver.
Check that the printer is
connected to the network
correctly and bidirectional
communication is enabled. If the
When Messages Are Displayed
midas-p3_com_operating_instructions_gb_00198757_eng.xml 389
Draft 2016/01/18
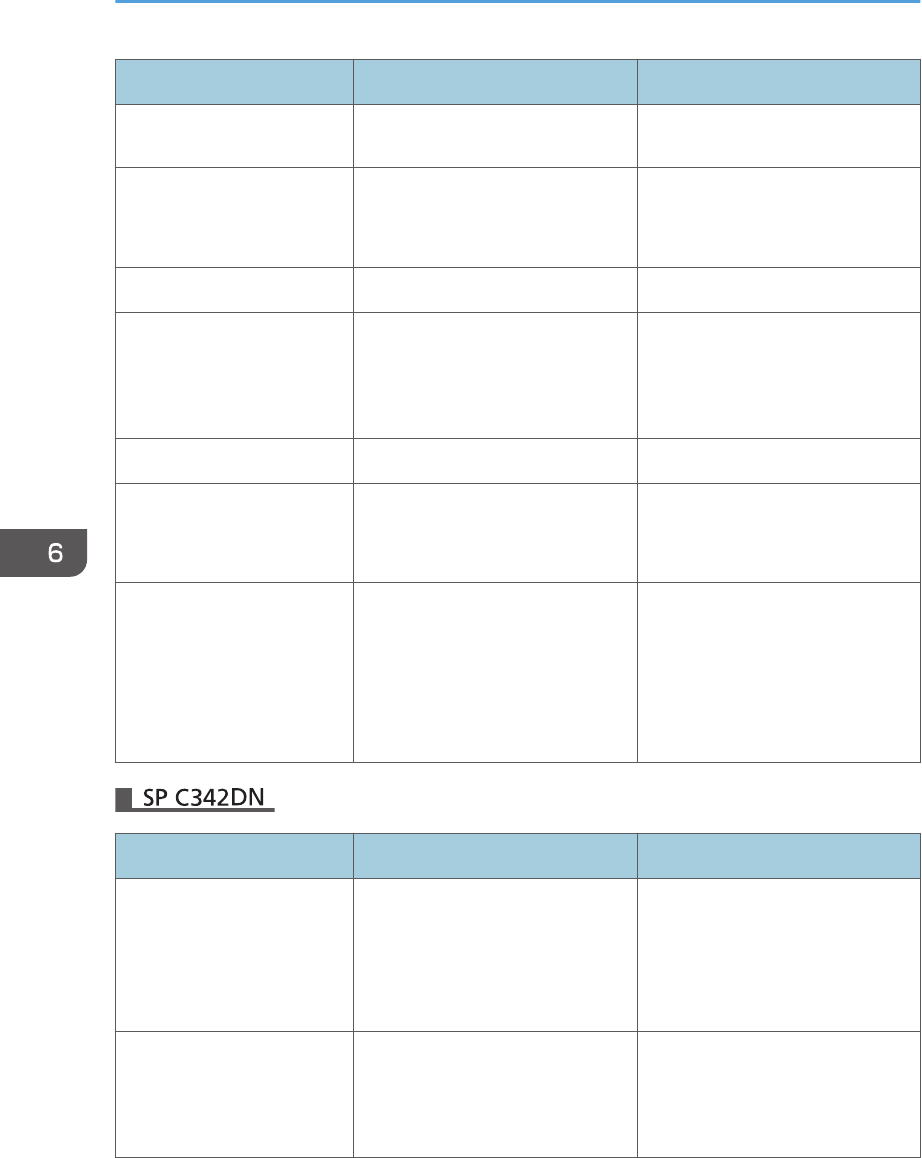
Message Cause Solution
problem persists, check the user
paper type settings of the printer.
"Password mismatch." A wrong password was entered
when an encrypted PDF file was
printed.
Check the password.
"PDF File Error." A syntax error, etc., occurred. Check that the PDF file is valid.
"Print overrun." Printing images was aborted. Select a lower resolution on the
printer driver. For details about
how to change the resolution
setting, see the printer driver Help.
"Receiving data failed." Data reception was aborted. Resend the data.
"Sending data failed." The printer received a command
to stop a transmission from the
printer driver.
Check that the computer is
working correctly.
"User auth. already exists." The same account name is
already used in the newly
selected domain or server in an
environment using LDAP
Authentication or Integration
Server Authentication.
Contact your user administrator.
Message Cause Solution
"98: Error" The printer could not access the
hard disk correctly.
Turn the main power switch off
and then back on again. If the
message appears frequently,
contact your service
representative.
"Address Book is currently in
use by another function.
Authentication has failed."
The printer currently cannot
perform authentication because
the Address Book is being used
by another function.
Wait a while, and then retry the
operation.
6. Troubleshooting
390 midas-p3_com_operating_instructions_gb_00198757_eng.xml
Draft 2016/01/18

Message Cause Solution
"Auto-registration of user
information has failed."
Automatic registration of
information for LDAP
Authentication or Windows
Authentication failed because the
Address Book is full.
For details about automatic
registration of user information,
see Security Guide.
"Classification Code is
incorrect."
The classification code has not
been entered, or the classification
code has been entered
incorrectly.
Enter the correct classification
code.
"Classification Code is
incorrect."
The classification code is not
supported by the printer driver.
Select [Optional] for the
classification code. For details
about how to specify classification
code settings, see page 149
"Registering Classification Codes".
"Collate has been
cancelled."
Collate was canceled. Decrease the number of files sent
to the printer.
"Command Error." An RPCS command error
occurred.
Check that the communication
between the digital camera and
the printer is working correctly.
"Command Error" An RPCS command error
occurred.
Check that the communication
between a device and the printer
is working correctly.
"Compressed Data Error." The printer detected corrupt
compressed data.
• Check the connection
between the computer and
the printer.
• Check that the program you
used to compress the data is
functioning correctly.
"Data storage error." You tried to print a Sample Print,
Locked Print, Hold Print, or Stored
Print file while the hard disk was
not installed.
The hard disk is required when
printing a Sample Print, Locked
Print, Hold Print, or Stored Print.
If the message appear after
installing the hard disk, contact
your service representative.
When Messages Are Displayed
midas-p3_com_operating_instructions_gb_00198757_eng.xml 391
Draft 2016/01/18

Message Cause Solution
"Duplex has been
cancelled."
Duplex printing was canceled. • Select the proper paper size
for the duplex function. For
details about paper size, see
page 106 "Paper Size
Specifications".
• Change the setting for
"Apply 2 sided" in [System
Settings] to enable duplex
printing for the paper tray.
For details about setting
"Apply 2 sided", see
page 287 "Tray Paper
Settings".
"Error has occurred." A syntax error, etc., occurred. Check that the PDF file is valid.
"Error occurred. Either job
was printed with settings
changed or it was
cancelled."
An error occurred during printing,
but it was skipped.
Check that the data is valid.
"Excdd max. No. of files to
print for temp./stored jobs."
While printing a Sample Print,
Locked Print, Hold Print, or Stored
Print file, the maximum file
capacity was exceeded.
Delete unneeded files stored in
the printer.
"Excdd max. No. of files.
(AT)"
While using the error job store
function to store Normal Print jobs
as Hold Print files, the maximum
file capacity for file storage or
Hold Print file management
(automatic) was exceeded.
Delete Hold Print files (automatic)
or unneeded files stored in the
printer.
"Excdd max. No. of
pages(AT)"
While using the error job store
function to store Normal Print jobs
as Hold Print files, the maximum
page capacity was exceeded.
• Delete unneeded files stored
in the printer.
• Reduce the number of pages
to print.
"Exceeded max. No. of
pages for temporary/stored
jobs."
While printing a Sample Print,
Locked Print, Hold Print, or Stored
Print file, the maximum page
capacity was exceeded.
• Delete unneeded files stored
in the printer.
• Reduce the number of pages
to print.
6. Troubleshooting
392 midas-p3_com_operating_instructions_gb_00198757_eng.xml
Draft 2016/01/18

Message Cause Solution
"Exceeded max. pages.
Collate is incomplete."
The number of pages exceeds the
maximum number of sheets that
can be used with Collate.
Reduce the number of pages to
print.
"Exceeded the maximum
unit count for Print Volume
Use. The job has been
cancelled."
The number of pages the user is
permitted to print has been
exceeded.
For details about Print Volum. Use
Limit., see Security Guide.
"Failed to obtain file
system."
PDF direct printing could not be
performed because the file system
could not be obtained.
Turn off the main power switch
and then back on again. If the
message appears again, contact
your service representative.
"File system is full." The PDF file does not print out
because the capacity of the file
system is full.
Delete all unnecessary files from
the hard disk, or decrease the file
size sent to the printer.
"HDD is full." The hard disk became full while
printing a Sample Print, Locked
Print, Hold Print, or Stored Print
file.
• Delete unneeded files stored
in the printer.
• Reduce the data size of the
Sample Print, Locked Print,
Hold Print, or Stored Print
file.
"HDD is full." When printing with the PostScript
3 printer driver, the hard disk
capacity for fonts and forms has
been exceeded.
Delete unneeded forms or fonts
registered in the printer.
"HDD is full. (Auto)" The hard disk became full while
using the error job store function
to store Normal Print jobs as Hold
Print files.
• Delete unneeded files stored
in the printer.
• Reduce the data size of the
Temporary Print file and/or
the Stored Print file.
"I/O buffer overflow." An input buffer overflow occurred. • Select [Font Priority] for
[Memory Usage] in
[System].
• In [I/O Buffer] under the
[Host Interface] menu, set the
When Messages Are Displayed
midas-p3_com_operating_instructions_gb_00198757_eng.xml 393
Draft 2016/01/18

Message Cause Solution
maximum buffer size to a
larger value.
• Reduce the number of files
being sent to the printer.
"Information for user
authentication is already
registered for another user."
The user name for LDAP
Authentication or Integration
Server Authentication was
already registered in a different
server with a different ID, and a
duplication of the user name
occurred due to a switching of
domains (servers), etc.
For details about User
Authentication, see Security
Guide.
"Insufficient Memory" A memory allocation error
occurred.
PCL 5/PostScript 3
Select a lower resolution on
the printer driver. For details
about how to change the
resolution setting, see the
printer driver Help.
PCL 6
Select a lower resolution on
the printer driver. For details
about how to change the
resolution setting, see the
printer driver Help. On the
printer driver's [Detailed
Settings] tab, click [Print
Quality] in "Menu:", and
then select [Raster] in the
"Vector/Raster:" list. In some
cases, it will take a long time
to complete a print job.
"Memory Retrieval Error" A memory allocation error
occurred.
Turn off the main power switch
and then back on again. message
appears again.
"No response from the
server. Authentication has
failed."
A timeout occurred while
connecting to the server for LDAP
Check the status of the server.
6. Troubleshooting
394 midas-p3_com_operating_instructions_gb_00198757_eng.xml
Draft 2016/01/18
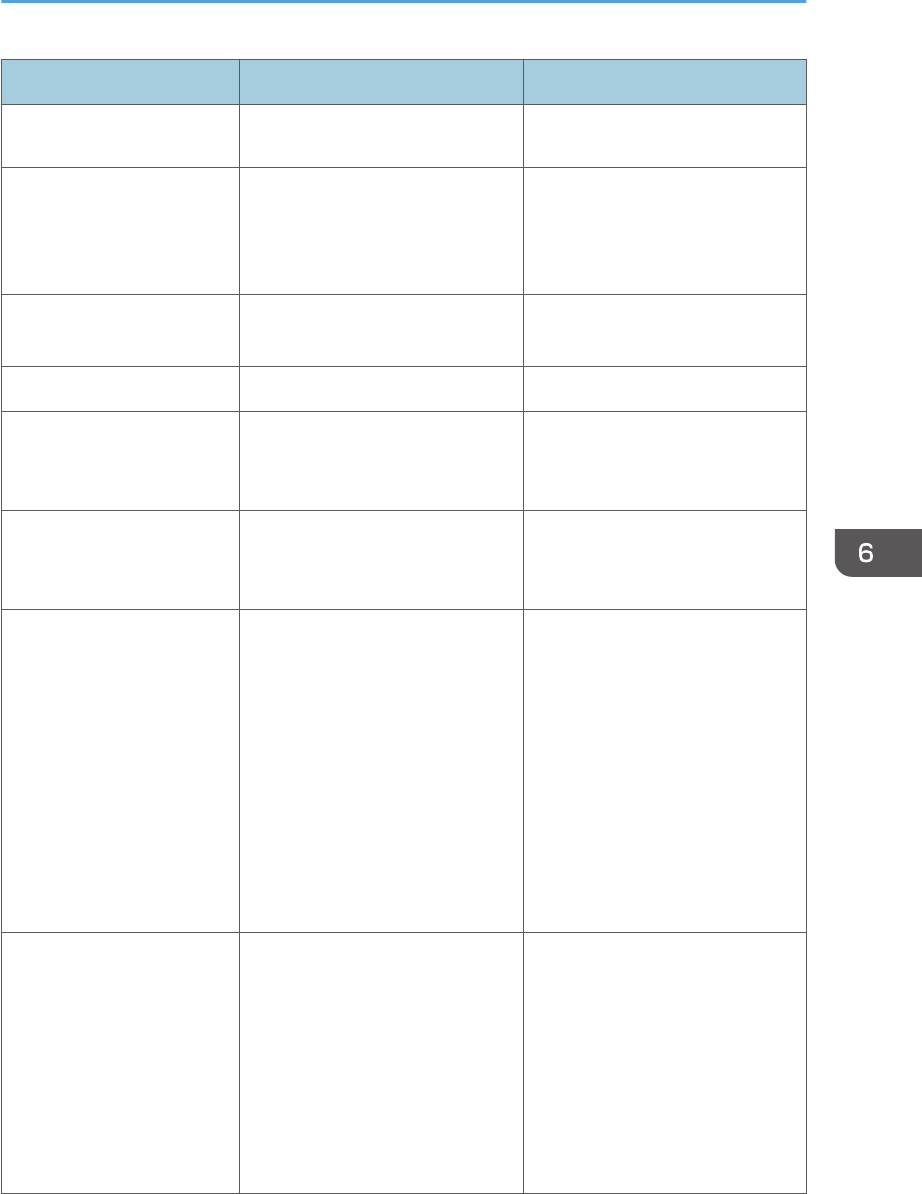
Message Cause Solution
Authentication or Windows
Authentication.
"Print overrun." Images were discarded while
printing.
Select a lower resolution on the
printer driver. For details about
how to change the resolution
setting, see the printer driver Help.
"Printing privileges have not
been set for this document."
The PDF document you have tried
to print has no privileges to print.
Contact the owner of the
document.
"Receiving data failed." Data reception was aborted. Resend the data.
"The selected paper size is
not supported. This job has
been cancelled."
Job Reset is automatically
performed if the specified paper
size is incorrect.
Specify the correct paper size,
and then print the file again.
"Sending data failed." The printer received a command
to stop transmission from the
printer driver.
Check that the computer is
working correctly.
"Unauthd. Copy Preventn.
Error"
The [Enter User Text:] field on the
[Unauthorized Copy Prevention
for Pattern Details] screen is blank.
PCL 6/PostScript 3
On the printer driver's
[Detailed Settings] tab, click
[Effects] in "Menu:". Select
[Unauthorized Copy
Prevention], and then click
[Details] to display
[Unauthorized Copy
Prevention for Pattern
Details]. Enter text in [Enter
User Text:].
"User Paper Type Error" The printer does not recognize the
paper type specified using the
printer driver.
Check that the printer is
connected to the network
correctly and bidirectional
communication is enabled. If the
problem persists, confirm the user
paper type settings of the printer.
For details, see page 127
"Registering Unique Names to
Paper Types".
When Messages Are Displayed
midas-p3_com_operating_instructions_gb_00198757_eng.xml 395
Draft 2016/01/18
Message Cause Solution
"You do not have a
privilege to use this function.
This job has been
cancelled."
The entered Login User Name or
Login Password is not correct.
Check that the Login User Name
and Login Password are correct.
"You do not have a
privilege to use this function.
This job has been
cancelled."
The logged in user is not allowed
to use the selected function.
For details about how to set
permissions, see Security Guide.
"You have no privilege to
use this func. Operation
canceld."
The logged in user does not have
the privileges to register programs
or change the paper tray settings.
For details about how to set
permissions, see Security Guide.
Messages during Direct print from a memory storage device
Message Causes Solutions
"99: Error" This data cannot be printed. The
specified data is either corrupt or
not supported by the Direct
printing function from memory
storage devices.
Check that the data is valid. For
details about the kinds of data
supported by the Direct printing
function from memory storage
devices, see page 191 "Direct
Printing from a Memory Storage
Device".
If printing does not start, contact your service representative.
• The contents of errors may be printed on the Configuration Page. Check the Configuration Page in
conjunction with the error log. For details about how to print the Configuration Page, see page 100
"Test Printing".
6. Troubleshooting
396 midas-p3_com_operating_instructions_gb_00198757_eng.xml
Draft 2016/01/18

When You Cannot Print
Problem Cause Solution
Printing does not start. The power is off. For details about how to turn on
the main power switch, see
page 73 "Turning On/Off the
Power".
Printing does not start. The cause is displayed on the
screen of the control panel.
Check the error message or
warning status on the display
panel, and then take the
required action. For details about
solutions, see page 377 "When
Messages Are Displayed".
Printing does not start. The interface cable is not
connected correctly.
For details about how to connect
interface cables correctly, see
page 78 "Connecting the
Printer".
Printing does not start. The correct interface cable is
not being used.
The type of interface cable to use
depends on the computer. Be
sure to use the correct one. If the
cable is damaged or worn,
replace it. For details about
interface cable, see page 78
"Connecting the Printer".
Printing does not start. The interface cable was
connected after the printer was
switched on.
Connect the interface cable
before turning on the main
power switch.
Printing does not start. If the printer is using wireless
LAN, failure to print might result
from a weak wireless signal.
Check the radio signal status of
the wireless LAN in [System
Settings]. If the signal quality is
not satisfactory, move the printer
to a location where radio waves
can pass or remove objects that
might cause interference.
You can check the signal status
only when wireless LAN is used
in infrastructure mode. For details
When You Cannot Print
midas-p3_com_operating_instructions_gb_00198761_eng.xml 397
Draft 2016/01/18

Problem Cause Solution
about the radio signal status of
the wireless LAN, see:
• page 255 "Host Interface
(SP C340DN)" (for SP
C340DN)
• page 291 "Interface
Settings" (for SP C342DN)
Printing does not start. If the printer is using wireless
LAN, when there is a
microwave oven, mobile
phone, industrial machine,
scientific instrument, or medical
instrument which uses the same
frequency range near the
device, radio waves may be
interfering with the wireless
LAN's communication.
Turn off the microwave oven,
mobile phone, industrial
machine, scientific instrument, or
medical instrument which uses
the same frequency range and
then try printing again. If printing
is successful, move the device to
a location where it does not
interfere.
Printing does not start. If the printer is using wireless
LAN, SSID settings may be
incorrect.
Check that the SSID is correctly
set using the printer's display
panel. For details about SSID
Setting, see page 85
"Connecting to the Wireless LAN
Interface".
Printing does not start. If the printer is using wireless
LAN, the receiver's MAC
address may be preventing
communication with the access
point.
Check the access point settings
when using the infrastructure
mode. Depending on the access
point, client access may be
filtered by MAC address. Also,
check that there are no
transmission problems between
the access point and wired
clients, and between the access
point and wireless clients.
Printing does not start. The wireless LAN interface is
not working.
Make sure the orange LED is lit,
and the green LED is lit or
flashing during transmission.
6. Troubleshooting
398 midas-p3_com_operating_instructions_gb_00198761_eng.xml
Draft 2016/01/18
Problem Cause Solution
Printing does not start. The Login User Name, Login
Password, or Driver Encryption
Key is incorrect.
Check the Login User Name,
Login Password, and Driver
Encryption Key.
Printing does not start. Advanced encryption has been
set using the Extended Security
function.
Check the settings of the
Extended Security function. For
details about Extended Security
function settings, see Security
Guide.
[List / Test Print] is disabled. A mechanical error might have
occurred.
Contact your service
representative.
Printing does not start when
using the extended wireless
LAN in Ad-hoc Mode.
The correct Communication
Mode is not set.
• Turn the main power switch
off and then back on again.
For details about how to
turn on/off the main power
switch, see page 73
"Turning On/Off the
Power".
• Change [Communication
Mode] in [System Settings]
to [802.11 Ad-hoc Mode],
and then select [Off] for
[Security Method]. For
details about
Communication Mode, see:
• page 255 "Host
Interface (SP
C340DN)" (for SP
C340DN)
• page 291 "Interface
Settings" (for SP
C342DN)
If printing does not start, contact your service representative.
When You Cannot Print
midas-p3_com_operating_instructions_gb_00198761_eng.xml 399
Draft 2016/01/18
When the Data In Indicator Does Not Light Up or Flash
When the Data In indicator does not light up or flash after a print job starts, data is not being sent to the
printer.
When the printer is connected to the computer using the interface cable
Check that the print port setting is correct. When connecting the printer to the computer using a
parallel interface, connect using LPT1 or LPT2.
1. Open the printer properties dialog box, and then click the [Ports] tab.
For details about displaying the printer properties dialog box, see page 131 "Displaying the
Printer Driver Properties with Windows".
2. In the [Print to the following port(s)] list, check that the correct port is selected.
Network connection
For details about the network connection, contact your administrator.
6. Troubleshooting
400 midas-p3_com_operating_instructions_gb_00198761_eng.xml
Draft 2016/01/18

Other Printing Problems
This section describes likely causes of and possible solutions for problems that can occur when a print
job is performed from a computer.
When You Cannot Print Properly
Problem Cause Solution
The printed image is smudged. Settings for thick paper have
not been configured when
printing on thick paper in the
bypass tray.
PCL 5e/5c
On the printer driver's
[Paper] tab, select [Bypass
Tray] in the "Input Tray:" list.
Then in the "Type:" list,
select a proper paper type.
PCL 6/PostScript 3
On the printer driver's
[Detailed Settings] tab, click
[Paper] in "Menu:", and
then select [Bypass Tray] in
the "Input Tray:" list. Then in
the "Paper Type:" list, select
a proper paper type.
Printed images contain blots or
are patchy.
The paper is damp. Use paper that has been stored
in the recommended temperature
and humidity conditions. For
details about the proper way to
store paper, see page 110
"Paper Precautions".
Printed images contain blots or
are patchy.
The printer is not on a level
surface.
The printer must be placed on a
stable and level surface. Check
the printer environment and
select an appropriate location.
For details about the printer's
environment, see page 47
"Install Location".
Printed images contain blots or
are patchy.
The paper is creased, curled, or
has blemishes.
Smooth out the wrinkles or
replace the paper. For details
Other Printing Problems
midas-p3_com_operating_instructions_gb_00198763_eng.xml 401
Draft 2016/01/18

Problem Cause Solution
about paper, see page 110
"Paper Precautions".
The printed image is faded over
the entire page.
The paper is damp. Use paper that has been stored
in the recommended temperature
and humidity conditions. For
details about the proper way to
store paper, see page 110
"Paper Precautions".
The printed image is faded over
the entire page.
The paper is unsuitable. Printing
on coarse or treated paper
might result in faint print image.
Use recommended paper. For
details about recommended
paper, see page 106 "Paper
Size Specifications" and
page 108 "Paper Type
Specifications".
The printed image is faded over
the entire page.
If [On] is selected in the
"Economy Color" list in the
printer driver settings, the entire
page will be faded when
printed.
PCL 6/PostScript 3
On the printer driver's
[Detailed Settings] tab, click
[Print Quality] in "Menu:",
and then select [Off] in the
"Economy Color ".
Images smudge when rubbed.
(Toner is not fixed.)
The specified paper type and
the paper that is actually
loaded might be different. For
example, thick paper might be
loaded but not specified as the
paper type.
PCL 5e/5c
On the printer driver's
[Paper] tab, select a proper
paper type in the [Type:]
box.
PCL 6/PostScript 3
On the printer driver's
[Detailed Settings] tab, click
[Paper] in "Menu:", and
then select a proper paper
type in the "Paper Type:"
list.
The printed image is different
from the image on the
computer's display.
Printing will be performed by
the printer's graphic processing
function.
PCL 6
On the printer driver's
[Detailed Settings] tab, click
[Print Quality] in "Menu:",
6. Troubleshooting
402 midas-p3_com_operating_instructions_gb_00198763_eng.xml
Draft 2016/01/18

Problem Cause Solution
and then select [Raster] in
the "Vector/Raster:" list.
The image is too dark or too
light.
The paper type settings are not
configured correctly.
Check that the paper loaded on
the paper tray or bypass tray
matches the paper type set on
the display panel. For details
about paper type settings, see
page 125 "Paper Settings".
The image is too dark or too
light.
The paper is loaded reverse
side up. Printing on non-print
surfaces reduces print quality
and can damage the printer's
internal components.
Before printing on special paper,
check its surface carefully. For
details about special paper, see
page 110 "Paper Precautions".
Image is dirty. Use of non-recommended toner
can result in a loss of print
quality and other problems.
Use genuine manufacturer toner.
Contact your service
representative.
Horizontal lines appear when
an image filled in black is
printed.
A black-and-white image is
occasionally recognized as a
color image and printed as a
streak when a large number of
pages that contain both black-
and-white and color images
are printed continuously.
• Set [B&W Page Detect] or
[Black & White Page
Detect] to [Per Page]. For
details, see one of the
followings depending on
the model being used:
• page 234 "System (SP
C340DN)" (for SP
C340DN)
• page 327
"Maintenance: Print"
(for SP C342DN)
• Change [Gray
Reproduction] in the [Print
Quality] menu of the printer
driver to [CMY + K].
Horizontal streaks appear on
the printed page.
Horizontal streaks may
sometimes appear on the
printed pages when a large
number of pages are
Perform the automatic gradation
correction. For details, see
page 441 "Correcting the Color
Gradation".
Other Printing Problems
midas-p3_com_operating_instructions_gb_00198763_eng.xml 403
Draft 2016/01/18

Problem Cause Solution
continuously printed in a high-
temperature or humid
environment.
The lower half of the page
appears faded when a filled-in
image is printed.
When the "Toner is almost
empty." or "Toner Cartridge is
almost empty. Replace Toner
Cartridge." message is
displayed on the display panel,
the toner is running low and the
printed page may appear
faded.
Replace the print cartridge.
Printed graphics do not match
graphics on the screen.
If the printer driver is configured
to use the graphics command,
the graphics command from the
printer is used to print.
If you want to print accurately,
set the printer driver to print
without using the graphics
command. For details about
settings for printer driver, see the
printer driver Help.
Print result differs from the
display.
A non-Windows operating
system is being used.
Check that the application
supports the printer driver.
Print result differs from the
display.
The printer is not selected for
printing.
Use the printer driver of the
printer and check that the printer
is the specified printer. For details
about how to open the printer
driver settings screen, see
page 131 "Displaying the
Printing Preferences dialog box
from the [Start] menu".
Print result differs from the
display.
Data transmission failed or was
canceled during printing.
Check whether there is failed or
canceled data remaining. For
details about how to identify the
cause of the error, see page 210
"Checking Error Logs".
Characters differ from the
display.
The loaded paper is unsuitable. Printing on recommended paper
produces better resolution. For
details about recommended
paper, see page 106 "Paper
Size Specifications" and
6. Troubleshooting
404 midas-p3_com_operating_instructions_gb_00198763_eng.xml
Draft 2016/01/18

Problem Cause Solution
page 108 "Paper Type
Specifications".
Image position differs from the
display.
The page layout settings are not
configured correctly.
Check the page layout settings
configured using the application.
For details about page layout
settings, see the application's
Help.
Image position differs from the
display.
The page layout settings are not
configured correctly.
PCL 5e/5c
On the printer driver's
[Paper] tab, select [Print
On] box, and then select
the desired size.
PCL 6 / PostScript 3
On the printer driver's
[Detailed Settings] tab, click
[Basic] in "Menu:", and then
select the desired size in the
"Print On:" list.
Lines of garbled or unwanted
alphanumeric characters
appear.
An incorrect printer language
might have been selected.
Select the correct printer driver,
and then print the file again.
Images are cut off, or excess is
printed.
You may be using paper
smaller than the size selected in
the application.
Use the same size paper as that
selected in the application. If you
cannot load paper of the correct
size, use the reduction function to
reduce the image, and then print.
For details about the reduction
function, see the printer driver
Help.
Photo images are grainy. Some applications print at a
lower resolution.
Use the application's or printer
driver's settings to specify a
higher resolution. For details
about printer driver's settings, see
the printer driver Help.
Other Printing Problems
midas-p3_com_operating_instructions_gb_00198763_eng.xml 405
Draft 2016/01/18

Problem Cause Solution
A solid line is printed as a
dashed line or appears blurred.
Dither patterns do not match. PostScript 3
Change the dithering
settings on the printer driver.
For details about the
dithering settings, see the
printer driver Help.
Fine lines are fuzzy with
inconsistent thickness or color,
or do not appear.
Super fine lines have been
specified in the application, or
a color that is too light has been
specified for the lines.
PostScript 3
Change the dithering
settings on the printer driver.
For details about the
dithering settings, see the
printer driver Help.
If the problem continues
after you change the
dithering settings, use the
settings of the application in
which the image was
created to change the color
and thickness of the lines.
Images appear only partially
colored.
The paper is damp. Use paper that has been stored
in the recommended temperature
and humidity conditions. For
details about the proper way to
store paper, see page 110
"Paper Precautions".
Paper Misfeeds Occur Frequently
Problem Cause Solution
Paper is not fed from the
selected tray.
When you are using Windows,
printer driver settings override
those settings using the display
panel.
PCL 5e/5c
On the printer driver's
[Paper] tab, select the
desired input tray in the
"Input Tray:" list.
6. Troubleshooting
406 midas-p3_com_operating_instructions_gb_00198763_eng.xml
Draft 2016/01/18

Problem Cause Solution
PCL 6/PostScript 3
On the printer driver's
[Detailed Settings] tab, click
[Paper] in "Menu:", and
then select the desired input
tray in the "Input Tray:" list.
Images are printed at a slant. The tray's side fences might not
be locked.
Check that the side fences are
locked. For details about how to
set the side fences, see
page 113 "Loading Paper into
Paper Trays" or page 119
"Loading Paper into the Bypass
Tray".
Images are printed at a slant. The paper is feeding in at a
slant.
Load the paper correctly. For
details about loading paper, see
page 113 "Loading Paper into
Paper Trays" or page 119
"Loading Paper into the Bypass
Tray".
Misfeeds occur frequently. The number of sheets loaded
exceeds the capacity of the
printer.
Load paper only as high as the
upper limit markings on the side
fences of the paper tray, or the
markings on the paper guides of
the bypass tray.
Misfeeds occur frequently. The paper tray's side fences are
set too tightly.
Push the side fences lightly, and
then reset them.
Misfeeds occur frequently. The paper is damp. Use paper that has been stored
in the recommended temperature
and humidity conditions. For
details about the proper way to
store paper, see page 110
"Paper Precautions".
Misfeeds occur frequently. The paper is too thick or too
thin.
Use recommended paper. For
details about recommended
paper, see page 106 "Paper
Size Specifications" and
Other Printing Problems
midas-p3_com_operating_instructions_gb_00198763_eng.xml 407
Draft 2016/01/18

Problem Cause Solution
page 108 "Paper Type
Specifications".
Misfeeds occur frequently. The paper is wrinkled or has
been folded/creased.
• Use recommended paper.
For details about
recommended paper, see
page 106 "Paper Size
Specifications" and
page 108 "Paper Type
Specifications".
• Use paper that has been
stored in the recommended
temperature and humidity
conditions. For details about
the proper way to store
paper, see page 110
"Paper Precautions".
Misfeeds occur frequently. Paper edges are burred when
cut in the manufacturing
process.
• Remove the burrs, for
example, with a ruler.
• Load paper upside down.
• Use clean cut paper with no
burrs.
Misfeeds occur frequently. Printed paper is being used. Do not load sheets that have
already been copied or printed
by another printer.
Misfeeds occur frequently. Sheets are sticking together. Fan the sheets thoroughly before
loading them. Alternatively, feed
the sheets into the printer one at
a time.
Sheets are feeding in together,
resulting in jams.
Sheets are sticking together. Fan the sheets thoroughly before
loading them. Alternatively, feed
the sheets into the printer one at
a time.
Printed paper becomes
creased.
The paper is damp. Use paper that has been stored
in the recommended temperature
and humidity conditions. For
details about the proper way to
6. Troubleshooting
408 midas-p3_com_operating_instructions_gb_00198763_eng.xml
Draft 2016/01/18

Problem Cause Solution
store paper, see page 110
"Paper Precautions".
Printed paper becomes
creased.
The paper is too thin. Use recommended paper. For
details about recommended
paper, see page 106 "Paper
Size Specifications" and
page 108 "Paper Type
Specifications".
Edges of sheets are creased. The paper is damp. Use paper that has been stored
in the recommended temperature
and humidity conditions. For
details about the proper way to
store paper, see page 110
"Paper Precautions".
Edges of sheets are creased. You are using non-
recommended paper.
Use recommended paper. For
details about recommended
paper, see page 106 "Paper
Size Specifications" and
page 108 "Paper Type
Specifications".
Duplex printing is
malfunctioning.
You have selected a paper tray
that is not set for duplex print.
Change the setting to enable
duplex printing for the paper
tray.
Duplex printing is
malfunctioning.
You have selected a paper type
that cannot be used for duplex
printing.
In [Tray Paper Settings], select a
paper type that can be used for
duplex printing. For details about
the paper types that can be
used, see page 138 "Printing on
Both Sides of a Page".
The image on the back side of
duplex printing has mottled
blank patches or is smudged.
Missing patches and smudges
are caused by moisture leaking
from the paper.
• Do not install the printer in
areas that are susceptible to
low temperature.
• Use paper that has been
stored in the recommended
temperature and humidity
conditions. For details about
the proper way to store
Other Printing Problems
midas-p3_com_operating_instructions_gb_00198763_eng.xml 409
Draft 2016/01/18
Problem Cause Solution
paper, see page 110
"Paper Precautions".
Additional Troubleshooting
Problem Causes Solutions
The output sheet falls from the
output tray.
Blocking occurs (the output
sheets on the output tray stick
together).
Depending on the size, type, or
printing conditions of the prints,
the output sheets may become
badly curled.
• Pull out the stop fence of the
output tray before printing.
• Turn over the stack of paper
in the tray.
• Remove all output sheets.
It takes a long time to complete
a print job.
Photographs and other data
intensive pages take a long
time for the printer to process,
so simply wait when printing
such data.
If the Data In indicator is
flashing, data has been received
by the printer. Wait for a
moment.
Changing the following settings
with the printer driver may help
speed up printing:
• Select [Speed] in "Print
Priority" list.
• Select a lower resolution.
For details about how to change
the settings, see the printer driver
Help.
Images are printed in the
wrong orientation.
The feed orientation you
selected and the feed
orientation selected in the
printer driver's option setup
might not be the same.
Set the printer's feed orientation
and the printer driver's feed
orientation accordingly. For
details about settings for printer
driver, see the printer driver
Help.
Optional components
connected to the printer are not
recognized.
Bidirectional communication is
not working.
Set up optional devices on the
properties of the printer. For
details about how to set up
optional devices, see the printer
driver Help.
6. Troubleshooting
410 midas-p3_com_operating_instructions_gb_00198763_eng.xml
Draft 2016/01/18
Problem Causes Solutions
Combined printing, booklet
printing, or Auto Reduce/
Enlarge printing does not come
out as expected.
The application or printer driver
settings are not configured
correctly.
Make sure the application's
paper size and orientation
settings match those of the printer
driver. If a different paper size
and orientation are set, select the
same size and orientation.
Some types of data, such as
graphics data or data from
certain applications, do not
print.
The printer driver settings are
not configured correctly.
PCL 5e/5c
On the printer driver's [Print
Quality] tab, select [600
dpi] in the "Resolution"
area.
PCL 6
• On the printer driver's
[Detailed Settings] tab,
click [Print Quality] in
"Menu:", and then
select [Quality] in the
"Print Priority:" list.
• On the printer driver's
[Detailed Settings] tab,
click [Print Quality] in
"Menu:", and then
select [Raster] in the
"Vector/Raster:" list.
PostScript 3
On the printer driver's
[Detailed Settings] tab, click
[Print Quality] in "Menu:",
and then select
[Photographic] in the
"Dithering:" list.
For details about the printer
driver settings, see the printer
driver Help.
Some characters are not
printed or appear strange.
The printer driver settings are
not configured correctly.
PCL 5e/5c
On the printer driver's [Print
Quality] tab, select [600
Other Printing Problems
midas-p3_com_operating_instructions_gb_00198763_eng.xml 411
Draft 2016/01/18

Problem Causes Solutions
dpi] in the "Resolution"
area.
PCL 6
• On the printer driver's
[Detailed Settings] tab,
click [Print Quality] in
"Menu:", and then
select [Quality] in the
"Print Priority:" list.
• On the printer driver's
[Detailed Settings] tab,
click [Print Quality] in
"Menu:", and then
select [Raster] in the
"Vector/Raster:" list.
PostScript 3
On the printer driver's
[Detailed Settings] tab, click
[Print Quality] in "Menu:",
and then select [Text] in the
"Dithering:" list.
For details about the printer
driver settings, see the printer
driver Help.
Print speed or application
relinquishing speed is slow.
The printer driver settings are
not configured correctly.
PCL 6
On the printer driver's
[Detailed Settings] tab, click
[Print Quality] in "Menu:",
and then select [Speed] in
the "Print Priority:" list.
For details about the printer
driver settings, see the printer
driver Help.
Quit any other applications.
Print ends mid-job. An error might have occurred. Check the printer's display panel
to see if an error has occurred.
6. Troubleshooting
412 midas-p3_com_operating_instructions_gb_00198763_eng.xml
Draft 2016/01/18
Problem Causes Solutions
A print instruction was issued
from the computer, but printing
did not start.
User Authentication may have
been set.
For details about User
Authentication, see Security
Guide.
Color originals are printed in
black and white.
No color print settings are
configured on the printer driver.
Change the "Color/ Black and
White:" setting on the printer
driver. For details about how to
change the "Color/ Black and
White:" setting, see the printer
driver Help.
PDF files do not print out/
cannot perform PDF direct print.
PDF files are password-
protected.
To print password-protected PDF
files, enter the password in [PDF
Menu].
PDF files do not print out/
cannot perform PDF direct print.
PDF files cannot be printed if
they are print-disabled in PDF
file security setting.
Change the PDF file security
setting.
PDF direct print produces
strange or malformed
characters.
Fonts were not embedded. Embed fonts in the PDF file you
want to print, and then print.
"Resetting job..." appears and
printing is suspended.
Memory is insufficient. In [System], select [Memory
Usage] to [Font Priority].
Printing did not start even
though the specified print time
has already passed.
[Jobs Not Printed As Machn.
Was Off] was set to [Do not
Print] in [Printer Features], but at
the specified printing time, the
main power switch was turned
off or the printer was in Low
Power Mode.
Set [Jobs Not Printed As Machn.
Was Off] to [Prt When Mach
On] in [Printer Features].
This function is available for SP
C342DN only.
Printing did not start even
though the specified print time
has already passed.
The time set on the printer or
computer is incorrect.
Set the correct time on the printer
or computer.
Printing via wireless LAN is
slow.
The number of jobs exceeds the
capacity of the printer.
Reduce the number of jobs.
Printing via wireless LAN is
slow.
• A communication error
might have occurred.
• Move the printer farther
away from the wireless LAN
device.
Other Printing Problems
midas-p3_com_operating_instructions_gb_00198763_eng.xml 413
Draft 2016/01/18
Problem Causes Solutions
• Interference from other
wireless LAN devices can
reduce the communication
speed
• If the printer is using a
wireless LAN, radio waves
may be interfering with the
wireless communication.
This may occur if there is a
microwave oven, cordless
telephone, industrial
printer, scientific
instrument, or medical
instrument using the same
frequency range near the
device.
• If there are active wireless
LAN devices nearby, move
the printer or disable those
devices.
• Turn off other printers or
instruments that use the
same frequency range, and
then try printing again. If
printing is successful, move
the devices to a location
where they do not interfere
with the printer.
The Printed Image is Different from the Image on the Computer
Problem Solutions
The printed image is different
from the image on the
computer's display.
When you use some functions, such as enlargement or reduction,
the layout of the image might be different from that displayed on
the computer display.
Images are cut off, or excess
pages are printed.
If you are using paper smaller than the paper size selected in the
application, use the same size paper with that selected in the
application. If you cannot load paper of the correct size, use the
reduction function to reduce the image, and then print.
For details, see the printer driver's Help.
PDF Direct Print is not executed
(PDF file is not printed).
You must install an optional hard disk or set the value of [RAM Disk]
in the System Menu to 2 MB or higher.
For details about [RAM Disk], see:
• page 234 "System (SP C340DN)" (for SP C340DN)
• page 314 "System" (for SP C342DN)
When printing a PDF using a password, set the password of the
PDF file using the [Change PDF Password] menu in [PDF Menu] or
6. Troubleshooting
414 midas-p3_com_operating_instructions_gb_00198763_eng.xml
Draft 2016/01/18

Problem Solutions
Web Image Monitor. For details about [Change PDF Password],
see:
• page 252 "PDF Menu (SP C340DN)" (for SP C340DN)
• page 325 "PDF Menu" (for SP C342DN)
For details about Web Image Monitor, see Web Image Monitor
Help.
• PDF files not allowed to be printed by the PDF file security
setting cannot be printed.
• Highly compressed PDFs cannot be printed using PDF Direct
Print. Open the relevant application and print the PDF file
using the printer driver. Set the file format to standard PDF.
As a result of printing using PDF
Direct Printing, characters are
missing or misshapen.
Before printing, embed the font in the PDF file to be printed.
The paper size appears on the
control panel and printing is not
performed with PDF Direct Print.
When PDF Direct Print is used, printout requires paper set within the
PDF file. When a message indicating a paper size appears, either
place the indicated size in the paper tray or perform Form Feed.
Also, if [Sub Paper Size] in the [System] menu is set to [Auto],
printing is performed assuming Letter size and A4 size to be the
same size. For example, when a PDF file set to A4 size paper is
printed using PDF Direct Print and Letter size paper is loaded in the
paper tray, or vice versa, the file will be printed out.
The color of the printout is
different from the color on the
computer's display.
• The colors created using color toner are different from the
ones displayed on the display.
• If you select [On] for [Economy Color:] on the [Print Quality]
menu in the printer driver's dialog box, the color gradation
may appear differently.
For details, see the printer driver's Help.
• Turn the printer off, and then turn it on again. If the colors are
different from what you expect, perform [Color Registration].
For details, see page 440 "Adjusting the Color Registration".
The color of the printout is
different from the color
specified.
If a specific color is missing turn the printer off, wait a few moments,
and then turn it on again. If this does not resolve the problem,
contact your sales or service representative.
Other Printing Problems
midas-p3_com_operating_instructions_gb_00198763_eng.xml 415
Draft 2016/01/18

Problem Solutions
The color changes significantly
when adjusted with the printer
driver.
Do not make extreme settings for the color balance on the [Print
Quality] menu under the [Detailed Settings] tab in the printer
driver's dialog box.
Note that the sample image displayed in the printer driver is used
only to show what processing will be performed, so it may not
match the print results.
For details, see the printer driver's Help.
Color documents are printed in
black and white.
• Color printing is not enabled for the printer.
For details, see the printer driver's Help.
• Some applications print color files in black and white.
Solid areas, lines, or text are
shiny or glossy when created as
a mixture of cyan, magenta,
yellow.
• Select [K (Black)] for [Gray Reproduction:] in the printer
driver's dialog box.
For details, see the printer driver's Help.
Black gradation is not natural. • Select [CMY + K] for [Gray Reproduction:] in the printer
driver's dialog box.
For details, see the printer driver's Help.
A color is missing or partially
blurred.
• Paper is damp. Use paper that has been stored properly.
For details, see page 110 "Paper Precautions".
• A print cartridge is almost empty. When the "Toner is almost
empty." message appears on the display panel. If the toner
indicator on the initial screen seems empty, replace the print
cartridge of the displayed color.
For details, see page 449 "Replacing the Print Cartridge".
• Condensation may have collected. If there were sudden
changes in temperature or humidity, restart the printer when it
is acclimatized.
6. Troubleshooting
416 midas-p3_com_operating_instructions_gb_00198763_eng.xml
Draft 2016/01/18
When Printer Is Not Functioning Properly
Problem Solutions
Paper is not fed from the
selected tray.
When you are using a Windows operating system, the printer
driver settings override those set using the control panel. Set the
input tray you want using the printer driver.
For details, see the printer driver's Help.
Prints do not stack properly. • Paper is damp. Use paper that has been stored properly. See
page 110 "Paper Precautions".
• If printed sheets come out curled, use the standard tray
extension. See page 14 "Guide to Components".
It takes too long to turn on the
printer.
If the printer is turned off while accessing the hard disk (for
example: during file deletion), the printer will require more time to
power-up the next time it is turned on. To avoid this time delay, do
not turn the printer off while it is in operation.
It takes too long to resume
printing.
• The data is so large or complex that it takes time to process it.
If Data In indicator is flashing, the data is being processed.
Wait until it resumes.
• The printer was in the Energy Saver mode or the Sleep mode.
To recover from these modes, the printer must warm up, and
this takes time until printing starts. For details, see page 74
"Saving Energy".
It takes too long to complete the
print job.
• Photographs and other data-intensive pages take a long time
for the printer to process, so wait when printing such data.
Changing the settings with printer driver may help to speed up
printing. For details, see the printer driver's Help.
• The data is so large or complex that it takes time for the printer
to process it. If Data In indicator is flashing, the data is being
processed. Wait until it resumes.
• If "Waiting for print data..." appears on the display, the printer
is now warming up. Wait for a while. The printer is adjusting
the color registration. Wait for a while.
Attached options are not
detected in the printer
properties.
The computer and printer are not in bidirectional communication.
You must configure attached options in the printer properties. For
details, see the printer driver's Help.
Other Printing Problems
midas-p3_com_operating_instructions_gb_00198763_eng.xml 417
Draft 2016/01/18
Problem Solutions
When printing combined prints
or bound prints.
Check that the paper size and direction set in the printer driver are
the same as those set in the application.
If the settings are not the same, change the settings of the printer
driver.
An empty tray is selected by
Auto Tray Select, and the
document is not printed due to
out of paper error.
If a paper tray is opened and closed while the printer is in Energy
Saver mode, the printer will initialize the tray upon recovery, but
the tray will not be selectable by Auto Tray Select.
To print from a paper tray that you opened and closed while the
printer was in Energy Saver mode, you must manually specify the
tray as the source paper tray before printing. When the printer
recovers from Energy Saver mode and completes initialization, it
will then print the document from the tray you have specified.
6. Troubleshooting
418 midas-p3_com_operating_instructions_gb_00198763_eng.xml
Draft 2016/01/18

When PictBridge Printing Does Not Work
Problem Causes Solutions
PictBridge is not available. There is a problem with the
USB connection or the
PictBridge settings.
Use the following procedure to check
the connection and settings:
1. Disconnect, and then reconnect
the USB cable.
2. Check that the PictBridge settings
are enabled.
3. Disconnect the USB cable, and
then turn off the printer. Turn the
printer back on. When the printer
has fully booted up, reconnect the
USB cable.
When two or more digital
cameras are connected, the
second and subsequent
cameras are not
recognized.
You have connected
multiple digital cameras.
Connect only one digital camera. Do
not connect multiple cameras.
Printing is disabled. The number of originals
exceeds the maximum
number of pages that can
be printed at a time.
The maximum specifiable print quantity
at a time is 999. Respecify the quantity
to 999 or less, and then retry printing.
Printing is disabled. There is no paper of the
specified size remaining.
There is no paper of the specified size
remaining.
If you have to use paper that is not of
the specified size, perform Form Feed.
To cancel printing, perform Job Cancel.
Printing is disabled. The paper size setting for
this tray cannot be printed
on the printer.
Select the paper size setting that can be
printed on the printer.
When PictBridge Printing Does Not Work
midas-p3_com_operating_instructions_gb_00198769_eng.xml 419
Draft 2016/01/18
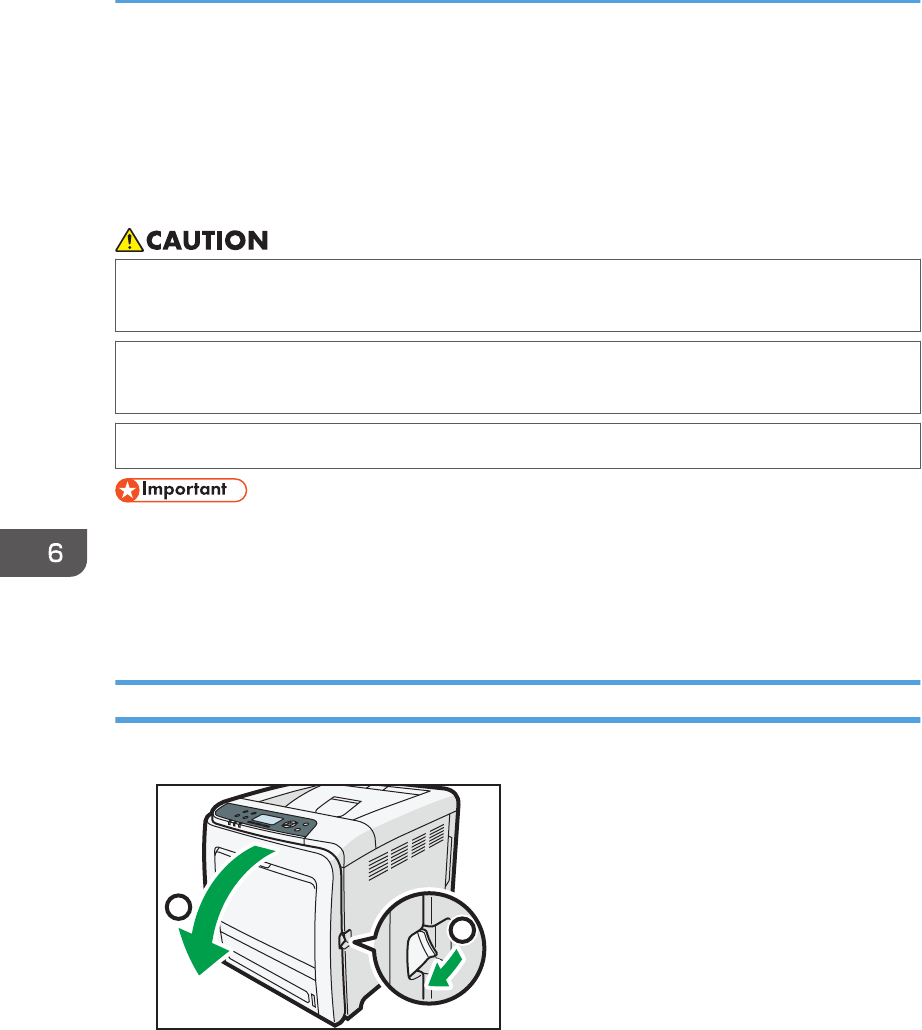
Removing Jammed Paper
An error message appears if a paper misfeed occurs. The error message indicates where the misfeed
occurs.
Check the location and remove the paper.
• The inside of the machine could be very hot. Do not touch the parts with a label indicating the
"hot surface." Otherwise, an injury might occur.
• Some of this machine's internal components get very hot. For this reason, take care when
removing misfed paper. Not doing so could result in burns.
• When removing jammed paper, make sure not to trap or injure your fingers.
• To prevent misfeeds, do not leave any torn scraps of paper inside the printer.
• Contact your service representative if misfeeds occur frequently.
• If the error message remains displayed even after you remove misfed paper, open and close the
front cover.
Paper Misfeed Message (A)
1. Pull the front cover open lever, and then open the front cover with both hands carefully.
1
2
DPP058
6. Troubleshooting
420 midas-p3_com_operating_instructions_gb_00198770_eng.xml
Draft 2016/01/18
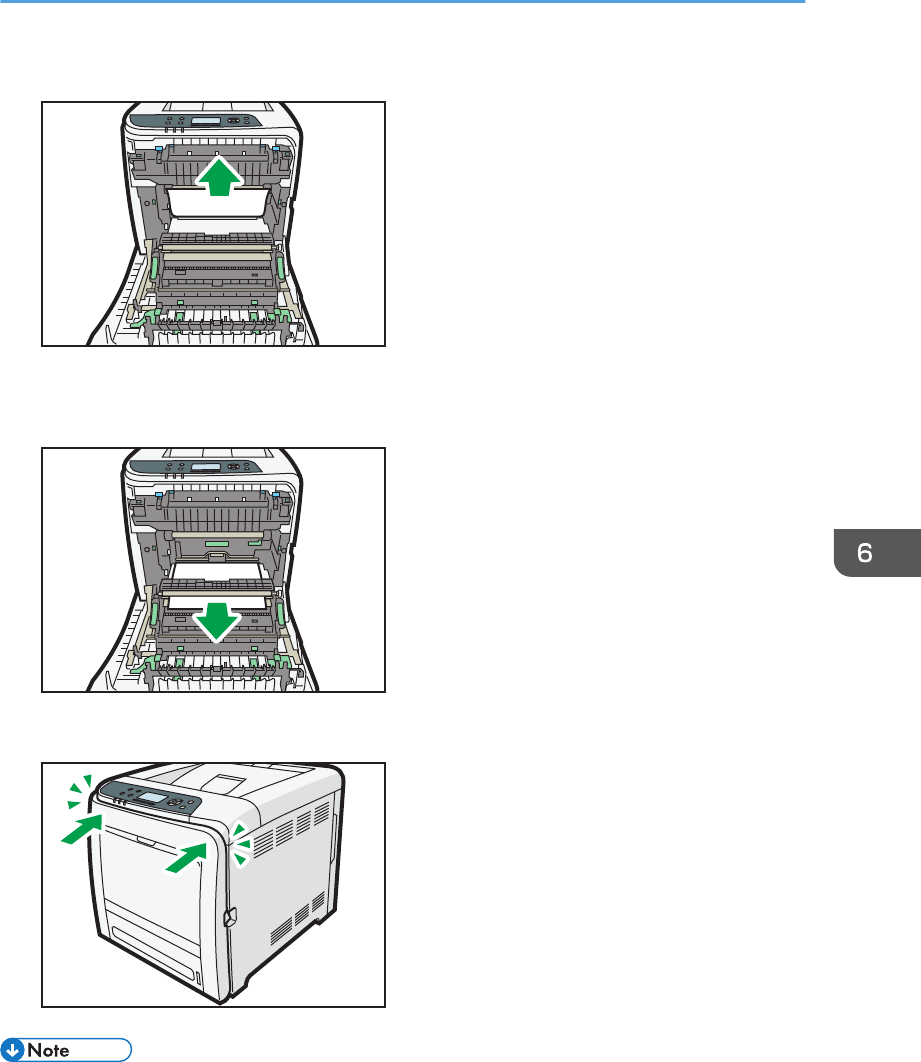
2. Carefully pull the jammed paper upward and out.
DPP059
If paper has jammed inside the paper transfer unit, holding both sides of the paper, pull the paper
carefully forward and out.
DPP060
3. Close the front cover with both hands carefully.
DPP061
• Do not pull out the paper tray (Tray 1).
• If paper is jammed in Tray 2, but it is difficult to locate, pull out Tray 2 to remove it. After removing
the paper, carefully push Tray 2 all the way back inside the printer.
• When closing the front cover, push the upper side of the cover firmly. After closing the cover, check
that the error is cleared.
Removing Jammed Paper
midas-p3_com_operating_instructions_gb_00198770_eng.xml 421
Draft 2016/01/18
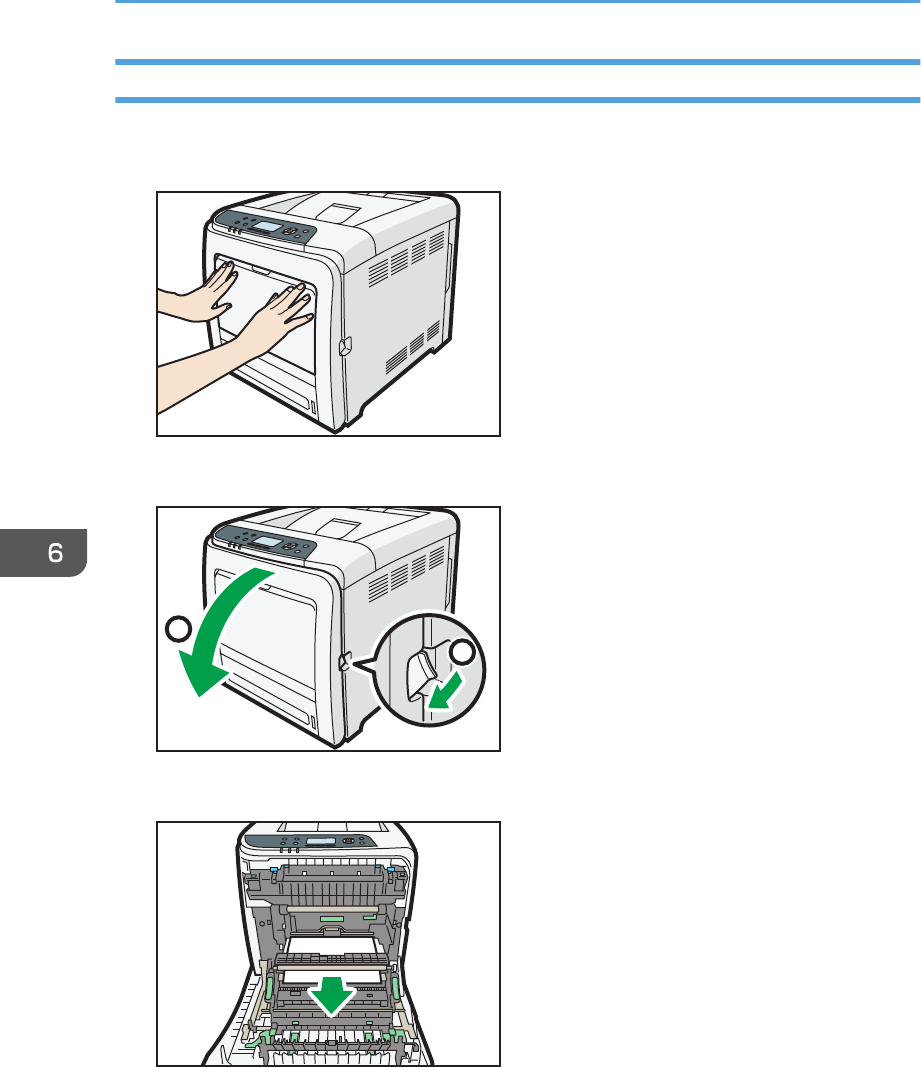
Misfeed Bypass Tray
1. Remove paper loaded in the bypass tray, and then close the bypass tray with both
hands.
DPP062
2. Pull Front Cover Open Lever, and then open the front cover with both hands carefully.
1
2
DPP058
3. Pull out the jammed paper carefully.
DPP060
6. Troubleshooting
422 midas-p3_com_operating_instructions_gb_00198770_eng.xml
Draft 2016/01/18
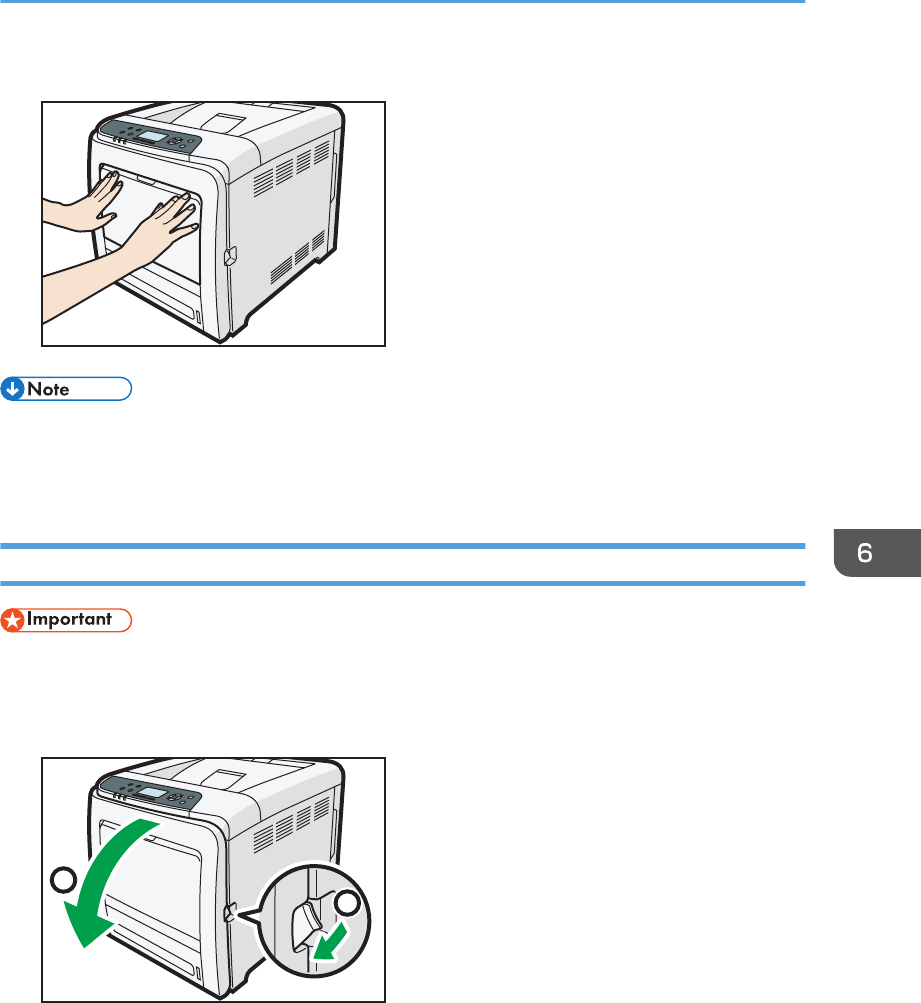
4. Close the front cover with both hands carefully.
DPP062
• Be sure the Tray 1 is inserted before you open the front cover.
• When closing the front cover, push the upper side of the cover firmly. After closing the cover, check
that the error is cleared.
Paper Misfeed Message (B)
• The inside of this printer becomes very hot. Before removing paper around the fusing unit, wait until
the temperature of the covers inside the fusing unit and paper transfer unit cools down.
1. Pull the front cover open lever, and then open the front cover with both hands carefully.
1
2
DPP058
Removing Jammed Paper
midas-p3_com_operating_instructions_gb_00198770_eng.xml 423
Draft 2016/01/18
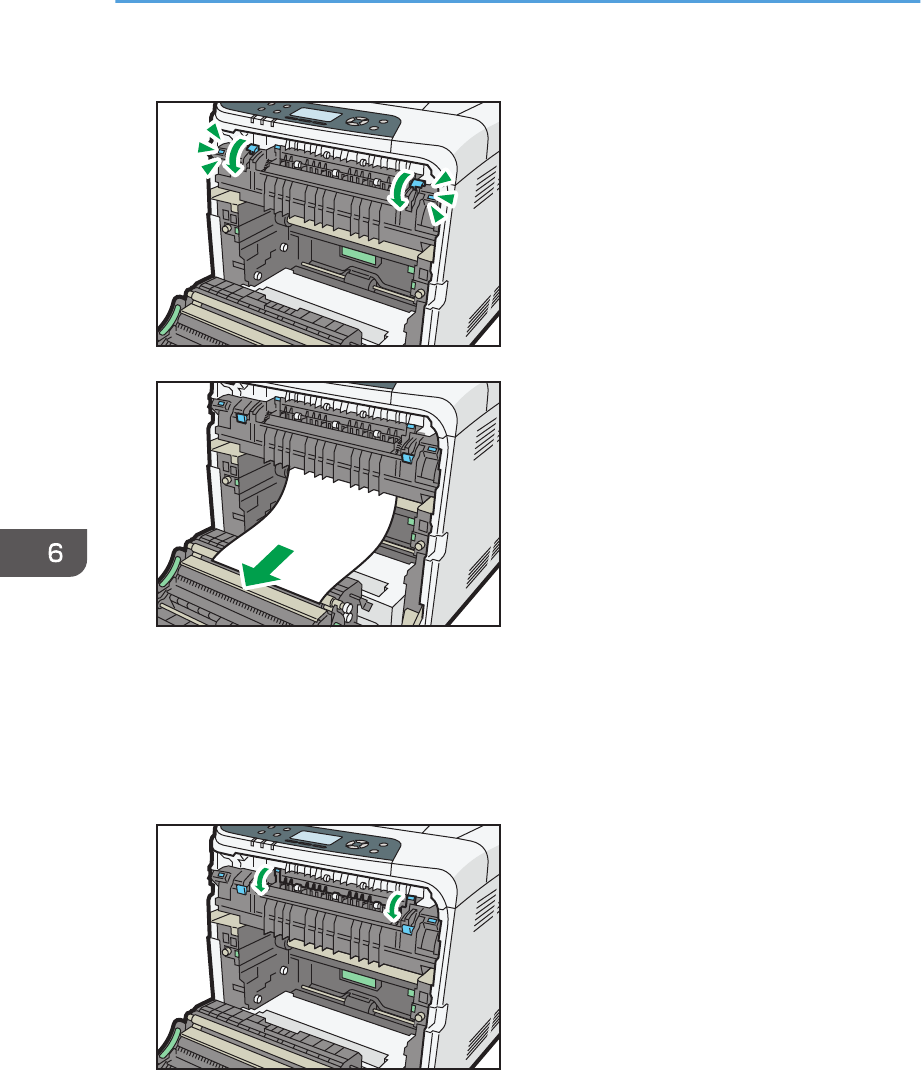
2. Lower the blue fusing unit levers, and pull out the jammed paper carefully.
DPP063
DPP064
Pull the paper downward to remove it. Do not pull it upward.
If the jammed paper is visible in the output tray, lower the blue fusing unit levers, and then pull the
jammed paper out of the tray.
If you cannot find the jammed paper, open the guide by lowering the guide's blue levers. Check
inside the guide for the jammed paper.
DPP065
6. Troubleshooting
424 midas-p3_com_operating_instructions_gb_00198770_eng.xml
Draft 2016/01/18
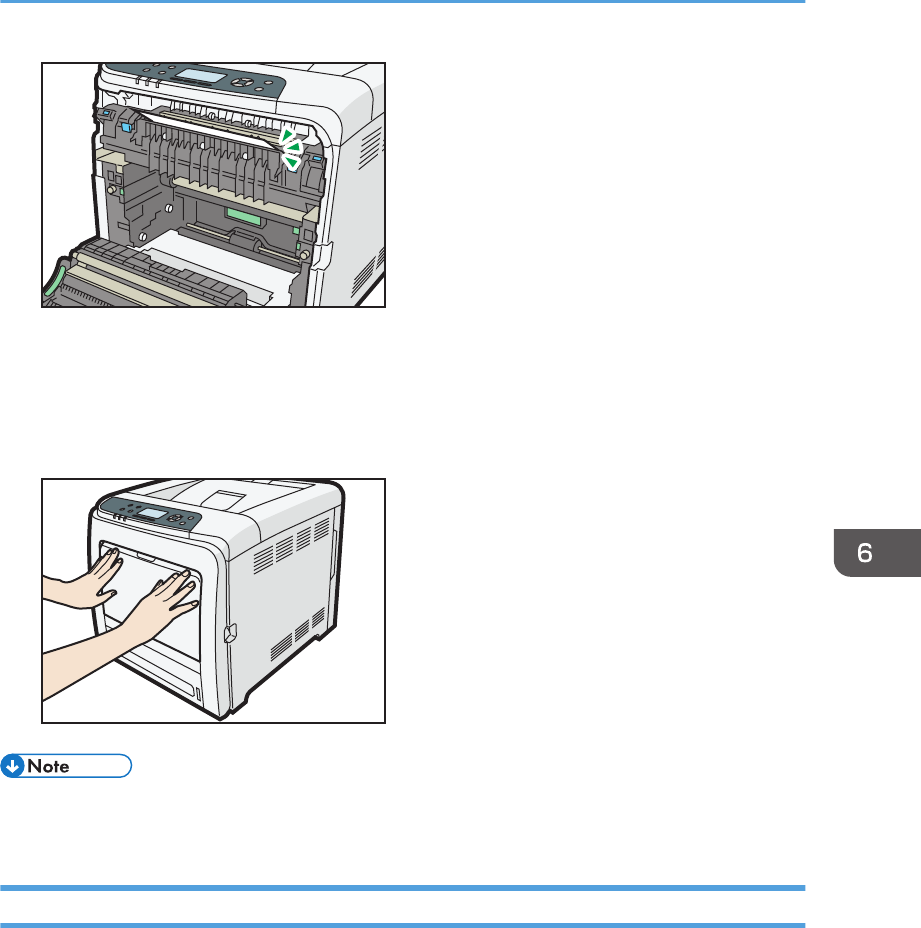
DPP066
Be sure to fully close the guide after you have checked inside it for jammed paper.
Attempting to close the front cover when the guide is still open will damage one or both of these
components.
3. Close the front cover with both hands carefully.
DPP062
• When closing the front cover, push the upper side of the cover firmly. After closing the cover, check
that the error has cleared.
Paper Misfeed Message (Y)
zzz
Removing Jammed Paper
midas-p3_com_operating_instructions_gb_00198770_eng.xml 425
Draft 2016/01/18
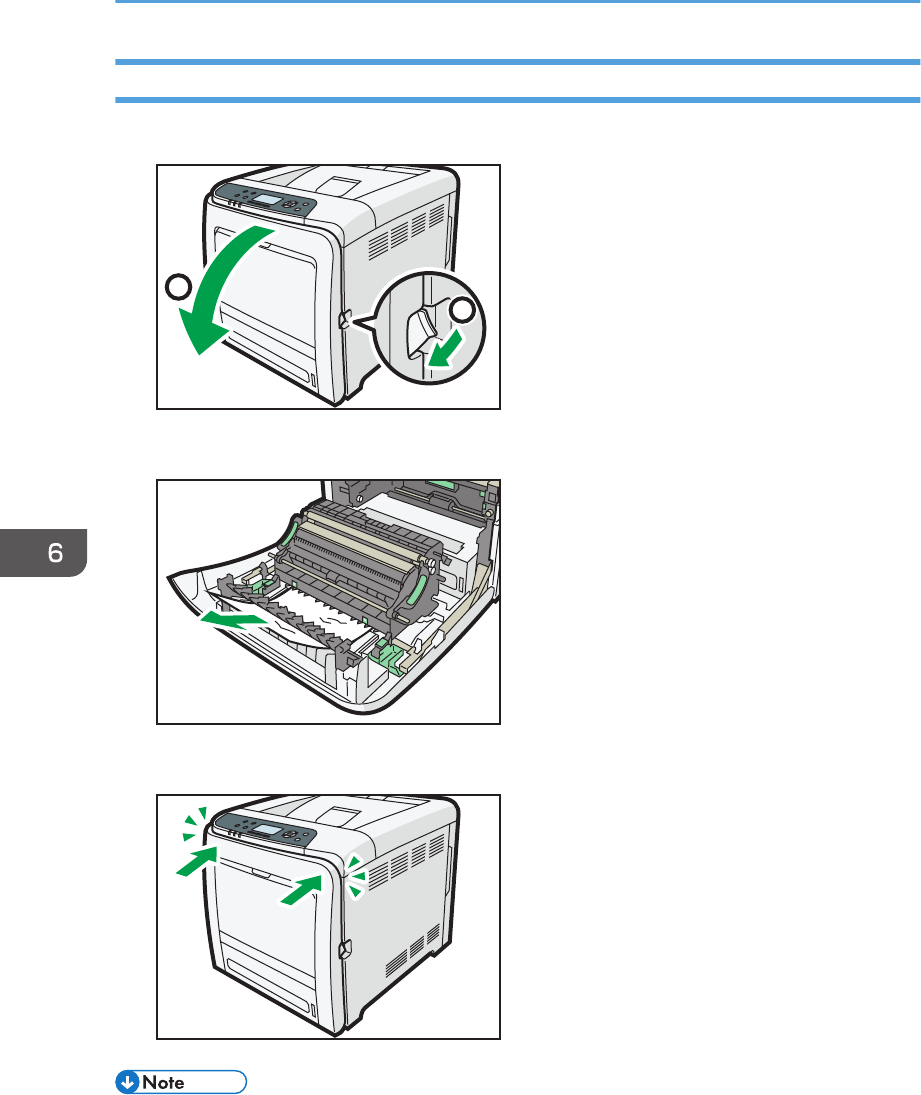
Paper Misfeed Message (Z)
1. Pull the front cover open lever, and then open the front cover with both hands carefully.
1
2
DPP058
2. Carefully remove jammed paper under the paper transfer unit.
DPP067
3. Close the front cover with both hands carefully.
DPP061
• When closing the front cover, push the upper side of the cover firmly. After closing the cover, check
that the error has cleared.
6. Troubleshooting
426 midas-p3_com_operating_instructions_gb_00198770_eng.xml
Draft 2016/01/18
7. Maintenance and Specifications
This chapter explains how to replace supplies and clean this printer. It also describes the specifications
of this printer and its options.
General Requirements
This section describes notes, cautions, and warnings user must check while using this printer.
Precautions
• Do not place vases, plant pots, cups, toiletries, medicines, small metal objects, or containers
holding water or any other liquids, on or close to this machine. Fire or electric shock could result
from spillage or if such objects or substances fall inside this machine.
• Do not use flammable sprays or solvents in the vicinity of this machine. Also, avoid placing these
items in the vicinity of this machine. Doing so could result in fire or electric shock.
• Do not obstruct the machine's vents. Doing so risks fire caused by overheated internal
components.
• Keep the machine away from humidity and dust. Otherwise a fire or an electric shock might
occur.
• Do not place the machine on an unstable or tilted surface. If it topples over, an injury might
occur.
• Make sure the room where you are using the machine is well ventilated and spacious. Good
ventilation is especially important when the machine is used heavily.
• The area around the ventilation holes might be warm. This is caused by exhaust air and is not a
malfunction.
• If the printer is moved from a cold to a warm place, condensation may be formed inside. After
moving the printer, do not use it for at least two hours, so that it can be adapted to its new
environment.
• Do not turn the printer off while it is in operation.
• Do not open the printer covers while the printer is working. Otherwise, a misfeed might occur.
midas-p3_com_operating_instructions_gb_00198780_eng.xml 427
Draft 2016/01/18
• Do not move or tilt the printer when the power is on.
• Do not subject the printer to shock or impact while it is operating.
• Depending on the ambient temperature and humidity, steam may come from the ventilation holes
behind the control panel during printing. This is water vapor from the paper, not a sign of
malfunction.
Ventilation
When you use this machine in a confined space without good ventilation for a long time or print
large quantities, you might detect an odd smell.
This might cause the output paper to also have an odd smell.
When you detect an odd smell, regularly ventilate in order to keep the workplace comfortable.
• Set up the machine so that it does not directly ventilate towards people.
• Ventilation should be more than 30 m3/hr/person.
New machine smell
When a machine is new, it might have a unique smell. This smell will subside in about one week.
When you detect an odd smell, sufficiently ventilate and circulate the air in the room.
Saving Printouts
• Prints will fade if exposed to strong light or dampness and humidity for lengthy periods. Preserve
the quality of your prints by storing them in a binder in a dark, dry place.
• Toner may melt if a print and a half-dried print are put on top of each other.
• Toner may also melt if solvent type adhesive agents are used for pasting prints.
• If prints are folded, toner in the folds will come off.
• Toner may melt if it is placed on mats made of chlorinated plastic in locations of high temperature
for long periods of time.
• Toner may melt if prints are placed in places of extremely high temperatures, such as near heaters.
Backing Up Hard Disk Data
This function is available for SP C342DN only.
You can store Address Book information on the printer's hard disk. To back up the printer's Address
Book, use SmartDeviceMonitor for Admin/Device Manager NX Lite or Web Image Monitor.
For details, see the manual for SmartDeviceMonitor for Admin/Device Manager NX Lite. For details
about Web Image Monitor, see Web Image Monitor Help.
7. Maintenance and Specifications
428 midas-p3_com_operating_instructions_gb_00198780_eng.xml
Draft 2016/01/18

• Avoid strong impact to the printer. Doing so may damage the hard disk.
• When turning off the power or disconnecting the power cord, follow the proper procedures. Not
doing so may damage the hard disk. For details about how to turn off the power, see page 73
"Turning On/Off the Power".
• If the printer's hard disk breaks data including Address Book information might be lost. For this
reason, do not save important data on the printer's hard disk without backing it up or downloading
it. We also recommend backing up fonts, forms, and any other downloaded resources that are
stored on the hard disk. The manufacturer is not liable for damages resulting from data loss.
General Requirements
midas-p3_com_operating_instructions_gb_00198780_eng.xml 429
Draft 2016/01/18
Moving the Printer
This section describes precautions to move the printer.
Choose your printer's location carefully. Environmental conditions greatly affect the printer's
performance.
• It is dangerous to handle the power cord plug with wet hands. Doing so could result in electric
shock.
• Unplug the power cord from the wall outlet before you move the machine. While moving the
machine, take care that the power cord is not damaged under the machine. Failing to take these
precautions could result in fire or electric shock.
• When disconnecting the power cord from the wall outlet, always pull the plug, not the cord.
Pulling the cord can damage the power cord. Use of damaged power cords could result in fire
or electric shock.
• The printer weighs approximately 29/30 kg (63.9/66.1 lb.). When moving the printer, use
the inset grips on both sides, and lift slowly in pairs. The printer will break or cause injury if
dropped.
• Be careful when moving the printer. Take the following precautions:
• Turn off the main power. For details about how to turn the main power off, see page 73
"Turning On/Off the Power".
• Close all covers and trays, including the front cover and bypass tray.
• If optional paper feed units are attached, remove them from the printer and move them
separately.
• Be sure to place the printer on a smooth and stable place.
• Keep the printer level and carry it carefully, taking care not to jolt or tip it. Rough handling
may cause a malfunction or damage the hard disk or memory, resulting in loss of stored files.
• Protect the printer from strong shocks. Impact can damage the hard disk and cause stored files
to be lost. As a precautionary measure, files should be copied to another computer.
1. Be sure to check the following:
• The main power switch is turned off.
• The power cord is unplugged from the wall outlet.
• The interface cable is unplugged from the printer.
7. Maintenance and Specifications
430 midas-p3_com_operating_instructions_gb_00198784_eng.xml
Draft 2016/01/18
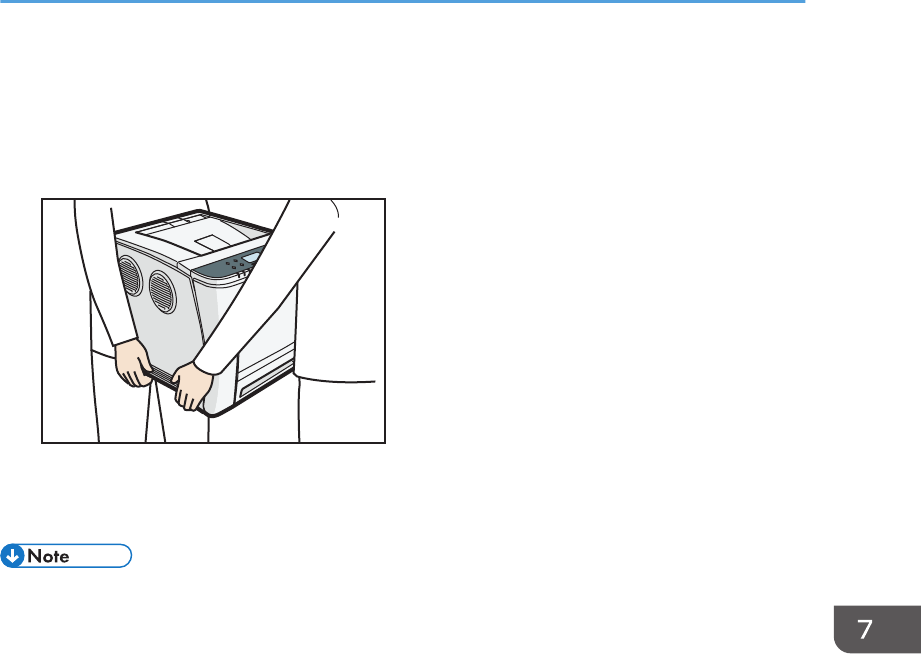
2. If any external options are attached, remove them.
See the relevant sections in this manual and refer to the steps to remove options.
3. Lift the printer by using the inset grips on both side of the printer, and then move it
horizontally to the place where you want to install it.
DFP068
4. If you removed options, reattach them.
For details, see the relevant sections in this manual.
• Be sure to move the printer horizontally. To prevent toner from scattering, move the printer slowly.
Moving the Printer
midas-p3_com_operating_instructions_gb_00198784_eng.xml 431
Draft 2016/01/18
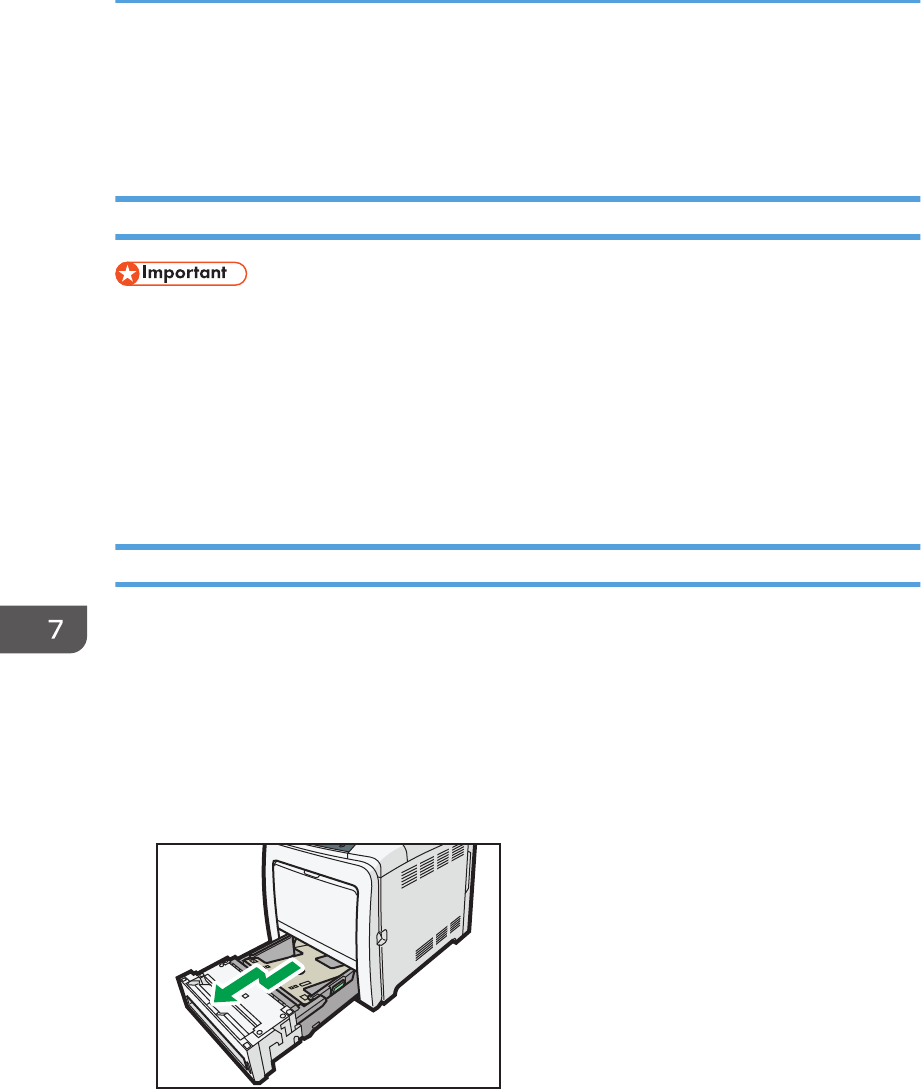
Cleaning the Printer
This section explains how to clean the printer.
Precautions When Cleaning the Printer
• Do not use chemical cleaners or organic solvents, such as thinner or benzine. If such substances get
inside the printer or melt plastic parts, a failure might occur.
• Do not clean parts other than those explicitly specified in this manual. Other parts should only be
cleaned by your service representative.
When cleaning the printer, wipe the printer with a soft, dry cloth. If this does not remove the dirt, wipe
the printer with a damp and tightly wrung cloth. If a damp cloth still does not remove the dirt, try using a
mild detergent. Wipe the printer with a dry cloth to remove the moisture after using a damp cloth.
Cleaning the Paper Tray, Friction Pad, and the Paper Feed Roller
If the paper tray, friction pad, or paper feed roller is dirty, a multi-feed or misfeed might occur. Clean
these parts by following the cleaning procedure for Tray 1 described below. The cleaning procedure is
the same for the optional paper feed units.
1. Turn off the printer and unplug the power cord.
2. Pull out the plug from the socket. Remove all the cables from the printer.
3. Pull the tray carefully until it stops, lift the front side of the tray, and then pull it out of the
printer.
DPP042
Place the tray on a flat surface.
4. If there is paper in the tray, remove the paper.
7. Maintenance and Specifications
432 midas-p3_com_operating_instructions_gb_00198785_eng.xml
Draft 2016/01/18
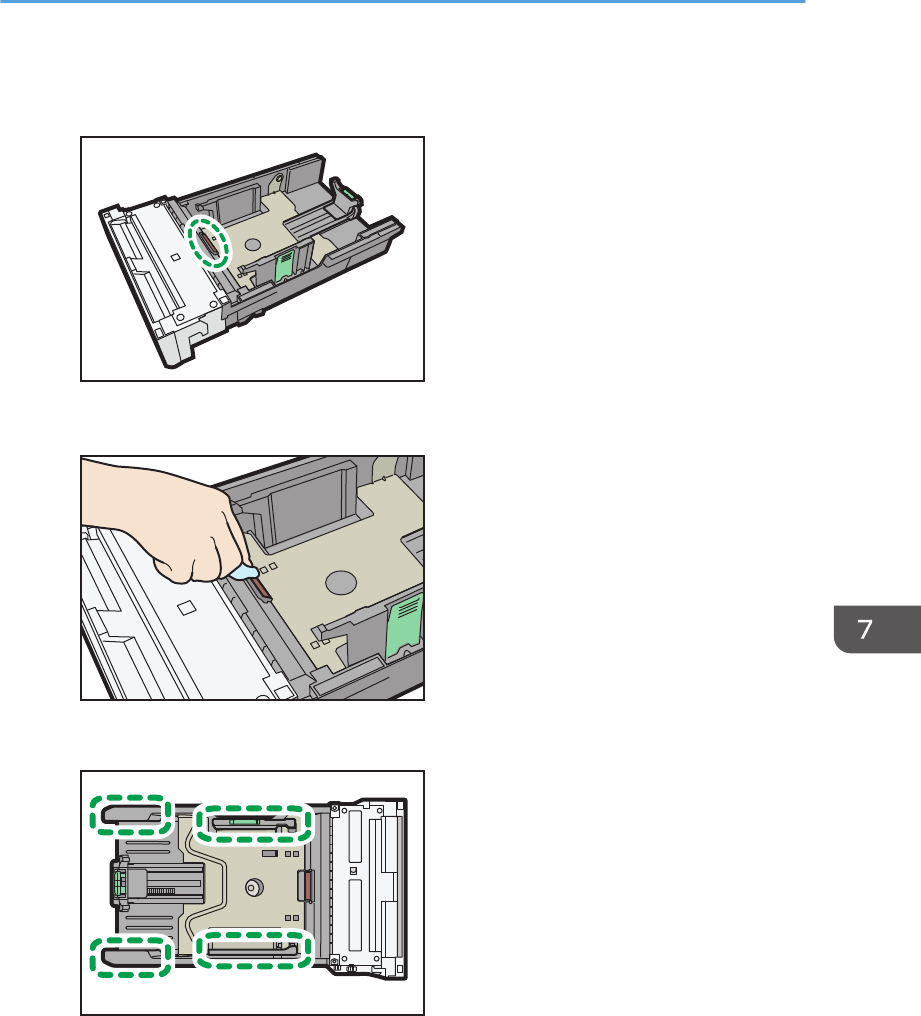
5. Wipe the areas indicated in the illustrations below using a dry or damp cloth.
• Friction pad
DPP069
Use only a dry cloth to clean the friction pad.
DPP070
• Paper tray
DPP071
• Paper feed roller
Wipe around the paper feed roller by turning it with a damp cloth. Then, wipe it with a dry
cloth to remove any water.
Cleaning the Printer
midas-p3_com_operating_instructions_gb_00198785_eng.xml 433
Draft 2016/01/18
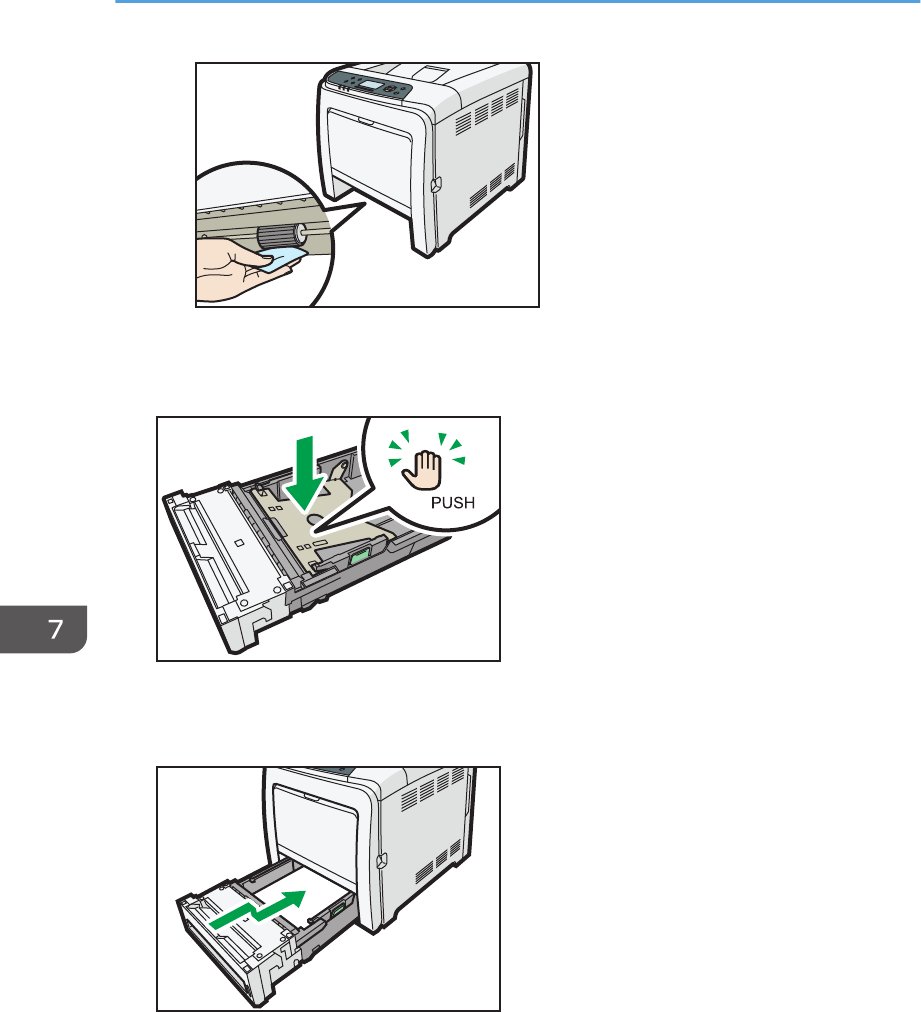
DPP072
After that, wipe it with a dry cloth to remove the water.
6. Push the metal plate down until it clicks into place to lock.
DPP043
7. Load the removed paper stack in the tray.
8. Lift the front side of the tray, and then slide it into the printer carefully until it stops.
DPP047
Do not slide the paper tray in forcefully. Otherwise, the front and side guides might move.
9. Firmly insert the plug of the power cord into the wall socket. Connect all the interface
cables that were removed.
10. Turn the main power switch on.
7. Maintenance and Specifications
434 midas-p3_com_operating_instructions_gb_00198785_eng.xml
Draft 2016/01/18
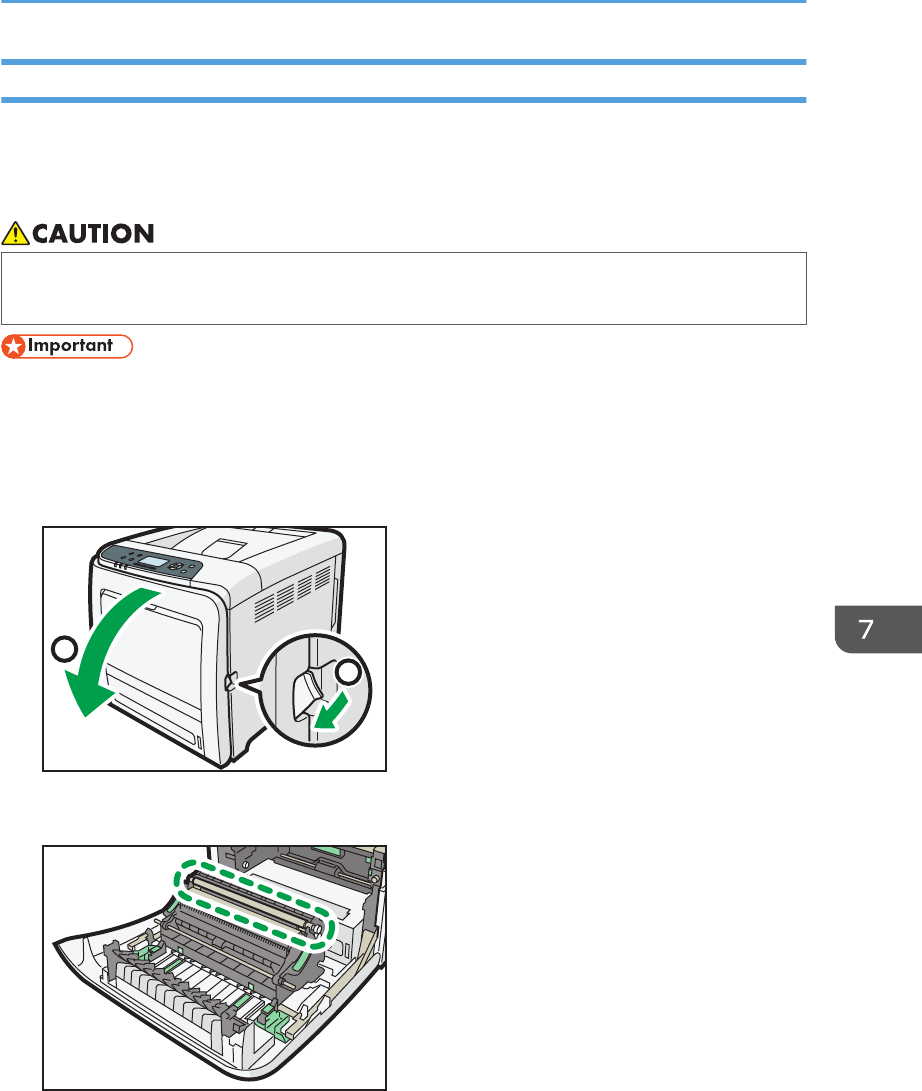
Cleaning the Registration Roller
When you use paper other than the standard types, specks of paper may stick on the registration roller,
causing problems. Clean the registration roller if white dots appear on prints.
Clean the registration roller if printed paper becomes smeared after a paper jam is cleared.
• The inside of the machine could be very hot. Do not touch the parts with a label indicating the
"hot surface". Otherwise, an injury might occur.
• Do not use chemical cleaners or organic solvents such as thinners or benzine.
1. Turn off the printer and unplug the power cord.
2. Pull out the plug from the socket. Remove all the cables from the printer.
3. Pull the front cover open lever, and then open the front cover with both hands carefully.
1
2
DPP058
The registration roller is set in the position shown by the illustration.
DPP073
Do not touch the registration roller.
Cleaning the Printer
midas-p3_com_operating_instructions_gb_00198785_eng.xml 435
Draft 2016/01/18
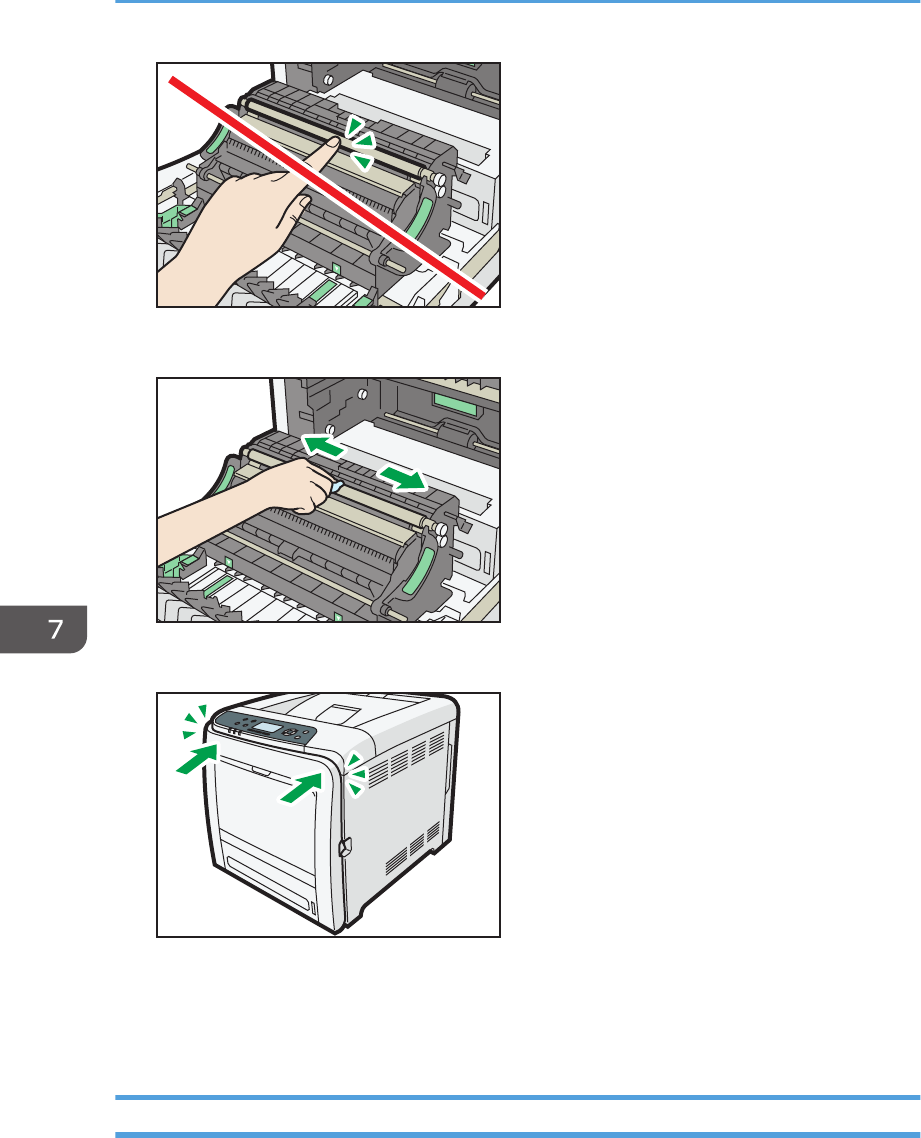
DPP074
4. Using a cloth, wipe the rubber registration roller.
DPP075
5. Close the front cover with both hands carefully.
DPP061
6. Firmly insert the plug of the power cord into the wall socket. Connect all the interface
cables that were removed.
7. Turn on the main power switch.
Cleaning the Toner Density Sensor
1. Turn off the printer and unplug the power cord.
7. Maintenance and Specifications
436 midas-p3_com_operating_instructions_gb_00198785_eng.xml
Draft 2016/01/18
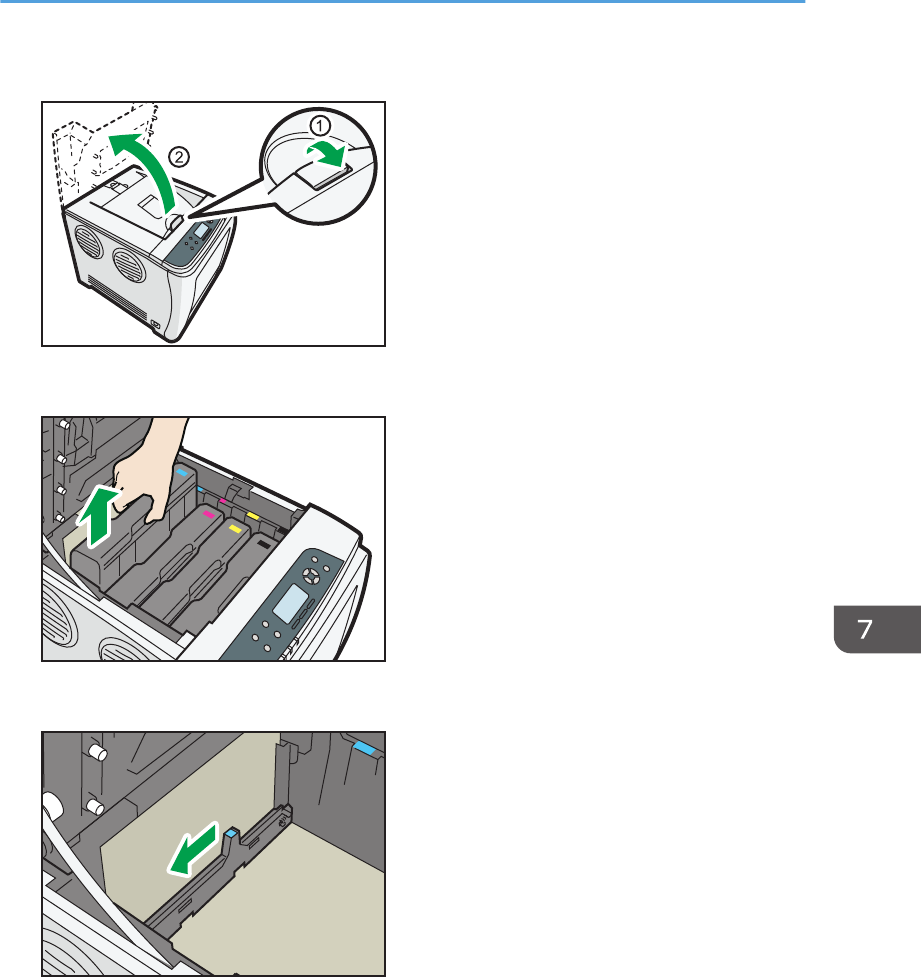
2. Pull the top cover open lever upward to open the top cover.
DFP009
3. Lift out the cyan print cartridge.
DFP076
4. Slide the toner density sensor lever once to the left.
DFP077
Slide the lever only once.
Cleaning the Printer
midas-p3_com_operating_instructions_gb_00198785_eng.xml 437
Draft 2016/01/18
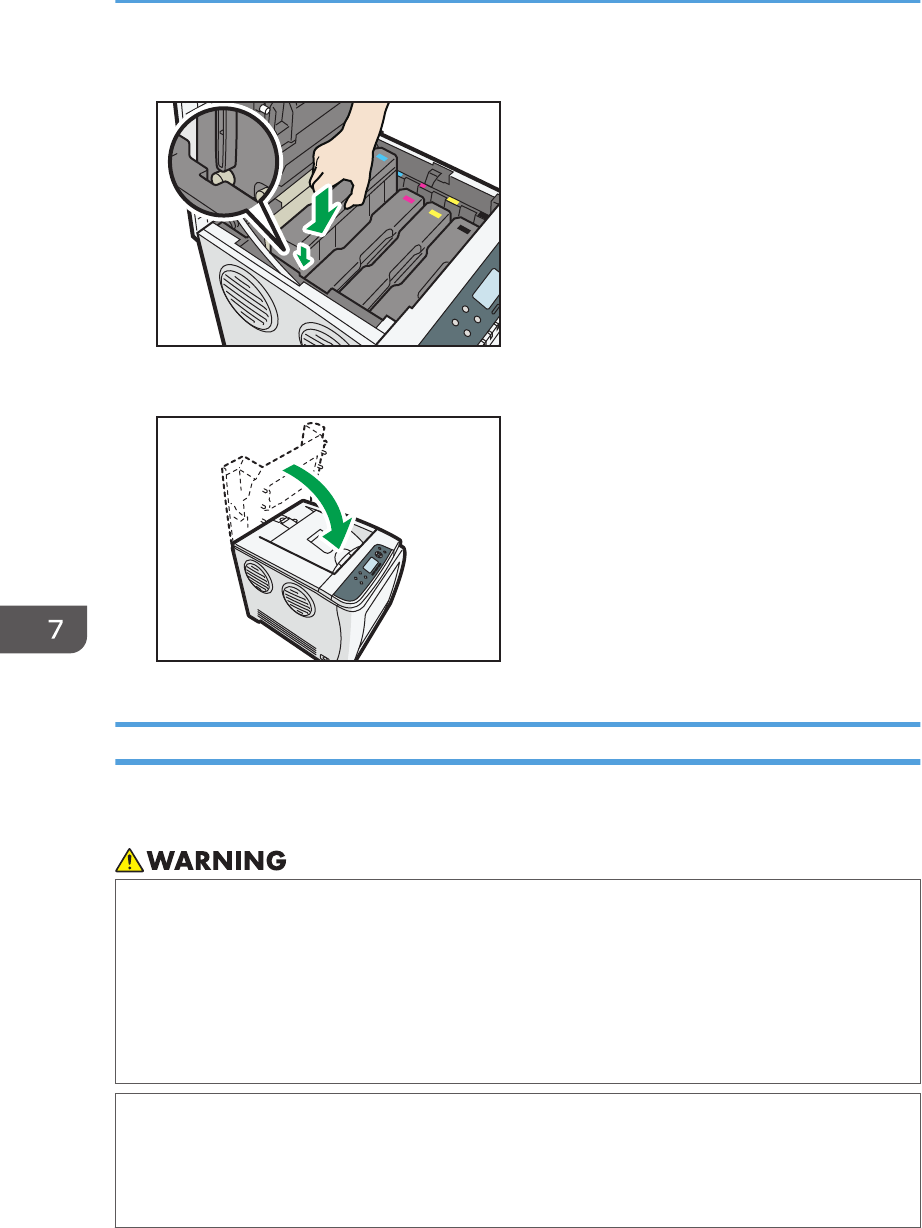
5. To reattach the cyan print cartridge removed in step 2. Push it all the way in carefully.
DFP078
6. Close the top cover with both hands carefully. Be careful not to trap your fingers.
DFP015
Cleaning the Power Cord Plug
To clean the power cord plug, wipe the plug with a soft, dry cloth with the power cord connected to the
printer.
• Be sure to disconnect the plug from the wall outlet at least once a year and check for the
following:
• There are burn marks on the plug.
• The prongs on the plug are deformed.
• If any of the above conditions exist, do not use the plug and consult your dealer or service
representative. Use of the plug could result in fire or electric shock.
• Be sure to disconnect the power cord from the wall outlet at least once a year and check for the
following:
• The power cord's inner wires are exposed, broken, etc.
• The power cord's coating has a crack or dent.
7. Maintenance and Specifications
438 midas-p3_com_operating_instructions_gb_00198785_eng.xml
Draft 2016/01/18
• When bending the power cord, the power turns off and on.
• Part of the power cord becomes hot.
• The power cord is damaged.
• If any of the above conditions exist, do not use the power cord and consult your dealer or
service representative. Use of the power cord could result in fire or electric shock.
• When disconnecting the power cord from the wall outlet, always pull the plug, not the cord.
Pulling the cord can damage the power cord. Use of damaged power cords could result in fire
or electric shock.
• Be sure to disconnect the plug from the wall outlet and clean the prongs and the area around
the prongs at least once a year. Allowing dust to build up on the plug constitutes a fire hazard.
• Turn off the main power switch before unplugging the power cord. See page 73 "Turning On/Off
the Power".
Cleaning the Printer
midas-p3_com_operating_instructions_gb_00198785_eng.xml 439
Draft 2016/01/18
Adjusting the Color Registration
After moving the printer, printing on thick paper, or printing repeatedly for some time, color degradation
may occur. By performing automatic color adjustment, you can restore optimum print quality.
Press the [Menu] key, and then select the setting items using the [ ] or [ ] key.
1. Select [Maintenance] Press [OK]
2. Select [Quality Maintenance] Press [OK]
3. Select [Color Registration] Press [OK]
4. Select [Auto Adjust] Press [OK]
5. Press [OK]
Automatic color adjustment begins.
Auto color registration takes about 30 seconds.
A confirmation message appears when the adjustment is complete.
6. Press [Exit]
1. Press the [User Tools] key, and then adjust the color registration.
[Maintenance: Image] [Color Registration] [Start]
Automatic color adjustment begins.
Auto color registration takes about 30 seconds.
A confirmation message appears when the adjustment is complete.
2. Press [Exit]
7. Maintenance and Specifications
440 midas-p3_com_operating_instructions_gb_00198791_eng.xml
Draft 2016/01/18
Correcting the Color Gradation
Color gradation during color printing changes depending on a number of factors. If you print the same
file repeatedly or toner was recently replaced, changes may occur in color tones. In such cases, you can
obtain optimal print results by correcting the color gradation.
Two methods are available for color gradation correction: automatic correction and manual correction
by printing a gradation correction sheet. Perform a manual correction if you are not satisfied with the
quality of output after an automatic correction.
• Color gradation correction is not required under normal circumstances.
• If a printer is not used for some time, changes may occur in color tones.
• If suitable results cannot be obtained after a single correction, repeat the correction several times
as needed.
• Corrections to color gradation will be applied to all user jobs.
• To check gradation corrections, use the same type of paper. If a different type of paper is used,
corrections may not be reflected.
Density graduation from midtones to highlights can be corrected automatically by executing the
automatic gradation correction function.
Corrections will be applied to each resolution setting. If color tones change when different resolutions
are selected in the printer driver, perform the gradation correction for the resolution you want to use.
Resolution setting in the printer driver Value specified for automatic gradation
correction
600 × 600 dpi 600 × 600 dpi (1 bit)
2400 × 600 dpi equivalent 600 × 600 dpi (2 bit)
1200 × 1200 dpi*1200 × 1200 dpi (1 bit)*
*zzz
Flow of Manual Gradation Correction
Manual Gradation Correction is performed in the following order:
1. Print gradation correction sheet 1.
2. Adjust the parts of highlight colors.
Set the correction value.
Correcting the Color Gradation
midas-p3_com_operating_instructions_gb_00198792_eng.xml 441
Draft 2016/01/18
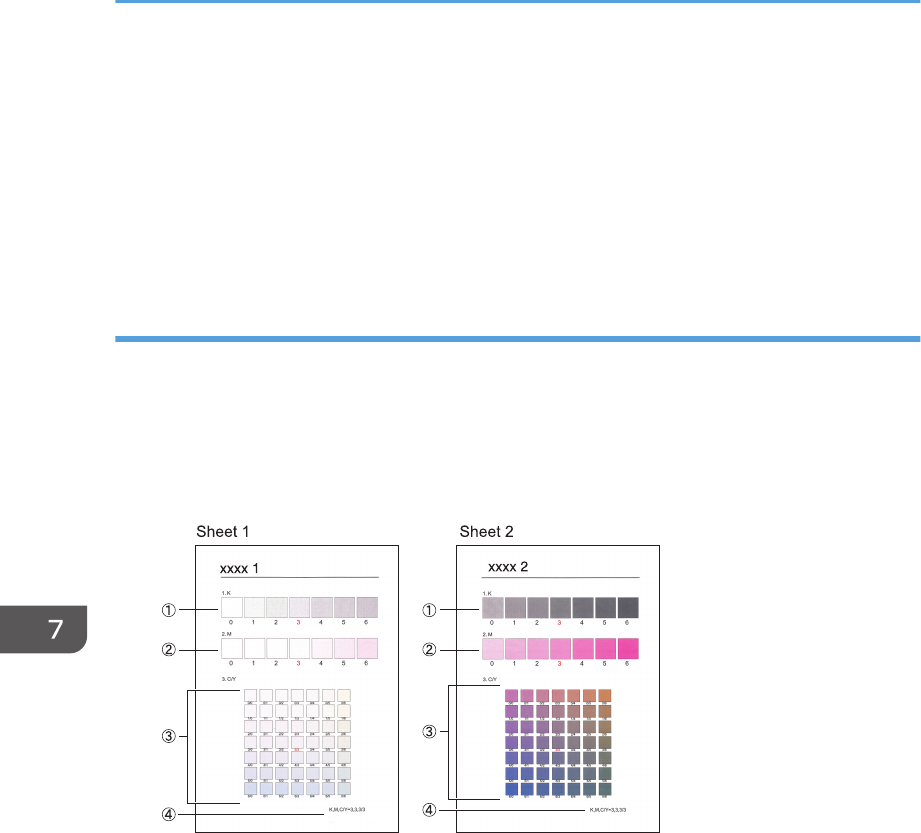
Print the gradation correction sheet, and then check the correction result.
3. Print gradation correction sheet 2.
Adjust the parts of middle colors.
Set the correction value.
Print the gradation correction sheet, and then check the correction result.
4. Save the correction value.
Gradation Correction Sheet
Reading the gradation correction sheet
The printed gradation correction sheet is read as shown below:
While comparing the gradation correction sheet and correction value of each color, K (black), M
(magenta), and C (cyan)/Y (yellow) determine the required gradation correction and configure
the settings using the control panel.
BFL359S
1. K (black) correction value
Adjusts the color printed when only black toner is used. The currently set correction value is printed in
red.
2. M (magenta) correction value
Adjusts the color printed when only magenta toner is used. The currently set correction value is printed in
red.
3. C (cyan)/Y (yellow) correction value
Corrects the colors printed when cyan and yellow are used. For C/Y (cyan/yellow), the correction
value is determined based on a combination of these two colors, although panel settings are configured
for each color.
7. Maintenance and Specifications
442 midas-p3_com_operating_instructions_gb_00198792_eng.xml
Draft 2016/01/18
4. Setting value
The value displayed is the one currently set when the gradation correction sheet is printed. This value
matches the one set on the control panel.
Setting Gradation Correction Values
Correct the gradation in two areas: bright areas (highlights), and medium areas (midtones). [Print Test
Pattern 1] or [Print Test Pattern 1 for Calibration] is used to set the correction value for highlights, and
[Print Test Pattern 2] or [Print Test Pattern 2 for Calibration] is used for mid tones.
Press the [Menu] key, and then select the setting items using the [ ] or [ ] key.
1. Select [Maintenance] Press [OK]
2. Select [Quality Maintenance] Press [OK]
3. Select [Color Calibration] Press [OK]
4. Select [Adj.Auto Dens.] Press [OK]
A confirmation message appears. Press [OK] to adjust Auto Density.
A confirmation message appears when the adjustment is complete. Press [Exit].
The display returns to the [Color Calibration] screen.
5. Select [Print Test Pattern 1] Press [OK]
6. Press [Print].
7. Compare the colors printed on gradation correction sheet 1 with the colors you want to
reproduce.
When the selected sheet is printed, a confirmation message will appear.
8. Press [Continue].
9. Select the color you want to adjust Press [OK]
10. Adjust the correction value Press [OK]
11. Press [Result].
12. Press [Print].
13. Check the result by printing the calibration sheet.
14. Press [Yes].
15. Select [Print Test Pattern 2] Press [OK]
Adjust the midtones on gradation correction sheet 2 by repeating the procedure you used to adjust
the color values on gradation correction sheet 1.
Correcting the Color Gradation
midas-p3_com_operating_instructions_gb_00198792_eng.xml 443
Draft 2016/01/18
1. Press the [User Tools] key, and then correct the gradation.
[Maintenance: Image] [Color Calibration] [Adjust Auto Density] [Start]
The confirmation message appears when complete. Press [Exit].
2. Print the selected sheet, and then correct the gradation.
[Print Test Pattern 1 for Calibration] or [Print Test Pattern 2 for Calibration] Select the color you
want to adjust Adjust the correction value for the selected color [OK]
Enter the value between 0 and 6.
3. Check the result by printing the calibration sheet, and then save the settings.
[Print Result] [Yes]
Resetting the Gradation Correction Value to the Default Value
Press the [Menu] key, and then select the setting items using the [ ] or [ ] key.
1. Select [Maintenance] Press [OK]
2. Select [Quality Maintenance] Press [OK]
3. Select [Color Calibration] Press [OK]
4. Select [Reset] Press [OK]
5. Press [Yes]
1. Press the [User Tools] key, and then reset the gradation correction value to the default
value.
[Maintenance: Image] [Color Calibrt.] [Reset Setting] [OK]
The confirmation message appears when complete. Press [Exit].
7. Maintenance and Specifications
444 midas-p3_com_operating_instructions_gb_00198792_eng.xml
Draft 2016/01/18
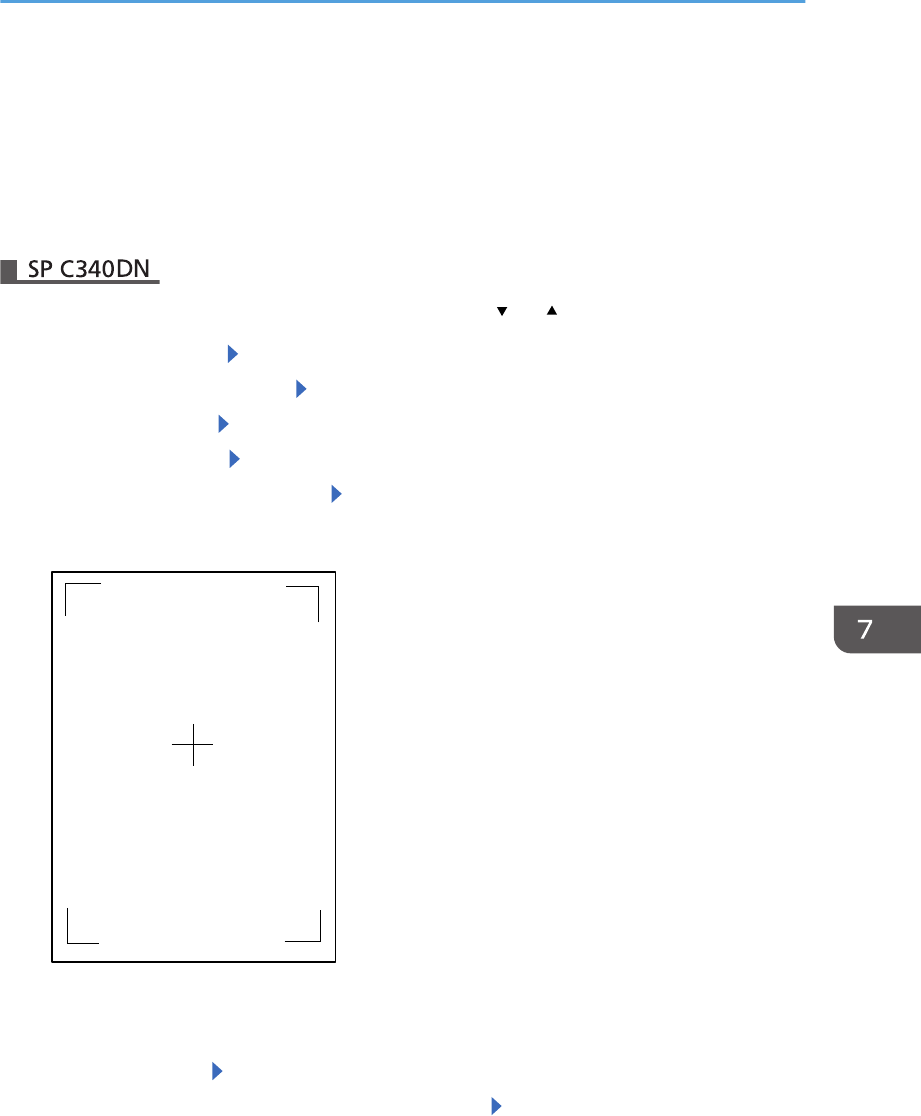
Adjusting Printing Position
You can adjust the printing position. Normally you do not need to update the printing position.
However, updating is useful in some cases when the optional paper feed unit is installed.
"Horizontal" paper is perpendicular to the feed direction. "Vertical" means paper is parallel to the paper
feed direction.
Press the [Menu] key, and then select the setting items using the [ ] or [ ] key.
1. Select [Maintenance] Press [OK]
2. Select [Quality Maintenance] Press [OK]
3. Select [Registration] Press [OK]
4. Select [Prt.Test Sheet] Press [OK]
5. Select the tray you want to adjust Press [OK]
6. Print the test sheet to preview the settings.
Use this sheet to check the current print position.
7. Press the [Escape] key until the screen returns to the [Registration] menu.
8. Select [Adjustment] Press [OK]
9. Select the tray and feed direction you want to adjust Press [OK]
Adjusting Printing Position
midas-p3_com_operating_instructions_gb_00198796_eng.xml 445
Draft 2016/01/18
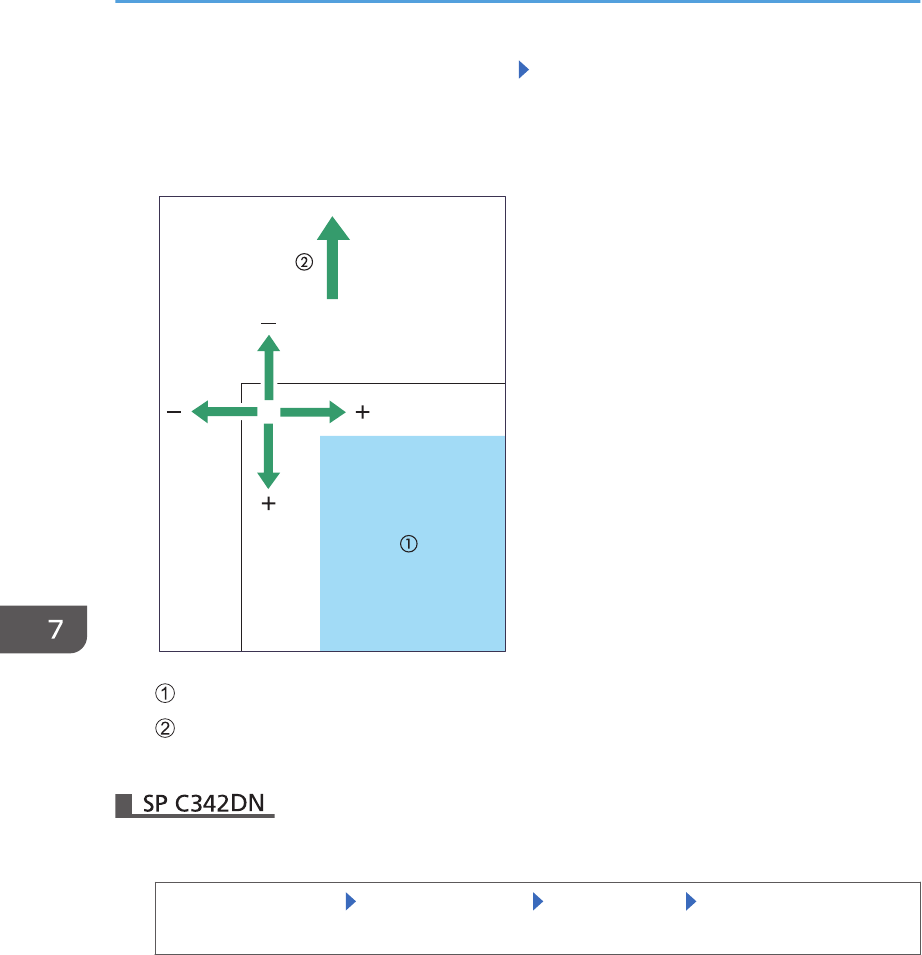
10. Enter to change the registered value (mm) Press [OK]
Increase the value to move the print area in the direction indicated by the "+" symbol in the
diagram below. Decrease the value to move the print area in the direction indicated by the "-"
symbol.
CQT692
: Print Area
: Paper Feed Direction
11. Print the test sheet to check the adjustment result.
1. Press the [User Tools] key, and then print the test sheet.
[Maintenance: Image] [Adjust Print Position] [Print Test Sheet] Select the tray you want to
adjust
7. Maintenance and Specifications
446 midas-p3_com_operating_instructions_gb_00198796_eng.xml
Draft 2016/01/18
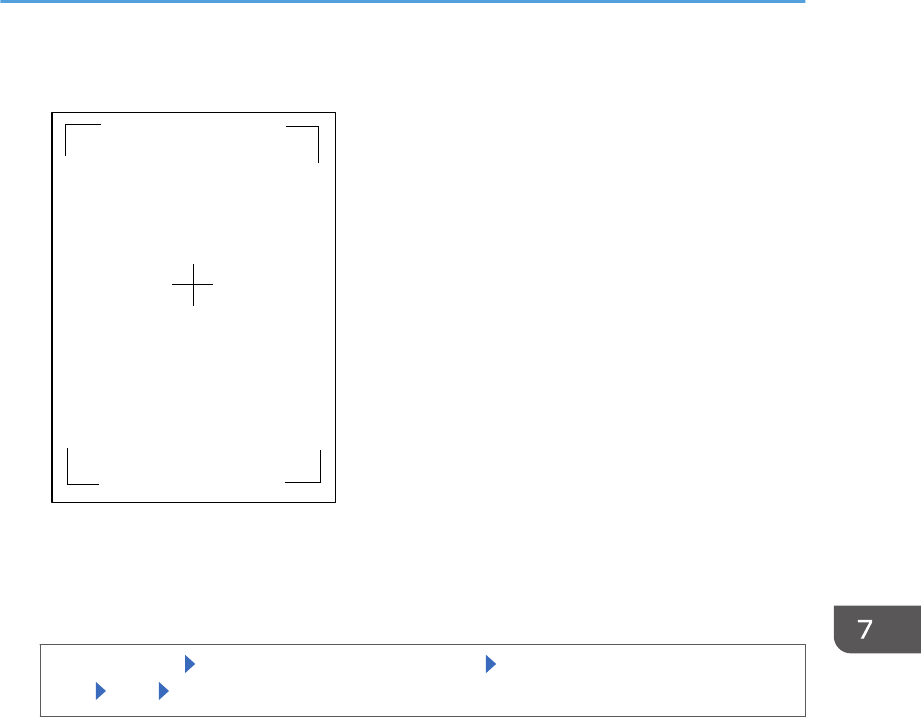
2. Print the test sheet to preview the settings.
Use this sheet to check the current print position.
3. Press [Exit].
4. Adjust the printing position.
[Adjust Position] Select the tray you want to adjust Enter to change the registered value
(mm) [OK] [Exit]
Increase the value to move the print area in the direction indicated by the "+" symbol in the
diagram below. Decrease the value to move the print area in the direction indicated by the "-"
symbol.
Adjusting Printing Position
midas-p3_com_operating_instructions_gb_00198796_eng.xml 447
Draft 2016/01/18
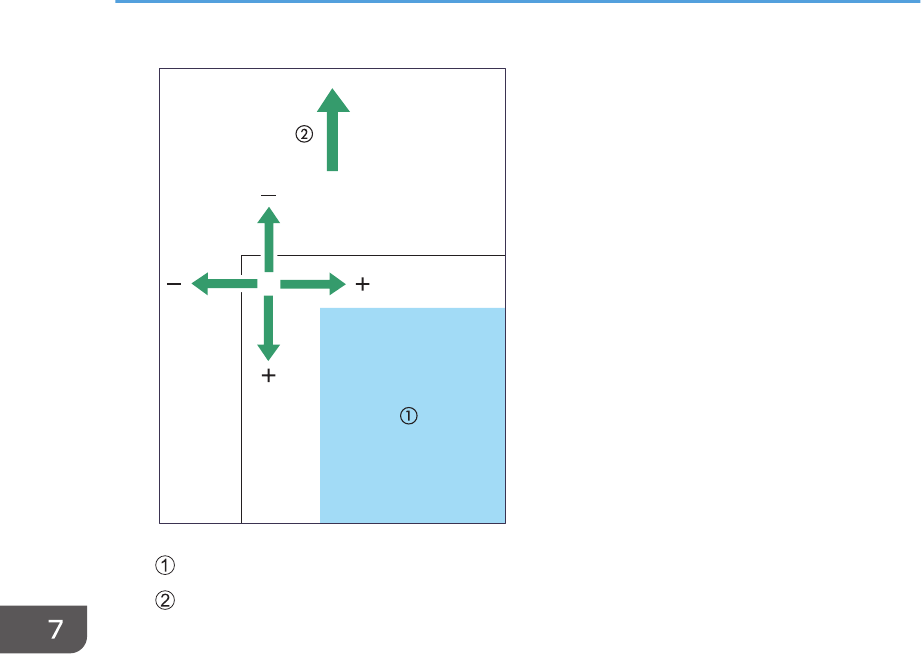
CQT692
: Print Area
: Paper Feed Direction
7. Maintenance and Specifications
448 midas-p3_com_operating_instructions_gb_00198796_eng.xml
Draft 2016/01/18
Replenishing and Replacing Consumables
This section explains how to replenish consumables when they run out.
Replacing the Print Cartridge
This section explains precautions to add toner when it has run out, and how to dispose of used toner.
• Do not incinerate toner (new or used) or toner containers. Doing so risks burns. Toner will ignite
on contact with naked flame.
• Do not store toner (new or used) or toner containers anywhere near naked flames. Doing so
risks fire and burns. Toner will ignite on contact with naked flame.
• Do not use a vacuum cleaner to remove spilled toner (including used toner). Absorbed toner
may cause a fire or explosion due to electrical contact flickering inside the vacuum cleaner.
However, it is possible to use a vacuum cleaner that is explosion-proof and dust ignition-proof. If
toner is spilled on the floor, remove the spilled toner slowly using a wet cloth, so that the toner is
not scattered.
• Do not crush or squeeze toner containers. Doing so can cause toner spillage, possibly resulting
in dirtying of skin, clothing, and floor, and accidental ingestion.
• Store toner (new or used), toner containers, and components that have been in contact with
toner out of reach of children.
• If toner or used toner is inhaled, gargle with plenty of water and move into a fresh air
environment. Consult a doctor if necessary.
• If toner or used toner gets into your eyes, flush immediately with large amounts of water. Consult
a doctor if necessary.
• If toner or used toner is swallowed, dilute by drinking a large amount of water. Consult a doctor
if necessary.
• When removing jammed paper or replacing toner, avoid getting toner (new or used) on your
clothing. If toner comes into contact with your clothing, wash the stained area with cold water.
Hot water will set the toner into the fabric and make removing the stain impossible.
Replenishing and Replacing Consumables
midas-p3_com_operating_instructions_gb_00198797_eng.xml 449
Draft 2016/01/18
• When removing jammed paper or replacing toner, avoid getting toner (new or used) on your
skin. If toner comes into contact with your skin, wash the affected area thoroughly with soap and
water.
• Actual printable numbers vary depending on image volume and density, number of pages printed
at a time, paper type and size, and environmental conditions such as temperature and humidity.
Toner quality degrades over time. Early replacement of the print cartridge might be necessary.
Therefore, we recommend you always keep a new print cartridge ready.
• The print cartridge might need to be replaced even if there is toner remaining in it. This is due to
depletion or wear of other components.
• Do not allow paper clips, staples, or other small metallic objects to fall inside the printer.
• Do not expose the print cartridge without its cover to direct sunlight for a long time.
• When removing print cartridge, be careful not to drop it.
• Store print cartridges in a cool dark place.
• SP C340DN:
For details about installing the toner, see the instructions on the package of the toner.
• SP C342DN:
Replace the print cartridge when the following message appears on the display. Follow the
instruction on the screen regarding how to replace the print cartridge.
Replace the print cartridge when the following messages appear on the display:
• SP C340DN:
"Out of toner"
• SP C342DN:
"No toner. Replace Toner Cartridge."
"No color toner. Color toner is required to print in black & white with the current paper type.
Replace the color Print Cartridge or press [Job Reset] to cancel printing."
When the following messages appear on the display, the toner has almost run out. Have a replacement
print cartridge at hand.
• SP C340DN:
" Toner is almost empty."
• SP C342DN:
"Toner Cartridge is almost empty. Replace Toner Cartridge."
7. Maintenance and Specifications
450 midas-p3_com_operating_instructions_gb_00198797_eng.xml
Draft 2016/01/18
• If print cartridge are not changed when necessary, printing will become impossible. We
recommend keeping a stock of print cartridge.
• Print cartridge (consumables) are not covered by warranty. However, if there is problem, contact
the store where they were purchased.
Replacing Other Consumables
Refer to the maintenance guide provided with the new items for the replacement.
• Do not use a vacuum cleaner to remove spilled toner (including used toner). Absorbed toner
may cause a fire or explosion due to electrical contact flickering inside the vacuum cleaner.
However, it is possible to use a vacuum cleaner that is explosion-proof and dust ignition-proof. If
toner is spilled on the floor, remove the spilled toner slowly using a wet cloth, so that the toner is
not scattered.
• Store toner (new or used), toner containers, and components that have been in contact with
toner out of reach of children.
• If toner or used toner is inhaled, gargle with plenty of water and move into a fresh air
environment. Consult a doctor if necessary.
• If toner or used toner gets into your eyes, flush immediately with large amounts of water. Consult
a doctor if necessary.
• If toner or used toner is swallowed, dilute by drinking a large amount of water. Consult a doctor
if necessary.
• When removing jammed paper or replacing toner, avoid getting toner (new or used) on your
clothing. If toner comes into contact with your clothing, wash the stained area with cold water.
Hot water will set the toner into the fabric and make removing the stain impossible.
• When removing jammed paper or replacing toner, avoid getting toner (new or used) on your
skin. If toner comes into contact with your skin, wash the affected area thoroughly with soap and
water.
Replenishing and Replacing Consumables
midas-p3_com_operating_instructions_gb_00198797_eng.xml 451
Draft 2016/01/18
• The fusing unit becomes very hot. When installing a new fusing unit, turn off the printer and wait
at least an hour after power off before replacing parts. Not allowing the printer to cool may
result in burns.
• Replace the intermediate transfer unit and transfer roller together.
• When installing the waste toner bottle and the intermediate transfer unit, do not tilt, turn upside
down, or shake it.
Waste toner bottle
Replace the waste toner bottle when the following message appears on the display:
• SP C340DN
"Waste Toner Bottle full"
• SP C342DN
"Waste Toner Bottle is full. Replace the bottle."
When the following message appears on the display, the waste toner bottle should be replaced
soon.
• SP C340DN
"Waste Toner almost full"
• SP C342DN
"Waste Toner Bottle is almost full. A new Waste Toner Bottle is required. Please contact your
local vendor."
Intermediate transfer unit
Replace the intermediate transfer unit when the following message appears on the display:
• SP C340DN
"Replacemnt Requird: IntTrans"
• SP C342DN
"Replacement of Transfer Unit is now necessary. Please call service."
When the following message appears on the display, the intermediate transfer unit should be
replaced soon.
• SP C340DN
"Replcmnt Rqrd Soon: IntTrans"
• SP C3432DN
"Replacement of Transfer Unit will soon be necessary. A new unit is required. Please contact
your local vendor."
7. Maintenance and Specifications
452 midas-p3_com_operating_instructions_gb_00198797_eng.xml
Draft 2016/01/18

Maintenance Kit
Replace the Maintenance Kit when the following messages appear on the display:
• SP C340DN
"Replacmnt Rqrd: Fusing Unit"
"Replace Fusing Unit."
• SP C342DN
"Fusing Unit must be replaced now. Replace Fusing Unit."
When the following message appears on the display, the fusing unit should be replaced soon.
• SP C340DN
"Repl Requrd Soon: FusingUnit"
• SP C342DN
"Replacement of Fusing Unit will soon be necessary. A new unit is required. Please contact
your local vendor."
Replenishing and Replacing Consumables
midas-p3_com_operating_instructions_gb_00198797_eng.xml 453
Draft 2016/01/18
Consumables
This section describes the information on consumables for SP C340DN. For SP C342DN, contact your
service representative.
When replacing consumables, refer to the maintenance guide provided with the new items for the
replacement, and read the precautions about how to replace consumables before replacing. For details
about the precautions, see page 449 "Replenishing and Replacing Consumables".
Print Cartridge
Toner
Black (Low yield)
Cyan, Magenta, Yellow (Low yield)
Black
Cyan, Magenta, Yellow
• Our products are engineered to meet the highest standards of quality and functionality. When you
purchase consumables, we recommend using only those specified by an authorized dealer.
• If the toner is not changed when necessary, printing will become impossible. We recommend
keeping a stock of toner or purchasing one soon.
• The actual number of printable pages varies depending on the image volume and density, number
of pages to be printed at a time, paper type and paper size used, contents of print images, and
environmental conditions such as temperature and humidity.
• Toner (consumable) is not covered by warranty. However, if there is a problem, contact the store
where you purchased it.
• Toner may need to be changed sooner than indicated above due to deterioration over the period
of use.
Waste Toner Bottle
Name Average number of printable pages*1
Waste Toner Bottle SP C310 55,000 pages
7. Maintenance and Specifications
454 midas-p3_com_operating_instructions_gb_00198801_eng.xml
Draft 2016/01/18
*1 A4/letter 5% test chart, 3 pages / job, printing in 50% monochrome/color.
• The number of printable pages is an estimate, based on continuous print jobs of three pages. The
actual number of printable pages varies depending on the image volume and density, number of
pages to be printed at a time, paper type and paper size used, contents of print images, and
environmental conditions such as temperature and humidity.
• If the waste toner bottle is not changed when necessary, printing will become impossible. We
recommend keeping a stock of waste toner bottle or purchasing one soon.
• Waste toner bottles are consumables and not covered by warranty. However, if there is a problem,
contact the store where you purchased them.
Intermediate Transfer Unit
Name Average number of printable pages
Transfer Unit SP C310 90,000 pages
• The number of printable pages is an estimate, based on continuous print jobs of three pages. The
actual number of printable pages varies depending on the image volume and density, number of
pages to be printed at a time, paper type and paper size used, contents of print images, and
environmental conditions such as temperature and humidity.
• If the intermediate transfer unit is not changed when necessary, the quality of printing is not
guaranteed. We recommend keeping a stock of transfer unit or purchasing one soon.
• A transfer unit package contains a transfer roller.
Maintenance Kit
Name Average printable number of pages
Maintenance Kit SP C320 (includes a fusing unit
and transcription roller)
90,000
• The actual number of printable pages varies depending on the image volume and density, number
of pages to be printed at a time, paper type and paper size used, and environmental conditions
such as temperature and humidity.
Consumables
midas-p3_com_operating_instructions_gb_00198801_eng.xml 455
Draft 2016/01/18

• The maintenance kit are not covered by warranty. However, if there is problem, contact the store
where they were purchased.
7. Maintenance and Specifications
456 midas-p3_com_operating_instructions_gb_00198801_eng.xml
Draft 2016/01/18
Specifications
This section describes the specifications for the main unit and options.
• We have obtained each author's permission for the use of applications including open-source
software applications. For details about the copyright information for these software applications,
see "OSS.pdf" on the CD-ROM supplied with the printer.
Specifications for the Printer
Configuration:
Desktop
Print process:
Laser beam scanning & Electrophotographic printing
4 drums tandem method
First print speed:
Full color: 13.5 seconds
B&W: 13.5 seconds
Print speed:
• One-side printing: 25 pages per minute (A4 )
• Two-side printing: 26 pages per minute (A4 )
Resolution:
600 × 600 dpi Speed (1 bit)
600 × 600 dpi Standard (2 bits)
1200 × 1200 dpi (1 bit)
Paper size:
For details, see page 106 "Paper Size Specifications".
Paper weight:
For details, see page 108 "Paper Type Specifications".
Paper output capacity:
Standard 150 sheets (80 g/m2, 20 lb. BOND)
Specifications
midas-p3_com_operating_instructions_gb_00198807_eng.xml 457
Draft 2016/01/18
Paper input capacity:
Tray Paper capacity*1
Standard paper feed tray 500 sheets
Bypass tray 100 sheets
500-sheet paper feed unit 500 sheets
*1 Paper weight: 80 g/m2 (20 lb. BOND)
Power requirements:
•
engb
(mainly Europe and Asia)
engb
220–240 V, 50/60 Hz, 6 A
•
engb
(mainly North America)
engb
120 V, 60 Hz, 11 A
ch,kr,tw
220-240 V, 50/60 Hz, 6 A
Power consumption (complete system):
Maximum: 1,300 W
The complete system consists of the main unit and the three optional paper feed units.
The power level when the main switch is turned off and the power cord is plugged into an outlet: 1
W or less
Power consumption (main unit only):
Ready: 60 W
During printing: 650 W
The power level when the main switch is turned off and the power cord is plugged into an outlet: 1
W or less
Warm-up time (23 °C (73.4 °F), rated voltage):
20 seconds
23 seconds
7. Maintenance and Specifications
458 midas-p3_com_operating_instructions_gb_00198807_eng.xml
Draft 2016/01/18
Dimensions:
Printer only (tray not extended)
Width Depth Height
SP C340dn 400 mm
(15.8 inches)
480 mm
(18.9 inches)
387 mm
(15.3 inches)
SP C342DN 400 mm
(15.8 inches)
480 mm
(18.9 inches)
404–467 mm
(15.9–18.4 inches)
• SP C340DN:
• There are protrusions of 12 mm (0.5 inches) on the control panel and 20 mm (0.8
inches) on the handles of the standard paper tray.
• When Tray 1 is extended, the depth increases by 125 mm (4.9 inches).
• SP C342DN:
• There are protrusions of 16 mm (0.7 inches) on the control panel and 20 mm (0.8
inches) on the handles of the standard paper tray.
• When the control panel is tilted, the height increases by up to 63 mm (2.5 inches).
• When Tray 1 is extended, the depth increases by 125 mm (4.9 inches).
Weight:
Approx. 29 kg (63.9 lb.)
Approx. 30 kg (66.1lb.)
Noise emission:
• Sound power level:
• Main unit only
Stand-by 40.0 dB (A)
Printing Full color:
65.5 dB (A)
B&W:
64.8 dB (A)
Specifications
midas-p3_com_operating_instructions_gb_00198807_eng.xml 459
Draft 2016/01/18
• Complete system
Stand-by 40.0 dB (A)
Printing 69.5 dB (A)
• Sound pressure level:
• Main unit only
Stand-by 28.0 dB (A)
Printing Full color:
50.0 dB (A)
B&W:
57.2 dB (A)
• Complete system
Stand-by 28.0 dB (A)
Printing 53.0 dB (A)
• Sound power levels and sound pressure levels are actual values measured in
accordance with ISO 7779.
• Sound pressure levels are measured from the position of the bystander.
• The complete system consists of the main unit and the three optional paper feed
units.
Memory:
Standard 512 MB, up to 2 GB (with the standard SDRAM module)
Hard disk:
320 GB (Optional)
Interfaces:
Standard:
• Gigabit Ethernet (10BASE-T/100BASE-TX/1000BASE-T)
• USB 2.0
To use USB 2.0, a USB computer port and cable that support USB 2.0 are required.
• USB Host
• SD card slot
Optional:
7. Maintenance and Specifications
460 midas-p3_com_operating_instructions_gb_00198807_eng.xml
Draft 2016/01/18
• IEEE 802.11a/b/g/n (Wireless LAN)
• Parallel (Bidirectional IEEE 1284)
• USB device server (10BASE-T/100BASE-TX/1000BASE-T)
Printer Language:
PCL5c/6, PostScript 3, PDF, PictBridge (optional), XPD (optional)
Fonts:
PCL 5c/PCL 6:
45 fonts, 13 International fonts
PostScript 3, PDF:
136 fonts
Network:
Topology: The physical or logical layout of the nodes (devices) in a network (10BASE-T/
100BASETX/1000BASE-T)
Protocol: TCP/IP (IPv4, IPv6), IPX/SPX
• First print speed, power consumption, warm-up time, sound power level and sound pressure level
may differ depending on the conditions and environment of the printer.
Specifications for 500-sheet Paper Feed Unit
Paper size:
For details, see page 106 "Paper Size Specifications".
Paper weight:
For details, see page 108 "Paper Type Specifications".
Paper capacity (80 g/m2, 20 lb. Bond):
500 sheets × 1 tray
Power consumption:
12.2 W or less (Power is supplied from the main unit.)
Dimensions (W × D × H):
400 × 480 × 127 mm (15.8 × 18.9 × 5.0 inches)
Weight:
Approx. 6.1 kg (13.5 lb.)
Specifications
midas-p3_com_operating_instructions_gb_00198807_eng.xml 461
Draft 2016/01/18
• For details about the paper supported by this option, see page 106 "Paper Size Specifications"
and page 108 "Paper Type Specifications".
Specification for Hard Disk
Storage Capacity (Formatted):
320 GB
Specifications:
• Spooling print data to collate
• Spooling Sample Print/Locked Print/Hold Print/Stored Print data
• Storing log data
• Storage capacity is subject to change without prior notice.
Specifications for Wireless LAN Interface Board
• Note that the available channels (frequency ranges) and locations to use the wireless LAN are
subject to the regulations of the country or region where the printer is used. Be sure to use the
wireless LAN according to the applicable regulations.
Transmission spec.:
Based on IEEE 802.11a/b/g/n (Wireless LAN)
Protocol:
TCP/IP, IPX/SPX
Transmission Rate:
1–300 Mbps
Frequency range (Center Frequency):
• 2412–2472 MHz (1–13 channels)
• 5180–5320 MHz (36, 40, 44, 48, 52, 56, 60, and 64 channels)
• 5500–5700 MHz (100, 104, 108, 112, 116, 120, 124, 128, 132, 136, and 140
channels)
Ad-hoc mode Channel Frequency range (Center Frequency):
• 2412–2462 MHz (1–11 channels)
7. Maintenance and Specifications
462 midas-p3_com_operating_instructions_gb_00198807_eng.xml
Draft 2016/01/18
• 5180–5240 MHz (36, 40, 44, and 48 channels)
Transmission mode:
• Ad hoc mode
• Infrastructure mode
• Web Image Monitor is supported.
• A transmission rate of 300 Mbps is a theoretical value of the wireless LAN specification.
• The maximum transmission rate in the ad-hoc mode is 54 Mbps for IEEE802.11a and 11 Mbps for
IEEE802.11b/g. The Ad-hoc communication is not supported in an IEEE802.11n environment.
• The channel in use might differ depending on the country.
Specifications for IEEE1284 Interface Board
• Do not use an IEEE 1284 cable that is longer than 3 meters.
Transmission spec.:
IEEE 1284
Required cable:
Standard IEEE 1284 compliant Micro Centronics 36 pin cable
Specifications for USB Device Server
Interfaces:
• Gigabit Ethernet (10BASE-T/100BASE-TX/1000BASE-T)
• USB 2.0 (For connecting the printer and the print server interface)
Operating Systems:
• Windows Vista/7/8/8.1/10, Windows Server 2003/2008/2008 R2/2012
• Mac OS X 10.3 to 10.8
Protocols:
• The USB device server supports Port 9100, IPP, and LPR only. IPP does not support SSL.
• The USB device server allows simultaneous connection of up to 8 sessions of printing
protocols.
Specifications
midas-p3_com_operating_instructions_gb_00198807_eng.xml 463
Draft 2016/01/18
Information for This Printer
User Information on Electrical & Electronic Equipment
Users in the countries where this symbol shown in this section has been specified in
national law on collection and treatment of E-waste
Our Products contain high quality components and are designed to facilitate recycling.
Our products or product packaging are marked with the symbol below.
The symbol indicates that the product must not be treated as municipal waste. It must be disposed of
separately via the appropriate return and collection systems available. By following these instructions
you ensure that this product is treated correctly and help to reduce potential impacts on the environment
and human health, which could otherwise result from inappropriate handling. Recycling of products
helps to conserve natural resources and protect the environment.
For more detailed information on collection and recycling systems for this product, please contact the
shop where you purchased it, your local dealer or sales/service representatives.
All Other Users
If you wish to discard this product, please contact your local authorities, the shop where you bought this
product, your local dealer or sales/service representatives.
For Turkey only
For Users in India
This product complies with the "India E-waste Rule 2011" and prohibits use of lead, mercury,
hexavalent chromium, polybrominated biphenyls or polybrominated diphenyl ethers in concentrations
7. Maintenance and Specifications
464 midas-p3_com_operating_instructions_gb_00198816_eng.xml
Draft 2016/01/18
exceeding 0.1 weight % and 0.01 weight % for cadmium, except for the exemptions set in Schedule 2
of the Rule.
EMC Directive
Using the Shield Cable
Properly shielded and grounded cables and connectors must be used for connections to a host computer
(and/or peripheral) in order to meet emission limits.
Note for the Battery and/or Accumulator Symbol (For EU countries only)
In accordance with the Battery Directive 2006/66/EC Article 20 Information for end-users Annex II,
the above symbol is printed on batteries and accumulators.
This symbol means that in the European Union, used batteries and accumulators should be disposed of
separately from your household waste.
In the EU, there are separate collection systems for not only used electrical and electronic products but
also batteries and accumulators.
Please dispose of them correctly at your local community waste collection/recycling centre.
Environmental Advice for Users
Users in the EU, Switzerland and Norway
Consumables yield
Please refer to either the User's Manual for this information or the packaging of the consumable.
Recycled paper
The machine can use recycled paper which is produced in accordance with European standard
EN 12281:2002 or DIN 19309. For products using EP printing technology, the machine can print
on 64 g/m2 paper, which contains less raw materials and represents a significant resource
reduction.
Information for This Printer
midas-p3_com_operating_instructions_gb_00198816_eng.xml 465
Draft 2016/01/18
Duplex printing (if applicable)
Duplex printing enables both sides of a sheet of paper to be used. This saves paper and reduces
the size of printed documents so that fewer sheets are used. We recommend that this feature is
enabled whenever you print.
Toner and ink cartridge return program
Toner and ink cartridge for recycling will be accepted free of charge from users in accordance with
local regulations.
For details about the return program, please refer to the Web page below or consult your service
person.
https://www.ricoh-return.com/
Energy efficiency
The amount of electricity a machine consumes depends as much on its specifications as it does on
the way you use it. The machine is designed to allow you to reduce electricity costs by switching to
Ready mode after it prints the last page. If required, it can immediately print again from this mode.
If no additional prints are required and a specified period of time passes, the device switches to an
energy saving mode.
In these modes, the machine consumes less power (watts). If the machine is to print again, it needs
a little longer to return from an energy saving mode than from Ready mode.
For maximum energy savings, we recommend that the default setting for power management is
used.
Products that comply with the Energy Star requirement are always energy efficient.
Notes for users in the state of California
Perchlorate Material - special handling may apply. See: www.dtsc.ca.gov/hazardouswaste/
perchlorate
ENERGY STAR Program
ENERGY STAR® Program Requirements for Imaging Equipment
7. Maintenance and Specifications
466 midas-p3_com_operating_instructions_gb_00198816_eng.xml
Draft 2016/01/18
The ENERGY STAR® Program Requirements for Imaging Equipment encourage energy conservation
by promoting energy efficient computers and other office equipment.
The program backs the development and dissemination of products that feature energy saving
functions.
It is an open program in which manufacturers participate voluntarily.
Targeted products are computers, monitors, printers, facsimiles, copiers, scanners, and multifunction
devices. Energy Star standards and logos are internationally uniform.
Sleep mode
If this machine remains idle for a specified period, it enters Sleep mode to reduce its electrical
consumption.
The default delay time the machine waits before entering Sleep mode is 1 minute. This default time
can be changed.
The machine can print jobs from computers while in Sleep mode.
Specification
Reduced electrical consumption in Sleep mode Less than 1.0 W
Time of switch into Sleep mode 1 minute
Time of switch out from Sleep mode (mainly Europe and Asia)
7.2 seconds
(mainly North America)
7.9 seconds
7.2 seconds
Information for This Printer
midas-p3_com_operating_instructions_gb_00198816_eng.xml 467
Draft 2016/01/18
Environmental protection expiration date for use
China only
Environmental protection
expiration date
This mark indicates environmental protection expiration date for use that
is applied to electronic information product sold in China.
As long as you follow the safety instructions and precautions for use of
this product, it will not cause environmental pollution nor cause serious
harm to the human body or properties, within this term reckoned from
the manufacturing date. This term is derived based on the safety use
expiration law.
Fixed form sentences 11 _ china environmental labeling notice _ LP_Title
Sentence 1
• Fixed form sentences 11 _ china environmental labeling notice _ LP_BodyText Sentence 1
• Fixed form sentences 11 _ china environmental labeling notice _ LP_BodyText Sentence 3 version
2
• Fixed form sentences 11 _ china environmental labeling notice _ LP_BodyText Sentence 4 version
2
• Fixed form sentences 11 _ china environmental labeling notice _ LP_BodyText Sentence 5
• Fixed form sentences 11 _ china environmental labeling notice _ LP_BodyText Sentence 6
• Fixed form sentences 11 _ china environmental labeling notice _ LP_BodyText Sentence 7
Fixed form sentences 11 _ china environmental labeling notice _ LP_Annotation Sentence 1
Fixed form sentences 11 _ china environmental labeling notice _ LP_Annotation Sentence 2
7. Maintenance and Specifications
468 midas-p3_com_operating_instructions_gb_00198816_eng.xml
Draft 2016/01/18
Appendix
Trademarks
Adobe, Acrobat, PostScript, PostScript 3, and Reader are either registered trademarks or trademarks of
Adobe Systems Incorporated in the United States and/or other countries.
Bonjour, Macintosh, Mac OS, OS X, and Safari are trademarks of Apple Inc., registered in the United
States and other countries.
Citrix, Citrix Presentation Server and Citrix XenApp are either registered trademarks or trademarks of
Citrix Systems, Inc.
Firefox® is a registered trademark of the Mozilla Foundation.
IPS is a trademark or registered trademark of Zoran Corporation and/or its subsidiaries in the United
States or other countries.
Java is a registered trademark of Oracle and/or its affiliates.
JAWS® is a registered trademark of Freedom Scientific, Inc., St. Petersburg, Florida and/or other
countries.
Microsoft, Windows, Windows Server, Windows Vista, and Internet Explorer are either registered
trademarks or trademarks of Microsoft Corporation in the United States and/or other countries.
Monotype is a registered trademark of Monotype Imaging Inc.
IPX, IPX/SPX, NCP, and NDS are either registered trademarks or trademarks of Novell, Inc.
OpenLDAP is a registered trademark of the OpenLDAP Foundation.
PCL® is a registered trademark of Hewlett-Packard Company.
PictBridge is a trademark.
UNIX is a registered trademark of the Open Group.
UPnPTM is a trademark of the UPnPTM Implementers Corporation.
The proper name of Internet Explorer 6 is Microsoft® Internet Explorer® 6.
The proper name of Internet Explorer 8 is Windows® Internet Explorer® 8.
The proper names of the Windows operating systems are as follows:
• The product names of Windows Vista are as follows:
Microsoft® Windows Vista® Ultimate
Microsoft® Windows Vista® Business
Microsoft® Windows Vista® Home Premium
Microsoft® Windows Vista® Home Basic
Microsoft® Windows Vista® Enterprise
Appendix
midas-p3_com_operating_instructions_gb_00198834_eng.xml 469
Draft 2016/01/18

• The product names of Windows 7 are as follows:
Microsoft® Windows® 7 Home Premium
Microsoft® Windows® 7 Professional
Microsoft® Windows® 7 Ultimate
Microsoft® Windows® 7 Enterprise
• The product names of Windows 8 are as follows:
Microsoft® Windows® 8
Microsoft® Windows® 8 Pro
Microsoft® Windows® 8 Enterprise
• The product names of Windows 8.1 are as follows:
Microsoft® Windows® 8.1
Microsoft® Windows® 8.1 Pro
Microsoft® Windows® 8.1 Enterprise
• The product names of Windows 10 are as follows:
Microsoft® Windows® 10 Home
Microsoft® Windows® 10 Pro
Microsoft® Windows® 10 Enterprise
Microsoft® Windows® 10 Education
• The product names of Windows Server 2003 are as follows:
Microsoft® Windows Server® 2003 Standard Edition
Microsoft® Windows Server® 2003 Enterprise Edition
• The product names of Windows Server 2003 R2 are as follows:
Microsoft® Windows Server® 2003 R2 Standard Edition
Microsoft® Windows Server® 2003 R2 Enterprise Edition
• The product names of Windows Server 2008 are as follows:
Microsoft® Windows Server® 2008 Standard
Microsoft® Windows Server® 2008 Enterprise
• The product names of Windows Server 2008 R2 are as follows:
Microsoft® Windows Server® 2008 R2 Standard
Microsoft® Windows Server® 2008 R2 Enterprise
• The product names of Windows Server 2012 are as follows:
Microsoft® Windows Server® 2012 Foundation
Microsoft® Windows Server® 2012 Essentials
7. Maintenance and Specifications
470 midas-p3_com_operating_instructions_gb_00198834_eng.xml
Draft 2016/01/18

Microsoft® Windows Server® 2012 Standard
• The product names of Windows Server 2012 R2 are as follows:
Microsoft® Windows Server® 2012 R2 Foundation
Microsoft® Windows Server® 2012 R2 Essentials
Microsoft® Windows Server® 2012 R2 Standard
Other product names used herein are for identification purposes only and might be trademarks of their
respective companies. We disclaim any and all rights to those marks.
Microsoft product screen shots reprinted with permission from Microsoft Corporation.
Appendix
midas-p3_com_operating_instructions_gb_00198834_eng.xml 471
Draft 2016/01/18

MEMO
472 EN
GB
EN
US
xxxx-xxxx
Draft 2016/01/18