Ricoh PRSPC342DN1 Part15 Subpart B-Printer User Manual BBP PRSPC342DN1 4
Ricoh Company Ltd Part15 Subpart B-Printer BBP PRSPC342DN1 4
Ricoh >
Contents
- 1. BBP-PRSPC342DN1_User Manual 1
- 2. BBP-PRSPC342DN1_User Manual 2
- 3. BBP-PRSPC342DN1_User Manual 3
- 4. BBP-PRSPC342DN1_User Manual 4
- 5. BBP-PRSPC342DN1_User Manual 5
BBP-PRSPC342DN1_User Manual 4
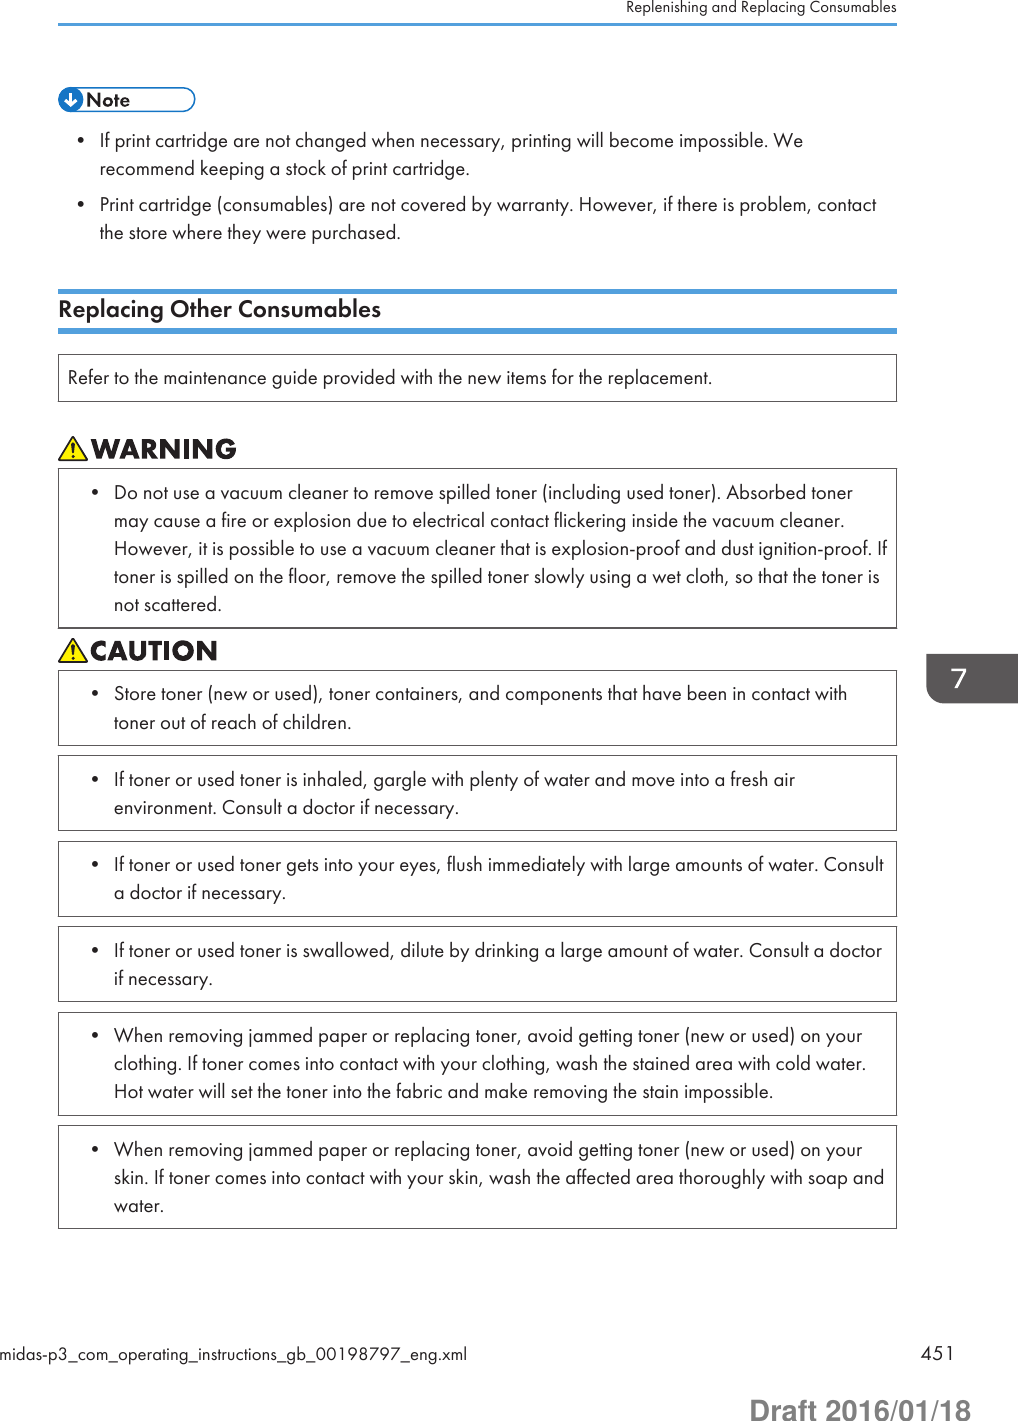
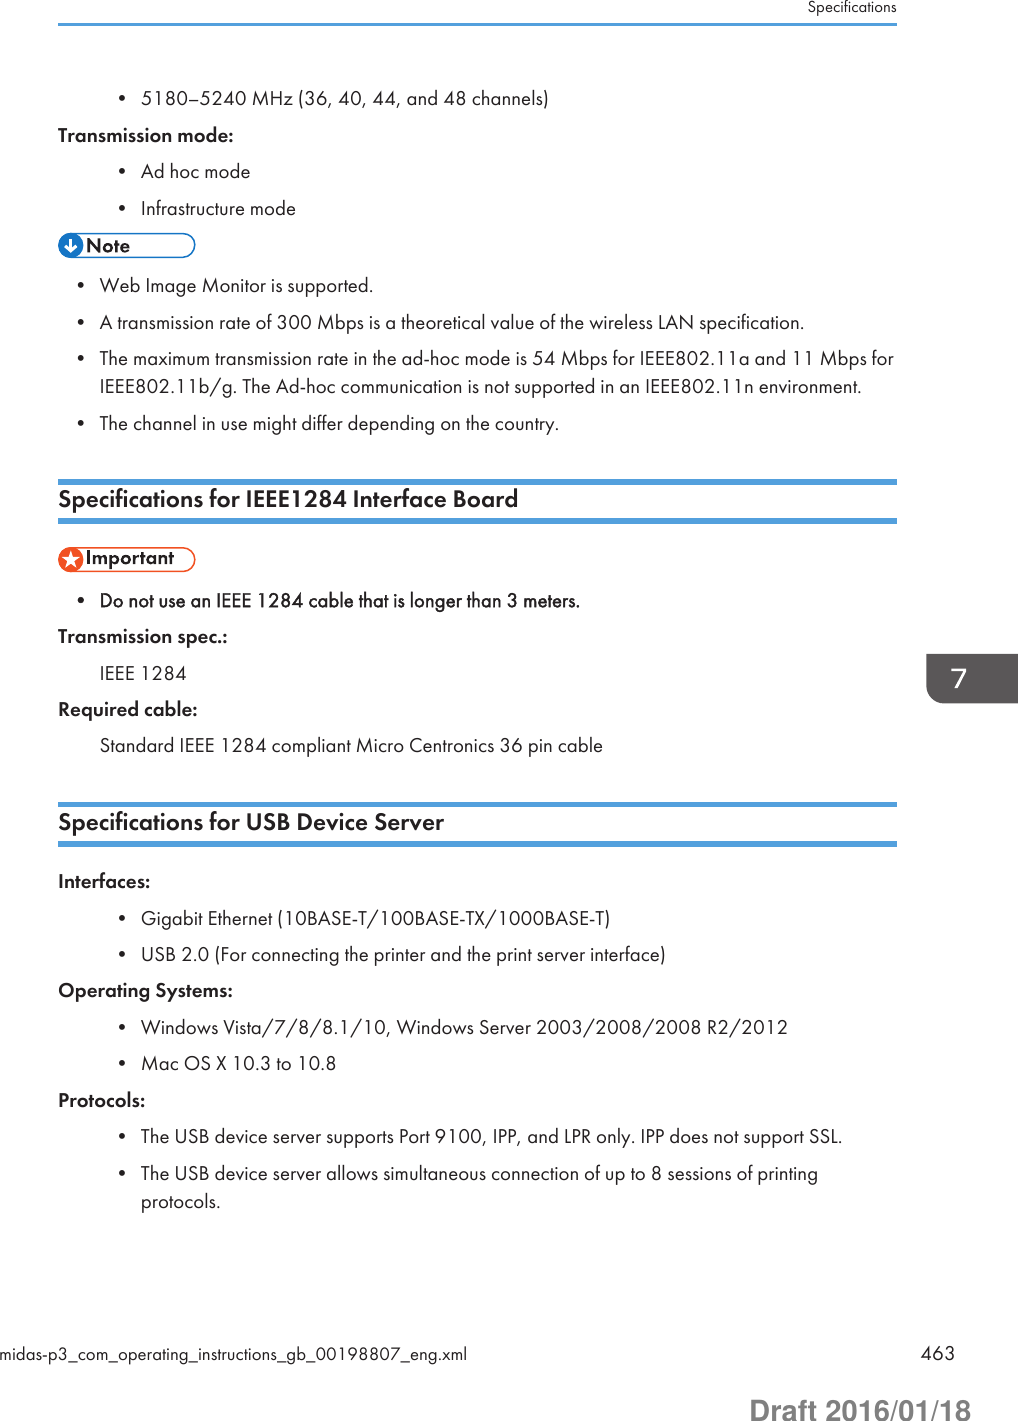
![Ready State After PrintingYou can specify the state the printer return to after printing documents during Sleep Mode.• Control Panel OnThe printer does not return to Sleep Mode and the initial screen appears on the control panel.• Cntrl Panel Off (EngySavg)The printer returns to Sleep Mode.Low Power Mode LevelSpecify the Low Power Mode Level. Starting up time and power consumption will differ accordingto this level.Default: [Level 2]• Level 1• Level 2When "Level 1" is specified, electricity consumption will be lower than that of normal stand bystate.When "Level 2" is specified, this machine returns from stand-by mode within 30 seconds.Stop Print at Output LimitSelect whether to stop printing when the number of printed sheets reaches the capacity number ofthe output tray. Stopping will prevent overflow and mixing of sheets on the output tray.To resume printing, remove the printed sheets from the output tray, and then press [Carry On] onthe control panel.Printing stops when the maximum number is reached, even if the prints have been removed from theoutput tray during the print run. The maximum number of sheets that can be printed at one time isapproximately 150.If the maximum number of output sheets is reached while printing a particular type of list, printingwill be canceled without the machine displaying a message.Default: [Inactive]• Active• InactiveBypass Print:64-90 mmSelect [Active] when printing on paper whose width is less than 90 mm. To print on paper ofanother size, select [Inactive].Default: [Inactive]• Active• InactiveFunction Details of the Printer Configuration Items (SP C340DN)midas-p3_com_operating_instructions_gb_00208890_eng.xml 241Draft 2016/01/18](https://usermanual.wiki/Ricoh/PRSPC342DN1.BBP-PRSPC342DN1-User-Manual-4/User-Guide-2978046-Page-1.png)
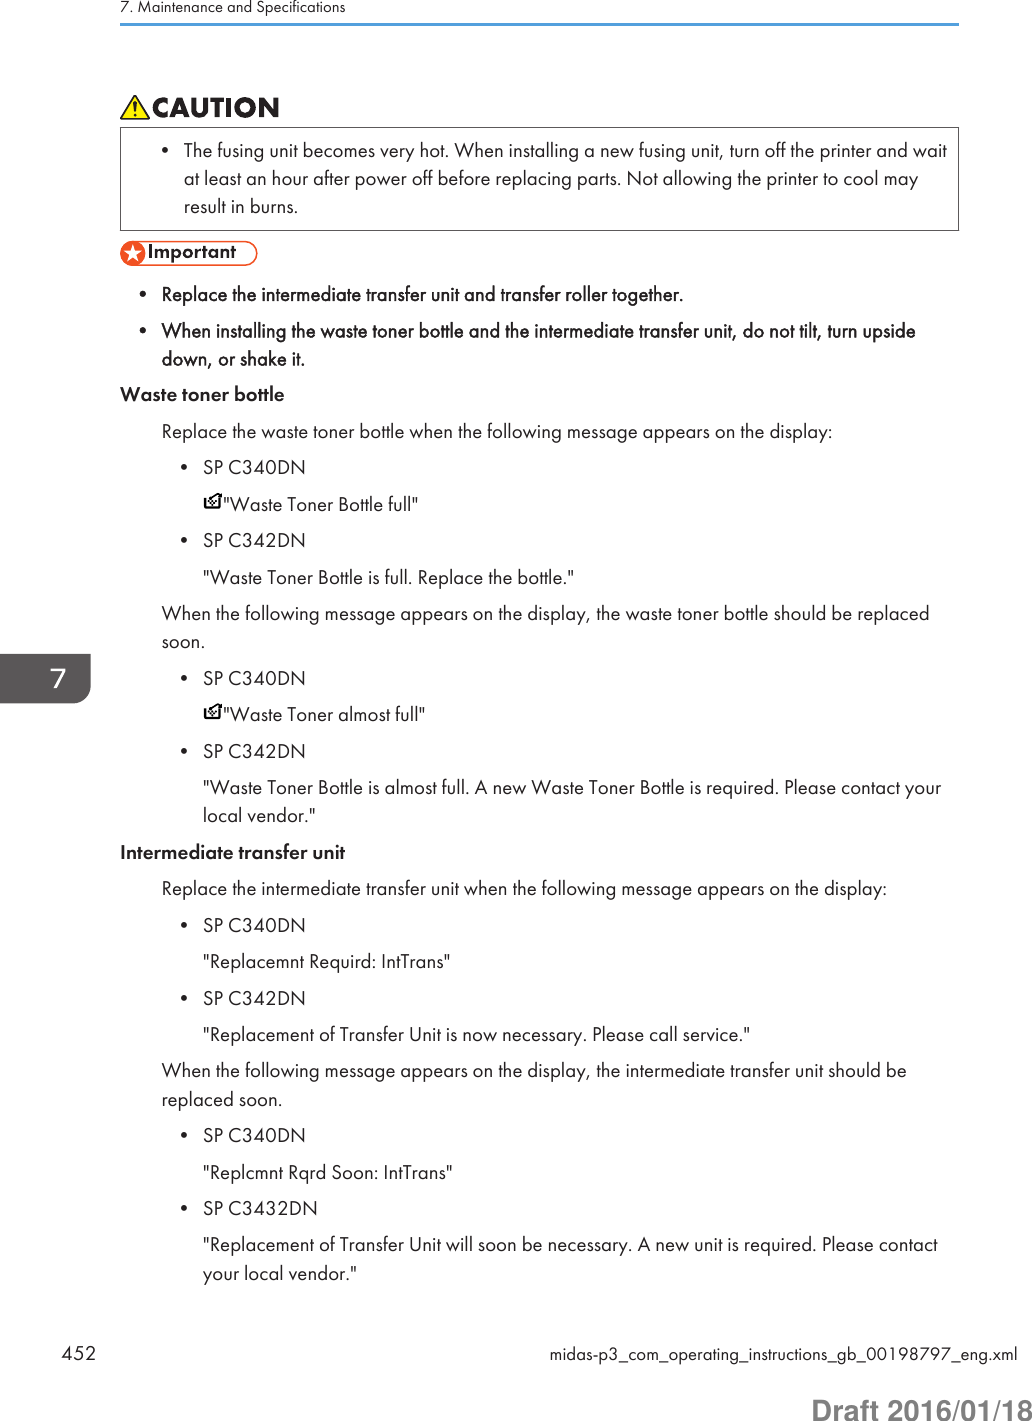
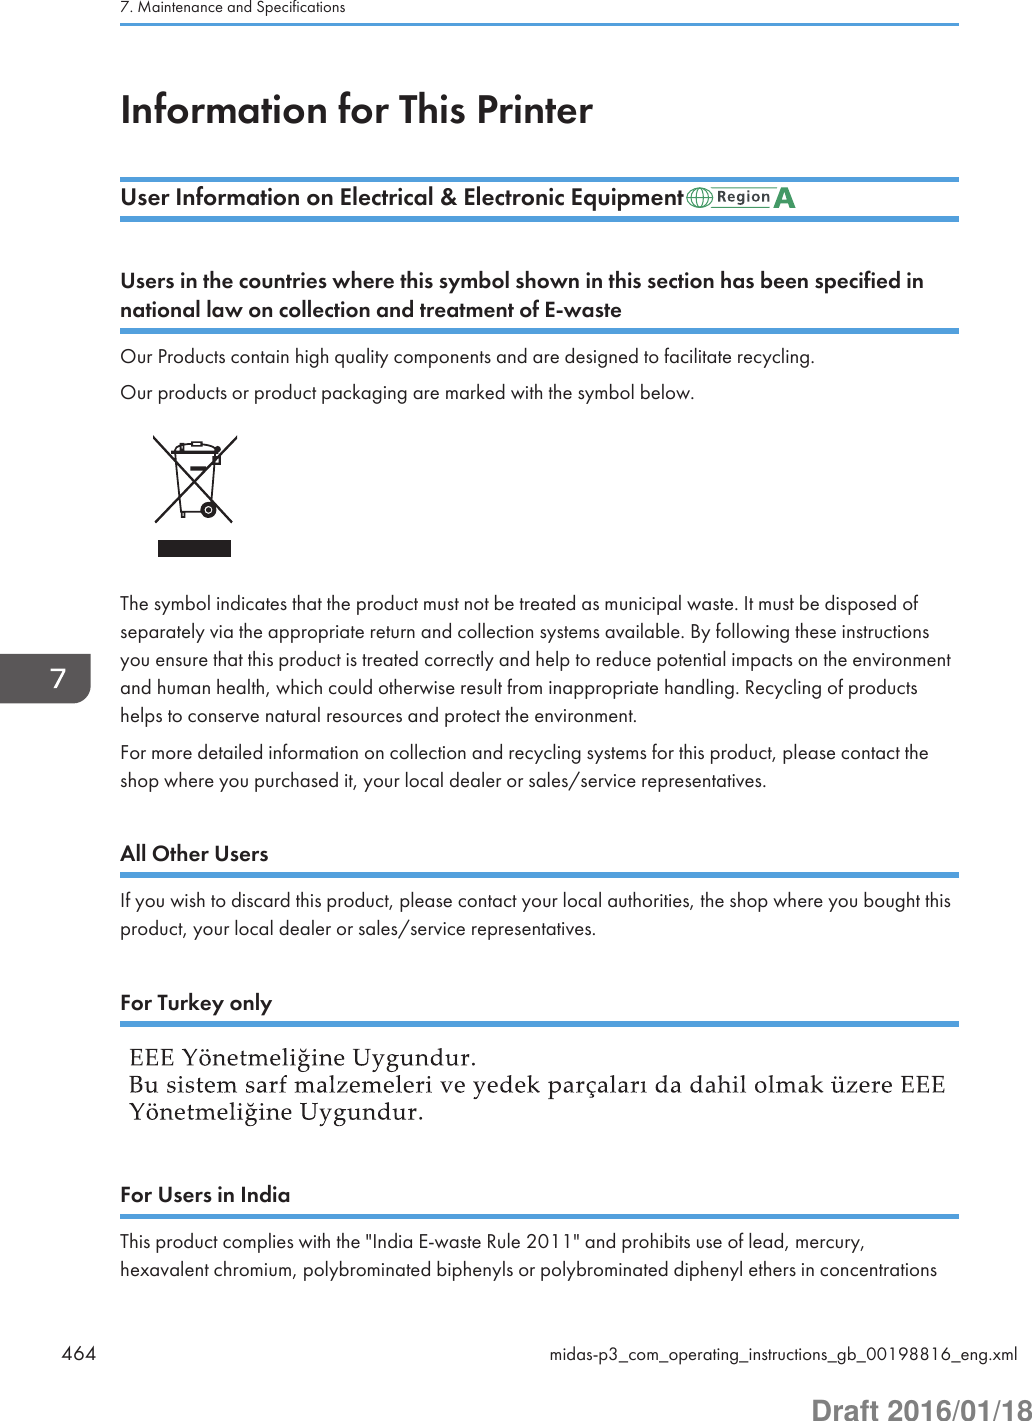
![B&W Print PriorityYou can specify whether or not to reduce the consumption of color toner. When this function isenabled, it may take longer to start printing a color page.Default: [Off]• On• OffAnti-HumiditySelect whether or not to reduce paper curl and print smearing when printing in a high-humidityenvironment.Anti-Humidity SettingDefault: [Off]• On• OffAnti-Humidity LevelDefault: [Level 1 (Weak)]• Level 1 (Weak)• Level 2 (Medium)• Level 3 (Strong)Print Compressed DataYou can specify whether or not to print compressed data. The supported compression format isGZIP.Default: [Off]• On• OffMemory UsageYou can specify whether or not to use memory from Font Priority or Frame Priority.Default: [Frame Priority]• Font PriorityAllocates more memory to the PDL work area. Select this setting if printing fails due toinsufficient memory.• Frame PriorityAllocates more memory for image processing. Select this setting to increase print speed.Depending on the document you are printing, this setting might not be effective.5. Configuring and Managing the Printer242 midas-p3_com_operating_instructions_gb_00208890_eng.xmlDraft 2016/01/18](https://usermanual.wiki/Ricoh/PRSPC342DN1.BBP-PRSPC342DN1-User-Manual-4/User-Guide-2978046-Page-2.png)
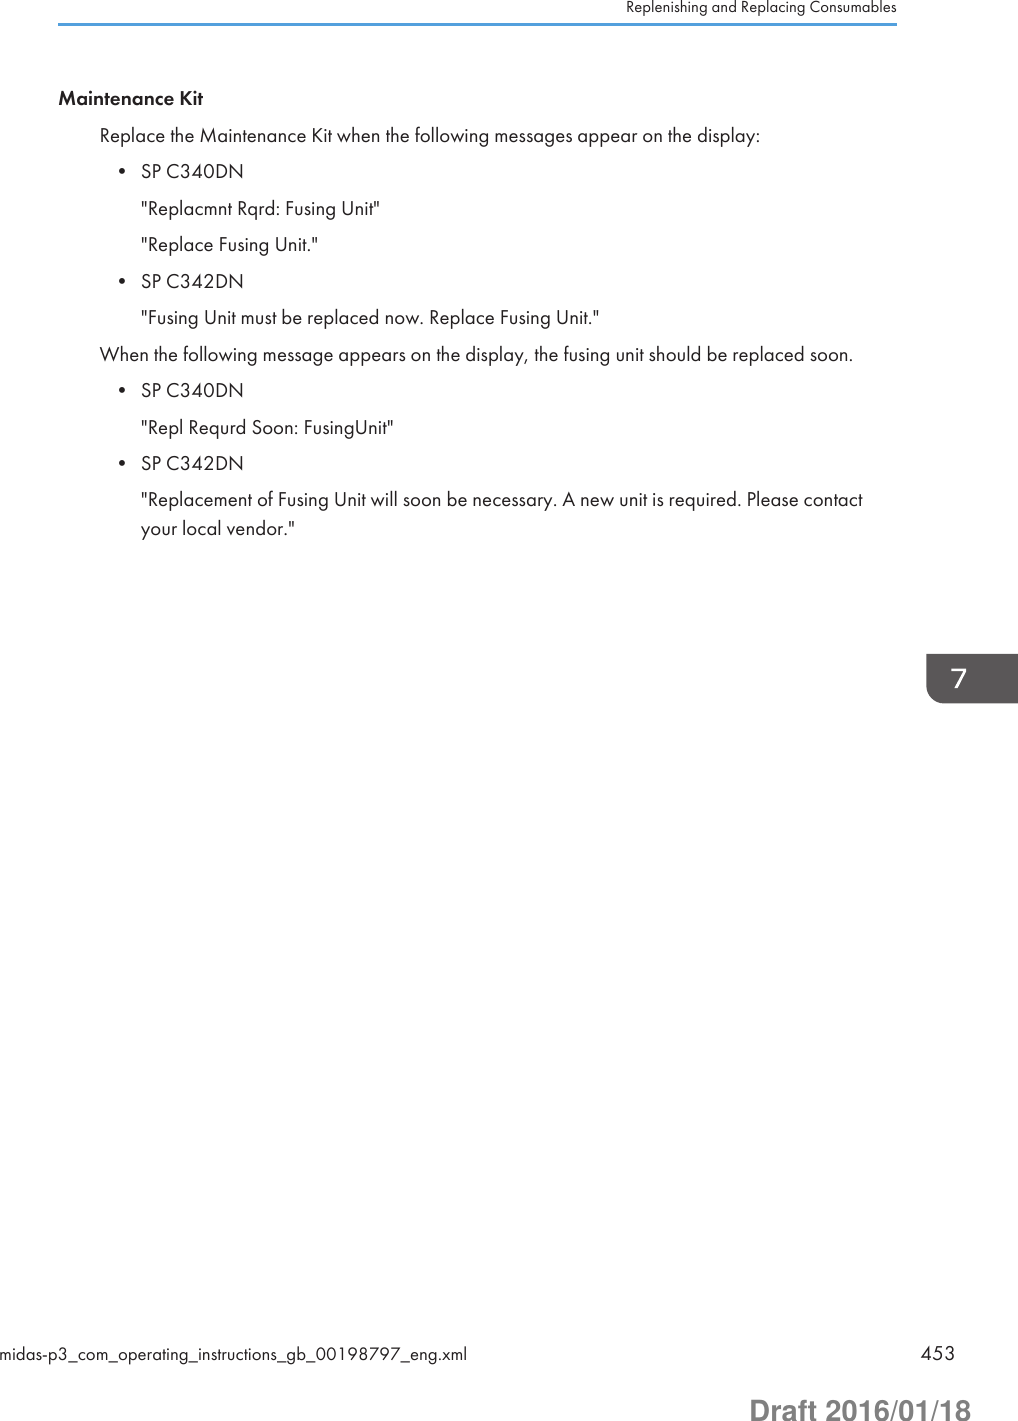
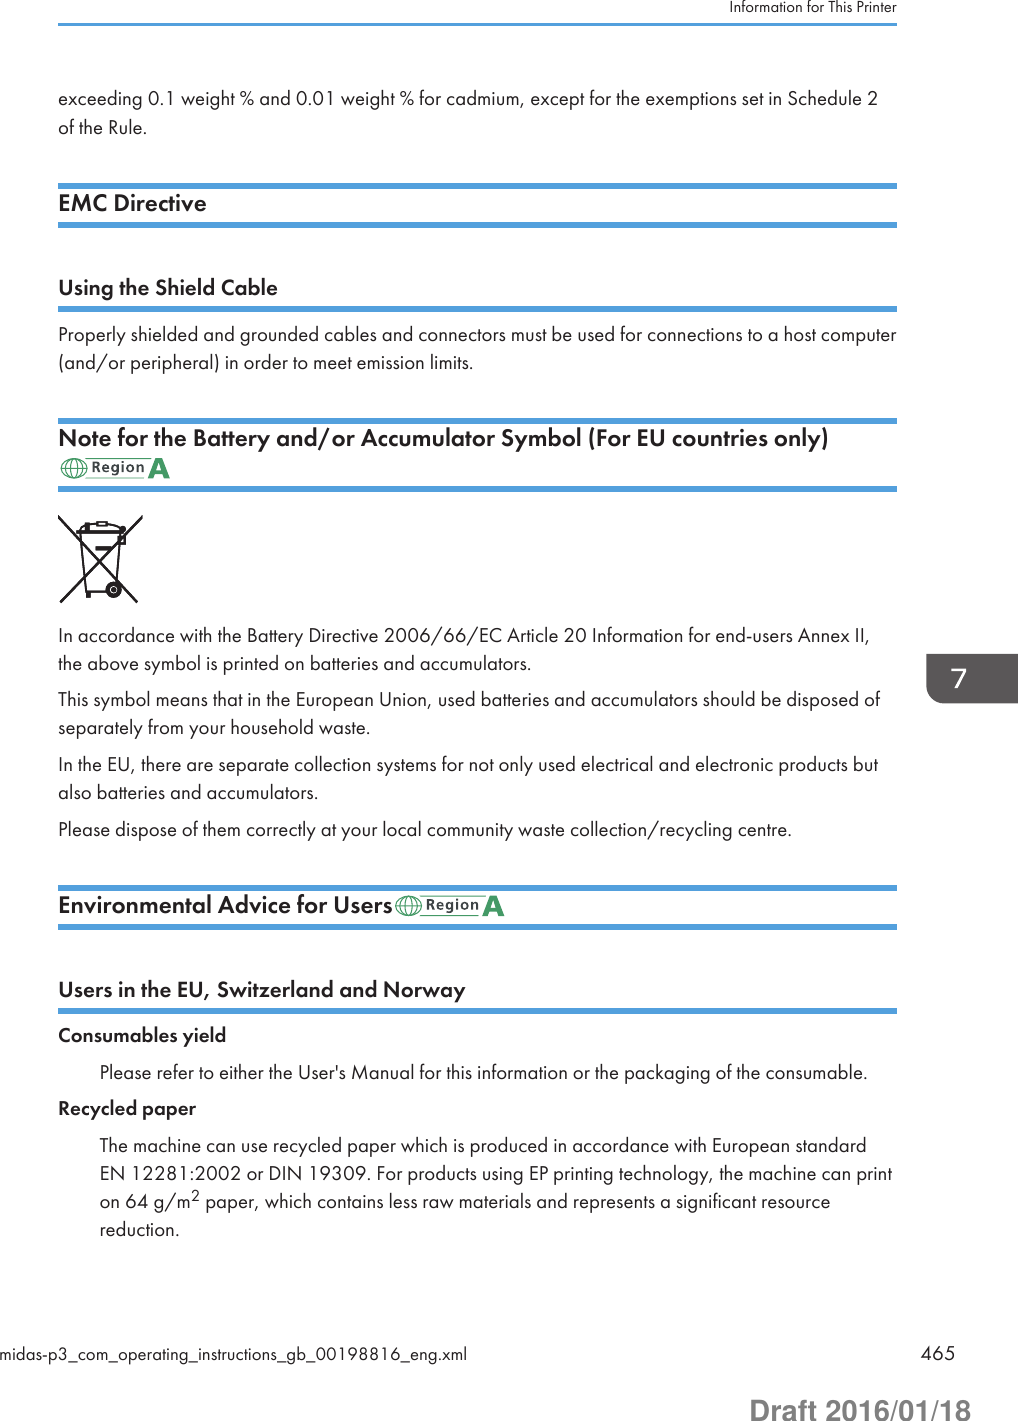
![B&W Page DetectYou can specify whether to recognize black-and-white images by page or by document. Theblack-and-white recognition function allows the printer to print monochrome images inmonochrome mode even if color printing is specified.Default: [Per Job]• Per Page• Per Job• OffRAM DiskIf the hard disk is not installed for PDF Direct Print, select a value of 2 MB or higher.Default: [4 MB]• 0 MB• 2 MB• 4 MB• 8 MB• 16 MBAuto E-mail NotifyYou can specify whether or not to send an error message to a preset e-mail address when a printererror occurs. After changing the setting, turn off the power of the printer briefly, and then turn it onagain. For information, see Web Image Monitor Help.Default: [On]• On• OffMain Pwr Off if Ntwrk DiscxxxxxxxDefault: [On]• On• OffSerial No. of MachineYou can check the serial number of the printer.Print Settings (SP C340DN)This section describes the parameters that can be set on [Print Settings].Function Details of the Printer Configuration Items (SP C340DN)midas-p3_com_operating_instructions_gb_00208890_eng.xml 243Draft 2016/01/18](https://usermanual.wiki/Ricoh/PRSPC342DN1.BBP-PRSPC342DN1-User-Manual-4/User-Guide-2978046-Page-3.png)
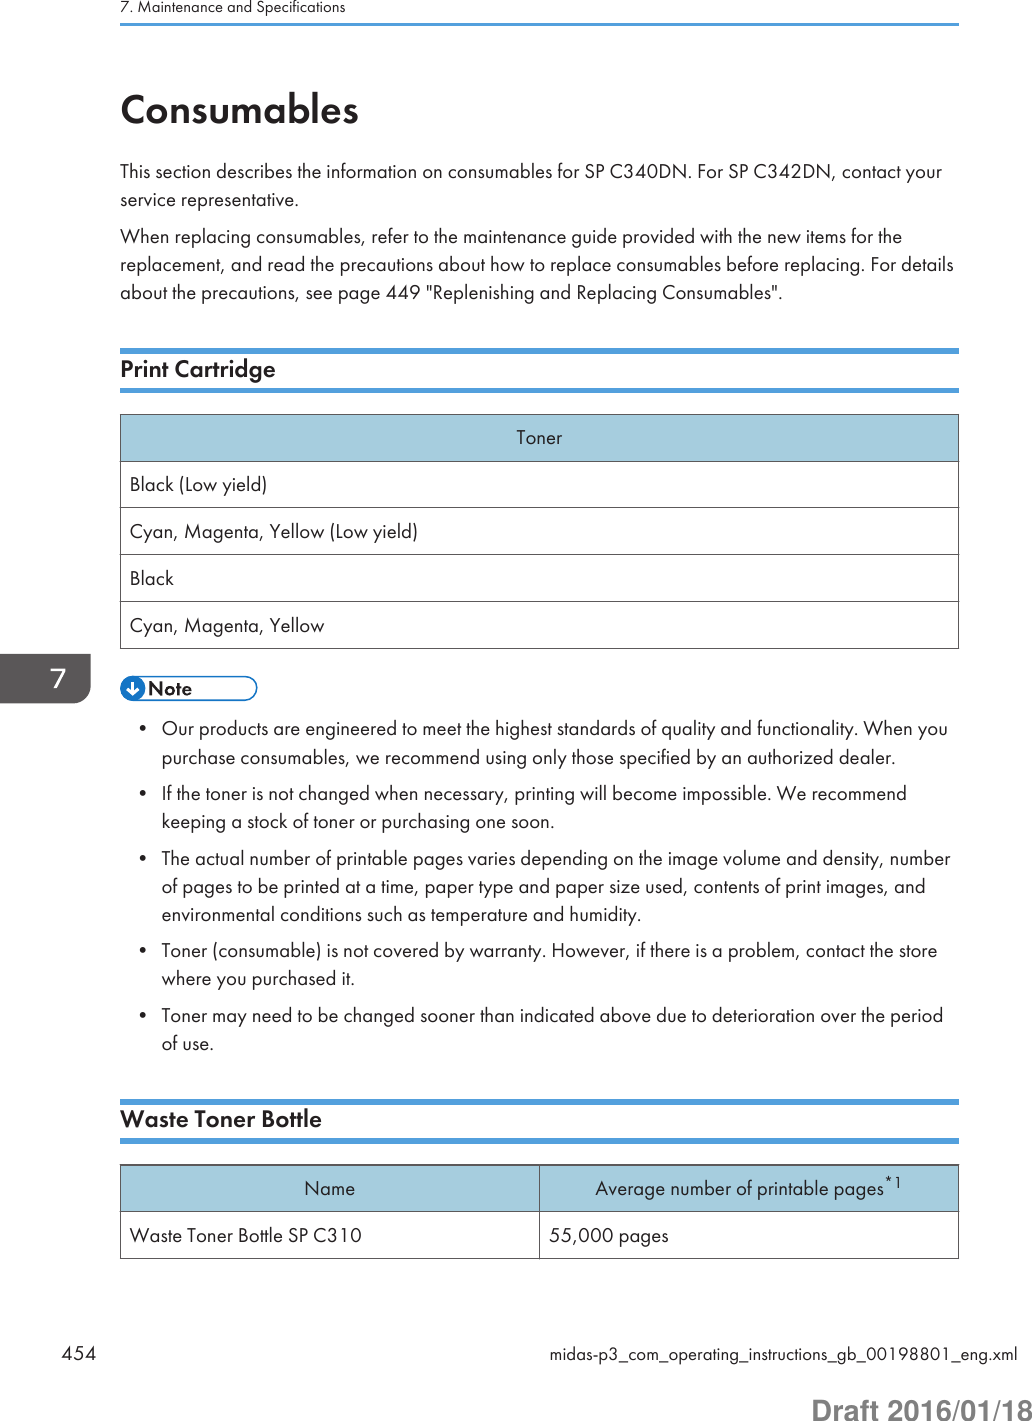
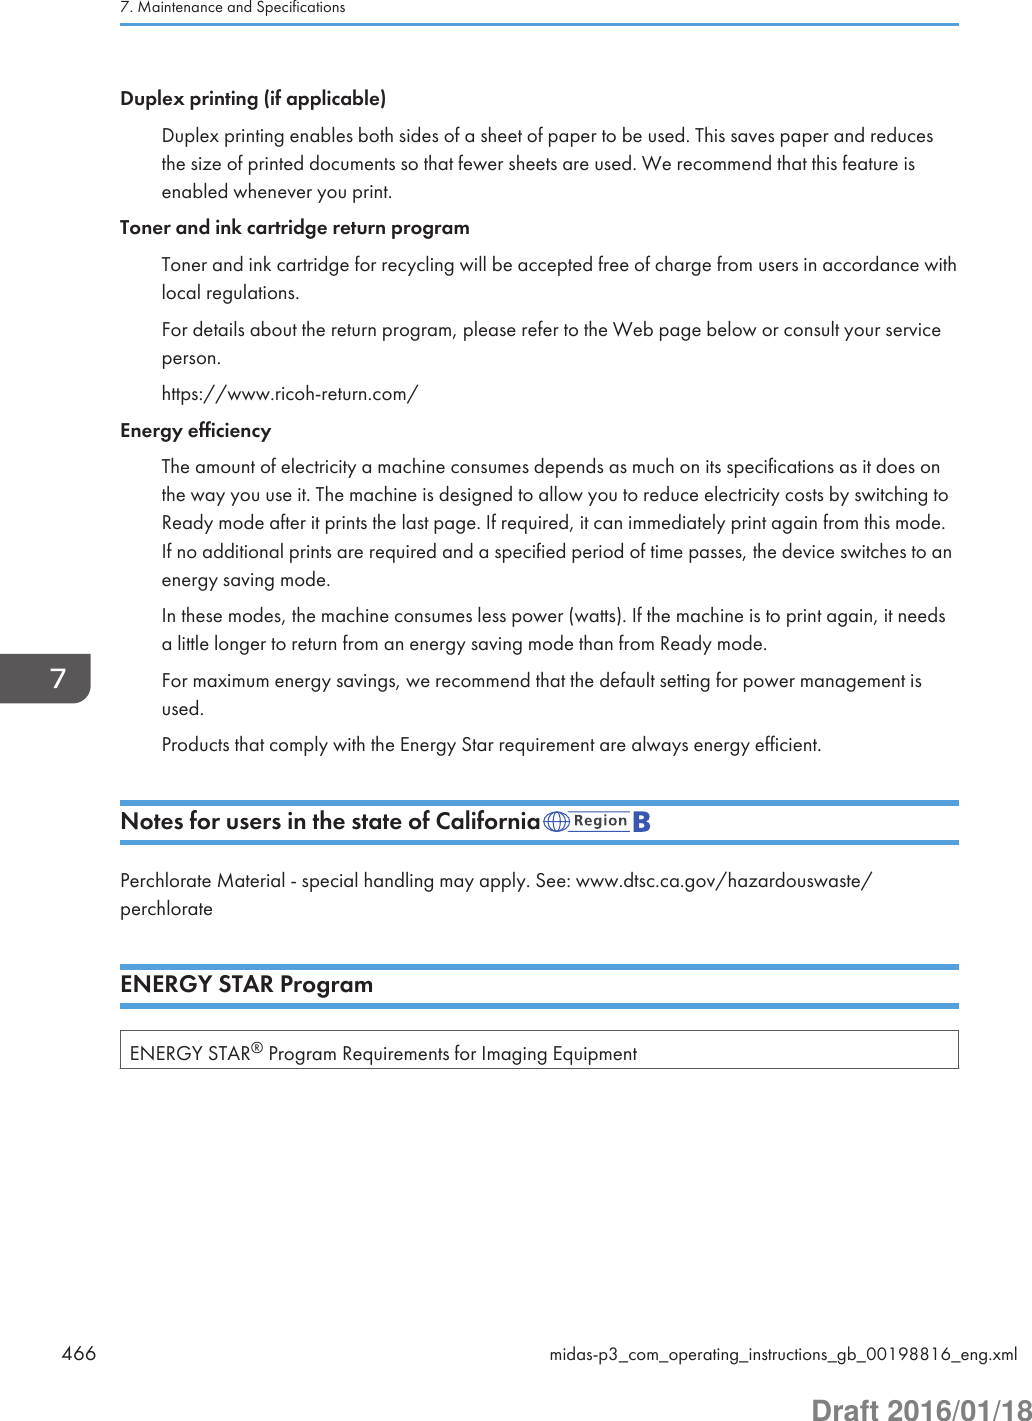
![Machine Modes (SP C340DN)CopiesYou can specify the number of copies to print.If the number of copies to print is specified by command or the printer driver, this setting isoverridden.Default: 1• 1 to 999Page SizeYou can specify the default paper size. The default paper size is used when the paper size is notspecified in the print data.Default:(mainly Europe and Asia)A4(mainly North America)81/2 × 11• (mainly Europe and Asia)A4, A5, A6, B5 JIS, B6 JIS, C5 Env, C6 Env, DL Env, 81/2 × 14, 81/2 × 132/5, 81/2 × 13,81/2 × 12, 81/2 × 11, 81/4 × 13, 8 × 13, 71/4 × 101/2, 51/2 × 81/2, 41/8 × 91/2,37/8 × 71/2, 16K, Custom Size• (mainly North America)81/2 × 14, 81/2 × 132/5, 81/2 × 13, 81/2 × 11, 81/4 × 13, 8 × 13, 71/4 × 101/2, 51/2× 81/2, 41/8 × 91/2, 37/8 × 71/2, A4, A5, A6, B5 JIS, B6 JIS, C5 Env, C6 Env, DL Env,16K, Custom SizeDuplexYou can specify whether or not to print on both sides of a sheet. If you specify duplex printing, youmust also specify the binding method.Default: [None]• None• Long Edge Bind• Short Edge BindRotate by 180 DegreesYou can specify whether or not to rotate the print image by 180 degrees.Default: [Off]• On• Off5. Configuring and Managing the Printer244 midas-p3_com_operating_instructions_gb_00208890_eng.xmlDraft 2016/01/18](https://usermanual.wiki/Ricoh/PRSPC342DN1.BBP-PRSPC342DN1-User-Manual-4/User-Guide-2978046-Page-4.png)
![Blank Page PrintYou can specify whether or not to print blank pages.Default: [On]• On• OffLetterhead SettingYou can specify whether or not to print on paper that has a fixed print side or print direction(letterhead paper, for example). For details, see page 121 "Loading Orientation-Fixed Paper orTwo-Sided Paper".Default: [Auto Detect]• OffThe letterhead printing mode is disabled.• Auto DetectYou can specify whether or not to print using letterhead mode whenever a page that has afixed print side or print direction is specified as the first page.• On (Always)Print with the letterhead printing mode regularly.Tray Setting PriorityYou can specify whether or not the paper size and type settings that are applied are thosespecified using the control panel, printer driver, or print command.Bypass TrayYou can specify whether or not the paper size and type settings applied for the bypass trayare those specified using the control panel, printer driver, or print command.Default: [Driver/Command]• Driver/CommandWhen the source paper tray is specified for a print job, the paper settings specified usingthe printer driver or by print command are applied, regardless of any settings specifiedusing the control panel.• Machine Setting(s)The paper settings specified on the printer's control panel are applied to all print jobs. Anerror may occur if the paper settings specified using the printer driver or by printcommand do not match those specified using the control panel.• Machine Settg(s): Any TypePrinting is performed according to the paper size specified using the printer driver orprint command and the paper type specified on the machine. Regardless of the type ofFunction Details of the Printer Configuration Items (SP C340DN)midas-p3_com_operating_instructions_gb_00208890_eng.xml 245Draft 2016/01/18](https://usermanual.wiki/Ricoh/PRSPC342DN1.BBP-PRSPC342DN1-User-Manual-4/User-Guide-2978046-Page-5.png)
![paper in the paper tray, you can print properly by specifying a paper type using theprinter driver or print command.• Any Size/TypeIf the printer's trays do not contain any paper to match the print job settings, printing canbe performed from the bypass tray with the job's settings applied.• Any Custom Size/TypeIf the printer's trays do not contain any paper to match the print job settings but custompaper was specified using the printer driver or by print command, printing can beperformed from the bypass tray with the job's settings applied.Trays 1 to 2You can specify whether the paper size and type settings applied for Trays 1 to 4 are thosespecified using the control panel, printer driver, or print command.Default: [Machine Setting(s)]• Driver/Command• Machine Setting(s)Tray SwitchingYou can specify whether or not the printer automatically switches paper trays when paper of thespecified size and type is not loaded in the driver-designated tray.Default: [Off]• On• OffExtend Auto Tray SwitchingYou can set the printer to switch paper trays automatically, regardless of whether the tray ismanually or automatically selected.Default: [Off]• On• OffPCL Char.Thickness Adjust.Specify whether or not to thicken the typeface if characters appear blurred when printing throughthe PCL 5c or PCL6 printer driver.Default: [Off]• On• Off5. Configuring and Managing the Printer246 midas-p3_com_operating_instructions_gb_00208890_eng.xmlDraft 2016/01/18](https://usermanual.wiki/Ricoh/PRSPC342DN1.BBP-PRSPC342DN1-User-Manual-4/User-Guide-2978046-Page-6.png)
![PCL Menu (SP C340DN)You can set conditions when using PCL for printing.OrientationSelect the page orientation.Default: [Portrait]• Portrait• LandscapeForm LinesYou can specify the number of lines per page from 5 to 128. The default paper size is used whenthe paper size is not specified in the print data.Default:(mainly Europe and Asia)64(mainly North America)60Font SourceYou can specify the location of the default font.When you select [RAM], you can select only fonts downloaded to the printer RAM.When you select [HDD], you can select only fonts downloaded to the hard disk.When you select [SD Font Download], you can select only fonts downloaded to the SD card.Default: [Resident]• Resident• RAM• HDD• SD• SD Font DownloadFont NumberYou can specify the ID of the default font you want to use.Default: 0• 0 to 63 (Resident)• 1 to X (Download; "X" is the number of downloaded fonts)Function Details of the Printer Configuration Items (SP C340DN)midas-p3_com_operating_instructions_gb_00208890_eng.xml 247Draft 2016/01/18](https://usermanual.wiki/Ricoh/PRSPC342DN1.BBP-PRSPC342DN1-User-Manual-4/User-Guide-2978046-Page-7.png)
![Point SizeYou can specify the point size you want to use for the default font between 4.00 to 999.75 in 0.25increments. This setting is effective only for a variable-space font.Default: 12.00 pointsFont PitchYou can specify the number of characters per inch you want to use for the default font between0.44 to 99.99 in 0.01 increments. This setting is effective only for fixed-space fonts.Default: 10.00 pitchesSymbol SetYou can specify the character set for the default font.Default: [PC-8]Available sets are as follows:Roman-8, Roman-9, ISO L1, ISO L2, ISO L5, ISO L6, ISO L9, PC-775, PC-8, PC-8 D/N,PC-850, PC-852, PC-858, PC8-TK, PC-1004, Win L1, Win L2, Win L5, Win Baltic, Desktop, PSText, MS Publ, Math-8, PS Math, Pifont, Legal, ISO 4, ISO 6, ISO 11, ISO 15, ISO 17, ISO 21,ISO 60, ISO 69, Win 3.0, MC Text, UCS-2, PC-864, Arabic-8, Win Arabic, PC-866, PC-866U,ISO Cyrillic, Win Cyrillic, PC-851, Greek-8, ISO Greek, PC-8 Greek, Win Greek, PC-862,Hebrew-7, Hebrew-8, ISO HebrewCourier FontYou can select the type of courier font.Default: [Regular]• Regular• DarkExt. A4 WidthYou can specify whether or not to extend the width of the printable area of A4 sheets by reducingside margins.Default: [Off]• On• OffAppend CR to LFYou can specify whether or not to append a CR code to each LF code to print text data clearly.Default: [Off]• On• Off5. Configuring and Managing the Printer248 midas-p3_com_operating_instructions_gb_00208890_eng.xmlDraft 2016/01/18](https://usermanual.wiki/Ricoh/PRSPC342DN1.BBP-PRSPC342DN1-User-Manual-4/User-Guide-2978046-Page-8.png)
![ResolutionYou can specify the print resolution in dots per inch.Default: [600dpi Fast]• 600dpi Fast• 600dpi Std.• 1,200dpi (PCL 6 only)PS Menu (SP C340DN)You can set conditions when using PostScript for printing.Job TimeoutYou can specify how long the printer waits before canceling the current job when the job isinterrupted while being processed. If you select Use Machine Setting(s), enter a value between 0 to999. (Default: 0)Default: [Use Driver/Command]• Use Driver/Command• Use Machine SettingsWait TimeoutYou can specify how long the printer waits before it denies receiving a job when the printer cannotdetermine when the job ends. If you select Use Machine Setting(s), enter a value between 0 to999. (Default: 300)Default: [Use Driver/Command]• Use Driver/Command• Use Machine SettingsPaper Selection MethodYou can specify how the source tray will be selected by specifying the default value forDeferredMediaSelection in PostScript.Default: [Select Paper Tray]• Auto SelectThe default value for DeferredMediaSelection is "true". The source tray that matches the papersetting specified in a print job will be selected.• Select Paper TrayThe default value for DeferredMediaSelection is "false". The source tray will be selectedaccording to the media selection of PostScript Language Reference.Function Details of the Printer Configuration Items (SP C340DN)midas-p3_com_operating_instructions_gb_00208890_eng.xml 249Draft 2016/01/18](https://usermanual.wiki/Ricoh/PRSPC342DN1.BBP-PRSPC342DN1-User-Manual-4/User-Guide-2978046-Page-9.png)
![Swtchg btwn 1&2 Sided PrntYou can specify which side of the paper to print on when the PS command is used to performduplex printing and the "setpagedevice" command is entered.Default: [Active]• ActiveCancels duplex printing, and prints pages after the "setpagedevice" command has beenentered on the front side of paper.• InactiveRetains duplex printing, and prints pages after the "setpagedevice" command has beenentered on the back side of paper.Data FormatYou can select the data format from Binary Data or TBCP.This setting is ineffective if a parallel or EtherTalk connection is used.When binary data is sent from the printer driver when the printer is working with a parallel or USBconnection, the print job is canceled.Default: [TBCP]• Binary Data• TBCPWhen an Ethernet connection is used, the print job is canceled if:• The printer driver data format is TBCP and the data format selected using the control panel isBinary Data.• The printer driver data format is binary and the data format selected using the control panel isTBCP.ResolutionYou can specify the resolution.Default: [600dpi Fast]• 600dpi Fast• 600dpi Std.• 1200dpiToner SavingYou can specify whether or not to reduce toner consumption when printing. When this setting isenabled, print quality may be degraded.Default: [Off]• On• Off5. Configuring and Managing the Printer250 midas-p3_com_operating_instructions_gb_00208890_eng.xmlDraft 2016/01/18](https://usermanual.wiki/Ricoh/PRSPC342DN1.BBP-PRSPC342DN1-User-Manual-4/User-Guide-2978046-Page-10.png)
![Color SettingYou can specify the RGB setting.Default: [Super Fine]• None• Fine• Super FineColor ProfileYou can specify the color profile.Default: [Auto]• Auto• Presentation• Solid Color• Photographic• User SettingProcess Color ModelYou can specify the color model.Default: [Color]• Color• Black and WhiteOrientation Auto DetectYou can specify orientation auto detect.Default: [On]• On• OffGray ReproductionYou can specify how to print black or gray tones.Default: [Black/Gray by K (Black)]• Black/Gray by K (Black)• Black by K (Black)• CMY + K• Blk/Gry by K(Blk)-TextOnly• Black by K (Blk)-Text Only• Black/Gray by K-Strong UCRFunction Details of the Printer Configuration Items (SP C340DN)midas-p3_com_operating_instructions_gb_00208890_eng.xml 251Draft 2016/01/18](https://usermanual.wiki/Ricoh/PRSPC342DN1.BBP-PRSPC342DN1-User-Manual-4/User-Guide-2978046-Page-11.png)
![PDF Menu (SP C340DN)You can set conditions when using PDF for printing.Change PDF PasswordYou can set the password for the PDF file printed using PDF Direct Print.A password can be also set using Web Image Monitor, but in this case the password information issent through the network. If security is a priority, set the password using this menu from the controlpanel.PDF Group PasswordThis setting is not available on this printer.Reverse Order PrintingYou can set the printer to start printing from the last page of the document. Use this function whenprints come out face up in the output tray. This allows a printed document to be assembled insequential order.Default: [Off]• On• OffResolutionYou can specify the resolution for the PDF file executing PDF Direct Print.Default: [600dpi Fast]• 600dpi Fast• 600dpi Std.• 1200dpiToner SavingYou can specify whether or not to reduce toner consumption when printing. When this setting isenabled, print quality may be degraded.Default: [Off]• On• OffColor SettingYou can specify the RGB setting.Default: [Super Fine]• None• Fine• Super Fine5. Configuring and Managing the Printer252 midas-p3_com_operating_instructions_gb_00208890_eng.xmlDraft 2016/01/18](https://usermanual.wiki/Ricoh/PRSPC342DN1.BBP-PRSPC342DN1-User-Manual-4/User-Guide-2978046-Page-12.png)
![Color ProfileYou can specify the color profile.Default: [Auto]• Auto• Presentation• Solid Color• Photographic• User SettingProcess Color ModelYou can specify the color model.Default: [Color]• Color• Black and WhiteOrientation Auto DetectYou can specify orientation auto detect for the PDF file executing PDF Direct Print.Default: [On]• On• OffSecurity Options (SP C340DN)This describes the parameters that can be set on [Security Options].Extended SecuritySpecify whether or not to use the extended security functions. For details about the extendedsecurity functions, see Security Guide.Service Mode LockYou can specify whether or not to prohibit entering service mode. This setting appears only whenthe user has logged in as the machine administrator.Default: [Off]• On• OffFirmware VersionYou can display the firmware version of the printer.Function Details of the Printer Configuration Items (SP C340DN)midas-p3_com_operating_instructions_gb_00208890_eng.xml 253Draft 2016/01/18](https://usermanual.wiki/Ricoh/PRSPC342DN1.BBP-PRSPC342DN1-User-Manual-4/User-Guide-2978046-Page-13.png)
![Network Security LevelYou can specify the network security level.Default: [Level 0]• Level 0• Level 1• Level 2• FIPS 140Auto Erase Memory SettingYou can specify whether or not to automatically delete the memory. When set to [On], specify theoverwrite times. To specify the number of memory overwrites, select [Random Numbers]. Thissetting appears only when the optional hard disk is installed.Default: [Off]• OnHDDErase• NSA• DoD• Random NumbersNumber of Erase: Between 1 to 9• OffErase All MemoryYou can delete all data inside the memory. When deleting memory, specify the overwrite times. Tospecify the number of memory overwrites, select [Random Numbers]. This setting appears onlywhen the optional hard disk is installed.Default: [Random Numbers]HDDErase• NSA• DoD• Random NumbersNumber of Erase: Between 1 to 9Extend Auth.Mng.For details about this function, see Security Guide.Transfer Log SettingYou can specify whether or not to send log information to the log collection server.Default: [Off]5. Configuring and Managing the Printer254 midas-p3_com_operating_instructions_gb_00208890_eng.xmlDraft 2016/01/18](https://usermanual.wiki/Ricoh/PRSPC342DN1.BBP-PRSPC342DN1-User-Manual-4/User-Guide-2978046-Page-14.png)
![• On (Only available from the log collection server.)• OffMachine Data EncryptionYou can encrypt data stored on the hard disk. Select the data to be carried over to the hard diskand not be reset.• Format All Data• CarryOver FileSys DataOnly• Carry Over All DataCollect LogsYou can specify whether or not to collect job logs, access logs, and eco-friendly logs.Job LogDefault: [Inactive]• Active• InactiveAccess LogDefault: [Inactive]• Active• InactiveEco-friendly LogsDefault: [Inactive]• Active• Inactive• For details, see Security Guide.Device Setting Information (SP C340 DN)xxxxxxxxxxHost Interface (SP C340DN)This section describes the parameters that can be set on [Host Interface].I/O BufferYou can select the size of the I/O buffer. Normally it is not necessary to change this setting.Function Details of the Printer Configuration Items (SP C340DN)midas-p3_com_operating_instructions_gb_00208890_eng.xml 255Draft 2016/01/18](https://usermanual.wiki/Ricoh/PRSPC342DN1.BBP-PRSPC342DN1-User-Manual-4/User-Guide-2978046-Page-15.png)
![Default: [128 KB]• 128 KB• 256 KBI/O TimeoutYou can specify how many seconds the printer should wait before ending a print job. If printingoperation is frequently interrupted by data from other ports, you can increase the timeout period.Default: [15 seconds]• 10 seconds• 15 seconds• 20 seconds• 25 seconds• 60 secondsNetworkYou can configure the network settings. For details, see page 90 "Configuration".Machine IPv4 AddressYou can specify whether to set the IPv4 address automatically or manually.Default: [Auto-Obtain (DHCP)]Auto-Obtain (DHCP)When DHCP is set to On, the IPv4 address, subnet mask address, and gateway addresscannot be changed. To change them, set DHCP to Off. Contact your administrator forinformation about the network configuration.Specify• IP Add.Manually specify the IPv4 address.Default: 11.22. 33.44• Subnet MManually specify the subnet mask.Default: 0.0.0.0• GatewayManually specify the gateway address.Default: 0.0.0.0IPv6 Stateless SettingYou can specify whether to enable or disable stateless IPv6 address auto configuration.Default: [Active]5. Configuring and Managing the Printer256 midas-p3_com_operating_instructions_gb_00208890_eng.xmlDraft 2016/01/18](https://usermanual.wiki/Ricoh/PRSPC342DN1.BBP-PRSPC342DN1-User-Manual-4/User-Guide-2978046-Page-16.png)
![• Active• InactiveDHCPv6 ConfigurationYou can configure the DHCPv6 settings.DHCPv6 SettingYou can specify whether or not to enable DHCPv6.Default: [Inactive]• Active• InactiveOperation ModeYou can specify the operation mode for DHCPv6 when [DHCPv6 Config.] is set to[Active].Default: [Router Request]• Router Request• Obtain IP Address• Do not obtain IP AddressDNS Server AddressYou can specify how the DNS server address is specified when [DHCPv6 Config.] is setto [Active].Default: [Auto-Obtain (DHCPv6)]• Auto-Obtain (DHCPv6)• SpecifyIpsecThis is a security function. For details, contact your administrator.Default: [Inactive]• Active• InactiveEffective ProtocolYou can specify the effective protocol.IPv4Default: [Active]• Active• InactiveFunction Details of the Printer Configuration Items (SP C340DN)midas-p3_com_operating_instructions_gb_00208890_eng.xml 257Draft 2016/01/18](https://usermanual.wiki/Ricoh/PRSPC342DN1.BBP-PRSPC342DN1-User-Manual-4/User-Guide-2978046-Page-17.png)
![IPv6Default: [Inactive]• Active• InactiveSMBDefault: [Active]• Active• Inactive@Remote ServiceDefault: [Active]• Active• InactiveFirmware Update (IPv4)Default: [Active]• Active• InactiveFirmware Update (IPv6)Default: [Active]• Active• InactiveEthernet SpeedYou can specify the network speed to operate the printer. If a communication error occursbecause of compatibility problems with the hub, select a speed suitable for your networkenvironment.In order to reduce power consumption of network devices, the default Ethernet speed of theprinter does not exceed 100BASE-TX (100 Mbps). If you want to communicate using a higherspeed, select [Auto Select: Enable 1Gbps] to enable 1000BASE-T (1Gbps) communication.Default: [Auto Select: Disable 1Gbps]• Auto Select: Enable 1Gbps• Auto Select: Disable 1Gbps• 10Mbps Half Duplex• 10Mbps Full Duplex• 100Mbps Half Duplex• 100Mbps Full Duplex5. Configuring and Managing the Printer258 midas-p3_com_operating_instructions_gb_00208890_eng.xmlDraft 2016/01/18](https://usermanual.wiki/Ricoh/PRSPC342DN1.BBP-PRSPC342DN1-User-Manual-4/User-Guide-2978046-Page-18.png)
![IEEE802.1X Auth.(Ethernet)You can specify IEEE 802.1X Ethernet authentication. For details about IEEE 802.1Xauthentication, see Security Guide.Default: [Inactive]• Active• InactiveRestr.IEEE802.1X Auth.Def.You can restore the default IEEE 802.1X setting.LAN TypeYou can select Ethernet or Wireless LAN. This menu appears only when the optional wirelessLAN interface board is installed.If Ethernet and Wireless LAN are both connected, the selected interface has priority.Default: [Ethernet]• Ethernet• Wireless LANPermit SSL/TLS Comm.You can set up encrypted communication for SSL/TLS. If you set to [Ciphertext Only], installthe SSL certificate for the printer.Default: [Ciphertext Priority]• Ciphertext Only• Ciphertext Priority• Ciphertext/CleartextParallel InterfaceYou can configure the parallel interface settings. This menu appears when the IEEE 1284 interfaceboard is installed.Parallel TimingYou can specify the parallel interface timing.Default: [ACK outside]• ACK inside• ACK outside• STB downParallel Comm. SpeedYou can specify whether or not to use DMA transfer for receiving data.Default: [High Speed]Function Details of the Printer Configuration Items (SP C340DN)midas-p3_com_operating_instructions_gb_00208890_eng.xml 259Draft 2016/01/18](https://usermanual.wiki/Ricoh/PRSPC342DN1.BBP-PRSPC342DN1-User-Manual-4/User-Guide-2978046-Page-19.png)
![• High Speed• StandardSelection Signal StatusYou can specify the selection signal level of the parallel interface.Default: [High]• High• LowInput PrimeYou usually do not need to change this setting.Default: [Inactive]• Active• InactiveBidirectional Comm.You can specify whether or not to enable or disable bi-directional communication.Default: [On]• On• OffWireless LAN SettingsYou can configure the wireless LAN settings. This menu appears only when the optional wirelessLAN interface board is installed.Wireless LAN Easy SetupYou can set up wireless LAN automatically using Wi-Fi Protected Setup.Default: [Push Button Method]• Push Button Method• PIN Code MethodCommunication ModeYou can specify the transmission mode for wireless LAN.Default: [Infrastructure Mode]• 802.11 Ad hoc• InfrastructureSSID SettingYou can specify the SSID settings to distinguish the access point in [Infrastructure] or [802.11Ad hoc].The characters that can be used are ASCII 0x20-0x7e (32 bytes).5. Configuring and Managing the Printer260 midas-p3_com_operating_instructions_gb_00208890_eng.xmlDraft 2016/01/18](https://usermanual.wiki/Ricoh/PRSPC342DN1.BBP-PRSPC342DN1-User-Manual-4/User-Guide-2978046-Page-20.png)
![Ad-hoc ChannelYou can specify the channel to use when [802.11 Ad hoc] has been selected. Set the channelthat matches the type of the wireless LAN being used.Default: [11]• IEEE 802.11b/g Wireless LANFrequency range:2412–2462 MHz (channels 1–11)• IEEE 802.11a Wireless LANFrequency range:5180–5240 MHz (channels 36, 40, 44, and 48)• IEEE 802.11n Wireless LANFrequency range:2412–2462 MHz (channels 1–11)5180–5240 MHz (channels 36, 40, 44, and 48)Security MethodYou can specify whether or not to enable the encryption method and security type when theencryption is enabled.Default: [Off]• Off• WEPPress [Details], and then enter the WEP key using hexadecimal and ASCII characters.• WPAPress [Details], and then select the Authentication Methods.Select one of the following Authentication Methods:WPA-PSK, WPA(802.1x), WPA2-PSK, WPA2• WPA2Press [Details], and then select the Authentication Method.When you select WPA2, the Encryption Method is set to CCMP (AES) and cannot bechanged.Select one of the following Authentication Methods:WPA2-PSK, WPA2When you select WPA2-PSK, enter a passphrase (from 8 to 63 characters).Function Details of the Printer Configuration Items (SP C340DN)midas-p3_com_operating_instructions_gb_00208890_eng.xml 261Draft 2016/01/18](https://usermanual.wiki/Ricoh/PRSPC342DN1.BBP-PRSPC342DN1-User-Manual-4/User-Guide-2978046-Page-21.png)
![Direct Connection SettingsYou can specify whether or not to enable the control panel can be used as a DHCP server.When the client on a network starts, the information such as an IP address that is required fornetwork connection is assigned automatically.Default: [OFF]Configure all the following items to enable this function:• Device namePress [RENAME DEVICE] on the top right of the screen, and then enter the name of thedevice connected to the client.• Connection PasswordEnter the password for connecting to a network.• Display IPv4 Address• Connection StatusWireless LAN SignalYou can check the signal strength when using wireless LAN.Restore DefaultsYou can reset the wireless LAN settings to their default.USB SettingsYou can configure the communication parameters for computer-to-printer connection via USB.USB SpeedDefault: [Auto Select]• Auto Select• Full SpeedFixed USB PortDefault: [Off]• Level 1• Level 2• Off• For details about how to configure the settings using Web Image Monitor, see Web Image MonitorHelp.5. Configuring and Managing the Printer262 midas-p3_com_operating_instructions_gb_00208890_eng.xmlDraft 2016/01/18](https://usermanual.wiki/Ricoh/PRSPC342DN1.BBP-PRSPC342DN1-User-Manual-4/User-Guide-2978046-Page-22.png)
![Language (SP C340DN)You can select the display language for the menu. Available languages vary depending on the countryof purchase.[English] (default), [French], [German], [Italian], [Spanish], [Dutch], [Norwegian], [Danish], [Swedish],[Polish], [Portuguese], [Hungarian], [Czech], [Finnish], [Russian]Extended Features (SP C340DN)Use Web Image Monitor to configure extended features. For details, see Extended Feature Settings.Memory Erase StatusYou can display the status of remaining data in the memory.• [Memory Erase Status] appears only when the optional hard disk is installed.Press the [Menu] key, and then select the setting items using the [ ] or [ ] key.1. Select [Memory Erase Status] Press [OK]2. Check the current memory status Press [OK][Data to erase remaining.] : Data remains inside the memory.[Currently no data to erase.] : No data remains inside the memory.[Erasing data...] : Data is being deleted.Function Details of the Printer Configuration Items (SP C340DN)midas-p3_com_operating_instructions_gb_00208890_eng.xml 263Draft 2016/01/18](https://usermanual.wiki/Ricoh/PRSPC342DN1.BBP-PRSPC342DN1-User-Manual-4/User-Guide-2978046-Page-23.png)
![Effective Protocol IPv4 Active (default), InactiveIPv6 Active, Inactive (default)SMB Active (default), Inactive@Remote Service Active (default), InactiveFirmware Update (IPv4) Active (default), InactiveFirmware Update (IPv6) Active (default), InactiveSMB Computer NameSMB Work GroupEthernet Speed AutoSelct:Enable 1Gbps, AutoSelct:Disable 1Gbps (default),10Mbps Half Duplex, 10Mbps Full Duplex, 100Mbps HalfDuplex, 100Mbps Full DuplexLAN Type Ethernet (default), Wireless LANPing CommandPermit SNMPv3CommunicationEncryption Only, Encryption/Cleartext (default)Permit SSL/TLS Communication Ciphertext Only, Ciphertext Priority (default), Encryption/CleartextHost NameMachine NameIEEE 802.1X Authentication forEthernetActive, Inactive (default)Restore IEEE 802.1X Authentication to DefaultsUSB Speed Auto Select (default), Full Speed• [LAN Type] is displayed only when the optional Wireless LAN interface board is installed.Parallel InterfaceParallel Timing ACK inside, ACK Outside (default), STB downParallel Communication Speed High Speed (default), StandardPrinter Configuration Items List (SP C342DN)midas-p3_com_operating_instructions_gb_00208892_eng.xml 269Draft 2016/01/18](https://usermanual.wiki/Ricoh/PRSPC342DN1.BBP-PRSPC342DN1-User-Manual-4/User-Guide-2978046-Page-29.png)
![Compulsory Unathd. CopyPreventn.Driver / Command (default),Driver/Command (MostSettings), Machine Setting(s)Unauthorized Copy PreventionTypeData Security for Copying,Unathd. Copy Prev.: Patn.(default)Data Security for Copying Effect Text and Background (default),Background OnlyUnathd. Copy Prev. of Ptrn. Effct. Text and Background (default),Background Only, Text Only,Reverse Patterns(Text/Background)Mask Type for Pattern None (default), Type 1, Type 2,Type 3, Type 4, Type 5, Type 6,Type 7, Type 8, Type 9, Type10Pattern Color Black (default), Magenta, CyanPattern Density Default: "3"Text Selection Default: [Unauthorized Copy]Program/Change User TextPCL Fonts for Texts Default: [Arial]PS Fonts for Texts Default: [Arial]xxxxxxxPoint Size 50-300 pointsDefault: "70" pointsCarriage Return Space 50-300 pointsDefault: "70" pointsText Angle 0-359 degreesDefault: "30" degreesRepeat Text On, On: Rotate 180deg onReturn, Off (default)5. Configuring and Managing the Printer274 midas-p3_com_operating_instructions_gb_00208892_eng.xmlDraft 2016/01/18](https://usermanual.wiki/Ricoh/PRSPC342DN1.BBP-PRSPC342DN1-User-Manual-4/User-Guide-2978046-Page-34.png)
![Font Source Resident (default), RAM, HDD, SD, SD Font DownloadFont Number 0 to 63 (When [Font Source] is [Resident]) or 1 to X (When [FontSource] is other than [Resident]; "X" is the number of fonts)Default: "0" (1 when [Font Source] is other than [Resident])Point Size 4 to 999.75 (in increments of 0.25)Default: "12.00"Font Pitch 0.44 to 99.99 (in increments of 0.01)Default: "10.00"Symbol Set Roman-8, Roman-9, ISO L1, ISO L2, ISO L5, ISO L6, ISO L9,PC-775, PC-8 (default), PC-8 D/N, PC-850, PC-852, PC-858,PC8-TK, PC-1004, Win L1, Win L2, Win L5, Win Baltic, Desktop,PS Text, MS Publ, Math-8, PS Math, Pifont, Legal, ISO 4, ISO 6,ISO 11, ISO 15, ISO 17, ISO 21, ISO 60, ISO 69, Win 3.0, MCText, UCS-2, PC-864, Arabic-8, Win Arabic, PC-866, PC-866U,ISO Cyrillic, Win Cyrillic, PC-851, Greek-8, ISO Greek, PC-8Greek, Win Greek, PC-862, Hebrew-7, Hebrew-8, ISO HebrewCourier Font Regular (default), DarkExtend A4 Width On, Off (default)Append CR to LF On, Off (default)Resolution 600 dpi (Fast) (default), 600 dpi (Standard)Toner Saving On, Off (default)PS Menu (SP C342DN)Job Timeout Use Driver/Command (default), Use Machine SettingsWait Timeout Use Driver/Command (default), Use Machine SettingsPaper Selection Method Auto Select, Select Paper Tray (default)Switching btwn. 1&2 SidedPrintActive (default), InactiveData Format Binary Data, TBCP (default)Resolution 600 dpi (Fast) (default), 600 dpi (Standard), 1200dpi5. Configuring and Managing the Printer280 midas-p3_com_operating_instructions_gb_00208892_eng.xmlDraft 2016/01/18](https://usermanual.wiki/Ricoh/PRSPC342DN1.BBP-PRSPC342DN1-User-Manual-4/User-Guide-2978046-Page-40.png)
![Gray Reproduction Black/Gray by K (Black) (default), Black by K (Black), CMY + K,Black/Gray by K(Black)-Text Only, Black by K (Black)-Text OnlyExtended Feature Settings (SP C342DN)Startup SettingInstallUninstallExtended Feature InfoAdministrator ToolsAdd.Program Startup SettingInstall Add.ProgramUninstall Add.ProgramAdd.Program InfoAddress Book Mangmnt (SP C342DN)You can configure [Address Book Management] in [Administrator Tools] under [System Settings]. Fordetails, see page 300 "Administrator Tools".Tray Paper Settings (SP C342DN)You can configure [Tray Paper Settings] under [System Settings]. For details, see page 287 "Tray PaperSettings".Paper Tray Priority: Printer Tray 1 (default), Tray 2, Bypass TrayTray Paper Size: Trays 1–2 For details about available paper sizes, see page 106 "Paper SizeSpecifications".Default:engb(mainly Europe and Asia)engbA4engb(mainly North America)5. Configuring and Managing the Printer282 midas-p3_com_operating_instructions_gb_00208892_eng.xmlDraft 2016/01/18](https://usermanual.wiki/Ricoh/PRSPC342DN1.BBP-PRSPC342DN1-User-Manual-4/User-Guide-2978046-Page-42.png)
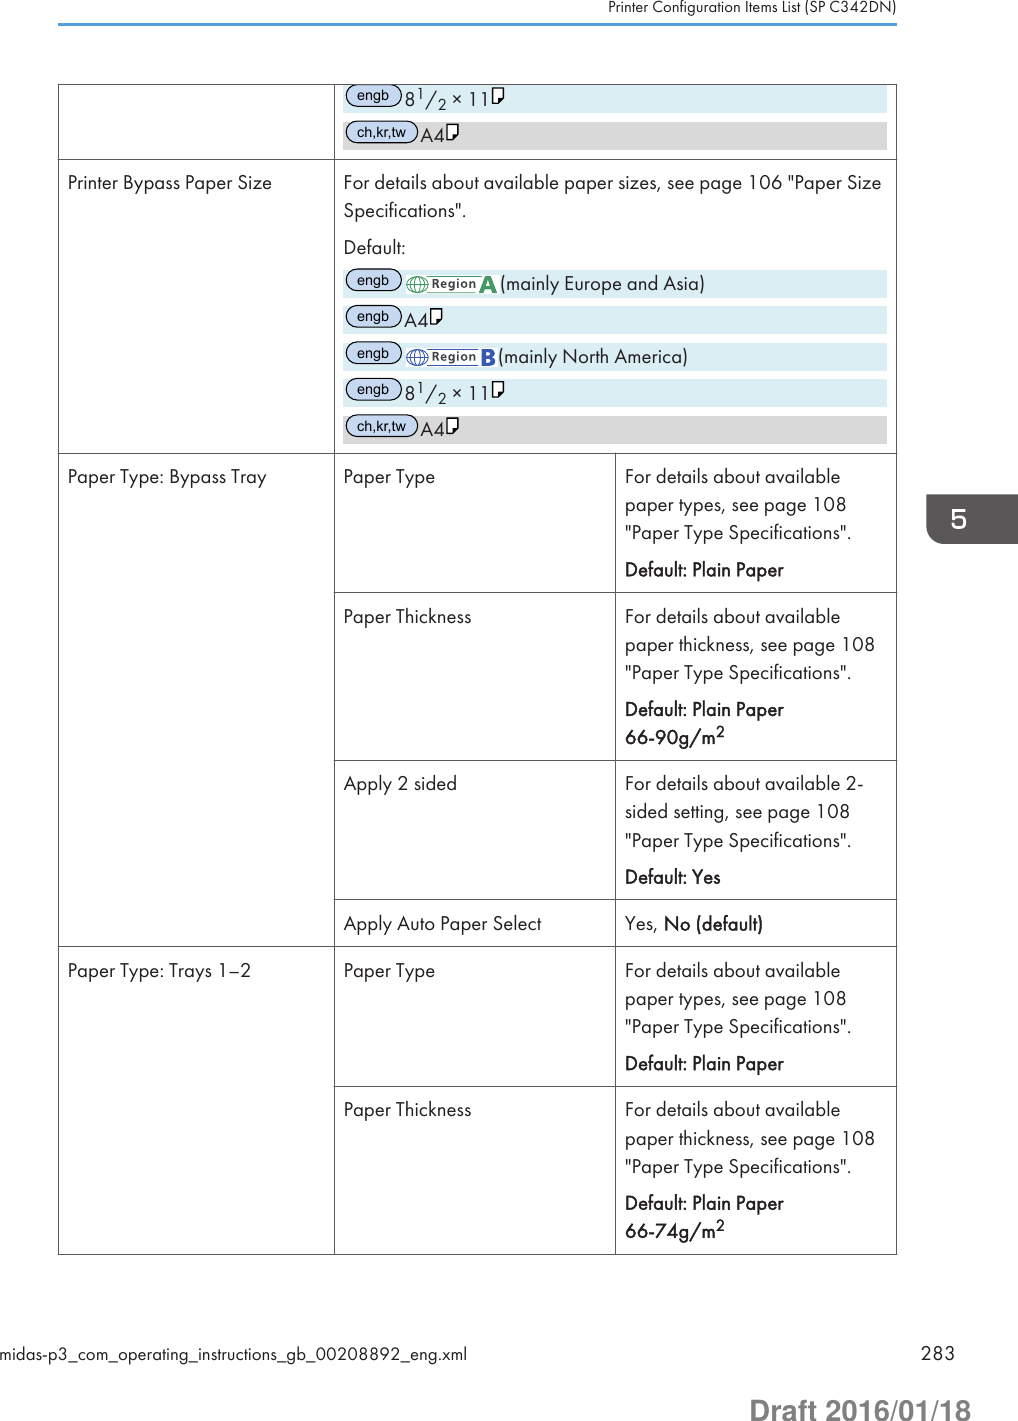
![Apply 2 sided For details about available 2-sided setting, see page 108"Paper Type Specifications".Default: YesApply Auto Paper Select Yes, No (default)Edit Home (SP C342DN)You can add shortcuts to frequently used embedded software applications in the [Home] screen. Fordetails, see page 31 "Customizing the [Home] Screen".Remote Services (SP C342DN)You can display the communication screen for @Remote Service. For details, see Security Guide.Switch Display Language (SP C342DN)The table below shows the list of setting items. For details about their functions, see page 327 "SwitchDisplay Language".English (default), French, German, Italian, Spanish, Dutch, Norwegian, Danish, Swedish, Polish,Portuguese, Hungarian, Czech, Finnish, Russian.Maintenance: Print (SP C342DN)Plain Paper Setting Plain Paper (default)Replacement Alert Toner, Waste Toner Bottle,Intermediate Transfer Unit,Fusing Unit.Notify Sooner, Normal(default), Notify LaterSupply End Option Continue Printing (default), Stop PrintingBlack & White Page Detect Per Page, Per Job (default)CleaningCurl Prevention Active, Inactive (default)5. Configuring and Managing the Printer284 midas-p3_com_operating_instructions_gb_00208892_eng.xmlDraft 2016/01/18](https://usermanual.wiki/Ricoh/PRSPC342DN1.BBP-PRSPC342DN1-User-Manual-4/User-Guide-2978046-Page-44.png)
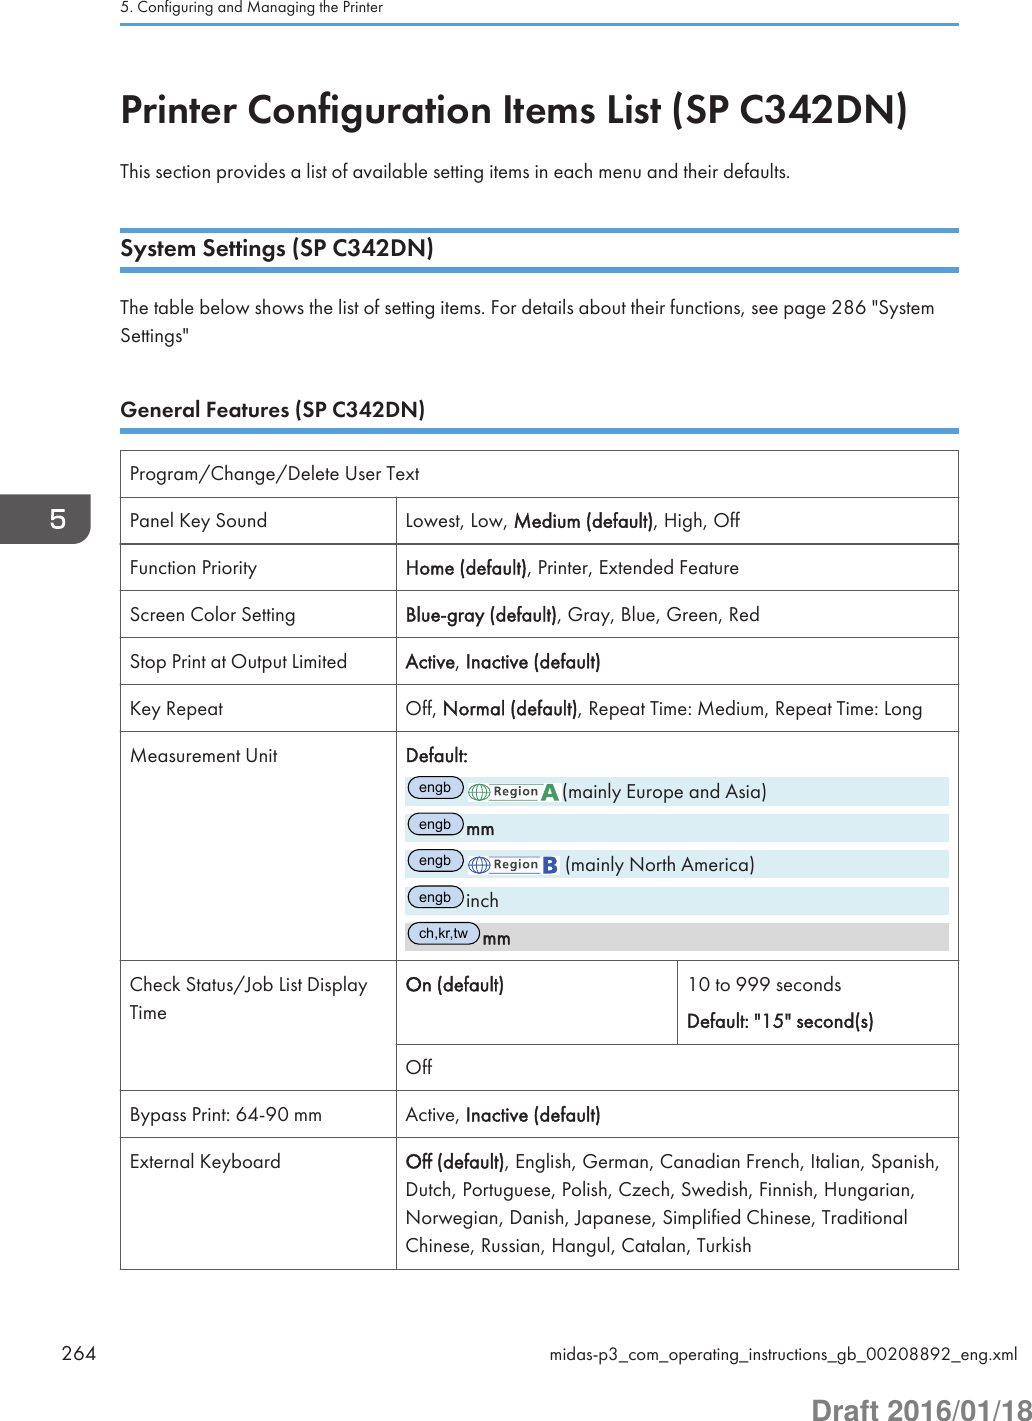
![Function Details of the Printer ConfigurationItems (SP C342DN)This section describes the information about the setting items in each menu.System SettingsThis section describes user tools under System Settings menu.General FeaturesProgram/Change/Delete User TextYou can register text phrases you often use when specifying settings, such as ".com" and "Regards".You can register up to 40 entries.Panel Key SoundYou can specify whether or not the beeper (key tone) sounds when a key is pressed.Default: [Medium]Function PriorityYou can specify the mode to be displayed immediately after the operation switch is turned on, orwhen System Reset mode is turned on.Default: [Home]Screen Color SettingYou can change the screen color.Default: [Blue-gray]Key RepeatYou can enable or disable repetition of an operation if a key on the screen or control panel ispressed continuously.Default: [Normal]Measurement UnitYou can switch the measurement between [mm] and [inch] when you specify a custom size on thecontrol panel.Default: (mainly Europe and Asia)[mm] (mainly North America)5. Configuring and Managing the Printer286 midas-p3_com_operating_instructions_gb_00208911_eng.xmlDraft 2016/01/18](https://usermanual.wiki/Ricoh/PRSPC342DN1.BBP-PRSPC342DN1-User-Manual-4/User-Guide-2978046-Page-46.png)
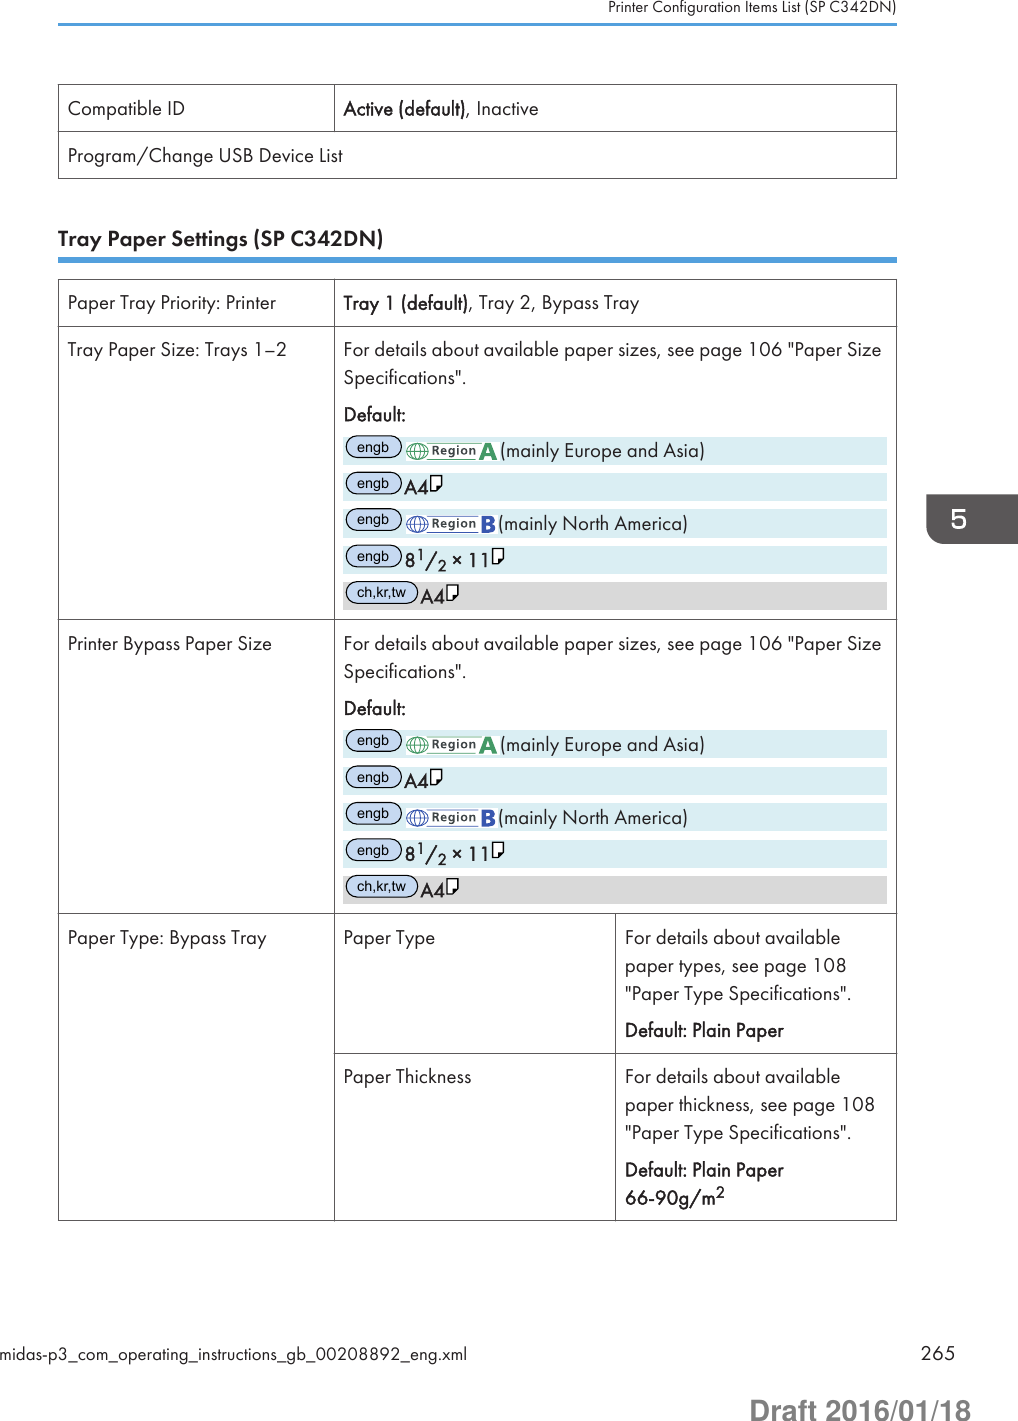
![[inch]Check Status/Job List Display TimeYou can specify how long to display the System Status and Job List display for.When the setting is [On], you can specify a display time between 10 and 999 seconds in 1 secondincrements using the number keys.Default: [On], "15" second(s)External KeyboardYou can specify the layout of the external keyboard connected to the USB port.Default: [Off]Compatible IDYou can enable or disable the Compatible ID setting.Default: [Active]Tray Paper Settings• If the specified paper size differs from the actual size of the paper loaded in the paper tray, amisfeed might occur because the correct paper size was not detected.Paper Tray Priority: PrinterYou can specify the tray to supply paper for output.Default: [Tray 1]Tray Paper Size: Trays 1–2You can specify the size of the paper loaded in the paper Trays 1–2. To specify a custom papersize, press [Custom Size] and enter the horizontal and vertical dimensions of the paper.The paper sizes to be set using the control panel.For details about available paper sizes, see page 106 "Paper Size Specifications".Only the installed trays appear on the screen.Printer Bypass Paper SizeYou can specify the size of the paper loaded in the bypass tray. For details about available papersizes, see page 106 "Paper Size Specifications".Default: [81/2 × 11 ]Paper Type: Bypass TrayYou can specify the type of the paper loaded in the bypass tray. For details about available papertypes, see page 108 "Paper Type Specifications".• Paper TypeFunction Details of the Printer Configuration Items (SP C342DN)midas-p3_com_operating_instructions_gb_00208911_eng.xml 287Draft 2016/01/18](https://usermanual.wiki/Ricoh/PRSPC342DN1.BBP-PRSPC342DN1-User-Manual-4/User-Guide-2978046-Page-47.png)
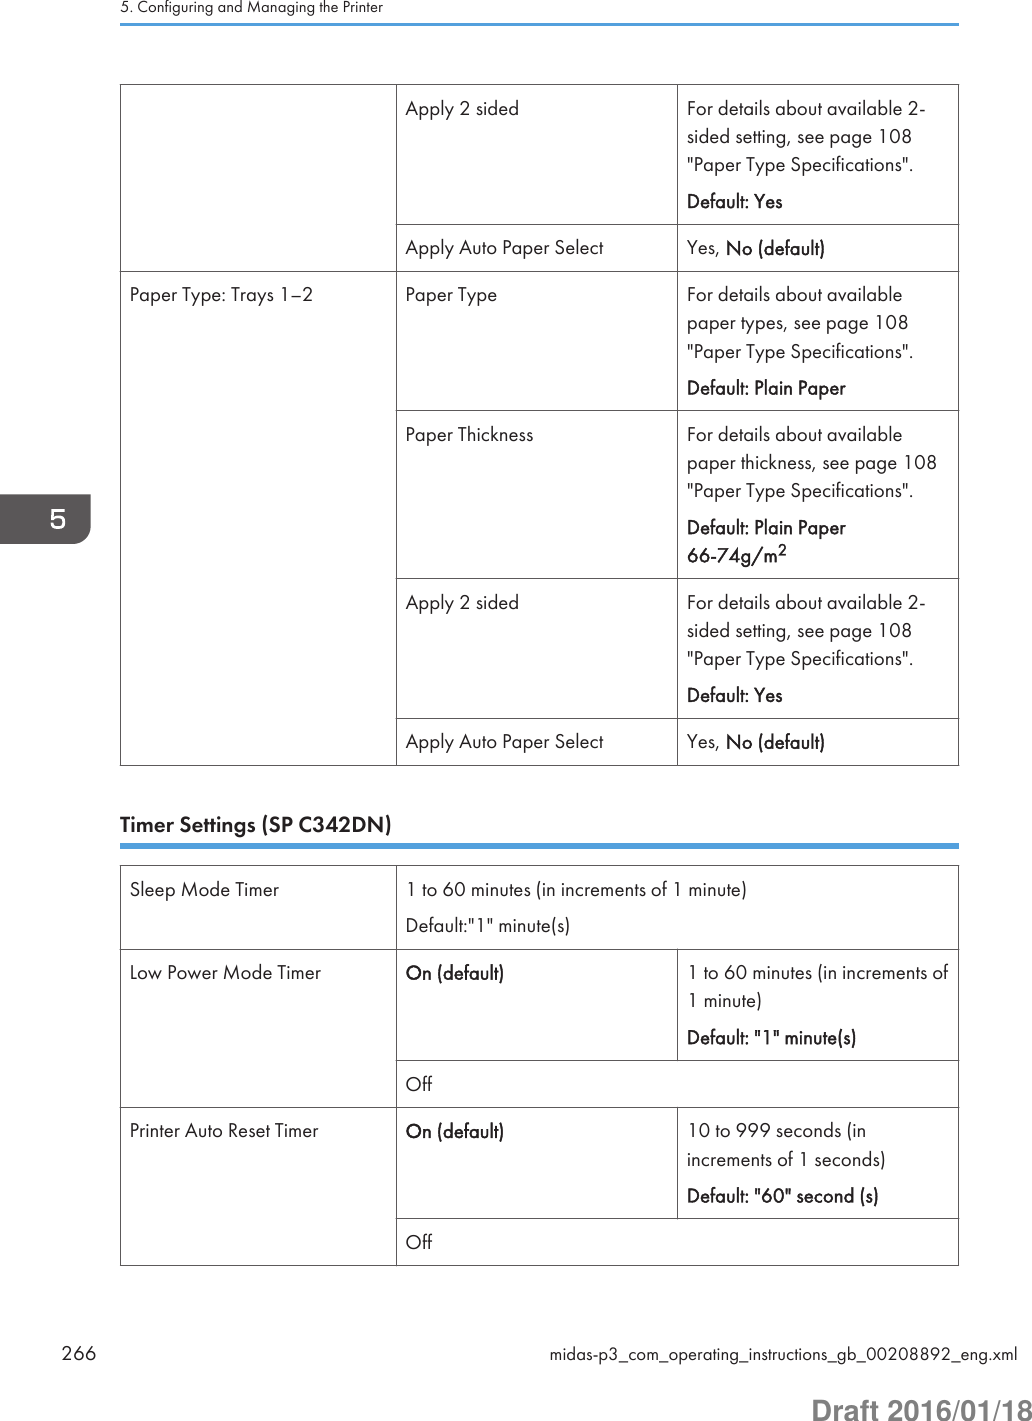
![Default: [Plain Paper]• Paper ThicknessDefault: [Plain Paper 66-90g/m2]• Apply 2 sidedDefault: [Yes]• Apply Auto Paper SelectDefault: [No]Paper Type: Trays 1–2You can specify the type of the paper loaded in the paper Trays 1–2. For details about availablepaper types, see page 108 "Paper Type Specifications".Only the installed trays appear on the screen.• Paper TypeDefault: [Plain Paper]• Paper ThicknessDefault: [Plain Paper]• Apply 2 sidedDefault: [Yes]• Apply Auto Paper SelectDefault: [No]• In [Plain Paper Setting] in [Maintenance: Print], you can specify the thickness of the plain paper youload. For details, see page 327 "Maintenance: Print".Timer SettingsSleep Mode TimerAfter a specified period has passed, or the [Energy Saver] key is pressed, the printer enters SleepMode in order to conserve energy.Specify the time to elapse before Sleep Mode.The time can be set from 1 to 60 minutes, using the number keys.Default:"1" minute(s)Depending on which Embedded Software Architecture application is installed on it, the printermight take longer than indicated to enter Sleep Mode.Printer Auto Reset TimerYou can specify the time to elapse before the printer function is reset.5. Configuring and Managing the Printer288 midas-p3_com_operating_instructions_gb_00208911_eng.xmlDraft 2016/01/18](https://usermanual.wiki/Ricoh/PRSPC342DN1.BBP-PRSPC342DN1-User-Manual-4/User-Guide-2978046-Page-48.png)
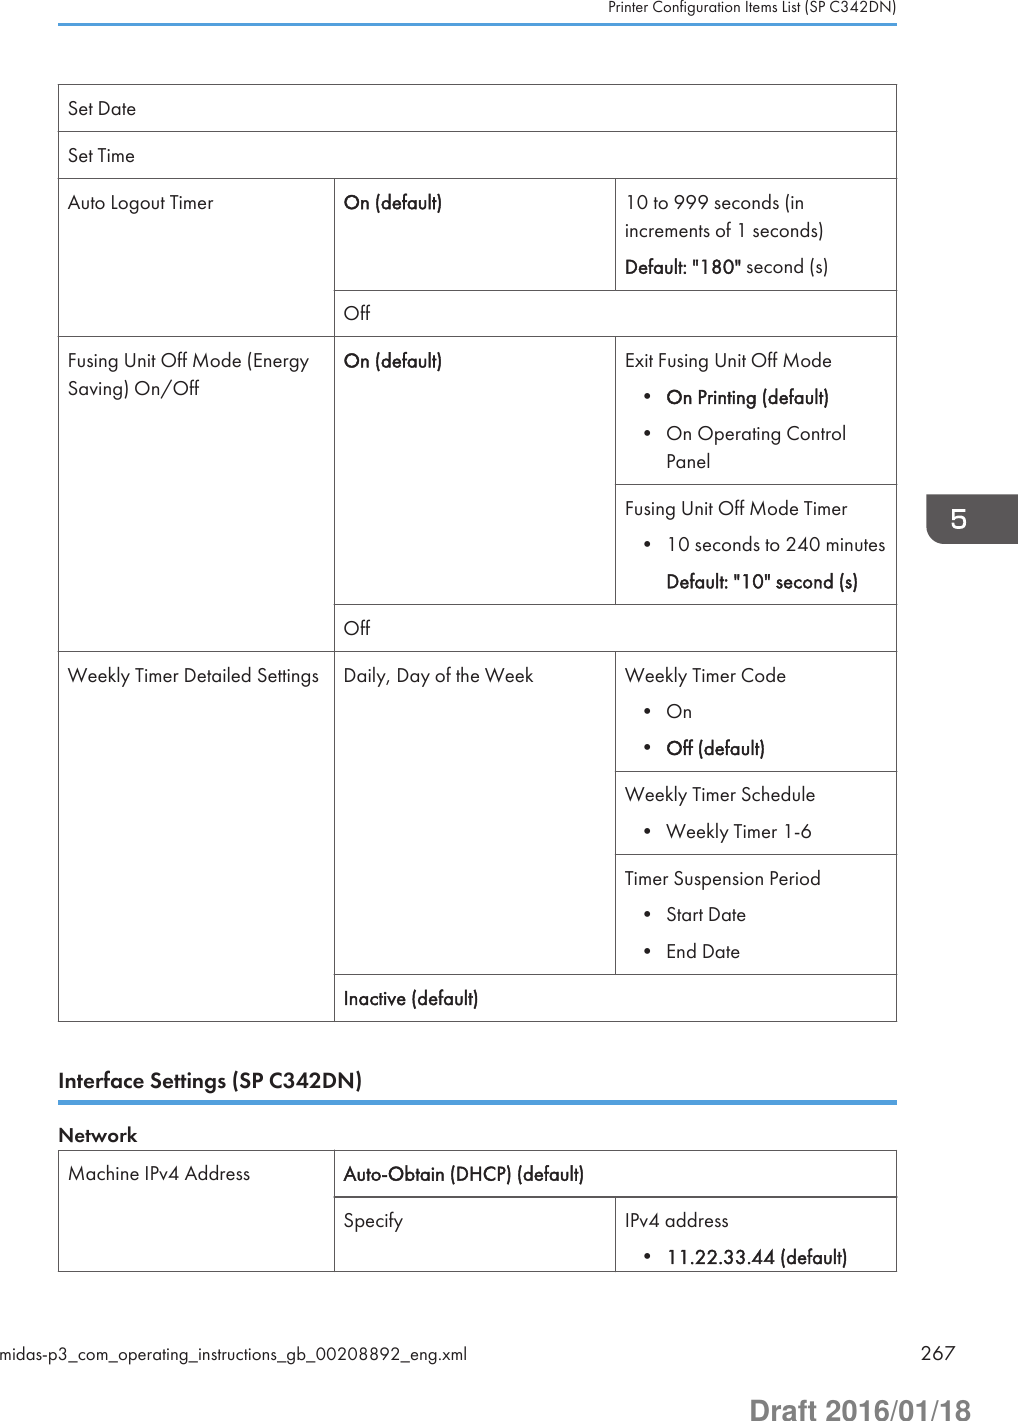
![The time can be set from 10 to 999 seconds, using the number keys.Default: [On], "60" second(s)Set DateYou can specify the date for the printer's internal clock using the number keys.To change between year, month, and day, press [ ] and [ ].Set TimeYou can specify the time for the printer's internal clock using the number keys.To change between hours, minutes and seconds, press [ ] and [ ]. (mainly Europe and Asia)Enter the time using the 24-hour format (in 1 second increments). (mainly North America)Enter the time using the 12-hour format (in 1 second increments).Auto Logout TimerYou can specify whether or not to automatically log out a user when the user does not operate theprinter for a specified period of time after logging in.The time can be set from 60 to 999 seconds in one second increments, using the number keys.Default: [On], "180" second(s)Fusing Unit Off Mode (Energy Saving) On/OffYou can specify whether or not to use Fusing Unit Off mode.Default: [Off]• OnTurns on Fusing Unit Off mode. This setting further reduces power consumption, but the printermay take longer to recover from Fusing Unit Off mode.When you select [On], you can set [Exit Fusing Unit Off Mode] and [Fusing Unit Off ModeTimer].• OffTurns off Fusing Unit Off mode.Exit Fusing Unit Off ModeYou can specify the condition for the printer to exit Fusing Unit Off mode.Default: [On Printing]• On PrintingThe printer exits Fusing Unit Off mode when printing is performed.• On Operating Control PanelThe printer exits Fusing Unit Off mode when any key on the control panel is pressed.Function Details of the Printer Configuration Items (SP C342DN)midas-p3_com_operating_instructions_gb_00208911_eng.xml 289Draft 2016/01/18](https://usermanual.wiki/Ricoh/PRSPC342DN1.BBP-PRSPC342DN1-User-Manual-4/User-Guide-2978046-Page-49.png)
![Fusing Unit Off Mode TimerYou can specify the period of time the printer waits before entering Fusing Unit Off mode.The timer is reset if any key on the control panel is pressed or printing is performed.Default: [10 seconds]The Fusing Unit Off Mode Timer is reset when:• A print is performed• A cover is opened when [Exit Fusing Unit Off Mode] is set to [On Printing]• Any key on the operating panel is pressed when [Exit Fusing Unit Off Mode] is set to [OnOperating Control Panel]Weekly TimerYou can set the timer for the printer to turn off and on the main power or to enter and exit Sleepmode every day or on specified days of the week.To use Weekly Timer, the date and time of the internal clock must be set using the control panel. Fordetails, see page 288 "Timer Settings".When Weekly Timer is set to [Daily] or [Day of the Week], the printer does not turn on even if[ECO Night Sensor] is set to [Power Off and On] and the time for turning on the main powerspecified in [Timer to Turn On] elapses.Default: [Inactive]• Daily• Day of the Week• InactiveWhen [Daily] or [Day of the Week] is selected, you can specify the following:Weekly Timer CodeTo configure this setting, administrator authentication must be enabled. For details, seeSecurity Guide.You can set a password (up to eight digits) for Weekly Timer. Once the password is set, thescreen requiring the password is displayed while the printer is turned off or in Sleep mode byWeekly Timer. Enter the password to turn on the printer or recover the printer from Sleepmode.If you set Weekly Timer Code to [Off], you do not need to enter a password to recover theprinter.Default: [Off]Weekly Timer ScheduleYou can specify when Weekly Timer takes effect (up to six settings).5. Configuring and Managing the Printer290 midas-p3_com_operating_instructions_gb_00208911_eng.xmlDraft 2016/01/18](https://usermanual.wiki/Ricoh/PRSPC342DN1.BBP-PRSPC342DN1-User-Manual-4/User-Guide-2978046-Page-50.png)
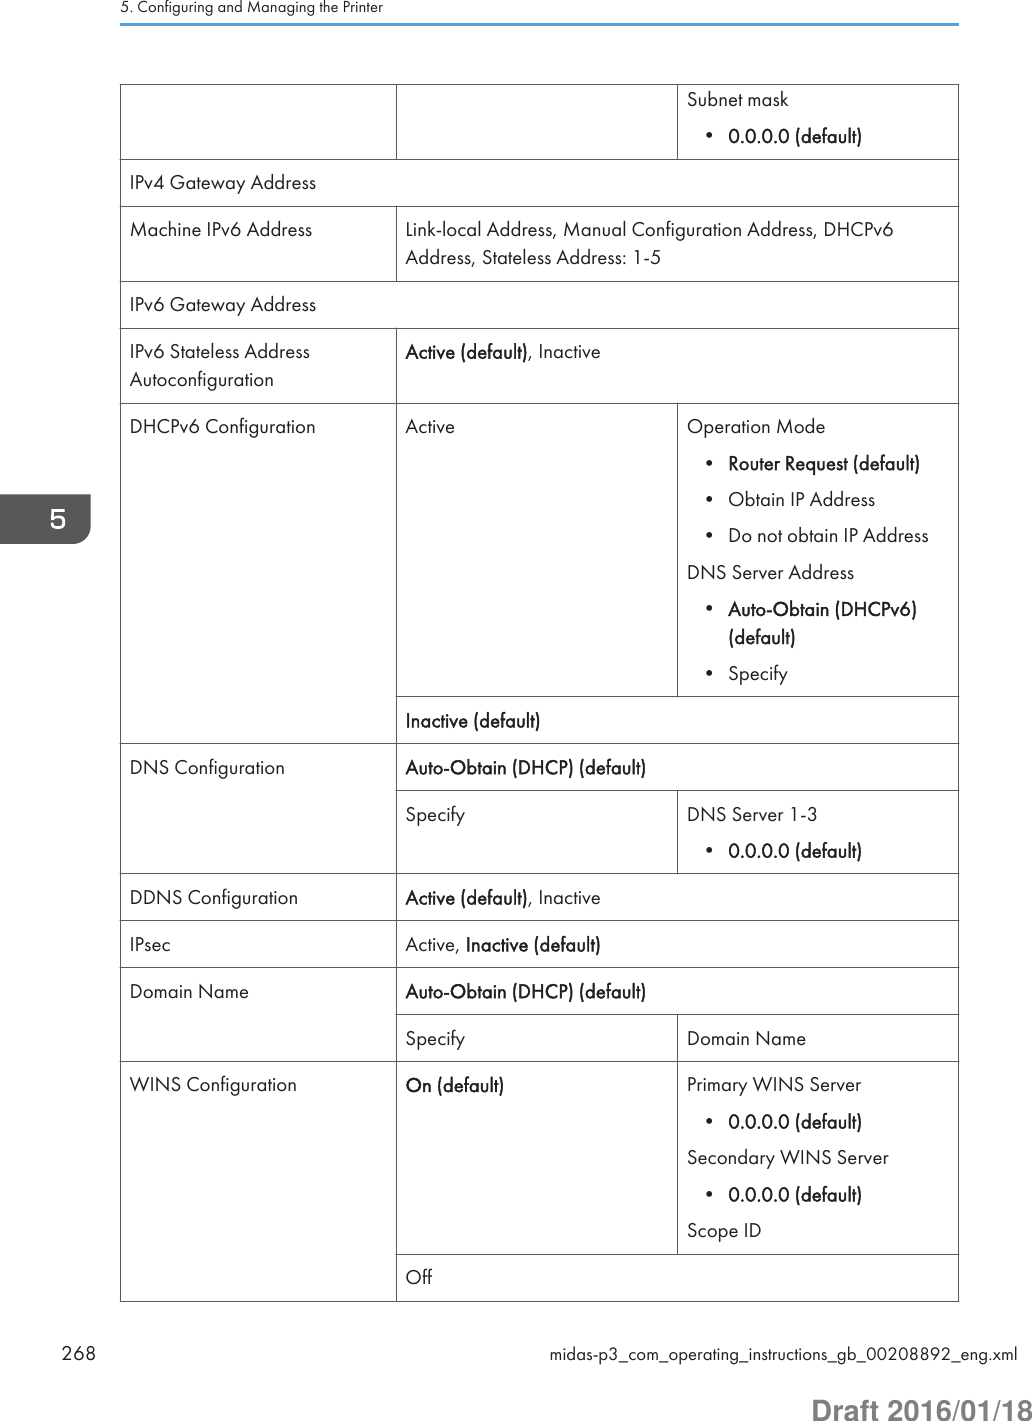
![Timer Suspension PeriodYou can specify the period when the printer does not turn on the main power with the WeeklyTimer settings.During the period specified in [Timer Suspension Period], the Weekly Timer Code is canceledat the time the printer turns on the main power with the Weekly Timer settings. If the printer isturned off during the period specified in [Timer Suspension Period], the Weekly Timer settingto turn on the main power is disabled until the printer is turned on manually.Interface SettingsNetworkMachine IPv4 AddressYou can specify the printer's IPv4 network address.Default: [Auto-Obtain (DHCP)]When you select [Specify], enter the IPv4 address and subnet mask as "xxx.xxx.xxx.xxx" ("x"indicates a number).When you select [Specify], make sure that the IPv4 address is different from that of otherprinters on the network.The physical address (MAC address) also appears.IPv4 Gateway AddressYou can specify the gateway address for the router or host computer used as a gateway.A gateway is a connection or interchange point between two networks.Default: [0.0.0.0]Machine IPv6 AddressYou can display the printer's IPv6 network address.• Link-local AddressThe printer's specified link-local address appears.• Manual Configuration AddressThe printer's manually configured address appears.• DHCPv6 AddressThe printer's DHCPv6 address appears.• Stateless Address: 1-5The specified stateless address appears if [IPv6 Stateless Address Autoconfiguration] isset to [Active].IPv6 Gateway AddressYou can display the printer's IPv6 gateway address.Function Details of the Printer Configuration Items (SP C342DN)midas-p3_com_operating_instructions_gb_00208911_eng.xml 291Draft 2016/01/18](https://usermanual.wiki/Ricoh/PRSPC342DN1.BBP-PRSPC342DN1-User-Manual-4/User-Guide-2978046-Page-51.png)
![IPv6 Stateless Address AutoconfigurationYou can specify IPv6 Stateless Address Autoconfiguration.Default: [Active]DHCPv6 ConfigurationYou can specify the DHCPv6 setting. If you set to [Active], select "Operation Mode" from[Router Request], [Obtain IP Address] or [Do not obtain IP Address], and also select "DNSServer Address" from [Auto-Obtain (DHCPv6)] or [Specify].Default: [Inactive]DNS ConfigurationYou can configure settings for the DNS server. When you select [Specify], enter the DNSServer IPv4 address as "xxx.xxx.xxx.xxx" ("x" indicates a number).Default: [Auto-Obtain (DHCP)]DDNS ConfigurationYou can specify the DDNS settings.Default: [Active]IPsecYou can specify the printer's IPsec setting. For details about this function, see Security Guide.Default: [Inactive]Domain NameYou can specify the domain name. When you select [Specify], enter the domain name usingup to 63 characters.Default: [Auto-Obtain (DHCP)]WINS ConfigurationYou can specify the WINS server settings. If [On] is selected, enter the WINS Server IPv4address as "xxx.xxx.xxx.xxx" ("x" indicates a number). If DHCP is in use, specify a Scope ID.Enter the Scope ID using up to 31 characters.Do not enter "255.255.255.255" as the primary or secondary WINS server address.Default: [On]Effective ProtocolYou can specify protocols to use in the network.• IPv4Default: [Active]• IPv6Default: [Inactive]• SMB5. Configuring and Managing the Printer292 midas-p3_com_operating_instructions_gb_00208911_eng.xmlDraft 2016/01/18](https://usermanual.wiki/Ricoh/PRSPC342DN1.BBP-PRSPC342DN1-User-Manual-4/User-Guide-2978046-Page-52.png)
![Default: [Active]• @Remote ServiceDefault: [Active]• Firmware Update (IPv4)Default: [Active]• Firmware Update (IPv6)Default: [Active]SMB Computer NameYou can specify the SMB computer name.Enter the computer name using up to 15 characters."*+,/:;<>=?[\]|. and spaces cannot be entered.Do not set a computer name starting with RNP and rnp.Only use uppercase letters for alphabets.SMB Work GroupYou can specify the SMB work group.Enter the computer name using up to 15 characters."*+,/:;<>=?[\]|. and spaces cannot be entered.Only use uppercase letters for alphabet.Ethernet SpeedYou can specify the network speed that the printer will use for Ethernet communication. If acommunication error occurs because of compatibility problems with the hub, select a speedsuitable for your network environment.To reduce power consumption of network devices, the default Ethernet speed of the printerdoes not exceed 100BASE-TX (100 Mbps). To communicate using a higher speed, select[Auto Select: Enable 1Gbps] to enable 1000BASE-T (1Gbps) communication.Default: [AutoSelct:Disable 1Gbps]• AutoSelct:Enable 1Gbps• AutoSelct:Disable 1Gbps• 10Mbps Half Duplex• 10Mbps Full Duplex• 100Mbps Half Duplex• 100Mbps Full DuplexFunction Details of the Printer Configuration Items (SP C342DN)midas-p3_com_operating_instructions_gb_00208911_eng.xml 293Draft 2016/01/18](https://usermanual.wiki/Ricoh/PRSPC342DN1.BBP-PRSPC342DN1-User-Manual-4/User-Guide-2978046-Page-53.png)
![LAN TypeWhen you have installed the Wireless LAN interface board, you can specify the method ofconnection. If Ethernet and Wireless LAN are both connected, the selected interface haspriority.Default: [Ethernet]Ping CommandYou can check the network connection with ping command using the given IPv4 address.If you fail to connect to the network, check the following, and then retry the ping command.• Make sure that "IPv4" in [Effective Protocol] is set to [Active].• Check that the printer is connected to the network.• There is a possibility that the same IPv4 address is used for the specified equipment.Permit SNMPv3 CommunicationYou can set the encrypted communication of SNMPv3. If you select [Encryption Only], youneed to set an encryption password for the printer.Default: [Encryption/Cleartext]Permit SSL/TLS CommunicationYou can set the encrypted communication of SSL/TLS. If you select [Ciphertext Only], youneed to install the SSL certificate for the printer.Default: [Ciphertext Priority]Host NameYou can specify the host name. Enter the host name using up to 63 characters.The following host names are unacceptable:a host name starting with or ending with a hyphena host name in which hyphens are used consecutivelya host name starting with "RNP" or "rnp"Machine NameYou can specify the printer name. Enter the printer name using up to 31 characters.IEEE 802.1X Authentication for EthernetYou can specify the IEEE 802.1X authentication for Ethernet. For details about IEEE 802.1Xauthentication, see Security Guide.Default: [Inactive]Restore IEEE 802.1X Authentication to DefaultsYou can return the IEEE 802.1X authentication settings to their defaults.For details about IEEE 802.1X authentication, see Security Guide.5. Configuring and Managing the Printer294 midas-p3_com_operating_instructions_gb_00208911_eng.xmlDraft 2016/01/18](https://usermanual.wiki/Ricoh/PRSPC342DN1.BBP-PRSPC342DN1-User-Manual-4/User-Guide-2978046-Page-54.png)
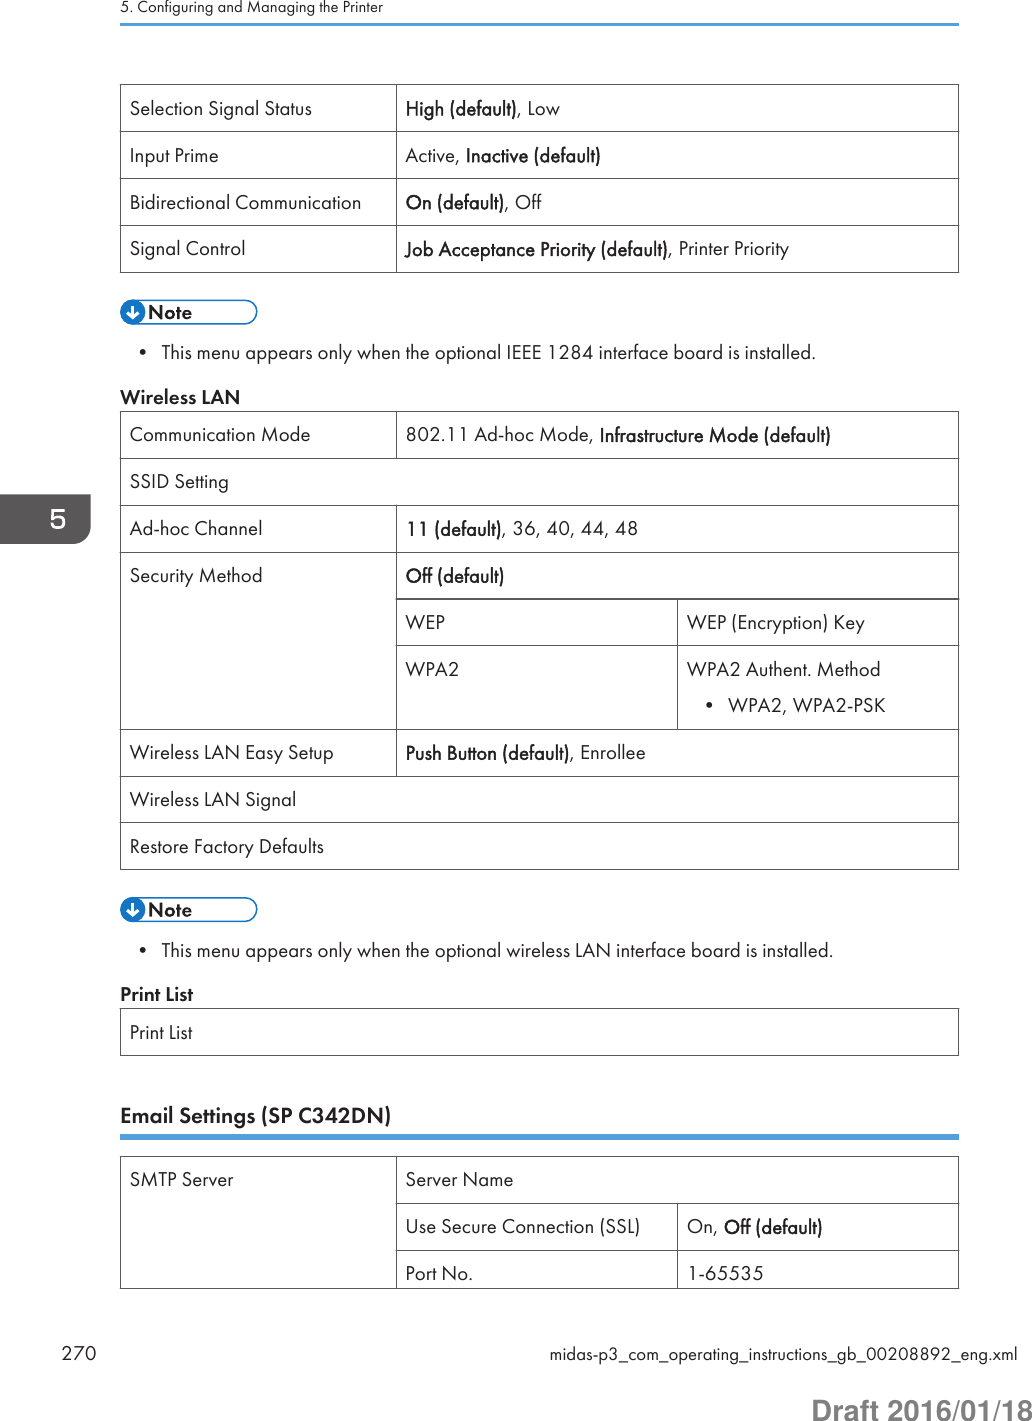
![USB SpeedYou can specify the communication parameters for computer-to-printer connection via USB.Default: [Auto Select]Parallel InterfaceThis menu appears only when the optional IEEE 1284 interface board is installed.Parallel TimingYou can specify the timing for the control signal of the parallel interface. Normally, you do notneed to change this setting.Default: [ACK Outside]Parallel Communication SpeedYou can specify the communication speed for the parallel interface. If the speed is too high,data may not be transferred smoothly. If this happens, change the setting to [Standard].Default: [High Speed]Selection Signal StatusYou can specify the level for the select signal of the parallel interface.Default: [High]Input PrimeYou can specify whether to validate or invalidate the input prime signal upon reception.Normally, you do not need to change this setting.Default: [Inactive]Bidirectional CommunicationYou can specify the printer's response mode to a status acquisition request when using aparallel interface. If you experience problems using another manufacturer's printer, set this to[Off]. When set to [Off], the bidirectional communication function will be disabled, and theprinter driver will not be installed under the Windows Auto Detect function.Default: [On]Signal ControlYou can specify how to handle errors that occur during printing operation or facsimiletransmission from a computer.Default: [Job Acceptance Priority]Wireless LANYou can configure the wireless LAN settings. This menu appears only when the optional wirelessLAN interface board is installed.Communication ModeYou can specify the communication mode of the wireless LAN.Function Details of the Printer Configuration Items (SP C342DN)midas-p3_com_operating_instructions_gb_00208911_eng.xml 295Draft 2016/01/18](https://usermanual.wiki/Ricoh/PRSPC342DN1.BBP-PRSPC342DN1-User-Manual-4/User-Guide-2978046-Page-55.png)
![Default: [Infrastructure Mode]SSID SettingYou can specify the SSID settings to distinguish the access point in [Infrastructure Mode] or[802.11 Ad-hoc Mode]. The characters that can be used are ASCII 0x20-0x7e (32 bytes).Ad-hoc ChannelYou can specify the channel to use when [802.11 Ad-hoc Mode] has been selected. Set thechannel that matches the type of the wireless LAN being used.Default: [11]• IEEE 802.11b/g Wireless LANFrequency range:2412–2462 MHz (channels 1–11)• IEEE 802.11a Wireless LANFrequency range:5180–5240 MHz (channels 36, 40, 44, and 48)• IEEE 802.11n Wireless LANFrequency range:2412–2462 MHz (channels 1–11)5180–5240 MHz (channels 36, 40, 44, and 48)Security MethodYou can specify whether or not to enable an encryption method and security type whenencryption is enabled.Default: [Off]• WEPPress [WEP (Encryption) Key], and then enter the WEP key using hexadecimal and ASCIIcharacters.• WPA2Press [WPA2 Authent. Method], and then select the authentication method.If you select WPA2, the encryption method is set to CCMP (AES) and cannot bechanged.Select one of the following authentication methods:WPA2-PSK, WPA2If you select WPA2-PSK, enter a passphrase (from 8 to 63 characters).• Off5. Configuring and Managing the Printer296 midas-p3_com_operating_instructions_gb_00208911_eng.xmlDraft 2016/01/18](https://usermanual.wiki/Ricoh/PRSPC342DN1.BBP-PRSPC342DN1-User-Manual-4/User-Guide-2978046-Page-56.png)
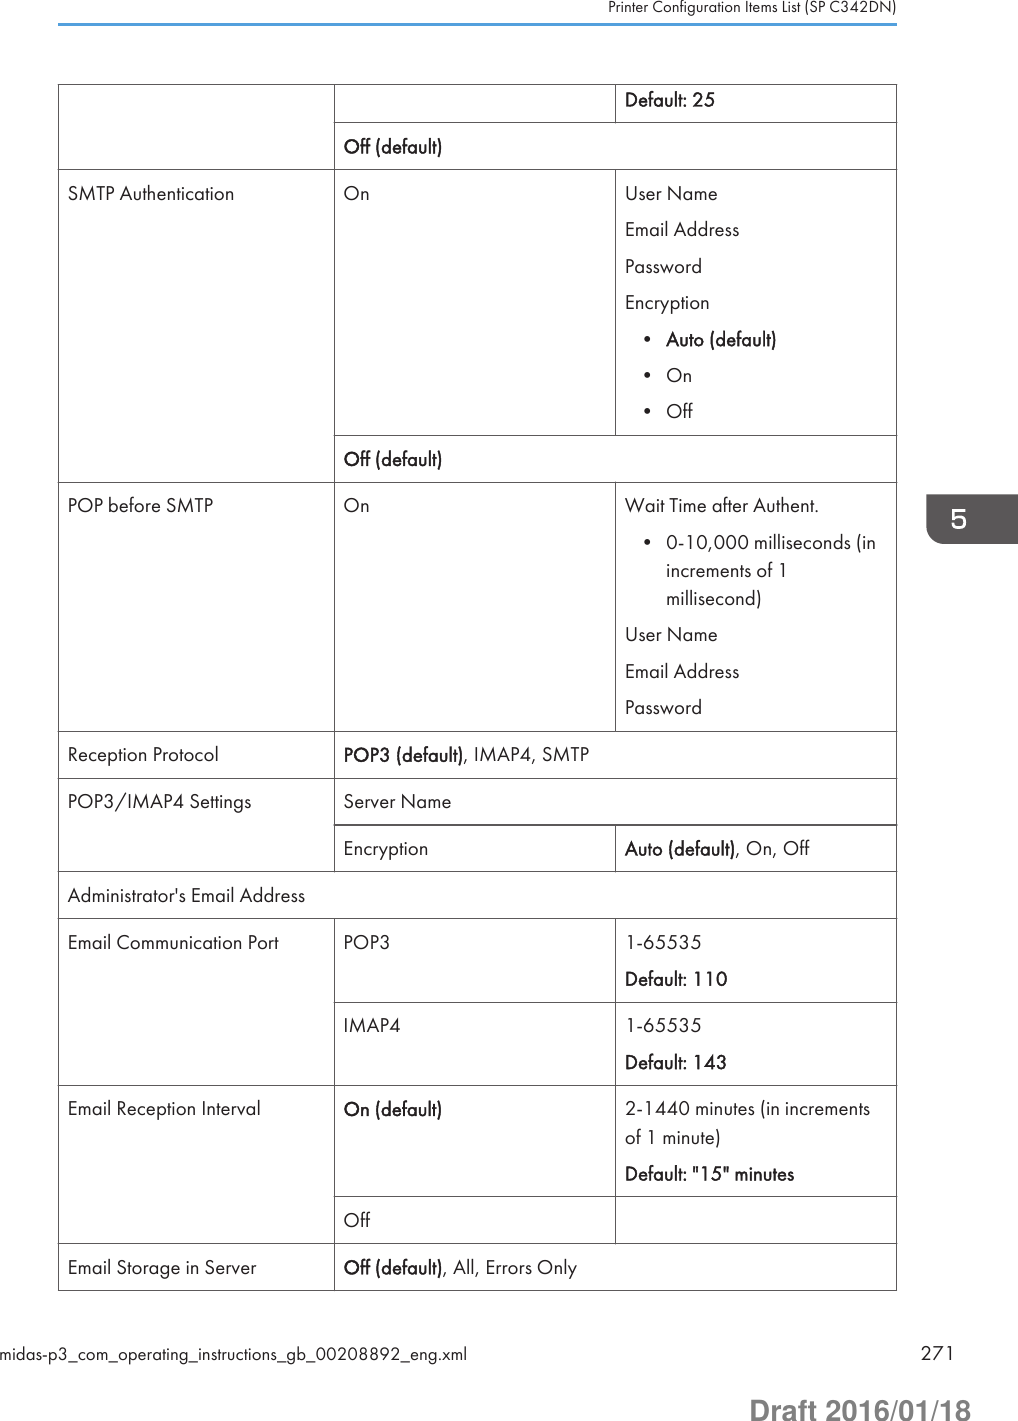
![Wireless LAN Easy SetupYou can set up wireless LAN automatically using Wi-Fi Protected Setup.Default: [Push Button]• Push Button• EnrolleeWireless LAN SignalWhen using infrastructure mode, press [Wireless LAN Signal] to display the printer's radiowave status.Restore Factory DefaultsYou can return the wireless LAN settings to their defaults.Print ListYou can print the printer's current network settings and network information.Email SettingsSMTP ServerYou can specify the SMTP server name. Enter the server name using up to 127 characters. Spacescannot be entered.If DNS is in use, enter the host name. If DNS is not in use, enter the SMTP server IPv4 address.Use Secure Connection (SSL)If you set Use Secure Connection (SSL) to [On], the port number automatically changes to"465".Default: [Off]Port No.Enter the port number between 1 and 65535 using the number keys. The SMTP server sharesthe same port number with the Direct SMTP server.Default: [25]SMTP AuthenticationYou can specify SMTP authentication (PLAIN, LOGIN, CRAMMD5, DIGEST-MD5). When sendinge-mail to an SMTP server, you can enhance the SMTP server security level using authentication thatrequires entering the user name and password.If the SMTP server requires authentication, set [SMTP Authentication] to [On], and then specify theuser name, password and encryption.Default: [Off]• OnFunction Details of the Printer Configuration Items (SP C342DN)midas-p3_com_operating_instructions_gb_00208911_eng.xml 297Draft 2016/01/18](https://usermanual.wiki/Ricoh/PRSPC342DN1.BBP-PRSPC342DN1-User-Manual-4/User-Guide-2978046-Page-57.png)
![User NameEnter the user name using up to 191 characters. Spaces cannot be entered. Dependingon the SMTP server type, "realm" must be specified. Add "@" after the user name, as in"user name@realm".Email AddressEnter the e-mail address using up to 128 characters.PasswordEnter the password using up to 128 characters. Spaces cannot be entered.Encryption• AutoUse if the authentication method is PLAIN, LOGIN, CRAM-MD5, or DIGEST-MD5.• OnUse if the authentication method is CRAMMD5 or DIGEST-MD5.• OffUse if the authentication method is PLAIN, or LOGIN.• OffPOP before SMTPYou can specify POP authentication (POP before SMTP). When sending e-mail to an SMTP server,you can enhance the SMTP server security level by connecting to the POP server for authentication.If you set POP before SMTP to [On], specify the waiting time after authentication, user name, e-mail address, and password. To enable POP server authentication before sending e-mail via theSMTP server, set [POP before SMTP] to [On]. E-mail is sent to the SMTP server after the timespecified for [Wait Time after Authent.] has elapsed. If you select [On], enter the server name inPOP3/IMAP4 Settings. Also, check the POP3 port number in E-mail Communication Port.Default: [Off]• OnWait Time after Authent.Specify [Wait Time after Authent.] from zero to 10,000 milliseconds, in increments ofone millisecond.Default: "300" msec.User NameEnter the user name using up to 191 characters. Spaces cannot be entered.Email AddressEnter the e-mail address using up to 128 characters. Spaces cannot be entered.5. Configuring and Managing the Printer298 midas-p3_com_operating_instructions_gb_00208911_eng.xmlDraft 2016/01/18](https://usermanual.wiki/Ricoh/PRSPC342DN1.BBP-PRSPC342DN1-User-Manual-4/User-Guide-2978046-Page-58.png)
![PasswordEnter the password using up to 128 characters. Spaces cannot be entered.• OffReception ProtocolYou can specify the Reception Protocol for receiving e-mails.Default: [POP3]POP3/IMAP4 SettingsYou can specify the POP3/IMAP4 server name for receiving e-mails. The specified POP3/IMAP4server name is used for [POP before SMTP].Server NameIf DNS is in use, enter the host name. If DNS is not in use, enter the POP3/IMAP4 or serverIPv4 address. Enter the POP3/IMAP4 server name using up to 127 characters. Spacescannot be entered.EncryptionYou can specify the encryption method.Default: [Auto]• AutoThe password is automatically encrypted according to the POP/IMAP server settings.• OnThe password is encrypted.• OffThe password is not encrypted.Administrator's Email AddressYou can specify the administrator's e-mail address using up to 128 characters.Email Communication PortYou can specify the port numbers for receiving e-mails. The specified POP3 port number is used for[POP before SMTP]. Enter a port number between 1 and 65535 using the number keys.POP3Default: [110]IMAP4Default: [143]Email Reception IntervalYou can specify the time interval for receiving e-mails via the POP3 or IMAP4 server. If [On] isselected, the time can be set from 2 to 1440 minutes in increments of one minute.Function Details of the Printer Configuration Items (SP C342DN)midas-p3_com_operating_instructions_gb_00208911_eng.xml 299Draft 2016/01/18](https://usermanual.wiki/Ricoh/PRSPC342DN1.BBP-PRSPC342DN1-User-Manual-4/User-Guide-2978046-Page-59.png)
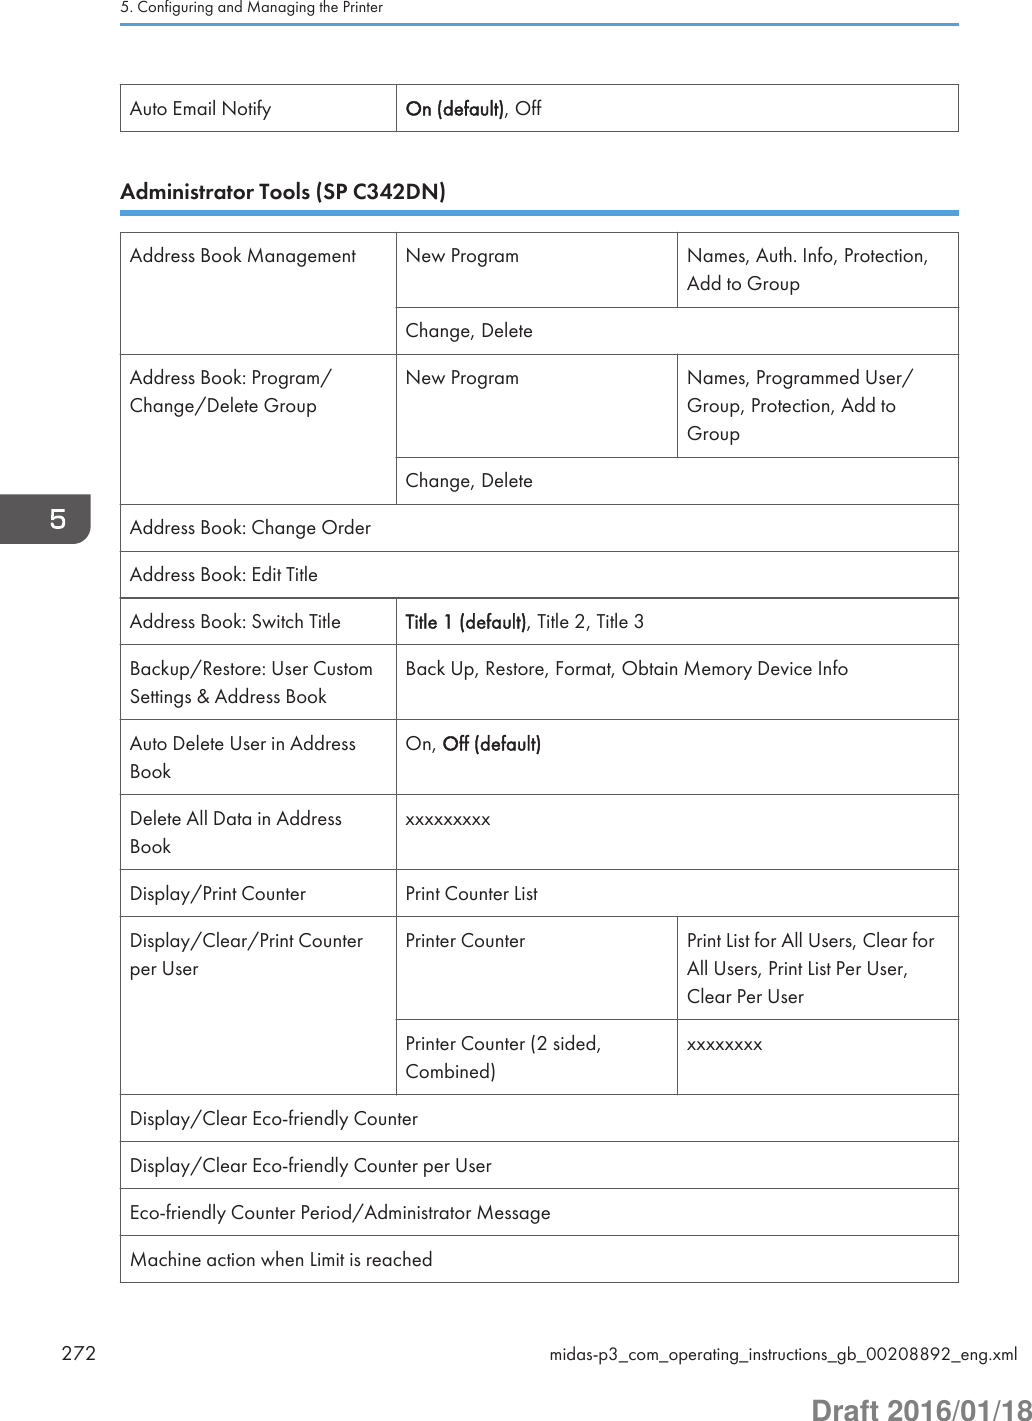
![Default: [On], "15" minute(s)Email Storage in ServerYou can specify whether or not to store received e-mails on the POP3 or IMAP4 server.Default: [Off]Auto Email NotifyYou can specify whether or not to send an error message to a preset e-mail address when an erroroccurs in the printer. After changing the setting, turn off the power of the printer briefly, and thenturn it on again. For details, see page 343 "Printer Status Notification by E-mail".Default: [On]Administrator ToolsTo change these settings, contact the administrator. It is recommended that you specify AdministratorAuthentication before configuring Administrator Tools settings.Address Book ManagementYou can add, change or delete information registered in the Address Book. For details about eachsetting under "Address Book Management", see page 350 "Registering the Address Book".You can register up to 1,000 users.You can also register and edit names in the Address Book using Web Image Monitor.For details about the [Print Volum. Use Limit.] setting under [Auth. Info], see Security Guide.New ProgramYou can register names as well as user codes.NamesYou can register a name, key display, registration number, display priority, and titleselection.Auth. InfoYou can register a user code, and specify the functions available to each user code. Youcan also register user names and passwords to be used when accessing an LDAP server.User codes or user names and passwords registered here are also used for the printvolume use limitation function.ProtectionYou can register a protection code.Add to GroupYou can register a user or group of users registered in the Address Book to a group.ChangeYou can change names as well as user codes.5. Configuring and Managing the Printer300 midas-p3_com_operating_instructions_gb_00208911_eng.xmlDraft 2016/01/18](https://usermanual.wiki/Ricoh/PRSPC342DN1.BBP-PRSPC342DN1-User-Manual-4/User-Guide-2978046-Page-60.png)
![All UsersYou can change information registered in the Address Book after selecting the user in [AllUsers].User CodeYou can change information registered in the Address Book after selecting the user in[User Code].DeleteYou can delete a name from the Address Book.Address Book: Program/Change/Delete GroupNames registered in the Address Book can be added into a group. You can register up to 100groups. For details on how to register names to a group, see page 358 "Registering Users to aGroup".You can also register and manage groups in the Address Book using Web Image Monitor.New ProgramYou can register groups.NamesYou can register a name, key display, registration number, display priority, and titleselection.Programmed User/GroupYou can check the names or groups registered in each group.ProtectionYou can register a protection code.Add to GroupYou can put groups registered in the Address Book into a group.ChangeYou can change a group from the Address Book.DeleteYou can delete a group from the Address Book.Address Book: Change OrderYou can change the order of registered names. For details about changing the order of the namesin the Address Book, see page 353 "Changing order of registered names".Address Book: Edit TitleYou can edit the title to easily find a user.For details on how to edit titles, see page 354 "Editing titles".Function Details of the Printer Configuration Items (SP C342DN)midas-p3_com_operating_instructions_gb_00208911_eng.xml 301Draft 2016/01/18](https://usermanual.wiki/Ricoh/PRSPC342DN1.BBP-PRSPC342DN1-User-Manual-4/User-Guide-2978046-Page-61.png)
![Address Book: Switch TitleYou can specify a sorting title for user names from [Title 1] to [Title 3]. For details about sortingtitles, see page 352 "Registering User Information".Default: [Title 1]Backup/Restore: User Custom Settings & Address BookUsing an SD card, you can backup the printer's Address Book and user settings, and also restorethose backup data to the printer.Restoring data overwrites Address Book data stored on the printer, and clears the counter of eachregistered user of the printer.You can also back up and restore the printer's Address Book using Web Image Monitor. Fordetails, see Web Image Monitor Help.• Back UpYou can back up the printer's Address Book and user settings to an SD card.• RestoreYou can restore the backup copy of the Address Book and user settings from an SD card.• FormatYou can format an SD card.• Obtain Memory Device InfoYou can check the free space and contents of the SD card.Auto Delete User in Address BookIf the maximum registerable limit for an account is reached and a new account is requested, theoldest account can be deleted and a new account can be registered according to the user settings.This new account is automatically registered to the Address Book and is not registered to theAddress Book manually.Default: [Off]Delete All Data in Address BookYou can delete all data in Address Book.Display/Print CounterYou can view and print the number of prints.Displays the number of prints for each function (Total, Printer, 2 Sided, Coverage).• Print Counter ListPrints out a list of the number of prints made under each function.5. Configuring and Managing the Printer302 midas-p3_com_operating_instructions_gb_00208911_eng.xmlDraft 2016/01/18](https://usermanual.wiki/Ricoh/PRSPC342DN1.BBP-PRSPC342DN1-User-Manual-4/User-Guide-2978046-Page-62.png)
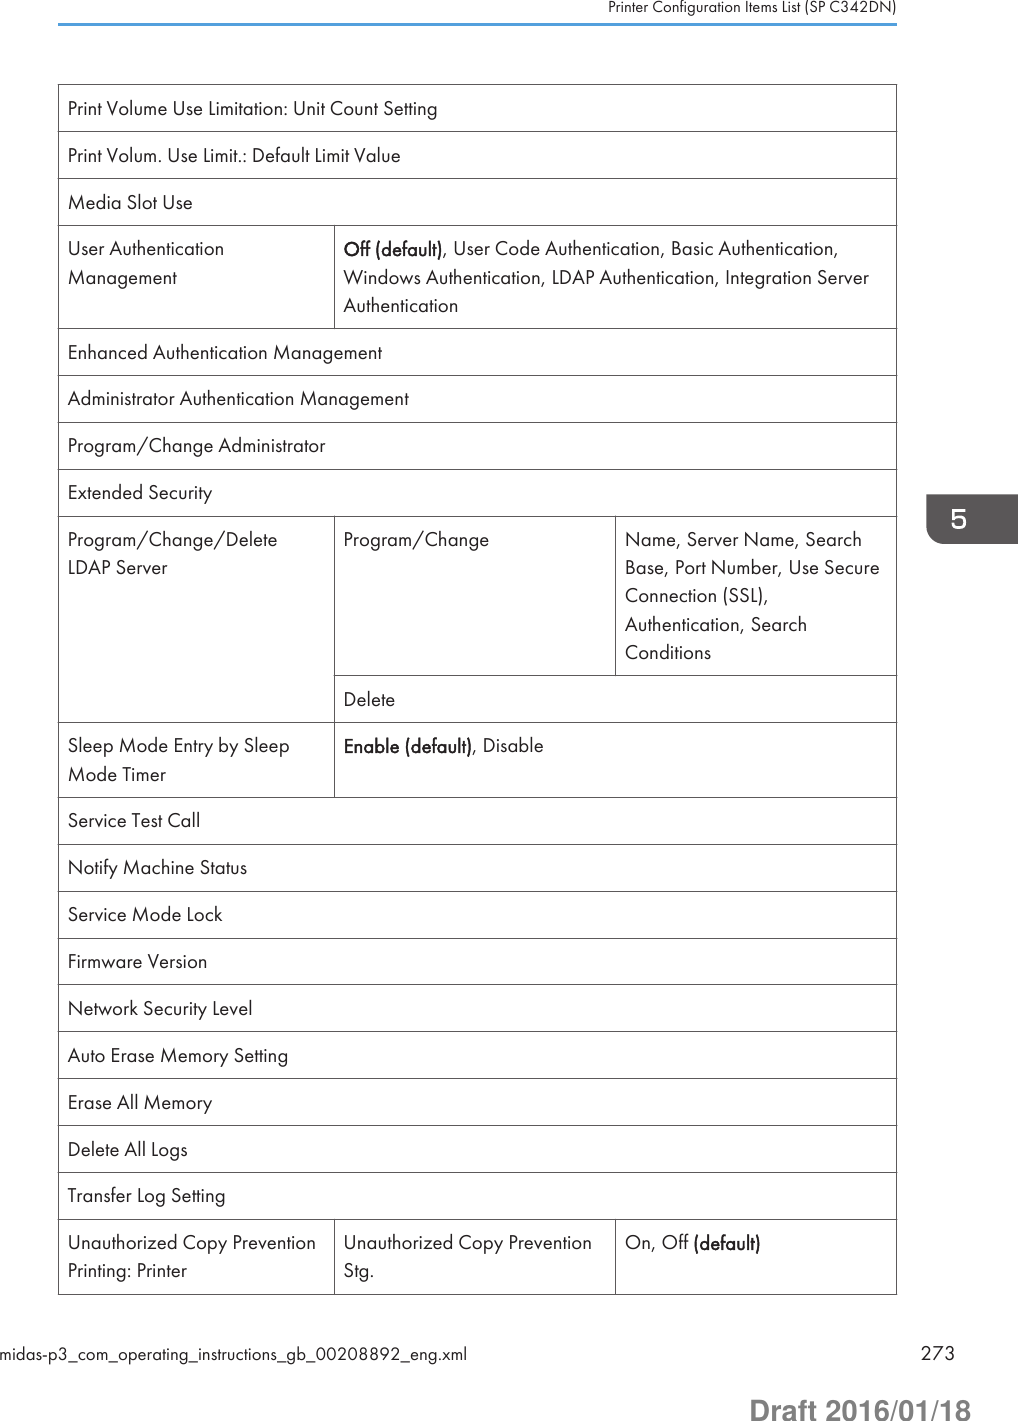
![Display/Clear/Print Counter per UserYou can view, print, and reset the number of prints for each user code. For details about printingthe counter, see page 357 "Printing or clearing the counter for each user" and page 358 "Printingor clearing the counter for all users".The number of prints may differ from the counter values shown in Display/Print Counter.Printer Counter• Print List for All UsersYou can print the counter value for all the users.• Clear for All UsersYou can reset the counter value for all the users.• Print List Per UserYou can print the counter value for each user.• Clear Per UserYou can reset the counter value for each user.Display/Clear Eco-friendly CounterFor details about this function, see Security Guide.Display/Clear Eco-friendly Counter per UserFor details about this function, see Security Guide.Eco-friendly Counter Period/Administrator MessageFor details about this function, see Security Guide.Machine Action When Limit is ReachedFor details about this function, see Security Guide.Print Volume Use Limitation: Unit Count SettingFor details about this function, see Security Guide.Print Volum. Use Limit.: Default Limit ValueFor details about this function, see Security Guide.Media Slot UseFor details about this function, see Security Guide.User Authentication ManagementDefault: [Off]• Off• User Code AuthenticationUsing User Code Authentication, you can limit the available functions and supervise their use.When using User Code Authentication, register user codes.Function Details of the Printer Configuration Items (SP C342DN)midas-p3_com_operating_instructions_gb_00208911_eng.xml 303Draft 2016/01/18](https://usermanual.wiki/Ricoh/PRSPC342DN1.BBP-PRSPC342DN1-User-Manual-4/User-Guide-2978046-Page-63.png)
![Program/ChangeYou can program an LDAP server or change a programmed LDAP server.• Name• Server Name• Search Base• Port Number• Use Secure Connection (SSL)• Authentication• Search ConditionsDeleteYou can delete a programmed LDAP server.Service Test CallYou can make a test call to the @Remote center. This function is available only if the @Remoteservice is enabled and active. This function is unavailable when [Notify Machine Status] is in use.Notify Machine StatusYou can send notification of the printer's status to the @Remote center. This function is availableonly if the @Remote service is enabled and active. This function is unavailable when [Service TestCall] is in use.Service Mode LockFor details about this function, see Security Guide.Firmware VersionYou can check the version of the software installed in this printer.Network Security LevelFor details about this function, see Security Guide.Auto Erase Memory SettingFor details about this function, see Security Guide.Erase All MemoryFor details about this function, see Security Guide.Delete All LogsFor details about this function, see Security Guide.Transfer Log SettingFor details about this function, see Security Guide.Function Details of the Printer Configuration Items (SP C342DN)midas-p3_com_operating_instructions_gb_00208911_eng.xml 305Draft 2016/01/18](https://usermanual.wiki/Ricoh/PRSPC342DN1.BBP-PRSPC342DN1-User-Manual-4/User-Guide-2978046-Page-65.png)
![Unauthorized Copy Prevention Printing: PrinterUnauthorized Copy Prevention Stg.Specify whether or not to enable the unauthorized copy prevention setting on the printer.Default: [Off]• On• OffCompulsory Unathd. Copy Preventn.Select the unauthorized copy prevention setting to prioritize.Default: [Driver / Command]• Driver / CommandPrints documents using the settings specified in the printer driver or commands.• Driver/Command (Most Settings)Prints the background pattern by using the color and density specified on the printer. Forother items, the settings configured in the printer driver or commands are applied whenprinting is performed.• Machine Setting(s)Prints documents using the settings specified on the printer regardless of the printer driversettings.Unauthorized Copy Prevention TypeSelect the Unauthorized Copy Prevention type to use.Default: [Unathd. Copy Prev.: Patn.]• Data Security for CopyingIf a printed document is copied or scanned using a copier or MFP that is installed withthe Copy Data Security unit, images in the document are covered with gray overprint.• Unathd. Copy Prev.: Patn.Embeds texts and background images for Unauthorized Copy Prevention for Pattern onthe printed document. When a printed document is copied or scanned, a text patternappears in the background of the document to prevent illegal copying.Data Security for Copying EffectSelect data security effects for copying that will be applied to a copied or printed document.Default: [Text and Background]• Text and Background• Background Only5. Configuring and Managing the Printer306 midas-p3_com_operating_instructions_gb_00208911_eng.xmlDraft 2016/01/18](https://usermanual.wiki/Ricoh/PRSPC342DN1.BBP-PRSPC342DN1-User-Manual-4/User-Guide-2978046-Page-66.png)
![Unathd. Copy Prev. of Ptrn. Effct.Select unauthorized copy prevention effects for patterns that will be applied to the printeddocument.Default: [Text and Background]• Text and Background• Background Only• Text Only• Reverse Patterns(Text/Background)Mask Type for PatternSelect a pattern to be embedded in the background of a printed document.Default: [None]The available settings are as follows:• None, Type 1, Type 2, Type 3, Type 4, Type 5, Type 6, Type 7, Type 8, Type 9, Type10Pattern DensitySelect a density level for the background pattern.Default: “3”Text SelectionEnter a text to be embedded in the printed documents to prevent unauthorized copying.Default: [Unauthorized Copy]The available settings are as follows:• Do not Specify, Unauthorized Copy, Illegal Copy, Void, Do not copy, Copy Restricted,Copy Prohibited, Controlled Document, Confidential Document, In Confidence, InStrictest Confidence, Confidential, User Name, File Name, Date & Time, User Name +File Name, User Name + Date & Time, File Name + Date & Time, User Name+FileName+Date & Time, User Text 1, User Text 2“User Name” is the PC login user name.Program/Change User TextRegister a text to be embedded for unauthorized copy prevention. Once registered, the text tobe used can be selected from [Text Selection].PCL Fonts for TextsSpecify a font type to be used for the copy prevention text when using the PCL.Default: [Arial]PS Fonts for TextsSpecify a font type to be used for the copy prevention text when using PostScript 3.Function Details of the Printer Configuration Items (SP C342DN)midas-p3_com_operating_instructions_gb_00208911_eng.xml 307Draft 2016/01/18](https://usermanual.wiki/Ricoh/PRSPC342DN1.BBP-PRSPC342DN1-User-Manual-4/User-Guide-2978046-Page-67.png)
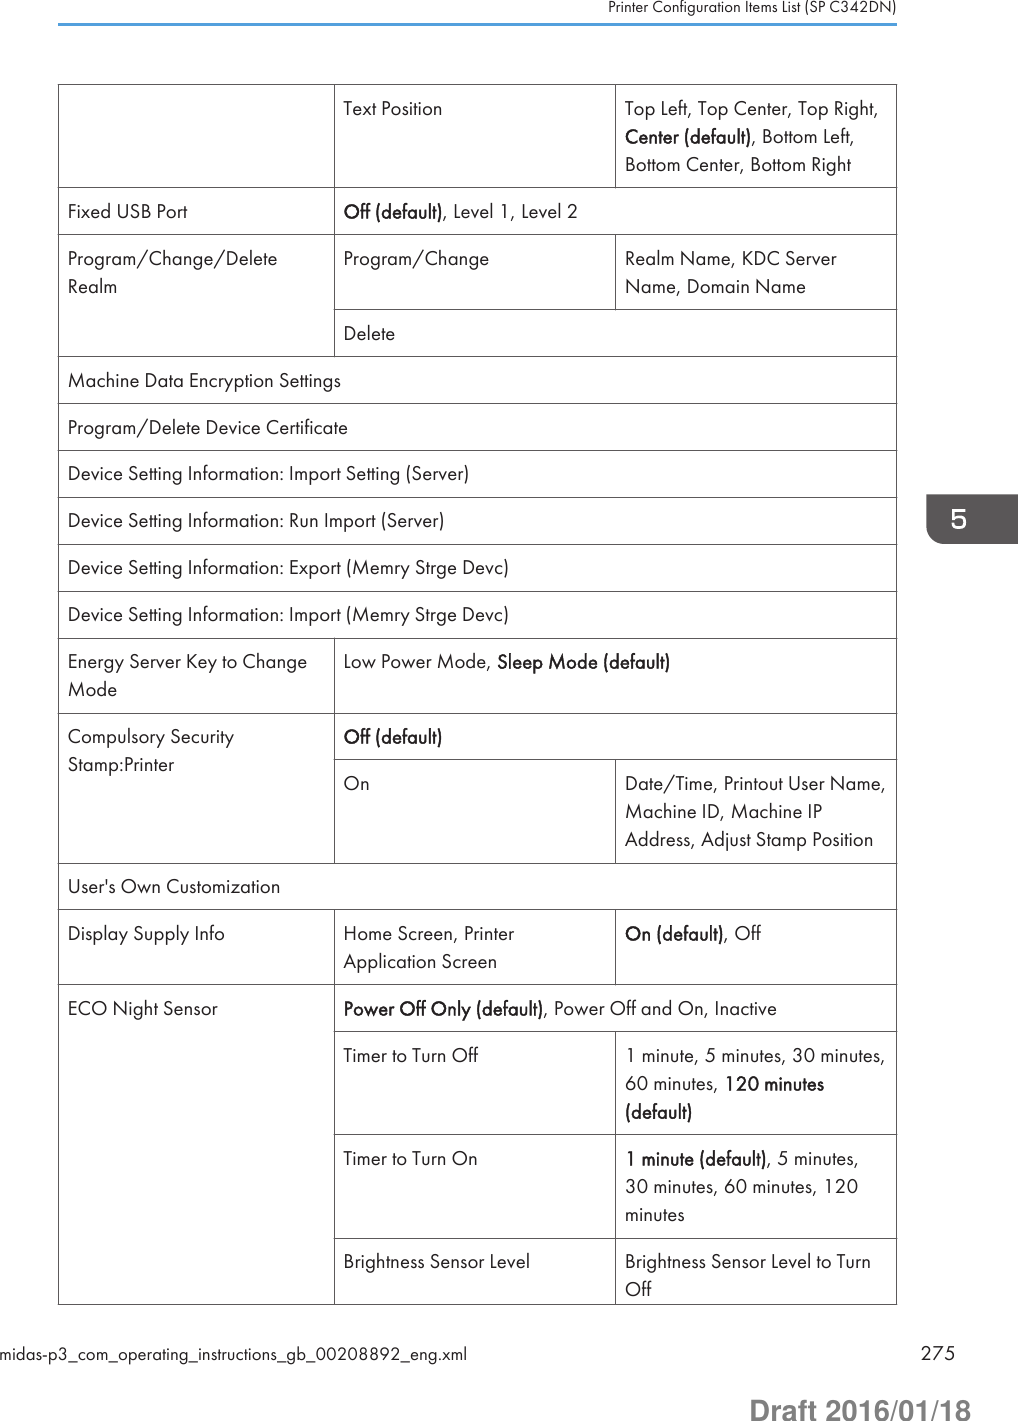
![Default: [Arial]Point SizeSpecify a font size for the copy prevention text by entering a value between 50 and 300points using the number keys.Default: “70” pointsCarriage Return SpaceSpecify line spaces between text by entering a value from 50 to 300 points using the numberkeys. This setting is displayed if a value other than [Off] is specified for [Repeat Text].Default: “70” pointsText AngleSpecify a text rotation angle. When a larger number is specified, the text is rotatedcounterclockwise around the middle of the text string. Specify an angle between 0 to 359degrees using the number keys.Default: “30” degreesRepeat TextThe text is printed downward from the upper left corner of the page. If [On: Rotate 180deg onReturn] is selected, each line of the text that is separated by a line feed will be rotated by 180degrees.Default: [Off]• On• On: Rotate 180deg on Return• OffText PositionSpecify where the text is inserted. This setting is displayed if 0 degrees is specified as the valuefor [Text Angle] and [Off] is specified as the value for [Repeat Text].Default: [Center]The available settings are as follows:• Top Left, Top Center, Top Right, Center, Bottom Left, Bottom Center, Bottom RightFixed USB PortIf this function is activated, you can avoid reinstalling the printer driver when connecting acomputer pre-installed with the driver to an identical printer model to this printer.Default: [Off]• Off• Level 15. Configuring and Managing the Printer308 midas-p3_com_operating_instructions_gb_00208911_eng.xmlDraft 2016/01/18](https://usermanual.wiki/Ricoh/PRSPC342DN1.BBP-PRSPC342DN1-User-Manual-4/User-Guide-2978046-Page-68.png)
![It is not necessary to install a new driver when the printer driver of this printer has alreadybeen installed on the PC.• Level 2For details about this function, consult your administrator.Program/Change/Delete RealmYou can program the realm to be used for Kerberos authentication. Be sure to set both the realmname and KDC server name when programming a realm. For details about Program/Change/Delete Realm, see page 368 "Configuring the Realm".Program/ChangeYou can program a realm or change a programmed realm.• Realm Name• KDC Server Name• Domain NameDeleteYou can delete a programmed realm.Machine Data Encryption SettingsFor details about this function, see Security Guide.Program/Delete Device CertificateYou can program and delete a self-generated device certificate and also check status of thecertificate.For details about this function, see Security Guide.Device Setting Information: Import Setting (Server)For details about this function, see Security Guide.Device Setting Information: Run Import (Server)For details about this function, see Security Guide.Device Setting Information: Export (Memry Strge Devc)For details about this function, see Security Guide.Device Setting Information: Import (Memry Strge Devc)For details about this function, see Security Guide.Energy Server Key to Change ModexxxxxCompulsory Security Stamp:PrinterYou can specify whether or not to print security stamps on output documents using the printerfunction. You can adjust where the stamps are printed. Available stamp settings : [Date/Time],[Printout User Name], [Machine ID], [Machine IP Address], [Adjust Stamp Position]Function Details of the Printer Configuration Items (SP C342DN)midas-p3_com_operating_instructions_gb_00208911_eng.xml 309Draft 2016/01/18](https://usermanual.wiki/Ricoh/PRSPC342DN1.BBP-PRSPC342DN1-User-Manual-4/User-Guide-2978046-Page-69.png)
![Default: [Off]User's Own CustomizationYou can specify whether or not to allow logged-in users to display their own home screen. Fordetails about this function, see Security Guide.Default: [Prohibit]Display Supply InfoYou can specify whether or not the amount of toner is displayed on the initial screen.• Home ScreenDefault: [On]• Printer Application ScreenDefault: [On]ECO Night SensorThe ECO Night Sensor (ambient light sensor) enables the printer to automatically turn off and onthe main power when changes in the ambient light level are detected.You can specify how the printer performs when the ECO Night Sensor detects changes in theambient light level.When Weekly Timer is set to [Daily] or [Day of the Week], the printer does not turn on even if[ECO Night Sensor] is set to [Power Off and On] and the time for turning on the main powerspecified in [Timer to Turn On] elapses.Default: [Power Off Only]• Power Off OnlyThe printer turns off the main power when the ECO Night Sensor detects a low ambient lightlevel.• Power Off and OnThe printer turns off the main power when a decrease in the ambient light level is detected. Itturns on the main power when an increase in the ambient light level is detected.• InactiveThe ECO Night Sensor is disabled.Timer to Turn OffYou can specify how long the printer waits to turn off the main power when the ECO NightSensor detects a low ambient light level.The timer is reset when:• The sensor detects changes in the ambient light level.• Any key on the control panel is pressed or printing is performed.• The main power switch is turned on.5. Configuring and Managing the Printer310 midas-p3_com_operating_instructions_gb_00208911_eng.xmlDraft 2016/01/18](https://usermanual.wiki/Ricoh/PRSPC342DN1.BBP-PRSPC342DN1-User-Manual-4/User-Guide-2978046-Page-70.png)
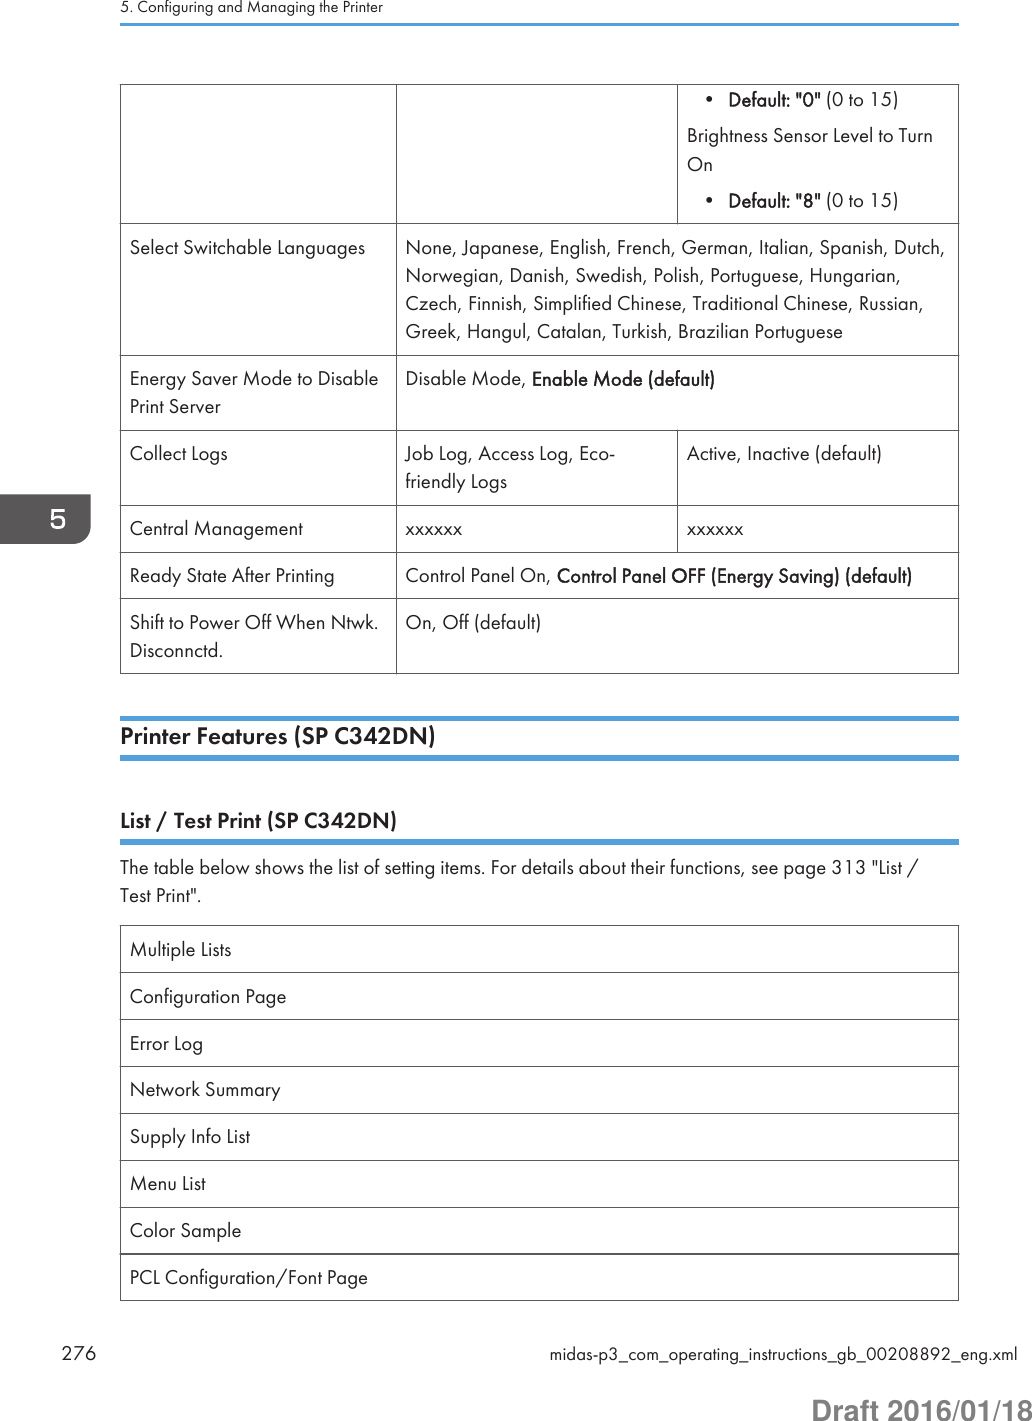
![• The printer configuration screen is displayed on the control panel.• The printer settings are changed using Web Image Monitor.• The printer settings are imported or exported.• A program is downloaded.• The printer resumes Fusing Unit Off mode.• The printer enters Sleep mode.Default: [120 minutes]• 1 minute• 5 minutes• 30 minutes• 60 minutes• 120 minutesTimer to Turn OnYou can specify how long the printer waits before it turns on the main power when the ECONight Sensor detects an increase in the ambient light level.The timer is reset when:• The sensor detects changes in the ambient light level.• The ECO Night Sensor setting is changed.• The main power is turned on.• The printer enters Sleep mode.Default: [1 minute]• 1 minute• 5 minutes• 30 minutes• 60 minutes• 120 minutesBrightness Sensor LevelBrightness Sensor Level to Turn OffYou can set the brightness threshold for the sensor to turn off the main power.Default: 0• 0 (Dark) - 15 (Bright)Level 0 (Very dark): Equivalent to a moonlit nightLevel 5 (Dark): Equivalent to a dimly-lit roomFunction Details of the Printer Configuration Items (SP C342DN)midas-p3_com_operating_instructions_gb_00208911_eng.xml 311Draft 2016/01/18](https://usermanual.wiki/Ricoh/PRSPC342DN1.BBP-PRSPC342DN1-User-Manual-4/User-Guide-2978046-Page-71.png)
![Level 7 (Dim): Equivalent to a room at sunsetLevel 9 (Bright): Equivalent to a brightly lit room at nightLevel 15 (Very bright): Equivalent to a sunlit roomBrightness Sensor Level to Turn OnYou can set the brightness threshold for the sensor to turn on the main power.Default: 8• 0 (Dark) - 15 (Bright)Level 0 (Very dark): Equivalent to a moonlit nightLevel 5 (Dark): Equivalent to a dimly-lit roomLevel 7 (Dim): Equivalent to a room at sunsetLevel 9 (Bright): Equivalent to a brightly lit room at nightLevel 15 (Very bright): Equivalent to a sunlit roomYou can set a lower value for [Brightness Level toTurnOff] than the one for [BrightnessLevel to TurnOn].Brightness levels are based on ambient light. The actual brightness level may differdepending on the environment in which the printer is used.Select Switchable LanguagesYou can register up to five languages to be displayed on the control panel. Also, you can changethe display language using the display language switch on the [User Tools] screen.Ready State After PrintingYou can specify the state the printer return to after printing documents during Sleep Mode.Default: [Off]• OnThe printer does not return to Sleep Mode and the [Home] screen appears on the controlpanel.• OffThe printer returns to Sleep Mode.• Unauthorized copy prevention can be specified in Web Image Monitor and in the printer driver.For details about how to configure the settings, see page 144 "Printing Documents that Are NotAuthorized for Duplication".Printer FeaturesThis section describes user tools under Printer Features menu.5. Configuring and Managing the Printer312 midas-p3_com_operating_instructions_gb_00208911_eng.xmlDraft 2016/01/18](https://usermanual.wiki/Ricoh/PRSPC342DN1.BBP-PRSPC342DN1-User-Manual-4/User-Guide-2978046-Page-72.png)
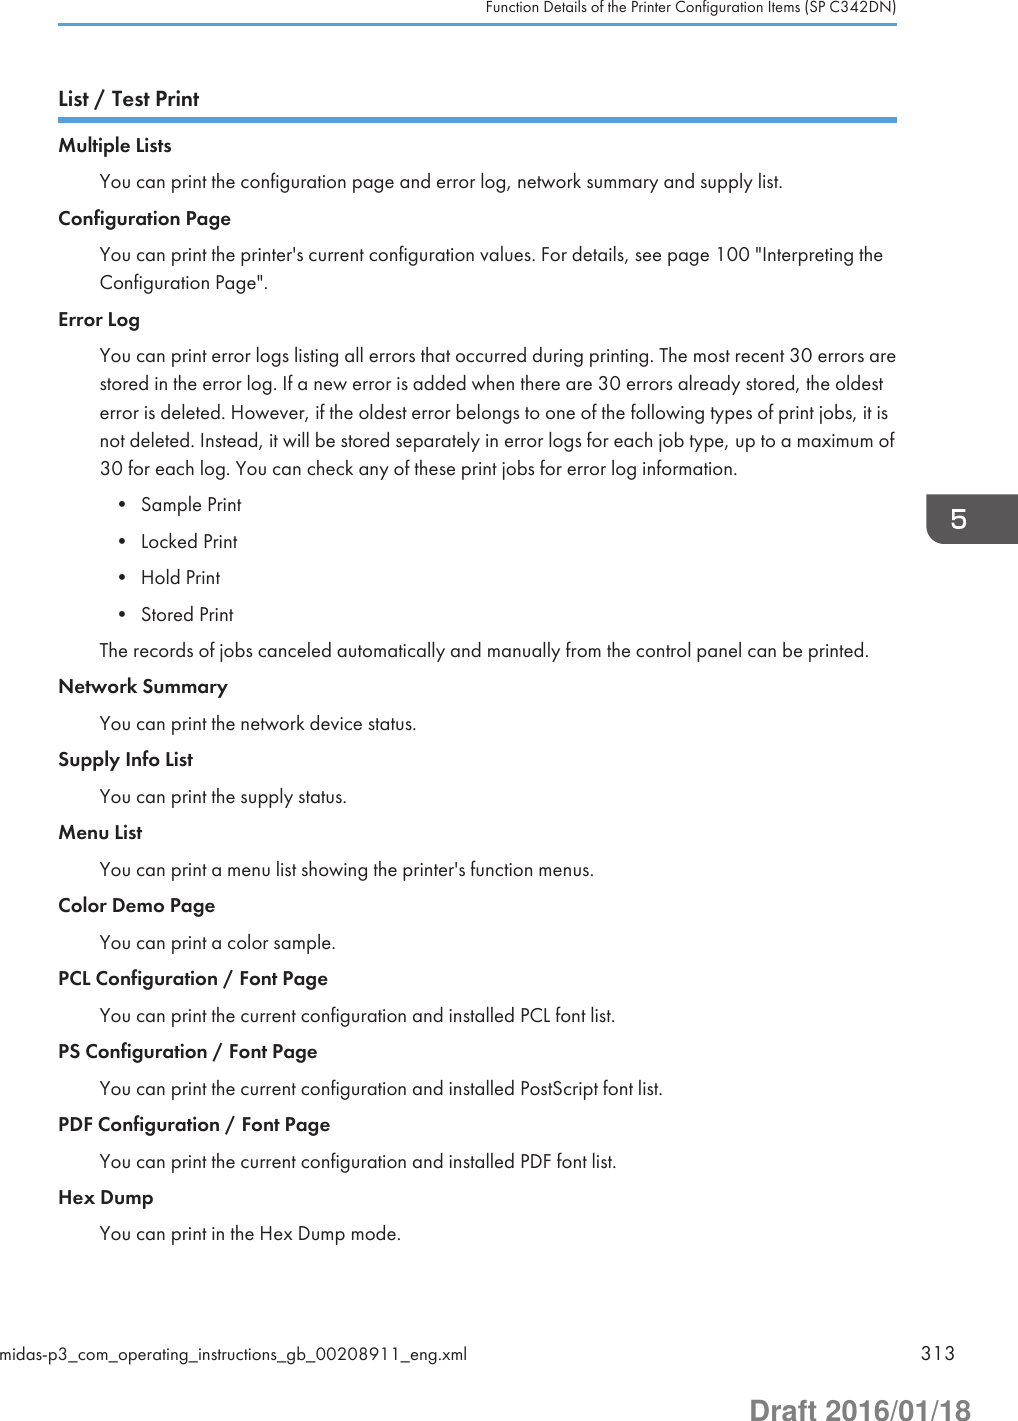
![Data ManagementMenu ProtectYou can prevent unauthenticated users from changing the user tools. For details, see SecurityGuide.List / Test Print LockYou can lock the [List / Test Print] items. For details, see Security Guide.Delete All Temporary Print JobsYou can delete all Sample Print, Locked Print, Hold Print files temporarily stored in this printer.Delete All Stored Print JobsYou can delete all Stored Print files stored in this printer.Auto Delete Temporary Print JobsYou can specify whether to automatically delete Sample Print, Locked Print, Hold Print filestemporarily stored in this printer. Hold Print files that have valid print time cannot be deletedautomatically.Default: [Off]If you select [On], you can set up to 200 hours for auto file deleting (Default: "8").Auto Delete Stored Print JobsYou can specify whether to automatically delete Stored Print files temporarily stored in this printer.Default: [On], "3" day(s)If you select [On], you can set up to 180 days for auto file deleting.Tray Parameters (PCL)You can configure settings to change paper tray parameters used for PCL printing. You can specifythe settings for the installed trays and the Auto Tray Select function.Tray Parameters (PS)You can configure settings to change paper tray parameters used for PostScript printing. You canspecify the settings for the installed trays only.SystemPrint Error ReportYou can specify whether the printer prints an error report when a printer or memory error occurs.Default: [Off]5. Configuring and Managing the Printer314 midas-p3_com_operating_instructions_gb_00208911_eng.xmlDraft 2016/01/18](https://usermanual.wiki/Ricoh/PRSPC342DN1.BBP-PRSPC342DN1-User-Manual-4/User-Guide-2978046-Page-74.png)
![Auto ContinueYou can specify whether or not the printer automatically continues to print after a system erroroccurs. For details about how to configure this function, see page 172 "Executing form feed whenan error occurs".Default: [Off]Store and Skip Errored JobA document is automatically stored in the printer if a print job is suspended due to an error. Despitethis error, the next document can be printed. This function can be used for Normal Print, SamplePrint, and Stored Print files. The job type can be specified in the "Job Type:" list of the printer driver.For details, see page 176 "Printing Stored Documents".Printing of the document that is stored in the printer can be resumed by operating the control panel.For details, see page 183 "Printing of documents stored when print configuration errors occur".The storage method differs depending on the type of the specified document. For details, seepage 174 "Storing jobs with errors automatically".You can specify the number of pages to check for errors. Enter the number of pages between 1 to999. (Default: "3")When two or more pages is specified, the first page of a document may take longer to print.Default: [Off]Memory OverflowYou can specify whether or not to print a memory overflow report.Default: [Do not Print]Auto Cancel Conf. for PDL Err.JobYou can specify whether or not to cancel printing and display confirmation screen when an erroroccurs because of restrictions related to the printer language, options, or security settings.Default: [Do not Display]Auto Cancel for Prt. Job(s) on Err.When an error occurs, the printer cancels the print job with an error and the jobs received beforethe error occurs. For details about setting this function, see page 173 "Automatically cancelingprinting of jobs with errors".Default: [Off]Rotate by 180 DegreesYou can specify whether to rotate the print image 180 degrees relative to the paper orientation.Default: [Off]Anti-HumiditySelect whether or not to reduce paper curl and print smearing when printing in a high-humidityenvironment.Function Details of the Printer Configuration Items (SP C342DN)midas-p3_com_operating_instructions_gb_00208911_eng.xml 315Draft 2016/01/18](https://usermanual.wiki/Ricoh/PRSPC342DN1.BBP-PRSPC342DN1-User-Manual-4/User-Guide-2978046-Page-75.png)
![Anti-Humidity SettingDefault: [Off]• On• OffAnti-Humidity LevelDefault: [Level 1 (Weak)]• Level 1 (Weak)• Level 2 (Medium)• Level 3 (Strong)Print Compressed DataYou can specify whether to uncompress and extract compressed job data before printing it.The supported compression format is GZIP.Default: [Off]Memory UsageYou can specify the amount of memory used in Font Priority or Frame Priority, according to papersize or resolution.Default: [Frame Priority]DuplexYou can specify whether or not to print on both sides of each page.Default: [Off]CopiesYou can specify the number of print sets. This setting is disabled if the number of pages to print hasbeen specified with the printer driver or another command.The number of copies can be specified from 1 to 999 by increments of one.Default: "1" copiesBlank Page PrintYou can specify whether or not to print blank pages.Default: [On]Pages that match one of the following conditions are identified as blank.• There are no images.• There are images but they are outside the printable area.• There are only blank characters.5. Configuring and Managing the Printer316 midas-p3_com_operating_instructions_gb_00208911_eng.xmlDraft 2016/01/18](https://usermanual.wiki/Ricoh/PRSPC342DN1.BBP-PRSPC342DN1-User-Manual-4/User-Guide-2978046-Page-76.png)
![PCL Char.Thickness Adjust.Specify whether or not to thicken the typeface if characters appear blurred when printing throughthe PCL 5c or PCL6 printer driver.Default: [Off]• On• OffSpool PrintingYou can specify whether or not to complete spooling before starting to print. Spooling stores a printjob temporarily in the printer, and then prints it. This function is available only if the hard disk isinstalled on the printer.Default: [Off]Jobs Not Printed As Machine Was OffThis function is available only if the hard disk is installed on the printer.You can specify whether or not to print Hold Print files whose specified print time has alreadypassed when the printer's main power switch is turned on.Default: [Do not Print]• Print When Machine OnWhen the printer's main power is turned on, the printer automatically prints all the Hold Printfiles stored in the printer whose specified print time has already passed.• Do not PrintIf there are Hold Print files whose specified print time has already passed when the printer'spower is turned on, the specified print time will be canceled and the files will be deleteddepending on the [Auto Delete Temporary Print Jobs] setting. For details, see page 314 "DataManagement".Restrict Direct Print JobsThis function is available only if the hard disk is installed on the printer.When a print job is sent to the printer, you can specify whether to store the document in the printerwithout printing it or cancel printing it. To prevent documents being left on the tray unattended, thedocuments that have been stored automatically in the printer are not printed unless the controlpanel is used to print them.If a document is a Normal Print, Sample Print, or Stored Print file, it can be printed physically. Thejob type can be specified in the "Job Type:" list of the printer driver. For details, see page 176"Printing Stored Documents".If [Automatcly. Store Jobs] is selected, the storage method differs depending on the type of thespecified document. For details, see page 172 "Preventing Documents from Being Left Unattendedor Taken By Mistake".Default: [Off]Function Details of the Printer Configuration Items (SP C342DN)midas-p3_com_operating_instructions_gb_00208911_eng.xml 317Draft 2016/01/18](https://usermanual.wiki/Ricoh/PRSPC342DN1.BBP-PRSPC342DN1-User-Manual-4/User-Guide-2978046-Page-77.png)
![• Off• Automatcly. Store JobsDocuments are automatically stored in the printer without being printed regardless of theirprint settings.• Cncl All Direct Prt JobsPrinting is always canceled regardless of the print settings.Switch Initial ScreenThis function is available only if the hard disk is installed on the printer.You can specify the screen to be displayed when [Printer] is pressed in the Home screen.Default: [Job List]• Job ListDisplays the list of jobs.• Print JobsDisplays the lists of the document stored in the printer and the User IDs.Printer LanguageYou can specify the printer language.Default: [Auto]Default Printer LanguageYou can set the default printer language if the printer cannot find the printer languageautomatically.Default: [PCL]Sub Paper SizeYou can specify whether A4 or Letter (81/2 ×11) size paper is automatically selected as thedefault size when the job-specified size is unavailable.Default: [Auto]Page SizeYou can specify the default paper size.Default:• (mainly Europe and Asia)A4• (mainly North America)81/2 × 11The paper size you can specify is as follows:• (mainly Europe and Asia)5. Configuring and Managing the Printer318 midas-p3_com_operating_instructions_gb_00208911_eng.xmlDraft 2016/01/18](https://usermanual.wiki/Ricoh/PRSPC342DN1.BBP-PRSPC342DN1-User-Manual-4/User-Guide-2978046-Page-78.png)
![A4, A5, A6, B5 JIS, B6 JIS, C5 Env, C6 Env, DL Env, 81/2 × 14, 81/2 × 132/5, 81/2 × 13,81/2 × 11, 81/4 × 13, 8 × 13, 71/4 × 101/2, 51/2 × 81/2, 41/8 × 91/2, 37/8 × 71/2,16K, Custom Size• (mainly North America)81/2 × 14, 81/2 × 132/5, 81/2 × 13, 81/2 × 11, 81/4 × 13, 8 × 13, 71/4 × 101/2, 51/2× 81/2, 41/8 × 91/2, 37/8 × 71/2, A4, A5, A6, B5 JIS, B6 JIS, C5 Env, C6 Env, DL Env,16K, Custom SizeLetterhead SettingYou can specify whether or not to print on paper that has a fixed print side or print direction(letterhead paper, for example). For details, see page 121 "Loading Orientation-Fixed Paper orTwo-Sided Paper".Default: [Auto Detect]• OffThe letterhead printing mode is disabled.• Auto DetectYou can specify whether or not to print using letterhead mode whenever a page that has afixed print side or print direction is specified as the first page.• On (Always)Print with the letterhead printing mode regularly.Tray Setting PriorityYou can specify whether or not to give priority to the settings specified by the printer driver orcommands or to the ones made on the control panel for each tray when the printer receives printdata. Only the trays attached to the printer are displayed.Paper Confirmation for Bypass TrayYou can specify whether or not to display the confirming screen for the paper size, type andfeed direction on the control panel when paper is fed from the bypass tray. If [Display] isspecified, you can check the print settings for the bypass tray before printing starts.Default: [Do not Display]• Display• Do not DisplayBypass TrayDefault: [Driver/Command]• Driver/CommandWhen the source paper tray is specified for a print job, the paper settings specified usingthe printer driver or by print command are applied, regardless of the settings specifiedusing the control panel.Function Details of the Printer Configuration Items (SP C342DN)midas-p3_com_operating_instructions_gb_00208911_eng.xml 319Draft 2016/01/18](https://usermanual.wiki/Ricoh/PRSPC342DN1.BBP-PRSPC342DN1-User-Manual-4/User-Guide-2978046-Page-79.png)
![• Machine Setting(s)The paper settings specified on the printer's control panel are applied to all print jobs. Anerror may occur if the paper settings specified using the printer driver or by printcommand do not match those specified using the control panel.• Machine Setting(s): Any TypePrinting is performed according to the paper size specified using the printer driver orprint command and the paper type specified on the machine. Regardless of the type ofpaper in the paper tray, you can print properly by specifying a paper type using theprinter driver or print command.• Any Size/TypeIf the printer's trays do not contain any paper to match the print job settings, printing canbe performed from the bypass tray with the job's settings applied.• Any Custom Size/TypeIf the printer's trays do not contain any paper to match the print job settings but custompaper is specified using the printer driver or by print command, printing can beperformed from the bypass tray with the job's settings applied.Trays 1 to 2Default: [Machine Setting(s)]• Driver/Command• Machine Setting(s)Tray SwitchingYou can specify whether or not the printer automatically switches paper trays if paper of thespecified size and type is not loaded in the driver-specified tray.Default: [Off]RAM DiskIf the hard disk is not installed for PDF Direct Print, select a value of 2 MB or higher. This function isdisplayed only if no hard disk is installed.Default: [4 MB]Extended Auto Tray SwitchingYou can specify whether or not to automatically switch to a suitable tray when the current tray runsout of paper.When [On] is set, the extended auto tray switching is priority, regardless of the printer driversettings.Default: [Off]I/O BufferYou can set the size of the I/O Buffer. Normally it is not necessary to change this setting.5. Configuring and Managing the Printer320 midas-p3_com_operating_instructions_gb_00208911_eng.xmlDraft 2016/01/18](https://usermanual.wiki/Ricoh/PRSPC342DN1.BBP-PRSPC342DN1-User-Manual-4/User-Guide-2978046-Page-80.png)
![Default: [128 KB]I/O TimeoutYou can set how many seconds the printer should wait before ending a print job. If data fromanother port usually arrives in the middle of a print job, you should increase this timeout period.Default: [15 seconds]PCL MenuOrientationYou can set the page orientation.Default: [Portrait]Form LinesYou can set the number of lines per page.The number of lines can be specified from 5 to 128 by increments of one.Default:• (mainly Europe and Asia)"64" lines• (mainly North America)"60" linesFont SourceYou can set the storage location of the default font.Default: [Resident][RAM], [HDD], [SD], and [SD Font Download] can be selected only when fonts have beendownloaded to the printer.Font NumberYou can set the ID of the default font you want to use.• When [Resident] is selected under [Font Source]:The font number can be specified from 0 to 63 by increments of one.Default: "0"• When [RAM], [HDD], [SD], or [SD Font Download] is selected under [Font Source]:The font number can be specified from 1 up to number of fonts stored on the printer.Default: "1"Point SizeYou can set the point size you want to use for the selected font.Function Details of the Printer Configuration Items (SP C342DN)midas-p3_com_operating_instructions_gb_00208911_eng.xml 321Draft 2016/01/18](https://usermanual.wiki/Ricoh/PRSPC342DN1.BBP-PRSPC342DN1-User-Manual-4/User-Guide-2978046-Page-81.png)
![The number of point sizes can be specified from 4.00 to 999.75 by increments of 0.25.This setting is effective only with variable-space fonts.Default: "12.00" pointsFont PitchYou can set the number of characters per inch for the selected font.The number of characters per inch can be specified from 0.44 to 99.99 by increments of 0.01.This setting is effective only with fixed-space fonts.Default: "10.00" pitchesSymbol SetYou can specify the character set of the selected font. The available settings are as follows:Roman-8, Roman-9, ISO L1, ISO L2, ISO L5, ISO L6, ISO L9, PC-775, PC-8, PC-8 D/N,PC-850, PC-852, PC-858, PC8-TK, PC-1004, Win L1, Win L2, Win L5, Win Baltic, Desktop, PSText, MS Publ, Math-8, PS Math, Pifont, Legal, ISO 4, ISO 6, ISO 11, ISO 15, ISO 17, ISO 21,ISO 60, ISO 69, Win 3.0, MC Text, UCS-2, PC-864, Arabic-8, Win Arabic, PC-866, PC-866U,ISO Cyrillic, Win Cyrillic, PC-851, Greek-8, ISO Greek, PC-8 Greek, Win Greek, PC-862,Hebrew-7, Hebrew-8, ISO HebrewDefault: [PC-8]Courier FontYou can specify a courier font type.Default: [Regular]Extend A4 WidthYou can extend the printing area width (when printing on A4 sheet with PCL).Default: [Off]When the setting is [On], the width will be 81/2 inches.Append CR to LFWhen set to [On], a carriage return will follow each line feed: CR=CR, LF=CR-LF, FF=CR-FF.Default: [Off]ResolutionYou can set the print resolution in dots per inch.Default: [600 dpi (Fast)]5. Configuring and Managing the Printer322 midas-p3_com_operating_instructions_gb_00208911_eng.xmlDraft 2016/01/18](https://usermanual.wiki/Ricoh/PRSPC342DN1.BBP-PRSPC342DN1-User-Manual-4/User-Guide-2978046-Page-82.png)
![PS MenuJob TimeoutYou can specify how long the printer waits before canceling the current job when the job isinterrupted while being processed.Default: [Use Driver/Command]If you select [Use Machine Settings], enter a value between 0 and 999.Default: "0"When set to "0", the current job will not be canceled when interrupted.Wait TimeoutYou can specify how long the printer waits before it cancels receiving the job when the printercannot detect the end of the job.Default: [Use Driver/Command]If you select [Use Machine Settings], enter a value between 0 and 999.Default: "300"When set to "0", the print job will not be canceled when the end of the job cannot be detected.Paper Selection MethodYou can specify how the source tray will be selected by specifying the default value forDeferredMediaSelection in PostScript.Default: [Select Paper Tray]• Auto SelectThe default value for DeferredMediaSelection is "true". The source tray that matches the papersetting specified in a print job will be selected.• Select Paper TrayThe default value for DeferredMediaSelection is "false". The source tray will be selectedaccording to the media selection of PostScript Language Reference.Switching between 1&2 Sided Print Functns.You can specify which side of paper to print on when the PS command is used to perform duplexprinting, and the "setpagedevice" command is entered.Default: [Active]• ActiveCancels duplex printing, and prints pages after the "setpagedevice" command has beenentered on the front side of paper.• InactiveRetains duplex printing, and prints pages after the "setpagedevice" command has beenentered on the back side of paper.Function Details of the Printer Configuration Items (SP C342DN)midas-p3_com_operating_instructions_gb_00208911_eng.xml 323Draft 2016/01/18](https://usermanual.wiki/Ricoh/PRSPC342DN1.BBP-PRSPC342DN1-User-Manual-4/User-Guide-2978046-Page-83.png)
![Data FormatYou can specify a data format.Default: [TBCP]This setting is not effective when operating the printer with a parallel connection.When operating the printer with a parallel connection, and also if the binary data is sent from theprinter driver, the print job is canceled.ResolutionYou can set the print resolution in dots per inch.Default: [600 dpi (Fast)]Toner SavingYou can specify whether or not to reduce toner consumption when printing. When this setting isenabled, print quality may be degraded.Default: [Off]Color SettingYou can make an RGB setting.Default: [Super Fine]Color ProfileYou can set the color profile.Default: [Auto]Process Color ModelYou can specify the color model.Default: [Color]Orientation Auto DetectYou can specify whether or not to automatically detect the print data orientation.Default: [On]Gray ReproductionYou can specify how to print black or gray tones.Default: [Black/Gray by K (Black)]• Black/Gray by K (Black)• Black by K (Black)• CMY + K• Black/Gray by K(Black)-Text Only• Black by K (Black)-Text Only• Black/Gray by K-Strong UCR5. Configuring and Managing the Printer324 midas-p3_com_operating_instructions_gb_00208911_eng.xmlDraft 2016/01/18](https://usermanual.wiki/Ricoh/PRSPC342DN1.BBP-PRSPC342DN1-User-Manual-4/User-Guide-2978046-Page-84.png)
![PDF MenuChange PDF PasswordYou can set the password for the PDF file printed using PDF Direct Print.[New Password] and [Confirm New Password] appear only when [Current Password] is set.A password can be also set using Web Image Monitor, but in this case the password information issent through the network. If security is a priority, set the password using this menu from the controlpanel.PDF Group PasswordThis setting is not available on this printer.Reverse Order PrintingYou can specify whether the printer automatically prints in reverse order.Default: [Off]ResolutionYou can set the print resolution in dots per inch.Default: [600 dpi (Fast)]Toner SavingReduces toner consumption when printing. When this setting is enabled, print quality may bedegraded.Default: [Off]Color SettingYou can make an RGB setting.Default: [Super Fine]Color ProfileYou can set the color profile.Default: [Auto]Process Color ModelSpecify the color model.Default: [Color]Orientation Auto DetectYou can specify whether or not to automatically detect the print data orientation.Default: [On]Function Details of the Printer Configuration Items (SP C342DN)midas-p3_com_operating_instructions_gb_00208911_eng.xml 325Draft 2016/01/18](https://usermanual.wiki/Ricoh/PRSPC342DN1.BBP-PRSPC342DN1-User-Manual-4/User-Guide-2978046-Page-85.png)
![XPS MenuResolutionYou can set the print resolution in dots per inch.Default: [600 dpi Fast]• 600dpi Fast• 600dpi StandardToner SavingReduces toner consumption when printing. When this setting is enabled, print quality may bedegraded.Default: [Off]Color ProfileYou can set the color profile.Default: [Auto]Process Color ModelSpecify the color model.Default: [Color]Gray ReproductionYou can specify how to print black or gray tones.Default: [Black/Gray by K (Black)]Extended Feature SettingsYou can install, uninstall, and set up Extended Features. For details, see Extended Feature Settings.Address Book MangmntYou can configure [Address Book Management] in [Administrator Tools] under [System Settings]. Fordetails, see page 300 "Administrator Tools".Tray Paper SettingsYou can configure [Tray Paper Settings] under [System Settings]. For details, see page 287 "Tray PaperSettings".5. Configuring and Managing the Printer326 midas-p3_com_operating_instructions_gb_00208911_eng.xmlDraft 2016/01/18](https://usermanual.wiki/Ricoh/PRSPC342DN1.BBP-PRSPC342DN1-User-Manual-4/User-Guide-2978046-Page-86.png)
![Edit HomeYou can add shortcuts to frequently used embedded software applications in the [Home] screen. Fordetails, see page 31 "Customizing the [Home] Screen".Remote ServicesYou can display the communication screen for @Remote Service. For details, see Security Guide.Switch Display LanguageEvery time you press the display language switch, the display language of the control panel togglesthrough the languages registered in [Select Switchable Languages] in [Administrator Tools] under[System Settings]. For details about how to change languages, see page 77 "Selecting the DisplayLanguage". For details about how to register languages, see page 300 "Administrator Tools".Maintenance: PrintPlain Paper SettingYou can specify the weight of plain paper when [Plain Paper] is selected for [Paper Type] in [TrayPaper Settings] under [System Settings].The paper weight can be set for each tray separately. For details about the actual paper weight,see page 108 "Paper Type Specifications".Default: [Plain Paper]• Plain PaperReplacement AlertUse this function to specify the timing to notify user when supplies need to be replaced. Settings canbe made separately for Toner, Waste Toner Bottle, Intermediate Transfer Unit, Fusing Unit.Default: [Normal]• Notify Sooner• Normal• Notify LaterSupply End OptionYou can specify whether or not to continue printing after the following components have exceededtheir recommended service life.Default: [Continue Printing]Function Details of the Printer Configuration Items (SP C342DN)midas-p3_com_operating_instructions_gb_00208911_eng.xml 327Draft 2016/01/18](https://usermanual.wiki/Ricoh/PRSPC342DN1.BBP-PRSPC342DN1-User-Manual-4/User-Guide-2978046-Page-87.png)
![• Continue Printing• Stop PrintingBlack & White Page DetectYou can specify whether to recognize black-and-white images by page or by document.The black-and-white recognition function allows the printer to print monochrome images inmonochrome mode even if color printing is specified.Default: [Per Job]• Per Page• Per JobCleaningYou can clear the intermediate transfer unit when white lines appear on printouts.Curl PreventionYou can control the fuser temperature to prevent paper from curling. Enabling this function mayincrease the print time and speed for first prints.Also, the lifetime of the drum unit, intermediate transfer unit, and fusing unit becomes shorter thantheir normal lifetime.Default: [Inactive]• Active• InactiveAnti-droplet (2 Sided Print)You can specify whether or not to dry the duplex unit before printing to prevent partial dropouts ofprinted images on the back sides of two-sided printouts. Enabling this function may increase theprint time for duplex printing of first prints. Also, the lifetime of the fusing unit becomes shorter thantheir normal lifetime.Default: [Inactive]• Active• InactiveAnti-humidity (Image Dropout Prevention)You can specify whether or not to prevent partial dropouts of printed images when printing in ahigh humidity environment.Default: [Inactive]• Active• Inactive5. Configuring and Managing the Printer328 midas-p3_com_operating_instructions_gb_00208911_eng.xmlDraft 2016/01/18](https://usermanual.wiki/Ricoh/PRSPC342DN1.BBP-PRSPC342DN1-User-Manual-4/User-Guide-2978046-Page-88.png)
![Black & White Print PriorityYou can specify whether or not to reduce consumption of color toner. When this function isenabled, it may take longer to start printing a color page.Default: [Off]• On• OffB & W Low Speed Printing (Thick Paper)You can specify whether or not to lower the print speed of black-and-white pages on thick paper iflateral streaks appear on the output. Enabling this setting prevents streaks from appearing on theoutput by lowering the print speed.If this function is enabled, the lifetime of the toner and drum unit becomes shorter than their normallifetime.Default: [Inactive]• Active• InactiveMaintenance: ImageColor Regist.You can perform automatic adjustment of color registration. For details, see page 440 "Adjustingthe Color Registration".Color Calibrt.You can adjust the gradation of bright (highlighted parts) and medium areas (middle parts) forprinting. For details, see page 441 "Correcting the Color Gradation".• Adjust Auto DensityYou can print the gradation of auto density.• Print Test Pattern 1You can print gradation correction sheet 1.• Print Test Pattern 2You can print gradation correction sheet 2.• Reset SettingYou can reset the gradation correction value to default.Adjust Print PositionYou can adjust the starting position of the printing page. For details, see page 445 "AdjustingPrinting Position".Function Details of the Printer Configuration Items (SP C342DN)midas-p3_com_operating_instructions_gb_00208911_eng.xml 329Draft 2016/01/18](https://usermanual.wiki/Ricoh/PRSPC342DN1.BBP-PRSPC342DN1-User-Manual-4/User-Guide-2978046-Page-89.png)
![Print Test SheetYou can print the registration test sheet.Only the installed trays appear on the display panel.• Paper Trays 1–2• Bypass Tray• Duplex UnitAdjust PositionYou can specify the start position for printing on a page.Only the installed trays appear on the display panel.• Horizontal: Trays 1-2• Horizontal: Bypass Tray• Horizontal: Back Side• Vertical: Trays 1–2• Vertical: Bypass Tray• Vertical: Back Side4 Color Graphic ModeYou can adjust levels of toner color overlap. If characters or lines blur, setting priority on text maymake them clearer. Under normal conditions, set priority on photos.Default: [Photo Priority]• Text Priority• Photo Priority5. Configuring and Managing the Printer330 midas-p3_com_operating_instructions_gb_00208911_eng.xmlDraft 2016/01/18](https://usermanual.wiki/Ricoh/PRSPC342DN1.BBP-PRSPC342DN1-User-Manual-4/User-Guide-2978046-Page-90.png)
![Using a Print ServerThis section explains how to configure the printer as a network printer.Configuring a Print ServerThis section explains how to configure the printer as a Windows network printer. The printer isconfigured to enable use by network clients.• To change printer properties in the [Printers and Faxes], [Printers], or [Devices and Printers]window, log in to the file server as an administrator or member of the PowerUsers group.1. On the [Start] menu, click [Devices and Printers].For Windows Vista, click [Control Panel], and then click [Hardware and Sound] from [Printer] todisplay the [Printer] window.For Windows 8/8.1, click [Settings] on the Charm Bar, and then click [Control Panel]. When the[Control Panel] window appears, click [View devices and printers].For Windows 10, right-click the [Start] button on the desktop, and then click [Control Panel]. Whenthe [Control Panel] window appears, click [View devices and printers].2. Right-click the icon of the printer you have added, and then click [Printer properties].The printer properties appear.For Windows Vista, right-click the icon of the printer you have added, click [Run as administrator],and then click [Properties].For Windows 8/8.1/10, right-click the icon of the printer you have added to select the printer,and then click [Printer properties].3. On the [Sharing] tab, click [Share this printer].4. To share the printer with users of a different version of Windows, click [AdditionalDrivers...].If you have installed an alternative driver by selecting [Shared] during the printer driver installation,this step can be ignored.5. Click [OK], and then close the printer properties.Using a Print Servermidas-p3_com_operating_instructions_gb_00198694_eng.xml 331Draft 2016/01/18](https://usermanual.wiki/Ricoh/PRSPC342DN1.BBP-PRSPC342DN1-User-Manual-4/User-Guide-2978046-Page-91.png)
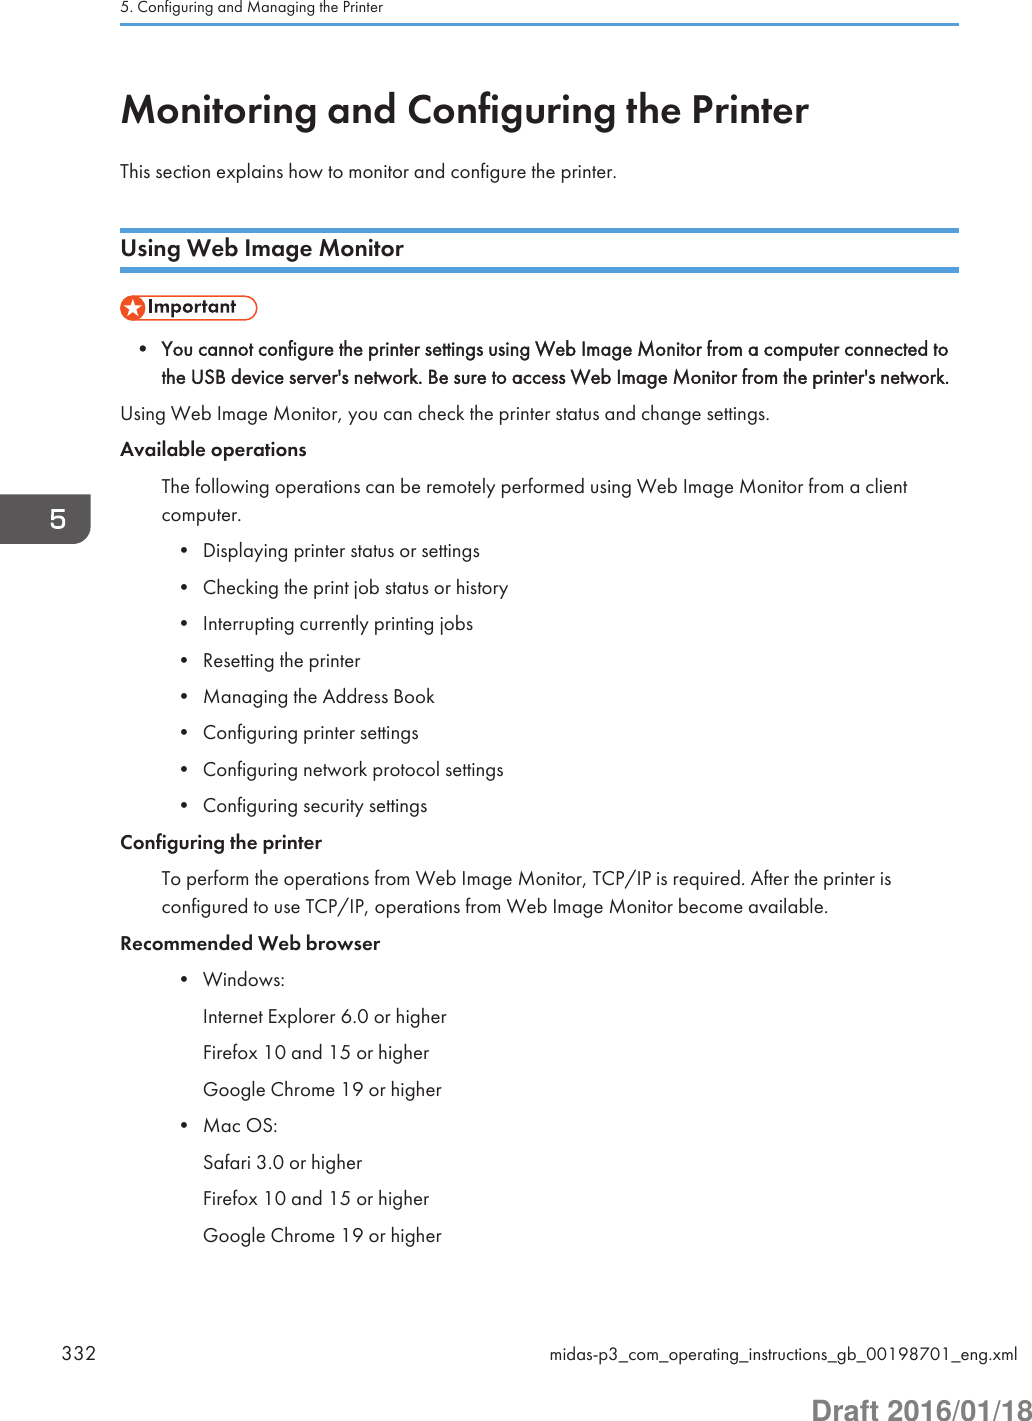
![Web Image Monitor supports screen reader software. We recommend JAWS 7.0 or a laterversion.• Display and operation problems may occur if you do not enable JavaScript and cookies, or if youare using a non-recommended Web browser.• If you are using a proxy server, change the Web browser settings. Contact your administrator forinformation about the settings.• We recommend using Web Image Monitor in the same network.• If the printer is firewall-protected, it cannot be accessed from computers outside the firewall.• If the printer under DHCP is used, the IP address may be changed automatically by the DHCPserver settings. Enable DDNS setting on the printer, and then connect using the printer's host name.Alternatively, set a static IP address to the DHCP server.• If the HTTP port is disabled, a connection to the printer using the printer's URL cannot beestablished. SSL settings must be enabled on this printer. For details, contact your networkadministrator.• If Firefox is used, fonts and colors may be different, or tables may not appear properly configured.• When using a host name under Windows Server 2003/2003 R2/2008/2008 R2/2012/2012R2 with IPv6 protocol, perform host name resolution using an external DNS server. The host filecannot be used.• To use JAWS 7.0 under Web Image Monitor, you must be running Windows and Internet Explorer6.0 or a later version.• If you are using Internet Explorer 8.0 or higher, downloading will be slower than with otherbrowsers. To download faster with Internet Explorer 8.0 or higher, open the browser's [InternetOptions] menu and register the printer's URL as a trusted site, and then disable SmartScreen filterfor trusted sites. For details about these settings, see the Internet Explorer Help files.• You can access Web Image Monitor more quickly by registering the printer's URL as a bookmark.Note that the URL you register must be the URL of the top page, which is the page that appearsbefore login. If you register the URL of a page that appears after login, Web Image Monitor willnot open properly from the bookmark.• If user authentication is activated, you must enter your login user name and password to use WebImage Monitor. For Details, see page 333 "Displaying the top page".• When you configure settings using Web Image Monitor, do not log in from the control panel. Thesettings you have configured using Web Image Monitor may become invalid.Displaying the top pageThere are two modes available with Web Image Monitor: guest mode and administrator mode.Displayed items may differ depending on the printer type.Monitoring and Configuring the Printermidas-p3_com_operating_instructions_gb_00198701_eng.xml 333Draft 2016/01/18](https://usermanual.wiki/Ricoh/PRSPC342DN1.BBP-PRSPC342DN1-User-Manual-4/User-Guide-2978046-Page-93.png)
![Guest modeThis mode requires no login to enter.In the guest mode, the printer status, settings, and print job status can be viewed, but the printersettings cannot be changed.Administrator modeThis mode requires an administrator login to enter.In the administrator mode, you can configure various printer settings.• When entering an IPv4 address, do not begin segments with zeros. For example: If the address is"192.168.001.010", you must enter it as "192.168.1.10".1. Start your Web browser.2. Enter "http://(printer's IP address or host name)/" in your Web browser's address bar.The top page of Web Image Monitor appears.If the printer's host name has been registered on the DNS or WINS server, you can enter it.When setting SSL, a protocol for encrypted communication, under the environment in which serverauthentication is issued, enter "https://(printer's IP address or host name)/".3. To log in to Web Image Monitor in the administrator mode, click [Login] on the top page.The window for entering the login user name and password appears.4. Enter your login user name and password, and then click [Login].For details about the login user name and password, contact your administrator.Depending on the configuration of your Web browser, the login user name and password might besaved. If you do not want to save them, configure your Web browser's settings so that thisinformation is not saved.12354CZV3055. Configuring and Managing the Printer334 midas-p3_com_operating_instructions_gb_00198701_eng.xmlDraft 2016/01/18](https://usermanual.wiki/Ricoh/PRSPC342DN1.BBP-PRSPC342DN1-User-Manual-4/User-Guide-2978046-Page-94.png)
![1. Menu areaDisplays the content of a selected menu item.2. Header areaDisplays the dialog box for switching to the user mode and administrator mode and the menu for each mode.Also displays the link to Help and dialog box for keyword search.3. Refresh/Help (Refresh): Click at the upper right in the work area to update the printer information. Click the Webbrowser's [Refresh] button to refresh the entire browser screen. (Help): Use Help to view or download Help file contents.4. Basic Information areaDisplays the basic information of the printer.5. Work areaDisplays the contents of the item selected in the menu area.List of setting itemsThe following tables show Web Image Monitor items that can be viewed or modified on a Webbrowser depending on the selected mode.Status/Information• Device InfoMenu Guest mode Administrator modeFunctions Read ReadSystem Read ReadVersion Read ReadPrinter Language Read Read• StatusMenu Guest mode Administrator modeAlert Read ReadMessages Read ReadStatus Read ReadToner Read ReadMonitoring and Configuring the Printermidas-p3_com_operating_instructions_gb_00198701_eng.xml 335Draft 2016/01/18](https://usermanual.wiki/Ricoh/PRSPC342DN1.BBP-PRSPC342DN1-User-Manual-4/User-Guide-2978046-Page-95.png)
![Menu Guest mode Administrator modeInput Tray Read ReadOutput Tray Read Read• SuppliesMenu Guest mode Administrator modeToner Read ReadOthers Read Read• CounterMenu Guest mode Administrator modeTotal Read ReadPrinter Read ReadCoverage Read ReadOther Function(s) Read Read• Counter per UserGuest mode Administrator modeNone Read/Modify• Display Eco-friendly CounterMenu Guest mode Administrator modeEco-friendly Counter None Read/Modify• JobMenu Guest mode Administrator modeJob List Read Read/ModifyPrinter Read Read• [Display Eco-friendly Counter] is displayed only SP C342DN.5. Configuring and Managing the Printer336 midas-p3_com_operating_instructions_gb_00198701_eng.xmlDraft 2016/01/18](https://usermanual.wiki/Ricoh/PRSPC342DN1.BBP-PRSPC342DN1-User-Manual-4/User-Guide-2978046-Page-96.png)
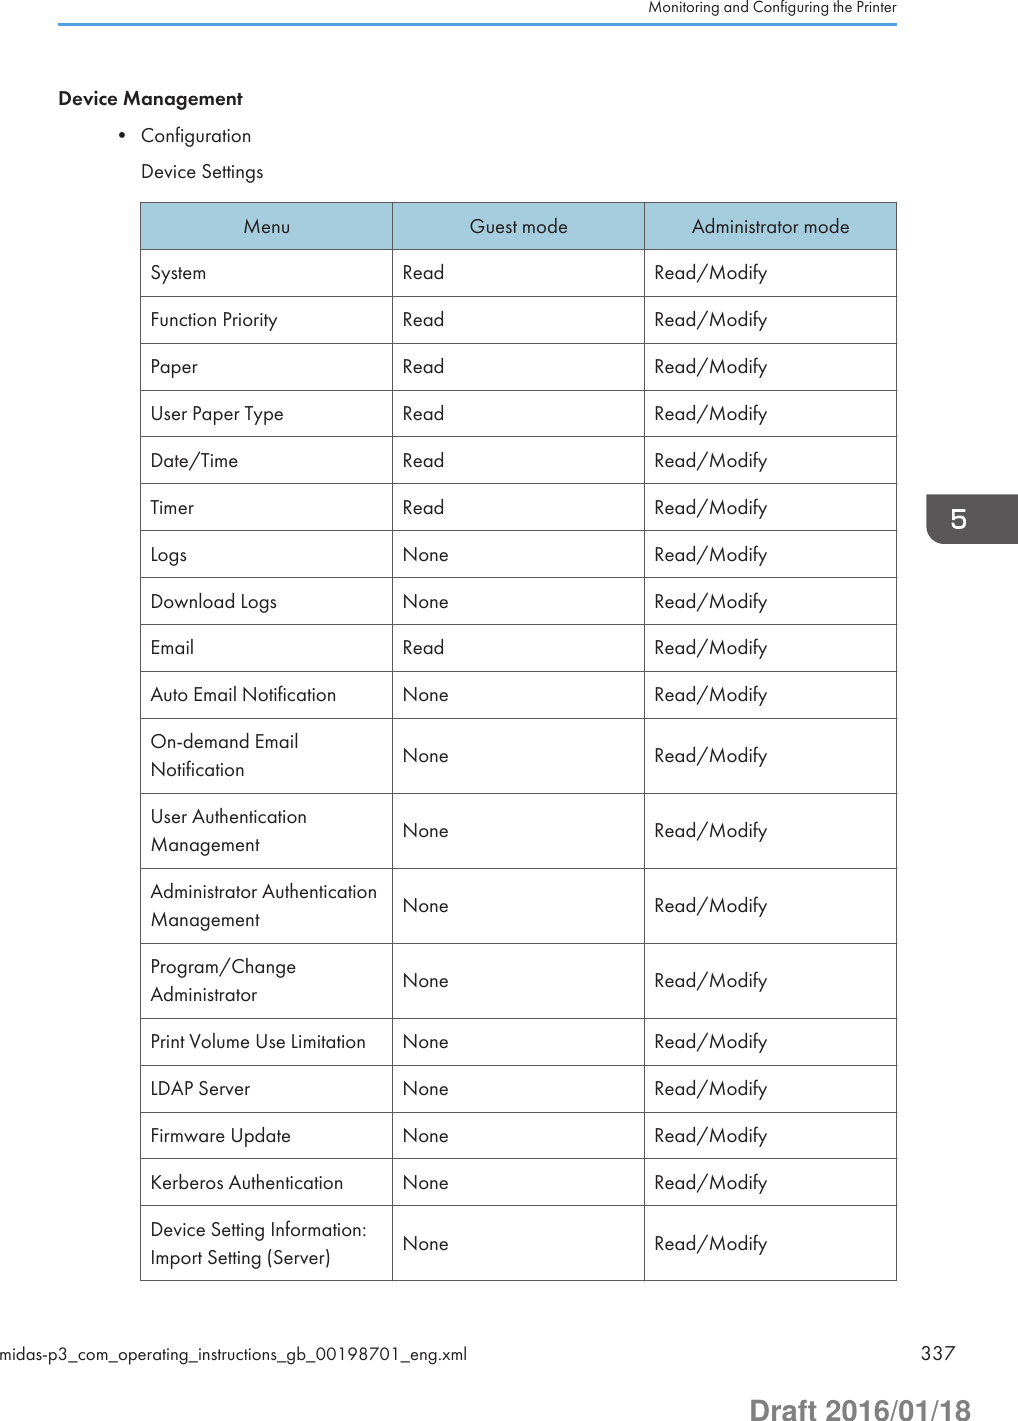
![Menu Guest mode Administrator modeImport Test None Read/ModifyImport/Export DeviceSetting Information None Read/ModifyEco-friendly CounterPeriod/AdministratorMessageRead Read/ModifyCompulsory Security Stamp None Read/ModifyUnauthorized CopyPrevention: Printer Read Read/ModifyProgram/Change USBDevice List Read Read/Modify• [Print Volume Use Limitation] can be read and modified only when User Authentication isactivated.• [Logs] and [Download Logs] are displayed only for SP C340DN.• [Function Priority], [Eco-friendly Counter Period/Administrator Message], and[Compulsory Security Stamp] are displayed only for SP C342DN.PrinterMenu Guest mode Administrator modeBasic Settings Read Read/ModifyTray Parameters (PCL) None Read/ModifyTray Parameters (PS) None Read/ModifyPDF Group Password None ModifyPDF Fixed Password None ModifyPDF Temporary Password Read/Modify NoneVirtual Printer Settings Read Read/Modify5. Configuring and Managing the Printer338 midas-p3_com_operating_instructions_gb_00198701_eng.xmlDraft 2016/01/18](https://usermanual.wiki/Ricoh/PRSPC342DN1.BBP-PRSPC342DN1-User-Manual-4/User-Guide-2978046-Page-98.png)
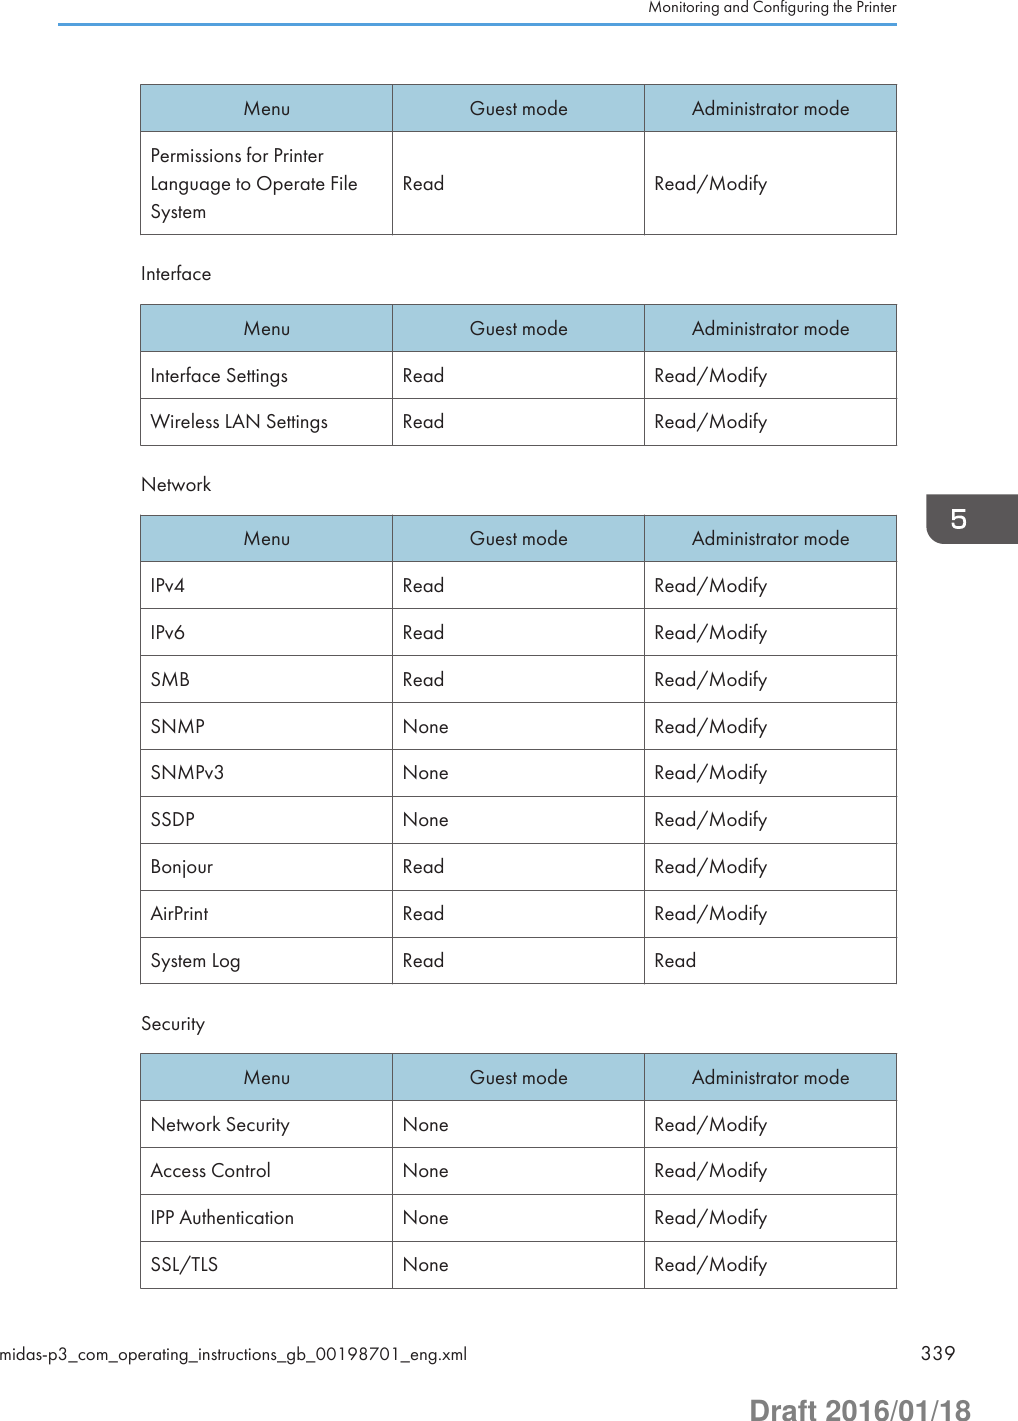
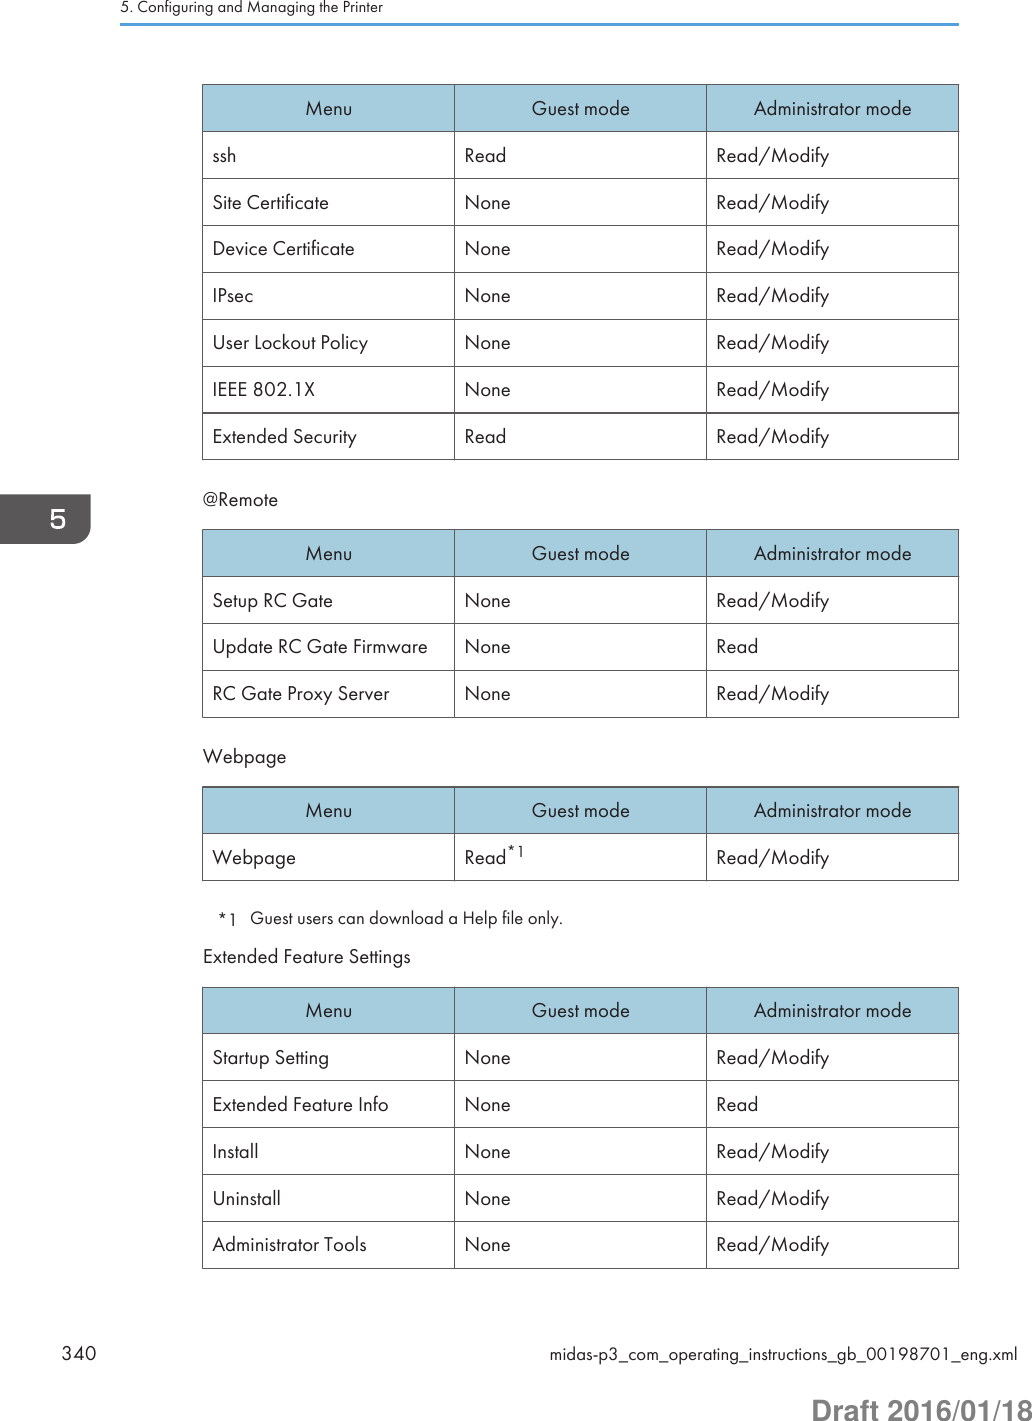
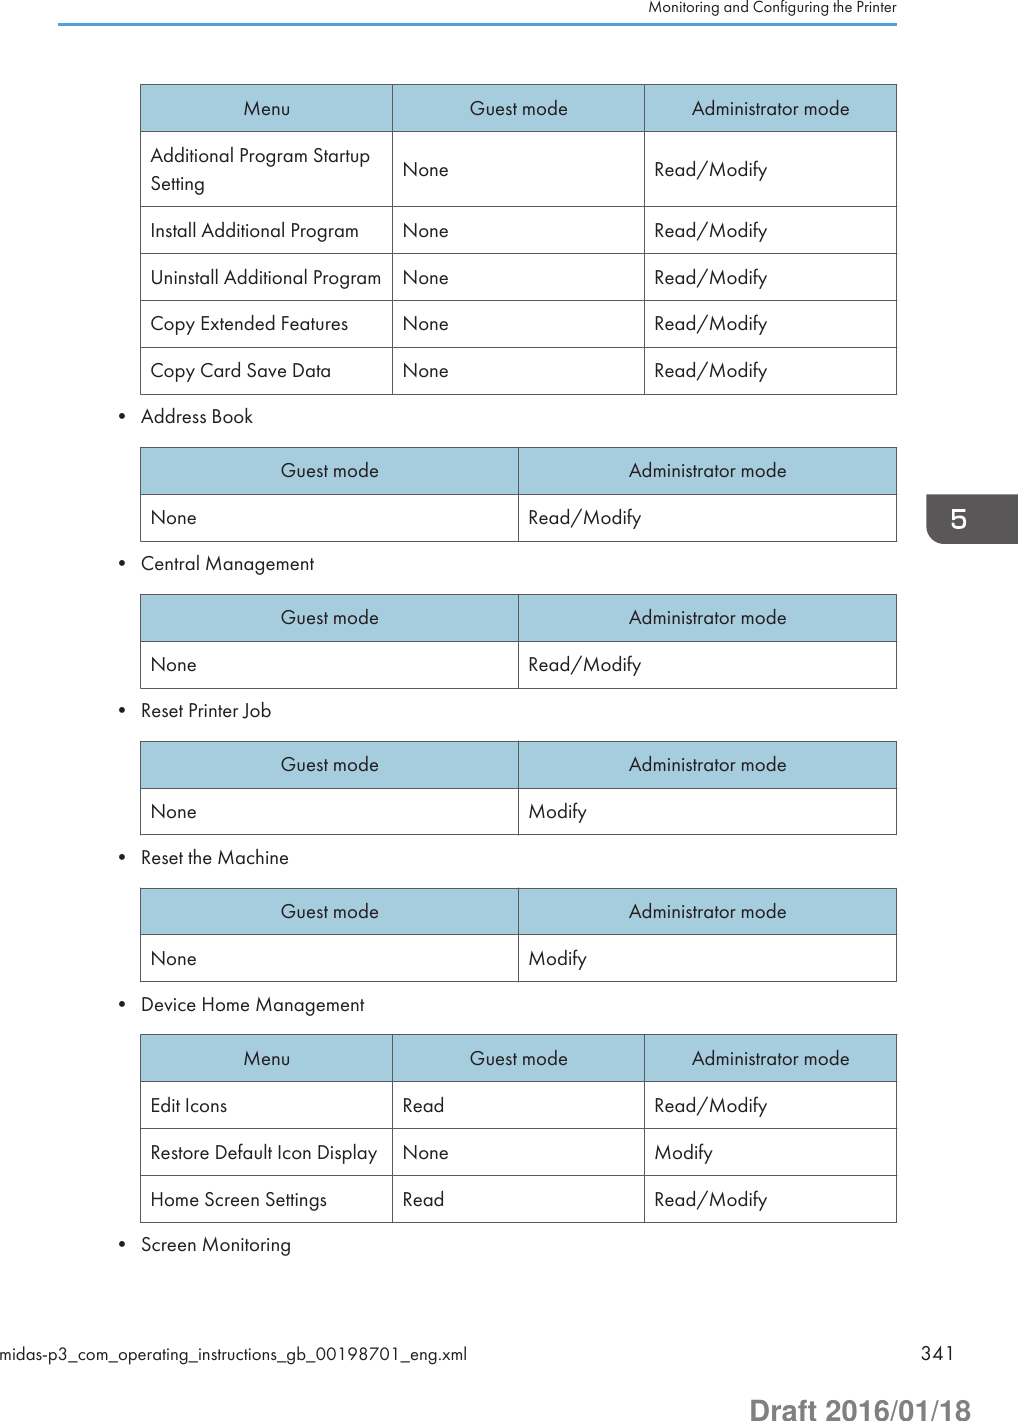
![Guest mode Administrator modeNone Modify• [Device Home Management] and [Screen Monitoring] are displayed only for SPC342DN.Print job/Stored File• Printer: Print JobsGuest mode Administrator modeRead/Modify Read/Modify• Some items do not appear depending on the security settings.Displaying Web Image Monitor HelpWhen using Help for the first time, click the Help button ( ) to display the message prompting youto select from displaying Help on-line or downloading Help.• Click the Help button ( ) in the header area again to display the contents of Help.• Click the Help button ( ) in the work area again to display the Help for the setting items in thework area.Viewing Help on our Web siteYou can view the latest Help information.Downloading and Checking HelpYou can download Help to your computer. Using the Help URL, you can specify the path to thelocal file to view Help without connecting to the Internet.Downloading Help1. In the "OS" list, select your operating system.2. In the "Language" list, select a language.3. Click [Download].4. Download Help by following the instructions on the screen.5. Store the downloaded compressed file in a given location, and then decompress the file.5. Configuring and Managing the Printer342 midas-p3_com_operating_instructions_gb_00198701_eng.xmlDraft 2016/01/18](https://usermanual.wiki/Ricoh/PRSPC342DN1.BBP-PRSPC342DN1-User-Manual-4/User-Guide-2978046-Page-102.png)
![To create a link for the Help button ( ), save the downloaded Help files on a Webserver.Linking the URL of the downloaded HelpYou can link the URL of the Help file on a computer or Web server to the Help button ( ).1. Log in to Web Image Monitor in the administrator mode.2. Click [Configuration] on the [Device Management] menu.3. Under "Webpage", click [Webpage].4. In the "Set Help URL Target" box, enter the URL of the Help file.If you saved the Help file to "\\Server_A\HELP\EN", enter "file://Server_A/HELP/".For example, if you saved the file to a Web server, and the URL of the index file is"http:// a.b.c.d/HELP/EN/index.html", enter "http://a.b.c.d/HELP/".5. Click [OK].6. "Updating..." appears. Wait about one or two minutes, and then click [OK].• If you save the Help files on your hard disk, you must access them directly. You cannotlink to them using the Help button ( ).Printer Status Notification by E-mailWhenever a paper tray becomes empty or paper is jammed, an alert e-mail is sent to the registeredaddresses to send notification of the printer status.For this notification, you can make the e-mail notification settings.Notification timing and e-mail content can be set.• Depending on your e-mail application, a phishing warning might appear after you receive an e-mail message. To prevent phishing warnings appearing after you receive e-mail from a specifiedsender, you must add the sender to the exclusion list of your e-mail application. For details abouthow to do this, see your e-mail application's Help.The e-mail notification functions you can set are as follows:• Auto e-mail notificationThe printer status information is automatically sent to the preregistered e-mail address. You mustspecify in advance the requested information items and an e-mail address to receive theinformation.• On-demand e-mail notificationThe printer status information is sent as a reply to a request e-mail from the administrator.The information that can be sent by auto e-mail notification is as follows:Monitoring and Configuring the Printermidas-p3_com_operating_instructions_gb_00198701_eng.xml 343Draft 2016/01/18](https://usermanual.wiki/Ricoh/PRSPC342DN1.BBP-PRSPC342DN1-User-Manual-4/User-Guide-2978046-Page-103.png)
![• Call Service• Out of Toner• Toner Almost Empty• Paper Misfeed• Cover Open• Out of Paper• Paper Tray Error• Output Tray Full• Unit Connection Error• Waste Toner Bottle is Full• Waste Toner Bottle is Almost Full• File Storage Memory Full Soon• Device Access Violation• Replacement Required: Unit• Replacement Required Soon: Unit• Toner Almost Empty (Remaining Level Selectable)1. Log in to Web Image Monitor in administrator mode.For details, see page 333 "Displaying the top page".2. Click [Configuration] on the [Device Management] menu.3. Under "Device Settings", click [Email].4. Configure the following settings:• Administrator Email Address: Specify the administrator's e-mail address.• Items in the Reception column: Make the necessary settings for sending and receiving e-mails.• Items in the SMTP column: Configure the SMTP server. Check your mailing environment, andthen specify the necessary items. You can also perform mail authentication for the SMTPserver.• Items in the POP before SMTP column: Configure the POP server. Check your mailingenvironment, and then specify the necessary items. You can also perform mail authenticationfor the POP server.• Items in the POP3/IMAP4 column: Configure the POP3 or IMAP4 server. Check your mailingenvironment, and then specify the necessary items.• Items in the Email Communication Port column: Configure the port to be used for access to themail server.• Items in the Email Notification Account column: Specify these items If you want to use e-mailnotification.5. Configuring and Managing the Printer344 midas-p3_com_operating_instructions_gb_00198701_eng.xmlDraft 2016/01/18](https://usermanual.wiki/Ricoh/PRSPC342DN1.BBP-PRSPC342DN1-User-Manual-4/User-Guide-2978046-Page-104.png)
![5. Click [OK].6. Click [Logout].7. Quit Web Image Monitor.• For details about the settings, see Web Image Monitor Help.Setting the account for e-mail notificationBefore you use Auto E-mail Notification or On-demand E-mail Notification, set up an e-mail account tobe used for the function. Perform the following configuration task in Web Image Monitor:1. Log in to Web Image Monitor in administrator mode.For details, see page 333 "Displaying the top page".2. Click [Configuration] on the [Device Management] menu.3. Under "Device Settings", click [Email].4. Configure the following settings in Email Notification Account:• Email Notification E-mail Address: Enter the address using alphanumeric characters. This willappear as the sender (From:) of the e-mail notification. Send requests for e-mail notification tothis address.• Receive Email Notification: Specify whether or not to use on-demand e-mail notification.• Email Notification User Name: Enter the specified user name for the e-mail account in "EmailNotification E-mail Address".• Email Notification Password: Enter the specified password for the e-mail account in "EmailNotification E-mail Address".5. Click [OK].6. Click [Logout].7. Quit Web Image Monitor.• The user name and e-mail address that is already registered as the e-mail destination cannot bespecified as the recipient of e-mail notification.Mail authenticationYou can configure mail authentication to prevent illegal use of the mail server.SMTP AuthenticationSpecify SMTP authentication settings.Monitoring and Configuring the Printermidas-p3_com_operating_instructions_gb_00198701_eng.xml 345Draft 2016/01/18](https://usermanual.wiki/Ricoh/PRSPC342DN1.BBP-PRSPC342DN1-User-Manual-4/User-Guide-2978046-Page-105.png)
![When an e-mail is sent to the SMTP server, authentication is performed using the SMTP AUTHprotocol by prompting the mail originator to enter the user name and password. This preventsillegal use of the SMTP server.1. Log in to Web Image Monitor in administrator mode.For details, see page 333 "Displaying the top page".2. Click [Configuration] on the [Device Management] menu.3. Under "Device Settings", click [Email].4. Make the following settings in SMTP column:• SMTP Server Name: Enter the IP address or host name of the SMTP server.• SMTP Port No.: Enter the port number used when sending e-mail to the SMTP server.• Use Secure Connection (SSL): Enable or disable SSL.• SMTP Authentication: Enable or disable SMTP authentication.• SMTP Auth. Email Address: Enter the e-mail address.• SMTP Auth. User Name: Enter the SMTP account name.• SMTP Auth. Password: Set or change the password for SMTP AUTH.• SMTP Auth. Encryption: Specify whether or not to encrypt the password.[Auto Select]: If the authentication method is PLAIN, LOGIN, CRAM-MD5, or DIGEST-MD5.[Active]: If the authentication method is CRAM-MD5 or DIGEST-MD5.[Inactive]: If the authentication method is PLAIN or LOGIN.5. Click [OK].6. Click [Logout].7. Quit Web Image Monitor.POP before SMTP AuthenticationSpecify whether or not log in to the POP3 server before sending an e-mail.1. Log in to Web Image Monitor in administrator mode.For details, see page 333 "Displaying the top page".1. Click [Configuration] on the [Device Management] menu.2. Under "Device Settings", click [Email].3. Configure the following settings in POP before SMTP column:• POP before SMTP: Enable or disable POP before SMTP.• POP Email Address: Enter the e-mail address.• POP User Name: Enter the POP account name.• POP Password: To set or change the POP password.5. Configuring and Managing the Printer346 midas-p3_com_operating_instructions_gb_00198701_eng.xmlDraft 2016/01/18](https://usermanual.wiki/Ricoh/PRSPC342DN1.BBP-PRSPC342DN1-User-Manual-4/User-Guide-2978046-Page-106.png)
![• Timeout setting after POP Auth.: Enter the time available before connecting to the SMTPserver after logging in to the POP server.4. Click [OK].5. Click [Logout].6. Quit Web Image Monitor.Auto e-mail notification1. Log in to Web Image Monitor in administrator mode.For details, see page 333 "Displaying the top page".2. Click [Configuration] on the [Device Management] menu.3. Under "Device Settings", click [Auto Email Notification].The dialog box for configuring notification settings appears.4. Configure the following settings:• Notification Message: You can set this according to your needs. For example, you canconfigure printer's location and the service representative's contact information.• Items in the Groups to Notify column: E-mail notification addresses can be grouped asrequired.• Items in the Select Groups/Items to Notify column: Select groups for each notification type,such as printer status and error.To configure detailed settings for these items, click [Edit] next to "Detailed Settings of EachItem".5. Click [OK].6. Click [Logout].7. Quit Web Image Monitor.• For details about the settings, see Web Image Monitor Help.Contents of Auto e-mail notificationIf any of the errors specified in [Auto Email Notification] occur, the printer sends an e-mail with thefollowing subject:"Device Alert Notification: XXXXX (description of the error that has occurred)"The body of the e-mail contains the error details and protocol setting information of the printer. Clear theerror according to the description.If any of the following messages appears, contact your service representative:Monitoring and Configuring the Printermidas-p3_com_operating_instructions_gb_00198701_eng.xml 347Draft 2016/01/18](https://usermanual.wiki/Ricoh/PRSPC342DN1.BBP-PRSPC342DN1-User-Manual-4/User-Guide-2978046-Page-107.png)
![• Functional Problem: Plotter• Error: Trays 1–2• Error: Address Book Data• SD Card Authentication Failure• Error: HDD Board• Error: Ethernet Board• Error: Parallel Interface• Error: Wireless LAN Card• Error: USB• Error: PrinterWhen the error is cleared, the printer sends an e-mail with the following subject:"Device Recovery Report: XXXXX (description of the error that has been cleared)"On-demand e-mail notification1. Log in to Web Image Monitor in administrator mode.For details, see page 333 "Displaying the top page".2. Click [Configuration] on the [Device Management] menu.3. Under "Device Settings", click [On-demand Email Notification].The dialog box for configuring notification settings appears.4. Make the following settings:• Notification Subject: Enter a text string to be added to the subject line of return e-mails.• Notification Message: You can set this according to your needs, for example, the printer'slocation and service representative contact information.• Restriction to Device Status Info.: Specify whether or not to allow access to information such asthe printer settings and status.• Items in the Receivable Email Address/Domain Name Settings column: Enter an e-mailaddress or domain name to use for requesting information by e-mail and to receive a return e-mail.5. Click [OK].6. Click [Logout].7. Quit Web Image Monitor.• For details about the settings, see Web Image Monitor Help.5. Configuring and Managing the Printer348 midas-p3_com_operating_instructions_gb_00198701_eng.xmlDraft 2016/01/18](https://usermanual.wiki/Ricoh/PRSPC342DN1.BBP-PRSPC342DN1-User-Manual-4/User-Guide-2978046-Page-108.png)
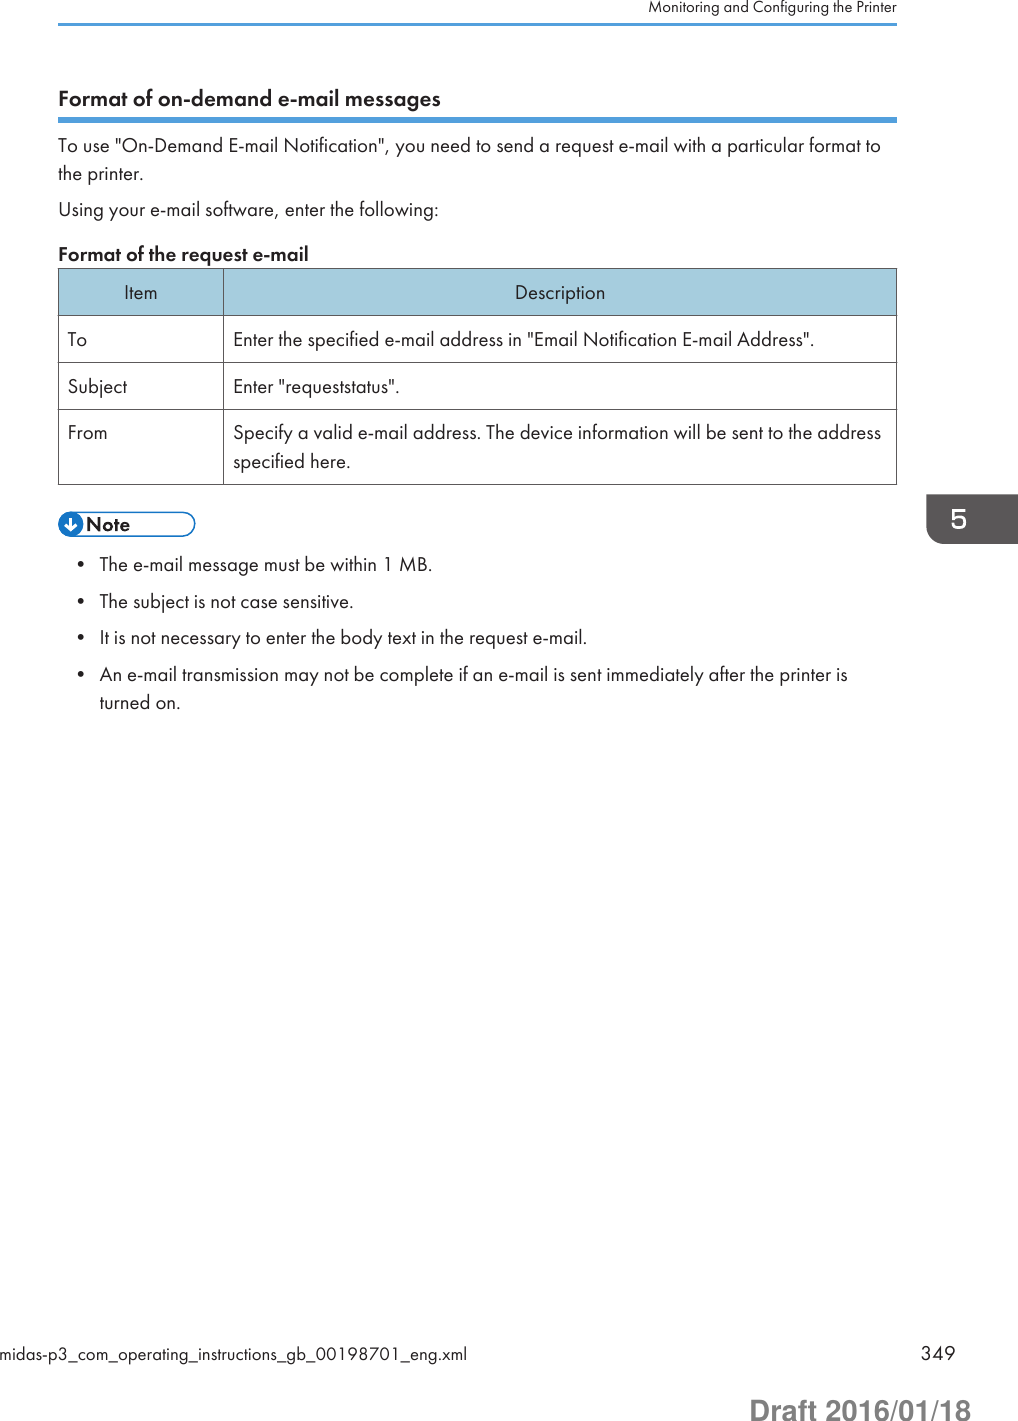
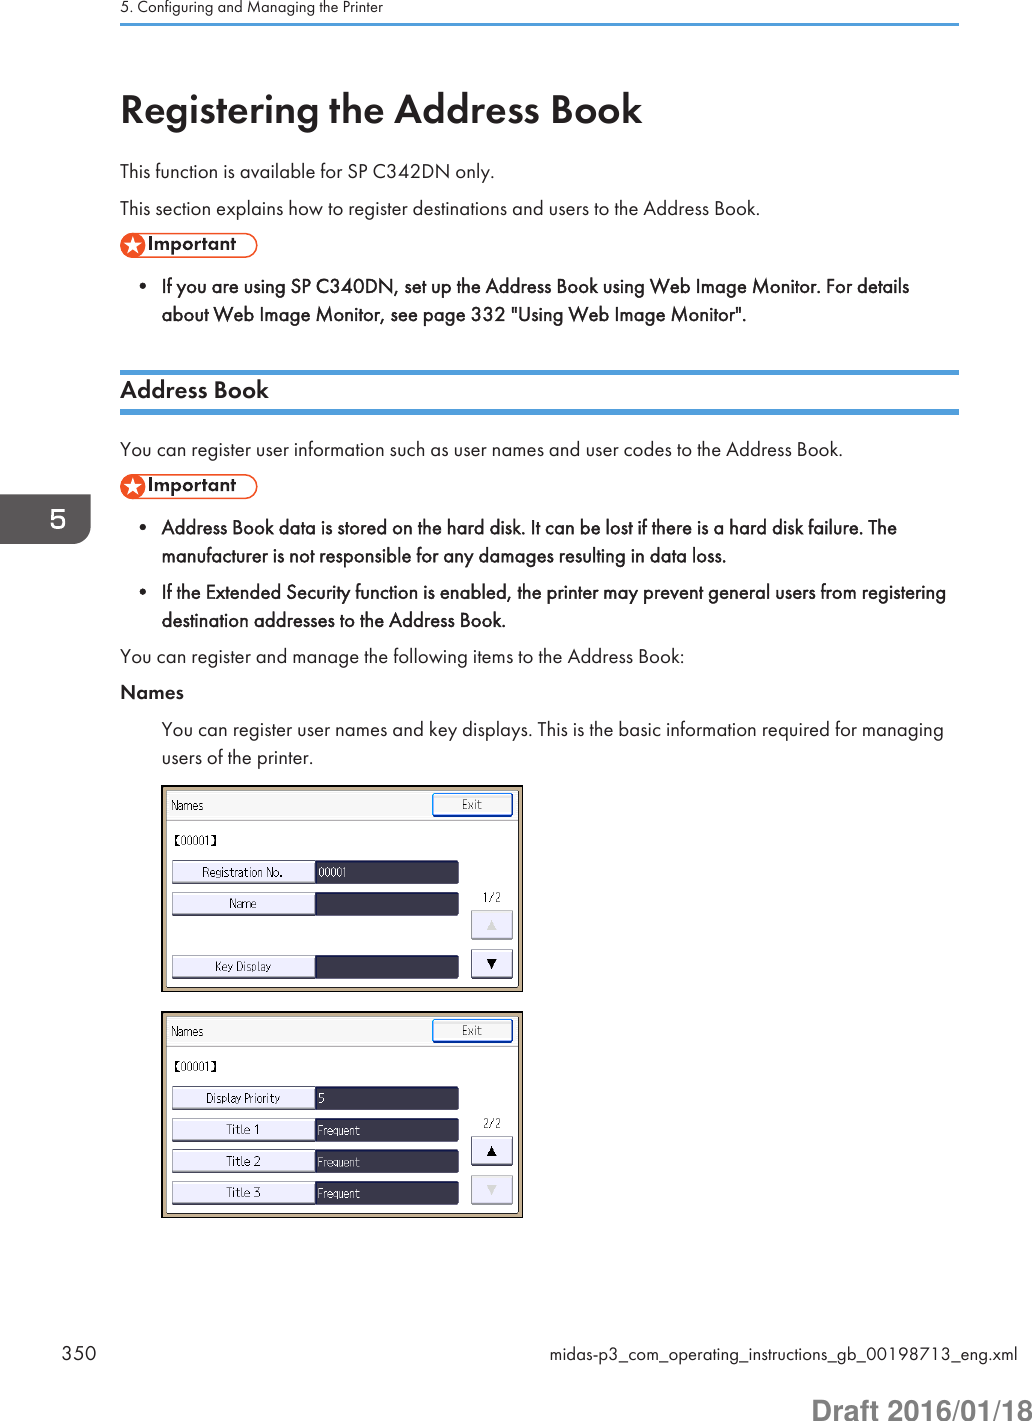
![Auth. InfoYou can register user codes to restrict particular functions to certain users and to monitor the usageof each function. You can also register login user names and login passwords to be used whenaccessing an LDAP server.Add to GroupYou can add registered users to a group for easier management.• You can also use Web Image Monitor to register names to the Address Book.• We recommend you back up the Address Book regularly. For details, see page 351 "AddressBook Backup and Restore".• For details about using Web Image Monitor, see Web Image Monitor Help.Address Book Backup and RestoreBacking up Address Book dataFollow the procedure below to save a copy of the printer's address book data:1. Log in to Web Image Monitor as an administrator.For details, see page 333 "Displaying the top page".2. In the menu area, click [Address Book] on the [Device Management] menu.3. Click [Maintenance].Registering the Address Bookmidas-p3_com_operating_instructions_gb_00198713_eng.xml 351Draft 2016/01/18](https://usermanual.wiki/Ricoh/PRSPC342DN1.BBP-PRSPC342DN1-User-Manual-4/User-Guide-2978046-Page-111.png)
![4. Enter the encryption key and click [Backup].Enter the encryption key that was set when the address book was encrypted. For details, contactyour administrator.Restoring Address Book dataFollow the procedure below to restore previously saved Address Book data to the printer:1. Log in to Web Image Monitor as an administrator.For details, see page 333 "Displaying the top page".2. In the menu area, click [Address Book] on the [Device Management] menu.3. Click [Maintenance].4. Click [Restore].5. Select the file you want to restore by following the on-screen instructions.6. Click [OK].7. Confirm the message, and then click [OK].8. Click [Back].9. Click [Logout].• Restoring the previous data will overwrite all Address Book data currently on the printer. Also, it willreset all user counters.Registering User InformationRegister user information including user names.You can register up to 1,000 names.Registering namesThis section explains how to register names.1. Press the [User Tools] key, and then display the screen for registering user information.[Address Book Mangmnt] [New Program] [Names]2. Register user information.• [Name]Enter the name [OK]5. Configuring and Managing the Printer352 midas-p3_com_operating_instructions_gb_00198713_eng.xmlDraft 2016/01/18](https://usermanual.wiki/Ricoh/PRSPC342DN1.BBP-PRSPC342DN1-User-Manual-4/User-Guide-2978046-Page-112.png)
![• [Title 1], [Title 2] and [Title 3]Select the key for the classification you want to use [OK]The keys you can select are as follows:• [Frequent]: Adds the user to the page that is displayed first.• [AB], [CD], [EF], [GH], [IJK], [LMN], [OPQ], [RST], [UVW], [XYZ], [1] to [10]: Adds the userto the list of items in the selected title.You can select [Frequent] and one more key for each title.3. Complete the setting.[Exit] [OK]Changing a registered name1. Press the [User Tools] key, and then display the screen for changing information aboutthe Address Book.[Address Book Mangmnt] [Change]2. Select the user whose information you want to change.[All Users] or [User Code] Press the name key of the user you want to changeYou can search a user by the registered name or user code.You can also specify a user by pressing [Reg. No.] and entering the registered number.3. Edit the user information.[Names] Select the item you want to change Change the user information [OK]4. Complete the setting.[Exit] [OK]Changing order of registered names1. Press the [User Tools] key, and then display the [Administrator Tools] screen.[System Settings] [Administrator Tools]Registering the Address Bookmidas-p3_com_operating_instructions_gb_00198713_eng.xml 353Draft 2016/01/18](https://usermanual.wiki/Ricoh/PRSPC342DN1.BBP-PRSPC342DN1-User-Manual-4/User-Guide-2978046-Page-113.png)
![2. Change the order of registered users.[Address Book: Change Order] [All Users] or [User Code] Press the name key to be moved Press the name key of the destinationYou can also specify the name key to be moved and the destination by pressing [Reg. No.] andentering the registered numbers.• You can rearrange the order of the names on the same tab, but names cannot be moved acrossdifferent tabs. For example, you cannot move a name registered under the [Frequent] tab to the[AB] tab.Editing titles1. Press the [User Tools] key, and then display the [Administrator Tools] screen.[System Settings] [Administrator Tools]2. Edit titles.[Address Book: Edit Title] Press the title key you want to change Enter the new name [OK] [OK]Deleting a registered name1. Press the [User Tools] key, and then display the screen for deleting a user from theAddress Book.[Address Book Mangmnt] [Delete]2. Select the user you want to delete.[All Users] or [User Code] Press the name key of the user you want to deleteYou can search a user by the registered name or user code.You can also specify a user by pressing [Reg. No.] and entering the registered number.3. Delete the selected user.[Yes] [Exit]5. Configuring and Managing the Printer354 midas-p3_com_operating_instructions_gb_00198713_eng.xmlDraft 2016/01/18](https://usermanual.wiki/Ricoh/PRSPC342DN1.BBP-PRSPC342DN1-User-Manual-4/User-Guide-2978046-Page-114.png)
![Authentication Information• The functions associated with each user code are the same. If you change or delete user codes,management data and limits associated with that code become invalid.• Register user codes to restrict and monitor users' performance on the printer.• You can register up to 1,000 user codes.• To automatically register a printer driver user code, select [PC Control] under "Printer" in "UserCode Authentication". To apply the user code set in User Tools, set the user codes registered toUser Tools for the printer driver. For details, see page 300 "Administrator Tools".• For details about setting user codes for the printer driver, see the printer driver Help.• For details about how to specify a user code, see Security Guide.Registering a user code1. Press the [User Tools] key, and then display the screen for changing information aboutthe Address Book.[Address Book Mangmnt] [Change]2. Select the user whose code you want to register.[All Users] or [User Code] Press the name key of the userYou can search a user by the registered name or user code.You can also specify a user by pressing [Reg. No.] and entering the registered number.3. Register the user code.[Auth. Info] [User Code] Enter the user code [OK]4. Complete the setting.[Exit] [OK]• You can enter a one-to eight-digit user code.• To register the name, see page 352 "Registering User Information".Registering the Address Bookmidas-p3_com_operating_instructions_gb_00198713_eng.xml 355Draft 2016/01/18](https://usermanual.wiki/Ricoh/PRSPC342DN1.BBP-PRSPC342DN1-User-Manual-4/User-Guide-2978046-Page-115.png)
![Changing a user code• Even if you change a user code, the counter value will not be cleared.1. Press the [User Tools] key, and then display the screen for changing information aboutthe Address Book.[Address Book Mangmnt] [Change]2. Select the user whose code you want to change.[All Users] or [User Code] Press the name key of the userYou can search a user by the registered name or user code.You can also specify a user by pressing [Reg. No.] and entering the registered number.3. Change the user code.[Auth. Info] [User Code] Enter the user code [OK]4. Complete the setting.[Exit] [OK]Deleting a user code• After clearing the user code, the counter is automatically cleared.1. Press the [User Tools] key, and then display the screen for changing information aboutthe Address Book.[Address Book Mangmnt] [Change]2. Select the user whose code you want to delete.[All Users] or [User Code] Press the name key of the userYou can search a user by the registered name or user code.You can also specify a user by pressing [Reg. No.] and entering the registered number.5. Configuring and Managing the Printer356 midas-p3_com_operating_instructions_gb_00198713_eng.xmlDraft 2016/01/18](https://usermanual.wiki/Ricoh/PRSPC342DN1.BBP-PRSPC342DN1-User-Manual-4/User-Guide-2978046-Page-116.png)
![3. Delete the user code.[Auth. Info] [User Code] [Clear] [OK]4. Complete the setting.[Exit] [OK]• To delete a name from the Address Book entirely, see page 352 "Registering User Information".Displaying the counter for each user1. Press the [User Tools] key, and then display the [Administrator Tools] screen.[System Settings] [Administrator Tools]2. Display the counter for each user.[Display/Clear/Print Counter per User] [Printer Counter] or [Print Volume Use Cntr.]The counter for each user code is displayed.[Print Volume Use Cntr.] is displayed only when User Code Authentication is enabled.3. Check the counter, and then press [Exit].Printing or clearing the counter for each user1. Press the [User Tools] key, and then display the [Administrator Tools] screen.[System Settings] [Administrator Tools]2. Select the user code whose counter you want to print or clear.[Display/Clear/Print Counter per User] [Printer Counter] or [Print Volume Use Cntr.] Selecta user code from the left side of the displayYou can select multiple user codes at a time.[Print Volume Use Cntr.] is displayed only when User Code Authentication is enabled.3. Print or clear the counter of the selected user.• To print the counter:Registering the Address Bookmidas-p3_com_operating_instructions_gb_00198713_eng.xml 357Draft 2016/01/18](https://usermanual.wiki/Ricoh/PRSPC342DN1.BBP-PRSPC342DN1-User-Manual-4/User-Guide-2978046-Page-117.png)
![Press [Print List] under "Per User" [Printer] or [Total Prints] [Start Printing]• To clear the counter:Press [Clear] under "Per User" [Printer], [Prt Volum Use], or [All Counters] [OK]4. Press [Exit].Printing or clearing the counter for all users1. Press the [User Tools] key, and then display the [Administrator Tools] screen.[System Settings] [Administrator Tools]2. Print or clear the counter for all users.• To print the counter:[Display/Clear/Print Counter per User] [Printer Counter] or [Print Volume Use Cntr.] Press [Print List] under "All Users" [Printer] or [Total Prints] [Start Printing]• To clear the counter:[Display/Clear/Print Counter per User] [Printer Counter] or [Print Volume Use Cntr.] Press [Clear] under "All Users" [Printer], [Prt Volum Use], or [All Counters] [OK][Print Volume Use Cntr.] is displayed only when User Code Authentication is enabled.Registering Users to a GroupYou can register users to a group. To add users to a group, the group must be registered first.• You can register up to 500 users to a group.Registering a group1. Press the [User Tools] key, and then display the screen for registering groups.[System Settings] [Administrator Tools] [Address Book: Program/Change/Delete Group] [New Program] [Names]2. Register the group information.• [Name]Enter the group name [OK]5. Configuring and Managing the Printer358 midas-p3_com_operating_instructions_gb_00198713_eng.xmlDraft 2016/01/18](https://usermanual.wiki/Ricoh/PRSPC342DN1.BBP-PRSPC342DN1-User-Manual-4/User-Guide-2978046-Page-118.png)
![• [Title 1], [Title 2] and [Title 3]Select the key for the classification you want to use [OK]The keys you can select are as follows:• [Frequent]: Adds the user to the page that is displayed first.• [AB], [CD], [EF], [GH], [IJK], [LMN], [OPQ], [RST], [UVW], [XYZ], [1] to [10]: Adds thegroup name to the list of items in the selected title.You can select [Frequent] and one more key for each title.3. Complete the setting.[Exit] [OK]Registering a user to a group1. Press the [User Tools] key, and then display the screen for changing information aboutthe Address Book.[Address Book Mangmnt] [Change]2. Select the user you want to add to a group.[All Users] or [User Code] Press the name key of the user you want to add to a groupYou can search a user by the registered name or user code.You can also specify a user by pressing [Reg. No.] and entering the registered number.3. Add the selected user to a group.[Add to Group] Select the group to which you want to add the userThe group key becomes highlighted, and the user is added to it.4. Complete the setting.[Exit] [OK]Adding a group to another group1. Press the [User Tools] key, and then display the screen for registering groups.[System Settings] [Administrator Tools] [Address Book: Program/Change/Delete Group]Registering the Address Bookmidas-p3_com_operating_instructions_gb_00198713_eng.xml 359Draft 2016/01/18](https://usermanual.wiki/Ricoh/PRSPC342DN1.BBP-PRSPC342DN1-User-Manual-4/User-Guide-2978046-Page-119.png)
![2. Select the group you want to add to another group.[Change] Press the name key of the group you want to add to another groupYou can search a group by the registered name.You can also specify a group by pressing [Reg. No.] and entering the registered number.3. Add the selected group to another group.[Add to Group] Select the group to which you want to add the selected groupThe group key becomes highlighted, and the group is added to it.4. Complete the setting.[Exit] [OK]Checking users registered in a group1. Press the [User Tools] key, and then display the screen for registering groups.[System Settings] [Administrator Tools] [Address Book: Program/Change/Delete Group]2. Select the group for which you want to check the registered users.[Change] Press the name key of the group for which you want to check the registered users [Programmed User/Group]You can search a group by the registered name.You can also specify a group by pressing [Reg. No.] and entering the registered number.3. Check the registered users, and then close the screen.[Exit] [OK]Removing a user from a group1. Press the [User Tools] key, and then display the screen for changing information aboutthe Address Book.[Address Book Mangmnt] [Change]5. Configuring and Managing the Printer360 midas-p3_com_operating_instructions_gb_00198713_eng.xmlDraft 2016/01/18](https://usermanual.wiki/Ricoh/PRSPC342DN1.BBP-PRSPC342DN1-User-Manual-4/User-Guide-2978046-Page-120.png)
![2. Select the user you want to remove from a group.[All Users] or [User Code] Press the name key of the user you want to remove from a groupYou can search a user by the registered name or user code.You can also specify a user by pressing [Reg. No.] and entering the registered number.3. Remove the selected user from a group.[Add to Group] Select the group from which you want to remove the userThe highlighted group key resumes normal display.4. Complete the setting.[Exit] [OK]Removing a group from another group1. Press the [User Tools] key, and then display the screen for registering groups.[System Settings] [Administrator Tools] [Address Book: Program/Change/Delete Group]2. Select the group you want to remove from another group.[Change] Press the name key of the group you want to remove from another groupYou can search a group by the registered name.You can also specify a group by pressing [Reg. No.] and entering the registered number.3. Select the group from which you want to remove the selected group.[Add to Group] Select the group from which you want to remove the selected groupThe highlighted group key resumes normal display.4. Complete the setting.[Exit] [OK]Registering the Address Bookmidas-p3_com_operating_instructions_gb_00198713_eng.xml 361Draft 2016/01/18](https://usermanual.wiki/Ricoh/PRSPC342DN1.BBP-PRSPC342DN1-User-Manual-4/User-Guide-2978046-Page-121.png)
![Editing group information1. Press the [User Tools] key, and then display the screen for registering groups.[System Settings] [Administrator Tools] [Address Book: Program/Change/Delete Group]2. Select the group for which you want to change the registered information.[Change] Press the name key of the group for which you want to change the registeredinformationYou can search a group by the registered name.You can also specify a group by pressing [Reg. No.] and entering the registered number.3. Edit the group information.[Names] Edit the group information4. Complete the setting.[Exit] [OK]Deleting a group1. Press the [User Tools] key, and then display the screen for registering groups.[System Settings] [Administrator Tools] [Address Book: Program/Change/Delete Group]2. Select the group you want to delete.[Delete] Press the name key of the group you want to deleteYou can search a group by the registered name.You can also specify a group by pressing [Reg. No.] and entering the registered number.3. Delete the selected group.[Yes] [Exit]Registering LDAP AuthenticationThis section explains how to register LDAP Authentication.5. Configuring and Managing the Printer362 midas-p3_com_operating_instructions_gb_00198713_eng.xmlDraft 2016/01/18](https://usermanual.wiki/Ricoh/PRSPC342DN1.BBP-PRSPC342DN1-User-Manual-4/User-Guide-2978046-Page-122.png)
![LDAP authenticationFor each user registered to the Address Book, you can register a login user name and login password tobe used when accessing an LDAP server.To use an LDAP server, you need to program it beforehand. For details, see page 365 "Configuring theLDAP Server".• When [Do not Specify] is selected for [LDAP Authentication], the User Name and Password thatyou have specified in [Program/Change LDAP Server] of [Administrator Tools] settings areapplied. For details, see page page 365 "Configuring the LDAP Server".• If User Authentication is specified, contact your administrator.1. Press the [User Tools] key, and then display the screen for changing information aboutthe Address Book.[Address Book Mangmnt] [Change]2. Select the user for which you want to set up LDAP Authentication.[All Users] or [User Code] Press the name key of the userYou can search a user by the registered name.You can also specify a user by pressing [Reg. No.] and entering the registered number.3. Set up LDAP Authentication for the selected user.[Auth. Info] [LDAP Authentication] [Specify Other Auth. Info] Press [Change] under "LoginUser Name" Enter the login user name [OK] Press [Change] under "Login Password" Enter the password [OK] Enter the password again to confirm [OK]• To register a user, see page 352 "Registering User Information".Checking Which Functions Are AvailableUser Authentication can be used to restrict access to the printer by individuals and groups of usersaccording to the login user name and password.Each individual or group of users can only use the functions made available to them by the administratoraccording to the user authentication.Functions Available to UsersFunctions available to users are for using the printer's functions, such as printing and storing files.Registering the Address Bookmidas-p3_com_operating_instructions_gb_00198713_eng.xml 363Draft 2016/01/18](https://usermanual.wiki/Ricoh/PRSPC342DN1.BBP-PRSPC342DN1-User-Manual-4/User-Guide-2978046-Page-123.png)
![If the available functions are restricted by user authentication, you can check which functions areavailable to you by following the procedure below:1. Press the [User Tools] key, and then display the screen for changing information aboutthe Address Book.[Address Book Mangmnt] [Change]2. Check the functions available for a specific user.[All Users] or [User Code] Press the name key of the user for which you want to checkavailable functions [Auth. Info] [Available Printer Functions] or [Available Other Functions] Check the functions available for the selected user [Exit]5. Configuring and Managing the Printer364 midas-p3_com_operating_instructions_gb_00198713_eng.xmlDraft 2016/01/18](https://usermanual.wiki/Ricoh/PRSPC342DN1.BBP-PRSPC342DN1-User-Manual-4/User-Guide-2978046-Page-124.png)
![Setting Up LDAP AuthenticationThis function is available for SP C342DN only.• If you are using SP C340DN, set up the LDAP server using Web Image Monitor. For details aboutWeb Image Monitor, see page 332 "Using Web Image Monitor".Configuring the LDAP ServerThis section explains how to configure the LDAP server settings.This function supports LDAP version 2.0 and 3.0.Configure the LDAP server to use LDAP Authentication as a User Authentication method.For details about LDAP Authentication, see the Security Guide.Registering or changing the LDAP serverTo use Kerberos Authentication, a realm must be registered beforehand. For details about registering arealm, see page 368 "Configuring the Realm".1. Press the [User Tools] key, and then display the [Administrator Tools] screen.[System Settings] [Administrator Tools]2. Select the LDAP server you want to register or change.[Program/Change/Delete LDAP Server] [Program/Change] Select [*Not Programmed] orthe LDAP server you want to change3. Enter the LDAP server name.[Name] Enter the LDAP server name [OK]4. Enter either the host name or IPv4 address of the LDAP server using up to 128 characters.[Server Name] Enter either the host name or IPv4 address [OK]5. Select a root folder to start a search.[Search Base] Select a root folder to start a search [OK]You can search for e-mail addresses registered to a selected folder.Setting Up LDAP Authenticationmidas-p3_com_operating_instructions_gb_00198743_eng.xml 365Draft 2016/01/18](https://usermanual.wiki/Ricoh/PRSPC342DN1.BBP-PRSPC342DN1-User-Manual-4/User-Guide-2978046-Page-125.png)
![For example, if the search target is the sales department of ABC company, enter "dc=salesdepartment, o=ABC". (In this example, the description is for an active directory. "dc" is for theorganization unit, and "o" is for the company.)Registering a search base may be required depending on your server environment. If it is required,unspecified searches will result in an error.Check your server environment and enter any required specifications.6. Specify a port number for communicating with the LDAP server.[Port Number] Enter the port number [OK]7. Specify whether or not to use SSL when communicating with the LDAP server.[Use Secure Connection (SSL)] [On] or [Off] [OK]To use SSL, the LDAP server must support SSL.If you set SSL to [On], the port number automatically changes to "636".If you do not enable SSL, security problems may occur. To enable SSL, you must use the printer'ssettings. For details, see Security Guide.8. Select the authentication method for the LDAP server.• If you do not want to use an authentication method:[Authentication] [Off]• If you want to use an authentication method:[Authentication] [On] [Authentication] [Kerberos Authentication], [DigestAuthentication], or [Cleartext Authentication] [OK] Specify the authenticationinformation, such as user name and password, as necessaryThe authentication settings must match your server's authentication settings. Check your serversettings before configuring this printer.The administrator account can be used for authentication when you send a search request to theLDAP server. Do not enter the administrator account name and password when usingauthentication for each individual or search.• [Kerberos Authentication]An encrypted password is sent to the KDC server where authentication is performed.• [Digest Authentication]An encrypted password is sent to the LDAP server.Digest Authentication is available with LDAP version 3.0 only.• [Cleartext Authentication]5. Configuring and Managing the Printer366 midas-p3_com_operating_instructions_gb_00198743_eng.xmlDraft 2016/01/18](https://usermanual.wiki/Ricoh/PRSPC342DN1.BBP-PRSPC342DN1-User-Manual-4/User-Guide-2978046-Page-126.png)
![An unencrypted password is sent to the LDAP server.Procedures for setting the user name differ depending on the server environment. Check your serverenvironment before configuring the setting.Example: Domain Name\User Name, User Name@Domain Name, CN=Name, OU=DepartmentName, DC=Server NameYou can also connect to the LDAP server using a user name and password stored in the AddressBook. For details, see page 363 "LDAP authentication".9. Access the LDAP server to check that a proper connection is established, and then quit themenu.[Connection Test] [Exit] [OK]Check that authentication works according to the authentication settings.If the connection test fails, check your settings and try again.This function does not check the search conditions or the search base.10. Enter the attributes you want to use when searching for e-mail addresses.[Search Conditions] [Name] or [Email Address] Enter the attributes you want to use whensearching for e-mail addresses [OK] [OK] [OK]You can enter an attribute as a typical search keyword (up to 64 characters). Using the enteredattributes, the function searches the LDAP server's Address Book.The attribute value may change depending on the server environment. Check that the attributevalue matches with your server environment before specifying it.You can leave items blank, but you cannot leave attributes blank when searching for e-mailaddresses from the LDAP server Address Book.Deleting the registered LDAP server1. Press the [User Tools] key, and then display the [Administrator Tools] screen.[System Settings] [Administrator Tools]2. Select the LDAP server you want to delete.[Program/Change/Delete LDAP Server] [Delete] Select the LDAP server to be deleted3. Delete the selected LDAP server.[Yes] [Exit]Setting Up LDAP Authenticationmidas-p3_com_operating_instructions_gb_00198743_eng.xml 367Draft 2016/01/18](https://usermanual.wiki/Ricoh/PRSPC342DN1.BBP-PRSPC342DN1-User-Manual-4/User-Guide-2978046-Page-127.png)
![Configuring the RealmThis section explains how to specify the Realm settings.A realm is the network area in which Kerberos authentication is used. After confirming the networkenvironment, specify the necessary items.You can register up to 5 realms.Registering or changing a Realm1. Press the [User Tools] key, and then display the [Administrator Tools] screen.[System Settings] [Administrator Tools]2. Select the Realm setting you want to register or change.[Program/Change/Delete Realm] [Program/Change] Select [*Not Programmed] or therealm you want to change3. Specify the Realm name.[Realm Name] Enter the realm name [OK]You can enter the host name instead of the Realm name.4. Specify the KDC server name.[KDC Server Name] Enter the KDC server name [OK]You can enter the host name or IPv4 address instead of the KDC server name.5. Specify the domain name.[Domain Name] Enter the domain name [OK]You can enter the host name instead of the domain name.6. Complete the setting.[OK] [Exit]5. Configuring and Managing the Printer368 midas-p3_com_operating_instructions_gb_00198743_eng.xmlDraft 2016/01/18](https://usermanual.wiki/Ricoh/PRSPC342DN1.BBP-PRSPC342DN1-User-Manual-4/User-Guide-2978046-Page-128.png)
![Deleting a Realm1. Press the [User Tools] key, and then display the [Administrator Tools] screen.[System Settings] [Administrator Tools]2. Select the Realm setting you want to delete.[Program/Change/Delete Realm] [Delete] Select the Realm setting you want to delete3. Delete the selected Realm setting.[Yes] [Exit]Setting Up LDAP Authenticationmidas-p3_com_operating_instructions_gb_00198743_eng.xml 369Draft 2016/01/18](https://usermanual.wiki/Ricoh/PRSPC342DN1.BBP-PRSPC342DN1-User-Manual-4/User-Guide-2978046-Page-129.png)

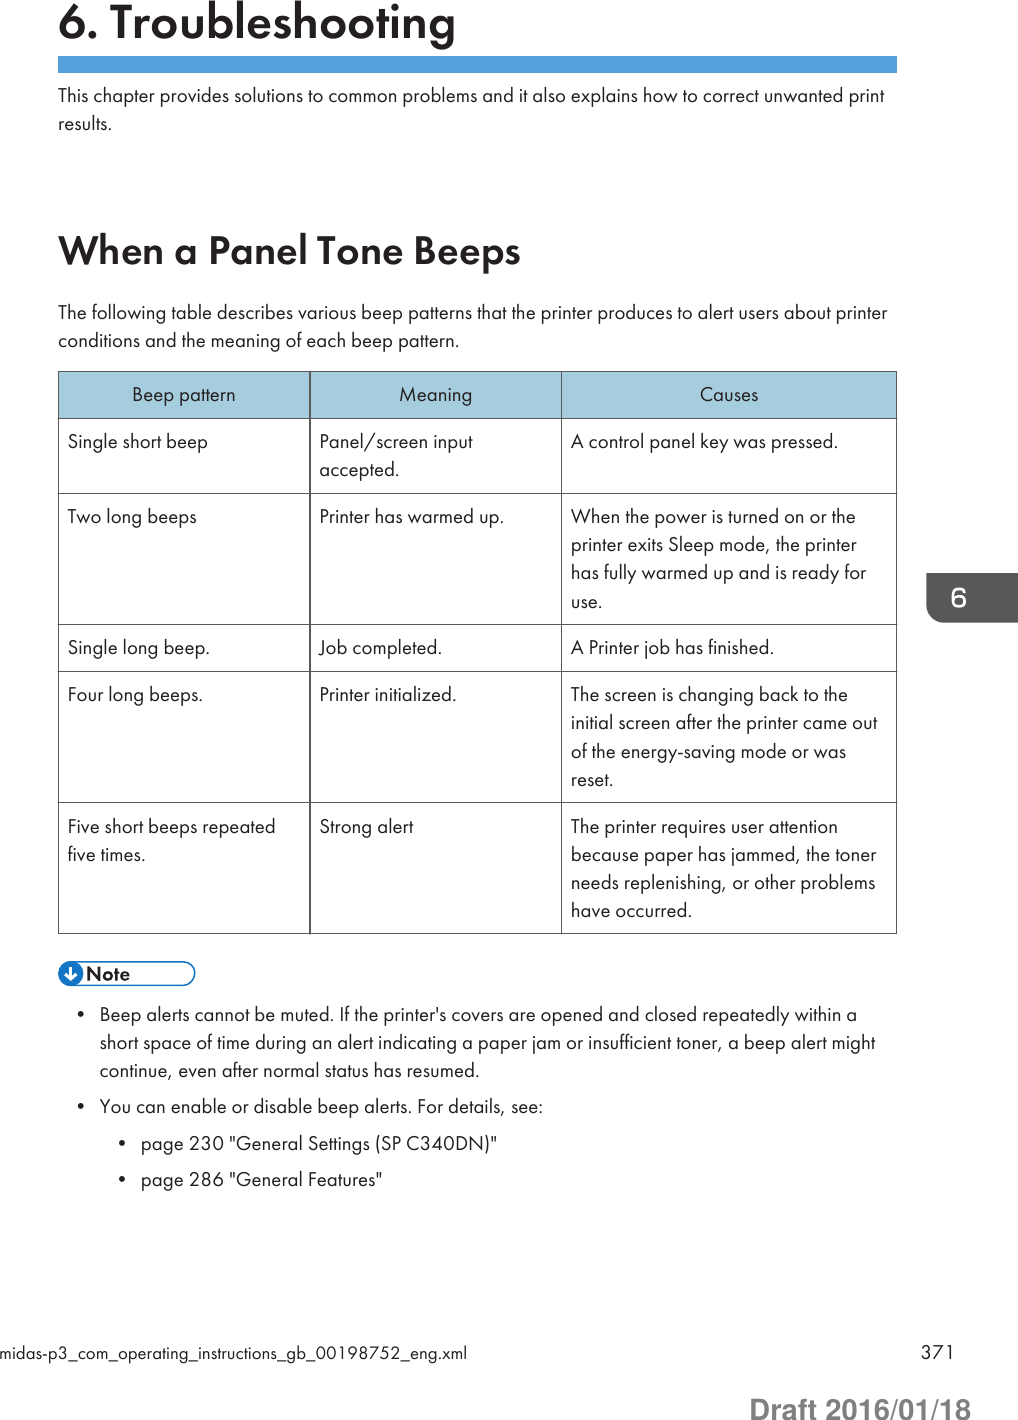
![When Checking the Indicator Lamps, StatusIcons, and Messages on the Control PanelIndicatorsThis section describes the indicators displayed when the printer requires the user to remove misfedpaper, to add paper, or to perform other procedures.Indicator Status : Paper Misfeed indicator Appears when a paper misfeed occurs.For details about removing jammed paper, see page 420"Removing Jammed Paper". : Load Paper indicator Appears when paper runs out.For details about loading paper, see page 105 "Loading Paper". : Add Toner indicator Appears when toner runs out.For details about adding toner, see page 449 "Replacing thePrint Cartridge". : Service Call indicator Appears when the printer is malfunctioning or requiresmaintenance. : Cover Open indicator Appears when one or more covers of the printer are open.Checking Printer Status and SettingsThis function is available for SP C342DN only.Maintnc. InfoYou can check the following items under [Maintnc. Info]:• Remaining TonerDisplays the amount of remaining toner.• Paper TrayDisplays the paper type and size loaded into the paper tray.• Output Tray FullDisplays whether the output tray is overloaded.• Paper Misfeed6. Troubleshooting372 midas-p3_com_operating_instructions_gb_00198753_eng.xmlDraft 2016/01/18](https://usermanual.wiki/Ricoh/PRSPC342DN1.BBP-PRSPC342DN1-User-Manual-4/User-Guide-2978046-Page-132.png)
![Displays the state of and solutions for paper misfeeds.• Cover OpenIndicates whether one or more covers of the printer are open.Data StorageYou can check the following items under [Data Storage]:• HDD Remaining Mem.Displays the amount of available hard disk memory.• HDD File(s)Displays the total number of jobs stored on the hard disk.• Print Job(s)Displays the number of jobs for "Hold Print Job(s):", "Stored Print Job(s):", "Locked PrintJob(s):", and "Sample Print Job(s):".Machine Adres InfoYou can check the following items under [Machine Adres Info]:• Machine IPv4 AddressDisplays the printer's IPv4 address.• Machine IPv6 AddressDisplays the printer's IPv6 address.1. Press the [Check Status] key, and then check the contents.[Maintnc/MacInfo] tab Each key Check the contents [Exit]• [Paper Misfeed], [Output Tray Full], and [Cover Open] appear on [Maintnc. Info] only when theseerrors occur.• Depending on the security settings, [Machine Adres Info] might not be displayed.• For details about how to locate and remove misfeeds, see page 420 "Removing Jammed Paper".When the Indicator Lamp for the [Check Status] Key Is Lit or FlashingThis function is available for SP C342DN only.If an indicator for the [Check Status] key lights up, press the [Check Status] key to display the [CheckStatus] screen. Check the status of the printer in the [Check Status] screen.When Checking the Indicator Lamps, Status Icons, and Messages on the Control Panelmidas-p3_com_operating_instructions_gb_00198753_eng.xml 373Draft 2016/01/18](https://usermanual.wiki/Ricoh/PRSPC342DN1.BBP-PRSPC342DN1-User-Manual-4/User-Guide-2978046-Page-133.png)
![[Check Status] screen1243 CQT6661. [Mac/ApliStat] tabIndicates the status of the printer.2. Status iconsThe icons that can be displayed are described below:: The printer function is performing a job.: An error has occurred on the printer.: An error has occurred in the printer function being used, or the printer function cannot be used because anerror has occurred on the printer.3. MessagesDisplays a message that indicates the status of the printer. This icon may also appear if the toner is runninglow.4. [Check]If an error occurs, press [Check] to view details.Pressing [Check] displays an error message or the printer screen. Check the error message displayed on theprinter screen and take the appropriate action. For details about error messages and their solutions, seepage 377 "When Messages Are Displayed".The following table describes problems that cause the indicator to light:Problem Cause SolutionDocuments and reports donot print out.The paper output tray is full. Remove the prints from the tray.Documents and reports donot print out.There is no paper left. Load paper. For details about loadingpaper, see page 105 "Loading Paper".An error has occurred. A function that has thestatus "Error Occurred" inPress [Check], and then check thedisplayed message and take appropriateaction. For details about error messages6. Troubleshooting374 midas-p3_com_operating_instructions_gb_00198753_eng.xmlDraft 2016/01/18](https://usermanual.wiki/Ricoh/PRSPC342DN1.BBP-PRSPC342DN1-User-Manual-4/User-Guide-2978046-Page-134.png)
![Problem Cause Solutionthe [Check Status] screen isdefective.and their solutions, see page 377"When Messages Are Displayed".The printer is unable toconnect to the network.A network error hasoccurred.• Press [Check], and then check thedisplayed message and takeappropriate action. For detailsabout error messages and theirsolutions, see page 377 "WhenMessages Are Displayed".• Check that the printer is correctlyconnected to the network and thatthe printer is correctly set. For detailsabout how to connect the network,see page 291 "Interface Settings".• For details about connecting to thenetwork, contact your administrator.• If the indicator is still lit even aftertrying to solve the problem asdescribed here, contact your servicerepresentative.When Checking the Indicator Lamps, Status Icons, and Messages on the Control Panelmidas-p3_com_operating_instructions_gb_00198753_eng.xml 375Draft 2016/01/18](https://usermanual.wiki/Ricoh/PRSPC342DN1.BBP-PRSPC342DN1-User-Manual-4/User-Guide-2978046-Page-135.png)
![If USB Connection FailsProblem Causes SolutionsThe printer is notautomatically recognized.The USB cable is notconnected properly.Disconnect the USB cable, turn off theprinter, and then turn it on again. Whenthe printer has fully booted up, reconnectthe USB cable.Windows has alreadyconfigured the USBsettings.Check whether or not thecomputer has identified theprinter as an unsupporteddevice.Open Windows' Device Manager, andthen, under [Universal Serial Buscontrollers], remove any conflictingdevices. A [!] or [?] icon is displayed forconflicting devices. Take care not toaccidentally remove required devices.For details, see Windows Help.6. Troubleshooting376 midas-p3_com_operating_instructions_gb_00198756_eng.xmlDraft 2016/01/18](https://usermanual.wiki/Ricoh/PRSPC342DN1.BBP-PRSPC342DN1-User-Manual-4/User-Guide-2978046-Page-136.png)
![When Messages Are DisplayedThis section describes the main messages that appear on the display panel and printed error logs andreports. If other messages appear, follow their instructions.Status MessagesMessage Status"@Remote Certif.updating..."The printer is updating the @Remote certificate. Turn the power off, andthen turn it on again."Calibrating..." The printer is calibrating the color. Wait a while."Energy Saver Mode" The printer is in Energy Saver mode. Press any key to recover to thenormal mode."Hex Dump Mode" In Hex Dump mode, the printer receives data in a hexadecimal format.Turn off the printer after printing, and then turn it on again."Job Suspended" All jobs are suspended. Turn off the printer, and turn it on again toresume the jobs."Offline" The printer is offline and cannot print."Please wait..." This message may appear for a few seconds. It means the printer isinitializing, replenishing toner, or performing maintenance operations.Wait a while."Printing..." The printer is printing. Wait a while."Printing Suspended" Printing is suspended. To resume printing, press the [Suspend/Resume]key."Ready" This is the default ready message. The printer is ready for use. Noaction is required."Resetting Job" The printer is resetting the print job. Wait a while."Setting change..." The printer is applying the changes made to its settings. Wait a while."Waiting for print data..." The printer is waiting for the next data to print. Wait a while.When Messages Are Displayedmidas-p3_com_operating_instructions_gb_00198757_eng.xml 377Draft 2016/01/18](https://usermanual.wiki/Ricoh/PRSPC342DN1.BBP-PRSPC342DN1-User-Manual-4/User-Guide-2978046-Page-137.png)
![Message Status"Calibrating..." The printer is calibrating the color. Wait a while."Hex Dump Mode" In Hex Dump mode, the printer receives data in a hexadecimal format.Press [Job Reset] to cancel Hex Dump mode."Job suspended." Printing was temporarily suspended because [Job Operation] or the[Suspended] key was pressed."Loading Toner..." The printer is loading the toner. Wait a while."Offline" The printer is offline."Please wait." This message might appear for a second or two while the printer ispreparing, performing initial adjustments, or adding toner. Wait awhile."Printing..." The printer is printing. Wait a while."Ready" This is the default ready message. The printer is ready for use. Noaction is required."Resetting job..." The printer is resetting the print job. Wait until "Ready" appears on thedisplay panel."Setting change..." The printer is changing settings. You cannot use the control panel whilethis message is displayed. Wait a while."Updating certif..." The @Remote certificate is being updated. Wait a while."Waitg. for prt.data" The printer is waiting for the next data to print. Wait a while.Alert Messages (Displayed on the Control Panel)Message Cause Solution" (A) Remove paper fromTrays. Opn & cls Frt. Cov."Open the front cover and removethe jammed paper from the paperfeed path.For details, see page 420"Removing Jammed Paper".6. Troubleshooting378 midas-p3_com_operating_instructions_gb_00198757_eng.xmlDraft 2016/01/18](https://usermanual.wiki/Ricoh/PRSPC342DN1.BBP-PRSPC342DN1-User-Manual-4/User-Guide-2978046-Page-138.png)
![Message Cause Solution"Connectfailed:WirelessCard Turnpower off, check card."The printer cannot detect thewireless LAN interface board.Check that the board is supportedor installed correctly."Cover Open. Please closethe indicated cover."A cover of the printer is open. Close the cover as indicated onthe control panel."Duplex mode is in offposition for (tray name)"The duplex mode for the indicatedtray is not available.You can use one-sided printingonly. Press [Change] to changethe tray's settings, press [JobReset]to reset the job, or press [FormFeed] to force printing."ECO Night Sensor did notturn Power Switch off. Turnswitch off manually or touse, press any key."Auto power off by the [ECONight Sensor] function failed.Turn off the power manually, orpress any key to use [ECO NightSensor] auto power off function."Ethernet Board Error" An error on the Ethernet isdetected.Turn the printer off, and then turn iton again. If the problem persists,contact your sales or servicerepresentative."Failed to connect to serverfor Remote Diagnostics."The printer cannot communicatewith Remote CommunicationGate.Check the connection to theRemote Server Gate."IPv6 Address already existsLink-localAddress(109/209)"The same IPv6 address is alreadyused.Contact your networkadministrator."IPv6 Address already existsStatelessAddress(109/209)"The same IPv6 address is alreadyused.Contact your networkadministrator."IPv6 Address already existsManual Config.Address(109/209)"The same IPv6 address is alreadyused.Contact your networkadministrator."Load paper in (tray name)or [Cancel] to FormFeed."There is no paper in the specifiedtray.Load the specified paper in thetray, press [JobReset] to reset thejob. To print from the bypass trayon paper whose width is less than90 mm, cancel the print job, and6. Troubleshooting380 midas-p3_com_operating_instructions_gb_00198757_eng.xmlDraft 2016/01/18](https://usermanual.wiki/Ricoh/PRSPC342DN1.BBP-PRSPC342DN1-User-Manual-4/User-Guide-2978046-Page-140.png)
![Message Cause Solutionthen, under [System], set [BypassPrint: 64-90 mm] to [Active]."May have exceeded maxno. of prints in output tray.Print stopped. Check thetray."The output tray is full. Remove paper from the outputtray."Parallel I/F Error" The printer's self diagnostic testfailed due to a loopback error.Replace the IEEE 1284 boardthat caused the error."Printer Font Error." There are problems with theprinter's font file.Turn the printer off, and then turn iton again.If the problem persists, contactyour sales or servicerepresentative."Problem:Wireless boardPlease call service."The printer cannot detect awireless LAN interface board.Check that the wireless LANinterface board installed correctly.If the problem persists, contactyour sales or servicerepresentative."Replacement Alert ReplaceTransfer Belt."You need to replace theintermediate transfer unit.Contact your sales or servicerepresentative to obtain a newintermediate transfer unit."ReplacemntRequird:IntTrans"You need to replace theintermediate transfer unit.For details, see page 451"Replacing Other Consumables"."Replcmnt Requrd: PrintCart"The toner has run out, or thephoto conductor unit has reachedthe end of its service life.For details, see xxxxx "Replacingthe Print Cartridge"."Replacmnt Rqrd:FusingUnit"You need to replace the fusingunit.For details, see page 451"Replacing Other Consumables"."Replcmnt RqrdSoon:IntTrans"You will need to replace theintermediate transfer unit soon.Contact your sales or servicerepresentative to obtain a newunit."Repl RequrdSoon:FusingUnit"You will need to replace thefusing unit soon.Contact your sales or servicerepresentative to obtain a newunit.When Messages Are Displayedmidas-p3_com_operating_instructions_gb_00198757_eng.xml 381Draft 2016/01/18](https://usermanual.wiki/Ricoh/PRSPC342DN1.BBP-PRSPC342DN1-User-Manual-4/User-Guide-2978046-Page-141.png)
![Message Cause Solution"The same IPv4 Addressalready exists.(102/202)"The IPv4 address specified for theprinter is already used by anotherdevice on the network.Contact your networkadministrator."The selected job hasalready been printed ordeleted."This message might appear if youprint or delete a job from WebImage Monitor.Press Exit on the message screen."USB has a problem. /Please call service."The printer has detected a USBboard failure.Turn the printer off, and then turn iton again. If the problem persists,contact your sales or servicerepresentative."Values set for IPv6/Gateway addresses areinvalid.(110/210)"The IPv6 address or gatewayaddress is invalid.Check the network settings."WPA Auth. incomplete.(211)"WPA authentication could not becompleted.Contact your networkadministrator.Message Cause Solution"Cannot connect with thewireless card. Turn the mainpower switch off, then checkthe card."• The wireless LAN interfaceboard was not inserted whenthe printer was turned on.• The wireless LAN interfaceboard was pulled out afterthe printer was turned on.• The settings are not updatedalthough the unit is detected.• Turn off the main powerswitch, and then confirm thewireless LAN interface boardis inserted correctly. Fordetails about installing theboard, contact your servicerepresentative.• If the message appearsagain, contact your servicerepresentative."Cannot print because boththe main and designation(chapter) sheets are set tothe same paper tray. Press[Job Reset] to cancel thejob."The tray selected for other pagesis the same as the one for slipsheets.Reset the job. Be sure the tray youselect for slip sheets is notproviding paper for other pages.When Messages Are Displayedmidas-p3_com_operating_instructions_gb_00198757_eng.xml 383Draft 2016/01/18](https://usermanual.wiki/Ricoh/PRSPC342DN1.BBP-PRSPC342DN1-User-Manual-4/User-Guide-2978046-Page-143.png)
![Message Cause Solution"Installing the InterfaceUnits".• If the message appearsagain, contact your servicerepresentative."Load ppr blw in (Trayname)."The printer driver settings areincorrect or the tray does notcontain paper of the size selectedin the printer driver.Check that the printer driversettings are correct, and then loadpaper of the size selected in theprinter driver into the input tray.For details about how to changethe paper size, see page 105"Loading Paper"."No toner. Replace TonerCartridge."The toner has run out. Replace theprint cartridge.For details, see page 449"Replacing the Print Cartridge"."No color toner. Color toneris required to print in black& white with the currentpaper type. Replace thecolor Print Cartridge orpress [Job Reset] to cancelprinting."The color toner has run out.Replace the print cartridge.For details, see page 449"Replacing the Print Cartridge"."n ppr siz msmtch Selectnew tray or use ppr sizebelow."("n" is a tray name.)The size of the paper in the traydoes not match the paper sizespecified in the printer driver.Select a tray containing paperthat is the same size as thespecified paper size."Problem: Printer Font Error" An error has occurred in the fontsettings.Contact your servicerepresentative."Problems with the wirelessboard. Please call service."(A "wireless LAN interfaceboard" is referred to as a"wireless board".)The printer has detected awireless LAN interface boardfailure.If the message appears again,contact your servicerepresentative."Output Tray is full. Removepaper."The output tray is full. Remove the paper.When Messages Are Displayedmidas-p3_com_operating_instructions_gb_00198757_eng.xml 385Draft 2016/01/18](https://usermanual.wiki/Ricoh/PRSPC342DN1.BBP-PRSPC342DN1-User-Manual-4/User-Guide-2978046-Page-145.png)
![Message Cause Solution"Cannot print." You have no privileges to print thePDF file you want to print.Contact the owner of thedocument."Classification Code Error" The classification code is notspecified with the printer driver.Select [Optional] for theclassification code. For detailsabout how to specify classificationcode settings, see page 149"Registering ClassificationCodes"."Collate cancelled." Collate was canceled. Turn the printer off, and then turn iton again. If the message appearsagain, contact your servicerepresentative."Collate: Page max." The amount of free memory isinsufficient to perform collating.Reduce the number of pages tobe printed."Command Error." An RPCS command erroroccurred.Check that the communicationbetween a device and the printeris working correctly."Compressed Data Error" The printer detected corruptcompressed data.Check that the program you usedto compress the data isfunctioning correctly."Duplex cancelled." Duplex printing was canceled. Change the setting for "DuplexTray" in [Paper Input] to enableduplex printing for the paper tray."Error occured. Prntd/Cncld."An error occurred during printing,but it was ignored.Check the print settings."Excd Prt Vol Use maxcount."Printing was canceled becausethe print maximum number wasreached.Contact your user administrator."Excd Prt Vol Use maxcount."Maximum number of user codesthat can be registered has beenreached.Delete unnecessary user codes."File System Error." PDF direct printing could not beperformed because the file systemcould not be obtained.Turn the printer off, and then turn iton again. If the message appears6. Troubleshooting388 midas-p3_com_operating_instructions_gb_00198757_eng.xmlDraft 2016/01/18](https://usermanual.wiki/Ricoh/PRSPC342DN1.BBP-PRSPC342DN1-User-Manual-4/User-Guide-2978046-Page-148.png)
![Message Cause Solutionagain, contact your servicerepresentative."File System Full." The PDF file cannot be printedbecause the capacity of the filesystem is full.Delete all unnecessary files fromthe hard disk, or decrease the filesize sent to the printer."Function use denied." The print job was cancelledbecause of one of the following:• The user does not haveprivileges to print.• No privileges to print areassigned to the entered username or user code, or• A wrong password wasspecified for the user name.Enter the user name or user codewith privileges to print, or enterthe correct password for the username."I/O buffer overflow." An input buffer overflow occurred. • Select [Font Priority] for[Memory Usage] in[System].• In [I/O Buffer] under the[Host Interface] menu, set themaximum buffer size to alarger value.• Reduce the number of filesbeing sent to the printer."No response from server." A timeout occurred while theprinter was connecting to theserver for LDAP Authentication orWindows Authentication.Check the status of the server."Paper Size Error" Printing was canceled becausethe specified paper size cannotbe fed from the tray.Check the available paper size."Paper Type Error" The printer does not recognize thepaper type specified using theprinter driver.Check that the printer isconnected to the networkcorrectly and bidirectionalcommunication is enabled. If theWhen Messages Are Displayedmidas-p3_com_operating_instructions_gb_00198757_eng.xml 389Draft 2016/01/18](https://usermanual.wiki/Ricoh/PRSPC342DN1.BBP-PRSPC342DN1-User-Manual-4/User-Guide-2978046-Page-149.png)
![Message Cause Solution"Auto-registration of userinformation has failed."Automatic registration ofinformation for LDAPAuthentication or WindowsAuthentication failed because theAddress Book is full.For details about automaticregistration of user information,see Security Guide."Classification Code isincorrect."The classification code has notbeen entered, or the classificationcode has been enteredincorrectly.Enter the correct classificationcode."Classification Code isincorrect."The classification code is notsupported by the printer driver.Select [Optional] for theclassification code. For detailsabout how to specify classificationcode settings, see page 149"Registering Classification Codes"."Collate has beencancelled."Collate was canceled. Decrease the number of files sentto the printer."Command Error." An RPCS command erroroccurred.Check that the communicationbetween the digital camera andthe printer is working correctly."Command Error" An RPCS command erroroccurred.Check that the communicationbetween a device and the printeris working correctly."Compressed Data Error." The printer detected corruptcompressed data.• Check the connectionbetween the computer andthe printer.• Check that the program youused to compress the data isfunctioning correctly."Data storage error." You tried to print a Sample Print,Locked Print, Hold Print, or StoredPrint file while the hard disk wasnot installed.The hard disk is required whenprinting a Sample Print, LockedPrint, Hold Print, or Stored Print.If the message appear afterinstalling the hard disk, contactyour service representative.When Messages Are Displayedmidas-p3_com_operating_instructions_gb_00198757_eng.xml 391Draft 2016/01/18](https://usermanual.wiki/Ricoh/PRSPC342DN1.BBP-PRSPC342DN1-User-Manual-4/User-Guide-2978046-Page-151.png)
![Message Cause Solution"Duplex has beencancelled."Duplex printing was canceled. • Select the proper paper sizefor the duplex function. Fordetails about paper size, seepage 106 "Paper SizeSpecifications".• Change the setting for"Apply 2 sided" in [SystemSettings] to enable duplexprinting for the paper tray.For details about setting"Apply 2 sided", seepage 287 "Tray PaperSettings"."Error has occurred." A syntax error, etc., occurred. Check that the PDF file is valid."Error occurred. Either jobwas printed with settingschanged or it wascancelled."An error occurred during printing,but it was skipped.Check that the data is valid."Excdd max. No. of files toprint for temp./stored jobs."While printing a Sample Print,Locked Print, Hold Print, or StoredPrint file, the maximum filecapacity was exceeded.Delete unneeded files stored inthe printer."Excdd max. No. of files.(AT)"While using the error job storefunction to store Normal Print jobsas Hold Print files, the maximumfile capacity for file storage orHold Print file management(automatic) was exceeded.Delete Hold Print files (automatic)or unneeded files stored in theprinter."Excdd max. No. ofpages(AT)"While using the error job storefunction to store Normal Print jobsas Hold Print files, the maximumpage capacity was exceeded.• Delete unneeded files storedin the printer.• Reduce the number of pagesto print."Exceeded max. No. ofpages for temporary/storedjobs."While printing a Sample Print,Locked Print, Hold Print, or StoredPrint file, the maximum pagecapacity was exceeded.• Delete unneeded files storedin the printer.• Reduce the number of pagesto print.6. Troubleshooting392 midas-p3_com_operating_instructions_gb_00198757_eng.xmlDraft 2016/01/18](https://usermanual.wiki/Ricoh/PRSPC342DN1.BBP-PRSPC342DN1-User-Manual-4/User-Guide-2978046-Page-152.png)
![Message Cause Solution"Exceeded max. pages.Collate is incomplete."The number of pages exceeds themaximum number of sheets thatcan be used with Collate.Reduce the number of pages toprint."Exceeded the maximumunit count for Print VolumeUse. The job has beencancelled."The number of pages the user ispermitted to print has beenexceeded.For details about Print Volum. UseLimit., see Security Guide."Failed to obtain filesystem."PDF direct printing could not beperformed because the file systemcould not be obtained.Turn off the main power switchand then back on again. If themessage appears again, contactyour service representative."File system is full." The PDF file does not print outbecause the capacity of the filesystem is full.Delete all unnecessary files fromthe hard disk, or decrease the filesize sent to the printer."HDD is full." The hard disk became full whileprinting a Sample Print, LockedPrint, Hold Print, or Stored Printfile.• Delete unneeded files storedin the printer.• Reduce the data size of theSample Print, Locked Print,Hold Print, or Stored Printfile."HDD is full." When printing with the PostScript3 printer driver, the hard diskcapacity for fonts and forms hasbeen exceeded.Delete unneeded forms or fontsregistered in the printer."HDD is full. (Auto)" The hard disk became full whileusing the error job store functionto store Normal Print jobs as HoldPrint files.• Delete unneeded files storedin the printer.• Reduce the data size of theTemporary Print file and/orthe Stored Print file."I/O buffer overflow." An input buffer overflow occurred. • Select [Font Priority] for[Memory Usage] in[System].• In [I/O Buffer] under the[Host Interface] menu, set theWhen Messages Are Displayedmidas-p3_com_operating_instructions_gb_00198757_eng.xml 393Draft 2016/01/18](https://usermanual.wiki/Ricoh/PRSPC342DN1.BBP-PRSPC342DN1-User-Manual-4/User-Guide-2978046-Page-153.png)
![Message Cause Solutionmaximum buffer size to alarger value.• Reduce the number of filesbeing sent to the printer."Information for userauthentication is alreadyregistered for another user."The user name for LDAPAuthentication or IntegrationServer Authentication wasalready registered in a differentserver with a different ID, and aduplication of the user nameoccurred due to a switching ofdomains (servers), etc.For details about UserAuthentication, see SecurityGuide."Insufficient Memory" A memory allocation erroroccurred.PCL 5/PostScript 3Select a lower resolution onthe printer driver. For detailsabout how to change theresolution setting, see theprinter driver Help.PCL 6Select a lower resolution onthe printer driver. For detailsabout how to change theresolution setting, see theprinter driver Help. On theprinter driver's [DetailedSettings] tab, click [PrintQuality] in "Menu:", andthen select [Raster] in the"Vector/Raster:" list. In somecases, it will take a long timeto complete a print job."Memory Retrieval Error" A memory allocation erroroccurred.Turn off the main power switchand then back on again. messageappears again."No response from theserver. Authentication hasfailed."A timeout occurred whileconnecting to the server for LDAPCheck the status of the server.6. Troubleshooting394 midas-p3_com_operating_instructions_gb_00198757_eng.xmlDraft 2016/01/18](https://usermanual.wiki/Ricoh/PRSPC342DN1.BBP-PRSPC342DN1-User-Manual-4/User-Guide-2978046-Page-154.png)
![Message Cause SolutionAuthentication or WindowsAuthentication."Print overrun." Images were discarded whileprinting.Select a lower resolution on theprinter driver. For details abouthow to change the resolutionsetting, see the printer driver Help."Printing privileges have notbeen set for this document."The PDF document you have triedto print has no privileges to print.Contact the owner of thedocument."Receiving data failed." Data reception was aborted. Resend the data."The selected paper size isnot supported. This job hasbeen cancelled."Job Reset is automaticallyperformed if the specified papersize is incorrect.Specify the correct paper size,and then print the file again."Sending data failed." The printer received a commandto stop transmission from theprinter driver.Check that the computer isworking correctly."Unauthd. Copy Preventn.Error"The [Enter User Text:] field on the[Unauthorized Copy Preventionfor Pattern Details] screen is blank.PCL 6/PostScript 3On the printer driver's[Detailed Settings] tab, click[Effects] in "Menu:". Select[Unauthorized CopyPrevention], and then click[Details] to display[Unauthorized CopyPrevention for PatternDetails]. Enter text in [EnterUser Text:]."User Paper Type Error" The printer does not recognize thepaper type specified using theprinter driver.Check that the printer isconnected to the networkcorrectly and bidirectionalcommunication is enabled. If theproblem persists, confirm the userpaper type settings of the printer.For details, see page 127"Registering Unique Names toPaper Types".When Messages Are Displayedmidas-p3_com_operating_instructions_gb_00198757_eng.xml 395Draft 2016/01/18](https://usermanual.wiki/Ricoh/PRSPC342DN1.BBP-PRSPC342DN1-User-Manual-4/User-Guide-2978046-Page-155.png)
![When You Cannot PrintProblem Cause SolutionPrinting does not start. The power is off. For details about how to turn onthe main power switch, seepage 73 "Turning On/Off thePower".Printing does not start. The cause is displayed on thescreen of the control panel.Check the error message orwarning status on the displaypanel, and then take therequired action. For details aboutsolutions, see page 377 "WhenMessages Are Displayed".Printing does not start. The interface cable is notconnected correctly.For details about how to connectinterface cables correctly, seepage 78 "Connecting thePrinter".Printing does not start. The correct interface cable isnot being used.The type of interface cable to usedepends on the computer. Besure to use the correct one. If thecable is damaged or worn,replace it. For details aboutinterface cable, see page 78"Connecting the Printer".Printing does not start. The interface cable wasconnected after the printer wasswitched on.Connect the interface cablebefore turning on the mainpower switch.Printing does not start. If the printer is using wirelessLAN, failure to print might resultfrom a weak wireless signal.Check the radio signal status ofthe wireless LAN in [SystemSettings]. If the signal quality isnot satisfactory, move the printerto a location where radio wavescan pass or remove objects thatmight cause interference.You can check the signal statusonly when wireless LAN is usedin infrastructure mode. For detailsWhen You Cannot Printmidas-p3_com_operating_instructions_gb_00198761_eng.xml 397Draft 2016/01/18](https://usermanual.wiki/Ricoh/PRSPC342DN1.BBP-PRSPC342DN1-User-Manual-4/User-Guide-2978046-Page-157.png)
![Problem Cause SolutionPrinting does not start. The Login User Name, LoginPassword, or Driver EncryptionKey is incorrect.Check the Login User Name,Login Password, and DriverEncryption Key.Printing does not start. Advanced encryption has beenset using the Extended Securityfunction.Check the settings of theExtended Security function. Fordetails about Extended Securityfunction settings, see SecurityGuide.[List / Test Print] is disabled. A mechanical error might haveoccurred.Contact your servicerepresentative.Printing does not start whenusing the extended wirelessLAN in Ad-hoc Mode.The correct CommunicationMode is not set.• Turn the main power switchoff and then back on again.For details about how toturn on/off the main powerswitch, see page 73"Turning On/Off thePower".• Change [CommunicationMode] in [System Settings]to [802.11 Ad-hoc Mode],and then select [Off] for[Security Method]. Fordetails aboutCommunication Mode, see:• page 255 "HostInterface (SPC340DN)" (for SPC340DN)• page 291 "InterfaceSettings" (for SPC342DN)If printing does not start, contact your service representative.When You Cannot Printmidas-p3_com_operating_instructions_gb_00198761_eng.xml 399Draft 2016/01/18](https://usermanual.wiki/Ricoh/PRSPC342DN1.BBP-PRSPC342DN1-User-Manual-4/User-Guide-2978046-Page-159.png)
![When the Data In Indicator Does Not Light Up or FlashWhen the Data In indicator does not light up or flash after a print job starts, data is not being sent to theprinter.When the printer is connected to the computer using the interface cableCheck that the print port setting is correct. When connecting the printer to the computer using aparallel interface, connect using LPT1 or LPT2.1. Open the printer properties dialog box, and then click the [Ports] tab.For details about displaying the printer properties dialog box, see page 131 "Displaying thePrinter Driver Properties with Windows".2. In the [Print to the following port(s)] list, check that the correct port is selected.Network connectionFor details about the network connection, contact your administrator.6. Troubleshooting400 midas-p3_com_operating_instructions_gb_00198761_eng.xmlDraft 2016/01/18](https://usermanual.wiki/Ricoh/PRSPC342DN1.BBP-PRSPC342DN1-User-Manual-4/User-Guide-2978046-Page-160.png)
![Other Printing ProblemsThis section describes likely causes of and possible solutions for problems that can occur when a printjob is performed from a computer.When You Cannot Print ProperlyProblem Cause SolutionThe printed image is smudged. Settings for thick paper havenot been configured whenprinting on thick paper in thebypass tray.PCL 5e/5cOn the printer driver's[Paper] tab, select [BypassTray] in the "Input Tray:" list.Then in the "Type:" list,select a proper paper type.PCL 6/PostScript 3On the printer driver's[Detailed Settings] tab, click[Paper] in "Menu:", andthen select [Bypass Tray] inthe "Input Tray:" list. Then inthe "Paper Type:" list, selecta proper paper type.Printed images contain blots orare patchy.The paper is damp. Use paper that has been storedin the recommended temperatureand humidity conditions. Fordetails about the proper way tostore paper, see page 110"Paper Precautions".Printed images contain blots orare patchy.The printer is not on a levelsurface.The printer must be placed on astable and level surface. Checkthe printer environment andselect an appropriate location.For details about the printer'senvironment, see page 47"Install Location".Printed images contain blots orare patchy.The paper is creased, curled, orhas blemishes.Smooth out the wrinkles orreplace the paper. For detailsOther Printing Problemsmidas-p3_com_operating_instructions_gb_00198763_eng.xml 401Draft 2016/01/18](https://usermanual.wiki/Ricoh/PRSPC342DN1.BBP-PRSPC342DN1-User-Manual-4/User-Guide-2978046-Page-161.png)
![Problem Cause Solutionabout paper, see page 110"Paper Precautions".The printed image is faded overthe entire page.The paper is damp. Use paper that has been storedin the recommended temperatureand humidity conditions. Fordetails about the proper way tostore paper, see page 110"Paper Precautions".The printed image is faded overthe entire page.The paper is unsuitable. Printingon coarse or treated papermight result in faint print image.Use recommended paper. Fordetails about recommendedpaper, see page 106 "PaperSize Specifications" andpage 108 "Paper TypeSpecifications".The printed image is faded overthe entire page.If [On] is selected in the"Economy Color" list in theprinter driver settings, the entirepage will be faded whenprinted.PCL 6/PostScript 3On the printer driver's[Detailed Settings] tab, click[Print Quality] in "Menu:",and then select [Off] in the"Economy Color ".Images smudge when rubbed.(Toner is not fixed.)The specified paper type andthe paper that is actuallyloaded might be different. Forexample, thick paper might beloaded but not specified as thepaper type.PCL 5e/5cOn the printer driver's[Paper] tab, select a properpaper type in the [Type:]box.PCL 6/PostScript 3On the printer driver's[Detailed Settings] tab, click[Paper] in "Menu:", andthen select a proper papertype in the "Paper Type:"list.The printed image is differentfrom the image on thecomputer's display.Printing will be performed bythe printer's graphic processingfunction.PCL 6On the printer driver's[Detailed Settings] tab, click[Print Quality] in "Menu:",6. Troubleshooting402 midas-p3_com_operating_instructions_gb_00198763_eng.xmlDraft 2016/01/18](https://usermanual.wiki/Ricoh/PRSPC342DN1.BBP-PRSPC342DN1-User-Manual-4/User-Guide-2978046-Page-162.png)
![Problem Cause Solutionand then select [Raster] inthe "Vector/Raster:" list.The image is too dark or toolight.The paper type settings are notconfigured correctly.Check that the paper loaded onthe paper tray or bypass traymatches the paper type set onthe display panel. For detailsabout paper type settings, seepage 125 "Paper Settings".The image is too dark or toolight.The paper is loaded reverseside up. Printing on non-printsurfaces reduces print qualityand can damage the printer'sinternal components.Before printing on special paper,check its surface carefully. Fordetails about special paper, seepage 110 "Paper Precautions".Image is dirty. Use of non-recommended tonercan result in a loss of printquality and other problems.Use genuine manufacturer toner.Contact your servicerepresentative.Horizontal lines appear whenan image filled in black isprinted.A black-and-white image isoccasionally recognized as acolor image and printed as astreak when a large number ofpages that contain both black-and-white and color imagesare printed continuously.• Set [B&W Page Detect] or[Black & White PageDetect] to [Per Page]. Fordetails, see one of thefollowings depending onthe model being used:• page 234 "System (SPC340DN)" (for SPC340DN)• page 327"Maintenance: Print"(for SP C342DN)• Change [GrayReproduction] in the [PrintQuality] menu of the printerdriver to [CMY + K].Horizontal streaks appear onthe printed page.Horizontal streaks maysometimes appear on theprinted pages when a largenumber of pages arePerform the automatic gradationcorrection. For details, seepage 441 "Correcting the ColorGradation".Other Printing Problemsmidas-p3_com_operating_instructions_gb_00198763_eng.xml 403Draft 2016/01/18](https://usermanual.wiki/Ricoh/PRSPC342DN1.BBP-PRSPC342DN1-User-Manual-4/User-Guide-2978046-Page-163.png)
![Problem Cause Solutioncontinuously printed in a high-temperature or humidenvironment.The lower half of the pageappears faded when a filled-inimage is printed.When the "Toner is almostempty." or "Toner Cartridge isalmost empty. Replace TonerCartridge." message isdisplayed on the display panel,the toner is running low and theprinted page may appearfaded.Replace the print cartridge.Printed graphics do not matchgraphics on the screen.If the printer driver is configuredto use the graphics command,the graphics command from theprinter is used to print.If you want to print accurately,set the printer driver to printwithout using the graphicscommand. For details aboutsettings for printer driver, see theprinter driver Help.Print result differs from thedisplay.A non-Windows operatingsystem is being used.Check that the applicationsupports the printer driver.Print result differs from thedisplay.The printer is not selected forprinting.Use the printer driver of theprinter and check that the printeris the specified printer. For detailsabout how to open the printerdriver settings screen, seepage 131 "Displaying thePrinting Preferences dialog boxfrom the [Start] menu".Print result differs from thedisplay.Data transmission failed or wascanceled during printing.Check whether there is failed orcanceled data remaining. Fordetails about how to identify thecause of the error, see page 210"Checking Error Logs".Characters differ from thedisplay.The loaded paper is unsuitable. Printing on recommended paperproduces better resolution. Fordetails about recommendedpaper, see page 106 "PaperSize Specifications" and6. Troubleshooting404 midas-p3_com_operating_instructions_gb_00198763_eng.xmlDraft 2016/01/18](https://usermanual.wiki/Ricoh/PRSPC342DN1.BBP-PRSPC342DN1-User-Manual-4/User-Guide-2978046-Page-164.png)
![Problem Cause Solutionpage 108 "Paper TypeSpecifications".Image position differs from thedisplay.The page layout settings are notconfigured correctly.Check the page layout settingsconfigured using the application.For details about page layoutsettings, see the application'sHelp.Image position differs from thedisplay.The page layout settings are notconfigured correctly.PCL 5e/5cOn the printer driver's[Paper] tab, select [PrintOn] box, and then selectthe desired size.PCL 6 / PostScript 3On the printer driver's[Detailed Settings] tab, click[Basic] in "Menu:", and thenselect the desired size in the"Print On:" list.Lines of garbled or unwantedalphanumeric charactersappear.An incorrect printer languagemight have been selected.Select the correct printer driver,and then print the file again.Images are cut off, or excess isprinted.You may be using papersmaller than the size selected inthe application.Use the same size paper as thatselected in the application. If youcannot load paper of the correctsize, use the reduction function toreduce the image, and then print.For details about the reductionfunction, see the printer driverHelp.Photo images are grainy. Some applications print at alower resolution.Use the application's or printerdriver's settings to specify ahigher resolution. For detailsabout printer driver's settings, seethe printer driver Help.Other Printing Problemsmidas-p3_com_operating_instructions_gb_00198763_eng.xml 405Draft 2016/01/18](https://usermanual.wiki/Ricoh/PRSPC342DN1.BBP-PRSPC342DN1-User-Manual-4/User-Guide-2978046-Page-165.png)
![Problem Cause SolutionA solid line is printed as adashed line or appears blurred.Dither patterns do not match. PostScript 3Change the ditheringsettings on the printer driver.For details about thedithering settings, see theprinter driver Help.Fine lines are fuzzy withinconsistent thickness or color,or do not appear.Super fine lines have beenspecified in the application, ora color that is too light has beenspecified for the lines.PostScript 3Change the ditheringsettings on the printer driver.For details about thedithering settings, see theprinter driver Help.If the problem continuesafter you change thedithering settings, use thesettings of the application inwhich the image wascreated to change the colorand thickness of the lines.Images appear only partiallycolored.The paper is damp. Use paper that has been storedin the recommended temperatureand humidity conditions. Fordetails about the proper way tostore paper, see page 110"Paper Precautions".Paper Misfeeds Occur FrequentlyProblem Cause SolutionPaper is not fed from theselected tray.When you are using Windows,printer driver settings overridethose settings using the displaypanel.PCL 5e/5cOn the printer driver's[Paper] tab, select thedesired input tray in the"Input Tray:" list.6. Troubleshooting406 midas-p3_com_operating_instructions_gb_00198763_eng.xmlDraft 2016/01/18](https://usermanual.wiki/Ricoh/PRSPC342DN1.BBP-PRSPC342DN1-User-Manual-4/User-Guide-2978046-Page-166.png)
![Problem Cause SolutionPCL 6/PostScript 3On the printer driver's[Detailed Settings] tab, click[Paper] in "Menu:", andthen select the desired inputtray in the "Input Tray:" list.Images are printed at a slant. The tray's side fences might notbe locked.Check that the side fences arelocked. For details about how toset the side fences, seepage 113 "Loading Paper intoPaper Trays" or page 119"Loading Paper into the BypassTray".Images are printed at a slant. The paper is feeding in at aslant.Load the paper correctly. Fordetails about loading paper, seepage 113 "Loading Paper intoPaper Trays" or page 119"Loading Paper into the BypassTray".Misfeeds occur frequently. The number of sheets loadedexceeds the capacity of theprinter.Load paper only as high as theupper limit markings on the sidefences of the paper tray, or themarkings on the paper guides ofthe bypass tray.Misfeeds occur frequently. The paper tray's side fences areset too tightly.Push the side fences lightly, andthen reset them.Misfeeds occur frequently. The paper is damp. Use paper that has been storedin the recommended temperatureand humidity conditions. Fordetails about the proper way tostore paper, see page 110"Paper Precautions".Misfeeds occur frequently. The paper is too thick or toothin.Use recommended paper. Fordetails about recommendedpaper, see page 106 "PaperSize Specifications" andOther Printing Problemsmidas-p3_com_operating_instructions_gb_00198763_eng.xml 407Draft 2016/01/18](https://usermanual.wiki/Ricoh/PRSPC342DN1.BBP-PRSPC342DN1-User-Manual-4/User-Guide-2978046-Page-167.png)
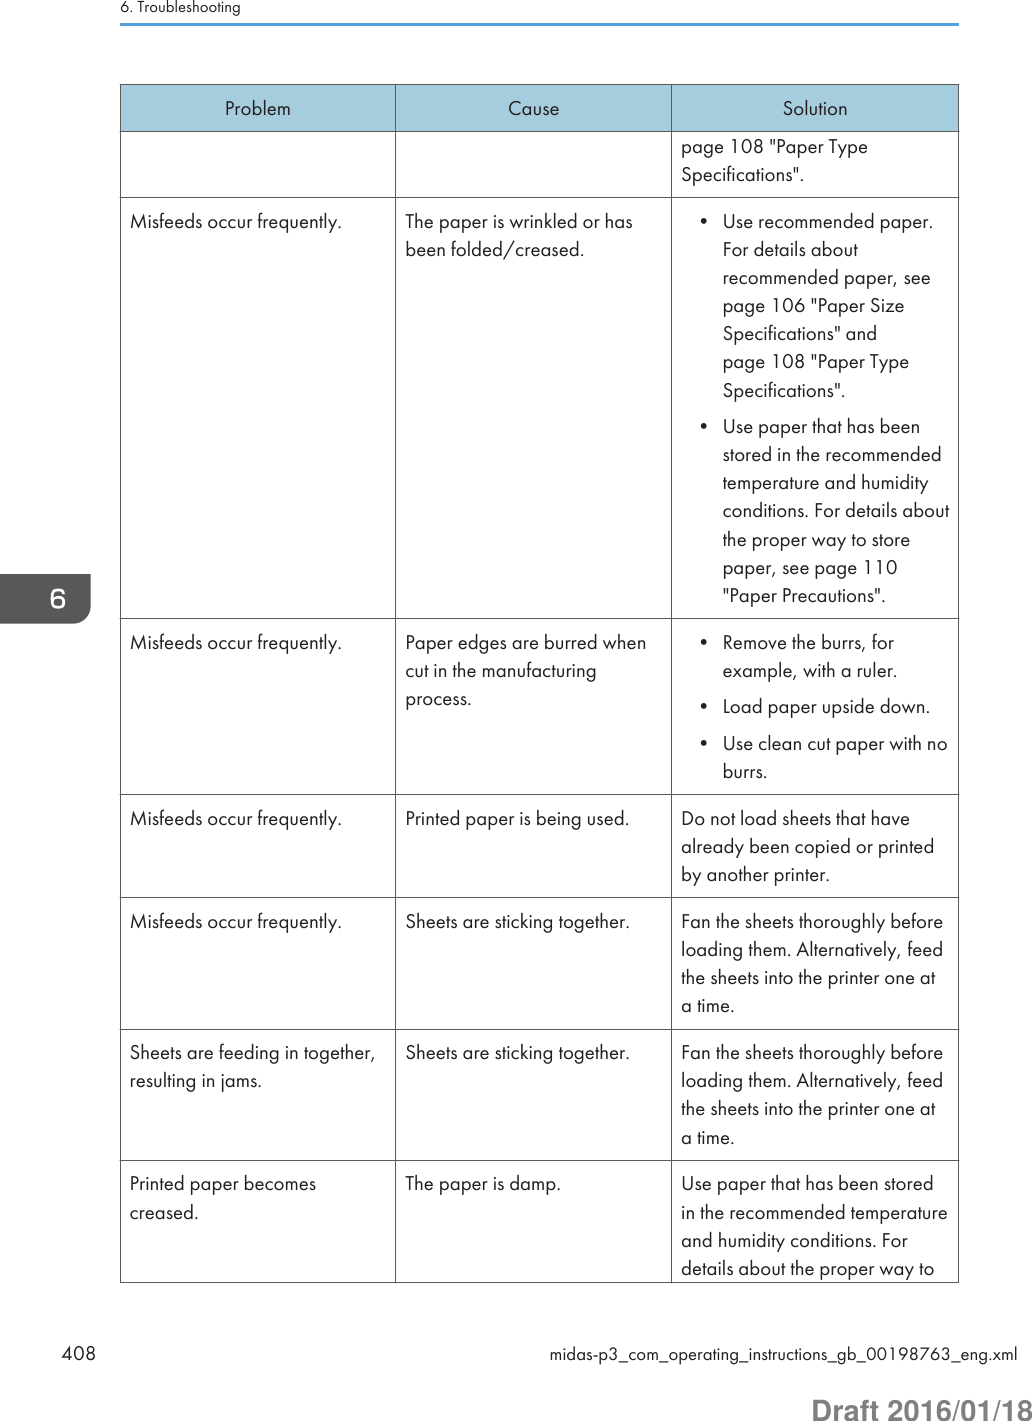
![Problem Cause Solutionstore paper, see page 110"Paper Precautions".Printed paper becomescreased.The paper is too thin. Use recommended paper. Fordetails about recommendedpaper, see page 106 "PaperSize Specifications" andpage 108 "Paper TypeSpecifications".Edges of sheets are creased. The paper is damp. Use paper that has been storedin the recommended temperatureand humidity conditions. Fordetails about the proper way tostore paper, see page 110"Paper Precautions".Edges of sheets are creased. You are using non-recommended paper.Use recommended paper. Fordetails about recommendedpaper, see page 106 "PaperSize Specifications" andpage 108 "Paper TypeSpecifications".Duplex printing ismalfunctioning.You have selected a paper traythat is not set for duplex print.Change the setting to enableduplex printing for the papertray.Duplex printing ismalfunctioning.You have selected a paper typethat cannot be used for duplexprinting.In [Tray Paper Settings], select apaper type that can be used forduplex printing. For details aboutthe paper types that can beused, see page 138 "Printing onBoth Sides of a Page".The image on the back side ofduplex printing has mottledblank patches or is smudged.Missing patches and smudgesare caused by moisture leakingfrom the paper.• Do not install the printer inareas that are susceptible tolow temperature.• Use paper that has beenstored in the recommendedtemperature and humidityconditions. For details aboutthe proper way to storeOther Printing Problemsmidas-p3_com_operating_instructions_gb_00198763_eng.xml 409Draft 2016/01/18](https://usermanual.wiki/Ricoh/PRSPC342DN1.BBP-PRSPC342DN1-User-Manual-4/User-Guide-2978046-Page-169.png)
![Problem Cause Solutionpaper, see page 110"Paper Precautions".Additional TroubleshootingProblem Causes SolutionsThe output sheet falls from theoutput tray.Blocking occurs (the outputsheets on the output tray sticktogether).Depending on the size, type, orprinting conditions of the prints,the output sheets may becomebadly curled.• Pull out the stop fence of theoutput tray before printing.• Turn over the stack of paperin the tray.• Remove all output sheets.It takes a long time to completea print job.Photographs and other dataintensive pages take a longtime for the printer to process,so simply wait when printingsuch data.If the Data In indicator isflashing, data has been receivedby the printer. Wait for amoment.Changing the following settingswith the printer driver may helpspeed up printing:• Select [Speed] in "PrintPriority" list.• Select a lower resolution.For details about how to changethe settings, see the printer driverHelp.Images are printed in thewrong orientation.The feed orientation youselected and the feedorientation selected in theprinter driver's option setupmight not be the same.Set the printer's feed orientationand the printer driver's feedorientation accordingly. Fordetails about settings for printerdriver, see the printer driverHelp.Optional componentsconnected to the printer are notrecognized.Bidirectional communication isnot working.Set up optional devices on theproperties of the printer. Fordetails about how to set upoptional devices, see the printerdriver Help.6. Troubleshooting410 midas-p3_com_operating_instructions_gb_00198763_eng.xmlDraft 2016/01/18](https://usermanual.wiki/Ricoh/PRSPC342DN1.BBP-PRSPC342DN1-User-Manual-4/User-Guide-2978046-Page-170.png)
![Problem Causes SolutionsCombined printing, bookletprinting, or Auto Reduce/Enlarge printing does not comeout as expected.The application or printer driversettings are not configuredcorrectly.Make sure the application'spaper size and orientationsettings match those of the printerdriver. If a different paper sizeand orientation are set, select thesame size and orientation.Some types of data, such asgraphics data or data fromcertain applications, do notprint.The printer driver settings arenot configured correctly.PCL 5e/5cOn the printer driver's [PrintQuality] tab, select [600dpi] in the "Resolution"area.PCL 6• On the printer driver's[Detailed Settings] tab,click [Print Quality] in"Menu:", and thenselect [Quality] in the"Print Priority:" list.• On the printer driver's[Detailed Settings] tab,click [Print Quality] in"Menu:", and thenselect [Raster] in the"Vector/Raster:" list.PostScript 3On the printer driver's[Detailed Settings] tab, click[Print Quality] in "Menu:",and then select[Photographic] in the"Dithering:" list.For details about the printerdriver settings, see the printerdriver Help.Some characters are notprinted or appear strange.The printer driver settings arenot configured correctly.PCL 5e/5cOn the printer driver's [PrintQuality] tab, select [600Other Printing Problemsmidas-p3_com_operating_instructions_gb_00198763_eng.xml 411Draft 2016/01/18](https://usermanual.wiki/Ricoh/PRSPC342DN1.BBP-PRSPC342DN1-User-Manual-4/User-Guide-2978046-Page-171.png)
![Problem Causes Solutionsdpi] in the "Resolution"area.PCL 6• On the printer driver's[Detailed Settings] tab,click [Print Quality] in"Menu:", and thenselect [Quality] in the"Print Priority:" list.• On the printer driver's[Detailed Settings] tab,click [Print Quality] in"Menu:", and thenselect [Raster] in the"Vector/Raster:" list.PostScript 3On the printer driver's[Detailed Settings] tab, click[Print Quality] in "Menu:",and then select [Text] in the"Dithering:" list.For details about the printerdriver settings, see the printerdriver Help.Print speed or applicationrelinquishing speed is slow.The printer driver settings arenot configured correctly.PCL 6On the printer driver's[Detailed Settings] tab, click[Print Quality] in "Menu:",and then select [Speed] inthe "Print Priority:" list.For details about the printerdriver settings, see the printerdriver Help.Quit any other applications.Print ends mid-job. An error might have occurred. Check the printer's display panelto see if an error has occurred.6. Troubleshooting412 midas-p3_com_operating_instructions_gb_00198763_eng.xmlDraft 2016/01/18](https://usermanual.wiki/Ricoh/PRSPC342DN1.BBP-PRSPC342DN1-User-Manual-4/User-Guide-2978046-Page-172.png)
![Problem Causes SolutionsA print instruction was issuedfrom the computer, but printingdid not start.User Authentication may havebeen set.For details about UserAuthentication, see SecurityGuide.Color originals are printed inblack and white.No color print settings areconfigured on the printer driver.Change the "Color/ Black andWhite:" setting on the printerdriver. For details about how tochange the "Color/ Black andWhite:" setting, see the printerdriver Help.PDF files do not print out/cannot perform PDF direct print.PDF files are password-protected.To print password-protected PDFfiles, enter the password in [PDFMenu].PDF files do not print out/cannot perform PDF direct print.PDF files cannot be printed ifthey are print-disabled in PDFfile security setting.Change the PDF file securitysetting.PDF direct print producesstrange or malformedcharacters.Fonts were not embedded. Embed fonts in the PDF file youwant to print, and then print."Resetting job..." appears andprinting is suspended.Memory is insufficient. In [System], select [MemoryUsage] to [Font Priority].Printing did not start eventhough the specified print timehas already passed.[Jobs Not Printed As Machn.Was Off] was set to [Do notPrint] in [Printer Features], but atthe specified printing time, themain power switch was turnedoff or the printer was in LowPower Mode.Set [Jobs Not Printed As Machn.Was Off] to [Prt When MachOn] in [Printer Features].This function is available for SPC342DN only.Printing did not start eventhough the specified print timehas already passed.The time set on the printer orcomputer is incorrect.Set the correct time on the printeror computer.Printing via wireless LAN isslow.The number of jobs exceeds thecapacity of the printer.Reduce the number of jobs.Printing via wireless LAN isslow.• A communication errormight have occurred.• Move the printer fartheraway from the wireless LANdevice.Other Printing Problemsmidas-p3_com_operating_instructions_gb_00198763_eng.xml 413Draft 2016/01/18](https://usermanual.wiki/Ricoh/PRSPC342DN1.BBP-PRSPC342DN1-User-Manual-4/User-Guide-2978046-Page-173.png)
![Problem Causes Solutions• Interference from otherwireless LAN devices canreduce the communicationspeed• If the printer is using awireless LAN, radio wavesmay be interfering with thewireless communication.This may occur if there is amicrowave oven, cordlesstelephone, industrialprinter, scientificinstrument, or medicalinstrument using the samefrequency range near thedevice.• If there are active wirelessLAN devices nearby, movethe printer or disable thosedevices.• Turn off other printers orinstruments that use thesame frequency range, andthen try printing again. Ifprinting is successful, movethe devices to a locationwhere they do not interferewith the printer.The Printed Image is Different from the Image on the ComputerProblem SolutionsThe printed image is differentfrom the image on thecomputer's display.When you use some functions, such as enlargement or reduction,the layout of the image might be different from that displayed onthe computer display.Images are cut off, or excesspages are printed.If you are using paper smaller than the paper size selected in theapplication, use the same size paper with that selected in theapplication. If you cannot load paper of the correct size, use thereduction function to reduce the image, and then print.For details, see the printer driver's Help.PDF Direct Print is not executed(PDF file is not printed).You must install an optional hard disk or set the value of [RAM Disk]in the System Menu to 2 MB or higher.For details about [RAM Disk], see:• page 234 "System (SP C340DN)" (for SP C340DN)• page 314 "System" (for SP C342DN)When printing a PDF using a password, set the password of thePDF file using the [Change PDF Password] menu in [PDF Menu] or6. Troubleshooting414 midas-p3_com_operating_instructions_gb_00198763_eng.xmlDraft 2016/01/18](https://usermanual.wiki/Ricoh/PRSPC342DN1.BBP-PRSPC342DN1-User-Manual-4/User-Guide-2978046-Page-174.png)
![Problem SolutionsWeb Image Monitor. For details about [Change PDF Password],see:• page 252 "PDF Menu (SP C340DN)" (for SP C340DN)• page 325 "PDF Menu" (for SP C342DN)For details about Web Image Monitor, see Web Image MonitorHelp.• PDF files not allowed to be printed by the PDF file securitysetting cannot be printed.• Highly compressed PDFs cannot be printed using PDF DirectPrint. Open the relevant application and print the PDF fileusing the printer driver. Set the file format to standard PDF.As a result of printing using PDFDirect Printing, characters aremissing or misshapen.Before printing, embed the font in the PDF file to be printed.The paper size appears on thecontrol panel and printing is notperformed with PDF Direct Print.When PDF Direct Print is used, printout requires paper set within thePDF file. When a message indicating a paper size appears, eitherplace the indicated size in the paper tray or perform Form Feed.Also, if [Sub Paper Size] in the [System] menu is set to [Auto],printing is performed assuming Letter size and A4 size to be thesame size. For example, when a PDF file set to A4 size paper isprinted using PDF Direct Print and Letter size paper is loaded in thepaper tray, or vice versa, the file will be printed out.The color of the printout isdifferent from the color on thecomputer's display.• The colors created using color toner are different from theones displayed on the display.• If you select [On] for [Economy Color:] on the [Print Quality]menu in the printer driver's dialog box, the color gradationmay appear differently.For details, see the printer driver's Help.• Turn the printer off, and then turn it on again. If the colors aredifferent from what you expect, perform [Color Registration].For details, see page 440 "Adjusting the Color Registration".The color of the printout isdifferent from the colorspecified.If a specific color is missing turn the printer off, wait a few moments,and then turn it on again. If this does not resolve the problem,contact your sales or service representative.Other Printing Problemsmidas-p3_com_operating_instructions_gb_00198763_eng.xml 415Draft 2016/01/18](https://usermanual.wiki/Ricoh/PRSPC342DN1.BBP-PRSPC342DN1-User-Manual-4/User-Guide-2978046-Page-175.png)
![Problem SolutionsThe color changes significantlywhen adjusted with the printerdriver.Do not make extreme settings for the color balance on the [PrintQuality] menu under the [Detailed Settings] tab in the printerdriver's dialog box.Note that the sample image displayed in the printer driver is usedonly to show what processing will be performed, so it may notmatch the print results.For details, see the printer driver's Help.Color documents are printed inblack and white.• Color printing is not enabled for the printer.For details, see the printer driver's Help.• Some applications print color files in black and white.Solid areas, lines, or text areshiny or glossy when created asa mixture of cyan, magenta,yellow.• Select [K (Black)] for [Gray Reproduction:] in the printerdriver's dialog box.For details, see the printer driver's Help.Black gradation is not natural. • Select [CMY + K] for [Gray Reproduction:] in the printerdriver's dialog box.For details, see the printer driver's Help.A color is missing or partiallyblurred.• Paper is damp. Use paper that has been stored properly.For details, see page 110 "Paper Precautions".• A print cartridge is almost empty. When the "Toner is almostempty." message appears on the display panel. If the tonerindicator on the initial screen seems empty, replace the printcartridge of the displayed color.For details, see page 449 "Replacing the Print Cartridge".• Condensation may have collected. If there were suddenchanges in temperature or humidity, restart the printer when itis acclimatized.6. Troubleshooting416 midas-p3_com_operating_instructions_gb_00198763_eng.xmlDraft 2016/01/18](https://usermanual.wiki/Ricoh/PRSPC342DN1.BBP-PRSPC342DN1-User-Manual-4/User-Guide-2978046-Page-176.png)
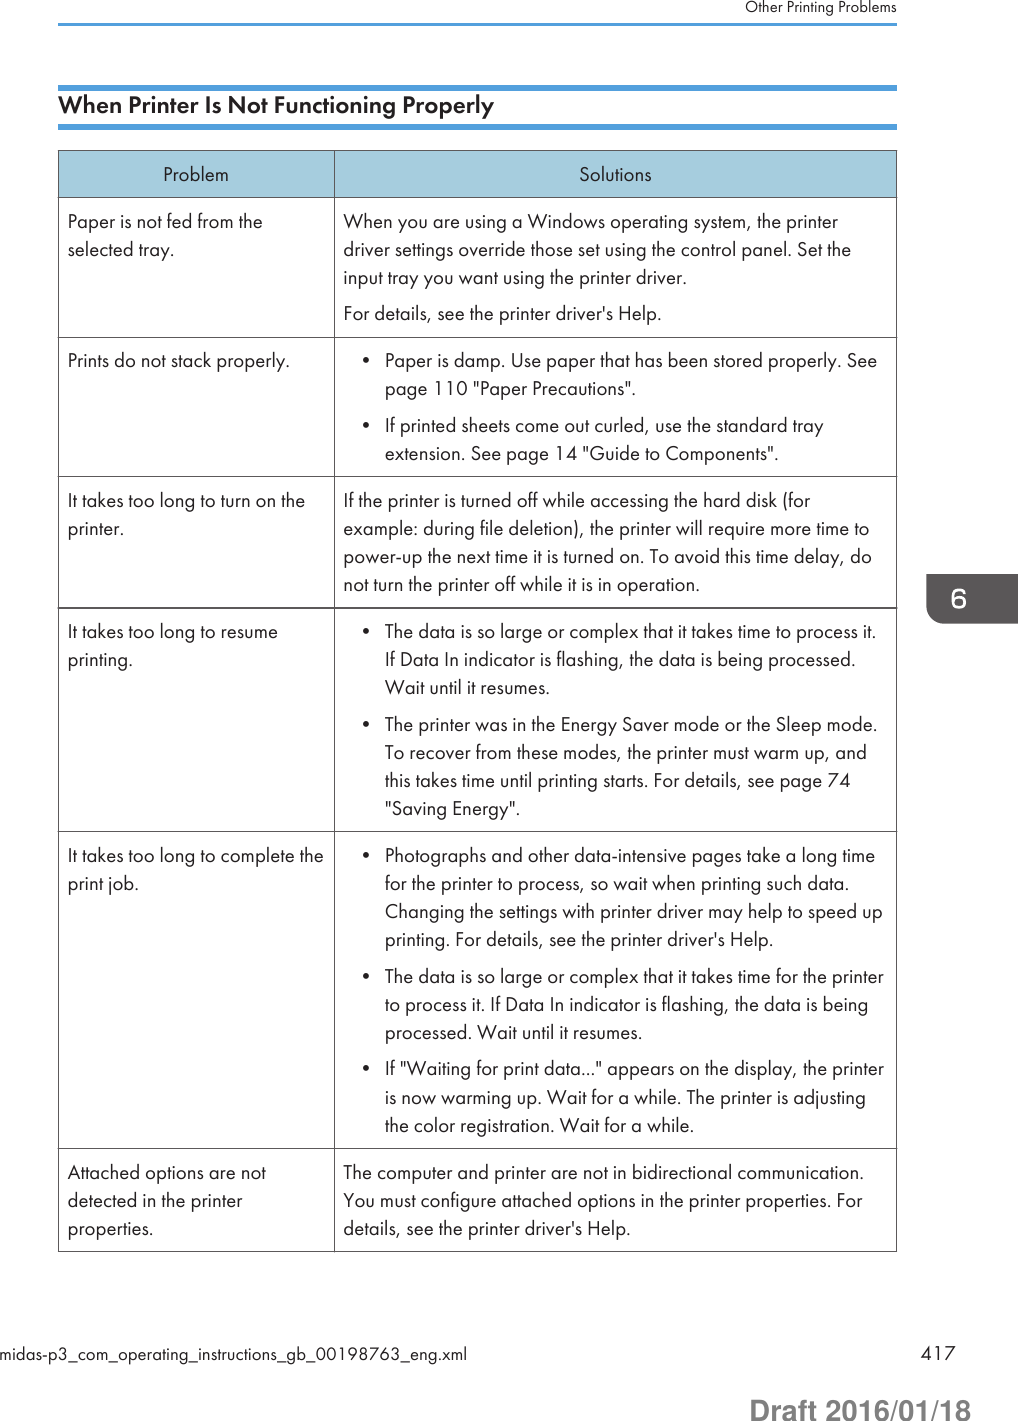
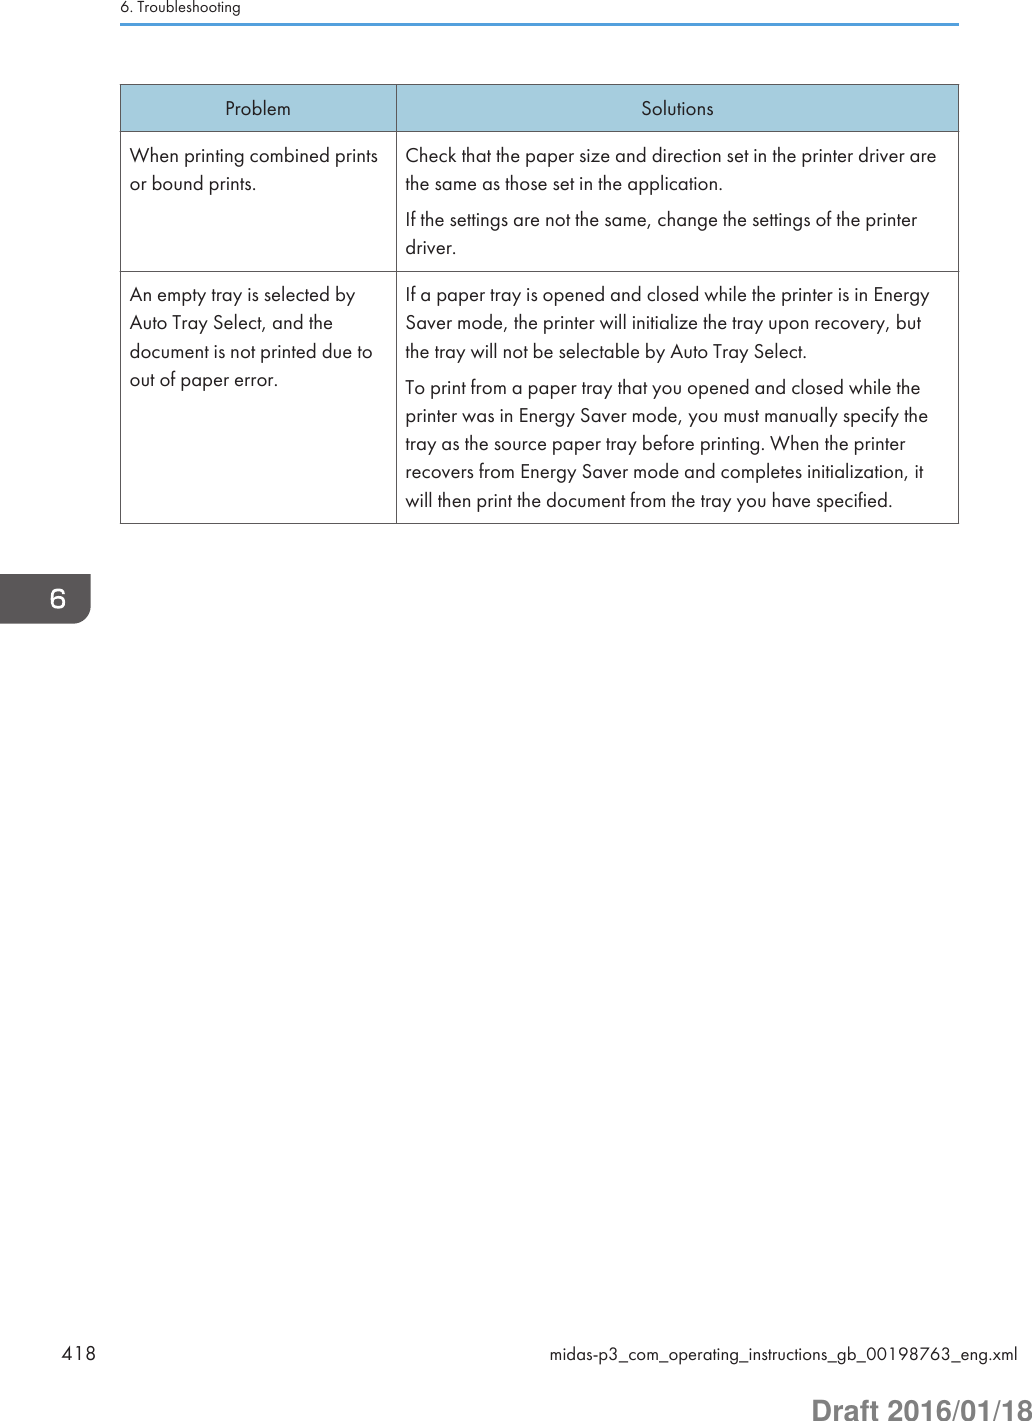
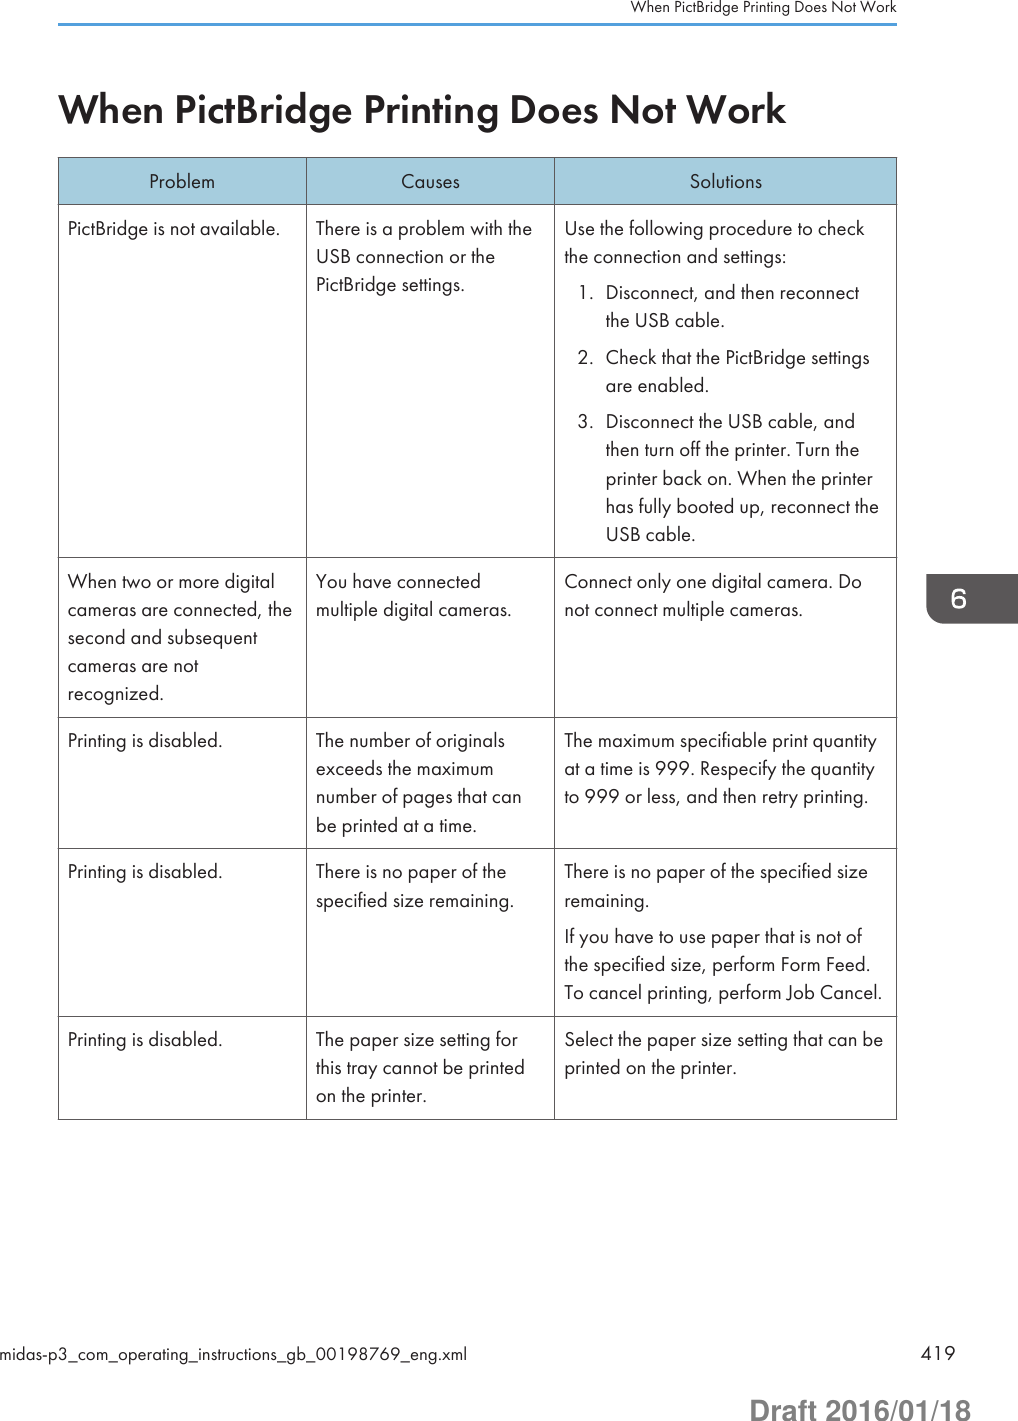
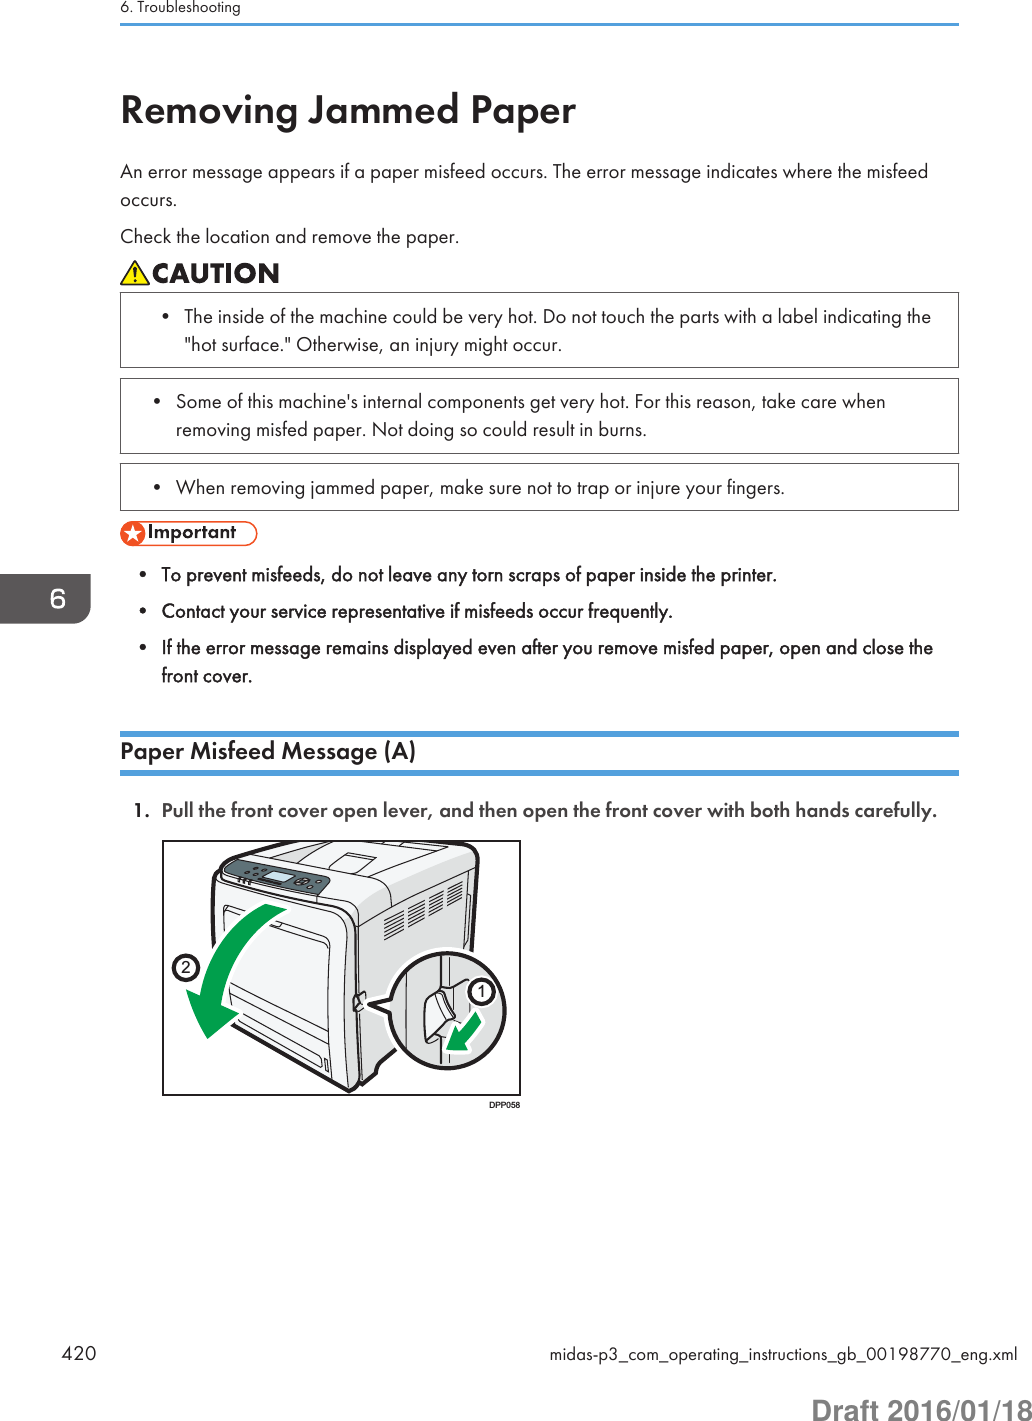
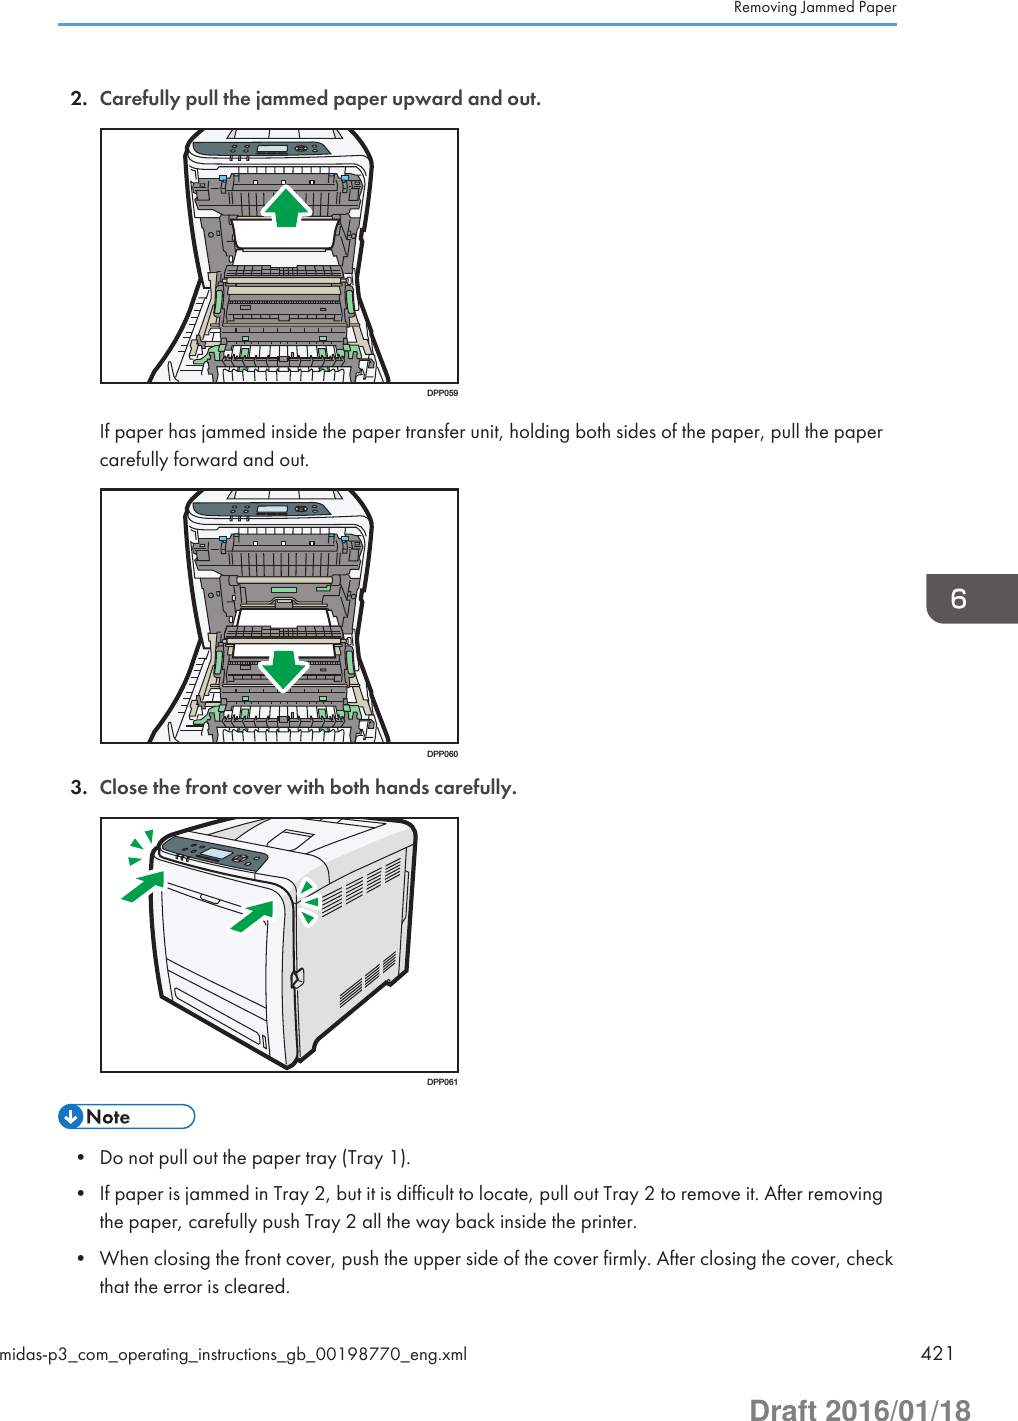
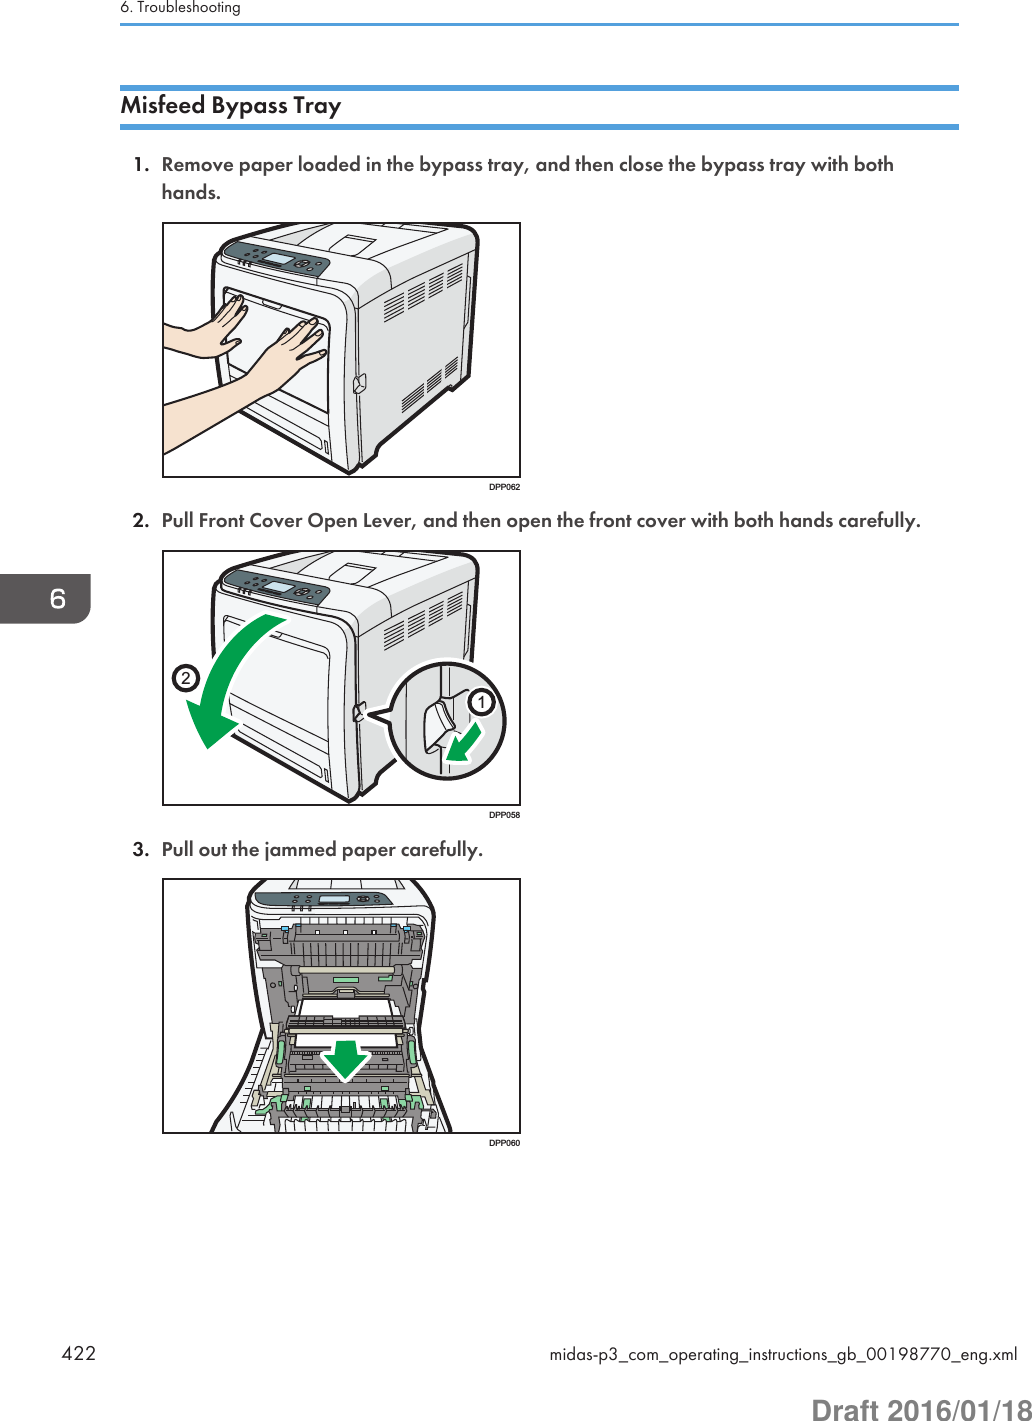
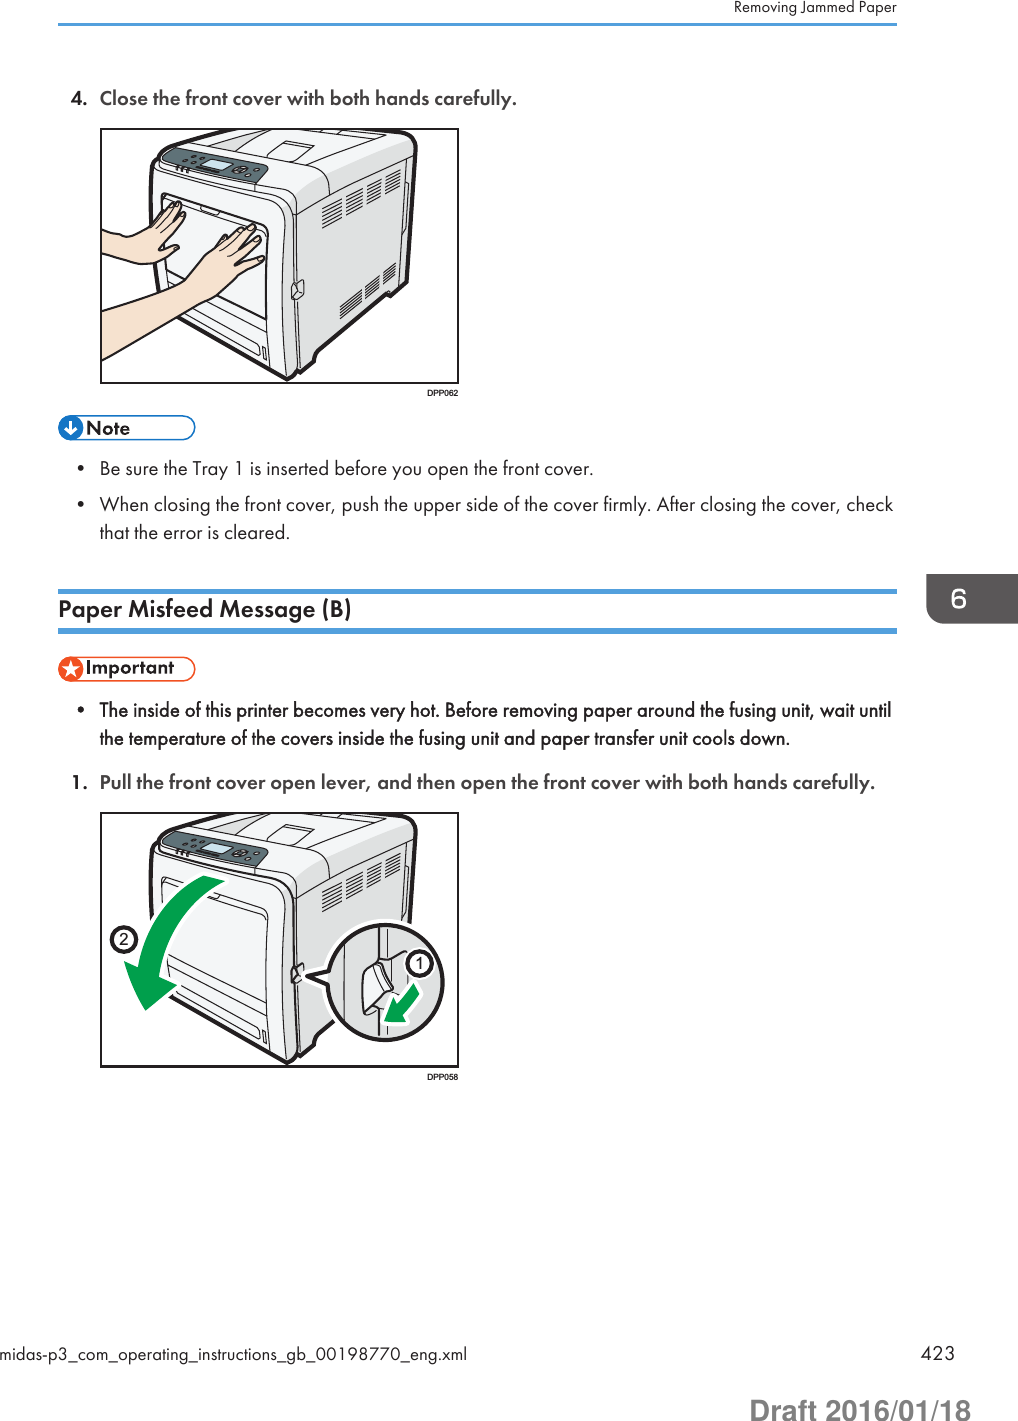
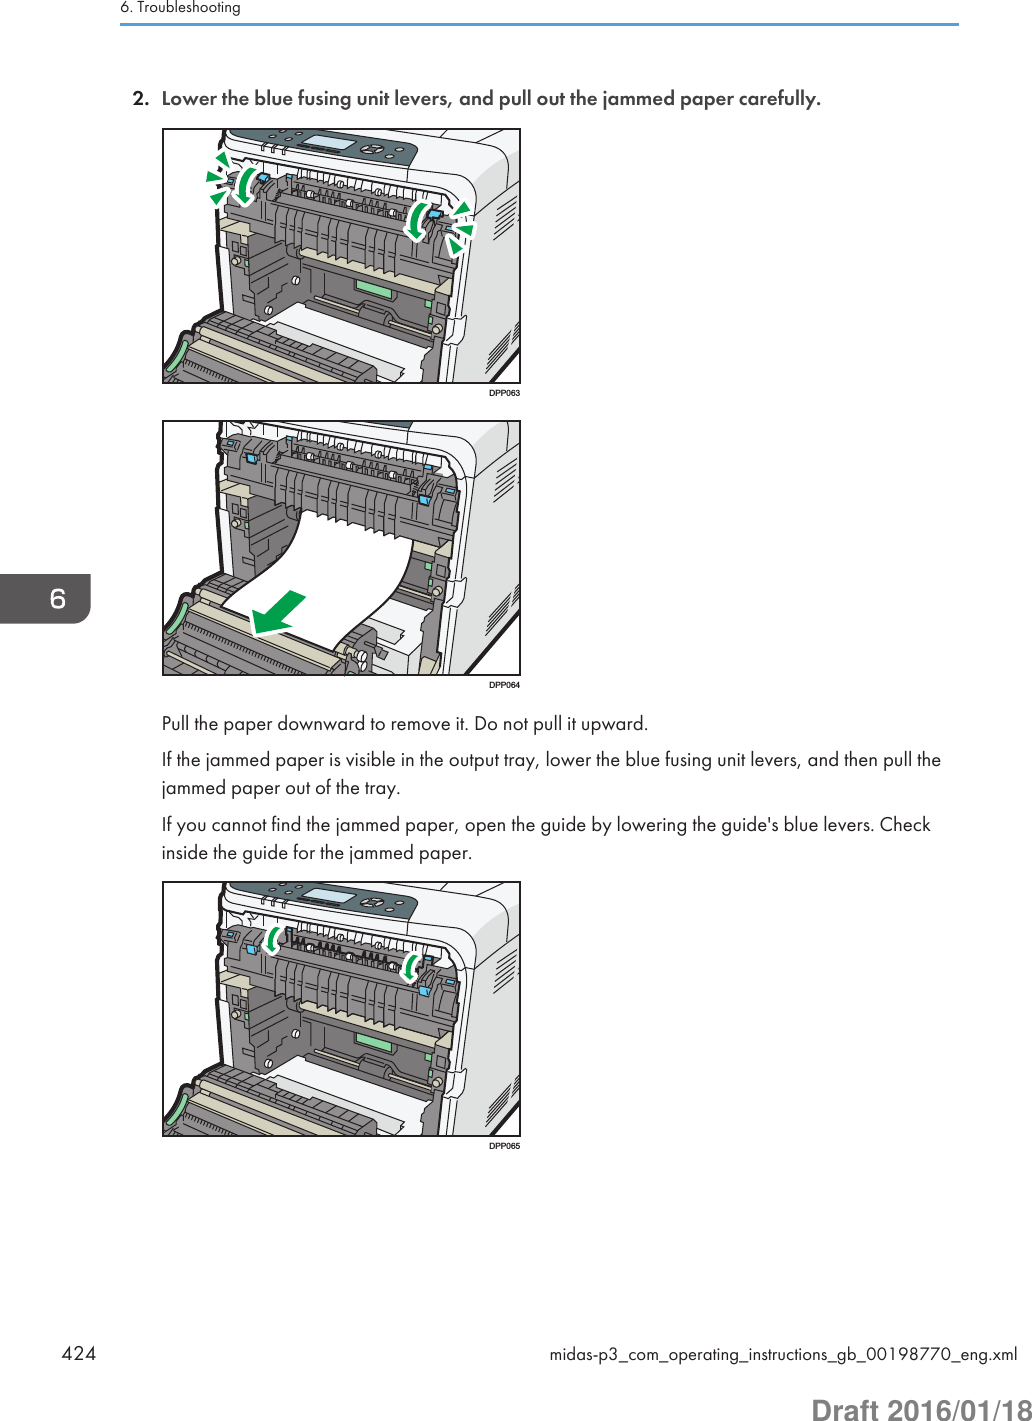
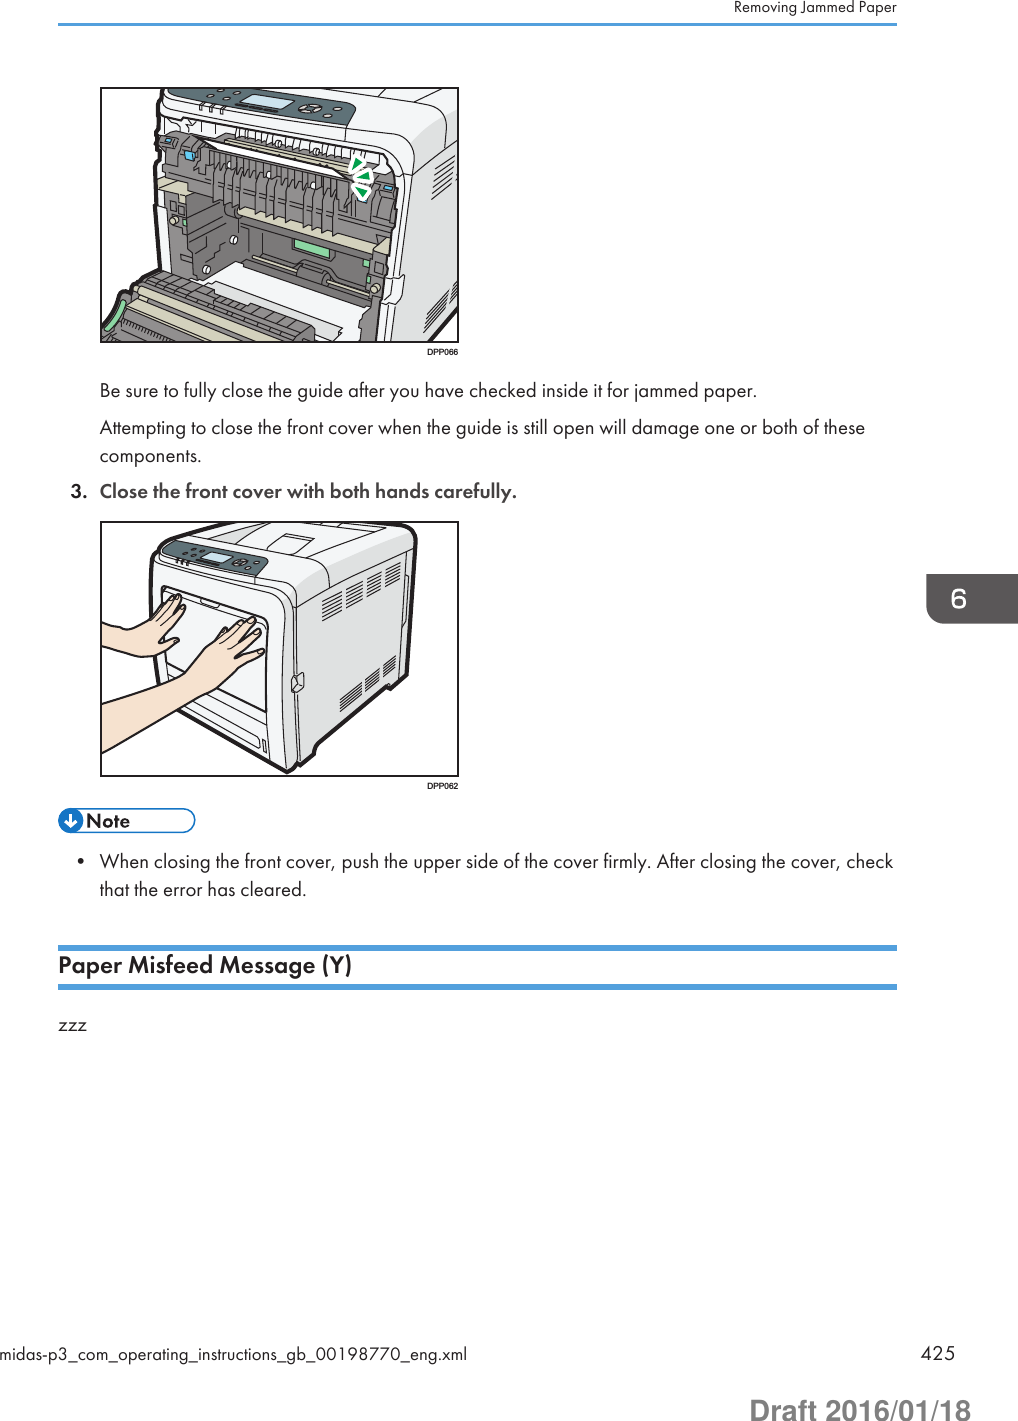
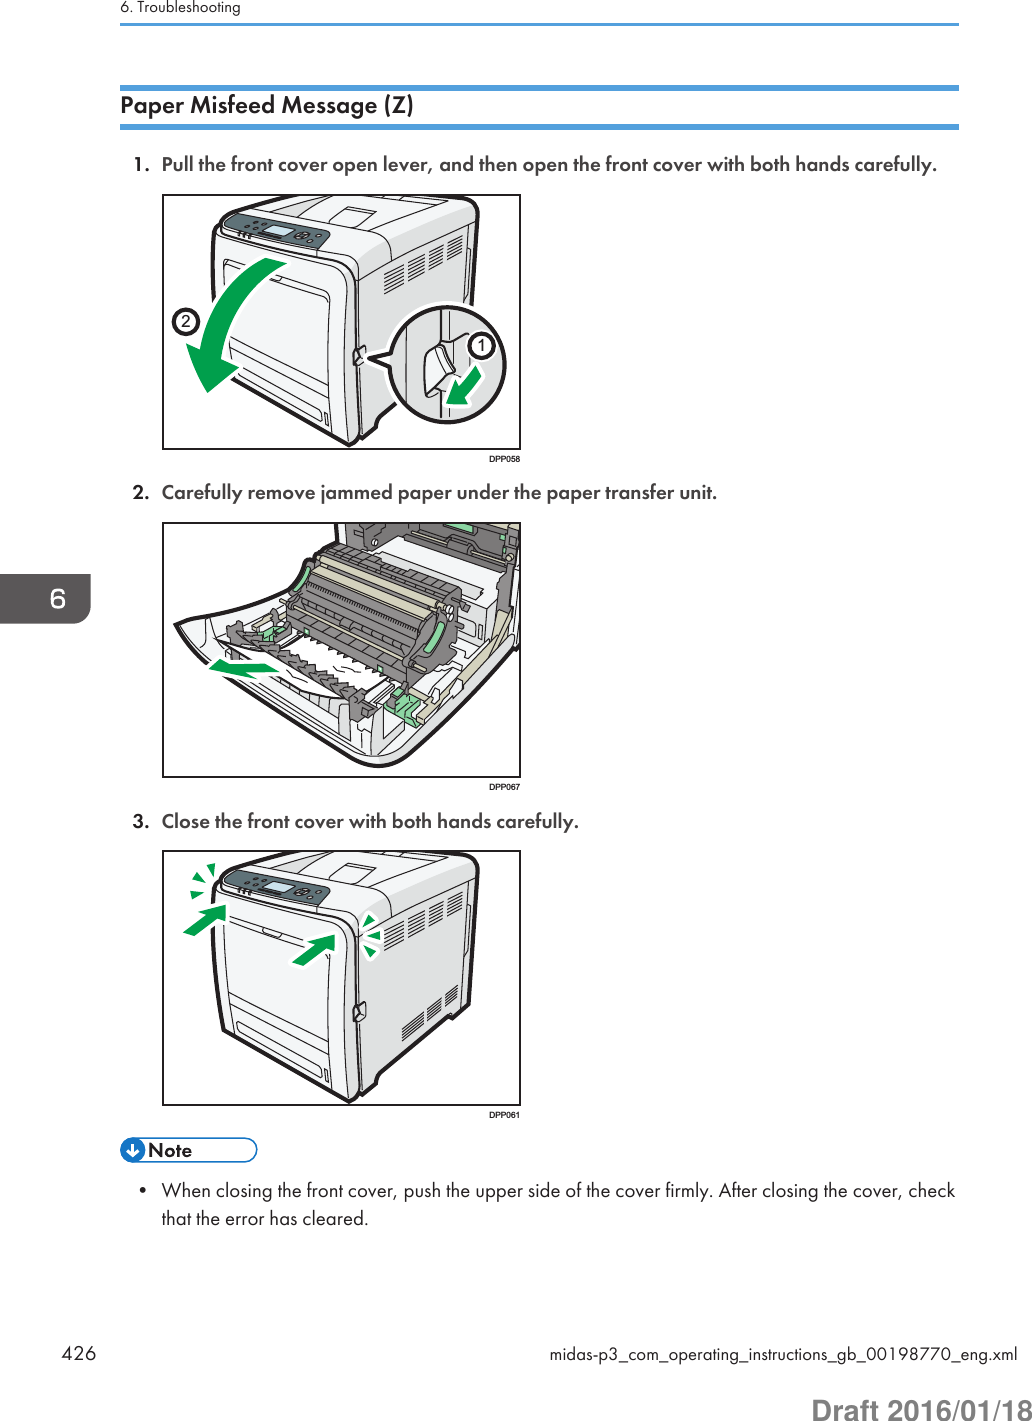

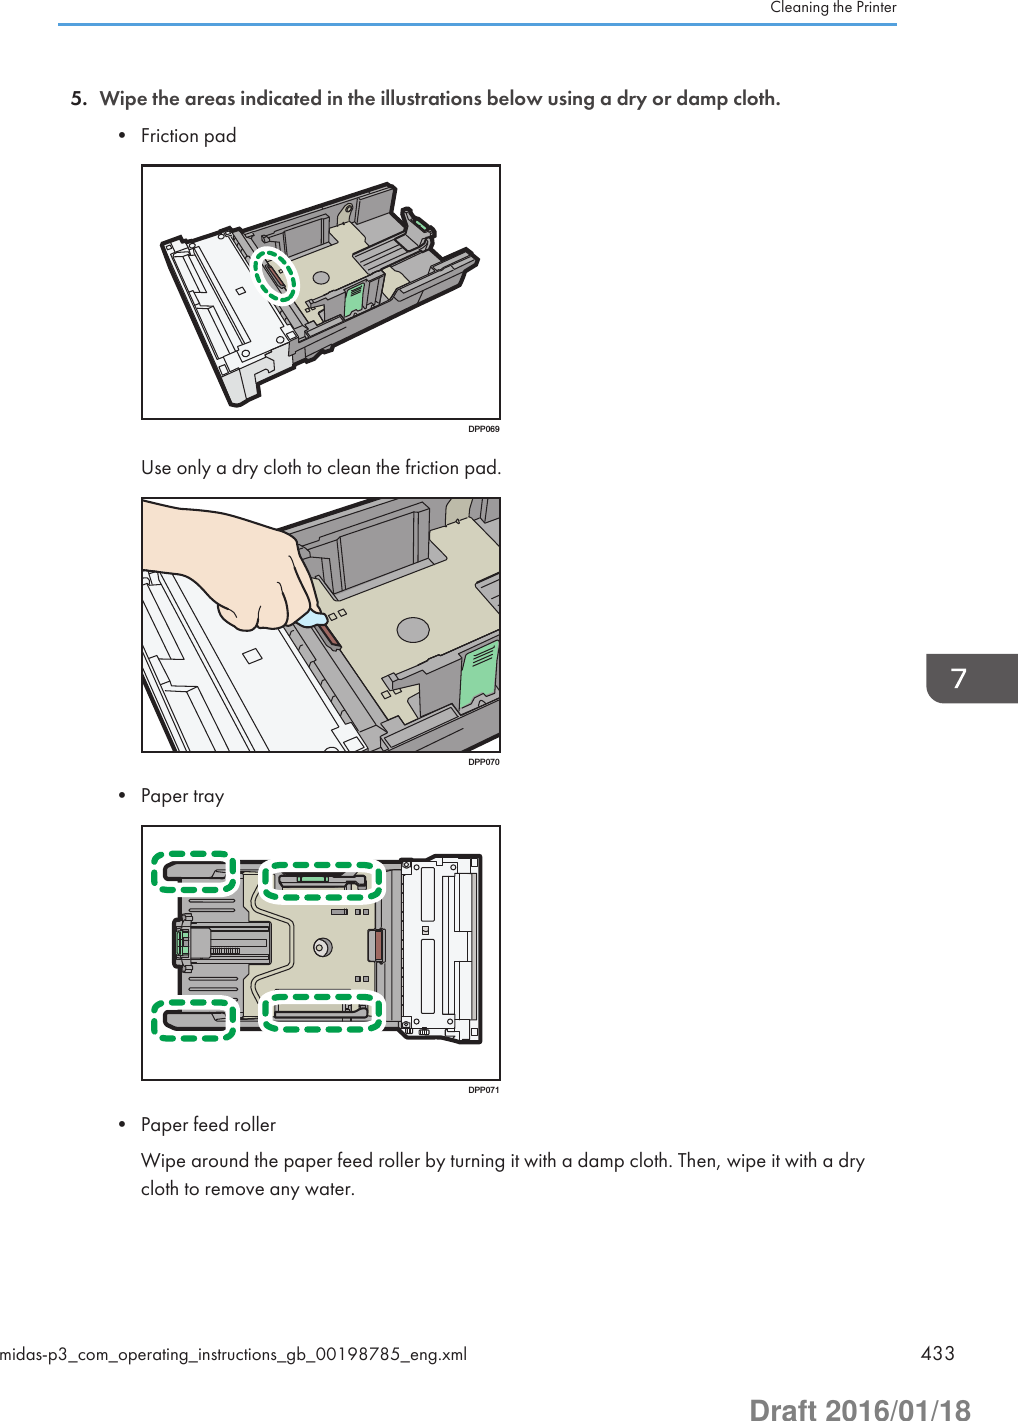
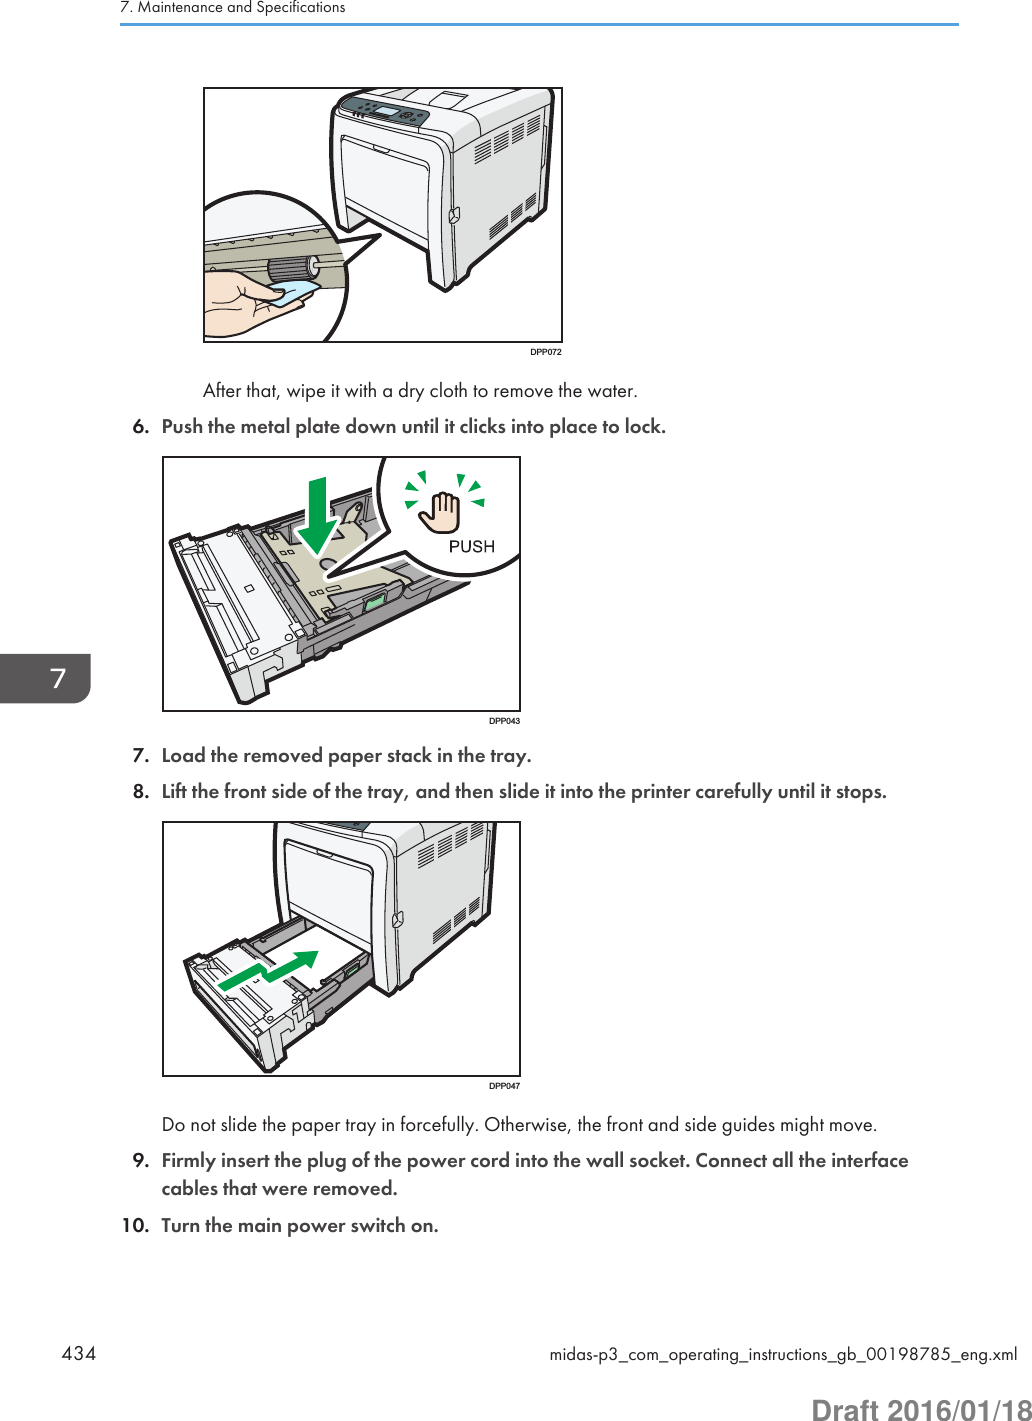
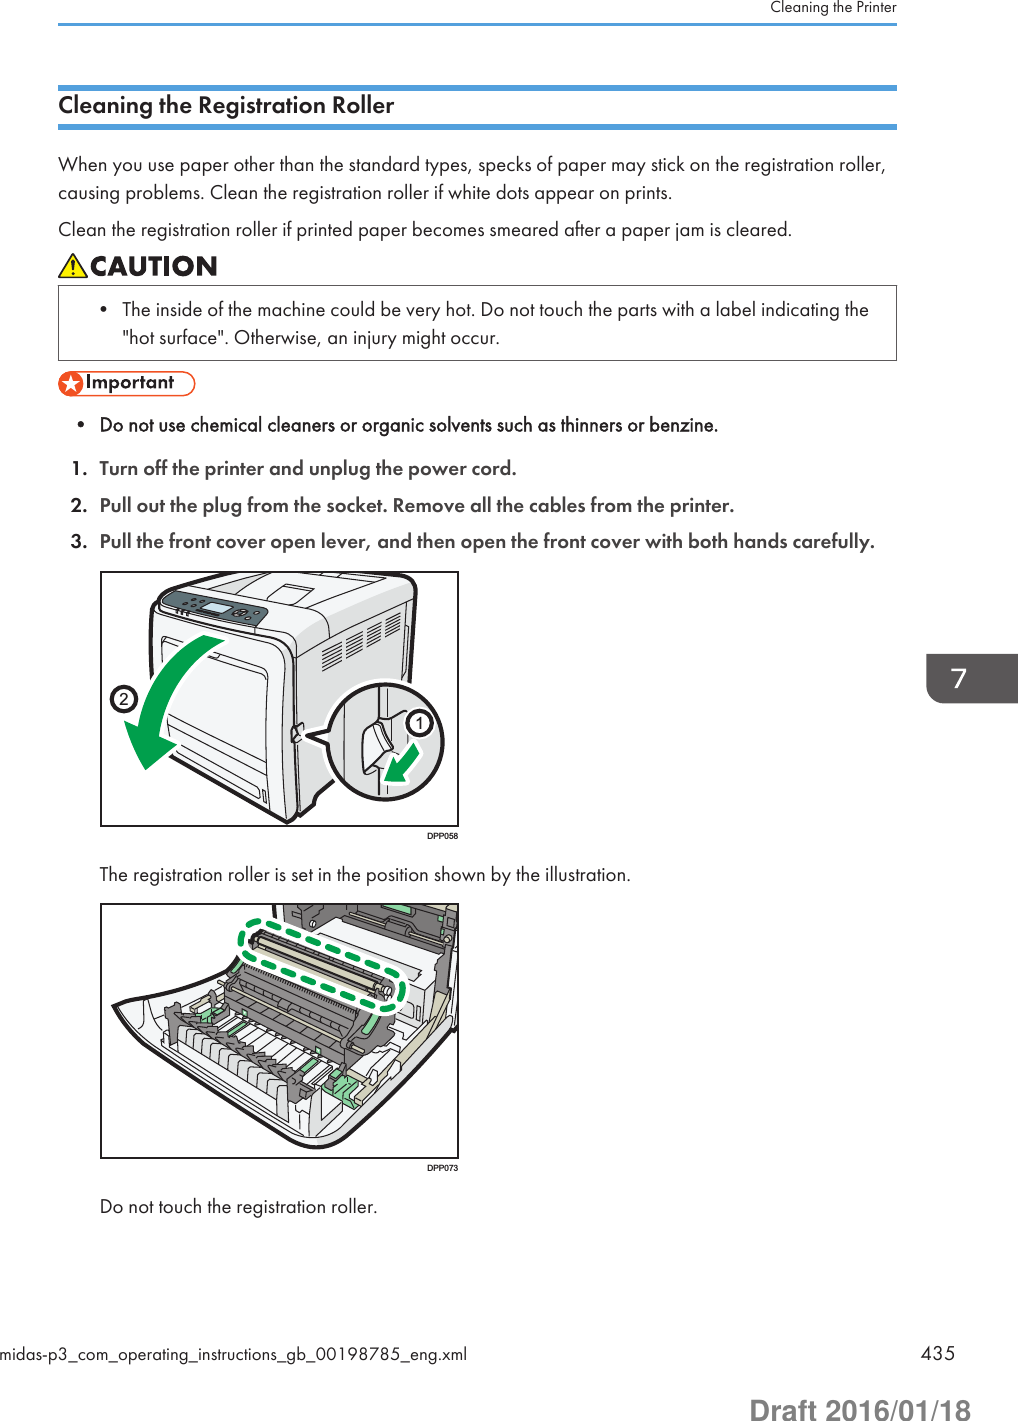
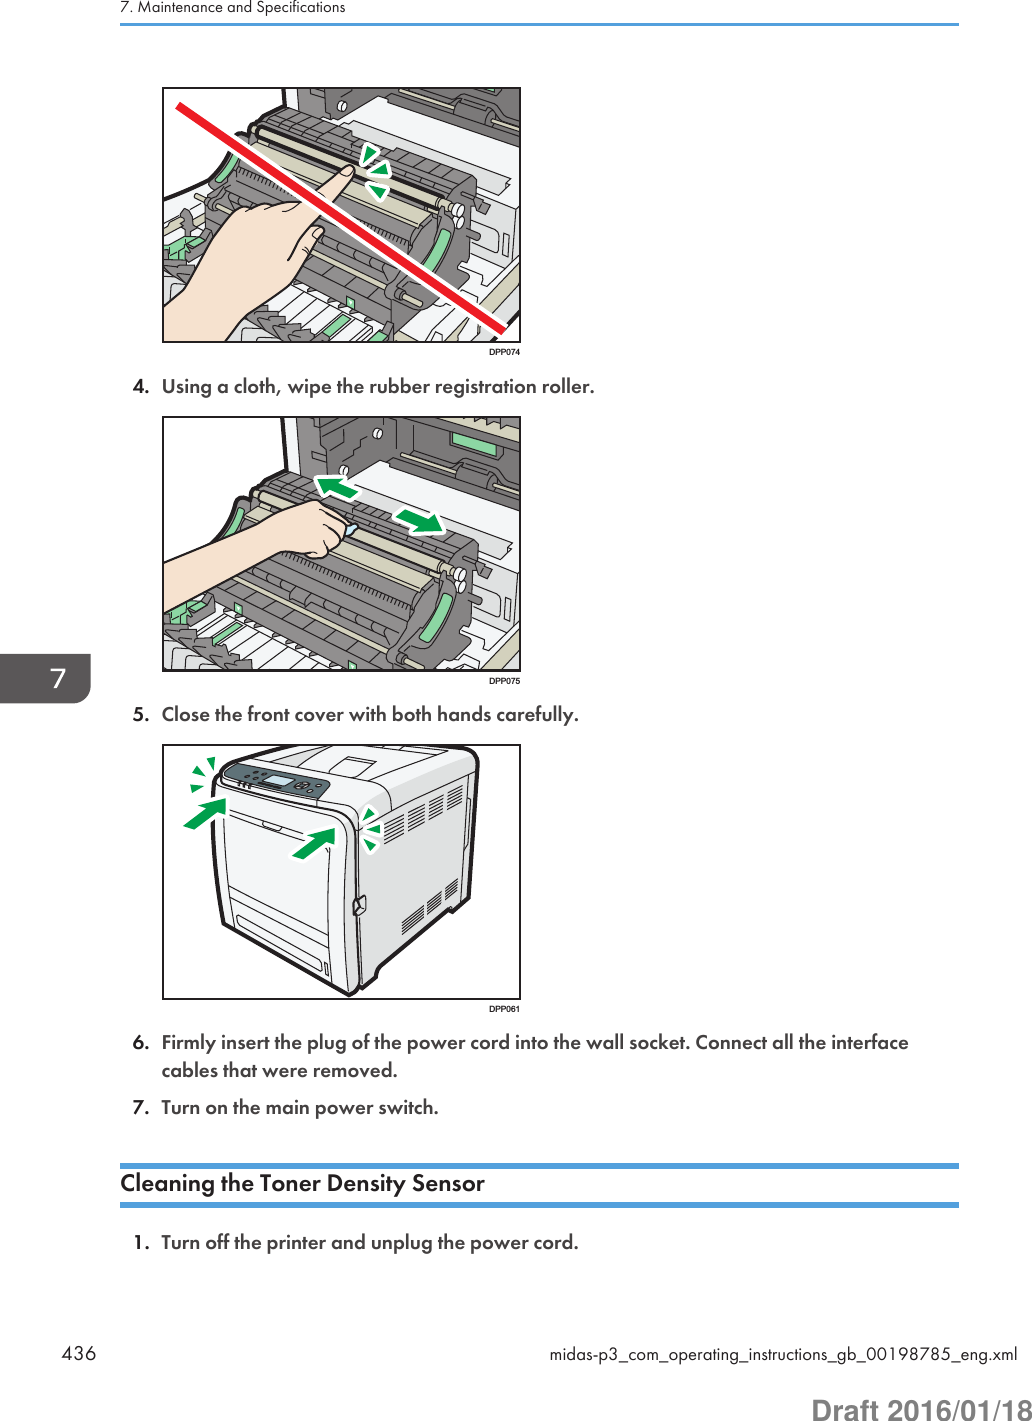
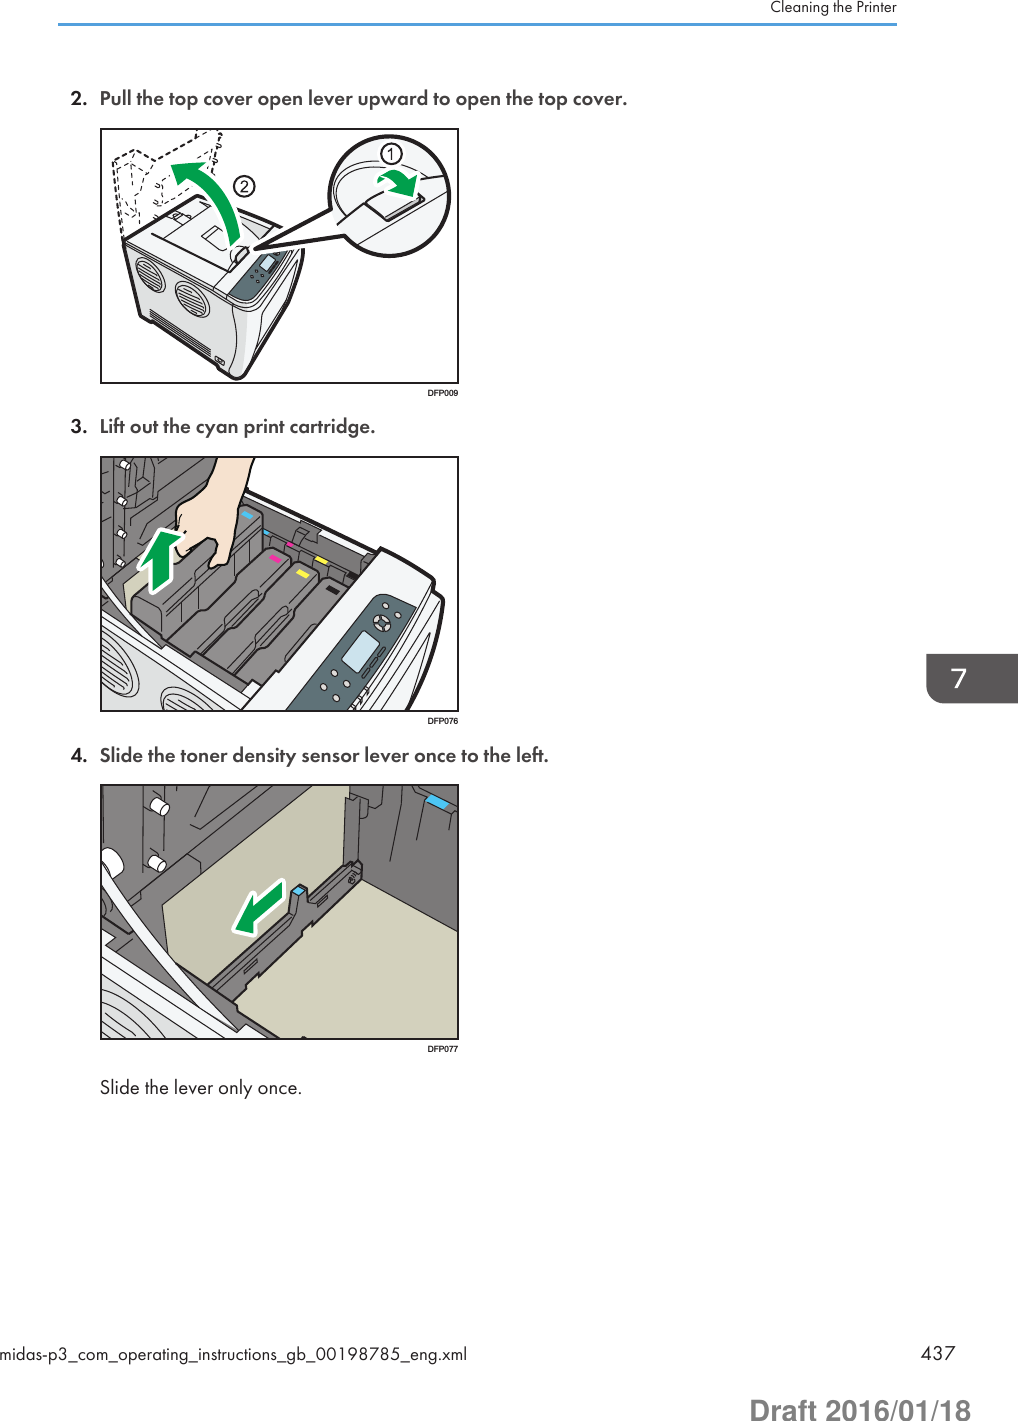
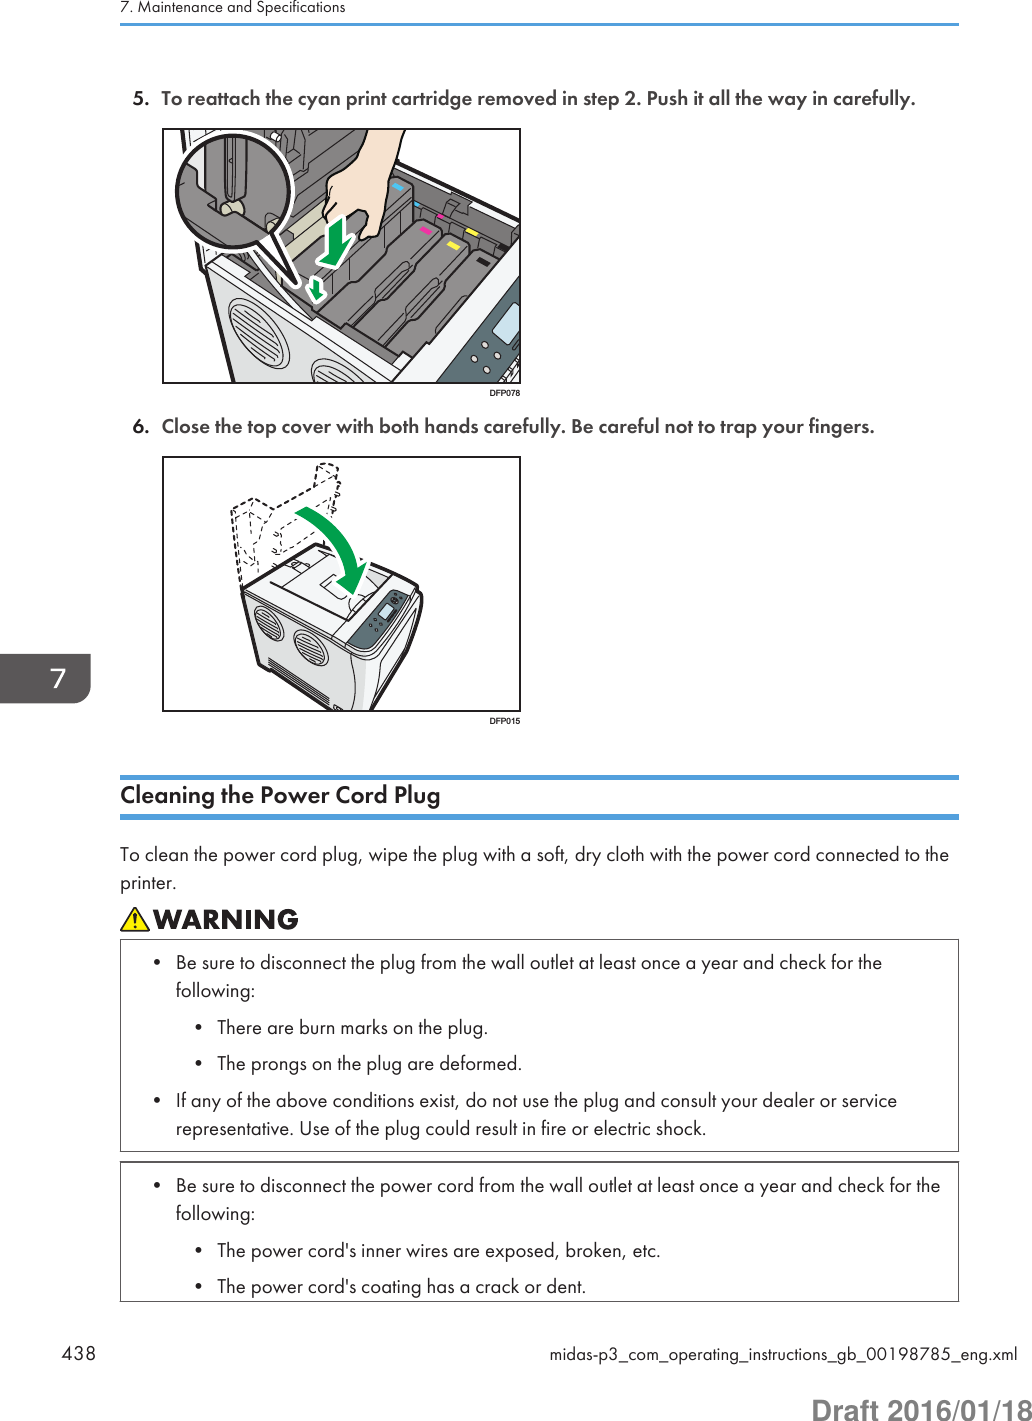
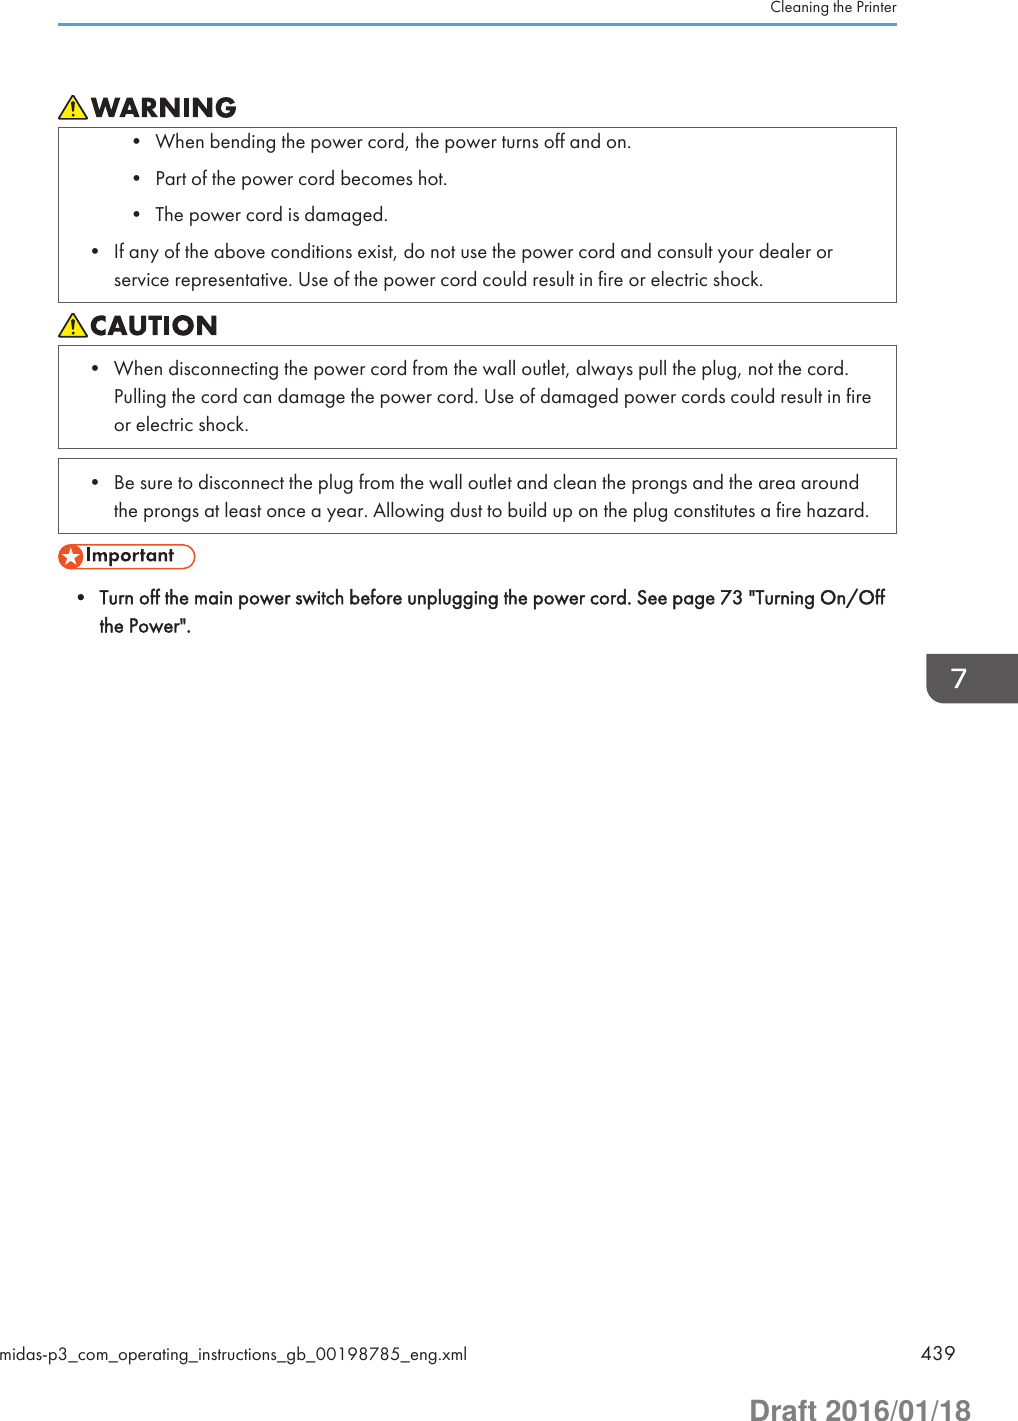
![Adjusting the Color RegistrationAfter moving the printer, printing on thick paper, or printing repeatedly for some time, color degradationmay occur. By performing automatic color adjustment, you can restore optimum print quality.Press the [Menu] key, and then select the setting items using the [ ] or [ ] key.1. Select [Maintenance] Press [OK]2. Select [Quality Maintenance] Press [OK]3. Select [Color Registration] Press [OK]4. Select [Auto Adjust] Press [OK]5. Press [OK]Automatic color adjustment begins.Auto color registration takes about 30 seconds.A confirmation message appears when the adjustment is complete.6. Press [Exit]1. Press the [User Tools] key, and then adjust the color registration.[Maintenance: Image] [Color Registration] [Start]Automatic color adjustment begins.Auto color registration takes about 30 seconds.A confirmation message appears when the adjustment is complete.2. Press [Exit]7. Maintenance and Specifications440 midas-p3_com_operating_instructions_gb_00198791_eng.xmlDraft 2016/01/18](https://usermanual.wiki/Ricoh/PRSPC342DN1.BBP-PRSPC342DN1-User-Manual-4/User-Guide-2978046-Page-200.png)
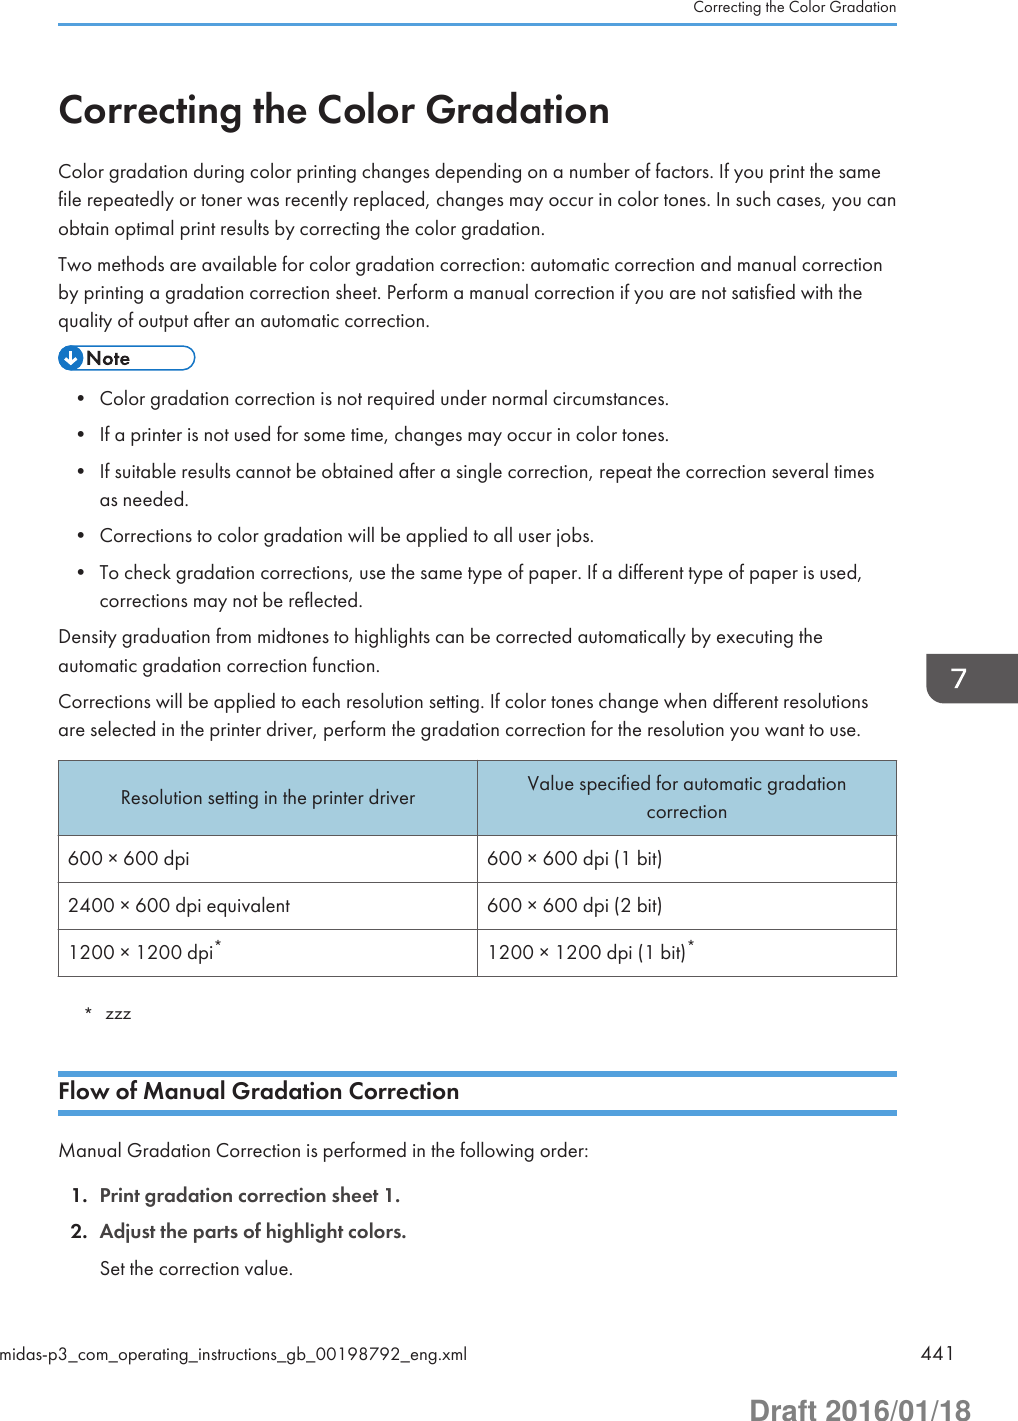
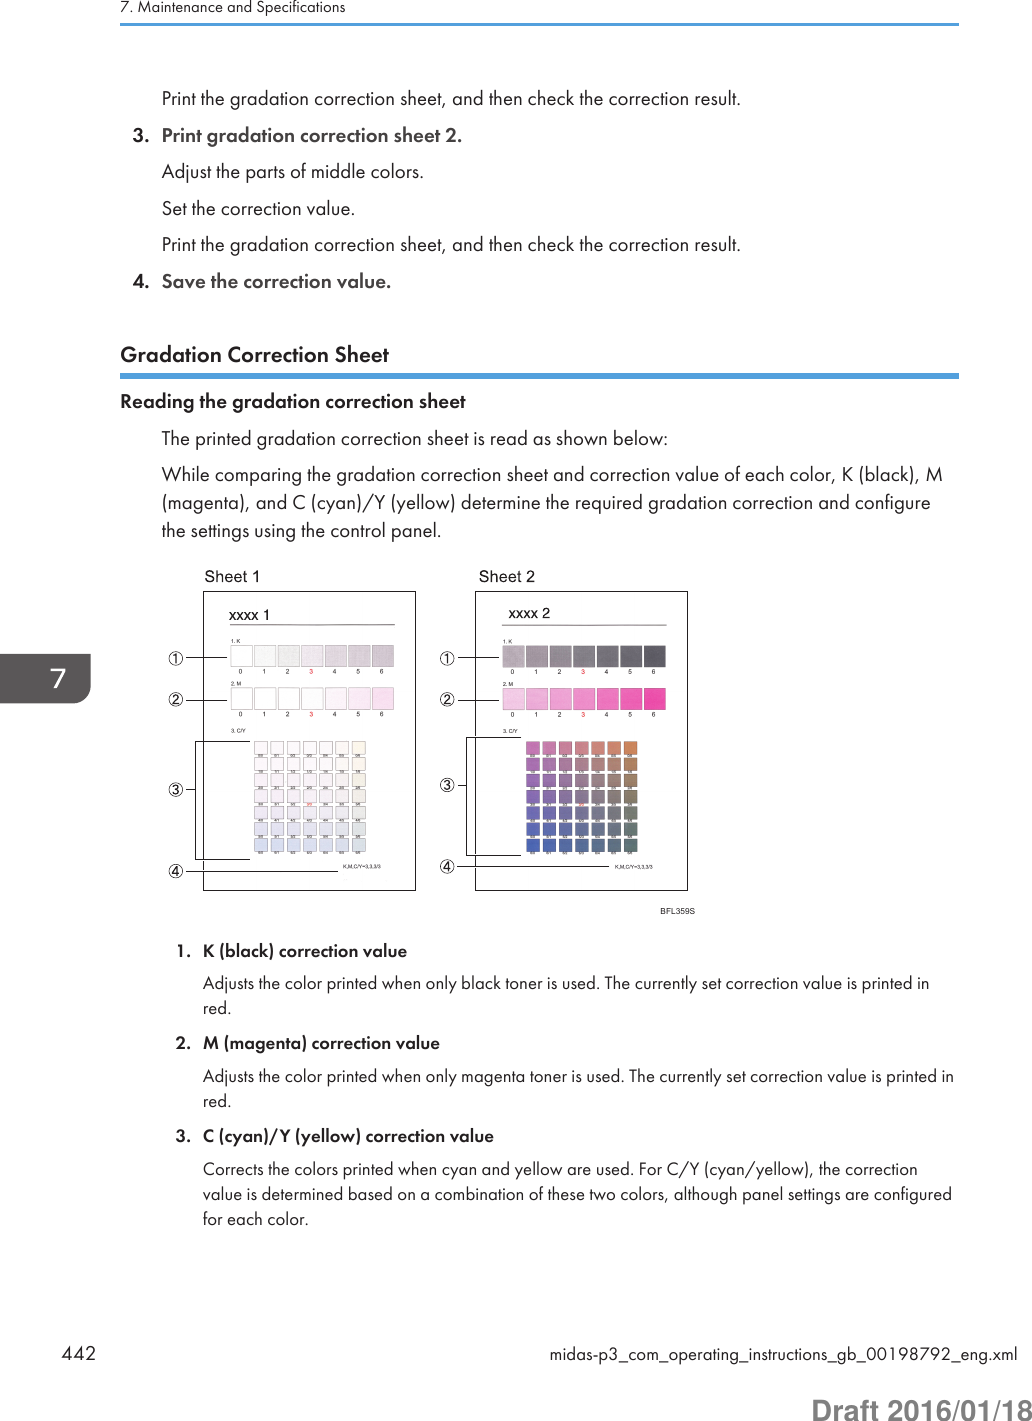
![4. Setting valueThe value displayed is the one currently set when the gradation correction sheet is printed. This valuematches the one set on the control panel.Setting Gradation Correction ValuesCorrect the gradation in two areas: bright areas (highlights), and medium areas (midtones). [Print TestPattern 1] or [Print Test Pattern 1 for Calibration] is used to set the correction value for highlights, and[Print Test Pattern 2] or [Print Test Pattern 2 for Calibration] is used for mid tones.Press the [Menu] key, and then select the setting items using the [ ] or [ ] key.1. Select [Maintenance] Press [OK]2. Select [Quality Maintenance] Press [OK]3. Select [Color Calibration] Press [OK]4. Select [Adj.Auto Dens.] Press [OK]A confirmation message appears. Press [OK] to adjust Auto Density.A confirmation message appears when the adjustment is complete. Press [Exit].The display returns to the [Color Calibration] screen.5. Select [Print Test Pattern 1] Press [OK]6. Press [Print].7. Compare the colors printed on gradation correction sheet 1 with the colors you want toreproduce.When the selected sheet is printed, a confirmation message will appear.8. Press [Continue].9. Select the color you want to adjust Press [OK]10. Adjust the correction value Press [OK]11. Press [Result].12. Press [Print].13. Check the result by printing the calibration sheet.14. Press [Yes].15. Select [Print Test Pattern 2] Press [OK]Adjust the midtones on gradation correction sheet 2 by repeating the procedure you used to adjustthe color values on gradation correction sheet 1.Correcting the Color Gradationmidas-p3_com_operating_instructions_gb_00198792_eng.xml 443Draft 2016/01/18](https://usermanual.wiki/Ricoh/PRSPC342DN1.BBP-PRSPC342DN1-User-Manual-4/User-Guide-2978046-Page-203.png)
![1. Press the [User Tools] key, and then correct the gradation.[Maintenance: Image] [Color Calibration] [Adjust Auto Density] [Start]The confirmation message appears when complete. Press [Exit].2. Print the selected sheet, and then correct the gradation.[Print Test Pattern 1 for Calibration] or [Print Test Pattern 2 for Calibration] Select the color youwant to adjust Adjust the correction value for the selected color [OK]Enter the value between 0 and 6.3. Check the result by printing the calibration sheet, and then save the settings.[Print Result] [Yes]Resetting the Gradation Correction Value to the Default ValuePress the [Menu] key, and then select the setting items using the [ ] or [ ] key.1. Select [Maintenance] Press [OK]2. Select [Quality Maintenance] Press [OK]3. Select [Color Calibration] Press [OK]4. Select [Reset] Press [OK]5. Press [Yes]1. Press the [User Tools] key, and then reset the gradation correction value to the defaultvalue.[Maintenance: Image] [Color Calibrt.] [Reset Setting] [OK]The confirmation message appears when complete. Press [Exit].7. Maintenance and Specifications444 midas-p3_com_operating_instructions_gb_00198792_eng.xmlDraft 2016/01/18](https://usermanual.wiki/Ricoh/PRSPC342DN1.BBP-PRSPC342DN1-User-Manual-4/User-Guide-2978046-Page-204.png)
![Adjusting Printing PositionYou can adjust the printing position. Normally you do not need to update the printing position.However, updating is useful in some cases when the optional paper feed unit is installed."Horizontal" paper is perpendicular to the feed direction. "Vertical" means paper is parallel to the paperfeed direction.Press the [Menu] key, and then select the setting items using the [ ] or [ ] key.1. Select [Maintenance] Press [OK]2. Select [Quality Maintenance] Press [OK]3. Select [Registration] Press [OK]4. Select [Prt.Test Sheet] Press [OK]5. Select the tray you want to adjust Press [OK]6. Print the test sheet to preview the settings.Use this sheet to check the current print position.7. Press the [Escape] key until the screen returns to the [Registration] menu.8. Select [Adjustment] Press [OK]9. Select the tray and feed direction you want to adjust Press [OK]Adjusting Printing Positionmidas-p3_com_operating_instructions_gb_00198796_eng.xml 445Draft 2016/01/18](https://usermanual.wiki/Ricoh/PRSPC342DN1.BBP-PRSPC342DN1-User-Manual-4/User-Guide-2978046-Page-205.png)
![10. Enter to change the registered value (mm) Press [OK]Increase the value to move the print area in the direction indicated by the "+" symbol in thediagram below. Decrease the value to move the print area in the direction indicated by the "-"symbol.CQT692: Print Area: Paper Feed Direction11. Print the test sheet to check the adjustment result.1. Press the [User Tools] key, and then print the test sheet.[Maintenance: Image] [Adjust Print Position] [Print Test Sheet] Select the tray you want toadjust7. Maintenance and Specifications446 midas-p3_com_operating_instructions_gb_00198796_eng.xmlDraft 2016/01/18](https://usermanual.wiki/Ricoh/PRSPC342DN1.BBP-PRSPC342DN1-User-Manual-4/User-Guide-2978046-Page-206.png)
![2. Print the test sheet to preview the settings.Use this sheet to check the current print position.3. Press [Exit].4. Adjust the printing position.[Adjust Position] Select the tray you want to adjust Enter to change the registered value(mm) [OK] [Exit]Increase the value to move the print area in the direction indicated by the "+" symbol in thediagram below. Decrease the value to move the print area in the direction indicated by the "-"symbol.Adjusting Printing Positionmidas-p3_com_operating_instructions_gb_00198796_eng.xml 447Draft 2016/01/18](https://usermanual.wiki/Ricoh/PRSPC342DN1.BBP-PRSPC342DN1-User-Manual-4/User-Guide-2978046-Page-207.png)
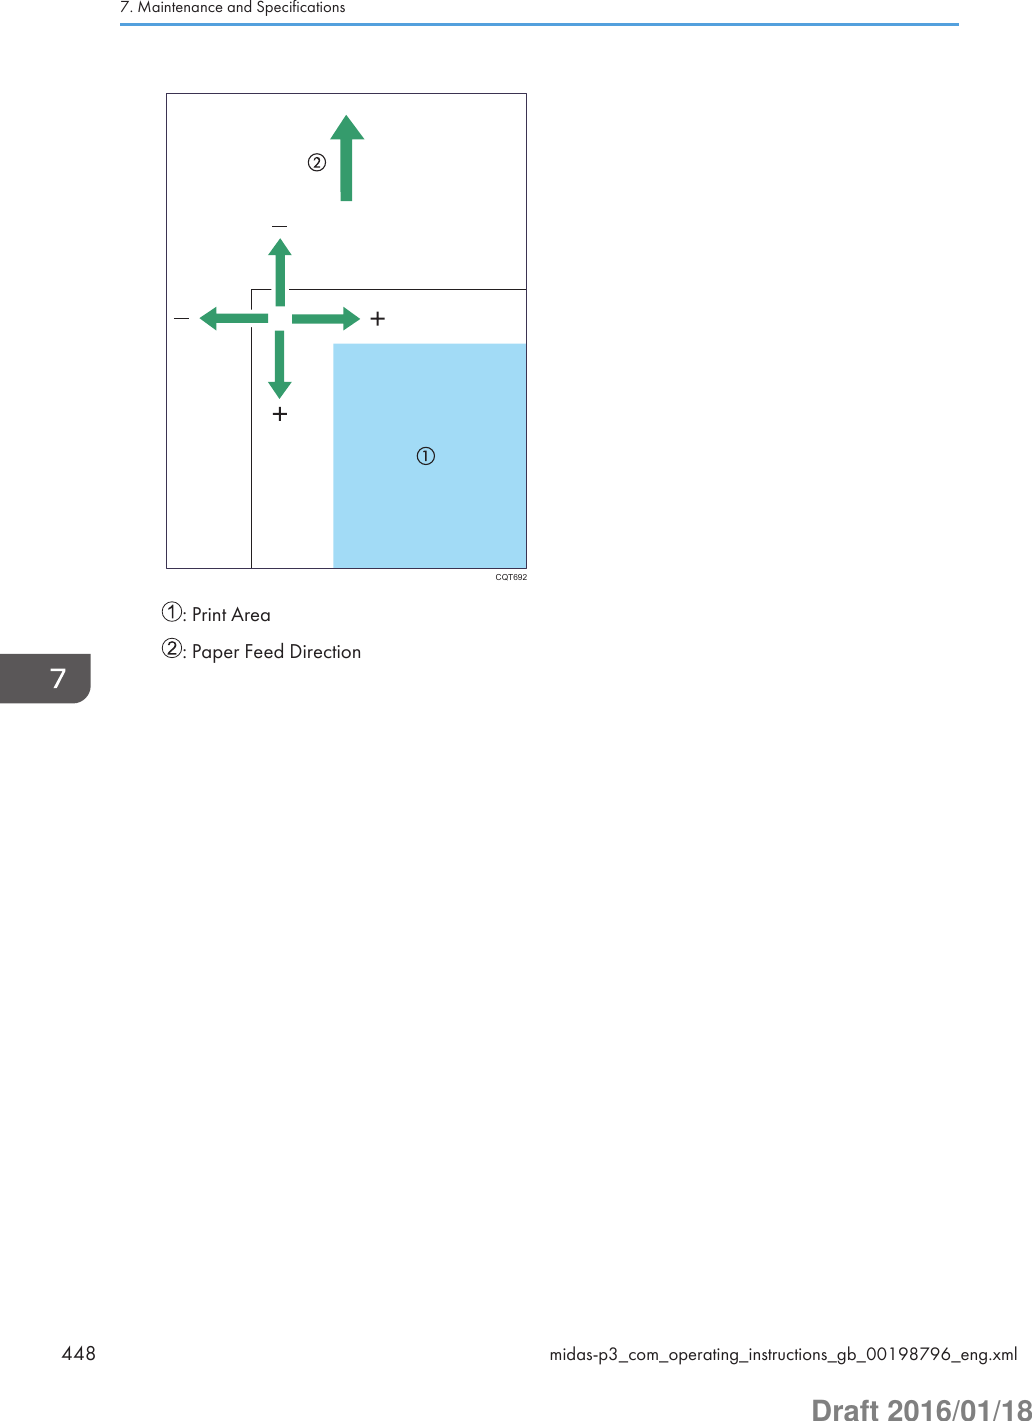
![• When removing jammed paper or replacing toner, avoid getting toner (new or used) on yourskin. If toner comes into contact with your skin, wash the affected area thoroughly with soap andwater.• Actual printable numbers vary depending on image volume and density, number of pages printedat a time, paper type and size, and environmental conditions such as temperature and humidity.Toner quality degrades over time. Early replacement of the print cartridge might be necessary.Therefore, we recommend you always keep a new print cartridge ready.• The print cartridge might need to be replaced even if there is toner remaining in it. This is due todepletion or wear of other components.• Do not allow paper clips, staples, or other small metallic objects to fall inside the printer.• Do not expose the print cartridge without its cover to direct sunlight for a long time.• When removing print cartridge, be careful not to drop it.• Store print cartridges in a cool dark place.• SP C340DN:For details about installing the toner, see the instructions on the package of the toner.• SP C342DN:Replace the print cartridge when the following message appears on the display. Follow theinstruction on the screen regarding how to replace the print cartridge.Replace the print cartridge when the following messages appear on the display:• SP C340DN:"Out of toner"• SP C342DN:"No toner. Replace Toner Cartridge.""No color toner. Color toner is required to print in black & white with the current paper type.Replace the color Print Cartridge or press [Job Reset] to cancel printing."When the following messages appear on the display, the toner has almost run out. Have a replacementprint cartridge at hand.• SP C340DN:" Toner is almost empty."• SP C342DN:"Toner Cartridge is almost empty. Replace Toner Cartridge."7. Maintenance and Specifications450 midas-p3_com_operating_instructions_gb_00198797_eng.xmlDraft 2016/01/18](https://usermanual.wiki/Ricoh/PRSPC342DN1.BBP-PRSPC342DN1-User-Manual-4/User-Guide-2978046-Page-210.png)