Ricoh RFAPL02 Full-Color MFP User Manual 2 of 3
Ricoh Company Ltd Full-Color MFP 2 of 3
UserManual.wiki
>
Ricoh
>
RFAPL02 User Manual
>
User Manual 2 of 3
Contents
1.
User Manual 1 of 3
2.
User Manual 2 of 3
3.
User Manual 3 of 3
User Manual 2 of 3
Navigation menu
Upload a User Manual
Namespaces
Wiki Guide
HTML
PDF
Info
Views
User Manual
Discussion / Help
Navigation

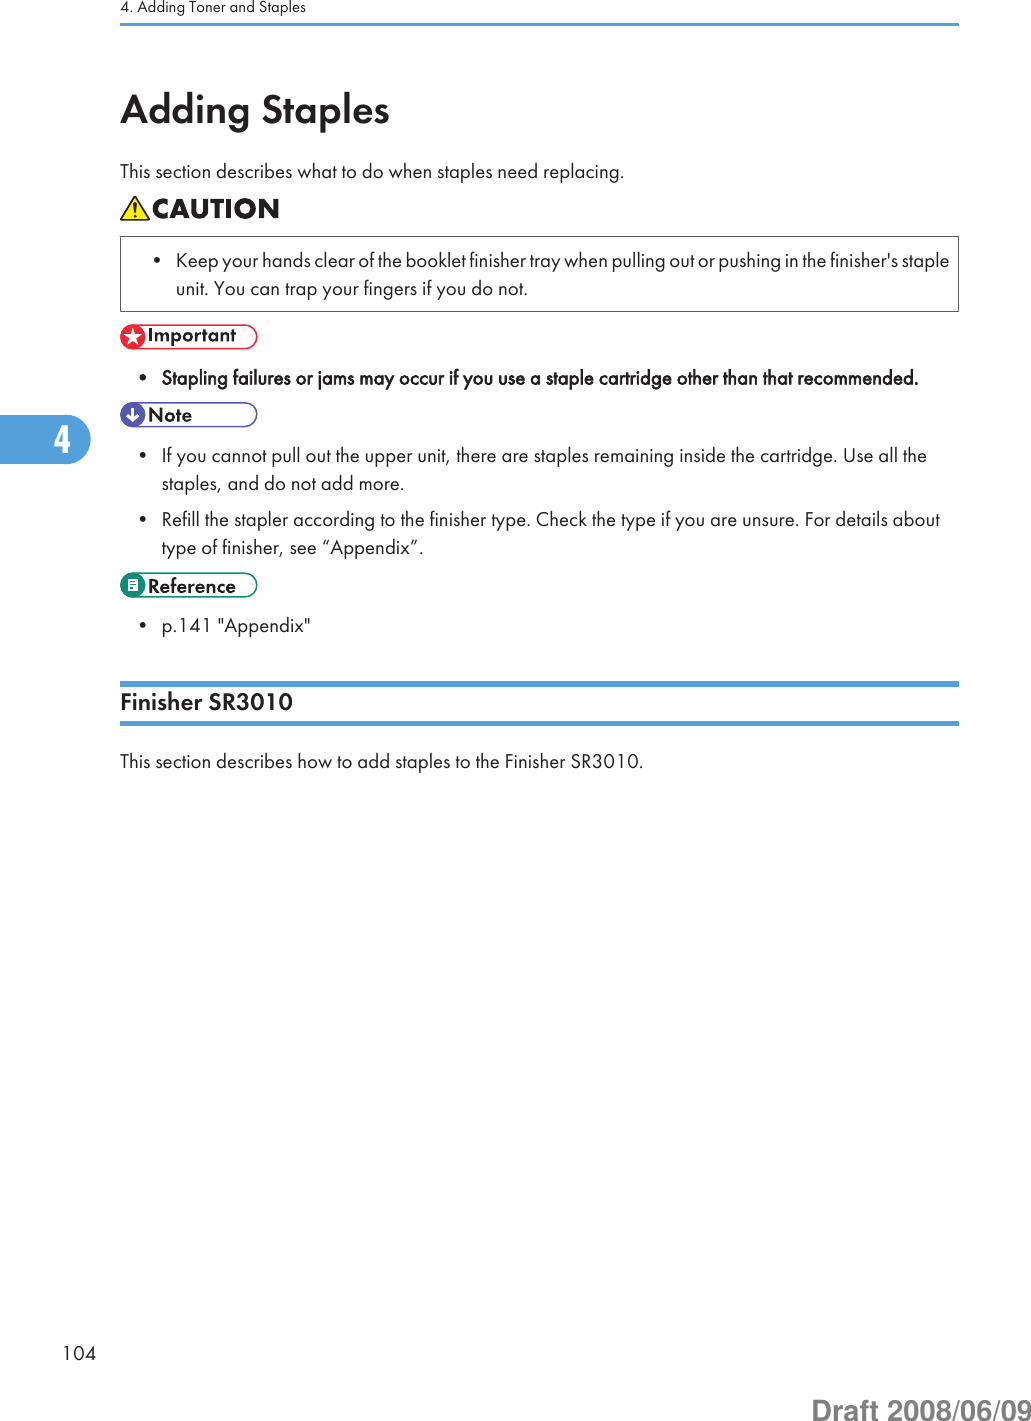
![• Always add toner when the machine instructs you.• Fault may occur if you use toner other than the recommended type.• When adding toner, do not turn off the operation switch. If you do, settings will be lost.• Do not repeatedly install and remove toner cartridges. This will result in toner leakage.• Do not shake the removed toner cartridge. Remaining toner might scatter.• If the message " Check toner cartridge replacement(s)." appears, the toner has almost run out. Havea replacement toner cartridge at hand.• You can check name of the required toner name and the replacement procedure using the " AddToner" screen.• Press [System Status] to check contact number where you can order supplies. See “Checking MachineStatus and Settings”, Troubleshooting .• You can add all four color toners in the same way.Replacing TonerThis section describes how to remove toner.BHL001S4. Adding Toner and Staples1024Draft 2008/06/09](https://usermanual.wiki/Ricoh/RFAPL02.User-Manual-2-of-3/User-Guide-968956-Page-2.png)
![Sending Faxes or Scanned Documents When Toner Has Run OutWhen the machine has run out of toner, the indicator on the display lights. Note that even if there is notoner left, you can still send faxes or scanned documents.• If number of communications executed after the toner has run out and not listed in the automaticallyoutput Journal exceeds 200, communication is not possible.1. Make sure the machine is in facsimile or scanner mode.2. Press [Exit], and then perform transmission operation.The error message disappears.• Any reports are not printed.• If the fax or scanner screen does not appear in step 1, press the [Facsimile] key or the [Scanner] key.Used TonerToner cannot be re-used.Bring the stored used container to your sales representative or service representative for recycling throughour recycling system. If you discard it on your own, treat it as general plastic waste material.Adding Toner1034Draft 2008/06/09](https://usermanual.wiki/Ricoh/RFAPL02.User-Manual-2-of-3/User-Guide-968956-Page-3.png)


![BJB030S• When entering uppercase or lowercase letters continuously, use [Shift Lock] to lock the case.• You can also use the number keys to enter numbers, regardless of mode.How to Enter TextThis section explains text entry more specifically.Entering lettersThis section explains how to enter letters.1. Press [Shift] to switch between uppercase and lowercase.2. Press the letters you want to enter.Deleting charactersThis section explains how to delete characters.1. Press [Backspace] or [Delete All] to delete characters.5. Entering Text1165Draft 2008/06/09](https://usermanual.wiki/Ricoh/RFAPL02.User-Manual-2-of-3/User-Guide-968956-Page-16.png)
![Adding user textYou can select and use a User Text that is registered in [Program / Change / Delete User Text].For the registration procedure under Program / Change / Delete User Text, see “System Settings”, Networkand System Settings Guide .1. Press [User Text].2. Select the User Text you want to use.Entering Text1175Draft 2008/06/09](https://usermanual.wiki/Ricoh/RFAPL02.User-Manual-2-of-3/User-Guide-968956-Page-17.png)

![6. Operating InstructionsThis chapter describes the Operating Instructions of this machine.Installing Operating InstructionsThe supplied “Manuals” and “Manuals for Administrators” CD-ROMs contain HTML format manuals. Foreasy access, we recommend you install the manuals on a computer.• The “Manuals for Administrators” CD-ROM that includes Security Reference is for administratorsof the machine.• The system requirements for installing the manuals are as follows:• Operating system: Windows 2000/XP/Vista, Windows Server 2003 or 2003 R2• Minimum display resolution: 800 × 600 pixels• Recommended browsers:• Microsoft Internet Explorer 4.01 SP2 or later• Netscape 6.2 or later• Non-recommended browsers can display the simplified manual only.• HTML manuals can also be viewed on a Macintosh.• Hyperlinks might not work and referenced sections might not appear unless all the HTML manualshave been installed. To display referenced sections, be sure to install all the HTML manuals.1. Select a language and a product, and then click [OK].2. Click [Install Manuals].If you want to read manuals from the CD-ROM, click [Read HTML manuals] or [Read PDF manuals].3. Install the manual you require according to the displayed instructions.4. When installation is complete, click [Finish].5. Click [Finish].• If you cannot install a manual, copy the “MANUAL_HTML” folder to your computer's hard drive, andthen run “Setup.exe”.• To delete an installed manual, on the [Start] menu, click [Programs], then [Product Name], and thenuninstall the data.• If you are installing the manuals on a Macintosh, open the “Manuals.htm” file on the CD-ROM.1196Draft 2008/06/09](https://usermanual.wiki/Ricoh/RFAPL02.User-Manual-2-of-3/User-Guide-968956-Page-19.png)
![How to Use the Operating InstructionsThis section explains how to use manuals.Opening from the IconThis section explains how to open a manual using its desktop icon.1. Double-click the icon on your desktop.The browser opens and the manual appears.Opening from the [Start] MenuThis section explains how to open a manual from the [Start] menu.1. On the [Start] menu, point to [Programs] (Windows XP: [All Programs]), then [ProductName], and then click the manual you want to view.The browser opens, and then the manual appears.• Depending on the settings made during installation, menu folder names may differ.How to Use the Operating Instructions1216Draft 2008/06/09](https://usermanual.wiki/Ricoh/RFAPL02.User-Manual-2-of-3/User-Guide-968956-Page-21.png)
![Opening from the CD-ROMThis section explains how to open a manual from the supplied “Manuals” and “Manuals for Administrators”CD-ROMs.1. Click [Read HTML manuals].2. Click the title of the manual you want to view.The browser opens, and then the manual appears.6. Operating Instructions1226Draft 2008/06/09](https://usermanual.wiki/Ricoh/RFAPL02.User-Manual-2-of-3/User-Guide-968956-Page-22.png)
![7. Other User ToolsInitial settings allow you to switch the language as well as checking the number of printed papers bydisplaying the counter.Changing the Display LanguageYou can change the language used on the display. English is set as default.1. Press the [User Tools/Counter] key.BBP015S2. Press [Español].The language is changed to Spanish.1237Draft 2008/06/09](https://usermanual.wiki/Ricoh/RFAPL02.User-Manual-2-of-3/User-Guide-968956-Page-23.png)
![3. Press [Salir].The menu appears in Spanish.7. Other User Tools1247Draft 2008/06/09](https://usermanual.wiki/Ricoh/RFAPL02.User-Manual-2-of-3/User-Guide-968956-Page-24.png)
![InquiryThe Inquiry function lets you check the telephone numbers to contact for repairs, or ordering consumablessuch as toner. Be sure to contact your service engineer to verify the following:Consumables• Telephone No. to order• Toner• Staple• Staple (Center)• TX Stamp NameMachine Maintenance/Repair• Telephone No.• Serial No. of MachineSales Representative• Telephone No.1. Press the [User Tools/Counter] key.BBP015S2. Press [Inquiry].Inquiry information appears.Inquiry1257Draft 2008/06/09](https://usermanual.wiki/Ricoh/RFAPL02.User-Manual-2-of-3/User-Guide-968956-Page-25.png)
![3. Press [Print Inquiry List].4. Press the [Start] key.Inquiry information prints out.5. Press [Exit] twice.7. Other User Tools1267Draft 2008/06/09](https://usermanual.wiki/Ricoh/RFAPL02.User-Manual-2-of-3/User-Guide-968956-Page-26.png)
![Changing Paper Thickness SettingsSelect [Plain Paper 1] or [Plain Paper 2] depending on the type of plain paper.If in System Settings, [Tray Paper Settings], you set “Paper Thickness” to [Plain Paper] for each tray's [PaperType], you must then select [Maintenance], [Plain Paper Setting] and specify either [Plain Paper 1] or [PlainPaper 2], depending on the thickness of the loaded paper.The default setting is Plain Paper 2.• Select [Plain Paper 1] when paper weight is between 60 g/m2 (16 lb.) and 74 g/m2 (20 lb.).• Select [Plain Paper 2] when paper weight is between 75 g/m2 (20 lb.) and 90 g/m2 (21 lb.).1. Press the [User Tools/Counter] key.BBP015S2. Press [Maintenance].Changing Paper Thickness Settings1277Draft 2008/06/09](https://usermanual.wiki/Ricoh/RFAPL02.User-Manual-2-of-3/User-Guide-968956-Page-27.png)
![3. Press [Plain Paper Setting].4. Select the plain paper type for each tray depending on the paper to be set and press [OK].5. Press [Exit].6. Press [Exit].• In System Settings, [Tray Paper Settings], for each tray's [Paper Type] you can specify [Plain Paper],[Middle Thick], [Thick Paper 1], [Thick Paper 2], or [Thick Paper 3]. For details about paper thickness,see “Recommended Paper Sizes and Types”.• p.88 "Recommended Paper Sizes and Types"7. Other User Tools1287Draft 2008/06/09](https://usermanual.wiki/Ricoh/RFAPL02.User-Manual-2-of-3/User-Guide-968956-Page-28.png)
![CounterDisplaying the Total CounterYou can display the total counter value used for all functions.1. Press the [User Tools/Counter] key.BBP015S2. Press [Counter].3. To print a counter list, press [Print Counter List].4. Press the [Start] key.A counter list prints out.Counter1297Draft 2008/06/09](https://usermanual.wiki/Ricoh/RFAPL02.User-Manual-2-of-3/User-Guide-968956-Page-29.png)


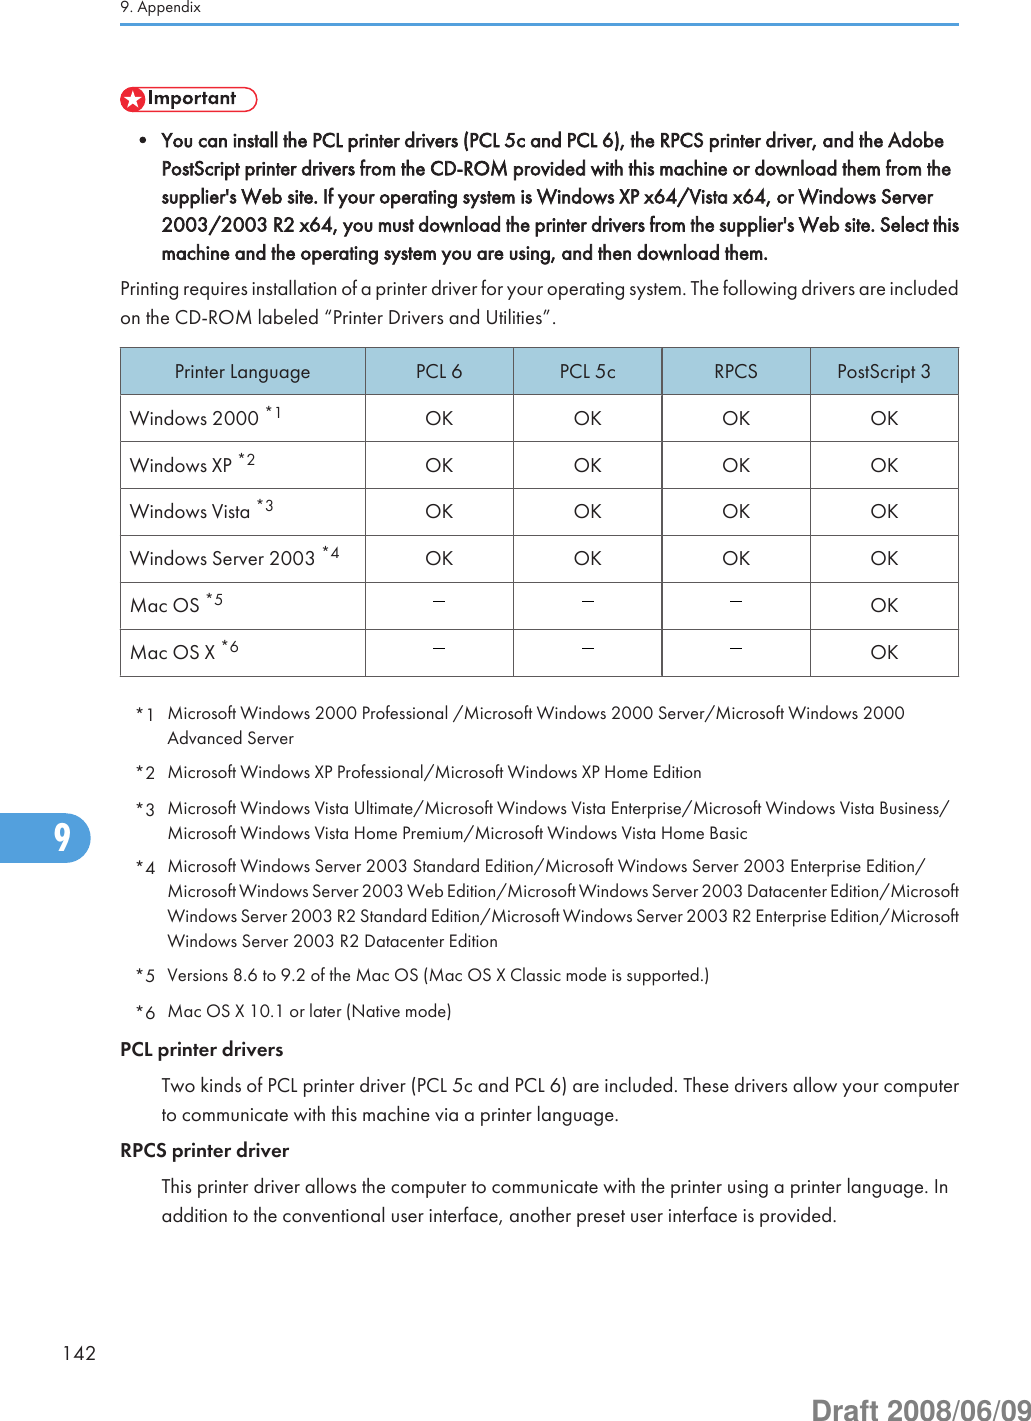
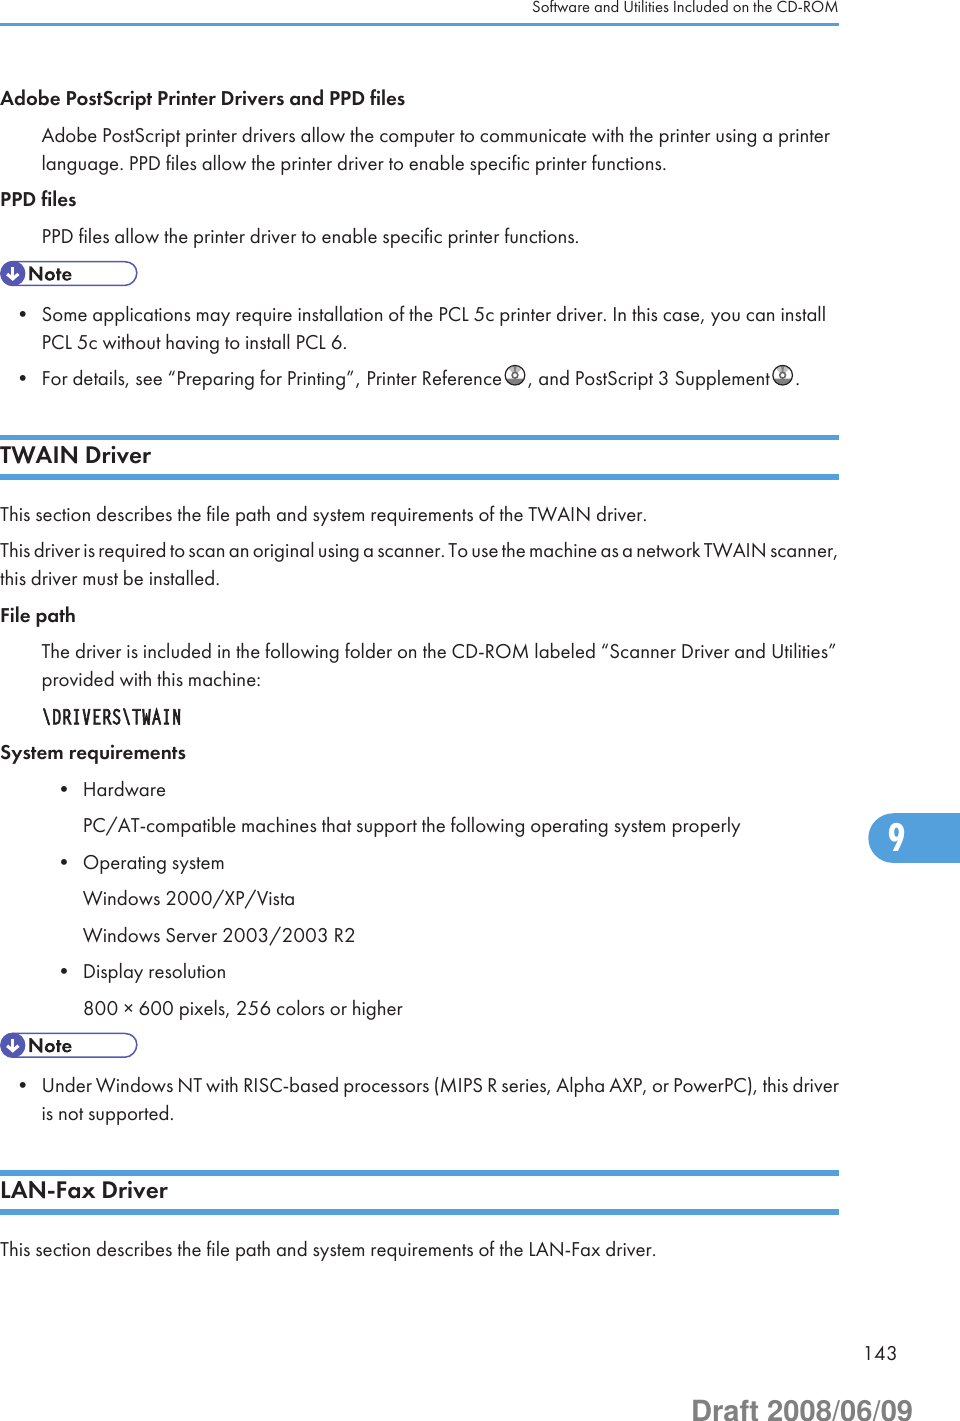
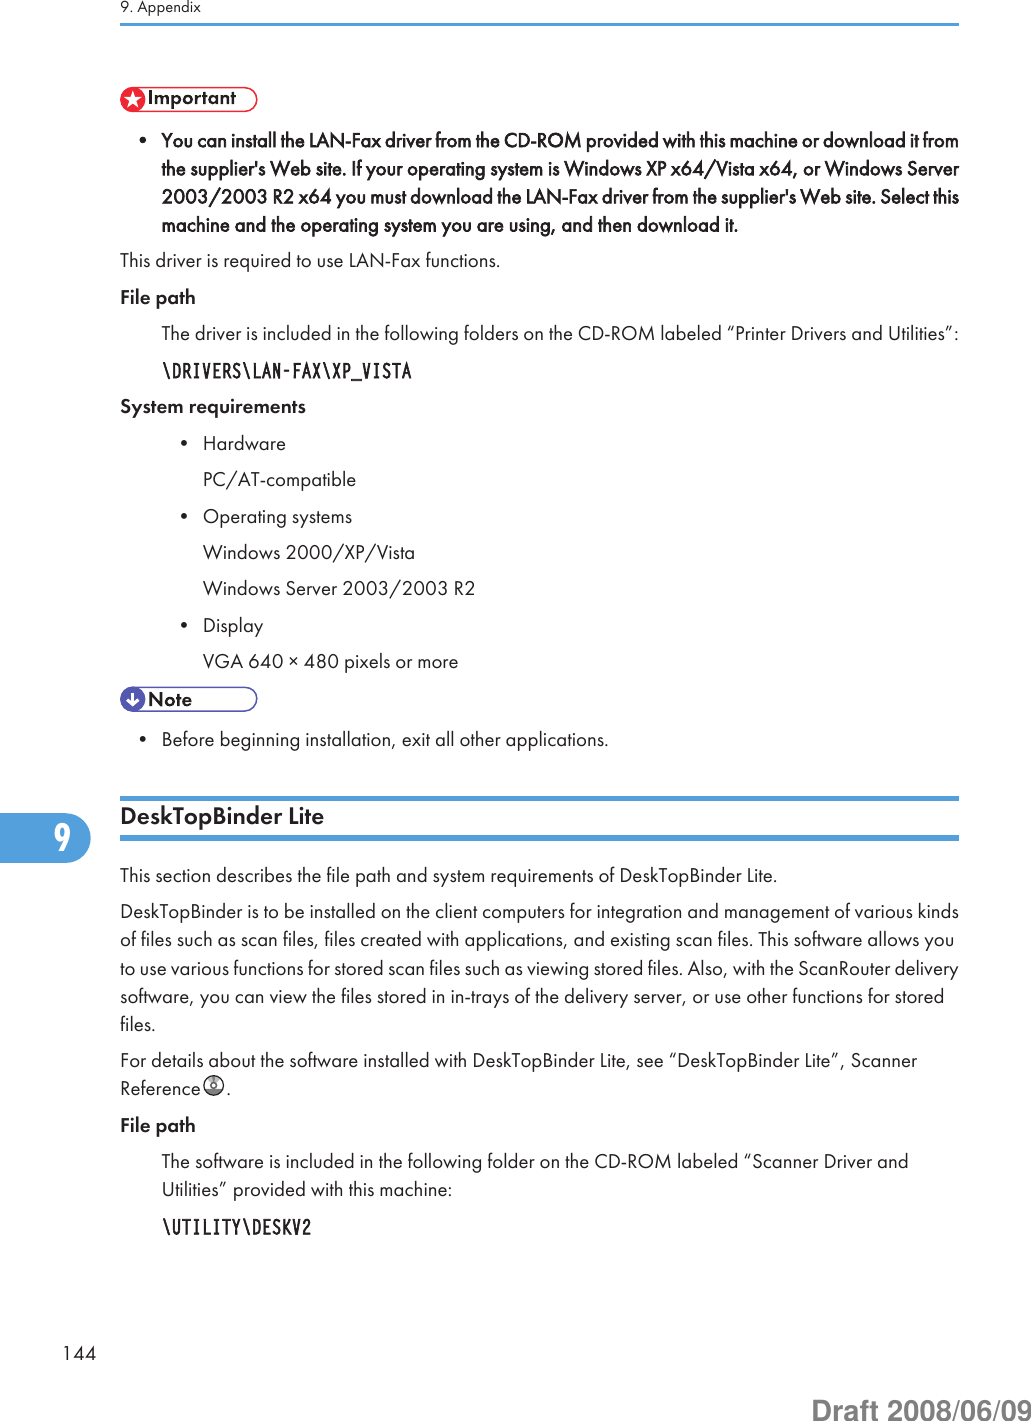
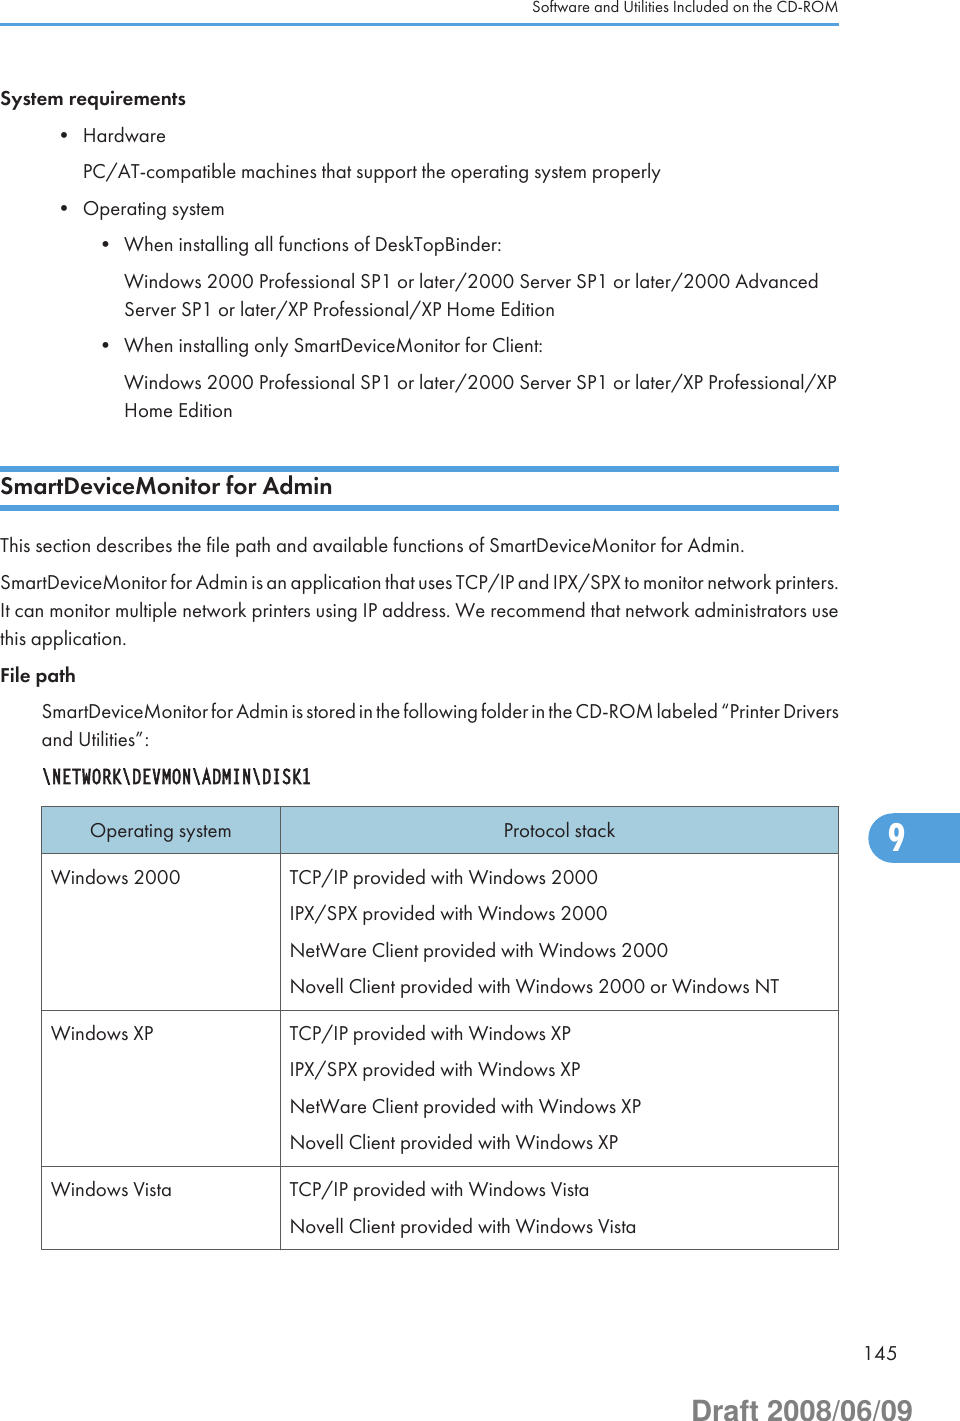
![9. AppendixThis chapter describes the provided software and utilities CD-ROMs, specifications, and paper.Software and Utilities Included on the CD-ROMThis section explains the software and utilities CD-ROMs provided with this machine.Two CD-ROMs come with this machine: “Printer Drivers and Utilities”, and “Scanner Driver and Utilities”.The following are included in these CD-ROMs:Font ManagerFor installing new screen fonts, or organizing and managing fonts already in the system. For detailsabout Font Manager, see the manual on the CD-ROM labeled “Printer Drivers and Utilities”.SmartDeviceMonitor for AdminFor the system administrator to manage network printers.DeskTopBinder-SmartDeviceMonitor for ClientFor users to manage their network print status.Printer Utility for MacThis utility allows users to download and manage a variety of fonts as well as manage printers. Fordetails about this utility, see PostScript 3 Supplement .• Some documentation about using the machine is included on the CD-ROM in PDF format. For detailsabout using Adobe Acrobat Reader/Adobe Reader, see Adobe Acrobat Reader/Adobe Readeronline Help.Viewing the Contents of the CD-ROMThis section explains how to view the contents of the CD-ROMs.1. Insert the CD-ROM into the CD-ROM drive.The installer starts.2. Click [Browse This CD-ROM].Explorer starts and displays the contents of the CD-ROM.Printer Drivers for This MachineThis section explains printer drivers for this machine.1419Draft 2008/06/09](https://usermanual.wiki/Ricoh/RFAPL02.User-Manual-2-of-3/User-Guide-968956-Page-41.png)

![Large capacity tray...............................................20Large capacity tray (LCT)..................58, 59, 79, 90LCT...................................................................20, 90Legal prohibition....................................................19Loading paper.......................................................77Loading paper into the large capacity tray (LCT)...................................................................................79Loading paper into the paper trays.....................77Loading paper into the tray 3 (LCT).....................78Local connection....................................................12Locked Print............................................................12Login.................................................................68, 70Login/Logout key..................................................64Logout..............................................................69, 70Low Power mode............................................40, 41Lower paper tray...................................................58lower paper trays..................................................88Lower paper trays...........................................58, 59Lower Paper Trays..........................................52, 55Lower Right Cover...........................................53, 55MMachine environment.........................................133Machine types.......................................................22Magazine..............................................................11Mail to Print............................................................14Main power.....................................................73, 75Main power indicator...........................................63Main power switch...................................52, 54, 73Maintaining your machine.................................137Manuals............................119, 120, 121, 122, 141Manuals for this machine........................................8Manuals list............................................................10Media slot........................................................57, 59Moving.................................................................133NNames of major Items...........................................20Network.................................................................15Network connection..............................................12Network delivery scanner....................................15Note.................................................................24, 26Note to users..........................................................24Note to users in the state of California................26Notes on lamp(s) inside this machine..................25Notice.....................................................................19Number keys..........................................................63OOff mode................................................................40OHP transparencies........................................11, 88Opening manuals from the [Start] menu...........121Opening manuals from the CD-ROM...............122Opening manuals from the icon........................121Operating instructions.........................................121Operation switch................................52, 55, 63, 73Optimum environmental conditions...................134Options...................................................57, 60, 184Orientation-fixed paper or two-sided paper......81PPaper................................................................47, 77Paper grain............................................................96Paper setting direction...........................................96Paper sizes.............................................................88Paper storage........................................................99Paper trays................................................52, 54, 96Paper types............................................................88Paperless fax reception.........................................13Paperless fax transmission....................................13Password................................................................16PCL........................................................................141PDF manuals..................................................10, 120PictBridge card......................................................60Plain Paper Setting..............................................123Positions of WARNING and CAUTION labels forusers of type 1 and 2............................................33Positions of WARNING and CAUTION labels forusers of type 3 and 4............................................36PostScript.............................................................141Power...............................................................73, 74Power connection................................................135Power supply.........................................................73PPD.......................................................................141Preventing an unauthorized copy........................17Print speed..............................................................22Printed manuals.....................................................10Printer...............................................................12, 71189Draft 2008/06/09](https://usermanual.wiki/Ricoh/RFAPL02.User-Manual-2-of-3/User-Guide-968956-Page-89.png)