RoyalTek RN2BF PORTABLE NAVIGATION DEVICE User Manual
RoyalTek Company Ltd. PORTABLE NAVIGATION DEVICE Users Manual
UserManual.wiki
>
RoyalTek
>
RN2BF User Manual
Users Manual
Navigation menu
Upload a User Manual
Namespaces
Wiki Guide
HTML
PDF
Info
Views
User Manual
Discussion / Help
Navigation
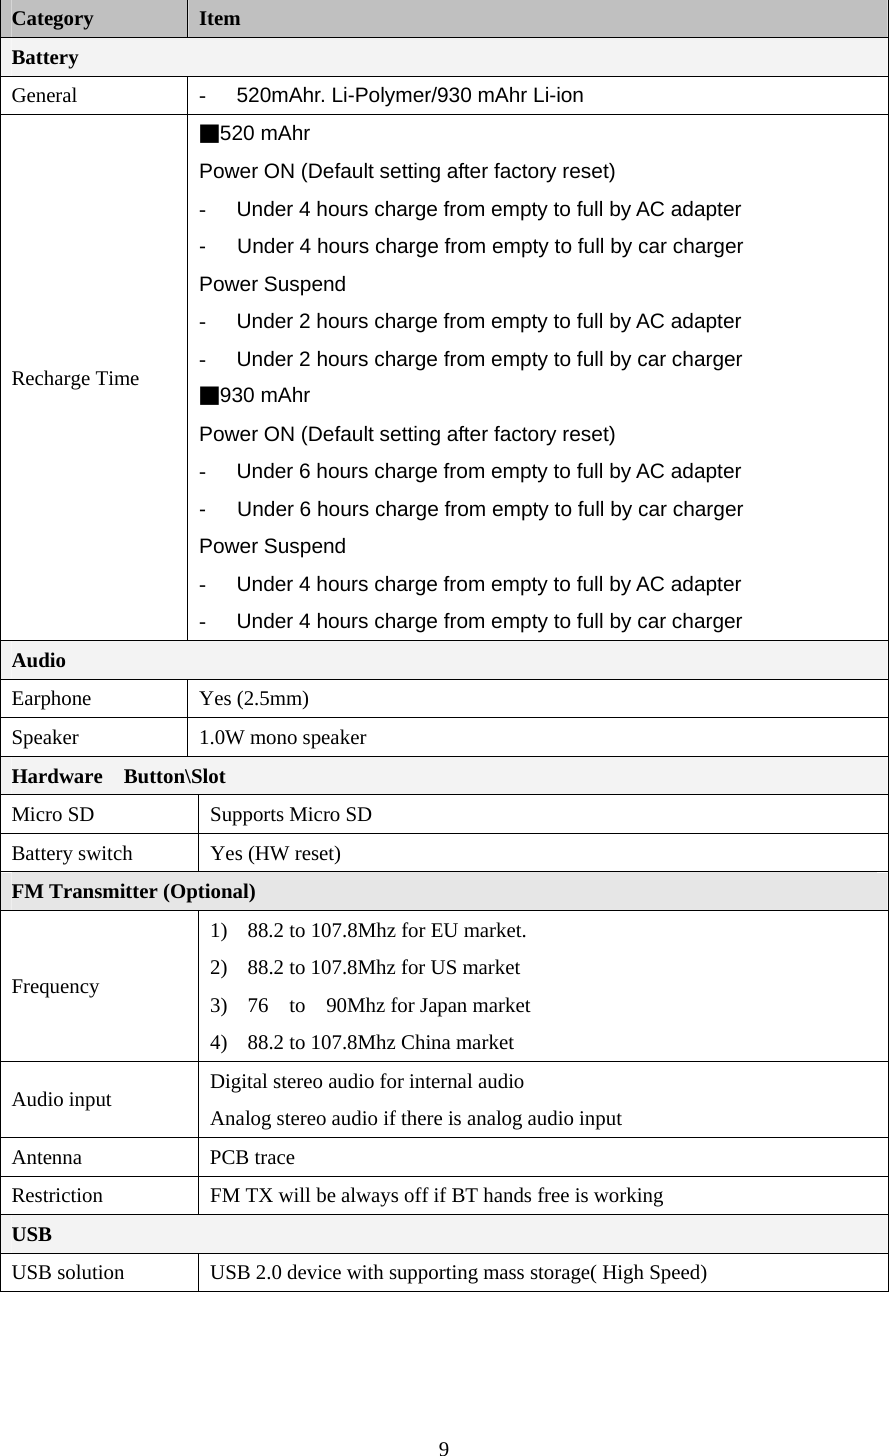
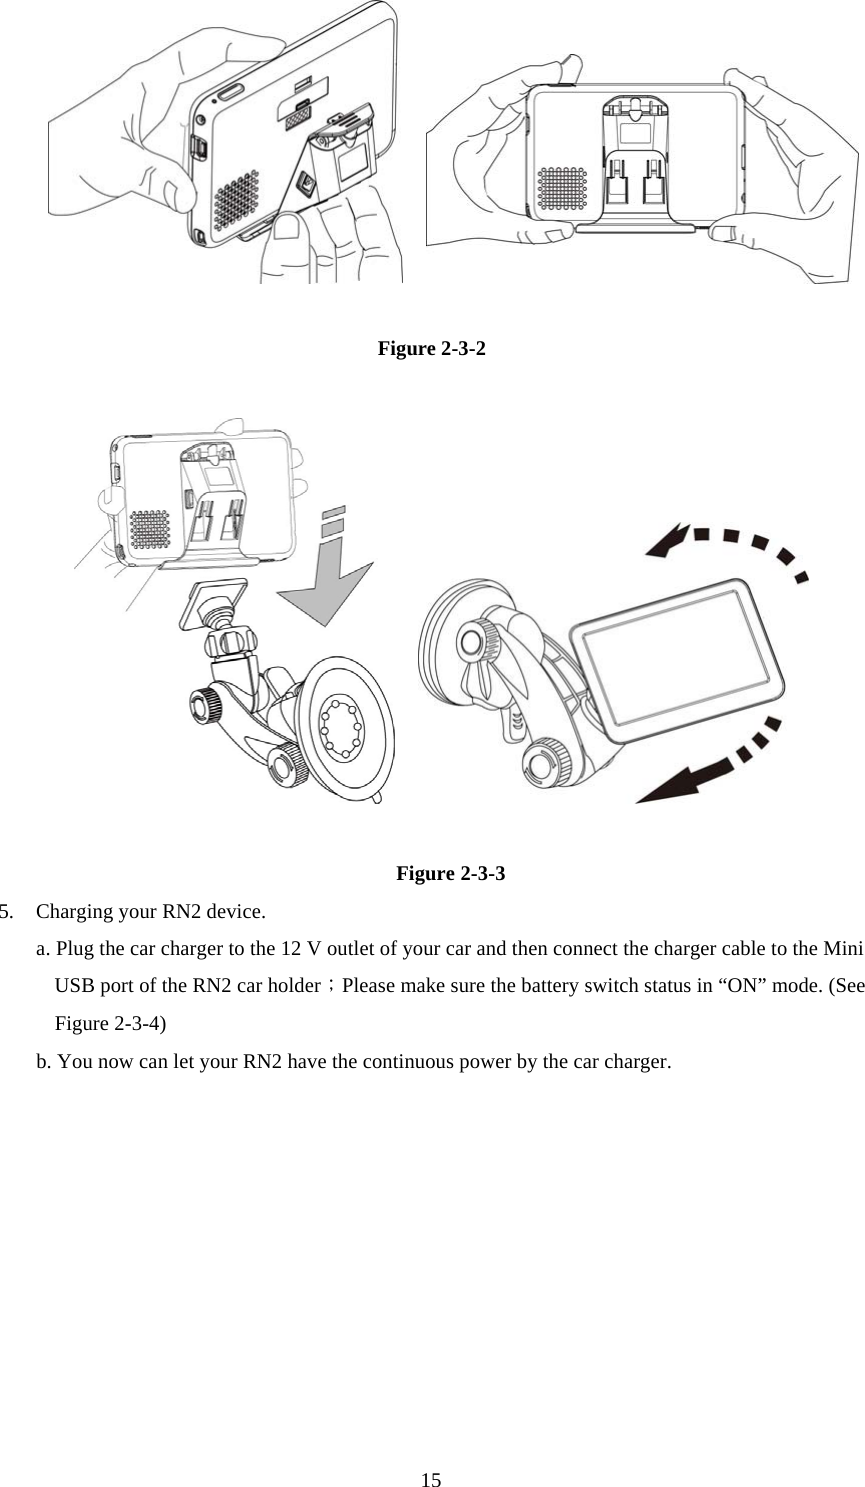
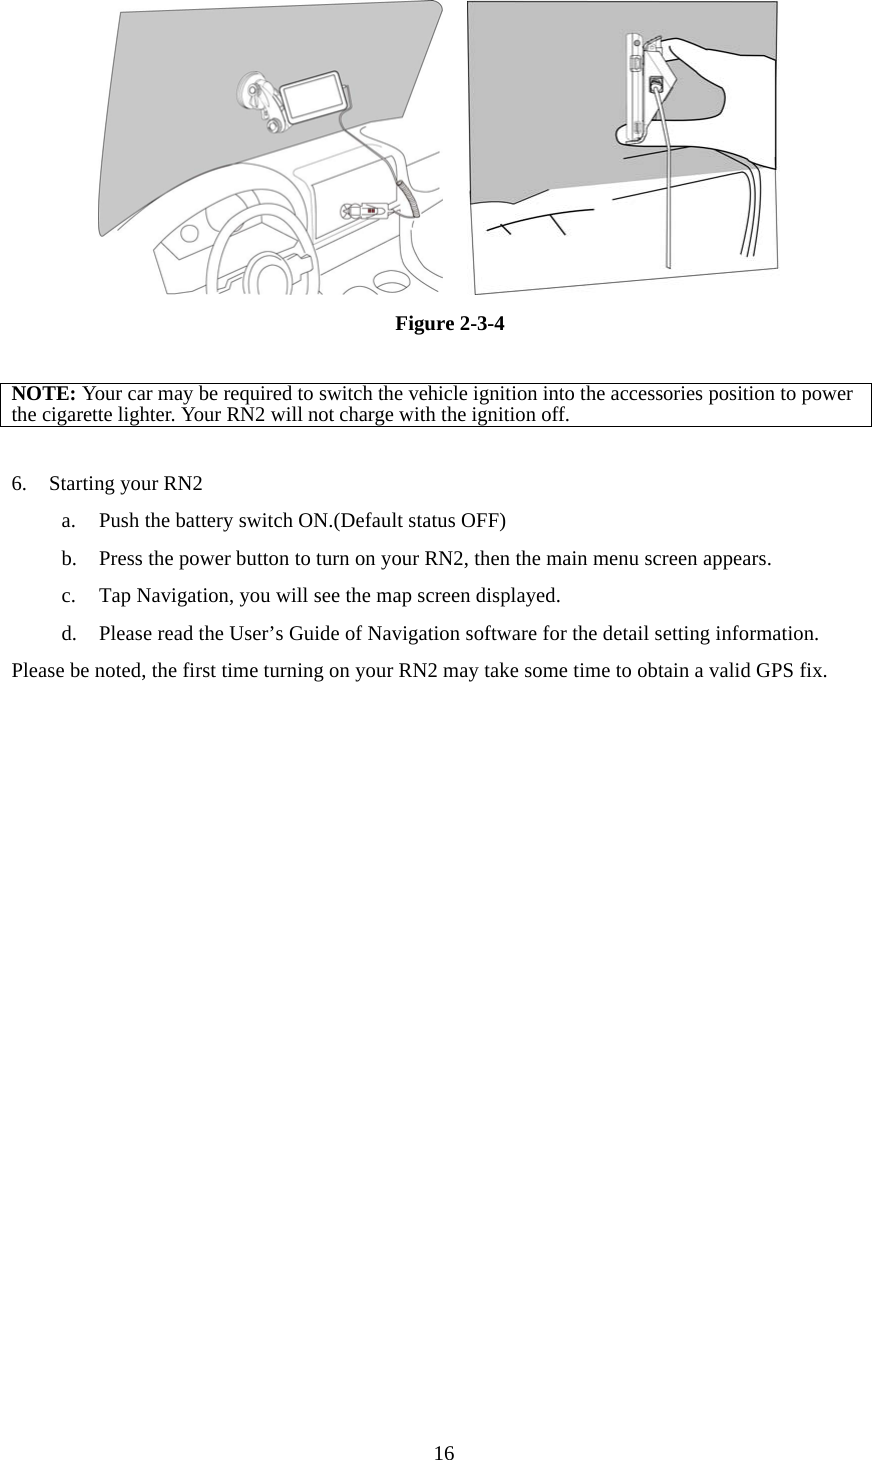
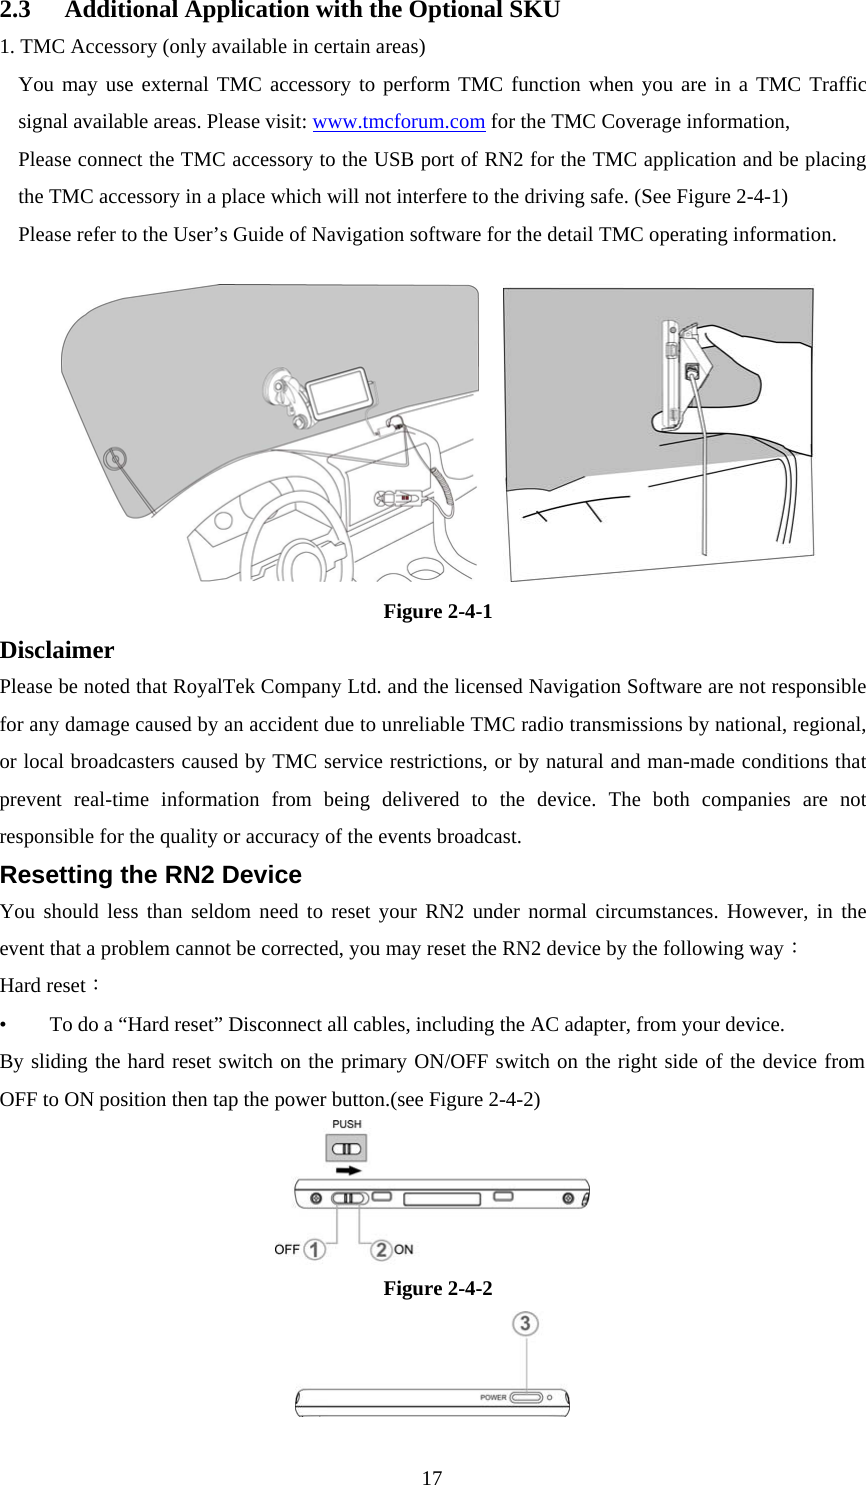
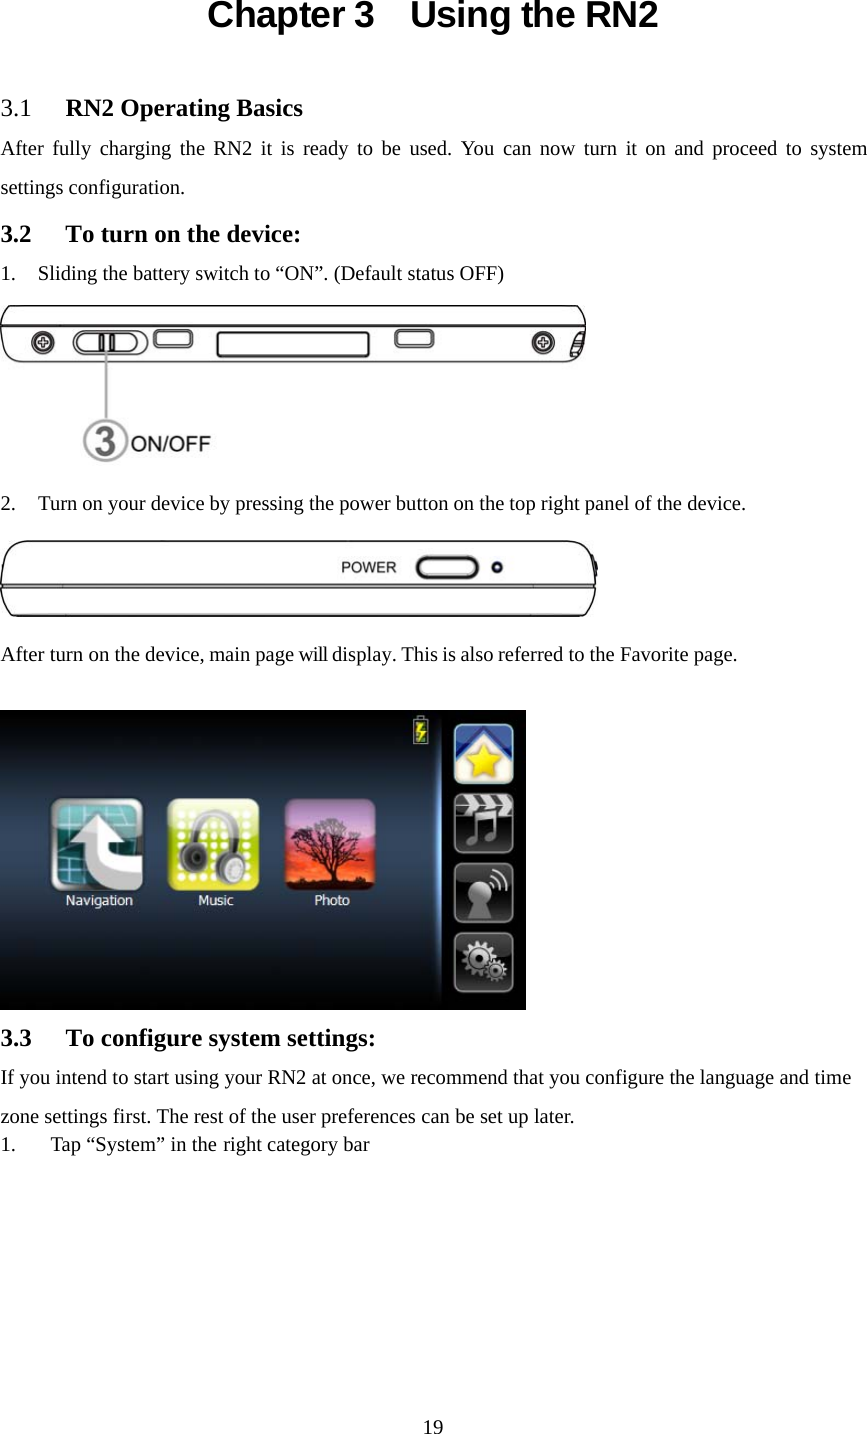
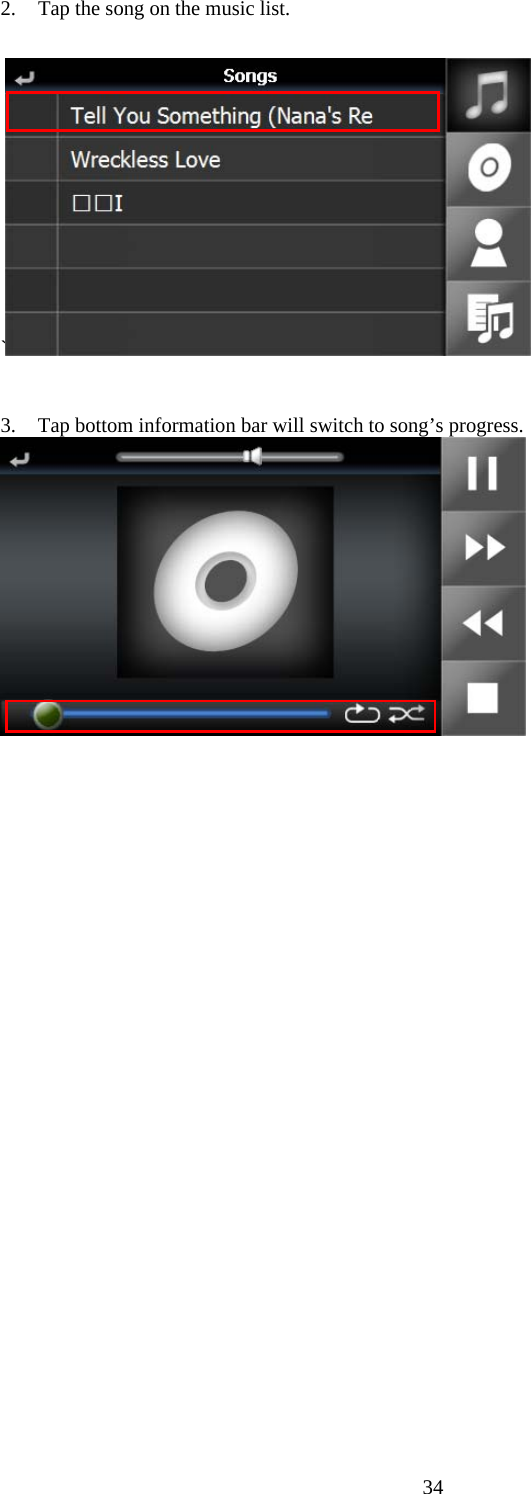
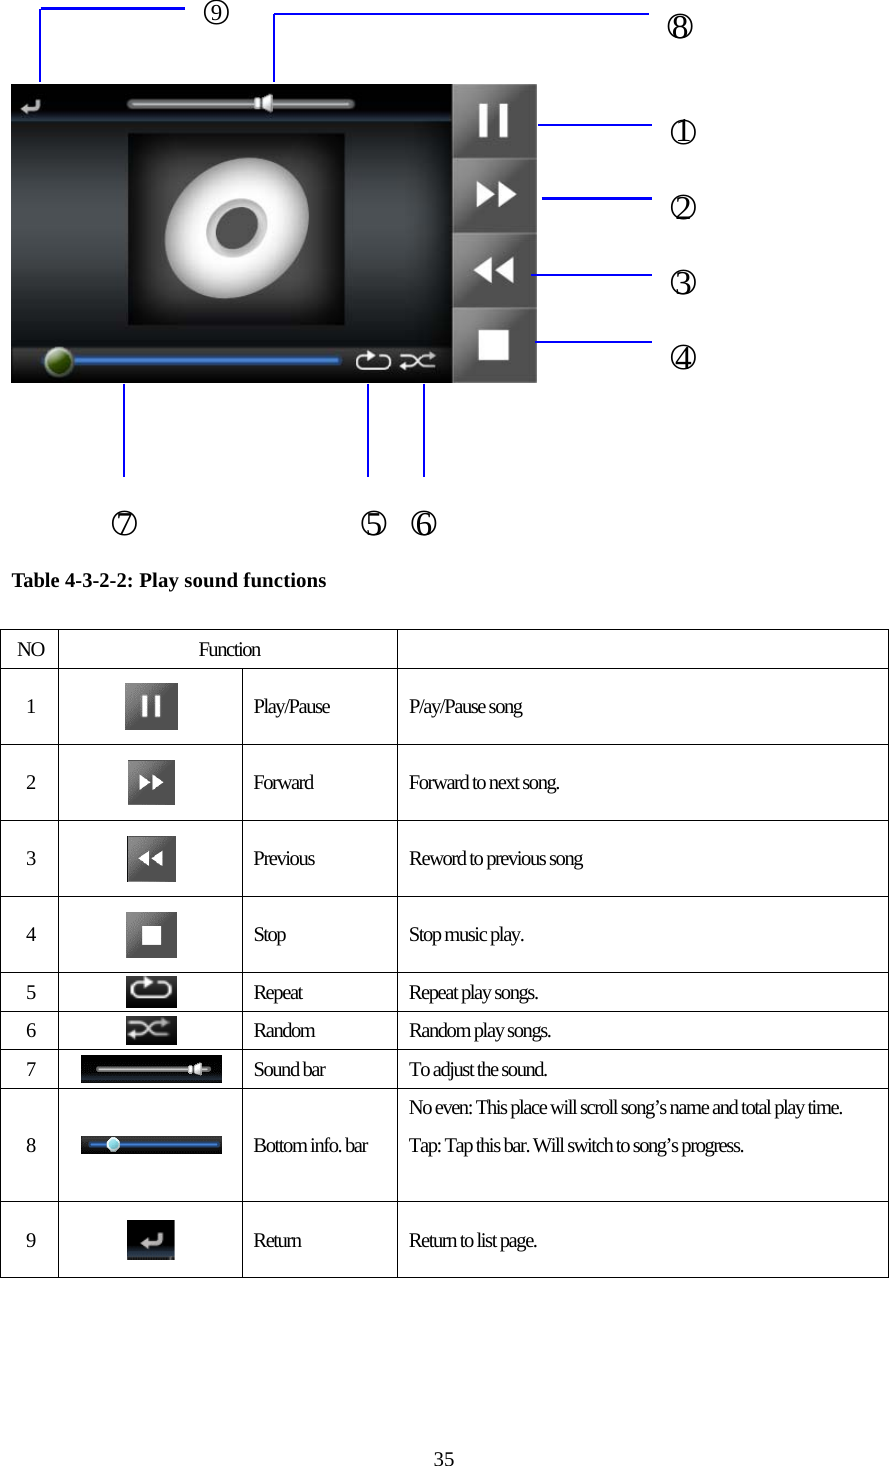
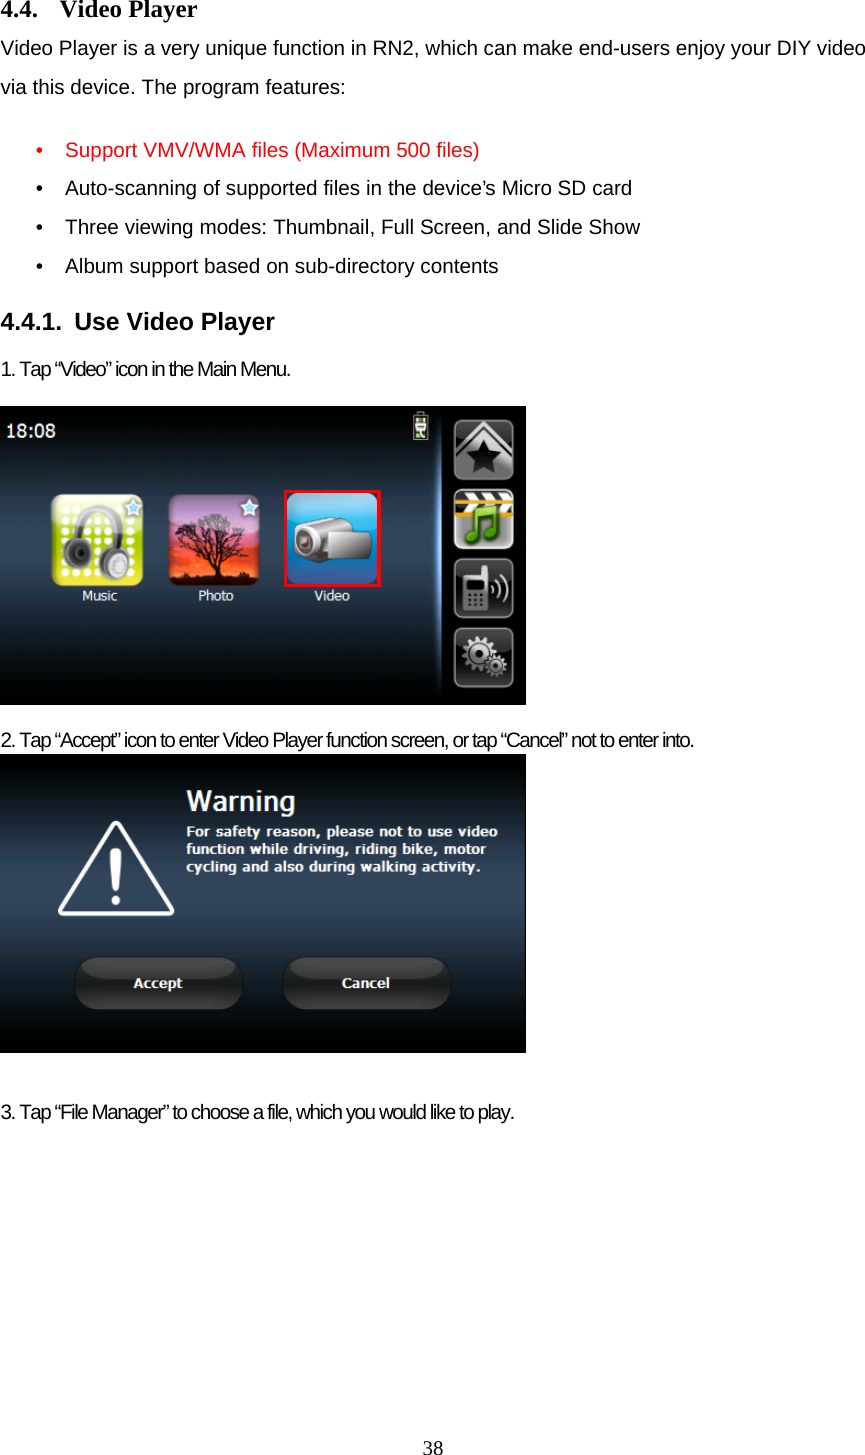
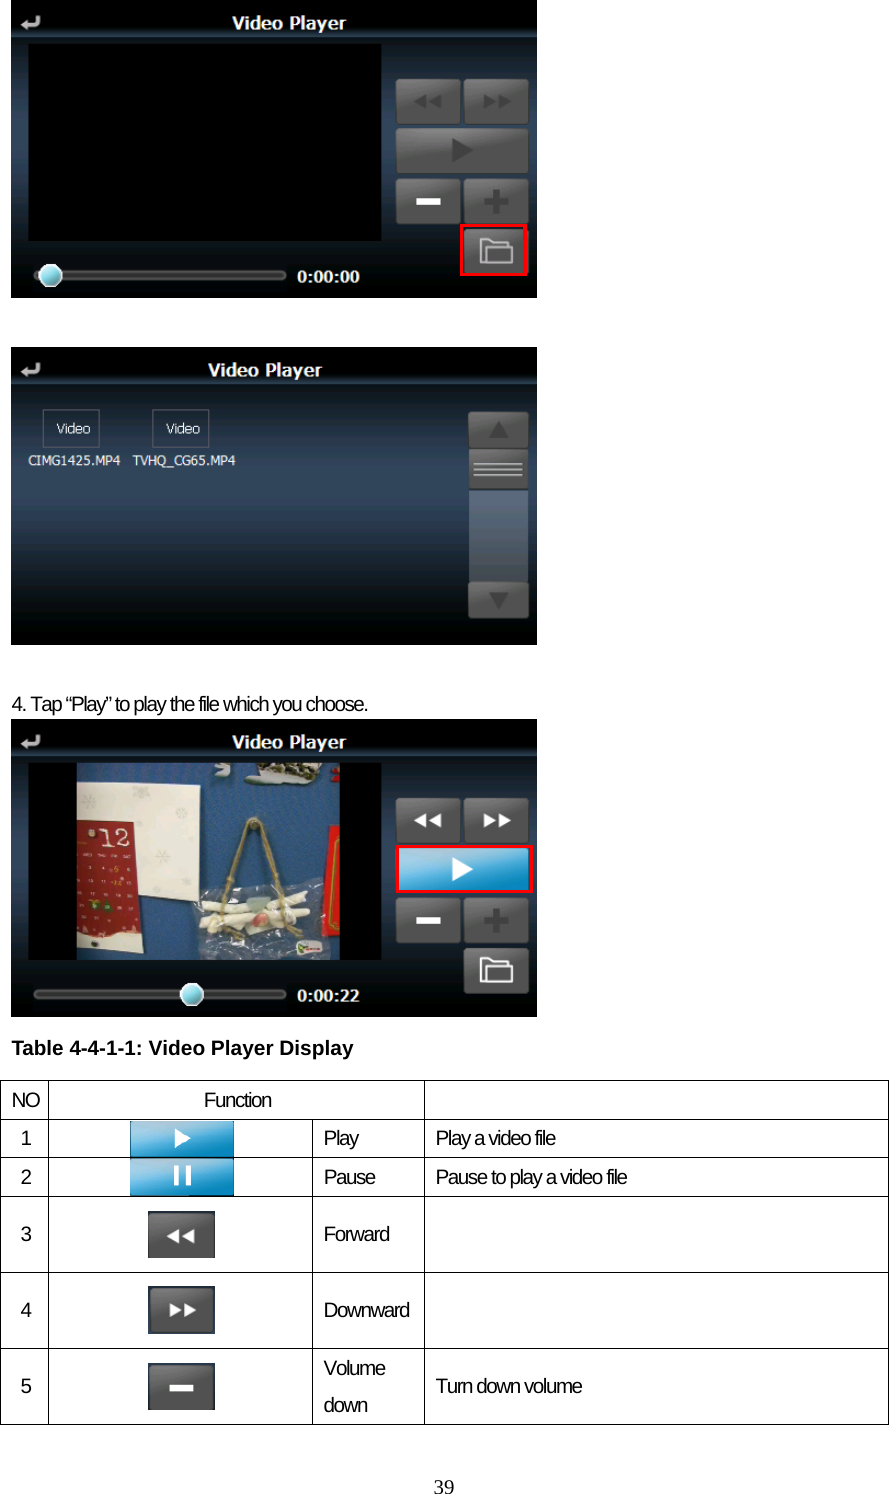
![5 Declaration of Conformity(R&TTE directive 1999/5/EC) The following items were completed and are considered relevant and sufficient: ‧ Essential requirements as in [Article 3] ‧ Protection requirements for health and safety as in [Article 3.1a] ‧ Testing for electric safety according to [EN 60950] ‧ Protection requirements for electromagnetic compatibility in [Article 3.1b] ‧ Testing for electromagnetic compatibility in [EN 301 489-1] & [EN 301] ‧ Testing according to [489-17] ‧ Effective use of the radio spectrum as in [Article 3.2] ‧ Radio test suites according to [EN 300 328] CE Mark Warning This is a Class B product, in a domestic environment, this product may cause radio interference, in which case the user may be required to take adequate measures.](https://usermanual.wiki/RoyalTek/RN2BF/User-Guide-1121225-Page-5.png)