SAGEMCOM BROANDS PPX3610 Pocket Projector User Manual Part 2
SAGEMCOM SAS Pocket Projector Part 2
Contents
- 1. Part 1
- 2. Part 2
- 3. Part 3
- 4. Addendum
Part 2
Connect to the Playback Device 16
Connecting using
Component-Video (YPbPr/
YUV) Cable
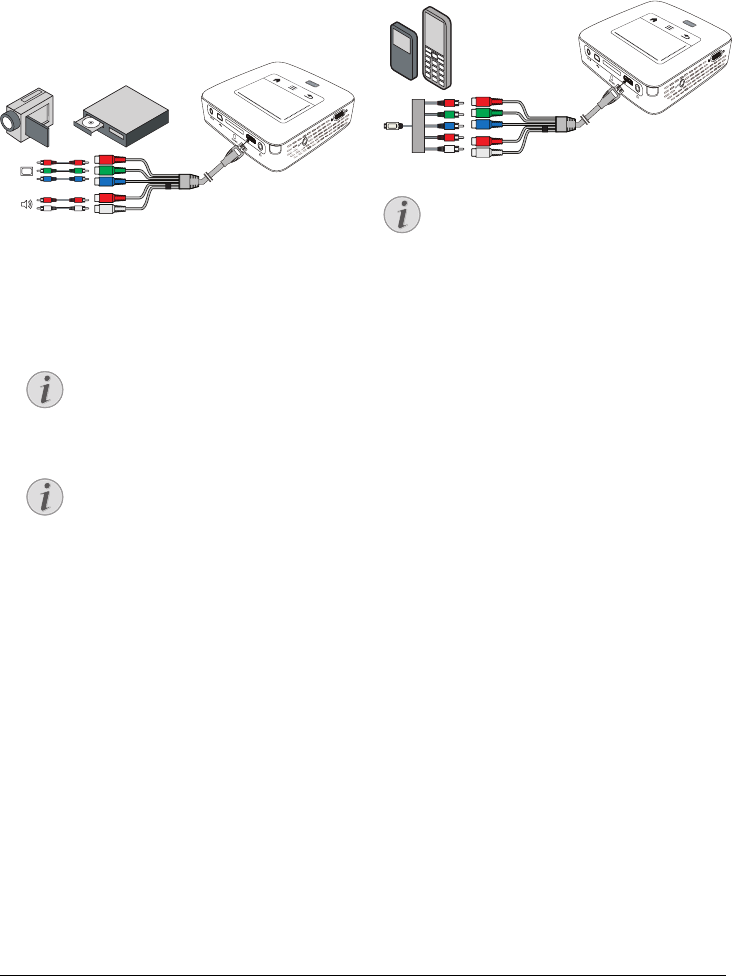
Please use this type of connection to obtain the highest
possible image quality. This cable is available as an acces-
sory. The device jacks have the colours green (Y), blue
(U/Pb), red (V/Pr) for the video signal and red (audio
right) and white (audio left) for the audio signal.
VGA
Y-Pb-Pr
HDMI
1Connect the video component cable (accessory) to
the projector's HDMI socket.
2Connect the video device's appropriate coloured
sockets to the component video cable of the projec-
tor using a conventional component video (RCA)
cable.
YCbCr
Note that the YPbPr outlets are labelled
YCbCr on some devices.
Two Red Phono (RCA) Connectors
When connecting, note that there are two
red phono (RCA) connectors on the cable.
One is for the right audio signal and the
other for the V/Pr element of the compo-
nent video signal. If these two connectors
are inserted incorrectly, the projected
image appears green and the audio signal
for the right speaker will not work.
3Select Menu > Source and switch to Component.
Connecting to mobile multimedia devices
Some video devices (e.g.: pocket multimedia players, ...)
require specific connection cables. There are either
supplied with the device or acquired from the manufac-
turer of the multimedia device. Please note that only the
original cables from the device manufacturer may func-
tion.
VGA
Y-Pb-Pr
HDMI
Switching to the Multimedia Device Sig-
nal Output
See the multimedia device instruction manual
to find out how to switch the signal output to
this jack.
Notice
Notice
Notice
17 Philips · PPX3610
Directly Connecting
Projector to Computer using
WLAN (WiFi Streaming)
With the software PicoPixWlink you can connect the
projector to a computer or a laptop over your wireless
network. For this purpose, both devices must be con-
nected to the same wireless network.
1Install the PicoPixWlink software (allready pre
installed on the projector) on your computer (see
also Connect to a Computer (USB), page 19).
2Connect the device with the wireless network (see
also Wireless Network (WLAN), page 20).
3Start PicoPixWlink (PicoPix Viewer) on your com-
puter.
4Click the PicoPixWlink icon in the notification area
and start the manager window.
You are now able to search for projectors in the net-
work (Search WIFI projector) and start the projection
(Start projection).
Connecting the headphones
1Before connecting the headphones, turn down the
volume on the device.
2Connect the headphones to the projector's head-
phone slot. The device speakers deactivate automat-
ically when the headphones are connected.
VGA
Y-Pb-Pr
HDMI
3After connecting the headphones, increase the vol-
ume to a comfortable level.
Danger of Hearing Damage
Do not use the device over a longer time at
high volume – especially when using head-
phones. This could lead to the risks of hearing
damage. Before connecting the headphones,
turn down the volume on the device. After
connecting the headphones, increase the vol-
ume to a comfortable level.
DANGER!
Memory 18
5 Memory
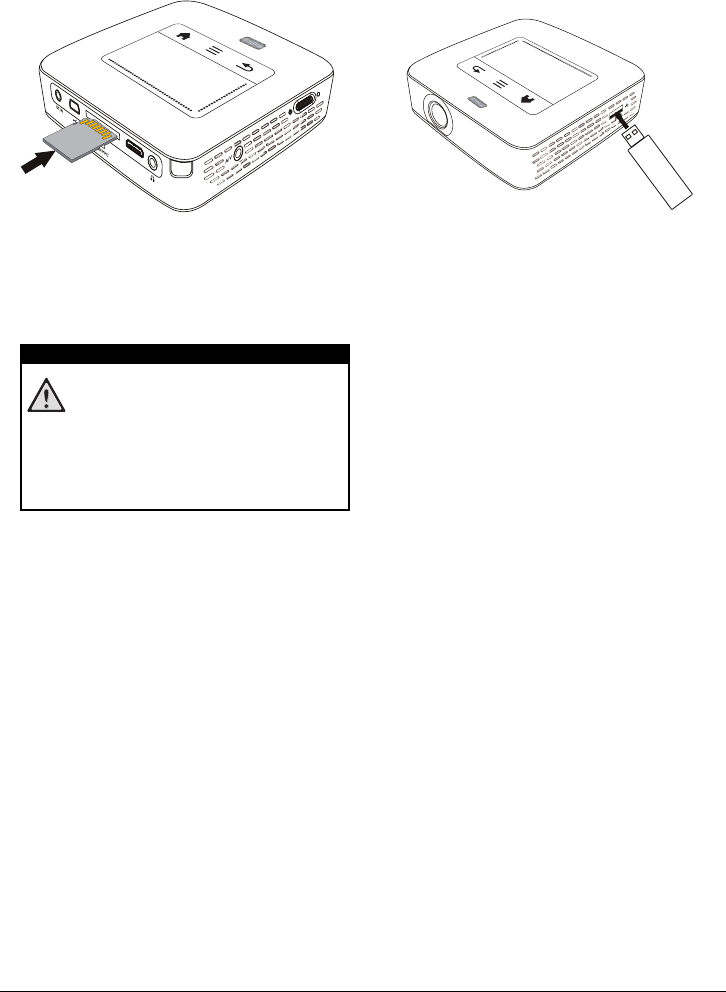
Inserting a Memory Card
VGA
Y-Pb-Pr
HDMI
1Insert a memory card with the contacts facing
upwards into the SD/MMC slot at the back of the
device. Your device supports the following memory
cards: SD/SDHC/SDXC/MMC.
2Insert the memory card into the slot until it snaps
into position.
Inserting a Memory Card!
Never pull out the memory card while the
device is accessing it. This could cause data
to be damaged or lost.
Switch the device off in order to make sure
that the device does not access the mem-
ory card.
3Press lightly on the memory card to remove it.
4The memory card is ejected.
Connecting USB Storage
Medium
1Connect the USB storage medium to the USB port
on the side of the device.
DANGER!
19 Philips · PPX3610
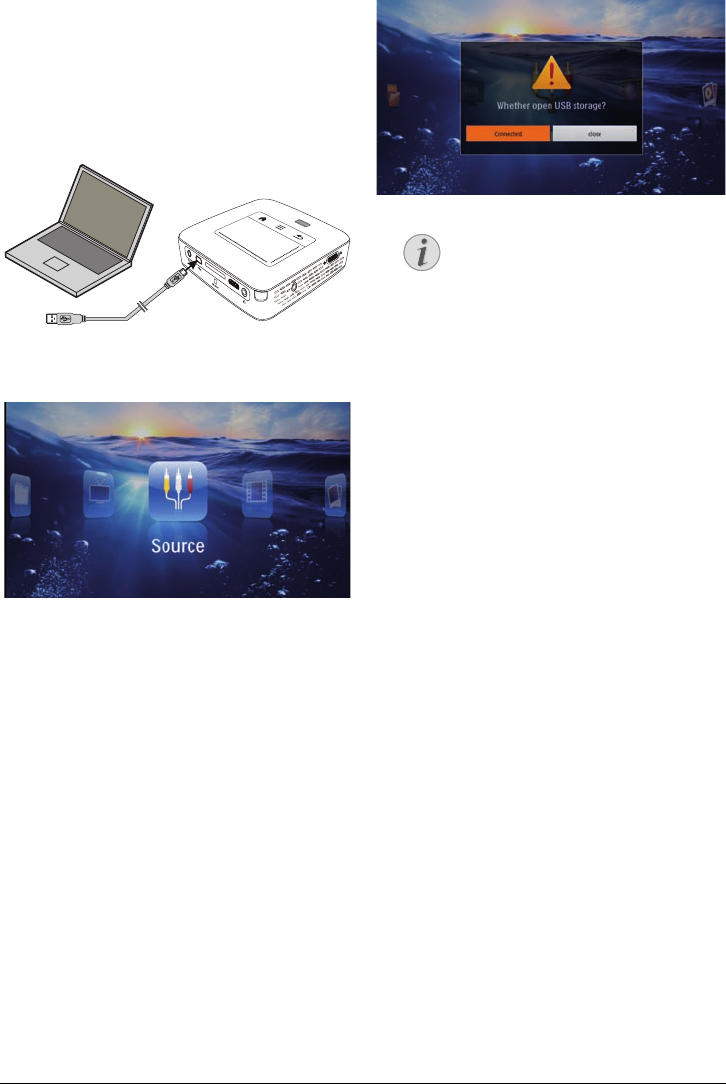
Connect to a Computer
(USB)
You can use the USB cable to connect the Pocket
Project to a computer. In this way, you are able to copy
files back and forth between the internal memory, an
inserted memory card and the computer. You can also
delete the files. You can playback the files saved on the
Pocket Projector on your computer.
VGA
Y-Pb-Pr
HDMI
1Switch the device on using the on/off switch on the
side.
2After the initial screen the main menu appears.
3Connect the mini-USB port to the Pocket Projector
and the USB socket to the computer.
4A confirmation screen appears when the devices are
connected successfully.
5Confirm to enable the connection.
Successful Connection
You cannot use the memory for media
playback when the Pocket Projector is
connected to a computer via USB. Use
WiFi Streaming instead (see also Directly
Connecting Projector to Computer using
WLAN (WiFi Streaming), page 17).
6If a memory card has been inserted, it will be dis-
played as another disk drive.
7You can move, copy or delete data from the compu-
ter, the memory card (if inserted) and the internal
memory.
Notice
Wireless Network (WLAN) 20
6 Wireless Network (WLAN)
In a wireless network (Wireless Local Area Network,
WLAN) at least two computers, printers or other addi-
tional devices communicate with each other over radio
waves (high frequency waves). Data transmission in the
radio network is based on the standards 802.11b,
802.11g and 802.11n.
Information on Using WLAN!
The functioning of security systems, medical
equipment or sensitive devices can be dis-
rupted by the transmission power of the
device. Observe any usage regulations (or
restrictions) in the vicinity of such equipment.
The use of this device can affect the operation
of insufficiently shielded medical devices and
hearing aids and pacemakers through the
release of high frequency radiation. Also con-
sult a doctor or the manufacturer of the med-
ical device to establish whether these are suf-
ficiently shielded from external high frequency
radiation.
Infrastructure Wireless Network
In an infrastructure network, multiple devices commu-
nicate via a central access point (gateway, router). All
data are sent to the access point (gateway, router) and
distributed from there.
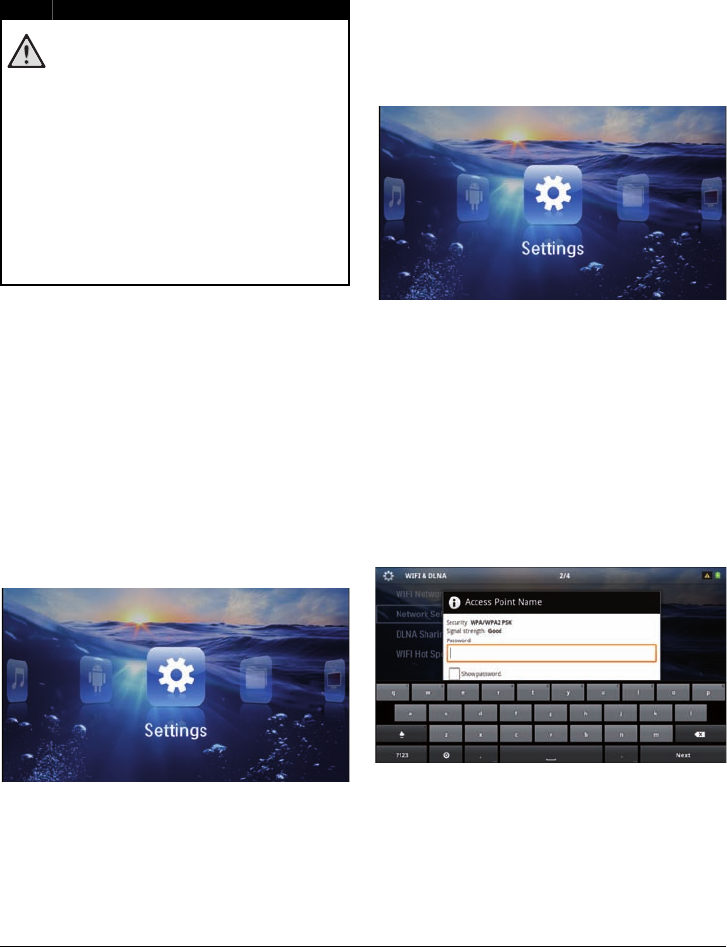
Switching Wireless
Networking (WLAN) on/off
Wireless networking is deactivated by default. You have
the option of turning this function on.
1Switch the device on using the on/off switch on the
side.
2After the initial screen the main menu appears.
3Use the navigation keys to select Settings.
4Confirm with à.
5Using ¡/¢ select WIFI & DLNA.
6Confirm with à.
7Using ¡/¢ select WIFI Network.
8Confirm with à.
9Modify the settings with ¡/¢.
10 Confirm with à.
The ¿ key takes you one step back in the menu.
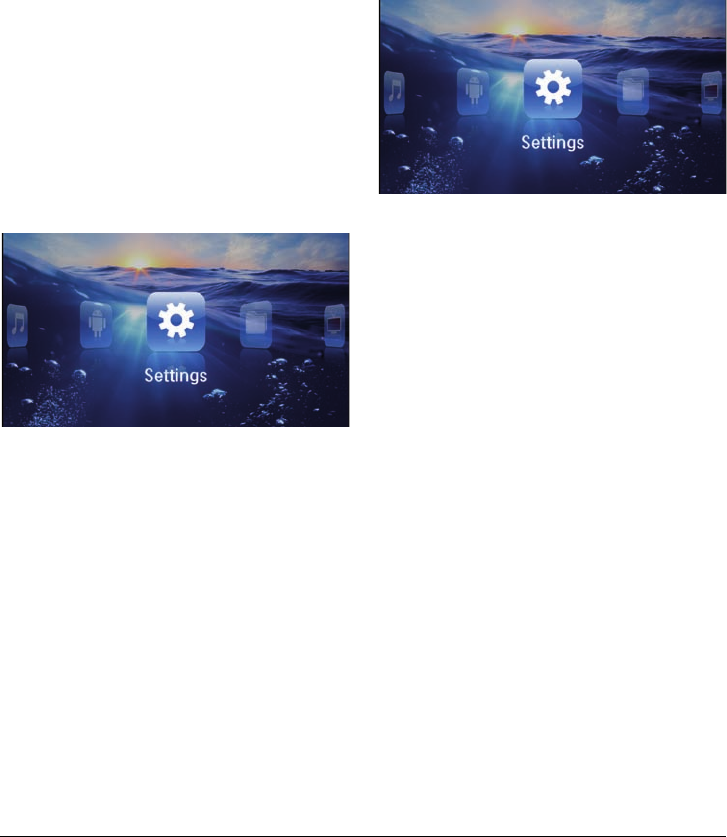
Setting up a Wireless
Network (WLAN)
1Switch the device on using the on/off switch on the
side.
2After the initial screen the main menu appears.
3Use the navigation keys to select Settings.
4Confirm with à.
5Using ¡/¢ select WIFI & DLNA.
6Confirm with à.
7Using ¡/¢ select Network Selection.
8Confirm with à.
9Use ¡/¢ to select the desired wireless network..
10 Confirm with à.
11 If your wireless network is password protected, an
input window appears. Click in the input field (see
also Touchpad / Gestures, page 7) using the touch-
pad or a mouse.
12 Using the touchpad or a mouse enter the password
on the software keyboard.
13 Click on Connect.
The ¿ key takes you one step back in the menu.
DANGER!
21 Philips · PPX3610
Setting up a Wireless
Network (WLAN) Using the
Wizard
You can integrate your device very quickly and easily
into an existing wireless network using Wi-Fi Protected
Setup (WPS) or using a wireless network scan. Using
WPS, all important settings like network name (SSID)
are automatically configured and the connection pro-
tected with secure WPA Encryption.
Using Wi-Fi Protected Set-up
(WPS)
Using Wi-Fi Protected Setup (WPS), you can integrate
your device into an existing wireless network in two dif-
ferent ways very quickly and easily. You can activate the
login with a pin code or using Push Button Configura-
tion (PBC), if your access point (Access Point, Router)
supports this method.
Using WPS with Push Button
Configuration (PBC)
1Switch the device on using the on/off switch on the
side.
2After the initial screen the main menu appears.
3Use the navigation keys to select Settings.
4Confirm with à.
5Using ¡/¢ select WIFI & DLNA.
6Confirm with à.
7Using ¡/¢ select Network Selection.
8Confirm with à.
9Use ¡/¢ to select the desired wireless network..
10 Confirm with à.
11 Activate Push Button Configuration on the WLAN
access point. The WLAN access point and device
connect automatically and create a WPA protected
connection.
Digital Living Network
Alliance (DLNA)
This device supports Digital Living Network Alliance
(DLNA). Using this standard you can quickly intercon-
nect your multimedia devices.
Switching DLNA on and off
The DLNA function is switched on by default. You have
the option of turning this function off.
1Switch the device on using the on/off switch on the
side.
2After the initial screen the main menu appears.
3Use the navigation keys to select Settings.
4Confirm with à.
5Using ¡/¢ select WIFI & DLNA.
6Confirm with à.
7Using ¡/¢ select DLNA Sharing.
8Confirm with à.
9Modify the settings with ¡/¢.
10 Confirm with à.
The ¿ key takes you one step back in the menu.
Play Media Using DLNA
If DLNA enabled devices are located in the connected
network, then you can access them in media playback
and file management (see also Media Playback, page 22).
DLNA Control
You can control the projector using another device (e.g.
a smartphone) using DLNA. To do this, see the instruc-
tion manual for the device in question.

Media Playback 22
7 Media Playback
Navigation Keys
All the keys shown are buttons on the remote
control.
Best Settings for Optimal Use
Read the informations on the best settings in
the chapter settings (see also Settings,
page 34) for optimal use of your device.
Video playback
Video Playback (USB/SD Card/
Internal Memory/DLNA)
1Switch the device on using the on/off switch on the
side.
2After the initial screen the main menu appears.
3Use the navigation keys to select Videos.
4Confirm with à.
5 With connected memory: Using the keys ¡/
¢ select the internal memory, a DLNA device, the
USB storage medium or the memory card.
6Confirm with à.
7Use ¡/¢ to select the video file that you wish to
play.
Displaying Video Files
Only those videos that are compatible
with the Pocket Projector will be dis-
played.
8Press à to start playback.
9Press ¿ to end the slide show and return to the
overview.
10 When you press ¿ again, you will return to the
main menu.
Navigation During Playback
Review / cue: Press :/; on the remote
control or À/Á on the device.
Press T to stop or continue playback.
During playback you can adjust the volume using ¬/
on the remote control. Press « or ¬ repeatedly to
shut off the volume completely.
File Format
There are various video file formats as *.mov, *.avi,
*.m4v. Many of these formats function as a container
that contains the various encoded audio and video files.
MPEG-4, H.264, MP3, and AAC are all examples of
encoded audio/video files. In order to play these files,
the projector must read them and decode the audio/
video signals.
Notice
Notice
Notice
Notice
23 Philips · PPX3610
Please note that some files cannot be played as a result
of different video and audio encoders.
Supported file formats
Container Video format
*.avi, *.mov, *.mp4 MJPEG, MPEG-4, H.264
*.mkv MPEG-4, H.264
*.ts MPEG-2, H.264
*.m2ts H.264
*.3gp H.263
*.rm, *.rmvb Real video
*.dat MPEG-1
*.vob MPEG-2
*.mpg, *.mpeg MPEG-1, MPEG-2
Video Playback (Mini-HDMI
Socket)
1Connect the audio/video output of the external
device to the Pocket Projector's HDMI socket. Use
the corresponding cable and cable adapter for this
purpose (see also Connect to the Playback Device,
page 14).
2To find out how to deactivate the video output for
the external device, please see the relevant instruc-
tion manual. Most often, this option is labelled "TV
out" or "TV Output" in the corresponding menu.
3Start the video playback on the external device.
4Modify the volume with ¬/.
Modify settings during playback
1Press the ¡ or ¢ key.
2Use the ¡/¢ keys to choose from the following
settings:
Volume: Adjust volume level
Smart Settings: Select predefined settings for
brightness / contrast / colour saturation
Saturation: Adjust colour saturation
Contrast: Adjust contrast
Brightness: Adjust brightness
3Modify the setting using À/Á.
The device saves the modified settings automatically.
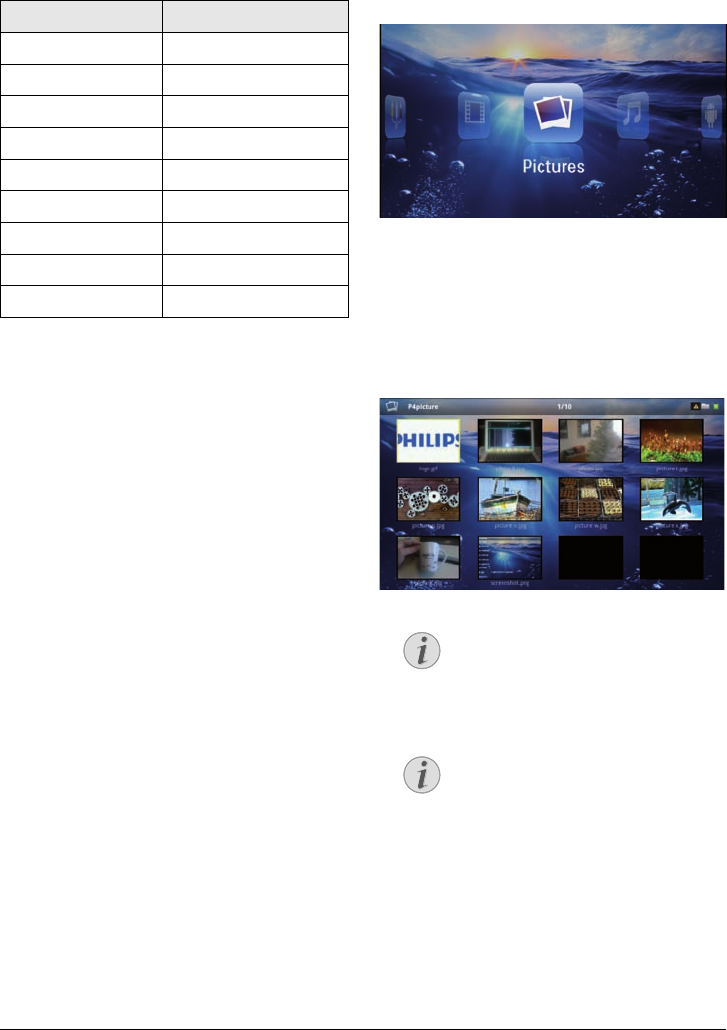
Photo Playback
1Switch the device on using the on/off switch on the
side.
2After the initial screen the main menu appears.
3Use the navigation keys to select Pictures.
4Confirm with à.
5 With connected memory: Using the keys ¡/
¢ select the internal memory, a DLNA device, the
USB storage medium or the memory card.
6Confirm with à.
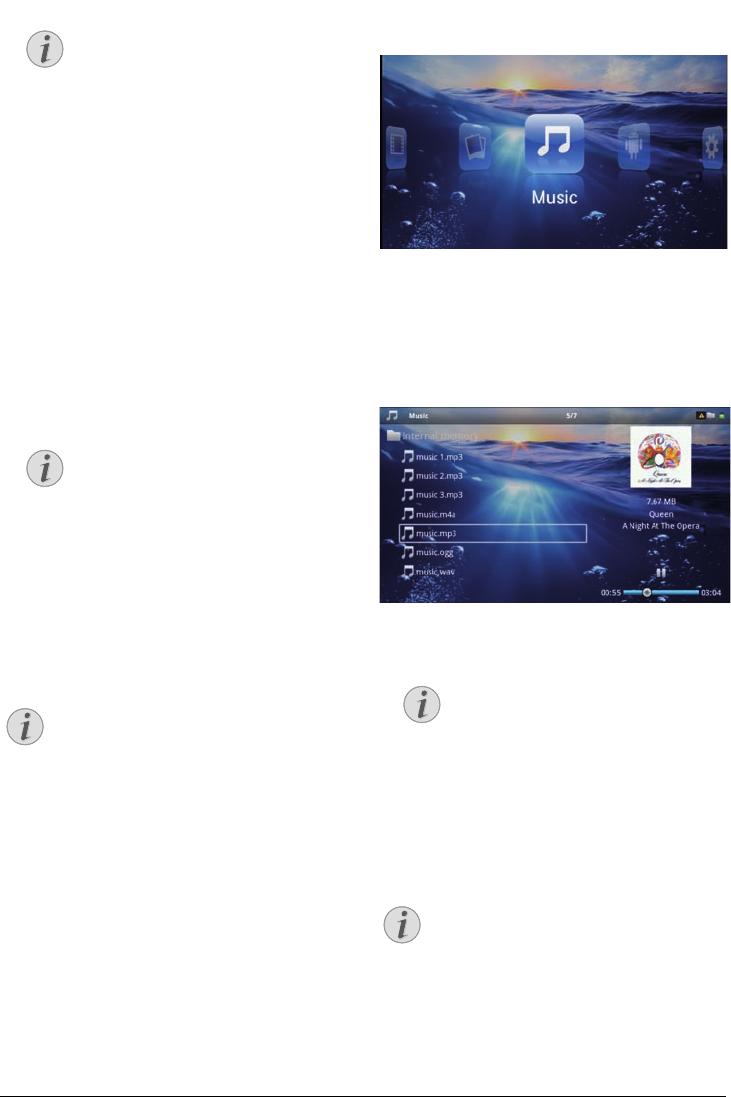
7Miniature photos are displayed on the screen as an
overview.
Miniature View or List
In the settings, you are able to select
whether the overview will be displayed as
miniatures or in a list.
Many Photos on the Memory Card or
the USB Medium
If there are a lot of photos on the memory
card or the USB storage medium it can
take a moment before the overview
appears.
8Use À/Á or ¡/¢ to select the image that you
want to start the slide show with.
9Press à to start the slide show.
Notice
Notice
Rotate the Image
Using your thumb contact the touchpad
and swipe with the forefinger in a circular
manner to rotate an image (see also
Touchpad / Gestures, page 7).
Media Playback 24
10 Press T to pause the slide show.
11 Press ¿ to end the slide show and return to the
overview.
12 When you press ¿again, you will return to the
main menu.
Slide Show with Background
Sound
1Start the slideshow.
2Press ¡/¢, to open the menu bar.
3Using À/Á select Ó.
4Confirm with à.
5Use ¡/¢ to select the file that you wish to play.
Storage Location
Only files from the internal memory/Mem-
ory Card/USB Storage Medium can be
played.
6To start the background sound confirm with à.
7Press ¬/ to adjust the volume level.
8If no input is made, the menu bar is hidden after 5
seconds.
Music Playback
Switch off the Image Playback
You can turn off image playback while playing
music in order to save power (see also Music
settings, page 34). As soon as you press the
¿ key, the image reappears and the fan starts
again.
1Switch the device on using the on/off switch on the
side.
2After the initial screen the main menu appears.
3Use the navigation keys to select Music.
4Confirm with à.
5 With connected memory: Using the keys ¡/
¢ select the internal memory, a DLNA device, the
USB storage medium or the memory card.
6Confirm with à.
7Use ¡/¢ to select the file that you wish to play.
8Press à to start playback.
9Press T to stop or continue playback.
Navigating when Image Playback is
Switched off
Press ¡/¢ to skip to the previous or
next song.
Press T to stop or continue playback.
Press ¿to return to the selection.
During playback you can adjust the volume using ¬/
on the remote control. Press « or ¬ repeatedly to
shut off the volume completely.
Touchpad / Gestures
Swipe left and right on the bottom edge of the
touchpad to adjust the volume.
Swipe over the touchpad with two fingers to
rewind and fast forward (see also Touchpad /
Gestures, page 7).
Notice
Notice
Notice
Notice
Notice
25 Philips · PPX3610
Office Playback (YOZO
Office)
You can display documents with YOZO Office.
1Switch the device on using the on/off switch on the
side.
2After the initial screen the main menu appears.
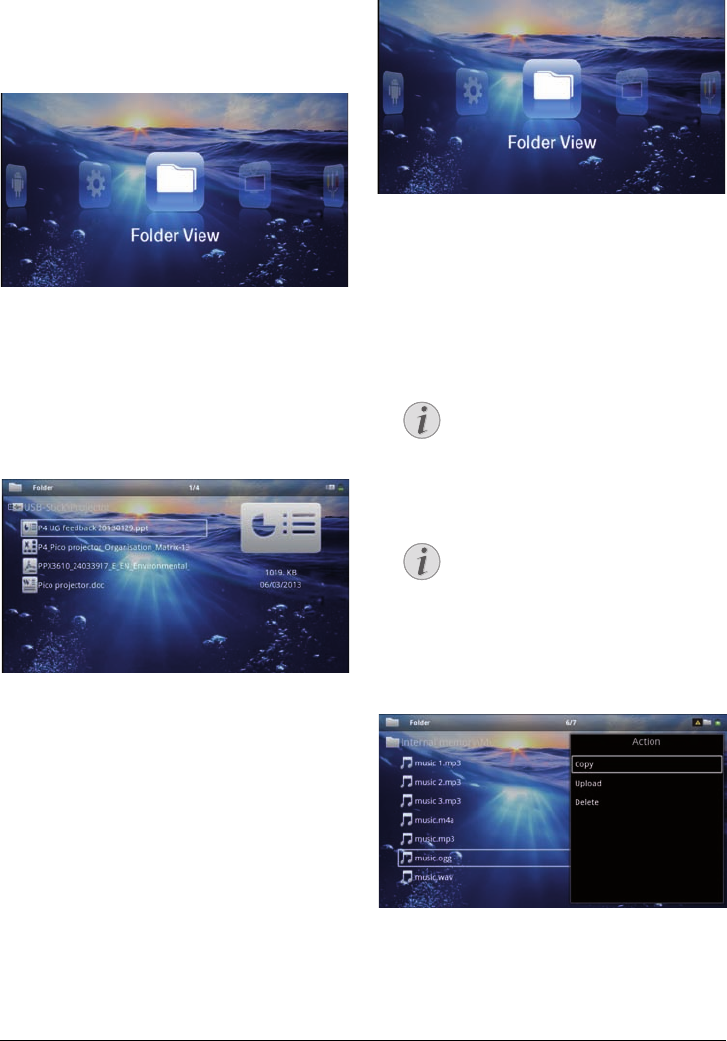
3Use the navigation keys to select Folder View.
4Confirm with à.
5 With an inserted memory card or USB stor-
age device: Select the internal memory, the USB
storage medium or the memory card using the keys
¡/¢.
6Confirm with à.
7Use ¡/¢ to select the file that you want to dis-
play.
8Press à to start the display.
9Swipe up and down on the right edge of the touch-
pad to scroll. Use the touchpad or a mouse to zoom
in / zoom out the document (see also Touchpad /
Gestures, page 7).
10 Press ¿ to end the display and return to the over-
view.
Managing Files
Copy Files
You can copy files back and forth from the internal
memory to the connected USB storage medium or
memory card.
1Switch the device on using the on/off switch on the
side.
2After the initial screen the main menu appears.
3Use the navigation keys to select Folder View.
4Confirm with à.
5 With an inserted memory card or USB stor-
age device: Select the internal memory, the USB
storage medium or the memory card using the keys
¡/¢.
6Confirm with à.
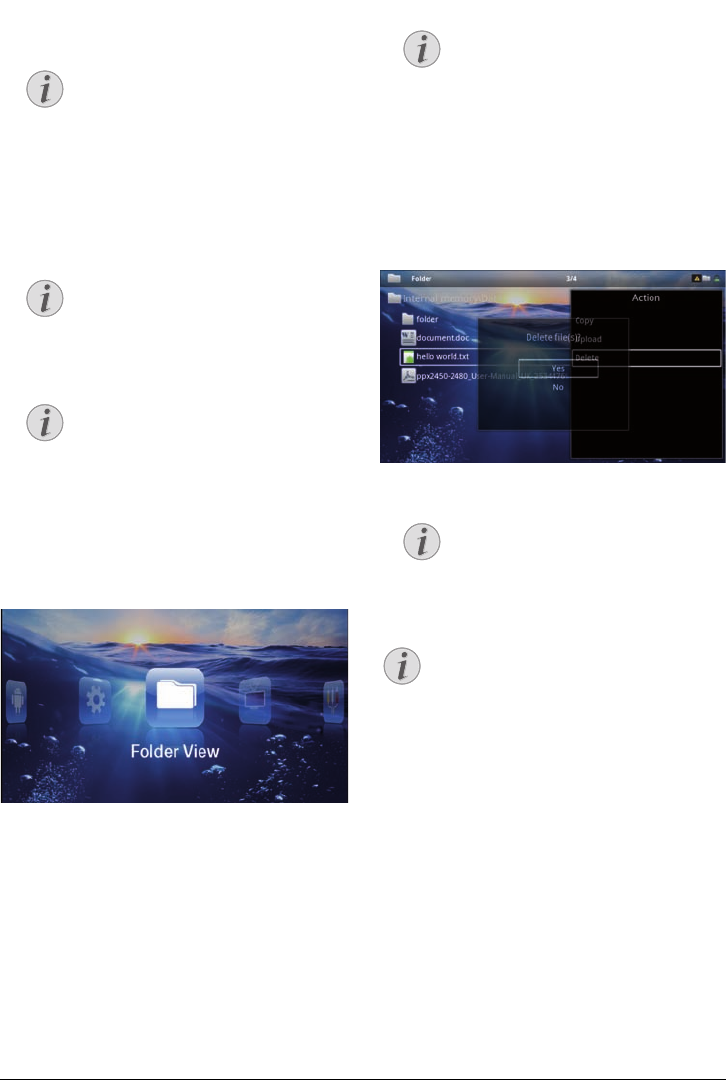
7Use ¡/¢ to select the file that you want to copy.
No Files Found (0 files)
Only those files that are compatible with
the Projector will be displayed.
8Mark the file using Á. Pressing the key again dese-
lects the chose file(s).
Mark the Entire Folder
You can also mark an entire folder to copy
all files from the folder. Note that the copy
process of large folders can takes some
time.
9Use ¡/¢ to select other files.
10 Press à.
11 Select with ¡/¢ Copy.
12 Confirm with à.
Notice
Notice
Media Playback 26
13 Use ¡/¢ to select the destination memory: SD
card, internal memory or USB storage medium.
14 Confirm with à.
Files Already Exist
If the files you are copying already exist in
the target folder, you must choose
whether or not you want to overwrite
them using ¡/¢ and à. If you choose
not to overwrite these files, copies will be
created. The copies can be recognised by a
number added to the file names.
15 The files are copied.
Error
If errors occur during the copying process,
make sure that enough free space is availa-
ble on the medium.
Removing Storage Medium
Only remove the storage medium after the
copy process is complete.
Delete Files
You can delete files from the internal memory, the con-
nected USB storage medium or the memory card.
1Switch the device on using the on/off switch on the
side.
2After the initial screen the main menu appears.
3Use the navigation keys to select Folder View.
4Confirm with à.
5 With connected memory: Using the keys ¡/
¢ select the internal memory, a DLNA device, the
USB storage medium or the memory card.
6Confirm with à.
7Use ¡/¢ to select the file that you want to delete.
No Files Found (0 files)
Only those files that are compatible with
the Projector will be displayed.
8Mark the file using Á. Pressing the key again dese-
lects the chose file(s).
9Use ¡/¢ to select other files.
10 Press à.
11 Select with ¡/¢ Delete.
12 Confirm with à.
13 Use ¡/¢ if you want to delete the files or cancel
the deletion process.
14 Confirm with à.
Error
If errors occur during the deletion proc-
ess, make sure that the storage medium is
not write-protected.
Deleting Photos on the Memory Card
When deleting photos via the computer, note
that the photos may not be correctly dis-
played when the memory card is inserted into
the digital camera again. Digital cameras
sometimes store additional information in
specific folders, including previews and orien-
tation information.
For this reason, only delete the photos using
the digital camera.
Notice
Notice
Notice
Notice
Notice
Notice
27 Philips · PPX3610
8 Digital TV Playback
Necessary Accessories
To be able to use the DVB-T function of your
projector, you either require the Pico Station
PPA7301 (not supplied) or the USB DVB-T
stick PPA8301 (not supplied).
You can purchase the Pico Station docking
station and th USB DVB-T stick according to
the ordersheet.
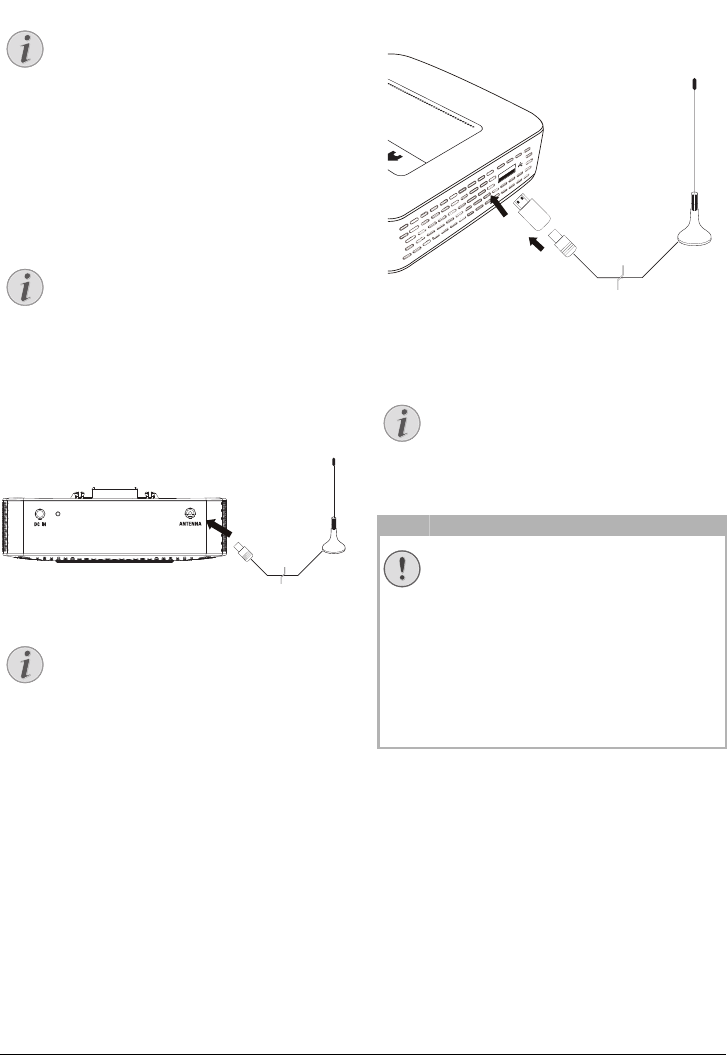
Connecting the Aerial
Aerial Size and Orientation
In some regions it is necessary to connect a
larger aerial in order to grant the reception.
In some countries it is necessary to point the
aerial horizontally in order to grant the recep-
tion.
Connecting the Aerial to the Pico
Station PPA7301
1Connect the aerial to the aerial socket.
Standard Definition Television
The Pico Station PPA7301 supports Standard
Definition Television (SDTV). High Definition
Television (HDTV) is not supported.
Connecting the Aerial to the USB
DVB-T Stick PPA8301
1Connect the USB-DVB-T stick to the USB port on
the side of your projector.
2Connect the aerial to the USB-DVB-T stick.
Standard Definition Television
The Pico StationUSB-DVB-T Stick PPA8301
supports Standard Definition Television
(SDTV). High Definition Television (HDTV) is
not supported.
Do not Remove DVB-T Stick During
Playback!
Do not pull out the DVB-T stick from the
device or remove the device from the Pico
Station (PPA7301) while you have accessed
the DVB sub menu. Preset channels may get
lost. Exit the DVB sub menu before pulling out
the DVB-T stick of the device or remove the
device from the Pico Station (PPA7301).
If the DVB-T stick is being removed during
playback you may have to restart the device.
Notice
Notice
Notice
Notice
CAUTION!
Digital TV Playback 28
First Playback
Navigation Keys
All the keys shown are buttons on the remote
control.
When the DVB-T function is first started, the automatic
channel search must be started.
1Switch the device on using the on/off switch on the
side.
2After the initial screen the main menu appears.
3Connect the aerial (see also Connecting the Aerial,
page 27).
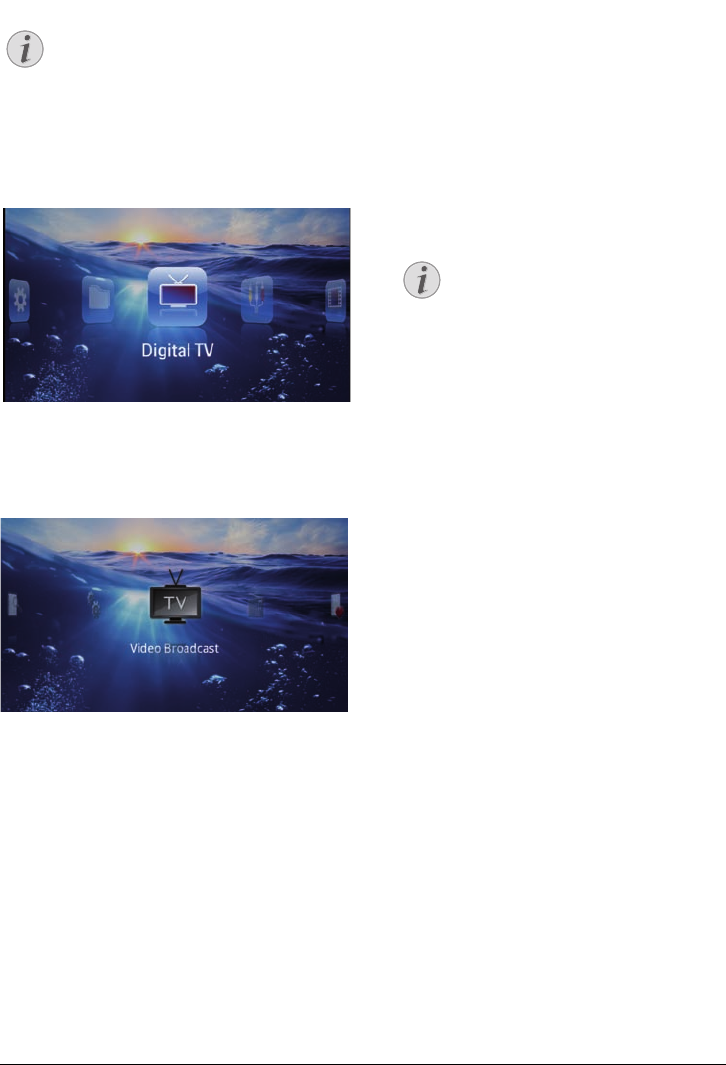
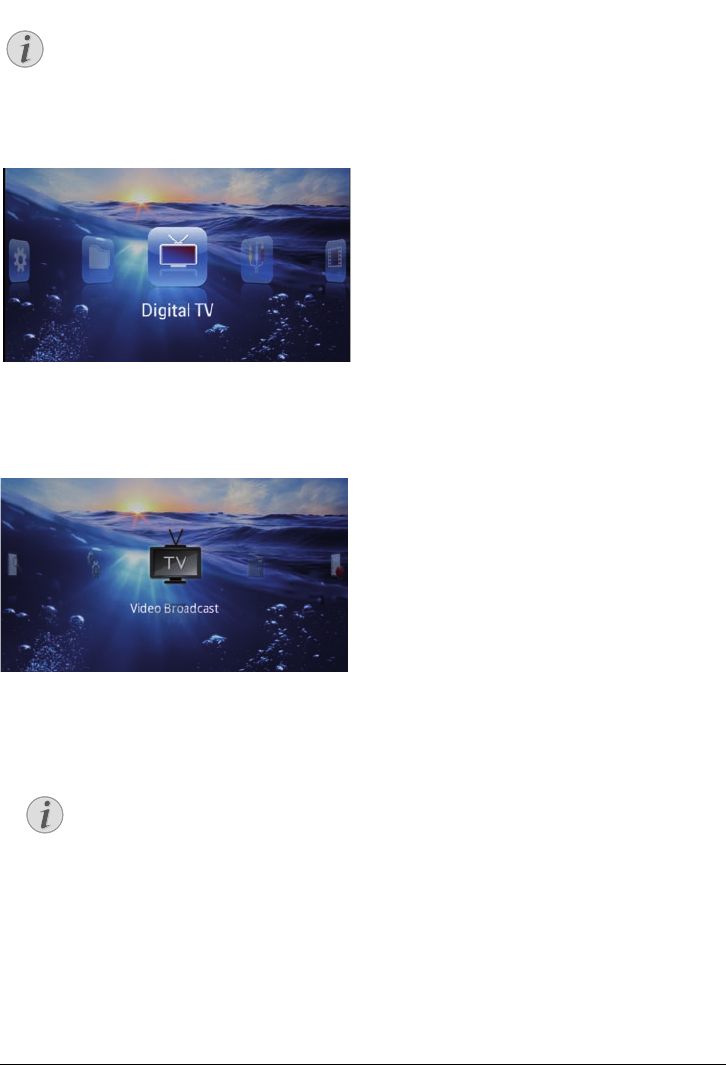
4Use the navigation keys to select Digital TV.
5Confirm with à.
6The sub menu appears.
Set Area
7Use the navigation keys to select Utilities/Setup.
8Confirm with à.
9Use the navigation keys to select Area set.
10 Confirm with à.
11 Use the navigation keys to select your area.
12 Confirm with à.
13 Press ¿to end the sub menu and return to the
overview.
Scan Channels
14 Use the navigation keys to select Scan Channels.
15 Confirm with à.
16 Use the navigation keys to select OK.
17 Confirm with à.
18 Use the navigation keys to select Auto.
19 Confirm with à.
Television
20 Use the navigation keys to select Video Broadcast.
21 Confirm with à.
22 Change the channel using z/{.
Displaying Channel Information
When changing channel, channel informa-
tion is displayed on the bottom projection
edge. The information bar is hidden after 5
seconds.
23 Press uto end playback and return to the main
menu.
During playback you can adjust the volume using ¬/
on the remote control. Press « or ¬ repeatedly to
shut off the volume completely.
Notice
Notice
29 Philips · PPX3610
Television
Navigation Keys
All the keys shown are buttons on the remote
control.
1Switch the device on using the on/off switch on the
side.
2After the initial screen the main menu appears.
3Connect the aerial (see also Connecting the Aerial,
page 27).
4Use the navigation keys to select Digital TV.
5Confirm with à.
6The sub menu appears.
7Use the navigation keys to select Video Broadcast.
8Confirm with à.
9The last viewed channel is played. Change the chan-
nel using z/{.
Displaying Channel Information
When changing channel, channel informa-
tion is displayed on the bottom projection
edge. The information bar is hidden after 5
seconds.
10 Press u to end playback and return to the main
menu.
During playback you can adjust the volume using ¬/
on the remote control. Press « or ¬ repeatedly to
shut off the volume completely.
Notice
Notice