SEUIC Technologies AUTOID6 AUTOID6 User Manual
Jiangsu SEUIC Technology Co.,Ltd AUTOID6 Users Manual
Users Manual

Basic function
Data collection
Wireless communication
Barcode scanning (1D、2D)
RFID(HF、UHF)
WIFI
IR
Bluetooth
Catalogue
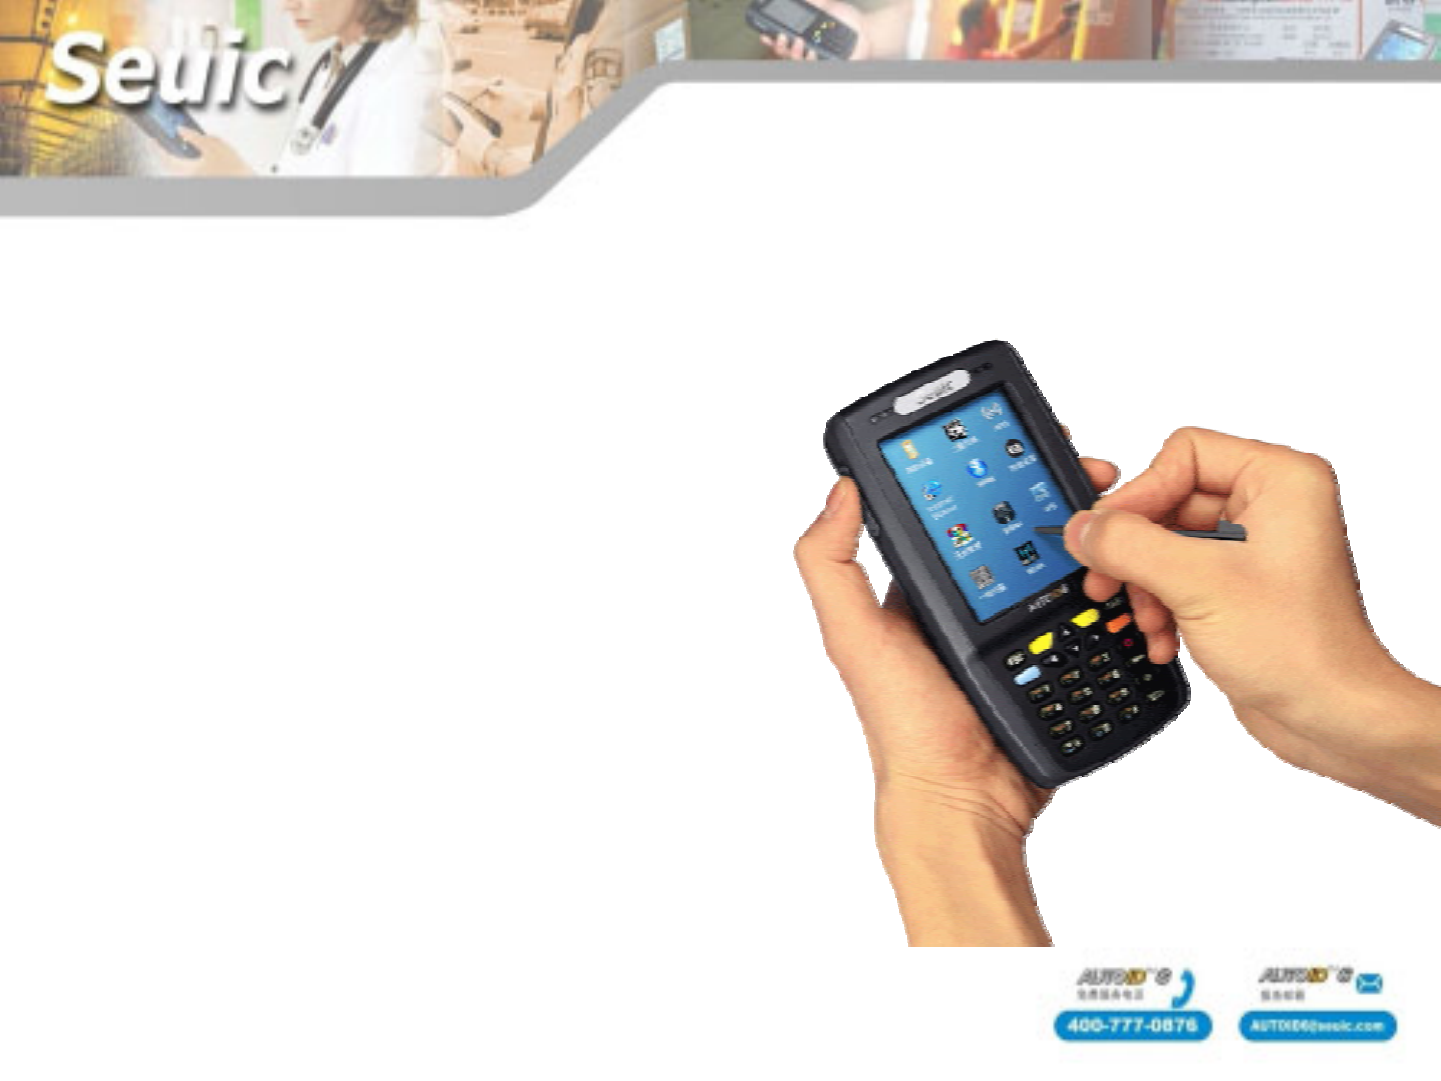
Appearance introduction
Input method
Charging mode
Use of application center

Basic function
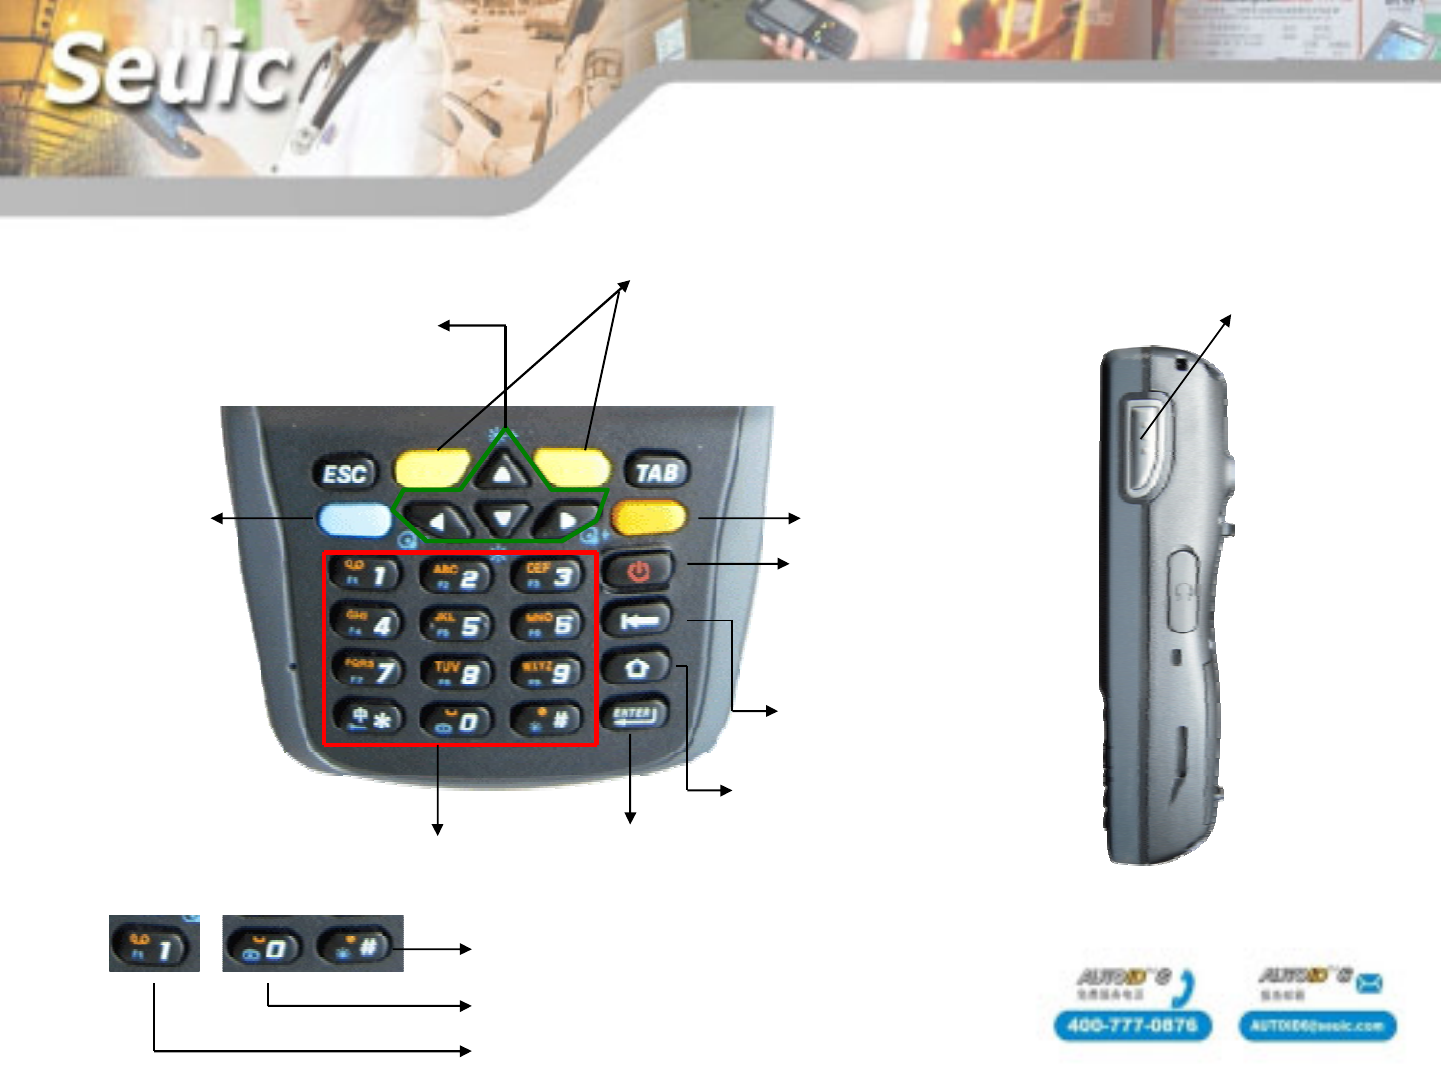
Hard keyboard introduction
Scan keys
Side keys, using as scan key
and three keys to restart PDA
Number、letter complex keys
With the blue key to set Fn function
Blue function
key
Orange function key
Enter
Shift key , using for
change case
Delete key
On/off key
Press and hold
the key for 2s
Point
0/space
With orange key can use as symbol key
Direction keys
With the blue function key to
adjust the volume and screen
brightness
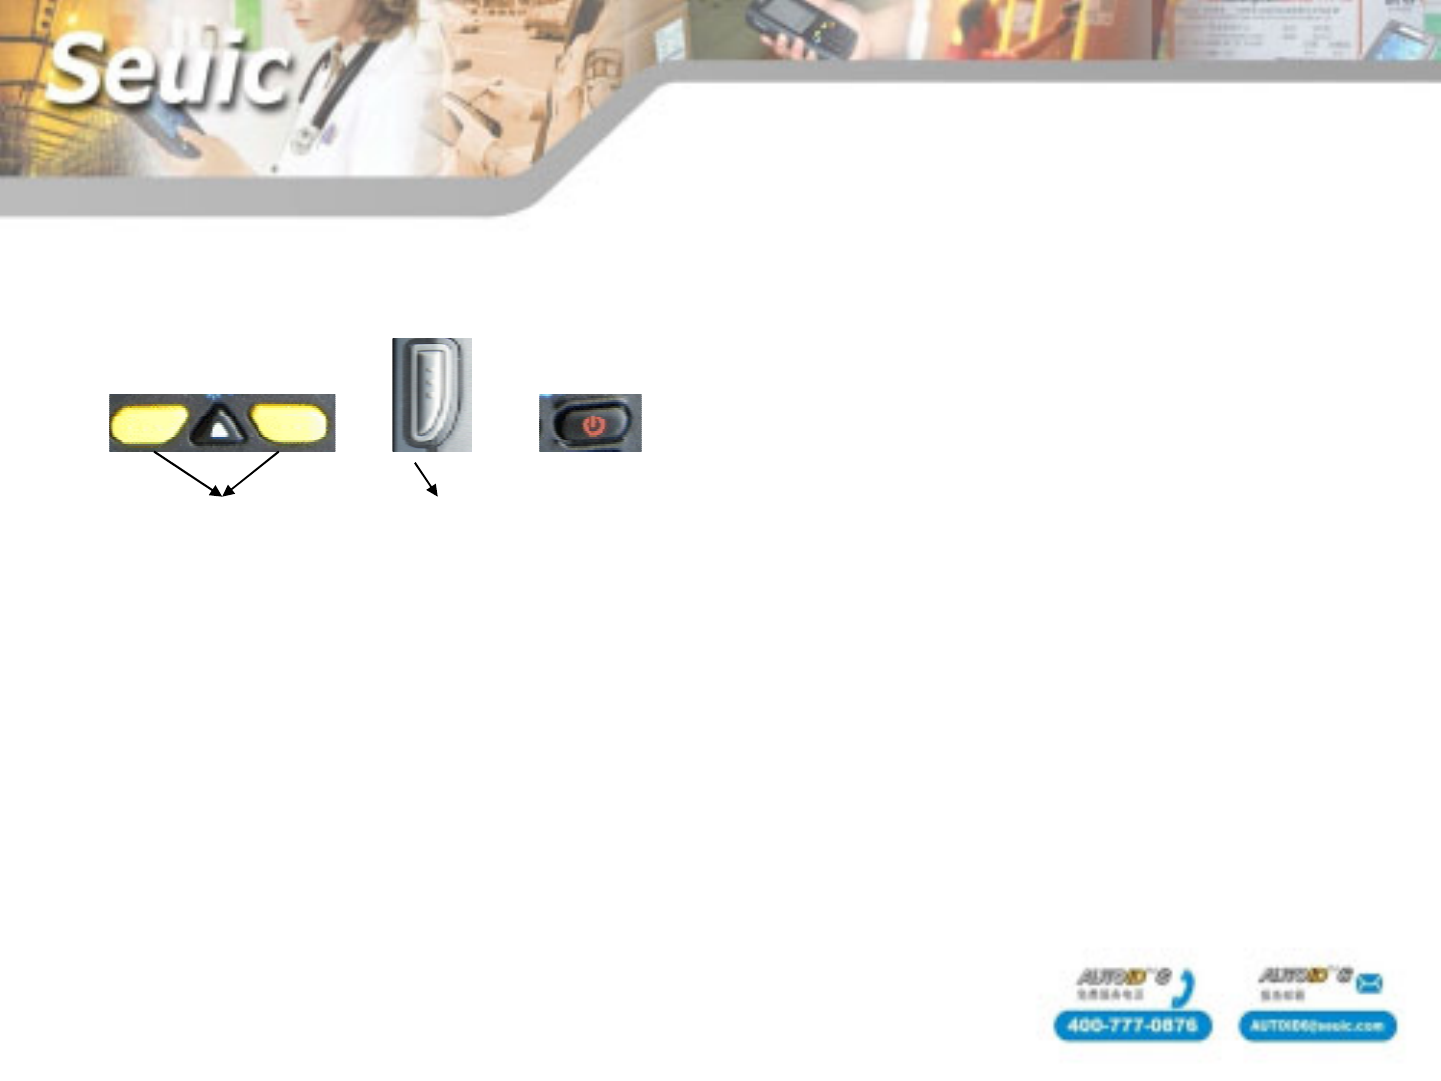
1.Restart :data in RAM is lost, but the install won’t be lost
Any one of
the two
+ +
Any one of the
side keys
Press the three keys together and then
release. You can restart the machine.
Hard keyboard introduction
2. Recover the device to default setting:all the programs and data will be cleared except
the data on user’s memory space.
Refer to the guidebook of default setting for details.
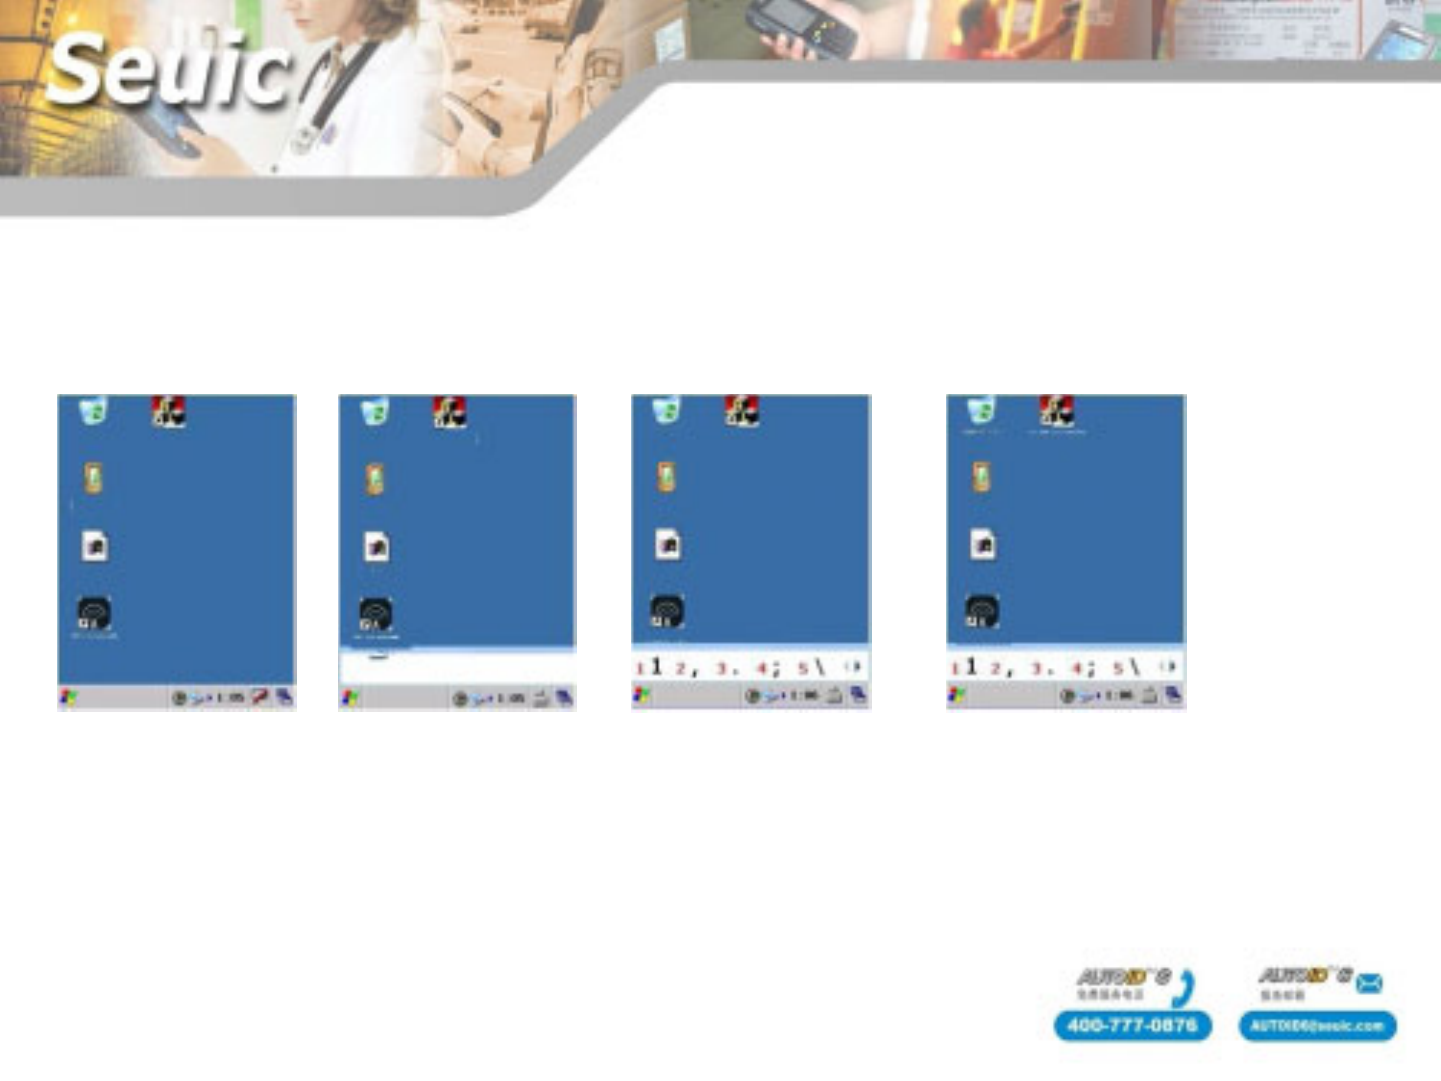
3、Use of orange key
The key is an input method switch key, press the orange function key, enter the text input
Before pressing
the orange key
After pressing the
key
After pressing 1
key
After pressing 2
key
Hard keyboard introduction
Hard keyboard
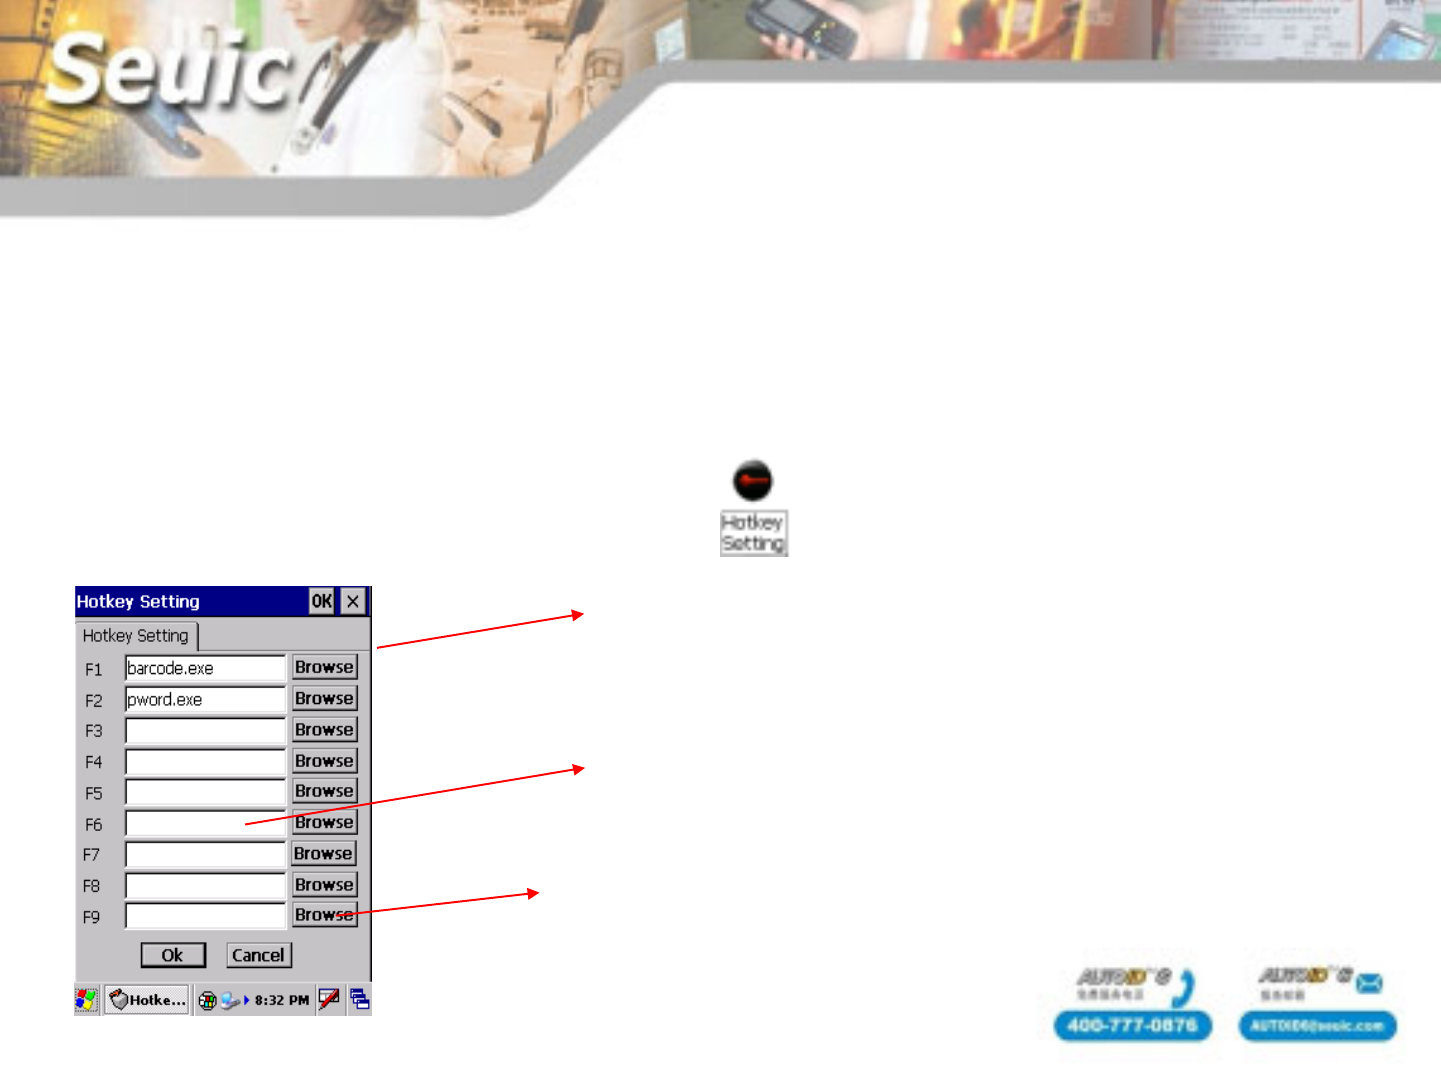
3、Blue function key usage
The key function is Fn, press blue key and then press 1,run F1.
Use the arrow keys with the left and right key to adjust the volume up and
down keys to adjust the screen
Fn setting :Click into Set-System, click
Pressing F1 will execute barcode
Scanning can set the hotkey
Blank means no hotkey
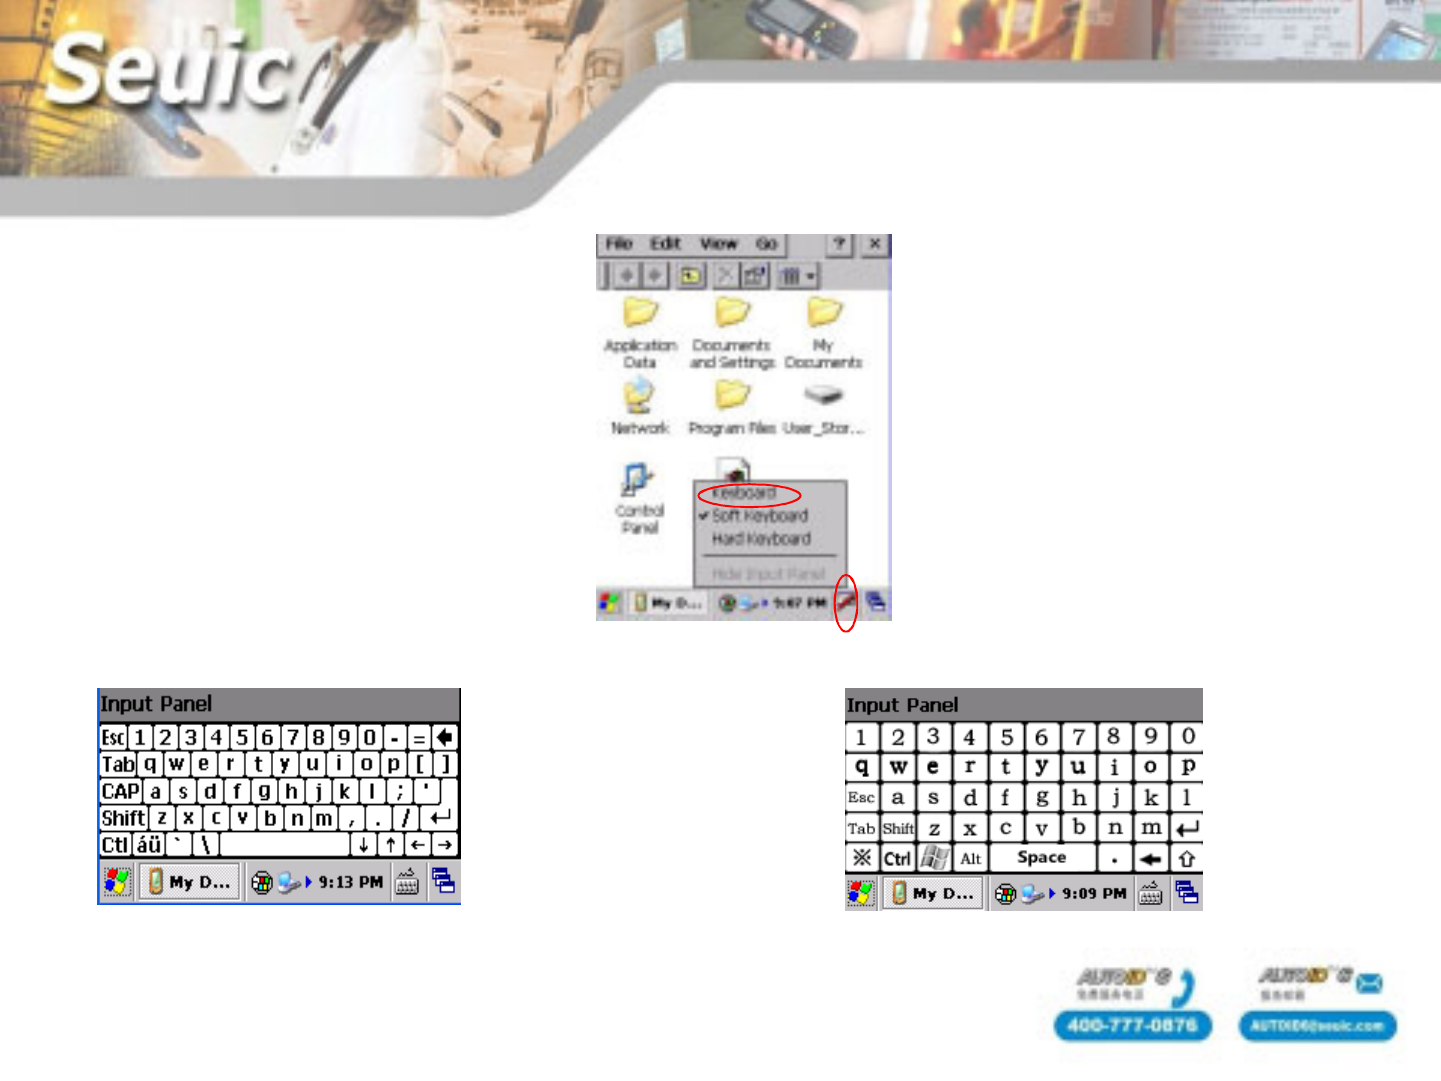
Input
1、Input
There are three input
methods,such as keyboard\soft
keyboard\hard keyboard
keyboard Soft keyboard
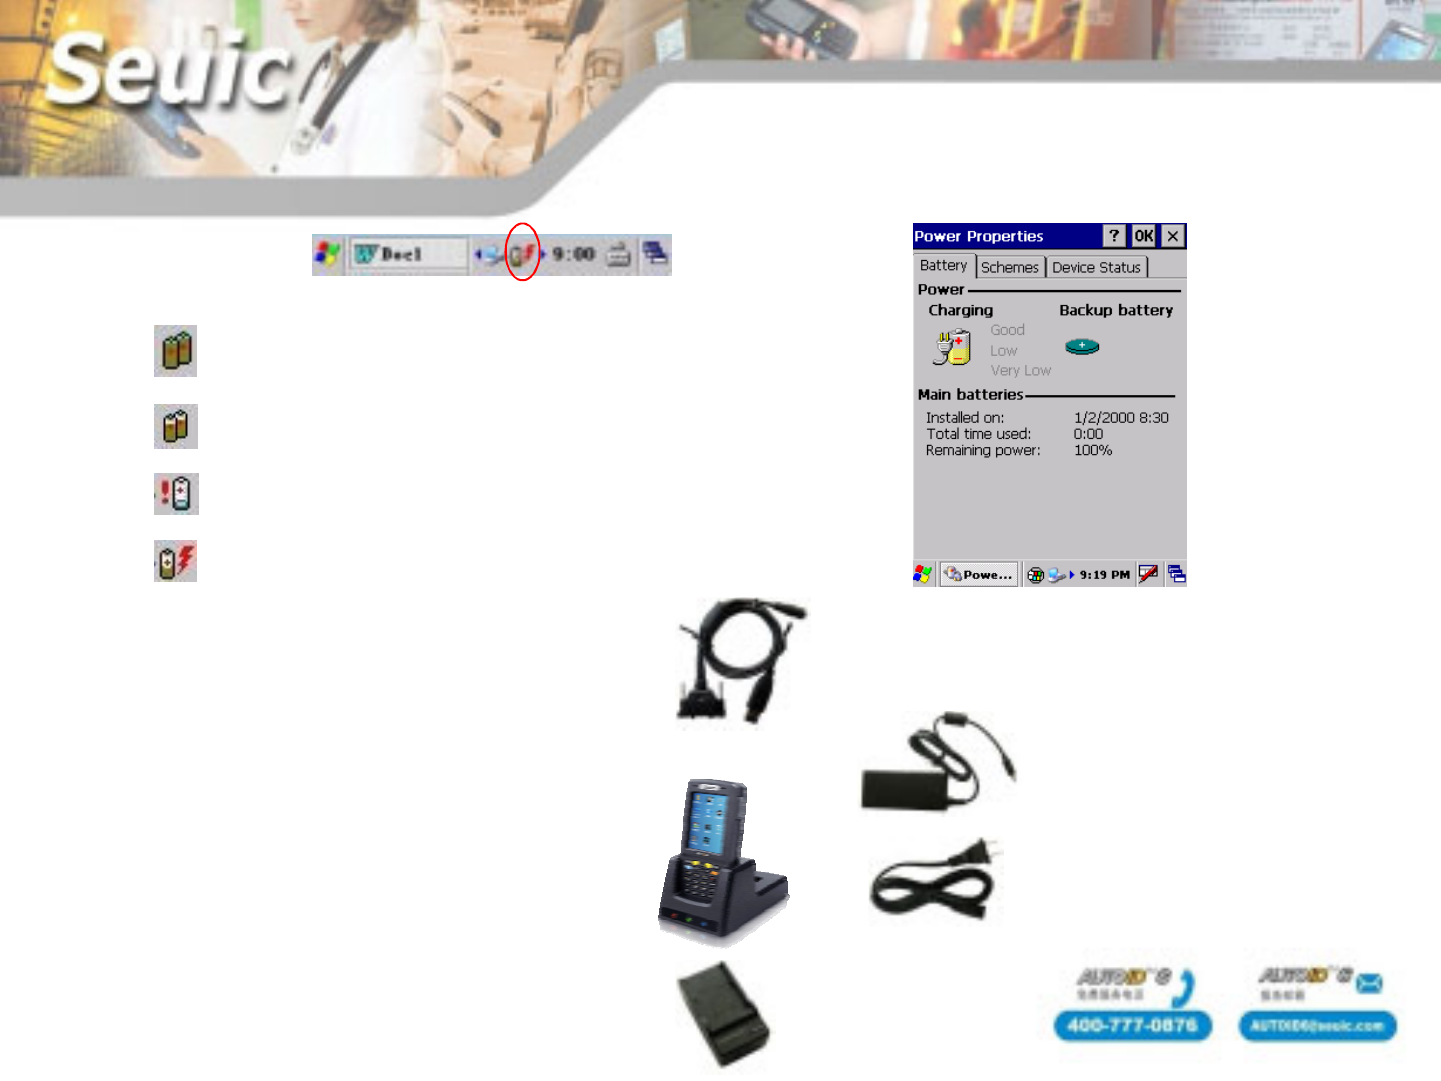
Battery indicator and charging
1、Indicator
Not full, double click the icon
to display the power
Low power
Charging
2、Charging methods
Full
End plug charging charging time:2-3h
Base charging charging time:2-3h
Portable charger charging time:4-5h
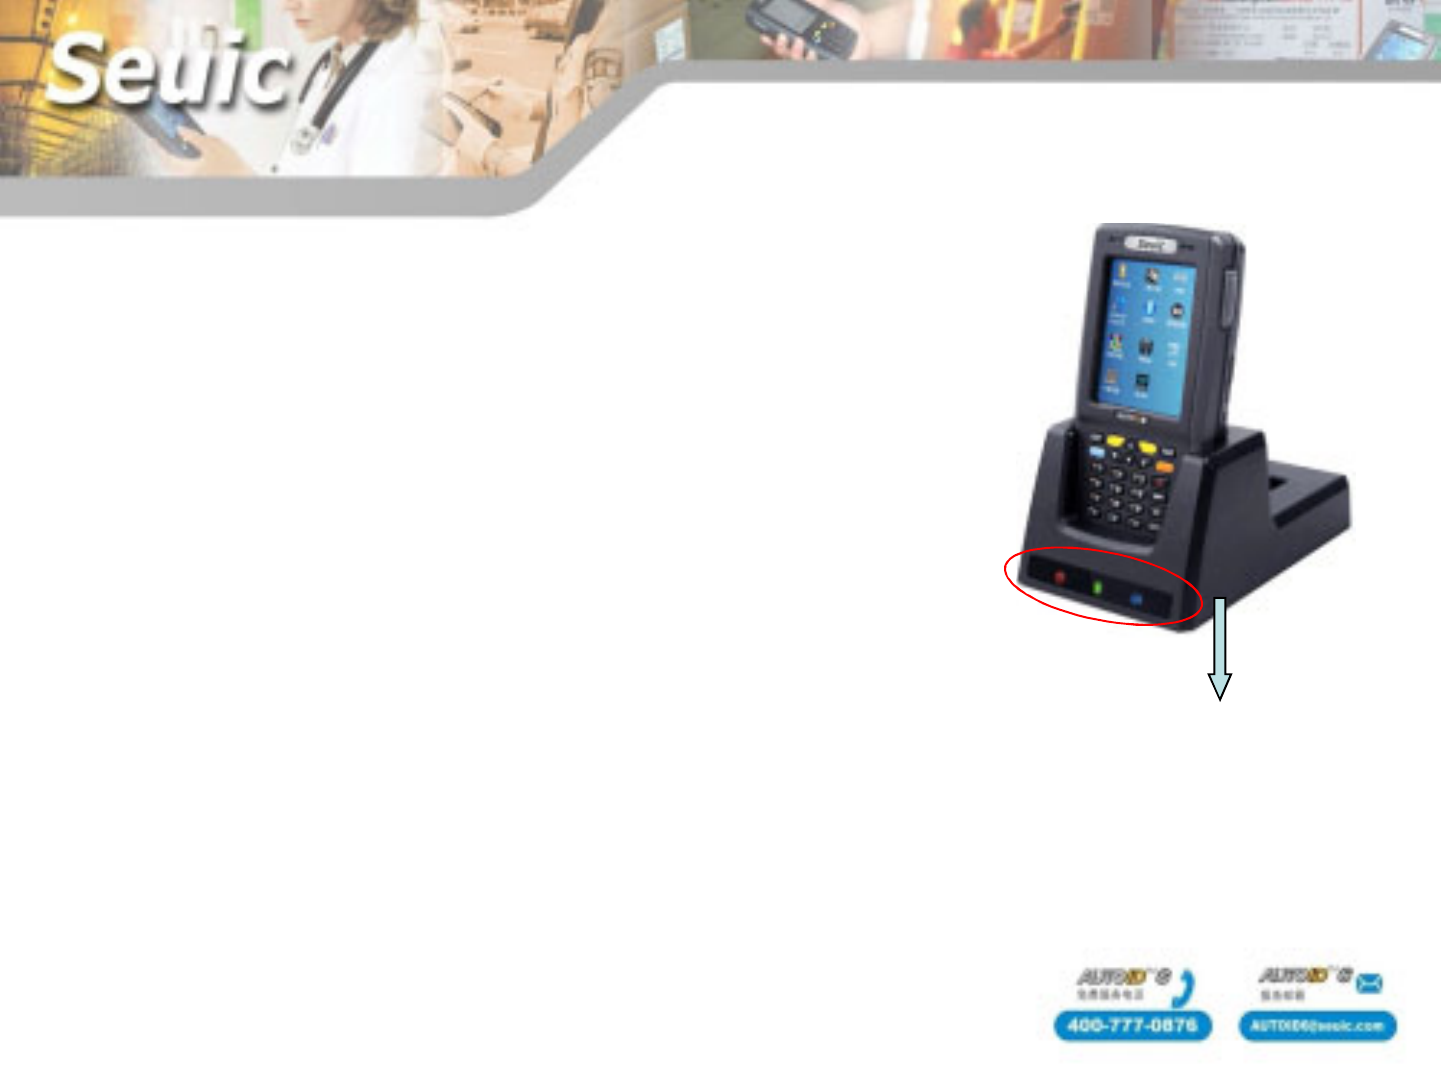
3、Cradle introduction
When the PDA is being charged, PDA’s red light means
charging, green light means full.
When the battery is being charged in cradle compartment,
the middle light will turn the red to green light.
Attention:
1.The three light-emitting diodes in cradle from left to
right are power entry、charging indicator、USB data
connection indicator.
2.When the battery will charge fully, the charging LED
will turn out for a short time.
RS232
USB1.1
Both PDA and battery
charging
Optional BT function
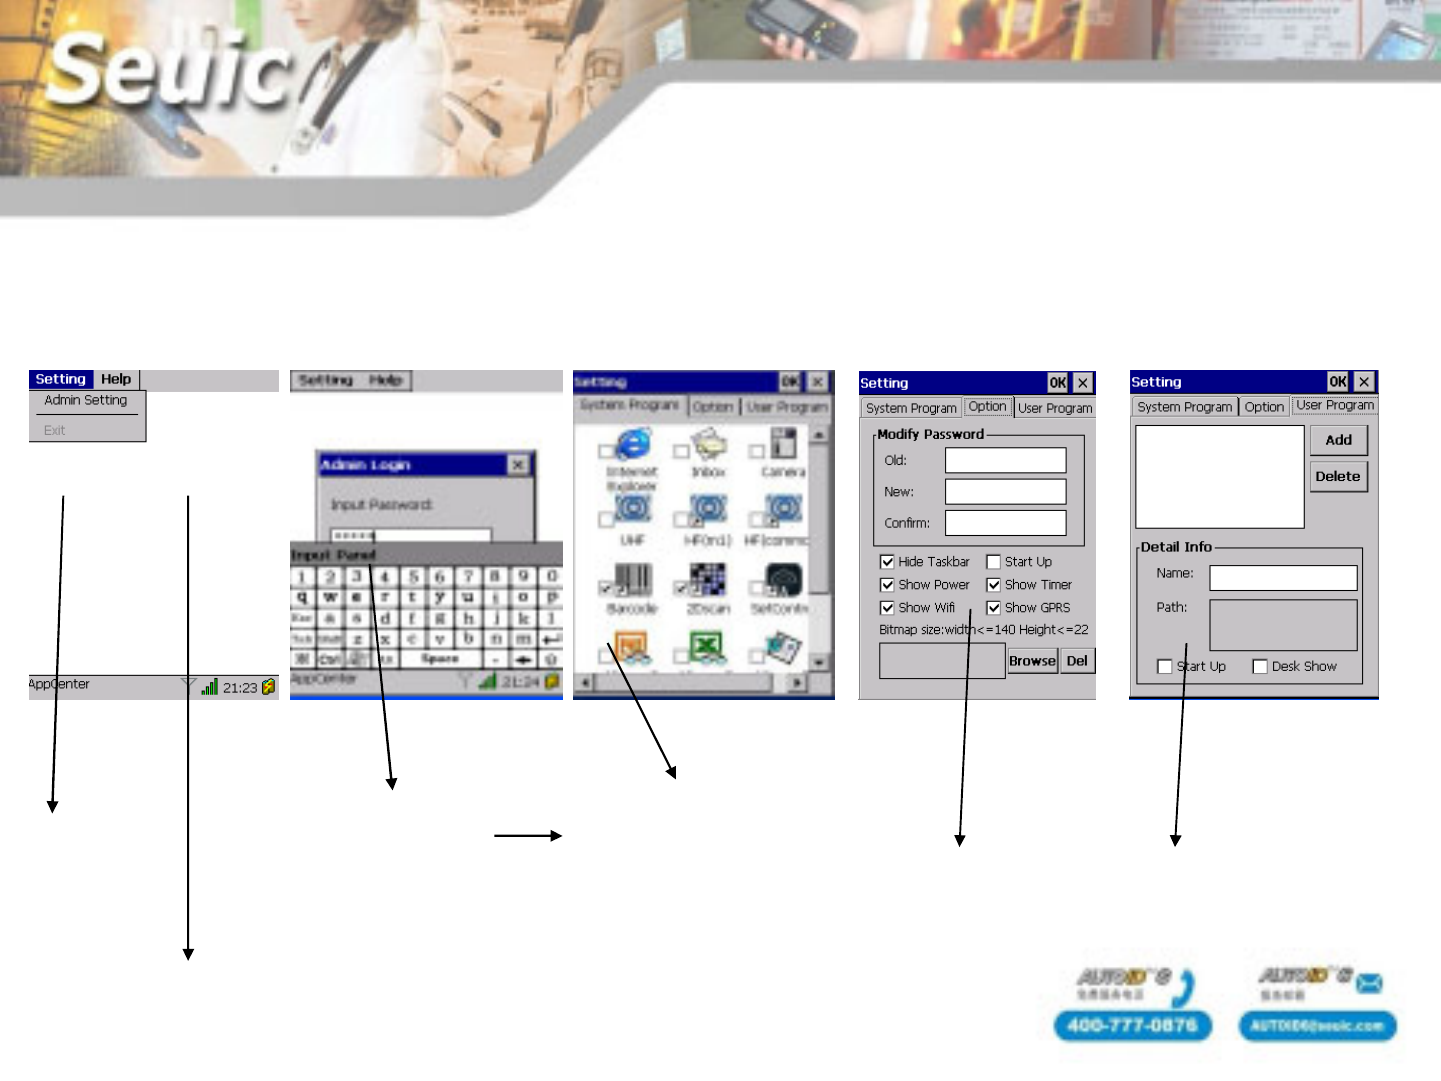
AppCenter
You can set the AppCenter. Default password is " seuic "
Open the AppCenter ( path: Start-Programs- AppCenter )
Enter into
management
setting
Display the opened
software
Enter the
password Modify the
password
Software authority
management Set boot from
the start

Data capture

• TYPE:MOTO(symbol)-SE955
• Optical Resolution: 0.004in(4mil)
• Scan Rate: 92scans/second to 116scans/second
• Scan Distance: 2cm to 100cm
• Rotation Angle: 5in±35°(100%UPC)
• Tilt Angle:5in±65°(100%UPC)
• Skew Tolerance: ±50°( 100%UPC)
• Ambient Light: Natural light:10,000ft. Candles(107,640Lux)
Artificial light:450ft.candles(4,844Lux)
• Scan Angle: 47°± 3°(standard)
• Laser Power: 1.7MW±0.2MW(standard)
• Support:
UPC-A,UPC-E,UPC-E1,EAN-8,EAN-13,Bookland
EAN ,Code-128,UCC/EAN-128,MSI,ISBT 128,
Code 39,Trioptic Code 39,Code 93,Code 11,
Codabar,ITF-14,RSS-14。
1D scanner parameters
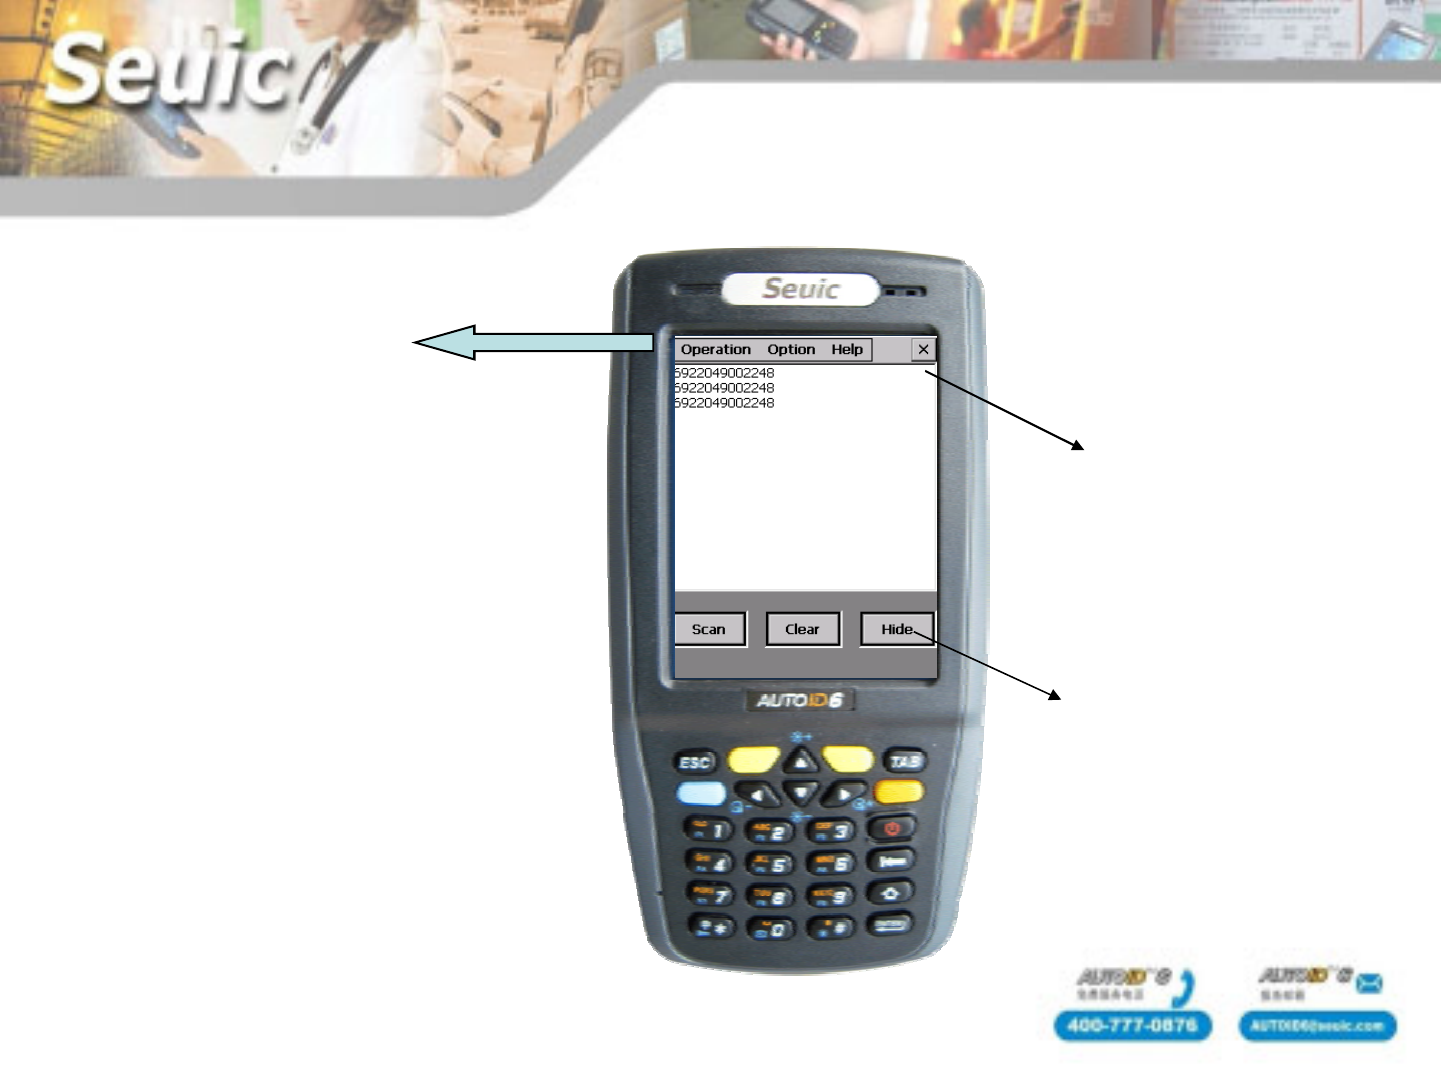
1D Scanner
Settings
Click this will
close the 1D scanner
Hide the 1D
scanner
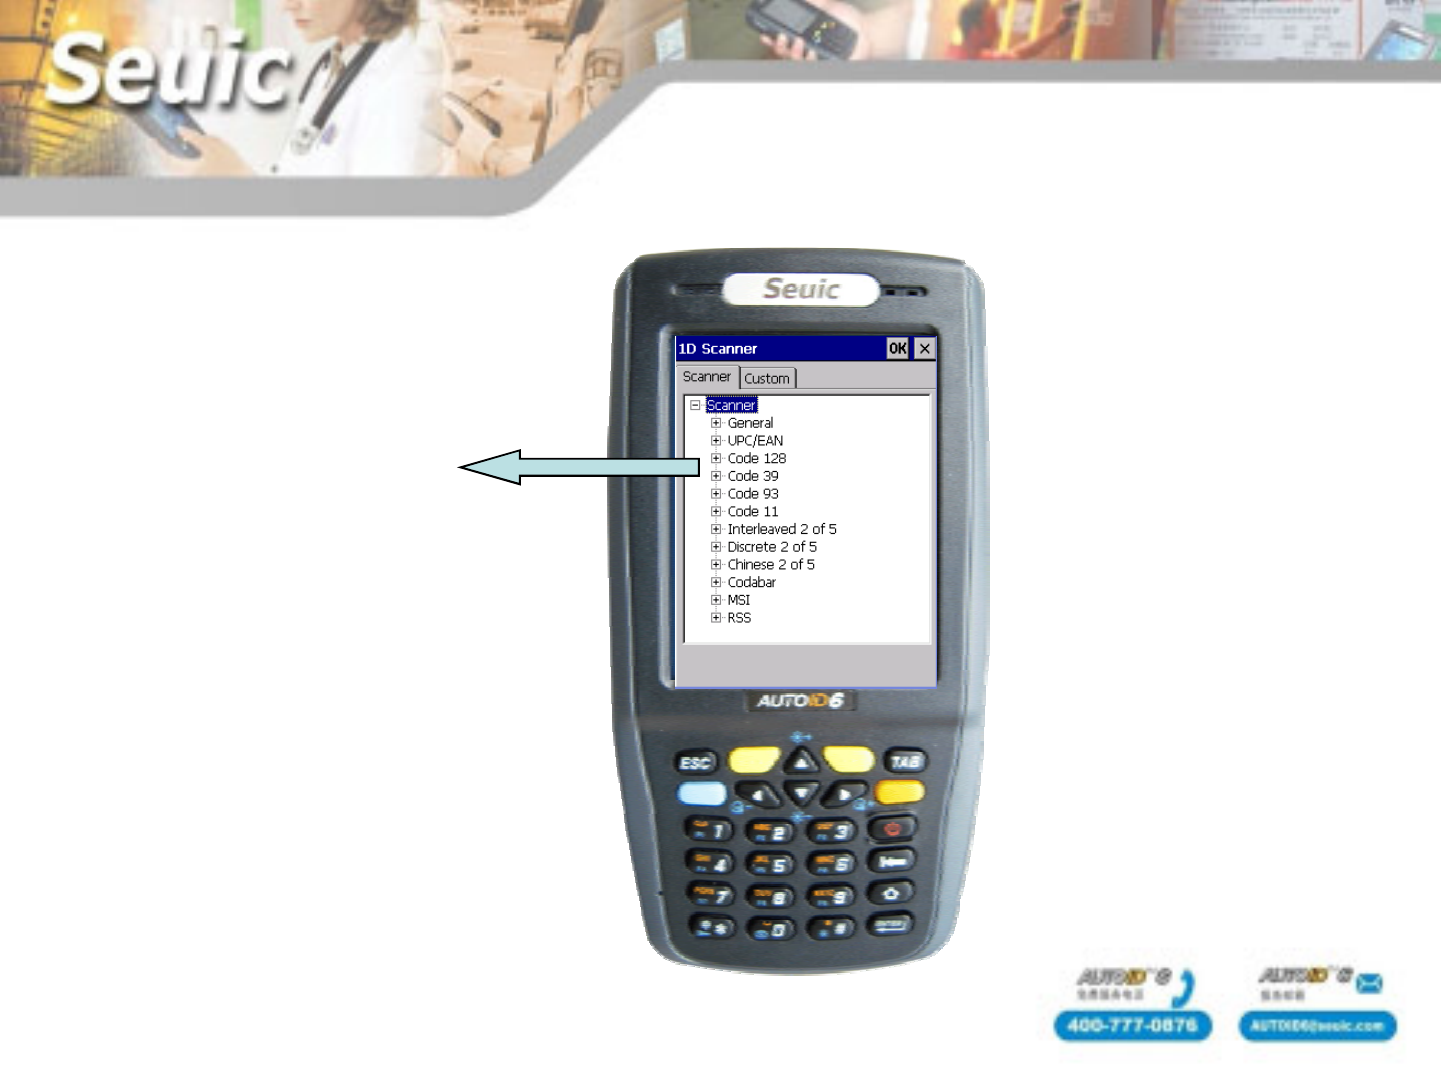
Setting barcode type
Suggest not modify
1D Scanner
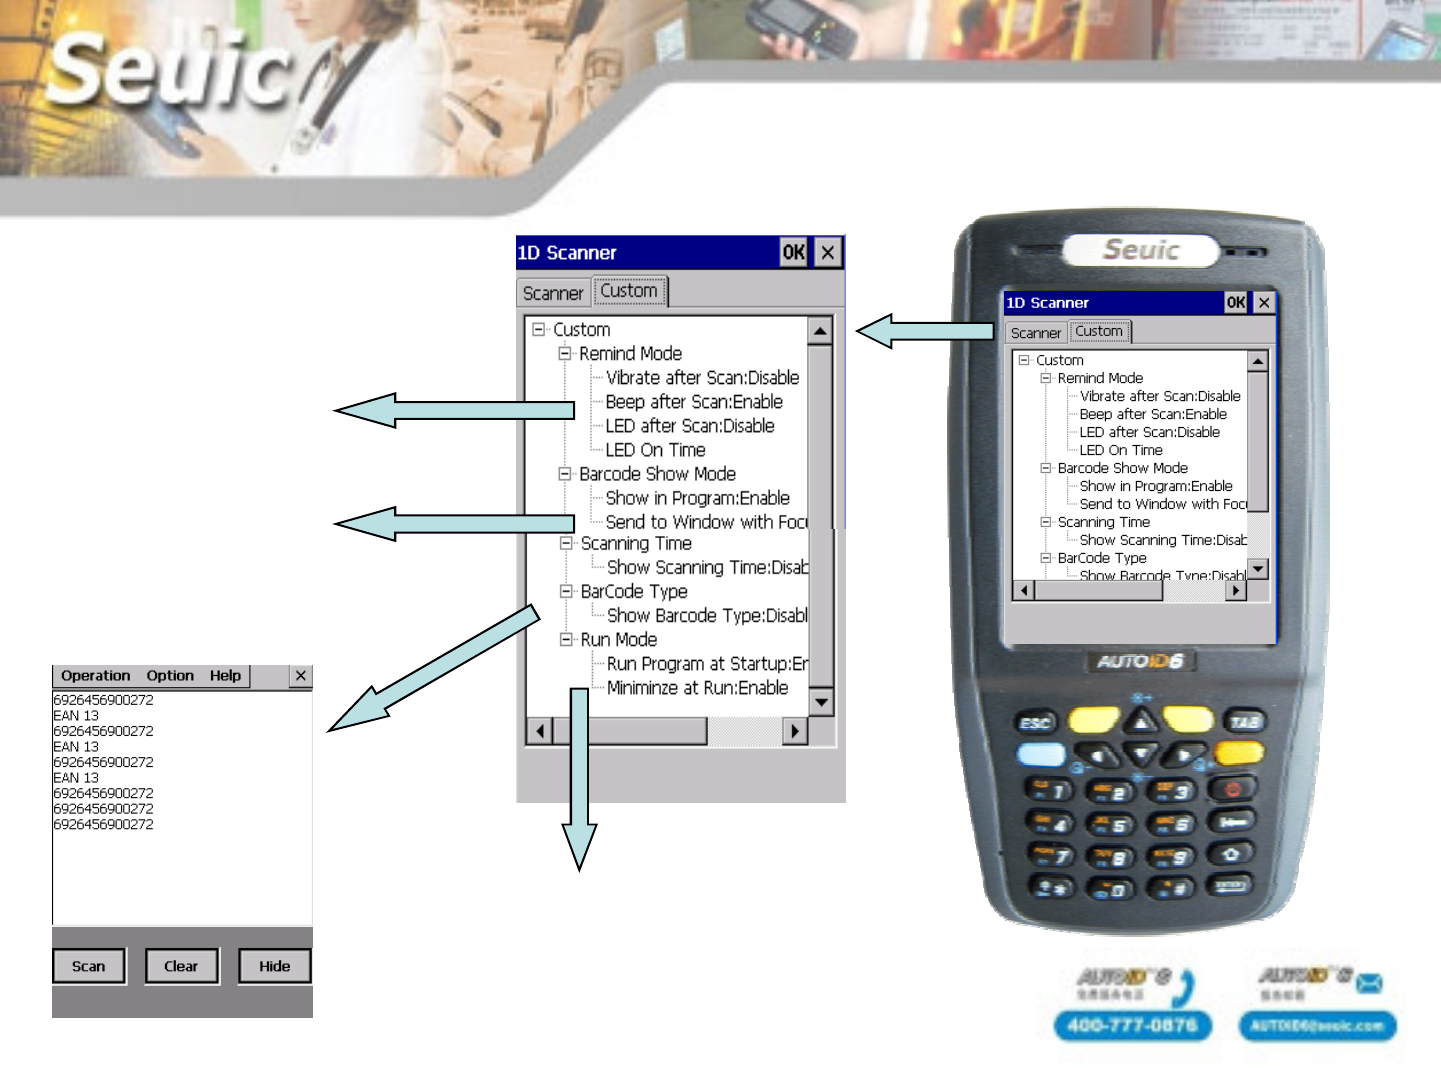
Set remind mode
Set barcode show
mode
Set run program at startup
1D Scanner
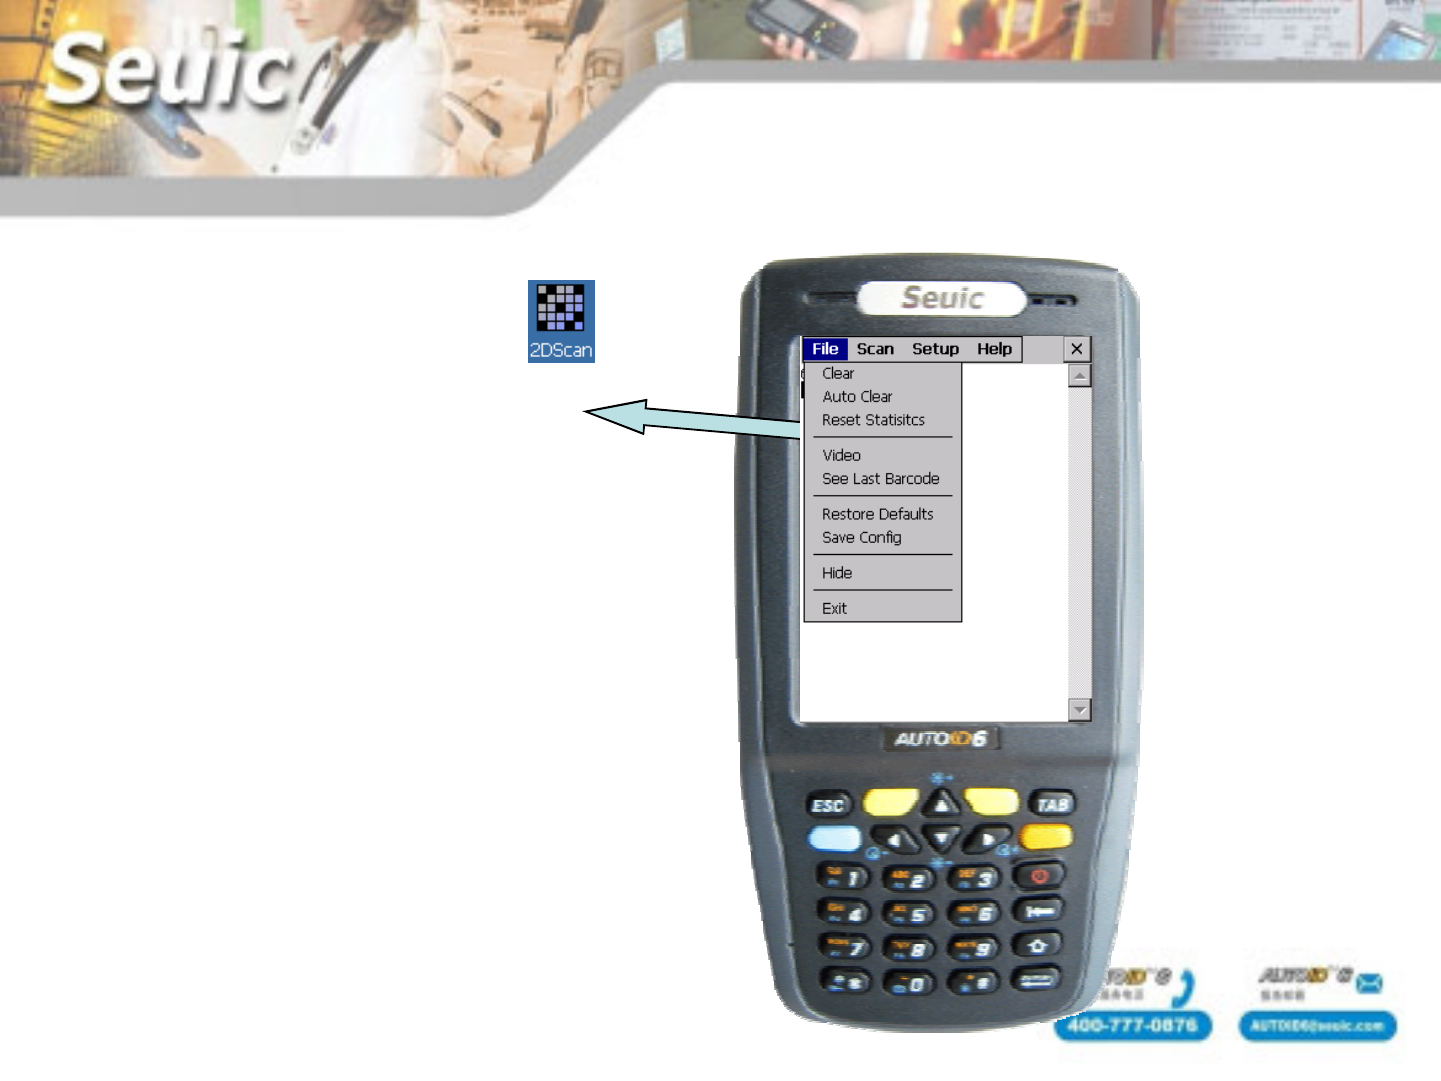
Enter into “AppCenter”,click
Start the 2D scanner
2D Scanner
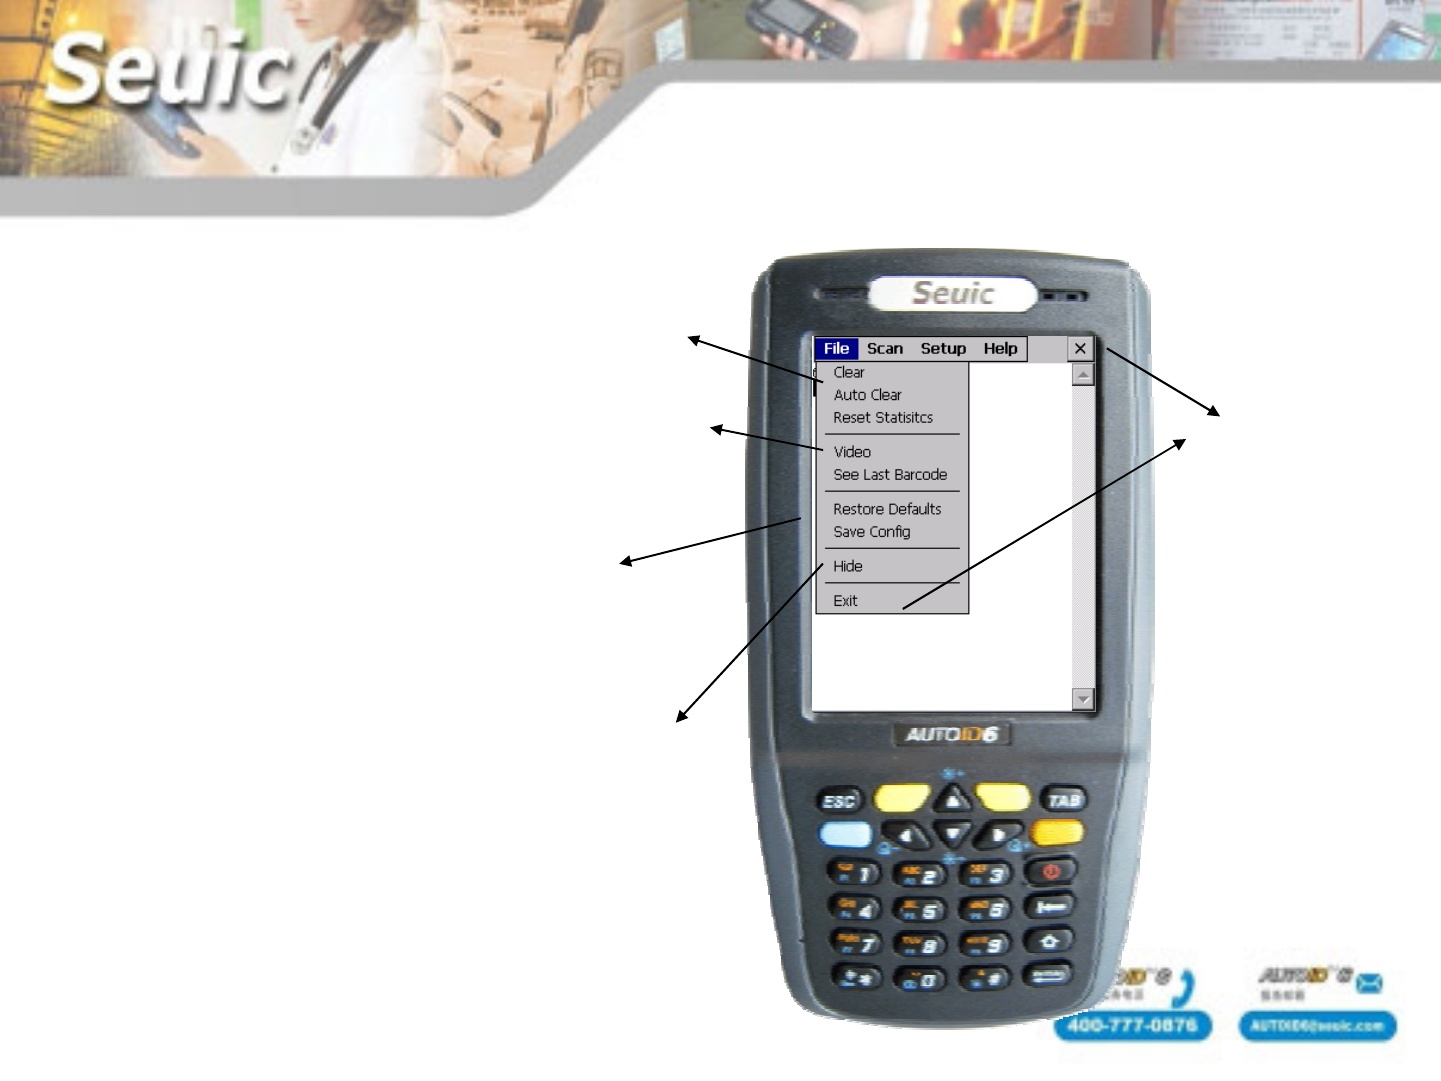
Clean the barcode information in
the screen
Image capture function can
capture black and white pictures
Recover to default settings
Save the modified settings
Attention: each time modify
Parameters, click saving
Hide the 2D software
Exit
2D Scanner
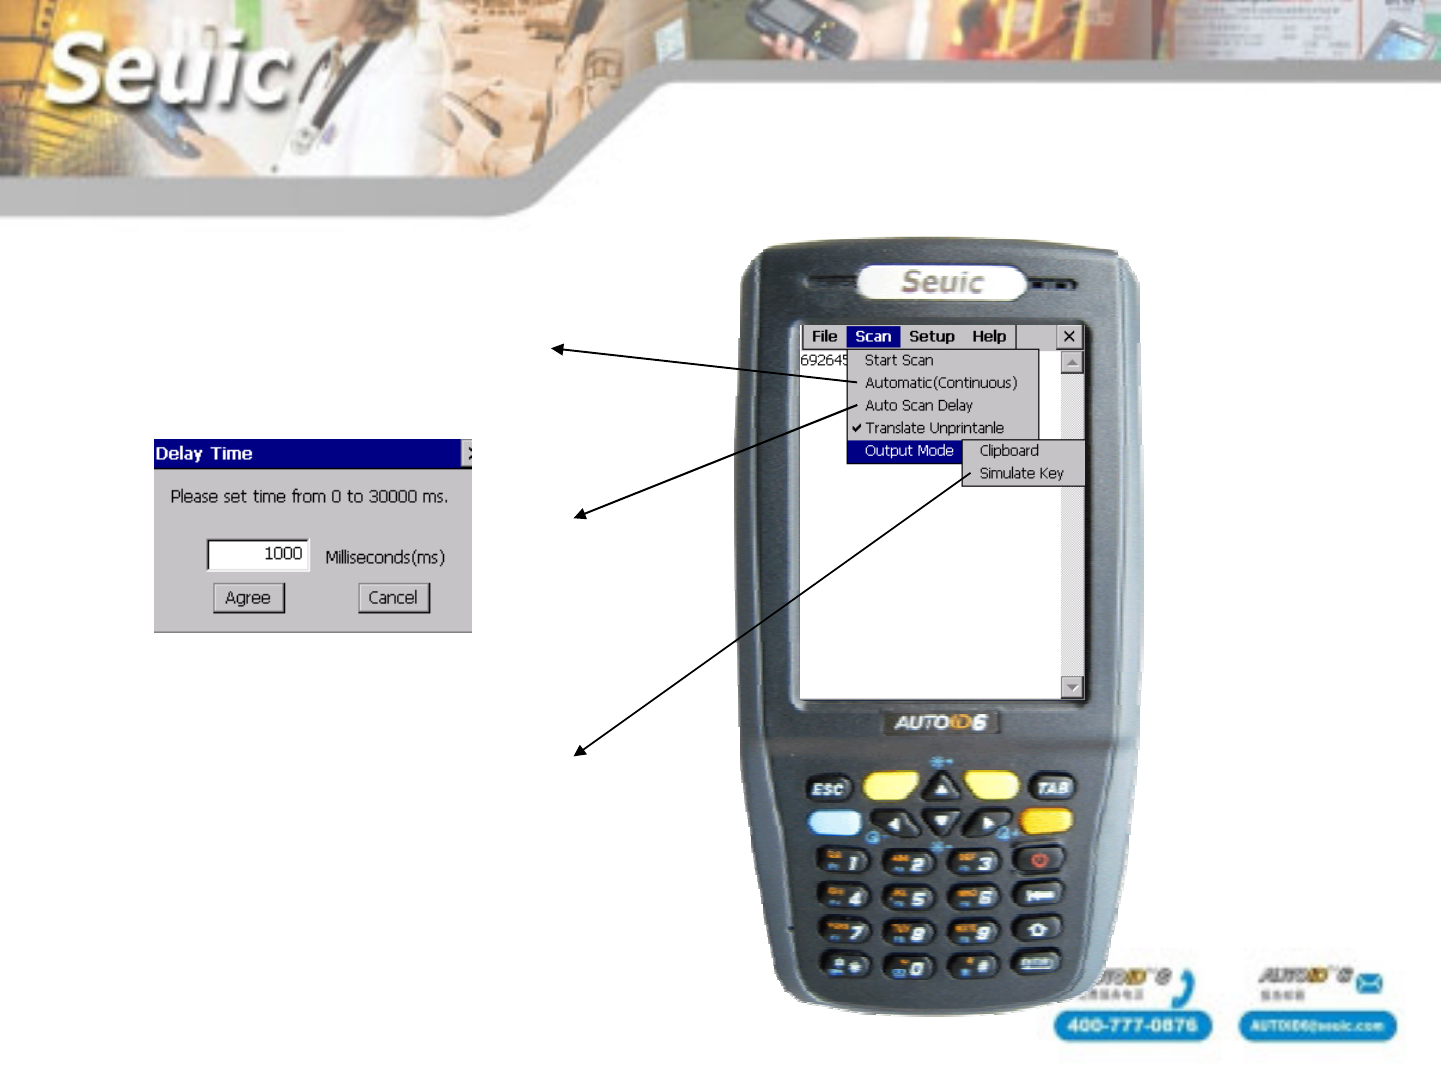
If you want to output the code to txt
or excel, you need to choose Clipboard or
Simulate Key
Set the time interval
Set automatic and auto scan delay
2D Scanner

1、Set scaner light
general select Both
aimer And LED
2、If code is white, background is
black. Please select Enable
Colour Reverse
3、Scan mode :general
" standard ".
4、Set the scan prompt
5、Display code
information
Cancel all display
information
Select all display
information
Reset Statisitcs can
clear it
6、Barcode
type open or
close
7、
Barcode
configuration
recovery
8、Hide the 2D
software
2D Scanner
HF (Mstar):
Read and write tag:support ISO15693、ISO14443A/B(Without encryption
protocol)、ISO18000-3 protocol
Read and write frequency:13.56MHz
Read and write distance: 0-6cm (write distance slightly less than read)
HF (M1):
Read and write tag :ISO14443A(encryption protocol)(Mifare one S50,S70
and other compatible tag)
Read and write frequency :13.56MHz
Read and write distance: 0-6cm (write distance slightly less than read)
RFID—HF module parameters
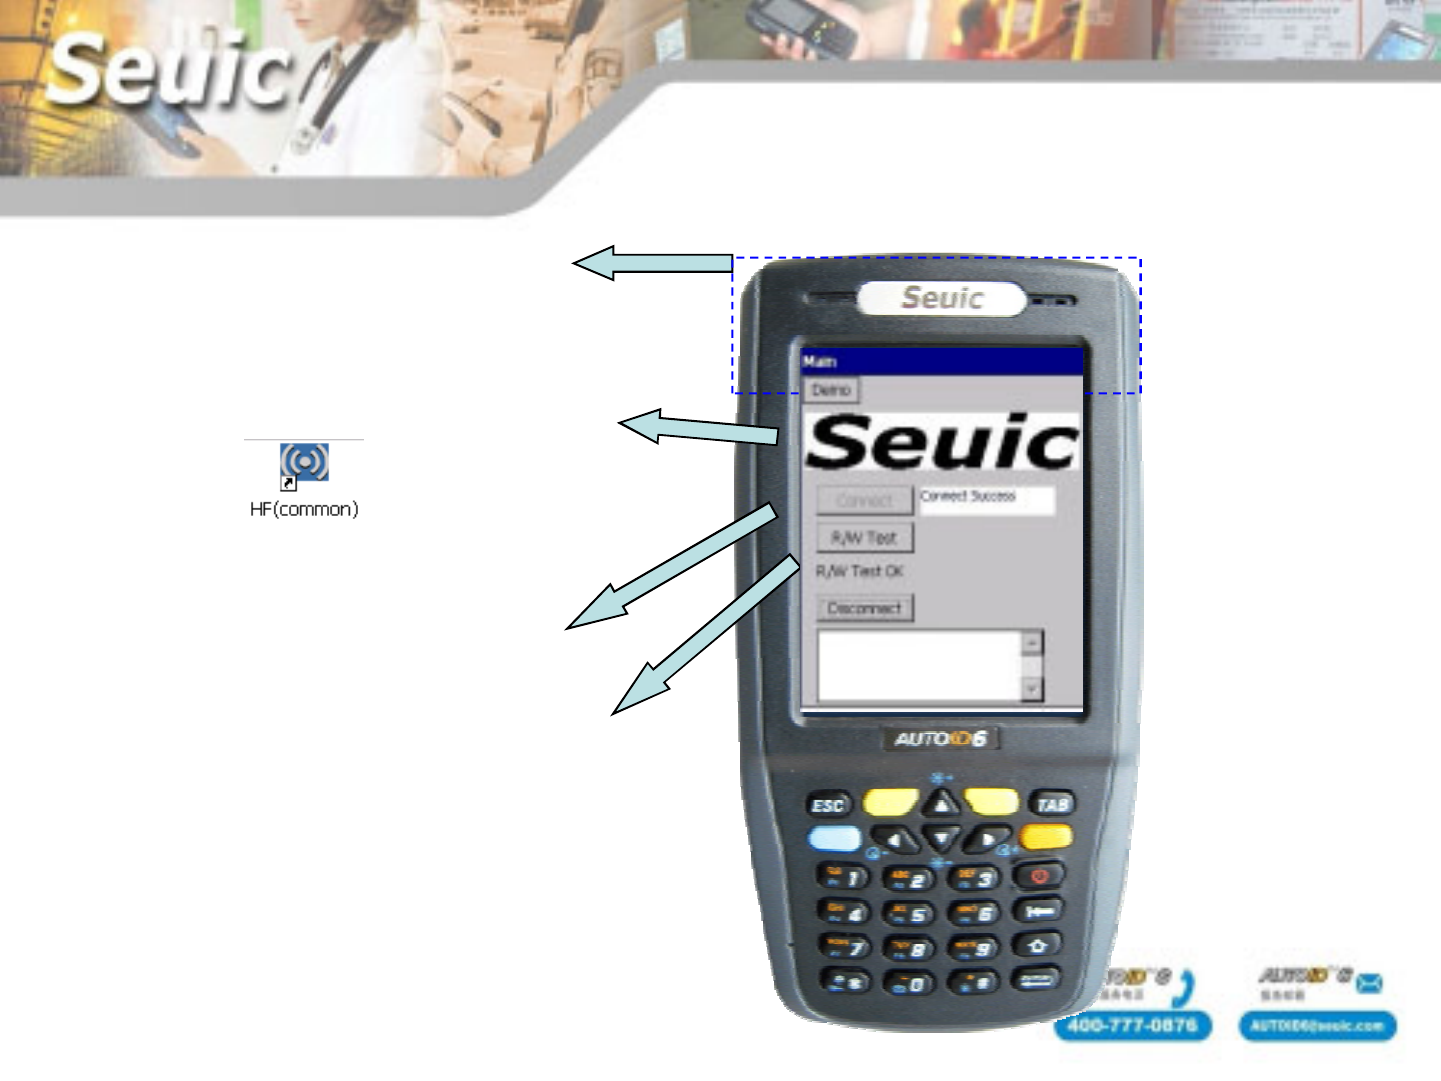
1、Enter into AppCenter then
click
RFID—HF ( Mstar usage)
2、Click " Connect" then display
" Connect success ".
3、Click " R/W Test " then display
" R/W Test OK ".
Top back space is
read and write area

4、Click " Tag Read " enter into read
and write operation
RFID—HF ( Mstar usage)
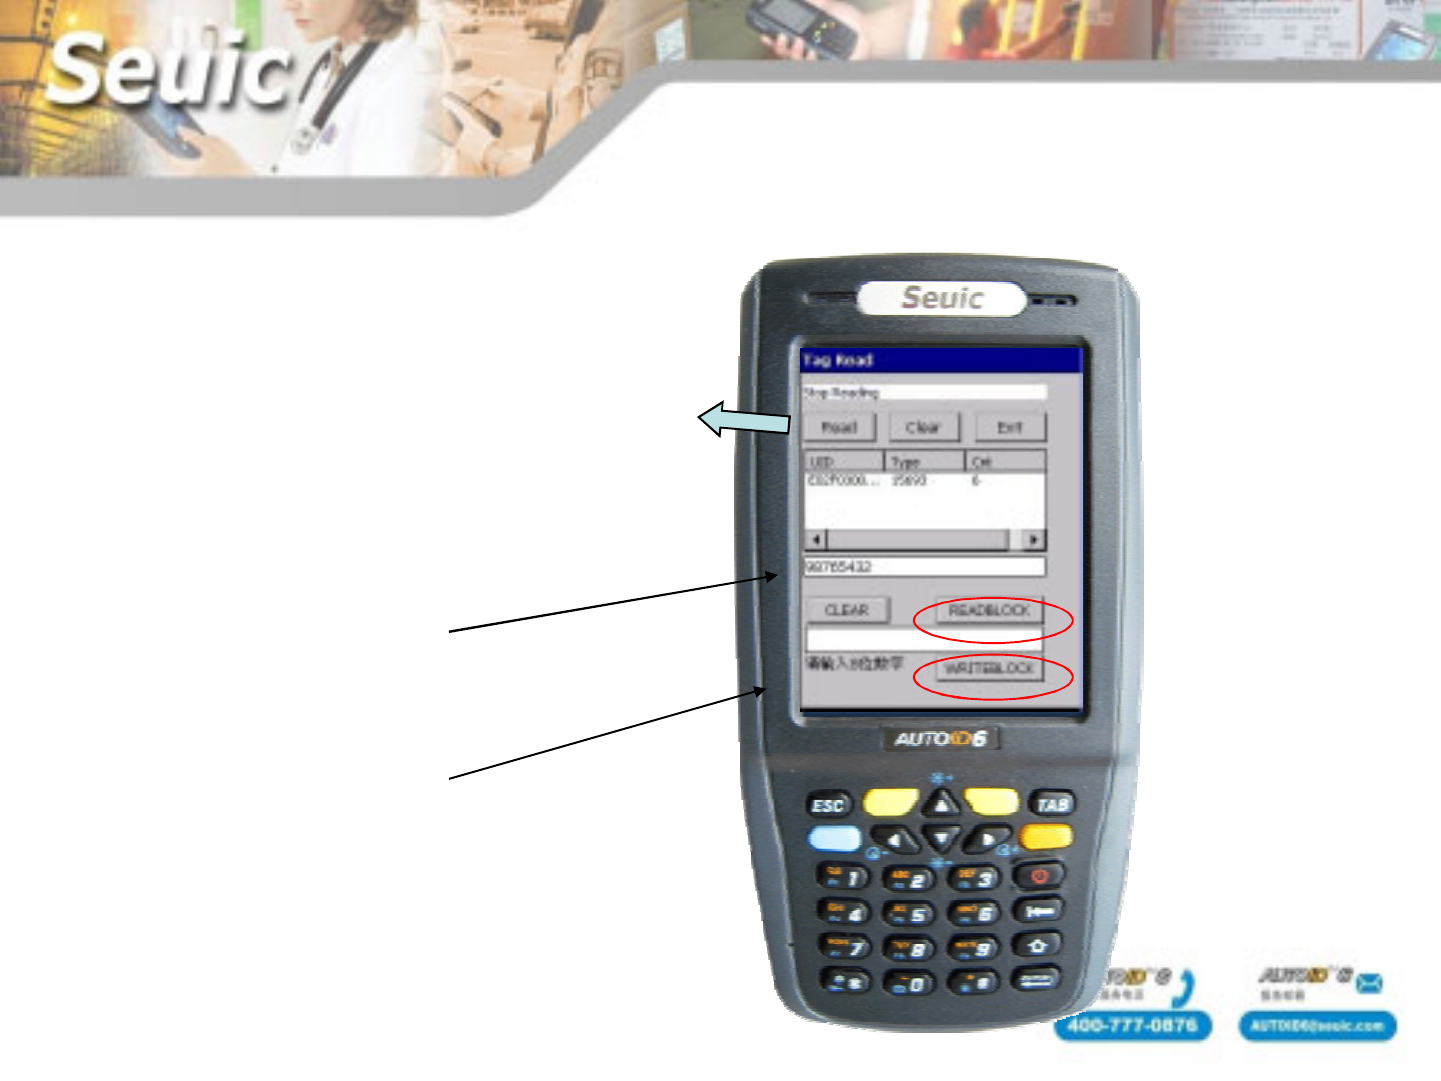
5、Click " Read " can read tag number、
protocol type、read times, as the
right figure
6、Click " READBLOCK " can read data
in the tag
7、Click " WRITEBLOCK " can write data
in the tag
Attention: this is just a demo software
RFID—HF ( Mstar usage)
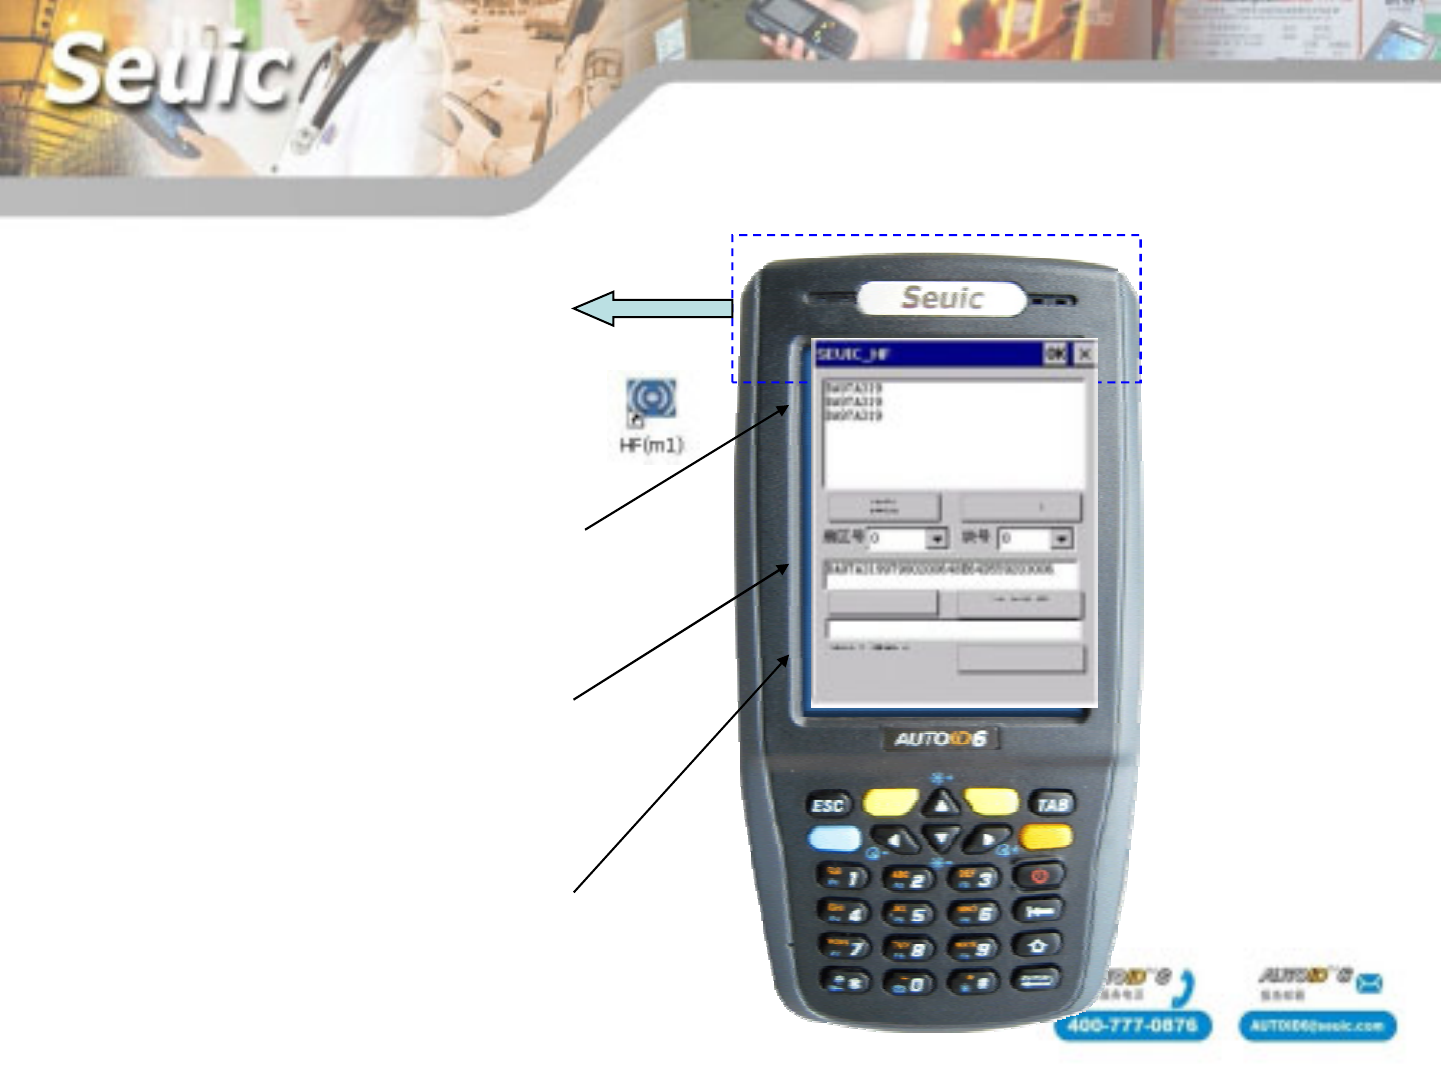
1、Enter into " AppCenter ", click
start the software
Top back space is
read and write area
2、Clicking “ReadID” can read tag
number
3、Select “Section” and “Block” ,click
“ReadCardData”
4、Clicking “WriteCardData” can write
data in the tag
Attention:Not
every section nor
block can read and
write,for example
section 0 and block
0 can only read
RFID—HF ( M1 usage)
Read and write tag :support ISO18000-6C、EPC CLASS1G2 protocol
Read and write frequency :902-928MHz
Transmit power:20-26dBm (adjustable)
Read and write distance :0-150cm (write distance slightly less than read)
Multiple tag read:support
RFID—UHF(common) module
parameter
Read and write optimum position:45°
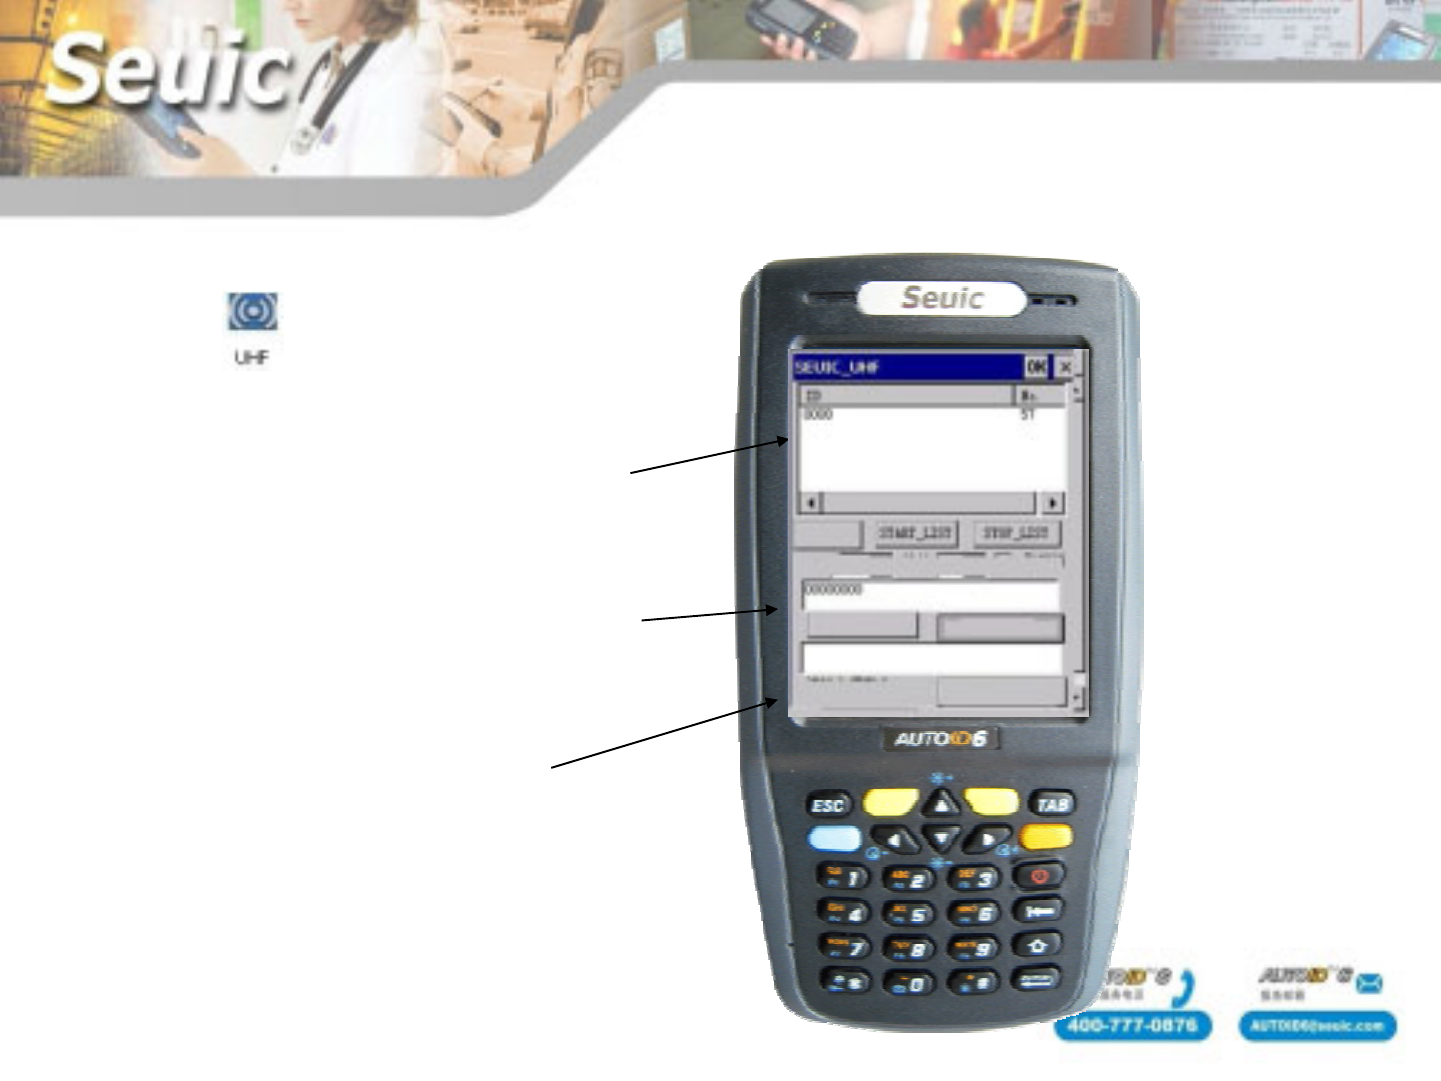
1、Enter into “ AppCenter” ,
click
RFID—UHF(common)
module
2、Click " Start_List" can read tag
number、read times, as the right
figure
3、Click "Stop_List", then click
“Read Card” can read the data in
tag
4、Click "WriteCard " can write data
in tag
Power setting:
20-26dBm
Address setting:
00 RESERVED
01 EPC
10 TID
11 USER
Reading many tags
,
select the option
Attention :This is just a demo software.

Wireless communication
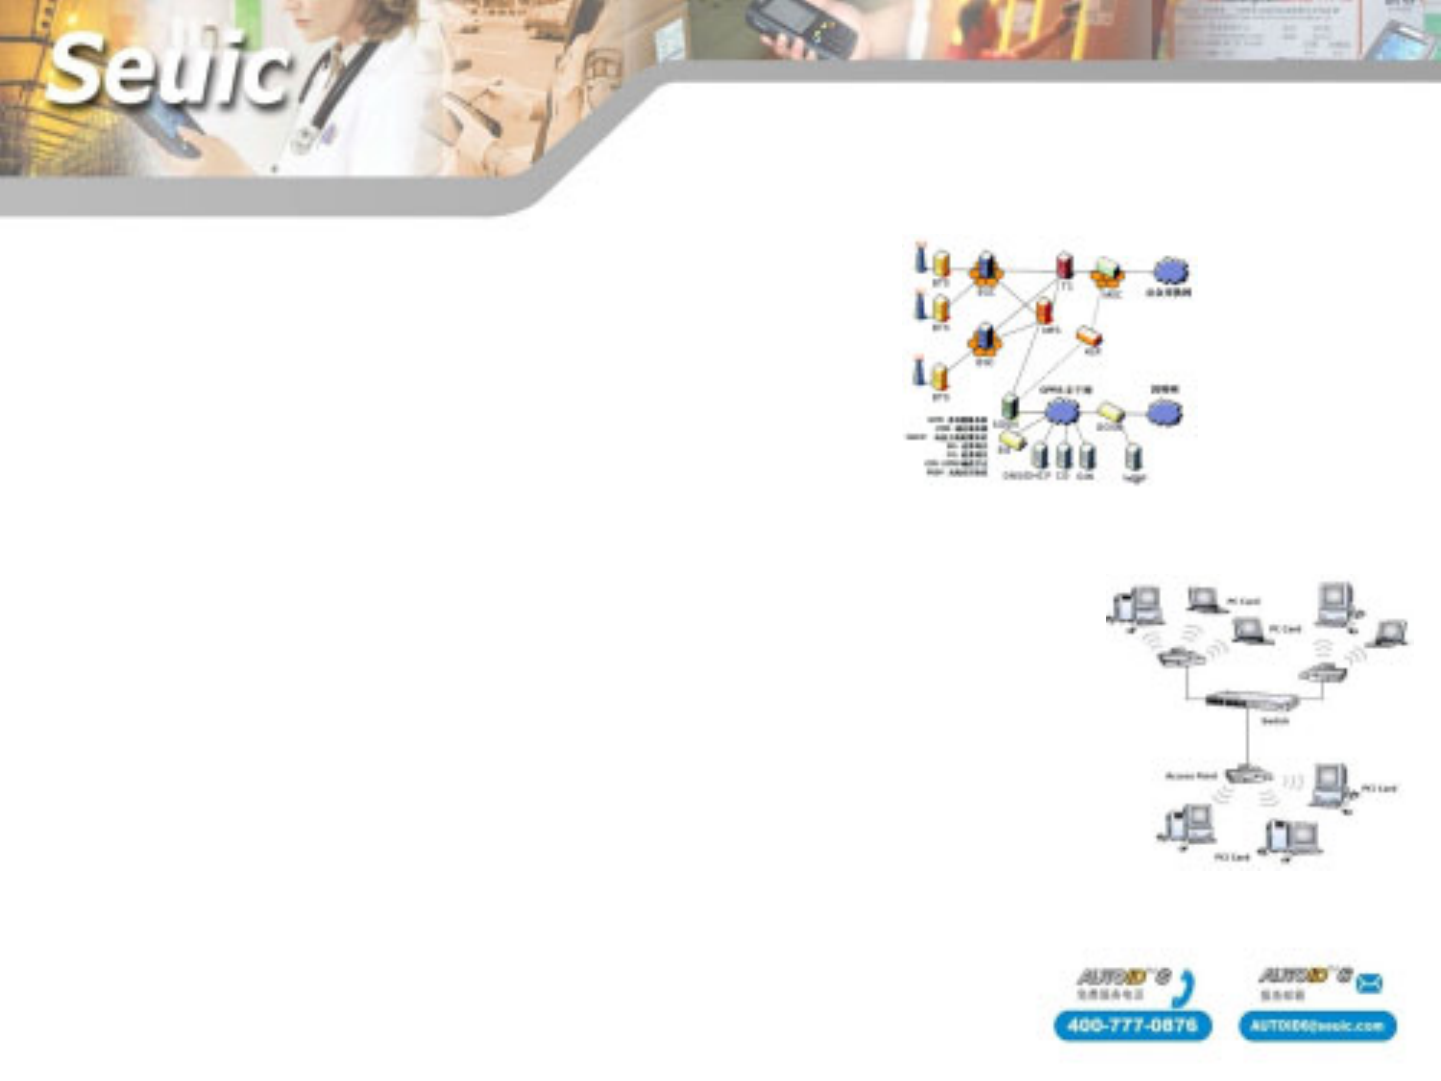
Wireless technical parameters
WLAN--------WiFi
standard:IEEE802.11b/g
Data rate :802.11b 11Mbps
802.11g 54Mbps
Frequency range: 2.4/2.5GHz
safety:WEP、TKIP、LEAP、PEAP、EAP-TLS、
WPA、WPA2、AES
WPAN--------Bluetooth V2.0+EDR
Data rate:2Mbps
frequency:2.4GHz
standard:IEEE802.15.1
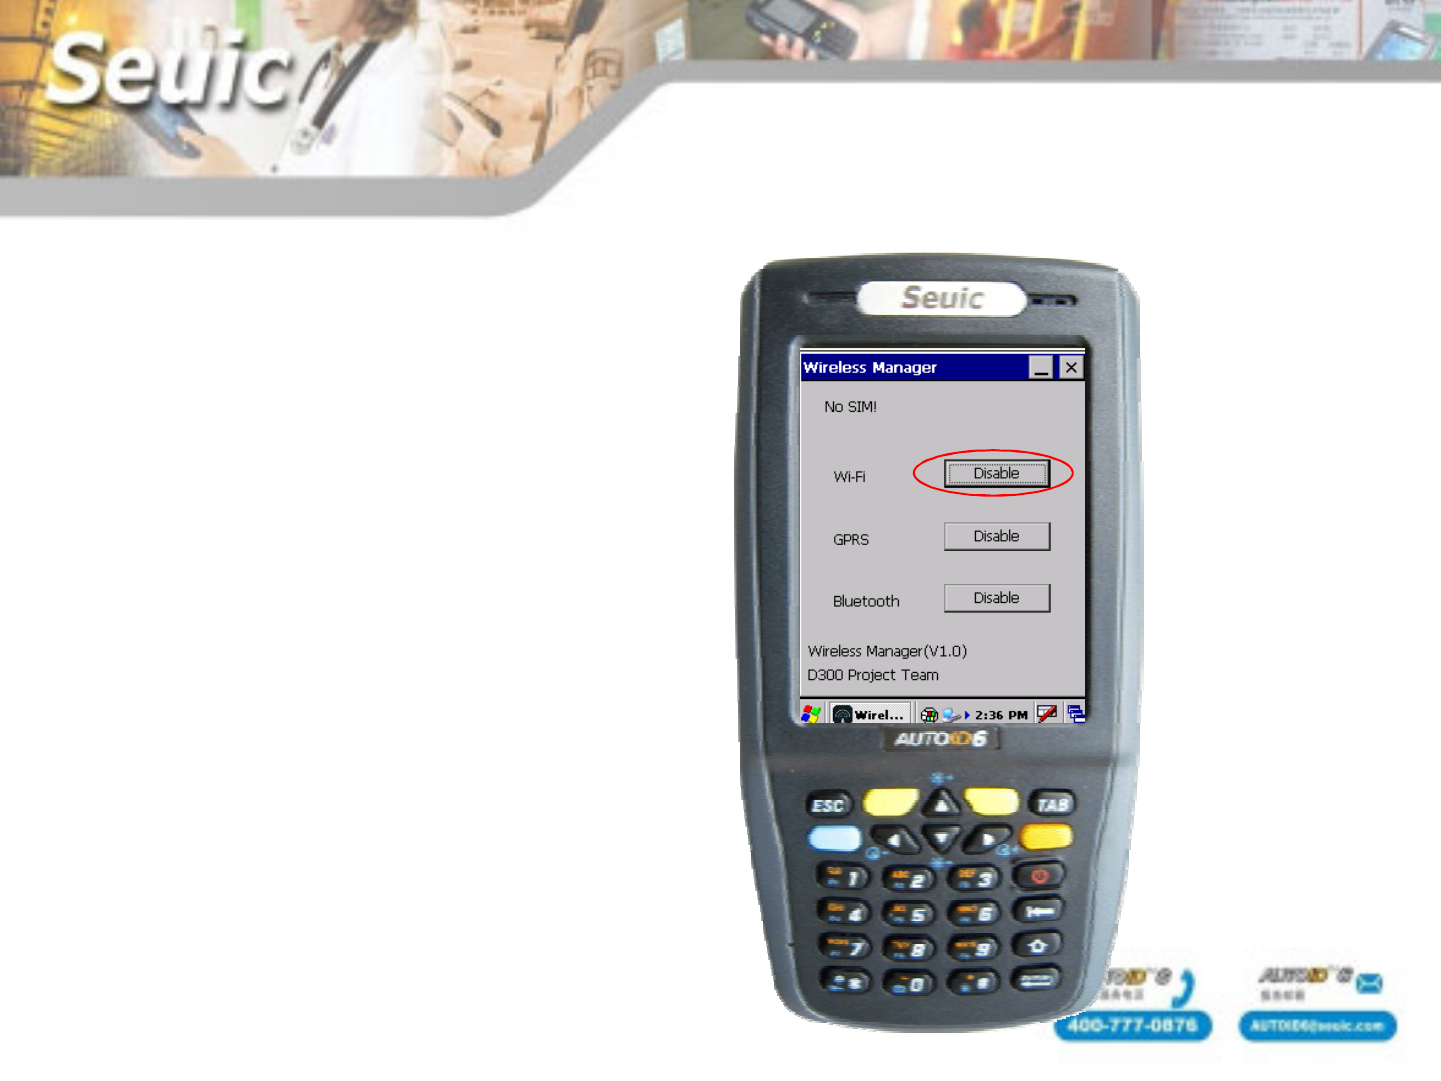
WiFi
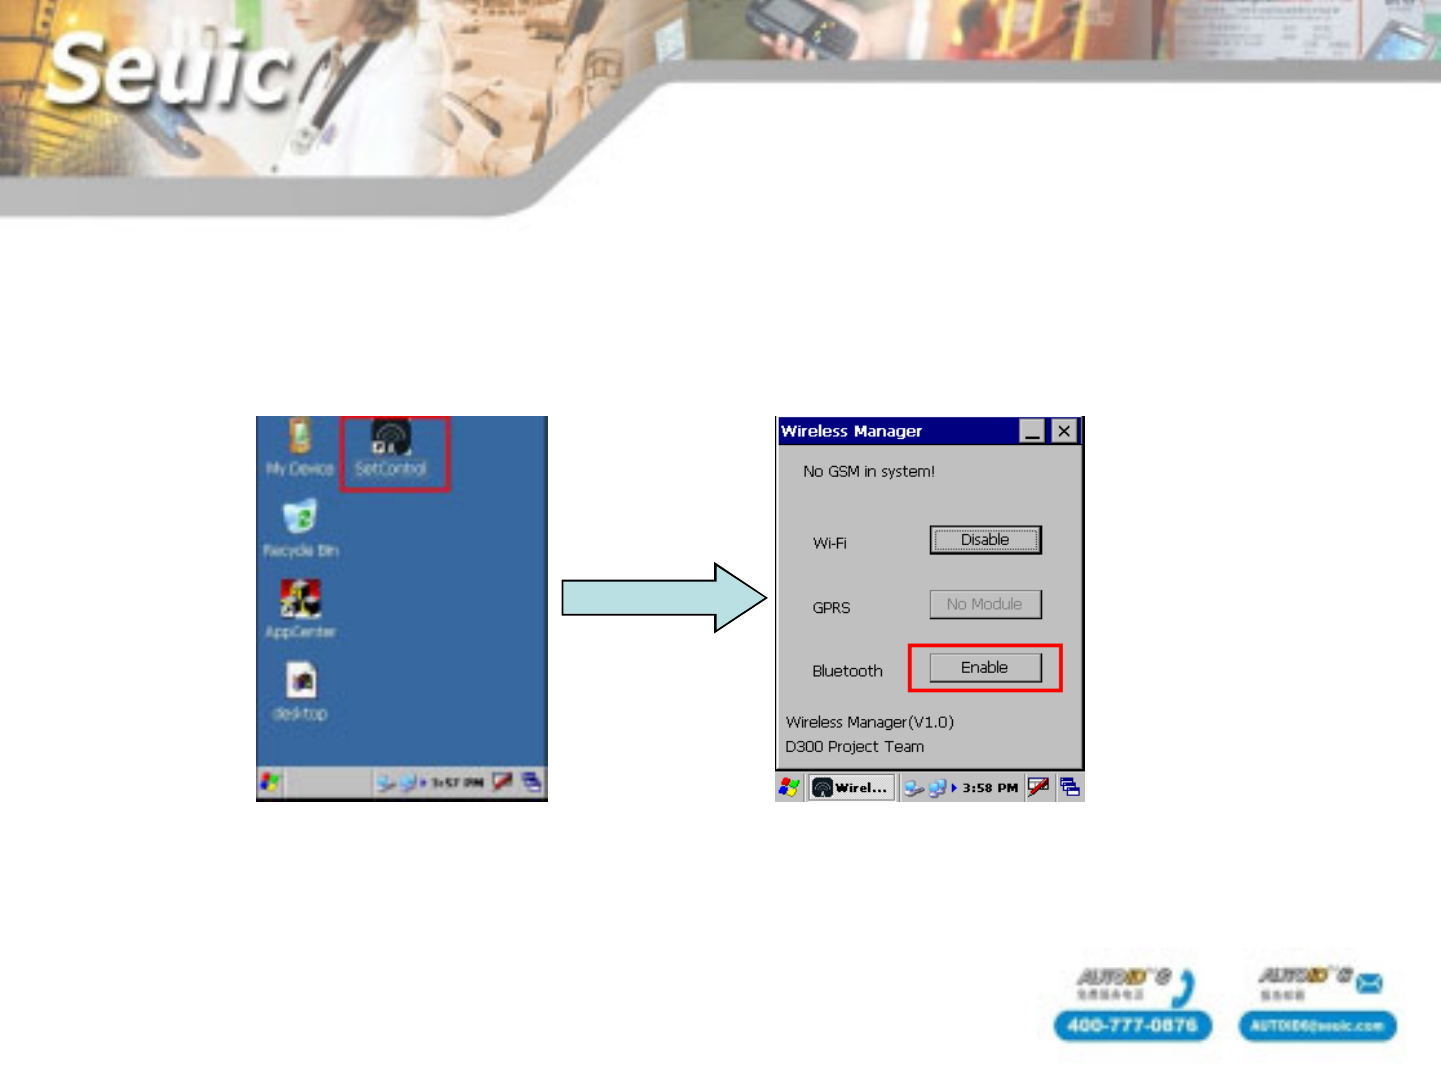
1、Open hardware:Enter into “Wireless Manager”,
if display “Disable”, means hardware is
open.If display “Enable”, click it to open
the hardware.
Attention:You don’t need to do the operation
next time you start the PDA.
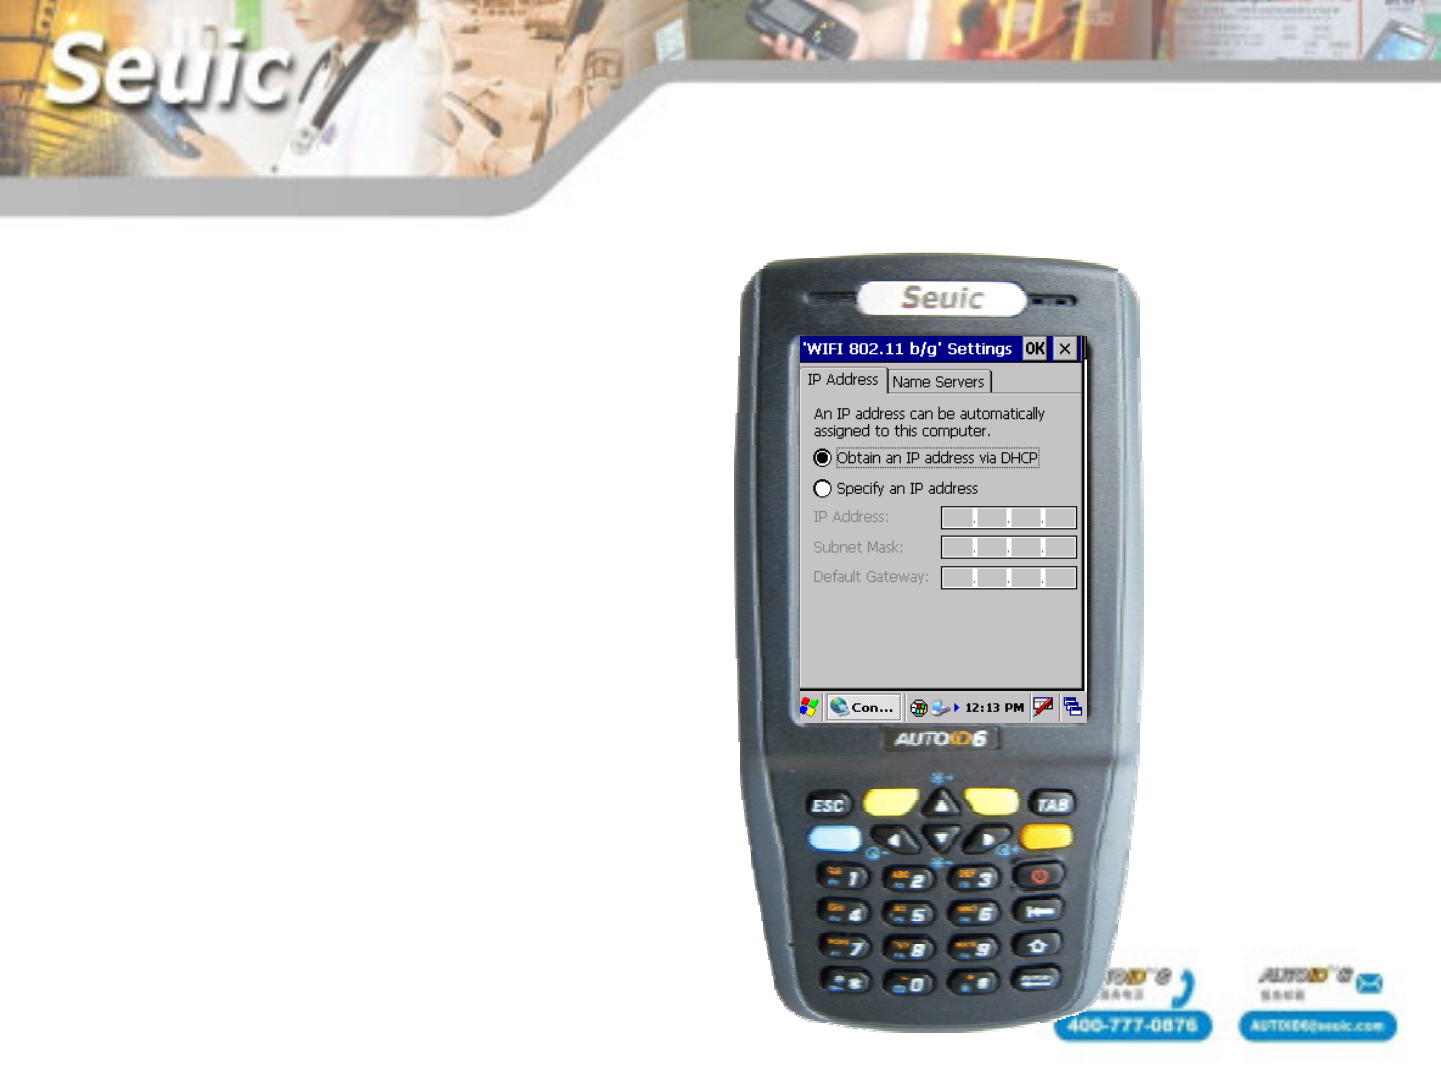
WiFi
2、Set IP address:If you need to set
fixed IP,enter into “Control Panel” ,
click “Network and Dial-up connections”,
click “WIFI”.
Attention:You don’t need to do the
operation next time you start the PDA.
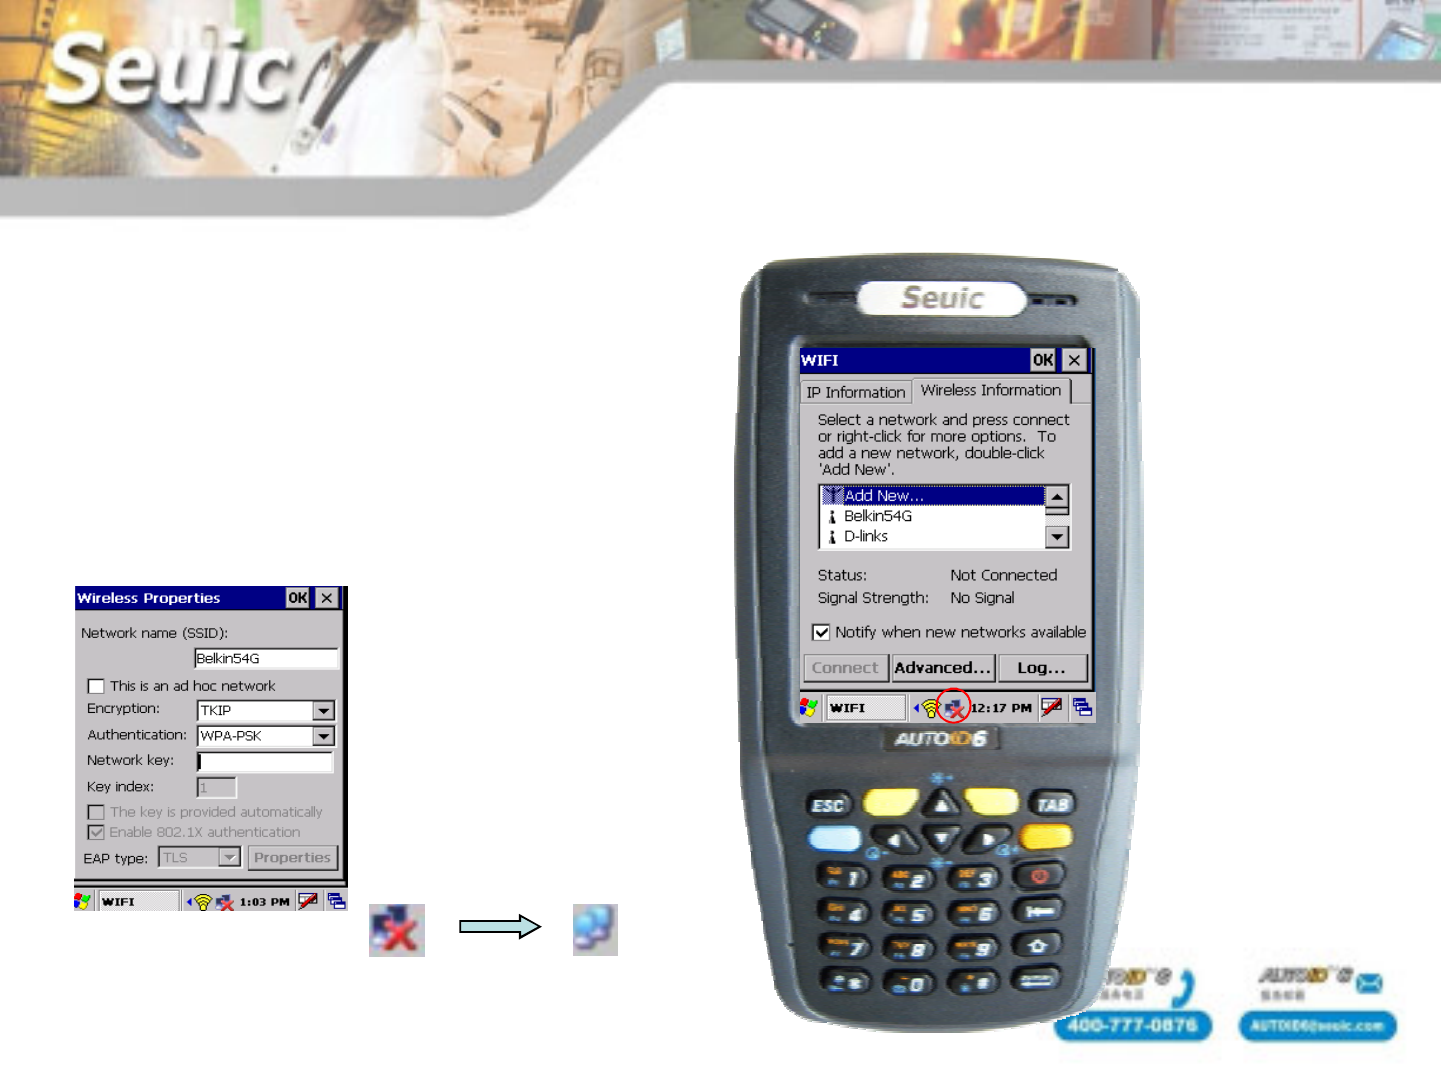
3、Connect a network:Double click the
red circle, click “Wireless information” .
Double click the network you want to
Connect, and set the net parameters
WiFi
Connect a network ok
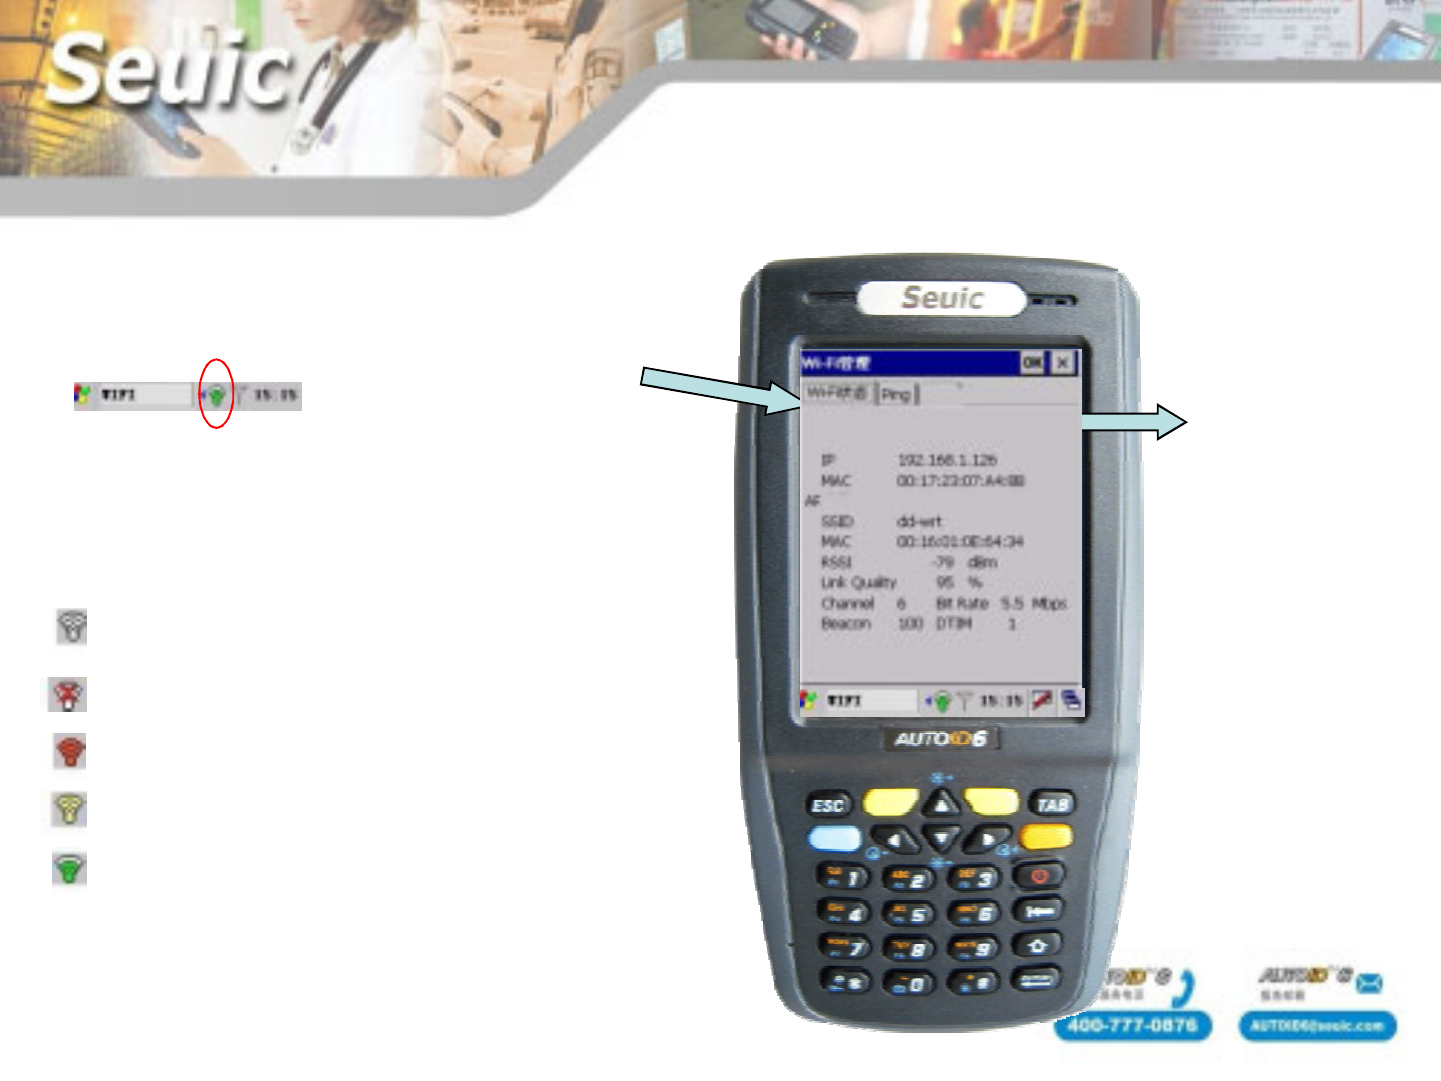
4、Wi-Fi Manager :click red circle icon
,start the Wifi manager
WIFI icon means:
No WiFi module。
WIFI module disable
No AP single around
There is single around,but not connection
PDA has connected with AP
Display the
current state and
parameters
WiFi

5、Ping test:click“ping” ,click “Start”
will do the Ping operation.
The more data lost,the worse performance
Attention: Some gateway and AP can’t allow
to ping operation.
WiFi
single strength
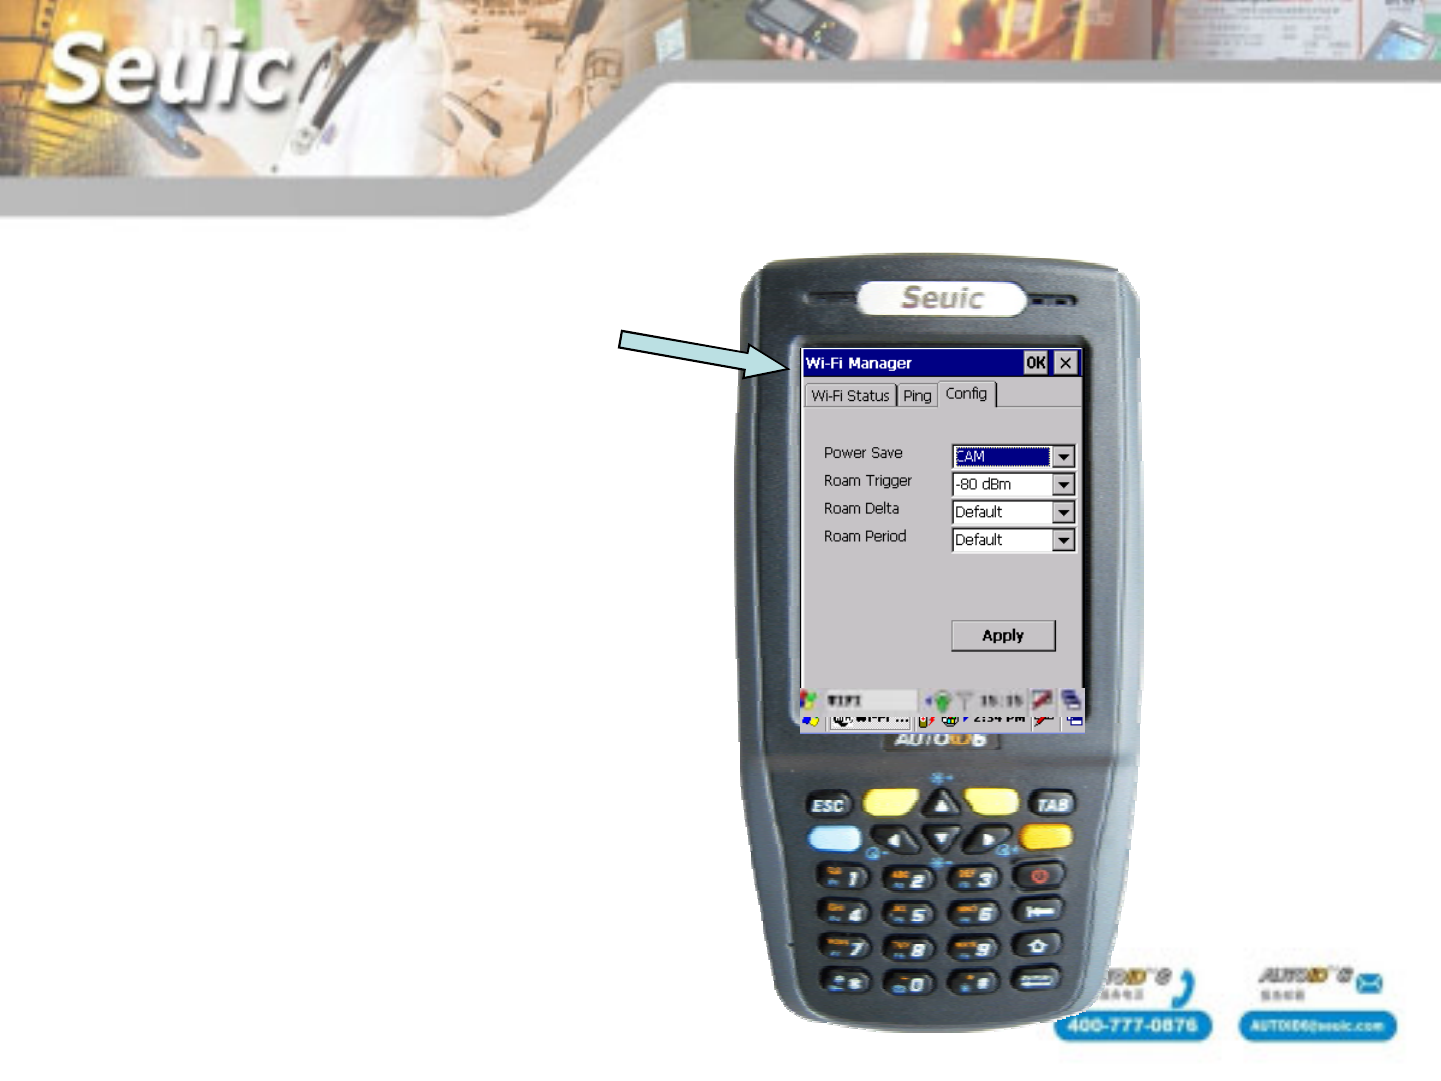
6、WIFI Config :Set Power Save/Roam
Trigger/Roam Delta/Roam Period
Power Save:Set power save mode,the more power
saving,the worse performance
Roam Trigger:Setting roaming switching values
WiFi

Infrared(power not control in
old version)
2、Serial Port select COM9,click “file” -“settings”,
set the communication protocol. The Baud Rate:1200
or2400.The port communication protocolmust the same
as the IR device settings.As the below figure
1、Click“ ”-“Run”,input “ cechat”,click OK
Set parameters as you need

Infrared(power control in new
version)
The latest infrared machine is controlled by power in receiving data.
So we need two infrared machines to test infrared
communication ,which need users to write a demo programe.
The development method of infrared is as follows
on():open the power control
off():close the power control
SetRecvState():set infrared to receive
SetSendState():set infrared to send
1、Open hardware:Enter into “Wireless Manager”,if display Disable”, means
hardware is open.If display “Enable”, click it to open the hardware.
Bluetooth function
Attention:You don’t need to do the operation next time you start the PDA.
Bluetooth function
2、Enter into Windows file, start the
PrintUI software, just as the right
Figure. Attention: just start one PrintUI
2
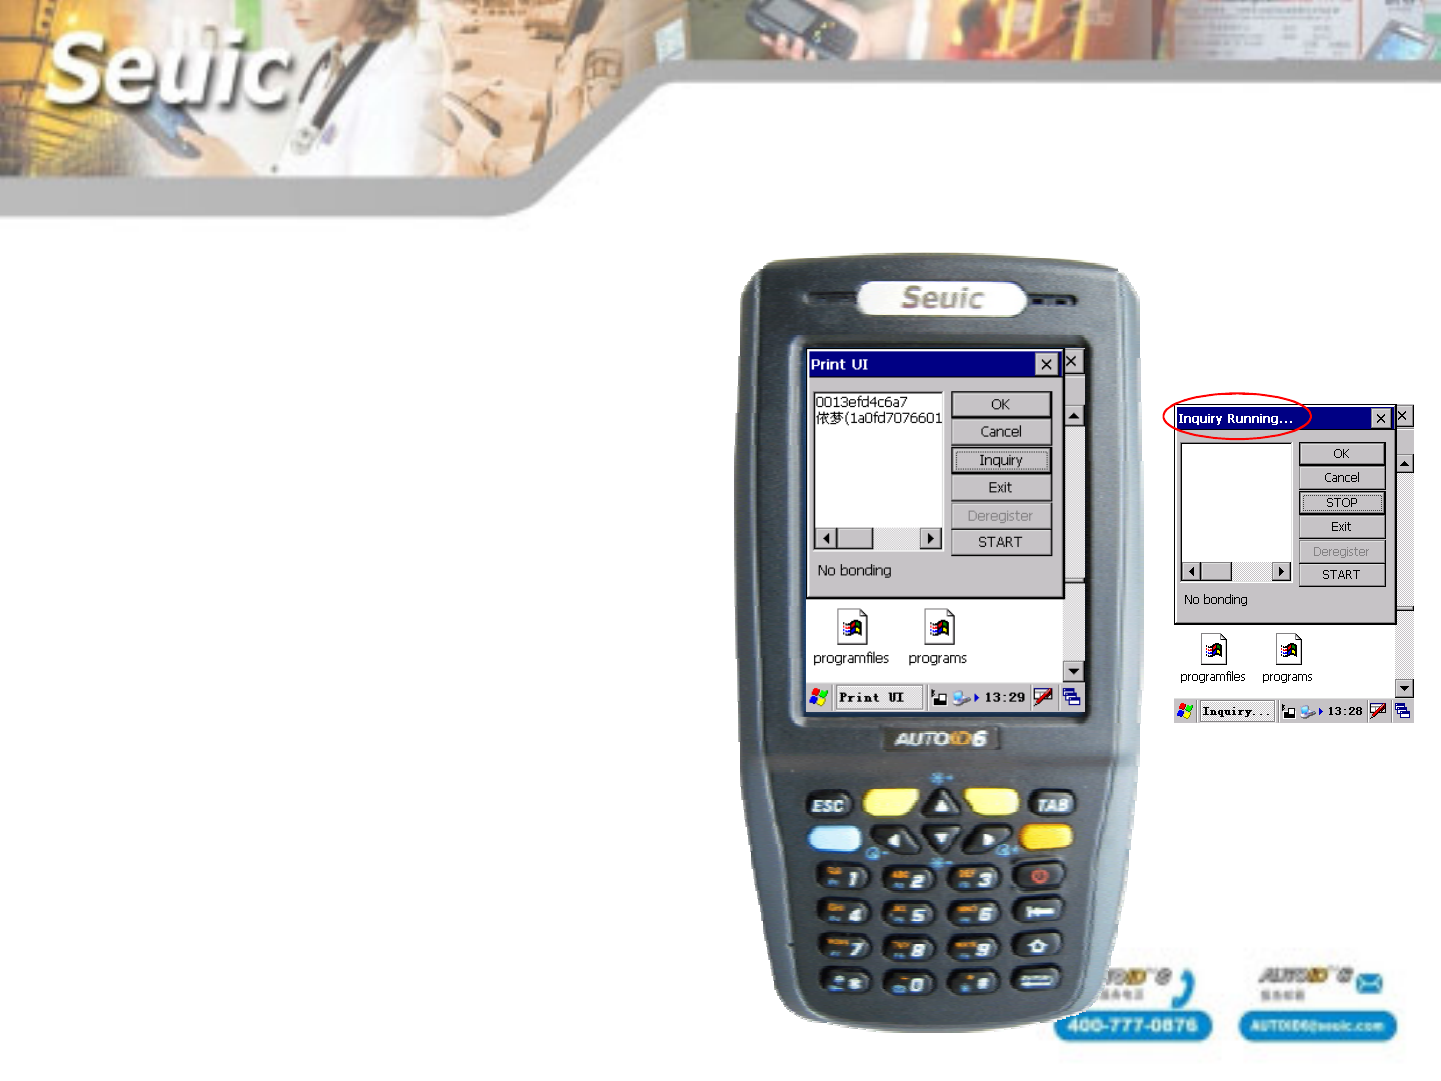
3、Connect other bluetooth device
Click “Inquiry”, other bluetooth devices
around will display in the text box.Select
one bluetooth device,click OK
Bluetooth function
Inquirying
Attention:The inquiry is over when
the top left corner appears "Print
UI",and during inquirying,don't do
other operations.
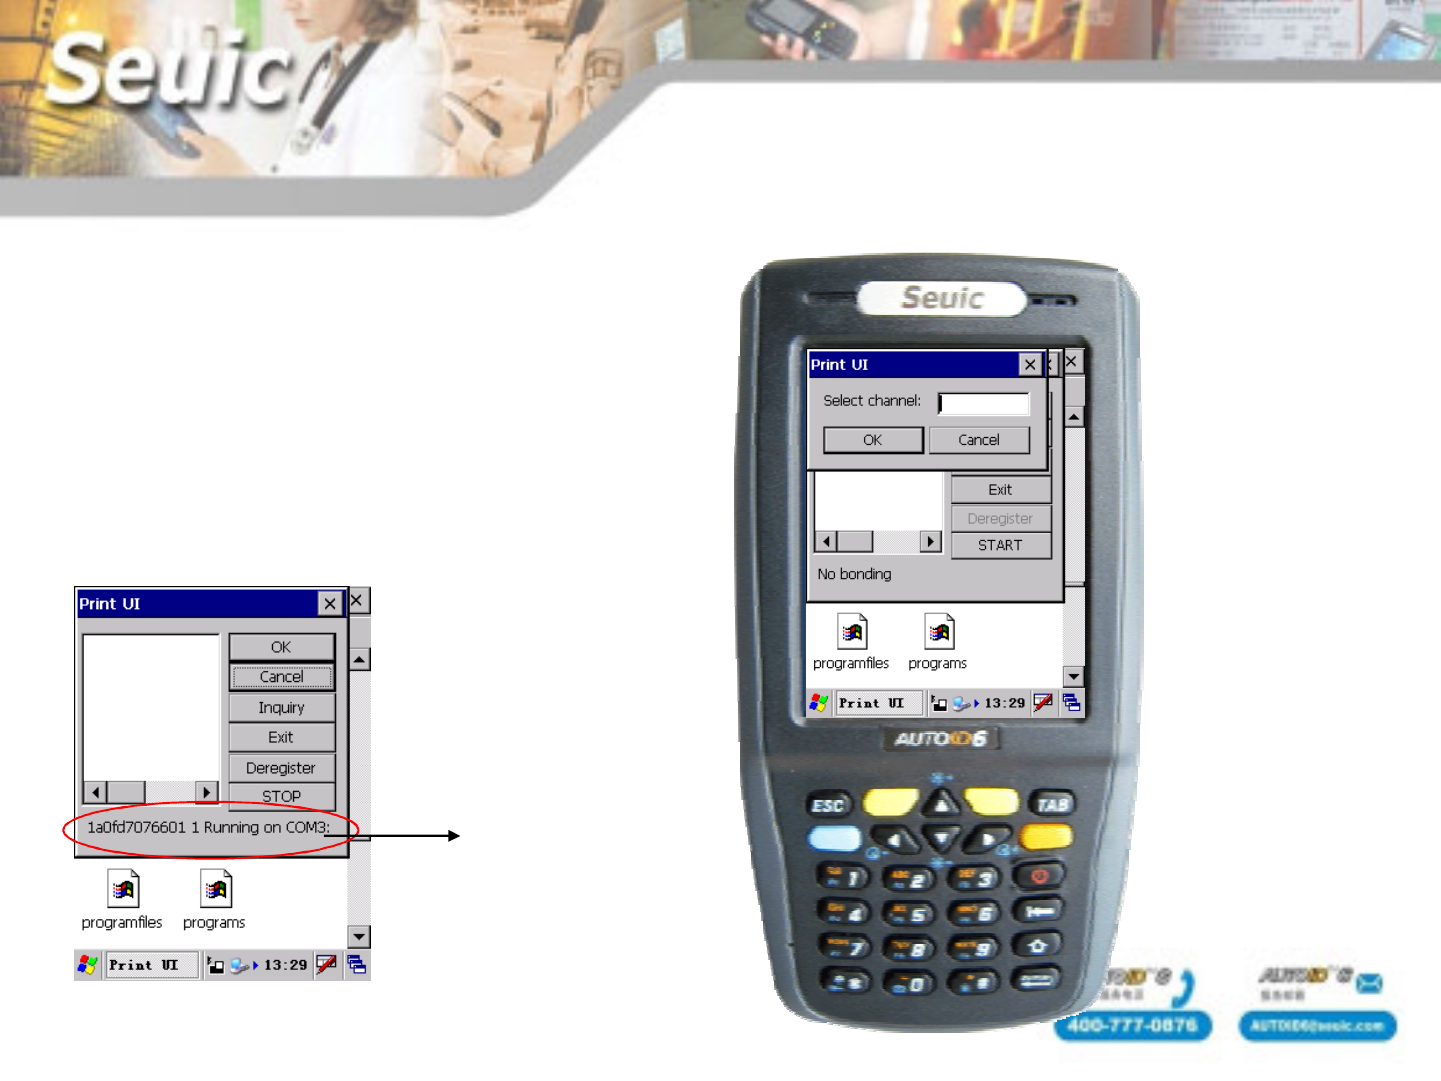
4、Connect bluetooth device
You need to input the Select
Channel number
Connect successful
Bluetooth function
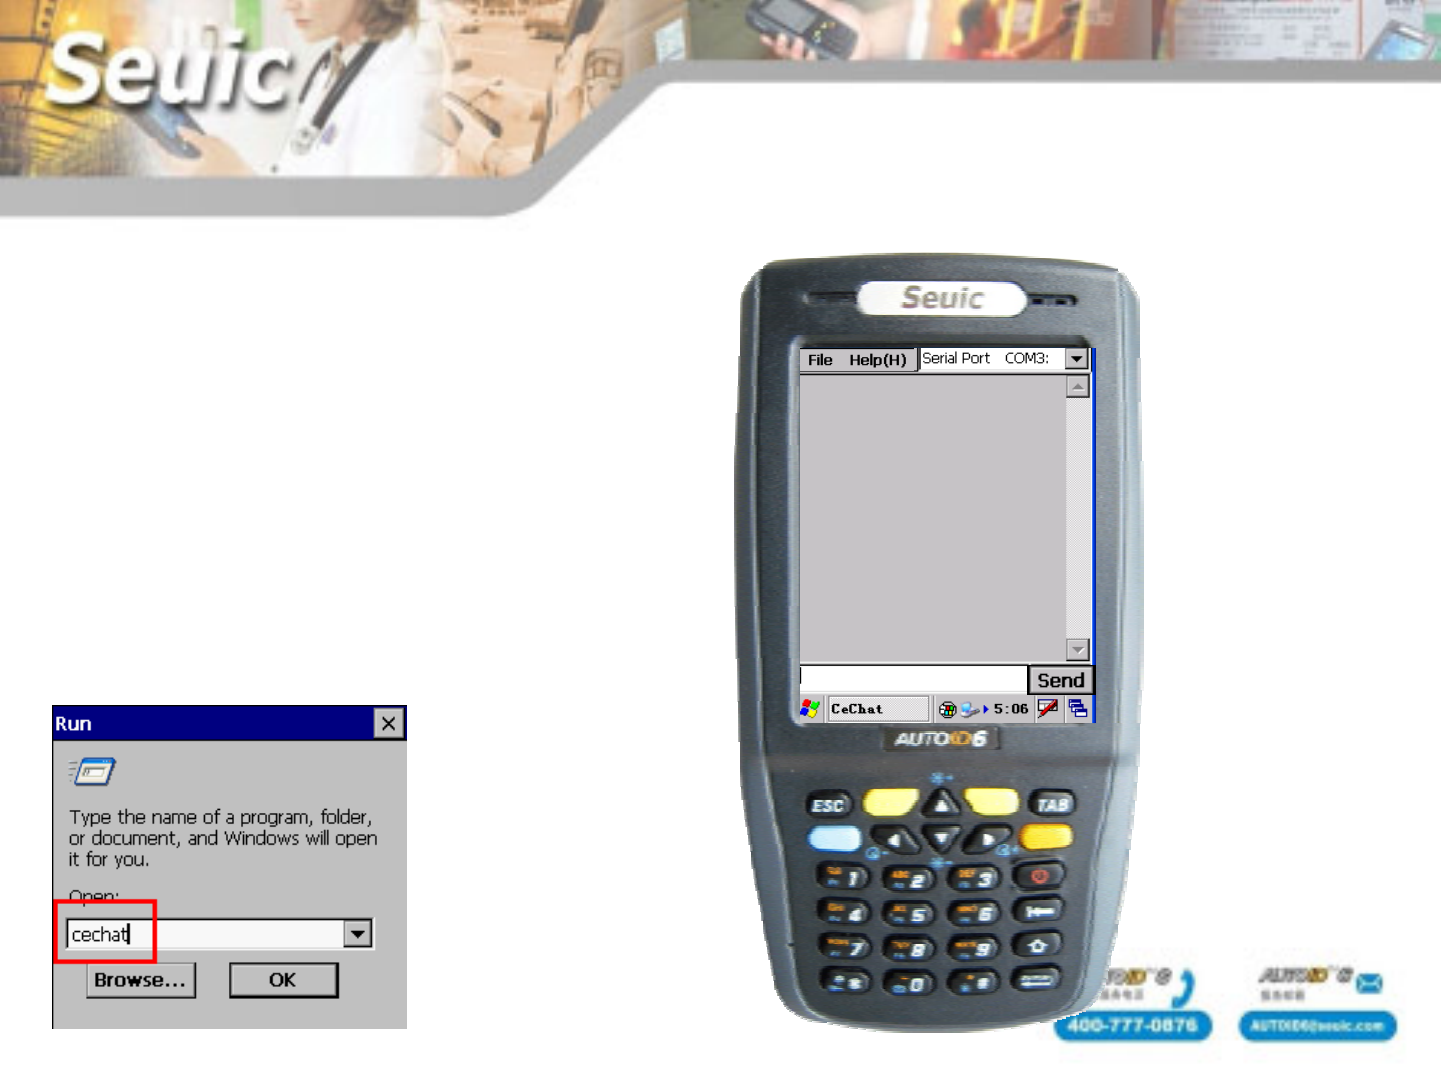
5、send and receive data:
You can send and receive data by using
cechat.
You should copy the cechat software into
PDA,then start cechat.Serial Port select
COM3.Then you can send and receive data.
Bluetooth function
Or:by below pathway:
Start-run input”cechat”,then
enter.
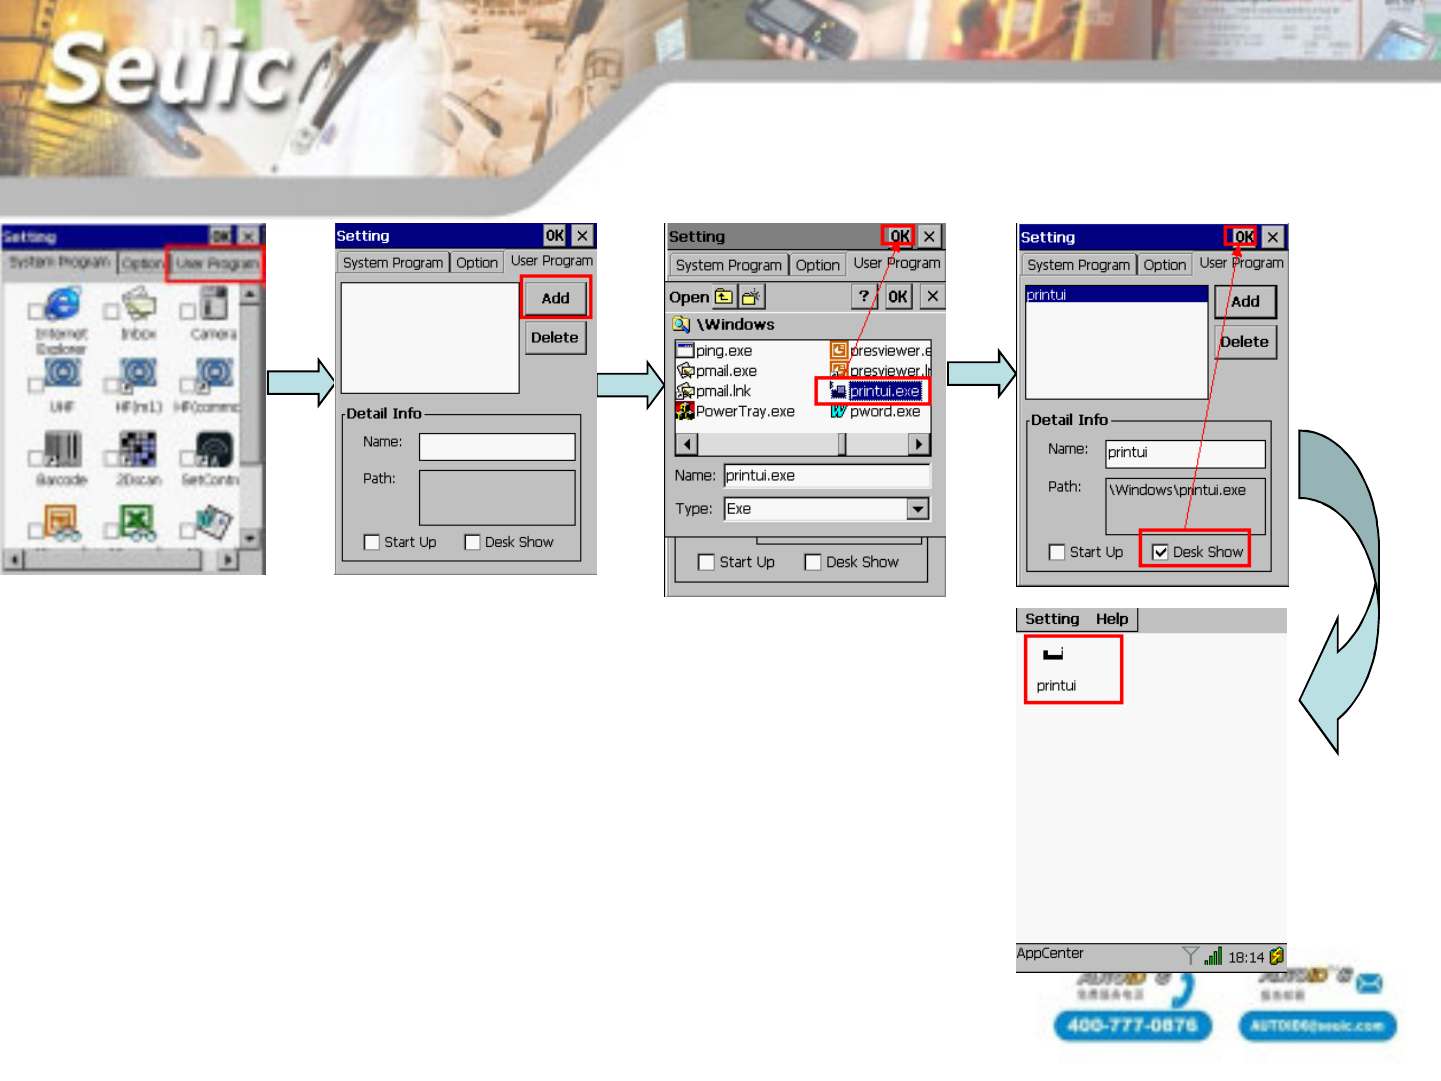
Start Bluetooth in AppCenter
1.Enter into application management, choose the third party
program management.
2.Click “add” button.
3.Look for “printui”in windows files, click ok.
4.Choose “show on the desk”, click ok.

FCC Radiation Exposure Statement:
This equipment complies with FCC radiation exposure limits set forth for an uncontrolled environment.
This transmitter must not be co-located or operating in conjunction with any other antenna or transmitter.
Note: This equipment has been tested and found to comply with the limits for a Class B digital device,
pursuant to part 15 of the FCC Rules. These limits are designed to provide reasonable protection against harmful interference in a residential
installation.
This equipment generates uses and can radiate radio frequency energy and, if not installed and used in accordance with the instructions,
may cause harmful interference to radio communications.
However, there is no guarantee that interference will not occur in a particular installation.
If this equipment does cause harmful interference to radio or television reception,
which can be determined by turning the equipment off and on, the user is encouraged to try to correct the interference
by one or more of the following measures:
—Reorient or relocate the receiving antenna.
—Increase the separation between the equipment and receiver.
—Connect the equipment into an outlet on a circuit different from that to which the receiver is connected.
—Consult the dealer or an experienced radio/TV technician for help.
This device complies with part 15 of the FCC Rules. Operation is subject to the following two conditions:
(1) This device may not cause harmful interference, and
(2) this device must accept any interference received, including interference that may cause undesired operation.

Technical support mail:zoujianjun@seuic.com
Tel:86-25-52261298
Fax:86-25-52261298-8858
URL:www.seuic.com
Hotline:400-777-0876
Service mailbox:AUTOID6@seuic.com
Postal:210006
Address:No 23. Wenzhu Road. Yuhuatai
District. Nanjing. China(210012)
Thank you!