SKYPINE ELECTRONICS CNE8115BCL Car Navigation Entertainment System User Manual IV
SKYPINE ELECTRONICS (SHEN ZHEN) CO., LTD. Car Navigation Entertainment System IV
UserManual.wiki
>
SKYPINE ELECTRONICS
>
CNE8115BCL User Manual
>
User Manual IV
Contents
1.
User Manual I
2.
User Manual II
3.
User Manual IV
User Manual IV
Navigation menu
Upload a User Manual
Namespaces
Wiki Guide
HTML
PDF
Info
Views
User Manual
Discussion / Help
Navigation
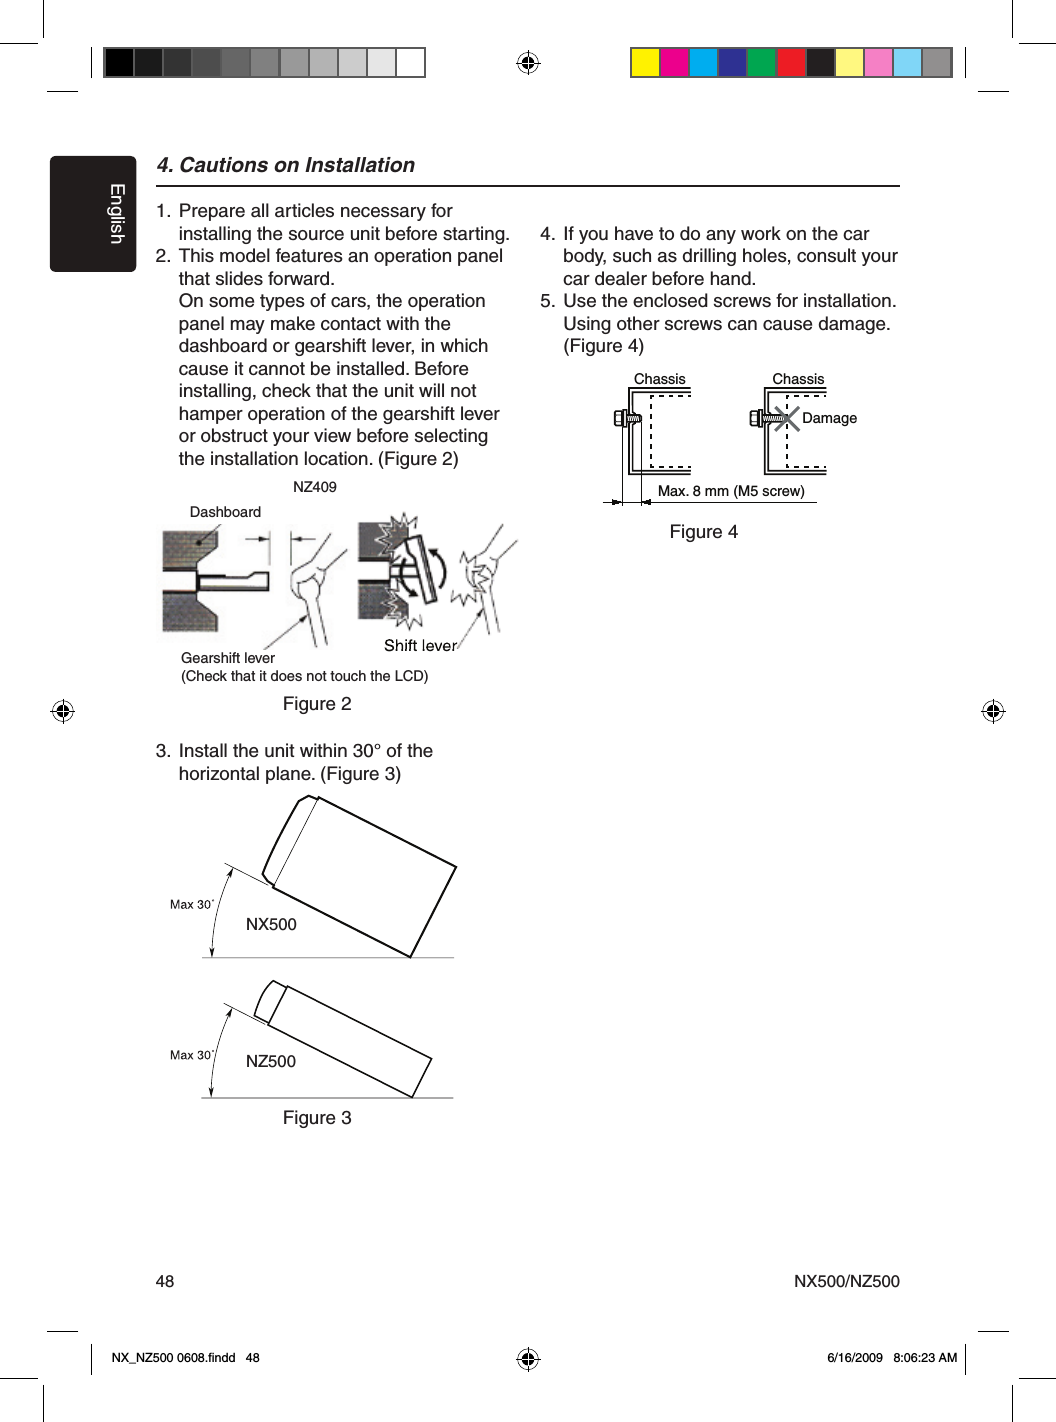
![EnglishNX500/NZ50042Press [Setup] button on the Main Menu screen.The Setup menu screen will be displayed.General Setup MenuClock: Touch the button to set the clock. Select Clock Mode 12 Hr.AM/PM: Touch the button to change AM or PM, when 12Hr mode is selected.Beep: The function of it is to choose the Beep voice on or off. Camera Image: The Function of it is to choose the mode of camera image normal or mirror.Radio Field: The function of it is to choose the radio mode in the country you are. It’s contain USA, Europe, S. America, Other.Tel Mute: The function of it is to set the Bluetooth ready on or off . Tel SP: The function of it is to set the speaker of the Bluetooth ready front left or front right.Auxin Input SW: The function of it is to choose the auxin input switch, including Low, Mid, High.Version: Display the software version information. Video Setup MenuThis menu includes: TV Shape; Aux IN; Brightness.TV Shape: The function of it is to choose the screen area shape - 4:3 or 16:9.Aux IN: The function of it is to choose Aux In format. It contains AUTO, PAL, NTSC. Brightness: Set brightness value from 0 to 20.ASP Setup MenuThis menu includes: Bass Freq; Treble Freq; Sub Filter; Bass Q-Factor.Bass Freq: Choose the desired bass frequency. 60Hz, 80Hz, 100Hz, 200HzTreble Freq: Choose the desired treble frequency 10KHz/12.5KHz/1 5KHz/ 17.5KHz.Sub Filter: Choose the desired Sub Filter frequency: 80Hz/120Hz/160Hz. Bass Q-Factor: Choose the Bass Q-Factor:1.0/1.25/1.5/2.0.Navigation Setup MenuThis menu includes: GPS Time, Time Zone, DST Setup OperationsNX_NZ500 0608.findd 4 6/16/2009 8:06:22 AM](https://usermanual.wiki/SKYPINE-ELECTRONICS/CNE8115BCL.User-Manual-IV/User-Guide-1183132-Page-1.png)
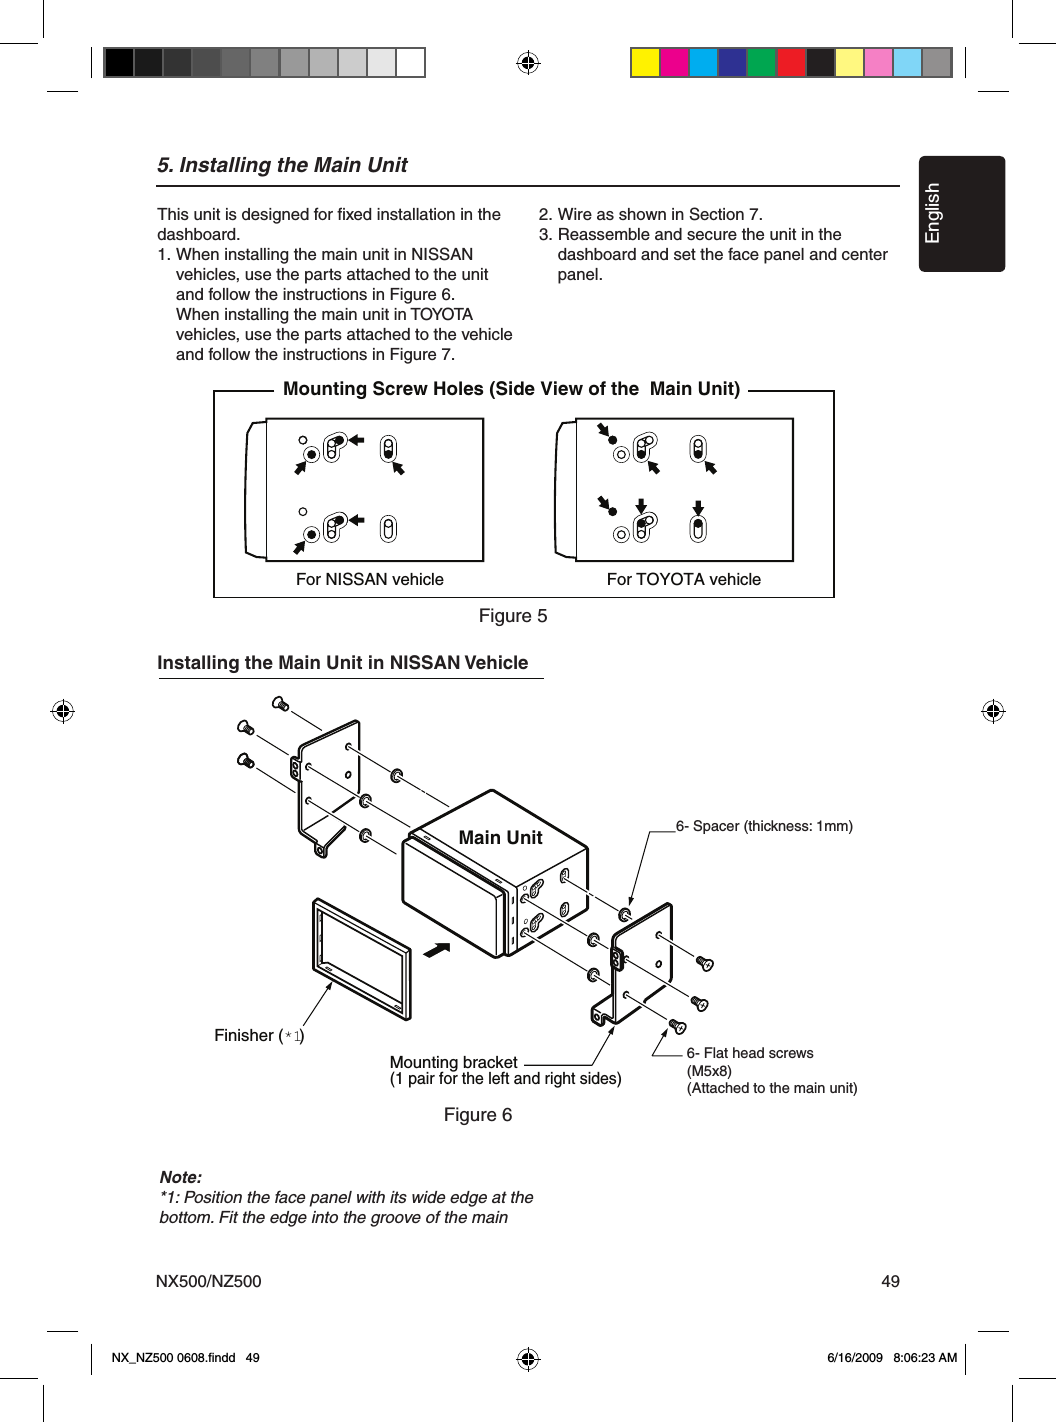
![EnglishNX500/NZ500 43GPS Time: Use this function of it is to synchronize the GPS time or not. It contains two choices: Ignore and Sync.Time Zone: Choose the desired Time Zone: NTF/Atlabtic/Eastern/Central/ Mountain/Pacific/Alaska.DST: Use this function to set Daylight Saving Time on or off.Misc Set UpThis menu include: TS Calibrate; Set Password; Parental control.TS Calibrate: The function of it is to select the TS Calibrate YES or NO. Set password: The function of it is to set the password of the child lock.Parental control: The function of it is to set the rating of the age. It contains Kid Saf/G/PG/PG- 13/PG-R/R/ NC- 17/Adult.Software Update: Choose the function to update the software. NAV Update: Choose the function to update the NAV software. Load Factory: The function is to select to load factory default or not. DVD Region: Choose DVD region.Parking Det.: The function of it is to select parking det. mode. Select: Ignore, Level and Seq.Macrovision: The function of it is to select macrovision ON or OFF.Phone MenuIf you receive a phone call and the Bluetooth is On, the screen will display Phone Interrupt Menu.1. Press the right top corner to go back to Main Menu.2. Touch [Setup] button to set Tel Mute and Tel SP.EQ Set UpMonitor OFF MenuPress Monitor OFF icon on Main Menu, it will show “Standing By”. Touch the screen to turn the monitor ON. Tuch the screen again to turn it OFF.Setup OperationsNo. Button Name Function1 Title Name Display title name2 Back Button Close the Audio Settins menu3 EQ Set EQ mode4 BASS Set bass value5 TREBLE Set treble value6 BALANCE Set balance value7 FADER Set fader value8 SW Set Sub Woofer value9 LOUDNESS Set loudness on or off134567892NX_NZ500 0608.findd 4 6/16/2009 8:06:22 AM](https://usermanual.wiki/SKYPINE-ELECTRONICS/CNE8115BCL.User-Manual-IV/User-Guide-1183132-Page-2.png)