SKYPINE ELECTRONICS CNE8201BALP Entertainment Systems User Manual 06 21 09 31 13
SKYPINE ELECTRONICS (SHEN ZHEN) CO., LTD. Entertainment Systems 06 21 09 31 13
Users Manual
Foreword
Thank you for choosing this multi-media System as your new entertainment
system .This onwer's manual will add to your understanding and full enjoyment
of the numerous fine features of this system .
This system reserves the right to make changes in design and specification .

USER MANUAL AUDIO/VIDEO NAVIGATION
- 1 -
Warning: Changes or modifications to this unit not expressly approved by the
party responsible for compliance could void the user’s authority to operate the
equipment.
NOTE: This equipment has been tested and found to comply with the limits for a
Class B digital device, pursuant to Part 15 of the FCC Rules. These limits are
designed to provide reasonable protection against harmful interference in a
residential installation. This equipment generates, uses and can radiate radio
frequency energy and, if not installed and used in accordance with the instructions,
may cause harmful interference to radio communications.
However, there is no guarantee that interference will not occur in a particular
installation. If this equipment does cause harmful interference to radio or
television reception, which can be determined by turning the equipment off and on,
the user is encouraged to try to correct the interference by one or more of the
following measures:
Reorient or relocate the receiving antenna.
Increase the separation between the equipment and receiver.
Connect the equipment into an outlet on a circuit different from that to which the
receiver is connected.
Consult the dealer or an experienced radio/TV technician for help.
This equipment complies with FCC RF radiation exposure limits set forth for an
uncontrolled environment. This equipment should be installed and operated with a
minimum distance of 20 centimeters between the radiator and your body.
USER MANUAL AUDIO/VIDEO NAVIGATION
- 2 -
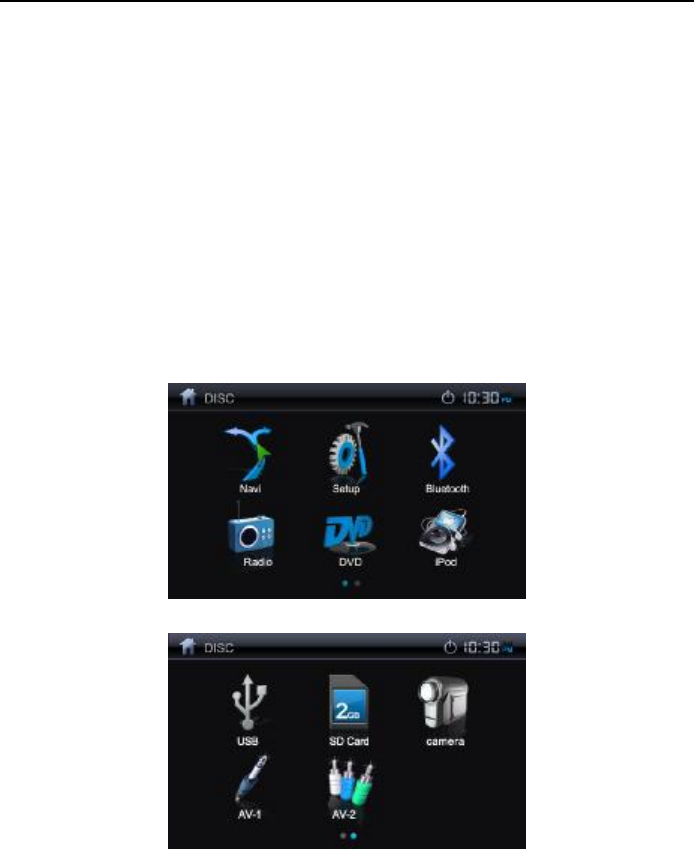
1. MAIN MENU(CONTROLS AND INDICATORS)
This unit contain Radio , DVD , Navigation , Bluetooth , iPod, Rear view
camera , SD, USB, AV IN, Setup ect. Touch icon on the main menu screen to
enter the mode .
There are 2 pages main menu ,as shown in figure 1 :interface 1 is main
menu ,display main function , Sliding page to flip over . Page no is shown
where you are .Interface 2 is root menu and touch icon to enter corresponding
function ; Touch the left upper return icon to exit main menu and back to working
interface ; Single touch the icon beside return button to turn off screen.
1-1.Main Menu interface
USER MANUAL AUDIO/VIDEO NAVIGATION
- 3 -
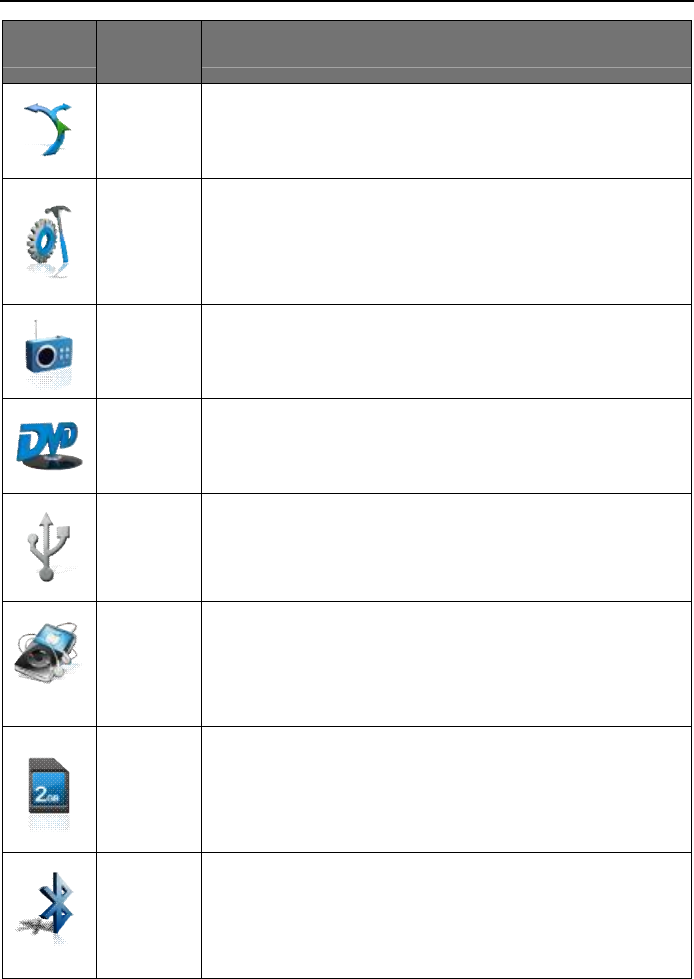
Icon Button
Name Function description
Navigation
In
serting the Map card and touch to enter NAVI
interface ,refer to the Navi users manual .
Setup Touch to enter system setup .
Radio Touch to enter Radio mode .
DVD
Playback
When inserting a DVD disc DVD mode is entered and
disc play begins .
USB
Playback
Connect with USB , touch to enter USB mode .
iPod
Playback
Touch to enter iPod playback interface .
SD Card
Playback
Inserting SD card and touch to enter SD playback mode .
Bluetooth
Touch to enter Bluetooth mode

USER MANUAL AUDIO/VIDEO NAVIGATION
- 4 -
AUX 1
An external
audio/video device can be connected to this
unit ,touch to enter AUX IN mode .
***Optional***
AUX 2
An external audio/video device can be connected to this
unit ,touch to enter AUX IN mode .
***Optional***
Camera
"Camera"mode is only available when t
he camera is
connected and when backing -
up.To install a rear view video
camera ,connect the camera video input cable to the rear
view camera output cable .
2. TUNNER ( FM/AM ) OPERATION
Enter system main menu , touch the radio icon to enter radio mode ,touch
other icon to exit ,the radio playback interface as shown in figure 1.
² Select FM/AM Band
Touch the Band on the screen to change among the following bands: FM-1,
FM-2, FM-3, AM-1。
² Manual Tuning
● Press the icon ( ► ) to increase the tuning frequency one step at a time.
● Press the icon (◄ ) to decrease the tuning frequency one step at a time.
● Or touch directly on the Manual tuning display to locate your desired stations.

USER MANUAL AUDIO/VIDEO NAVIGATION
- 5 -
² Storing a Station
Select a band ( If needed ), then select a station.
Example: FM1 103.6MHz
Touch and Hold for 3 seconds the desired preset number to store Radio station.
² Recalling a Station
Select a Band ( If needed ).
Touch On-screen preset buttons to select the corresponding stored stations or
press the number button on the Radio panel.
² Auto Store ( AS )
Press AS icon on the screen to automatically scan and store all stations in
current band.
² Preset Scan ( PS )
Touch the PS icon on the screen for scan the stations in the 6 preset channels in the
current band.
² Scan
Touch the Scan icon on the screen to automatically scan all stations in current band
to preview stations.
Press any to stop scanning and listen to the selected stations.

USER MANUAL AUDIO/VIDEO NAVIGATION
- 6 -
USER MANUAL AUDIO/VIDEO NAVIGATION
- 7 -
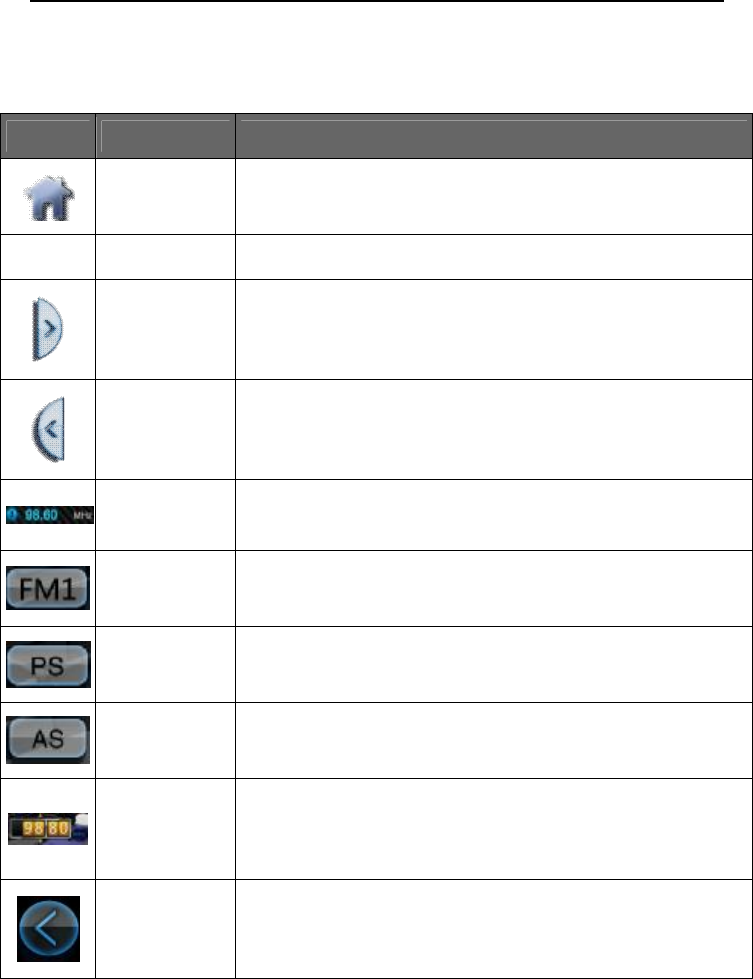
Ø 2-1. Radio interface
Icon Button name
Function description
Home Button
Touch to back to main menu .
10:30
System clock
Display current time ,press to enter screensaver .
Left Open Touch to open Hide button.
Right Open Touch to open Radio Preset frequency list.
Current
frequency Current frequency, is the NO. in preset list .③
Playing Source
change among the following bands: FM-1, FM-2, FM-3 and
AM, preset 6 station each band .
Program scan
Press the PS button on the screen. Scan the stations in the 6
preset channels in the current band.
Auto store
Press AS button on the screen to automatically scan and store
all stations in current band.
activate/
deactivate
Scan Mode
Click on up/ down button to run number seeking the
station ,Click on scroll pannel change to digit keyboard .
seek up Touch to down a step of the current frequency .
USER MANUAL AUDIO/VIDEO NAVIGATION
- 8 -
Icon Button name
Function description
seek down Touch to up a step of the current frequency
Frequency
scale Display current frequency and touch to select a new station .
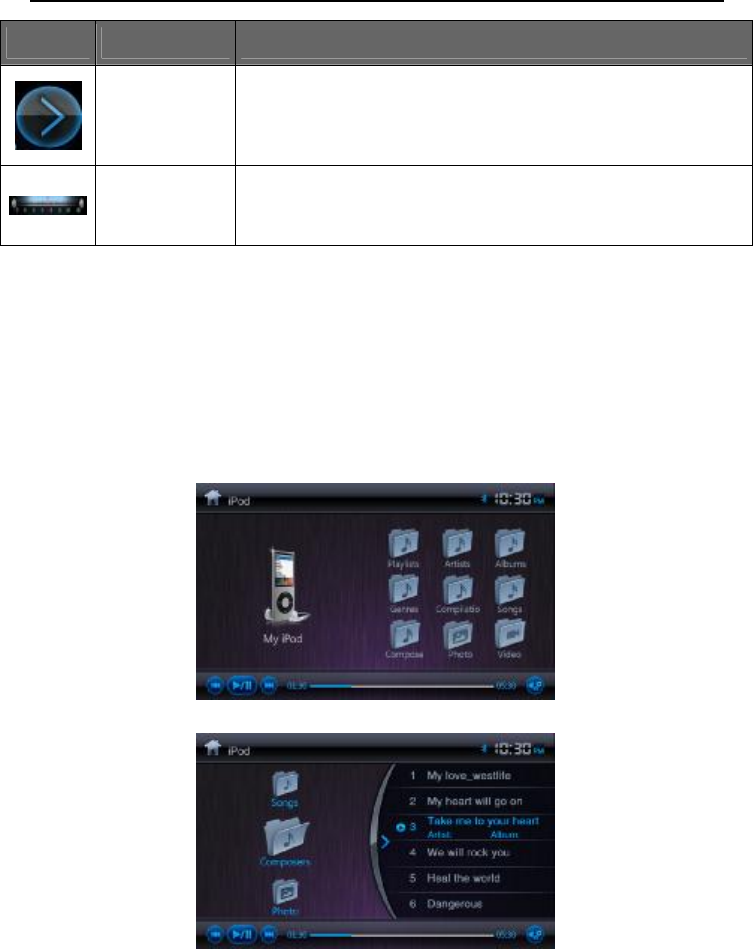
3. iPod Operation
Please Fist make sure of that your ipod/iphone connect to the DVD machine via USB,
Then switch current source to iPod source by touching iPod icon on main menu or using “SRC”
panel button. IPod function can be showed by picture3-1,3-2.
3-1
3-2
USER MANUAL AUDIO/VIDEO NAVIGATION
- 9 -
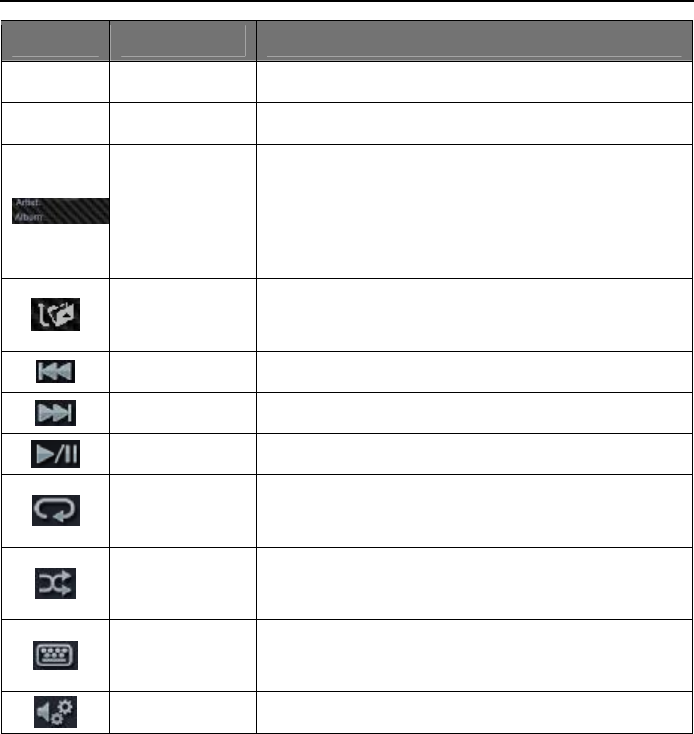
Icon Button name Function description
Interface title
iPod play Display current interface
10:30 System clock Display the currently system time,click to screen saver mode
current play
progress bar Display the current playing song's progress time
Play message
The previous line display current playing song,.the song name
will
roll display.
The next line list the song's ID3 informations, including singer,
album,time,genre and etc.
Last song button
Touch to play the last track of the song list.
Next song button
Touch to play the next track of the song list
Play/Pause button
Press to begin playback.press again to pause playback.
EQ button Press the icon to access the Equalizer menu.
4 . player function operation
This system player function can play DVD disc.It cancompatible with
DVD/VCD/CD/MP3/WMA/JPEG/MPEG and other kinds of disc and multimedie
format file.
USER MANUAL AUDIO/VIDEO NAVIGATION
- 10 -
Firstly confirm whether there are CDs in the system,then enter main
menu,touch the player function button to enter the player function mode. If there
is no CDs in the system,put the disc in the disc mouth lightly,the disc will be
slotted automatic. When the system detected the disc,it will auto switch to disc
player function mode and play the CDs. Disc play interface as below.
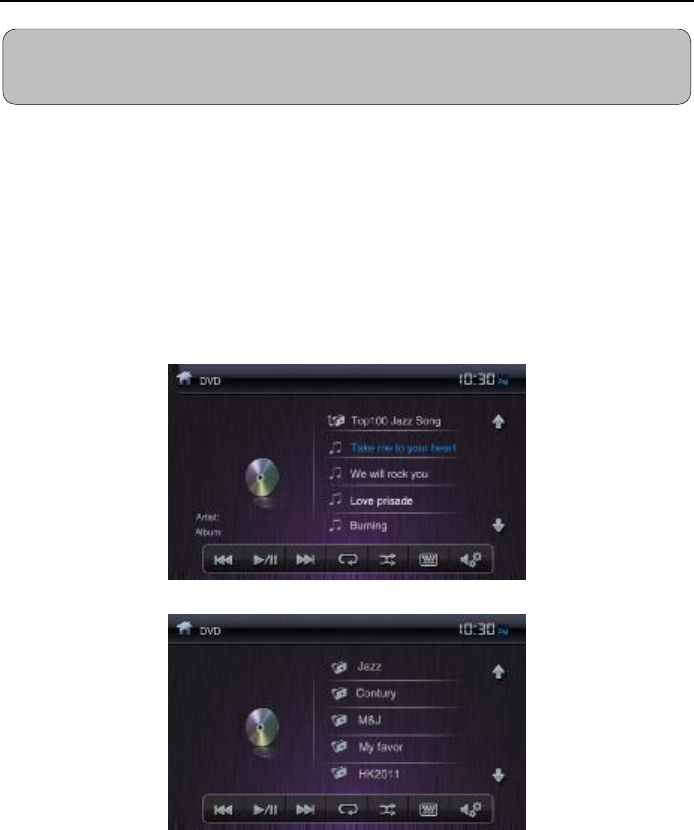
Ø 4.1 Audio files play interface
4-1 DISC audio play interface
4-2 multimedia format disc root directory menu
Warning :Please use the authorized disc and keep it clean. It is strictly prohibited
to use damaged disc. Only one disc is in the system one time .

USER MANUAL AUDIO/VIDEO NAVIGATION
- 11 -
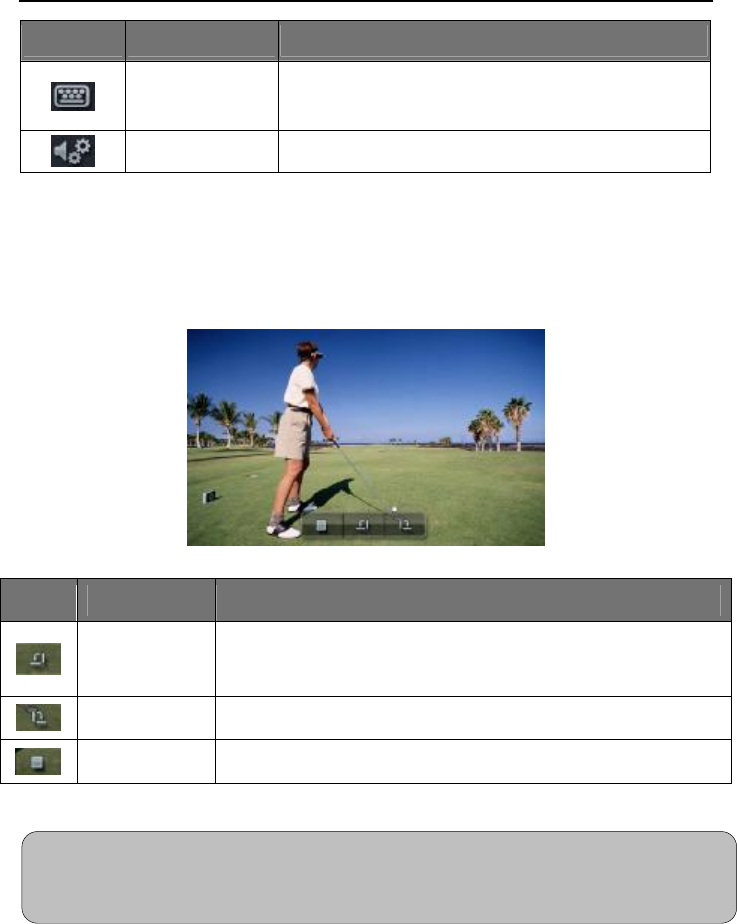
4-3 DVD picture play interface
Function operation as below:
Icon Button name Function description
Interface title
DVD play Display the name of current interface
10:30 System clock Display the currently system time
Play message
The previous line display current playing song,.the song name will
roll display.
The next line list the song's ID3 informations, including singer,
album,time,genre and etc.
Return to root
directory button
If the media file is folder into different files,press this button into
root directory ,then list all the files name. As the charts 4-2
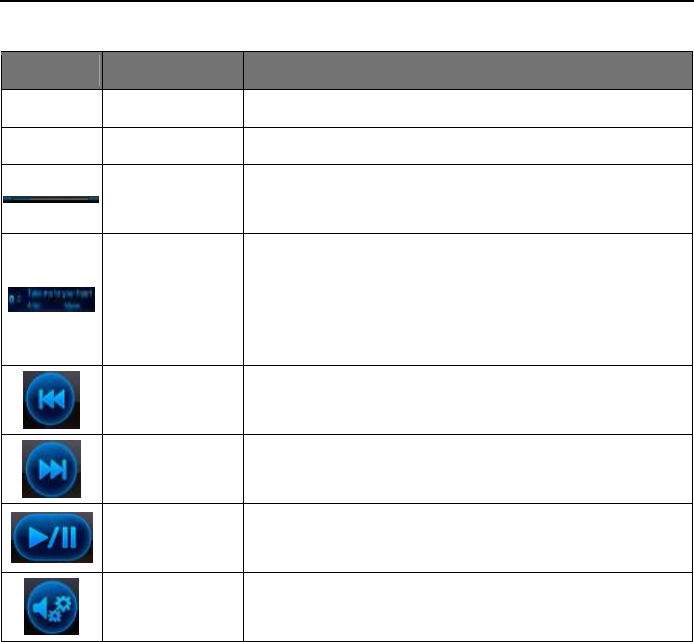
Last song button Touch to play the last track of the song list.
Next song button Touch to play the next track of the song list
Play/Pause button Press to begin playback.press again to pause playback.
Loop playback button
Press to loop playback. Press different times can switch from
single repeat to folder repeat and all repeat and repeat off.
Random play button
Press to switch the shuffle mode on or off.
USER MANUAL AUDIO/VIDEO NAVIGATION
- 12 -
Icon Button name Function description
Number button Press to access the direct access song selection function.
EQ button Press the icon to access the Equalizer menu.
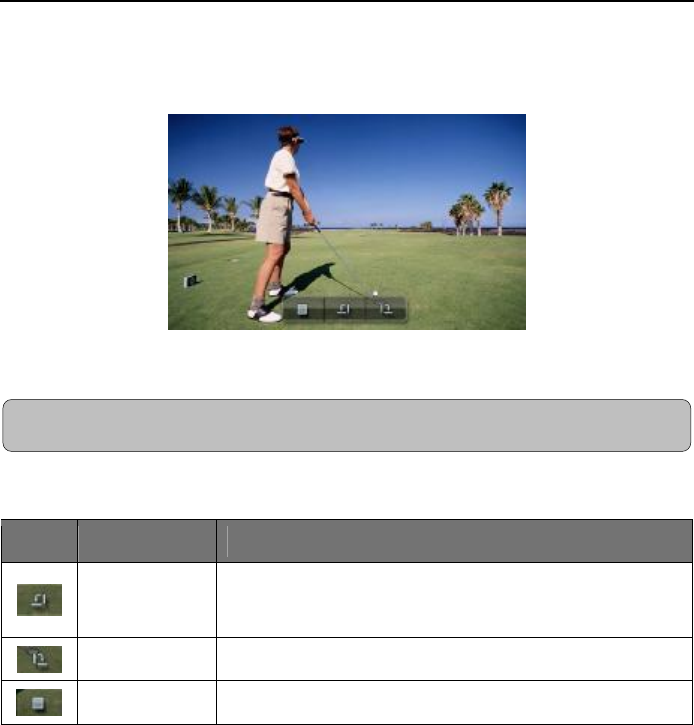
Ø 4.2 Disc picture file play interface
Click the picture ,enter to see the picture as 4-4
Click the shade in bottom of the screen can reveal the stop and rotating button. Click again can hide the
button.
图4-4 disc picture file play interface
Icon
Button name Function description
Counter-cloc
kwise button
Press this icon to rotate the image counter-clockwise in 90 degree
increments.
Clockwise button
Press this icon to rotate the image clockwise in 90 degree increments.
Stop button Press to return to image list interface
Warning: File large image browse affect the display speed. So please use smaller image files to make sure
you can view the picture fluent.
USER MANUAL AUDIO/VIDEO NAVIGATION
- 13 -
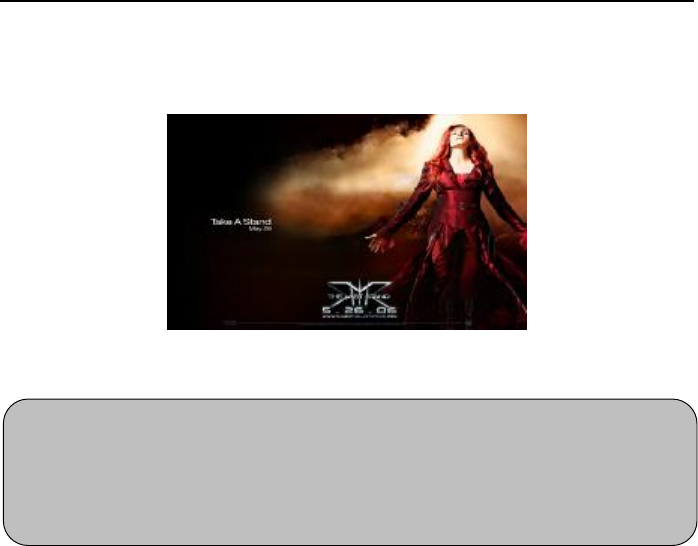
Ø 4.3 DVD video file play interface
Under the media playing mode,touch can back to the DVD interface.(as the graph 4-3)
5. SD card and USB operation
Make sure the SD card input and USB connected with the system before using SD card and USB function.
The system would switch to USB playing interface directly when USB has connected well with the system.
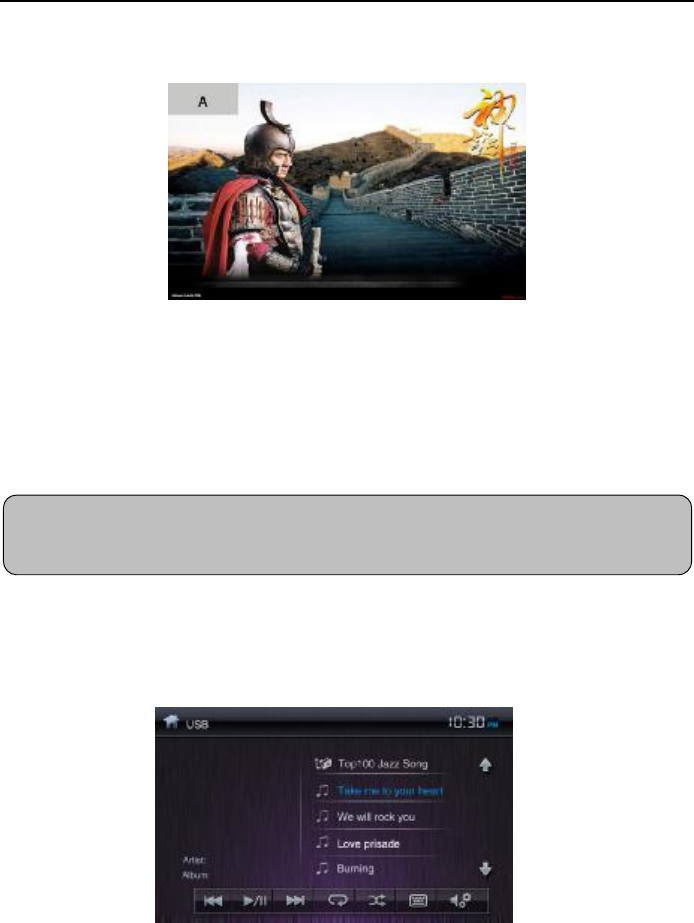
Ø 5.1 SD card/USB video file playing interface
Enter the system main menu,click SD card/USB button to the corresponding function mode, click the other
function button can exit this mode. The SD card and USB has the some playing interface as the 5-1 :
图5-1 USB/SD Audio interface
For extend the service life of the SD card, we recommend to not extract SD card
in use it.
USER MANUAL AUDIO/VIDEO NAVIGATION
- 14 -
Icons Button name Function description
Interface title
SD card play Display the name of current pattern
21:09 System clock Display the currently system time
Play message
The previous line display current playing song,.the song name
will roll display.
The next line list the song's ID3 informations, including singer,
album,time,genre and etc.
Return to root
directory button
If the media file is folder into different files,press this button
into root directory ,then list all the files name. As the charts 4-2.
Last song button Press to play the last track of the song list.
Next song button Press to play the next track of the song list
Play/Pause button
Press to begin playback.press again to pause playback.
Loop playback
button
Press to loop playback. Press different times can switch from
single repeat to folder repeat and all repeat and repeat off.
Random play Press to switch the shuffle mode on or off.
Number button Press to access the direct access song selection function.
EQ button Press the icon to access the Equalizer menu.
USER MANUAL AUDIO/VIDEO NAVIGATION
- 15 -
Ø 5.2 SD card/USB image files play interface
Click the bottom of the screen can reveal the stop and rotating button. Click again can hide the
button.
图5-4 SD card/USB image files play interface
Icons Button name Function description
Counter-cloc
kwise button
Press this icon to rotate the image counter-clockwise in 90 degree
increments.
Clockwise button
Press this icon to rotate the image clockwise in 90 degree increments.
Stop button Press to return to image list interface
Warning: File large image browse affect the display speed. So please use smaller image files to make
USER MANUAL AUDIO/VIDEO NAVIGATION
- 16 -
Ø 5.3 SD card/USB video files play interface
Click the bottom of the screen can reveal the play ,pause,skip forward and rewind button. Click
again can hide the button.
图5-5 SD card/USB video files play interface
Warning:SD card and USB are movable storage device, the system support stored
MP3,WMA,JPEG,MPEG video files. As different brands have different standard in SD card and USB
producing, some of SD card and USB may be not supported. Please use the SD card/Udisk from
regular manuf
acturers.
USER MANUAL AUDIO/VIDEO NAVIGATION
- 17 -
6 . Bluetooth function operation
The system supports Bluetooth hand-free communication function, so if your cellphone have bluetooth
function, it can establish point-to-point connection and dial-up on screen.
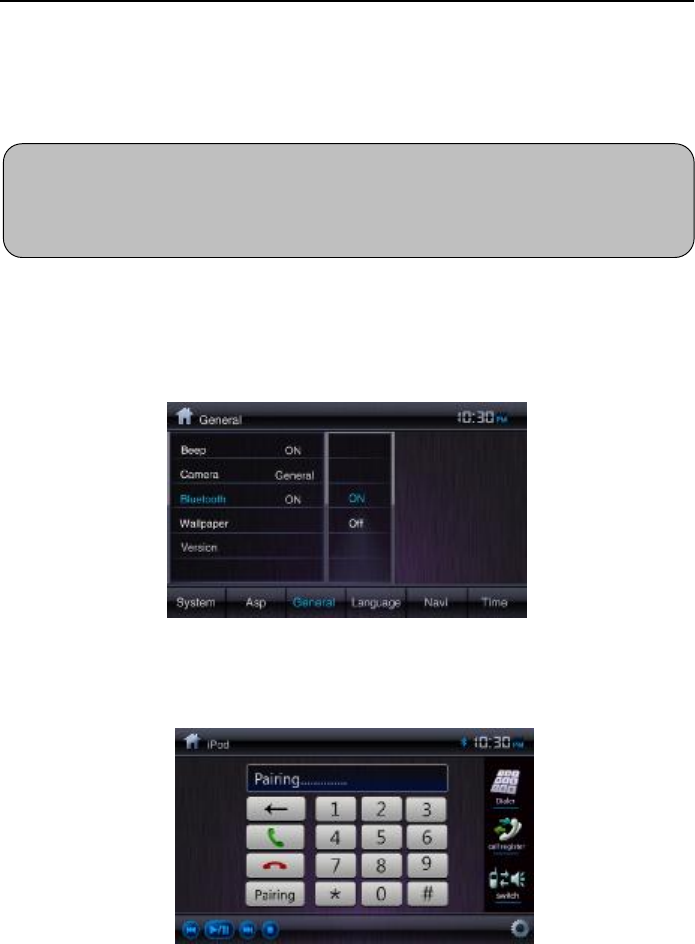
Please confirm the bluetooth function opened before using the bluetooth. Access
the setup menu first, select the bluetooth open function in general set. As the
picture 6-1
6-1 bluetooth on/off set
The bluetooth icon in the top right screen will not flashed when BT equipment
has connected with the system. The BT icon would flash if not connected.
图6-2. Bluetooth phone interface.
Warning: As different brands adopt different kinds of bluetooth technology and software , it may have
discrepancy in using. Some even not compatible
.This is not the problem of our
bluetooth system. Sorry for the inconvenience.
USER MANUAL AUDIO/VIDEO NAVIGATION
- 18 -
Ø 6.1 Phone
You can dial and listen the phones by the system screen in dialer interface.
The specific as figure 6-2
6.11 Dial function
Dial numbers from mobile phone or system screen. Click the dial button .
6.12 telephone access listen to function
The system will change to BT function interface automatic from other
function mode when a telephone access.It can also change the original mode
voice to the caller ring tone.Click the voice switching button can switch the voice
call from the vehicular speaker phone to mobile phone. The caller ID will
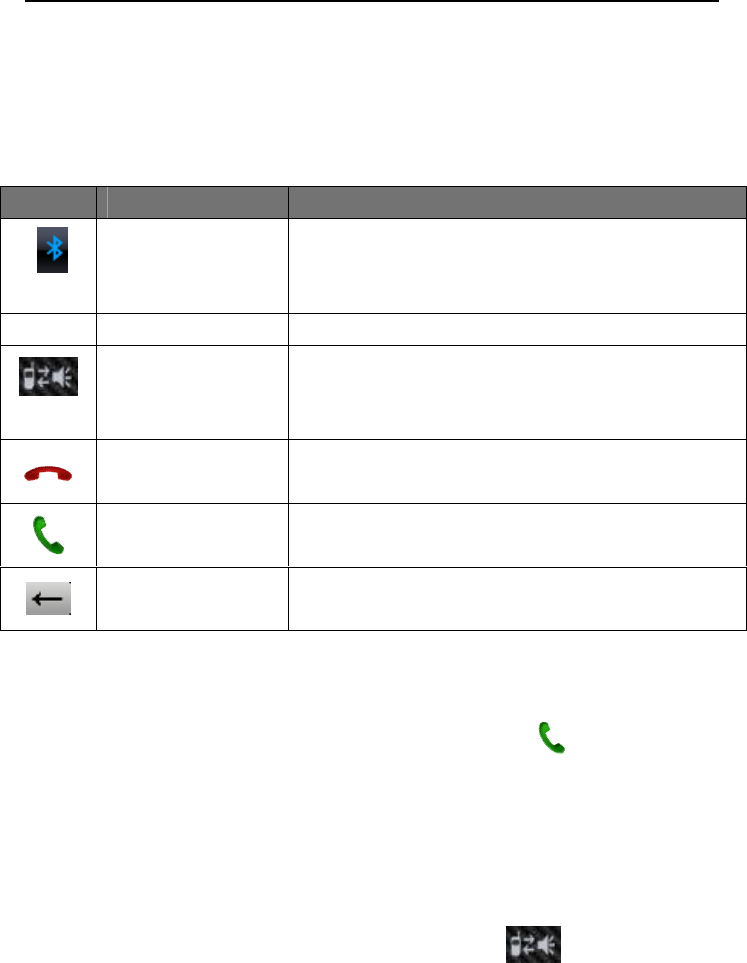
Icon Button name Function description
Bluetooth mark The bluetooth icon flash means bluetooth be
powered off , on the contrast, be powered on when
the icon not flash.
10:30
System clock Display the currently system time
Voice switching key
Switch the voice call from the vehicular speaker
phone to mobile phone when you click the voice
switching key during a conversation.
Hold button As the mobile phone hold button.
Dial button As the mobile phone dial button
Delect button Delect the wrong numbers in the message box.
USER MANUAL AUDIO/VIDEO NAVIGATION
- 19 -
indicate in the message box.
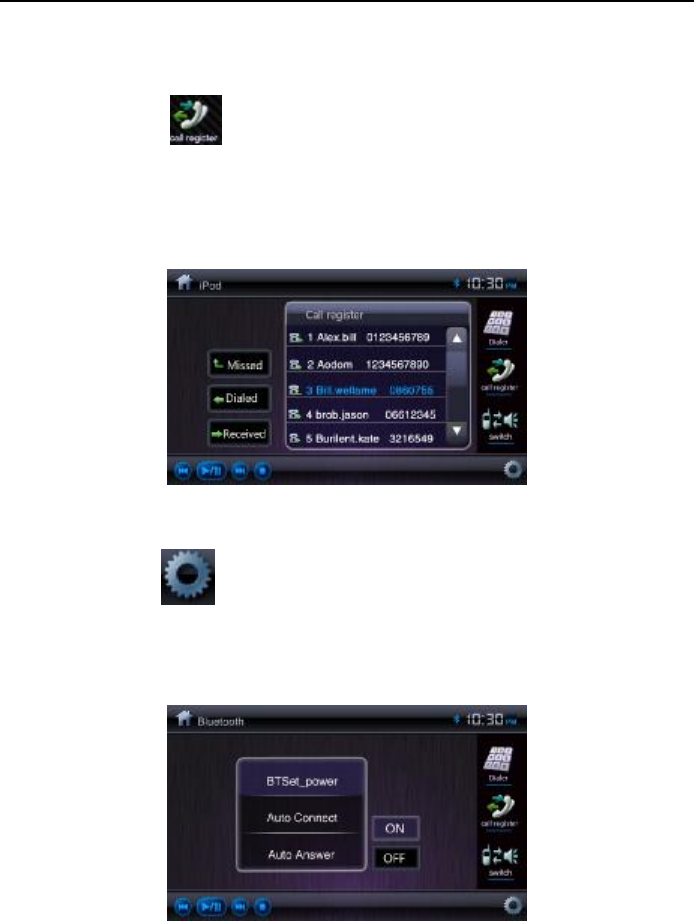
Ø 6.2 Check call records function
Clicking this button on the screen can check call records (as the graph 6-3),
double click the recorded number can call it. The interface will change to call
interface after connected.
Music Playback Interface
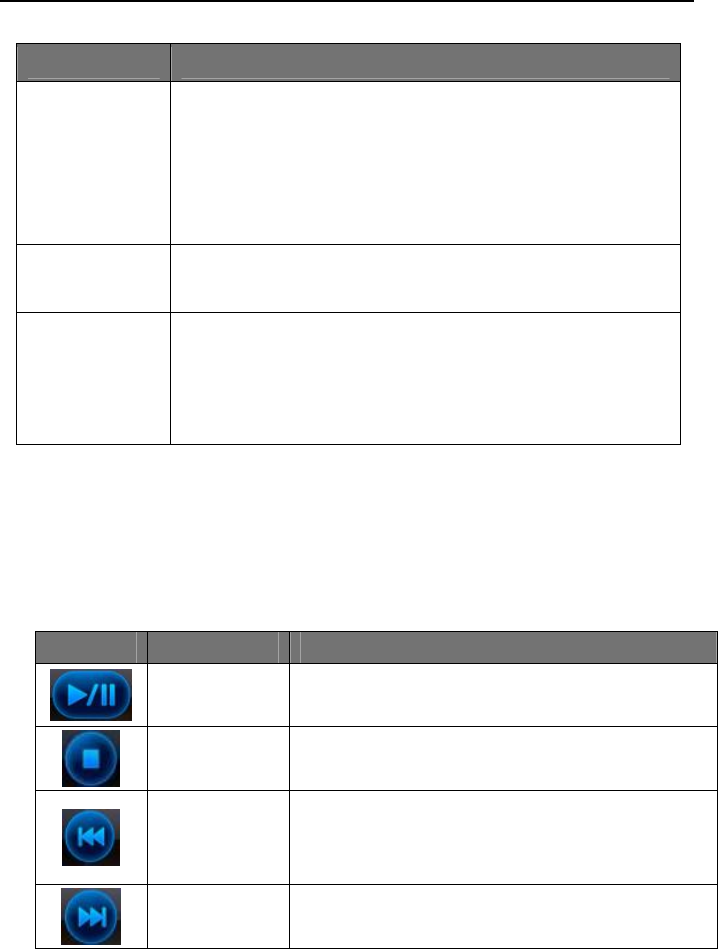
Ø 6.3 Bluetooth Setup
Touch the icon on the left side of the screen to get access to the Bluetooth
setup interface, which includes the pairing mode,auto answer and connect (see
picture below). The interface returns to the keypad automatically when no settings are
made.
Bluetooth setup interface
USER MANUAL AUDIO/VIDEO NAVIGATION
- 20 -
Ø 6.4 Bluetooth Streaming Music(A2DP)
The bluetooth provides the Advanced Audio Distribution Profile (A2DP) for
streaming music. Playback control are performed by the control bar in the
transparent shade below.
Icon Function description
Pairing
Press the on-screen pair button to initiate the pairing,then
select yes or no. If your mobile phone pop up a prompt
requesting a pass key or pairing code after you select
"Yes",enter "1234" to connect.The Bluetooth will be
disconnected when you select "No".
Auto answer When the auto answer is on, the unit will answer the call
automatically.
Connect
Touch options to specify how incoming calls are handled:
Auto connect: the unit will automatically connect the
previous mobile phone.
Manual connect
Icon Button Function Description
Play/Pause Touch to play or pause the music playing
Stop Touch to return to the audio play list interface
Previous
If the music starts playing for less than 2 seconds,
touch it to play the previous file or you have to
repeat the current music
Next Touch to play the next file.
USER MANUAL AUDIO/VIDEO NAVIGATION
- 21 -
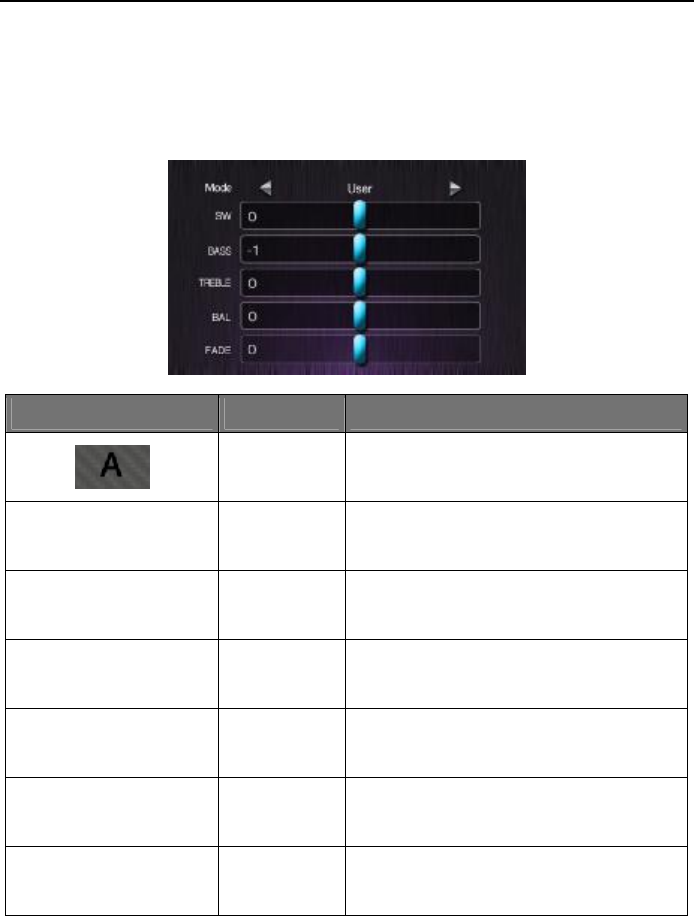
7 . EQ settings
Click the equalizer under each source playing mode to enter into the EQ settings
menu.You can select Jazz,Pop, Classical, Rock or User according to your preference
in the EQ adjustment menu.See picture below:
EQ settings interface
Icon Button Function Description
Exit The Exit button is invisible. You can
click to exit from the EQ settings
mode EQ mode
switch
You can switch the music genre by
clicking the left and right arrows
sw Subwoofer
Scroll the blue rectangular bar to adjust
the subwoofer
bass Bass Scroll the blue rectangular bar to adjust
the bass
treble Treble Scroll the blue rectangular bar to adjust
the tremble
bal Balance Scroll the blue rectangular bar to adjust
the balance
fade Fade Scroll the blue rectangular bar to adjust
the fade
USER MANUAL AUDIO/VIDEO NAVIGATION
- 22 -
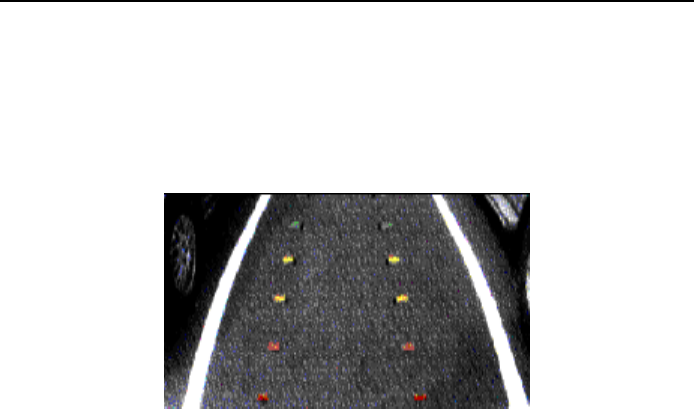
8 . Rear View Camera
NOTE: only after you connect the rear view camera with our unit, the Camera
function works.
Not connected with rear view camera
Camera image with rear view camera connection
When the camera is installed, the rear view image of what's behind the vehicle
will appear when the vehicle is placed in reverse gear. See picture above.When you
place the forward gear, the unit returns to the previous working mode automatically.
If no camera is installed, when you place the reverse gear or click the Camera
icon in the main menu, unit displays " No signal input" see picture above
You can also watch what's behind the vehicle when camera is installed under the
camera interface.
USER MANUAL AUDIO/VIDEO NAVIGATION
- 23 -
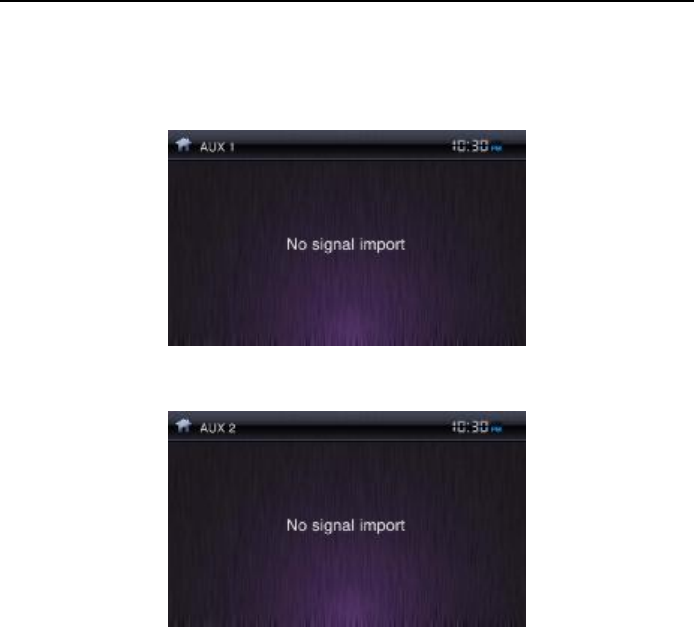
9. AUX1/AUX2
NOTE: The AUX1/AUX 2 is available only the unit is connected with the external
A/V device,otherwise prompt shows "No signal input"
AUX 1:No signal input
AUX 2:No signal input
Our unit supports bothAUX1 and AUX2 Inputs,each input can be connected
with camera, game consoles,walkmans and other playing devices.
If there is no signal, screen displays "No signal input".You can click the upper
left corner to return to main menu.
USER MANUAL AUDIO/VIDEO NAVIGATION
- 24 -
10. System Setup
System setup consists of 6 sub-menu settings: system settings, ASP
settings,general settings, language settings,Navigation settings and time settings.
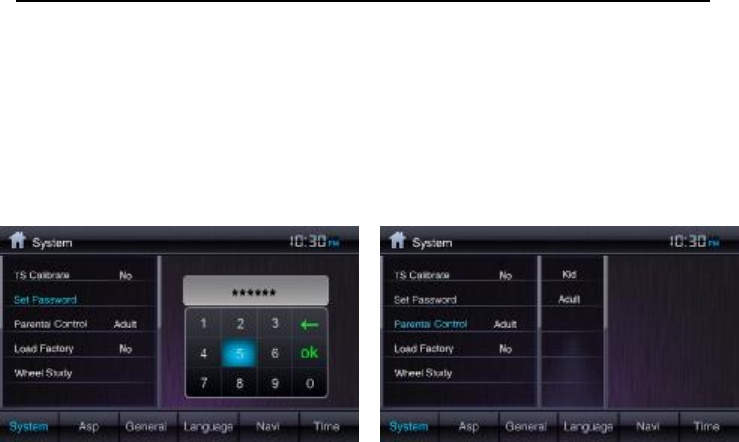
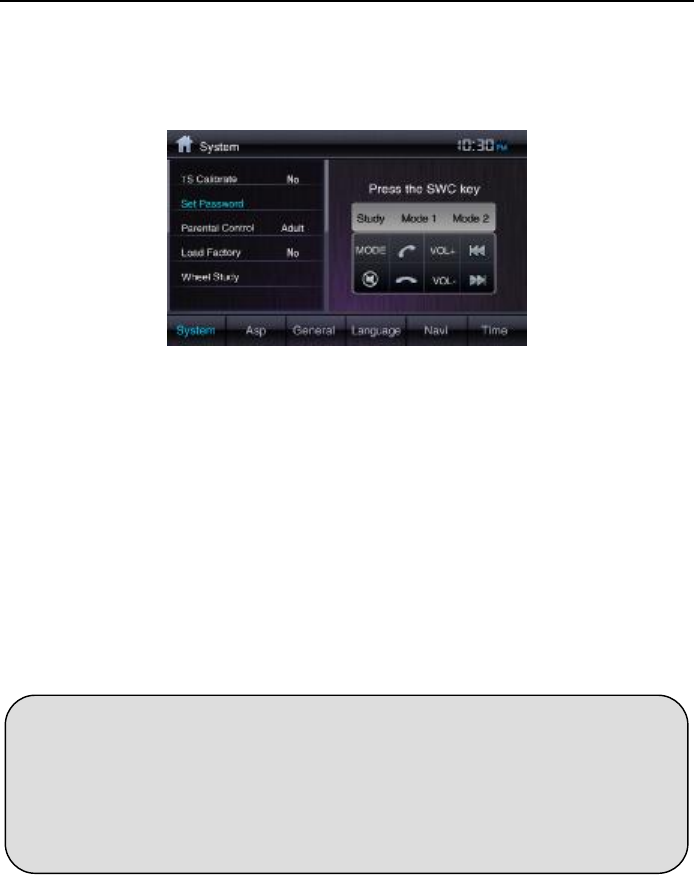
Ø 10.1 System settings
In system settings, there are calibration,set password,Parental control,Factory
default. See picture below:
System settings interface
TS Calibration:After selecting "Yes",a crosshair + appears in a corner quadrant of
the screen.To begin calibration,press and hold the crosshair for one second until t
moves to the next quadrant.Continue for eash quadrant until the calibration is
completed.
Set password:Enter a 4-digit password to activate the "Parent Control" function.To
reset the password, access the "Set Password" option and enter the current password
to unlock the field.Access the "Set Password" again once unlocked and enter a new
password.( the default password is blank,you can enter 8888 to unlock the parent
control anytime.
Parent Control:Select the appropriate rating level for the inteded audience.You may
override higher ratings by using your password.
Factory default: Select "Yes"to restore the factory default settings for the rating
system only.
USER MANUAL AUDIO/VIDEO NAVIGATION
- 25 -
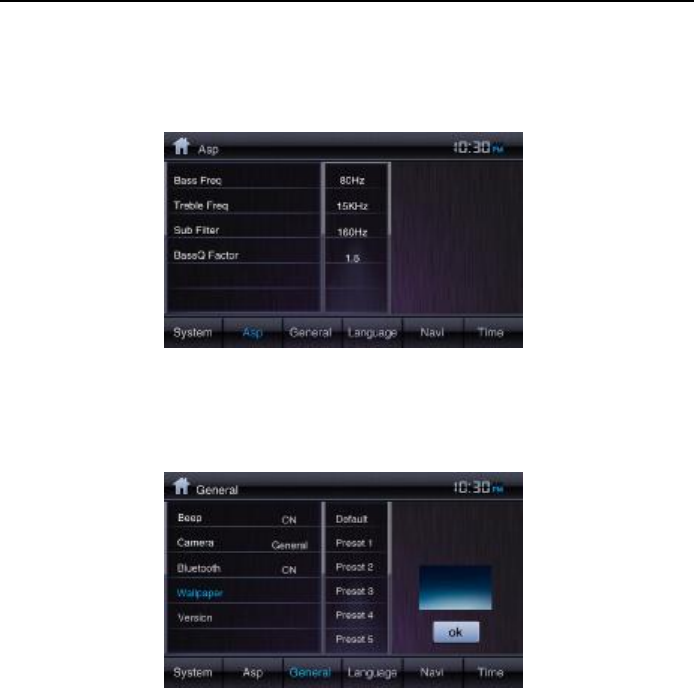
Ø 10.2 ASP settings
ASP settings has four sub-menu settings:Bass Freq, Tremble Freq, Sub Freq and Bass
Q factor. See picture below:
Ø 10.3 General settings
General settings has five sub-menu settings:Beep, Camera, Bluetooth, Wallpaper and
Version .See picture below
Beep: when turned on, an audible beep tone confirms each function selection.
Camera: when turned on, the rear view camera function is on.
Bluetooth: when turned on, the bluetooth is on.
Wallpaper: Select the wallpaper according to your preference.
Version: software version information display
USER MANUAL AUDIO/VIDEO NAVIGATION
- 26 -
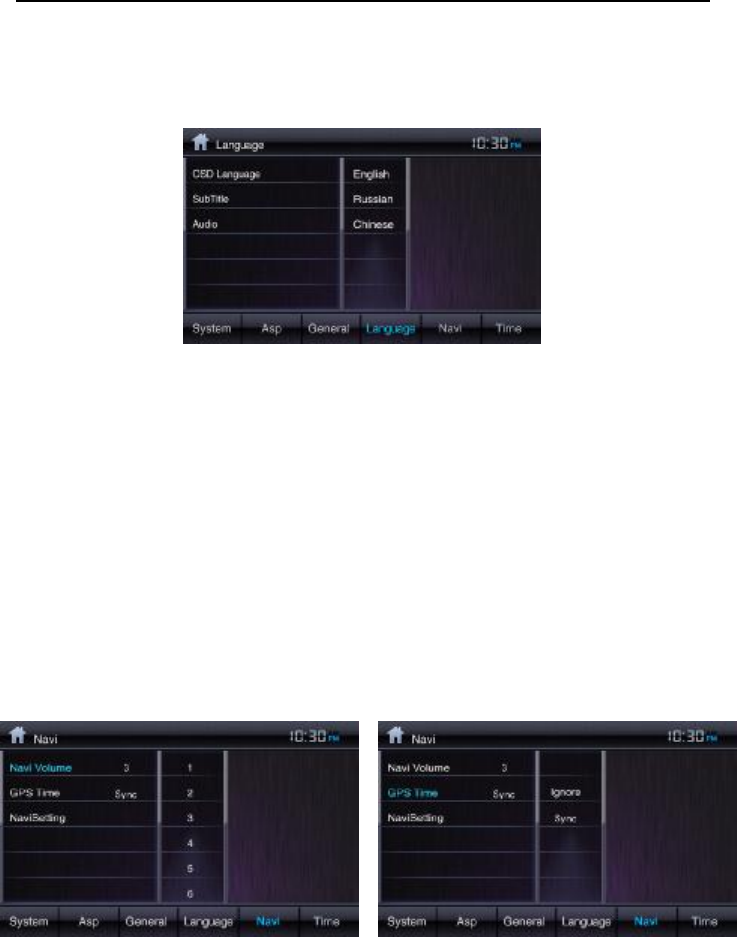
Ø 10.4 Language settings
Language settings has three sub-menu settings: OSD language, Subtitle language and
audio language.See picture below.
OSD language:set the show-on screen language display,language options include
English, France, Spanish and Chinese.
Audio language: set audio language display.language options include English, France,
Spanish and Chinese.
Subtitle language: set the subtitle language.language options include English, France,
Spanish, Chinese,automatic and off.
Ø 10.5 Navi setting
Navi settings includes: Navi volume,GPS time, Navi setting
USER MANUAL AUDIO/VIDEO NAVIGATION
- 27 -
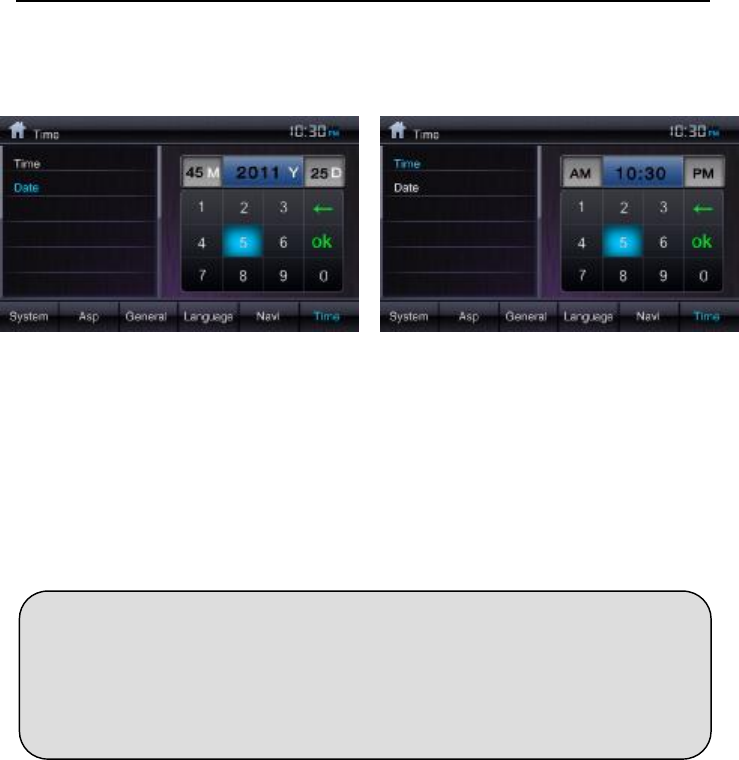
Ø 10.6 Time setting
Time setting includes: time setting and date setting. See picture below
Date setting Time setting
Date setting: click the date setting and pop up the keypad " MM/YY/DD", then click
the numeric keypad to set the date.
Time setting: click the date setting and pop up the keypad " AM/TIME/ PM", then
click the numeric keypad to set the time.Click the AM/PM to select 12H or 24H.
Please pay attention to the following tips when reset the DVD rating level:
**Input the password to unlock the field,then the password is cleared.In order to validate the password please re-enter
the password.
**The rating of each disc is marked on the disc,disc packing or document.If the rating is not available on the disc, the
parental lock feature is unavailable.Some discs restrict only parts of the disc and only the appropriate content will be
displayed.
USER MANUAL AUDIO/VIDEO NAVIGATION
- 28 -
11. Steering Wheel Function Study
Enter into the setup interface, click the others to enter the other settings interface.The
steering wheel function study interface is as below:
The Steering Wheel Function Study goes as:
Enter into the study interface, click the function key, and push the same buttons
on the steering wheel. After the study is completed,the function key will be turned
into blue.After all the functions study is finished,click the upper left corner to exit the
study interface.If you push the wrong buttons on the wheel,please click the study
mode options( such as general, mode 1 and mode 2) to do the study again.
There are three modes of steering wheel function study:General,Mode 1 and
Mode 2, each is with different parameters to match different vehicle series.The
General and Mode 1 is suitable with most vehicles while Mode 2 is served to the
special vehicles.
System reset notes:
** If you reset the DVD settings, the Parent control password and rating level setting will
not be changed.
** Please note that DVD reset is different with system reset.DVD reset is only to restore the
DVD loading settings with other settings unchanged.System reset is to erase all the user settings
to restore the factory default settings.