SKYPINE ELECTRONICS SD9614SV CAR DVD ENTERTAINMENT CENTER (BLUETOOTH PORTION ONLY) User Manual SD 9614 SV
SKYPINE ELECTRONICS (SHEN ZHEN) CO., LTD. CAR DVD ENTERTAINMENT CENTER (BLUETOOTH PORTION ONLY) SD 9614 SV
Contents
- 1. USERS MANUAL 1
- 2. USERS MANUAL 2
- 3. USERS MANUAL 3
USERS MANUAL 2
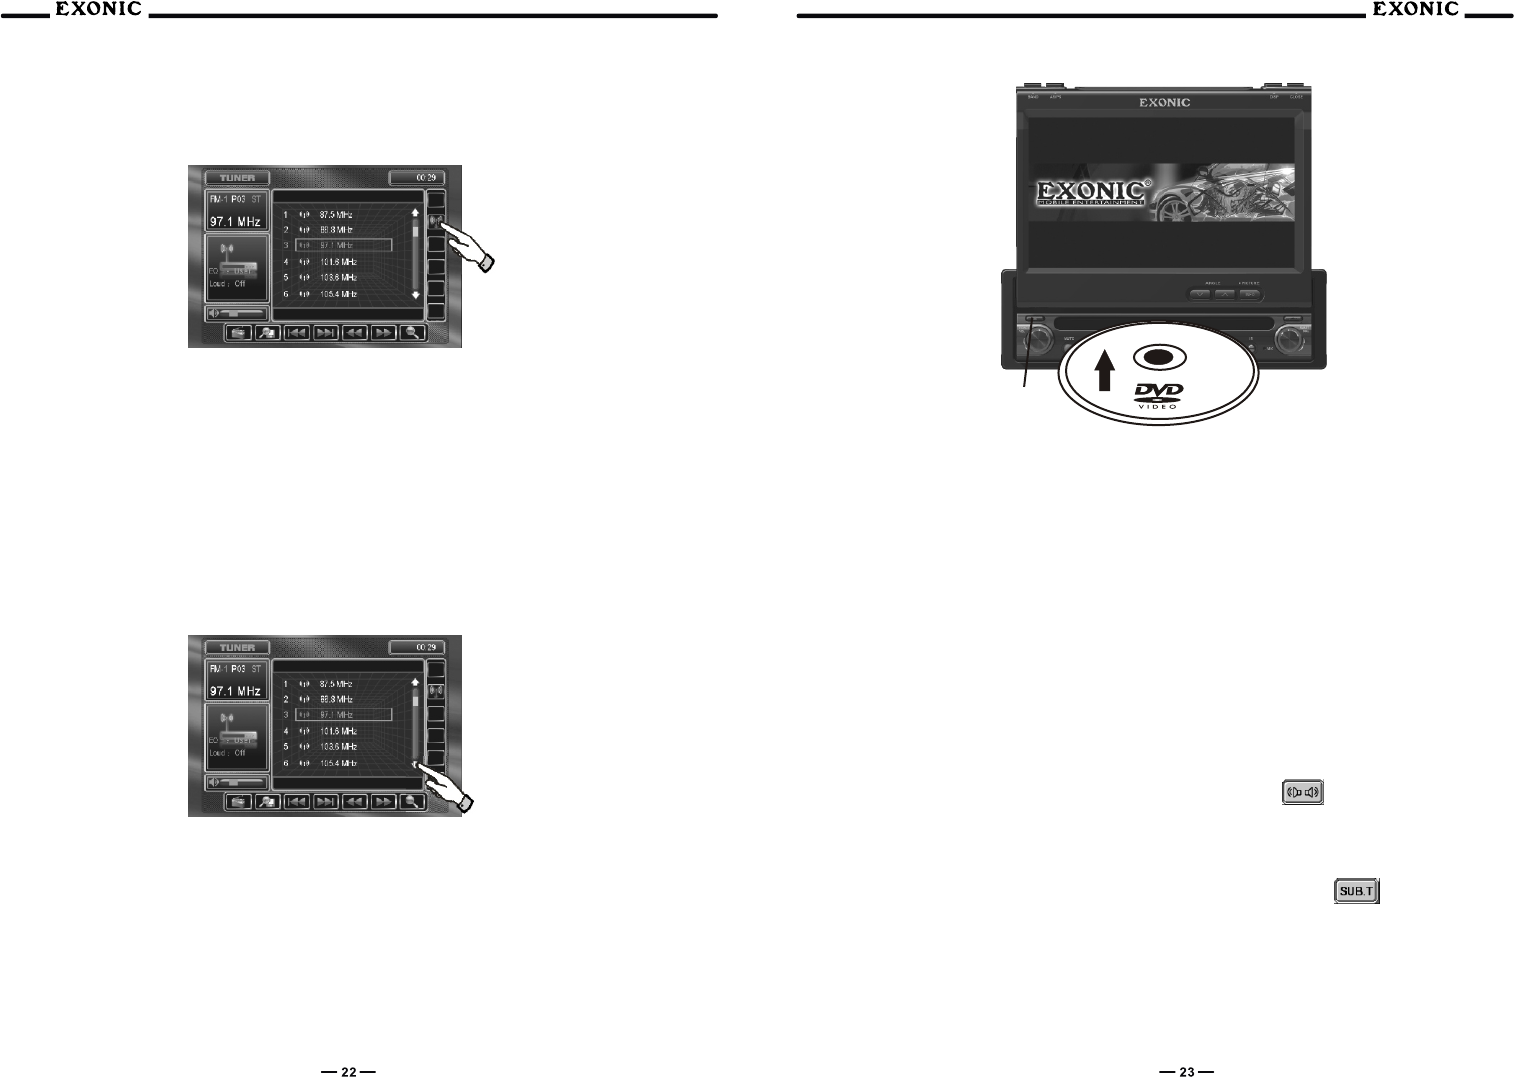
LOC/DX Radio Station
Touch LOC button on the TFT to activate LOC / DX when the LOCAL function is on, LOC will appear, only
radio stations with a strong signal are received, DX is for radio stations that are far away and/or have weak
signals.
Storing Radio Stations Preset
Up to 36 FM stations and 12 AM stations can be stored. To store a station, select the desired band and
station. Press and hold the desired preset button (1-12) for more than 2 seconds. When stored, the
PRESET number will appear in the display. The station can be recalled anytime by pressing the
corresponding preset button on the MONITOR.
Recalling a Radio Station Preset
Touch an corresponding PRESET number for less than 2 seconds to recall.
Preset Page Up/Down
Only 6 PRESETS can be display at one time, use PRESET page up/down to access next stored
PRESETSaccordingly.
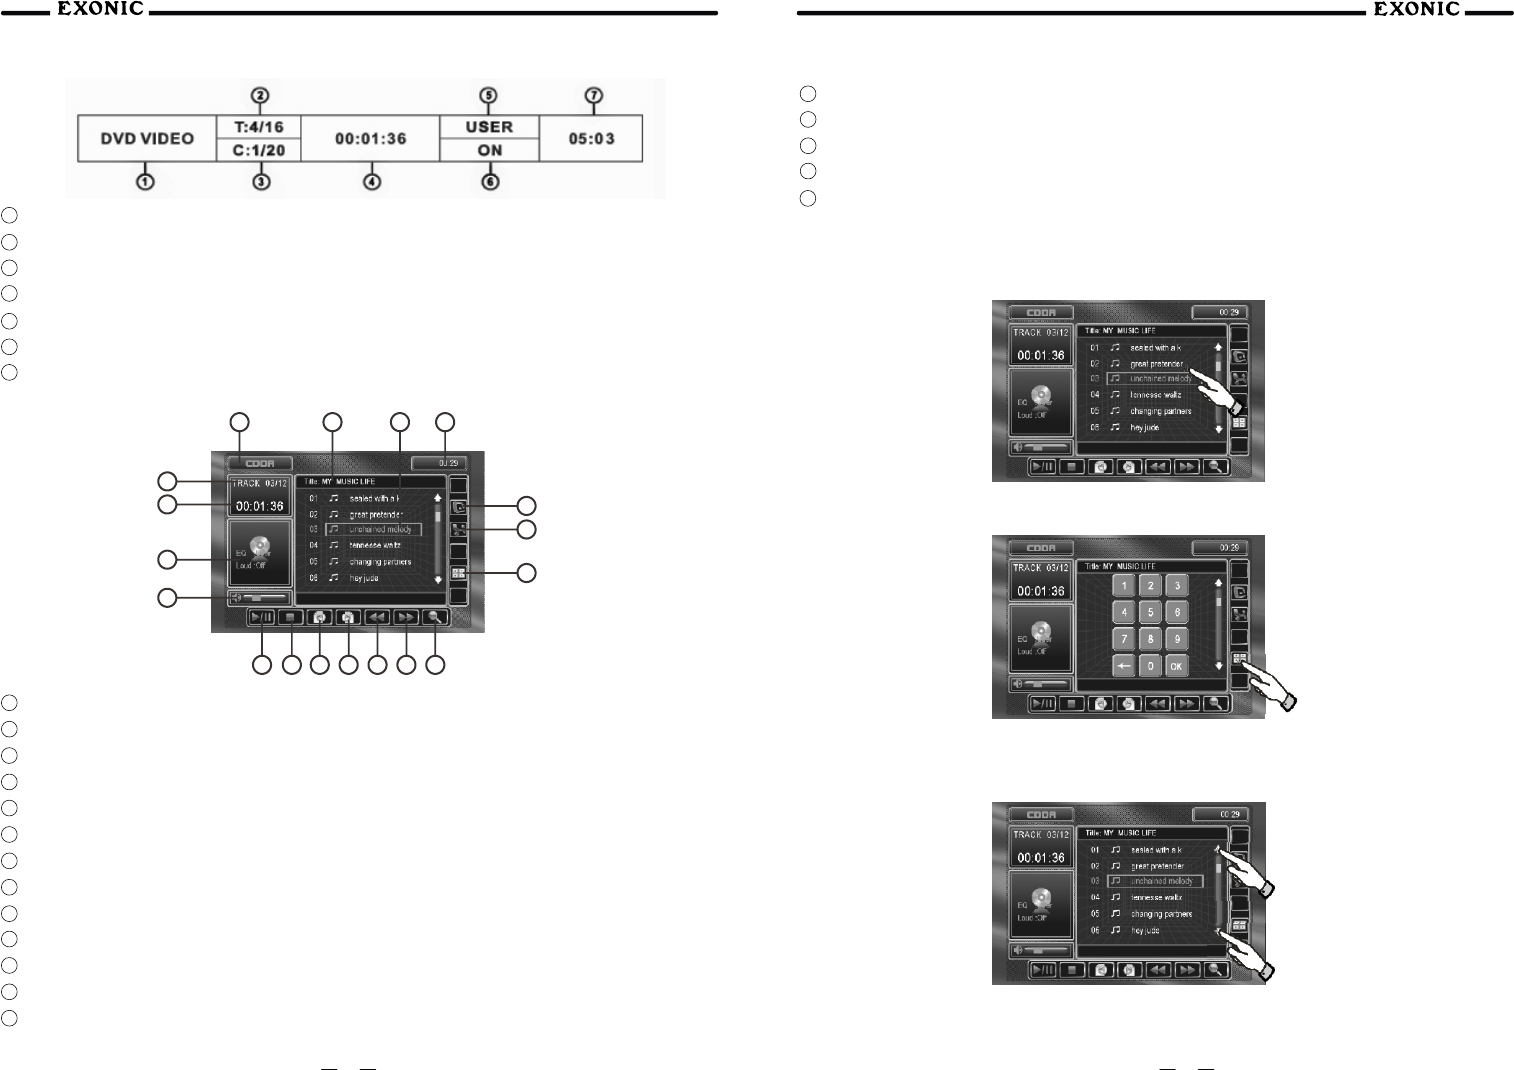
DVD Operation
Inserting a Disc
Insert CD/DVD with label facing upwards
When inserting a DVD disc, it will play automatically. Other sub-menus may have to be pressed to access
the DVD movie / music content, read the directions of your specific DVD disc for hidden features.
Notes:1. If PARENTAL Lock is activated and the disc inserted is not authorized, a 4-digit code must
be entered and/or the disc be authorized. (See "RATING MENU")
2. Only one disc can be inserted at one time.
Ejecting the DISC
Press the EJECT button
Resetting the Loading Mechanism
If the disc loads abnormally or an system error occurs, press and hold the eject button for 3 seconds to
reset the loading mechanism. The disc will eject and normal operation should resume.
Direct Chapter / Track Selection
During DVD and CD playback, you can use the numeric keypad on the IR remote to access tracks directly
Viewing an Alternate Picture Angle (DVD Only)
Some DVD's contain scenes that have been shot simultaneously from different angles. For discs recorded
with multiple angle, press the ANGLE button on the remote control to toggle between available angles on
the screen.
Multi-Language Disc
If you are watching a disc recorded in multiple languages, press the AUDIO button on the IR remote to
choose your desired language. You can also touch AREA E and use the button to change
languages.
Changing Subtitle Language
If you are watching a disc recorded in multiple languages with subtitles, press the SUB-T button on the IR
remote to choose your desired subtitle, you can also touch AREA E and use the button to change
languages.
DVD Playback Information
During playback, press the INFO button on the IR remote or touch AREA B to display the playback
information on screen.
The following information will be displayed:
TM
Eject button
1 Indicates current source playing.
2 Indicates that the fourth of sixteen title on the DVD is currently playing.
3 Indicates that the first of twenty chapters on the DVD is currently playing.
4 Indicates the playback time if the current title.
5 Indicates the USER defined EQ levels
6 Indicates the SOUND setting is on.
7 Indicates the current system time.
CD Operation
1 Current source indicator, touch AREA A to access MAIN source menu
2 Disc title
3 Track title
4 Current TIME
5 Touch to activate / deactivate REPEAT: Single mode
6 Touch to activate / deactivate RANDOM mode
7 Touch to access the DIRECT TRACK access keypad
8 Touch to SCAN CD tracks for 5 sec each track, touch again to deactivate
9 Touch to FAST FORWARD current track
10 Touch to FAST REVERSE current track
11 Touch to PAGE up
12 Touch to PAGE down
13 Touch to STOP disc playback
14 Touch to PLAY / PAUSE disc playback.
15 Volume indicator
16 Playback information
17 Elapsed playback time.
18 Current track and total number of tracks on the disc
Ratings Setup Menu
After inserting a CD disc, files will play in numerical order in the directory.
Touch to playback track
Touch for DIRECT TRACK access
Previous / Next Page
Touch to view UP / DOWN pages of available TRACKS.
24 25
1313 1111
1212 1010 9988
1414
1515
1616
1717
1818
11223344
55
77
66

1 Current source indicator, touch AREA A to access MAIN source menu
2 Disc title.
3 rack title.
4 Current TIME.
5 Touch to PLAY / PAUSE disc playback.
6 Touch to STOP disc playback.
7 Touch to PAGE down.
8 Touch to PAGE up.
9 Touch to PREVIOUS FOLDER.
10 Touch to NEXT FOLDER.
11 Touch to FAST FORWARD MP3 tracks, touch PLAY to deactivate.
12 Touch to activate / deactivate REPEAT: Single mode.
13 Touch to activate / deactivate RANDOM mode.
14 Touch to access the DIRECT TRACK access keypad.
15 Current track and total number of tracks on the disc.
16 Elapsed playback time.
17 Playback information.
18 Volume indicator.
Previous / Next Page
Touch to view UP / DOWN pages
of available TRACKS
Selecting by Single Track
Touch to playback track
Selecting by Direct Track Access
Touch to for DIRECT TRACK access
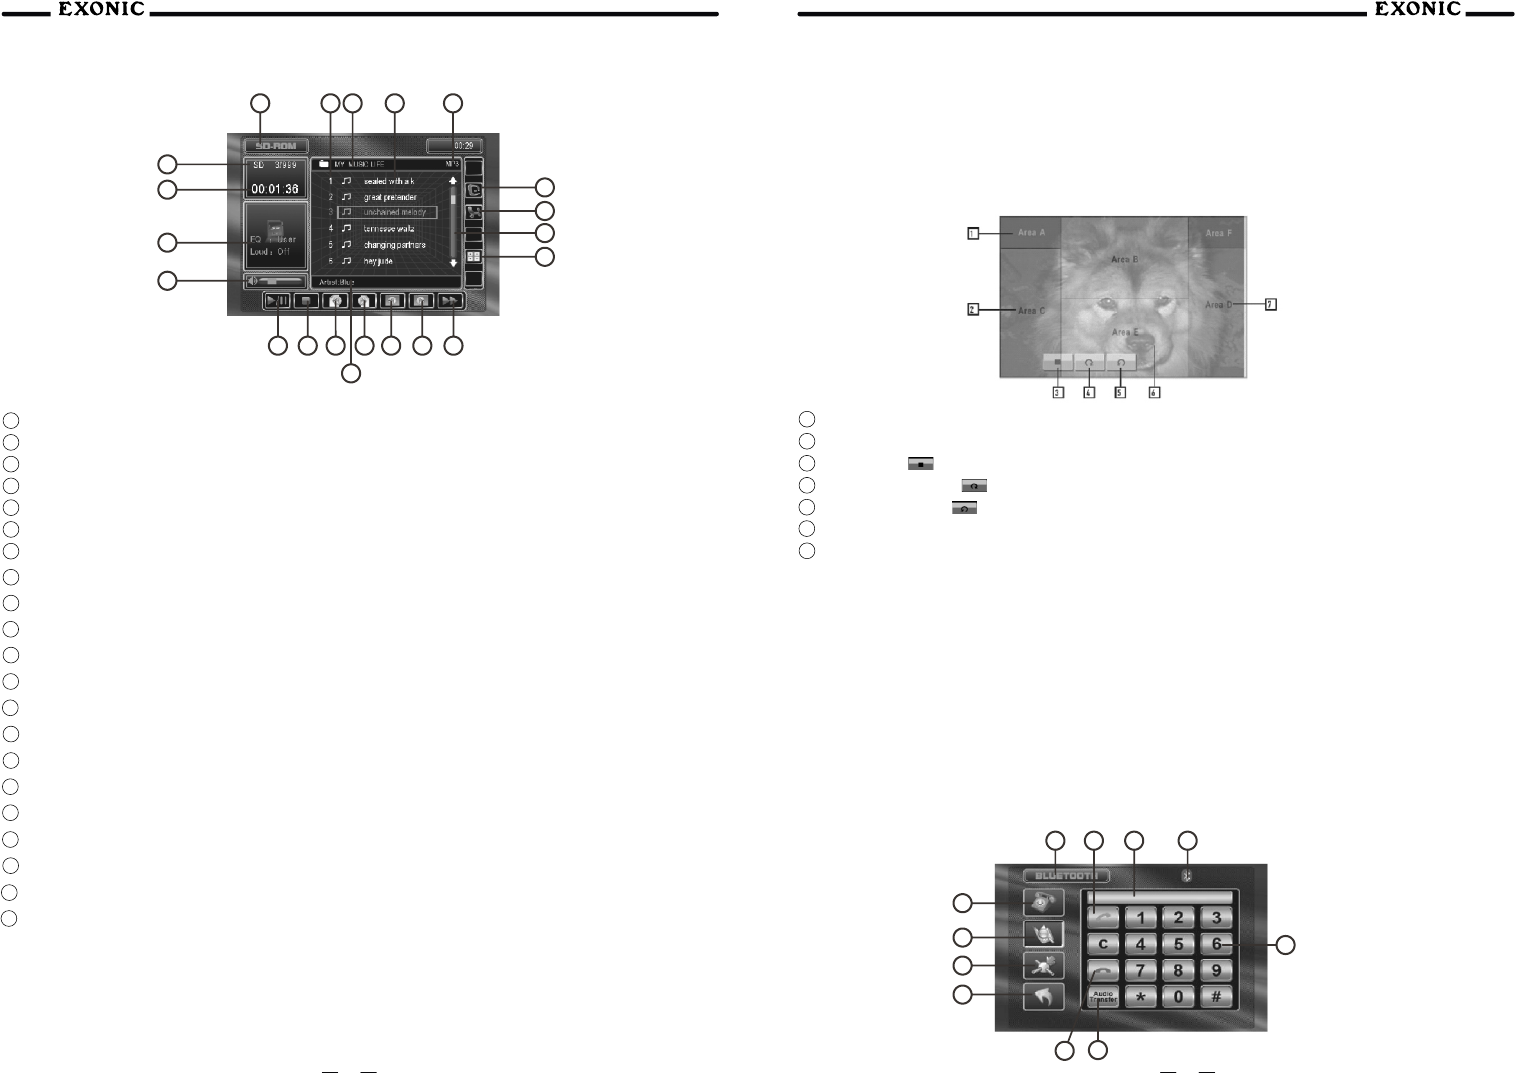
iPod Operation
1 Current source indicator, touch AREA A to access MAIN source menu
2 Disc title.
3 Track title.
4 Current TIME.
5 Touch to PLAY / PAUSE disc playback.
6 Touch to STOP disc playback.
7 Touch to PAGE down.
8 Touch to PAGE up.
9 Touch to FAST REVERSE current song.
10 Touch to FAST FORWARD current song.
11 Touch to SCAN SONGS for 5sec each SONG, touch again to deactivate.
12 Touch to wait for iPod VIDEO or PHOTO.
13 Touch to activate / deactivate REPEAT: Single mode.
14 Touch to activate / deactivate RANDOM mode.
15 Touch to access root directory.
16 Touch to access DIRECT SONG access keypad.
17 Touch to display song list.
18 Displays current song number and total number of songs on the disc.
19 Elapsed playback time.
20 Playback information.
21 Volume indicator.
Notes:To switch to iPod press the MODE button on the front panel or IR remote or from the MAIN
source menu
Playing iPod Files
After connecting an iPod, files will play in numerical order in the directory.
26 27
1313 66
1111 88
1212 77
1010 99
991 01 0
881 11 1
141455
1515 2121
1616 2020
17171919
1818
1818
11
11
22
22
33
33
44
44
55
77
66
1515
1717
1616
1212
1414
1313
MP3 Operation
Playing MP3 Files
After inserting a CD disc, files will play in numerical order in the directory.
Previous / Next Page
Touch to view UP / DOWN pages
of available SONGS
Selecting by Single SONG
Touch to playback SONG.
Selecting by Direct Track Access
Touch for DIRECT SONG access.
Notes:PHOTO FILES are only compatible with NANO and G5 iPod
VIDEO FILES are only compatible with G5 iPod
Playing Photo or Video File From iPod
1.Touch VIDEO icon, iPod is now disconnected and waiting for video signal.
2.Make sure VIDEO OUTPUT is turned on in your iPod, consult your iPod owners manual for details.
3.Press PLAY on your iPod, video should now appear on the TFT.
Releasing Video Content from iPod
Touch AREA F (upper right screen) to reconnect iPod to play music again.
iPod Will Now Reconnect
Selecting Music By:
1.Playlist 2. Artist 3.Album 4.Genre 5.Song
Touch desired Folder, music will begin to play after selection.
Direct Song Access
1.Touch the Keypad icon, keypad will appear.
2.Enter the desired song you wish to play.
3.Enter OK.
28 29
1 Current source indicator, touch AREA A to access MAIN source menu
2 Master Song Number List, shows the number of the song relative to the entire disc.
3 Folder, displays the name of the currently selected folder.
4 Filename List, displays up to 6 songs in the current folder in order, with filename.
5 File Type Indicator, displays type of song file, either MP3 or WMA.
6 touch to activate / deactivate REPEAT: Single mode.
7 touch to activate / deactivate RANDOM mode.
8 scroll bar,Allows scrolling of song list.
9 touch to access DIRECT SONG access keypad.
10 touch to FAST FORWARD current song.
11 Next Folder, pressing this button will select the next available folder.
12 Previous Folder, pressing this button will select the previous available channel.
13 Page Up, touch the icon to see the next 6 songs in the folder.
14 Page Down, touch the icon to see the previous 6 songs in the folder.
15 Touch to STOP disc playback.
16 Touch to PLAY / PAUSE disc playback.
17 Information, displays available information for the current song.
18 Volume indicator, indicates current volume level, controlled by rotary encoder.
19 Playback information
20 Elapsed playback time.
21 Displays current song number and total number of songs on the disc
Note: Song control only works for MP3 type files and there is no audio output while song control is
active.
JPEG Operation
JPEG mode works a bit differently from the other modes. There is no separate JPEG mode, rather this
mode is accessed within either SD mode or MP3/WMA mode. Whenever a picture is present on an SD card
or CD, the unit will switch to the JPEG mode to view it. Each picture is displayed on the screen for 5
seconds, unless paused. JPEG mode will automatically exit when the next file is not a picture, or when
STOP is pressed.
1 Touching this zone will bring up the Main Menu for the unit.
2 Touching this zone will skip to the previous file.
3 Stop, touch to stop viewing at the current file.
4 Rotate Right ,touch to rotate the image 90º clockwise.
5 Rotate Left, touch to rotate the image 90º counterclockwise.
6 Touching this zone will bring up the on-screen buttons (3, 4 & 5).
7 Touching this zone will skip to the next file.
Notes:Unlike the music player, when the viewer is paused, moving to the next or previous picture
will not automatically resume the slideshow.
Zoom Mode is only active when the viewer is paused.
Bluetooth Operation
Before using the Bluetooth
Select the Bluetooth option in the General setup and select On to activate the Bluetooth feature. Refer to
page 21 for more details.
Bluetooth Mode
From the main menu, touch the Bluetooth icon on the screen or, press the Bluetooth icon at the top of the
screen. The Bluetooth function must be turned on for the Bluetooth icon to appear at the top of the screen.
30 31
1313
1717
1212 1111
77
1010
66
33
33
44
44
55
66
99
55
77
88
1515 1414
1616
1818
88
1919
99
2020
1010
2121
1111
11
11
22
22
SD Card Operation
1 Current Source Indicator, displays source or current mode.
2 Talk button, press to answer an incoming call or to place an outgoing call.
3 Display Indicator, phone number display and call status indicator.
4 When the Bluetooth function is OFF, the Bluetooth Status Indicator is black. When the Bluetooth
function is ON and no phone is connected (paired) to the unit, the indicator will flash blue. When the
Bluetooth function is ON and a phone is connected (paired) to the unit, the indicator is blue.
5 Keypad interface, press 0-9, *, # and + to enter desired phone number; press C to clear the last digit.
6 Audio Transfer Button, press to transfer audio between the head unit and mobile phone.
7 End button, press to end a call in progress or to reject an incoming call.
8 Return button, touch to RETURN to previous screen.
9 Setup Menu Icon, press to access Bluetooth setup menu.
10 Phone book Icon, press to access the phone book menu.
Keypad Interface Icon, press to display the keypad interface.
11
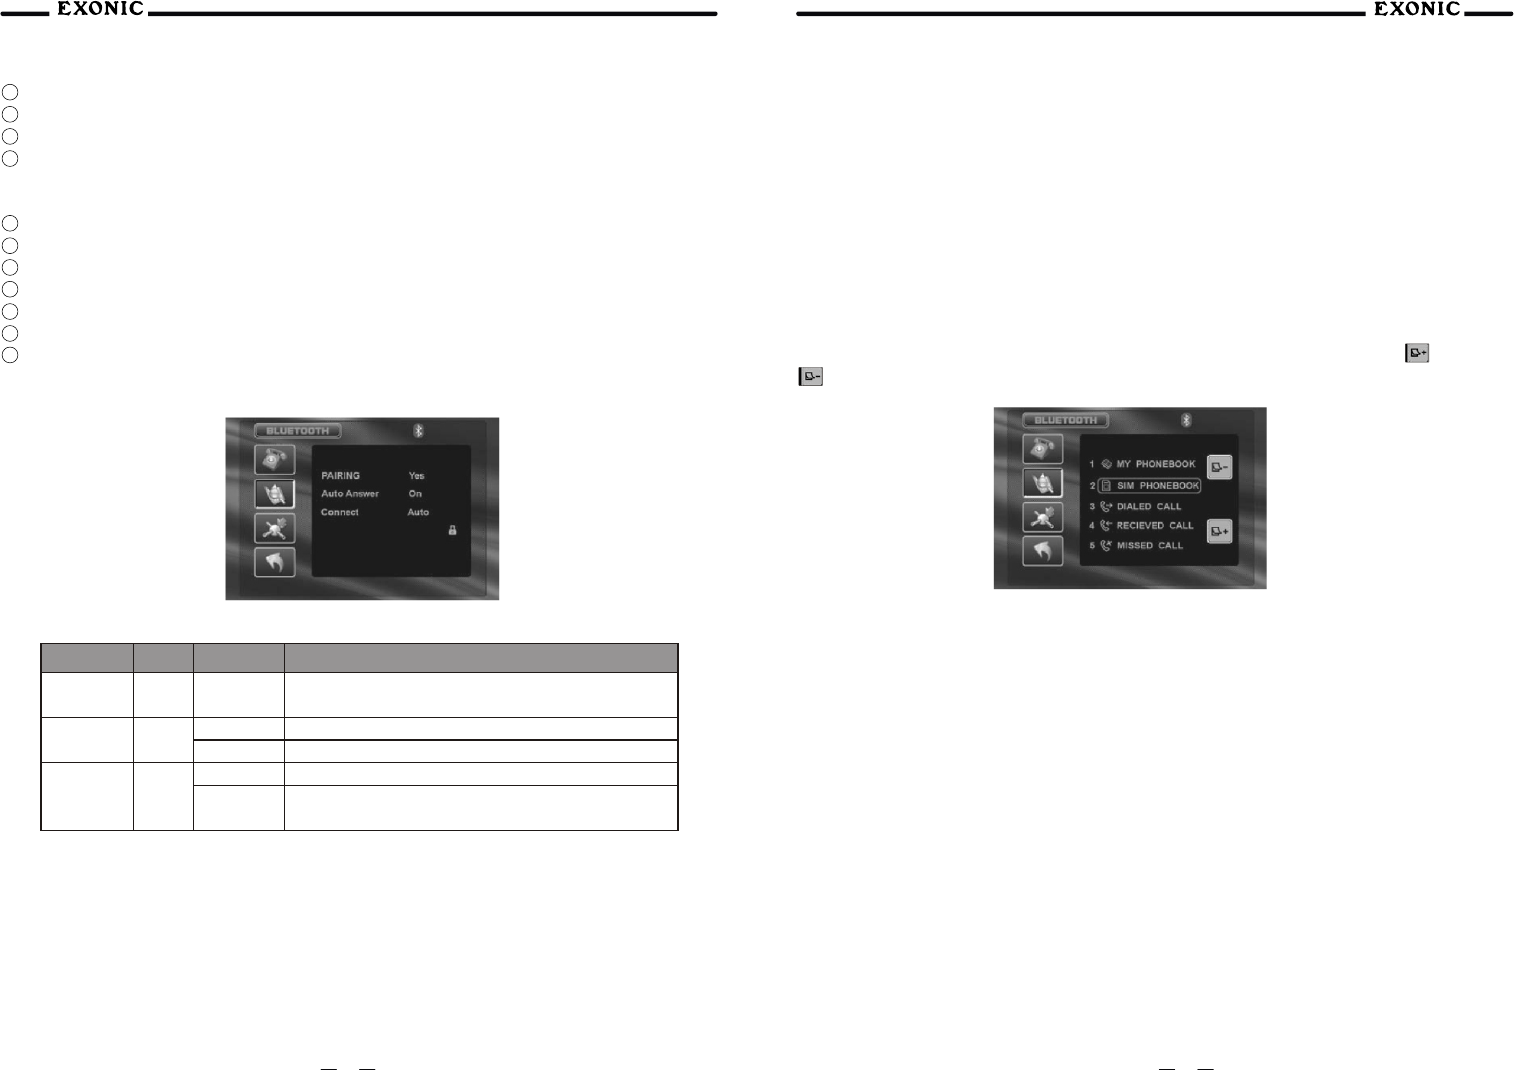
Bluetooth Setup Menu
Settings Default Options Function
Pairing Yes Yes (Pair) Press YES to begin the pairing function. Press YES
again to cancel
Auto Answer Off Off
On
Talk button must be pressed to answer incoming calls
Head unit will automatically answer incoming calls
Connect
Manual
Manual
Connect phone to head unit each time
Head unit will automatically connect to previously
paired phone.
Auto
Pairing
Access Bluetooth setup menu and press YES option on the screen, then "Wait Pairing" will display. Now
you can pair a mobile device with the unit. When prompted by your mobile device, enter 1234 for the PIN or
pass code. After the pairing process has completed, the Bluetooth icon will turn solid blue. This unit can
remember more than 4 mobile devices. The head unit will delete the phone that was least used to allow for
the new pairing (connection). The mobile device that is initially connected will always be remembered and
set as the default phone.
Auto Connect
The head unit will automatically connect to a previously connected mobile device when the Connect
feature is set to Auto. If the connect feature is set to Manual, the head unit will not automatically connect to
any mobile device. Set the Connect feature the Manual when you do not want to connect to any Bluetooth
mobile device.
Auto Answer
The head unit will automatically answer incoming calls when the Auto Answer feature is set to ON. If the
Auto Answer feature is set to OFF, the Talk Button must be pressed to answer an incoming call.
Bluetooth Phone Book Menu
Phonebook
Press the phone book icon to access the phone book. You can see the phone book list, SIM book list,
dialed call list, received call list and missed call list. Touch the desired name to call. Press or to
navigate through the phone list.
Making a Phone Call
Phone calls can be completed four different ways:
1.Enter the desired number using the keypad interface, then press the Talk Button
2.Enter the desired number using the numeric keypad on the remote, then press OK.
3.Select a previous call from the phone book menu.
4.If your phone supports voice dial, access this mode on your phone instead of using the phonebook.
Answering a Phone Call
When calls come in, the interface will display on the screen. The head unit will answer calls automatically if
the Auto Answer feature is set to ON, otherwise, the Talk Button must be pressed to answer an incoming
call. During an incoming call, the audio is muted for the current source and the incoming call screen will be
displayed. Adjust the volume during the call using the volume controls on the main unit.
Ending a Phone Call
Press the END Button on the screen or the ESC button on the main remote control to end a call in progress
or to reject an incoming call.
32 33
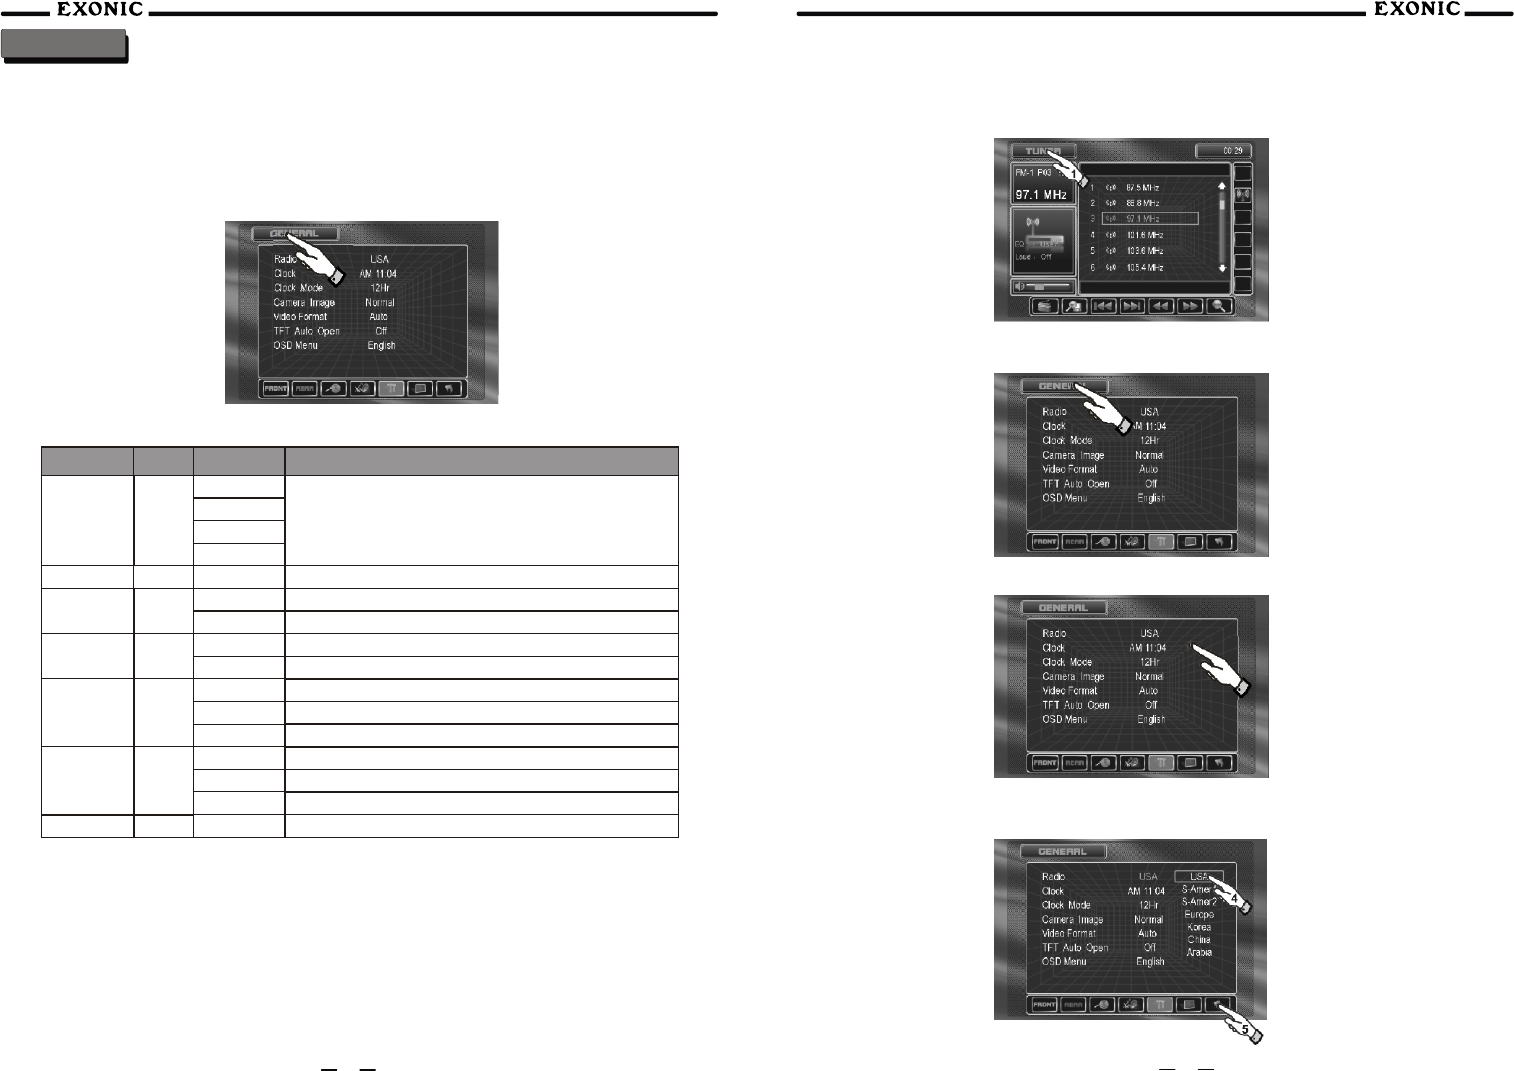
System GENERAL Setup Menu
General Setup Menu
Press the GENERAL button to access the setup mode.
Select desired parameter you wish to change.
Page will return back to previous screen after 10 seconds of inactivity or by pressing the RETURN
Button.
Settings
GENERAL Setup Menu Table
Settings Default Options Function
Radio USA
USA
Set to appropriate setting for your Country
S-AMER1
S-AMER2
Europe
Clock adjust AM 00:00 See adjusting the clock for more details
Clock Mode 12Hr 12Hr PM 6:00
24Hr 18:00
Camera
Image Normal
Normal Normal Image
Reverse Mirror camera input image 180 degrees
Video
Format Auto
AUTO
NTSC
PAL
System will auto detect NTSC or PAL
For NTSC compatibility
For PAL compatibility
TFT Auto
Open Off Off
On
Manual
TFT panel will automatically open when IGN is turned on
TFT will remain closed until the OPEN button is pressed
Will only close when OPEN
OSD Menu English English
Notes:Not all GENERAL setup features are described in detail
Adjusting RADIO Frequency
Step 1) Touch top left corner of screen
Step 2) Touch GENERAL setup button
Step 3) Touch USA
34 35
2
3
Step 4) Touch the setting for your Country
Step 5) Touch RETURN to exit

Adjusting the Clock
12 or 24 Hour Clock Mode
Step 2) Touch GENERAL setup button
Step 3) Touch 00:00 area in the CLOCK row
Step 4) Keypad should appear
Step 5) Enter the time in HOURS, touch OK
Step 6) Enter MINUTES, touch Ok
36 37
3
2
Step 7) Touch AM or PM to set
Step 8) Touch RETURN to exit
Step 9) If you desire 24Hr format, select 24Hr
from CLOCK MODE, then follow steps 1-7.
Step 10) Touch RETURN to exit
7
Step 1) Touchtop left corner of screen
Audio Signal Processing (ASP)
Step 2) Touch ASP SETUP button
Step 3) Scroll down to adjust settings
Step 1) Touch top left corner of screen
2
2
Step 4) Touch to adjust bass frequency
Step 6) Touch to adjust sub filter
Step 5) Touch to adjust treble frequency
Step 7) Touch to adjust sub phase
Step 8) Touch to adjust base Q factor
Step 9) Touch RETURN to exit
6
4