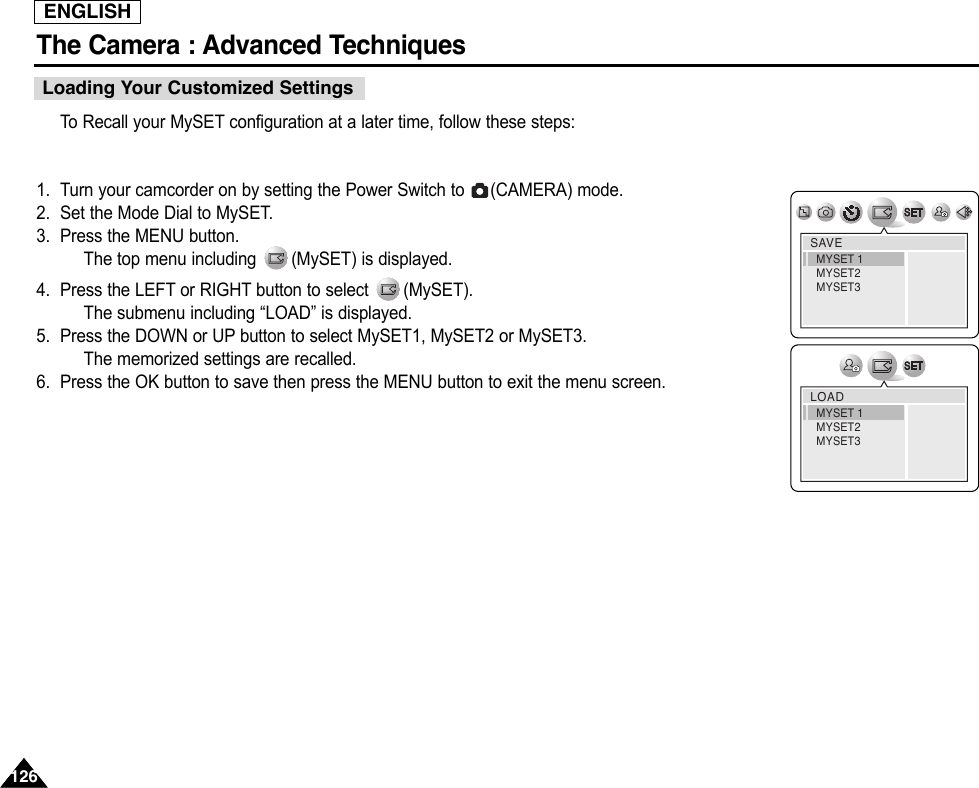
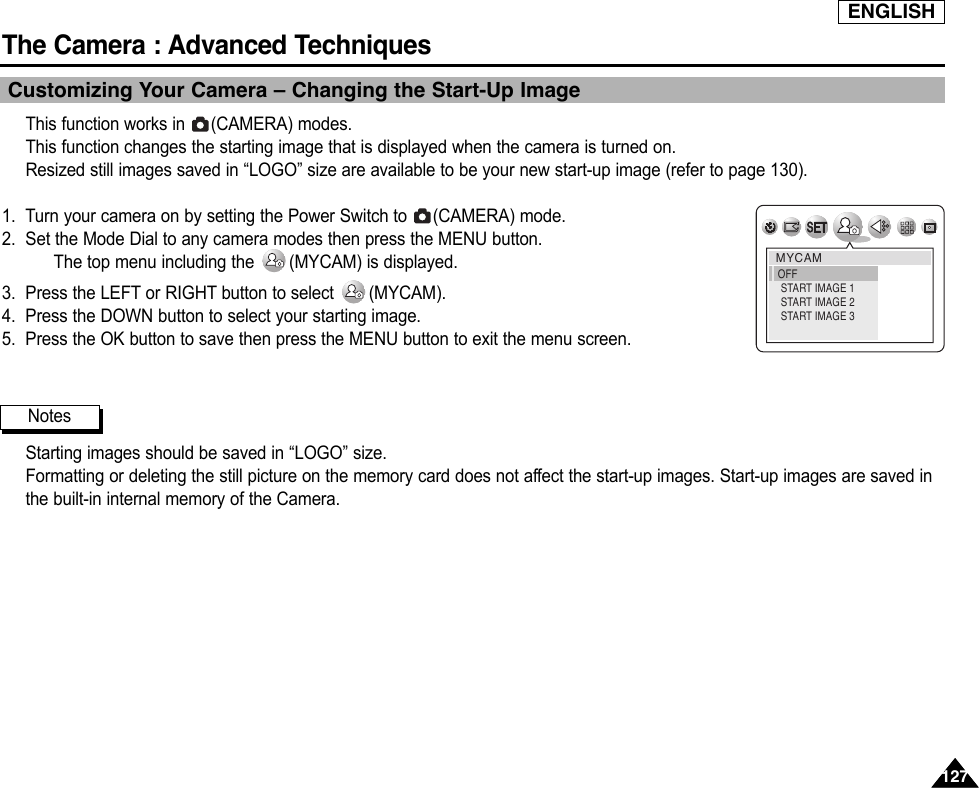
Samsung Electronics Co 04GAMMA2 DIGITAL CAMCORDER User Manual scd6050 01
Samsung Electronics Co Ltd DIGITAL CAMCORDER scd6050 01
UserManual.wiki
>
Samsung Electronics Co
>
04GAMMA2 User Manual
>
Users Manual 2
Contents
1.
Users Manual 1
2.
Users Manual 2
Users Manual 2
Navigation menu
Upload a User Manual
Namespaces
Wiki Guide
HTML
PDF
Info
Views
User Manual
Discussion / Help
Navigation
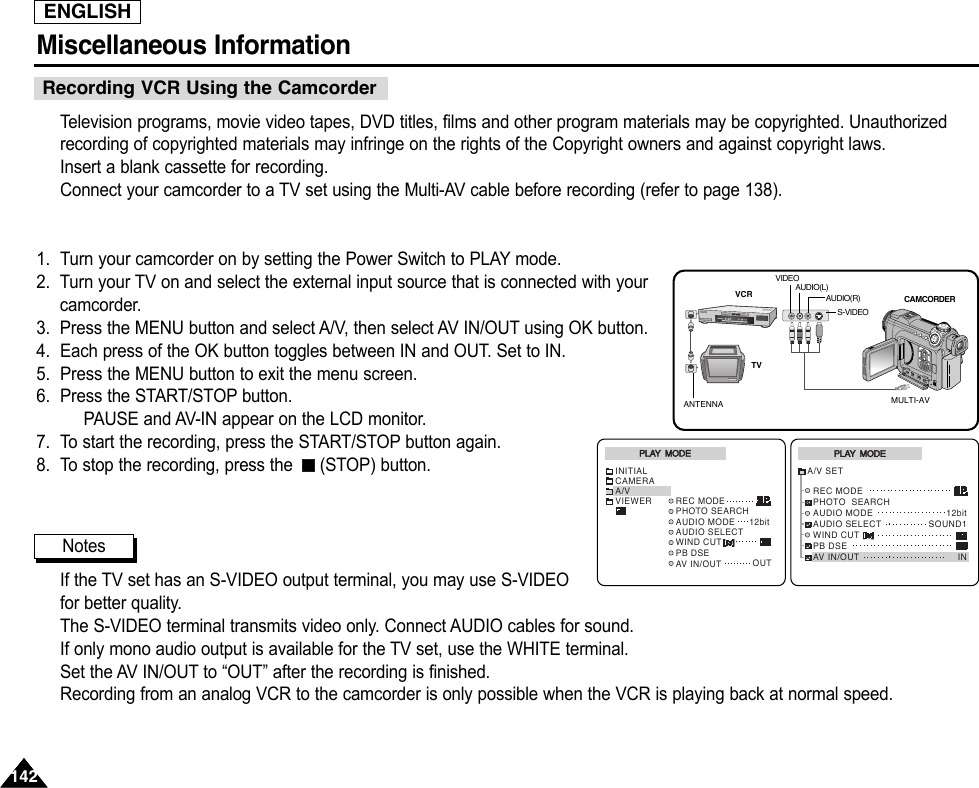
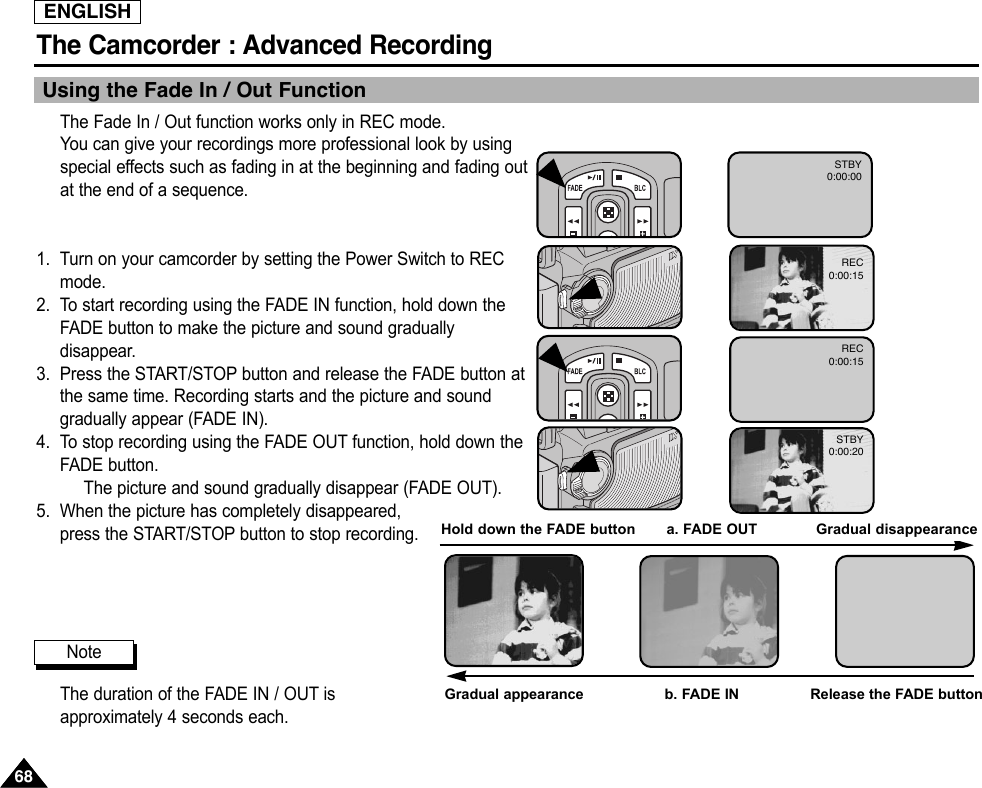
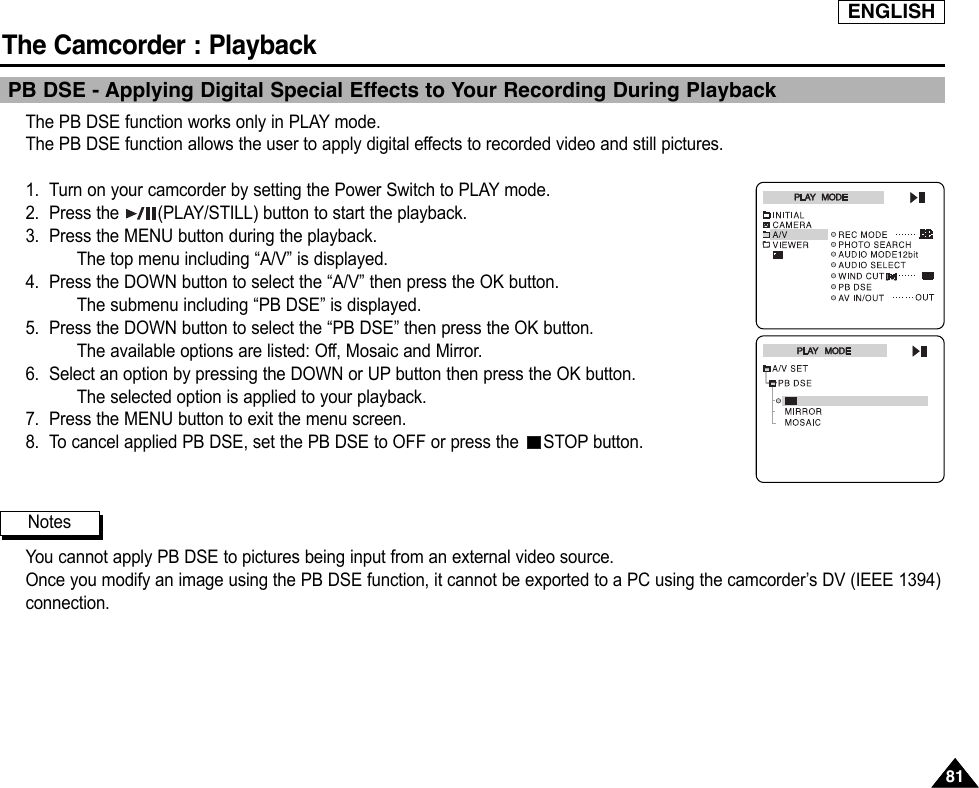
![ENGLISHThe Camcorder : Advanced Recording6767Setting the Shutter Speed and Exposure Shutter Speed function works only in REC mode.Adjusting the exposure and shutter speed helps the user to control the recorded image. Greater exposure results in abrighter image while shorter shutter speeds make the image darker. For further information on theeffect on the image according to exposure and shutter speed, refer to the page 64.1. Turn on your camcorder by setting the Power Switch to REC mode.2. Turn the Navigation Wheel to select then press the Navigation Wheel.The Quick Menu including “SHUTTER” and “EXPOSURE” is displayed.3. Turn the Navigation Wheel to select SHUTTER for shutter speed adjustment, or select“EXPOSURE” for exposure adjustment.The Control Bar appears for the selected submenu.4. Turn the Navigation Wheel for adjustment then press the Navigation Wheel to set the adjustment.The new value of your adjustment is applied.Values for Shutter Speed: 1/60, 1/100, 1/250, 1/500, 1/1000, 1/2000, 1/4000, 1/10000 secondValues for Exposure: 0 ~ 295. Press the START/STOP button to start recording. Note that the SHUTTER SPEED andEXPOSURE disappear from the On-Screen Display and your adjustment is canceled, returning toAutomatic Mode.Manual Exposure and Shutter Speed are only applied while this menu appears on the LCDmonitor.6. Turn the Navigation Wheel to select then press the Navigation Wheel to exit the menu screen.Do not frame the sun when you set the shutter speed to less than 1/1000 second. Slower shutterspeeds expose the CCD to the light source and can damage the CCD.Slow shutter speed may produce discontinuous and uneven motion.Manual Exposure and Shutter Speed are not available in EASYQ mode.NITE PIX and Manual Shutter Speed/Exposure cannot be applied at the same time.SHUTTEREXPOSURESTBY0 : 0 0 : 3 064 minS. 1/60STBY0 : 0 0 : 3 064 minSHUTTEREXP. [29]STBY0 : 0 0 : 3 064 minNotes](https://usermanual.wiki/Samsung-Electronics-Co/04GAMMA2.Users-Manual-2/User-Guide-420938-Page-9.png)
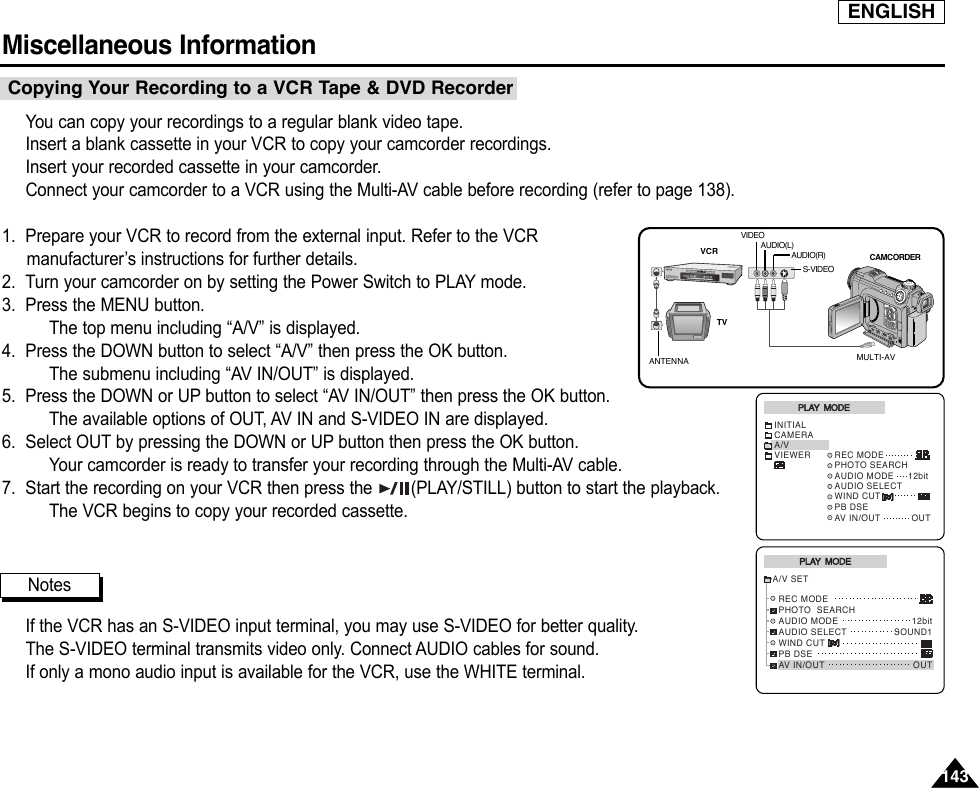
![ENGLISHThe Camcorder : Advanced Recording7171-Provides a quick way to access the SHUTTER Speed Settings.1. Press the Navigation Wheel once then turn the Navigation Wheel to select “SHUTTER”.The adjustable Shutter Speed slide bar appears on the screen.2. Adjust the Shutter Speed by turning the Navigation Wheel.The range of Shutter Speeds: 1/60 ~ 1/10,000 (8 steps)3. Press the Navigation Wheel to select the adjusted Shutter Speed.S. [Value] is displayed.4. Turn the Navigation Wheel to select the Navigator icon ( ) then press the Navigation Wheel to return to recordingmode.-Provides a quick way to access the EXPOSURE settings.1. Press the Navigation Wheel once then turn the Navigation Wheel to select “EXPOSURE”.The adjustable Exposure slide bar appears on the screen.2. Adjust the EXPOSURE by turning the Navigation Wheel.The range of Exposure Values: 0 ~ 29 (30 steps)3. Press the Navigation Wheel to select the adjusted Exposure Value.EXP. [Value] is displayed.4. Turn the Navigation Wheel to select the Navigator icon ( ) then press the Navigation Wheel to return to recordingmode.The Quick Menu is not available in EASYQ mode.SHUTTEREXPOSURENote](https://usermanual.wiki/Samsung-Electronics-Co/04GAMMA2.Users-Manual-2/User-Guide-420938-Page-13.png)

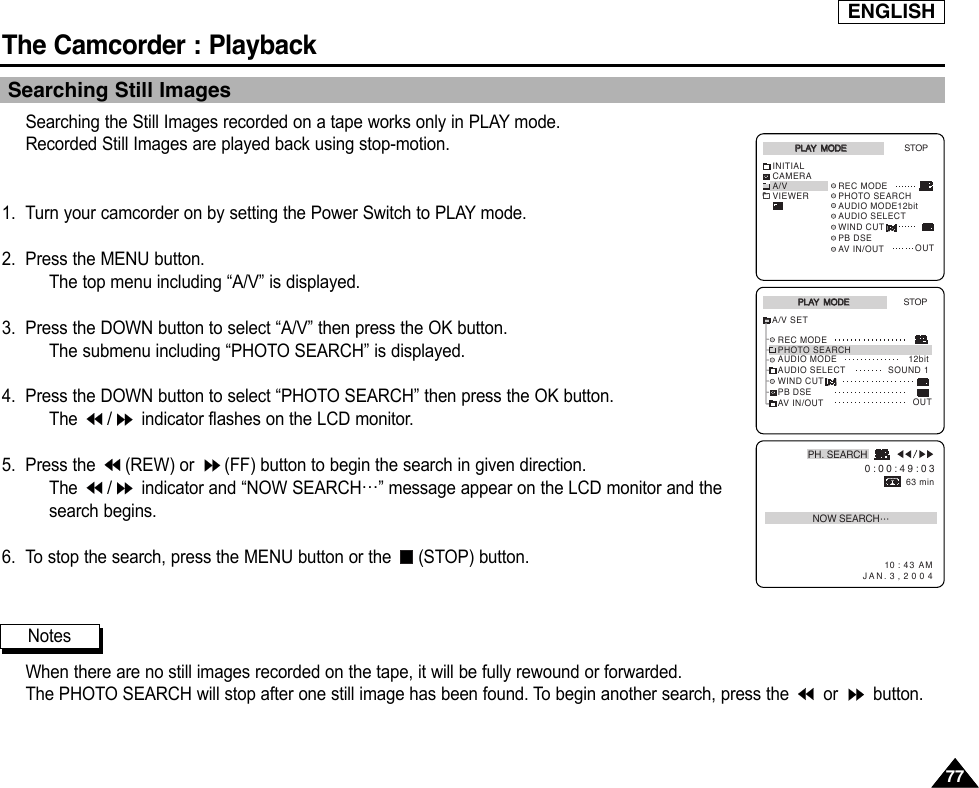
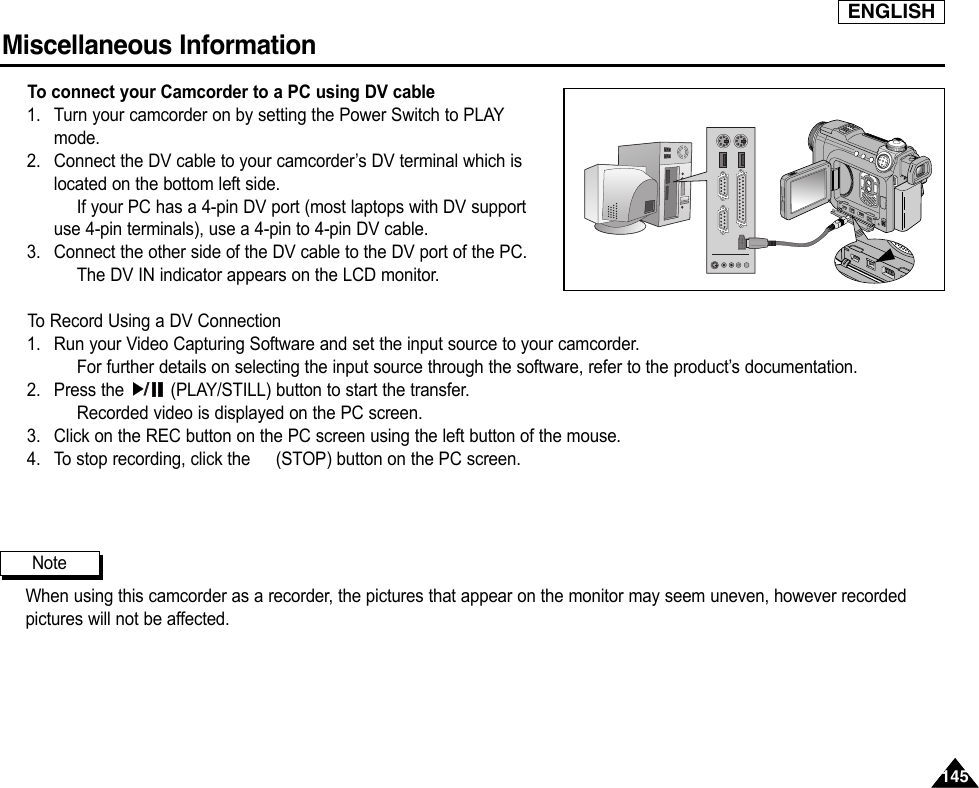
![ENGLISHThe Camcorder : Playback7979Playing Dubbed SoundYou may select the audio track to be played back.1. Turn your camcorder on by setting the Power Switch to PLAY mode.2. Press the MENU button.The top menu including “A/V” is displayed.3. Press the DOWN button to select “A/V” then press the OK button.The submenu including “AUDIO SELECT” is displayed.4. Press the DOWN button to select “AUDIO SELECT” then press the OK button.The available AUDIO SELECT options are listed.-SOUND[1]: Main Audio Track only, plays only the original audio.-SOUND[2]: Additional Audio Track only, plays only the dubbed audio.-MIX[1+2]: Mixed Audio Tracks, plays both the original and the dubbed audio.5. Select your option by pressing the DOWN or UP button then press the OK button.The selected option is applied.6. Press the MENU button to exit the menu screen.7. Press the (PLAY/STILL) button to begin the playback.The selected Audio Tracks are played back.8. To stop the playback, press the (PLAY/STILL) button again.PLAY MODEPLAY MODE STOPINITIALCAMERAA/VVIEWERWIND CUTPB DSEAV IN/OUT OUTREC MODEPHOTO SEARCHAUDIO MODE12bit AUDIO SELECTPLAY MODEPLAY MODEA/V SETSTOPWIND CUTPB DSEAV IN/OUT OUTREC MODEPHOTO SEARCHAUDIO MODEAUDIO SELECT12bitSOUND 1](https://usermanual.wiki/Samsung-Electronics-Co/04GAMMA2.Users-Manual-2/User-Guide-420938-Page-21.png)


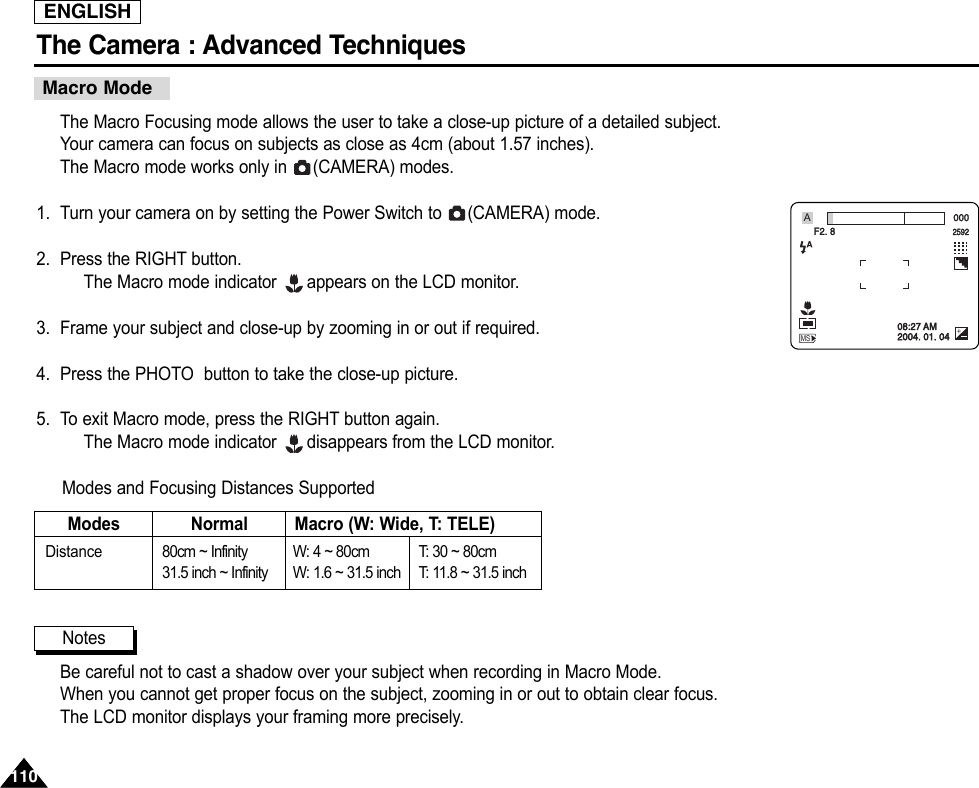
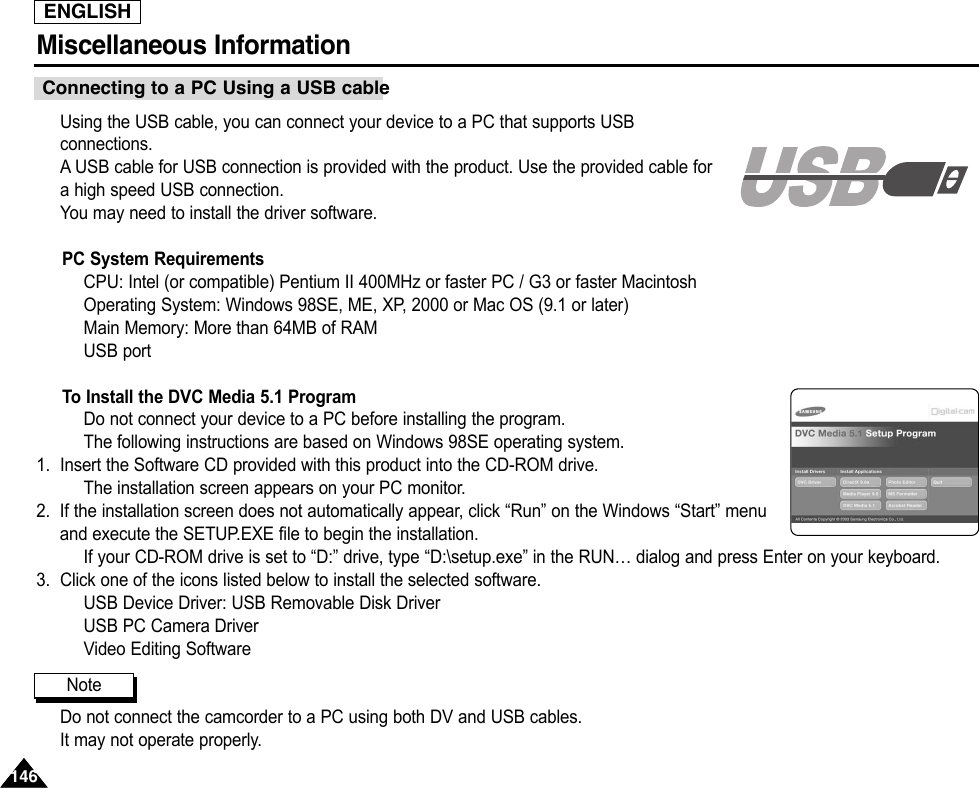
![ENGLISHThe Camera : Advanced Techniques 108108Setting the Focus ModesChoose a focus mode to suit your subject and composition. Auto focusing, Continuous Auto focusing, Manual focusing, andMacro focusing modes are available.Focus will be automatically set near the center of the frame for Auto focusing.Focus is set when you push the PHOTO button halfway down. Focus is set on the subject located nearest the center of theframe. To provide sharper, clearer images, SPOT metering and MULTI metering modes are available. Refer to page 112 forfurther details on Metering Modes.Use this focus mode in most picture taking conditions to obtain the best results. Turning on your camera by setting thePower Switch to (CAMERA) mode automatically sets the focus mode to Auto Focus.There is no indicator for Auto Focus Mode.Allows the user to adjust the focus by manual.When Manual Focus mode is set, [MF] is displayed on the LCD monitor.1. Turn your camera on by setting the Power Switch to (CAMERA) mode.2. Turn the Mode Dial to set A, S, or M mode.3. Press the MF/AF button until [MF] is displayed to set the focus mode to Manual Focus.[MF] indicator is displayed with a focus bar.4. To adjust the focus, press the DOWN or UP button. To apply your selection, press the OK button.Selected focus distance is displayed.5. Press the PHOTO button to take photo.6. To return to Auto Focus Mode, press the MF/AF button until the [MF] indicator disappears.NoteAuto Focus ModeManual Focus Mode08:36 PM2004.01.03MSMF0031805030104~ ~ ~](https://usermanual.wiki/Samsung-Electronics-Co/04GAMMA2.Users-Manual-2/User-Guide-420938-Page-50.png)
![ENGLISHThe Camera : Advanced Techniques 109109allows the user to focus rapidly, whereas the single auto focus gives a less rapid response but saves battery power.When Continuous Auto Focus mode is selected, [CAF] is displayed on the LCD monitor.1. Turn your camera on by setting the Power Switch to (CAMERA) mode.2. Turn the Mode Dial to set A, S, M or SCENE mode.3. Press the MF/AF button until [CAF] is displayed to set the focus mode to Continuous Auto Focus.The [CAF] indicator is displayed.4. Press the PHOTO button to take photo.5. To return to Auto Focus Mode, press the MF/AF button until the [CAF] indicator disappears.EASYQ and AUTO mode selects the AUTO FOCUS automatically.Only the Children Setting of SCENE mode supports the manual focusing.Be sure to confirm that the focus is set using the LCD monitor or the viewfinder when Manual Focusing is used.Continuous Auto Focus will consume more battery power.Notes000259208:27 PM2004.01.03MSCAFContinuous Auto Focus Mode](https://usermanual.wiki/Samsung-Electronics-Co/04GAMMA2.Users-Manual-2/User-Guide-420938-Page-51.png)