Samsung Electronics Co 06MM2MX2 Digital Camcorder User Manual SC X205 00994A 001 007
Samsung Electronics Co Ltd Digital Camcorder SC X205 00994A 001 007
UserManual.wiki
>
Samsung Electronics Co
>
06MM2MX2 User Manual
>
Users Manual 2
Contents
1.
Users Manual 1
2.
Users Manual 2
Users Manual 2
Navigation menu
Upload a User Manual
Namespaces
Wiki Guide
HTML
PDF
Info
Views
User Manual
Discussion / Help
Navigation
![You can copy mp3 files from a PC to the Sports Camcorder while connected to the PC with a USB cable.Before your start! ◆You can copy the MP3 files when <USB Mode> sets to <Mass Storage> ➥page 98◆<Mass Storage> is set basically in <USB Mode>.1. Press the [POWER] button to turn on the Sports Camcorder.◆The Movie Record screen appears.2. Connect the Sports Camcorder to the PC using the USB cable provided.◆A - Connect the USB cable to the Sports Camcorder.◆B - Connect the other end of the USB cable to the PC.3. Double-click the new removable drive to open.4. Select the MP3 folder and double-click to enter.5. Drag and drop the MP3 file from your PC into the MUSIC folder.◆The maximum music memory capacity is 2000 MP3 files.Disconnecting USB ConnectionAfter completing the data transfer, you must disconnect the cable in the following way.1. Select the removable disk icon and click the right mouse button to select ‘SafelyRemove Hardware’.2. Select ‘Stop’ and disconnect the USB cable when the pop-up screen disappears.[ Warning ]✤Copying and redistributing of MP3 files may violate the copyright law.[ Notes ]✤You can copy a folder on your Sports Camcorder.✤To see MP3 file capacity with regards to the Sports Cam's memory capacity.➥page 32.✤It is recommended to use an AC Power Adapter during the file transfer to avoidunintended power outage due to low battery power.ENGLISH7676MP3 Mode : Storing MP3 in the Sports CamcorderCopying MP3 Files to the Sports CamcorderABUSBMMC/SDSC-X205 00994A 076~096 2006.1.27 10:4 PM 페이지76 001 PagePro 9100](https://usermanual.wiki/Samsung-Electronics-Co/06MM2MX2.Users-Manual-2/User-Guide-626616-Page-1.png)
![[ Notes ]✤The MP3 file with tag information will display the artist name. MP3 files with no tag information will leave the item blank.✤If a broken file name is displayed, try renaming it on a PC.✤When language of Setting is not equal to language of Tag information for MP3 file, Artist indicator may not display correctly. ✤When the earphones, Audio/Video cable or *External Camera Module cable is connected to the Sports Camcorder, the built-in speaker will turnoff automatically. (* Items apply to SC-X205L/X210L/X220L only.)✤Sports Camcorder only supports MP3 file format.✤Damaged or non-standard MP3 files may not display properly or fail to play back.✤MP3 files with VBR setting will appear as VBR on the LCD monitor and its play time and recording time may differ from the displayed diagram.✤If a title of a track is too long, it may appear cropped on the LCD monitor.ENGLISH7777MP3 Mode : PlayingPlaying MP3 FilesYou can play back stored MP3 files.1. Press the [POWER] button to turn on the Sports Camcorder.◆The Movie Record screen appears.2. Set the MP3 mode by pressing the [MODE] button.◆The MP3 playlist appears.◆If there is no MP3 file stored, the message “No Files...” appears.3. Select a MP3 file to play by moving the [Joystick] up / down, and then press the[Joystick(OK)].4. The selected MP3 file is played back.◆Each time you press the [PLAY] button or [Joystick(OK)], play or pause is selected repeatedly.◆To adjust volume, move [Joystick] up / down. Volume indicator appears and disappears after few seconds.4Move PlayLife is cool.mp3Everytime.mp3Toxic.mp3Don’t push me.mp3Love you.mp3Search1/10PauseOKListLife is cool.mp3Sweetbox 00:01:07/00:03:27Stereo 44.1KHz 192Kbps3Move PlayOKLife is cool.mp3Everytime.mp3Toxic.mp3Don’t push me.mp3Don’t push me.mp3Love you.mp3Search1/10PauseListLife is cool.mp3Sweetbox Setting to Hold[MP3/ *External Camera Module HOLD] switchIf you slide the [MP3/ *External Camera Module HOLD] switch down,all buttons except the Power button and Volume control are locked.The [MP3/ *External Camera Module HOLD] switch operates only inthe MP3 mode or when connecting *External Camera Module.Using the Joystick (left/right)Move the [Joystick] left◆Within 2 seconds after starting playback - Previous file plays.◆In Pause/Stop mode - Previous file appears.◆2 seconds after starting playback - Current file starts again.Move the [Joystick] right◆During playback - The next file plays.◆In Pause/Stop mode - The next file appears. SC-X205 00994A 076~096 2006.1.27 8:31 PM 페이지77 001 PagePro 9100](https://usermanual.wiki/Samsung-Electronics-Co/06MM2MX2.Users-Manual-2/User-Guide-626616-Page-2.png)
![ENGLISH7878Deleting MP3 FilesYou can delete a selected MP3 file or group of MP3 files.1. Press the [POWER] button to turn on the Sports Camcorder.◆The Movie Record screen appears.2. Set the MP3 mode by pressing the [MODE] button.◆The MP3 playlist appears.◆Move to desired MP3 file, using the [Joystick].3. Press the [DELETE] button on the LCD monitor in pause mode. Select anoption by moving the [Joystick] up / down and then press the [Joystick(OK)].◆<OK>: Deletes the selected MP3 file.◆<Multi Select>: Multiple MP3 files can be selected using the [Joystick(OK)]. < ✔ > indicator appears on the selected files. Press the [PLAY] button.◆<All>: All MP3 files will be deleted.◆<Cancel>: Cancels the deletion.3. Press the [PLAY] button or [Joystick(OK)].◆The selected MP3 file is played.4. Press the [DELETE] button on the LCD monitor in pause mode. Select anoption by moving the [Joystick] up / down and then press the [Joystick(OK)].◆<OK>: Deletes the selected MP3 file.◆<Cancel>: Cancels the deletion.[ Note ]✤You cannot access the menu during playback. MP3 Mode : Setting the MP3 Play OptionsDeleting MP3 Files in MP3 playlistDeleting MP3 File in Full screen34PauseMove PlayLife is cool.mp3Everytime.mp3Toxic.mp3Don’t push me.mp3Love you.mp3Move SelectLife is cool.mp3Everytime.mp3Toxic.mp3Don’t push me.mp3Love you.mp3Search1/10PauseOKListLife is cool.mp3Sweetbox 00:00:00/00:03:27Stereo 44.1KHz 192KbpsMove1/10SelectLife is cool.mp3Sweetbox PauseOKMove PlayLife is cool.mp3Everytime.mp3Toxic.mp3Don’t push me.mp3Love you.mp3Move SelectLife is cool.mp3Everytime.mp3Toxic.mp3Don’t push me.mp3Love you.mp3Search1/10PauseListLife is cool.mp3Sweetbox Move1/10SelectLife is cool.mp3Sweetbox 00:00:00/00:03:27Stereo 44.1KHz 192KbpsCancelOKOK32PauseMove PlayOKLife is cool.mp3Everytime.mp3Toxic.mp3Don’t push me.mp3Don’t push me.mp3Love you.mp3Move SelectLife is cool.mp3Everytime.mp3Toxic.mp3Don’t push me.mp3Love you.mp3Search1/10PauseListLife is cool.mp3Sweetbox Move1/10SelectLife is cool.mp3Sweetbox PauseMove PlayLife is cool.mp3Everytime.mp3Toxic.mp3Don’t push me.mp3Love you.mp3Move SelectOKLife is cool.mp3Everytime.mp3Toxic.mp3Don’t push me.mp3Don’t push me.mp3Love you.mp3Search1/10PauseListLife is cool.mp3Sweetbox Move1/10SelectLife is cool.mp3Sweetbox CancelOKMulti SelectAllSC-X205 00994A 076~096 2006.1.27 8:31 PM 페이지78 001 PagePro 9100](https://usermanual.wiki/Samsung-Electronics-Co/06MM2MX2.Users-Manual-2/User-Guide-626616-Page-3.png)
![ENGLISH7979MP3 Mode : Setting the MP3 Play OptionsSetting the Repeat PlayYou can repeat a selected MP3 file or group of MP3 files, or play the MP3 files at random.1. Press the [POWER] button to turn on the Sports Camcorder.◆The Movie Record screen appears.2. Set the MP3 mode by pressing the [MODE] button.◆The MP3 playlist appears.3. Press the [MENU] button in pause mode.Move the [Joystick] left / right to select <Repeat>.4. Select an option by moving the [Joystick] up / down and then press the[Joystick (OK)].◆<Off>: No repeat, plays each title once in the order from the selected MP3 file.◆<Repeat One>: One selected MP3 file will play repeatedly.◆<Repeat Folder>: All files in the folder will play repeatedly.◆<Repeat All>: All MP3 files will play through in order and start again from the beginning.◆<Shuffle Folder>: All files in the folder will play at random.◆<Shuffle All>:All MP3 files will play in random order once.5. Press the [MENU] button to exit the menu.◆Move the MP3 file of the desired folder using the [Joystick]. ◆When the MP3 file plays back, the selected option will be applied. [ Notes ]✤When the earphones, Audio/Video cable or *External Camera Module cable is connected tothe Sports Camcorder, the built-in speaker will not operate. ( * Items apply to SC-X205L/X210L/X220L only.) ✤You cannot access the menu during playback. 45Move PlayLife is cool.mp3Everytime.mp3Toxic.mp3Don't push me.mp3Love you.mp3Move PlayLife is cool.mp3Everytime.mp3Toxic.mp3Don't push me.mp3Love you.mp3MP3Move ExitMENUSelectOKRepeatRepeat OneRepeat FolderOff1MP3Move ExitSelectRepeatRepeat FolderOffRepeat One11Move PlayLife is cool.mp3Everytime.mp3Toxic.mp3Don't push me.mp3Love you.mp3Move PlayLife is cool.mp3Everytime.mp3Toxic.mp3Don't push me.mp3Love you.mp3MP3Move ExitSelectRepeatRepeat OneRepeat FolderOff1MP3Move ExitMENUSelectOKRepeatRepeat FolderOffRepeat One11Move PlayLife is cool.mp3Everytime.mp3Toxic.mp3Don't push me.mp3Love you.mp3Move PlayOKLife is cool.mp3Everytime.mp3Toxic.mp3Don't push me.mp3Love you.mp3MP3Move ExitSelectRepeatRepeat OneRepeat FolderOff1MP3Move ExitSelectRepeatRepeat FolderOffRepeat One113Move PlayOKLife is cool.mp3Everytime.mp3Toxic.mp3Don't push me.mp3Love you.mp3Move PlayLife is cool.mp3Everytime.mp3Toxic.mp3Don't push me.mp3Love you.mp3MP3Move ExitSelectRepeatRepeat OneRepeat FolderOff1MP3Move ExitSelectRepeatRepeat FolderOffRepeat One11SC-X205 00994A 076~096 2006.1.27 9:30 PM 페이지79 001 PagePro 9100](https://usermanual.wiki/Samsung-Electronics-Co/06MM2MX2.Users-Manual-2/User-Guide-626616-Page-4.png)
![ENGLISH8080MP3 Mode : Setting the MP3 Play Options345Setting the EqualizerYou can choose an Equalizer mode for different types of music.1. Press the [POWER] button to turn on the Sports Camcorder.◆The Movie Record screen appears.2. Set the MP3 mode by pressing the [MODE] button.◆The MP3 playlist appears.3. Press the [MENU] button in pause mode.Move the [Joystick] left / right to select <Equalizer>.4. Select an option by moving the [Joystick] up / down and then press the[Joystick (OK)].◆<Off> / <Pop> / <Classic> / <Jazz>5. Press the [MENU] button to exit the menu.◆The selected option is applied.[ Note ]✤You cannot access the menu during playback. Move PlayLife is cool.mp3Everytime.mp3Toxic.mp3Don’t push me.mp3Love you.mp3MP3Move ExitMENUSelectOKEqualizerPopClassicOffMP3Move ExitSelectEqualizerClassicOffPopSearch PauseListLife is cool.mp3Sweetbox POPPOPPOPClasClasPOPClasMove PlayLife is cool.mp3Everytime.mp3Toxic.mp3Don’t push me.mp3Love you.mp3MP3Move ExitSelectEqualizerPopClassicOffMP3Move ExitMENUSelectOKEqualizerClassicOffPopSearch PauseListLife is cool.mp3Sweetbox POPPOPClasPOPPOPClasClasMove PlayLife is cool.mp3Everytime.mp3Toxic.mp3Don’t push me.mp3Love you.mp3MP3Move ExitSelectEqualizerPopClassicOffMP3Move ExitSelectEqualizerClassicOffPopSearch PauseOKListLife is cool.mp3Sweetbox 00:01:07/00:03:27Stereo 44.1KHz 192KbpsPOPPOPPOPClasPOPClas2Move PlayOKLife is cool.mp3Everytime.mp3Toxic.mp3Don’t push me.mp3Don’t push me.mp3Love you.mp3MP3Move ExitSelectEqualizerPopClassicOffMP3Move ExitSelectEqualizerClassicOffPopSearch PauseListLife is cool.mp3Sweetbox POPPOPClasPOPClasSC-X205 00994A 076~096 2006.1.27 8:31 PM 페이지80 001 PagePro 9100](https://usermanual.wiki/Samsung-Electronics-Co/06MM2MX2.Users-Manual-2/User-Guide-626616-Page-5.png)
![ENGLISH8181MP3 Mode : Setting the MP3 Play OptionsLocking MP3 File in Full screenLocking MP3 FilesYou can protect saved important MP3 files from accidental deletion. Protected files will not bedeleted unless you release the protection or format the memory.1. Press the [POWER] button to turn on the Sports Camcorder.◆The Movie Record screen appears.2. Set the MP3 mode by pressing the [MODE] button.◆The MP3 playlist appears.◆Move to desired MP3 file, using the [Joystick].3. Press the [MENU] button in pause mode.Move the [Joystick] left / right to select <Lock>.4. Select an option by moving the [Joystick] up / down and then press the[Joystick (OK)].◆<Lock>: The selected MP3 file is locked.◆<Multi Select>: Multiple MP3 files can be selected using the [Joystick(OK)]. < > indicator appears on the selected files.Press the [PLAY] button.◆<Lock All>: All MP3 files are locked.◆<Unlock All>: Unlocking all MP3 files.3. Press the [PLAY]button or [Joystick(OK)]◆The selected MP3 file is played.4. Press the [MENU] button in pause mode.Move the [Joystick] left / right to select <Lock>.5. Press the [Joystick(OK)].◆The selected MP3 file is locked.[ Note ]✤You cannot access the menu during playback. 34Move PlayLife is cool.mp3Everytime.mp3Toxic.mp3Don’t push me.mp3Love you.mp3MP3Move ExitSelectLockMulti SelectLock AllLockMP3Move ExitSelectLockLock1/10Search1/10PauseOKListLife is cool.mp3Sweetbox 00:00:00/00:03:27Stereo 44.1KHz 192KbpsMove PlayLife is cool.mp3Everytime.mp3Toxic.mp3Don’t push me.mp3Love you.mp3MP3Move ExitSelectLockMulti SelectLock AllLockMP3Move ExitMENUSelectOKLockLock1/10Search1/10PauseListLife is cool.mp3Sweetbox 32Move PlayOKLife is cool.mp3Everytime.mp3Toxic.mp3Don’t push me.mp3Don’t push me.mp3Love you.mp3MP3Move ExitSelectLockMulti SelectLock AllLockMP3Move ExitSelectLockLock1/10Search1/10PauseListLife is cool.mp3Sweetbox Move PlayLife is cool.mp3Everytime.mp3Toxic.mp3Don’t push me.mp3Love you.mp3MP3Move ExitMENUSelectOKLockMulti SelectLock AllLockMP3Move ExitSelectLockLock1/10Search1/10PauseListLife is cool.mp3Sweetbox Locking MP3 Files in MP3 playlistSC-X205 00994A 076~096 2006.1.27 8:31 PM 페이지81 001 PagePro 9100](https://usermanual.wiki/Samsung-Electronics-Co/06MM2MX2.Users-Manual-2/User-Guide-626616-Page-6.png)
![ENGLISH8282MP3 Mode : Setting the MP3 Play OptionsCopying MP3 FilesYou can copy saved files from the internal memory to the memory card and vice versa.1. Insert the memory card into the memory card slot on the Sports Camcorder.2. Press the [POWER] button to turn on the Sports Camcorder.◆The Movie Record screen appears.3. Set the MP3 mode by pressing the [MODE] button.◆The MP3 playlist appears.◆Move to desired MP3 file, using the [Joystick].4. Press the [MENU] button in pause mode.Move the [Joystick] left / right to select <Copy To>.5. Select an option by moving the [Joystick] up / down and then press the[Joystick (OK)].◆<OK>: Copy the selected MP3 file.◆<Multi Select>: Multiple MP3 files can be selected using the [Joystick(OK)]. < ✔ > indicator appears on the selected files. Press the [PLAY] button.◆<All>: Cancel copying MP3 file.4. Press the [PLAY]button or [Joystick(OK)]◆The selected MP3 file is played.5. Press the [MENU] button in pause mode.Move the [Joystick] left / right to select <Copy To>.6. Press the [Joystick (OK)].◆Copy the selected MP3 file.[ Notes ]✤The Sports Cam copies from the currently-used memory to another. If the internal memory isbeing used, it copies to a memory card.✤If the memory card is not inserted, you cannot perform the <Copy To> function.✤You cannot access the menu during playback. 56Move Play1/10Life is cool.mp3Everytime.mp3Toxic.mp3Don’t push me.mp3Love you.mp3Search1/10PauseListLife is cool.mp3DPOFOKCopying file(s)...Life is cool.mp3Press OK to cancel.MP3Move ExitSelectCopy ToMulti SelectAllOK1/101/10MP3MP3Move ExitMENUSelectOKMove ExitSelectCopy ToOK1/10Move Play1/10Life is cool.mp3Everytime.mp3Toxic.mp3Don’t push me.mp3Love you.mp3Search1/10PauseListLife is cool.mp3DPOFOKCopying file(s)...Life is cool.mp3Press OK to cancel.CancelMP3Move ExitSelectCopy ToMulti SelectAllOK1/101/10MP3MP3Move ExitSelectMove ExitMENUSelectOKCopy ToOK1/1043Move Play1/10OKLife is cool.mp3Everytime.mp3Toxic.mp3Don’t push me.mp3Don’t push me.mp3Love you.mp3Search1/10PauseListLife is cool.mp3DPOFOKCopying file(s)...Life is cool.mp3Press OK to cancel.MP3Move ExitSelectCopy ToMulti SelectAllOK1/101/10MP3MP3Move ExitSelectMove ExitSelectCopy ToOK1/10Move Play1/10Life is cool.mp3Everytime.mp3Toxic.mp3Don’t push me.mp3Love you.mp3Search1/10PauseListLife is cool.mp3DPOFOKCopying file(s)...Life is cool.mp3Press OK to cancel.MP3Move ExitMENUSelectOKCopy ToMulti SelectAllOK1/101/10MP3MP3Move ExitSelectMove ExitSelectCopy ToOK1/10Copying MP3 Files in MP3 playlistCopying MP3 File in Full screenSC-X205 00994A 076~096 2006.1.27 8:31 PM 페이지82 001 PagePro 9100](https://usermanual.wiki/Samsung-Electronics-Co/06MM2MX2.Users-Manual-2/User-Guide-626616-Page-7.png)
![8383Voice Recorder Mode44Recording........................................................................................84Recording Voice Files ...............................................................84Playing .............................................................................................85Playing Voice Files....................................................................85Setting the Voice Play Options.....................................................86Deleting Voice Files ..................................................................86Setting the Play Mode...............................................................87Locking Voice Files ...................................................................88Copying Voice Files ..................................................................89◆Save important data / recordings separately on other media, toavoid accidental loss due to a system failure or other reasons.How to set toVoice RecordermodeHow to set toVoice RecordermodeVoice Recorder2. Set the Voice Recorder modeby pressing the [MODE]button.ENGLISHMENUMODEDC INHOLDPowerbutton1. Press the [POWER] button toturn on the Sports Camcorder.SC-X205 00994A 076~096 2006.1.27 8:31 PM 페이지83 001 PagePro 9100](https://usermanual.wiki/Samsung-Electronics-Co/06MM2MX2.Users-Manual-2/User-Guide-626616-Page-8.png)
![ENGLISH848434Voice Recorder Mode : RecordingRecording Voice FilesThe built-in microphone allows users to record voices without any additional devices.1. Press the [POWER] button to turn on the Sports Camcorder.◆The Movie Record screen appears.2. Set the Voice Recorder mode by pressing the [MODE] button.◆The Voice Record screen appears.3. Press the [Record / Stop] button to start recording.◆< > icon appears on the screen and starts recording.4. To stop recording, press the [Record / Stop] button again.[ Notes ]✤Recorded voice files are saved in a list automatically.✤During voice recording or in the Voice Record mode, the menu is not accessed.2006/01/01 12:00:00 AMSWAV0001.WAV00:00:12/34:59:48Stereo 8.0KHz 64KbpsSWAV0002.WAV00:00:12/34:59:48SWAV0001.WAV00:00:00/35:00:002006/01/01 12:00:00 AMSWAV0001.WAV00:00:12/34:59:48SWAV0002.WAV00:00:12/34:59:48Stereo 8.0KHz 64KbpsSWAV0001.WAV00:00:00/35:00:0022006/01/01 12:00:00 AMSWAV0001.WAV00:00:12/34:59:48SWAV0002.WAV00:00:12/34:59:48SWAV0001.WAV00:00:00/35:00:00Stereo 8.0KHz 64KbpsSC-X205 00994A 076~096 2006.1.27 8:31 PM 페이지84 001 PagePro 9100](https://usermanual.wiki/Samsung-Electronics-Co/06MM2MX2.Users-Manual-2/User-Guide-626616-Page-9.png)
![ENGLISH8585346Voice Recorder Mode : PlayingPlaying Voice FilesYou can play back recorded voice files using the built-in speaker or the earphones.1. Press the [POWER] button to turn on the Sports Camcorder.◆The Movie Record screen appears.2. Set the Voice Recorder mode by pressing the [MODE] button.◆The Voice Record screen appears.3. Press the [PLAY] button or [Joystick(OK)].◆The Voice Playlist screen appears.4. Select a voice file to play by moving the [Joystick] up/down, and then pressthe [Joystick(OK)]. 5. The selected voice file is played back.◆To pause playback, press the [Joystick(OK)].◆To search backward / forward, move the [Joystick] left / right.6. To adjust the volume, move the [Joystick] up / down. ◆Volume indicator appears and disappears after a few seconds.[ Notes ]✤When the earphones, Audio/Video cable or *External Camera Module cable is connected tothe Sports Camcorder, the built-in speaker will not operate. (* Items apply to SC-X205L/X210L/X220L only.)✤You cannot access the menu during voice playback. ✤While the menu screen is displayed, pressing the [Record / Stop] button will move to VoiceRecord mode.SWAV0004.WAV00:00:00/30:20:00Move Play3/3OK2006/01/01 12:00:00 AM2006/01/01 12:36:25 AM2006/01/01 01:00:02 AMMove Play2/32006/01/01 12:00:00 AM2006/01/01 12:36:25 AM2006/01/01 01:00:02 AM2006/01/01 12:36:25 AMSWAV0002.WAV00:00:12/00:02:152/3Search PauseListSWAV0004.WAV00:00:00/30:20:00Move Play3/32006/01/01 12:00:00 AM2006/01/01 12:36:25 AM2006/01/01 01:00:02 AMMove Play2/3OK2006/01/01 12:00:00 AM2006/01/01 12:36:25 AM2006/01/01 01:00:02 AM2006/01/01 12:36:25 AMSWAV0002.WAV00:00:12/00:02:152/3Search PauseList1SWAV0004.WAV00:00:00/30:20:00Move Play3/32006/01/01 12:00:00 AM2006/01/01 12:36:25 AM2006/01/01 01:00:02 AMMove Play2/32006/01/01 12:00:00 AM2006/01/01 12:36:25 AM2006/01/01 01:00:02 AM2006/01/01 12:36:25 AMSWAV0002.WAV00:00:12/00:02:15Stereo 8.0KHz 64Kbps2/3Search PauseOKList2SWAV0004.WAV00:00:00/30:20:00Stereo 8.0KHz 64KbpsMove Play3/32006/01/01 12:00:00 AM2006/01/01 12:36:25 AM2006/01/01 01:00:02 AMMove Play2/32006/01/01 12:00:00 AM2006/01/01 12:36:25 AM2006/01/01 01:00:02 AM2006/01/01 12:36:25 AMSWAV0002.WAV00:00:12/00:02:152/3Search PauseListSC-X205 00994A 076~096 2006.1.27 8:31 PM 페이지85 001 PagePro 9100](https://usermanual.wiki/Samsung-Electronics-Co/06MM2MX2.Users-Manual-2/User-Guide-626616-Page-10.png)
![ENGLISH8686Voice Recorder Mode : Setting the Voice Play OptionsDeleting Voice FilesYou can delete a selected voice file or group of voice files.1. Press the [POWER] button to turn on the Sports Camcorder.◆The Movie Record screen appears.2. Set the Voice Recorder mode by pressing the [MODE] button.◆The Voice Record screen appears.3. Press the [PLAY] button or [Joystick(OK)]◆The Voice Playlist screen appears.◆Move to desired voice file, using the [Joystick].4. Press the [DELETE] button on the LCD monitor in pause mode. Select anoption by moving the [Joystick] up / down and then press the [Joystick(OK)].◆<OK>: Deletes the selected Voice file.◆<Multi Select>: Multiple Voice files can be selected using the [Joystick(OK)]. < ✔ > indicator appears on the selected files. Press the [PLAY] button.◆<All>: All Voice files will be deleted.◆<Cancel>: Cancels the deletion.[ Notes ]✤You cannot access the menu during voice playback. ✤While the menu screen is displayed, pressing the [Record / Stop] button will move to VoiceRecord mode.4SWAV0004.WAV00:00:00/30:20:00Move Play3/32006/01/01 12:00:00 AM2006/01/01 12:36:25 AM2006/01/01 01:00:02 AMMove Select1/3OK2006/01/01 12:00:00 AM2006/01/01 12:36:25 AM2006/01/01 01:00:02 AMCancelOKMulti SelectAll32SWAV0004.WAV00:00:00/30:20:00Stereo 8.0KHz 64KbpsMove Play3/32006/01/01 12:00:00 AM2006/01/01 12:36:25 AM2006/01/01 01:00:02 AMMove Select1/32006/01/01 12:00:00 AM2006/01/01 12:36:25 AM2006/01/01 01:00:02 AMSWAV0004.WAV00:00:00/30:20:00Move Play3/3OK2006/01/01 12:00:00 AM2006/01/01 12:36:25 AM2006/01/01 01:00:02 AMMove Select1/32006/01/01 12:00:00 AM2006/01/01 12:36:25 AM2006/01/01 01:00:02 AMSC-X205 00994A 076~096 2006.1.27 8:31 PM 페이지86 001 PagePro 9100](https://usermanual.wiki/Samsung-Electronics-Co/06MM2MX2.Users-Manual-2/User-Guide-626616-Page-11.png)
![ENGLISH8787546Voice Recorder Mode : Setting the Voice Play OptionsSetting the Play ModeYou can play all files continuously or play the selected file only. You can also set the repeat option.1. Press the [POWER] button to turn on the Sports Camcorder.◆The Movie Record screen appears.2. Set the Voice Recorder mode by pressing the [MODE] button.◆The Voice Record screen appears.3. Press the [PLAY] button or [Joystick(OK)]◆Switches to the Voice Playlist screen.4. Press the [MENU] button.Move the [Joystick] left / right to select <Play Mode>.5. Move the [Joystick] up / down to select an option, and then press the [Joystick(OK)].◆<Play One>: The selected voice file will be played.◆<Play All>: All voice files will be played.◆<Repeat One>: The selected voice file will be played repeatedly.◆<Repeat All>: All voice files will be played repeatedly.6. Press the [MENU] button to exit the menu.◆When you play back, the selected option will be applied. ◆The selected icon is displayed on the repeat file.[ Notes ]✤You cannot access the menu during voice playback. ✤While the menu screen is displayed, pressing the [Record / Stop] button will move to VoiceRecord mode.Voice RecorderMove ExitSelectPlay ModePlay AllRepeat OnePlay One1/31Voice RecorderMove ExitMENUSelectOKPlay ModePlay AllPlay One1/3Repeat One1Move Play1/32006/01/01 12:00:00 AM2006/01/01 12:36:25 AM2006/01/01 01:00:02 AMMove Play1/32006/01/01 12:00:00 AM2006/01/01 12:36:25 AM2006/01/01 01:00:02 AMVoice RecorderMove ExitSelectPlay ModePlay AllRepeat OnePlay One1/31Voice RecorderMove ExitSelectPlay ModePlay AllPlay One1/3Repeat OneMove Play1/32006/01/01 12:00:00 AM2006/01/01 12:36:25 AM2006/01/01 01:00:02 AMMove Play1/3OK2006/01/01 12:00:00 AM2006/01/01 12:36:25 AM2006/01/01 01:00:02 AM1Voice RecorderMove ExitMENUSelectOKPlay ModePlay AllRepeat OnePlay One1/31Voice RecorderMove ExitSelectPlay ModePlay AllPlay One1/3Repeat OneMove Play1/32006/01/01 12:00:00 AM2006/01/01 12:36:25 AM2006/01/01 01:00:02 AMMove Play1/32006/01/01 12:00:00 AM2006/01/01 12:36:25 AM2006/01/01 01:00:02 AM3Voice RecorderMove ExitSelectPlay ModePlay AllRepeat OnePlay One1/31Voice RecorderMove ExitSelectPlay ModePlay AllPlay One1/3Repeat OneMove Play1/3OK2006/01/01 12:00:00 AM2006/01/01 12:36:25 AM2006/01/01 01:00:02 AMMove Play1/32006/01/01 12:00:00 AM2006/01/01 12:36:25 AM2006/01/01 01:00:02 AMSC-X205 00994A 076~096 2006.1.27 8:31 PM 페이지87 001 PagePro 9100](https://usermanual.wiki/Samsung-Electronics-Co/06MM2MX2.Users-Manual-2/User-Guide-626616-Page-12.png)
![ENGLISH888845Voice Recorder Mode : Setting the Voice Play OptionsMove ExitMENUSelectOKLockMulti SelectLock AllLock1/3Voice RecorderMove ExitSelectLockLock AllLock1/3Voice RecorderMulti SelectMove Play1/32006/01/01 12:00:00 AM2006/01/01 12:36:25 AM2006/01/01 01:00:02 AMMove Play1/32006/01/01 12:00:00 AM2006/01/01 12:36:25 AM2006/01/01 01:00:02 AMMove ExitSelectLockMulti SelectLock AllLock1/3Voice RecorderMove ExitMENUSelectOKLockLock AllLock1/3Voice RecorderMulti SelectMove Play1/32006/01/01 12:00:00 AM2006/01/01 12:36:25 AM2006/01/01 01:00:02 AMMove Play1/32006/01/01 12:00:00 AM2006/01/01 12:36:25 AM2006/01/01 01:00:02 AMMove ExitSelectLockMulti SelectLock AllLock1/3Voice RecorderMove ExitSelectLockLock AllLock1/3Voice RecorderMulti SelectMove Play1/32006/01/01 12:00:00 AM2006/01/01 12:36:25 AM2006/01/01 01:00:02 AMMove Play1/3OK2006/01/01 12:00:00 AM2006/01/01 12:36:25 AM2006/01/01 01:00:02 AM3Move ExitSelectLockMulti SelectLock AllLock1/3Voice RecorderMove ExitSelectLockLock AllLock1/3Voice RecorderMulti SelectMove Play1/3OK2006/01/01 12:00:00 AM2006/01/01 12:36:25 AM2006/01/01 01:00:02 AMMove Play1/32006/01/01 12:00:00 AM2006/01/01 12:36:25 AM2006/01/01 01:00:02 AMLocking Voice FilesYou can protect saved important voice files from accidental erasure. Protected files will not bedeleted unless you release the protection or format the memory.1. Press the [POWER] button to turn on the Sports Camcorder.◆The Movie Record screen appears.2. Set the Voice Recorder mode by pressing the [MODE] button.◆The Voice Record screen appears.3. Press the [PLAY] button or [Joystick(OK)]◆Switches to the Voice Playlist screen.◆Move to desired voice file, using the Joystick.4. Press the [MENU] button.Move the [Joystick] left / right to select <Lock>.5. Move the [Joystick] up / down to select an option, and then press the [joystick(OK)].◆<Lock>: The selected voice file is locked.◆<Multi Select>: Multiple voice files can be selected using the [Joystick(OK)]. < > indicator appears on the selected files. Press [PLAY] button◆<Lock All>: All voice files are locked.◆<Unlock All>: Unlocks all voice files.[ Notes ]✤The < > icon is displayed on the locked file.✤You cannot access the menu during voice playback. ✤While the menu screen is displayed, pressing the [Record / Stop] button will move to VoiceRecord mode.SC-X205 00994A 076~096 2006.1.27 8:31 PM 페이지88 001 PagePro 9100](https://usermanual.wiki/Samsung-Electronics-Co/06MM2MX2.Users-Manual-2/User-Guide-626616-Page-13.png)
![ENGLISH8989Voice Recorder Mode : Setting the Voice Play OptionsYou can copy saved files from the internal memory to a memory card and vice-versa.1. Insert the memory card into the memory card slot on the Sports Camcorder.2. Press the [POWER] button to turn on the Sports Camcorder.◆The Movie Record screen appears.3. Set the Voice Recorder mode by pressing the [MODE] button.◆The Voice Record screen appears.4. Press the [PLAY] button or [Joystick(OK)].◆Switches to the Voice Playlist screen.◆Move to desired voice file, using the [Joystick].5. Press the [MENU] button in pause mode.Move the [Joystick] left / right to select <Copy To>.6. Select an option by moving the [Joystick] up / down and then press the[Joystick(OK)].◆<OK>: Copy the selected Voice file.◆<Multi Select>: Multiple Voice files can be selected using the [Joystick(OK)]. < ✔ > indicator appears on the selected files. Press the [PLAY] button.◆<All>: All voice files will be copied.[ Notes ]✤The Sports Cam copies from the currently-used memory to another. If the internal memorywas used, it copies to a memory card.✤If a memory card is not inserted, you cannot perform the <Copy To> function.✤You cannot access the menu during voice playback. ✤While the menu screen is displayed, pressing the [Record / Stop] button will move to VoiceRecord mode.Copying Voice Files5Move ExitMENUSelectOKCopy To1/3Voice RecorderDPOFCopying file(s)...SWAVE0001.WAVPress OK to cancel.OK1/3Move ExitSelectMove ExitSelectCopy To1/3Voice RecorderVoice RecorderMulti SelectMove Play1/32006/01/01 12:00:00 AM2006/01/01 12:36:25 AM2006/01/01 01:00:02 AMMulti SelectAllOKAll4Move ExitSelectCopy To1/3Voice RecorderDPOFCopying file(s)...SWAVE0001.WAVPress OK to cancel.OK1/3Move ExitSelectMove ExitSelectCopy To1/3Voice RecorderVoice RecorderMulti SelectMove Play1/3OK2006/01/01 12:00:00 AM2006/01/01 12:36:25 AM2006/01/01 01:00:02 AMMulti SelectAllOKAllMove ExitSelectCopy To1/3Voice RecorderDPOFCopying file(s)...SWAVE0001.WAVPress OK to cancel.CancelOK1/3Move ExitMENUSelectOKMove ExitSelectCopy To1/3Voice RecorderVoice RecorderMulti SelectMove Play1/32006/01/01 12:00:00 AM2006/01/01 12:36:25 AM2006/01/01 01:00:02 AMMulti SelectAllOKAll6Move ExitSelectCopy To1/3Voice RecorderDPOFCopying file(s)...SWAVE0001.WAVPress OK to cancel.OK1/3Move ExitSelectMove ExitMENUSelectOKCopy To1/3Voice RecorderVoice RecorderMulti SelectMove Play1/32006/01/01 12:00:00 AM2006/01/01 12:36:25 AM2006/01/01 01:00:02 AMMulti SelectAllOKAllSC-X205 00994A 076~096 2006.1.27 8:31 PM 페이지89 001 PagePro 9100](https://usermanual.wiki/Samsung-Electronics-Co/06MM2MX2.Users-Manual-2/User-Guide-626616-Page-14.png)
![Using File Browser55Viewing Files or Folders................................................................91Deleting Files or Folders ...............................................................92Locking Files...................................................................................93Copying Files or Folders...............................................................94Viewing File Information................................................................95◆Save important data / recordings separately on other media, toavoid accidental loss due to a system failure or other reasons.How to set to File Browser modeHow to set to File Browser modeFile Browser2. Set the File Browser mode bypressing the [MODE] button.MENUMODEDC INHOLDPowerbutton1. Press the [POWER] button toturn on the Sports Camcorder.ENGLISHENGLISH9090SC-X205 00994A 076~096 2006.1.27 8:31 PM 페이지90 001 PagePro 9100](https://usermanual.wiki/Samsung-Electronics-Co/06MM2MX2.Users-Manual-2/User-Guide-626616-Page-15.png)
![ENGLISH9191Using File BrowserYou can play back the stored file(AVI, JPEG, MP3, WAV) in Sports Camcorder.1. Press the [POWER] button to turn on the Sports Camcorder.◆The Movie Record screen appears.2. Set the File Browser mode by pressing the [MODE] button.◆The File Browser screen appears.3. Select the desired folder or file by moving the [Joystick] up/down and thenpress the [Joystick(OK)].◆Perform these steps repeatedly until the file you want to view appears.4. The selected file will be played back.[ Notes ]✤If you slide the [W/T] switch to W(WIDE) in play mode, return to the file list screen.✤If you move the [Joystick] left, the previous folder screen appears. 34Viewing Files or Folders100-0001DCIMMISCMUSICVIDEOVOICE/DCIM100SSDVC/DCIM/100SSDVCDCAM0002.JPGDCAM0003.JPGDCAM0004.JPGDCAM0001.JPG720X48012:00AM 2006/01/0101SepiaMove PlayMove PlayOKMove Play2100-0001DCIMMISCMUSICVIDEOVOICE/DCIM100SSDVC/DCIM/100SSDVCDCAM0002.JPGDCAM0003.JPGDCAM0004.JPGDCAM0001.JPG720X48012:00AM 2006/01/0101SepiaMove PlayOKMove PlayMove Play100-0001DCIMMISCMUSICVIDEOVOICE/DCIM100SSDVC/DCIM/100SSDVCDCAM0002.JPGDCAM0003.JPGDCAM0004.JPGDCAM0001.JPG720X48012:00AM 2006/01/0101SepiaMove PlayMove PlayMove PlayOK100-0001DCIMMISCMUSICVIDEOVOICE/DCIM100SSDVC/DCIM/100SSDVCDCAM0002.JPGDCAM0003.JPGDCAM0004.JPGDCAM0001.JPG720X48012:00AM 2006/01/0101Sepia Move PlayMove PlayMove PlaySC-X205 00994A 076~096 2006.1.27 8:31 PM 페이지91 001 PagePro 9100](https://usermanual.wiki/Samsung-Electronics-Co/06MM2MX2.Users-Manual-2/User-Guide-626616-Page-16.png)
![ENGLISH9292Using File BrowserYou can delete the file(AVI, JPEG, MP3, WAV) or folders you recorded.1. Press the [POWER] button to turn on the Sports Camcorder.◆The Movie Record screen appears.2. Set the File Browser mode by pressing the [MODE] button.◆The File Browser screen appears.3. Select the desired file or folder by using the [Joystick].◆Move the [Joystick] up/down and press the [Joystick(OK)] repeatedly until the file or folderyou want appears.4. Press the [DELETE] button on the LCD monitor. Select an option by movingthe [Joystick] up / down and then press the [Joystick(OK)].◆<OK>: The selected file or folder are is deleted.◆<Multi Select>: Multiple files or folders will be selected using the [Joystick(OK)]. < ✔ > indicator appears on the selected files. Press the [PLAY] button.◆<All>: All files or folders will be deleted.◆<Cancel>: Cancels deleting files or folders.[ Notes ]✤If you slide the [W/T] switch to W(WIDE) in play mode, it returns to the previous screen.✤Locked files or folders will not be deleted.✤If you move the [Joystick] left, the previous folder screen appears. Deleting Files or Folders4DCIMMISCMUSICVIDEOVOICEMove PlayMISCMUSICVIDEOVOICEMove PlayOKDCIMMISCMUSICVIDEOVOICECancelOKMulti SelectAllMove PlayDCIMMISCMUSICVIDEOVOICEMove SelectOKMove SelectMove Play2DCIMMISCMUSICVIDEOVOICEMove PlayMISCMUSICVIDEOVOICEMove PlayDCIMMISCMUSICVIDEOVOICEMove PlayDCIMMISCMUSICVIDEOVOICEMove SelectMove SelectMove PlayOKDCIMMISCMUSICVIDEOVOICEMove PlayMISCMUSICVIDEOVOICEMove PlayDCIMMISCMUSICVIDEOVOICEMove PlayOKDCIMMISCMUSICVIDEOVOICECancelOKMulti SelectAllMove SelectMove SelectOKMove PlayDCIMMISCMUSICVIDEOVOICEMove PlayOKMISCMUSICVIDEOVOICEMove PlayDCIMMISCMUSICVIDEOVOICEMove PlayDCIMMISCMUSICVIDEOVOICEMove SelectMove SelectMove PlaySC-X205 00994A 076~096 2006.1.27 8:31 PM 페이지92 001 PagePro 9100](https://usermanual.wiki/Samsung-Electronics-Co/06MM2MX2.Users-Manual-2/User-Guide-626616-Page-17.png)
![ENGLISH93931234Using File BrowserLocking FilesYou can lock the important files so they can not be deleted.1. Press the [POWER] button to turn on the Sports Camcorder.◆The Movie Record screen appears.2. Set the File Browser mode by pressing the [MODE] button.◆The File Browser screen appears.3. Select the desired file or folder by using the [Joystick].◆Move the [Joystick] up/down and press the [Joystick(OK)] repeatedly until the file youwant appears.4. Press the [MENU] button.Move the [Joystick] left / right to select <Lock>.5. Move the [Joystick] up / down to select an option, and then press the [Joystick(OK)].◆<Lock>: The selected file is locked.◆<Multi Select>: Multiple files can be selected using the [Joystick(OK)]. < > indicator appears on the selected files. Press the [PLAY] button.◆<Lock All>: All files are locked.◆<Unlock All>: Unlocking all files.[ Notes ] ✤You can’t lock folders.✤The < > icon is displayed when the file is locked.✤If you slide the [W/T] switch to W(WIDE) in play mode, return to the file list screen.✤If you move the [Joystick] left, the previous folder screen appears. /DCIM/100SSDVCDCAM0002.JPGDCAM0003.JPGDCAM0001.JPGDCAM0001.JPG/DCIM/100SSDVCDCAM0002.JPGDCAM0003.JPGDCAM0001.JPGDCAM0001.JPGMove ExitSelectLockMulti SelectLock AllLockFile Browser/DCIM/100SSDVCDCAM0002.JPGDCAM0003.JPGDCAM0004.JPGDCAM0001.JPGDCIMMISCMUSICVIDEOVOICE1/51/131/131/13Move PlayOKMove PlayMove Play/DCIM/100SSDVCDCAM0002.JPGDCAM0003.JPGDCAM0001.JPGDCAM0001.JPG/DCIM/100SSDVCDCAM0002.JPGDCAM0003.JPGDCAM0001.JPGDCAM0001.JPGMove ExitSelectLockMulti SelectLock AllLockFile Browser/DCIM/100SSDVCDCAM0002.JPGDCAM0003.JPGDCAM0004.JPGDCAM0001.JPGDCIMMISCMUSICVIDEOVOICE1/51/131/131/13Move PlayMove PlayOKMove Play/DCIM/100SSDVCDCAM0002.JPGDCAM0003.JPGDCAM0001.JPGDCAM0001.JPG/DCIM/100SSDVCDCAM0002.JPGDCAM0003.JPGDCAM0001.JPGDCAM0001.JPGMove ExitMENUSelectOKLockMulti SelectLock AllLockFile Browser/DCIM/100SSDVCDCAM0002.JPGDCAM0003.JPGDCAM0004.JPGDCAM0001.JPGDCIMMISCMUSICVIDEOVOICE1/51/131/131/13Move PlayMove PlayMove Play5/DCIM/100SSDVCDCAM0002.JPGDCAM0003.JPGDCAM0001.JPGDCAM0001.JPG/DCIM/100SSDVCDCAM0002.JPGDCAM0003.JPGDCAM0001.JPGDCAM0001.JPGMove ExitSelectLockMulti SelectLock AllLockFile Browser/DCIM/100SSDVCDCAM0002.JPGDCAM0003.JPGDCAM0004.JPGDCAM0001.JPGDCIMMISCMUSICVIDEOVOICE1/51/131/131/13Move PlayMove PlayMove PlayOKSC-X205 00994A 076~096 2006.1.27 8:31 PM 페이지93 001 PagePro 9100](https://usermanual.wiki/Samsung-Electronics-Co/06MM2MX2.Users-Manual-2/User-Guide-626616-Page-18.png)
![ENGLISH949413456Using File BrowserCopying Files or FoldersYou can copy the file or folder to the internal or external memory.1. Insert the memory card into the memory card slot on the Sports Camcorder.2. Press the [POWER] button to turn on the Sports Camcorder.◆The Movie Record screen appears.3. Set the File Browser mode by pressing the [MODE] button.◆The File Browser screen appears.4. Select the desired file or folder by using the [Joystick].◆Move the [Joystick] up/down and press the [Joystick(OK)] repeatedly until the file orfolder you want appears.5. Press the [MENU] button.Move the [Joystick] left / right to select <Copy To>.6. Move the [Joystick] up / down to select an option, and then press the [Joystick(OK)].◆<OK>: Copy the selected file or folder.◆<Multi Select>: Multiple files or folders can be selected using the [Joystick(OK)]. < ✔ > indicator appears on the selected files or folders. Press the [PLAY] button.◆<All>: All files or folders will be copied.[ Notes ] ✤The Sports Cam copies from the currently-used memory to another. If the internal memorywas used, it copies to a memory card.✤If a memory card is not inserted, you cannot perform the <Copy To> function.✤If you slide the [W/T] switch to W(WIDE) in play mode, the Cam return to the file list screen.✤If you move the [Joystick] left, the previous folder screen appears. /DCIM/100SSDVCDCAM0002.JPGDCAM0003.JPGDCAM0001.JPGDCAM0001.JPGExitMove SelectCopy ToFile BrowserMove Play/DCIM/100SSDVCDCAM0002.JPGDCAM0003.JPGDCAM0001.JPGDCAM0001.JPGMove PlayOKDCIMMISCMUSICVIDEOVOICEMulti SelectAllOKDPOFOKCopying file(s)...DCAM0001.JPGPress OK to cancel.Move ExitSelectFile Browser1/131/131/13Move PlayOK/DCIM/100SSDVCDCAM0002.JPGDCAM0003.JPGDCAM0001.JPGDCAM0001.JPGExitMove SelectCopy ToFile BrowserMove PlayOK/DCIM/100SSDVCDCAM0002.JPGDCAM0003.JPGDCAM0001.JPGDCAM0001.JPGMove PlayDCIMMISCMUSICVIDEOVOICEMulti SelectAllOKDPOFOKCopying file(s)...DCAM0001.JPGPress OK to cancel.Move ExitSelectFile Browser1/131/131/13Move Play/DCIM/100SSDVCDCAM0002.JPGDCAM0003.JPGDCAM0001.JPGDCAM0001.JPGExitMENUMove SelectOKCopy ToFile BrowserMove Play/DCIM/100SSDVCDCAM0002.JPGDCAM0003.JPGDCAM0001.JPGDCAM0001.JPGMove PlayDCIMMISCMUSICVIDEOVOICEMulti SelectAllOKDPOFOKCopying file(s)...DCAM0001.JPGPress OK to cancel.Move ExitSelectFile Browser1/131/131/13Move Play/DCIM/100SSDVCDCAM0002.JPGDCAM0003.JPGDCAM0001.JPGDCAM0001.JPGExitMove SelectCopy ToFile BrowserMove Play/DCIM/100SSDVCDCAM0002.JPGDCAM0003.JPGDCAM0001.JPGDCAM0001.JPGMove PlayDCIMMISCMUSICVIDEOVOICEMulti SelectAllOKDPOFOKCopying file(s)...DCAM0001.JPGPress OK to cancel.CancelMove ExitMENUSelectOKFile Browser1/131/131/13Move PlaySC-X205 00994A 076~096 2006.1.27 8:31 PM 페이지94 001 PagePro 9100](https://usermanual.wiki/Samsung-Electronics-Co/06MM2MX2.Users-Manual-2/User-Guide-626616-Page-19.png)
![ENGLISH959512345Using File BrowserViewing File InformationYou can see the file name, format, size and date. 1. Press the [POWER] button to turn on the Sports Camcorder.◆The Movie Record screen appears.2. Set the File Browser mode by pressing the [MODE] button.◆The File Browser screen appears.3. Select the desired file list by using the [Joystick].Move the [Joystick] up or down to want to view file information.◆Move the [Joystick] up/down and press the [Joystick(OK)] repeatedly until the file list youwant appears.4. Press the [MENU] button.Move the [Joystick] left / right to select <File Info.>.5. Press the [Joystick(OK)] to view the file infomation.◆The screen with file name, size, date, locked state appears.6. Press the [Joystick(OK)] to finish viewing file information.[ Notes ] ✤You cannot view folder information. You can only view file information.✤If you move the [Joystick] left, the previous folder screen appears. /DCIM/100SSDVCDCAM0002.JPGDCAM0003.JPGDCAM0004.JPGDCAM0001.JPGMove ExitSelectFile Info.File BrowserMove Play/DCIM/100SSDVCDCAM0002.JPGDCAM0003.JPGDCAM0004.JPGDCAM0001.JPGMove PlayOKDCIMMISCMUSICVIDEOVOICEOKMove ExitSelectFile Info.File BrowserOKDCAM0001.JPGSize 92805 bytesDate 2006/01/0112:00:00 AMLocked No1/51/131/131/13Move PlayOKMove Play/DCIM/100SSDVCDCAM0002.JPGDCAM0003.JPGDCAM0004.JPGDCAM0001.JPGMove ExitSelectFile Info.File BrowserMove PlayOK/DCIM/100SSDVCDCAM0002.JPGDCAM0003.JPGDCAM0004.JPGDCAM0001.JPGMove PlayDCIMMISCMUSICVIDEOVOICEOKMove ExitSelectFile Info.File BrowserOKDCAM0001.JPGSize 92805 bytesDate 2006/01/0112:00:00 AMLocked No1/51/131/131/13Move PlayMove PlayOK/DCIM/100SSDVCDCAM0002.JPGDCAM0003.JPGDCAM0004.JPGDCAM0001.JPGMove ExitMENUSelectOKFile Info.File BrowserMove Play/DCIM/100SSDVCDCAM0002.JPGDCAM0003.JPGDCAM0004.JPGDCAM0001.JPGMove PlayDCIMMISCMUSICVIDEOVOICEOKMove ExitSelectFile Info.File BrowserOKDCAM0001.JPGSize 92805 bytesDate 2006/01/0112:00:00 AMLocked No1/51/131/131/13Move PlayMove Play/DCIM/100SSDVCDCAM0002.JPGDCAM0003.JPGDCAM0004.JPGDCAM0001.JPGMove ExitSelectFile Info.File BrowserMove Play/DCIM/100SSDVCDCAM0002.JPGDCAM0003.JPGDCAM0004.JPGDCAM0001.JPGMove PlayDCIMMISCMUSICVIDEOVOICEOKMove ExitMENUSelectOKFile Info.File BrowserOKClose : OKDCAM0001.JPGSize 92805 bytesDate 2006/01/0112:00:00 AMLocked No1/51/131/131/13Move PlayMove PlaySC-X205 00994A 076~096 2006.1.27 8:31 PM 페이지95 001 PagePro 9100](https://usermanual.wiki/Samsung-Electronics-Co/06MM2MX2.Users-Manual-2/User-Guide-626616-Page-20.png)
![Setting the SportsCamcorder66Setting Memory ..............................................................................97Selecting the Storage Type.......................................................97Setting USB Mode..........................................................................98Setting USB Mode ....................................................................98Setting Memory ..............................................................................99Setting the File No. Function ....................................................99Formatting the Memory...........................................................100Viewing Memory Space..........................................................101Adjusting the LCD monitor .........................................................102Adjusting the LCD Brightness.................................................102Adjusting the LCD Color .........................................................103Adjusting Date/Time.....................................................................104Setting Date&Time..................................................................104Setting Date Format................................................................105Setting Time Format ...............................................................106Setting Date/Time Display ......................................................107Setting the System Settings .......................................................108Setting the Beep Sound..........................................................108Setting Start-up Mode.............................................................109Resetting the Sports Camcorder ............................................110Selecting Language.................................................................111Setting the Auto Shut off .........................................................112Setting the Demonstration Function .......................................113Viewing Version Information ...................................................114Using USB Mode ..........................................................................115Transferring files to a computer ..............................................115Printing with PictBridge ...........................................................116Using the PC Cam Function ...................................................117◆Save important data / recordings separately on other media, toavoid accidental loss due to a system failure or other reasons.How to set to System SettingsmodeHow to set to System SettingsmodeSystem Settings2. Set the System Settings modeby pressing the [MODE]button.MENUMODEDC INHOLDPowerbutton1. Press the [POWER] button toturn on the Sports Camcorder.ENGLISH9696SC-X205 00994A 076~096 2006.1.27 8:31 PM 페이지96 001 PagePro 9100](https://usermanual.wiki/Samsung-Electronics-Co/06MM2MX2.Users-Manual-2/User-Guide-626616-Page-21.png)
![ENGLISH97974Selecting the Storage TypeSetting the Sports Camcorder : Setting MemoryYou can set the storage to the internal memory or memory card (not supplied).1. Press the [POWER] button to turn on the Sports Camcorder.◆The Movie Record screen appears.2. Set the System Settings mode by pressing the [MODE] button.◆The System Settings screen appears.3. Move the [Joystick] left / right to select <Storage Type>.4. Move the [Joystick] up / down to select an option, and then press the [Joystick(OK)].◆<Internal>: Movie, photo, music and voice files are stored in the internal memory.◆<External>: Movie, photo, music and voice files are stored in the external memory(SD/MMC).5. After you finish setting, move to the desired mode by pressing the [MODE]button.[ Notes ]✤If you insert a memory card when the Sports Camcorder is on, the “pop-up message” willprompt you automatically to select the storage type .✤If there is no memory card inserted, only the <internal> option will be available.✤System requires a small portion of memory space, actual storage capacity may differ fromthe printed memory capacity.✤The maximum recording time and image capacity is subject to change depending on themedia used. ➥page 31, 32System SettingsMove SelectStorage TypeExternalInternalSystem SettingsMove SelectOKTYPEVer.Storage TypeInternalExternalSepiaRecording...12:00AM 2006/01/01SFSTBY 00:00:00/00:40:055System SettingsMove SelectStorage TypeExternalInternalSystem SettingsMove SelectStorage TypeInternalExternalSepiaRecording...12:00AM 2006/01/01SS720iFF STBY 00:00:00/00:40:053System SettingsMove SelectOKTYPEVer.Storage TypeExternalInternalSystem SettingsMove SelectStorage TypeInternalExternalSepiaRecording...12:00AM 2006/01/01SFSTBY 00:00:00/00:40:05SC-X205 00994A 097~122 2006.1.27 8:32 PM 페이지97 001 PagePro 9100](https://usermanual.wiki/Samsung-Electronics-Co/06MM2MX2.Users-Manual-2/User-Guide-626616-Page-22.png)
![ENGLISH9898Setting USB ModeSetting the Sports Camcorder : Setting USB ModeConnect your Sports Camcorder to your Computer via USB.1. Press the [POWER] button to turn on the Sports Camcorder.◆The Movie Record screen appears.2. Set the System Settings mode by pressing the [MODE] button.◆The System Settings screen appears.3. Move the [Joystick] left / right to select <USB Mode>.4. Move the [Joystick] up / down to select an option, and then press the [Joystick(OK)].[ Note ]✤Mass storage operates as a basic mode when connecting USB.3System SettingsMove SelectOKTYPEUSB ModePictBridgePC-CamMass StorageSystem SettingsMove SelectUSB ModeMass StoragePictBridgePC-Cam4System SettingsMove SelectUSB ModePictBridgePC-CamMass StorageSystem SettingsMove SelectOKTYPEUSB ModeMass StoragePictBridgePC-CamMass Storage Transferring files from the Sports Camcorder to your computer➥page 115PictBridgeBy connecting the Sports Camcorder to printers with PictBridgesupport (sold separately), you can send images from the internalmemory or external memory (SD/MMC) directly to the printerwith a few simple operations. ➥page 116PC-Cam You can use the Sports Camcorder as a PC camera for video chatting,video conference and other PC camera applications. ➥page 117SC-X205 00994A 097~122 2006.1.27 8:32 PM 페이지98 001 PagePro 9100](https://usermanual.wiki/Samsung-Electronics-Co/06MM2MX2.Users-Manual-2/User-Guide-626616-Page-23.png)
![ENGLISH9999Setting the Sports Camcorder : Setting MemorySetting the File No. FunctionYou can set the file numbers so that they reset each time the memory card is formatted, or sothat they count up continuously.1. Press the [POWER] button to turn on the Sports Camcorder.◆The Movie Record screen appears.2. Set the System Settings mode by pressing the [MODE] button.◆The System Settings screen appears.3. Move the [Joystick] left / right to select <File No.>.4. Move the [Joystick] up / down to select an option, and then press the [Joystick(OK)].◆<Series>: Numbering is continuous between the memory cards, so that the first filenumber assigned on a new memory card is 1 more than the last file number assigned onthe previous memory card.◆<Reset>: When the storage memory is formatted, the file number goes back to its defaultvalue (100-0001).5. After you finish, move to the desired mode by pressing the [MODE] button.[ Note ]✤When you set <File No.> to <Series>, each file is assigned with a different number so as toavoid duplicating file names. It is convenient when you want to manage your files on a PC.4System SettingsMove SelectOKFile No.ResetSeriesRGBSystem SettingsMove SelectFile No.SeriesReset3System SettingsMove SelectFile No.ResetSeriesSystem SettingsMove SelectOKFile No.SeriesRGBResetSC-X205 00994A 097~122 2006.1.27 8:32 PM 페이지99 001 PagePro 9100](https://usermanual.wiki/Samsung-Electronics-Co/06MM2MX2.Users-Manual-2/User-Guide-626616-Page-24.png)
![ENGLISH100100Setting the Sports Camcorder : Setting MemoryFormatting the MemoryYou can format the internal memory or the memory card to erase all files.1. Press the [POWER] button to turn on the Sports Camcorder.◆The Movie Record screen appears.2. Set the System Settings mode by pressing the [MODE] button.◆The System Settings screen appears.3. Move the [Joystick] left / right to select <Format>.4. Move the [Joystick] up / down to select an option, and then press the [Joystick(OK)].◆<Internal>: Format the internal memory.◆<External>: Format the external memory.When the [Joystick(OK)] is pressed, the pop-up message appears.Select <OK> or <Cancel> by moving the [Joystick] up / down and then press the[Joystick(OK)].5. After you finish setting, move to the desired mode by pressing the [MODE]button.[ Warning ]✤Previous information can not be restored after formatting.[ Notes ]✤There is no guarantee on the operation of a memory card which has not been formatted onthe Sports Camcorder. Make sure to format the memory card on the Sports Camcorderbefore using.✤If the memory card is not inserted, <External> option is not displayed.4System SettingsMove SelectFormatExternalInternalSystem SettingsMove SelectOKFormatInternalRGBExternalSystem SettingsMove SelectFormatInternalExternalAre you sure you want toformat the external memory,all files will be erased?System SettingsMove SelectFormatInternalExternalFormattingexternal memory...System SettingsMove SelectFormatExternalInternalSystem SettingsMove SelectFormatInternalExternalSystem SettingsMove SelectOKFormatInternalRGBExternal Are you sure you want toAre you sure you want toformat the external memory,all files will be erased?CancelOKSystem SettingsMove SelectFormatInternalExternalFormattingexternal memory...System SettingsMove SelectFormatExternalInternalSystem SettingsMove SelectFormatInternalExternalSystem SettingsMove SelectFormatInternalExternalAre you sure you want toformat the external memory,all files will be erased?System SettingsMove SelectOKFormatInternalRGBExternalFormattingexternal memory...3System SettingsMove SelectOKFormatExternalInternalRGBSystem SettingsMove SelectFormatInternalExternalSystem SettingsMove SelectFormatInternalExternalAre you sure you want toformat the external memory,all files will be erased?System SettingsMove SelectFormatInternalExternalFormattingexternal memory...SC-X205 00994A 097~122 2006.1.27 8:32 PM 페이지100 001 PagePro 9100](https://usermanual.wiki/Samsung-Electronics-Co/06MM2MX2.Users-Manual-2/User-Guide-626616-Page-25.png)
![ENGLISH101101Setting the Sports Camcorder : Setting MemoryViewing Memory SpaceYou can check used memory space and total memory space of the Sports Camcorder.1. Press the [POWER] button to turn on the Sports Camcorder.◆The Movie Record screen appears.2. Set the System Settings mode by pressing the [MODE] button.◆The System Settings screen appears.3. Move the [Joystick] left / right to select <Memory Space>.4. The used memory space and total memory space are displayed.5. After you viewing memory space, move to the desired mode by pressing the[MODE] button.[ Notes ]✤System requires a small portion of memory space, actual storage capacity may differ from theprinted memory capacity.✤If the memory card is not inserted, <External> option is not displayed✤The OSD indicators of this manual are based on the model SC-X210(L).4System SettingsMoveMemory SpaceRGBInternal3MB/983MBExternal0MB/243MBMemory SpaceUsed memory capacity indicator Total memory capacity indicator1212SC-X205 00994A 097~122 2006.1.27 8:32 PM 페이지101 001 PagePro 9100](https://usermanual.wiki/Samsung-Electronics-Co/06MM2MX2.Users-Manual-2/User-Guide-626616-Page-26.png)
![ENGLISH102102Setting the Sports Camcorder : Adjusting the LCD monitorAdjusting the LCD BrightnessYou can adjust the brightness of the LCD monitor to compensate for ambient lighting conditions.1. Press the [POWER] button to turn on the Sports Camcorder.◆The Movie Record screen appears.2. Set the System Settings mode by pressing the [MODE] button.◆The System Settings screen appears.3. Move the [Joystick] left / right to select <LCD Brightness>.4. Move the [Joystick] up / down to adjust the brightness, and then press the [Joystick(OK)].◆Moving the [Joystick] up will brighten the screen whereas moving it down will darken thescreen.◆Brightness range: You can adjust the LCD Brightness from 0% to 100%.5. After you finish setting, move to the desired mode by pressing the [MODE]button.[ Notes ]✤A Brighter LCD screen setting consumes more battery power.✤Adjust the LCD brightness when the ambient lighting is too bright and the monitor is hard to see.✤LCD Brightness does not affect the brightness of images to be stored.34System SettingsMove Adjust SetOKRGBLCD Brightness20%System SettingsLCD BrightnessMove Adjust Set1212122424241224System SettingsMove Adjust SetLCD BrightnessSystem SettingsRGBLCD Brightness60%Move Adjust SetOK1224121212242424SC-X205 00994A 097~122 2006.1.27 8:32 PM 페이지102 001 PagePro 9100](https://usermanual.wiki/Samsung-Electronics-Co/06MM2MX2.Users-Manual-2/User-Guide-626616-Page-27.png)
![ENGLISH103103Setting the Sports Camcorder : Adjusting the LCD monitorAdjusting the LCD ColorYou can adjust the color of the LCD monitor depending on the situation.1. Press the [POWER] button to turn on the Sports Camcorder.◆The Movie Record screen appears.2. Set the System Settings mode by pressing the [MODE] button.◆The System Settings screen appears.3. Move the [Joystick] left / right to select <LCD Color>.4. Move the [Joystick] up / down to adjust the LCD color, and then press the [Joystick(OK)].◆You can adjust the LCD Color from 0% to 100%. 5. After you finish setting, move to the desired mode by pressing the [MODE]button.34System SettingsMoveLCD Color50%System SettingsLCD ColorAdjust SetOKMove Adjust Set1212122424241224System SettingsMoveLCD ColorSystem SettingsLCD Color10%Adjust SetMove Adjust SetOK1224121212242424SC-X205 00994A 097~122 2006.1.27 8:32 PM 페이지103 001 PagePro 9100](https://usermanual.wiki/Samsung-Electronics-Co/06MM2MX2.Users-Manual-2/User-Guide-626616-Page-28.png)
![ENGLISH104104Setting the Sports Camcorder : Adjusting Date/TimeSetting Date&TimeYou can set the date/time using this menu.1. Press the [POWER] button to turn on the Sports Camcorder.◆The Movie Record screen appears.2. Set the System Settings mode by pressing the [MODE] button.◆The System Settings screen appears.3. Move the [Joystick] left / right to select <Date&Time Set> and then press the[Joystick(OK)].4. Set the desired value by moving the [Joystick] up / down.5. Move to the next item by moving the [Joystick] left / right, and then setvalues by moving the [Joystick] up / down.◆Items are displayed in the order of the date format.◆By default, it appears in the order of Year, Month, Date, Hour, Minute and AM/PM.6. After setting the last item, press the [Joystick(OK)] to finish the setting.7. After you finish setting, move to the desired mode by pressing the [MODE]button.[ Notes ]✤See page 107 to set the Date/Time to display on the LCD.✤You can set the year up to 2037.34System SettingsMoveDate&Time Set 01 0100 : 00 AM2006System SettingsMove SetOKRGBDate&Time SetAdjust Set1212122424241224 01 0112 : 00 AM2006System SettingsMoveRGBDate&Time Set 01 0100 : 00 AM2006System SettingsMove SetDate&Time SetAdjust SetOK1224121212242424 01 0112 : 00 AM2006SC-X205 00994A 097~122 2006.1.27 8:32 PM 페이지104 001 PagePro 9100](https://usermanual.wiki/Samsung-Electronics-Co/06MM2MX2.Users-Manual-2/User-Guide-626616-Page-29.png)
![ENGLISH105105Setting the Sports Camcorder : Adjusting Date/TimeSetting Date FormatYou can select the date format to display.1. Press the [POWER] button to turn on the Sports Camcorder.◆The Movie Record screen appears.2. Set the System Settings mode by pressing the [MODE] button.◆The System Settings screen appears.3. Move the [Joystick] left / right to select <Date Format>.4. Move the [Joystick] up / down to select an option, and then press the [Joystick(OK)].◆<YY/MM/DD>: The date is displayed in the order of Year / Month / Date.◆<DD/MM/YY>: The date is displayed in the order of Date / Month / Year.◆<MM/DD/YY>: The date is displayed in the order of Month / Date / Year.5. After you finish setting, move to the desired mode by pressing the [MODE] button.4System SettingsMove SelectDate FormatYY/MM/DDDD/MM/YYMM/DD/YYSystem SettingsMove SelectOKDate FormatYY/MM/DDMM/DD/YYDD/MM/YYMMMM12241212122424243System SettingsMove SelectOKDate FormatYY/MM/DDDD/MM/YYMM/DD/YYSystem SettingsMove SelectDate FormatYY/MM/DDMM/DD/YYDD/MM/YYMMMM1212122424241224SC-X205 00994A 097~122 2006.1.27 8:32 PM 페이지105 001 PagePro 9100](https://usermanual.wiki/Samsung-Electronics-Co/06MM2MX2.Users-Manual-2/User-Guide-626616-Page-30.png)
![ENGLISH106106Setting the Sports Camcorder : Adjusting Date/TimeSetting Time FormatYou can select the time format to display.1. Press the [POWER] button to turn on the Sports Camcorder.◆The Movie Record screen appears.2. Set the System Settings mode by pressing the [MODE] button.◆The System Settings screen appears.3. Move the [Joystick] left / right to select <Time Format>.4. Move the [Joystick] up / down to select an option, and then press the [joystick(OK)].◆<12 Hour>: The time is displayed as the unit of 12 hours.◆<24 Hour>: The time is displayed as the unit of 24 hours.5. After you finish setting, move to the desired mode by pressing the [MODE] button.4System SettingsMove SelectTime Format12 Hour24 HourMMSystem SettingsMove SelectOKTime Format12 HourMM24 Hour12241212122424243System SettingsMove SelectOKTime Format12 Hour24 HourMMSystem SettingsMove SelectTime Format12 HourMM24 Hour1212122424241224SC-X205 00994A 097~122 2006.1.27 8:32 PM 페이지106 001 PagePro 9100](https://usermanual.wiki/Samsung-Electronics-Co/06MM2MX2.Users-Manual-2/User-Guide-626616-Page-31.png)
![ENGLISH107107You can set to display date and time on the LCD monitor.1. Press the [POWER] button to turn on the Sports Camcorder.◆The Movie Record screen appears.2. Set the System Settings mode by pressing the [MODE] button.◆The System Settings screen appears.3. Move the [Joystick] left / right to select <Date/Time>.4. Move the [Joystick] up / down to select an option, and then press the [Joystick(OK)].◆<Off>: Date and Time are not displayed.◆<Date>: The date is displayed.◆<Time>: The time is displayed.◆<Date&Time>: The date and time are displayed.5. After you finish setting, move to the desired mode by pressing the [MODE]button.◆The selected Date/Time is displayed in Movie Record/Play or Photo Capture mode.Setting the Sports Camcorder : Adjusting Date/TimeSetting Date/Time Display34System SettingsMove SetOKDate/TimeOffDateTimeMMSystem SettingsMove SetDate/TimeDateTimeMMDate&TimeSepiaRecording...SFSTBY 00:00:00/00:40:0512:00AM 2006.01.011212122424241224System SettingsMove SetDate/TimeOffDateTimeMMSystem SettingsMove SetOKDate/TimeDateTimeMMDate&TimeSepiaRecording...SFSTBY 00:00:00/00:40:0512:00AM 2006.01.0112241212122424245System SettingsMove SetDate/TimeOffDateTimeMMSystem SettingsMove SetDate/TimeDateTimeMMDate&TimeSepiaRecording...SS720iFF STBY 00:00:00/00:40:0512:00AM 2006.01.0112241224SC-X205 00994A 097~122 2006.1.27 8:32 PM 페이지107 001 PagePro 9100](https://usermanual.wiki/Samsung-Electronics-Co/06MM2MX2.Users-Manual-2/User-Guide-626616-Page-32.png)
![ENGLISH1081084Setting the Sports Camcorder : Setting the System SettingsSetting the Beep SoundYou can set the beep sound to on/off. When on, a beep will sound every time a button is pressed.1. Press the [POWER] button to turn on the Sports Camcorder.◆The Movie Record screen appears.2. Set the System Settings mode by pressing the [MODE] button.◆The System Settings screen appears.3. Move the [Joystick] left / right to select <Beep Sound>.4. Move the [Joystick] up / down to select an option, and then press the [Joystick(OK)].◆<On>: Turn the beep sound on.◆<Off>: Turn the beep sound off.5. After you finish setting, move to the desired mode by pressing the [MODE]button.[ Note ]✤When the earphones, Audio / Video cable or * External Camera Module is connected to theSports Camcorder, the <Beep Sound> function will not operate.(* Items apply to the SC-X205L/X210L/X220L models only.)System SettingsMove SelectBeep SoundOnOffMMSystem SettingsMove SelectOKBeep SoundOnMMOff3System SettingsMove SelectOKBeep SoundOnOffMMSystem SettingsMove SelectBeep SoundOnMMOffSC-X205 00994A 097~122 2006.1.27 8:32 PM 페이지108 001 PagePro 9100](https://usermanual.wiki/Samsung-Electronics-Co/06MM2MX2.Users-Manual-2/User-Guide-626616-Page-33.png)
![ENGLISH1091094Setting the Sports Camcorder : Setting the System SettingsSetting Start-up ModeYou can select the starting mode displayed when you turn the Sports Camcorder on. 1. Press the [POWER] button to turn on the Sports Camcorder.◆The Movie Record screen appears.2. Set the System Settings mode by pressing the [MODE] button.◆The System Settings screen appears.3. Move the [Joystick] left / right to select <Start-up>.4. Move the [Joystick] up / down to select an option, and then press the [Joystick(OK)].◆Movie Mode: The Sports Camcorder starts up in the Movie Mode. ◆Previous Mode: The Sports Camcorder starts up in the mode you used last. 5. After you finish setting, move to the desired mode by pressing the [MODE]button.[ Note ]✤Make sure that the start-up mode is set to the selected mode when turning on the SportsCamcorder again.System SettingsMove SelectStart-upMovie ModePrevious ModeMSystem SettingsMove SelectOKStart-upMovie ModeMMPrevious ModeDEMO3System SettingsMove SelectOKStart-upMovie ModePrevious ModeMMSystem SettingsMove SelectStart-upMovie ModeMPrevious ModeDEMOSC-X205 00994A 097~122 2006.1.27 8:32 PM 페이지109 001 PagePro 9100](https://usermanual.wiki/Samsung-Electronics-Co/06MM2MX2.Users-Manual-2/User-Guide-626616-Page-34.png)
![ENGLISH110110Setting the Sports Camcorder : Setting the System SettingsResetting the Sports CamcorderYou can reset the Sports Camcorder to the default (factory) settings.1. Press the [POWER] button to turn on the Sports Camcorder.◆The Movie Record screen appears.2. Set the System Settings mode by pressing the [MODE] button.◆The System Settings screen appears.3. Move the [Joystick] left / right to select <Reset> and then press the[Joystick(OK)].◆The Sports Camcorder will be initialized to the default settings.[ Warning ]✤If you reset the Sports Camcorder, all functions you set are re-initialized to the default(factory) settings.[ Note ]✤After resetting the Sports Camcorder, set <Date&Time Set>. ➥page 1043System SettingsMove SelectOKResetOKMMDEMOVer.SC-X205 00994A 097~122 2006.1.27 8:32 PM 페이지110 001 PagePro 9100](https://usermanual.wiki/Samsung-Electronics-Co/06MM2MX2.Users-Manual-2/User-Guide-626616-Page-35.png)
![ENGLISH11111134System SettingsMove SelectOKLanguageEnglishEspañolFrançaisDEMOTYPEVer.Ajustes sistemaMove SelectLanguageEnglishFrançaisEspañolSystem SettingsMove SelectLanguageEnglishEspañolFrançaisAjustes sistemaMove SelectOKLanguageEnglishFrançaisDEMOTYPEVer.EspañolSetting the Sports Camcorder : Setting the System SettingsSelecting LanguageYou can select the desired language of the Sports Camcorder. 1. Press the [POWER] button to turn on the Sports Camcorder.◆The Movie Record screen appears.2. Set the System Settings mode by pressing the [MODE] button.◆The System Settings screen appears.3. Move the [Joystick] left / right to select <Language>.4. Move the [Joystick] up / down to select the desired language, and then pressthe [Joystick(OK)].◆English / Español / Français / Português / Deutsch / Italiano / Nederlands / Polski /PÛÒÒÍËÈ / / / Iran / Arab / Magyar / ‰‰∑∑¬¬/ ì͇ªÌҸ͇ / Svenska 5. After you finish setting, move to the desired mode by pressing the [MODE]button.SC-X205 00994A 097~122 2006.1.27 8:32 PM 페이지111 001 PagePro 9100](https://usermanual.wiki/Samsung-Electronics-Co/06MM2MX2.Users-Manual-2/User-Guide-626616-Page-36.png)
![ENGLISH112112Setting the Sports Camcorder : Setting the System SettingsTo save battery power, you can set the <Auto Shut off> function which turns off the Sports Camcorder if there is no operation fora certain period of time.1. Press the [POWER] button to turn on the Sports Camcorder.◆The Movie Record screen appears.2. Set the System Settings mode by pressing the [MODE] button.◆The System Settings screen appears.3. Move the [Joystick] left / right to select <Auto Shut off>.4. Move the [Joystick] up / down to select an option, and then press the [Joystick(OK)].◆<Off>: Cancels the <Auto Shut off> function.◆<5 Minutes>: Automatically turns off after 5 minutes.5. After you finish setting, move to the desired mode by pressing the [MODE] button.[ Notes ]✤The <Auto Shut off> will not function when you connect the AC Power Adapter to the Sports Camcorder. The <Auto Shut off> functions when the Battery Pack is the only power source.✤<Auto Shut off> will only function when you set this function in System Settings mode.✤Press the [POWER] button to revive the Sports Camcorder.Setting the Auto Shut off34System SettingsMove SelectOKAuto Shut offOff5 MinutesDEMOTYPEVer.System SettingsMove SelectAuto Shut offOff5 MinutesSystem SettingsMove SelectAuto Shut offOff5 MinutesSystem SettingsMove SelectOKAuto Shut offOffDEMOTYPEVer.5 MinutesSC-X205 00994A 097~122 2006.1.27 8:32 PM 페이지112 001 PagePro 9100](https://usermanual.wiki/Samsung-Electronics-Co/06MM2MX2.Users-Manual-2/User-Guide-626616-Page-37.png)
![ENGLISH113113Setting the Sports Camcorder : Setting the System SettingsThe Demonstration function will allow you to view all the functions that the Sports Camcorder supports.1. Press the [POWER] button to turn on the Sports Camcorder.◆The Movie Record screen appears.2. Set the System Settings mode by pressing the [MODE] button.◆The System Settings screen appears.3. Move the [Joystick] left / right to select <Demonstration>.4. Move the [Joystick] up / down to select an option, and then press the [Joystick(OK)].◆<Off>: Cancels the Demonstration function. ◆<5 Minutes>: Starts the Demonstration function in 5 minutes. ◆<Play Now>: Starts the Demonstration function now. [ Note ]✤If you set the Demonstration function, it operates only in Video Record mode.Setting the Demonstration Function34System SettingsMove SelectOKDemonstrationOff5 MinutesPlay NowDEMOTYPEVer.System SettingsMove SelectDemonstrationOff5 MinutesPlay Now Functions 1. Digital Camcorder 2. Digital Camera 3. MP3 Player 4. Stereo Audio Recorder 5. PC-Camera 6. Data StorageSTBY 00:00:00/00:40:05System SettingsMove SelectDemonstrationOff5 MinutesPlay NowSystem SettingsMove SelectOKDemonstrationOff5 MinutesPlay NowDEMOTYPEVer. Functions 1. Digital Camcorder 2. Digital Camera 3. MP3 Player 4. Stereo Audio Recorder 5. PC-Camera 6. Data StorageSTBY 00:00:00/00:40:05System SettingsMove SelectDemonstrationOff5 MinutesPlay NowSystem SettingsMove SelectDemonstrationOff5 MinutesPlay Now Functions 1. Digital Camcorder 2. Digital Camera 3. MP3 Player 4. Stereo Audio Recorder 5. PC-Camera 6. Data StorageSTBY 00:00:00/00:40:05SC-X205 00994A 097~122 2006.1.27 8:32 PM 페이지113 001 PagePro 9100](https://usermanual.wiki/Samsung-Electronics-Co/06MM2MX2.Users-Manual-2/User-Guide-626616-Page-38.png)
![ENGLISH114114Setting the Sports Camcorder : Setting the System SettingsYou can see the firmware version information.1. Press the [POWER] button to turn on the Sports Camcorder.◆The Movie Record screen appears.2. Set the System Settings mode by pressing the [MODE] button.◆The System Settings screen appears.3. Move the [Joystick] left / right to select <Version Info>.◆The firmware version of the Sports Camcorder is displayed. 4. After you view the version information, move to the desired mode by pressing the [MODE] button.Viewing Version Information3System SettingsMoveVersion InfoSamsung Elec. Co. LTDS/W 0.22 Jan 19 2006 18:31:08Syscon 0.21 Jan 18 2006 19:32:38 PRDEMOTYPEVer.SC-X205 00994A 097~122 2006.1.27 8:32 PM 페이지114 001 PagePro 9100](https://usermanual.wiki/Samsung-Electronics-Co/06MM2MX2.Users-Manual-2/User-Guide-626616-Page-39.png)
![ENGLISH115115Setting the Sports Camcorder : Using USB ModeYou can use transfer photo and video files to your PC.1. Turn on your PC.2. Press the [POWER] button to turn on the Sports Camcorder.◆The Movie Record screen appears.3. Connect the Sports Camcorder to your PC with the USB cable.◆Mass storage for transferring files runs as the default mode when connectingwith the USB.4. Copy the desired file from the Sports Camcorder to your PC.5. When finished, disconnect the USB cable.[ Notes ]✤Disconnecting the USB cable while the data transfer will stop the data transferand might damage the data stored.✤Multiple USB devices connected to a PC or using USB hubs may causecommunication / installation errors with the Sports Camcorder.✤Mass storage runs as the default mode when connecting with the USB. ResetUSB mode to use the Pict-bridge function or PC-Cam function. ➥page 98Transferring files to a computerUSBMMC/SDUSB cableOpen the front cover andconnect the USB cable.USBUSBSC-X205 00994A 097~122 2006.1.27 9:18 PM 페이지115 001 PagePro 9100](https://usermanual.wiki/Samsung-Electronics-Co/06MM2MX2.Users-Manual-2/User-Guide-626616-Page-40.png)
![ENGLISH116116Setting the Sports Camcorder : Using USB ModeWith the provided USB cable and a PictBridge-supporting printer, you can print yourphoto images directly without connecting to a PC.1. Press the [POWER] button to turn on the Sports Camcorder.◆The Movie Record screen appears.2. Set the System Settings mode by pressing the [MODE] button.◆The System Settings screen appears.3. Move the [Joystick] left / right to select <USB Mode>.4. Move the [Joystick] up / down to select <PictBridge> and then pressthe [Joystick(OK)].5. Connect the Sports Camcorder and the PictBridge supportingprinter with a USB cable. 6. Move the [Joystick] left/right to select the file you want to print.7. Move the [Joystick] up/down to set the number of copies.◆Range of possibilities: 1 ~ 308. Press the [Joystick(OK)] to begin printing.9. When finished, disconnect the USB cable.[ Warning ]✤This function works only with printers that support PictBridge.[ Notes ]✤For printing information, refer to the User's manual of the printer.✤Depending on the printer, printing failure may occur. In this case, download JPEG files directly to the PC and print them.✤Depending on the printer, date and time option may not be supported. In this case, date and time menu will not be displayed.✤Mass storage runs as the default mode when connecting with the USB. Reset USB mode touse the Pict-bridge function or PC-Cam function.Printing with PictBridge4System SettingsMove SelectOKTYPEUSB ModeMass StoragePictBridgePC-Cam100-0001PictBridgeSearch PrintCopies017System SettingsMove SelectUSB ModeMass StoragePictBridgePC-Cam 100-0001PictBridgeSearch PrintCopiesOK01USBMMC/SDPictBridge Supporting Printer (sold separately)USBUSBSC-X205 00994A 097~122 2006.1.27 8:32 PM 페이지116 001 PagePro 9100](https://usermanual.wiki/Samsung-Electronics-Co/06MM2MX2.Users-Manual-2/User-Guide-626616-Page-41.png)
![You can use this the CAM as a PC camera for video chatting, video conference and other PCcamera applications.Before your start! ◆For PC Cam use, it is required to install the DV Driver.➥page 1241. Press the [POWER] button to turn on the Sports Camcorder.◆The Movie Record screen appears.2. Set the System Settings mode by pressing the [MODE] button.◆The System Settings screen appears.3. Move the [Joystick] left / right to select <USB Mode>.4. Move the [Joystick] up / down to select <PC-Cam> and then press the[Joystick(OK)].5. Turn on your PC.6. Connect the Sports Camcorder to your PC with the USB cable. 7. The Sports Camcorder can be used as a PC Cam for programs suchas Windows Messenger. ◆Various applications take advantage of the PC Cam function. Refer torespective product documentation for further details.8. When finished, disconnect the USB cable.[ Notes ]✤You must install the DV Driver. ➥page 124✤When the USB Port connection changed, it may require DV Driver re-installation.➥page 124✤It is recommended to use an AC Power Adapter during data transfer to avoidunintended power outages.✤Microsoft Windows 98 SE or later operating systems support the PC Camfunction.✤Mass storage runs as the default mode when connecting with the USB. Reset USB mode to use the Pict-bridge function or PC-Cam function.ENGLISH117117Setting the Sports Camcorder : Using USB ModeUsing the PC Cam FunctionUSBMMC/SDUSB cableOpen the front cover andconnect the USB cable.USBUSB3System SettingsMove SelectOKTYPEUSB ModePictBridgePC-CamMass StorageSystem SettingsMove SelectUSB ModeMass StoragePictBridgePC-Cam4System SettingsMove SelectUSB ModePictBridgePC-CamMass StorageSystem SettingsMove SelectOKTYPEUSB ModeMass StoragePictBridgePC-CamSC-X205 00994A 097~122 2006.1.27 9:29 PM 페이지117 001 PagePro 9100](https://usermanual.wiki/Samsung-Electronics-Co/06MM2MX2.Users-Manual-2/User-Guide-626616-Page-42.png)
![ENGLISH119119Using the External Camera Module (SC-X205L/X210L/X220L only) : Recording with the External Camera ModuleRecording Video using the External Camera ModuleYour Sports Camcorder offers the ability to record those thrillingmoments. Whether you're snow boarding or skiing you can recordthe moments with the External Camera Module and accessories.1. Connect the External Camera Module cable to themulti jack of Sports Camcorder.◆You may fix the External Camera Module using a Tripod (not supplied), Rubber Mount, or Mounting Band.2. Press the [POWER/Record /Stop] button of ExternalCamera Module for more than 2 seconds.◆The power of the Sports Camcorder and the External Camera Module are turned on.◆If you press the [POWER] buttonof the Sports Camcorder, only the Sports Camcorder isturned on.3. Turn the Picture Rotator to the desired direction.◆The Picture Rotator turns 90 degrees left or right to select the desired picture angle.4. Press the [POWER/Record /Stop] button of the External Camera Module to startrecording.◆LED lamp lights in red.◆Press the [Record /Stop]button of the Sports Camcorder to start recording.5. Press the [POWER/Record /Stop] button of the External Camera Module to stoprecording.◆Recording stops and the Sports Camcorder is ready again.6. After recording, to prevent battery consumption, press the [POWER/Record /Stop]button of the External Camera Module more than 2 seconds to turn off.◆The power of the Sports Camcorder and the External Camera Module are turned off.◆If you press the [POWER] button of the Sports Camcorder, only the Sports Camcorder isturned off.[ Notes ]✤The External Camera Module is available for recording movie only.✤You can use the [POWER/Record /Stop] button of the External Camera Module to power on/off and to start/stop recordingsimultaneously.✤Multi jack is used as a Earphones jack, AV Input/Output jack and External Camera Module jack.MENUMODEDC INWTHOLDDISPLAYDELETE1[POWER/Record /Stop] button3612:00AM 2006/01/01 SepiaRecording...SSFF STBY 00:00:00:00:40:0512:00AM 2006/01/01 SepiaRecording...SFSTBY 00:00:02:00:40:0312:00AM 2006/01/01 SepiaSF00:00:02:00:40:03 Recording...720i90 degrees (max.)SC-X205 00994A 097~122 2006.1.27 8:47 PM 페이지119 001 PagePro 9100](https://usermanual.wiki/Samsung-Electronics-Co/06MM2MX2.Users-Manual-2/User-Guide-626616-Page-44.png)
![ENGLISH120120Using the External Camera Module (SC-X205L/X210L/X220L only) :Wearing the External Camera ModuleMounting the External Camera Module on Rubber Mount1 21. Set the Rubber Mount receptacle of the External Camera Module to the screw of Rubber Mount.2. Turn the Rubber Mount's screw to the right to fasten.[ Note ]✤Dropping the External Camera Module or bumping it to other objects may cause device failure. When using the device,you must attach it to the rubber mount, and be careful not to drop or strike it.screwRubber Mount receptacleSC-X205 00994A 097~122 2006.1.27 8:32 PM 페이지120 001 PagePro 9100](https://usermanual.wiki/Samsung-Electronics-Co/06MM2MX2.Users-Manual-2/User-Guide-626616-Page-45.png)
![ENGLISH121121Using the Long Mount Bands While the Sports Camcorder is inside your carrying case or backpack, you can attach the External Camera Module mounted onthe Rubber Mount with help of the Long Mount Bands.Using the External Camera Module (SC-X205L/X210L/X220L only) : Wearing the External Camera Module1. Run the strap of Long Mount Band through both of the slots onthe rubber mount as illustrated.◆You can use both the short part and long part of Rubber Mount as slots.2. Run the strap through the buckle to adjust the tightness.3. Fasten the strap. [ Notes ]✤Dropping the External Camera Module or bumping it to other objects maycause device failure. When using the device, you must attach it to the rubbermount, and be careful not to drop or strike it.✤A direct contact of the Rubber Mount with your skin for a long period of timemay cause skin irritation or allergy. Avoid long term contact.123Rubber MountSC-X205 00994A 097~122 2006.1.27 8:32 PM 페이지121 001 PagePro 9100](https://usermanual.wiki/Samsung-Electronics-Co/06MM2MX2.Users-Manual-2/User-Guide-626616-Page-46.png)
![ENGLISH123123USB connection to a computer System EnvironmentHigh Speed USB is not guaranteed if the supplied driver is not installed on an OS other than Microsoft Windows or Apple's Mac OS X.✤Windows 98SE/ME: Full Speed USB ✤Windows 2000: Service Pack 4 or higher - High Speed USB ✤Windows XP: Service Pack 1 or higher - High Speed USB✤Mac OS X: 10.3 or higher - High Speed USB[ Notes ]✤Not all PCs configured with the above environment are guaranteed to operate properly.✤USB connection using an external USB hub or an additional USB daughterboard is not guaranteed.✤If your OS is Windows 2000/XP, log in as the [Administrator(administrator of the PC)] (or a user with the equivalent privileges) to installthe OS.✤If the capacity of PC is low, the movie file may not play normally or will often stop.✤If the capacity of PC is low, it may take a long time to edit the video file.✤Intel®Pentium III™ or Pentium 4™ is a trademark of the Intel Corporation.✤Mac, Macintosh and Mac OS are trademarks of Apple Computer, Inc.✤Windows®is a registered trademark of the Microsoft®Corporation.✤All other brands and names are property of their respective owners.Pentium III, 600MHzWindows 98SE/ME128MB200MB(For applications only. Apart from this, 1GB or more free space 800x600 dots 16-bit colorUSB 1.1CPUOSMemoryFree space on the hard diskDisplay ResolutionUSBPentium 4, 2GHzWindows 2000/XP512MB or above2GB or above1024x768 dots 24-bit colorUSB 2.0 High SpeedMinimum RecommendedG3 500MHzMac OS 10.2128MB200MB(For applications only.Apart from this, 1GB or more free space800x600 dots 16-bit colorUSB 1.1G4 ProcessorMac OS 10.3512MB or above2GB or above1024x768 dots 24-bit colorUSB 2.0 High SpeedMinimum RecommendedWindows Environment Macintosh EnvironmentMiscellaneous Information : USB Interface EnvironmentSC-X205 00994A 123~142 2006.1.27 8:33 PM 페이지123 001 PagePro 9100](https://usermanual.wiki/Samsung-Electronics-Co/06MM2MX2.Users-Manual-2/User-Guide-626616-Page-48.png)
![ENGLISH124124Miscellaneous Information : Installing SoftwareInstalling DV Media Pro 1.0You need to install DV Media Pro 1.0 to play back recorded movie files or the transferred data from Sports Camcorder with theUSB cable on your PC.Before your start! ◆Turn on your PC. Exit all other applications running.◆Insert the provided CD into the CD-ROM drive.The setup screen appears automatically soon after the CD was inserted. If the setup screen does not appear, click on “Start”on the bottom left corner and select “Run” to display a dialog. Type “D:\autorun.exe” and then press ENTER, if your CD-ROMdrive is mapped to “D:Drive”.Installing Driver - DV Driver and DirectX 9.0◆DV Driver is a software driver that is required to support establishing connection to a PC.(If it is not installed, some functions will not be supported.)1. Click on “DV Driver” on the Setup screen.◆Driver software required is installed automatically. Following drivers will be installed:- USB Removable disk driver (Windows 98 SE only)- USB PC-CAMERA driver2. Click on <Confirm> to finish driver installation.◆Windows 98 SE users need to restart the PC.3. If the "DirectX 9.0" is not installed, it is installed automatically after setting "DV Driver".◆After installing DirectX 9.0, PC needs to be restarted.◆If DirectX 9.0 is installed already, there is no need to restart the PC.Application Installation - Video Codec◆Click on “Video Codec” on the Setup screen.Video Codec is required to play movie files recorded by Sports Camcorder on a PC.[ Note ]✤If a message saying “Digital Signature not found” or something similar appears, ignore the message and continue with theinstallation.SC-X205 00994A 123~142 2006.1.27 8:33 PM 페이지124 001 PagePro 9100](https://usermanual.wiki/Samsung-Electronics-Co/06MM2MX2.Users-Manual-2/User-Guide-626616-Page-49.png)
![ENGLISH125125Miscellaneous Information : Installing SoftwareUlead Video StudioApplication Installation – Photo Express 1. Click “Photo Express” on the Setup screen.◆It is a photo editing tool that allows users to edit images.Application Installation – Quick Time1. Click “Quick Time” on the Setup screen.◆QuickTime is Apple's technology for handling movie, sound, animation, graphics, text, music, and even 360-degree virtualreality (VR) scenes.Setting up Ulead Video StudioAfter inserting the CD, the setup screen displays automatically. Follow the instruction to start installation.It is a video editing tool that allows users to edit movie files.[ Notes ]✤For photo editing, use Photo Express.✤For movie playback on a PC, install software in this order : DV Driver - DirectX 9.0 - Video Codec✤For movie editing, use the Ulead Video Studio.✤For PC Cam use, it is required to install the DV Driver installation is required.✤You have to install “DV Driver”, “Video Codec” and “DirectX 9.0” to run DV Media Pro 1.0 properly.✤If a message saying “Digital Signature not found” or something similar appears, ignore the message and continue with theinstallation. SC-X205 00994A 123~142 2006.1.27 8:33 PM 페이지125 001 PagePro 9100](https://usermanual.wiki/Samsung-Electronics-Co/06MM2MX2.Users-Manual-2/User-Guide-626616-Page-50.png)
![ENGLISH126126Connect to a PC with the provided USB cable. You can view your files on your PC.Connecting to a PC – Playing Files1. Press the [POWER] button to turn on the Sports Camcorder.2. Connect the Sports Camcorder to the PC with the provided USBcable as shown in the diagram.3. Copy the file to your PC.◆We recommend copying the files onto your PC for better viewing.4. Double-click on the copied file name.It starts to play back.Disconnecting from a PC1. Click on the “Safely remove hardware” tray icon on the bottomright side of the desktop.Select the device and click on the “Stop” button.2. When the message saying that it is safe to remove the hardware appears, unplug the cable from the PC.[ Warning ]✤When data communication is disrupted due to static electricity, magnetic field or other reason, restart the program or try todisconnect / connect the communication cable (USB Cable) again.[ Notes ]✤Multiple USB devices connected to a PC or using USB hubs may cause communication / installation errors with the SportsCamcorder.✤Refer to page 123 for PC recommendations on USB use. Some PCs meeting the requirements may not support proper USBoperation due to various reasons. Please refer to the product documentation of the PC for further details.✤If you disconnect the USB cable from the PC or the Sports Camcorder during the data transfer, the data transfer will stopand the data may be damaged.✤The Sports Camcorder may operate abnormally in the recommended system environment depending on your PC.For example, the movie file may play abnormally.Miscellaneous Information : Connecting To Other Devices Connecting to a PC using USB CableUSBMMC/SDUSB cableUSBUSB<Open the front cover and connect the USB cable.>SC-X205 00994A 123~142 2006.1.27 8:33 PM 페이지126 001 PagePro 9100](https://usermanual.wiki/Samsung-Electronics-Co/06MM2MX2.Users-Manual-2/User-Guide-626616-Page-51.png)
![ENGLISH127127Connecting to a TV monitorYou can connect your Sports Camcorder directly to a TV set. Set the appropriate video input when viewing Sports Camplayback on the TV.1. Connect the provided Audio/Video cable to the [Multi jack] of the Sports Camcorder.2. Connect the other end of the cable to the TV set bymatching the colors of the terminals.3. Turn on the TV and set the TV's <Source> to the externalinput the Sports Camcorder is connected to.◆<Source> may be represented as <Line In>, <Input>, <A/V Input>, etc. depending on the manufacturer.4. Press the [POWER] button to turn on the SportsCamcorder.◆Movie Record mode is displayed on the TV screen.5. Press the [PLAY] button or [Joystick(OK)] to switch toMovie Play mode.6. Move the [Joystick] left / right to select a movie and then press the [Joystick(OK)].◆It begins playback.◆To pause playback, press the [Joystick(OK)].[ Notes ]✤You can play back photo files as well as movie files.✤When you connect your Sports Camcorder to a TV, some indicators may not partly appear.✤If you wish to input/output an image from another device to the Sports Camcorder, you must first set <Line In/out> in moviemode. ➥page 51Miscellaneous Information : Connecting To Other Devices DC INLine InputVIDEO AUDIO(L) (R)DC INSC-X205 00994A 123~142 2006.1.27 8:33 PM 페이지127 001 PagePro 9100](https://usermanual.wiki/Samsung-Electronics-Co/06MM2MX2.Users-Manual-2/User-Guide-626616-Page-52.png)
![ENGLISH128128Miscellaneous Information : Connecting To Other Devices Connecting to a VCR / DVD RecorderYou can connect your Sports Camcorder to a TV set through a VCR/DVD Recorder.1. Connect the provided Audio/Video Cable to the [Multi jack] of the Sports Camcorder.2. Connect the other end of the cable to theVCR/DVD Recorder by matching the colors ofthe terminals.3. Connect the Audio/Video Cable from TV Input to Video Output of the VCR/DVD Recorder.4. Turn on the TV and set the <Source> to theexternal input the VCR/DVD Recorder isconnected.5. Turn on the VCR/DVD Recorder and set the<Source> to the external input source whereyou connected the Sports Camcorder.[ Notes ]✤You can play back photo files as well as the movie files.✤If you wish to input/output an image from another device to the Sports Camcorder, you must first set <Line In/out> in moviemode. ➥page 51DC INLine InputLine OutputLine InputVIDEO AUDIO(L) (R)DC INSC-X205 00994A 123~142 2006.1.27 8:33 PM 페이지128 001 PagePro 9100](https://usermanual.wiki/Samsung-Electronics-Co/06MM2MX2.Users-Manual-2/User-Guide-626616-Page-53.png)
![ENGLISHMiscellaneous Information : Connecting To Other Devices 129129Recording unscrambled content from other digital devicesYou can connect other external digital devices to Sports Camcorder to record unscrambled contents.1. Connect the provided Audio/Video Cable to the [Multi jack] of the Sports Camcorder.2. Connect the Audio/Video cable to the external outputterminal of your digital devices (DVD, DVC, etc.) bymatching the cable to the colors of the terminals. 3. Press the [POWER] button to turn on the SportsCamcorder.◆The Movie Record screen appears.4. Press the [MENU] button.Move the [Joystick] left / right to select <Line In/Out>.5. Move the [Joystick] up / down to select <In> andthen press the [Joystick(OK)].6. Play back the other digital devices.7. Press the [Record/Stop] button to start recording.8. To stop recording, press the [Record/Stop] button again.[ Note ]✤The quality of an input signal recorded through the Line input terminal cannot be guaranteed unless it comes from digitaldevices (DVD, DVC, etc.).DC INLine OutputSC-X205 00994A 123~142 2006.1.27 8:33 PM 페이지129 001 PagePro 9100](https://usermanual.wiki/Samsung-Electronics-Co/06MM2MX2.Users-Manual-2/User-Guide-626616-Page-54.png)
![ENGLISH130130Miscellaneous Information : Printing PhotosPrinting with DPOFDPOF (Digital Printing Order Format) defines the print information for each photo on the memory card. You can easily makeprints using a DPOF-compatible printer or order copies from commercial digital image developers.Printing DPOF files in the memory card1. Set the DPOF information for the photo you want to print. ➥page 722. Insert a memory card into the DPOF- supporting printer.3. Follow the steps of the printer to print out photos.[ Notes ]✤For further details about printing photos, refer to the user's manual of the printer.✤Printing may not be performed depending on types of printers.In this case, download JPEG files directly to the PC and print them.SC-X205 00994A 123~142 2006.1.27 8:33 PM 페이지130 001 PagePro 9100](https://usermanual.wiki/Samsung-Electronics-Co/06MM2MX2.Users-Manual-2/User-Guide-626616-Page-55.png)
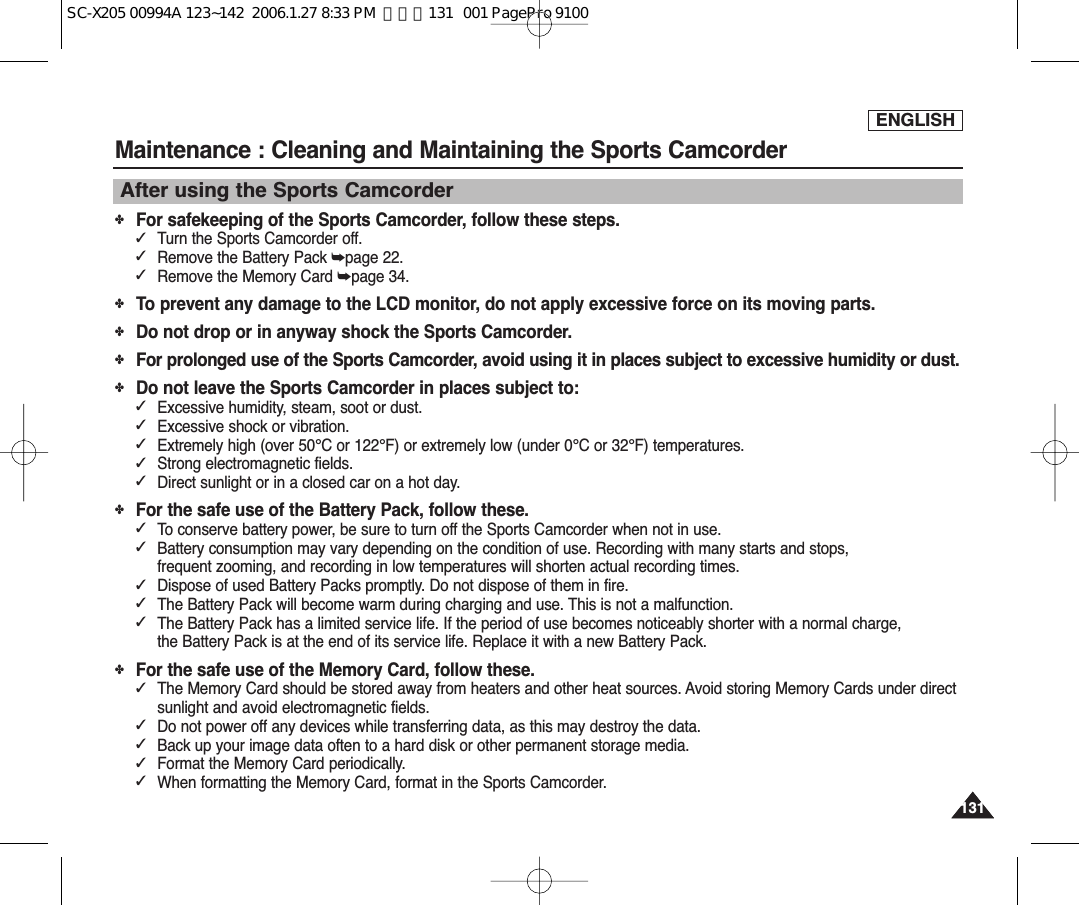
![ENGLISH132132Maintenance : Cleaning and Maintaining the Sports CamcorderCleaning the Body✤To Clean the Exterior of the Sports Camcorder✓To clean the exterior, use a soft dry cloth. Wipe the body gently. Do not apply excessive force when cleaning, gently rub the surface.✓The LCD monitor surface should not be pressed. Use a soft dry cloth to clean the surface.✓To clean the lens, use an optional air blower to blow out dirt and other small objects. Do not wipe the lens with cloth or your fingers. If necessary, use lens cleaning paper.✓Do not use thinner, alcohol or benzene for cleaning. Otherwise, the finish may be damaged.✓Cleaning should be done only after the Battery Pack has been removed, and other power sources have beendisconnected.Using the Built-in Rechargeable BatteryThe Sports Camcorder incorporates a rechargeable lithium cell that maintains the date and other settings even when the ACPower Adapter and the battery are removed. The rechargeable lithium cell is automatically recharged when the SportsCamcorder is used. ✤If the Sports Camcorder is not used at all, the cell runs down in 5 days. In this case, connect the AC Power Adapter to the SportsCamcorder and press the [POWER] button to turn on the Sports Camcorder. Then leave it for 24 hours. After that, set the date and other settings again. Charging the Built-in Rechargeable Battery[ Note ]✤If the lens looks dimmer, turn off the Sports Camcorder and leave it for about 1 hour.SC-X205 00994A 123~142 2006.1.27 8:33 PM 페이지132 001 PagePro 9100](https://usermanual.wiki/Samsung-Electronics-Co/06MM2MX2.Users-Manual-2/User-Guide-626616-Page-57.png)