Samsung Electronics Co 707SC Single-Band PCS GSM/ EDGE Phone with Bluetooth User Manual
Samsung Electronics Co Ltd Single-Band PCS GSM/ EDGE Phone with Bluetooth Users Manual
Contents
- 1. Users Manual 1
- 2. Users Manual 2
- 3. Users Manual 3
Users Manual 2
5-15
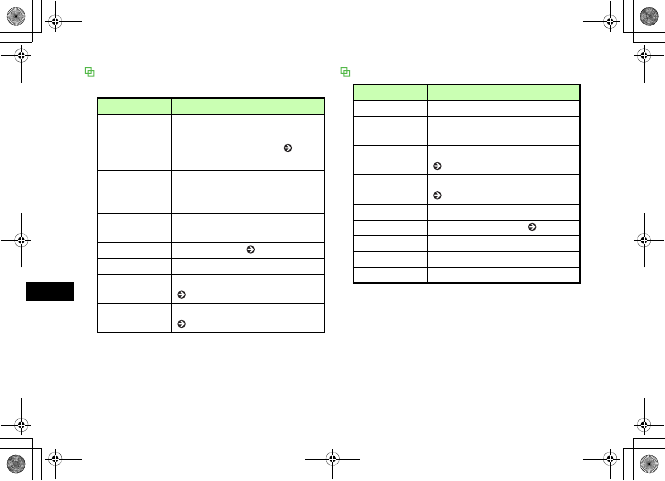
Phonebook
5
To reset
Highlight Voice call,Video call, or Message and
press o (Reset)
DPress w (Save)
Copy to USIM/Copy to Phone
AHighlight entry or open Entry details
BCopy the entry
To copy from Phonebook to USIM Card
Phonebook
Select Options →Copy to USIM →Selected or
All →Yes
To copy from USIM Card Phonebook to
Phonebook
Select Options →Copy to phone →Selected or
All
Deleting Entries
Deleting a Single Entry
AHighlight entry or open Entry details
BSelect Options →Delete →Selected
→Yes
Deleting Multiple Entries at Once
AHighlight entries
To select Phonebook or USIM Card Phonebook
Select Options →View from Phone or View from
USIM
BSelect Options →Delete →Multiple
CCheck an entry to delete
DRepeat Step 3 to check all target
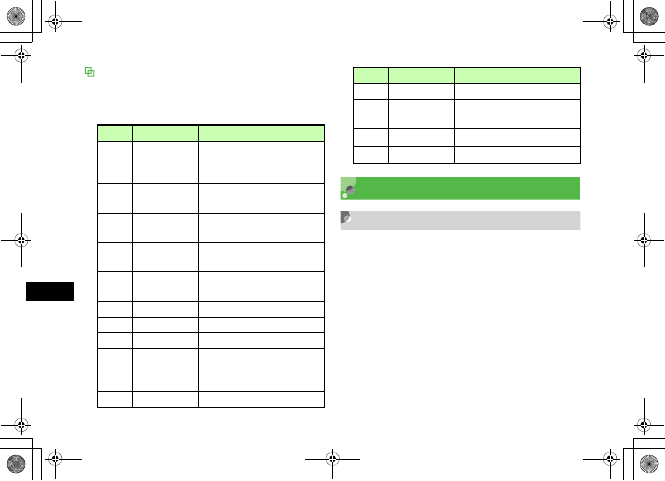
entries
5%'DQQMࡍࠫ㧞㧜㧜㧢ᐕ㧝㧜㧞㧢ᣣޓᧁᦐᣣޓඦ೨㧝㧝ᤨ㧝㧥ಽ
5-16
Phonebook
5
EPress w (Delete) and proceed to
Step 7 when all are not checked
FEnter Phone Password, press
c (Confirm)
GSelect Yes
Deleting All Entries at Once
Delete all Phonebook or USIM Card Phonebook entries.
AHighlight entries
To move between Phonebook and USIM Card
Phonebook
Select Options →View from USIM or View f rom
Phone
BSelect Options →Delete →All
CEnter Phone Password, press
c (Confirm) →Yes
My Phonebook Details
Confirm handset phone number. Add your name, mail
address, street address, and other information.
APress c and Press 0
To enter or edit other items
aPress w (Edit)
bEnter or edit items following the same procedures
for Phonebook items; when finished, then press
w (Save)
5%'DQQMࡍࠫ㧞㧜㧜㧢ᐕ㧝㧜㧞㧢ᣣޓᧁᦐᣣޓඦ೨㧝㧝ᤨ㧝㧥ಽ
5-17
Phonebook
5
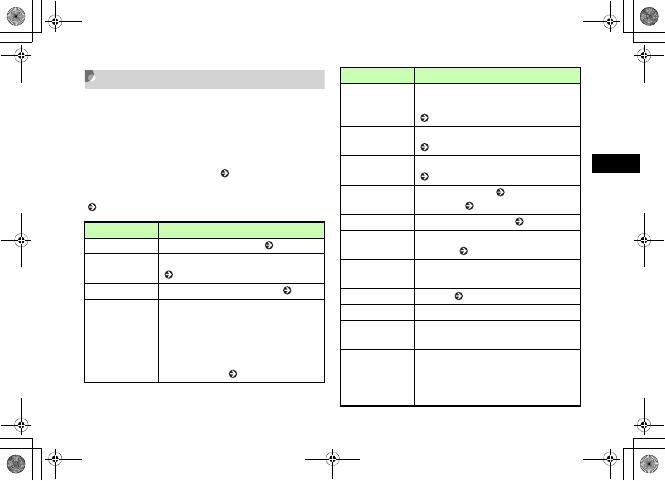
Options
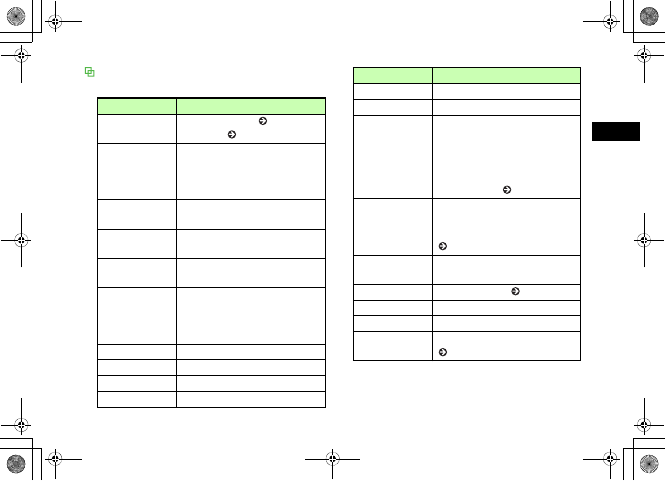
Item Description
Send my
phonebook
details
Send as a vFile; select Via message to
create a message with vFile attached
( P.17-6), or Via Bluetooth to send
vFile wirelessly ( P.12-6).
Delete Delete owner info except numbers on
USIM Card.
Save to Data
Folder
Create a vFile and save it to Other
documents in Data Folder.
Copy item Copy highlighted entry item.
Print via
Bluetooth
Print My phonebook details (name,
phone number information) using the
printer via Bluetooth® connection.
5%'DQQMࡍࠫ㧞㧜㧜㧢ᐕ㧝㧜㧞㧢ᣣޓᧁᦐᣣޓඦ೨㧝㧝ᤨ㧝㧥ಽ

5-18
5%'DQQMࡍࠫ㧞㧜㧜㧢ᐕ㧝㧜㧞㧢ᣣޓᧁᦐᣣޓඦ೨㧝㧝ᤨ㧝㧥ಽ

Video Call
5%'DQQMࡍࠫ㧞㧜㧜㧢ᐕ㧝㧜㧞㧢ᣣޓᧁᦐᣣޓඦ೨㧝㧝ᤨ㧝㧥ಽ

6-2
Video Call
6
Before Using Video Calls
Exchange voice and video via Video Call-compatible 3G
handsets.
You may choose not to send your own image ( P.6-6).
Video Call Precautions
• Calls to incompatible handsets may be disconnected;
charges apply.
• It may be difficult to use Speaker Phone with earpiece
volume raised; lower volume or use Stereo Earphone
Microphone.
• Ambient noise may hamper voice quality; use Stereo
Earphone Microphone.
• Using Speaker Phone in public may disturb other; please
mind your manners.
Initiating a Video Call
Dial directly or from Phonebook entries or Call Log records.
AEnter a phone number
BSelect Options →Video call
CPress y to end the call
When Video Call cannot be connected
Unavailable for a video call... appears; select Options →
Voice call or Create message to contact the recipient, or
View contact details to open Phonebook. Select Add to
Phonebook to save the receiver's number to Phonebook or
USIM Card Phonebook.
Initiating a Call ( P.2-3)
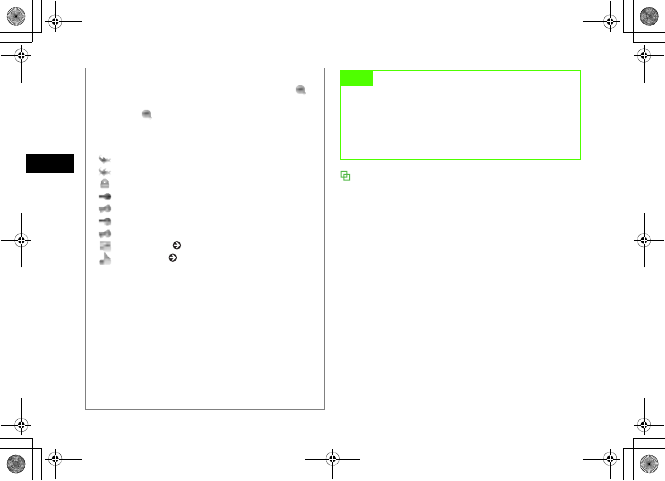
Receiving a Video Call
AWhen 707SC rings/vibrates, press
c (Accept)
Loudspeaker on? appears;
Select Yes or No
Allow own picture to be shown? appears;
Select Yes or No
Tip
• Engaged Video Call Operations ( P.6-3)
5%'DQQMࡍࠫ㧞㧜㧜㧢ᐕ㧝㧜㧞㧢ᣣޓᧁᦐᣣޓඦ೨㧝㧝ᤨ㧝㧥ಽ
6-3
Video Call
6
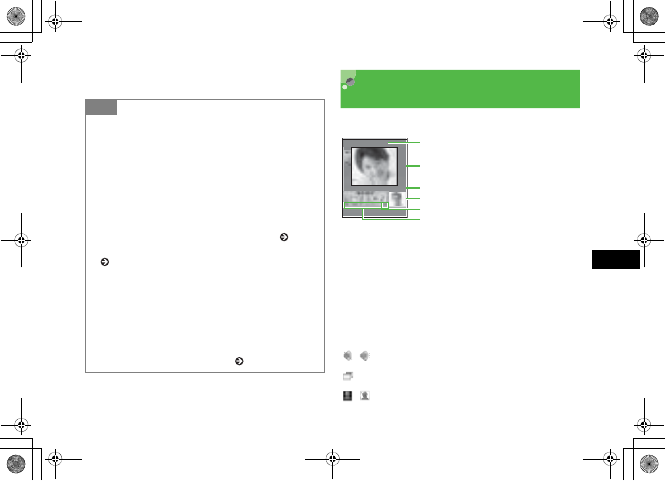
BPress y to end the call Engaged Video Call
Operations
Perform operations from Video Call Menu or Options.
aLarge Display (Normally, the other party's image)
bSmall Display (Normally, your image)
cThe other party's name or phone number
dCall duration
eMeaning of the icon at cursor position
fVideo Call Menu Icons
/ : Toggle Speaker Phone Off/On
: Toggle Incoming Image Size
/ : Freeze or unfreeze outgoing image
Tip
• To adjust ringtone volume
While 707SC is ringing, press n or b.
• When a Stereo Earphone Microphone is connected
Press Stereo Earphone Microphone switch for 1+ seconds to
answer video calls. Press for 1+ seconds to end a Video Call.
• To disconnect a Video Call without answering it
Press o (Busy)
• To change or cancel outgoing image
Set 707SC to send Substitute Image beforehand ( P.6-6).
Alternatively, change to Substitute Image during a call
( P.6-6).
• Send Your Image or Substitute Image during a Video
Call
After Step 1, Your Image appears. When confirmation
appears, select Yes or No to send Your Image or Substitute
Image. When Video Call connects Your Image or Substitute
Image appears.
• Engaged Video Call Operations ( P.6-5)
⋧↰ฬㇺ
䎂 䋱䋴䋴 䋰䋰䋺䋰䋰䋺䋰䋰
⚳ੌ
䉥䊐䉙 䉲䊢 䊮
c
b
f
a
d
e
5%'DQQMࡍࠫ㧞㧜㧜㧢ᐕ㧝㧜㧞㧢ᣣޓᧁᦐᣣޓඦ೨㧝㧝ᤨ㧝㧥ಽ
6-4
Video Call
6
(Blue)/ (Gray): Toggle Your Image and Substitute
Image
/ : Freeze or unfreeze incoming image
: Flip image
ADuring Video Calls, select Video Call
Menu or Options to adjust Video Call
settings
To toggle Speaker Phone off/on
Highlight / and press c
To select incoming image size
Highlight and press c to select an item
To freeze or unfreeze outgoing image
Highlight / and press c
To toggle Your Image and Substitute Image
Highlight (Blue/Gray) and press c
To freeze or unfreeze incoming image
Highlight / and press c
To flip outgoing image
Highlight and press c
To cancel Your Image/mic/key tones
aSelect Options →Mute
bCheck item(s) to cancel and press w (Save)
When Camera (Your Image) is canceled, Substitute
Image is sent.
To adjust outgoing image appearance/quality
aSelect Options →Display options →Effects
or Quality
bHighlight an item and press c
To adjust outgoing image brightness
aSelect Options →Display options →
Brightness
bUse s to adjust brightness
5%'DQQMࡍࠫ㧞㧜㧜㧢ᐕ㧝㧜㧞㧢ᣣޓᧁᦐᣣޓඦ೨㧝㧝ᤨ㧝㧥ಽ
6-5
Video Call
6
Engaged Video Call Options Video Call Settings
Sending Your Image
When Always ask is set, Choose between Your Image or
Substitute Image as outgoing image each time a Video
Call is received.
Tip
• To adjust earpiece volume
Press j during a Video Call.
• To enlarge or reduce outgoing image
Press n or b during a Video Call.
• When outgoing image is canceled
707SC send caller Substitute Image.
Item Description
Normal/Speaker on Toggle Speaker Phone off/on
( P.6-4).
Mute Cancel sending outgoing image/mic/
key tones ( P.6-4).
Display options Adjust outgoing image appearance/
quality ( P.6-4).
Settings Select Video Call settings ( P.6-5).
Phonebook Open Phonebook Search window.
Add to Phonebook Save number to Phonebook or USIM
Card Phonebook ( P.5-6).
Send DTMF Send push tones.
Memo Create and save text memos
( P.14-10).
Details Open Phonebook Entry details.
Switch to headset/
Switch to phone
Appears when Bluetooth®-
compatible headset is in use. Select
headset or phone (handset).
Default Setting 䂓Always ask
Item Description
5%'DQQMࡍࠫ㧞㧜㧜㧢ᐕ㧝㧜㧞㧢ᣣޓᧁᦐᣣޓඦ೨㧝㧝ᤨ㧝㧥ಽ
6-6
Video Call
6
APress c and select Settings →Call
settings →Video call →Show my
picture
BSelect the setting and press c (Save)
Selecting a Substitute Image
Select an image to use as the outgoing image (in place of
Your Image).
APress c and select Settings →Call
settings →Video call →Select still
picture
BPress c (Change)
COpen Data Folder, select a file and
press c (Save)
Retry Settings
APress c and select Settings →Call
settings→Video call →Retry with
BSelect the setting and press c (Save)
Default Setting 䂓Camera Off
Tip
• To restore Substitute Image to its default
aPerform Steps 1 and 2
bSelect any image file in Data Folder →Options →
Reset
Default Setting 䂓Always ask
5%'DQQMࡍࠫ㧞㧜㧜㧢ᐕ㧝㧜㧞㧢ᣣޓᧁᦐᣣޓඦ೨㧝㧝ᤨ㧝㧥ಽ
6-7
Video Call
6
Voice Mute
Set Voice mute to On to answer Video Calls with no
sound sending to caller.
APress c and select Settings →Call
settings →Video call →Voice mute
BSelect On and press c (Save)
Tip
• The contents of Retry with are:
Always ask: Select an action from Options.
Voice call: Choose whether or not to redial number as a
Voice Call.
Messages: Choose whether or not to create a message.
None: Return to Standby after a failed Video Call.
Automatic retry option changes by the setting.
Default Setting 䂓Off
Tip
• To send sound
aDuring a Video Call, select Options →Mute
bUncheck Vo i c e
cPress w (Save)
5%'DQQMࡍࠫ㧞㧜㧜㧢ᐕ㧝㧜㧞㧢ᣣޓᧁᦐᣣޓඦ೨㧝㧝ᤨ㧝㧥ಽ

6-8
5%'DQQMࡍࠫ㧞㧜㧜㧢ᐕ㧝㧜㧞㧢ᣣޓᧁᦐᣣޓඦ೨㧝㧝ᤨ㧝㧥ಽ

Mobile Camera
5%'DQQMࡍࠫ㧞㧜㧜㧢ᐕ㧝㧜㧞㧢ᣣޓᧁᦐᣣޓඦ೨㧝㧝ᤨ㧝㧥ಽ
7-2
Mobile Camera
7
Before Using Mobile
Camera
Capture still images in JPEG format or video in 3GP
format.
Mobile Camera Precautions
• Use a dry soft cloth to remove debris from camera lens.
• Avoid camera shake; hold 707SC steady or place it on a
stable surface and use Timer.
• Mobile Camera employs high precision technology,
however, some pixels may seem brighter or darker than
others.
• Leaving 707SC in a hot place for an extended period
before image capture/save may affect image quality.
• Exposing camera lens to direct sunlight may affect color
filter.
707SC Camera
707SC has rotating camera. Capture still images/videos
with rotating Camera lens inwards/outwards to suit
various situations. Images/videos may appear upside down
on Display by Camera lens direction. Use n to display
images/videos in the normal position.
Lens inwards
Lens outwards
5%'DQQMࡍࠫ㧞㧜㧜㧢ᐕ㧝㧜㧞㧢ᣣޓᧁᦐᣣޓඦ೨㧝㧝ᤨ㧝㧥ಽ
7-3
Mobile Camera
7
Using Display as Viewfinder
aSize
, , , ,
, , ,
bQuality
: Superfine : Fine
: Normal : Low
: Economy
cWhite Balance
: Auto : Fine : Cloudy
: Incandescent : Fluorescent
dMode
No display : Single shot
: Multi-shot (6 shots) : Multi-shot (9 shots)
: Multi-shot (15 shots)
: Mosaic shot (2 x 2) : Mosaic shot (3 x 3)
eTimer (When set)
: 3 seconds
: 5 seconds
: 10 seconds
fDisplay Position (Top & Bottom)
: Normal display when lens outwards
: Normal display when lens inwards
gDisplay Position (Left & Right)
: Normal image
: Mirror image
hAudio Recording
: On : Off
iRecording Time
: Limit for S! Mail : 10 seconds
: 30 seconds : Normal recording
Camera Viewfinder Video Viewfinder
e
d
f
g
abc
abchi
jk
l
5%'DQQMࡍࠫ㧞㧜㧜㧢ᐕ㧝㧜㧞㧢ᣣޓᧁᦐᣣޓඦ೨㧝㧝ᤨ㧝㧥ಽ
7-4
Mobile Camera
7
jElapsed Recording Time
kTotal Data Size/Recording Time
lProgress Bar
Capturing a Still Image
Camera Mode
Select Single shot to capture single images, Multishot or
Mosaic shot to capture multiple images. Save images in
Pictures.
Mode Description Image size
Single shot
Capture single images, select
size for purpose; attach images
to S! Mail, save as Wallpaper,
etc.
1600 x 1200
1280 x 960
640 x 480
320 x 240
240 x 320
240 x 192
Multi-shot Press shutter once to capture 6,
9 or 15 sequential images. 320 x 240
Mosaic shot
Capture multiple images, one at
a time; 707SC automatically
combines single images (4 for
2
x
2 or 9 for 3
x
3) into one
composite image.
240 x 192
Tip
• When using Single shot mode with a flame
Image size is automatically adjusted to 240 x 192.
Mode Description Image size
5%'DQQMࡍࠫ㧞㧜㧜㧢ᐕ㧝㧜㧞㧢ᣣޓᧁᦐᣣޓඦ೨㧝㧝ᤨ㧝㧥ಽ
7-5
Mobile Camera
7
Capturing Still Images
Single Shot
APress e
In Video mode
Press w (Photos) to change to Camera mode
BSelect Options →Shooting mode →
Single shot →Take & save
To save captured images without review
Select Automatic save
CSelect Options and perform other
actions as required ( P.7-6)
DPreview image on Display
Zoom image preview in/out (invalid for 1600 x
1200)
Use u or d to zoom out or in
Adjust brightness
Use r or l to lighten or darken image
EPress c (Take)
To cancel the image and capture another
Press w (Back)
Tip
• To activate/adjust Timer in image preview
Press
5
to toggle
3 seconds
,
5 seconds
,
10 seconds
,
and
Off
.
• To adjust viewfinder in image preview
Press # to toggle Full screen,Actual ratio,Full
screen without indicator, and Full screen with grid.
• To send an image via S! Mail or Bluetooth®
aAfter Step 5, press c (Send) and select send medium
bSend image ( P.12-6, 17-6)
5%'DQQMࡍࠫ㧞㧜㧜㧢ᐕ㧝㧜㧞㧢ᣣޓᧁᦐᣣޓඦ೨㧝㧝ᤨ㧝㧥ಽ
7-6
Mobile Camera
7
Preview Options
Available options may vary by mode and other settings.
Review Options
Item Description
Shooting mode
Select Shooting mode and save setting
for Single shot, or image count for
Multi-shot or Mosaic shot ( P.7-5,
7-9).
Effects
Select Black & White,Sepia or
Negative effects filters. When an effect
is active, select None to cancel.
Frames Add a frame to image in Single shot
mode.
Timer Activate self-timer ( P.7-5).
Go to photos Open Pictures folder.
Camera settings Select image size, image quality, etc.
( P.7-13).
Camera shortcuts Open a function shortcuts graphic
( P.7-10).
Item Description
Delete Delete the last image captured.
Set as Set image for Wallpaper, Phonebook
entries, or Substitute Image.
Edit photo Edit an image in Pictures folder
( P.7-15).
Dynamic Effect Create Flash images using Still images
( P.7-19).
Rename Change file name.
mPostcard Create a mobile postcard ( P.7-7).
Go to photos Open Pictures folder.
Lock/Unlock Set/release file protection.
Details Confirm file size or format.
5%'DQQMࡍࠫ㧞㧜㧜㧢ᐕ㧝㧜㧞㧢ᣣޓᧁᦐᣣޓඦ೨㧝㧝ᤨ㧝㧥ಽ
7-7
Mobile Camera
7
Mobile Postcard
Use Single shot,Multi-shot, or Mosaic shot images.
This function renders one of two images as line art,
merging it with the other to create a stamped photograph.
ACapture an image ( P.7-5, 7-8)
BSelect Options →mPostcard
CPress c (Add)
DAdd a second image
To select a still image from Data Folder
aSelect Open
bOpen Data Folder and select an image file
To capture an image
aSelect Take photo
bPress c (Take)
cPress c (Add)
EPress c (Merge) and check the
merged result
To change image
aPress C
bHighlight image to change, select Options →
Change image
cRepeat Steps 4 and 5
To swap image positions
aPress C
bSelect Options →Swap image
cPerform Step 5
FTo edit line art, press o (Edit)
To change line art position
aSelect Options →Move
bUse a to move image and press w (Done)
To change line art size
aSelect Options →Size
bUse j to adjust image and press w (Done)
5%'DQQMࡍࠫ㧞㧜㧜㧢ᐕ㧝㧜㧞㧢ᣣޓᧁᦐᣣޓඦ೨㧝㧝ᤨ㧝㧥ಽ
7-8
Mobile Camera
7
To rotate line art
aSelect Options →Rotate
bUse s to rotate image and press w (Done)
To change line art color
aSelect Options →Change colour
bUse s to select color and press w (Done)
To adjust line art shadow
aSelect Options →Shadow on or Shadow off
bPress w (Done)
GPress w (Save) and enter a file name
To save and send image
aPress c (S & S)
bSelect medium and send ( P.12-6, 17-6)
Multi Shot
APress e
In Video mode
Press w (Photos) to change Camera mode
BSelect Options →Shooting mode →
Multi-shot and select the number of
images to capture
CSelect Options and perform other
actions as required ( P.7-6)
DPreview image on Display
Zoom in/out
Use u or d to enlarge or reduce image
Adjust brightness
Use r or l to lighten or darken image
EPress c (Take)
5%'DQQMࡍࠫ㧞㧜㧜㧢ᐕ㧝㧜㧞㧢ᣣޓᧁᦐᣣޓඦ೨㧝㧝ᤨ㧝㧥ಽ

7-9
Mobile Camera
7
FView captured still image(s)
To view still images individually
aHighlight the image and press c (View)
bPress C
To retake a still image
Press w (Back)
Mosaic Shot
APress e
In Video mode
Press w (Photos) to change Camera mode
BSelect Options →Shooting mode →
Mosaic shot to select the number of
images to capture
CSelect Options and perform other
actions as required ( P.7-6)
DPreview image on Display
Zoom in/out
Use u or d to zoom in or out
Adjust brightness
Use r or l to brighten or darken image
EPress c (Take) for each image
FView captured still images
To retake an image
Press w (Back)
Mosaic Mode (2 x 2)
5%'DQQMࡍࠫ㧞㧜㧜㧢ᐕ㧝㧜㧞㧢ᣣޓᧁᦐᣣޓඦ೨㧝㧝ᤨ㧝㧥ಽ
7-10
Mobile Camera
7
Shortcut Key Operations
Change the settings by pressing the key assigned to each
item.
Available shortcuts vary by mode or setting status.
Capturing Video
Video Mode
Capture videos suitable for attaching to mail or saving as a
record.
Alternatively, capture videos without sound. Captured
video is saved in 3GP format to the Videos folder of Data
Folder.
Key Item Description
1Size
1600 x 1200, 1280 x 960,
640 x 480, 320 x 240,
240 x 320, 240 x 192
2Quality Superfine, Fine, Normal, Low,
Economy
3Shooting mode Single shot, Multi-shot (6, 9, 15
shots), Mosaic shot (2 x 2, 3 x 3)
4White balance Auto, Fine, Cloudy,
Incandescent, Fluorescent
5Timer 3 seconds, 5 seconds, 10
seconds
6Frames Select from 9 types
7Effects Black & White, Sepia, Negative
0Photo album -
#Screen mode
Toggle Full screen, Actual ratio,
Full screen without indicator,
Full screen with grid
wMode switch -
nVertical inverse -
bHorizontal
inverse -
jZoom -
sBrightness -
Key Item Description
5%'DQQMࡍࠫ㧞㧜㧜㧢ᐕ㧝㧜㧞㧢ᣣޓᧁᦐᣣޓඦ೨㧝㧝ᤨ㧝㧥ಽ

7-11
Mobile Camera
7
Capturing Video
APress e
In Camera mode
Press w (Videos) to open Video mode
BSelect Options and perform other
actions as required ( P.7-11)
CPreview image on Display
Zoom in/out
Use u or d to enlarge or reduce image
Adjust brightness
Use r or l to lighten or darken image
DPress c (Record)
EPress c (Save) and end
After recording time elapses
Capturing automatically ends and captured video is
saved automatically.
FPress c (Play) to view captured
video
To continue capturing
Press w (Back)
Preview Options
Tip
• To activate/adjust Timer when capturing
In image preview, press
5
to toggle
3 seconds
,
5
seconds
,
10 seconds
,
Off
.
Item Description
Effects
Select Black & White,Sepia, or
Negative effects filters. When an effect
is active, select None to cancel.
Timer Activate self-timer ( P.7-11).
Go to videos Open Videos folder.
Video settings Select image size, image quality, etc.
( P.7-14).
Camcorder
shortcuts
Open a function shortcuts graphic
( P.7-12).
5%'DQQMࡍࠫ㧞㧜㧜㧢ᐕ㧝㧜㧞㧢ᣣޓᧁᦐᣣޓඦ೨㧝㧝ᤨ㧝㧥ಽ
7-12
Mobile Camera
7
Review Options
Shortcut Key Operations
Change the settings by pressing the key assigned to each
item.
Item Description
Edit Edit Video files in Data Folder (P.7-17).
Resolution Select video display size while playing
or paused.
Send Send file via S! Mail ( P.17-6) or
Bluetooth® ( P.12-6).
Set as Set captured videos as Voice ringtone
or Video ringtone.
Delete Delete the last video captured.
Rename Change file name.
Go to videos Open Videos folder.
Lock/Unlock Set/release file protection.
Details Confirm file size or format.
Key Item Description
1Size 320 x 240, 176 x 144,
128 x 96
2Quality Fine, Normal, Low, Economy
3Shooting time
Limit for S! Mail, 10 seconds,
30 seconds, Normal
recording
4White balance Auto, Fine, Cloudy,
Incandescent, Fluorescent
5Timer 3 seconds, 5 seconds, 10
seconds
6Audio recording On, Off
7Effects Black & White, Sepia,
Negative
0Record album -
wMode switch -
nVertical inverse -
bHorizontal
inverse -
jZoom -
sBrightness -
Key Item Description
5%'DQQMࡍࠫ㧞㧜㧜㧢ᐕ㧝㧜㧞㧢ᣣޓᧁᦐᣣޓඦ೨㧝㧝ᤨ㧝㧥ಽ
7-13
Mobile Camera
7
Mobile Camera Settings
Make settings related to image capturing including the
size, image quality, save location, etc. of images.
Camera Settings
APress e
In Video mode
Press w (Photos) to change to Camera mode
BSelect Options →Camera settings
CSelect an item and perform
operations to set
To set image size
aSelect Size
bSelect the setting and press c (Save)
To set image quality
aSelect Quality
bSelect the setting and press c (Save)
To set Viewfinder
aSelect Viewfinder
bSelect the setting and press c (Save)
To set the shutter sound
aSelect Shutter sound
bSelect the setting and press c (Save)
To set sequential shot speed
aSelect Multi-shot speed
bSelect the setting and press c (Save)
To set the Single shot mode
aSelect Single shot mode
bSelect the setting and press c (Save)
Default Setting 䂓 Size: 240 x 320 䂓 Quality: Normal
䂓 Viewfinder: Full screen
䂓 Shutter sound: Shutter 1
䂓 Multi-shot speed: High
䂓 Single shot mode: Take & save
䂓 White balance: Auto
䂓 Default name: Photo
5%'DQQMࡍࠫ㧞㧜㧜㧢ᐕ㧝㧜㧞㧢ᣣޓᧁᦐᣣޓඦ೨㧝㧝ᤨ㧝㧥ಽ

7-14
Mobile Camera
7
To set white balance
aSelect White balance
bSelect the setting and press c (Save)
To set file name
aSelect Default name
bEnter file name
Video Settings
APress e
In Camera mode
Press w (Videos) to change to Video mode
BSelect Options →Video settings
CSelect an item and adjust settings
To set duration
aSelect Recording time
bSelect the setting and press c (Save)
To set size
aSelect Size
bSelect the setting and press c (Save)
To set image quality
aSelect Quality
bSelect the setting and press c (Save)
To set voice recording
aSelect Audio recording
bSelect the setting and press c (Save)
To set file name
aSelect Default name
bEnter file name
Default Setting 䂓 Recording time: Limit for S! Mail
䂓 Size: 176 x 144
䂓 Quality: Economy 䂓 Audio recording: On
䂓 Default name: Video
5%'DQQMࡍࠫ㧞㧜㧜㧢ᐕ㧝㧜㧞㧢ᣣޓᧁᦐᣣޓඦ೨㧝㧝ᤨ㧝㧥ಽ
7-15
Mobile Camera
7
Viewing Images
View images/video clips saved in Data Folder.
Viewing Still Images
APress e
In Video mode
Press w (Photos) to change Camera mode
BSelect Options →Go to photos
CHighlight a file and press c (View)
Viewing Videos
APress e
In Camera mode
Press w (Videos) to change to Video mode
BSelect Options →Go to videos
CHighlight and select a file and press
c (Play)
Editing Still Images
Edit image files saved in Data Folder.
APress c, select Data folder and
select an image to edit
BHighlight a file and press c (View)
CPress c (Edit)
Tip
• Video recording time
When the recording time is set to
Normal recording
, video
with maximum of approximately one hour can be recorded in
ordinary mode.
• When Recording time is set to Limit for S! Mail
Unable to set
Size with 320
x
240
; Quality is automatically
set to
Economy
, and cannot be changed.
5%'DQQMࡍࠫ㧞㧜㧜㧢ᐕ㧝㧜㧞㧢ᣣޓᧁᦐᣣޓඦ೨㧝㧝ᤨ㧝㧥ಽ

7-16
Mobile Camera
7
DEdit using Options
To change the size of an image
aSelect Resize
bSelect the setting
cEnter Width or Height (If Customise is selected)
dPress w (Done)
To add effects to an image
aSelect Effects
bSelect the setting
cPress w (Done)
To add blur or correct red-eye
aSelect Partial effects →Partial blur or Redeye
repair
bSelect Options and select the suitable operation
cPress w (Done)
To adjust an image
aSelect Adjust →Brightness/Contrast/Colour
bAdjust the image
cPress w (Done)
To add a frame
aSelect Frames
bUse s to select a frame
cPress w (Done)
To add clip art to an image
aSelect Cliparts
bSelect a piece of clip art to add to an image
cSelect Options →Size and use j to adjust
the clip art size
dSelect Options →Rotate and use s to turn
the clip art
eSelect Options →Move and use a to move
the clip art
fPress w (Done)
To add text to image (320 x 240 or above)
aSelect Insert text
bEnter text
cSelect Options →Size and use j to adjust
the text size
5%'DQQMࡍࠫ㧞㧜㧜㧢ᐕ㧝㧜㧞㧢ᣣޓᧁᦐᣣޓඦ೨㧝㧝ᤨ㧝㧥ಽ
7-17
Mobile Camera
7
dSelect Options →Rotate and use s to turn
the text
eSelect Options →Font size →Large/Normal/
Small
fSelect Options →Colour and use a to adjust
the text color
gPress w (Done)
To rotate image
aSelect Rotate
bSelect 90° R or 90° L
cPress w (Done)
To flip image
aSelect Flip
bSelect Vertically or Horizontally
cPress w (Done)
To crop image
aSelect Crop
bSelect Options →Size and use j to adjust
the trimming size
cSelect Options →Shape and use s to select
the trimming shape
dSelect Options →Move and use a to adjust
the trimming position
eSelect Options →Crop
fPress w (Done)
EPress c (Save)
FEnter a name for the image
Editing Videos
Edit Video files in Data Folder.
APress c, and select Data Folder →
Videos
BHighlight a file, select Options →Edit
CEdit using Options
To cut video
aSelect Cut
5%'DQQMࡍࠫ㧞㧜㧜㧢ᐕ㧝㧜㧞㧢ᣣޓᧁᦐᣣޓඦ೨㧝㧝ᤨ㧝㧥ಽ
7-18
Mobile Camera
7
bPress c (Play)
cPress w (Start) at the start point
dPress w (End) at the End point
eTo cancel and retry, press o (Reset) and repeat
b to d
fPress w (Done)
To merge multiple videos
aSelect Merge
bCheck files to merge (Up to ten files)
cRepeat b to check all target files
dPress w (Done)
ePress c (Merge)
To replace sound from other video/sound
aSelect Replace sound →From other video or
From other sound
bPress c (Open)
cSelect a file and press w (Done)
DPress c (Save)
EEnter a file name
Tip
• To confirm video before editing
Press
w
(Preview)
• To add files to merge videos
aAfter e in Step 3 in "To merge multiple videos," select
Options →Add
bPerform b to e in Step 3 in "To merge multiple
videos"
• To delete the file order for merging
aAfter e in Step 3 in "To merge multiple videos," use
s to highlight the file to delete
bSelect Options →Delete →Yes
• To change the file order for merging
aAfter e in Step 3 in "To merge multiple videos," use
s to highlight the file to move
bSelect Options →Change order
cUse s to highlight a personal folder or a file, highlight
the file and press c
5%'DQQMࡍࠫ㧞㧜㧜㧢ᐕ㧝㧜㧞㧢ᣣޓᧁᦐᣣޓඦ೨㧝㧝ᤨ㧝㧥ಽ
7-19
Mobile Camera
7
Create Flash®
Create Flash® images using still images saved in Pictures
folder, already created Flash® images saved in Other
documents folder, or still images previewed immediately
after shooting; newly created Flash® images are saved to
Other documents folder in Data Folder.
APress c and Camera →Dynamic
effect list
BSelect files
CPerform creation operations
To add frame to image
aSelect (Frame)
bSelect the frame
To add icon to image
aSelect (Icon)
bSelect the icon
cSelect Options →Size, use j to adjust the
size and press w (Done)
dSelect Options →Rotate and use s to adjust
the angle as required
eUse a to adjust the position and w (Done)
fRepeat a to e to add more icons
To add text to image
aSelect (Text)
bEnter text
cSelect Options →Font size and adjust the size
as required, and press w (Done)
dSelect Options →Font color and use s to
adjust the color as required, and press w (Done)
eUse a to adjust the position and w (Done)
fUse s to change scroll direction and press
w (Done)
gTo add more text, select (Text), press
c (Insert) and repeat b to g
5%'DQQMࡍࠫ㧞㧜㧜㧢ᐕ㧝㧜㧞㧢ᣣޓᧁᦐᣣޓඦ೨㧝㧝ᤨ㧝㧥ಽ
7-20
Mobile Camera
7
To add watch on image
aSelect (Watch)
bSelect the watch
cPress w (Done)
To reset image during editing
aSelect (Reset)
bSelect Yes
DPress w (Save)
EEnter an image name Attaching Images to a
Message
Attach captured image or recorded video and send via S!
Mail.
AAfter capturing, press c (Send) →
As message
To send video
In image review, select Options →Send →As
message
Tip
• To delete added frame/watch
aAfter Step 2, select (Frame) or (Watch)
bPress w (Delete)
• To delete added icon(s)/text(s)
aAfter Step 2, select (Icon) or (Text)
bUse s to highlight more icons/texts to delete
cPress w (Delete)
dPress c (Done)
• Available icon/text to add
Up to 5 icons/texts can be added.
• To create Flash® images using images already saved
in Data Folder
aHighlight image saved in Data Folder and select Options
→Dynamic Effect
bPerform Steps 1 to 3 ( P.7-19) in "Create Flash®"
Note
• Created Flash® images cannot be sent as message.
5%'DQQMࡍࠫ㧞㧜㧜㧢ᐕ㧝㧜㧞㧢ᣣޓᧁᦐᣣޓඦ೨㧝㧝ᤨ㧝㧥ಽ
7-21
Mobile Camera
7
BEnter an address, subject, text, etc.,
and send
Tip
• To send a still image or video via Bluetooth®
Select Via bluetooth in Step 1 ( P.12-6).
5%'DQQMࡍࠫ㧞㧜㧜㧢ᐕ㧝㧜㧞㧢ᣣޓᧁᦐᣣޓඦ೨㧝㧝ᤨ㧝㧥ಽ

7-22
5%'DQQMࡍࠫ㧞㧜㧜㧢ᐕ㧝㧜㧞㧢ᣣޓᧁᦐᣣޓඦ೨㧝㧝ᤨ㧝㧥ಽ

Display Settings
5%'DQQMࡍࠫ㧞㧜㧜㧢ᐕ㧝㧜㧞㧢ᣣޓᧁᦐᣣޓඦ೨㧝㧝ᤨ㧝㧥ಽ
8-2
Display Settings
8
Standby Display Settings
Wallpaper
Set Pictures that displays the saved still images or
animations, or Photo slide that displays still images one
by one, or mPet world image. Set to hide still image.
A
Press
c
and select
Settings
→
Display settings
→
Wallpaper
BPerform operations to set
To change settings
Select Pictures,Photo slide,mPet world image,
or None
To change the image of Pictures
aHighlight Pictures and press w (Edit)
bSelect the save location of files and select a file
cPress c (Set)
To set/edit the image of Photo slide
aSelect Photo slide and press w (Edit)
bPerform Steps 2 to 4 in "Setting Photo Slide"
( P.8-2) or perform Steps 2 and 3 in "Editing
Photo Slide" ( P.8-3)
CPress c (Save)
Photo Slide
APress c and select Tools →Photo
slide
Default Setting 䂓Pictures
Tip
• After setting mPet
mPet operations are enabled ( P.24-5). Press y to show
Standby as usual; various operations can be performed.
Note
• With no pet selected in mPet,mPet world image
cannot be set as Wallpaper.
5%'DQQMࡍࠫ㧞㧜㧜㧢ᐕ㧝㧜㧞㧢ᣣޓᧁᦐᣣޓඦ೨㧝㧝ᤨ㧝㧥ಽ
8-3
Display Settings
8
BPress c (Add)
CSelect save location for the file, check
the image to set and press w (Done)
To see preview
aPress w (Preview) and select Yes (Cropping the
left and the right) or No (Displaying in the original
horizontal and vertical ratio)
bPress C to close the preview
To set effect
aUse j to highlight Effect field
bUse s to toggle setting
To change the switching duration per still
image
aUse j to highlight Duration field
bUse s to highlight Effect field
DPress c (Set) and select Yes (crop
sides) or No (show full image)
Editing Photo Slide
APress c and select Tools →Photo
slide
BPerform editing operations
To edit still images
aSelect Options →Replace
bCheck a still image to set and press w (Done)
To change order of still images
aHighlight the still images to change order, select
Options →Change Order
bUse a to change order and press c (Save)
To delete a still image
Highlight the still image to delete, select Options →
Delete →Yes
Tip
• To adjust slide size
To display large in the window, select Ye s in Step 4. To
display in the original horizontal and vertical ratio, select No.
5%'DQQMࡍࠫ㧞㧜㧜㧢ᐕ㧝㧜㧞㧢ᣣޓᧁᦐᣣޓඦ೨㧝㧝ᤨ㧝㧥ಽ

8-4
Display Settings
8
To add a still image
aHighlight any part where a still image is not set
and press o (Add)
bCheck a still image to add and press w (Done)
CPress c (Set) and select Yes or No
Clock Display
In Standby, select Digital clock, Dual clock, and Calendar
to display. In Standby, hiding clock is also available.
APress c and select Settings →
Display settings →Clock display
BSelect settings
Digital clock
aSelect Digital clock
bPress w (Edit) and use s to select clock type
cPress c
Dual clock
aSelect Dual clock
bPress w (Edit)
cPerform Step 3 in "Changing Home Time Zone"
( P.1-20)
To display calendar
Select Calendar
To hide clock
Select Off
CPress c (Save)
Tip
• To adjust slide size
To display large in the window, select Yes in Step 3. To
display in the original horizontal and vertical ratio, select No.
Default Setting 䂓Off
5%'DQQMࡍࠫ㧞㧜㧜㧢ᐕ㧝㧜㧞㧢ᣣޓᧁᦐᣣޓඦ೨㧝㧝ᤨ㧝㧥ಽ
8-5
Display Settings
8
Operator Name
In Standby, show or hide operator name.
APress c and select Settings →
Display settings →Operator name
BSelect the setting and press c (Save)
Menu Display
Menu Style
Change Display type of menu list (Except Yahoo! Keitai
menu).
APress c and select Settings →
Display settings →Main menu style
BPerform operations to set
To set Bicycle
aSelect Bicycle
bUse s to change the type
cPress d and Use s to change seasons
To set Amoeba or Slider
aSelect Amoeba or Slider
bUse s to change the type
Tip
• When Dual clock is set
In Standby, two types of clock appear. Upper clock indicates
time of the district set by "Changing Home Time Zone"
( P.1-20). Bottom clock indicates time of the district set by
"Dual clock."
Default Setting 䂓Off
Default Setting 䂓Black
5%'DQQMࡍࠫ㧞㧜㧜㧢ᐕ㧝㧜㧞㧢ᣣޓᧁᦐᣣޓඦ೨㧝㧝ᤨ㧝㧥ಽ
8-6
Display Settings
8
To set Black
Proceed to Step 4
CPress c
DPress w (Save)
Popup Menu
Set whether to display minor items in balloon when
highlighting a medium item of a menu.
APress c and select Settings →
Display settings →Popup menu
BSelect the setting and press c (Save)
List Font Size
Set main menu item font size.
APress c and select Settings →
Display settings →List font size
BSelect the setting and press c (Save)
Default Setting 䂓Off
Tip
• When you highlight a middle item that has no small
item
Menu balloons are not displayed. They are not displayed in
Alarms in Tool Menu either.
Default Setting 䂓 Large
5%'DQQMࡍࠫ㧞㧜㧜㧢ᐕ㧝㧜㧞㧢ᣣޓᧁᦐᣣޓඦ೨㧝㧝ᤨ㧝㧥ಽ

8-7
Display Settings
8
Zoom List
Set whether to enlarge highlighted item of a menu in
selection display.
APress c and select Settings →
Display settings →Zoom list
BSelect the setting and press c (Save)
Backlight Brightness &
Duration
Adjusting Display Brightness
APress c and select Settings →
Display settings →Brightness
BUse a to adjust brightness and
press c (Save)
Backlight Duration
Set Display backlight lighting time and make display
settings. Display becomes dimmer when the time set in On
has elapsed and Display goes off when the time set in Dim
has elapsed.
Default Setting 䂓Off
Tip
• Applicable range of the zoom list setting
Zoom list setting is applied to the third layer menu and
lower. For example, in a case you select Settings →Call
settings →Voice call →Diverts, the menu Voice call
and lower menus are zoomed.
Default Setting 䂓On: 15 seconds 䂓Dim: 5 seconds
5%'DQQMࡍࠫ㧞㧜㧜㧢ᐕ㧝㧜㧞㧢ᣣޓᧁᦐᣣޓඦ೨㧝㧝ᤨ㧝㧥ಽ
8-8
Display Settings
8
APress c and select Settings →
Display settings →Backlight time
BSelect an item and make settings
To set the time to light brightly
aSelect On field
bSelect the time to set and press c
To set the time till Display goes off
aSelect Dim field
bSelect the time to set and press c
CPress w (Save)
Sub LCD Light
APress c and select Settings →
Display settings →Sub LCD light
BSelect the setting and press c (Save)
Dialing Display
Change Display to appear when dialing in Standby mode.
When character type is set to either Normal or Serif,
alternatively, change the font size, color, and/or
background color.
APress c and select Settings →
Display settings →Dialling display
Default Setting 䂓Power saving mode
Tip
• The contents of Sub LCD light are:
On: Turn on for 3 seconds after closing 707SC, then the
bottom part of Sub LCD turns off.
Power saving mode: Turn on for 3 seconds after closing
707SC, then turns off.
Off: Always off.
Sub LCD always turns off while 707SC is opened.
Default Setting 䂓Font type: Normal
5%'DQQMࡍࠫ㧞㧜㧜㧢ᐕ㧝㧜㧞㧢ᣣޓᧁᦐᣣޓඦ೨㧝㧝ᤨ㧝㧥ಽ
8-9
Display Settings
8
BSelect an item and make settings
To set font type
aSelect Font type
bUse s to switch font type
To set the font size
aSelect Font size
bUse s to select the size
To set font color
aSelect Font colour
bUse s to select the setting
cUse u to move cursor to Color selection field
and use s to select a color (For Monochrome
only)
To set background color
aSelect Background colour
bUse s to select the color
CPress c (Save)
Greeting Messages
Change power on message for Display.
APress c and select Settings →
Display settings →Greeting message
→Main LCD or Sub LCD
BEdit power on message text
Default Setting 䂓Main LCD: No entry
䂓Sub LCD: No entry
5%'DQQMࡍࠫ㧞㧜㧜㧢ᐕ㧝㧜㧞㧢ᣣޓᧁᦐᣣޓඦ೨㧝㧝ᤨ㧝㧥ಽ
8-10
Display Settings
8
Display Language
Set 707SC user interface to appear in English, Japanese, or
Korean.
APress c and select →
→Language or
BSelect English and press c (ሽ/
Save/)
Default Setting 䂓ᣣᧄ⺆ (Japanese)
⸳ቯ
৻⥸⸳ቯ
⸒⺆ㆬᛯ
5%'DQQMࡍࠫ㧞㧜㧜㧢ᐕ㧝㧜㧞㧢ᣣޓᧁᦐᣣޓඦ೨㧝㧝ᤨ㧝㧥ಽ
Sound Settings
5%'DQQMࡍࠫ㧞㧜㧜㧢ᐕ㧝㧜㧞㧢ᣣޓᧁᦐᣣޓඦ೨㧝㧝ᤨ㧝㧥ಽ
9-2
Sound Settings
9
Changing Profile Settings
Change 707SC incoming transmission response by profile.
In Car Profile, select a different method to answer calls.
AIn Standby, press * for 1+
seconds
BHighlight a profile and press w
(Edit)
To set Ringtone volume
aSelect Ringtone volume and select item to set
bUse s to adjust volume
cPress w (Play) to check the volume and press
c
dPress w (Save)
To set ringtone for Voice/Video Call
aSelect Ringtone and select Voice call or Video
call
bSelect the save location for files
cHighlight a melody, select Options →Play
dPress o (Select)
ePress w (Save)
To set ringtone for S! Mail/SMS
aSelect Ringtone and select Messages
bSelect the setting
cPress w (Play) to check the ringtone and press
c
dPress w (Save)
To set vibra t or
aSelect Vibration and select the items
bSelect the setting and press c (Save)
To set ringtone duration for S! Mail/SMS
aSelect Message ringtone duration
bEnter duration and press c
To set sound effect or key tone volume
aSelect Key tone volume
bUse s to adjust the volume and press
c (Save)
5%'DQQMࡍࠫ㧞㧜㧜㧢ᐕ㧝㧜㧞㧢ᣣޓᧁᦐᣣޓඦ೨㧝㧝ᤨ㧝㧥ಽ
9-3
Sound Settings
9
To make sound effect
aSelect Phone sounds
bCheck an item to set and press w (Save)
To set key tone
aSelect Key tones
bSelect the setting and press c (Save)
To set the answering method (Car Profile
only)
aSelect Call answer mode
bSelect the setting and press c (Save)
Tip
• Ringtone volume
Select to adjust volume step by step. Ringtone volume
become louder gradually.
•Acoustic shock
Setting Acoustic shock function On, even with high Ringtone
volume for Voice Call/Video Call, the 707SC rings at Level 1
volume for the first two seconds, then at the set volume.
• Incoming call answering mode in Car Profile
With Any key set, answer an incoming call with any key
except w , o , y , or Side Key n or b. With
Automatic set, automatically answer it and talk with the
speaker without performing key operations.
• To set the time (seconds) to answer automatically in
Car Profile
After b in "To set the answering method" in Step 2, select
Automatic, press w (Edit), select the setting and press
c to set the answering method.
• To set a ringtone after recording with Voice recorder
After b in "To set ringtone" in Step 2, select amr file.
• To adjust the volume while 707SC rings
Press Side Key n or b while 707SC rings.
5%'DQQMࡍࠫ㧞㧜㧜㧢ᐕ㧝㧜㧞㧢ᣣޓᧁᦐᣣޓඦ೨㧝㧝ᤨ㧝㧥ಽ
9-4
Sound Settings
9
Sound settings in Settings
Sound settings in Settings is a menu for changing the
settings of Normal Profile. Other mode settings cannot be
changed.
• To set notification by display indicator only (Mute)
To set receiving notifications (for incoming calls/received
messages) by display indicator only, mute Ringtone volume
and set Vibration Off; 707SC shows mute indicator ( ).
• To change ringtone title for S! Mail/SMS
aAfter b in "To set ringtone for S! Mail/SMS" in Step 2,
highlight Data Folder and press o (Change)
bSelect location to save the file
cHighlight the file, select Options →Play
dPress o (Select)
ePress w (Save)
• To adjust the key tone volume in Standby
In Standby, press Side Key n or b.
5%'DQQMࡍࠫ㧞㧜㧜㧢ᐕ㧝㧜㧞㧢ᣣޓᧁᦐᣣޓඦ೨㧝㧝ᤨ㧝㧥ಽ
9-5
Sound Settings
9
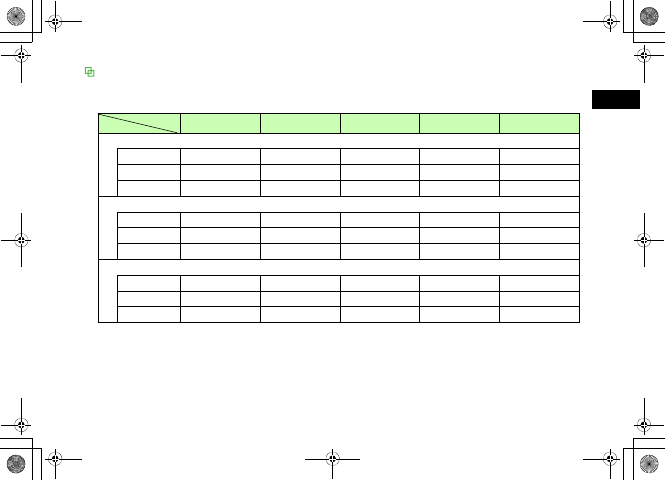
Profile settings
Available items vary by each Mode. The defaults are as listed below.
䋭: Setting deactivated
Profile
Item Normal Manner Car Meeting Outdoor
Ringtone volume
Voice call Level 4 䋭Level 4 Off Level 5
Video call Level 4 䋭Level 4 Off Level 5
Messages Level 4 䋭Level 4 Off Level 5
Ringtone
Voice call 03 acapella.mmf 䋭03 acapella.mmf 03 acapella.mmf 03 acapella.mmf
Video call Techno Dance.mp4 䋭Techno Dance.mp4 Techno Dance.mp4 Techno Dance.mp4
Messages Pure 䋭Pure Pure Pure
Vibration
Voice call On On On On On
Video call On On On On On
Messages On On On On On
5%'DQQMࡍࠫ㧞㧜㧜㧢ᐕ㧝㧜㧞㧢ᣣޓᧁᦐᣣޓඦ೨㧝㧝ᤨ㧝㧥ಽ
9-6
Sound Settings
9
Profile
Item Normal Manner Car Meeting Outdoor
Ringtone duration
Messages 5 Seconds 䋭5 Seconds 5 Seconds 5 Seconds
Key tone volume Level 2 䋭Level 4 Off Level 5
Phone sounds Several tones On Alerts on call Several tones On Alerts on call Several tones On
Key tones Xylophone 䋭Xylophone Xylophone Xylophone
Call answer mode 䋭䋭
Normal 䋭䋭
Answer machine 䋭On 䋭䋭䋭
5%'DQQMࡍࠫ㧞㧜㧜㧢ᐕ㧝㧜㧞㧢ᣣޓᧁᦐᣣޓඦ೨㧝㧝ᤨ㧝㧥ಽ
9-7
Sound Settings
9
Phone sounds setup items
Available items vary by each Mode. The volume of these
sounds follows the Key tone volume settings.
Item Description
All Check/uncheck all of the effect sound
items.
Popup box alerts Generate sound when a confirmation or
warning message appears.
Minute minder Generate sound at approximately every
minute during a call.
Call connect tone
When a call is initiated, the call is
connected before the ringtone sounds
on other party's handset and you will
be notified with a tone that the other
party will be called from now.
Call end tone Generate sound at the end of a call.
Power on Generate sound when the power is
turned on.
Open/close folder Generate sound when opening or
closing handset.
Alerts on call
Generate sound when alarm is
activated or mail is received during a
call.
5%'DQQMࡍࠫ㧞㧜㧜㧢ᐕ㧝㧜㧞㧢ᣣޓᧁᦐᣣޓඦ೨㧝㧝ᤨ㧝㧥ಽ

9-8
5%'DQQMࡍࠫ㧞㧜㧜㧢ᐕ㧝㧜㧞㧢ᣣޓᧁᦐᣣޓඦ೨㧝㧝ᤨ㧝㧥ಽ

Media Player
5%'DQQMࡍࠫ㧞㧜㧜㧢ᐕ㧝㧜㧞㧢ᣣޓᧁᦐᣣޓඦ೨㧝㧝ᤨ㧝㧥ಽ
10-2
Media Player
10
Before Using Media Player
Play sound or video files saved in Data Folder or stream
online media.
• From Music or Video menu, select Download music or
Download videos, to access Yahoo! Keitai and
download media files.
• Hear sound not only from the speaker, but also using the
stereo earphone microphone. Insert the plug as shown
in the figure below. When using the speaker, unplug the
stereo earphone microphone from handset.
• Use the stereo earphone microphone not only for
listening to music but also for initiating voice calls.
When 707SC rings/vibrates while playing music using a
stereo earphone microphone, press the switch on the
stereo earphone microphone for 1+ seconds to answer
the call.
Playable File Type
Left (L)
Right (R)
Stereo Earphone
Microphone
Charger Connector
Player File (Extension)
Music MPEG4 Audio (mp4, aac, 3gp (Sound only))
Video MPEG4 (mp4, 3gp)
Tip
• Other restrictions
Files other than described above saved in Sounds &
Ringtones in Data Folder are not playable with Media Player.
To play these files, select directly from Sounds & Ringtones
folder in Data Folder.
5%'DQQMࡍࠫ㧞㧜㧜㧢ᐕ㧝㧜㧞㧢ᣣޓᧁᦐᣣޓඦ೨㧝㧝ᤨ㧝㧥ಽ
10-3
Media Player
10
Playing Music
APress c and select Media Player →
Music
BPerform file selection operations
To select from All music
Select All music and highlight the file
To select from Recent music
Select Recent music and highlight the file
To select from Most played music
Select Most played music and highlight the file
To playback using Playlist ( P.10-7)
CPress c (Play)
aArtist's name and title (File name when the music title
information is unknown)
bSkin
cStatus : PLAY䋯PAUSE䋯STOP
dRepeat mode
(Off)䋯(One)䋯(Shuffle)䋯(All)
eFile number/Total number of files
fPlaying volume
gTotal playing time
hElapsed playing time
iProgress bar
䌎䌡䌴䌳䌵䇭䌁䌩䌤䌡䋭䌅䌶䌥䌮䌩䌮䌧䇭䌗䌡䌬䌴䌺
৻ᤨᱛ
ౣ↢
䉥䊐䉙 䉲䊢 䊮
a
e
g
h
i
b
c
d
f
Melody Player Window
5%'DQQMࡍࠫ㧞㧜㧜㧢ᐕ㧝㧜㧞㧢ᣣޓᧁᦐᣣޓඦ೨㧝㧝ᤨ㧝㧥ಽ
10-4
Media Player
10
All music
All playable files by Media Player's Music function appear. Up
to 9999 files can be listed.
Download music
Use Download music as shortcut to a download site. Select
to connect to a download site on the internet.
Music search
Music search of Media Player is a shortcut to a music search
site Music search. It allows you to search for music by music
category or keyword.
Recent music/Most played music
Recent music shows playback record in recent days. The
most recent played file appears on top of the list. Most
played music shows frequently played files record. The most
frequent played file appears on top of the list. Up to 100
records can be saved.
Tip
• To end the playback and return to Options
Press C. If you press C while Options appearing/
operating Options;Options closes/returns to the previous
menu.
• If there is an incoming call while playing
The play pauses and a ringtone sounds. After the call is
ended, Media player continues to pause the playback.
• If Message is received while playing
or appears on the top of Display and 707SC vibrates
to notify you.
• When the time set for alarm has come while playing
Playing pauses, Alarm sounds and alarm details appears.
Press any key to stop Alarm sound and restart playing. Press
any key again to restore Media Player display.
• To set melody file as Ringtone/Alert tone
While a file is highlighted or playing is paused or stopped,
press w (Set as) and choose how to use the file. However,
a file that cannot be set to be a ringtone will not be set a
ringtone.
• To use another function while listening to music
Use Switch Bar ( P.1-22).
5%'DQQMࡍࠫ㧞㧜㧜㧢ᐕ㧝㧜㧞㧢ᣣޓᧁᦐᣣޓඦ೨㧝㧝ᤨ㧝㧥ಽ
10-5
Media Player
10
Player Window & List Options
Available items vary by file type, etc.
Item Description
Send Send file via S! Mail ( P.17-6) or
Bluetooth® ( P.12-6).
Add
Add files to Playlist. Select Playlist to
add all files contained in another
Playlist. Select Files to add selected
files to Playlist.
Move track in
playlist Change order of files in Playlist.
View bookmark Access a page containing a streaming
play link saved as a bookmark.
View history Access a page containing a streaming
play link already accessed.
Add to playlist
Files in All music are added to Play
List. Choose Selected file to add
highlighted file, or Multiple file to
add multiple files to Playlist.
Play by Play tracks by album, artist or genre.
Delete Delete a highlighted file or all files.
Rename Change file name.
Lock/Unlock Set/release file protection.
Details Confirm file size, etc.
Stop Stop playing.
Play via
Playback music files. When Playback
display, select Phone to sound from
speaker. Select A/V headset to sound
from speaker or Bluetooth®-
compatible devices (stereo
headphone, etc.) ( P.12-7).
Transfer to A/V
headset/Transfer to
Phone
Toggle sound output between
Bluetooth®-compatible devices (stereo
headphone, etc.) and Phone
( P.12-7).
Download content
key Purchase or acquire Content Key.
Create playlist Create new Playlist ( P.10-6).
Rename Change Playlist name.
Open playlist Open Playlist.
Player settings Select settings related to Media Player
( P.10-7).
Item Description
5%'DQQMࡍࠫ㧞㧜㧜㧢ᐕ㧝㧜㧞㧢ᣣޓᧁᦐᣣޓඦ೨㧝㧝ᤨ㧝㧥ಽ
10-6
Media Player
10
Playing Melodies Using a
Playlist
Create Playlist
Create a maximum of 20 Playlists, each containing up to
100 files.
APress c and select Media Player →
Music
BSelect Options →Create playlist
CEnter Playlist name
DSelect the created Playlist
ESelect Options →Add →Files
FCheck every file to save and press
w (Save)
Tip
•With Transfer to A/V headset is set
Raise/lower volume from A/V headset. 707SC cannot be
used to raise/lower volume. Tip
• To create new Playlist by selecting all tracks in
existing Playlist:
aPerform Steps 1 to 3
bSelect Options →Add →Playlist
cSelect Playlist from which to add all melodies
• To change the name of Playlist
aHighlight Playlist, select Options →Rename
bEnter Playlist name
• To delete selected Playlist
Highlight Playlist, select Options →Delete →Selected →
Yes
• To delete all Playlists
aHighlight Playlist, select Options →Delete →All
bEnter Phone Password and press c (Confirm)
cSelect Yes
5%'DQQMࡍࠫ㧞㧜㧜㧢ᐕ㧝㧜㧞㧢ᣣޓᧁᦐᣣޓඦ೨㧝㧝ᤨ㧝㧥ಽ
10-7
Media Player
10
Play
APress c and select Media Player →
Music
BSelect Playlist to play, select Options
→Play
Changing Music Player
Settings
Repeat Mode
Play a single track repeatedly, all files in All music, or
tracks from Playlist, randomly or repeatedly.
APress c and select Media Player →
Music
BSelect Options →Player settings →
Repeat mode
CSelect an item and press c (Save)
Tone Volume
APress c and select Media Player →
Music
BSelect Options →Player settings →
Ton e vol um e
CUse a to adjust the volume and
press c (Save)
Audio Skin
Set one of two images to appear on Display while playing
a melody.
Default Setting 䂓OFF
Default Setting 䂓Rainbow wave
5%'DQQMࡍࠫ㧞㧜㧜㧢ᐕ㧝㧜㧞㧢ᣣޓᧁᦐᣣޓඦ೨㧝㧝ᤨ㧝㧥ಽ
10-8
Media Player
10
APress c and select Media Player →
Music
BSelect Options →Player settings →
Audio Skin
CSelect the setting and press c (Save)
Visualization Mode
Visualization On/Off
Select whether to display the skin set in Visualization, to
display the controller, and to activate backlight settings on
Display while playing AAC or AAC+ format file within
MPEG4.
APress c and select Media Player →
Music
BSelect Options →Player settings →
Visualization →Visualization mode
CSelect the setting and press c (Save)
Skin, Show Controller, & Backlight
Select one of 10 skins to display while playing a melody
file. To display this skin on the whole window, set the
Show controller to Hide. With the Backlight set to
Always on, while handset is open, view the skin while
listening to music.
APress c and select Media Player →
Music
Default Setting 䂓On
Default Setting 䂓Skin: Flowers
䂓Show controller: Show
䂓Backlight: Normal
5%'DQQMࡍࠫ㧞㧜㧜㧢ᐕ㧝㧜㧞㧢ᣣޓᧁᦐᣣޓඦ೨㧝㧝ᤨ㧝㧥ಽ
10-9
Media Player
10
BSelect Options →Player settings →
Visualization →Skin,Show controller,
or Backlight
CSelect the setting and press c (Save)
Playing Video
APress c and select Media Player →
Video
BPerform operations to select files
To select from All Video
Select All Video and highlight the file
To select from Recent video
Select Recent video and highlight the file
To select from Most Played video
Select Most Played video and highlight the file
To select from Playlist ( P.10-7)
CPress c (Play)
aArtist's name and title (File name when the video title
information is unknown)
bPlaying status : PLAY/PAUSE/STOP
cProgress bar
dFile no./Total number of files
ePlaying volume level
fTotal playing time
gElapsed playing time
䌎䌡䌴 䌳䌵䇭䌍䌯䌶䌩 䌥䋭䋱
ౣ↢
a
g
b
c
d
e
f
Video Player Window
5%'DQQMࡍࠫ㧞㧜㧜㧢ᐕ㧝㧜㧞㧢ᣣޓᧁᦐᣣޓඦ೨㧝㧝ᤨ㧝㧥ಽ
10-10
Media Player
10
All Video
All playable files by Media Player's Video function appear. Up
to 9999 files can be listed.
Download videos
Use Download videos as shortcut to a download site. Select
to connect to a download site on the internet.
Recent video/Most Played video
Recent video shows playback record in recent days. The most
recent played file appears on top of the list. Most Played
Video shows frequently played files record. The most frequent
played file appears on top of the list. Up to 100 records can
be saved.
Player Window & List Options
Select Options in Player window or list and perform
operations listed below. Available items vary by file type, etc.
Tip
• To set video file as Ringtone
Highlight the file press w (Set as) with suspending
Playback, then perform operations to set ( P.11-11). The
operations are unavailable for files those cannot be set for
ringtone.
• Playlist
aAfter Step 1, select Options →Create playlist
bPerform Steps 2 to 5 in "Create Playlist" ( P.10-6)
Item Description
Full screen view Display video on the whole window.
Add
Add files to Playlist. Select Playlist to
add all files contained in another
Playlist. Select files to add selected (not
all) files to Playlist.
Move track in
playlist Change order of files in Playlist.
Stop Stop playing video.
Edit Edit video files ( P.7-17).
Resolution Set video display size.
Send Send file via S! Mail ( P.17-6) or
Bluetooth® ( P.12-6).
View bookmark Access a page containing a streaming
play link saved as a bookmark.
View history Access a page containing a streaming
play link already accessed.
5%'DQQMࡍࠫ㧞㧜㧜㧢ᐕ㧝㧜㧞㧢ᣣޓᧁᦐᣣޓඦ೨㧝㧝ᤨ㧝㧥ಽ
10-11
Media Player
10
Player Settings
Repeat Mode
Set to play a file repeatedly; set to play all files in a folder
at random or repeatedly.
APress c and select Media Player →
Video
BHighlight a file and press c (Play)
CSelect Options →Player settings →
Repeat mode
DSelect the setting and press c (Save)
Add to playlist
Add a file to Playlist in All Video.
Select Selected file to add a
highlighted file to Playlist.
Select Multiple file to add multiple
files to Playlist.
Delete Delete a highlighted file or all files.
Rename Change file name.
Lock/Unlock Set/release file protection.
Details Confirm file size, etc.
Play via
Playback music files. When Playback
display, select Phone to sound from
speaker. Select A/V headset to sound
from speaker or Bluetooth®-compatible
devices (stereo headphone, etc.)
( P.12-7).
Transfer to A/V
headset/Transfer
to Phone
Toggle sound output between
Bluetooth®-compatible devices (stereo
headphone, etc.) and Phone
( P.12-7).
Create Playlist Create new Playlist ( P.10-6).
Rename Change Playlist name.
Item Description
Player settings Select settings related to Media Player
( P.10-11).
Default Setting 䂓Off
Item Description
5%'DQQMࡍࠫ㧞㧜㧜㧢ᐕ㧝㧜㧞㧢ᣣޓᧁᦐᣣޓඦ೨㧝㧝ᤨ㧝㧥ಽ
10-12
Media Player
10
Tone Volume
APress c and select Media player →
Video
BHighlight a file and press c (Play)
CSelect Options →Player settings →
Ton e vol um e
DUse a to adjust the volume and
press c (Save)
Resolution
Set the size of videos appearing on Display during play or
pause.
APress c and select Media Player →
Video
BHighlight a file and press c (Play)
CSelect Options →Resolution and
select a size
5%'DQQMࡍࠫ㧞㧜㧜㧢ᐕ㧝㧜㧞㧢ᣣޓᧁᦐᣣޓඦ೨㧝㧝ᤨ㧝㧥ಽ

Managing Files
(Data Folder)
5%'DQQMࡍࠫ㧞㧜㧜㧢ᐕ㧝㧜㧞㧢ᣣޓᧁᦐᣣޓඦ೨㧝㧝ᤨ㧝㧥ಽ

11-2
Managing Files
(Data Folder)
11
Data Folder
707SC files are organized in folders by file format.
Default Folders
Data Folder contains six Default folders; new files are
saved to the appropriate folder (see right). Create
additional sub-folders in Default folders as required.
1 Copy or move sorted files (by their file types) to other folders as
required.
䌄䌡䌴 䌡䇭䌆䌯䌬 䌤䌥䌲
䌐䌩 䌣 䌴 䌵 䌲 䌥 䌳
㶎
S䌯䌵䌮䌤䌳 䇭䋧䇭䌒䌩 䌮䌧 䌴 䌯䌮䌥 䌳
㶎
S! A䌰䌰䌬 䌩
B䌯䌯䌫
䌏䌴 䌨䌥 䌲 䇭䌤䌯䌣 䌵䌭䌥䌮䌴 䌳
㶎
䌍䌥䌭䌯䌲䌹䇭䌳䌴䌡䌴䌵䌳
䌖䌩 䌤䌥䌯䌳
Default Folders
㶎Sub-folder Pre-installed
(For files which come pre-
installed with handset).
Folder Description File Formats1
Pictures All still images JPEG, BMP, GIF, WBMP,
PNG, Animation GIF
Videos All videos MPEG4 (3GP, MP4)
Sounds &
Ringtones
All sounds recorded
with Voice Recorder,
downloaded music,
and other sound files
SMAF/MIDI/SP-MIDI,
MPEG4 Audio,
AMR
S! Appli S! Appli JAVA
Book
Save downloaded
electronic comic/
photo book files
CCF
Other
documents
Documents, graphics/
animation requiring
File Viewer for
display; Flash® files,
vFiles, etc. are saved
here
SWF, SVG, vCard,
vCalendar, PDF,
XLS, DOC,
PP T, T XT,
Unsupported files
5%'DQQMࡍࠫ㧞㧜㧜㧢ᐕ㧝㧜㧞㧢ᣣޓᧁᦐᣣޓඦ೨㧝㧝ᤨ㧝㧥ಽ
11-3
Managing Files
(Data Folder)
11
Memory status
By selecting Memory status, view the memory usage of each
Data Folder.
Alternatively, use the setup menu to view this ( P15-8).
Download links
, displayed in Data Folder, is a shortcut to a download
site. If you select this shortcut, connect to a download site on
the internet.
Download Book feature
In Data Folder, Use Download Book in Book Folder as
shortcut to a download site. Select to connect to a download
site on the internet.
Saved Files
Opening Files
APress c and select Data Folder
BSelect the folder where a file is saved
CHighlight a file and press c (View/
Play/Select)
Tip
• Savable number of files/folders
Up to 999 files/folders can be saved each Default Folder.
Tip
• To use Slide Show
aPerform Steps 1 to 3 to display images
bSelect Options →Slide show
• To enlarge or reduce image
aPerform Steps 1 to 3 to display an image
bSelect Options →Zoom
cPress w (), o ( ), or a to enlarge, reduce, or
scroll the image
dPress C to return to the previous window
5%'DQQMࡍࠫ㧞㧜㧜㧢ᐕ㧝㧜㧞㧢ᣣޓᧁᦐᣣޓඦ೨㧝㧝ᤨ㧝㧥ಽ
11-4
Managing Files
(Data Folder)
11 Activating Camera or Voice Recorder from Data
Folder
Select Options →Take photo; activate Camera in Camera
mode by highlighting the Pictures folder or an image file
captured by 707SC.
In the same way, select Options →Record video; activate
Camera in Video mode by highlighting the Videos folder or a
video captured by 707SC.
Select Options →Record sound; activate Voice Recorder by
highlighting the Sounds & Ringtones folder or sound file
captured by 707SC.
• After enlarging/reducing image
After b in "To enlarge or reduce image," press o () to
display list window.
Press o ( ) to change window view; select another file
to check.
• File List Indicators
: Nontransferable
: Nontransferable and unusable
: Protected
: Copyrighted file (Transferable, Content Key valid)
: Copyrighted file (Transferable, Content Key expired)
: Copyrighted file (Nontransferable, Content Key valid)
: Copyrighted file (Nontransferable, Content Key expired)
: Wallpaper set ( P.11-10)
: Ringtone set ( P.11-11)
• When another USIM Card is inserted into 707SC
Other than preinstalled nontransferable files/preinstalled
copyrighted files cannot be used.
• To show displayed image in Full screen view
After Step 3, select Options →Full screen view. For
partially displayed image, use a to change the display
area. Press o (Rotate) to rotate the image. Press C to
return to the previous view.
• Viewing File Details
Select Options →Details
Note
• A file that is larger than 3 MB cannot be displayed.
Also, a file that is larger than 1600 x 1200 pixels
cannot be edited or zoomed. A file that is larger
than 1.3 MB cannot be set as Incoming image or
Substitute Image.
5%'DQQMࡍࠫ㧞㧜㧜㧢ᐕ㧝㧜㧞㧢ᣣޓᧁᦐᣣޓඦ೨㧝㧝ᤨ㧝㧥ಽ
11-5
Managing Files
(Data Folder)
11
Using File Viewer
Open PDF, XLS, DOC, PPT, or TXT files saved in Data Folder;
File Viewer activates automatically. Select Normal View or
Full Screen View; navigate files via Options or shortcuts.
APress c and select Data Folder
BSelect file location then file
CSelect Options/navigation shortcuts to
navigate
To scroll
Press a
To change Display appearance
Select Options →Full screen view or Normal
view
To enlarge or reduce the image
aSelect Options →Zoom
bPress In or Out to enlarge/reduce
To fit document size to Display
Select Options →Fit to screen
To move a page
Select Options →Go to and select an item
To move to specified page
aSelect Options →Go to →Page
bEnter page number
To capture current screen
Select Screen capture
Normal View Full Screen View
Navigation
Shortcuts
5%'DQQMࡍࠫ㧞㧜㧜㧢ᐕ㧝㧜㧞㧢ᣣޓᧁᦐᣣޓඦ೨㧝㧝ᤨ㧝㧥ಽ
11-6
Managing Files
(Data Folder)
11
To rotate image 90 degrees clockwise
aSelect Options →Rotate
bSelect Options →Rotate to return to the
previous window
To search words in the page
aSelect Options →Search
bEnter words
cPress 3 to continue searching forward or
press 1 to continue searching backward, for
the same word
To view assigned shortcut keys
Select Options →FileViewer shortcuts
File Viewer Settings
APress c and select Data Folder
BSelect save location and select the file
CSelect Options →Settings
DPerform operations to set
To assign scroll range per press of a
aSelect Panning
bSelect the setting and press c (Save)
To fit text width to Display
aSelect Reflow
bSelect On and press c (Save)
Tip
• After capturing
Captured files are saved in Other documents in 707SC
Data Folder (Phone) as JPEG format.
Default Setting 䂓 Panning: 10 pixel 䂓 Reflow: Off
䂓 Map on: On 䂓 Controller: On
䂓 Name: Capture
5%'DQQMࡍࠫ㧞㧜㧜㧢ᐕ㧝㧜㧞㧢ᣣޓᧁᦐᣣޓඦ೨㧝㧝ᤨ㧝㧥ಽ
11-7
Managing Files
(Data Folder)
11
To set Map (shows display position) on/off
aSelect Map on
bSelect the setting and press c (Save)
To set guide for shortcuts in Full screen view
aSelect Options →Settings →Controller
bSelect the setting and press c (Save)
To change default file mane
aSelect Name
bEnter a name
Navigation Shortcuts
Confirmation Window & List Options
For items other than window operation options, see "Data
Folder Options" ( P.11-13).
Tip
• When Reflow is set to On
Fit text width (such as doc. or txt.) to 707SC window width.
No need to scroll right/left to show the contents.
• When Map on is set to On
In bottom right of the window, map showing the current
position/area in the whole page appears. The current
position/area is indicated in red frame.
Key Description
Side Key nZoom in
Side Key bZoom out
2Move to the first page
4Move to the previous page
5Rotate 90 degrees clockwise or cancel
6Move to the next page
8Move to the final page
*Select Normal View or Full Screen View
Note
• If a document includes many pages or complicated
designs, all pages of the document may not be able
to be displayed.
• If a file includes any language other than Japanese
or English, that file may not appear properly.
5%'DQQMࡍࠫ㧞㧜㧜㧢ᐕ㧝㧜㧞㧢ᣣޓᧁᦐᣣޓඦ೨㧝㧝ᤨ㧝㧥ಽ
11-8
Managing Files
(Data Folder)
11
Viewing Graphics/Animation with
the SVG-T/Flash
®
Viewer
View SVG, SVGZ, and SWF formatted files in Data Folder.
When one of these files is selected from Data Folder list,
the SVG-T/Flash® Viewer is automatically launched.
View the graphics/animation on Normal View or Full
Screen View. In either mode, Options and shortcut (Key
operations) are available to control Display.
APress c and select Data Folder
BSelect file location then file
CSelect Options/navigation shortcuts to
navigate
To change Display appearance
Select Options →Full screen view or Normal
view
To enlarge or reduce the image
aSelect Options →Zoom
bPress w ( ) to enlarge an image or o ()
to reduce
cUse a to scroll the window
dPress c to return to the previous window
To pause or restart an flash® image
Select Options →Pause or Resume
To select image quality
Select Options →Quality and select an item
To rotate the screen 90 degrees clockwise or
counterclockwise
Select Options →Rotate and select an item
Normal View Full Screen View
5%'DQQMࡍࠫ㧞㧜㧜㧢ᐕ㧝㧜㧞㧢ᣣޓᧁᦐᣣޓඦ೨㧝㧝ᤨ㧝㧥ಽ
11-9
Managing Files
(Data Folder)
11
Confirmation Window & List Options
For items other than window operation options, see "Data
Folder Options" ( P.11-13).
Sorting Files
Sort files in various ways.
ASelect Options →Sort by
BSelect an item
To sort files in descending order of dates
Select Date
To sort files by file types
Select Type
To sort files by file names
Select Name
To sort files in ascending order of size
Select Size
To sort files by status of Content Key
Select Activation Status
Tip
• To set an image for Wallpaper
Press w (Set as) on Normal View, or in Options of Full
Screen View, select Set as and select Wallpaper.
Tip
• When folders are contained in a list
Folders are placed at the top in any order.
• Sorting order when Type is selected
Files are sorted in the alphabetical order of the file extension
(For example doc, jpg, swf, and such).
• Sorting order when Name is selected
Files are sorted in the order of number → alphanumerics →
Japanese character of the file names.
• Sorting order when Activation status is selected
Files are displayed in the following order:
Unrestricted file → Nontransferable file → Copyrighted file
(Content Key valid) → Copyrighted file (Content Key expired)
→ Nontransferable and unusable file
5%'DQQMࡍࠫ㧞㧜㧜㧢ᐕ㧝㧜㧞㧢ᣣޓᧁᦐᣣޓඦ೨㧝㧝ᤨ㧝㧥ಽ
11-10
Managing Files
(Data Folder)
11
Using Files
Wallpaper
Set an image file as Wallpaper of Display, an image in
Phonebook, or a Substitute Image for Video Calls to
display with incoming calls.
AHighlight a file and press w (Set as)
To set while viewing an image
Highlight a file, press c (View) and press
w (Set as)
BSet the Use of the File
To set as Wallpaper on Display
Select Wallpaper, confirm the preview and press
c (Set)
To set as Phonebook image for use with an
incoming call
aSelect Caller ID
bSearch and select an entry in which to place the
image and press c (Set)
To set as Substitute Image for use with an
incoming Video Call
aSelect Still picture
bPress c (Save)
Tip
• To edit a still image ( P.7-15)
• To create a mobile postcard ( P.7-7)
• To print a still image ( P.12-12)
5%'DQQMࡍࠫ㧞㧜㧜㧢ᐕ㧝㧜㧞㧢ᣣޓᧁᦐᣣޓඦ೨㧝㧝ᤨ㧝㧥ಽ
11-11
Managing Files
(Data Folder)
11
Setting Sound File as Ringtone
Change ringtone settings in Normal profile ( P.3-3).
APress c, select Data Folder and
select location to save the file
BHighlight the file and press w (Set as)
CPerform operations to set
To set ringtone for Voice Calls
Select Voice ringtone
To set ringtone for Video Calls
Select Video ringtone
To set ringtone for Phonebook entries
aSelect Caller ringtone
bSearch Phonebook and select an entry
To set ringtone for S! Mail/SMS
Select Message alert tone
Setting Video File as Ringtone
Change ringtone settings in Normal profile ( P.3-3).
APress c, select Data Folder and
select location to save the file
BHighlight the file and press w (Set as)
CPerform operations to set
To set video file as ringtone for Voice Call
Select Voice ringtone
To set video file as ringtone for Video Call
Select Video ringtone
To set ringtone for Phonebook entries
Select Caller ringtone
Tip
• Settings Restriction
MPEG4 files with audio codec (AAC, AAC+, or Enhanced
AAC+), can be set only when they are copyrighted.
5%'DQQMࡍࠫ㧞㧜㧜㧢ᐕ㧝㧜㧞㧢ᣣޓᧁᦐᣣޓඦ೨㧝㧝ᤨ㧝㧥ಽ
11-12
Managing Files
(Data Folder)
11 Setting Flash® file as Wallpaper
APress c and select Data Folder →
Other documents
To set while viewing a Flash® image
Highlight the file, press c (View) and press
w (Set as)
BHighlight the file, press w (Set as)
CSelect Wallpaper
DCheck preview window and press
c (Set)
Saving a vFile
vFile is the standard format to exchange Phonebook data,
etc. via the Internet. 707SC uses vCard (extension: vcf)
format for Phonebook data; also uses vCalendar
(extension: vcs) format for Schedule/To Do data.
Save a vFile stored in Data Folder to Phonebook, calendar,
or as a scheduled event.
APress c, select Data Folder and
select save location for the vFile
BSelect a file and press c (Register)
Tip
• Settings Restriction
MPEG4 files (mp4, 3gp) with audio codec (AAC, AAC+, or
Enhanced AAC+), can be set only when they are copyrighted.
5%'DQQMࡍࠫ㧞㧜㧜㧢ᐕ㧝㧜㧞㧢ᣣޓᧁᦐᣣޓඦ೨㧝㧝ᤨ㧝㧥ಽ
11-13
Managing Files
(Data Folder)
11
Data Folder Options
Perform the following operations from Options in list or
viewing windows. Options that appear vary by the type of
file or folder.
For Options used for the File Viewer or SVG-T/Flash®
Viewer, see "Using File Viewer" ( P.11-5) or "Viewing a
Graphics/Animation with the SVG-T/Flash® Viewer"
( P.11-8).
Item Description
Edit Edit a still image or Videos ( P.7-15).
Dynamic Effect/
Dynamic effect list
Create Flash® images using Still images
( P.7-19).
Full screen view Display Still image in full screen ( P.11-5).
Playback
Playback video files.
When playback display, select Phone to
sound from speaker.
Select A/V headset to sound from
Bluetooth®-compatible devices (stereo
headphone, etc.) ( P.12-7).
Transfer to A/V
headset
Switch sound output to Bluetooth®-
compatible devices (stereo headphone, etc.)
( P.12-7).
Register to
phonebook
Export a vCard file to Phonebook
( P.11-12).
Register to
Calendar
Export a vCalendar file to Calendar
( P.11-12).
Send Send file via S! Mail ( P.17-6) or
Bluetooth® ( P.12-6).
mPostcard Create a mobile postcard ( P.7-7).
Zoom Enlarge or reduce still image being
confirmed ( P.11-3).
Browser access Access linked site included in electronic
comic/photo book files.
Sort by Sort files ( P.11-9).
Move Move files from/to 707SC another folder.
Copy Copy files and paste from/to 707SC
another folder.
Add to playlist
Add files to Playlist.
Highlight Selected and select to add a file.
Highlight Multiple and select to add
multiple files at once.
Item Description
5%'DQQMࡍࠫ㧞㧜㧜㧢ᐕ㧝㧜㧞㧢ᣣޓᧁᦐᣣޓඦ೨㧝㧝ᤨ㧝㧥ಽ
11-14
Managing Files
(Data Folder)
11
Delete Delete a file/files ( P.11-17).
Delete folder Delete a folder ( P.11-17).
Take phot o Activate Camera in Camera mode
( P.11-4).
Record video Activate Camera in Video mode ( P.11-4).
Record sound Activate Voice Recorder ( P.11-4).
Rename Change file name ( P.11-15).
Rename folder Change folder name ( P.11-15).
Show/Hide file
info
In List window for Picture Folder with
thumbnail view, set to display folder/file
name when highlighted.
View By
Select List window type for Picture Folder.
Select List to show folder/file in list view.
Select Thumbnail view to show folder/file
in thumbnail view.
Create folder Create a new folder ( P.11-15).
Print via Print Still images using the printer via USB/
Bluetooth® connection.
Lock/Unlock Set/release file protection.
Download
content key Purchase or acquire Content Key.
Item Description
Details Confirm file/folder properties.
Content key info
Show the list of Content Keys for the files in
Data Folder; manage them by selecting
Delete to delete ( P.11-19) or Details to
check the details.
Item Description
5%'DQQMࡍࠫ㧞㧜㧜㧢ᐕ㧝㧜㧞㧢ᣣޓᧁᦐᣣޓඦ೨㧝㧝ᤨ㧝㧥ಽ
11-15
Managing Files
(Data Folder)
11
Managing Files/Folders
Create Folder
Create sub-folders in Default folders.
APress c and select Data Folder
BSelect Default folder to create a
sub-folder
CSelect Options →Create folder
DEnter a name
Changing a File Name/Folder
Name
Change the name of a file or a created sub-folder.
APress c and select Data Folder
BSelect Default folder and highlight a
sub-folder or a file to change the
name, select Options →Rename
folder or Rename
CEnter a name
Moving a File/Folder
Move a file/folder to another folder or a location outside
folders.
APress c and select Data Folder
BSelect Default folder and highlight a
sub-folder or a file to move
CSelect Options →Move
Tip
• When a file is locked
You cannot change the file name.
5%'DQQMࡍࠫ㧞㧜㧜㧢ᐕ㧝㧜㧞㧢ᣣޓᧁᦐᣣޓඦ೨㧝㧝ᤨ㧝㧥ಽ
11-16
Managing Files
(Data Folder)
11
DMove the file or folder
To move one file or all files in the same folder
or all created sub-folders
Select Selected or All
To select and move multiple files or created
sub-folders
aSelect Multiple
bCheck files or created sub-folders to move and
press w (Move)
ESelect the destination folder →Move
here
Copying Files/Folders
Make a copy of a file or folder in another folder or a
location outside folders.
APress c and select Data Folder
BHighlight a folder or a file to copy,
select Options →Copy
Tip
• To check/uncheck all files or folders at once
Press o (Mark all) or o (Unmark all)
• When a file is locked
You cannot move the file.
• When there is a file or folder with the same name at
the destination
You have to change the name of the file or folder to move. In
message text, enter a new name.
Note
• The files downloaded with 707SC may not appear/
playback properly when moving to other mobile
phones or inserting other's USIM Card into 707SC.
5%'DQQMࡍࠫ㧞㧜㧜㧢ᐕ㧝㧜㧞㧢ᣣޓᧁᦐᣣޓඦ೨㧝㧝ᤨ㧝㧥ಽ
11-17
Managing Files
(Data Folder)
11
CCopy the file or folder
To copy one file or all files in the same folder
or all folders
Select Selected or All
To select and copy multiple files or folders
aSelect Multiple
bCheck files or folders to copy and press
w (Copy)
DSelect the destination folder and
select Paste here
Deleting a File/Folder
Delete
APress c and select Data Folder
BHighlight a file, select Options →
Delete
Tip
• To check/uncheck all files or folders at once
( P.11-16)
• When a copy of a file or folder is pasted to the same
location as the original
•The pasted file or folder is saved under another name, i.e.,
_001 is automatically added to the name.
• When there is a file or folder with the same name in
the destination
You have to change the name of the file or folder to paste. In
message text, enter a new name.
Note
• The file that forwarding is impossible and the
copyrighted file cannot be copied.
5%'DQQMࡍࠫ㧞㧜㧜㧢ᐕ㧝㧜㧞㧢ᣣޓᧁᦐᣣޓඦ೨㧝㧝ᤨ㧝㧥ಽ
11-18
Managing Files
(Data Folder)
11
CDelete the file
To delete one file
Select Selected →Yes
To delete all files from the same folder
aSelect All
bEnter Phone Password press c (Confirm) and
select Yes
To select and delete multiple files
aSelect Multiple
bCheck files, press w (Delete)
cEnter Phone Password and press c (Confirm) (If
all files are checked)
dSelect Yes
Delete Folder
APress c and select Data Folder
BSelect Default folder and highlight a
created sub-folder to delete, select
Options →Delete folder
CEnter Phone Password, press
c (Confirm) and select Yes
If no file saved in a sub-folder
Phone Password is not required.
Tip
• To check/uncheck files or folders at once ( P.11-16)
• If a file is set as Wallpaper or ringtone, or locked
A confirmation message appears. Select Yes to execute
deletion. To delete multiple or all files, select No to delete
only those files without setting or protection.
• When file has Content Key
A confirmation message appears. Select Yes to delete both
the file and Content Key.
5%'DQQMࡍࠫ㧞㧜㧜㧢ᐕ㧝㧜㧞㧢ᣣޓᧁᦐᣣޓඦ೨㧝㧝ᤨ㧝㧥ಽ
11-19
Managing Files
(Data Folder)
11
Deleting a Content Key
APress c and select Data Folder
BSelect Options →Contents key info
CPerform operations to delete
To delete a Content Key
Select Selected
To delete all Content Keys
Select Delete all
Tip
• If a folder contains files set as Wallpaper, ringtones,
or locked/copyrighted files
A confirmation message appears. Select Yes to execute
folder deletion. Select No to delete only files without
designated uses or protection, leaving the folder undeleted.
• When file in a folder has Content Key
A confirmation message appears. Select Yes to delete both
the file and Content Key.
5%'DQQMࡍࠫ㧞㧜㧜㧢ᐕ㧝㧜㧞㧢ᣣޓᧁᦐᣣޓඦ೨㧝㧝ᤨ㧝㧥ಽ

11-20
5%'DQQMࡍࠫ㧞㧜㧜㧢ᐕ㧝㧜㧞㧢ᣣޓᧁᦐᣣޓඦ೨㧝㧝ᤨ㧝㧥ಽ

External Connections
5%'DQQMࡍࠫ㧞㧜㧜㧢ᐕ㧝㧜㧞㧢ᣣޓᧁᦐᣣޓඦ೨㧝㧝ᤨ㧝㧥ಽ
12-2
External Connections
12
External Connections
Send and receive data to/from a Bluetooth®-compatible
device, without any physical connection. Alternatively,
connect 707SC with various devices, like a Personal
Computer or a printer to exchange data or print out
images via a USB cable.
Bluetooth®
Exchange data among Bluetooth®-compatible devices
including mobile phones such as 707SC using signals.
When a Bluetooth® handsfree device is connected,
converse without operating 707SC directly with your
hands. Alternatively, use a dialup-connection devices, to
access the Internet or for other purposes.
Before Using Bluetooth®
Communications
Bluetooth® communications can be performed only when
others using Bluetooth®-compatible devices with the
same profiles.
The Bluetooth® specifications of 707SC are as listed
below.
Item Specification
Communication
Standard Bluetooth® Standard Version 1.2
Applicable
profiles
Headset
Handsfree
Serial Port
Dialup Networking
File Transfer
Object Push
Advanced Audio Distribute
Audio/Video Remote Control
Basic Imaging
Basic Printing1
Output Bluetooth® Power Class2
5%'DQQMࡍࠫ㧞㧜㧜㧢ᐕ㧝㧜㧞㧢ᣣޓᧁᦐᣣޓඦ೨㧝㧝ᤨ㧝㧥ಽ
12-3
External Connections
12
1 For Printing function only.
2 Varies by radio interference and other conditions.
Bluetooth® Precautions
• 707SC may not work with all Bluetooth®-compatible
devices.
• Exchanging data may be unavailable with some devices
even if they are Bluetooth®-compatible devices and they
may have different operating procedures, displays or
actions of 707SC, depending on their characteristics
and/or specifications.
• The radio band (2.4GHz) used by Bluetooth®-
compatible devices is also used by various other devices.
Therefore, the transmission rate or distance may be
reduced or communications may be blocked due to the
influences of other devices.
• Talking using wireless or handsfree mode may induce
noise depending on the other connected devices and/or
the communications environment.
• 707SC Bluetooth® function does not allow multiple
devices when Bluetooth®-compatible headset is
connected.
• USB and Bluetooth® functions cannot be used at the
same time.
• Set the Bluetooth® function off before connecting a USB
cable to handset.
Line-of-signal
distance2Approximately 10 meters or less
Frequency band
used 2.4 GHz
Item Specification
Tip
• To check Bluetooth® functions available
aPress c and select Settings →Connectivity →
Bluetooth →Bluetooth service
bSelect an item and view the contents
• To confirm the device address of 707SC
Press c and select Settings →Connectivity →
Bluetooth →My Information
5%'DQQMࡍࠫ㧞㧜㧜㧢ᐕ㧝㧜㧞㧢ᣣޓᧁᦐᣣޓඦ೨㧝㧝ᤨ㧝㧥ಽ

12-4
External Connections
12
Sending & Receiving Data
Send and receive Phonebook entries, My Phonebook
details, Schedule information, Task information, still
images, video, sound files, vFiles, and others.
Activation
Setting the Bluetooth® function On activates connection
with a Bluetooth®-compatible device and causes to
appear at the top of Display.
APress c and select Settings →
Connectivity →Bluetooth →
Activation
BSelect the setting
Search New Device
Register a Bluetooth®-compatible device to the My
devices list. Register a maximum of 10 devices. When
registering a device, the same passkey must be entered
into 707SC and the other device.
Activate the Bluetooth® function of the other device
beforehand.
APress c and select Settings →
Connectivity →Bluetooth →My
devices
BSelect Search new device
CWhen devices replying to the search
have appeared, select the device to
register
DEnter passkey (4 to 16 digits) and
press c
Default Setting 䂓Off
5%'DQQMࡍࠫ㧞㧜㧜㧢ᐕ㧝㧜㧞㧢ᣣޓᧁᦐᣣޓඦ೨㧝㧝ᤨ㧝㧥ಽ
12-5
External Connections
12
EWithin 30 seconds, enter the same
passkey on the other device
Tip
• Passkey
The Passkey is a password used to connect Bluetooth®-
compatible devices. When connecting to a handsfree device,
enter the Passkey specified for it. You are not required to
enter the Passkey again for a registered device.
• If authentication with the other device has failed
A confirmation message appears asking whether to try
authentication again. Select Yes to retry.
• If ten peripheral devices have already been
registered
A message indicating the device memory is full appears.
• To check Bluetooth® functions available for each
device
aPress c and select Settings →Connectivity →
Bluetooth →My devices
bHighlight a device, select Options →Service list
cHighlight an item, select Options →Help and view the
contents
• To change the name of a registered device
aPress c and select Settings →Connectivity →
Bluetooth →My devices
bHighlight a device, select Options →Rename
cEnter a new name
• To delete a device from My devices
aPress c and select Settings →Connectivity →
Bluetooth →My devices
bHighlight a device, select Options →Delete →
Selected or All
cEnter Phone Password, press c (Confirm) (In the case
of All only) and select Yes
• To search for or register a device from other
Bluetooth®-compatible devices ( P.12-10)
5%'DQQMࡍࠫ㧞㧜㧜㧢ᐕ㧝㧜㧞㧢ᣣޓᧁᦐᣣޓඦ೨㧝㧝ᤨ㧝㧥ಽ
12-6
External Connections
12
Icons displayed on the My devices list
The device name is preceded by the following icons.
: Personal Computer : Mobile phone
: Handsfree device/Headset
: PDA : Printer : Other
Connection request from another Bluetooth®-
compatible device
If a message indicating that there is a connection request
from another Bluetooth®-compatible device appears, select
Yes and enter the same Passkey as that of the other device
within 30 seconds.
If there is a connection request from an already registered
device, such as a handsfree device, 707SC will be
automatically connected.
Sending Files
Send data from Options of function windows. After the
receiving side approves a communication, sending is
started.
APerform operations to set
To send files from Data Folder
aHighlight the data to send
bIn list window, select Options →Send →Via
bluetooth
To send files from other functions (except
Data Folder)
aIn list window for each functions, highlight the
data to send
bSelect Options →Send →Via bluetooth
BSelect the device of the receiver
When the receiver's device has not been
registered
Select Service new device, search for that device
and register it ( P.12-4)
Tip
• To send data after viewing the contents
Some functions allow sending option from Details/Playback
window.
5%'DQQMࡍࠫ㧞㧜㧜㧢ᐕ㧝㧜㧞㧢ᣣޓᧁᦐᣣޓඦ೨㧝㧝ᤨ㧝㧥ಽ
12-7
External Connections
12
Receiving a File
When connection from the sender is approved, file
reception starts and the received file is saved in Data
Folder.
AWhen a confirmation window
appears, select Yes
A/V Headset
Connect Bluetooth®-compatible headphone/headset
devices to Media Player to enjoy playback sounds.
APlayback Melody/video files using
Media Player ( P.10-3, 10-9)
BSelect Options →Transfer to A/V
headset
CSelect headset device
To register device
Select Search new device and search the device to
register ( P.12-4)
Print Still image in Data Folder
Connect Bluetooth®-compatible printer to 707SC; enable
to print Still images/vFiles in Data Folder directly through
handling 707SC. Set paper size/number for printing with
707SC.
See User Guide attached to printer for printer operations/
paper settings.
Tip
• Operations while Melody is stopped
aIn Melody Playback window, select Options →Play via
→ A/V headset
bSelect the destination device or Search new device and
search the device to register ( P.12-4)
5%'DQQMࡍࠫ㧞㧜㧜㧢ᐕ㧝㧜㧞㧢ᣣޓᧁᦐᣣޓඦ೨㧝㧝ᤨ㧝㧥ಽ
12-8
External Connections
12
AIn Data Folder list window, highlight
still image/vFile
BSelect Options →Print via →
Bluetooth
CSelect receiver's device
To register receiver's device
Select Search new device to search and register
( P.12-4)
DPerform operations to set
To set a paper size
Select Paper size and the setting
To set the number of copies
Select Number of copies, enter the number of
copies (1 to 99) and press c
To set the number of pages to print on a sheet
Select Paper per sheet and the setting (1 to 16)
To set whether or not to print the date
Select Date print and the setting
To set whether or not to print a frame
Select Frame and the setting
To set a print quality
Select Print quality and the setting
EPress o (Preview)
FCheck the preview window and press
c (Print)
Accessing Connected Device Files
Access the shared folders and files of the other party's
device. Alternatively, receive or delete data residing on the
other device.
APress c and select Settings →
Connectivity →Bluetooth →My
devices
BSelect a device
5%'DQQMࡍࠫ㧞㧜㧜㧢ᐕ㧝㧜㧞㧢ᣣޓᧁᦐᣣޓඦ೨㧝㧝ᤨ㧝㧥ಽ
12-9
External Connections
12
CApprove access on the side sharing
the data
Locations of received files
Received files are automatically saved to Data Folder. The type
of the folder that a file is saved to vary by file format; for
example, JPEG and BMP files are saved to the Pictures folder
and vFiles to the Other documents folder.
Connecting Handsfree
Register the handsfree device following the steps for
"Search for and Register a Bluetooth®-Compatible
Device" ( P.12-4) beforehand.
Waiting Connection Request
In the steps given below, 707SC is placed in mode waiting
for a handsfree-device connection request.
APress c and select Settings →
Connectivity →Bluetooth →My
devices
BSelect a handsfree-compatible device
When Passkey entry window appears
Enter the same Passkey as is set for the handsfree
device
Answering Mode
If the setting is changed to Automatic a call to 707SC will
be answered without the operation of any keys.
Tip
• To receive an accessed file
After Step 3, select a file to receive.
Default Setting 䂓Normal
5%'DQQMࡍࠫ㧞㧜㧜㧢ᐕ㧝㧜㧞㧢ᣣޓᧁᦐᣣޓඦ೨㧝㧝ᤨ㧝㧥ಽ
12-10
External Connections
12
APress c and select Settings →
Connectivity →Bluetooth →
Answering mode
BSelect the setting
Handsfree Mode
Select answer settings for calls when handsfree devices
connected.
APress c and select Settings →
Connectivity →Bluetooth →
Handsfree setting
BSelect the setting
Changing Bluetooth® Settings
My Phone's Visibility
To activate search and saving from other Bluetooth®-
compatible devices, you have to make your 707SC visible.
Tip
• To set the time (Seconds) before automatic
reception
After Step 1, highlight Automatic, select Options →Edit
and select the number of seconds to ring before answering.
Default Setting 䂓 Handsfree Mode
Tip
• While Private Mode is set
Answer outgoing/incoming calls with 707SC for calls made
with 707SC; answer outgoing/incoming calls with handsfree
devices for calls made with handsfree devices.
• While Handsfree Mode is set
Answer all outgoing/incoming calls with handsfree devices.
Default Setting 䂓On
5%'DQQMࡍࠫ㧞㧜㧜㧢ᐕ㧝㧜㧞㧢ᣣޓᧁᦐᣣޓඦ೨㧝㧝ᤨ㧝㧥ಽ
12-11
External Connections
12
APress c and select Settings →
Connectivity →Bluetooth →My
phone's visibility
BSelect the setting
Bluetooth® Name
The displayed name shown on another device for your
707SC can be changed.
APress c and select Settings →
Connectivity →Bluetooth →My
Information
BSelect Bluetooth Name
CModify the name and press c
Secure Mode for Data Transfer
If set On, a confirmation message appears before you
sending data.
APress c and select Settings →
Connectivity →Bluetooth →Secure
mode
BSelect the setting
USB Connection
Connect 707SC to a PC via a USB cable to exchange data
between the devices. Alternatively, connect a printer to
print still images.
Default Setting 䂓707SC
Default Setting 䂓On
5%'DQQMࡍࠫ㧞㧜㧜㧢ᐕ㧝㧜㧞㧢ᣣޓᧁᦐᣣޓඦ೨㧝㧝ᤨ㧝㧥ಽ
12-12
External Connections
12
Connecting to a PC
Perform the following:
• Send files from Data Folder of 707SC
• Receive files from the PC and saving them to Data Folder
• Perform packet data communications
Before Using the USB Connection
Before connecting 707SC to a PC with a USB cable, you
have to install the USB driver and the Samsung PC Studio.
For more information about the installation procedure,
operating conditions of a PC available, etc., see the User's
guide in the attached CD-ROM.
Connecting to a Printer
Connect 707SC to a PictBridge-compatible printer with a
USB cable and directly print still images from Data Folder.
Alternatively, set a paper size, number of copies, and other
items from 707SC.
For more information about printer operations and paper
setting, see the printer's User Manual.
Printing a Still Image from Data Folder
AHighlight a still image file in Data
Folder
BSelect Options →Print via → USB
CConnect 707SC to a printer with a USB
cable
DSelect the printer settings
To set a paper size
Select Paper size and select the setting
To set the number of copies
Select Number of copies, enter the number of
copies (1 to 99) and press c
5%'DQQMࡍࠫ㧞㧜㧜㧢ᐕ㧝㧜㧞㧢ᣣޓᧁᦐᣣޓඦ೨㧝㧝ᤨ㧝㧥ಽ
12-13
External Connections
12
To set the number of pages to print on a sheet
Select Paper per sheet and select the setting (1 to
16)
To set whether or not to print the date
Select Date print and select the setting
To set whether or not to print a frame
Select Border and select the setting
To set a print quality
Select Print quality and select the setting
EPress c
FCheck the preview window and press
c (Print)
Note
• Never disconnect the USB cable during printing.
5%'DQQMࡍࠫ㧞㧜㧜㧢ᐕ㧝㧜㧞㧢ᣣޓᧁᦐᣣޓඦ೨㧝㧝ᤨ㧝㧥ಽ

12-14
5%'DQQMࡍࠫ㧞㧜㧜㧢ᐕ㧝㧜㧞㧢ᣣޓᧁᦐᣣޓඦ೨㧝㧝ᤨ㧝㧥ಽ

Security
5%'DQQMࡍࠫ㧞㧜㧜㧢ᐕ㧝㧜㧞㧢ᣣޓᧁᦐᣣޓඦ೨㧝㧝ᤨ㧝㧥ಽ
13-2
Security
13
Change Phone Password
APress c and select Settings →
Security →Change phone password
BEnter current Phone Password and
press c (Confirm)
CEnter new Phone Password (4 digits)
and press c (Confirm)
DEnter new Phone Password again and
press c (Confirm)
PIN
PINs are security codes for USIM Card. For more
information, see "USIM Card" ( P.1-2).
Changing PIN/PIN2
APress c and select Settings →
Security →Change PIN code or
Change PIN2 code
BEnter current PIN or PIN2 and press
c (Confirm)
CEnter new PIN or PIN2 (4 to 8 digits)
and press c (Confirm)
DEnter new PIN or PIN2 again and press
c (Confirm)
Default Setting 䂓9999
Note
•When PIN lock ( P.13-3) is set to Disable, PIN
cannot be changed.
5%'DQQMࡍࠫ㧞㧜㧜㧢ᐕ㧝㧜㧞㧢ᣣޓᧁᦐᣣޓඦ೨㧝㧝ᤨ㧝㧥ಽ
13-3
Security
13
PIN Lock
To require PIN authentication each time the power is
turned on, set this function to Enable.
APress c and select Settings →
Security →PIN lock
BSelect the setting and press c (Save)
CEnter PIN and press c (Confirm)
Resetting PIN Lock
If PIN or PIN2 is been incorrectly entered three consecutive
times, PIN or PIN2 lock is set, restricting operations of
707SC. Unlock PIN or PIN2 lock in the steps given below.
AWith PIN lock unlocking code (PUK
Code) entry window displayed, enter
PUK Code and press c (Confirm)
BEnter new PIN or PIN2 (4 to 8 digits)
and press c
CEnter new PIN or PIN2 again and press
c
Default Setting 䂓Enable
5%'DQQMࡍࠫ㧞㧜㧜㧢ᐕ㧝㧜㧞㧢ᣣޓᧁᦐᣣޓඦ೨㧝㧝ᤨ㧝㧥ಽ
13-4
Security
13 USIM Lock
Set handset so that it is deactivated unless a USIM
password is entered when another USIM Card is installed
in handset.
APress c and select Settings →
Security →USIM lock
BSelect the setting and press c (Save)
CEnter a USIM password (4 to 8 digits)
and press c (Confirm)
To set Disable
The settings are saved and the operation completes.
To set Enable
Proceed to Step 4
DEnter the USIM password again and
press c (Confirm)
Note
• For more information about PIN and PIN2 lock
unlocking codes (PUK and PUK2 Codes), contact
Customer Service ( P.25-25).
• If incorrect PIN lock unlocking code is entered ten
consecutive times, USIM Card is locked (The count is
not cleared when handset is turned off).
• There is no way to unlock the locked USIM Card.
Contact Customer Service ( P.25-25).
Default Setting 䂓Disable
5%'DQQMࡍࠫ㧞㧜㧜㧢ᐕ㧝㧜㧞㧢ᣣޓᧁᦐᣣޓඦ೨㧝㧝ᤨ㧝㧥ಽ
13-5
Security
13
Handset Security
Phone Lock
Set Phone lock to Enable; then Phone Password entry is
required each time the power is turned on.
APress c and select Settings →
Security →Phone lock
BSelect the setting and press c (Save)
CEnter Phone Password and press
c (Confirm)
Password Lock
Set Password lock to Enable; then hide Softkeys in
Standby. Press any key; Phone Password entry window
appears. Enter Phone Password to cancel Password lock;
707SC operations are enabled.
APress c and select Settings →
Security →Password lock
BSelect the setting and press c (Save)
CEnter Phone Password and press
c (Confirm)
Tip
• USIM password
This is a password dedicated to USIM Card authentication. If
the USIM password matches, the other USIM Card can also
be used for 707SC.
Change USIM password each time the USIM check setting is
set to Enable.
• When you forget your USIM password
Insert a USIM Card (with USIM lock set to Enable) to 707SC
and execute All reset ( P.13-11).
Default Setting 䂓Disable
Default Setting 䂓Disable
5%'DQQMࡍࠫ㧞㧜㧜㧢ᐕ㧝㧜㧞㧢ᣣޓᧁᦐᣣޓඦ೨㧝㧝ᤨ㧝㧥ಽ
13-6
Security
13
Privacy
L
ock
Set Privacy lock to require Phone Password entry each
time calling up checked function/functions (selected
among All,Messages,Data Folder,Phonebook,Call
log,Calendar).
APress c and select Settings →
Security →Privacy lock
BCheck the functions to lock and press
w (Save)
CEnter Phone Password and press
c (Confirm)
Activate Secret Mode
Set Secret Mode to Hide; then hide the saved entry
information (with Phonebook Secret Mode On) in
Phonebook list.
APress c and select Settings →
Security →Activate Secret mode
BEnter Phone Password and press
c (Confirm)
CSelect the setting and press c (Save)
Tip
• When Password lock is canceled
Password lock is automatically set to Disable.
Default Setting 䂓Unlock all
Default Setting 䂓Hide
5%'DQQMࡍࠫ㧞㧜㧜㧢ᐕ㧝㧜㧞㧢ᣣޓᧁᦐᣣޓඦ೨㧝㧝ᤨ㧝㧥ಽ
13-7
Security
13
Mobile Tracker
Set Mobile tracker to On; then 707SC notifies when
another USIM Card (not the one in 707SC during the
setting operations) is inserted. Set SMS address for
notification. Up to 2 addresses can be specified.
APress c and select Settings →
Security →Mobile tracker
BEnter Phone Password and press
c (Confirm)
CSelect Activation field
DSelect On and press c (Select)
ESelect Recipients field and enter an
address
To select an address from Phonebook
aHighlight To field and select Options →
Phonebook
bSearch Phonebook and select an entry ( P.5-9)
cHighlight phone number and press c (Select)
To enter a phone number directly
aHighlight To field and select Options →Direct
input
bEnter phone number
FPress w (Done)
GSelect Sender field and enter a
sender's name
HPress w (Save)
IPress w (Accept) after checking the
items
Tip
• Under following conditions, 707SC turns the setting
to Hide;Activate Secret mode is set to Show then
707SC is powered on again.
Default Setting 䂓Off
5%'DQQMࡍࠫ㧞㧜㧜㧢ᐕ㧝㧜㧞㧢ᣣޓᧁᦐᣣޓඦ೨㧝㧝ᤨ㧝㧥ಽ
13-8
Security
13
With another USIM Card inserted
When powered on replacing with another USIM Card; 707SC
send a notification SMS to your specified address during the
handset activation. The SMS sending never come to the
person (who replace the USIM Card)'s notice. 707SC also
send a notification SMS when Phone Password is incorrectly
entered three consecutive times during Mobile tracker
setting is Off.
Rejecting Incoming Calls
Reject calls by callers who do not send caller IDs/by callers
who are unable to send caller IDs. In addition, nuisance
calls can also be rejected by registering the caller phone
numbers to a Black list.
Reject Withheld
APress c and select Settings →Call
settings →All calls →Reject incoming
calls
BSelect Reject withheld field
CSelect the setting and press c
DPress w (Save)
Reject Unavailable
Reject/accept calls by callers who are unable to send caller
IDs, like International calls from overseas/transferred calls
from landlines.
Tip
• To delete an address
After Step 5, highlight the address, select Options →Delete Default Setting 䂓Off
Default Setting 䂓Off
5%'DQQMࡍࠫ㧞㧜㧜㧢ᐕ㧝㧜㧞㧢ᣣޓᧁᦐᣣޓඦ೨㧝㧝ᤨ㧝㧥ಽ
13-9
Security
13
APress c and select Settings →Call
settings →All calls →Reject incoming
calls
BSelect Reject unavailable field
CSelect the setting and press c
DPress w (Save)
Black List
APress c and select Settings →Call
settings →All calls →Reject incoming
calls
BSelect Black list field
CSet the phone number
To enter a phone number directly
aSelect Options →Add →Direct input
bEnter phone number
To select a phone number from Phonebook
aSelect Options →Add →Phonebook
bSearch Phonebook and select an entry ( P.5-9)
cSelect phone number
To enter a phone number using Call Log
aSelect Options →Add →Call log
bSelect the log record
DPress C and press w (Save)
Tip
• To delete phone numbers from Black list
aPerform Steps 1 and 2
bHighlight the phone number to delete, select Options →
Delete →Selected or All →Yes
5%'DQQMࡍࠫ㧞㧜㧜㧢ᐕ㧝㧜㧞㧢ᣣޓᧁᦐᣣޓඦ೨㧝㧝ᤨ㧝㧥ಽ
13-10
Security
13
Reject Black List
APress c and select Settings →Call
settings →All calls →Reject incoming
calls
BSelect Reject black list field
CSelect the setting and press c
DPress w (Save)
Calls from phone numbers in Black list
Calls are not connected. Caller hears a busy tone. Missed
call appears in Standby. Press w (View) to see Missed
Calls.
Restoring Defaults
Clear Memory
Clear Data Folder, Messaging folders, Phonebook (Phone)
entries, and Calendar entries each or all at once.
APress c and select Settings →
Memory settings →Phone memory →
Clear memory
BCheck items to reset and press
w (OK)
CEnter Phone Password, press
c (Confirm) and select Yes
5%'DQQMࡍࠫ㧞㧜㧜㧢ᐕ㧝㧜㧞㧢ᣣޓᧁᦐᣣޓඦ೨㧝㧝ᤨ㧝㧥ಽ
13-11
Security
13
Master Reset
Reset Settings
Clear Saved contents/settings and restore defaults.
However, the following contents are not restored.
APress c and select Settings →
Memory settings →Phone memory →
Master reset →Reset settings
BEnter Phone Password, press
c (Confirm) and select Yes
Reset All
Restore 707SC defaults and delete Phonebook (Phone),
Messaging, and Data Folder contents/settings. Original
files and S! Appli are restored.
APress c, select Settings →Memory
settings →Phone memory →Master
reset →Reset all
BEnter Phone Password, press
c (Confirm) and select Yes
Setting menu Content not to be reset
Phone settings Contents set in Time and Date fields for
Time & date
Display settings Contents set in Brightness
Call settings
All calls→Reject incoming calls→
contents saved in Black list
Voice call/Video call→contents saved/
set in Diverts
Voice call→contents set in Call waiting
Contents set in Call barring
Contents set in Voice m a i l
Phonebook
settings
Contents saved/set in My phonebook
details,Category settings
Connectivity Preferred networks
Security USIM lock,PIN lock,Change PIN
code,Change PIN2 code
5%'DQQMࡍࠫ㧞㧜㧜㧢ᐕ㧝㧜㧞㧢ᣣޓᧁᦐᣣޓඦ೨㧝㧝ᤨ㧝㧥ಽ

13-12
5%'DQQMࡍࠫ㧞㧜㧜㧢ᐕ㧝㧜㧞㧢ᣣޓᧁᦐᣣޓඦ೨㧝㧝ᤨ㧝㧥ಽ

Tools
5%'DQQMࡍࠫ㧞㧜㧜㧢ᐕ㧝㧜㧞㧢ᣣޓᧁᦐᣣޓඦ೨㧝㧝ᤨ㧝㧥ಽ
14-2
Tools
14
Alarms
Wake-up Alarm/Alarms
Register a Wake-up alarm and 4 other alarms. Each alarm
can be named and the name given to Alarm appears when
Alarm sounds. Once an alarm time is saved, it can only be
set/reset by switching Alarm activation to On or Off. In
addition to setting one time only alarm, set alarms to
repeat on specific days of the week or everyday.
APress c and select Tools →Alarms
BSelect an alarm from Wake-up alarm
to Alarm4
CSelect Alarm activation field
DSelect On and press c
ESelect and set other items as required
Set a name (Wake-up alarm cannot be edited)
aSelect Alarm name field
bEnter the name to set
Set Alarm time
Highlight Alarm time field and enter the time
Set an Alarm sound
aSelect Alert tone field
bSelect the location of sound file, select an alarm
sound and press c
Set Vibrator
aSelect Vibration field
bSelect the setting and press c
Set Alarm volume
aSelect Alarm volume field
bUse s to adjust the volume
cPress w (Play) to check the volume and press
c (Save)
5%'DQQMࡍࠫ㧞㧜㧜㧢ᐕ㧝㧜㧞㧢ᣣޓᧁᦐᣣޓඦ೨㧝㧝ᤨ㧝㧥ಽ
14-3
Tools
14
Set whether to sound repeatedly or only one
time
aSelect Repeat field
bSelect Everyday or Once alarm and press c
Set days of the week for a repeated alarm to
sound
aSelect Repeat field
bSelect Specify days and press c (Edit)
cCheck the days to set and press w (OK)
Set a snooze procedure
aSelect Snooze field
bSelect the setting and press c
If you do not want to activate Alarm yet
aSelect Alarm activation field
bSelect Off and press c
FPress w (Save)
Tip
• When wake-up alarm/alarms are set
appears.
• When wake-up alarm and/or multiple alarms have
been set for the same activation time
Wake-up alarm takes priority over Alarm1 to Alarm4.
Among alarms, the last set one takes priority.
• Alarm volume settings
Select to adjust volume step by step. Alarm volume
become louder gradually.
5%'DQQMࡍࠫ㧞㧜㧜㧢ᐕ㧝㧜㧞㧢ᣣޓᧁᦐᣣޓඦ೨㧝㧝ᤨ㧝㧥ಽ
14-4
Tools
14
When the time set for Wake-up alarm/Alarm
comes
Alarm sounds and a message appears if an alarm sound is set
to mute ( P.9-4), you are notified by the vibrator even when
Alarm sound is not set to On in Step 5. Alternatively, notify
using vibrator with vibration setting On. Press any key to stop
Alarm sound and press any key again to clear the message.
When Snooze is not set to Off
Until Snooze canceling operation takes place, alarm
notification continues for about one minute repeatedly in
specified time intervals. The notification repeated up to six
times. If no key operation or any key operations other than
y,o (End) take place during alarm notification, alarm
sound stops; notification with alarm is set to sound again
after specified time elapsed. To cancel Snooze, press y or
o (End).
When a call is being initiated or during a call
During a call or connection (Connecting㵺appears), 707SC
notifies with a short sound and indicator; uncheck Alerts on
call (in Phone sounds setting) to notify only by an indicator.
When an outgoing call is being Initiated (Dialing㵺appears),
707SC notifies with a short sound and indicator as connection
established. Press any key twice to clear an indicator; with
Snooze On, press o (End).
When the time set comes while capturing video
or recording sound
Alarm sound is generated as soon as capturing of recording
finishes.
Auto Power On
If you set this setting to On, even when the power is
turned off, the power is automatically turned on at the
time set for a wake-up alarm or alarm.
APress c and select Tools →Alarms
→Auto power
BSelect On or Off and press c (Save)
Default Setting 䂓Off
5%'DQQMࡍࠫ㧞㧜㧜㧢ᐕ㧝㧜㧞㧢ᣣޓᧁᦐᣣޓඦ೨㧝㧝ᤨ㧝㧥ಽ
14-5
Tools
14
When the Time for Wake-up alarm/Alarm comes
707SC automatically turned the power on. Deactivating alarm
sound, display indicator, snooze function is performed by the
same operation as usual ( P.14-4). Stop alarm sound and go
off display indicator; 707SC shows Standby display and
continues to power on.
Calendar
Displaying Calendar
APress c and select Tools →
Calendar
Viewing Calendar
There are three modes for displaying Calendar. Select a
date on Monthly or Weekly view window to display Daily
view window for the selected day.
Note
• Cancel Auto power settings under following
conditions; near electronic devices requiring high-
precision control or handling weak signals, in places
such as airplanes or hospitals prohibiting the use of
mobile phones.
Monthly View Window
: Highlighted position
(Date in light blue) : Current
day
Date in red: Holiday/Sunday
Weekly View Window
(In Yellow) : Anniversary registered
(In Blue) : Schedule registered
(In Green) : Memo registered
(In Red) : Task registered
Daily View Window
: Schedule
: Anniversary
: Holiday
: Memo
: Task
: Priority
: Alarm set
: Repetition set
5%'DQQMࡍࠫ㧞㧜㧜㧢ᐕ㧝㧜㧞㧢ᣣޓᧁᦐᣣޓඦ೨㧝㧝ᤨ㧝㧥ಽ

14-6
Tools
14
Calendar Window Format
Set Calendar to begin with Sunday or Monday.
Alternatively, set the window displayed when activating
Calendar.
APress c and select Tools →
Calendar
BSelect Options →Settings
CSelect settings
Set the first day of week
aSelect Starting day
bSelect the setting and press c (Save)
Set the default view mode
aSelect Default view mode
bSelect the setting and press c (Save)
Tip
• To display the previous or next month on Monthly
view window
Press */#, highlight Year/Month field and press
s
• To display the previous or next week on Weekly view
window
Press */#, highlight Year/Month field and press
s
• To display the previous or next day on Daily view
window
Press s,*, or #
• To view a particular month or week
From Monthly view window or Weekly view window, change
Display by specifying year, month, and day as follows.
aIn the calendar window, select Options →Go to
bSelect Date, enter the year, month, and day and press
c
When Today is selected in Step b, the current date is
highlighted on the window of the current month or week.
Default Setting 䂓Starting day: Sunday
䂓Default view mode: Monthly view
5%'DQQMࡍࠫ㧞㧜㧜㧢ᐕ㧝㧜㧞㧢ᣣޓᧁᦐᣣޓඦ೨㧝㧝ᤨ㧝㧥ಽ
14-7
Tools
14
Saving New Entries to Calendar
Scheduled Events
Save a maximum of 100 items.
APress c and select Tools →
Calendar
BSelect Options →Add new →
Schedule
CSelect items and make settings
Set a title
Select Title field and enter a text
Set details
Select Details field and enter a text
Set a starting date
Highlight Start date field and enter a date
Set a starting time
Highlight Start time field and enter a time
Set an ending date
Highlight End date field and enter a date
Set an ending time
Highlight End time field and enter a time
Set an event location
Select Location field and enter a text
Tip
• When settings are changed
A change in Starting day is immediately reflected. Selecting
the settings of Default view mode can be applied when you
deactivate calendar and then reactivate it.
• To temporarily change display mode
In the calendar window, select Options →View mode →
Display mode
5%'DQQMࡍࠫ㧞㧜㧜㧢ᐕ㧝㧜㧞㧢ᣣޓᧁᦐᣣޓඦ೨㧝㧝ᤨ㧝㧥ಽ
14-8
Tools
14
Set an alarm
aCheck Alarm field to select
bHighlight Before field, enter an interval before
Alarm time, use s to highlight Unit field and
switch to an appropriate unit
cSelect Alert tone field, select a location of sound
files and select an alert tone
Set Repeat
aCheck Repeat field to select
bUse s to highlight Time cycle field and specify
the time cycle unit
cHighlight Value field and enter a value
dHighlight Until date field and enter a year, month,
and day to stop repetition
Set Expiry time for a Calendar Event
Use s to highlight Expiry field and switch the
expiry limit
DPress w (Save)
Tip
• To make it easier to enter a Start date and/or End
date
Put cursor on the target date on Calendar window before
Step 2 to show that date in Start date or End date field.
• When an event entry has expired
An event is automatically deleted from Calendar when it
expires. For example, if the expiration is set to After 1 year,
and event repetition not set, the indication is deleted when
one year has elapsed from the ending date of the event.
With repetition set, it is deleted one year after the ending
date of the last repetition. To deactivate automatic deletion,
set the expiry to Disable.
5%'DQQMࡍࠫ㧞㧜㧜㧢ᐕ㧝㧜㧞㧢ᣣޓᧁᦐᣣޓඦ೨㧝㧝ᤨ㧝㧥ಽ
14-9
Tools
14
Anniversary/Holiday
Register a maximum of 50 anniversaries and 50 holidays.
APress c and select Tools →
Calendar
BSelect Options →Add new →
Anniversary or Holiday
CSelect items and make settings
Set a text
aSelect Text entry field
bEnter text
Set a date
Highlight Date field and enter the date
Set an alarm (Anniversary only)
aCheck Alarm field to select
bHighlight Before field, enter an interval before the
anniversary Alarm time, use s to highlight Unit
field and switch to an appropriate unit
cHighlight Alarm time field, and enter a time
dSelect Alert tone field, select the location of sound
of files and select an alert tone
Set to repeat every year
Check Repeat every year field
DPress w (Save)
Tip
• To make it easier to enter a date
Put cursor on the target date on Calendar window before
Step 2 to show that date in Date field.
5%'DQQMࡍࠫ㧞㧜㧜㧢ᐕ㧝㧜㧞㧢ᣣޓᧁᦐᣣޓඦ೨㧝㧝ᤨ㧝㧥ಽ

14-10
Tools
14
Memo
Up to 20 memos can be registered. Memos can be
registered even while talking ( P.2-8, 6-5).
APress c and select Tools →
Calendar
BSelect Options →Add new →Memo
CSelect the memo text box and enter
text
To set the date
Select Date and enter the date
DPress w (Save)
Tasks
Register a maximum of 100 time-limited items and
manage them in a list.
APress c and select Tools →
Calendar
BSelect Options →Add new →Task
CSelect items and make settings
Set a title
aSelect Title field
bEnter title
Tip
• To make it easier to enter a date ( P.14-9)
5%'DQQMࡍࠫ㧞㧜㧜㧢ᐕ㧝㧜㧞㧢ᣣޓᧁᦐᣣޓඦ೨㧝㧝ᤨ㧝㧥ಽ
14-11
Tools
14
Set a description of the task
aSelect Task field
bEnter text
To set the starting date
Highlight Start date field and enter the date
To set the due date
Highlight Due date field and enter the date
Set an alarm
aCheck Alarm field
bHighlight Before field, enter a value for how long
before the task starts the alarm should sound, use
s to highlight field of units and select an
appropriate unit
cHighlight Alarm time field and enter the time
dSelect Alert tone field, select the location of sound
files and select an alert tone
Set a priority level
Use s to highlight Priority field and select a value
DPress w (Save)
Volume of Alarm sound
The volume follows the setting of Tone volume for Voice
calls; the setting of Voice call in Vibration for Vibrator.
When the time set for Alarm comes
Alarm sounds and a message appears. To stop Alarm, press
any key. Press c to cancel the message display.
With no action to stop Alarm, a message appears indicating
Missed alarm event. Press w (View) to view the message.
When a call is being initiated or during a call
During a call or connection (Connecting㵺appears), 707SC
notifies with a short sound and indicator; uncheck Alerts on
call (in Phone sounds setting) to notify only by an indicator.
When an outgoing call is being Initiated (Dialing㵺appears),
707SC notifies only by an indicator. Press c to clear an
indicator.
Tip
• To make it easier to enter a Starting date or Due
date
Put cursor on the target date on Calendar window before
Step 2 to show that date in Starting date and Due date field.
5%'DQQMࡍࠫ㧞㧜㧜㧢ᐕ㧝㧜㧞㧢ᣣޓᧁᦐᣣޓඦ೨㧝㧝ᤨ㧝㧥ಽ
14-12
Tools
14
Viewing Saved Calendar Entries
APress c and select Tools →
Calendar
BOpen a window listing items
To check items of one day
Select a date on Monthly view window or Weekly
view window, or use s to change the date on
Daily view window
To check registered contents by type
Select Options →Event list and select a type
To check the message of a missed alarm
Select Options →Missed alarm event
CSelect and view details
Editing Calendar Entries
Editing and Saving as New Entries
In addition to edit and update the entries, edit the entries
and save them as new entries.
APress c and select Tools →
Calendar
BOpen a window listing entries
To open a window listing entries for a single
day
Select a date on Monthly view window or Weekly
view window, or use s to change the date on
Daily view window
To view events by type
Select Options →Event list and select a type
CSelect an item to edit
DPress c (Edit)
Tip
• To check calendar item status
Select Options in Calendar or registered contents list and
Memory status; check the number of savings by type.
5%'DQQMࡍࠫ㧞㧜㧜㧢ᐕ㧝㧜㧞㧢ᣣޓᧁᦐᣣޓඦ೨㧝㧝ᤨ㧝㧥ಽ
14-13
Tools
14
EChange the information as required
FPress w (Save) and select New or
Update
Marking a Task as Completed
APress c and select Tools →
Calendar
BSelect Options →Event list →Task
CHighlight a completed task, select
Options →Completed
To remove the completion mark
Select Options →To do
Deleting Calendar Entries
AIn Calendar window or saved contents
list, select Options →Delete
BDelete the entry
To delete only the highlighted entry
Select Selected →Yes
To delete all entries of the current month or
week
Select This month or This week →Yes
To delete only entries from a specific period
of time
aSelect Periods
bEnter the start and end dates
cPress c (Delete) and select Yes
Tip
• To sort tasks
In the Task window, select Options →Sort by and select a
sorting type. Classify tasks into completed/uncompleted ones
or sort them by due date or priority.
5%'DQQMࡍࠫ㧞㧜㧜㧢ᐕ㧝㧜㧞㧢ᣣޓᧁᦐᣣޓඦ೨㧝㧝ᤨ㧝㧥ಽ
14-14
Tools
14
To delete all entries or all before the
highlighted date
aSelect All or All past data
bEnter Phone Password, press c (Confirm) and
select Yes
Calendar Options
Perform the following operations from Options on a
window listing Calendar entries:
Tip
• To collectively delete multiple registered items
Select registered unnecessary items from a list by type and
delete them collectively.
aPress c and select Tools →Calendar
bSelect Options →Event list and select the type
cSelect Options →Delete →Multiple
dCheck the items to delete, press w (Delete) and select
Yes
Item Description
Add new Save a new Calendar entry ( P.14-7).
Send schedule/
Send task
Send Calendar entry via S! Mail ( P.17-6)
or Bluetooth® ( P.12-6).
View mode Select a display mode ( P.14-7).
Go to
Display a particular month or week by
changing Monthly/Weekly view window
( P.14-6).
Event list View events listed by type ( P.14-12).
Delete Delete a Calendar entry ( P.14-13).
Completed/To do Set or cancel the task completion mark
( P.14-12).
Sort by Sort tasks ( P.14-13).
Save to Data
Folder
Create a vFile and save it to Other
documents in Data Folder.
Settings Select Calendar Display settings
( P.14-6).
5%'DQQMࡍࠫ㧞㧜㧜㧢ᐕ㧝㧜㧞㧢ᣣޓᧁᦐᣣޓඦ೨㧝㧝ᤨ㧝㧥ಽ
14-15
Tools
14
Voice Recorder
Voice Recorder can record voice of a maximum of 60
minutes. Voice Recorder can be started from the tool
menu, as well as during a call, Options of Data Folder, or
Message creation window. Voice recording can be
activated during a call.
Voice Recorder Window
Control Voice Recorder with Softkeys and navigation key.
Missed alarm
event
View the message of a missed alarm
( P.14-12).
Print via
Bluetooth
Print highlighted schedule event or task
using the printer via Bluetooth®
connection.
Memory status Check memory usage for Calendar
functions ( P.14-12).
Item Description
Recording Window
Navigation key
Elapsed time
Remaining recording time
Playback Window
Navigation key
Elapsed time
Play time
5%'DQQMࡍࠫ㧞㧜㧜㧢ᐕ㧝㧜㧞㧢ᣣޓᧁᦐᣣޓඦ೨㧝㧝ᤨ㧝㧥ಽ
14-16
Tools
14
Recording Voice
The recorded voice is saved to Sounds & Ringtones Data
Folder.
APress c and select Tools →Vo i ce
recorder
To change the fixed recording time ( P.14-17)
BPress c (Record)
CPress w (Stop) or continue
recording until the set time runs out
DAs required, press c (Play) to replay
To pause
Press c (Pause)
To resume
Select Options →Record
To record voice from Options ( P.14-16)
Playing Voice
Replay a voice file saved in Data Folder.
APress c and select Tools →Voice
recorder
BSelect Options →My sounds
CHighlight the file and press c (Play)
Voice Recorder Options
Operate listed below from Options before and after
recording. Options and selectable items vary by the
conditions. For more information about available options after
selecting My sounds, see "Data Folder Options" ( P.11-13).
Item Description
Record Start recording.
My sounds Call up list of sound files saved in the
My sounds folder.
Send Send a file via S! Mail ( P.17-6) or
Bluetooth® ( P.12-6).
Set as Set voice for ringtone, etc.
5%'DQQMࡍࠫ㧞㧜㧜㧢ᐕ㧝㧜㧞㧢ᣣޓᧁᦐᣣޓඦ೨㧝㧝ᤨ㧝㧥ಽ
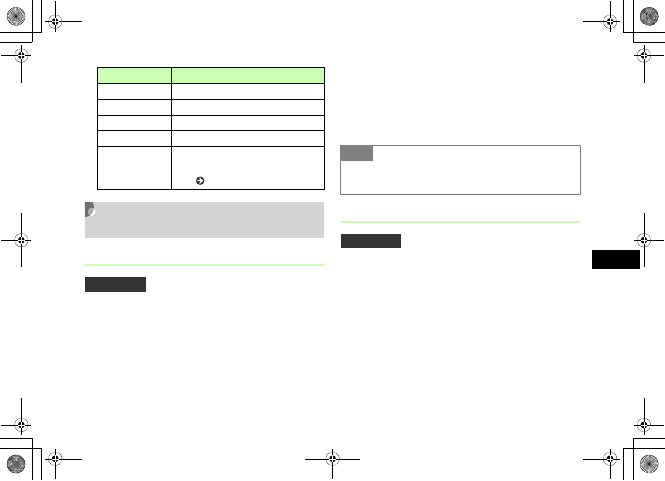
14-17
Tools
14
Changing Voice Recorder
Settings
Default Name
The voice recorded with Voice recorder is saved under a
name such as "Voice 001." "Voice" can be changed to
another word.
APress c and select Tools →Vo i ce
recorder
BSelect Options →Record settings →
Default name
CEnter a name
Recording Time
APress c and select Tools →Voice
recorder
BSelect Options →Record settings →
Recording time
CSelect a duration and press c (Save)
Delete Delete a recorded voice file.
Rename Change file name.
Lock/Unlock Set/release file protection.
Details Confirm recorded sound file size, etc.
Record settings
Select the file name assigned
automatically or the fixed recording
time ( P.14-17).
Default Setting 䂓Voice
Item Description
Tip
• If the default name is changed
The naming rule is applied from the next recording.
Default Setting 䂓5 minutes
5%'DQQMࡍࠫ㧞㧜㧜㧢ᐕ㧝㧜㧞㧢ᣣޓᧁᦐᣣޓඦ೨㧝㧝ᤨ㧝㧥ಽ
14-18
Tools
14
World Clock
World clock allows you to check the current time all over
the world.
Viewing World Clock
APress c and select Tools →World
clock
Selecting Areas
When you save a second time zone, easily check the time
at that area looking at World clock.
APress c and select Tools →Wor ld
clock
BUse j to highlight area 1 and use
sto change city name
To set summer time
aPress o (DST)
bCheck the area to set summer time and press
w (Done)
CPress c (Save)
Current time and city name of area 1
Current time and city name of area 2
Default Setting 䂓Tokyo, Seoul for both areas
5%'DQQMࡍࠫ㧞㧜㧜㧢ᐕ㧝㧜㧞㧢ᣣޓᧁᦐᣣޓඦ೨㧝㧝ᤨ㧝㧥ಽ

14-19
Tools
14
Using Calculator
Arithmetic operations to a maximum of 13 digits can be
performed.
APress c and select Tools →
Calculator
BCalculate
To enter numbers
Press keys
To enter 䋫,䋭,㬍, or 㬭
Press r,l,u, or d
To display the calculation result
Press c
To enter ., (, or )
Press w (.( )) to toggle symbols
To move cursor left or right
Press * or #
To erase a symbol in a mathematical
expression
Place cursor after a symbol to erase and press C
To erase both the mathematical expression
and the calculation result
Press C for 1+ seconds
Converting Currencies or
Units
Convert the currencies for various countries. Alternatively,
convert the units of length, weight, etc.
5%'DQQMࡍࠫ㧞㧜㧜㧢ᐕ㧝㧜㧞㧢ᣣޓᧁᦐᣣޓඦ೨㧝㧝ᤨ㧝㧥ಽ
14-20
Tools
14
Converting Currencies
APress c and select Tools →
Converter →Currency
BSelect Original currency field and the
currency
To replace the original currency with the
target currency
Press o (Reverse)
CSelect Original currency amount field
and enter the amount
To enter a decimal point
Press *
DSelect Target currency field and the
currency
EView the result in the target currency
To check the exchange rate
aHighlight either of Currency fields and press
w (View Rate)
bPress C to return to the Original window
To change the exchange rate
aHighlight either of Currency fields and press
w (View Rate)
bSelect the base currency to change the rate,
highlight the currency, select Options →Edit
cEnter the rate and press c (Save)
Original currency
Enter the amount in original currency
Target currency
Converted amount appears
5%'DQQMࡍࠫ㧞㧜㧜㧢ᐕ㧝㧜㧞㧢ᣣޓᧁᦐᣣޓඦ೨㧝㧝ᤨ㧝㧥ಽ

14-21
Tools
14
To add a currency unit
aPress w (View Rate)
bSelect Options →Add Rate
cEnter the currency unit/rate and press c (Save)
Converting Units
APress c and select Tools →
Converter
BSelect Length,Weig ht,Vo l u m e,Area,
or Temperature
CSelect Original unit field and select
the unit
To replace the original unit with the target
unit
Press o (Reverse)
DHighlight Original unit value field and
enter the value
To enter a decimal point
Press *
To enter/delete "-" when converting
temperature
Press #
ESelect target Unit field and select the
unit
Original unit
Enter a value in original unit
Target un it
The converted value appears
5%'DQQMࡍࠫ㧞㧜㧜㧢ᐕ㧝㧜㧞㧢ᣣޓᧁᦐᣣޓඦ೨㧝㧝ᤨ㧝㧥ಽ
14-22
Tools
14
FView the result in Converted value
field
To clear the values
Press w (Clear)
Stopwatch
707SC can be used as a stopwatch for measuring a
maximum of ten lap times plus the total time.
APress c and select Tools →
Stopwatch
BPress c (Start)
CPress c (Lap) to measure a lap time
or w (Stop) to stop time
measurement
Dictionary
Look up English/Japanese dictionaries.
APress c and select Tools →
Dictionary
BSelect a dictionary
To use English dictionary
Select English dictionary
To use Japanese dictionary
Select Japanese dictionary
CEnter a word to search
DSelect a target word
5%'DQQMࡍࠫ㧞㧜㧜㧢ᐕ㧝㧜㧞㧢ᣣޓᧁᦐᣣޓඦ೨㧝㧝ᤨ㧝㧥ಽ
14-23
Tools
14
Interpreter
Use 707SC Interpreter as a translator to find frequently
used phrases in particular places (such as an airport),
through voice prompts in each language. Available
languages are English, Korean, and Chinese. Select place
name or the phrases using keys or your voice.
APress c and select Tools →
Interpreter
BSelect the language
CSelect an item
To set by your voice
Speak the item in menu to 707SC after the beep
To set by keys
Use a to highlight the item and press c
DSelect the phrase
To set by your voice
Speak the phrase for inquiry to 707SC after the beep
To set by ke y s
Press w (䊜䊆䊠䊷) to select the item
EHighlight the phrase and press c
To listen the phrase
Press w (㖸䉕 ⡬䈒 )
To listen the phrase again
Press w (䊥䊏䊷䊃)
Tip
• To play voice prompts
After Step 3, press o (䊗䉟 䉴䉥䊮)
• When appears
707SC could not recognize your voice. Speak clearly again or
say another phrases.
䉅 䈉 ৻࿁⸒䈦 䈩 ਅ䈘 䈇
5%'DQQMࡍࠫ㧞㧜㧜㧢ᐕ㧝㧜㧞㧢ᣣޓᧁᦐᣣޓඦ೨㧝㧝ᤨ㧝㧥ಽ

14-24
5%'DQQMࡍࠫ㧞㧜㧜㧢ᐕ㧝㧜㧞㧢ᣣޓᧁᦐᣣޓඦ೨㧝㧝ᤨ㧝㧥ಽ

Advanced Functions
5%'DQQMࡍࠫ㧞㧜㧜㧢ᐕ㧝㧜㧞㧢ᣣޓᧁᦐᣣޓඦ೨㧝㧝ᤨ㧝㧥ಽ
15-2
Advanced Functions
15
Calling Functions
Auto Redial
Set to automatically disconnect a Voice/Video Call initiated
to a party that is busy and redial the same party soon.
Automatic redialing repeats up to 10 times until y is
pressed or 707SC is closed.
APress c and select Settings →Call
settings→All calls →Auto redial
BSelect a value and press c (Save)
International Dial
International Prefix
Set the international code frequently used when initiating
an international phone call.
APress c and select Settings→Call
settings →Voice call →International
dial→ Int'l prefix
BEnter an international code
Default Setting 䂓Off
Tip
• When Retry with is set for Video Call
Automatic redialing settings take priority.
• When receiver has activated Voice Mail or Call
Forwarding
The call is forwarded and automatic redialing is canceled.
Default Setting 䂓 010
5%'DQQMࡍࠫ㧞㧜㧜㧢ᐕ㧝㧜㧞㧢ᣣޓᧁᦐᣣޓඦ೨㧝㧝ᤨ㧝㧥ಽ
15-3
Advanced Functions
15
Editing Country Codes
Add a country code or delete an unnecessary one.
APress c and select Settings →Call
settings →Voice call →International
dial →Country codes
BPerform operations to add, change, or
delete
To add or change
aHighlight the item to add or change and press
c (Change)
bSelect Country name field and enter the country
name
cHighlight Country code, enter code and press
w (Save)
To delete
Highlight item to delete, press w (Delete) and
select Yes
Earphone call
When Earphone call is set to On, press switch for 1+
seconds to call specified number.
APress c and select Settings →Call
settings →Voice call →Earphone call
Default Setting 䂓1: Japan 2: KOR 3: GBR 4: ITA 5: CHE
6: ESP 7: DEU 8: PRT 9: NLD 10: FRA
11: MCO 12: USA 13: SWE 14: AUS
15: CHN 16: HKG 17: TWN
18 to 20: Unused
Default Setting 䂓 Earphone call activate: Off
䂓 Call number: No list
5%'DQQMࡍࠫ㧞㧜㧜㧢ᐕ㧝㧜㧞㧢ᣣޓᧁᦐᣣޓඦ೨㧝㧝ᤨ㧝㧥ಽ
15-4
Advanced Functions
15
BSelect Earphone call activate
CSelect the setting
DHighlight Call number and perform
operations to save phone number
To enter a phone number directly
aPress c (Select) and select Direct input
bEnter phone number
To select a phone number from Phonebook
aPress c (Select) and select Phonebook
bSearch Phonebook and select an entry ( P.5-9)
cHighlight phone number and press c (Select)
To enter a phone number using Call Log
aPress c (Select) and select Call log
bSelect the log record
EPress w (Save)
Tip
• To delete a phone number
aPerform Step 1
bPress c (Select) and select Direct input
cPress C for 1+ seconds press c
• To change a phone number
aPerform Step 1
bPerform Step 4
cPress c (Save)
5%'DQQMࡍࠫ㧞㧜㧜㧢ᐕ㧝㧜㧞㧢ᣣޓᧁᦐᣣޓඦ೨㧝㧝ᤨ㧝㧥ಽ
15-5
Advanced Functions
15
Handling Incoming Calls
Anykey Answer
Answer Voice Calls using keys other than c (Accept) or
t.
APress c and select Settings →
Phone settings →Anykey answer
BSelect On or Off and press c (Save)
Acoustic Shock
To avoid 707SC starts to ring at high volume, even when
high Ringtone volume for Voice Call/Video Call is set,
Acoustic shock enables 707SC starts to ring at Level 1
volume for the first two seconds, then at the set volume.
APress c and select Settings →Call
settings →All calls →Acoustic shock
BSelect the setting and press c (Save)
Default Setting 䂓Off
Tip
• Answering a Voice Call when On is set ( P.2-3)
Default Setting 䂓On
5%'DQQMࡍࠫ㧞㧜㧜㧢ᐕ㧝㧜㧞㧢ᣣޓᧁᦐᣣޓඦ೨㧝㧝ᤨ㧝㧥ಽ
15-6
Advanced Functions
15
Active Folder
When On, open 707SC to answer an incoming call.
APress c and select Settings →
Phone settings →Active folder
BSelect On or Off and press c (Save)
Side Key Silence/Reject
Use n or b to mute ringer or reject an incoming call.
Select from Reject (disconnect the call) or Silence (silence
the incoming tone).
APress c and select Settings →
Phone settings →Side key
BSelect a value and press c (Save)
Side Key Lock
With this function set to On, Side Keys of 707SC are
locked. Avoid accidental key presses when 707SC is placed
inside a bag, etc.
APress c and select Settings →
Phone settings →Side key lock
BSelect On or Off and press c (Save)
Default Setting 䂓Off
Default Setting 䂓Silence
5%'DQQMࡍࠫ㧞㧜㧜㧢ᐕ㧝㧜㧞㧢ᣣޓᧁᦐᣣޓඦ೨㧝㧝ᤨ㧝㧥ಽ