Samsung Electronics Co 707SC Single-Band PCS GSM/ EDGE Phone with Bluetooth User Manual
Samsung Electronics Co Ltd Single-Band PCS GSM/ EDGE Phone with Bluetooth Users Manual
Contents
- 1. Users Manual 1
- 2. Users Manual 2
- 3. Users Manual 3
Users Manual 3
15-7
Advanced Functions
15
Simple Search Setting
When Simple search is set to On, enter numbers in
Standby to search Phonebook entries starting with
Reading name corresponding each number. Then search
result (entry names and phone numbers) list appears.
APress c and select Settings →
Phone settings →Simple search
BSelect the setting and press c (Save)
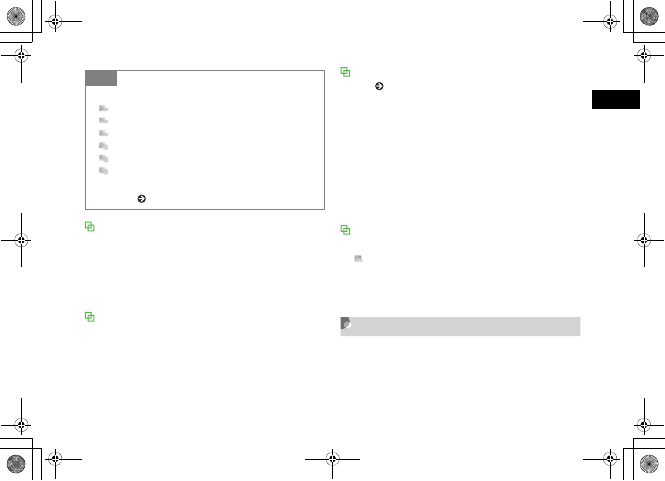
Idle Shortcuts
Up to nine frequently used functions can be saved; create
own Shortcut Menu. In Standby, press u to access
functions saved to shortcuts.
APress u
BHighlight unsaved function entry box
and press c (Assign)
CSelect the function
DRepeat Steps 2 and 3 to save the
function
Default Setting 䂓Off
Tip
• To initiate calls using Simple search ( P.5-11)
5%'DQQMࡍࠫ㧞㧜㧜㧢ᐕ㧝㧜㧞㧢ᣣޓᧁᦐᣣޓඦ೨㧝㧝ᤨ㧝㧥ಽ
15-8
Advanced Functions
15
Memory Status
Check the following information:
• Available shared memory
• Status of SMS and S! Mail mailboxes
• Status of memory in Data Folder
• Status of Calendar items registered
• Status of Phonebooks (Handset and USIM Card)
Alternatively, delete saved entries and/or files.
APress c and select Settings →
Memory settings →Memory status
BSelect an item to check
Tip
• To change functions
aIn Step 2, Highlight the function, select Options →
Assign
bSelect Yes and select the function
• To sort functions
aIn Step 2, Highlight the function, select Options →
Change Order
bUse a to highlight the target function box and press
c (Select)
• To delete functions
In Step 2, Highlight the function, select Options →Delete
→Yes
• To restore defaults
In Step 2, Highlight the function, select Options →Reset
→Yes
5%'DQQMࡍࠫ㧞㧜㧜㧢ᐕ㧝㧜㧞㧢ᣣޓᧁᦐᣣޓඦ೨㧝㧝ᤨ㧝㧥ಽ
15-9
Advanced Functions
15
Tip
• To delete the contents
When the contents in Data Folder, Calendar or Phonebook
are to be deleted
aPerform Steps 1 and 2
bHighlight an item, press c (Select), select Yes and
view an entry
cCheck the fields to delete, press w (Delete) and select
Yes
• To delete all contents
After Step c in "To delete the contents," enter Phone
Password, press c (Confirm) and select Yes
• To check/uncheck all contents at once
After Step c in "To delete the contents," select Options →
Mark all or Unmark all
• When the checked contents contain the contents
that functions or locks are set in
After Step c in "To delete the contents" or the "To delete
all contents" operations, the confirmation window appears.
If you select Yes, the deletion is performed. If you select No,
only files without functions or locks set are deleted.
5%'DQQMࡍࠫ㧞㧜㧜㧢ᐕ㧝㧜㧞㧢ᣣޓᧁᦐᣣޓඦ೨㧝㧝ᤨ㧝㧥ಽ

15-10
5%'DQQMࡍࠫ㧞㧜㧜㧢ᐕ㧝㧜㧞㧢ᣣޓᧁᦐᣣޓඦ೨㧝㧝ᤨ㧝㧥ಽ

Optional Services
5%'DQQMࡍࠫ㧞㧜㧜㧢ᐕ㧝㧜㧞㧢ᣣޓᧁᦐᣣޓඦ೨㧝㧝ᤨ㧝㧥ಽ
16-2
Optional Services
16
Optional Services
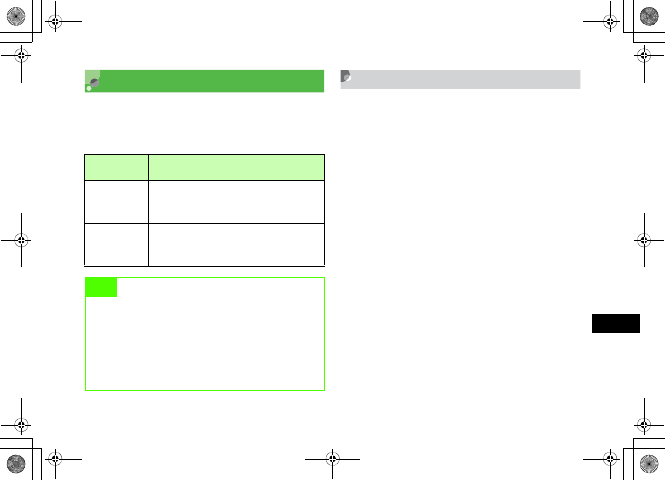
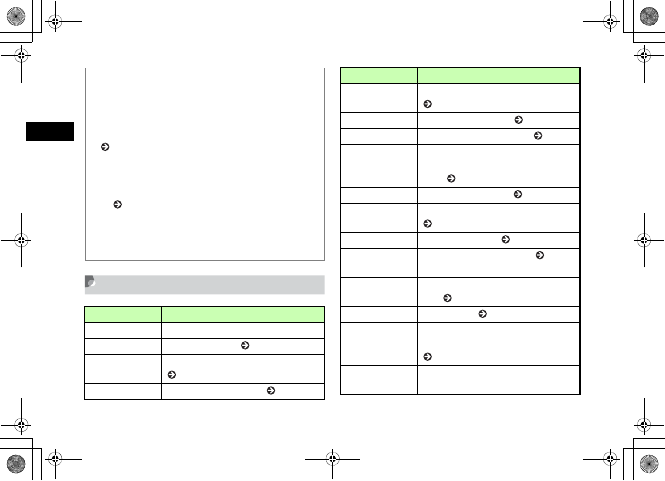
The following optional services are available with 707SC:
* This service requires a separate subscription.
Service Description
Call
Forwarding
When you know you will be unable to answer
calls to 707SC, automatically divert calls to a
specified number.
Voice Mail
Divert all or all unanswered calls to Voice Mail
Center; access caller messages via 707SC
from within the service area or via a
touchtone phone anywhere.
Call Waiting*
A tone sounds for incoming calls when the
line is engaged.
Put the line on hold to answer or alternate
between lines.
Conference
Call*
Open another line while one is engaged;
toggle lines or talk on all simultaneously. Add
new parties to an existing conference; talk on
up to five lines simultaneously.
Call Barring Restrict incoming or outgoing calls by
condition.
Caller
Identification
Show or hide your own number when placing
calls.
Note
•When Out appears, access services from a touchtone
landline. For details, contact Customer Service
( P.25-25).
Service Description
5%'DQQMࡍࠫ㧞㧜㧜㧢ᐕ㧝㧜㧞㧢ᣣޓᧁᦐᣣޓඦ೨㧝㧝ᤨ㧝㧥ಽ
16-3
Optional Services
16
Call Forwarding
Set forwarding condition and number, by call type (Voice
Call or Video Call), beforehand, to divert incoming calls to
a specified number.
Activating Call Forwarding
Specify a forwarding number beforehand.
APress c and select Settings →Call
settings →Voice call or Video call →
Diverts
BSelect No reply or Always; view the
current settings
When the settings are acceptable
After viewing, press l to return to the previous
window
Forwarding
Condition Description
No reply
Unanswered calls are diverted after the
specified ring time, or when the line is busy or
707SC is out-of-range.
Always
707SC does not ring/vibrate for incoming
calls; calls are diverted automatically and
Missed Call does not appear.
Note
• Call Forwarding and Voice Mail cannot be used at
the same time.
• Activating Call Forwarding cancels Voice Mail.
• Call Forwarding is not available when All outgoing
calls or All incoming calls in Call Barring is active
(Call Barring takes priority over Call Forwarding).
5%'DQQMࡍࠫ㧞㧜㧜㧢ᐕ㧝㧜㧞㧢ᣣޓᧁᦐᣣޓඦ೨㧝㧝ᤨ㧝㧥ಽ
16-4
Optional Services
16
CHighlight Forwarding address field
and enter a number
To select a phone number from Phonebook
aHighlight forwarding Address field and select
Options →Phonebook
bSelect Phonebook, highlight a phone number and
press c (Select)
DFor No reply, highlight Waiting time
field and set a time
EPress c (ON)
Cancel All
Cancel all Diverts services at once.
APress c and select Settings →Call
settings →Voice call or Video call →
Diverts →Cancel all
Check Status
APress c and select Settings →Call
settings →Voice call or Video call →
Diverts →Check status
Tip
• When Call Forwarding (No reply) is active
While 707SC rings/vibrates, answer a call or press o
(Busy) to forward it.
Tip
• To stop Call Transfer service for each forwarding
condition
aPress c and select Settings →Call Settings →
Voice call or Video call →Diverts
bSelect No reply or Always
cPress w (OFF)
5%'DQQMࡍࠫ㧞㧜㧜㧢ᐕ㧝㧜㧞㧢ᣣޓᧁᦐᣣޓඦ೨㧝㧝ᤨ㧝㧥ಽ
16-5
Optional Services
16
Voice Mail
Forward an incoming Voice Call to Voice Mail Center or a
specified number based on preset forwarding conditions
( P.16-3).
Activating Voice Mail
APress c and select Settings →Call
settings →Voice mail
BSelect No reply or Always
CFor No reply, highlight Waiting time
field and set a time
DPress c (ON)
Note
• Voice Mail and Call Forwarding cannot be active at
the same time.
• Activating Voice Mail cancels Call Forwarding.
• Voice Mail is not available when All outgoing calls or
All incoming calls in Call Barring is active (Call
Barring takes priority over Voice Mail). Tip
• When Voice Mail (No reply) is active
While 707SC rings/vibrates, answer a call or press o
(Busy) to forward it.
5%'DQQMࡍࠫ㧞㧜㧜㧢ᐕ㧝㧜㧞㧢ᣣޓᧁᦐᣣޓඦ೨㧝㧝ᤨ㧝㧥ಽ
16-6
Optional Services
16
Canceling Voice Mail
Cancel all Voice mail services at once.
APress c and select Settings →Call
settings →Voice mail →Cancel all
Checking Settings
APress c and select Settings →Call
settings →Voice mail →Check status
Listening to Messages
When a caller saves a message at Voice Mail Center, in
standby, a message appears. Also, appears at the top
of Display.
While Message Appears
Connect to Voice Mail Center as described below and
follow voice prompts.
APress w (Dial)
To check message details
Press c while message appears
Tip
• To cancel Voice Mail by forwarding condition
aPress c and select Settings →Call settings →
Voice mail
bSelect No reply or Always
cPress w (OFF)
䋱䋲 䋱5䋱530
Notification
5%'DQQMࡍࠫ㧞㧜㧜㧢ᐕ㧝㧜㧞㧢ᣣޓᧁᦐᣣޓඦ೨㧝㧝ᤨ㧝㧥ಽ
16-7
Optional Services
16
While No Message Appears
AEnter 1416 and press t
Incoming Call Notification
If there was a call that could not be answered because you
were out of service area or handset was powered off, it is
notified with SMS. It is also notified when a caller saves a
message at Voice Mail Center while you are talking to
other party.
Incoming Call Notification
AEnter 1414 and press t (Free of
charge)
When setting from a general subscriber phone
in Japan (Free of charge)
Dial 090-665-1414 and press t
When setting in overseas (Charged)
Press 0 for 1+ seconds, enter +, enter 81-90-
665-14191 and press t
BPerform operations following the
audio prompts
Tip
• To access caller message from overseas
aPress 0 for 1+ seconds and enter +
bEnter 819066514170 and press t
• To delete a message without listening to it
Press o (End).
• To clear
Voice Mail indicator disappears when messages are accessed
via 707SC.
5%'DQQMࡍࠫ㧞㧜㧜㧢ᐕ㧝㧜㧞㧢ᣣޓᧁᦐᣣޓඦ೨㧝㧝ᤨ㧝㧥ಽ
16-8
Optional Services
16
Call Waiting*
* A separate subscription is required to use this service.
This service is only available for Voice Calls.
Activating or Canceling
APress c and select Settings →Call
settings →Voice call →Call waiting
BActivate or cancel the service
To a ctiva te
Press c (ON)
To c ancel
Press w (OFF)
Receiving a Second Call
When there is an incoming call during a call, you are
notified with a specific interrupt sound and display. Place
the current call on hold and answer the second call.
AWhen you hear the interrupt sound,
press c (Accept)
BSelect Hold active call
To end the current call and answer the second
call
Select End active call
CPress w (Swap) to toggle the calls
DTo end the current call, press y
To end the call on hold
Select Options →End →Held call
5%'DQQMࡍࠫ㧞㧜㧜㧢ᐕ㧝㧜㧞㧢ᣣޓᧁᦐᣣޓඦ೨㧝㧝ᤨ㧝㧥ಽ

16-9
Optional Services
16
To end both calls at once
Select Options →End →All calls, or close 707SC
Conference Call*
* A separate subscription is required to use this service.
Talk with a maximum of six parties simultaneously.
New Call
When the called party is connected, the party that has
been connected is placed on hold.
ADuring a call, select Options →New
call and enter number
To use Phonebook
aPress c (Search) and select Phonebook
bHighlight the phone number and press
c (Select)
To use a log
Press t, open logs and highlight the entry
BPress c (Call) and talk with the
connected party
Tip
• When the other party ends the call and you have
another call waiting
Press w (Retrieve) to talk to the waiting party.
• When the Call Transfer service or Voice Mail service
is active
When the second call is not answered, it is forwarded to a
forwarding destination or Voice Mail Center. When the
forwarding condition is set to Always, the Call Waiting
service is not available.
5%'DQQMࡍࠫ㧞㧜㧜㧢ᐕ㧝㧜㧞㧢ᣣޓᧁᦐᣣޓඦ೨㧝㧝ᤨ㧝㧥ಽ
16-10
Optional Services
16
Engaged Conference Call
Operations
ACall another party during a call
( P.16-9)
BPress w (Swap) to switch connected
calls
Join
ADuring a call, initiate a call to another
party ( P.16-9)
BSelect Options →Join
Tip
• To end the call on hold
During a call, select Options →End →Held call
• To end all calls
During a call, select Options →End →All calls, or close
707SC
• When the current caller ends the call while using
Conference Call service
A party on hold remains on-hold state. Switch to the on-hold
party to talk.
Tip
• To call with only one person
During a call, select Options →Split and select a caller to
talk to
• To end the call for a specific caller
During a call, select Options →End →Select
participant, check callers to end and press w (End)
• To end the all calls
During a call, press y
• When one party ends the call during Conference Call
Continue talking with remaining parties.
5%'DQQMࡍࠫ㧞㧜㧜㧢ᐕ㧝㧜㧞㧢ᣣޓᧁᦐᣣޓඦ೨㧝㧝ᤨ㧝㧥ಽ

16-11
Optional Services
16
Call Barring
Use this service to bar outgoing/incoming calls for Voice/
Video Calls, sending/receiving SMS under the conditions
listed below.
When setting restrictions, you are required to enter
Network Password (The 4-digit number dedicated to
Outgoing/incoming service specified at the subscription).
Item Description
Restrict
outgoing
calls
All outgoing
calls
Deactivates initiating calls and
SMS sending, except
emergency calls.
Outgoing Intl
calls
Deactivates initiating
international calls and SMS
sending within your current
location.
Intl except
home
Deactivates initiating
international calls and SMS
sending within your current
location or except Japan.
Restrict
incoming
calls
All incoming
calls
Deactivates reception of all
calls and SMS receiving.
Incoming
when roaming
Deactivates reception of all
calls and SMS receiving while
outside of Japan.
Note
• If incorrect Network Password is entered three
consecutive times, setting or canceling the Call
Barring service is deactivated. Note that, in this
case, change Network Password and Center Access
code. For more information, contact Customer
Service ( P.25-25).
• When the Call Transfer service or Voice Mail service
is active, you cannot use All outgoing calls or All
incoming calls (Call Transfer service or Voice Mail
service takes priority).
5%'DQQMࡍࠫ㧞㧜㧜㧢ᐕ㧝㧜㧞㧢ᣣޓᧁᦐᣣޓඦ೨㧝㧝ᤨ㧝㧥ಽ

16-12
Optional Services
16
Restrict Outgoing/Incoming
Calls
Restrict outgoing calls and/or Restrict incoming calls for
each type of call (Voice/Video Calls, SMS)/transmission.
APress c and select Settings →Call
settings →Call barring
BSelect Voice call,Video call, or SMS
and select a restriction type
CEnter Network Password
DSet or cancel call barring
To set
Press c (ON)
To cancel
Press w (OFF)
Cancel All
Canceling outgoing and incoming call is available for each
of call types (Voice and Video Calls, SMS)/transmission.
APress c and select Settings →Call
settings →Call barring
BSelect Voice call,Video call, or SMS
→Cancel all
Tip
• When an attempt is made to initiate a call while calls
are restricted
A message appears indicating that outgoing call restriction is
active. The message may appear after a while depending on
the area where using 707SC.
Tip
• To check settings
Perform Steps 1 and 2. After checking the settings, press
C to return to the previous window.
5%'DQQMࡍࠫ㧞㧜㧜㧢ᐕ㧝㧜㧞㧢ᣣޓᧁᦐᣣޓඦ೨㧝㧝ᤨ㧝㧥ಽ
16-13
Optional Services
16
CEnter Network Password and press c
Changing Network Password
APress c and select Settings →Call
settings →Call barring → Change
password
BEnter the current Network Password in
Old field and new Network Password
(4 digits) in New and Cnf (Confirm)
field, then press c (Confirm)
Caller ID
Show or hide your own phone number when calling from
707SC.
Show My Number
APress c and select Settings →Call
settings →All calls →Show my
number
BSelect the setting and press c (Save)
Default Setting 䂓By network
Tip
• When set to By network
Automatically set to Show/Hide your number by current
network status.
5%'DQQMࡍࠫ㧞㧜㧜㧢ᐕ㧝㧜㧞㧢ᣣޓᧁᦐᣣޓඦ೨㧝㧝ᤨ㧝㧥ಽ
16-14
Optional Services
16
Adding 186 or 184
Use 186 (Show ID) or 184 (Hide ID) prefixes to show or
hide your number when calling from 707SC, regardless of
the Show my number setting.
AEnter Show ID or Hide ID Prefix
To show Caller ID
Press 186
To hide Caller ID
Press 184
BEnter phone number
CPress t
To initiate a Video Call
Select Options →Video c all
5%'DQQMࡍࠫ㧞㧜㧜㧢ᐕ㧝㧜㧞㧢ᣣޓᧁᦐᣣޓඦ೨㧝㧝ᤨ㧝㧥ಽ

Receiving & Sending Messages
5%'DQQMࡍࠫ㧞㧜㧜㧢ᐕ㧝㧜㧞㧢ᣣޓᧁᦐᣣޓඦ೨㧝㧝ᤨ㧝㧥ಽ
17-2
Receiving & Sending Messages
17
Getting Started
S! Mail
Use this service to send/receive long text messages,
images, videos, other files, and sounds between S! Mail
compatible SoftBank handsets and PCs via e-mail.
A separate subscription is required to use S! Mail and
receive e-mail.
SMS
Use this service to send/receive short text messages
between SMS-compatible SoftBank handsets using phone
numbers.
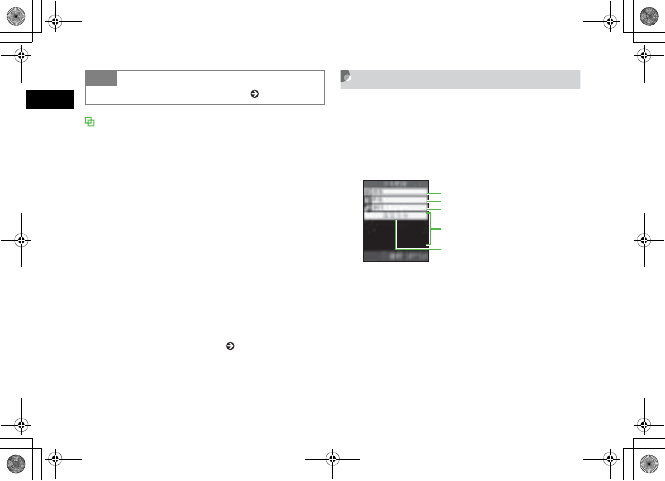
Checking for New
Messages
When a message is received in Standby mode, reception
notification appears. The number of received messages,
senders and reception dates/times appear.
Tip
• Retry function
If the other party's handset cannot receive a message
because the power turned off or out-of-range, 707SC keeps
the message saved on Mail Server; then send to the other
party after signal reception recovers stable.
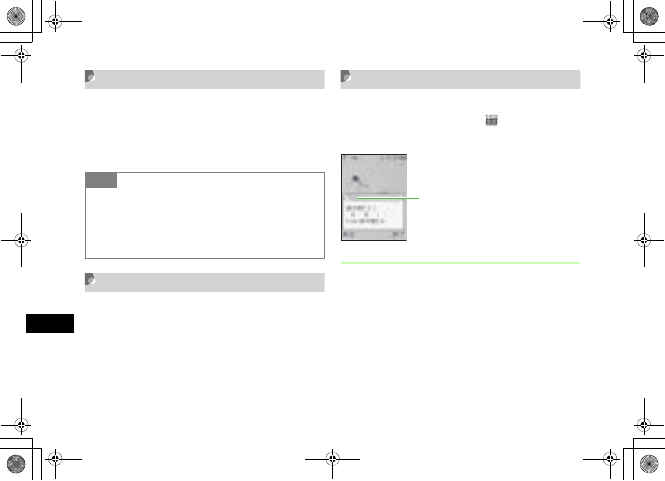
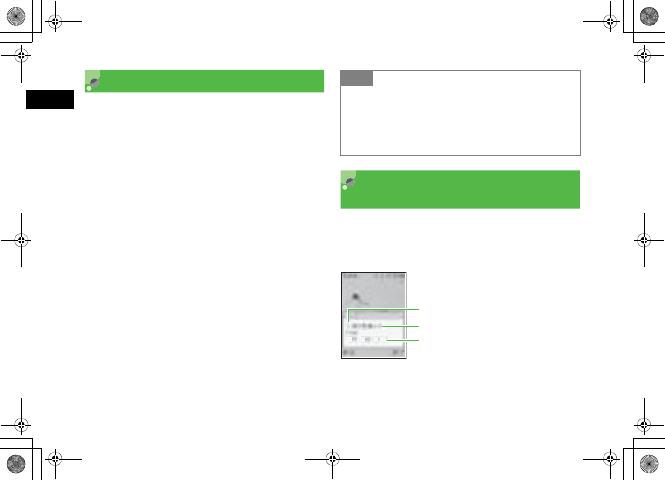
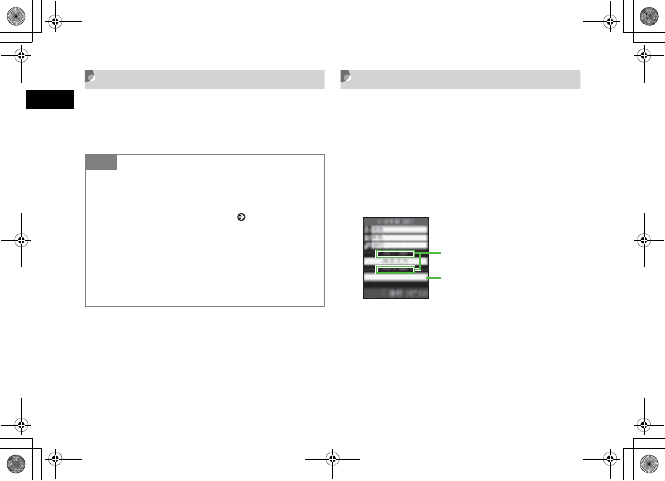
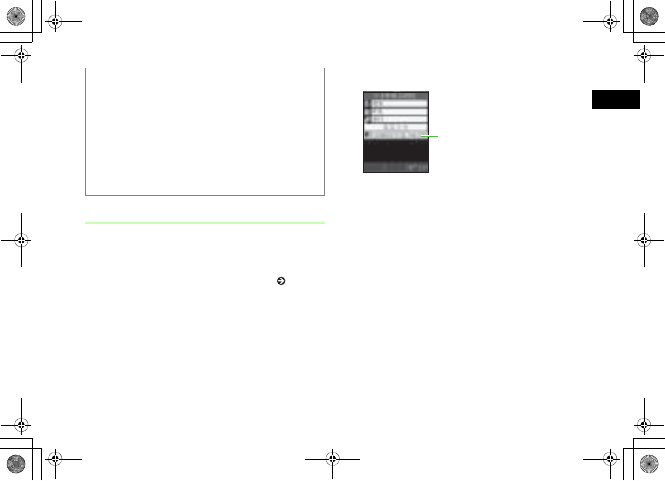
Reception Notification Window
⋧↰ฬㇺ
䋱䋲 䋱5䋱530
Number of received messages
Sender
Reception date and time
5%'DQQMࡍࠫ㧞㧜㧜㧢ᐕ㧝㧜㧞㧢ᣣޓᧁᦐᣣޓඦ೨㧝㧝ᤨ㧝㧥ಽ
17-3
Receiving & Sending Messages
17
APress w (View)
When multiple messages appear
Use s to select the tab and press w (View)
BSelect a new received message
Operations in SMS window
In SMS window, press Side Keys nb to enlarge/reduce text
font size. Alternatively, press u or d for 1+ seconds to
auto scroll. To stop auto scroll, press any key. Press r or
l to adjust the scroll speed.
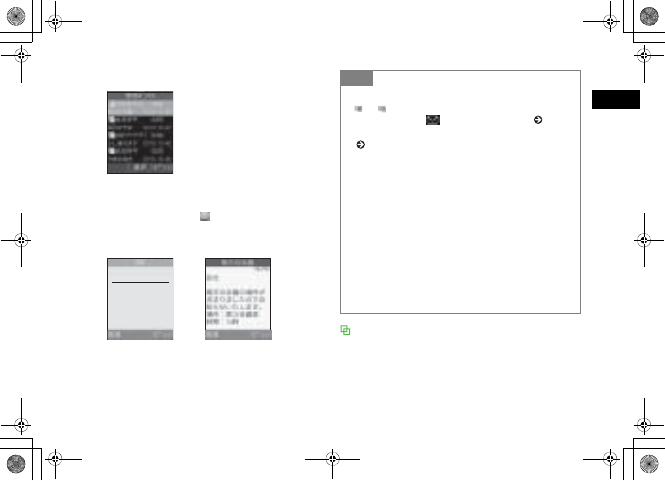
Received Message List
SMS Window
䋲䋰䋰䋶
ᐕ
䇭䋱䋲
䋱䋵
ᣣ
䇭䋱䋸䋺䋱䋵
䋺 ⋧↰ฬㇺ
䌆䌲 䌯䌭
ળ⼏䈱႐ᚲ䈫 ᤨ㑆䈏䉁
䉍 䉁 䈚 䈢 䈱䈪䈍⍮䉌 䈞䈚
䉁䈜䇯
႐ᚲ䋺
䋵
㓏╙
䋳
ળ⼏ቶ
ᤨ㑆䋺
䋱䋴䋺䋰䋰
S! Mail Text
Tip
• When a message is received (out of Standby mode)
or appears on the top of Display. When 707SC is
closed, an icon like appears on Sub Display ( P.1-8,
1-10). The icon does not appear with Sub LCD light
( P.8-8) set to Off.
• Received message count
When there are unread messages, the total number of new
and unread messages appears.
• Sender information
A phone number or mail address appears. When the sender
has been saved in Phonebook, you will see the name saved
in Phonebook. When an incoming image has been saved in
Phonebook or an incoming image has been set for the group,
the image appears at the same time. While Secret Mode is
set to Hide and Phonebook Secret Mode is set to On for
message receiver/sender information; sender's name/image
does not appear.
5%'DQQMࡍࠫ㧞㧜㧜㧢ᐕ㧝㧜㧞㧢ᣣޓᧁᦐᣣޓඦ೨㧝㧝ᤨ㧝㧥ಽ
17-4
Receiving & Sending Messages
17
3D Pictogram ( P.20-5)
By default, when you check an incoming/unread message
(Except S! Mail that is set for Slide Show or with an
attachment), the message text appears in 3D Pictogram. After
3D Pictogram display ends or w (Stop) is pressed, Message
window appears. Perform various operations after Message
window appears.
Retrieving Complete Messages
When Home network ( P.20-3) or Roaming ( P.20-3)
is set to Manual, S! Mail is temporarily stored on Mail
Server; part of the received message is sent to 707SC as a
reception notification. Retrieve complete messages from
Mail Server.
APress w and select Received msgs
BSelect a message with the rest of it
CPress c (Retrieve)
DSelect complete message
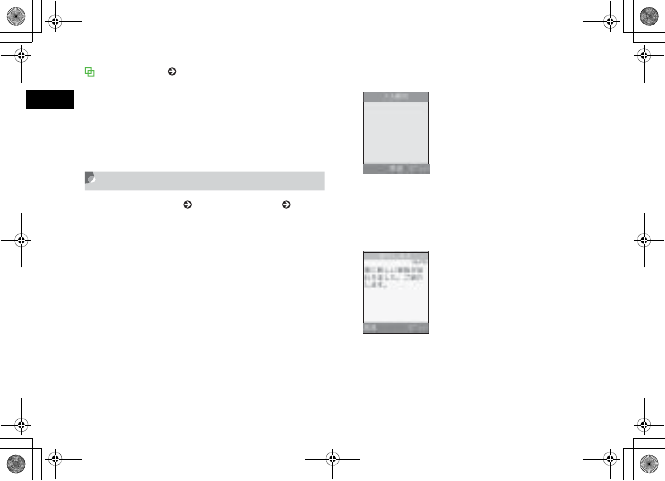
Notification Details
ᣣઃ
䋺
2006
ᐕ
䇭䋱䋲
䇭䋱䋵
ᣣ
䇭15
䋺
00
䌆䌲 䌯䌭䋺
090XXXXXXXX
ᧄᢥ
䋺
ኅ䈮ᣂ䈚 䈇ኅᣖ䈏ട䉒䉍 䉁
䈚 䈢䇯 䈗 ⚫䈚 䉁 䈜䇯
ฃା
Message Window
5%'DQQMࡍࠫ㧞㧜㧜㧢ᐕ㧝㧜㧞㧢ᣣޓᧁᦐᣣޓඦ೨㧝㧝ᤨ㧝㧥ಽ
17-5
Receiving & Sending Messages
17
Message window for S! Mail with an
attachment
The first page shows the file name for the attachment and the
second and subsequent pages show the message. Use r to
read the message or select Options →Play to start Slide
Show.
Message window for S! Mail with Slide Show
set
Select Options →Play to play the slide. During playing,
press c (Pause)/w (Stop) to pause/stop it. Use s to
manually select pages.
Message window for S! Mail with an inserted
file ( P.17-17, 17-18)
If an image is inserted, the image appears with the message.
If sound is inserted, select Options →Play to play sound.
If Slide Show is set, sound is played when the page with an
inserted sound appears.
If video is inserted, select Options →Play and press o
(Video) to play video.
If Slide Show is set, Video appears at the lower right and
pressing o (Video) plays sound when the page with an
inserted video appears.
Message window with a file requiring
purchasing/obtaining Content Key
appears on a page with an inserted file that you cannot
view/play.
Select Options →Download content key to view/play the
file.
Using Received Messages
Send a message directly to the sender.
APress w (Reply) on the Message
window
Tip
• Received Message list window indicators
: Unread reception notification (Priority: High)
: Unread reception notification (Priority: Standard)
: Unread reception notification (Priority: Low)
: Read reception notification (Priority: High)
: Read reception notification (Priority: Standard)
: Read reception notification (Priority: Low)
• To retrieve complete messages from Message list
window ( P.19-2)
5%'DQQMࡍࠫ㧞㧜㧜㧢ᐕ㧝㧜㧞㧢ᣣޓᧁᦐᣣޓඦ೨㧝㧝ᤨ㧝㧥ಽ
17-6
Receiving & Sending Messages
17
BCreate a message and press w (Send)
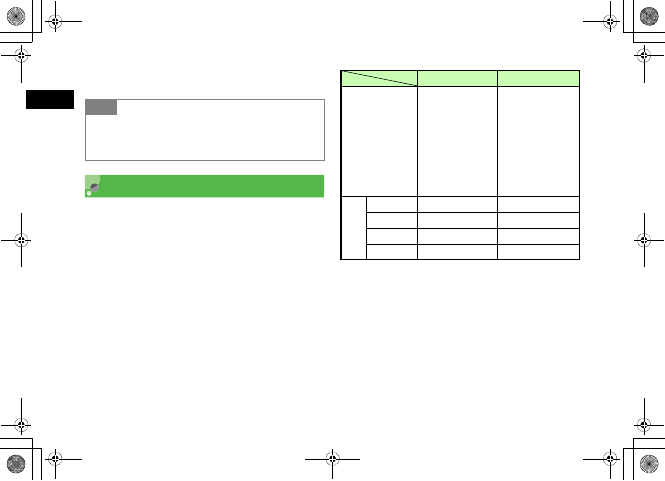
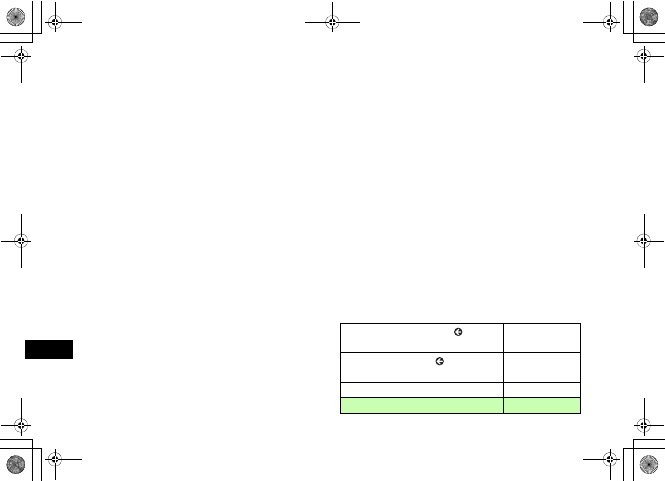
Creating Messages
Two types of messages are available on 707SC: S! Mail
and SMS. The number of characters that can be sent and
entry items are different between these types (Shown
below). Yes: Available
No: Not available
1 The number of characters that can be sent varies by the
attachment size, etc.
2 Set a maximum of 20 slides in one message.
3 Total size of all kinds of messages (Including address, subject,
text, and attachments).
Tip
• Subject display of S! Mail for replies
The subject of a replied S! Mail is prefixed with "RE:"
automatically.
S! Mail SMS
Number of
characters that
can be sent
Approximately
10,000 single-byte/
double-byte
characters1
Approximately
10,000 characters
in one slide2
(Up to 300K bytes3)
Maximum of 70
single- byte/double-
byte, Katakana
characters
Maximum of 160
single-byte
alphanumerics (Up
to 140 bytes)
Entry
items
Address Yes Yes
Subject Yes No
Attachment Yes No
Message Yes Yes
5%'DQQMࡍࠫ㧞㧜㧜㧢ᐕ㧝㧜㧞㧢ᣣޓᧁᦐᣣޓඦ೨㧝㧝ᤨ㧝㧥ಽ
17-7
Receiving & Sending Messages
17
Using the Mail Art Function
When displaying an S! Mail window, use mail art function to
display text messages and/or images consecutively like slides
or with a background color ( P.17-12, 17-15, 17-18).
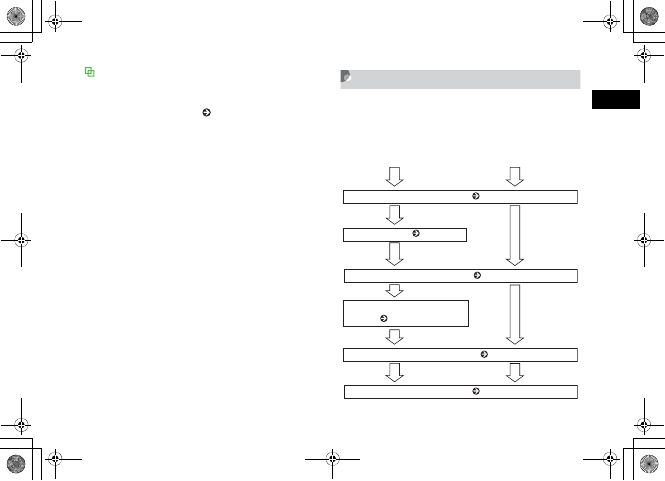
Procedures
Mails should be created in the flow as shown below.
Items other than Destination should be entered as
required.
Creating S! Mail Creating SMS
Enter an address ( P.17-8)
Enter message text ( P.17-11)
Enter a subject ( P.17-11)
Attach/Insert files
( P.17-15, 17-18)
Set any sending options ( P.17-12)
Send the message ( P.17-12)
5%'DQQMࡍࠫ㧞㧜㧜㧢ᐕ㧝㧜㧞㧢ᣣޓᧁᦐᣣޓඦ೨㧝㧝ᤨ㧝㧥ಽ
17-8
Receiving & Sending Messages
17
Automatic Change of Message Type
When message creation is started, the message type is set to
SMS; it automatically changes to S! Mail when one of the
following occurs:
• Entering mail address as a destination
• Entering a subject
• Entering characters exceeding the number of characters
that can be sent by SMS
• Inserting files on Slide Show page
• Attaching or inserting a file
• Changing the address type to Cc or Bcc
When the message is modified to allow it to be sent as SMS,
for example, by deleting an attached or inserted file or a
subject, the message type automatically changes to SMS.
Depending on message creation conditions, it may not
automatically change type. If the mail type is not changed
automatically, change it manually ( P.17-12).
Address
Enter a phone number or mail address for S! Mail or a
phone number for SMS as a message address. Up to
twenty addresses can be entered.
APress w and select Create msg
Tip
• To set sending options beforehand ( P.20-2, 20-5)
Message Creation Window
Address field
Subject field
Message field
Text entry field
Attach field
5%'DQQMࡍࠫ㧞㧜㧜㧢ᐕ㧝㧜㧞㧢ᣣޓᧁᦐᣣޓඦ೨㧝㧝ᤨ㧝㧥ಽ
17-9
Receiving & Sending Messages
17
BEnter an address
To select an address from Phonebook
aSelect Address field and select From Phonebook
bSearch Phonebook and select an entry ( P.5-9)
cHighlight a phone number or mail address and
press c (Select)
To enter an address directly
aSelect Address field and select Enter Recipient
bEnter phone number or mail address
To select an address from sent records
Select Address field and select the record
To select an address from a Phonebook
Category
aSelect Address field and select From Category
bSelect a Category, with/without Address selection
window, highlight an address to enter and press
c (Select)
CTo enter another address
To enter an address directly
aSelect Address field
bSelect Entry field and select Enter Recipient
cEnter phone number or mail address and press
w (Done)
To select an address from Phonebook
aSelect Options →Add recipients →
Phonebook
bSearch and select Phonebook
cHighlight a phone number or mail address and
press c (Select)
To select an address from a Phonebook
Category
aSelect Options →Add recipients →Category
bSelect a Category; with/without Address selection
window, highlight an Address to enter and press
c (Select)
5%'DQQMࡍࠫ㧞㧜㧜㧢ᐕ㧝㧜㧞㧢ᣣޓᧁᦐᣣޓඦ೨㧝㧝ᤨ㧝㧥ಽ
17-10
Receiving & Sending Messages
17
Tip
• To create a message using a template ( P.17-14)
• To confirm the entered address
In Step 3, select Options →Recipient list
• To add an address after confirming the entered
address
aIn Step 3, select Options →View recipient list
bSelect Entry field and perform operation in the same way
as Step 2
cPress w (Done)
• To send a message after confirming the entered
address
aIn Step 3, select Options →View recipient list
bSelect Options →Send
• To change the address type to To, Cc, or Bcc
aIn Step 3, select Options →View recipient list
bSelect Options, highlight an address →Change
recipients →To,Cc, or Bcc
• To delete an address
aIn Step 3, select Options →view recipient list
bSelect Options, highlight an address →Remove
• To copy, cut, or paste characters ( P.4-13)
• Displaying Address field
When multiple addresses have been saved, and the
number of addresses appear in Address field on Message
creation window.
Note
• If the free space of the shared memory ( P.25-15)
on 707SC is less than 464K bytes, you cannot create
a message. To create a message, delete unnecessary
messages.
• If the shared memory ( P.25-15) becomes low while
in a message creation, you may not be able to save
the message in Drafts.
• A message created on 707SC may not appear the
same way on the other party's phone.
• Message sent with Subject/Text in Hangul, may
appear as spaces or be deleted on the other party's
phone.
5%'DQQMࡍࠫ㧞㧜㧜㧢ᐕ㧝㧜㧞㧢ᣣޓᧁᦐᣣޓඦ೨㧝㧝ᤨ㧝㧥ಽ
17-11
Receiving & Sending Messages
17
Subject
AIn Message creation window, select
Subject field
BEnter a subject
Message
AIn Message creation window, select
Message field
When Slide Show is set ( P.17-12)
Select Text entry field
BEnter the message
Tip
• To copy, cut, or paste characters ( P.4-13)
• To set/release the prediction entry function
( P.4-14)
Tip
• To copy, cut, or paste characters ( P.4-13)
• To use an SMS template or Phonebook entry
(P.4-11)
• To change the font size of characters being entered
In Step 2, select Options →Font Size →Small,
Standard, or Large
• To set/release the prediction entry function
(P.4-14)
• To set Slide Show ( P.17-12)
• To insert image files, etc. in a Message field
( P.17-15, 17-18)
• To view the text in 3D Pictogram
In Message creation window, highlight Message field, select
Options →3D Pict.Disp.
5%'DQQMࡍࠫ㧞㧜㧜㧢ᐕ㧝㧜㧞㧢ᣣޓᧁᦐᣣޓඦ೨㧝㧝ᤨ㧝㧥ಽ
17-12
Receiving & Sending Messages
17
Sending a Message
AIn Message creation window, press
w (Send)
Slide Show
Display S! Mail window in Slide Show. Text messages,
images, movies, and sounds can be inserted on each page
of Slide Show. Set a maximum of 20 slide pages in one
message.
AIn Message creation window, select
Options →Insert →Text
BSelect added Text entry field and
enter a message
CTo add a Text entry field for Slide
Show, perform Steps 1 and 2
Tip
• To set sending settings for a message being created
aIn Message creation window, select Options →
Sending options
bSelect an item and make settings ( P.20-2, 20-5)
cPress w (Apply) or w (Save)
• To change the message type
aIn Message creation window, highlight all fields except
Address field
bSelect Options →Change to S! Mail or Change to
SMS →Yes
Message Creation Window
Slide page No. and display time
䊜䊷䊦
ᚑ
Added Text entry field
5%'DQQMࡍࠫ㧞㧜㧜㧢ᐕ㧝㧜㧞㧢ᣣޓᧁᦐᣣޓඦ೨㧝㧝ᤨ㧝㧥ಽ
17-13
Receiving & Sending Messages
17
Changing the Style of Message
Field
Set the font color, font style, interval time for displaying
Slide Show, background color, etc.
AIn Message creation window,
highlight Message field
BSet options as required
To set background color
aSelect Options →Edit style
bHighlight Select page and use s to display All
pages
cHighlight Background colour and use a to
highlight a color
Set the page display
aHighlight a Character entry field to set
bSelect Options →Edit style
cHighlight Slide interval and enter a time
Set the font color
aSelect Options →Edit style
bHighlight Select page and use s to display All
pages
cHighlight Font colour and use a to highlight a
color
Set a font color for a single slide page
aHighlight a Character entry field to set
Tip
• To insert Image,Sound, or Video
Perform operations in "Inserting a File" ( P.17-17).
Alternatively, other files can be inserted in the same page.
But image/video or sound/video cannot be displayed in the
same page.
• To delete a Text entry field
aIn Message creation window, highlight Text entry field
bSelect Options →Remove →Yes
• To preview Slide Show before sending
aIn Message creation window, highlight a field other than
Address field
bSelect Options →Preview
cSelect Options →Play
5%'DQQMࡍࠫ㧞㧜㧜㧢ᐕ㧝㧜㧞㧢ᣣޓᧁᦐᣣޓඦ೨㧝㧝ᤨ㧝㧥ಽ
17-14
Receiving & Sending Messages
17
bSelect Options →Edit style
cHighlight Font colour and use a to highlight a
color
Set font size for all pages
aSelect Options →Edit style
bHighlight Select page and use s to display All
pages
cHighlight Font Size and use s to display a size
To set font size for a single slide page
aHighlight a Character entry field to set
bSelect Options →Edit style
cHighlight Font Size and use s to display a size
To change the display order for text and
images (Videos)
aSelect Options →Edit style
bHighlight Select page and use s to display All
pages
cHighlight Order item and use s to display
Text- Top or Image (Video)
CPress c (Save)
Templates
Create and send a message using S! Mail or SMS
template.
APress w and select Templates →
S! Mail templates or SMS templates
BHighlight an S! Mail or SMS template
Tip
• To preview the style before sending
aIn Message creation window, highlight a field other than
Address field
bSelect Options → Preview
cSelect Options → Play
Note
• If the type of message being created is SMS, Edit
style or Preview does not appear in Options.
5%'DQQMࡍࠫ㧞㧜㧜㧢ᐕ㧝㧜㧞㧢ᣣޓᧁᦐᣣޓඦ೨㧝㧝ᤨ㧝㧥ಽ
17-15
Receiving & Sending Messages
17
CSelect Options →Send
DCreate a message and press w (Send)
Attaching/Inserting Files
A file that can be attached/inserted to an S! Mail is limited
in size to 294K bytes (except the message address, subject
and message text size). Up to 20 files can be attached to
one S! Mail.
Attaching/Inserting a File from Data
Folder, etc. into Message Field
Attach images, video, and/or sounds saved in Data Folder
to a message, as well as any contents saved in Phonebook
and Calendar (converted as vCard format or vCalendar
format). If you insert a file in Message field, display/play
the file when you view the Message window.
Tip
• To use after viewing an S! Mail template
aPerform Steps 1 and 2
bSelect Options →View
cSelect Options →Play as required
dSelect Options →Edit and send
• To register a template ( P.4-16, 18-19)
Tip
• To check the size of a message being created
Select S! Mail as the Type of the message, the message size
appears in the upper-right corner.
Note
• Note that some recipients may not be able to
receive attachment or inserted files.
• Video files that cannot be sent by S! Mail (File size:
over 294K bytes, Size: over 176 x 144, Quality: other
than Economy, or etc.) are attached/inserted, the
message indicating attaching/inserting failed
appears.
5%'DQQMࡍࠫ㧞㧜㧜㧢ᐕ㧝㧜㧞㧢ᣣޓᧁᦐᣣޓඦ೨㧝㧝ᤨ㧝㧥ಽ

17-16
Receiving & Sending Messages
17
Attaching a File
AIn Message creation window, Select
Attach field
BPerform operations to attach
To attach file
aSelect Data Folder
bSelect a file from Data Folder
To attach Phonebook data as vCard file
format
aSelect Phonebook details
bSearch Phonebook and select an entry ( P.5-9)
cPress w (Add)
To attach Calendar items as vCard file format
aSelect Calendar item
bSelect the items
Message Creation Window
(File Attached)
Attach field
Attachment name
Tip
• To add a file
Perform Step 1 to 2 in "Attaching a file" ( P.17-16)
• To check an attachment
aIn Message creation window, highlight a file in Attach
field and select Options →View attachment
bSelect a file
• If you attach a file
An icon indicating the file type and the file name is displayed
in Attach field.
: Image : Sound
: Video : vCalendar
: vCard : File other than above
• To replace a file
aIn Message creation window, highlight a file in Attach
field and select Options →View attachment
bHighlight a file and select Options →Replace
cPerform Step 2 in "Attaching a file" ( P.17-16)
5%'DQQMࡍࠫ㧞㧜㧜㧢ᐕ㧝㧜㧞㧢ᣣޓᧁᦐᣣޓඦ೨㧝㧝ᤨ㧝㧥ಽ
17-17
Receiving & Sending Messages
17
Inserting a File
AIn Message creation window, select
Options →Insert
To insert a file with Slide Show set ( P.17-12)
aIn Message creation window, highlight Text entry
field to insert a file
bSelect Options →Insert
BSelect the file to insert
To insert an image
aSelect Image
bSelect an image from Data Folder
To insert sound
aSelect Sound
bSelect sound from Data Folder
To insert a video
aSelect Video
bSelect movie from Data Folder
• To delete a file
aIn Message creation window, highlight a file in Attach
field and select Options →View attachment
bHighlight a file and select Options →Remove →
Selected
• To delete all files
aIn Message creation window, highlight a file in Attach
field and select Options →View attachment
bSelect Options →Remove →All →Yes Message Creation Window
(File Inserted)
Inserted file name
5%'DQQMࡍࠫ㧞㧜㧜㧢ᐕ㧝㧜㧞㧢ᣣޓᧁᦐᣣޓඦ೨㧝㧝ᤨ㧝㧥ಽ
17-18
Receiving & Sending Messages
17
Creating & Inserting a File
While creating a message, create a file and insert it. The
file inserted to Message field is displayed/played when
Message window is opened.
AIn Message creation window, select
Options →Create & Insert
To insert a file with Slide Show is set
aIn Message creation window, highlight Text entry
field where a file to be inserted
bSelect Options →Create & Insert
Tip
• To preview an inserted file
aSelect Options →Preview
bSelect Options →Play
• If you insert a file
In Message creation window, the icon indicating the file
type, file name, and file size is displayed in Text entry field. If
you inserted an image with no restrictions on its being
displayed, the image will be shown in reduced size instead of
the icon.
: Images that cannot be displayed because of Content Key
has not been purchased or otherwise obtained
: Sound
: Video
• To replace a file
aIn Message creation window, highlight a file in Text entry
field
bSelect Options →Replace
cSelect a file, an entry, or a calendar item
• To delete a file
aIn Message creation window, highlight a file in Text entry
field
bSelect Options →Remove →Yes
• To insert a file where another file has already been
inserted
A new Slide Show page is added automatically and the file is
inserted. In case of an image file and sound file, both can be
inserted on the same page.
5%'DQQMࡍࠫ㧞㧜㧜㧢ᐕ㧝㧜㧞㧢ᣣޓᧁᦐᣣޓඦ೨㧝㧝ᤨ㧝㧥ಽ
17-19
Receiving & Sending Messages
17
BSelect a creation method and insert
the file
To capture a photograph
aSelect Take picture
bPress c (Take)
cPress c (Add)
To record video
aSelect Record video
bPress c (Record)
cPress c (Save)
dSelect Options →Add to message
To record sound
aSelect Record sound
bPress c (Record)
cPress w (Stop)
dSelect Options →Add to message
Tip
• If you insert a file
707SC works the same way as the file inserted from Data
Folder to Text entry field ( P.17-18).
• To insert a file where another file has already been
inserted
707SC works the same way as the file inserted from Data
Folder to Text entry field ( P.17-18).
• To replace or delete a file
Perform operations the same way as the file inserted from
Data Folder to Text entry field ( P.17-18).
• Operations activated before and after capturing a
still image ( P.7-6)
• Operations activated before and after recording
video ( P.7-11)
• Operations activated before and after recording
sound ( P.14-16)
5%'DQQMࡍࠫ㧞㧜㧜㧢ᐕ㧝㧜㧞㧢ᣣޓᧁᦐᣣޓඦ೨㧝㧝ᤨ㧝㧥ಽ
17-20
Receiving & Sending Messages
17
Saving Created Messages
Save to Drafts
When temporarily stopping message creation to perform
other operations, save the message being created to the
Drafts.
AIn Message creation window, select
Options →Save to Drafts
Save as a Template
By saving a message with fixed contents, etc. as an S! Mail
templates, new S! Mail can be easily created and sent.
AIn Message creation window,
highlight Attach field or Text entry
field
BSelect Options →Save as template
Tip
• When C / y / l is pressed on Message
creation window
When C,y, or l is pressed after entering
something or attaching or inserting a file, a message appears
asking whether to finish creating the message. Select Yes to
save the created message to Drafts.
Note
• Only when any of addresses, subject, and text is
entered or a file is attached/inserted, Save to Drafts
appears in Options.
Note
•Saved as template appears in Options only when a
subject is entered or the message is longer than
SMS, or when a file is inserted.
5%'DQQMࡍࠫ㧞㧜㧜㧢ᐕ㧝㧜㧞㧢ᣣޓᧁᦐᣣޓඦ೨㧝㧝ᤨ㧝㧥ಽ

Messaging Folders
5%'DQQMࡍࠫ㧞㧜㧜㧢ᐕ㧝㧜㧞㧢ᣣޓᧁᦐᣣޓඦ೨㧝㧝ᤨ㧝㧥ಽ

18-2
Messaging Folders
18
Viewing Messages
Five mailboxes are created on 707SC.
Message Lists
From list of Received msgs or Unsent msgs, view the
messages.
APress w
BSelect Received msgs or Unsent msgs
Mailbox Message type
Received msgs Received messages.
Drafts Message drafts saved before completion.
Unsent msgs Messages unsent because of failure or
cancellation, or waiting to be sent.
Sent msgs Messages already sent.
Templates S! Mail or SMS saved as templates.
Tip
• To check message memory status
aPress w
bSelect Memory status
cSelect SMS,S! Mail (By count), or S! Mail (By size)
• To create a personal folder in Received msgs
( P.18-15)
Note
• When adding a new SMS to Drafts, Unsent msgs, or
Sent msgs cause the maximum number of allowed
message to be exceeded, the oldest SMS is deleted
automatically.
Received Message List
5%'DQQMࡍࠫ㧞㧜㧜㧢ᐕ㧝㧜㧞㧢ᣣޓᧁᦐᣣޓඦ೨㧝㧝ᤨ㧝㧥ಽ
18-3
Messaging Folders
18
To check from a personal folder in Received
msgs
Select a folder; then Phone Password entry window
appears, enter Phone Password and press c (Confirm)
CSelect a message
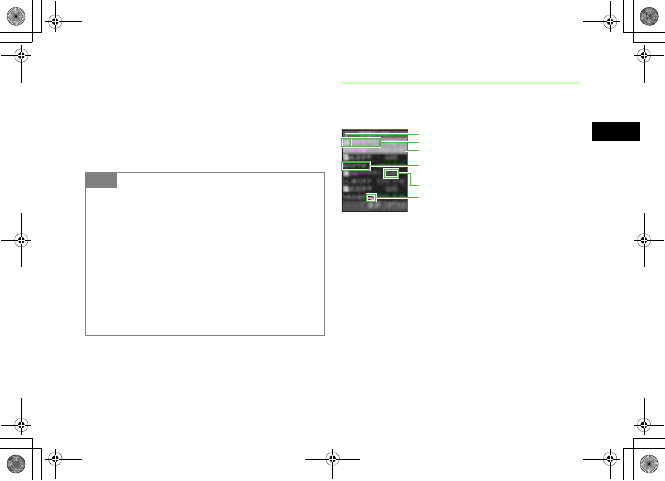
Message List Window
The following information appears in lists for each
Messaging folder.
Tip
• In Message window, press * or #
Switch between previous and next window.
• When pressing Side Keys nb in SMS window
Press Side Key n to enlarge font size by two levels; press
Side Key b to reduce font size by two levels
• To view a sent message
aIn Step 2, select Sent msgs
bHighlight a message, select Options →View
• To view S! Mail details
In Step 3, highlight a message, select Options →Details
Received Message List
Message type icon
Information icon of copyrighted file
Sender or recipient
Reception date
Subject or the top of the message
Message size
5%'DQQMࡍࠫ㧞㧜㧜㧢ᐕ㧝㧜㧞㧢ᣣޓᧁᦐᣣޓඦ೨㧝㧝ᤨ㧝㧥ಽ
18-4
Messaging Folders
18
Tip
• Received Message Indicators
: Unread S! Mail (Priority: High)
: Unread S! Mail (Priority: Standard)
: Unread S! Mail (Priority: Low)
: Unread S! Mail (Priority: High; Video and/or sound
inserted)
: Unread S! Mail (Priority: Standard; Video and/or sound
inserted)
: Unread S! Mail (Priority: Low; Video and/or sound
inserted)
: Read S! Mail (Priority: High)
: Read S! Mail (Priority: Standard)
: Read S! Mail (Priority: Low)
: Read S! Mail (Priority: High; Video and/or sound
inserted)
: Read S! Mail (Priority: Standard; Video and/or sound
inserted)
: Read S! Mail (Priority: Low; Video and/or sound
inserted)
: Unread reception notification (Priority: High)
: Unread reception notification (Priority: Standard)
: Unread reception notification (Priority: Low)
: Read reception notification (Priority: High)
: Read reception notification (Priority: Standard)
: Read reception notification (Priority: Low)
: Unread SMS
: Read SMS
: Unread SMS (saved in USIM Card)
: Read SMS (saved in USIM Card)
: Unread S! Mail Delivery Report
: Read S! Mail Delivery Report
: Unread SMS Delivery Report
: Read SMS Delivery Report
: Receiving S! Mail
• Draft Message Indicators
: S! Mail (Priority: High)
: S! Mail (Priority: Standard)
: S! Mail (Priority: Low)
: S! Mail (Priority: High; Video and/or sound inserted)
: S! Mail (Priority: Standard; Video and/or sound inserted)
: S! Mail (Priority: Low; Video and/or sound inserted)
: SMS
5%'DQQMࡍࠫ㧞㧜㧜㧢ᐕ㧝㧜㧞㧢ᣣޓᧁᦐᣣޓඦ೨㧝㧝ᤨ㧝㧥ಽ
18-5
Messaging Folders
18
Message Window Operations
Saving to Phonebook
Save the phone number/mail address of the sender/
recipient to Phonebook while displaying Message window
(Received)/Reception notification window.
AIn Message window, select Options →
Add to Phonebook →Phone or USIM
BSelect New or Update
To save as a new entry
Select New
To save to an existing entry
aSelect Update
bSearch Phonebook and select an entry ( P.5-9)
CSelect an icon
DSave other items ( P.5-4)
• Unsent Message Indicators
: S! Mail
: S! Mail (Video and/or sound inserted)
: SMS
: Sending S! Mail
• Sent Message Indicators
: S! Mail
: S! Mail (Video and/or sound inserted)
: SMS
: SMS (saved in USIM Card)
• Copyrighted file indicators
Attached/inserted copyrighted file indicators
: Transferable, Content Key has already been purchased
: Transferable, Content Key has not been purchased or
otherwise obtained
: Nontransferable, Content Key has already been
purchased
: Nontransferable, Content Key has not been purchased or
otherwise obtained
• While Secret Mode is set to Hide
Phonebook Secret Mode is set to On for message receiver/
sender information; only the number or email addresses
appear (instead of the name).
5%'DQQMࡍࠫ㧞㧜㧜㧢ᐕ㧝㧜㧞㧢ᣣޓᧁᦐᣣޓඦ೨㧝㧝ᤨ㧝㧥ಽ
18-6
Messaging Folders
18
EPress w (Save)
Saving as an S! Mail Template
Save received or sent S! Mail as an S! Mail template.
AIn Message window, select Options →
Save as S! Mail template
Message Window Options
Note
• When an underlined phone number, mail address or
URL is highlighted on a message window, Add to
Phonebook does not appear in Options.
Tip
• If a message appears indicating name duplication
aPress c
bPress c (Select) and enter the name
cPress w (Save)
• When a name entry window has opened
aPress c (Select) and enter the name
bPress w (Save)
Note
• While displaying S! Mail sent from a PC or other
devices, Add to S! Mail template does not appear in
Options.
Item Description
Play Play Slide Show, inserted video, or sound
( P.17-5).
Retrieved Receive subsequent part of the notified
message.
Reply Reply to the sender of the reception
notification.
Reply to all Send reply to all entered S! Mail recipients.
Forward Forward received message.
Download
content key Purchase or acquire Content Key.
Delete Delete displayed messages.
Save as S! Mail
template
Add displayed S! Mail as an S! Mail
template ( P.18-6).
5%'DQQMࡍࠫ㧞㧜㧜㧢ᐕ㧝㧜㧞㧢ᣣޓᧁᦐᣣޓඦ೨㧝㧝ᤨ㧝㧥ಽ
18-7
Messaging Folders
18
Replying to a Message
APress w and select Received msgs
BHighlight message, select Options →
Reply
To reply to all recipients entered in the S! Mail
Highlight message, select Options → Reply to all
CCreate a message and press
w (Send)
Item copy Save files attached or inserted in an S! Mail
to Data Folder ( P.18-14).
Add to
Phonebook
Save number or mail address to
Phonebook or USIM Card Phonebook
( P.18-5).
Details Confirm S! Mail size, etc.
3D Pict. Disp. Display a message in 3D Pictogram
( P.20-5).
Move to Phone/
USIM
Move an SMS received or being sent to
handset or USIM Card ( P.18-18).
Item Description
Tip
• The subject of message replies
The subject of an S! Mail reply is prefixed with "RE:"
automatically.
• While Reply with text is set to On
Under two line breaks, received message text is
automatically entered in Text entry field.
Note
• If free space of the shared memory ( P.25-15) on
707SC is less than 464K bytes, you cannot reply to a
message. To reply to the message, first delete
unnecessary messages.
5%'DQQMࡍࠫ㧞㧜㧜㧢ᐕ㧝㧜㧞㧢ᣣޓᧁᦐᣣޓඦ೨㧝㧝ᤨ㧝㧥ಽ

18-8
Messaging Folders
18
Forwarding a Message
Forward a received or sent message to another recipient.
APress w and select Received msgs or
Sent msgs
BHighlight message, select Options →
Forward
CCreate a message and press
w (Send)
Sending from Drafts
APress w and select Drafts
BHighlight the message and press
w (Send)
When Send does not appear
aPress c (Edit)
bEnter address and press w (Send)
Tip
• The subject of forwarded messages
The subject of a forwarded S! Mail is prefixed with "FW:"
automatically.
Note
• If free space of the shared memory ( P.25-15) on
707SC is less than 464K bytes, you cannot forward a
message. To forward the message, first delete
unnecessary messages.
5%'DQQMࡍࠫ㧞㧜㧜㧢ᐕ㧝㧜㧞㧢ᣣޓᧁᦐᣣޓඦ೨㧝㧝ᤨ㧝㧥ಽ
18-9
Messaging Folders
18
Sending from Unsent
Messages
Send messages directly from Unsent Messages.
APress w and select Unsent msgs
BHighlight the message and press
w (Send)
To send after modifying
aHighlight the message, select Options →Edit
bEdit the message and press w (Send)
Deleting a Message
Deleting Specified Message(s)
Delete multiple specified messages. Alternatively, specify
and delete saved templates.
APress w
BSelect a mailbox
To delete a saved S! Mail or SMS templates
Select Templates →S! Mail templates or SMS
templates
CDelete a Message or Template
To delete one message or template
aHighlight the message or template
bSelect Options →Delete →Selected →Yes
To delete multiple messages or templates
aSelect Options →Delete →Multiple
bCheck a message or template to delete
cRepeat b to check all of the target messages or
templates
dPress w (Delete) and proceed to f when all
are not checked
eEnter Phone Password and press c (Confirm)
fSelect Yes
5%'DQQMࡍࠫ㧞㧜㧜㧢ᐕ㧝㧜㧞㧢ᣣޓᧁᦐᣣޓඦ೨㧝㧝ᤨ㧝㧥ಽ
18-10
Messaging Folders
18
Designating & Deleting a
Mailbox
APress w to select Settings →Delete
all
BCheck a mailbox to delete
CRepeat Step 2 to check all target
mailboxes
DPress w (Delete)
EEnter Phone Password, and press
c (Confirm) to select Ye s
Tip
• To view the contents of multiple messages or S! Mail
templates while selecting them
aRepeat Steps 1 and 2
bSelect Options →Delete →Multiple
cHighlight message or S! Mail template, select Options
→View
• To collectively select/deselect multiple messages or
S! Mail templates
aRepeat Steps 1 and 2
bSelect Options →Delete →Multiple
cSelect Options →Mark all or Unmark all
• To collectively select/deselect multiple SMS
templates
aPerform Steps 1 and 2
bSelect Options →Delete →Multiple
cPress o (Mark all) or o (Unmark all)
Note
• While highlighting an S! Mail template designated
as default, Delete does not appear in Options.
5%'DQQMࡍࠫ㧞㧜㧜㧢ᐕ㧝㧜㧞㧢ᣣޓᧁᦐᣣޓඦ೨㧝㧝ᤨ㧝㧥ಽ

18-11
Messaging Folders
18
Deleting All Messages from a
Mailbox
Delete saved templates all at once.
APress w
BSelect a mailbox
To delete an S! Mail or SMS template
Select Templates →S! Mail templates or SMS
templates
CSelect Options →Delete →All
DEnter Phone Password, press
c (Confirm) and select Yes
Linked Information
If Message window or Notification details window
contains an underlined number, mail address, or URL; save
it to Phonebook or use it to place a call, send messages,
save bookmark, or access the site.
As linked information, following number of characters can
be recognized for each S! Mail Font size setting:
Maximum of 45 lines (1,035 characters) for Standard,
54 lines (1,026 characters) for Large, and 41 lines (1,025
characters) for Small.
Note
• Personal folders cannot be deleted by this
operation. To delete Personal folders, perform the
following operations: Messaging →Settings →
Delete all
• You cannot delete the S! Mail template designated
as the default.
5%'DQQMࡍࠫ㧞㧜㧜㧢ᐕ㧝㧜㧞㧢ᣣޓᧁᦐᣣޓඦ೨㧝㧝ᤨ㧝㧥ಽ
18-12
Messaging Folders
18
Saving to Phonebook
AIn Message window, select a phone
number, mail address, or URL and
select Add to phonebook →Phone or
USIM
BSelect saving method to create a new
entry or update an existing entry
To save as a new entry
Select New
To save to an existing entry
aSelect Update
bSearch Phonebook and select an entry ( P.5-9)
CSelect an icon
DSave other items ( P.5-4)
EPress w (Save)
Saving as a Bookmark
AIn Message window, select a URL and
select Bookmark
BPress c (Select) to enter a subject
and press w (Save)
Initiating a Call, Sending a
Message, or Accessing the Web
Use phone number/mail address/URL information in
Message window or Notification details window.
AIn Message window, take procedures
down below
Note
• When you select a URL, you cannot select USIM in
Step 1.
5%'DQQMࡍࠫ㧞㧜㧜㧢ᐕ㧝㧜㧞㧢ᣣޓᧁᦐᣣޓඦ೨㧝㧝ᤨ㧝㧥ಽ
18-13
Messaging Folders
18
To initiate a Voice Call
Select a phone number and select Voice call
To initiate a Video Call
Select a phone number and select Video call
To send a message
aSelect a phone number or mail address and select
Create msg
bCreate a message and press w (Send)
To access the Web
Select URL and select Go to URL
Using an Attachment
Viewing an Attachment
Open images/play sounds attached to S! Mail. For vCard/
vCalendar, open Details to see contents.
ASelect a file and select Open file
Tip
• Operations in Notification details window
Phone number/mail address/URL information except in From
(other party's phone number) can be used.
Tip
• To save a file in Data Folder directly
In Message window, select a file →Save items
• To save vCard/vCalendar to Phonebook/Calendar
directly
In Message window, select a file →Register to
Phonebook or Register to Calendar
• To register vCard/vCalendar to Phonebook/Calendar
after viewing
aPerform Step 1
bPress c (Register)
5%'DQQMࡍࠫ㧞㧜㧜㧢ᐕ㧝㧜㧞㧢ᣣޓᧁᦐᣣޓඦ೨㧝㧝ᤨ㧝㧥ಽ
18-14
Messaging Folders
18
Saving Attachments to Data
Folder
Save S! Mail attachment/inserted files to 707SC.
AIn Message window, select Options →
Save items
BPerform file selection operation
To select and save one file
aHighlight a file
bPress c (Select) or select Options →Selected
To select and save multiple files
aSelect Options →Multiple
bCheck the files to save
cRepeat b to check all target files
dPress w (Save)
To save all files
Select Options →All
• When a file requiring Content Key is attached
If you perform Step 1, a message appears and you cannot
open the file. To view the file, select Save items in Step 1 to
save and purchase/obtain Content Key from Data Folder
( P.11-13).
• When an attachment has a restriction (only one time
playback allowed)
When you perform Step 1, a message appears notifying you
that only one time playback is allowed).
Tip
• To select or deselect multiple files at once
aIn Step 2, select Options → Multiple
bPress o (Mark all) or o (Unmark all)
• When a popup message appears indicating the file
name is a duplicate while saving
aPress c
bPress c (Select) and change the file name
cPress w (Save)
Note
• When a file is highlighted in Message window, Save
items does not appear in Options.
5%'DQQMࡍࠫ㧞㧜㧜㧢ᐕ㧝㧜㧞㧢ᣣޓᧁᦐᣣޓඦ೨㧝㧝ᤨ㧝㧥ಽ
18-15
Messaging Folders
18
Managing Folders
Create personal folders in Received msgs; organize and
save in the folders for each mail types. Set own security
setting for personal folders.
Create Folder
APress w and select Received msgs
BSelect Options →Create folder
CEnter a name
Edit Folder
Change name for personal folders.
APress w and select Received msgs
BSelect Options →Edit folder
CEnter a name
Security ON/OFF
Set Security setting for a personal folder; require Phone
Password entry to check messages in the personal folder.
APress w and select Received msgs
BHighlight the personal folder, select
Options →Security ON/OFF
CEnter Phone Password and press c
(Confirm), then select Ye s
Tip
• Folder with Security setting
appears indicating Security setting has been selected.
• With Security settings On
Select personal folders; Phone Password entry window
appears. Enter Phone Password and press c; Message list
window in the personal folder appears.
5%'DQQMࡍࠫ㧞㧜㧜㧢ᐕ㧝㧜㧞㧢ᣣޓᧁᦐᣣޓඦ೨㧝㧝ᤨ㧝㧥ಽ
18-16
Messaging Folders
18
Moving Messages
APress w and select Received msgs
To move messages in personal folder to
another personal folder
Select a personal folder
BHighlight message, select Options →
Move this
CSelect the destination folder
To resent messages to Received msgs
Select Received msgs
Delete Folder
APress w and select Received msgs
BHighlight the personal folder, select
Options →Delete folder →Yes
To select personal folder with Security setting
On
Enter Phone Password and press c (Confirm)
CSelect Yes
From Message List
Saving to Phonebook
APress w and select Received msgs,
Unsent msgs or Sent msgs
BHighlight message, select Options →
Add to Phonebook
5%'DQQMࡍࠫ㧞㧜㧜㧢ᐕ㧝㧜㧞㧢ᣣޓᧁᦐᣣޓඦ೨㧝㧝ᤨ㧝㧥ಽ
18-17
Messaging Folders
18
CSelect a phone number or mail
address and select Phone or USIM
DSelect saving method to create a new
entry or update an existing entry
To save as a new entry
Select New
To save to an existing entry
aSelect Update
bSearch Phonebook and select an entry ( P.5-9)
ESelect an icon
FEnter additional items as required
( P.5-4)
GPress w (Save)
Sorting Messages
Available sorting types to display vary by Message list
window of the mailbox.
AIn Message list window, select
Options →Sort by
BSelect an item
To sort in descending order of date
Select Date
To sort by sender
Select Sender
To sort by recipient
Select Recipient
To display read and unread messages
separately
Select Unread to read or Read to unread
5%'DQQMࡍࠫ㧞㧜㧜㧢ᐕ㧝㧜㧞㧢ᣣޓᧁᦐᣣޓඦ೨㧝㧝ᤨ㧝㧥ಽ
18-18
Messaging Folders
18
To display messages separately by message
type
Select Message type
To sort by subject
Select Subject
To sort in descending order of message size
Select Size
Move to Phone/Move to USIM
Move received SMS or sent SMS.
Save up to ten messages to USIM Card.
APress w and select Received msgs or
Sent msgs
BMove messages
To move from USIM Card to 707SC
aHighlight an SMS saved on USIM Card
bSelect Options →Move to phone
To move from 707SC to USIM Card
aHighlight an SMS saved in USIM Card
bSelect Options →Move to USIM
Tip
• Listing order when selecting Message type
Listed in the order of SMS → S! Mail (Including message
notification) → SMS saved in USIM Card.
• Listing order when selecting Sender, Recipient, or
Subject
Listed in the order of single-byte symbol →single-byte
number → single-byte alphabet →single-byte Katakana →
double-byte symbol →double-byte Hiragana →double-
byte Katakana →Kanji → double-byte number → double-
byte alphabet. But if Subject is selected, messages with no
subject are listed at the top.
5%'DQQMࡍࠫ㧞㧜㧜㧢ᐕ㧝㧜㧞㧢ᣣޓᧁᦐᣣޓඦ೨㧝㧝ᤨ㧝㧥ಽ
18-19
Messaging Folders
18
Saving an S! Mail Template
For more information about saving an SMS template, see
"SMS Templates" ( P.4-16).
APress w and select Templates →
S! Mail templates
BSelect Options →Add new
CSelect Subject field or Text entry field
and enter a subject or message
DPress w (Save)
Tip
• Message List SMS Indicators
: Unread SMS
: Read SMS
: Unread SMS (USIM Card)
: Read SMS (USIM Card)
: Sent SMS
: Sent SMS (USIM Card)
• To move received SMS in personal folder to USIM
Card
A confirmation message appears. Select Yes to complete the
move.
Tip
• To view an S! Mail template being created
In Step 3, select Options →Preview
• To display and view an S! Mail template
In Step 2, highlight S! Mail template, select Options →
View
• To modify an S! Mail template
aIn Step 2, select a registered S! Mail template and
perform modification operation
bPress w (Save)
• To delete an S! Mail template
Perform the same operation as for a message ( P.18-9).
• To copy, cut, or paste characters ( P.4-13)
• To use contents of an SMS template or Phonebook
( P.4-11)
5%'DQQMࡍࠫ㧞㧜㧜㧢ᐕ㧝㧜㧞㧢ᣣޓᧁᦐᣣޓඦ೨㧝㧝ᤨ㧝㧥ಽ
18-20
Messaging Folders
18
Message List Options
• To change the font size of characters being entered
aIn Step 3, select Text entry field, select Options →Font
Size
bSelect any of Small,Standard, or Large
• To set/release the prediction entry function
( P.4-14)
• Setting Slide Show/inserting a file
aIn Step 3, select Options →Insert or Create & Insert
bPerform setting, attaching, or inserting operation
( P.17-12, 17-17, 17-18)
• To view the text in 3D Pictogram
In Step 3, highlight Text entry field, select Options →3D
Pict.Disp.
Item Description
Retrieve Retrieve complete S! Mail from the Server.
Reply Reply to the sender ( P.18-7).
Reply to all Send reply to all entered S! Mail recipients
( P.18-7).
Forward Forward received message ( P.18-8).
Move this Move received mails to a personal folder
( P.18-16).
Create folder Create a personal folder ( P.18-15).
Edit folder Change personal folder name ( P.18-15).
Security On/Off
With Security setting On, enter Phone
Password to check mails in a personal
folder ( P.18-15).
Delete folder Delete a personal folder ( P.18-16).
View Open sent messages or S! Mail templates
( P.18-3, 18-19).
Edit Edit unsent message ( P.18-8).
Delete Delete messages or templates ( P.18-9,
18-11).
Move to phone/
Move to USIM
Move SMS between 707SC and USIM
Card ( P.18-18).
Sort by Sort messages ( P.18-17).
Add to Phonebook
Save number or mail address to
Phonebook or USIM Card Phonebook
( P.18-16).
Details Check memory status in a personal folder
or confirm S! Mail size, etc.
Item Description
5%'DQQMࡍࠫ㧞㧜㧜㧢ᐕ㧝㧜㧞㧢ᣣޓᧁᦐᣣޓඦ೨㧝㧝ᤨ㧝㧥ಽ
18-21
Messaging Folders
18
Cancel retrieving Stop message retrieval from Mail Server.
Send Send message using S! Mail template or
SMS template ( P.17-14).
Add new Save a new S! Mail template or SMS
template ( P.4-16, 18-19).
Item Description
5%'DQQMࡍࠫ㧞㧜㧜㧢ᐕ㧝㧜㧞㧢ᣣޓᧁᦐᣣޓඦ೨㧝㧝ᤨ㧝㧥ಽ

18-22
5%'DQQMࡍࠫ㧞㧜㧜㧢ᐕ㧝㧜㧞㧢ᣣޓᧁᦐᣣޓඦ೨㧝㧝ᤨ㧝㧥ಽ

Server Mail
5%'DQQMࡍࠫ㧞㧜㧜㧢ᐕ㧝㧜㧞㧢ᣣޓᧁᦐᣣޓඦ೨㧝㧝ᤨ㧝㧥ಽ
19-2
Server Mail
19
Message List
View messages stored on the Mail Server in a list form.
Retrieve, forward, or delete messages.
Acquire Mail List
APress w and select Server mail box
BSelect Acquire Mail List
Download
APress w and select Server mail box
BSelect Mail List
CHighlight the message, select Options
→Download
Tip
• To check Mail Server usage state
aSelect Server mail volume in Step 2
bPress c (Update) and select Yes to update to the
latest information
Tip
• To receive all messages from Message list window
In Step 2, select Retrieve All Mail
5%'DQQMࡍࠫ㧞㧜㧜㧢ᐕ㧝㧜㧞㧢ᣣޓᧁᦐᣣޓඦ೨㧝㧝ᤨ㧝㧥ಽ
19-3
Server Mail
19
Delete
APress w and select Server mail box
BSelect Mail List
CDelete unwanted messages
To delete one message
aHighlight a message
bSelect Options →Delete →Selected →Yes
To delete multiple messages
aSelect Options →Delete →Multiple
bCheck a message to delete
cRepeat b to check all target messages to delete
dPress w (Delete) and go to f if unmarking all
eEnter Phone Password and press c (Confirm)
fSelect Yes
To delete all messages
aSelect Options →Delete →All
bEnter Phone Password, press c (Confirm) and
select Yes
Tip
• To select/deselect multiple messages at once
aPerform Steps 1 and 2
bSelect Options →Delete →Multiple
cSelect Options →Mark all or Unmark all
5%'DQQMࡍࠫ㧞㧜㧜㧢ᐕ㧝㧜㧞㧢ᣣޓᧁᦐᣣޓඦ೨㧝㧝ᤨ㧝㧥ಽ
19-4
Server Mail
19
Remote Forward
Forward a message from the Mail Server to another
address. Contents except the address are sent without
modification.
APress w and select Server mail box
BSelect Mail List
CHighlight message, select Options →
Remote Forward
DEnter an address
To directly enter an address
aSelect Entry field and select Enter Recipient
bEnter a phone number or mail address
To enter an address using a log
Select Entry field and select a displayed log entry
To select an address from Phonebook
aSelect Entry field and select From Phonebook
bSearch Phonebook and select an entry ( P.5-9)
cHighlight a phone number or mail address and
press w (Select)
To select an address from Category of
Phonebook
aSelect Entry field and select From Category
bSelect a Category, with/without an Address
selection window, highlight an address and press
w (Select)
ESelect Options →Send
5%'DQQMࡍࠫ㧞㧜㧜㧢ᐕ㧝㧜㧞㧢ᣣޓᧁᦐᣣޓඦ೨㧝㧝ᤨ㧝㧥ಽ
19-5
Server Mail
19
Tip
• Message subject
The subject of a forwarded message is prefixed with "FW:"
automatically.
• To set other sending options for a message being
created
aIn Step 5, select Options →Sending options
bSelect an item and perform operations to set ( P.20-2)
cPress w (Apply)
• To delete an address
In Step 5, highlight a recipient, select Options →Remove
• To change the address type to To, Cc, or Bcc
aIn Step 5, highlight a recipient, select Options →
Change recipients
bSelect any of To,Cc, or Bcc
5%'DQQMࡍࠫ㧞㧜㧜㧢ᐕ㧝㧜㧞㧢ᣣޓᧁᦐᣣޓඦ೨㧝㧝ᤨ㧝㧥ಽ

19-6
5%'DQQMࡍࠫ㧞㧜㧜㧢ᐕ㧝㧜㧞㧢ᣣޓᧁᦐᣣޓඦ೨㧝㧝ᤨ㧝㧥ಽ

Other Message Settings
5%'DQQMࡍࠫ㧞㧜㧜㧢ᐕ㧝㧜㧞㧢ᣣޓᧁᦐᣣޓඦ೨㧝㧝ᤨ㧝㧥ಽ

20-2
Other Message Settings
20
Customizing Handset
Address
Change your mail address (alphanumerics before @) used
for sending and receiving S! Mail to/from PC, etc. The
default account name consists of random alphanumerics.
APress w and select Settings →
S! Mail →Mail Address setting
BFollow onscreen instructions
S! Mail Settings
Sending Settings
Set options related to sending S! Mail. Alternatively, set
sending options separately for each S! Mail to send
( P.17-12).
APress w and select Settings →
S! Mail → Sending options
BSelect an item and set
Message priority
aSelect Priority
bSelect a level and press c
Retention period (before expire) on the Mail
Server
aSelect Expiration
bSelect an item and enter a time if you selected
Custom time (Hour)
cPress c
Retention period (before delivery) on the Mail
Server
aSelect Delivery
bSelect an item and press c
Delivery report request
Check Request delivery report
Default Setting 䂓Priority: Normal 䂓Expiration: Maximum
䂓Delivery: Immediately
䂓Request delivery report: Unchecked
5%'DQQMࡍࠫ㧞㧜㧜㧢ᐕ㧝㧜㧞㧢ᣣޓᧁᦐᣣޓඦ೨㧝㧝ᤨ㧝㧥ಽ
20-3
Other Message Settings
20
CPress w (Save)
Receiving Settings
Set options related to receiving S! Mail.
APress w and select Settings →
S! Mail → Receiving options
BSelect an item and set
To set the receiving method to use in Japan
aSelect Home network
bSelect an item and press c
To set the receiving method while overseas
aSelect Roaming network
bSelect an item and press c
CPress w (Save)
Tip
• When the retention set in Expiration expires
The S! Mail is deleted automatically from the Mail Server.
• When retention is set in Delivery
When the specified time has elapsed, the S! Mail is sent from
the Mail Server.
• When Request delivery report is checked
When an S! Mail is sent from the Mail Server, a distribution
report is sent to your handset.
Default Setting 䂓Home network: Manual
䂓Roaming network: Manual
Tip
• The contents of Home network and Roaming
network are:
Auto download: Receive automatically.
Manual: Receive only reception notification.
5%'DQQMࡍࠫ㧞㧜㧜㧢ᐕ㧝㧜㧞㧢ᣣޓᧁᦐᣣޓඦ೨㧝㧝ᤨ㧝㧥ಽ
20-4
Other Message Settings
20
Message Size
Deactivate sending messages exceeding the specified size.
APress w and select Settings →
S! Mail → Message size
BSelect an item and press c (Save)
Default Style
Set font color, font style, background color, and Slide Show
time intervals. Alternatively, change display settings for
each S! Mail sent ( P.17-13).
APress w and select Settings →
S! Mail →Default style
BSet options
Font color
aSelect Font color
bUse a to highlight a color and press c
To set a font size
aSelect Font Size
bSelect an item and press c
Background color
aSelect Background color
bUse a to highlight a color and press c
Slide Show time intervals
aSelect Slide interval
bSelect an item, with Custom time, enter a time
cPress c
CPress w (Save)
Default Setting 䂓300KB
Default Setting 䂓Font color: Black 䂓Font size: Large
䂓Background color: White
䂓Slide interval: Custom time (3 seconds)
5%'DQQMࡍࠫ㧞㧜㧜㧢ᐕ㧝㧜㧞㧢ᣣޓᧁᦐᣣޓඦ೨㧝㧝ᤨ㧝㧥ಽ

20-5
Other Message Settings
20
SMS Settings
Set options related to sending SMS. Alternatively, set
options for each SMS to send ( P.17-12).
APress w and select Settings →SMS
BSet options
Request a delivery report
Check Delivery report
Change the character set of fonts used in the
text
aSelect Character support
bSelect an item and press c
CPress w (Save)
3D Pictogram Settings
3D Pictogram is a function that allows you to display in 3D
animation for words, pictograms, or emoticons in message
text.
Activate or deactivate 3D Pictogram or set the background
color and display speed.
APress w and select Settings →
3D pictogram
Default Setting 䂓Delivery report: Unchecked
䂓Character support: Automatic
Tip
•When Delivery report is checked
When an SMS is sent from the Mail Server, a distribution
report is sent to your handset.
Default Setting 䂓Display type: New mails only
䂓Background: Pattern 1
䂓Running Speed: Normal
5%'DQQMࡍࠫ㧞㧜㧜㧢ᐕ㧝㧜㧞㧢ᣣޓᧁᦐᣣޓඦ೨㧝㧝ᤨ㧝㧥ಽ
20-6
Other Message Settings
20
BSet options
Whether to use 3D Pictogram
aSelect Display type
bSelect an item and press c (Save)
Background pattern and font colors
aSelect Background
bPress s, display the pattern and press
c (Save)
To set a display speed
aSelect Running speed
bSelect an item and press c (Save)
Reply with text
When creating reply message, set to include received
message text.
APress w and select Settings →Reply
with text
BSelect an item and press c (Save)
Tip
• The contents of Display type are:
Always: Use 3D Pictogram when viewing every message.
New mails only: Use 3D Pictogram only when viewing an
unread message received.
OFF: Not use 3D Pictogram.
Note
• Such as file-attached/Slide Show set S! Mail may not
appear properly in 3D Pictogram.
Default Setting 䂓Off
Tip
• The contents of Reply with text are:
On: Reply with text including received message text.
Off: Reply with text not including received message text.
5%'DQQMࡍࠫ㧞㧜㧜㧢ᐕ㧝㧜㧞㧢ᣣޓᧁᦐᣣޓඦ೨㧝㧝ᤨ㧝㧥ಽ

Mobile Internet
5%'DQQMࡍࠫ㧞㧜㧜㧢ᐕ㧝㧜㧞㧢ᣣޓᧁᦐᣣޓඦ೨㧝㧝ᤨ㧝㧥ಽ
21-2
Mobile Internet
21
Getting Started
Web
From a handset, access to Yahoo! Keitai and the Web to
browse various sites or download images, sounds, etc.
A separate subscription is required to use the Web.
Accessing from the Yahoo! Keitai Main Menu
From the Yahoo! Keitai main menu, select a menu items to
access various contents.
Internet Accessing
Enter a URL and access pages.
SSL/TLS
Secure Sockets Layer (SSL) and Transport Layer Security
(TLS) are encryption protocols for secure Internet
transmissions of important/sensitive information (credit
card numbers, etc.) and authentication. Confirm electronic
certificates saved on 707SC ( P.22-14, 23-4).
SSL/TLS Precautions
When a security notice appears, subscribers must decide for
themselves whether or not to open the page. Opening secure
pages constitutes agreement to the terms of usage.
SOFTBANK MOBILE Corp., VeriSign Japan K.K., Betrusted
Japan Co., Ltd., and Entrust Japan Co., Ltd. are not liable for
damages associated with SSL/TLS use.
Cache
Retrieved Mobile Internet pages are temporarily saved
here. Cache remains even after a session ends or 707SC is
turned off. When full, oldest pages are automatically
deleted to make room for new ones. When a saved page is
opened again, it may open from Cache. For the latest
version, reload the page ( P.22-13).
Tip
• To manually delete Cache contents ( P.23-4)
• When another USIM Card is inserted into 707SC
Cache contents are automatically deleted.
• When a page with an expiry date is saved
Page is automatically deleted upon expiry.
5%'DQQMࡍࠫ㧞㧜㧜㧢ᐕ㧝㧜㧞㧢ᣣޓᧁᦐᣣޓඦ೨㧝㧝ᤨ㧝㧥ಽ

21-3
Mobile Internet
21
Getting Online
Yahoo! Keitai Main Menu
Access Mobile Internet sites via Yahoo! Keitai main menu
APress o
Alternatively, press o for 1+ seconds
Yahoo! Keitai menu appears. Select Yahoo! Keitai
to open Yahoo! Keitai main menu.
BSelect an item
Enter URL
APress c and select Yahoo! Keitai →
Enter URL
BSelect URL field and enter a URL
CPress w (Go to)
Tip
• When accessing Mobile Internet for the first time
After Step 1, Time & date settings window appears; set time
& date to display Information window.
Tip
• To save the entered URL as a bookmark
aIn Step 2, check Add bookmark
bSelect Title field and enter title
cPress w (Go to)
• To access a page from the access history ( P.22-11)
5%'DQQMࡍࠫ㧞㧜㧜㧢ᐕ㧝㧜㧞㧢ᣣޓᧁᦐᣣޓඦ೨㧝㧝ᤨ㧝㧥ಽ
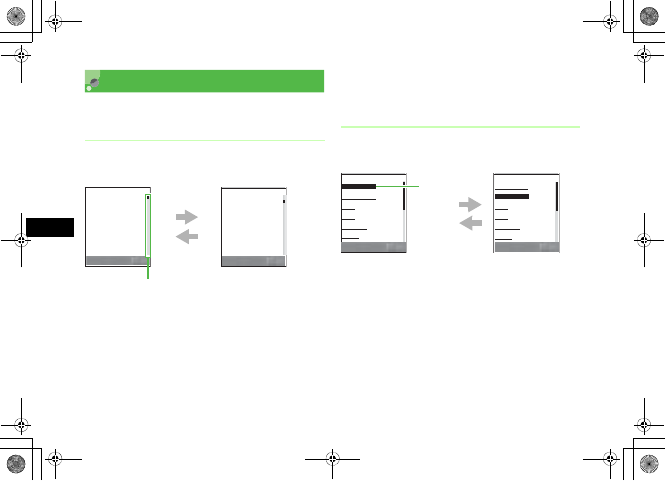
21-4
Mobile Internet
21
Page Window Operations
Operations on pages are as follows.
Scrolling
Scroll bar appears when page content extends beyond
current view.
d/r: Scroll down by one line
When a horizontal scroll bar appears, use r to
scroll right
u/l: Scroll up by one line
When a horizontal scroll bar appears, use l to
scroll left
Side Key b: Scroll page down by multiple lines
Side Key n: Scroll page up by multiple lines
Moving Cursor
When selecting an item such as link, move cursor to that
item.
/
dr: When items are listed vertically, move cursor
down
When the page is already scrolled to the bottom,
alternatively, press Side Key b to move cursor down
/
ul: When items are listed vertically, move cursor
up
When the page is already scrolled to the top,
alternatively, press Side Key n to move cursor up
䈒 䈛 䉌 䈱 ൻ⍹䉕 ⊒ជ
䊆䊠 䊷䉴 䋨 ㅦႎ䋩
㬍㬍 ⋵䂾䂾Ꮢ䈱 䊎 䊦Ꮏ႐
䈪䇮 ⚂
䋳䋰䋰
ਁᐕ೨䈱䈒 䈛 䉌 䈱ൻ
⍹䉕 ⊒䇯
ൻ⍹䈱․ᓽ䈎䉌 䇮䂦䂦䈒 䈛 䉌 䈱
৻⒳䈪䈲䈭 䈇䈎䈫 䉂䉌 䉏 䈩䈇
䉎䇯
䂾䂾Ꮢ䈪䈲䈖 䉏䉁 䈪 䈮䈒 䈛 䉌
䈱ൻ⍹䈏
䋱䋰
⊒ជ䈘 䉏䈩䈇 䉎
ᚯ䉎
䈒 䈛 䉌 䈱 ൻ⍹䉕 ⊒ជ
㬍㬍 ⋵䂾䂾Ꮢ䈱 䊎 䊦Ꮏ႐
䈪䇮 ⚂
䋳䋰䋰
ਁᐕ೨䈱䈒 䈛 䉌 䈱ൻ
⍹䉕 ⊒䇯
ൻ⍹䈱․ᓽ䈎䉌 䇮䂦䂦䈒 䈛 䉌 䈱
৻⒳䈪䈲䈭 䈇䈎䈫 䉂䉌 䉏 䈩䈇
䉎䇯
䂾䂾Ꮢ䈪䈲䈖 䉏䉁 䈪 䈮䈒 䈛 䉌
䈱ൻ⍹䈏
䋱䋰
⊒ជ䈘 䉏䈩䈇 䉎
䈏䇮 ࿁⊒䈘 䉏䈢 䈱䈲ઁ䈱
䉅䈱䉋䉍 䉅
䋵䋰
ਁᐕ䈾䈬 ฎ䈇䈫
ᚯ䉎
d/r/b
u/l/n
Scroll bar
䊆䊠䊷䉴
䋱䋮
࿖ౝ䈱䊆 䊠 䊷䉴
䋲䋮
ᶏᄖ䈱䊆 䊠 䊷䉴
䋳䋮
ᴦ
䋴䋮
⚻ᷣ
䋵䋮
䉴䊖䉙 䊷䉿
䋶䋮
䈠䈱ઁ
ᚯ䉎 ㆬᛯ
䊆䊠䊷䉴
䋱䋮
࿖ౝ䈱䊆 䊠 䊷䉴
䋲䋮
ᶏᄖ䈱䊆 䊠 䊷䉴
䋳䋮
ᴦ
䋴䋮
⚻ᷣ
䋵䋮
䉴䊖䉙 䊷䉿
䋶䋮
䈠䈱ઁ
ᚯ䉎 ㆬᛯ
d/r
u/l
Cursor
5%'DQQMࡍࠫ㧞㧜㧜㧢ᐕ㧝㧜㧞㧢ᣣޓᧁᦐᣣޓඦ೨㧝㧝ᤨ㧝㧥ಽ

21-5
Mobile Internet
21
Previous or Next Page
Highlight link, etc. and press c: Display the next page
Alternatively, select Options →Forward to change
the window
w (Back) or C: Display the previous page
Text Entry/Item Selection
An information window may show fields and items given
below.
aText entry field
Enter data, certification passwords, etc.; highlight Text
entry field, press c and enter text
Tip
• When items are listed in the same row
Press s to move cursor right or left.
• When you move cursor
The selected item is highlighted or enclosed in a frame of
dotted lines if it is link to another page.
䊆䊠䊷䉴
䋱䋮
࿖ౝ䈱䊆 䊠 䊷䉴
䋲䋮
ᶏᄖ䈱䊆 䊠 䊷䉴
䋳䋮
ᴦ
䋴䋮
⚻ᷣ
䋵䋮
䉴䊖䉙 䊷䉿
䋶䋮
䈠䈱ઁ
ᚯ䉎 ㆬᛯ
䊆䊠䊷䉴䋨 䉴 䊘䊷䉿䋩
䋱䋮
㊁
䋲䋮
䉰䉾 䉦䊷
䋳䋮
䉯䊦䊐
䋴䋮
䈠䈱ઁ
ᚯ䉎 ㆬᛯ
c
w (Back)/C
Tip
•If w (Back)/C is pressed with no previous page
displayed
A message appears asking whether to terminate the Web
connection; select Yes to terminate the Web connection.
䈍ฬ೨
ᕈ䇭䇭↵䇭䇭ᅚ
ᚲ
䉝䊮 䉬 䊷䊃 䋨 ⶄᢙㆬᛯน䋩
ೋ䉄䈩 ⾼䈚 䈢
䉅 䈉 ৻ᐲ⾼䈚 䈢 䈇
㆐䈮䉅 ⮈䉄䈢 䈇
ㅍା 䉨䊞䊮 䉶䊦
ᚯ䉎 ㆬᛯ
aText entry field
bRadio button
cMenu field
dCheck box
eCommand button
5%'DQQMࡍࠫ㧞㧜㧜㧢ᐕ㧝㧜㧞㧢ᣣޓᧁᦐᣣޓඦ೨㧝㧝ᤨ㧝㧥ಽ
21-6
Mobile Internet
21
bRadio button
Select only one of the selection items. Highlight an item
with and press c to select it (Appearing as ).
cMenu field
Display a menu and select an item. Highlight a menu,
press c to display the menu. Use j to highlight the
item and press c to select the item. When multiple
items can be selected for Menu field, press C to
cancel multiple selections.
dCheck box
Select any number of selection items. Highlight an item
with and press c to select it (Appearing as ). To
deselect a selected item, highlight and press c.
eCommand button
Perform operations assigned to a button such as send or
reset. Highlight a command button and press c to
execute the operation.
Using Linked Info
Use phone numbers, mail addresses, and URLs contained
on an page to initiate calls, create and send messages, and
access other pages.
Available phone numbers, mail addresses, and URLs are
underlined.
Note
• The appearance of text entry or item selection varies
by page opened.
5%'DQQMࡍࠫ㧞㧜㧜㧢ᐕ㧝㧜㧞㧢ᣣޓᧁᦐᣣޓඦ೨㧝㧝ᤨ㧝㧥ಽ
21-7
Mobile Internet
21
Using Page Links
AOpen a page containing linked info
BUse the available links
To initiate a Voice Call
Select a phone number and select Voice Call
To create and send messages
aSelect a phone number or mail address and select
Create message
bCreate messages and press w (Send)
To access another page
Select a URL
Saving to Phonebook
AOpen a page with linked number or
address
BSelect a number or address and select
Save Number or Save Address →
Phone or USIM
CCreate a new entry or update an
existing entry
To save as a new entry
Select New
To add to an existing entry
aSelect Update
bSearch for an existing entry to modify ( P.5-9)
DSelect an icon
ESave the item ( P.5-4)
FPress w(Save)
5%'DQQMࡍࠫ㧞㧜㧜㧢ᐕ㧝㧜㧞㧢ᣣޓᧁᦐᣣޓඦ೨㧝㧝ᤨ㧝㧥ಽ

21-8
5%'DQQMࡍࠫ㧞㧜㧜㧢ᐕ㧝㧜㧞㧢ᣣޓᧁᦐᣣޓඦ೨㧝㧝ᤨ㧝㧥ಽ
Mobile Internet Files
5%'DQQMࡍࠫ㧞㧜㧜㧢ᐕ㧝㧜㧞㧢ᣣޓᧁᦐᣣޓඦ೨㧝㧝ᤨ㧝㧥ಽ
22-2
Mobile Internet Files
22
Using Image Files
Saving Images to Data Folder
Saving Linked Images
Download and save images from page links.
AOpen a page containing an image link
BSelect link
CPress c
When details appear
Press c
DPress C
To open the image
Press c (Launch)
To set saved image as Wallpaper
Press w (Set) and perform Step 3 in "Wallpaper"
( P.22-3)
Saving Page Images
Save a page image to Data Folder.
AOpen a page with an image
BSelect Options →Save →Save image
CHighlight the image and press
c (Save)
DPress C
To open the image
Press c (Launch)
To set saved image as Wallpaper
Press w (Set) and perform Step 3 in "Wallpaper"
( P.22-3)
EPress C to end the operation
To save another image
Repeat Step 3
5%'DQQMࡍࠫ㧞㧜㧜㧢ᐕ㧝㧜㧞㧢ᣣޓᧁᦐᣣޓඦ೨㧝㧝ᤨ㧝㧥ಽ
22-3
Mobile Internet Files
22
Wallpaper
Set a saved image as Wallpaper.
AOpen image to set as Wallpaper
( P.22-2)
BPress w (Set as)
CSelect an item
To set as Wallpaper
aSelect Wallpaper
bPress c (Set)
To set as incoming image for Phonebook
entries
aSelect Caller ID
bSearch Phonebook and select an entry ( P.5-9)
cPress c (Set)
To set as outgoing image
aSelect TV call Still picture
bPress c (Save)
Tip
• If the same file name exists
aPress c (Edit) and change the file name
bPress w (Save)
• Viewing images
Press w (Set as) to set Wallpaper. ( P.22-3).
Press c (Zoom) to enlarge or reduce the image. Press
o (Details) to view image details.
• When SVG-T/SWF format file is saved
Options appears on the save image confirmation window,
then select Options and execute various operations
( P.11-8).
5%'DQQMࡍࠫ㧞㧜㧜㧢ᐕ㧝㧜㧞㧢ᣣޓᧁᦐᣣޓඦ೨㧝㧝ᤨ㧝㧥ಽ
22-4
Mobile Internet Files
22
Using Sound Files
Playing Sound
Play sounds from page links.
AOpen a page containing link
BSelect link to sound
Saving Sound Files to Data
Folder
Download sound files from page links and save them to
Data Folder.
AOpen a page containing a sound link
BSelect link
CPress c
When details appear
Press c
DSelect Exit
To play sound
Select Launch
Note
• For SVG-T/SWF format file, Settings does not appear.
For Wallpaper, open Data Folder and open an image
( P.11-8).
5%'DQQMࡍࠫ㧞㧜㧜㧢ᐕ㧝㧜㧞㧢ᣣޓᧁᦐᣣޓඦ೨㧝㧝ᤨ㧝㧥ಽ
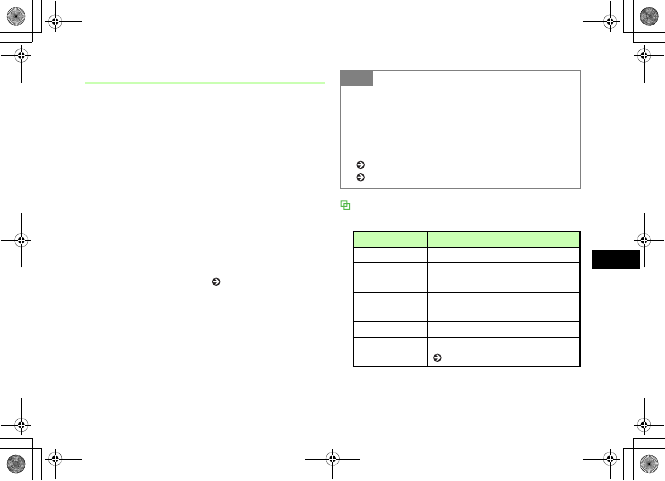
22-5
Mobile Internet Files
22
Saving Sound Being Played
Save sound played in the background while viewing a
page.
AOpen a page with sound
BSelect Options →Save →Save sound
CPress C
To play sound
Press c (Launch)
To set saved sound as Ringtone
Press w (Set as) and perform Step 3 in "Setting
Sound File as Ringtone" ( P.11-11)
Options
The items listed vary by the window status.
Tip
• If same file name exists
aPress c (Edit) and change the file name
bPress w (Save)
• To play sounds
Press w (Set as) and set saved sound as Ringtone
( P.11-11). For other operations, refer to Media Player
( P.10-3).
Item Description
Stop Stop playing.
View bookmark Access a page containing a streaming
play link saved as a bookmark.
View history Access a page containing a streaming
play link already accessed.
Details Confirm sound size, etc.
Player settings Select settings related to Media Player
( P.10-7).
5%'DQQMࡍࠫ㧞㧜㧜㧢ᐕ㧝㧜㧞㧢ᣣޓᧁᦐᣣޓඦ೨㧝㧝ᤨ㧝㧥ಽ
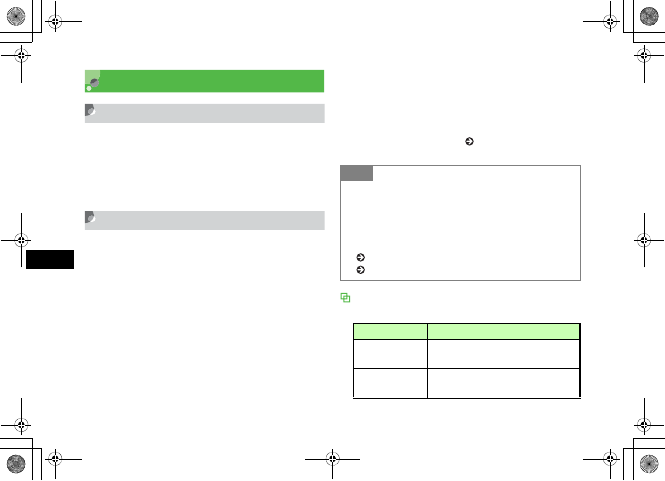
22-6
Mobile Internet Files
22
Using Video Files
Playing a Video
Play video from a page link.
AOpen a page containing a video link
BSelect link
Saving Videos to Data Folder
Download and save videos from page links.
AOpen a page containing a video link
BSelect link
CPress c
When details appear
Press c
DPress C
To play video
Press c (Launch)
To set saved video as Ringtone
Press w (Set as) and perform Step 3 in "Setting
Video File as Ringtone" ( P.11-11)
Options
The items listed vary by the window status.
Tip
• If same file name exists
aPress c (Edit) and change the file name
bPress w (Save)
• To play video
Press w (Set as) and set saved video as Ringtone
( P.11-11). For other operations, refer to Media Player
( P.10-9).
Item Description
Resolution Set video display size while playing or
paused.
View bookmark Access a page containing a streaming
play link saved as a bookmark.
5%'DQQMࡍࠫ㧞㧜㧜㧢ᐕ㧝㧜㧞㧢ᣣޓᧁᦐᣣޓඦ೨㧝㧝ᤨ㧝㧥ಽ
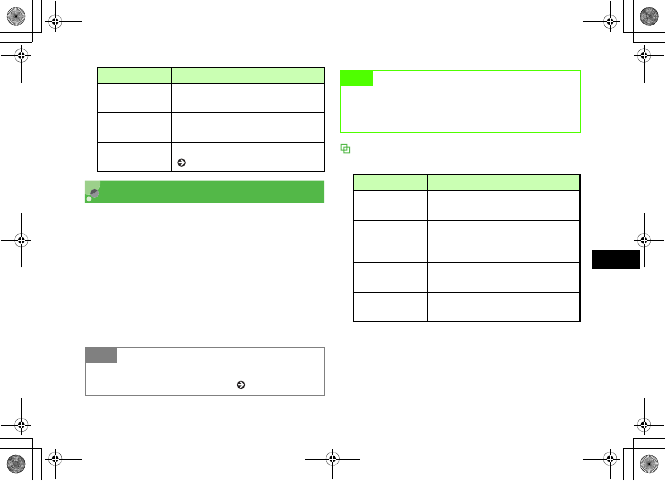
22-7
Mobile Internet Files
22
Streaming
Enjoy audio visual media while it downloads. Access
compatible files via page links, etc. Downloaded content
cannot be saved.
AOpen a page containing a streaming
video link
BSelect link
Options
The items listed vary by the window status.
View history Access a page containing a streaming
play link already accessed.
Details Set video display size while playing or
paused.
Player settings Select settings related to Media Player
( P.10-11).
Tip
• To stream files
Operate the same as Media Player ( P.10-3, 10-9).
Item Description Note
• Even when use of streaming is temporarily stopped,
communications continue, so packet communication
fees continue.
Item Description
Resolution Set video display size while playing or
paused.
Add bookmark
During accessing, save a page
containing a streaming play link as a
bookmark.
View bookmark Access a page containing a streaming
play link saved as a bookmark.
View history Access a page containing a streaming
play link already accessed.
5%'DQQMࡍࠫ㧞㧜㧜㧢ᐕ㧝㧜㧞㧢ᣣޓᧁᦐᣣޓඦ೨㧝㧝ᤨ㧝㧥ಽ
22-8
Mobile Internet Files
22
Saving Pages
Saving a Page
Save a displayed page and open it at any time without
accessing the Web. Up to 50 pages can be saved.
AOpen a page
BSelect Options →Saved pages → Save
Opening a Saved Page
APress c and select Yahoo! Keitai →
Saved pages
BSelect a page
Change Title
APress c and select Yahoo! Keitai →
Saved pages
BHighlight a page, select Options →
Rename
CPress c (Edit) and change the name
DPress w (Save)
5%'DQQMࡍࠫ㧞㧜㧜㧢ᐕ㧝㧜㧞㧢ᣣޓᧁᦐᣣޓඦ೨㧝㧝ᤨ㧝㧥ಽ
22-9
Mobile Internet Files
22
Deleting a Saved Page
APress c and select Yahoo! Keitai →
Saved pages
BDelete as required
To delete one page
aHighlight a page
bSelect Options →Delete →Selected →Yes
To delete multiple pages
aSelect Options →Delete →Multiple
bCheck a page to delete
cRepeat Step b to check all target pages
dPress w (Delete) and select Yes
To delete all pages
aSelect Options →Delete →All
bEnter Phone Password, press w (OK) and select
Yes
Saving Bookmarks
Saving an Address as a
Bookmark
By saving the Web addresses (URLs) of frequently used
pages as bookmarks, access those pages. Up to 30 URLs
can be saved as bookmarks.
AOpen a page
BSelect Options →Bookmarks →Add
to Bookmarks
Tip
• To select/deselect multiple pages at once
aIn Step 2, select Options →Delete →Multiple
bSelect Options →Selected/All
5%'DQQMࡍࠫ㧞㧜㧜㧢ᐕ㧝㧜㧞㧢ᣣޓᧁᦐᣣޓඦ೨㧝㧝ᤨ㧝㧥ಽ

22-10
Mobile Internet Files
22
CCheck the title and URL
To change the title/URL
aSelect Title or URL field
bChange a title or URL
DPress w (Save)
Opening a Bookmark
APress c and select Yahoo! Keitai →
Bookmarks
BSelect a bookmark
Editing Bookmarks
Modify the title or URL of bookmark.
APress c and select Yahoo! Keitai →
Bookmarks
BHighlight a bookmark, select Options
→Edit bookmark
CSelect Title field or URL field, and
modify the title or URL
DPress w (Save)
Tip
• To manually enter and save a bookmark
aPress c and select Yahoo! Keitai →Bookmarks
bSelect Options →Add bookmark
cSelect Subject field and enter a subject
dSelect URL field and enter a URL
ePress w (Save)
Tip
• To send a bookmark URL in a message
aIn Step 2, highlight a bookmark, select Options →Send
URL
bCreate a message and press w (Send)
5%'DQQMࡍࠫ㧞㧜㧜㧢ᐕ㧝㧜㧞㧢ᣣޓᧁᦐᣣޓඦ೨㧝㧝ᤨ㧝㧥ಽ
22-11
Mobile Internet Files
22
Deleting a Bookmark
APress c and select Yahoo! Keitai →
Bookmarks
BDelete as required
To delete one bookmark
aHighlight a bookmark
bSelect Options →Delete →Selected →Yes
To delete multiple bookmarks
aSelect Options → Delete →Multiple
bCheck a bookmark to delete
cRepeat b to check all target bookmarks
dPress w (Delete) and select Yes
To delete all bookmarks
aSelect Options →Delete → All
bEnter Phone Password, press w (OK) and select
Yes
History
The history records up to 50 URLs of accessed pages. Using
the history, access pages previously accessed.
APress c and select Yahoo! Keitai →
History
BUse the history
To access a page from the history URL
Select URL
To delete a history URL
aHighlight the URL
bSelect Options →Delete →Selected →Yes
Tip
• To select/deselect multiple bookmarks at once
aIn Step 2, select Options →Delete →Multiple
bSelect Options →Selected/All
5%'DQQMࡍࠫ㧞㧜㧜㧢ᐕ㧝㧜㧞㧢ᣣޓᧁᦐᣣޓඦ೨㧝㧝ᤨ㧝㧥ಽ
22-12
Mobile Internet Files
22
To delete multiple histories
aSelect Options →Delete →Multiple
bCheck a history to delete
cRepeat b to check all target histories
dPress w (Delete) and select Yes
To delete all histories
aSelect Options →Delete →All
bEnter Phone Password, press w (OK) and select
Yes
Display Settings
Rendering
Set pages to match Display size or show only text.
AOpen a page
BSelect Options →Rendering
CSelect an item
To display a page without changing its layout
Select Wide
To display a page to fit Display
Select Standard
To display only page text
Select Simple
Tip
• To select/deselect multiple histories collectively
aIn Step 2, select Options →Delete →Multiple
bSelect Options →Selected/All
Default Setting 䂓Standard
5%'DQQMࡍࠫ㧞㧜㧜㧢ᐕ㧝㧜㧞㧢ᣣޓᧁᦐᣣޓඦ೨㧝㧝ᤨ㧝㧥ಽ
22-13
Mobile Internet Files
22
Search Text
ADisplay information window
BSelect Options →Search text
CSelect Text entry field and enter the
word
DSelect the searching direction and
press w (Search)
Copy Text
ADisplay information window
BSelect Options →Copy Text
CIn a text entry window, select Options
→Copy
DUse a to move cursor on the first
character and press c (Start)
To copy all texts in text entry window
Press o (All) to copy
EUse a to specify the range and
press c (End)
Reload
AOpen a page
BSelect Options →Reload
5%'DQQMࡍࠫ㧞㧜㧜㧢ᐕ㧝㧜㧞㧢ᣣޓᧁᦐᣣޓඦ೨㧝㧝ᤨ㧝㧥ಽ
22-14
Mobile Internet Files
22
Page Details
View current page information including URL and page
title.
AOpen a page
BSelect Options →Browser setting →
Page details
Send URL
Attach the URL of the current page to a message and send
it.
AOpen a page
BSelect Options →Send URL
CCreate a message and press w (Send)
Server Certificate
View server certificates of a page using a SSL/TLS
connection.
AOpen a secure page
BSelect Options →Browser setting →
Certificates
CSelect Server certification and select a
certificate
Tip
• When you open a page that uses SSL/TLS
appears on the top of Display.
5%'DQQMࡍࠫ㧞㧜㧜㧢ᐕ㧝㧜㧞㧢ᣣޓᧁᦐᣣޓඦ೨㧝㧝ᤨ㧝㧥ಽ
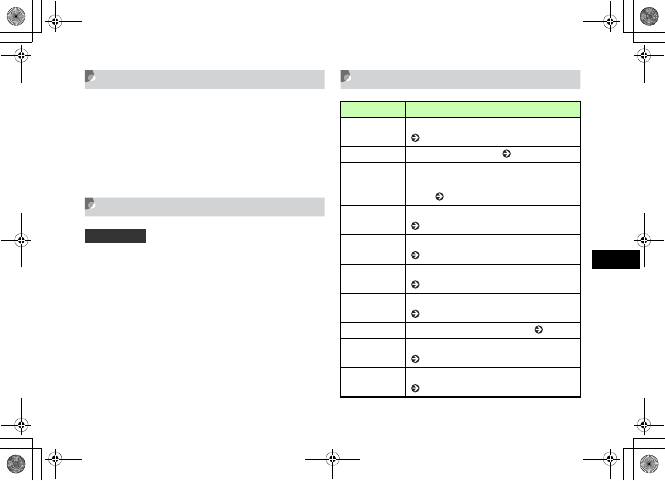
22-15
Mobile Internet Files
22
Returning to Default Page
Return to the Yahoo! Keitai main menu.
AOpen a page
BFrom any page, select Options →
Yahoo! Keitai
Encoding
If page text appears garbled, change character encoding.
AOpen a page
BSelect Options →Browser setting →
Encoding
CSelect an option and press c (Save)
Information Window Options
Default Setting 䂓Auto
Item Description
Forward Move to the next information window
( P.21-5).
Bookmark Add or open bookmarks ( P.22-9).
Saved pages
Save information windows to Saved pages.
Display information window from Saved
pages ( P.22-8, 22-8).
Text search Search text in information window
( P.22-13).
Reload Reload the information for a page
( P.22-13).
Enter URL Enter a URL to open another site/page
( P.21-3).
Rendering Change the displaying method for pages
( P.22-15).
Copy text Copy text in information window ( P.22-13).
Save Save images and sounds to Data Folder
( P.22-2, 22-4).
Send URL Send URLs of a page in a message
( P.22-14).
5%'DQQMࡍࠫ㧞㧜㧜㧢ᐕ㧝㧜㧞㧢ᣣޓᧁᦐᣣޓඦ೨㧝㧝ᤨ㧝㧥ಽ
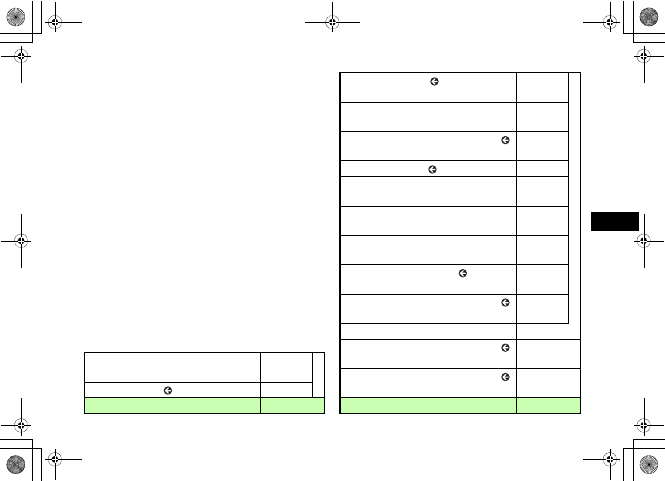
22-16
Mobile Internet Files
22
History Access a page you have already visited
( P.22-11).
Yahoo! Keitai Return to the Yahoo! Keitai main menu
( P.22-15).
Browser setting Make detailed settings for Web Browser.
Text size Set text size in information window
( P.23-3).
Downloads Set various settings for image/sound
downloads ( P.23-2).
Empty
cache Delete all information from the cache.
Empty
cookies
Delete all cookies (tokens left by various Web
sites on your handset).
Cookie
options Activate or deactivate cookies.
Certificates View the certificate ( P.22-14, 23-4).
Page details View the detailed information about a page
( P.22-14).
Manufacture
No.
Set whether to notify a Web site of your
handset's serial number.
Encoding Change the character codes set for the page
currently displayed ( P.22-15).
Item Description
Java Script Set Java Script on/off ( P.23-3).
About
browser View detailed information about the browser.
Item Description
5%'DQQMࡍࠫ㧞㧜㧜㧢ᐕ㧝㧜㧞㧢ᣣޓᧁᦐᣣޓඦ೨㧝㧝ᤨ㧝㧥ಽ

Other Web Settings
5%'DQQMࡍࠫ㧞㧜㧜㧢ᐕ㧝㧜㧞㧢ᣣޓᧁᦐᣣޓඦ೨㧝㧝ᤨ㧝㧥ಽ
23-2
Other Web Settings
23
Preferences
Set 707SC to deactivate embedded images/sounds when
opening pages. Pages download more quickly without
image and sound data.
APress c and select Yahoo! Keitai →
Browser settings →Downloads
BPerform operations to set
To deactivate images
aSelect Display images
bSelect an item and press w (Save)
To deactivate sounds
aSelect Play sound
bSelect an item and press w (Save)
Security
Cookie Options
Activate or deactivate Cookies that allow information
providers to automatically record information identifying
handset user. User information, access date, and other
information are saved in Cookies.
APress c and select Yahoo! Keitai →
Browser settings →Cookie options
BSelect an item and press c (Save)
Default Setting 䂓Display images: Checked
䂓Play sound: Checked
Default Setting 䂓Accept all
Tip
• The contents of Cookie options are:
Accept all: Always accept Cookies.
Reject all: Always reject Cookies.
Prompt: Confirm Cookies each time they appear.
5%'DQQMࡍࠫ㧞㧜㧜㧢ᐕ㧝㧜㧞㧢ᣣޓᧁᦐᣣޓඦ೨㧝㧝ᤨ㧝㧥ಽ
23-3
Other Web Settings
23
Activating/Deactivating Java
Script
APress c and select Yahoo! Keitai →
Browser settings →Java script
BSelect an item and press c (Save)
Text Size
Change the size of the page fonts.
APress c and select Yahoo! Keitai →
Browser settings →Text size
BSelect an item and press c (Save)
Manufacture Number
Set 707SC to automatically send handset serial number to
Websites upon request for user identification.
APress c and select Yahoo! Keitai →
Browser settings →Manufacture
number
BSelect an item and press c (Save)
Browser Information
APress c and select Yahoo! Keitai →
Browser settings →About browser
Default Setting 䂓Off
Default Setting 䂓Normal
Default Setting 䂓Off
5%'DQQMࡍࠫ㧞㧜㧜㧢ᐕ㧝㧜㧞㧢ᣣޓᧁᦐᣣޓඦ೨㧝㧝ᤨ㧝㧥ಽ

23-4
Other Web Settings
23
Certificates
View electronic certificate saved on 707SC.
AOpen a page using SSL/TLS
BSelect Options →Browser setting →
Certificates
CSelect Root certificate to view the
certificate
Refresh Browser
Empty Cache/Empty Cookies
Delete information saved in Cache and Cookies.
APress c and select Yahoo! Keitai →
Browser settings
BDelete as required
To delete Cache contents
Select Empty cache →c (Yes)
To delete Cookies
Select Empty cookies →c (Yes)
5%'DQQMࡍࠫ㧞㧜㧜㧢ᐕ㧝㧜㧞㧢ᣣޓᧁᦐᣣޓඦ೨㧝㧝ᤨ㧝㧥ಽ

S! Appli
5%'DQQMࡍࠫ㧞㧜㧜㧢ᐕ㧝㧜㧞㧢ᣣޓᧁᦐᣣޓඦ೨㧝㧝ᤨ㧝㧥ಽ
24-2
S! Appli
24
Getting Started
S! Appli
Download 707SC-compatible S! Appli including games,
3D images, and information via Mobile Internet sites.
• Use only compatible S! Appli.
• To download S! Appli, separate subscription is required
and communication fees apply.
Network S! Appli
Some S! Appli require network connection. Enjoy network
gaming or access real-time information like stock prices.
• A separate subscription is required to download S! Appli
or use those which require network connection.
• Connection fees apply.
Downloading S! Appli
APress c and select S! Appli →
S! Application list
BSelect Download S! Appli
CSelect S! Appli to download
DSelect Yes
When details appear
Press c
ESelect Exit
To activate S! Appli
Select Launch
5%'DQQMࡍࠫ㧞㧜㧜㧢ᐕ㧝㧜㧞㧢ᣣޓᧁᦐᣣޓඦ೨㧝㧝ᤨ㧝㧥ಽ
24-3
S! Appli
24
Starting S! Appli
APress c and select S! Appli →
S! Application list
BSelect S! Appli and press c (Start)
Exit, Pause, & Resume
Exiting or Pausing S! Appli
APress y while a S! Appli is being
executed
BChoose to exit/pause
To exit S! Appli
Press w (Exit)
To pause S! Appli
Press c (Pause)
Tip
• When S! Appli is active
appears.
Tip
• When S! Appli is paused
707SC returns to Standby and appears.
• When 707SC is closed while S! Appli is active
S! Appli is paused.
5%'DQQMࡍࠫ㧞㧜㧜㧢ᐕ㧝㧜㧞㧢ᣣޓᧁᦐᣣޓඦ೨㧝㧝ᤨ㧝㧥ಽ
24-4
S! Appli
24
Restarting a Paused S! Appli
AIn Standby with S! Appli paused,
press c and select S! Appli
BPress w (Resume)
Managing S! Appli
Details
Open Details to confirm S! Appli properties.
APress c and select S! Appli →
S! Application list
BHighlight a S! Appli, select Options →
Details
Lock/Unlock
Lock S! Appli to prevent accidental deletion.
APress c and select S! Appli →
S! Application list
BHighlight S! Appli, select Options →
Lock
Tip
• S! Appli properties
Open Details to see following properties:
Name, Description, Profiles, Certification, Size, Record Size,
Version, and Vendor.
Tip
• Locked S! Appli Indicator
In S! Appli list, appears.
• To cancel lock
In Step 2, highlight locked S! Appli, select Options →
Unlock
5%'DQQMࡍࠫ㧞㧜㧜㧢ᐕ㧝㧜㧞㧢ᣣޓᧁᦐᣣޓඦ೨㧝㧝ᤨ㧝㧥ಽ
24-5
S! Appli
24
Delete
APress c and select S! Appli →
S! Application list
BDelete S! Appli
To delete one S! Appli
Select Options →Delete →Selected →Yes
To delete multiple S! Appli
aSelect Options →Delete →Multiple
bCheck S! Appli to delete
cRepeat Step b to check all target S! Appli
dPress w (Delete) and select Yes
To delete all S! Appli
aSelect Options →Delete →All
bEnter Phone Password, press c (Confirm) and
select Yes
cSelect Yes to delete all S! Appli or No to exclude
locked ones
mPet
With 707SC mPet, raise your own virtual pet. Train or enjoy
playing games with.
Selecting Pet
APress c and select S! Appli →
S! Application list →mPet →Ye s
Tip
• When all S! Appli are checked
In Step 2, perform a to c in "To delete multiple S! Appli,"
press w (Delete) in d and proceed the following
procedures
aEnter Phone Password, press c (Confirm) and select
Yes
bSelect Yes to delete all S! Appli or No to exclude locked
ones
• To select/deselect multiple S! Appli at once
aIn Step 2, select Options →Delete →Multiple
bSelect Options →Mark all or Unmark all
5%'DQQMࡍࠫ㧞㧜㧜㧢ᐕ㧝㧜㧞㧢ᣣޓᧁᦐᣣޓඦ೨㧝㧝ᤨ㧝㧥ಽ
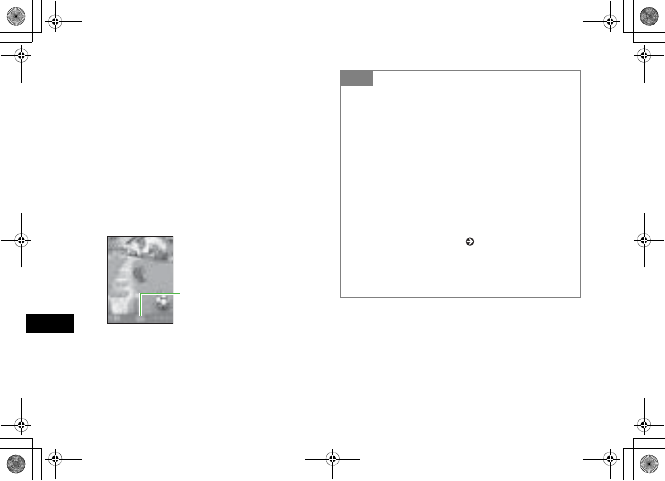
24-6
S! Appli
24
BUse s to select the pet and press
c (Select)
To select pet after checking action
Select Options →animate and press c (Select)
To select pet after checking direction
Select Options →turn and press c (Select)
CEnter a name
DSelect Ye s and press c
Emotion Indicator
mPet Window
Tip
• After selecting your pet
Garden appears. Train or tame in this location. Play game
with in other rooms. Activating mPet shows the location last
used.
• Pet action in mPet window
After a while with no action to pet; pet starts to play alone,
bark, shows it's emotional text bubble. With low battery, pet
gets down and starts sniffing.
• To end mPet
Press C or y
• To set mPet as Wallpaper ( P.8-2)
• mPet Help
Use mPet Help to see other operations. In mPet window,
select Options →Help or press o while Help appears
5%'DQQMࡍࠫ㧞㧜㧜㧢ᐕ㧝㧜㧞㧢ᣣޓᧁᦐᣣޓඦ೨㧝㧝ᤨ㧝㧥ಽ
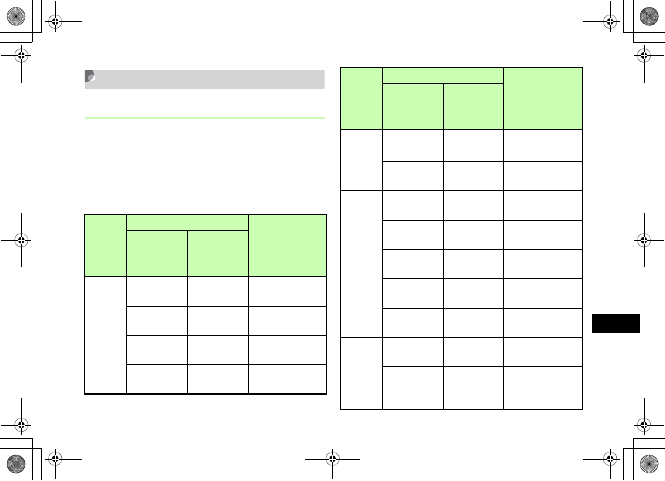
24-7
S! Appli
24
mPet Operations
Window Operations
In Options, set Navigation to Shortcut mode, then
press corresponding button to select operation; set
Navigation to Walking mode, then use a to move pet
to specified location and select operation. Available
operations in each location are listed below.
Location
Operation
Description
Shortcut
mode
Walking
mode
(Window
area)
Garden
1Notes
(Upper Left)
Play the Ding
Dong game.
2Front Door
(Upper)
Move to Living
Room.
3Flower Bed
(Upper Right) Go for a walk.
4Ball
(Down Right)
Play the Stanza
game.
Living
Room
1Door
(Upper Left) Move to Garden.
2Back Door
(Upper Right) Move to Kitchen.
Kitchen
1Back Door
(Upper Left)
Move to Living
Room.
2Door
(Upper Right)
Move to Bed
Room.
3Bowl
(Down Right) Feed full meal.
4Today's Saying
(Down Left)
Display Today's
Saying.
5Snacks
(Upper) Give snacks.
Bed
Room
1Door
(Upper Left) Move to Kitchen.
2Laundry
Basket
(Upper)
Bathe pet.
Location
Operation
Description
Shortcut
mode
Walking
mode
(Window
area)
5%'DQQMࡍࠫ㧞㧜㧜㧢ᐕ㧝㧜㧞㧢ᣣޓᧁᦐᣣޓඦ೨㧝㧝ᤨ㧝㧥ಽ
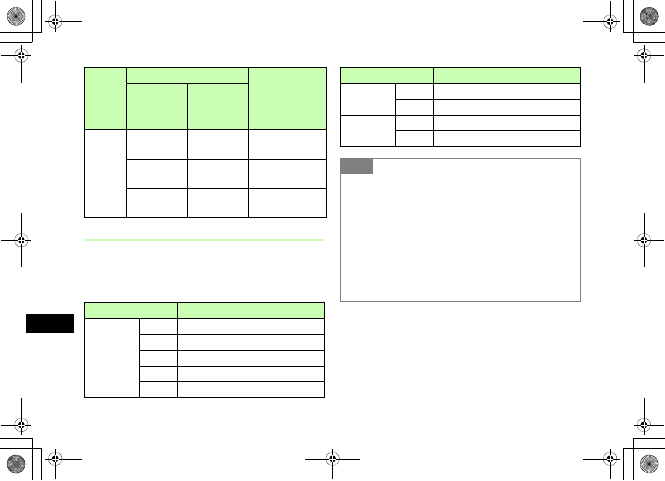
24-8
S! Appli
24
Action Operations
In mPet window, press w (Action) to perform the
operations listed below (Train/Commend/Discipline).
Pet growth varies by operations.
Bed
Room
3Dog House
(Upper Right) Pet sleeps.
4Book
(Down Right) Play English Quiz.
5Injector
(Down Left) Cure pet.
Item Description
Train
Sit Teach pet to sit down.
Roll Teach pet to roll over.
Turn Teach pet to turn around.
Bark Teach pet to bark.
Paw Teach pet to give you a paw.
Location
Operation
Description
Shortcut
mode
Walking
mode
(Window
area)
Commend Praise Praise pet for good behavior.
Pet Cheer pet up.
Discipline Warn Order pet not to do.
Punish Punish pet for bad behavior.
Tip
• When pet refuse to act
Pet sometimes refuse to act as operated, due to such as the
first time operation, pet status. Teach pet repeatedly or check
the status and take care.
• When each operation ends
Pet barks and responds to operation with emotional state
text bubble; pet status window appears. Check the pet
status by following category: Health/Fatigue/Fullness/
Clean/Stress/Obedient/Intimacy.
Item Description
5%'DQQMࡍࠫ㧞㧜㧜㧢ᐕ㧝㧜㧞㧢ᣣޓᧁᦐᣣޓඦ೨㧝㧝ᤨ㧝㧥ಽ
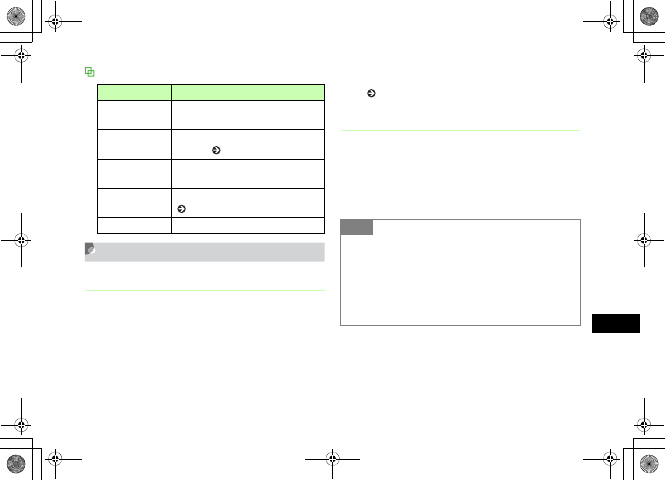
24-9
S! Appli
24
Options
Other Operations
Adopt a New Pet
Up to 5 pets can be adopted.
AIn mPet window, select Options →Pet
Inventory
BSelect Options →Adopt a new pet
CPerform Steps 2 and 3 in "Select Pet"
( P.24-5)
Pet Inventory
AIn mPet window, select Options →Pet
Inventory
BSelect a pet
Item Description
Location Select a location from among Garden/
Living room/Kitchen/Bedroom.
Pet Inventory Show Pet list to select various
settings ( P.24-9).
Pet Status Check Pet status while pet is playing
around.
Options Select mPet sound/display settings
( P.24-10).
Help Check mPet operations description. Tip
• Pet status
In Step 2, select Options →View status
• Rename your pet
aIn Step 2, highlight the pet
bSelect Options →Rename
cEnter a name
5%'DQQMࡍࠫ㧞㧜㧜㧢ᐕ㧝㧜㧞㧢ᣣޓᧁᦐᣣޓඦ೨㧝㧝ᤨ㧝㧥ಽ
24-10
S! Appli
24
Say Goodbye
AIn mPet window, select Options →Pet
Inventory
BHighlight the pet and select Options
→Say Goodbye
CPress o (Yes)
DPress c
mPet Sound & Settings
AIn mPet window, select Options →
Options
BPerform operations to set
To set pet sound
aSelect Sound
bSelect an item and Press c
To set operation mode
aSelect Navigation
bSelect an item and Press c
To set action menu sound
aSelect Sound type
bSelect an item and Press c
CPress c
Note
• Note that once gave up your pet, unable to restore
it.
Default Setting 䂓Sound: Sound only
䂓Navigation: Shortcut mode
䂓Sound type: Voice
5%'DQQMࡍࠫ㧞㧜㧜㧢ᐕ㧝㧜㧞㧢ᣣޓᧁᦐᣣޓඦ೨㧝㧝ᤨ㧝㧥ಽ
24-11
S! Appli
24
Comic Surfing
"䉮䊚 䉾 䉪䉰䊷䊐䉞 䊮" is the file viewer for browsing
electronic comic/photo book files (CCF files) saved in Book
folder in Data Folder. Enlarge/reduce images, scroll the
page easily, browse more lively images with sound/
vibration effects.
To browse CCF files, acquire Content Key. No Content Key
is required to browse the default sample files in 707SC.
Browsing Electronic Comic
APress c and select S! Appli →
S! application list
→
Tip
• The contents of Sound are:
Sound & Vibrate: Pet barks and 707SC vibrates
simultaneously.
Sound only: Pet barks.
Vibrate: 707SC vibrates with no pet barking.
No sound: No vibration and with no pet barking.
• The contents of Navigation are:
Shortcut mode: Show available shortcuts indicators in mPet
window to use assigned shortcuts keys.
Walking mode: Use a to move locations with the pet.
• The contents of Sound type are:
Vo i c e : Indicate the selected action operation by voice.
Melody: Indicate the selected action operation by melody.
Tip
• After starting
Refer to in .
䉮䊚 䉾䉪䉰䊷䊐䉞 䊮
䊓䊦䊒 䉮 䊚 䉾 䉪 䉰䊷䊐 䉞 䊮
5%'DQQMࡍࠫ㧞㧜㧜㧢ᐕ㧝㧜㧞㧢ᣣޓᧁᦐᣣޓඦ೨㧝㧝ᤨ㧝㧥ಽ

24-12
S! Appli
24
Security
Set whether to allow S! Appli to automatically use
communication functions. Alternatively, set to display a
confirmation message when activating S! Appli or using
communications.
APress c and select S! Appli →
S! Application list
BHighlight S! Appli, select Options →
Permissions
CSelect items to set
Web accessing functions
Select Net Access
Automatic starting functions
Select Application Autoinvocation
Connection functions to external devices
Select Local connectivity
Read user data access function
Select Read user data access
Write user data access function
Select Write user data access
DSelect items and press c (Save)
Default Setting 䂓Net Access: Per session
䂓Application Autoinvocation: Per session
䂓Local connectivity: Per session
䂓Read user data access: Per access
䂓Write use data access: Per access
5%'DQQMࡍࠫ㧞㧜㧜㧢ᐕ㧝㧜㧞㧢ᣣޓᧁᦐᣣޓඦ೨㧝㧝ᤨ㧝㧥ಽ
24-13
S! Appli
24
S! Appli Settings
Make S! Appli settings and restore defaults.
Backlight
Set Display settings for the backlight.
APress c and select S! Appli →
S! Appli settings →Backlight
BSelect the setting and press c
Application Volume
Adjust the volume of sounds.
APress c and select S! Appli →
S! Appli settings →Application
Vo l u m e
Tip
• The contents of Permissions are:
Setting for each item are as follows. Settings vary by item.
Always: Always allow the use of the function.
Per session: After activating, S! Appli asks, for the first use,
whether to allow the use of the function. Display this
message only once.
Per access: Every time you use a function, display a
message for confirmation.
Never: Never allow the use of the function.
• To restore defaults
In Step 3, select Reset →Yes
Default Setting 䂓Normal settings
Tip
• The contents of Backlight are:
Always On: Set the backlight always on.
Always Off: Set the backlight always off.
Normal settings: Settings of Backlight time ( P.8-7) for
Display settings take priority.
Default Setting 䂓Level 3
5%'DQQMࡍࠫ㧞㧜㧜㧢ᐕ㧝㧜㧞㧢ᣣޓᧁᦐᣣޓඦ೨㧝㧝ᤨ㧝㧥ಽ
24-14
S! Appli
24
BUse a to adjust the volume and
press c
Vibration
Set whether or not to active the vibration when using
S! Appli with vibrator.
APress c and select S! Appli →
S! Appli settings →Vibration
BSelect an item and press c
S! Appli Sort
APress c and select S! Appli →
S! Appli settings →S! Appli sort
BSelect an item and press c
Reset S! Appli Settings
Restore S! Appli settings to defaults.
APress c and select S! Appli →
S! Appli settings →Reset S! Appli
settings
BEnter Phone Password, press
c (Confirm) and select Yes
Tip
• Sound volume in Manner Profile
Sound volume follows the settings of the current Manner
Profile.
Default Setting 䂓On
Default Setting 䂓By Date
5%'DQQMࡍࠫ㧞㧜㧜㧢ᐕ㧝㧜㧞㧢ᣣޓᧁᦐᣣޓඦ೨㧝㧝ᤨ㧝㧥ಽ

Appendix
5%'DQQMࡍࠫ㧞㧜㧜㧢ᐕ㧝㧜㧞㧢ᣣޓᧁᦐᣣޓඦ೨㧝㧝ᤨ㧝㧥ಽ
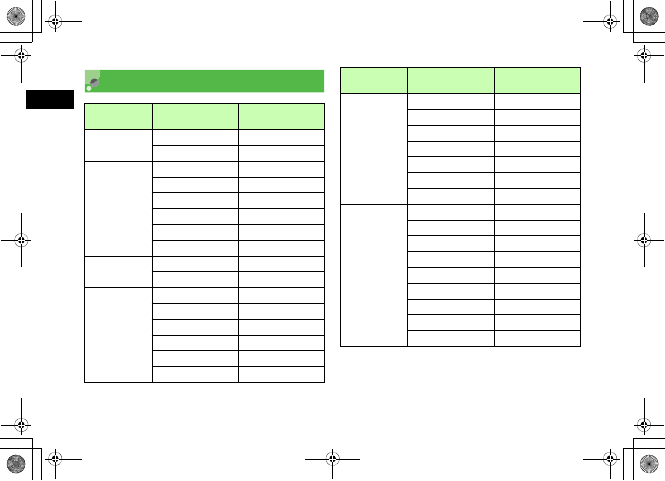
25-2
Appendix
25
Functions
Main Menu
Item Item Page
S! Appli S! Application list P.24-2
S! Appli Settings P.24-13
Yahoo! Keitai
Yahoo! Keitai P.21-3
Bookmarks P.22-9
Saved pages P.22-8
Enter URL P.21-3
History P.22-11
Browser settings P.23-2
Media Player Music P.10-3
Video P.10-9
Camera
Take photo P.7-5
Record video P.7-11
Go to photos P.7-6
Go to videos P.7-12
Dynamic effect list P.7-19
Video editor P.7-17
Data Folder
Pictures P.11-2
Videos P.11-2
Sounds & Ringtones P.11-2
S! Appli P.11-2
Book P.11-2
Other documents P.11-2
Memory status P.11-3
Messaging
Received msgs P.17-4, 18-2
Create msg P.17-8
Drafts P.18-8
Unsent msgs P.18-9
Sent msgs P.18-8
Templates P.17-14
Server mail box P.19-2
Settings P.20-2, 20-5
Memory status P.18-2
Main Menu
Item Item Page
5%'DQQMࡍࠫ㧞㧜㧜㧢ᐕ㧝㧜㧞㧢ᣣޓᧁᦐᣣޓඦ೨㧝㧝ᤨ㧝㧥ಽ
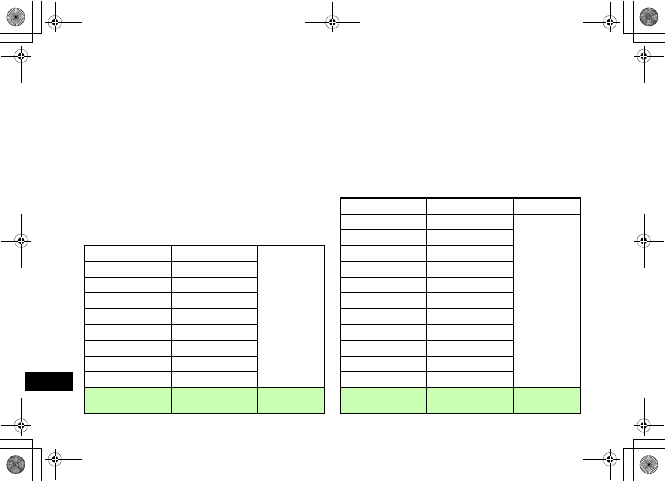
25-3
Appendix
25
Tools
Alarms P.14-2
Calendar P.14-5
Voice recorder P.14-15
World clock P.14-18
Calculator P.14-19
Converter P.14-19
Stopwatch P.14-22
Dictionary P.14-22
Photo slide P.8-2
Interpreter P.14-23
Memory status P.14-12
Phonebook Phonebook List P.5-9
Main Menu
Item Item Page
Settings
Phone settings -
Sound settings P.9-4
Display settings P.8-1
Call settings -
Phonebook settings P.5-1
Connectivity P.12-1
Security P.13-1
Software Update P.25-10
Memory settings P.13-10, 15-8
Main Menu
Item Item Page
5%'DQQMࡍࠫ㧞㧜㧜㧢ᐕ㧝㧜㧞㧢ᣣޓᧁᦐᣣޓඦ೨㧝㧝ᤨ㧝㧥ಽ

25-4
Appendix
25
Troubleshooting
䂓707SC does not turn on
"Is battery empty?
#Replace or charge battery.
"Is battery installed in 707SC?
#Install battery correctly.
䂓When power is turned on, PIN entry
window appears
"Is PIN lock set to Enable?
#If PIN lock is Enable, enter PIN.
䂓When power is turned on, USIM password
entry window appears
"Is USIM lock set to Enable?
#If USIM lock is Enable, enter USIM
password.
䂓Please insert USIM card or This card
cannot be recognized appears when 707SC
is turned on or executing a function
"Is USIM Card correctly installed?
#Check to see if USIM Card is correctly
installed. If the message appears even though
USIM Card is correctly installed, it may be
damaged.
"Is an incorrect USIM Card used?
#Check to see if correct USIM Card is used. Use
USIM Card specified by SoftBank.
"Are the IC contacts of USIM Card
contaminated with fingerprints, etc.?
#Wipe contamination off with a clean, dry
cloth, and install USIM Card correctly.
5%'DQQMࡍࠫ㧞㧜㧜㧢ᐕ㧝㧜㧞㧢ᣣޓᧁᦐᣣޓඦ೨㧝㧝ᤨ㧝㧥ಽ
25-5
Appendix
25
䂓Reading USIM Cannot operate or Reading
USIM Card Cannot start appears
#USIM Card data is being read. Try again later.
䂓A Busy tone continues after dialing
"Have you entered a phone number beginning
with zero such as an area code?
#Enter a phone number beginning with zero
such as an area code.
"Is 707SC set to Offline mode? ( appears)
#Change 707SC to another mode such as
Normal.
䂓 or appears and no calls can be
initiated
"707SC is out-of-range.
#Move to a place where the signal is stronger
and try again.
䂓Calls are interrupted or disconnected
"Does or appear?
#Move to a place where the signal is stronger
and try again.
"Is battery empty?
#Replace or charge battery.
䂓Unable to initiate a call
"Is Call Barring set?
#Deactivate Call Barring.
5%'DQQMࡍࠫ㧞㧜㧜㧢ᐕ㧝㧜㧞㧢ᣣޓᧁᦐᣣޓඦ೨㧝㧝ᤨ㧝㧥ಽ

25-6
Appendix
25
䂓Unable to open Phonebook entry, Data
Folder, Call Log, Calendar, or Messaging
"Is Privacy lock set?
#Cancel Privacy lock.
䂓Clicking noise is heard during a call
"Noise may be generated when the signal is
weak or while moving between coverage
areas.
䂓Unable to charge battery
"Is AC Charger Connector securely inserted into
707SC?
#Insert AC Charger Connector securely.
"Is AC Charger securely inserted into an electric
outlet?
#Insert AC Charger securely.
"Is battery installed in 707SC?
#Install battery correctly.
"Are the charging terminals of 707SC, battery
or the connector plug of AC Charger clean?
#Clean the contacts with a dry cotton swab,
etc.
"Has battery been charged in places with
ambient temperature below 5 ºC or above
40 ºC.
#Charge battery in places with ambient
temperature between 5 ºC and 40 ºC.
"Battery may need to be replaced.
#Replace with a new battery.
"Does battery always lose its charge quickly
after being charged?
#Battery life has expired. Replace with a new
battery.
5%'DQQMࡍࠫ㧞㧜㧜㧢ᐕ㧝㧜㧞㧢ᣣޓᧁᦐᣣޓඦ೨㧝㧝ᤨ㧝㧥ಽ

25-7
Appendix
25
"Does 707SC or battery become very warm
during charging?
#If the temperature rises too much, charging
may stop. After 707SC and battery are cool,
retry charging.
䂓Devices become hot
"During charging, AC Charger may become
hot.
"707SC may become hot during charging or a
long call.
#If 707SC can be touched with your hand, it is
normal. If it is too hot to touch, immediately
stop charging and contact Customer Service
( P.25-25).
䂓Battery drains quickly
"Battery may drain quickly depending on the
operating environment (Ambient temperature,
charging conditions, or Signal Strength),
operations, and settings.
#Use 707SC in an appropriate environment and
reduce operations requiring high power
( P.1-11).
䂓Display flickers
"Is 707SC used near a fluorescent light?
#Use 707SC as far away from a fluorescent
light as possible.
䂓Display is dim or unlit
"This may be due to the characteristics of
Display and not a problem. The time (seconds)
until Display is dimmed or unlit can be
changed by adjusting the Backlight time.
5%'DQQMࡍࠫ㧞㧜㧜㧢ᐕ㧝㧜㧞㧢ᣣޓᧁᦐᣣޓඦ೨㧝㧝ᤨ㧝㧥ಽ

25-8
Appendix
25
䂓Unable to play music through the speaker
"Is Manner Profile set?
#Cancel Manner Profile.
"Is the stereo earphone microphone
connected?
#Disconnect the connector for the stereo
earphone microphone from 707SC.
䂓Too many applications are already running,
thus unable to launch anymore appears
"Memory is low or full.
#Delete unnecessary S! Mail messages. If
multiple functions are active, close some of
them.
䂓Unable to establish Bluetooth® or USB
connections using Samsung PC Studio
"Is the USB driver installed? (for USB
connection)
#If communications are executed connecting to
a personal computer with the supplied USB
cable, installing the driver is required. Install
the driver from the supplied CD-ROM.
"Is the connection method set correctly on the
personal computer?
#Set the connection method to USB or
Bluetooth on the Connection Manager of
Samsung PC Studio or the Connection Wizard
for the communication in use.
5%'DQQMࡍࠫ㧞㧜㧜㧢ᐕ㧝㧜㧞㧢ᣣޓᧁᦐᣣޓඦ೨㧝㧝ᤨ㧝㧥ಽ

25-9
Appendix
25
"Are the settings of Bluetooth® or the USB
connection port of the PC same as those for
Samsung PC Studio?
#Make sure port settings match those set for
Samsung PC Studio Connection Manager or
Connection Wizard.
䂓Some Phonebook entries do not appear
"Is 707SC set to Hide in Secret Mode?
#Set to Show in Secret Mode.
䂓Message cannot be created
"Shared Memory may be full.
#Delete unnecessary messages. If available
memory is less than 464 KB, messages cannot
be created.
䂓Try again appears
"Signal conditions are poor.
#Move for a stronger signal and try again.
䂓Sending message failed or Unknown error
appears
"Network connection failed.
#Try again later.
䂓All available connections are busy appears
"New S! Mail arrives while 707SC is being used
for packet data communications.
#End the data communication and try again.
䂓Service unavailable appears
"707SC is outside the service area.
#Send from within the service area.
䂓No response appears
"Network/Server is busy.
#Try again later.
5%'DQQMࡍࠫ㧞㧜㧜㧢ᐕ㧝㧜㧞㧢ᣣޓᧁᦐᣣޓඦ೨㧝㧝ᤨ㧝㧥ಽ
25-10
Appendix
25
䂓Change from flight profile to other profile
for network service,created message will be
saved in outbox appears
"Offline mode is active.
#Cancel Offline mode and try again.
䂓Cannot download because of too large data
appears
"S! Appli memory is full.
#Delete unnecessary S! Appli and try again.
䂓Received invalid data. Quit download or
Cannot download because of too large data
appears
#File cannot be downloaded; cancel download.
Software Update
Check for 707SC software updates and download as
required. Choose to begin Update or Schedule update.
APress c and select Settings →
Software update
BPress w (Yes)
707SC connects to network.
CRead Terms of Use and select Agree
Read through Terms of Use before selecting Agree.
DEnter Center Access Code ( P.1-23)
and press c
Update Result appears.
5%'DQQMࡍࠫ㧞㧜㧜㧢ᐕ㧝㧜㧞㧢ᣣޓᧁᦐᣣޓඦ೨㧝㧝ᤨ㧝㧥ಽ

25-11
Appendix
25
EPress c
To update immediately
Select Update now to start the update. When
completed, 707SC turns the power off and on again;
then Notification window appears.
To schedule later update
aSelect Schedule update
bPress c (Yes)
cPress w (Yes)
dSelect schedule date and press c
eSelect schedule time and press c
fConfirm schedule date & time and press c
Notification Window
Tip
• Operation procedures
Procedures can be found in the SoftBank Website (http://
www.softbank.jp).
• Connection fees
Connection fees do not apply to updates (including checking
for updates, downloading, and rewriting).
• Scheduled update time comes
Confirmation window appears at scheduled update time.
Press c or wait approximately ten seconds to start.
Update will not start while 707SC is in use. When the current
operation ends, confirmation window appears. But other
functions active, and ten minutes after scheduled update
time, scheduled update is automatically canceled.
• To cancel Schedule update
aPerform Steps 1 to 5, select Cancel schedule
bPress w (Yes)
Notification Window
5%'DQQMࡍࠫ㧞㧜㧜㧢ᐕ㧝㧜㧞㧢ᣣޓᧁᦐᣣޓඦ೨㧝㧝ᤨ㧝㧥ಽ

25-12
Appendix
25
Symbols & Pictograms
Symbols
Double-byte Symbols
Note
• Charge battery beforehand; a low battery may cause
update to fail.
• When Scheduled update time comes and 707SC is
out-of-range, Software Update does not start.
• Keep 707SC in a place where signal is strong and
stable.
• 707SC Phonebook entries, media files, and other
contents are not affected by software updates, but
always back-up important information (note that
some files cannot be copied). SoftBank is not liable
for damages from lost information, etc.
• During update, calling or receiving messages, etc.
cannot be used.
• Update may take for a while.
• Update failure may disable 707SC. Contact SoftBank
Customer Center, Customer Assistance.
䄟
5%'DQQMࡍࠫ㧞㧜㧜㧢ᐕ㧝㧜㧞㧢ᣣޓᧁᦐᣣޓඦ೨㧝㧝ᤨ㧝㧥ಽ
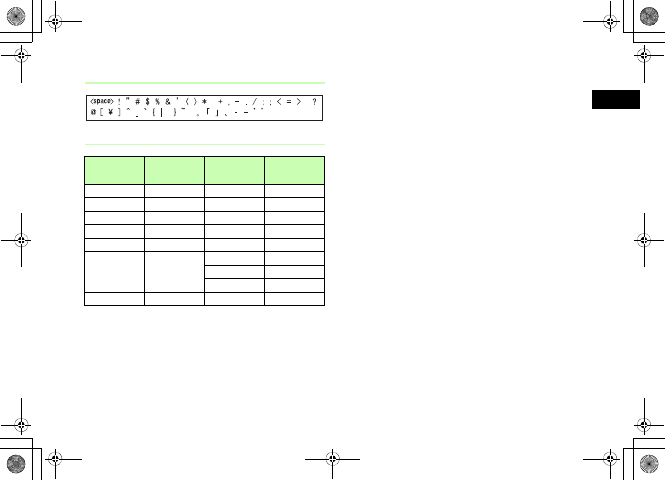
25-13
Appendix
25
Single-byte Symbols
Symbol Conversions
Symbol
Label Symbol Symbol
Label Symbol
䈅䈦䈫 䌀
@
䈖䉄 㶎
䈇䈖 䊷䉎 䋽
=
䈖䉐䉖 䋺 䋻
䈋䉖
䎂
䈘 䉖䈎䈒 䂦䂥䂰䂯
䈍䉖䈺 䅇 䈚 䈎䈒 䂔䂓䂺䂹
䈎䈔䉎 㬍 䈬䈉 䉚 䇰䇱
䈎䈦䈖 ()䇸䇹䇺䇻䇼䇽䇴䇵
[]
㵬
䇭
㵭㵰
䇭
㵱䋨
䇭
䋩䈀
䇭
䈁
䌛
䇭
䌝䌻
䇭
䌽䇴
䇭
䇵䇶
䇭
䇷
䈴䊷䈞䉖䈫 %
%
䈾䈚 䃩䃨
䉁 䉎 䂾䃂䃁
䈎䉌 䌾 䉇䈛 䉎 䈚 →←↑↓
5%'DQQMࡍࠫ㧞㧜㧜㧢ᐕ㧝㧜㧞㧢ᣣޓᧁᦐᣣޓඦ೨㧝㧝ᤨ㧝㧥ಽ
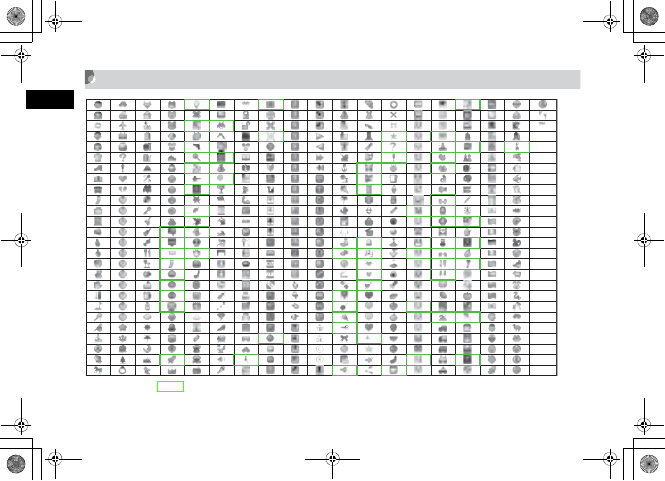
25-14
Appendix
25
Pictograms
• Pictograms with are animated.
• Some pictograms and animated pictograms may not appear properly on some models of SoftBank handsets or other devices.
5%'DQQMࡍࠫ㧞㧜㧜㧢ᐕ㧝㧜㧞㧢ᣣޓᧁᦐᣣޓඦ೨㧝㧝ᤨ㧝㧥ಽ
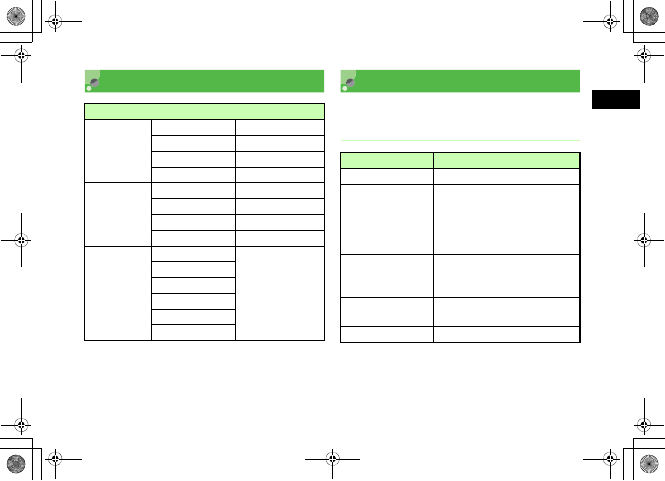
25-15
Appendix
25
Memory List Specifications
707SC specifications may change without prior notice.
SoftBank 707SC
• 707SC with battery installed.
Shared Memory
S! Mail
Received msgs Up to 500 messages
Drafts Up to 10 messages
Unsent msgs Up to 10 messages
Sent msgs Up to 250 messages
SMS
Received msgs Up to 500 messages
Drafts Up to 10 messages
Unsent msgs Up to 10 messages
Sent msgs Up to 250 messages
Data Folder
Pictures
Up to 999 items (files
and subfolders) per
folder
Videos
Sounds & Ringtones
S! Appli
Book
Other documents
Item Specification
Weight Approximately 97 g
Continuous Talk Time
Voice Call:
Approximately 165 minutes (3G)
Approximately 310 minutes (GSM)
Video Call:
Approximately 100 minutes (3G)
Continuous Standby
Time (707SC closed
and sub Display OFF)
Approximately 255 hours (3G)
Approximately 300 hours (GSM)
Dimensions
(W x H x D)
Approximately 51.4 x 102.5 x 11.9 䋘
(707SC closed)
Maximum Output 0.25 W
5%'DQQMࡍࠫ㧞㧜㧜㧢ᐕ㧝㧜㧞㧢ᣣޓᧁᦐᣣޓඦ೨㧝㧝ᤨ㧝㧥ಽ
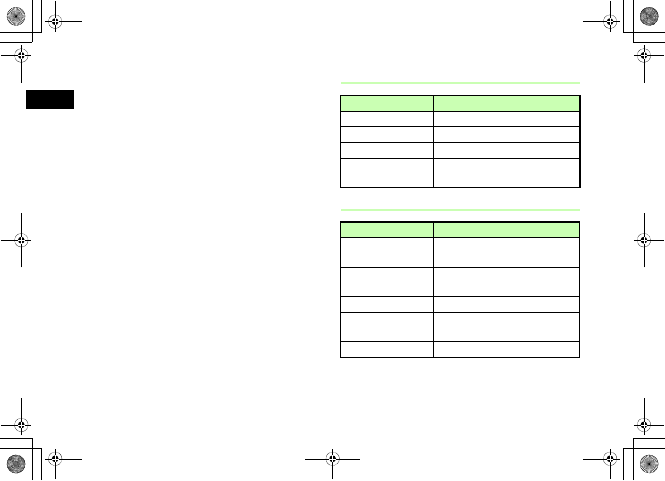
25-16
Appendix
25
• Battery Time is calculated by SoftBank under stable
signal conditions. Calling in poor signal conditions or
leaving 707SC on out-of-range will consume more
power and may reduce Battery Time by more than half.
• Frequent 707SC operations requiring Backlight (e.g.,
Yahoo! Keitai) may reduce Continuous Talk Time and
Continuous Standby Time.
• Using video for Wallpaper may significantly reduce
Continuous Talking and Continuous Standby Times.
• Using S! Appli may reduce Continuous Talking and
Continuous Standby Times.
• Continuous Talk Time is an average measured with a
new, fully charged battery in stable signal conditions.
Continuous Standby Time is an average measured with a
new, fully charged battery with 707SC closed without
calls or operations, in Standby, in stable signal
conditions. Alternating between usage and Standby
shortens Continuous Talk Time and Continuous Standby
Time. Talk Time/Standby Time may vary by environment
(battery status, ambient temperature, etc.).
Battery
AC Charger
Item Specification
Voltage 3.7 V
Type Lithium-ion
Capacity 880 mAh
Dimensions
(W x H x D)
Approximately 46.3 x 36.9 x 5.2 mm
(without protruding parts)
Item Specification
Power Source AC 100 V-240 V, 50/60 Hz
(with power cable)
Output Voltage/
Current DC 5 V/720 mA
Charging Temperature 5 to 40 ºC
Dimensions
(W x H x D)
Approximately 53 x 49 x 20 mm
(without cables)
Cord Length Approximately 180 cm
5%'DQQMࡍࠫ㧞㧜㧜㧢ᐕ㧝㧜㧞㧢ᣣޓᧁᦐᣣޓඦ೨㧝㧝ᤨ㧝㧥ಽ
25-17
Appendix
25
INDEX
A
AC Charger ................................................1-14
Acoustic shock .........................................15-5
Activate Secret mode ..........................13-6
Activating Bluetooth® ........................12-4
Activating S! Appli ...............................24-3
Active Folder ............................................15-6
Add to playlist .........................................10-5
Adding Reject Black List ....................13-9
Adjusting earpiece volume ................2-7
Adjusting ringtone volume ........ 2-3,6-3
Adjusting volume level to play
.......................................................... 10-7,10-12
Alarms ..........................................................14-2
All music .....................................................10-3
Anniversary ...............................................14-9
Answer Machine .......................................2-5
Answering mode ....................................12-9
Anykey answer ........................................15-5
Applicable Profiles for Bluetooth®
...................................................................... 12-2
Attaching files ...................................... 18-13
Attaching to a message for sending
still images ........................................... 7-20
Attaching to a message for sending
videos ...........................................7-20,11-13
Attaching/Inserting a file ............... 17-15
Audio Skin ................................................. 10-7
Auto power ON ...................................... 14-4
Auto redial ................................................ 15-2
B
Backlight ................................. 8-7,10-8,24-13
Battery ................................................1-10,1-12
Bluetooth® ................................................ 12-2
Bluetooth® Address ............................ 12-3
Bluetooth® service .............................. 12-3
Browser Information ........................... 23-3
C
Cache ............................................................ 21-2
Calculator ................................................ 14-19
Calendar ......................................................14-5
Calendar window format ..................14-6
Call answer mode ....................................9-3
Call cost limit ...........................................2-12
Call Log Records ......................................2-9
Call Transfer service ............................16-3
Call Waiting ..............................................16-8
Caller ID ....................................................16-13
Camera ..........................................................7-2
Camera mode ............................................7-4
Camera setting .......................................7-13
Capturing continuous images ..........7-8
Capturing in Mosaic shot ....................7-9
Capturing mode .......................................7-4
Capturing still images ..........................7-5
Capturing videos ...................................7-10
Category .......................................................5-7
Centre access code ...............................1-23
Certificates .................................... 22-16,23-4
Changing a file name ........................11-15
Changing a folder name ...... 11-15,18-15
Changing mail address .......................20-2
Changing phone password ..............13-2
5%'DQQMࡍࠫ㧞㧜㧜㧢ᐕ㧝㧜㧞㧢ᣣޓᧁᦐᣣޓඦ೨㧝㧝ᤨ㧝㧥ಽ

25-18
Appendix
25
Changing PIN ...........................................13-2
Changing PIN2 .........................................13-2
Changing profile ......................................3-3
Changing settings of each profile
........................................................................9-2
Changing to SMS .................................17-12
Changing to S! mail ...........................17-12
Changing voice recorder settings
....................................................................14-17
Charger Port ...............................................1-7
Charging ........................................... 1-14,1-16
Checking memory usage ......... 15-8,18-2
Clear memory ........................................13-10
Clock Display ..............................................8-4
Conference Call ......................................16-9
Connecting a Bluetooth®-compatible
device ............................................. 12-6,12-9
Connection to another Bluetooth
devices .....................................................12-6
Content key info ..................................11-14
Converting currency or unit ..........14-19
Cookie setting .........................................23-2
Copy text ..................................................22-13
Copying characters .............................. 4-13
Copying files .......................................... 11-16
Copying folders .................................... 11-16
Copying items ......................................... 5-14
Copying Phonebook ............................ 5-15
Copyrighted file icons ........................ 18-5
Country code ........................................... 15-3
Creating a folder ......................11-15,18-15
Creating a play list ............................... 10-6
Creating messages ............................... 17-6
Current contacts ...................................... 2-9
Cutting characters ................................ 4-13
D
Data folder .......................................7-15,11-2
Date and time setting ........................ 1-18
Default name ......................................... 14-17
Default style ............................................. 20-4
Deleting a bookmark ........................ 22-11
Deleting a file ....................................... 11-17
Deleting a folder ......................11-17,18-16
Deleting a Saved page ....................... 22-9
Deleting a S! Appli ............................... 24-5
Deleting access logs ..........................22-11
Deleting Cache ........................................23-4
Deleting Calendar items .................14-13
Deleting Call Log Records ................2-10
Deleting characters ..............................4-12
Deleting Cookies ...................................23-4
Deleting messages ...............................18-9
Deleting messages in server ...........19-3
Deleting My devices ............................12-5
Deleting Phonebook ............................5-15
Deleting still images .............................7-6
Deleting templates ..........4-17,18-9,18-11
Dialed Call Log Records .......................2-9
Dialing display ..........................................8-8
Dictionary .................................................14-22
Display ...........................................................1-8
Display brightness ..................................8-7
Display mode ...........................................14-7
Display Operator name ........................8-5
Display rendering ................................22-12
Display size of videos .......................10-12
Displaying Slide show ......................17-12
Download Content Key ....................11-14
5%'DQQMࡍࠫ㧞㧜㧜㧢ᐕ㧝㧜㧞㧢ᣣޓᧁᦐᣣޓඦ೨㧝㧝ᤨ㧝㧥ಽ

25-19
Appendix
25
Downloading a S! Appli ....................24-2
Drafts ............................................................18-2
DTMF ....................................................... 2-8,6-5
Dynamic effect list ................................7-19
E
Earphone call ...........................................15-3
Editing bookmarks .............................22-10
Editing Calendar details ..................14-12
Editing Phonebook ...............................5-14
Editing still images ...............................7-15
Editing Style ...........................................17-13
Editing the title for a Saved page
......................................................................22-8
Editing Videos .........................................7-17
Effect sound and keypad tone
volume .......................................................9-2
Effect sound setting ....................... 9-3,9-7
Effects ..........................................................7-12
Encode ........................................................22-15
Entering a number to select an item
......................................................................1-21
Entering by quoting text ...................4-11
Entering characters .........................4-2,4-5
Entering emoticons .............................. 4-10
Entering pictograms ............................ 4-10
Entering symbols ................................... 4-10
Entering URL ............................................ 21-3
Entry mode for characters ................. 4-2
Event list .................................................. 14-12
External Device Port ............................. 1-7
F
File details ............................................... 11-14
File Viewer ................................................ 11-5
Font size .............................4-15,8-6,8-9,23-3
Forwarding ............................................... 18-8
Forwarding Messages ........................ 19-4
Forwarding messages in server .... 19-4
Frames ..................................................7-6,7-16
G
Greeting Messages ................................ 8-9
H
Holiday .........................................................14-9
Home zone .................................................1-20
I
Icons for attached files ....................17-16
Icons for files ................................. 11-2,11-4
Icons on Drafts list ...............................18-4
Icons on My devices list ....................12-6
Icons on Received messages list
......................................................................18-4
Icons on Sent messages ....................18-5
Icons on Unsent messages list .......18-5
Image display ..........................................23-2
In-car charger ..........................................1-16
Initiating a call ................................ 2-2,2-14
Initiating a call overseas ...................2-14
Initiating a Video Call ...........................6-2
Initiating an international call
.............................................................. 2-2,2-14
Inserting/Removing USIM Card .......1-3
Installing and removing battery ...1-12
5%'DQQMࡍࠫ㧞㧜㧜㧢ᐕ㧝㧜㧞㧢ᣣޓᧁᦐᣣޓඦ೨㧝㧝ᤨ㧝㧥ಽ
25-20
Appendix
25
International code ................................15-2
International roaming ........................2-13
Interpreter ...............................................14-23
Invoking a function with Switch Bar
......................................................................1-22
Invoking functions from Main menu
......................................................................1-20
Items to save to Phonebook .............5-2
J
Java Script .................................................23-3
Jump ..............................................................4-14
K
Key assignments ......................................4-3
Keypad tone ...............................................9-3
L
Language ....................................................8-10
List Font Size ..............................................8-6
Locking/unlocking ...............................11-14
Locking/unlocking files ....................11-14
Locking/Unlocking sound files .... 14-17
Locking/Unlocking S! Appli ............. 24-4
M
Mail art function ................................... 17-7
Mail Server ............................................... 19-2
Mailbox ....................................................... 18-2
Main menu style ...................................... 8-5
Manner profile .......................................... 3-2
Mark default number ......................... 5-14
Maximum of message size .............. 20-4
Media Player ............................................ 10-2
Memo ......................................................... 14-10
Message ..................................................... 17-2
Message details ..................................... 18-3
Message List ............................................ 19-2
Message type icon ............................... 18-3
Missed Call ...........................................2-4,2-9
Mobile Postcard ....................................... 7-7
Mobile tracker ........................................ 13-7
Modifying characters .......................... 4-12
Move to USIM ....................................... 18-20
mPet .............................................................. 24-5
mPostcard ....................................................7-6
Multi Selector ............................................ xiv
Mute .................................................2-3,2-8,9-4
My devices ..............................12-4,12-8,12-9
My phone’s name ................................12-11
My phone’s visibility .........................12-10
My phone’s visibility for Bluetooth®
....................................................................12-10
N
Network mode ........................................2-13
Network password ................... 1-24,16-13
Network Profile ......................................2-13
Network selection .................................2-13
Network S! Appli ...................................24-2
O
Offline Profile ............................................3-2
Opening Saved page ...........................22-8
Operating messages in server .......19-2
Operations available during a Video
Call ...............................................................6-3
Operations during a call ......................2-8
5%'DQQMࡍࠫ㧞㧜㧜㧢ᐕ㧝㧜㧞㧢ᣣޓᧁᦐᣣޓඦ೨㧝㧝ᤨ㧝㧥ಽ
25-21
Appendix
25
Option menu .............................................1-23
Outgoing/incoming call barring
service ....................................................16-11
Owner information ...............................5-16
P
Page Details ............................................22-14
Page Window ...........................................21-4
Password Lock .........................................13-5
Pasting characters ................................4-13
Phone lock .................................................13-5
Phonebook search ...................................5-9
Photo slide ...................................................8-2
PIN ....................................................................1-5
PIN authentication at power on
.............................................................. 1-5,13-3
PIN lock .......................................................13-3
PIN2 .................................................................1-5
PIN2 lock unlocking code .................13-3
Player settings .............................10-7,10-11
Playing melody .......................................10-3
Playing video .................................. 7-15,10-9
Playing voice ..........................................14-16
Popup menu ............................................... 8-6
Power ON/OFF ................................1-17,1-18
Predictive entry function ON/OFF
...................................................................... 4-14
Preferences ............................................... 23-2
Preferred network ................................ 2-14
Pre-installed ............................................. 11-2
Print via Bluetooth® ........................... 12-7
Privacy Lock ............................................. 13-6
Providing Manufacturer Number
...................................................................... 23-3
PUK Code ............................................1-5,13-3
Putting a call on hold ........................... 2-7
Q
Quoting for entries .............................. 4-11
R
Received call log ..................................... 2-9
Received messages .............................. 18-2
Receiving a call ........................................ 2-3
Receiving a Video Call ......................... 6-2
Receiving all messages ...................... 19-2
Receiving data via Bluetooth® .....12-7
Receiving message in server ..........19-2
Receiving settings .................................20-3
Record settings .....................................14-17
Recording voice ....................................14-16
Registering an S! Mail Template
....................................................................18-19
Registering as S! Mail Template
......................................................................18-6
Registering SMS templates .............4-16
Registering to bookmark ..................22-9
Registering to Phonebook .................5-4
Rejecting call reception .....................15-6
Rejecting incoming calls ...................13-8
Renaming a still image file ................7-6
Renaming My devices .........................12-5
Renaming sound files .......................14-17
Repeat mode ................................ 10-7,10-11
Reply ................................................... 17-5,18-7
Reply with text .......................................20-6
Reset ...........................................................13-11
Reset all ....................................................13-11
Reset settings ........................................13-11
5%'DQQMࡍࠫ㧞㧜㧜㧢ᐕ㧝㧜㧞㧢ᣣޓᧁᦐᣣޓඦ೨㧝㧝ᤨ㧝㧥ಽ

25-22
Appendix
25
Resetting a call cost .............................2-11
Resetting Call times .............................2-11
Resetting PIN lock .................................13-3
Resetting S! Appli settings ............24-14
Restarting paused S! Appli ..............24-4
Retry function ..........................................17-2
Retry with ....................................................6-6
Ringtone for a Voice Call ....................5-8
S
Saving a page ..........................................22-8
Saving as a template .........................17-20
Saving attached files .........................18-14
Saving images .........................................22-2
Saving sounds ..........................................22-5
Saving to Drafts ...................................17-20
Schedule ......................................................14-7
Search text ..............................................22-13
Search type ...............................................5-12
Secure mode for data transfer ....12-11
Security ......................................................24-12
Security Codes .........................................1-23
Selecting 3G or GSM ...........................2-13
Sending a bookmark URL ............... 22-10
Sending a message from Drafts ... 18-8
Sending data via Bluetooth® ......... 12-6
Sending from Unsent Messages ... 18-9
Sending settings ............... 17-12,20-2,20-5
Sending sound files ........................... 14-16
Sending still images via Bluetooth®
...................................................................... 12-6
Sending URL ........................................... 22-14
Sending videos via Bluetooth®
.............................................................7-12,12-6
Sending your image .............................. 6-5
Sent messages ........................................ 18-2
Server Certification ........................... 22-14
Server Mail Size ..................................... 19-2
Shortcut operations ............................. 7-10
Shortcuts ...........................................1-22,15-7
Side Key ...................................................... 15-6
Side Key Lock .......................................... 15-6
Simple Search Setting ........................ 15-7
Skin ................................................................ 10-8
Slide show ................................................. 11-3
SMS ......................................................17-2,20-5
SMS templates ........................................4-11
Softkey .......................................................... xiii
Software Update .................................25-10
Sort .........................................11-9,14-13,18-17
Sorting files ..............................................11-9
Sound file details ................................14-17
Sound file setting ................................14-16
Sound playback ......................................23-2
Sound Settings ..........................................9-4
Speaker Phone call .................................2-7
Speed dialing ...........................................5-12
SSL/TLS .........................................................21-2
SSL/TLS certificate ................................23-4
Still image details ...................................7-6
Stopping or Pausing S! Appli .........24-3
Stopwatch ................................................14-22
Streaming ...................................................22-7
Sub LCD Light ............................................8-8
Substitute images ...................................6-6
SVG-T/Flash® Viewer ..........................11-8
Switching callers ..................................16-10
S! Appli ........................................................24-2
S! Appli detailed information ........24-4
5%'DQQMࡍࠫ㧞㧜㧜㧢ᐕ㧝㧜㧞㧢ᣣޓᧁᦐᣣޓඦ೨㧝㧝ᤨ㧝㧥ಽ
25-23
Appendix
25
S! Mail ..........................................................17-2
S! Mail templates ................................17-14
T
Task ..............................................................14-10
Templates ......................................... 4-11,18-2
Timer .............................................................7-11
U
Unsent messages ...................................18-2
Updating information .......................22-13
Updating mail list ..................................19-2
USB connection .....................................12-11
User dictionary ........................................4-15
USIM Card ....................................................1-2
USIM lock ...................................................13-4
USIM password .......................................13-5
Using a file ..............................................11-10
Using a template .................................17-14
Using SMS templates ..........................4-16
V
Various settings for Video Call ....... 6-5
vFile ............................................................. 11-12
Vibration .........................................14-2,24-14
Vibrator/Sound settings ...................... 9-2
Video Mode .............................................. 7-10
Video settings ......................................... 7-14
Viewfinder ................................................... 7-3
Viewing a file .......................................... 11-3
Viewing attached files ..................... 18-13
Viewing Call cost .................................. 2-11
Viewing Call Log Records .................. 2-9
Viewing Call times ............................... 2-11
Viewing Saved Calendar Entries
.................................................................... 14-12
Viewing your phone number (My
Phonebook details) .......................... 5-16
Visualization ............................................ 10-8
Voice Mail Service ................................ 16-5
Voice Recorder ..................................... 14-15
Volume ....................................... 2-7,9-2,24-13
W
Wake-up Alarm .......................................14-2
Wallpaper .....................................................8-2
Web ................................................................21-2
Web access from a bookmark ......22-10
Web connection from access logs
....................................................................22-11
World clock .............................................14-18
Y
Yahoo! Keitai .........................................22-16
Z
Zoom list .......................................................8-7
Numerics
3D Pictogram ...........................................20-5
5%'DQQMࡍࠫ㧞㧜㧜㧢ᐕ㧝㧜㧞㧢ᣣޓᧁᦐᣣޓඦ೨㧝㧝ᤨ㧝㧥ಽ
25-24
Appendix
25
Warranty & After Sales
Service
Warranty
The purchased 707SC comes with a Warranty.
• Check the shop and date of purchase.
• Read through the contents of the Warranty and keep it
in a safe place.
• The warranty period can be found in the Warranty.
SoftBank is not liable for damages to you or a third party
from missed calls, etc. due to handset failure or
malfunction, etc.
Repair Requests
Before submitting 707SC for repair, consult the
"Troubleshooting" section.
for a solution. If a problem persists, contact Customer
Service ( P.25-25) or the nearest SoftBank shop; be
prepared to describe problem in detail.
• During the warranty period, repairs will be made under
the terms and conditions described in the warranty.
• After the warranty period, repairs will be upon request;
if said repairs can be made, you will be charged for
them.
Note
• 707SC files and settings may be lost or altered due
to accidents or repairs. Keep a copy of important
files, etc. like Phonebook entries. SoftBank is not
liable for damages resulting from accidental loss or
alteration of 707SC files (Phonebook, Data Folder,
etc.) or settings.
• Disassembling or modifying this product may be a
violation of the Radio Law. Note that SoftBank will
not accept repair requests for disassembled or
modified products.
5%'DQQMࡍࠫ㧞㧜㧜㧢ᐕ㧝㧜㧞㧢ᣣޓᧁᦐᣣޓඦ೨㧝㧝ᤨ㧝㧥ಽ
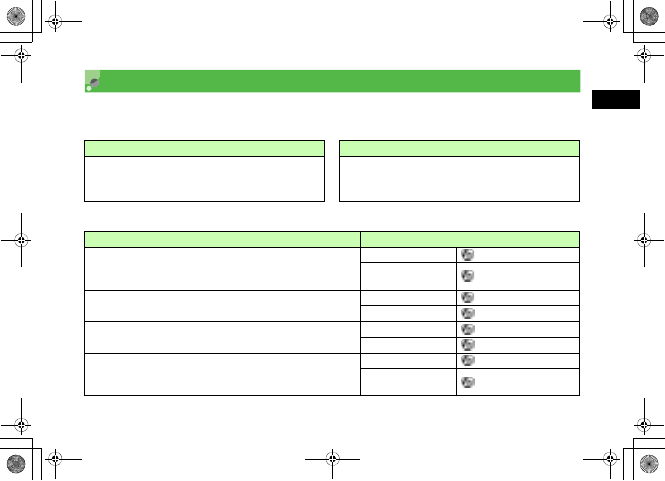
25-25
Appendix
25
Customer Service
If you have questions about SoftBank handsets or services, please call General Information.
For repairs, please call Customer Assistance.
Call these numbers toll free from landlines.
SoftBank Customer Center SoftBank International Call Center
From a SoftBank handset, dial toll free at
157 for General Information or
113 for Customer Assistance
From outside Japan, dial +81-3-5351-3491
(Please take care to dial correctly; international charges will
apply.)
Subscription Areas Contact
Hokkaido, Aomori, Akita, Iwate, Yamagata, Miyagi, Fukushima, Niigata,
Tokyo, Kanagawa, Chiba, Saitama, Ibaraki, Tochigi, Gunma, Yamanashi,
Nagano, Toyama, Ishikawa, Fukui
General Information 0088-240-157 (Toll-free)
Customer Assistance 0088-240-113 (Toll-free)
Aichi, Gifu, Mie, Shizuoka General Information 0088-241-157 (Toll-free)
Customer Assistance 0088-241-113 (Toll-free)
Osaka, Hyogo, Kyoto, Nara, Shiga, Wakayama General Information 0088-242-157 (Toll-free)
Customer Assistance 0088-242-113 (Toll-free)
Hiroshima, Okayama, Yamaguchi, Tottori, Shimane, Tokushima, Kagawa,
Ehime, Kochi, Fukuoka, Saga, Nagasaki, Oita, Kumamoto, Miyazaki,
Kagoshima, Okinawa
General Information 0088-250-157 (Toll-free)
Customer Assistance 0088-250-113 (Toll-free)
5%'DQQMࡍࠫ㧞㧜㧜㧢ᐕ㧝㧜㧞㧢ᣣޓᧁᦐᣣޓඦ೨㧝㧝ᤨ㧝㧥ಽ

25-26
5%'DQQMࡍࠫ㧞㧜㧜㧢ᐕ㧝㧜㧞㧢ᣣޓᧁᦐᣣޓඦ೨㧝㧝ᤨ㧝㧥ಽ
SoftBank 707SC User Guide
October 2006 Version 1
*For more information, please visit
your nearest SoftBank Shop.
SOFTBANK MOBILE Corp.
Model name : SoftBank 707SC
Manufacturer : Samsung Electronics
Co., Ltd.
To help protect the environment and
recycle valuable resources, mobile
phone, and PHS shops displaying the
above mark accept mobile phones,
batteries, and chargers of all
manufacturers.
*Mobile phones, batteries, and chargers
collected for recycling cannot be returned.
*To protect your privacy, delete any personal
information (telephone numbers, call log
records, messages, etc.) beforehand.
5%'DQQMKࡍࠫ㧞㧜㧜㧢ᐕ㧝㧜㧞㧢ᣣޓᧁᦐᣣޓඦ೨㧝㧝ᤨ㧝㧥ಽ