Samsung Electronics Co AT50L7 DLP Projection TV User Manual BP68 00352A 00 cover
Samsung Electronics Co Ltd DLP Projection TV BP68 00352A 00 cover
UserManual.wiki
>
Samsung Electronics Co
>
AT50L7 User Manual
>
Users Manual 2
Contents
1.
Users Manual 1
2.
Users Manual 2
Users Manual 2
Navigation menu
Upload a User Manual
Namespaces
Wiki Guide
HTML
PDF
Info
Views
User Manual
Discussion / Help
Navigation

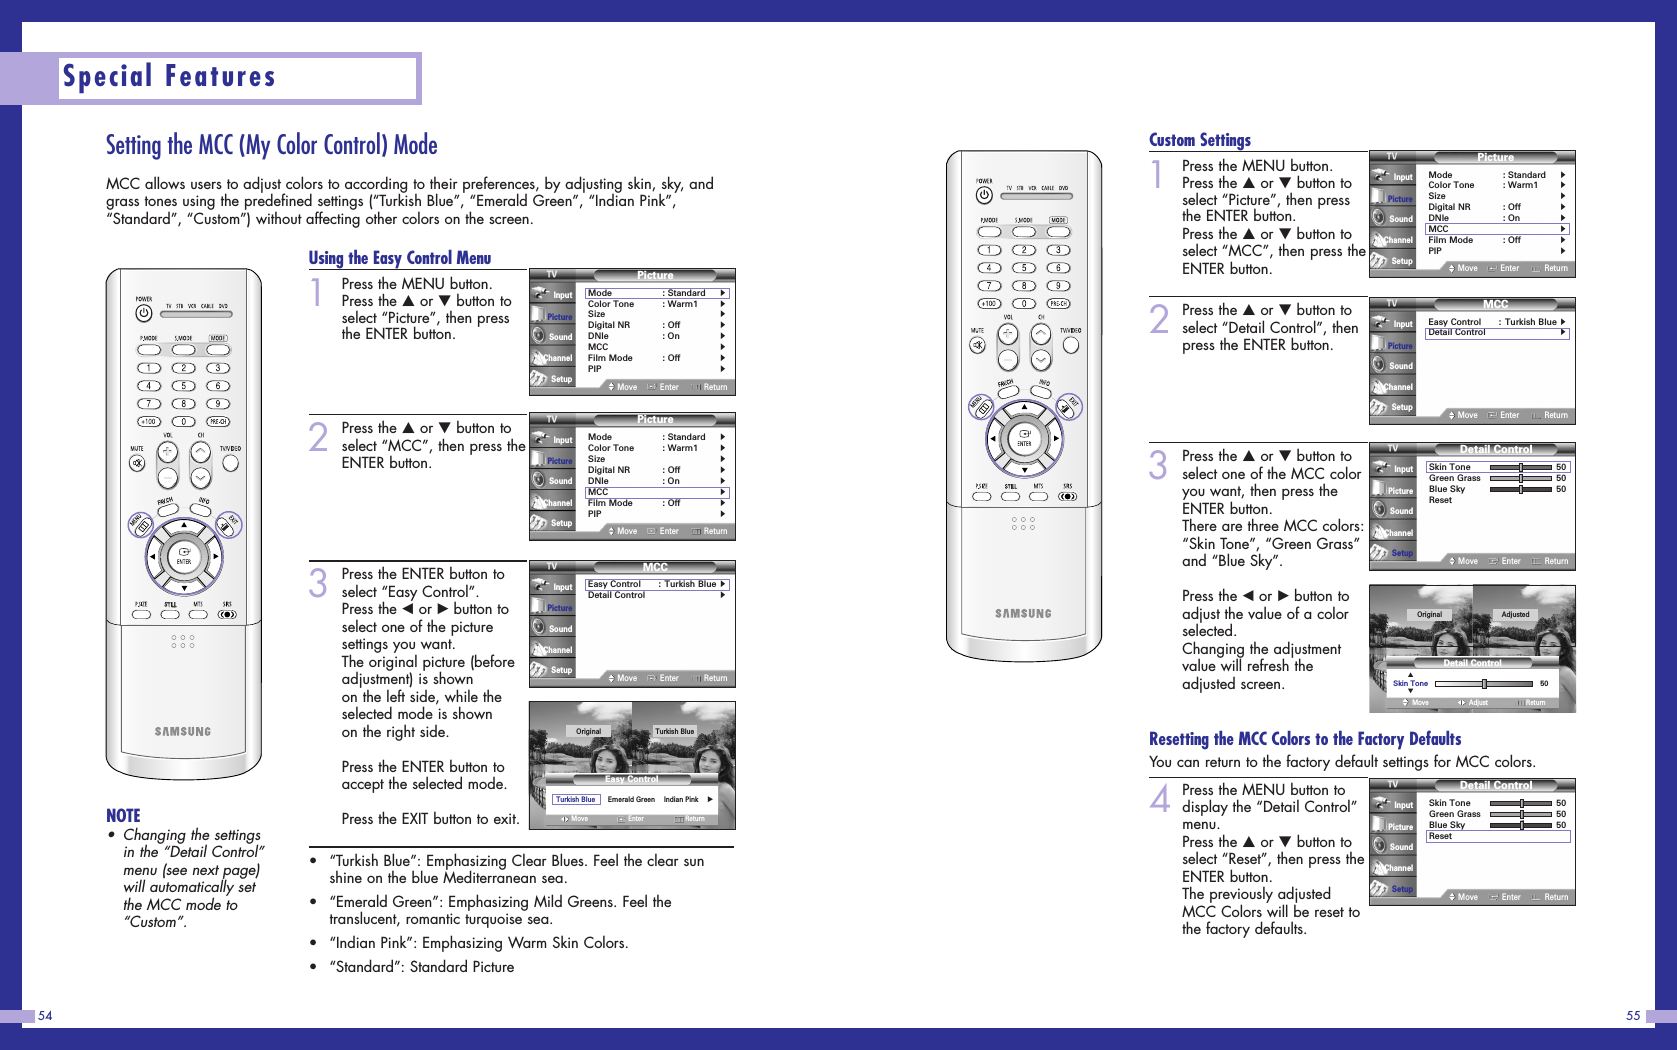
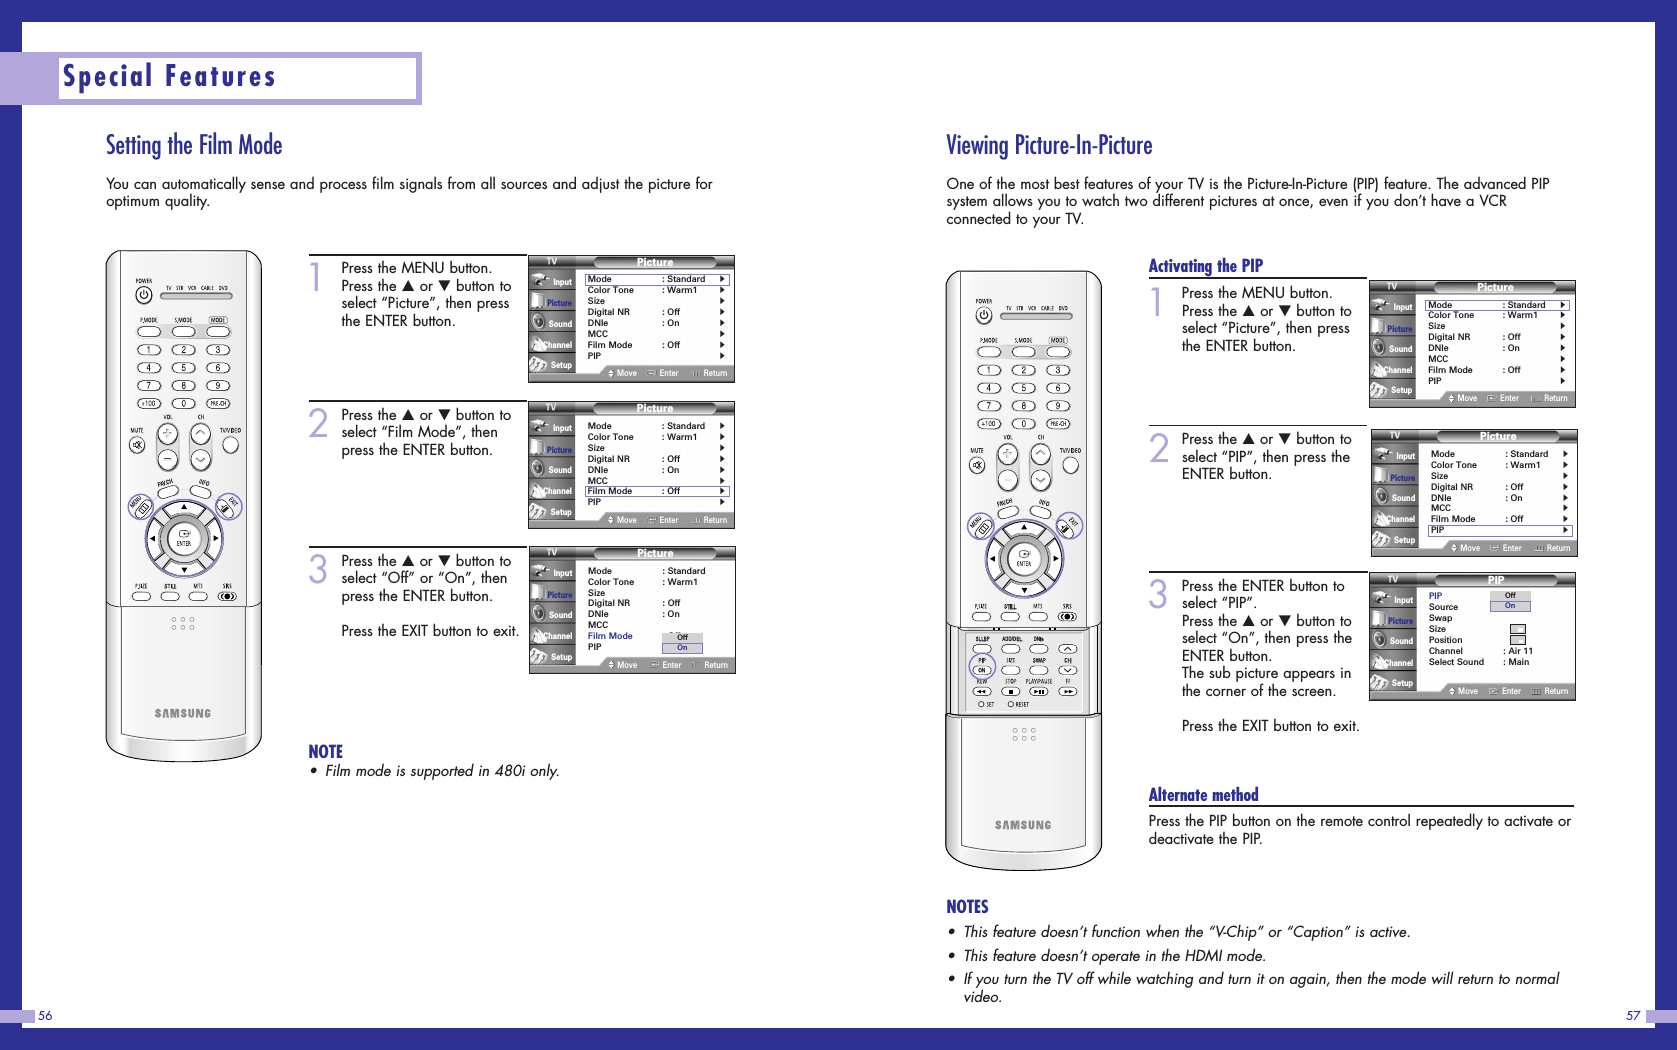
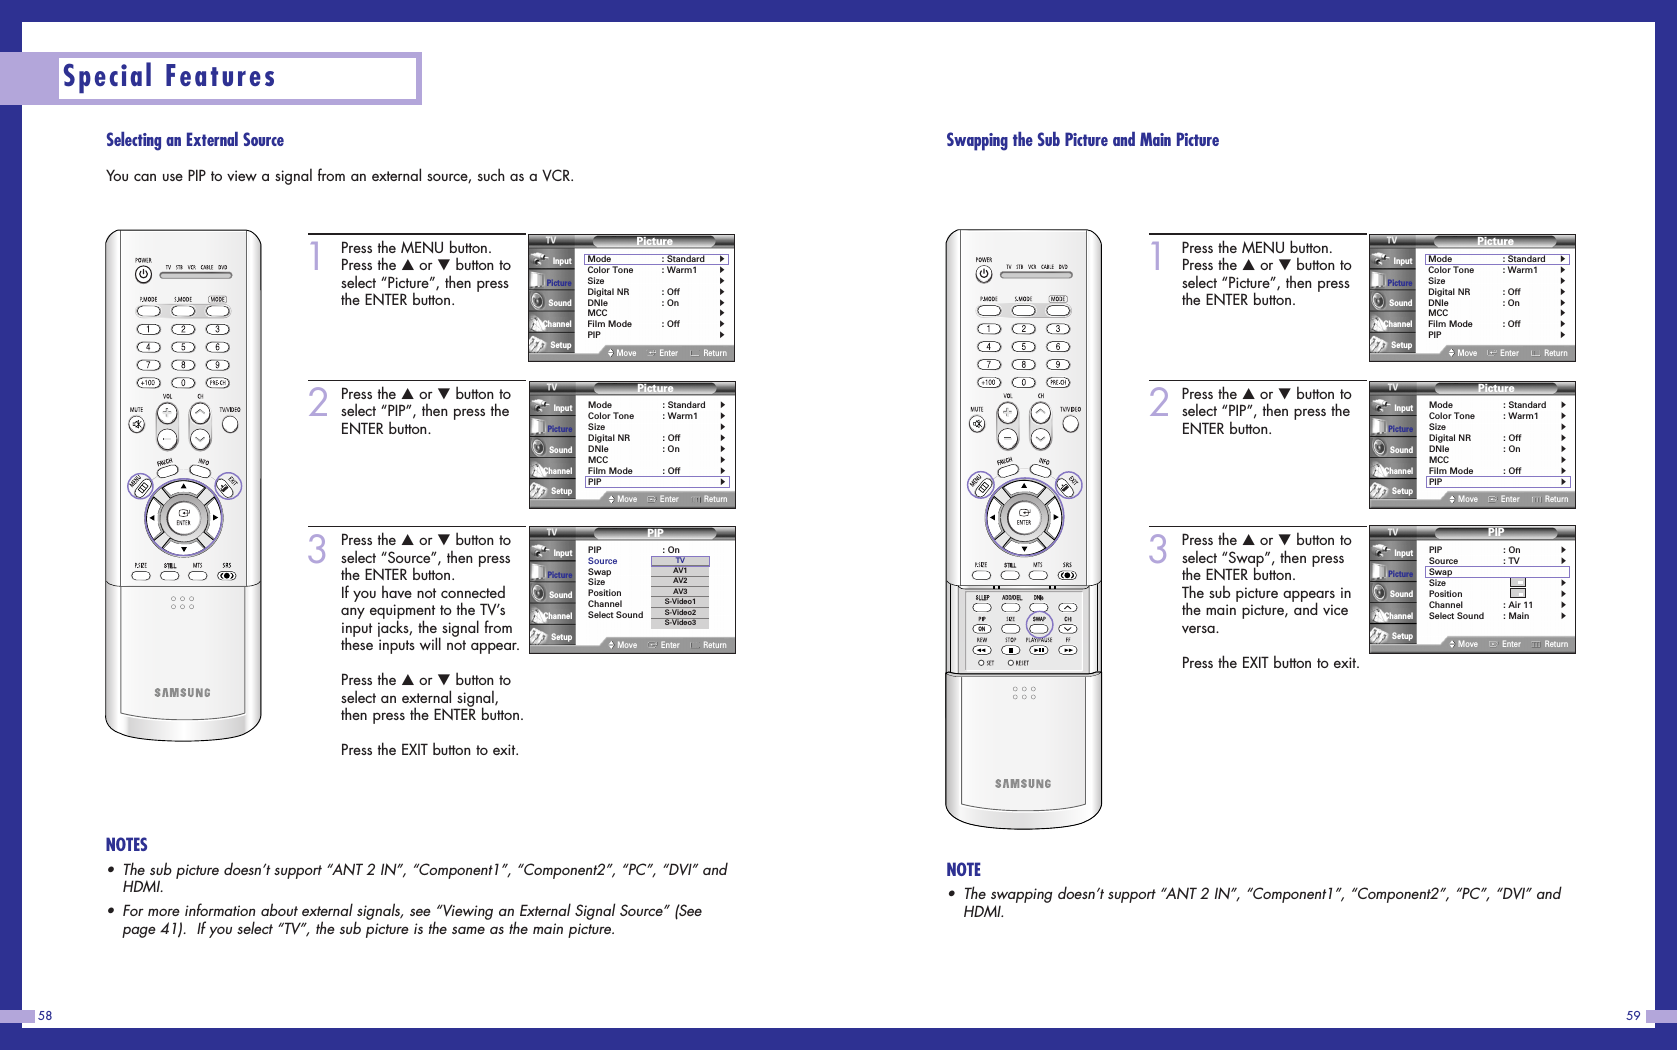
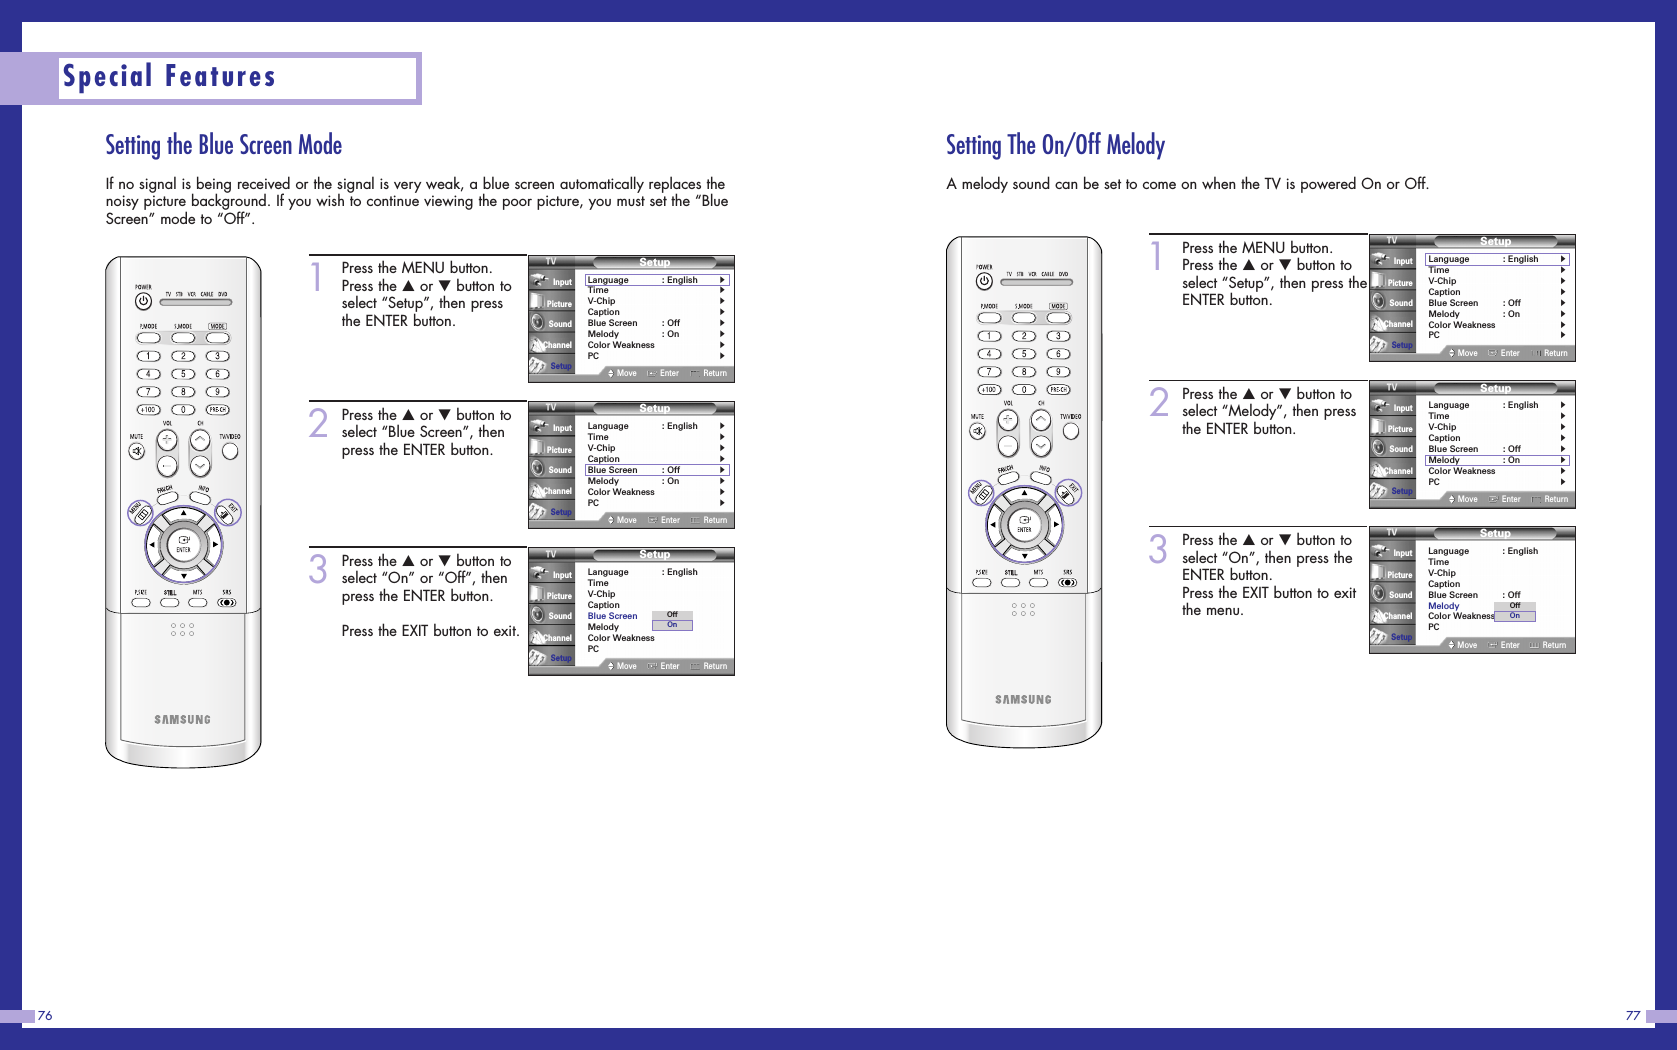
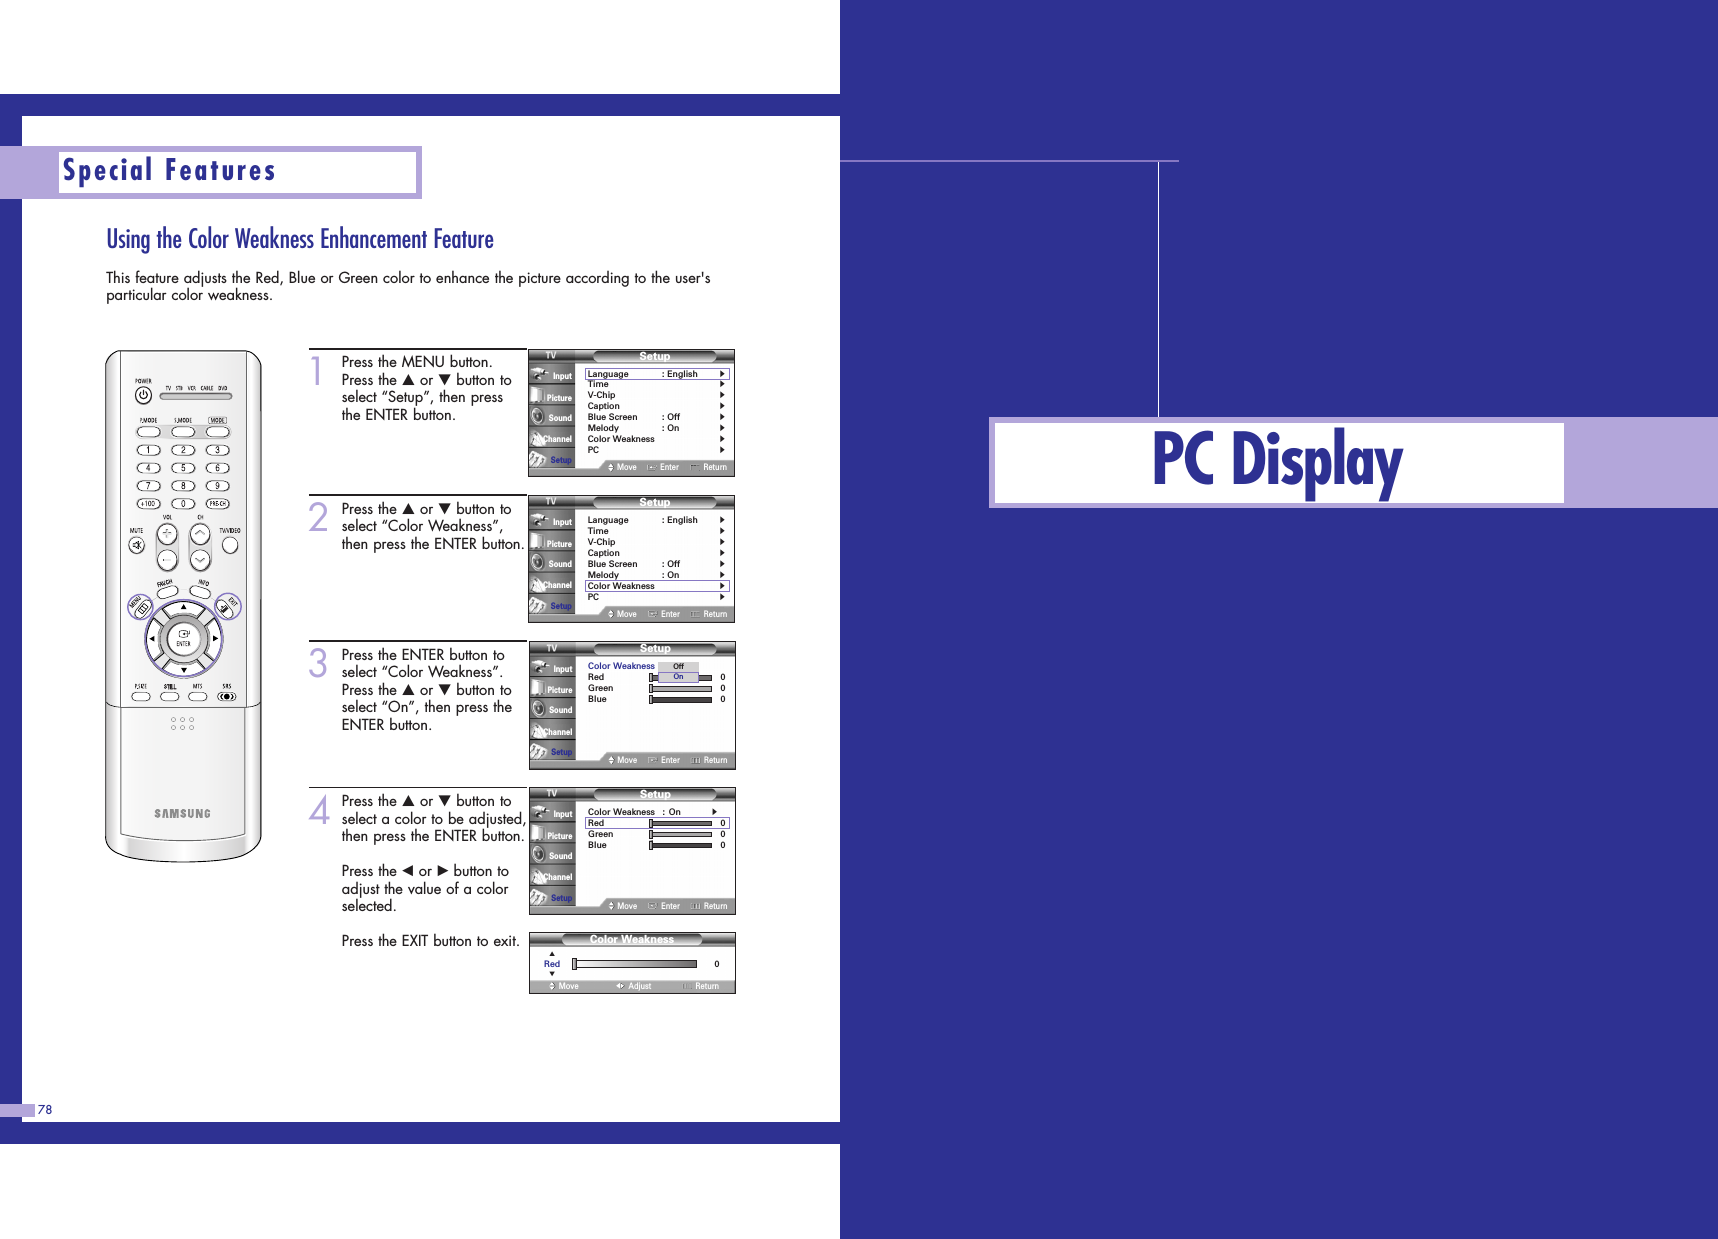
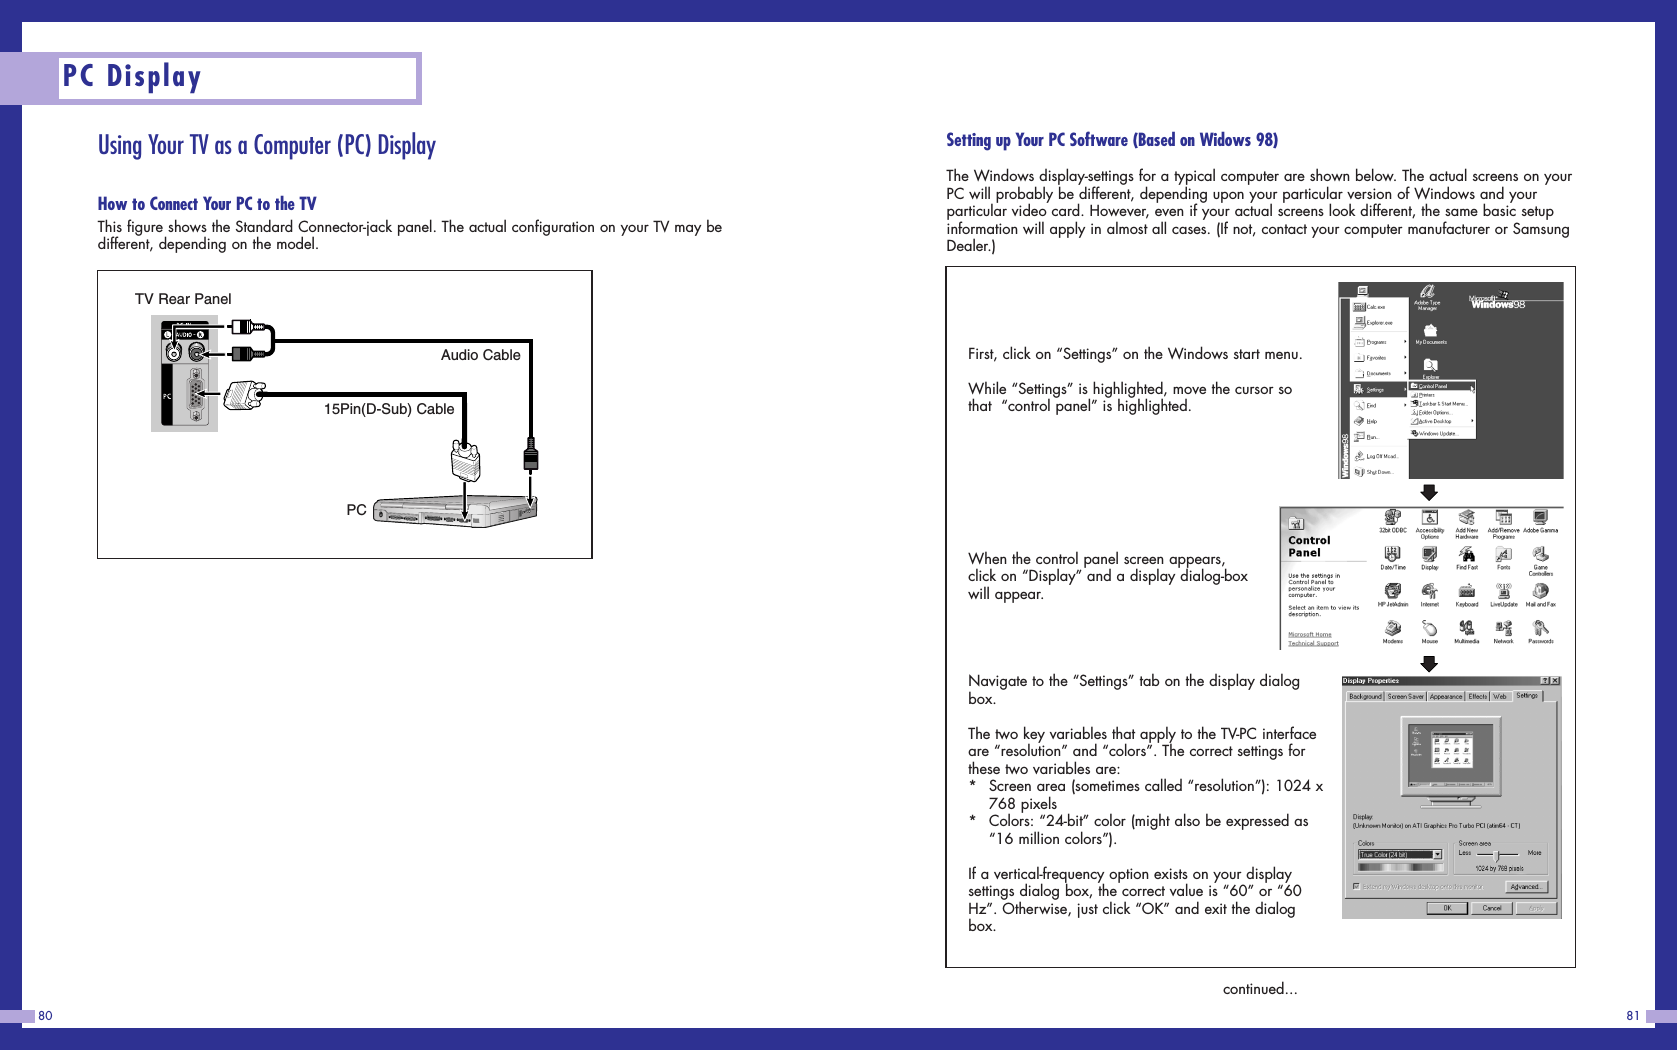
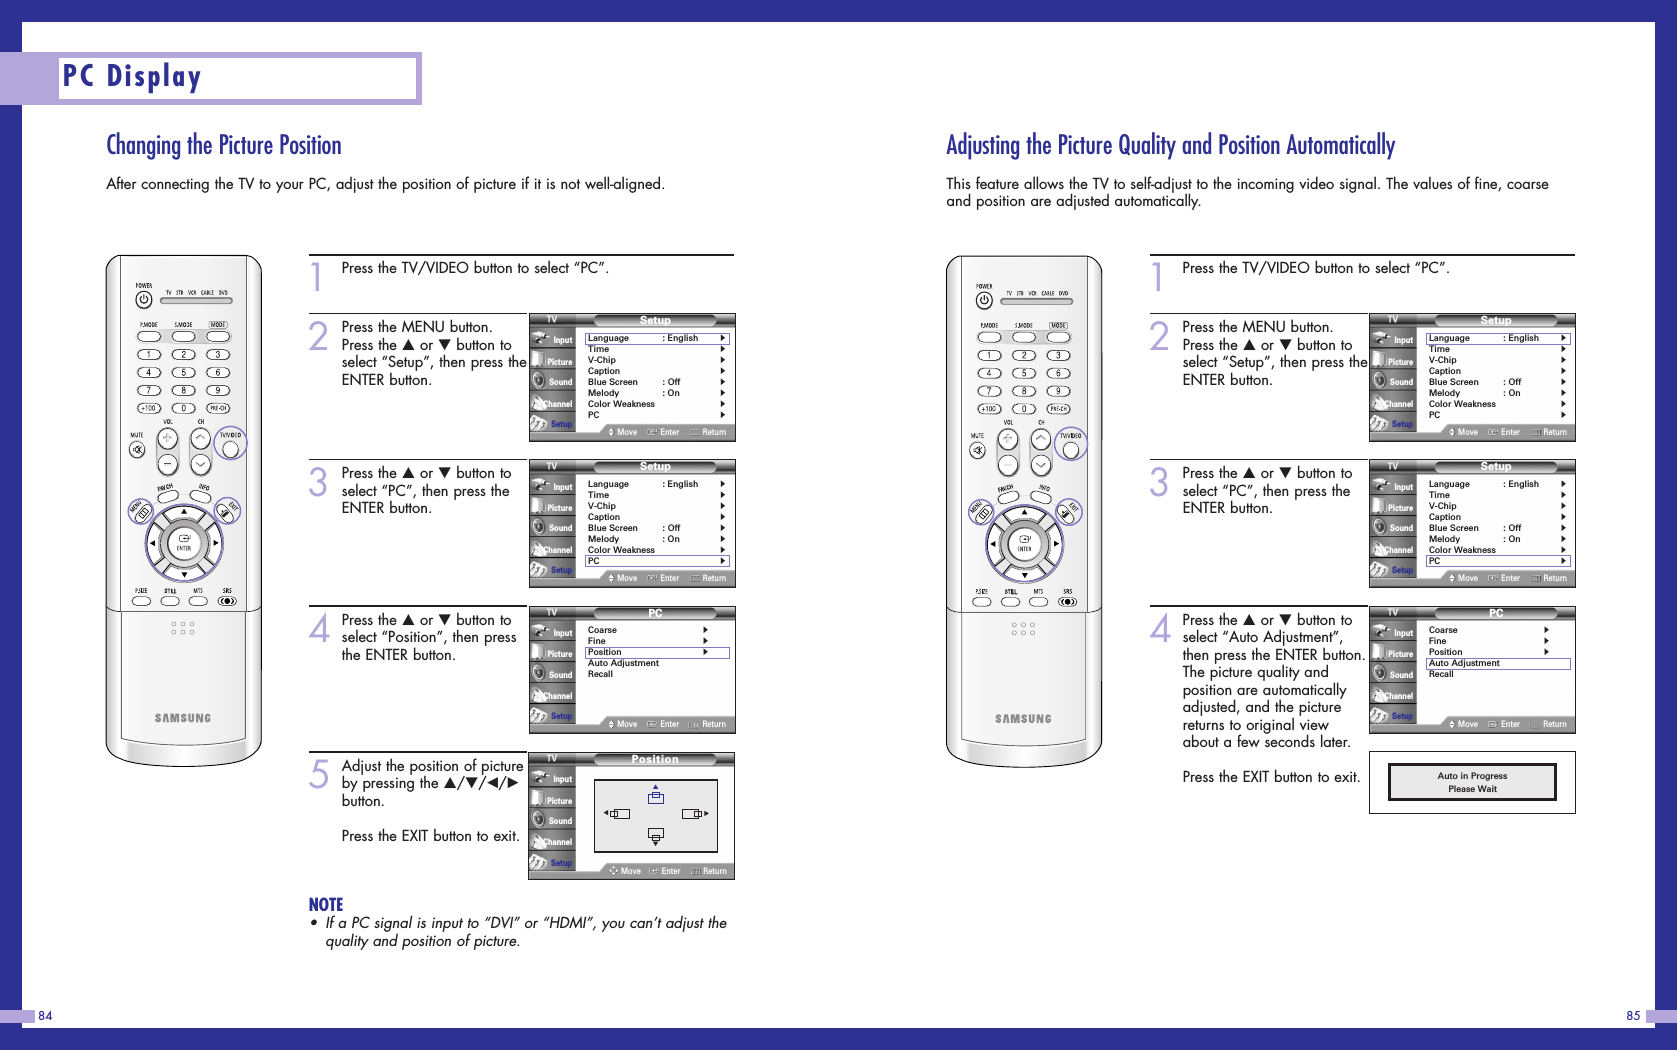
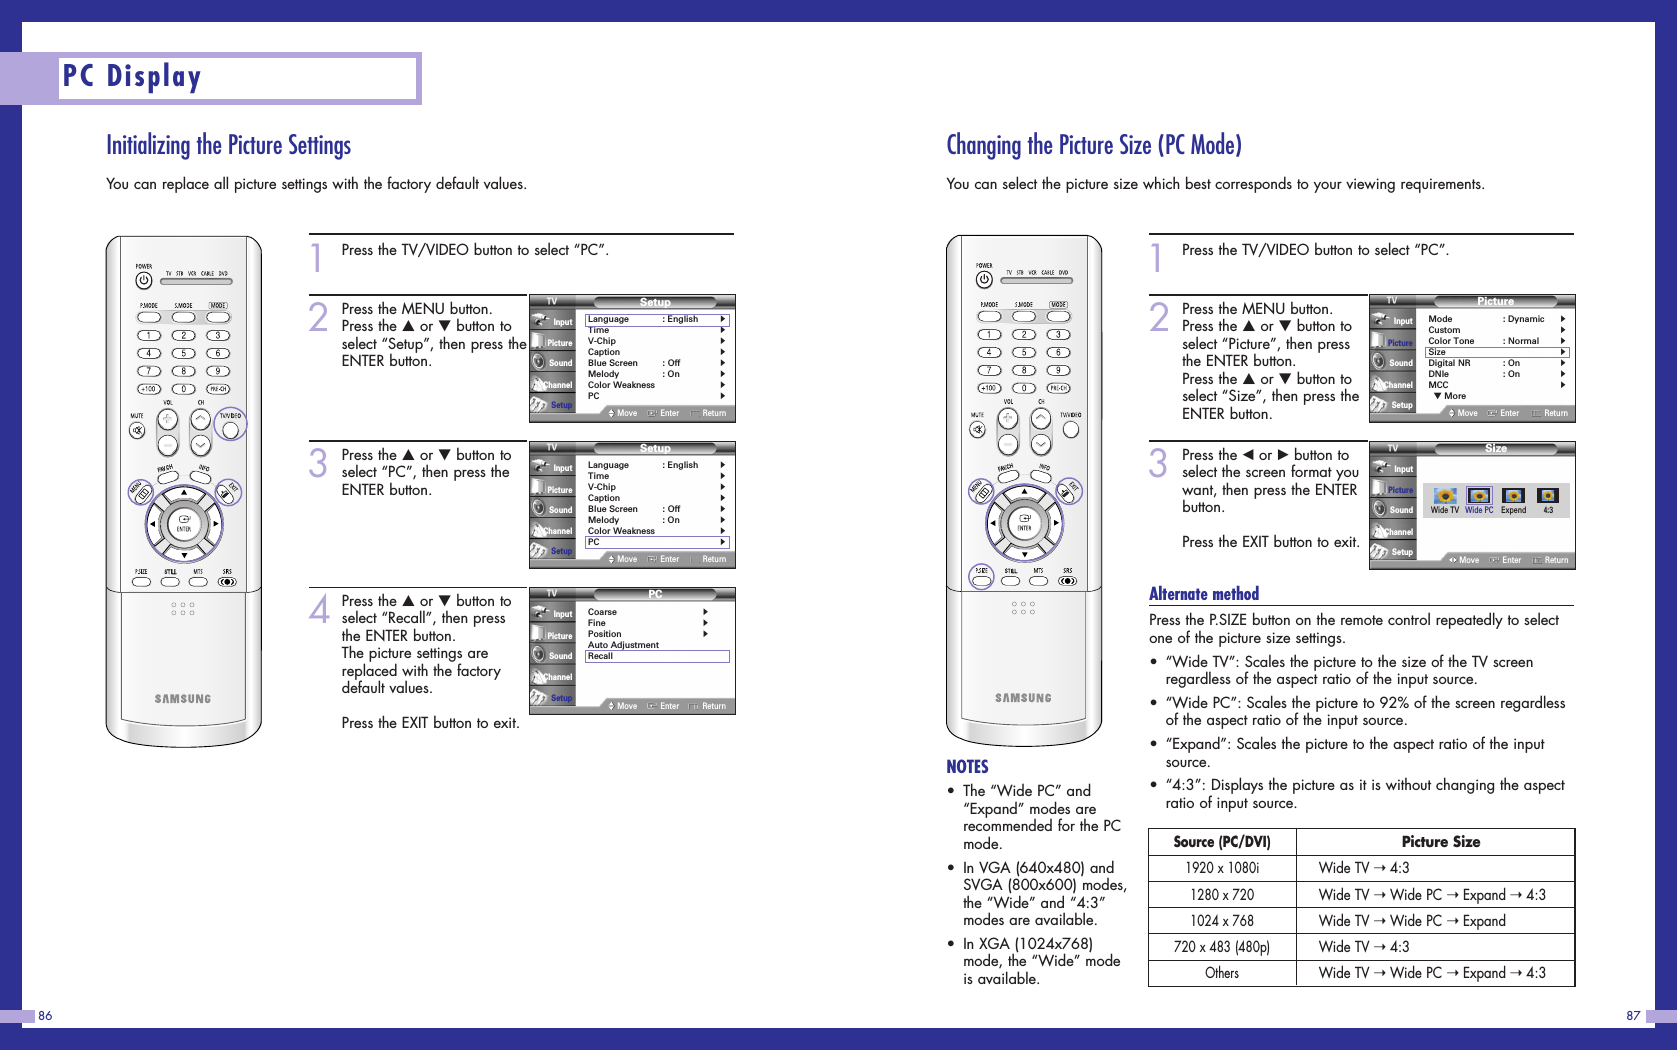
![Adjusting the Picture QualityThe purpose of picture quality adjustment is to remove or reduce picture noise. If the noise is notremoved by fine tuning alone, then do the frequency adjustments to the utmost and fine tuneagain. After the noise has been reduced, re-adjust the picture so that it is aligned on the center ofscreen.83PC Display82NOTE• Both screen position and size will vary, depending on the type of PC monitor and its resolution.The table above shows all of the display modes that are supported:* The interlace mode is not supported.* The TV will operate abnormally if a non-standard video format is selected.NOTES•When this TV is used as a PC display, 32-bit color is supported (over 16 million colors).•Your PC display screen might appear different, depending on the manufacturer (and dependingon your particular version of Windows). Check your PC instruction book for information aboutconnecting your PC to a TV display-monitor.•Same modes as PC are supported for the signal input to the DVI jack. Only a separate sync signal is supported. Resolution640 x 350720 x 400640 x 480800 x 600832 x 6241024 x 7681920 x 1080i1280 x 720p720 x 483pHorizontal Frequency [KHz]31.4731.4737.9331.4735.0037.8637.5043.2735.1637.8848.0846.8753.6749.7348.3656.4060.0233.7545.0031.47Vertical Frequency [Hz]70.0070.0085.0060.0066.7072.8075.0085.0056.3060.3072.2075.0085.1074.6060.0070.1075.00606060Pixel Clock [MHz]25.17528.32235.525.17530.2431.5031.5036.0036.0040.0050.0049.5056.2557.28465.0075.0078.7574.2574.2527Sync Polarity (H/V)+/--/--/+-/+-/--/--/--/--+/-+/+-+/++/++/+-/+-/--/-+/-XXXModeVGASVGAXGADTVDisplay Modes1Press the TV/VIDEO button to select “PC”.2Press the MENU button.Press the …or †button toselect “Setup”, then press theENTER button.3Press the …or †button toselect “PC”, then press theENTER button.4Press the …or †button toselect “Coarse” or “Fine”,then press the ENTER button.5Pressing the œor √buttonto remove the picture noise.Press the EXIT button to exit.NOTE•This feature may change the width of the image. If necessary,adjust the position to center.SetupLanguage : English√Time√V-Chip√Caption√Blue Screen : Off√Melody : On√Color Weakness√PC√Move Enter ReturnInputPictureSoundChannelSetupSetupLanguage : English√Time√V-Chip√Caption√Blue Screen : Off√Melody : On√Color Weakness√PC√Move Enter ReturnInputPictureSoundChannelSetup▲Coarse▼1344PCCoarse√Fine√Position√Auto AdjustmentRecallMove Enter ReturnInputPictureSoundChannelSetup▲Fine▼0](https://usermanual.wiki/Samsung-Electronics-Co/AT50L7.Users-Manual-2/User-Guide-422612-Page-16.png)


![TCO'03 Recycling Information (TCO'03 applied model only)Medical Requirement (Medical applied model only)[European Residents Only]For recycling information for TCO'03 certified monitors, for the residents in the following countries,please contact the company corresponding to your region of residence. For those who reside in other countries, please contact a nearest local Samsung dealer for recycling information for the products to be treated inenvironmentally acceptable way.Classifications:In accordance with UL 2601-1/IEC 60601-1, the product is classified as Continuous duty Class Iequipment, which is not protected against ingress of liquids. The product is not suitable for use inthe presence of a flammable anaesthetic mixture with air or with oxygen or nitrous oxide.EMCThis equipment has been tested and found to comply with the limits for medical devices to the IEC 601-1-2:1994.These limits are designed to provide reasonable protection against harmful interference in a typical medical installation. This equipment generates, uses and can radiate radio frequency energy and, if not installed and used inaccordance with the instructions, may cause harmful interference to other devices in the vicinity. However, there isno guarantee that interference will not occur in a particular installation. If this equipment does cause harmfulinterference to other devices, which can be determined by turning the equipment off and on, the user is encouragedto try to correct the interference by one or more of the following measures:• Reorient or relocate the receiving device.• Increase the separation between the equipment.• Connect the equipment into an outlet on a circuit different from that to which the other device (s) are connected.• Consult the manufacturer or field service technician for help.Video In / RS 232 / Video OutAccessories equipment connected to the analog and digital interfaces must be certified to the respective IEC standards (i.e. IEC 950 for data processing equipment and IEC 601-1 for medical equipment.) Furthermore all configurations shall comply with the system standard IEC 601-1-1.Everybody who connects additional equipment to the signal input part or signal output part configures a medicalsystem, and is therefore, responsible that the system complies with the requirements of the system standard IEC601-1-1. If in doubt, consult the technical services department or your local representative.Transport and Storage Limitations:Temperature Range of -40°C to +70°CRelative Humidity of 10 -95%, non-condensing* Bio-accumulative is defined as substances which accumulate within living organisms.** Lead, Cadmium and Mercury are heavy metals which are Bio-accumulative.COMPANYU.S.A. Residents Only European Residents OnlyU.S.A. SWEDEN NORWAY GERMANY49 0 2234 9587 - 0vfw.info@vfw-ag.devfw AGMax Plank Strasse 4250858 CollogneGermanyElektronikkretur AS23 06 07 4023 06 07 41adm@elektronikkretur.nohttp://www.elretur.no/6454 Etterstad 0602OsloFyrstikkalln 3B08-545 212 99info@el-kretsen.sehttp://www.el-kretsen.se/08-545 212 90ELKRETSENELKRETSEN Box1357, 111 83StockholmBarnhusgatan 3, 4 tr.Solid Waste Transfer &Recycling Inc973-565-0181Fax: 973-565-9485nonehttp://www.bcua.org/SolidWaste_Disposal.htm442 Frelinghuysen AveNewark, NJ 07114ADDRESSTELEPHONEFAXE-MAILHOMEPAGEN- 19 -safety 2003.12.3 4:51 AM 페이지20](https://usermanual.wiki/Samsung-Electronics-Co/AT50L7.Users-Manual-2/User-Guide-422612-Page-39.png)