Samsung Electronics Co CLX4195FW Color Multi-function Printer User Manual azalea scarlet english
Samsung Electronics Co Ltd Color Multi-function Printer azalea scarlet english
Contents
- 1. Users Manual 1
- 2. Users Manual 2
- 3. Users Manual 3
- 4. Users Manual 4
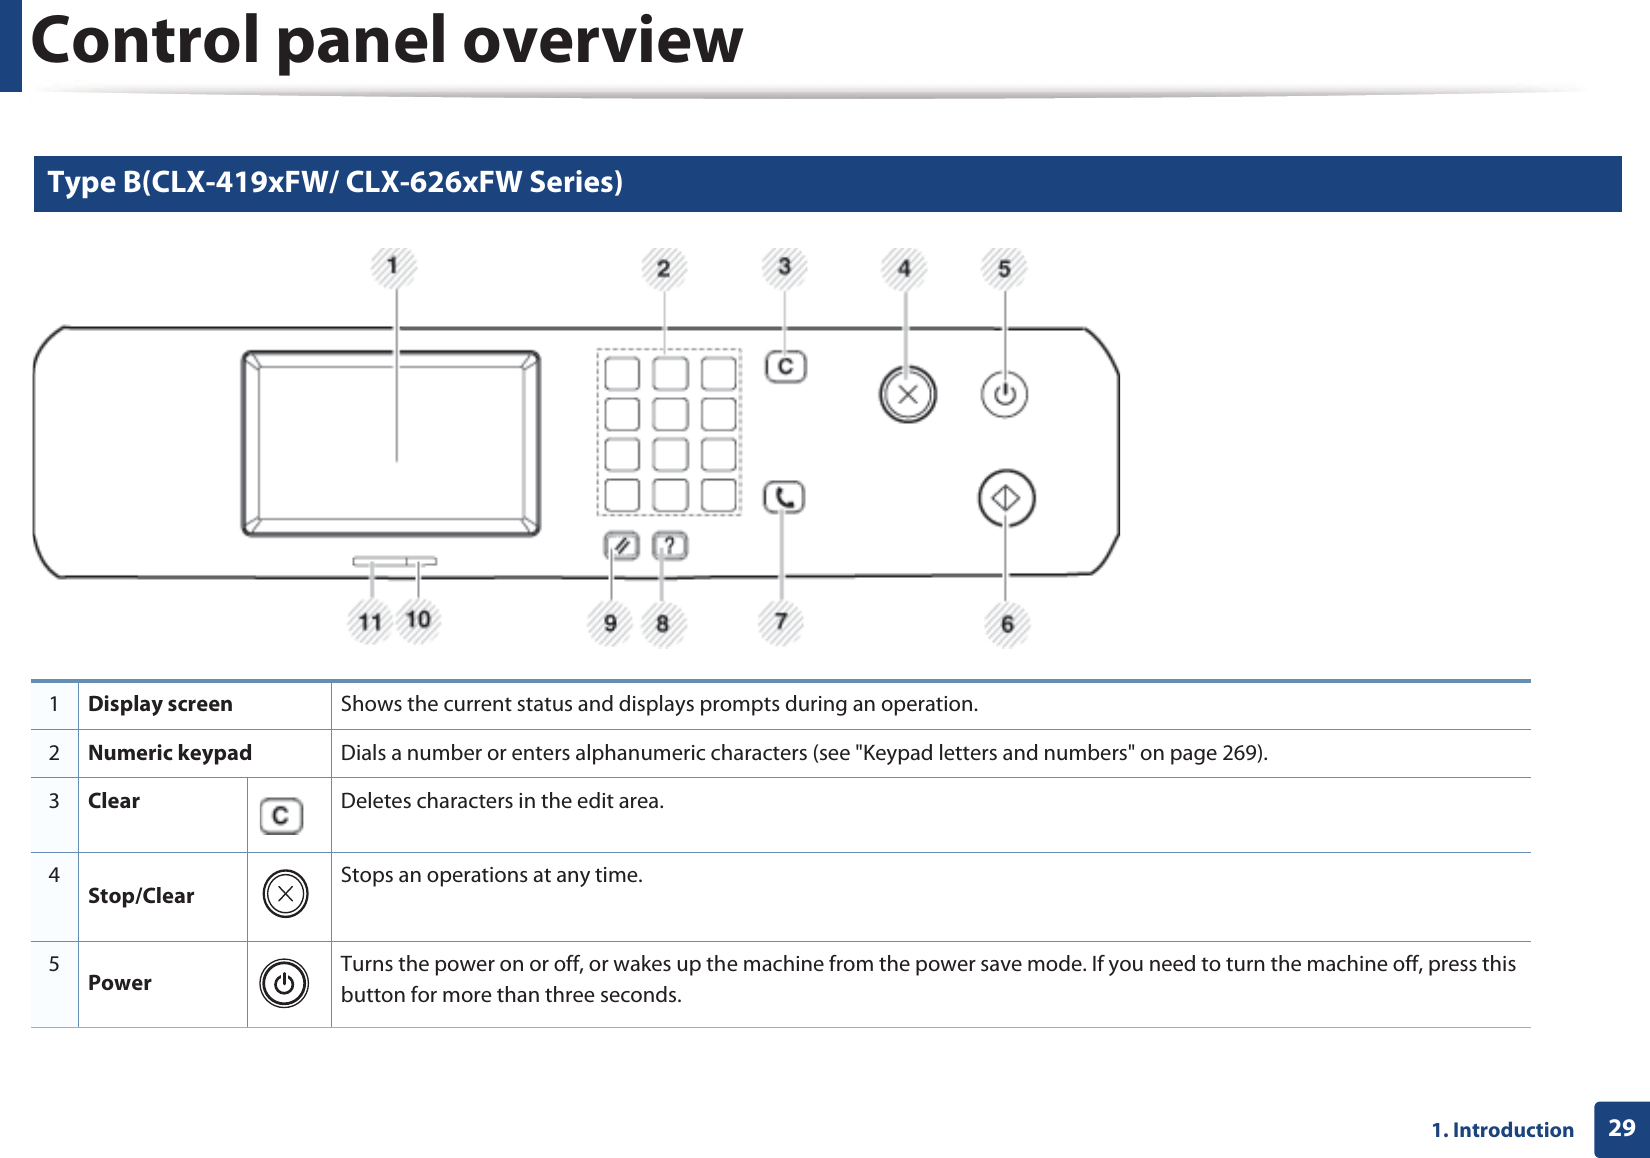
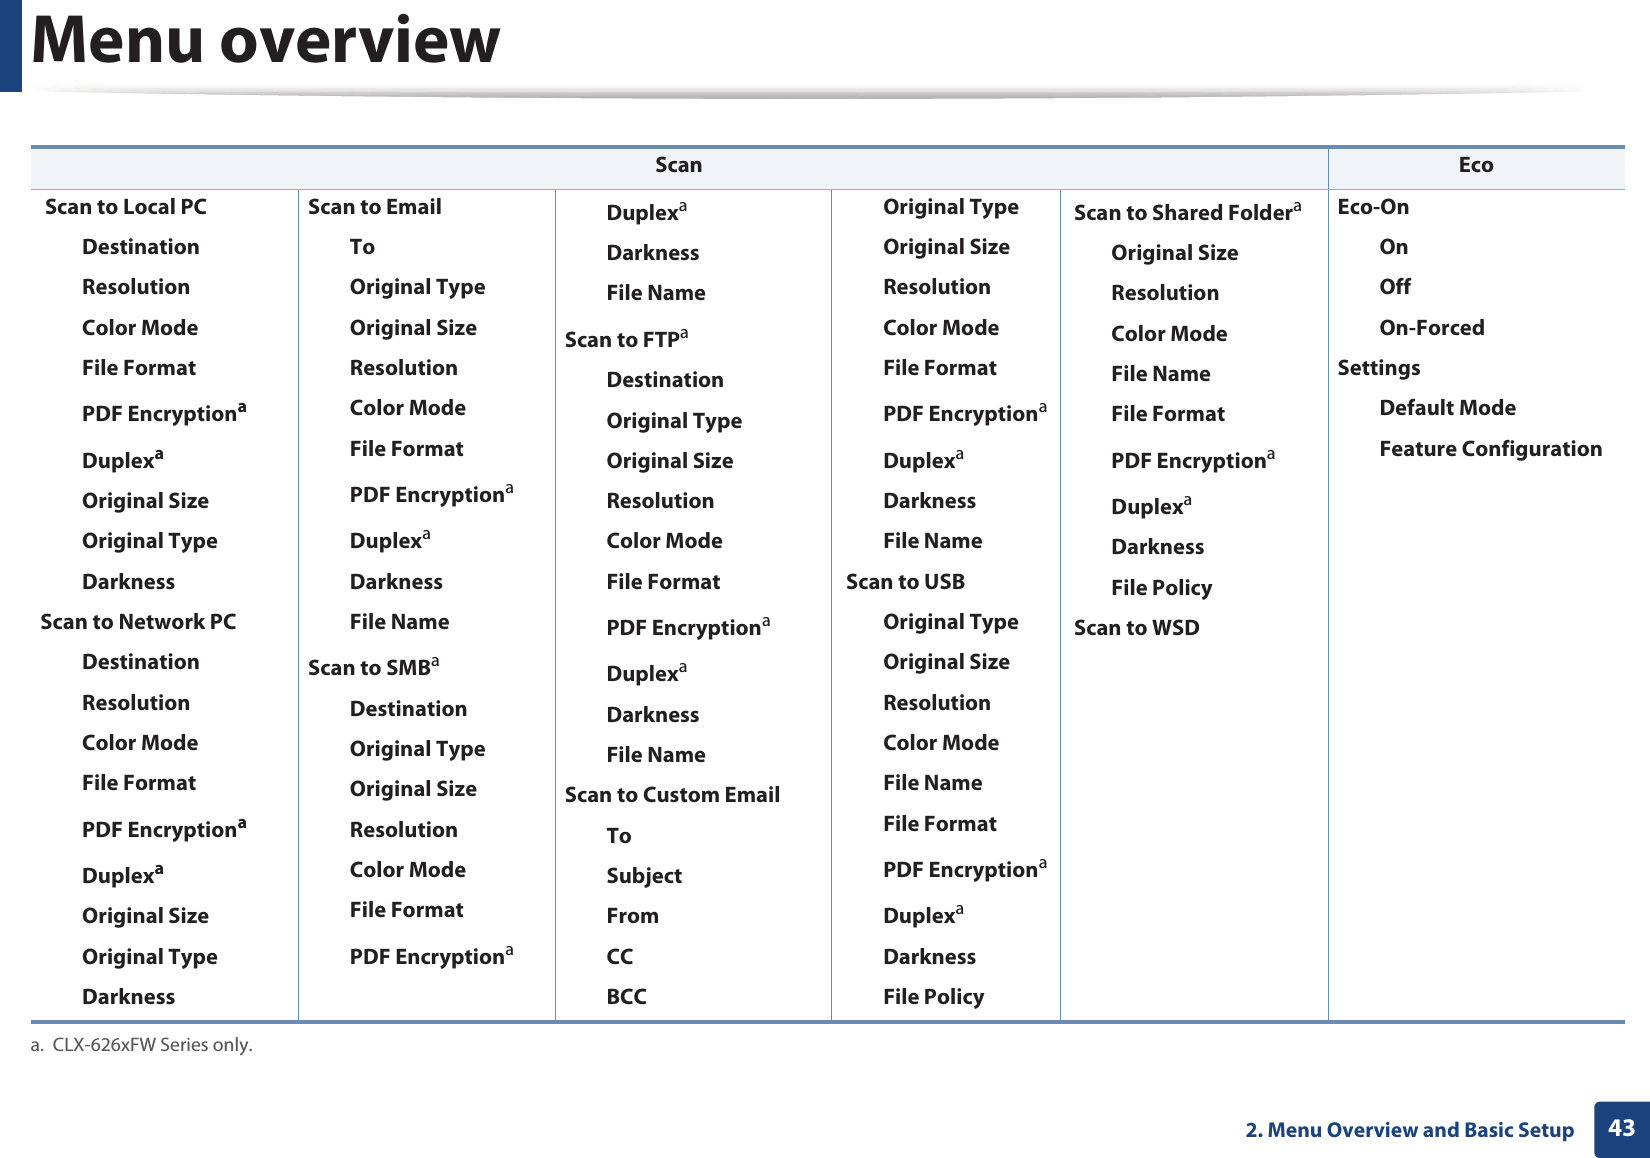
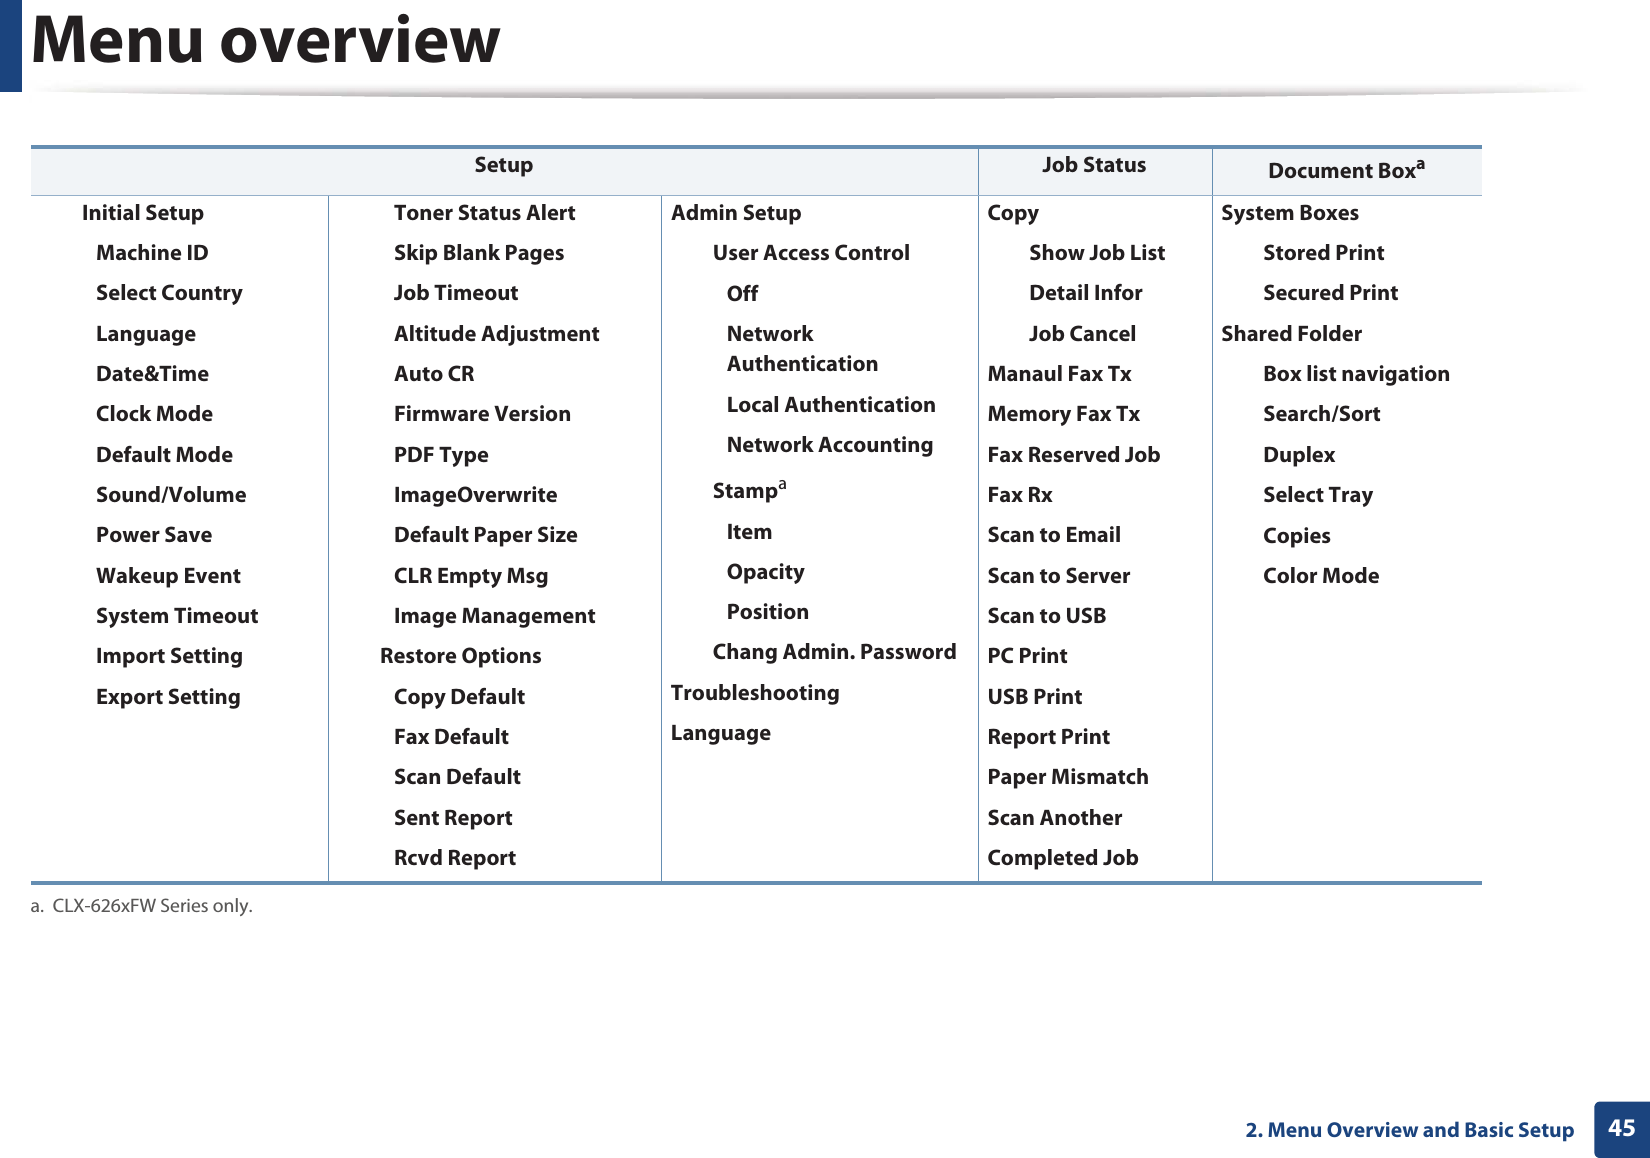
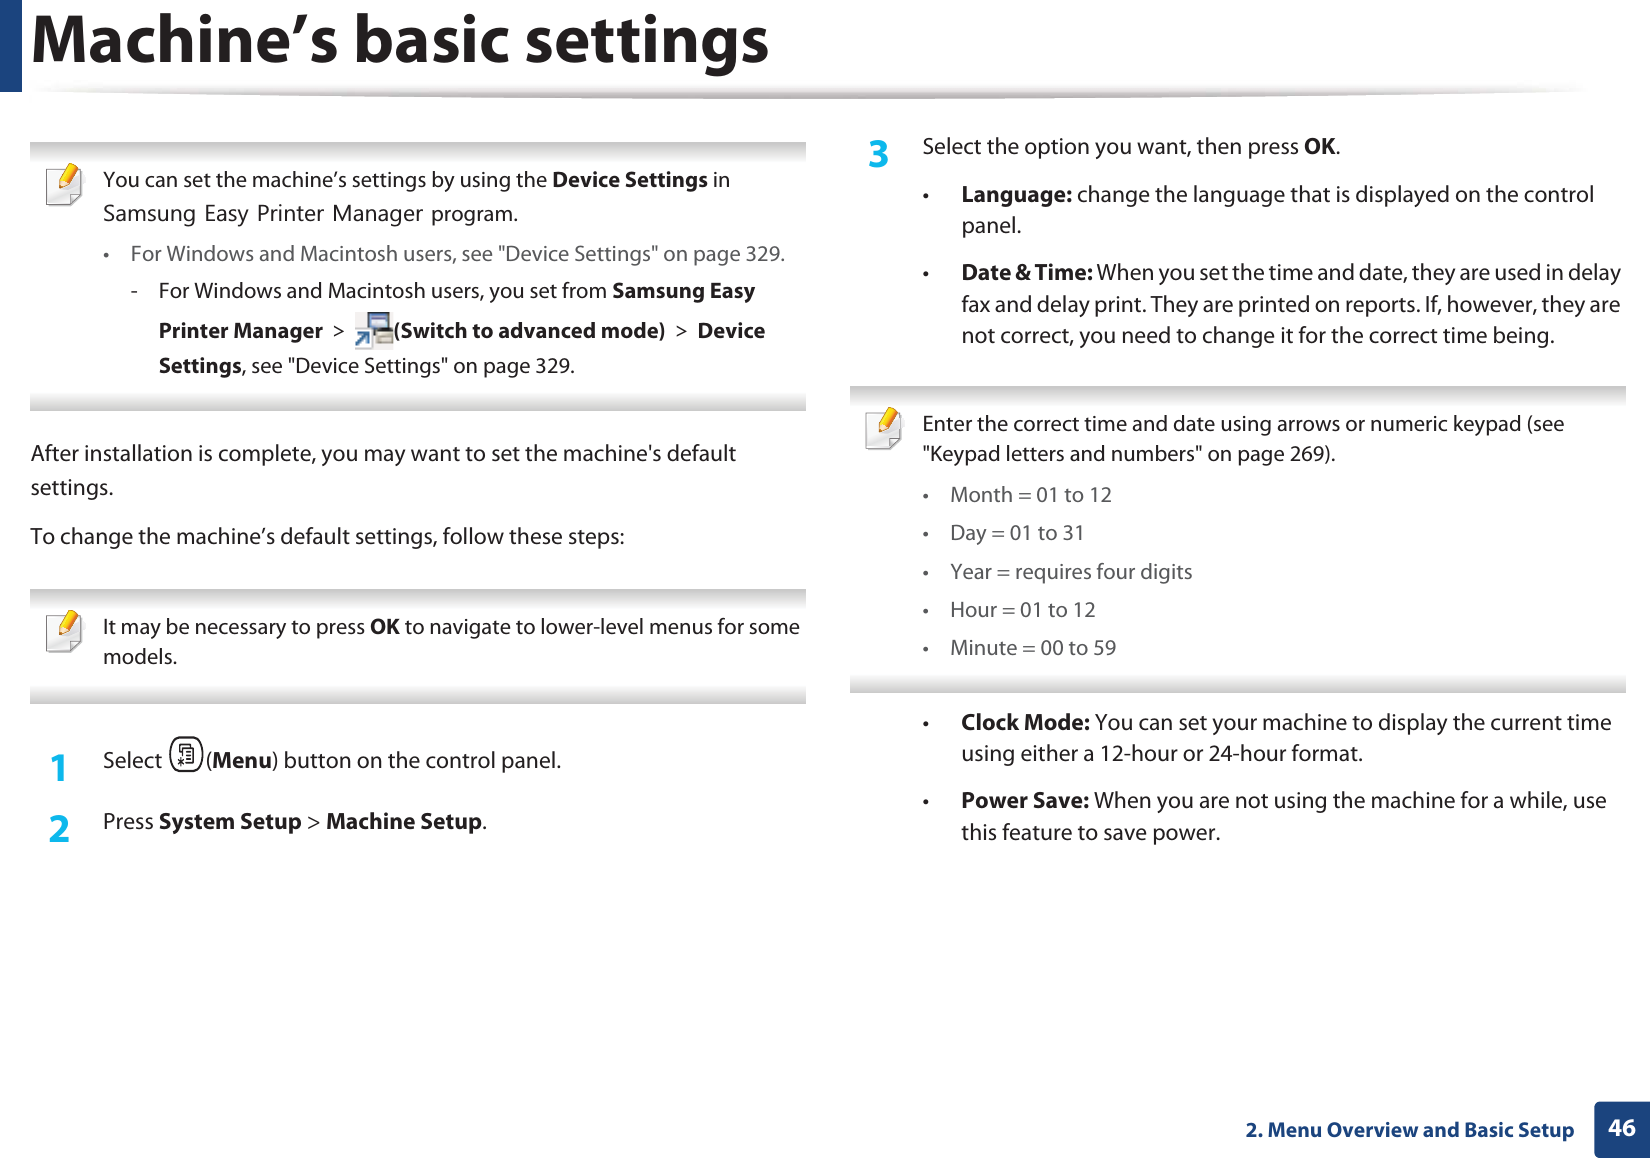
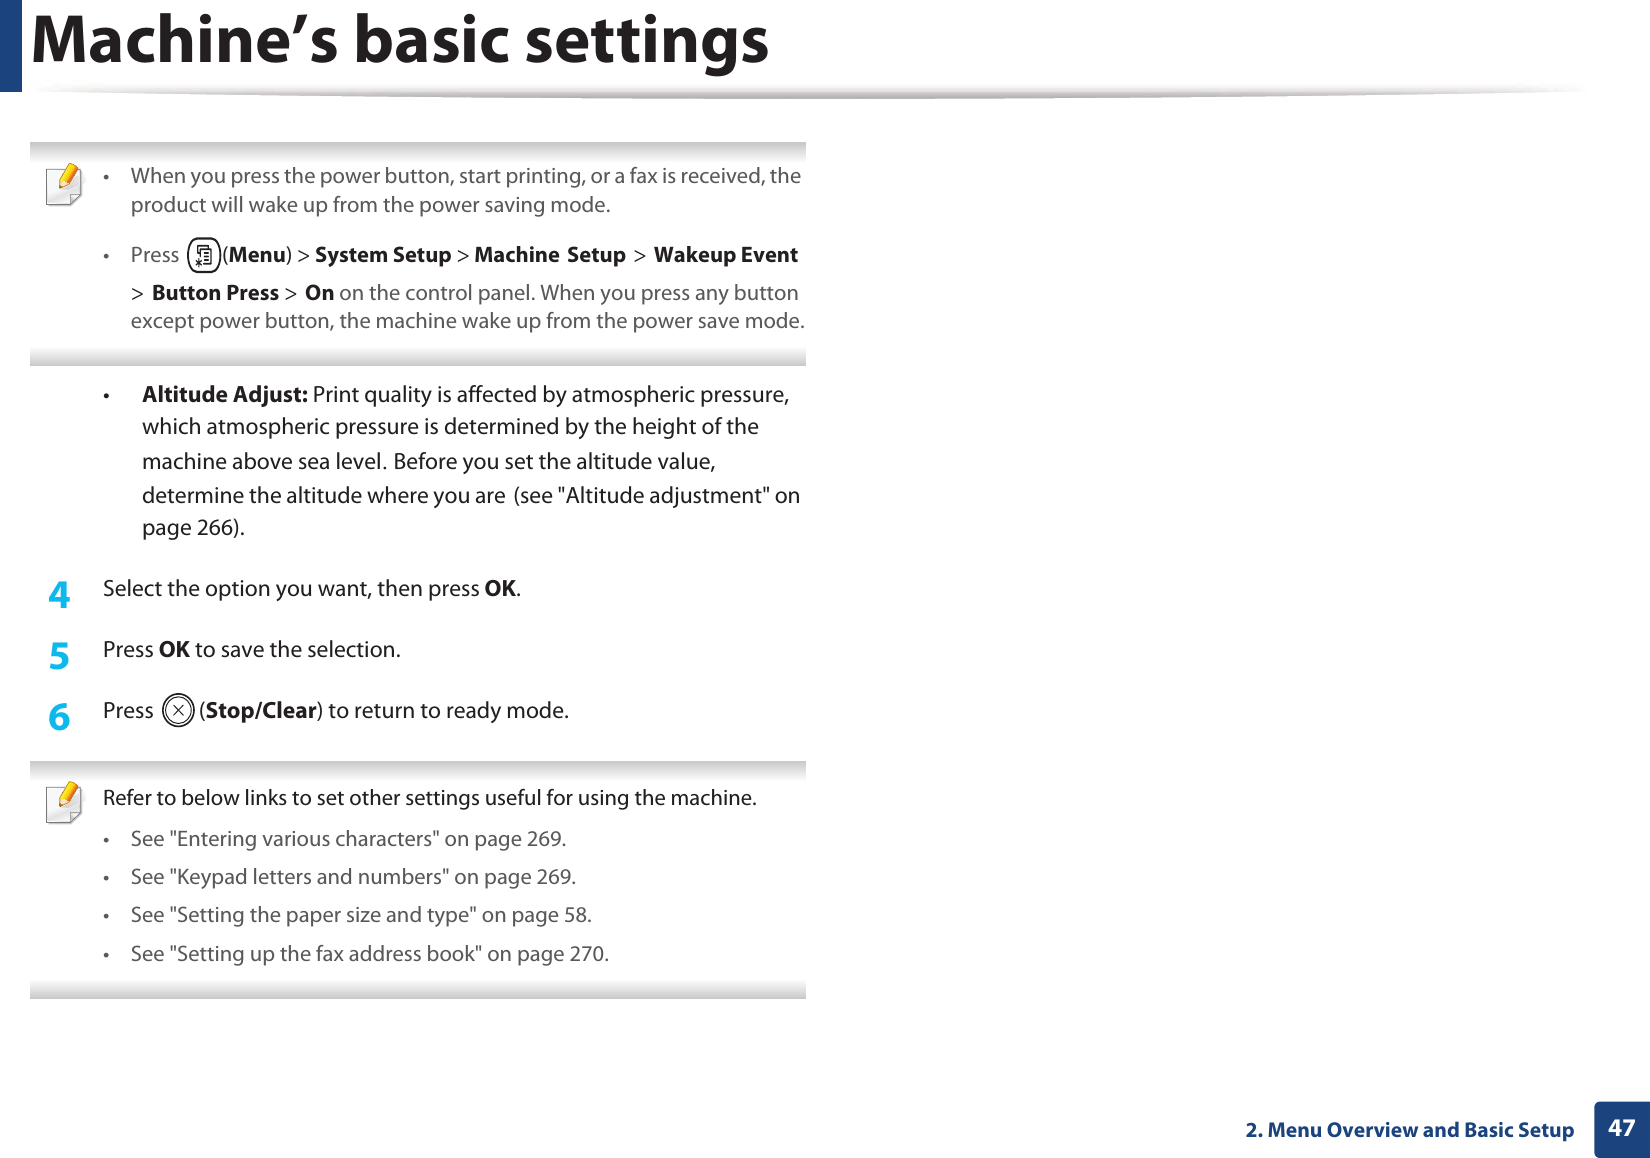
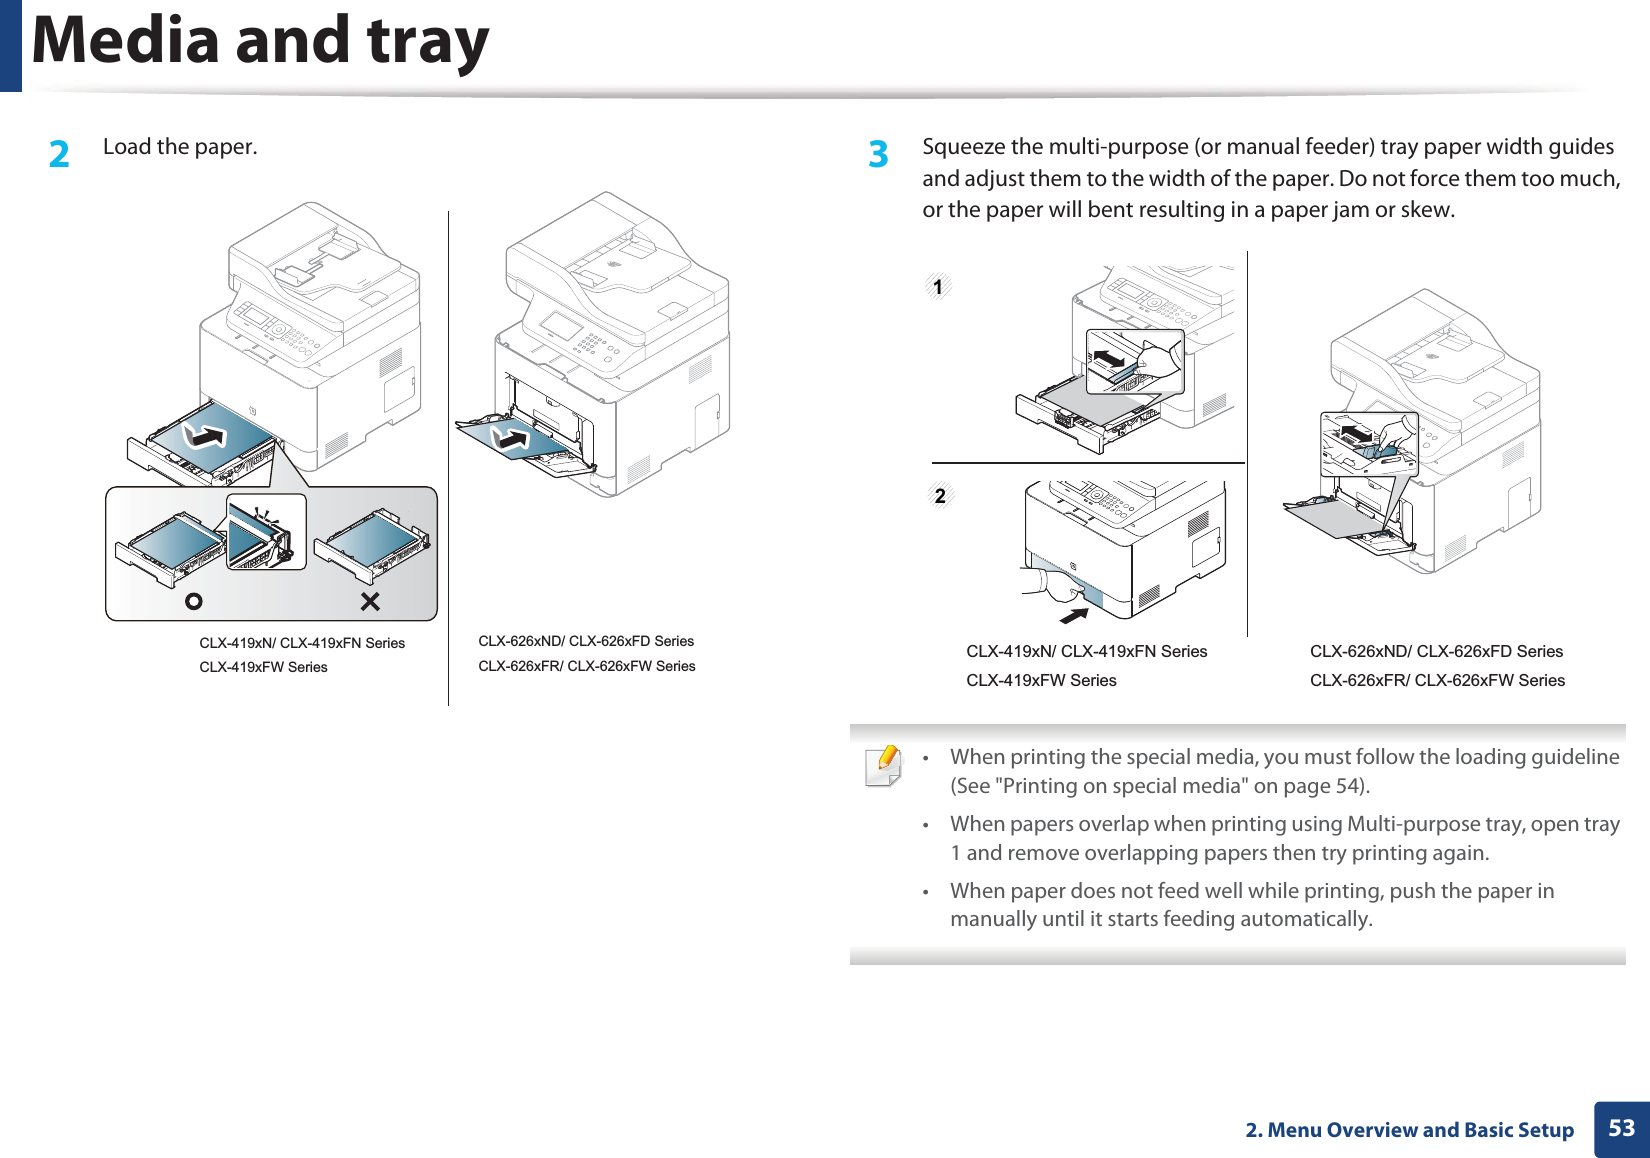
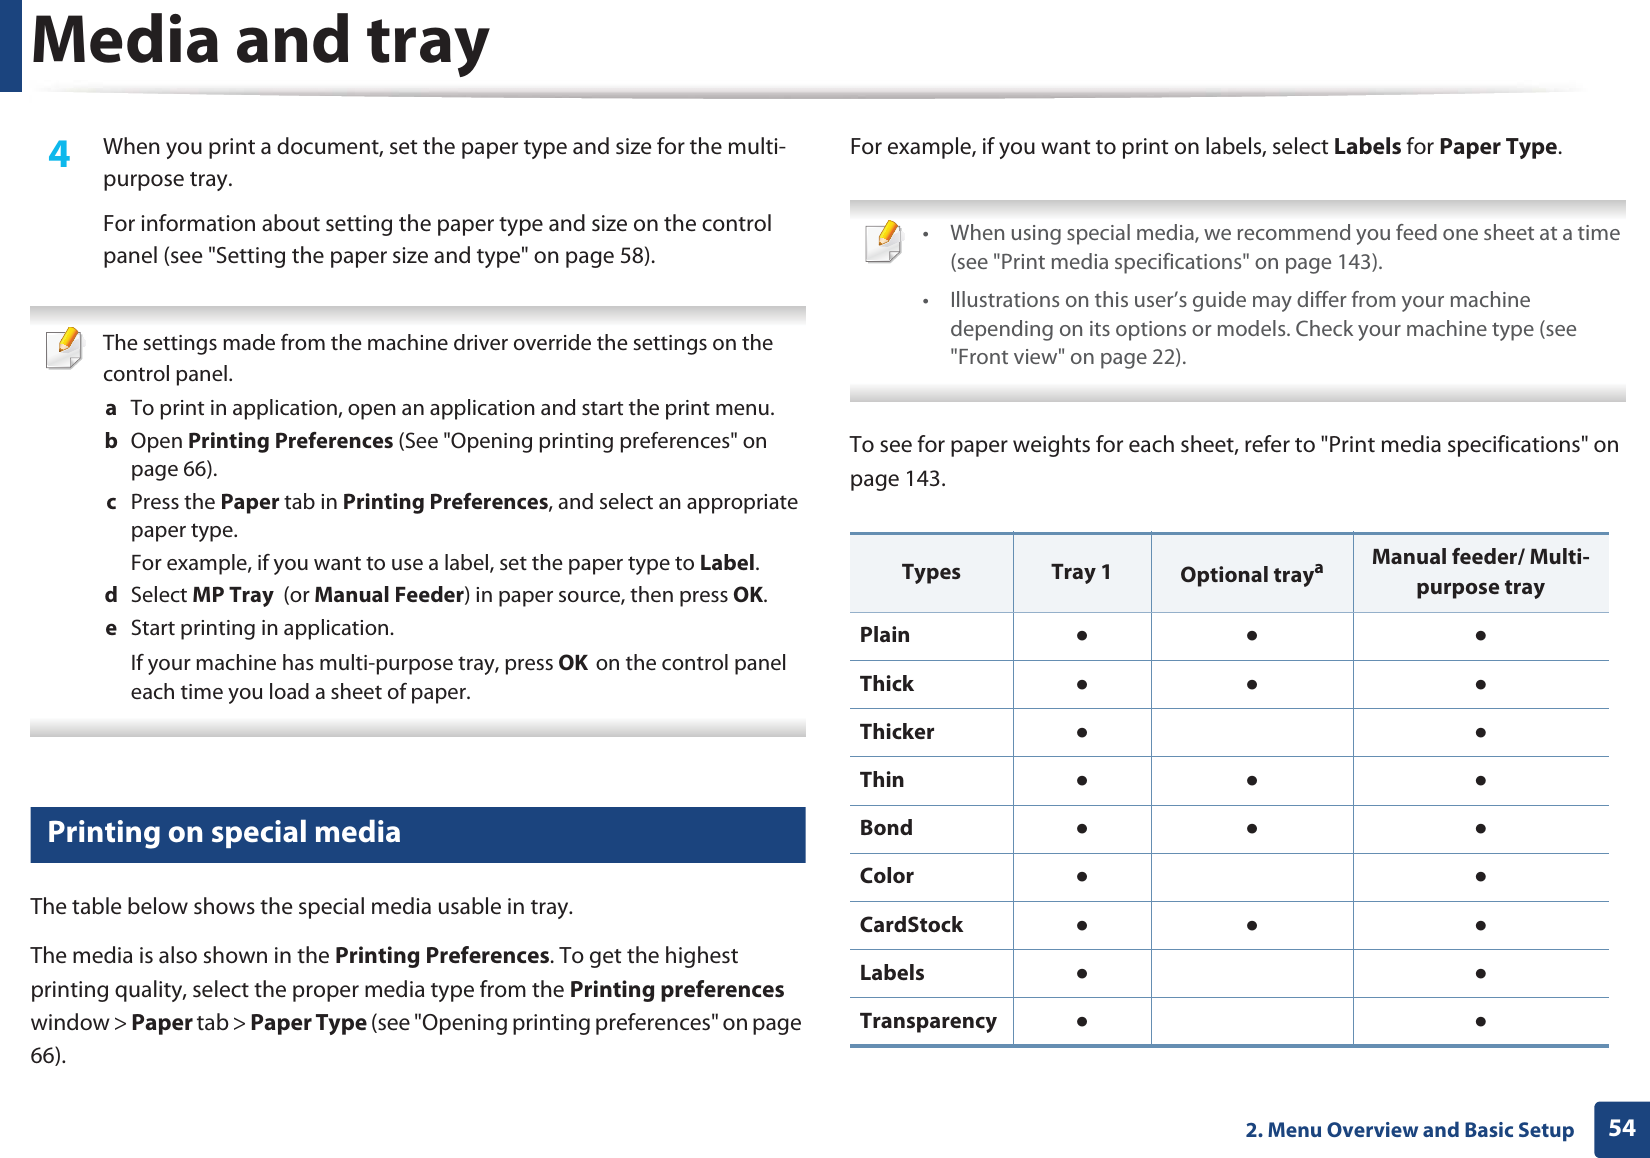
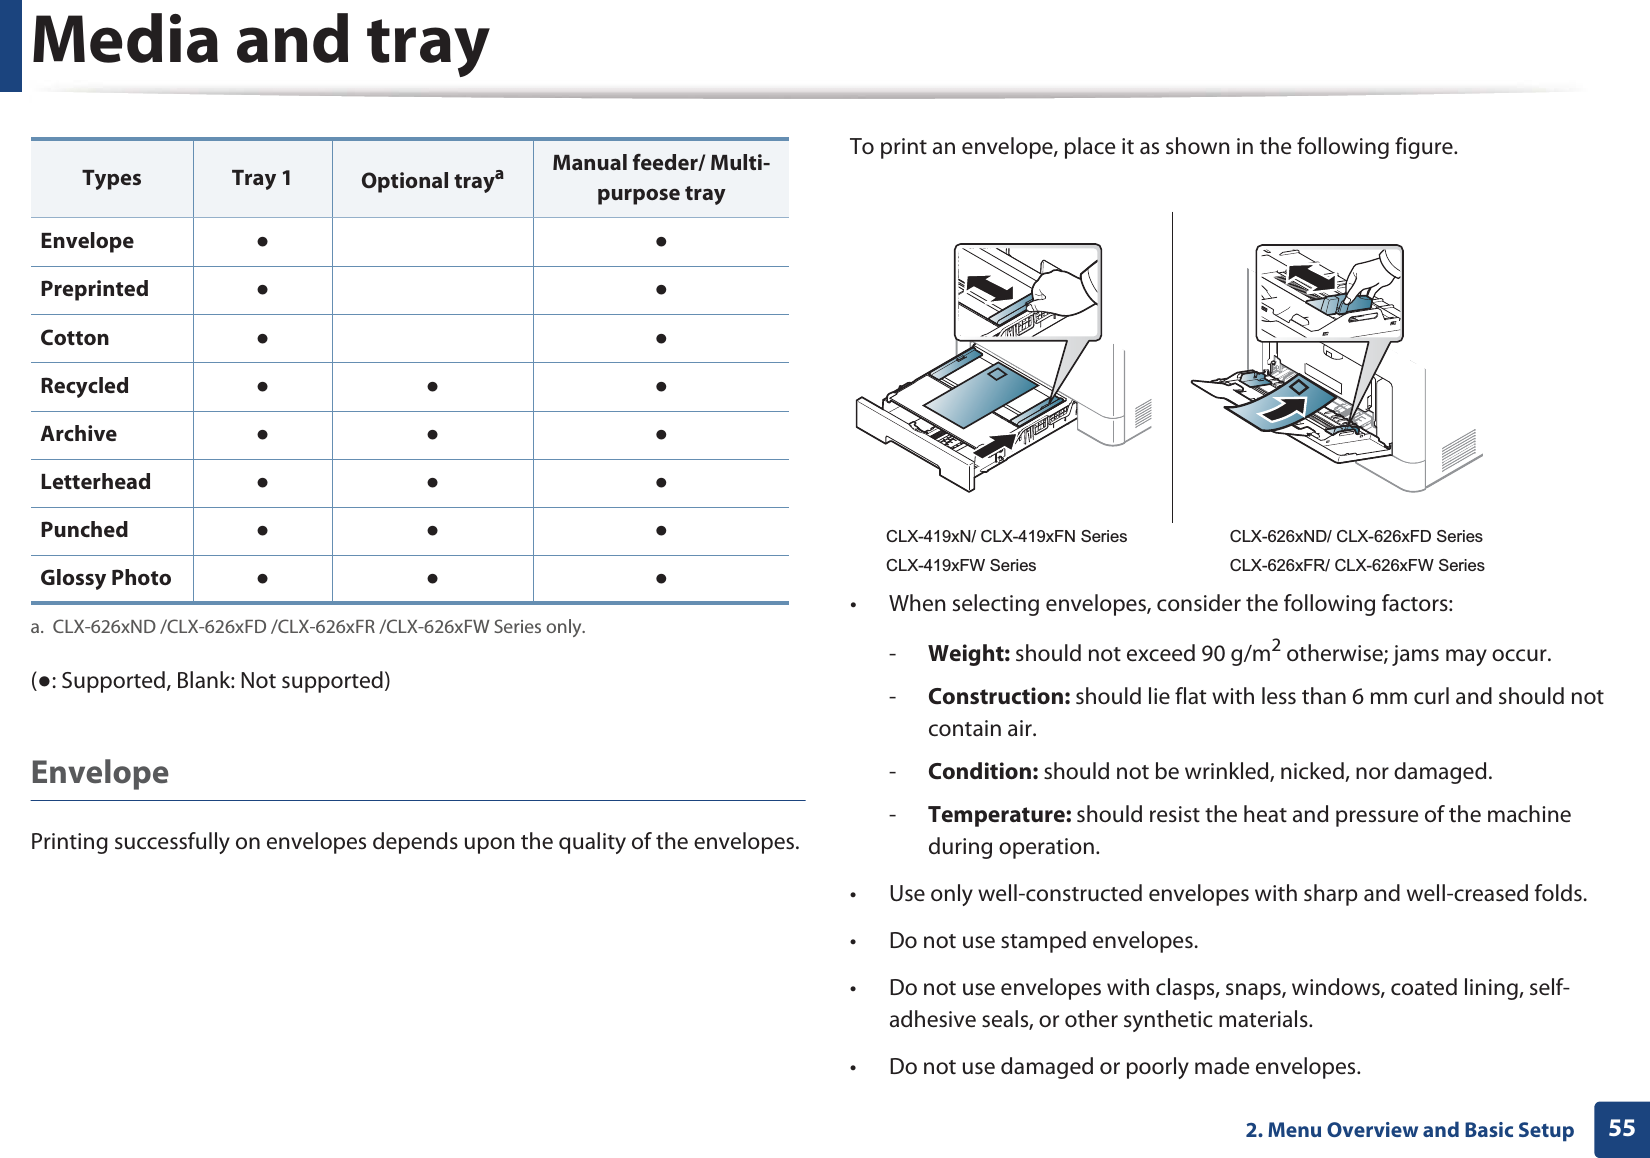
Users Manual 1