Samsung Electronics Co DV180F Digital Camera User Manual DV150F UM ENG 121112
Samsung Electronics Co Ltd Digital Camera DV150F UM ENG 121112
UserManual.wiki
>
Samsung Electronics Co
>
DV180F User Manual
>
User manual 1 of 3
Contents
1.
User manual 1 of 3
2.
User manual 2 of 3
3.
User manual 3 of 3
User manual 1 of 3
Navigation menu
Upload a User Manual
Namespaces
Wiki Guide
HTML
PDF
Info
Views
User Manual
Discussion / Help
Navigation
![6Icons used in this manualIcon FunctionAdditional informationSafety warnings and precautions[] Camera buttons. For example, [Shutter] represents the shutter button.() Page number of related informationThe order of options or menus you must select to perform a step; for example: Select Face Detection Normal (represents Select Face Detection, and then select Normal).*AnnotationExpressions used in this manualPressing the shutter• Half-press [Shutter]: Press the shutter halfway down• Press [Shutter]: Press the shutter all the way downHalf-press [Shutter] Press [Shutter]Subject, background, and composition• Subject: The main object in a scene, such as a person, animal, or still life • Background: The objects around the subject• Composition: The combination of a subject and backgroundCompositionBackgroundSubjectExposure (Brightness)The amount of light that enters your camera determines the exposure. You can alter the exposure by changing the shutter speed, aperture value, or ISO sensitivity. By altering the exposure, your photos will be darker or lighter.S Normal exposureS Overexposure (too bright)](https://usermanual.wiki/Samsung-Electronics-Co/DV180F.User-manual-1-of-3/User-Guide-2466960-Page-7.png)
![7Basic troubleshootingLearn to solve common problems by setting shooting options.The subject’s eyes appear red.Red eye occurs when the subject's eyes reflect light from the camera flash.• Set the flash option to Red-eye or Red-eye Fix. (p. 64)• If the photo has already been captured, select Red-eye Fix in the edit menu. (p. 97)Photos have dust spots.If dust particles are present in the air, you may capture them in photos when you use the flash.• Turn off the flash or avoid capturing photos in a dusty place.• Set ISO sensitivity options. (p. 66)Photos are blurred. Blurring can occur if you capture photos in low light conditions or hold the camera incorrectly. Use the OIS function or half-press [Shutter] to ensure the subject is focused. (p. 35)Photos are blurred when shooting at night.As the camera tries to let in more light, the shutter speed slows. This can make it difficult to hold the camera steady long enough to capture a clear photo and may result in camera shake.• Select Night Shot mode. (p. 51)• Turn on the flash. (p. 64)• Set ISO sensitivity options. (p. 66)• Use a tripod to prevent your camera from shaking.Subjects come out too dark because of backlighting.When the light source is behind the subject or when there is a high contrast between light and dark areas, the subject may appear too dark.• Avoid shooting toward the sun.• Select Backlight in Scene mode. (p. 42)• Set the flash option to Fill in. (p. 64)• Adjust the exposure. (p. 74)• Set the Auto Contrast Balance (ACB) option. (p. 75)• Set the metering option to Spot if a subject is in the center of the frame. (p. 75)](https://usermanual.wiki/Samsung-Electronics-Co/DV180F.User-manual-1-of-3/User-Guide-2466960-Page-8.png)

![Basic functions 18Charging the battery and turning on your cameraTurning on your cameraPress [POWER] to turn your camera on or off.• The initial setup screen appears when you turn on the camera for the first time. (p. 19)Turning on your camera in Playback modePress [P]. The camera turns on and immediately accesses Playback mode.If you turn on your camera by pressing and holding [P] until the status lamp blinks, the camera does not emit any sounds.Charging the batteryBefore you use the camera for the first time, you must charge the battery. Plug the small end of the USB cable into your camera, and then plug the other end of the USB cable into the AC adapter.Status lamp• Red light on: Charging• Red light off: Fully charged• Red light blinking: ErrorUse only the AC adapter and USB cable supplied with your camera. If you use another AC adapter (such as SAC-48), the camera battery may not charge or work properly.](https://usermanual.wiki/Samsung-Electronics-Co/DV180F.User-manual-1-of-3/User-Guide-2466960-Page-19.png)
![Basic functions 19Performing the initial setupWhen you turn on your camera for the first time, the initial setup screen appears. Follow the steps below to configure the camera’s basic settings.4 Press [D/c] to select Home, and then press [o].• When you travel to another country, select Visit, and then select a new time zone.5 Press [F/t] to select a time zone, and then press [o] [m].Cancel SetTime Zone : HomeLondon• The screen may differ depending on the language selected.1 Verify that Language is highlighted, and then press [t] or [o].2 Press [D/c] to select a language, and then press [o].3 Press [c] to select Time Zone, and then press [t] or [o].](https://usermanual.wiki/Samsung-Electronics-Co/DV180F.User-manual-1-of-3/User-Guide-2466960-Page-20.png)
![Basic functions 20Performing the initial setup6 Press [c] to select Date/Time Set, and then press [t] or [o].Cancel SetDate/Time SetYear Month Day Hour Min DST• The screen may differ depending on the language selected.7 Press [F/t] to select an item.8 Press [D/c] to set the date, time, and daylight-saving time, and then press [o].9 Press [c] to select Date Type, and then press [t] or [o].10 Press [D/c] to select a date type, and then press [o].11 Press [c] to select Time Type, and then press [t] or [o].12 Press [D/c] to select a time type, and then press [o].13 Press [m] to finish the initial setup.](https://usermanual.wiki/Samsung-Electronics-Co/DV180F.User-manual-1-of-3/User-Guide-2466960-Page-21.png)
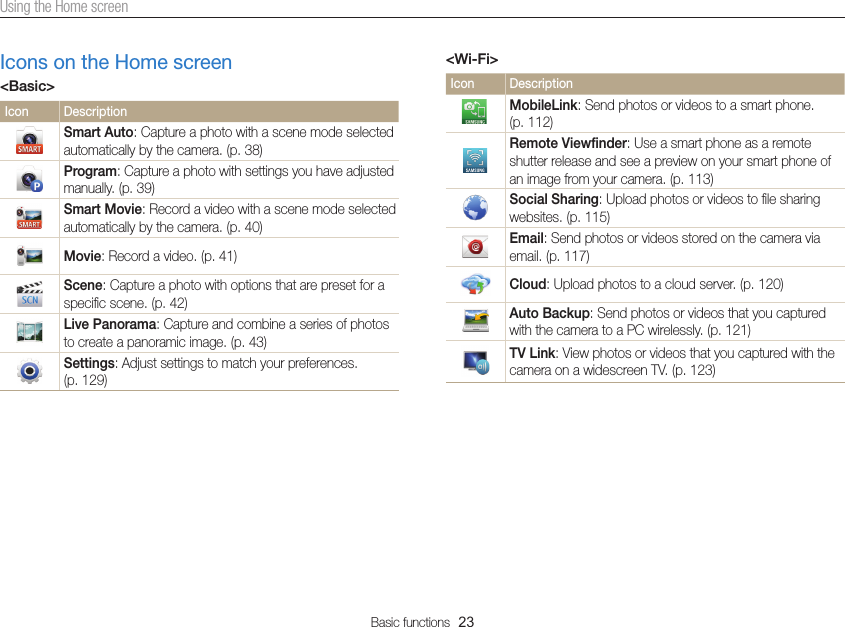
![Basic functions 22Using the Home screenYou can select a shooting mode or access the settings menu by selecting the icons on the Home screen.No. Description1Current Home screen• Rotate [Zoom] to the left or right to switch to another Home screen.• Press [D] to scroll to the Home screen name, and then press [F/t] to switch to another Home screen.• Press [F/t] repeatedly to switch to another Home screen.2Mode icons• Press [D/c/F/t] to scroll to a desired mode, and then press [o] to access the mode.Accessing the Home screenIn Shooting or Playback mode, press [h]. Press [h] again to return to the previous mode.12Smart AutoSceneProgramLive PanoramaSmart Movie MovieBack Page MoveSettingsAlbum Wi-FiBasicBasic](https://usermanual.wiki/Samsung-Electronics-Co/DV180F.User-manual-1-of-3/User-Guide-2466960-Page-23.png)
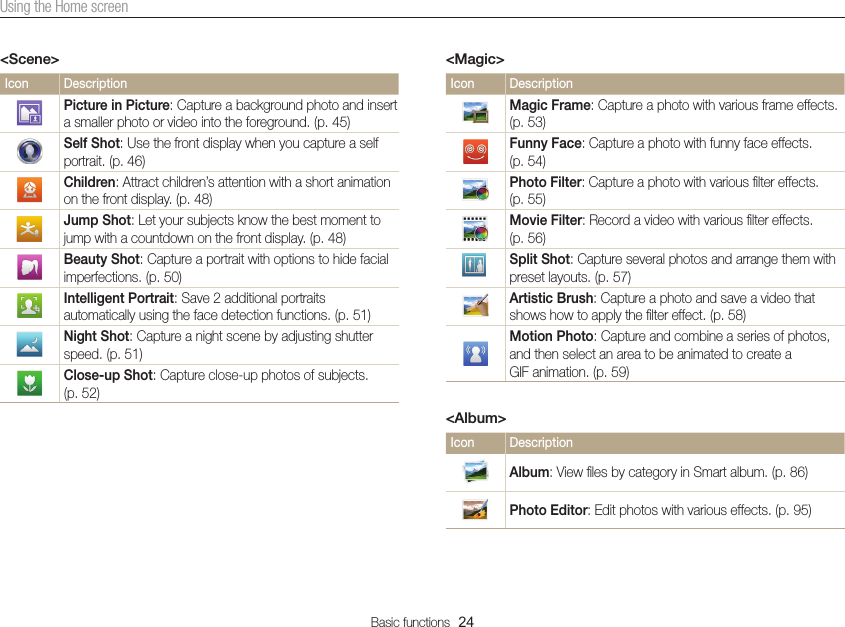
![Basic functions 25Using the Home screenSetting WallpaperSet wallpaper for the Home screen with the desired image.1 On the Home screen, scroll to <Basic>.2 Select .3 Select Display Wallpapers.4 Select an option.Option DescriptionWallpaper Gallery Select the desired wallpaper from the default gallery.Album Set a photo you have captured as wallpaper.5 Scroll to the desired wallpaper, and then press [o].• If you select a photo you have captured, you can set a specified area as wallpaper. Rotate [Zoom] to the left or right to reduce or enlarge the area. Press [D/c/F/t] to move the area.6 Press [o] to save. You can also set the photo you are viewing as wallpaper by pressing [m], and then selecting Set Wallpaper in Playback mode.](https://usermanual.wiki/Samsung-Electronics-Co/DV180F.User-manual-1-of-3/User-Guide-2466960-Page-26.png)
![Basic functions 26Selecting options or menusTo select an option or a menu, press [m], and then press [D/c/F/t] or [o].Going back to the previous menuPress [m] to go back to the previous menu.Half-press [Shutter] to return to Shooting mode.1 In Shooting mode, press [m].2 Select an option or a menu.• To move up or down, press [D] or [c].• To move left or right, press [F] or [t].3 Press [o] to confirm the highlighted option or menu.](https://usermanual.wiki/Samsung-Electronics-Co/DV180F.User-manual-1-of-3/User-Guide-2466960-Page-27.png)
![Basic functions 27Selecting options or menus4 Press [D/c] to select White Balance, and then press [t] or [o].EVWhite BalanceISOFlashFocusFocus AreaExit Select5 Press [F/t] to select a White Balance option.Back SelectWhite Balance : Daylight6 Press [o] to save your settings. For example, to select a White Balance option in Program mode:1 On the Home screen, scroll to <Basic>.2 Select .3 Press [m].Exit SelectEVWhite BalanceISOFlashFocusFocus Area](https://usermanual.wiki/Samsung-Electronics-Co/DV180F.User-manual-1-of-3/User-Guide-2466960-Page-28.png)
![Basic functions 28Setting the display and soundLearn how to change the basic display information and sound settings.Setting the option display viewYou can hide or show the option display appearing in some modes.Press [o] repeatedly.• Hide the option display.• Show the option display.Option displayLandscapePanel offS For example, in Scene modeSetting the display typeYou can select a display type for the Shooting or Playback mode. Each type displays different shooting or playback information. See the table below.Press [D] repeatedly to change the display type.Mode Display typeShooting• Hide all information about shooting options.• Show all information about shooting options.Playback• Hide all information about the current file.• Hide all information about the current file except basic information.• Show all information about the current file.](https://usermanual.wiki/Samsung-Electronics-Co/DV180F.User-manual-1-of-3/User-Guide-2466960-Page-29.png)
![Basic functions 30Capturing photosLearn how to capture photos easily and quickly in Smart Auto mode.5 Press [Shutter] to capture a photo.6 Press [P] to view the captured photo.• To delete the photo, press [f], and then select Yes.7 Press [P] to return to Shooting mode.See page 35 for tips to get clearer photos.1 On the Home screen, scroll to <Basic>.2 Select .3 Align your subject in the frame.4 Half-press [Shutter] to focus.• A green frame means the subject is in focus.• A red frame means the subject is out of focus.](https://usermanual.wiki/Samsung-Electronics-Co/DV180F.User-manual-1-of-3/User-Guide-2466960-Page-31.png)
![Basic functions 31Capturing photosZoomingYou can capture close-up photos by adjusting the zoom.Zoom out Zoom inZoom ratioWhen you rotate the zoom button, the zoom ratio shown on the screen may change inconsistently.Turning on the front displayThe front display helps you capture photos while viewing yourself.In Shooting mode, press [F.LCD].• Press [F.LCD] again to turn it off.• Several buttons are not available when the front display turns on.• In Self Shot, Children, and Jump Shot modes, the front display will activate automatically.• When you set timer options, the front display will remain active. (p. 63)• When you use the camera in brightly lit or sunny areas, you may not be able to see the front display clearly.• The front display will not activate when you press [F.LCD] in Playback mode.• When the front display is on, the camera consumes more battery power.](https://usermanual.wiki/Samsung-Electronics-Co/DV180F.User-manual-1-of-3/User-Guide-2466960-Page-32.png)
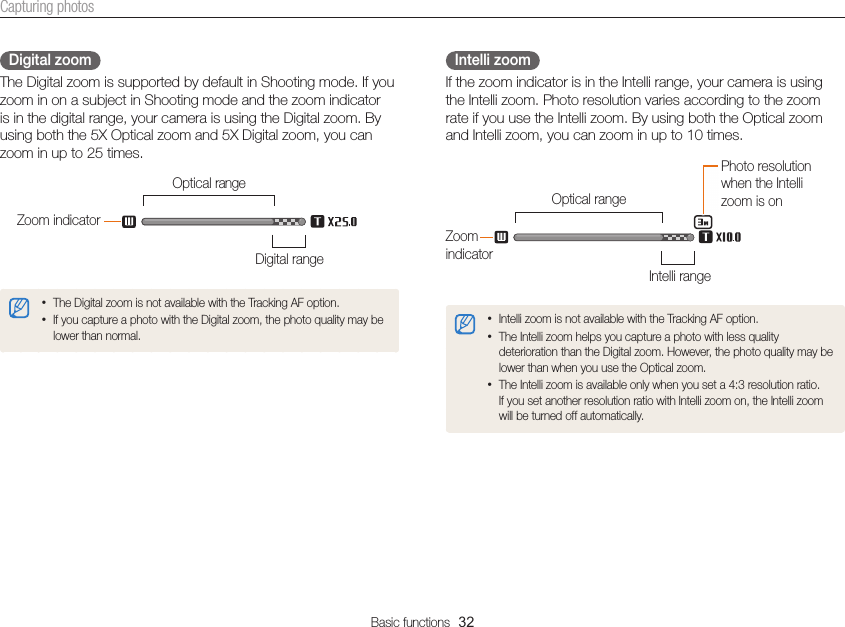
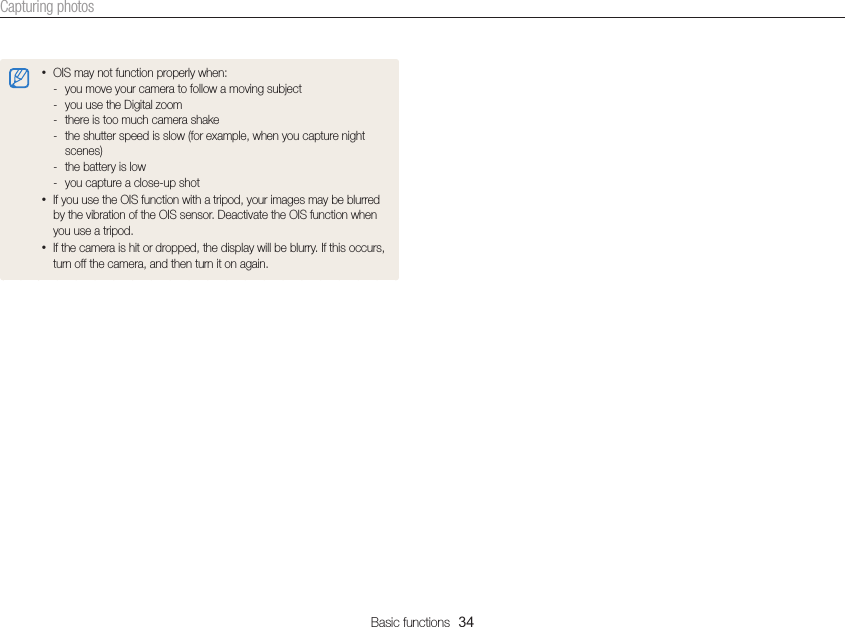
![Basic functions 33Capturing photosSetting Intelli zoom1 In Shooting mode, press [m].2 Select Intelli Zoom.3 Select an option.Icon DescriptionOff: The Intelli zoom is deactivated.On: The Intelli zoom is activated.Reducing camera shake (OIS)Reduce camera shake optically in Shooting mode.S Before correctionS After correction1 In Shooting mode, press [m].2 Select OIS.3 Select an option.Icon DescriptionOff: OIS is deactivated.On: OIS is activated.](https://usermanual.wiki/Samsung-Electronics-Co/DV180F.User-manual-1-of-3/User-Guide-2466960-Page-34.png)
![Basic functions 35 Holding your camera correctlyEnsure nothing is blocking the lens, flash, or microphone. Half-pressing the shutter buttonHalf-press [Shutter] and adjust the focus. The camera adjusts the focus and exposure automatically.The camera sets the aperture value and shutter speed automatically.Focus frame•Press [Shutter] to capture the photo if the focus frame appears in green.•Change the composition and half-press [Shutter] again if the focus frame appears in red. Reducing camera shakeSet the Optical Image Stabilization option to reduce camera shake optically. (p. 33) When is displayedCamera shakeWhen you shoot in the dark, avoid setting the flash option to Slow Sync or Off. The aperture remains open longer and it may be harder to hold the camera steady long enough to capture a clear photo.•Use a tripod or set the flash option to Fill in. (p. 64)•Set ISO sensitivity options. (p. 66)Tips for getting a clearer photo](https://usermanual.wiki/Samsung-Electronics-Co/DV180F.User-manual-1-of-3/User-Guide-2466960-Page-36.png)
![Basic functions 36 Preventing your subject from being out of focusIt may be difficult to get your subject in focus when: -there is little contrast between the subject and background (for example, when your subject is wearing clothing that is similar in color to the background) -the light source behind the subject is too bright -the subject is shiny or reflective -the subject includes horizontal patterns, such as blinds -the subject is not positioned in the center of the frame• When you capture photos in low lightTurn on the flash. (p. 64)• When subjects are moving rapidlyUsing the focus lockHalf-press [Shutter] to focus. When the subject is in focus, you can reposition the frame to change the composition. When you are ready, press [Shutter] to capture your photo.Use the Continuous or Motion Capture function. (p. 78)](https://usermanual.wiki/Samsung-Electronics-Co/DV180F.User-manual-1-of-3/User-Guide-2466960-Page-37.png)
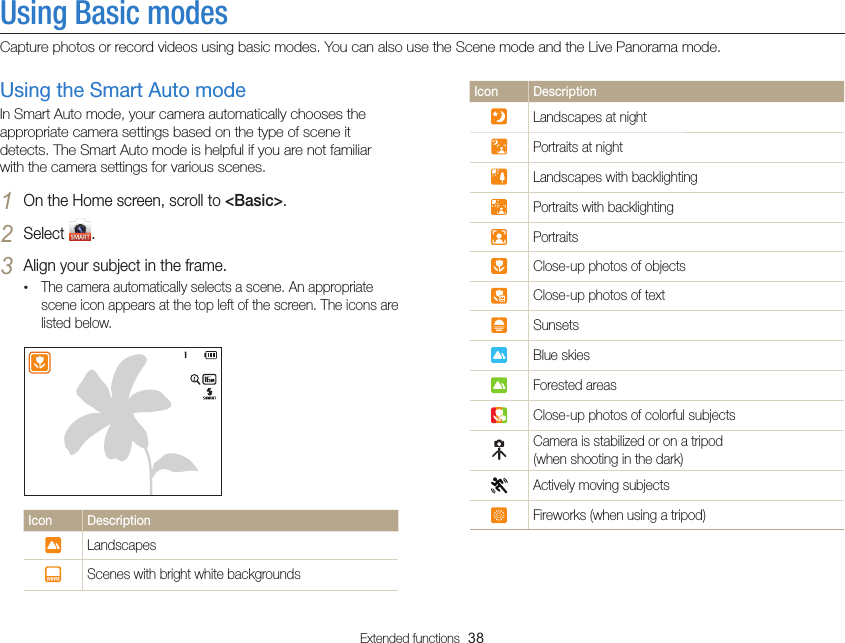
![Extended functions 39Using Basic modes4 Half-press [Shutter] to focus.5 Press [Shutter] to capture the photo.• If the camera does not recognize an appropriate scene mode, it uses the default settings for Smart Auto mode.• Even if it detects a face, the camera may not select a portrait mode depending on the subject's position or lighting.• The camera may not select the correct scene depending on the shooting conditions, such as camera shake, lighting, or distance to the subject.• Even if you use a tripod, the camera may not detect the mode if the subject is moving.• In Smart Auto mode, the camera consumes more battery power, because it changes settings often to select appropriate scenes.Using the Program modeIn Program mode, you can set most options, except the shutter speed and aperture value, which the camera sets automatically.1 On the Home screen, scroll to <Basic>.2 Select .3 Set the desired options. • For a list of options, refer to "Shooting options". (p. 60)4 Align your subject in the frame, and then half-press [Shutter] to focus.5 Press [Shutter] to capture the photo.](https://usermanual.wiki/Samsung-Electronics-Co/DV180F.User-manual-1-of-3/User-Guide-2466960-Page-40.png)
![Extended functions 40Using Basic modesUsing the Smart Movie modeIn Smart Movie mode, your camera automatically chooses the appropriate camera settings based on the scene it has detected.1 On the Home screen, scroll to <Basic>.2 Select .3 Align your subject in the frame.• The camera automatically selects a scene. An appropriate scene icon will appear at the top left of the screen.Icon DescriptionLandscapesSunsetsBlue skiesForested areas4 Press [Shutter] to start recording.5 Press [Shutter] again to stop recording.• If the camera does not recognize an appropriate scene mode, it uses the default settings for Smart Movie mode.• The camera may not select the correct scene depending on the shooting conditions, such as camera shake, lighting, and distance to the subject.](https://usermanual.wiki/Samsung-Electronics-Co/DV180F.User-manual-1-of-3/User-Guide-2466960-Page-41.png)
![Extended functions 41Using Basic modes1 On the Home screen, scroll to <Basic>.2 Select .3 Set desired options. • For a list of options, refer to "Shooting options". (p. 60)4 Press [Shutter] to start recording.5 Press [Shutter] again to stop recording.Using the Movie modeIn Movie mode, you can customize settings to record HD videos of up to 20 minutes in length. The camera saves recorded videos as MP4 (H.264) files. • H.264 (MPEG-4 part10/AVC) is a high-compression video format established by the international standards organizations ISO-IEC and ITU-T.• Some memory cards may not support high definition recording. If your card does not, set a lower resolution.• Memory cards with slow writing speeds will not support high-resolution videos. To record high-resolution videos, use memory cards with faster write speeds.• If you activate the OIS function while recording a video, the camera may record the operating sound of the OIS function.• If you use the zoom function when recording a video, the camera may record the noise of the zoom operating. To decrease zoom noise, use the Sound Alive function. (p. 80)](https://usermanual.wiki/Samsung-Electronics-Co/DV180F.User-manual-1-of-3/User-Guide-2466960-Page-42.png)
![Extended functions 42Using Basic modesPause recordingThe camera allows you to temporarily pause a video while recording. With this function, you can record separate scenes as a single video.• Press [o] to pause while recording.• Press [o] to resume.Using the Scene modeIn Scene mode, you can capture a photo with options that are preset for a specific scene.1 On the Home screen, scroll to <Basic>.2 Select .3 Select a scene.LandscapePanel off](https://usermanual.wiki/Samsung-Electronics-Co/DV180F.User-manual-1-of-3/User-Guide-2466960-Page-43.png)
![Extended functions 43Using Basic modesOption DescriptionLandscape Capture still-life scenes and landscapes.Sunset Capture scenes at sunset, with natural-looking reds and yellows.Dawn Capture scenes at sunrise.Backlight Capture backlit subjects.Beach & Snow Reduce underexposure of subjects caused by sunlight reflected from sand or snow.Text Clearly capture text from printed or electronic documents.4 Align your subject in the frame, and then half-press [Shutter] to focus.5 Press [Shutter] to capture the photo.Using the Live Panorama modeIn Live Panorama mode, you can capture a wide panoramic scene in a single photo. Capture and combine a series of photos to create a panoramic image. S Shooting example1 On the Home screen, scroll to <Basic>.2 Select .3 Align your subject in the frame, and then half-press [Shutter] to focus.• Align the camera with the far left or the far right, or very top or bottom, of the scene you want to capture.4 Press and hold [Shutter] to start shooting.](https://usermanual.wiki/Samsung-Electronics-Co/DV180F.User-manual-1-of-3/User-Guide-2466960-Page-44.png)
![Extended functions 44Using Basic modes5 With [Shutter] pressed, slowly move the camera in the direction that will let it capture the rest of the panorama.• When the viewfinder is aligned with the next scene, the camera captures the next photo automatically.6 When you are finished, release [Shutter].• When you have captured all the necessary shots, the camera combines them into one panoramic photo.• For best results when capturing panoramic photos, avoid the following: - moving the camera too quickly or too slowly - moving the camera too little to capture the next image - moving the camera at irregular speeds - shaking the camera - changing the camera direction while capturing a photo - shooting in dark places - capturing moving subjects nearby - shooting conditions where the brightness or color of light is changing• Selecting Live Panorama mode will disable the digital and optical zoom functions. If you select Live Panorama mode while the lens is zoomed in, the camera automatically zooms out to the default position.• In Live Panorama mode, some shooting options are not available.• The camera may stop shooting due to the shooting composition or movement within the scene.• In Live Panorama mode, your camera may not capture the last scene in its entirety if you stop moving the camera exactly where you want the scene to end. To capture the entire scene, move your camera slightly beyond the point where you want the scene to end.](https://usermanual.wiki/Samsung-Electronics-Co/DV180F.User-manual-1-of-3/User-Guide-2466960-Page-45.png)
![Extended functions 45Using Basic modesCapturing an Easy Self ShotIf you press [F.LCD] when the power is off, the front display turns on in Easy Self Shot mode. Because the main display is off, the camera consumes less battery power and you can prevent others from viewing the main display.• The camera will turn off when you press [F.LCD] again or press [POWER].• The front display will turn off and the main display will turn on when you press [h].Using the Self Shot modeConveniently capture photos of yourself with the front display.1 On the Home screen, scroll to <Scene>.2 Select .• Your camera will automatically detect your face and display a frame to indicate the detected face.3 Half-press [Shutter] to focus.4 Press [Shutter] to capture the photo.In Self Shot mode, the front display will activate automatically.](https://usermanual.wiki/Samsung-Electronics-Co/DV180F.User-manual-1-of-3/User-Guide-2466960-Page-46.png)
![Extended functions 46Using Basic modesCustomizing the front displayYou can let subjects know when to smile or attract their attention to the lens.1 In Shooting mode, press [m]. 2 Select Half Shutter an option.Half ShutterOffSmile IconEyesight catchingBack SelectIcon DescriptionOff: No icon will appear on the front display.Smile Icon: Set an icon to appear that prompts the subject to smile.Eyesight catching: Set an icon to appear to attract the subject’s attention to the lens.Using the Children modeThe Children mode attracts children by showing a short animation on the front display.1 On the Home screen, scroll to <Scene>.2 Select .• The front display will activate and play the preset animation.3 Press [m].4 Select Background Music an option.5 Align your subject in the frame, and then half-press [Shutter] to focus.6 Press [Shutter] to capture the photo.You can download animations for the front display from Intelli-studio. (p. 102)](https://usermanual.wiki/Samsung-Electronics-Co/DV180F.User-manual-1-of-3/User-Guide-2466960-Page-47.png)
![Extended functions 47Using Basic modesUsing the Jump Shot modeCapture a photo of people jumping. An icon will appear on the front display to tell your subjects when to jump.1 On the Home screen, scroll to <Scene>.2 Select .• To capture animated jump shots, refer to "Capturing animated jump shots". (p. 49)3 Press [Shutter].• The AF-assist light/timer lamp blinks.• The front display will start a countdown a few seconds before shooting. 4 Jump when the jump icon appears on the front display.• The camera will capture multiple shots.• If you are capturing photos using the jump shot timer in low light conditions or indoors, photos may appear dark.• Use a tripod to prevent your camera from shaking.](https://usermanual.wiki/Samsung-Electronics-Co/DV180F.User-manual-1-of-3/User-Guide-2466960-Page-48.png)
![Extended functions 48Using Basic modesCapturing animated jump shotsCapture multiple jump shots, and then save them as a GIF animation. This feature is available only when you insert a memory card into the camera.1 In Jump Shot mode, press [m].2 Select Jump Shot GIF animation.• The camera saves an animated GIF and one JPG of the middle scene from the GIF file. You cannot view the JPG file on your camera. To view it, connect your camera to a PC. (p. 101) • If you select GIF animation, the resolution is automatically set to .• If you select GIF animation, it may take longer to save files.• Use a tripod to prevent your camera from shaking.Using the Beauty Shot modeIn Beauty Shot mode, you can capture a portrait with options to hide facial imperfections. 1 On the Home screen, scroll to <Scene>.2 Select .3 Press [F/t] to adjust Face Retouch.• For example, increase the face retouch setting to hide more imperfections.Panel offFace Retouch : 24 Press [m].5 Select Face Tone.](https://usermanual.wiki/Samsung-Electronics-Co/DV180F.User-manual-1-of-3/User-Guide-2466960-Page-49.png)
![Extended functions 49Using Basic modes6 Press [F/t] to adjust Face Tone.• For example, increase the face tone setting to make skin appear lighter.Face Tone : 2Cancel Set7 Press [o] to save the setting.8 Align your subject in the frame, and then half-press [Shutter] to focus.9 Press [Shutter] to capture the photo.Using the Night Shot modeIn Night Shot mode, you can use a slow shutter speed to extend the time the shutter stays open. Increase the aperture value to prevent overexposure.1 On the Home screen, scroll to <Scene>.2 Select .3 Press [F/t] to adjust the shutter speed.Shutter Speed : 1 secPanel off4 Align your subject in the frame, and then half-press [Shutter] to focus.5 Press [Shutter] to capture the photo.Use a tripod to prevent blurry photos.](https://usermanual.wiki/Samsung-Electronics-Co/DV180F.User-manual-1-of-3/User-Guide-2466960-Page-50.png)
![Extended functions 50Using Basic modesUsing the Close-up Shot modeIn Close-up Shot mode, you can capture close-up photos of subjects, such as flowers or insects.1 On the Home screen, scroll to <Scene>.2 Select .3 Align your subject in the frame, and then half-press [Shutter] to focus.4 Press [Shutter] to capture the photo.](https://usermanual.wiki/Samsung-Electronics-Co/DV180F.User-manual-1-of-3/User-Guide-2466960-Page-51.png)