Samsung Electronics Co DVDV9500 DVD Player/ Video Cassette Recorder User Manual 00742A V9500 eng1
Samsung Electronics Co Ltd DVD Player/ Video Cassette Recorder 00742A V9500 eng1
UserManual.wiki
>
Samsung Electronics Co
>
DVDV9500 User Manual
>
Users Manual 1
Contents
1.
Users Manual 1
2.
Users Manual 2
Users Manual 1
Navigation menu
Upload a User Manual
Namespaces
Wiki Guide
HTML
PDF
Info
Views
User Manual
Discussion / Help
Navigation
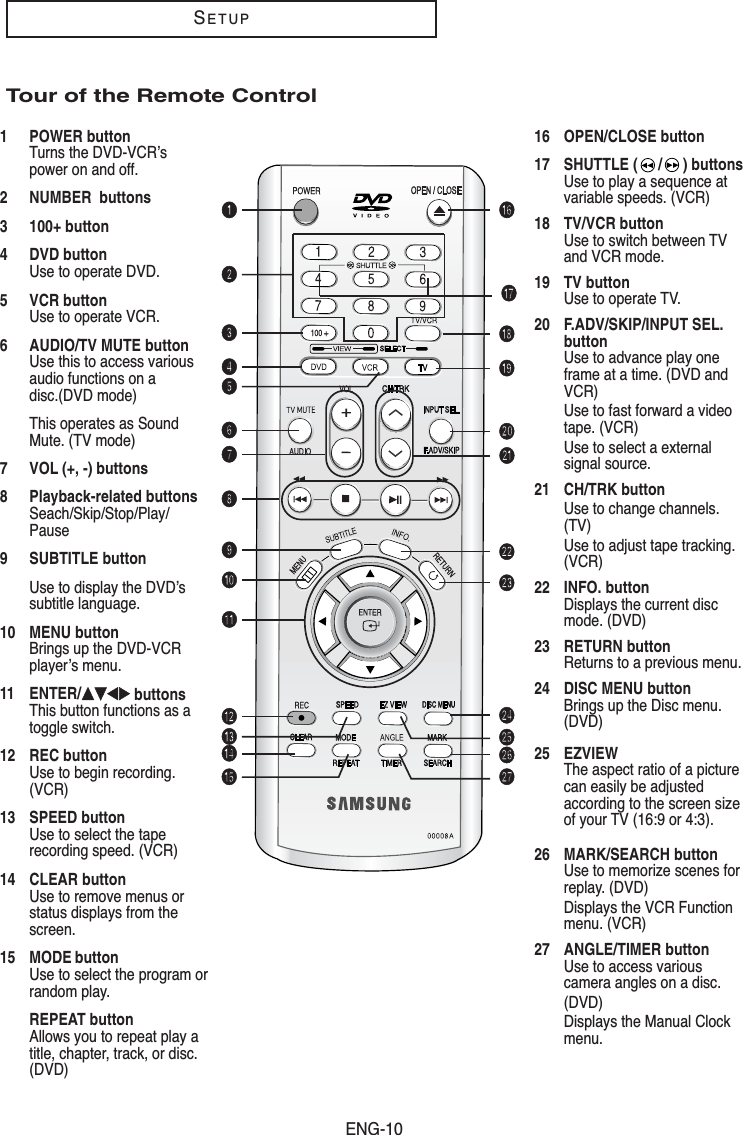
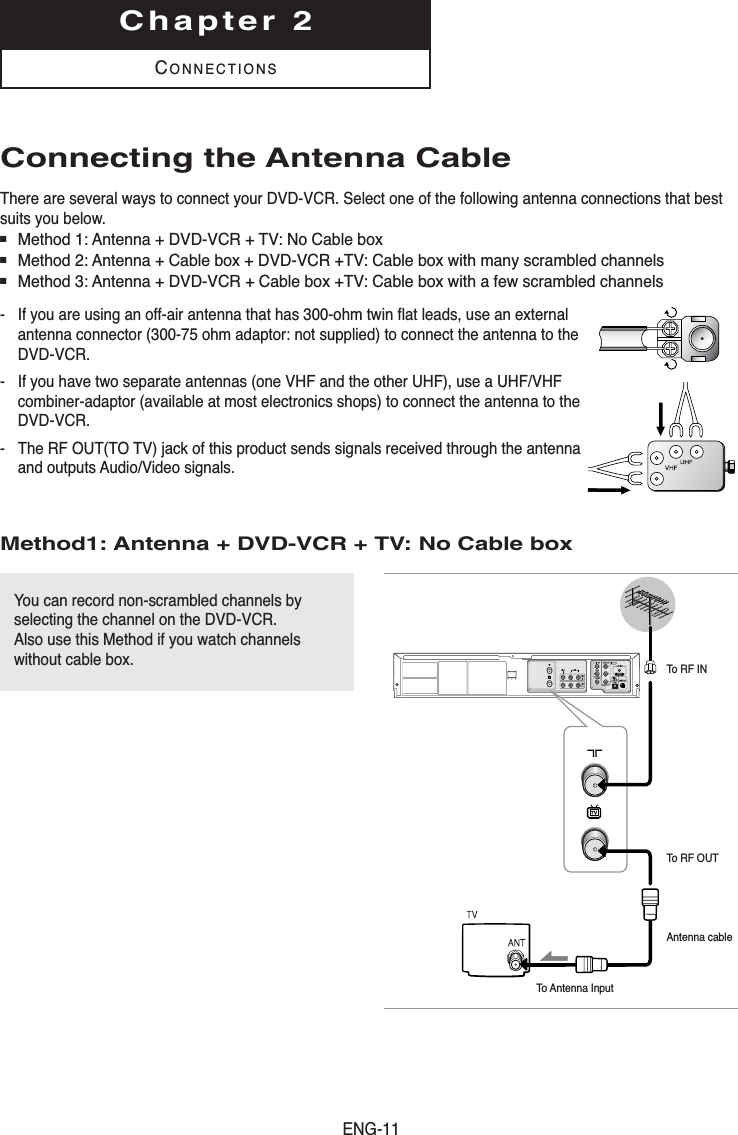

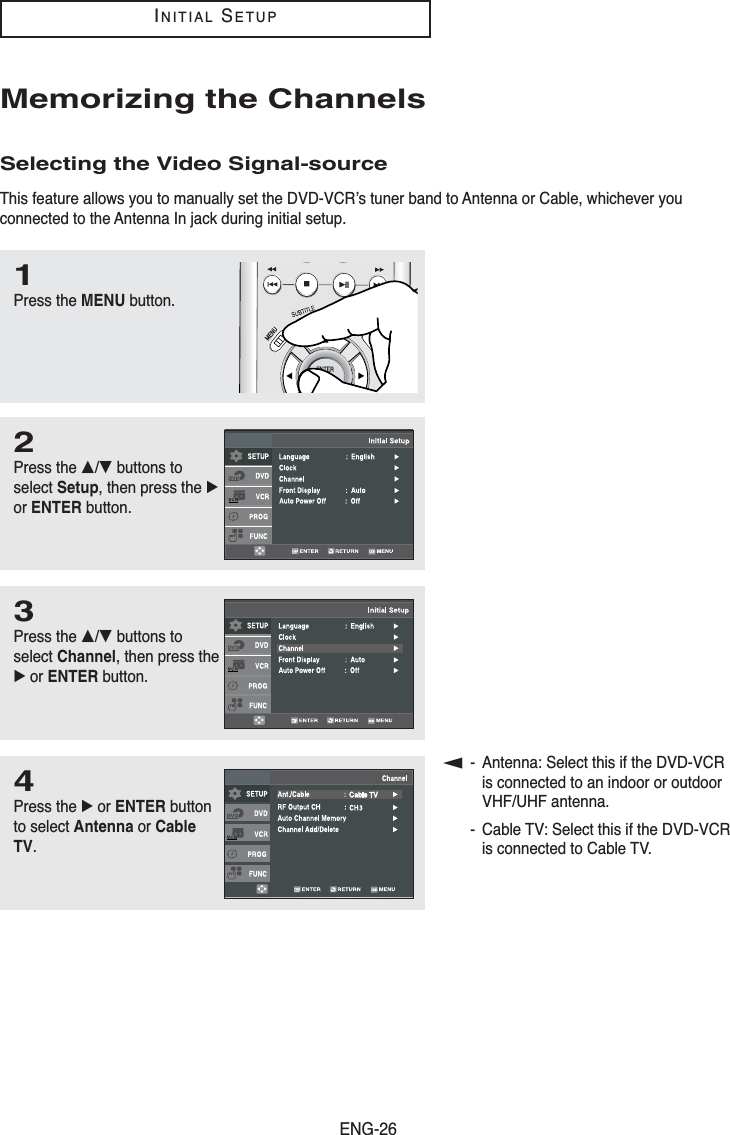
![ENG-27INITIALSETUPStoring Channels in Memory (Automatic Method)Auto Channel Memory will automatically seek and store all active channels in your area.5Press the …/†buttons toselect Auto Channel Memory,then press the √or ENTERbutton.The DVD-VCR willautomatically search for all available channels.This procedure may take a fewminutes to complete.When finished, the lowestchannel found will bedisplayed. NoteDo not turn the power off when AutoChannel Memory function is proceeding asnot all channels will be memorized.Adding and Erasing Channels (Manual Method)Use this feature if Auto Channel Search missed a channel that you would like to add, delete a channel you wishto remove.6Press the …/†buttons toselect Channel Add/Delete,then press the √or ENTERbutton.7Press the CH / buttons totune in the channel numberyou wish to add or delete. Use the number button toselect the channel directly.CHANNEL ADD/DELETESelect channel : [07]and press [√] to ADDpress [œ] to DELETERETURN CH …†8Press the œor √button todelete the channel from yourchannel list or to add.Repeat steps 7 to add orto delete additional channels. Press the MENU button to exit.CHANNEL ADD/DELETESelect channel : [07](in memory)and press [√] to ADDpress [œ] to DELETERETURN CH …†NoteUse the number button to move the channeldirectly.](https://usermanual.wiki/Samsung-Electronics-Co/DVDV9500.Users-Manual-1/User-Guide-544425-Page-27.png)