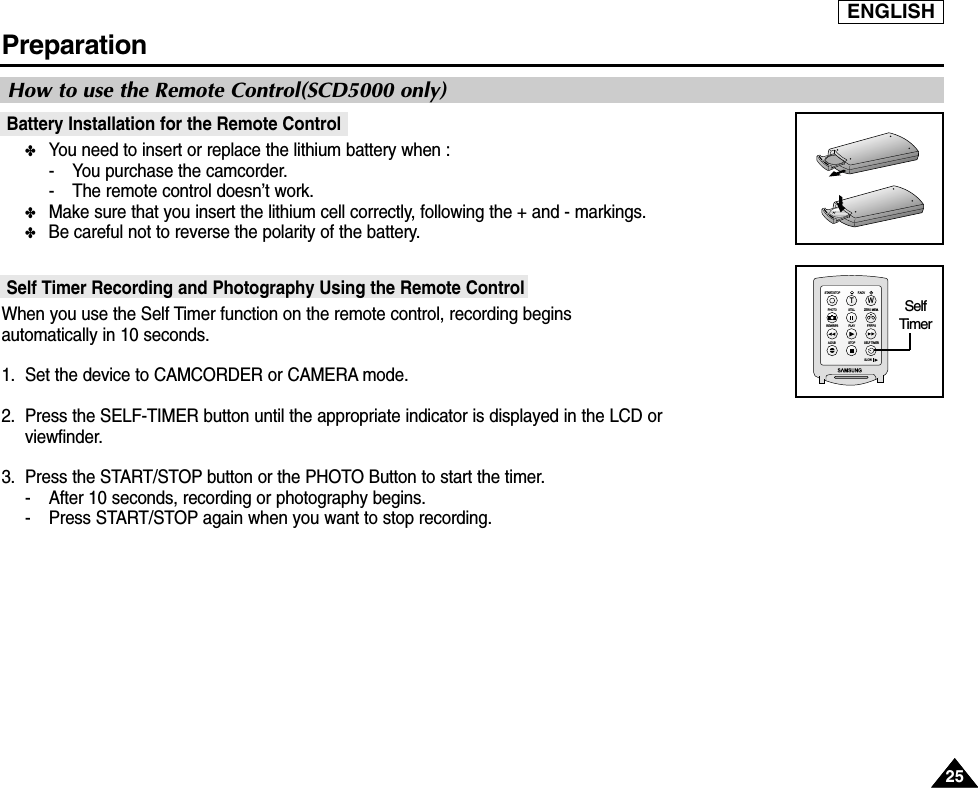
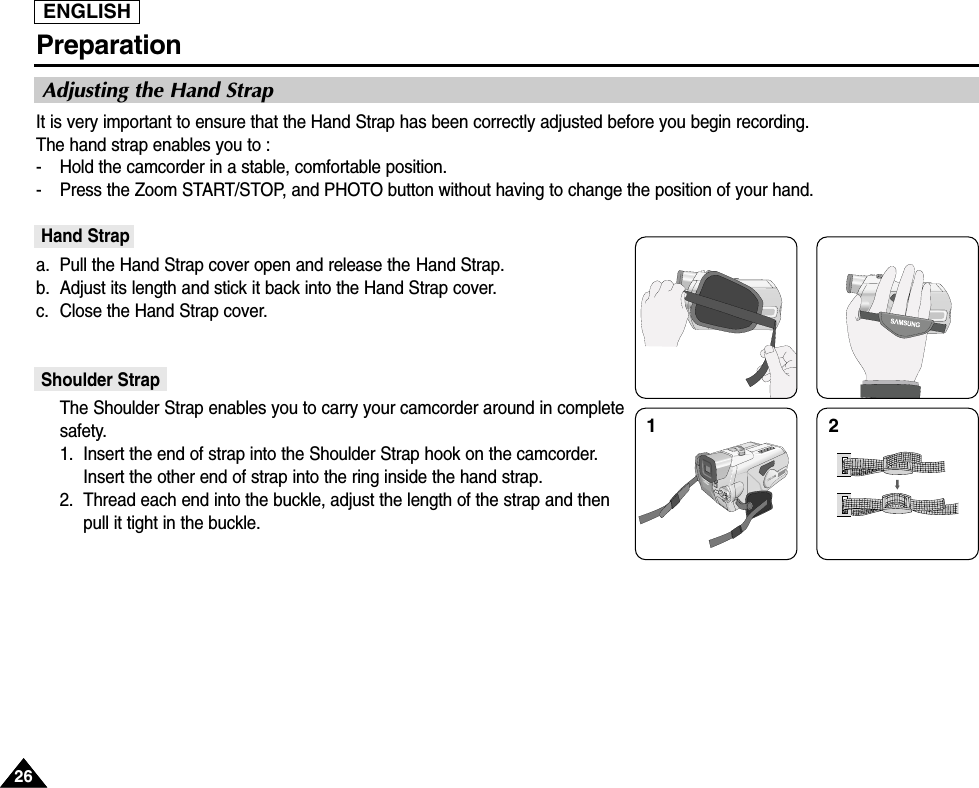
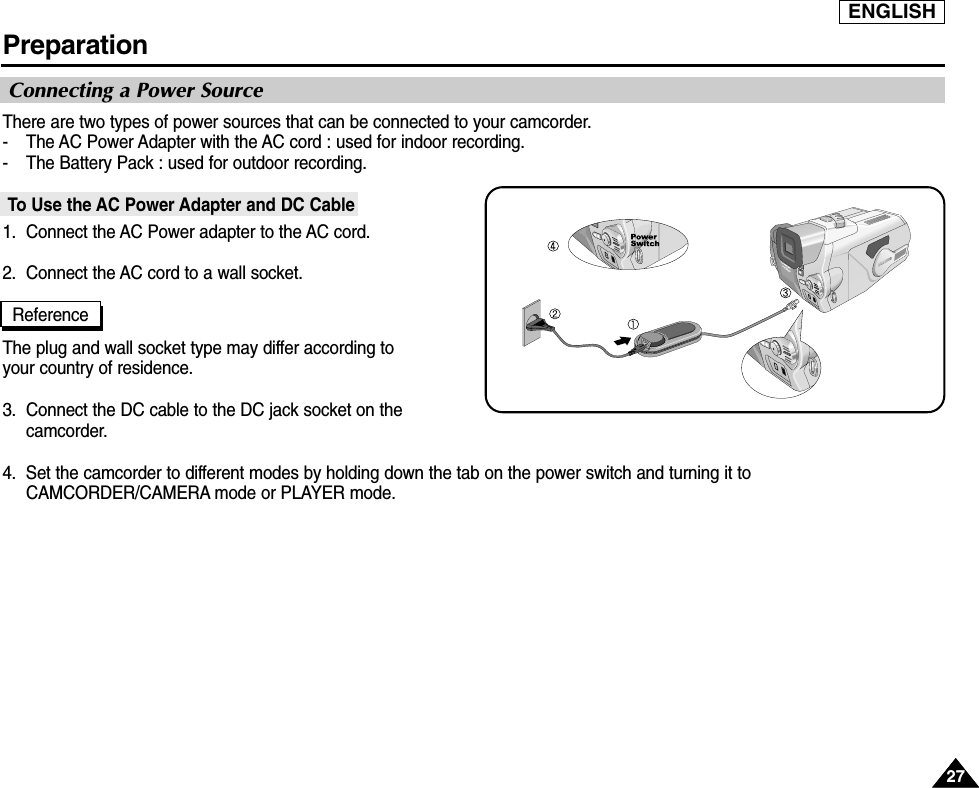
Samsung Electronics Co GAMMA Digital Camcorder User Manual 1
Samsung Electronics Co Ltd Digital Camcorder Users Manual 1
UserManual.wiki
>
Samsung Electronics Co
>
GAMMA User Manual
>
Users Manual 1
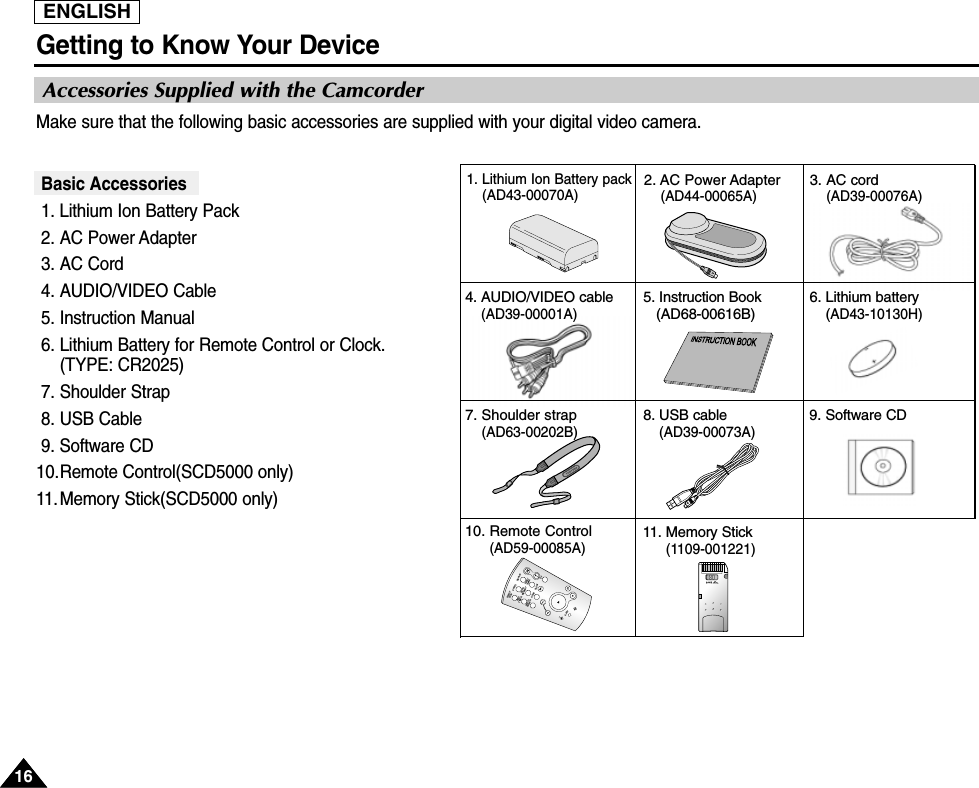
Contents
1.
Users Manual 1
2.
Users Manual 2
Users Manual 1
Navigation menu
Upload a User Manual
Namespaces
Wiki Guide
HTML
PDF
Info
Views
User Manual
Discussion / Help
Navigation

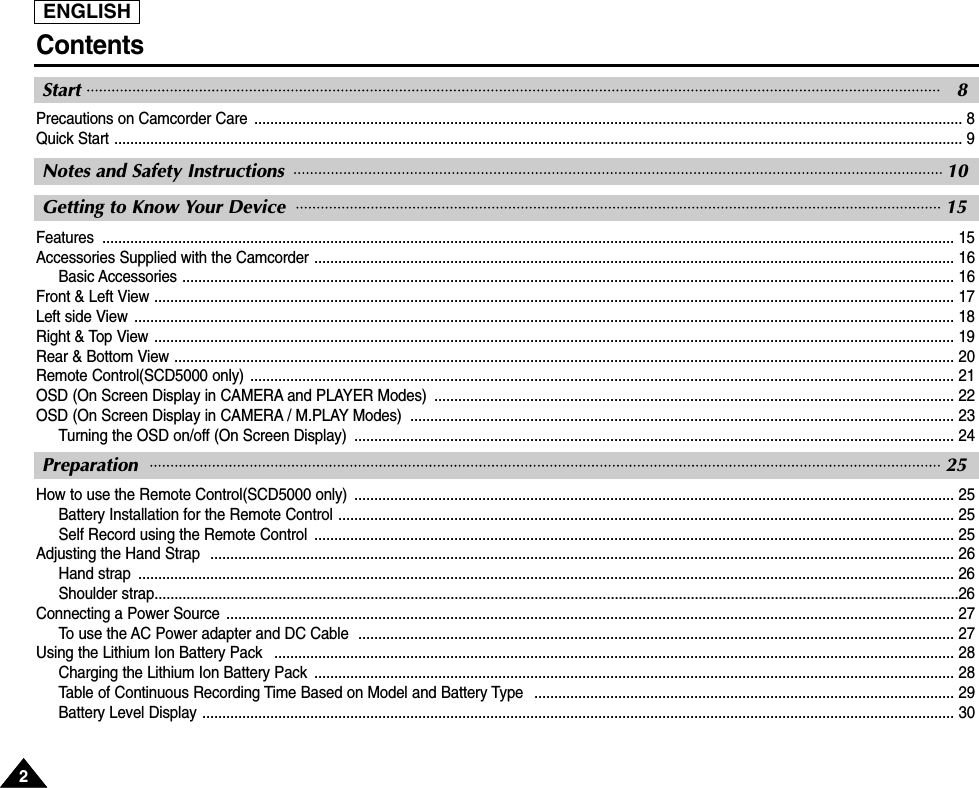

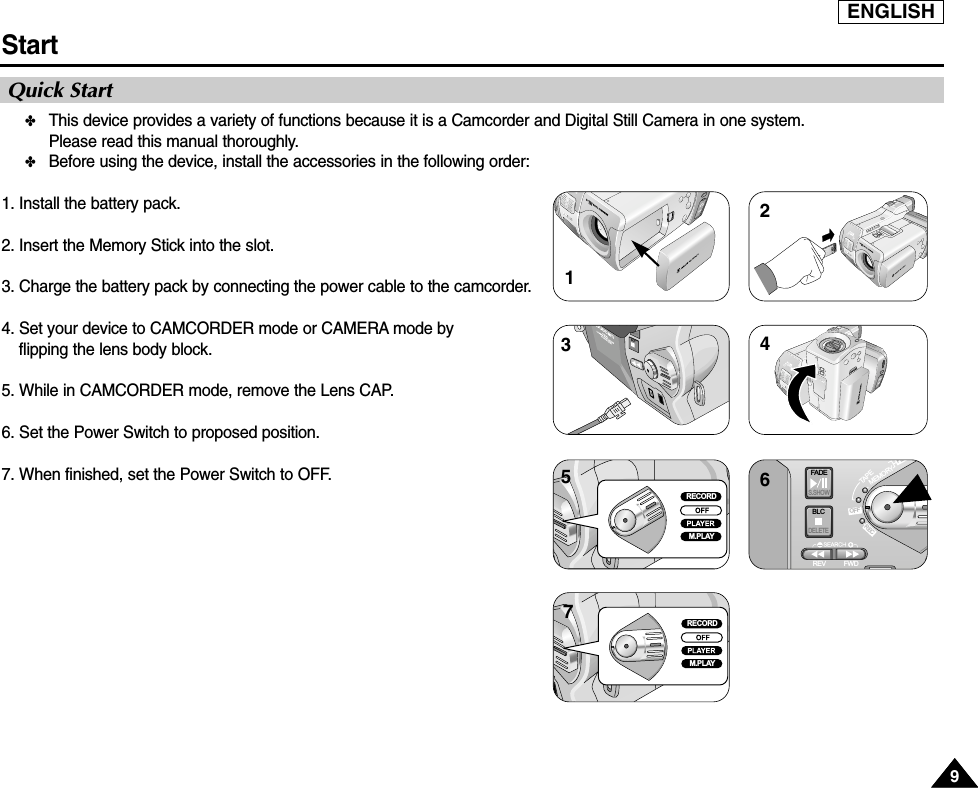

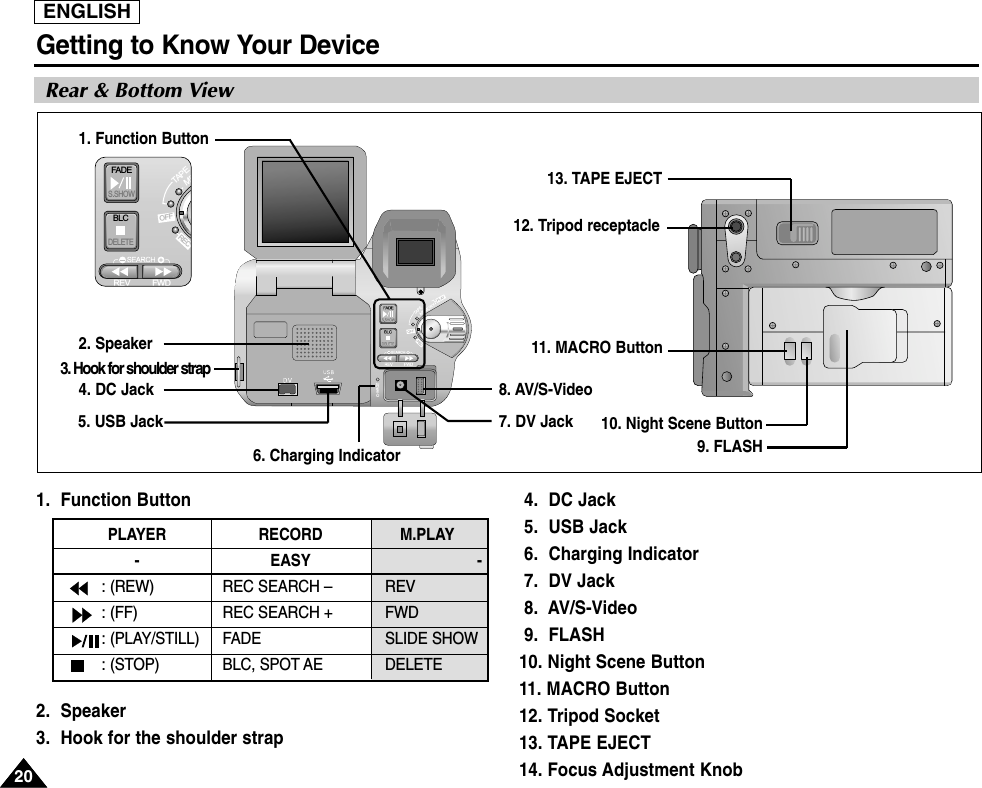
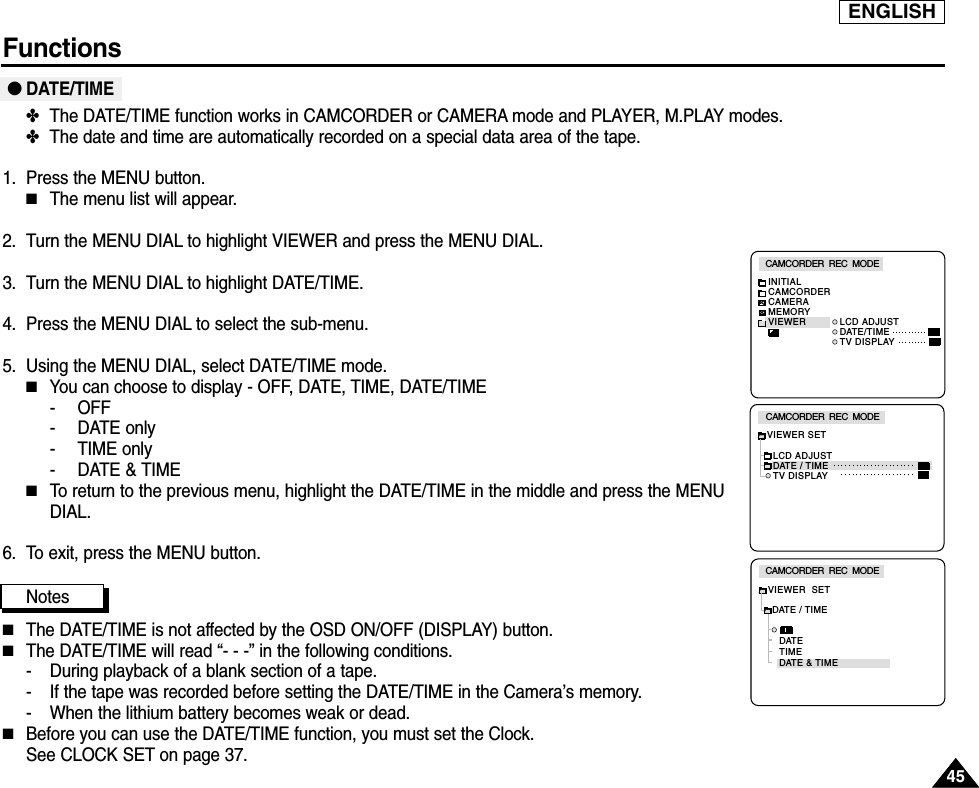
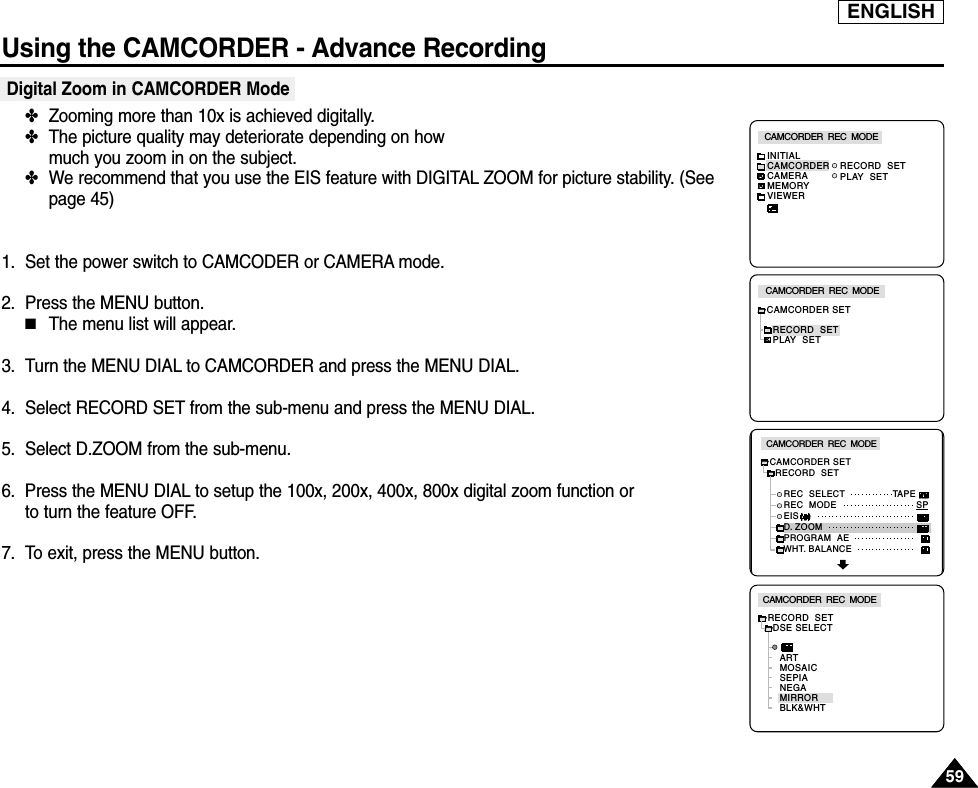
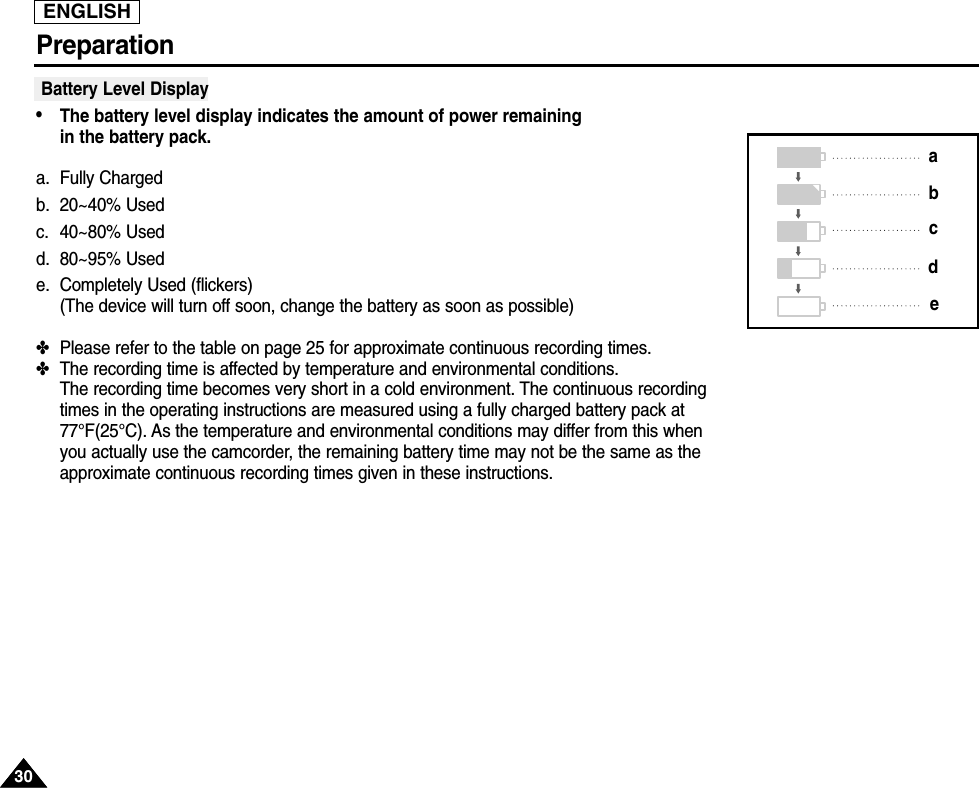
![ENGLISHGetting to Know Your Device2222OSD (On Screen Display in CAMERA and PLAYER Modes)1. Battery Level (See page 28)2. Easy Mode (See pages 47)3. Slow Shutter (See pages 69) 4. DSE (Digital Special Effects) Mode (See page 61)5. BLC (Back Light Compensation) (See page 70)6. Program AE (See page 56)7. White Balance Mode (See page 58)8. Manual Focus (See page 48) 9. POWER NITE PIX (See page 76)10. Zoom Position (See page 49)11. Shutter Speed and EXPOSURE (See page 68)12. NITE PIX (See page 75)13. DATE / TIME (See page 45)14. USB (See page 120)15. WL. REMOTE(SCD5000 only) (See page 43)16. WIND CUT (See page 65)17. Audio recording mode (See page 64)18. Message Line19. Zero Memory Indicator (See page 82) (SCD5000 only)20. Remaining Tape (measured in minutes) 21. Tape Counter22. Operating Mode23. Record Speed Mode (See page 63)24. PHOTO Mode (See page 74)25. Self Recording and Waiting Timer (See page 25) (SCD5000 only)26. EIS (See page 60)27. PB ZOOM(See page 84)28. PB DSE (See page 83)29. Audio Playback Channel (See page 73)30. PB ZOOM / ENTER (See page 84)31. Volume Control (See page 35)32. DV IN (DV data transfer mode) (See page 86)33. DEW (See page 11)OSD in CAMCORDER modeTAPE !NITE PIXMIRRORMF PSHUTTERZOOMSHUTTEREXPOSUREEXPOSUREEASY M - 0 : 0 0 : 0 0 5 5 min1 6 bit1 2 : 0 0 AM O C T. 1 0 , 2 0 0 3RECS 1 / 30TWBLC. . . D123456781011926 25 24 23 2221201917161514131218OSD in TAPE PLAY mode. . . DSOUND [ 2 ]MIRRORE N T E R : PB ZOOM8 . 0 X0 : 0 0 : 0 0 : 0 0 5 5 min1 6 bit1 2 : 0 0 AM O C T . 1 0 . 2 0 0 3VOL. [ 1 1 ]DVTAPE !27282930333231](https://usermanual.wiki/Samsung-Electronics-Co/GAMMA.Users-Manual-1/User-Guide-326050-Page-23.png)

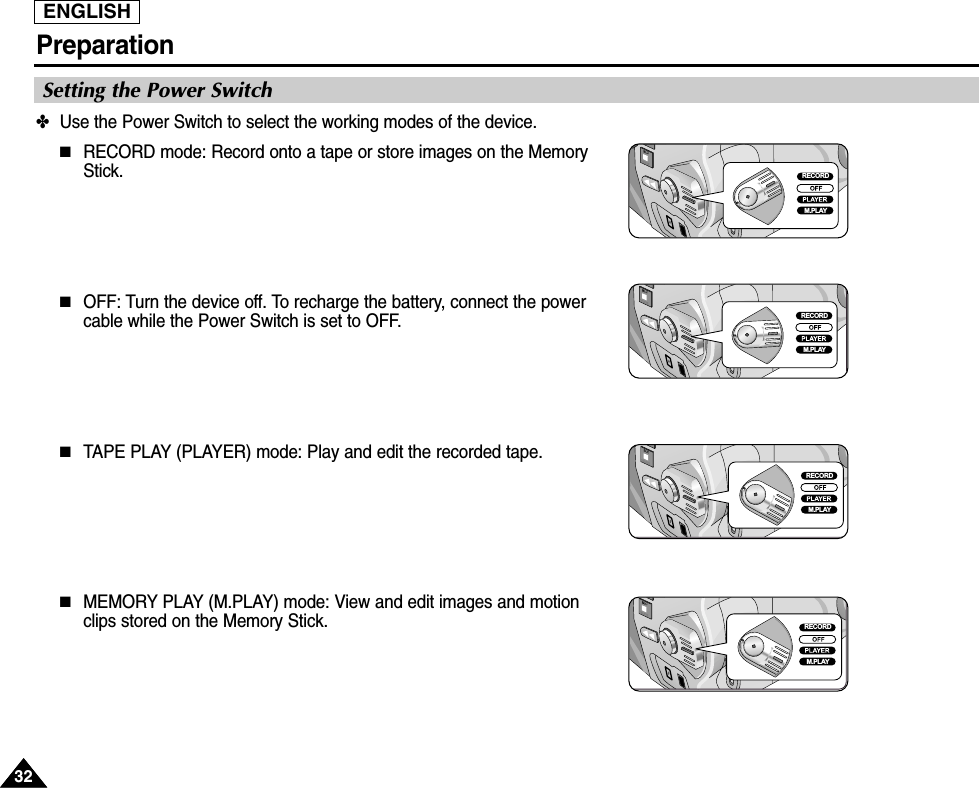
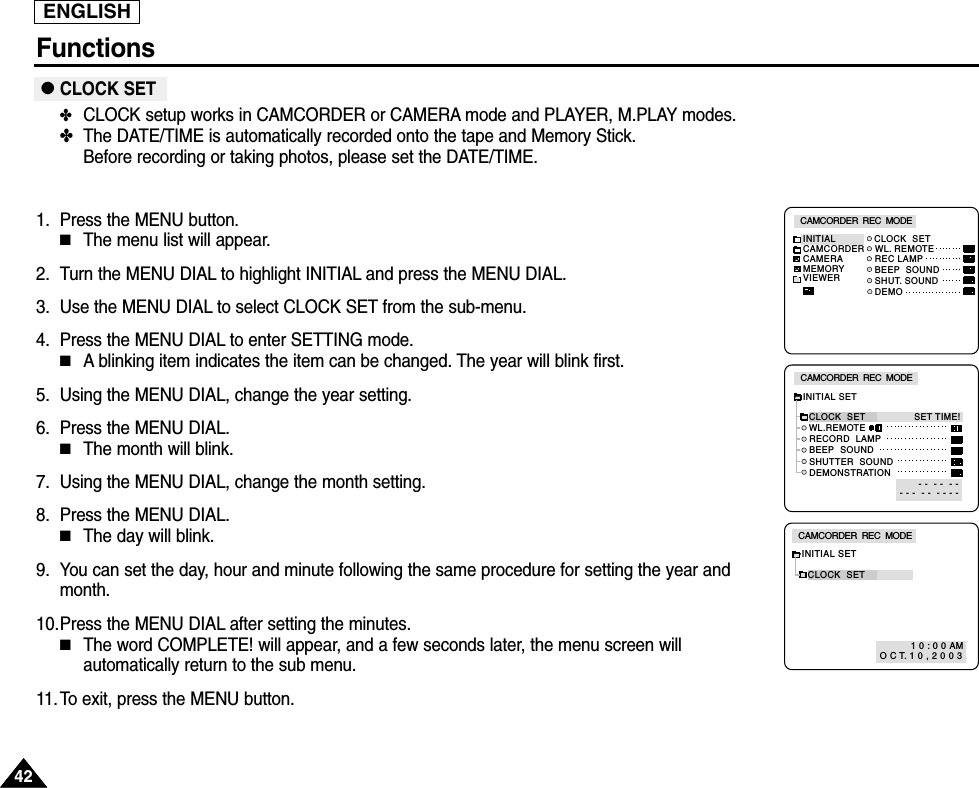
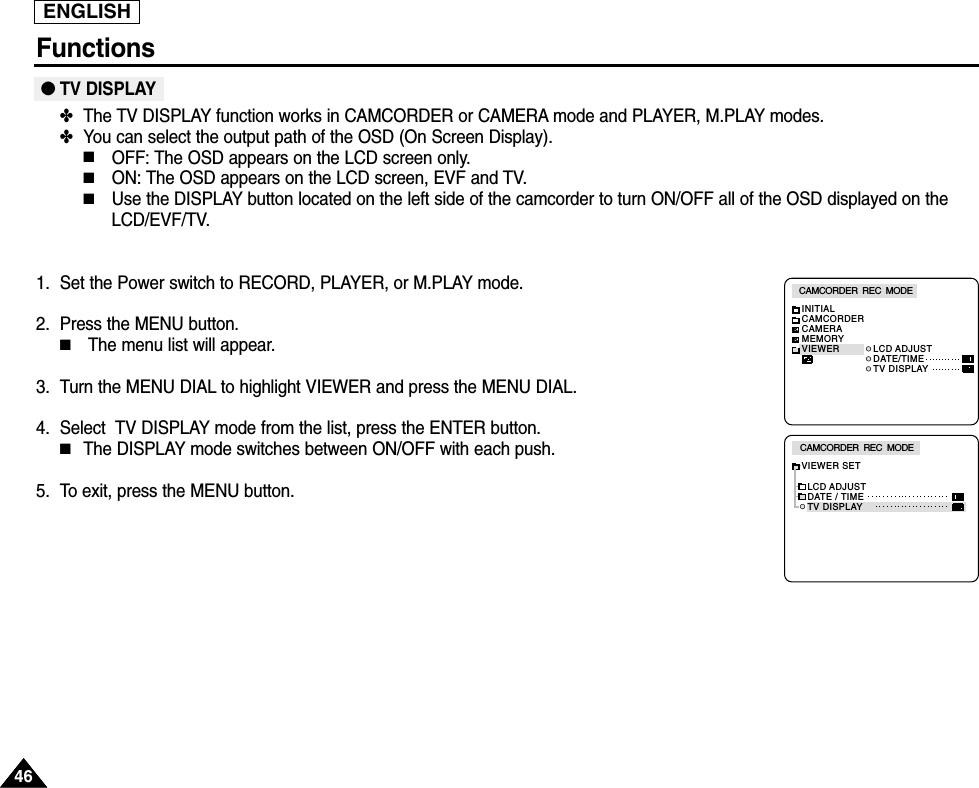
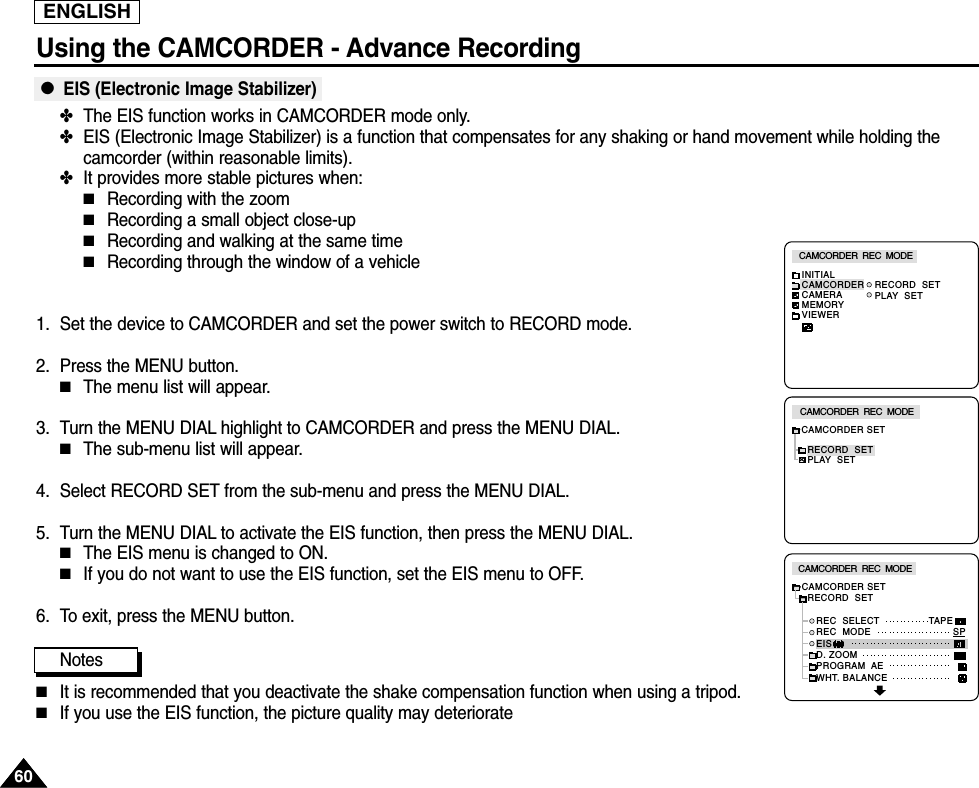
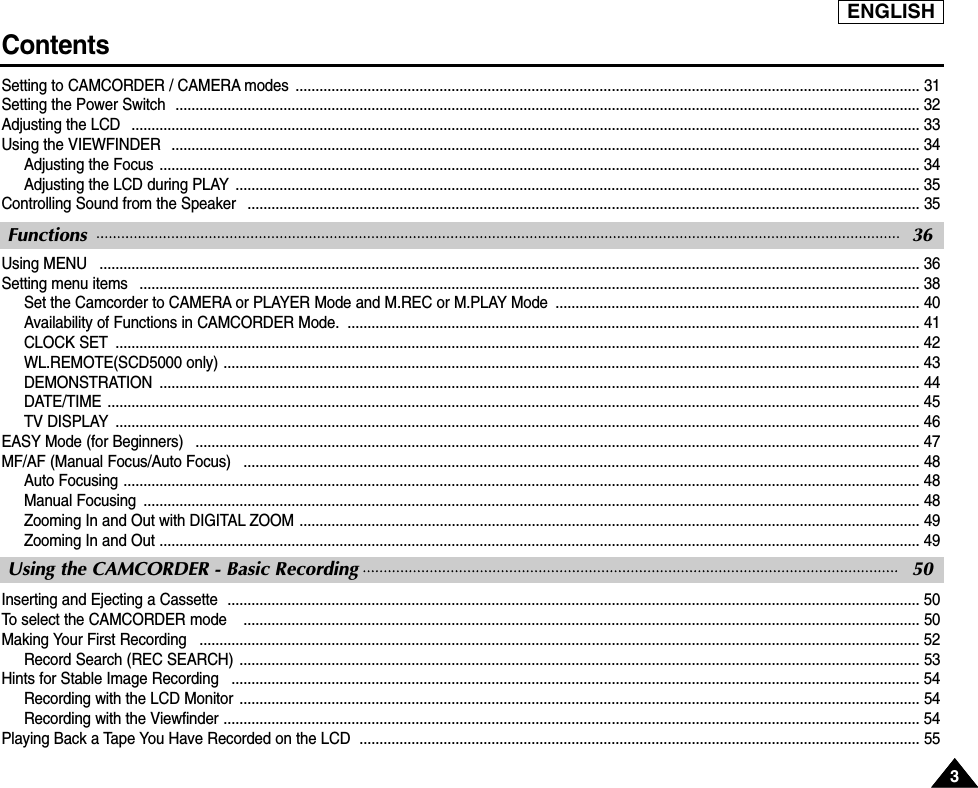
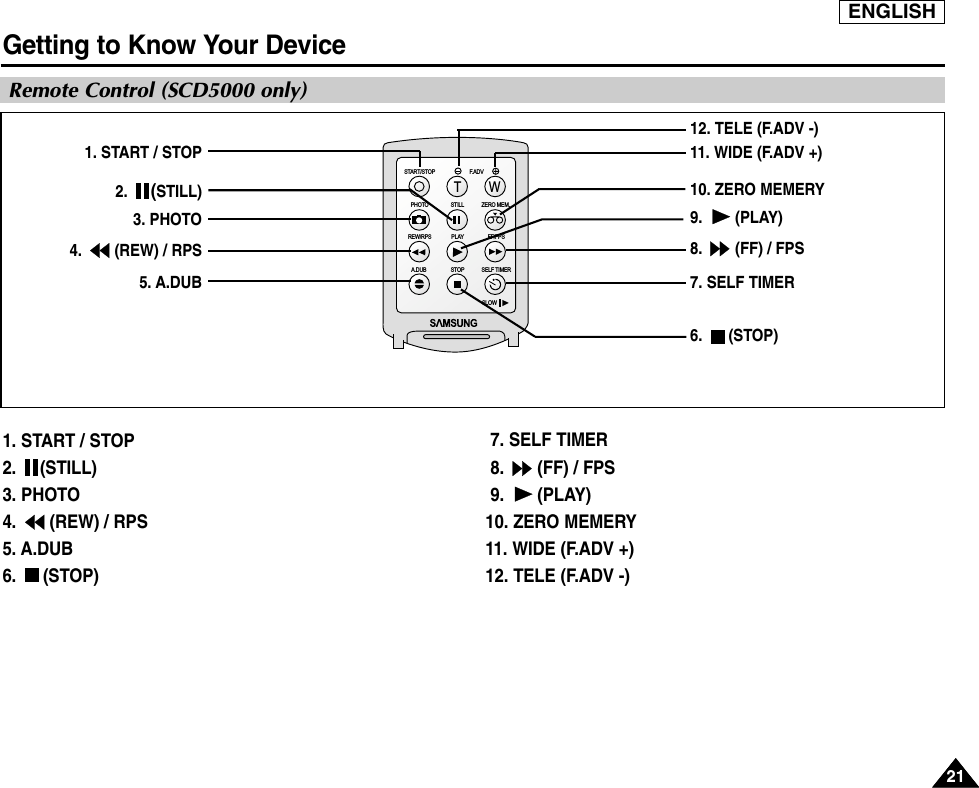
![ENGLISHPreparation3333✤Your camcorder is equipped with a 2.5 inch color Liquid Crystal Display(LCD) screen, which enables youto view what you are recording and play back directly.✤Depending on the conditions under which you are using the camcorder (indoors or outdoors), you canadjust ;■BRIGHT ADJUST■COLOR ADJUST1. Set the POWER switch to the CAMCORDER or CAMERA position.■In PLAYER mode, you can only setup the LCD while the tape is playing. 2. Open the LCD screen. The LCD switches on.3. Press the MENU button.4. Turn the MENU DIAL so that VIEWER is highlighted and then press the MENU DIAL. 5. Turn the MENU DIAL so that LCD ADJUST is highlighted.6. Press the ENTER button to enter the sub-menu.7. Turn the MENU DIAL so that it highlights the menu item you want to adjust (BRIGHT ADJUST, COLOR ADJUST).CAMCORDER REC MODEVIEWER SETLCD ADJUSTDATE / TIMETV DISPLAYCAMCORDER REC MODEINITIALLCD ADJUSTDATE/TIMETV DISPLAYCAMCORDERCAMERAMEMORYVIEWERCAMCORDER REC MODELCD ADJUSTVIEWER SETBRIGHT ADJUST . . . . . . [ 1 8 ]COLOR ADJUST . . . . . . [ 1 8 ]Adjusting the LCDRECORDM.PLAY](https://usermanual.wiki/Samsung-Electronics-Co/GAMMA.Users-Manual-1/User-Guide-326050-Page-34.png)
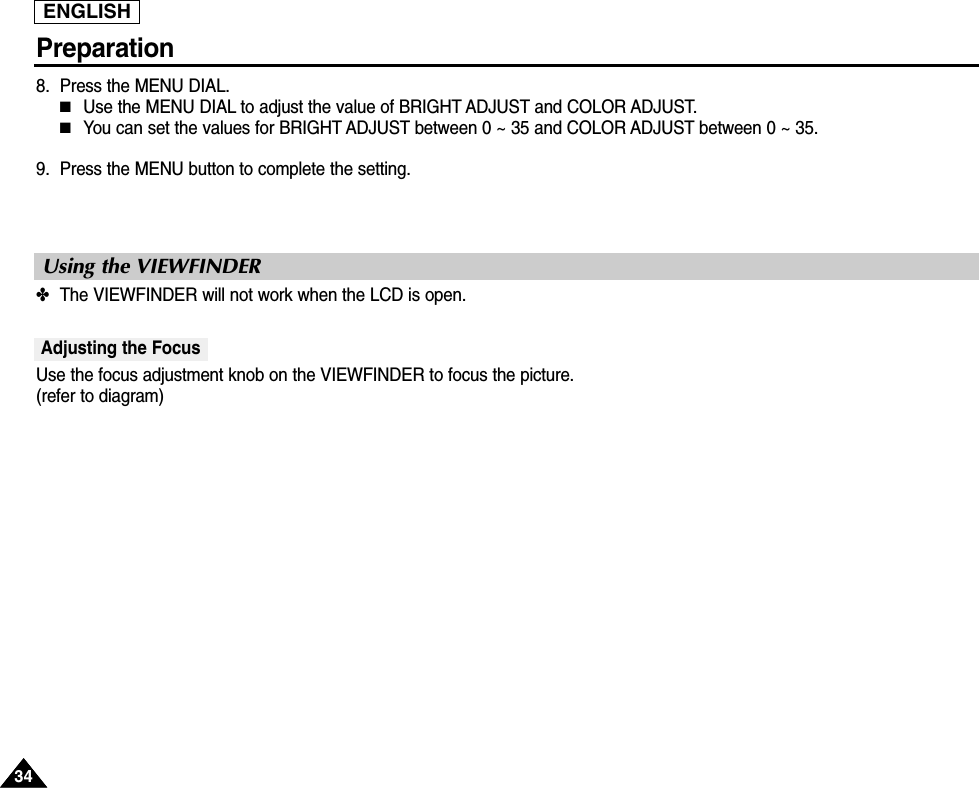
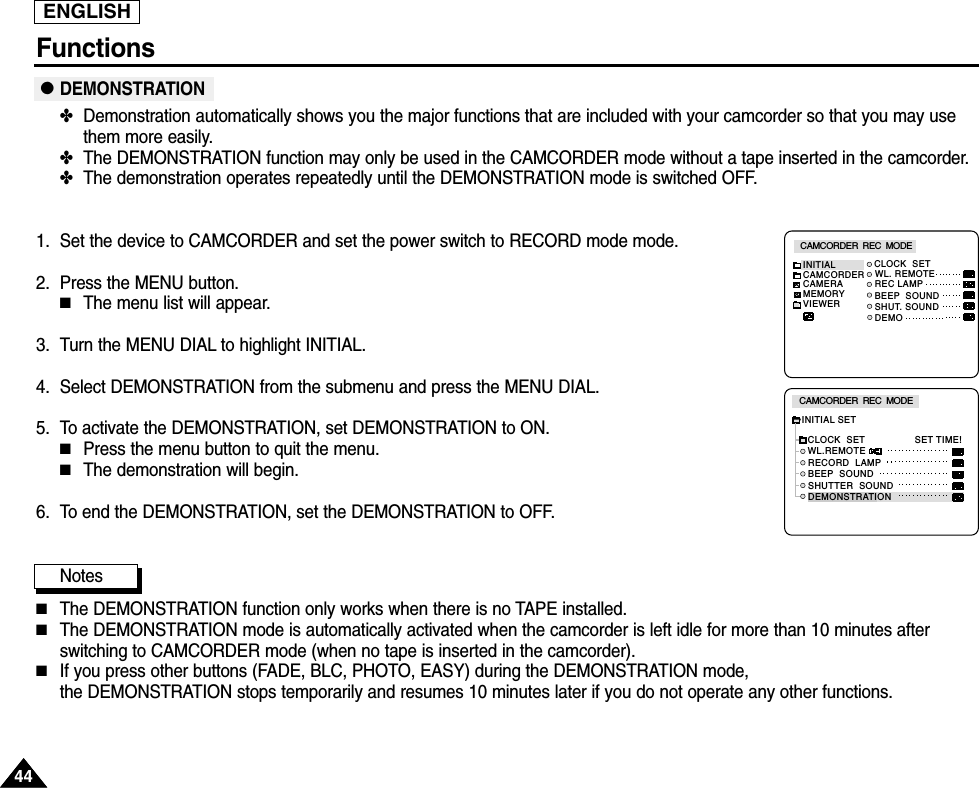
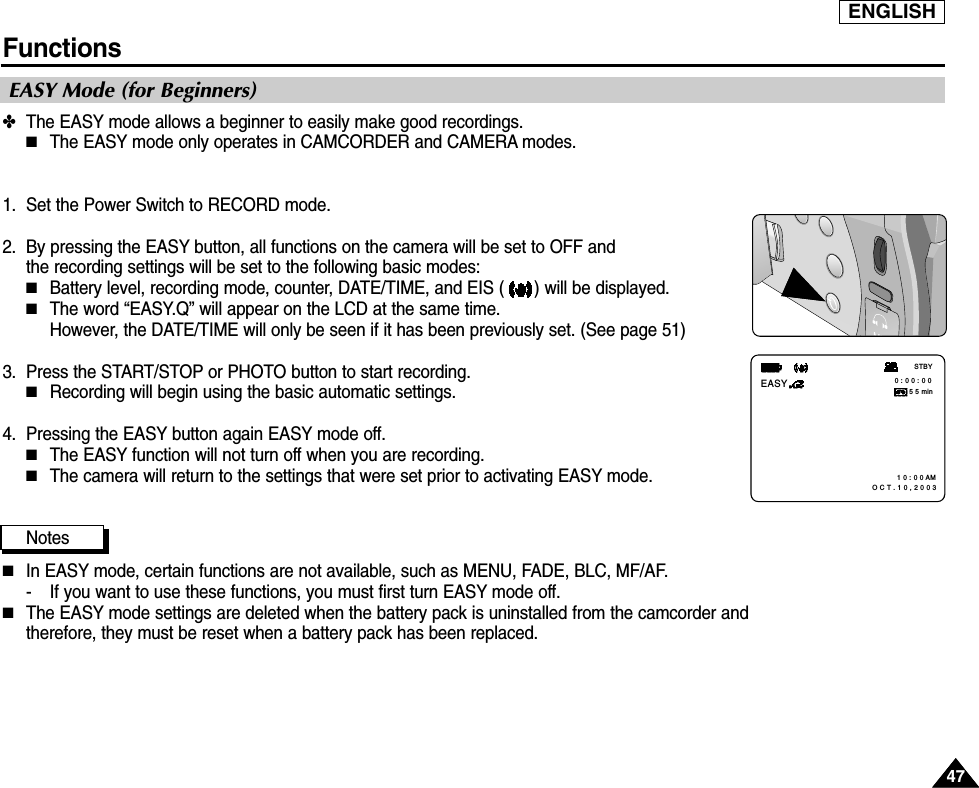
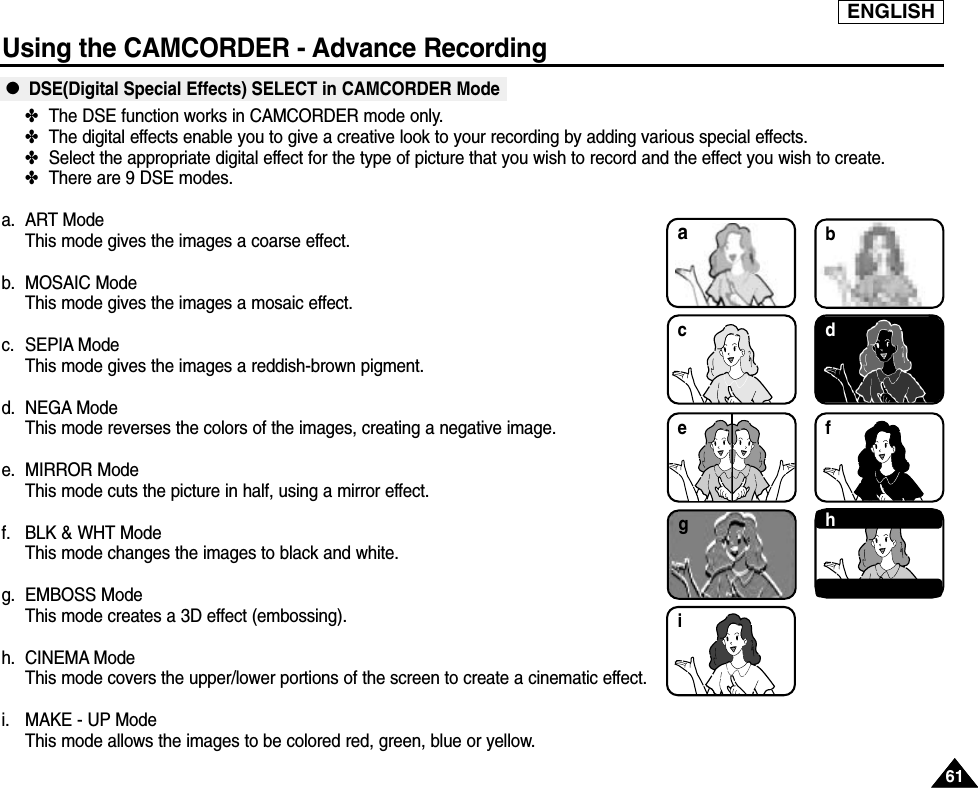
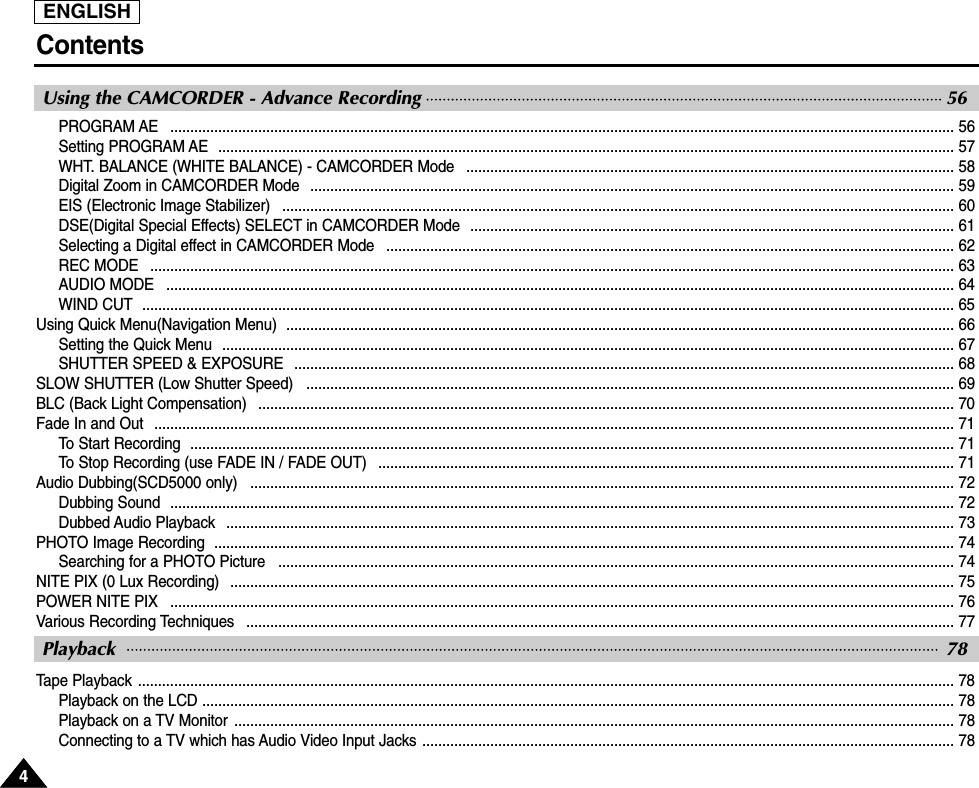
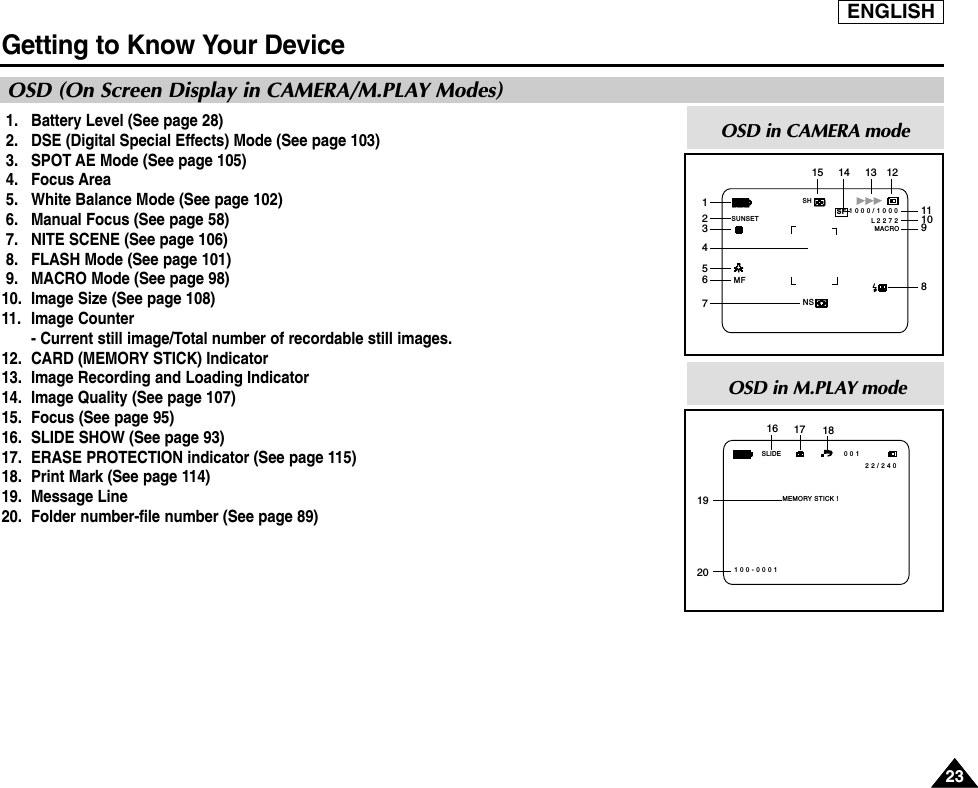
![ENGLISHPreparation3535Adjusting the LCD during PLAY✤ You can adjust the LCD during playback.✤ The adjustment method is the same as is used while in CAMERA mode. (See page 31) The Speaker only works in PLAYER mode.■When you use the LCD screen for playback, you can hear the recorded sound from the built-in Speaker.- Follow the instructions below to decrease or mute speaker volume in PLAYER mode. - Take the following steps to lower the volume or mute the sound while playing a tape on the camcorder.1. Set the device to CAMCORDER and set the Power Switch to PLAYER mode.2. Press (PLAY/STILL) to play the tape.3. Once the tape is in play and you hear sound, use the MENU DIAL to adjust the volume.■A Volume Level display will appear on the LCD. Levels may be adjusted from anywhere between 0 to 19. You will not hear any sound when the volume is set on 0.■If you close the LCD while playing, you will not hear sound from the speaker.Notes■When the cable is connected to the A/V jack, you cannot hear sound from the speaker and cannot adjust the volume. ■You can hear sound from the speaker by removing the connected cable from the A/V jack 0 : 2 3 : 4 75 5 min1 2 : 0 0 AM O C T . 1 0 . 2 0 0 3VOL. [ 1 1 ]<3-2>Controlling Sound from the SpeakerFADES.SHOWBLCREV FWDMEMORYTAPEDELETERECPLAYOFF](https://usermanual.wiki/Samsung-Electronics-Co/GAMMA.Users-Manual-1/User-Guide-326050-Page-36.png)