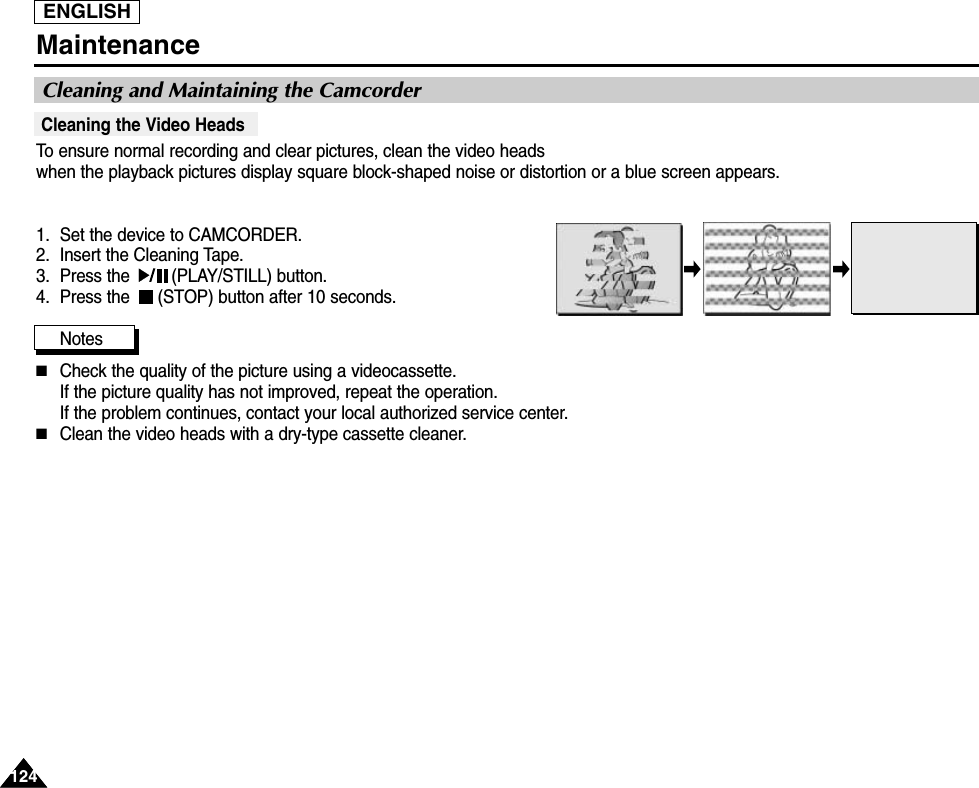
Samsung Electronics Co GAMMA Digital Camcorder User Manual 2
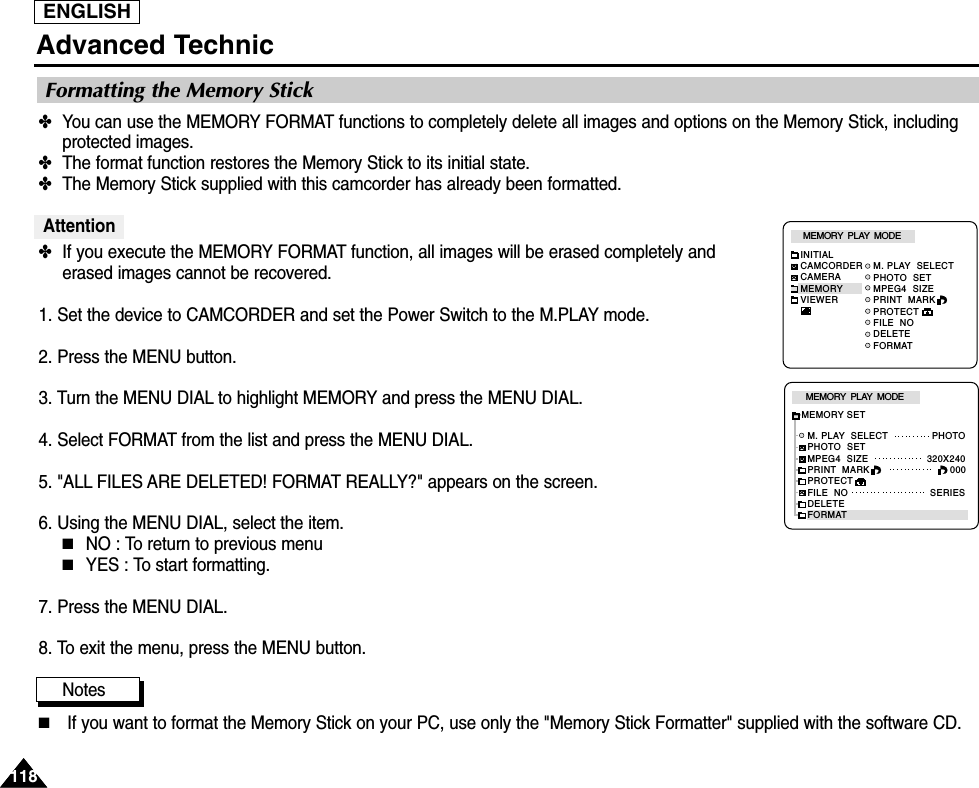
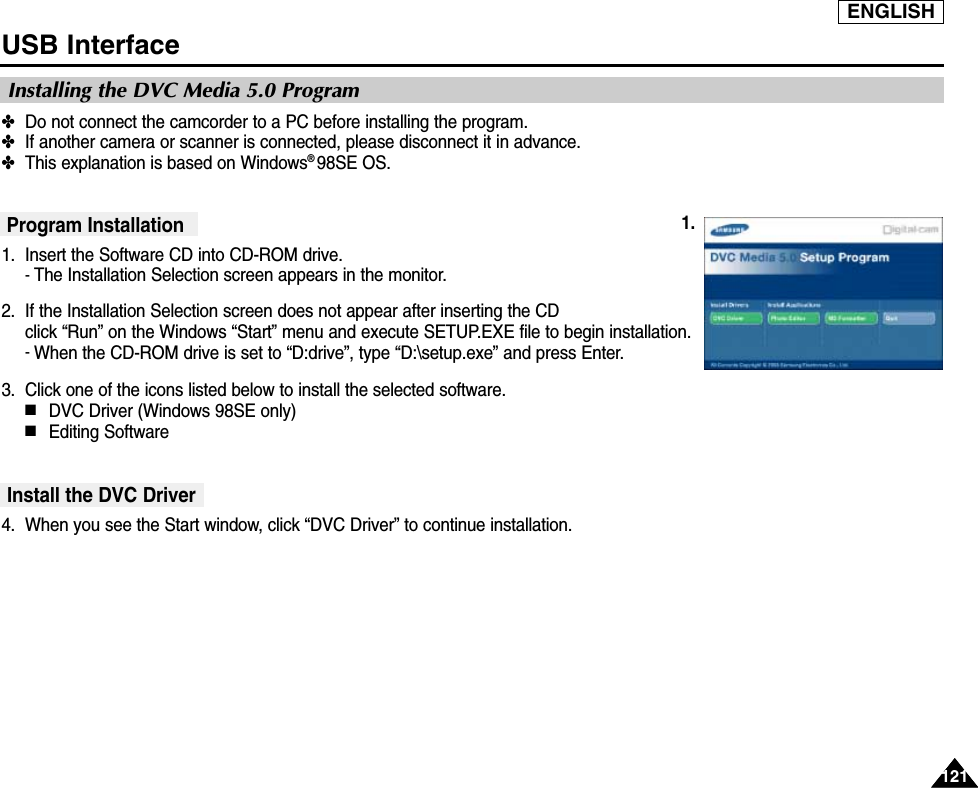
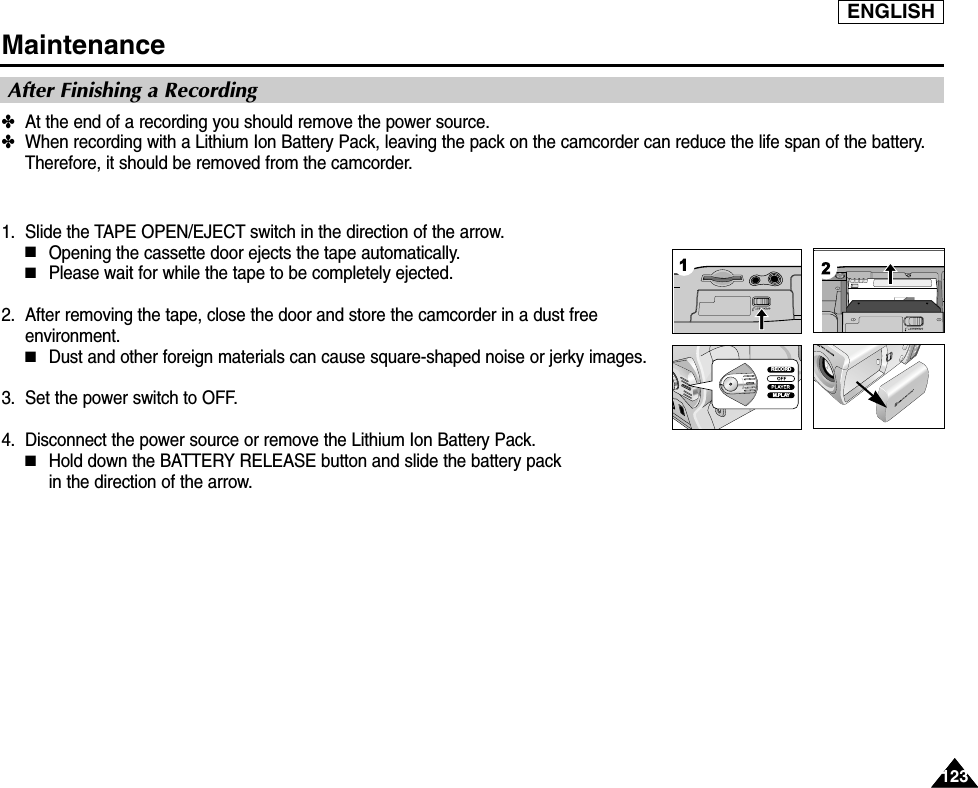
Samsung Electronics Co Ltd Digital Camcorder Users Manual 2
UserManual.wiki
>
Samsung Electronics Co
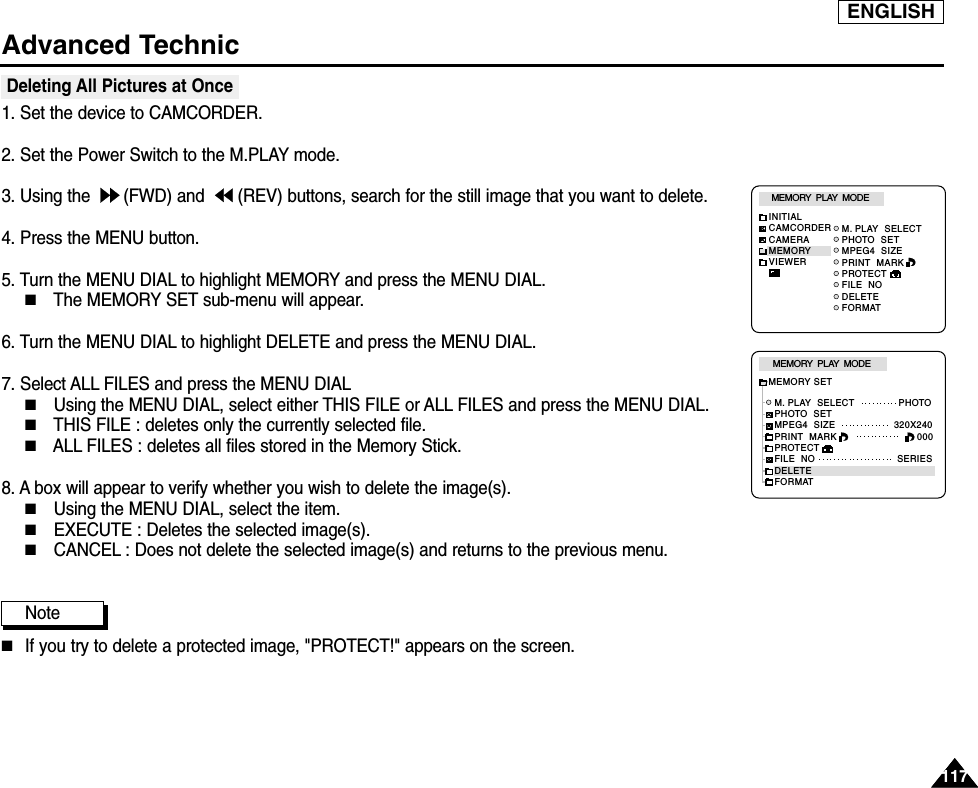
>
GAMMA User Manual
>
Users Manual 2
Contents
1.
Users Manual 1
2.
Users Manual 2
Users Manual 2
Navigation menu
Upload a User Manual
Namespaces
Wiki Guide
HTML
PDF
Info
Views
User Manual
Discussion / Help
Navigation

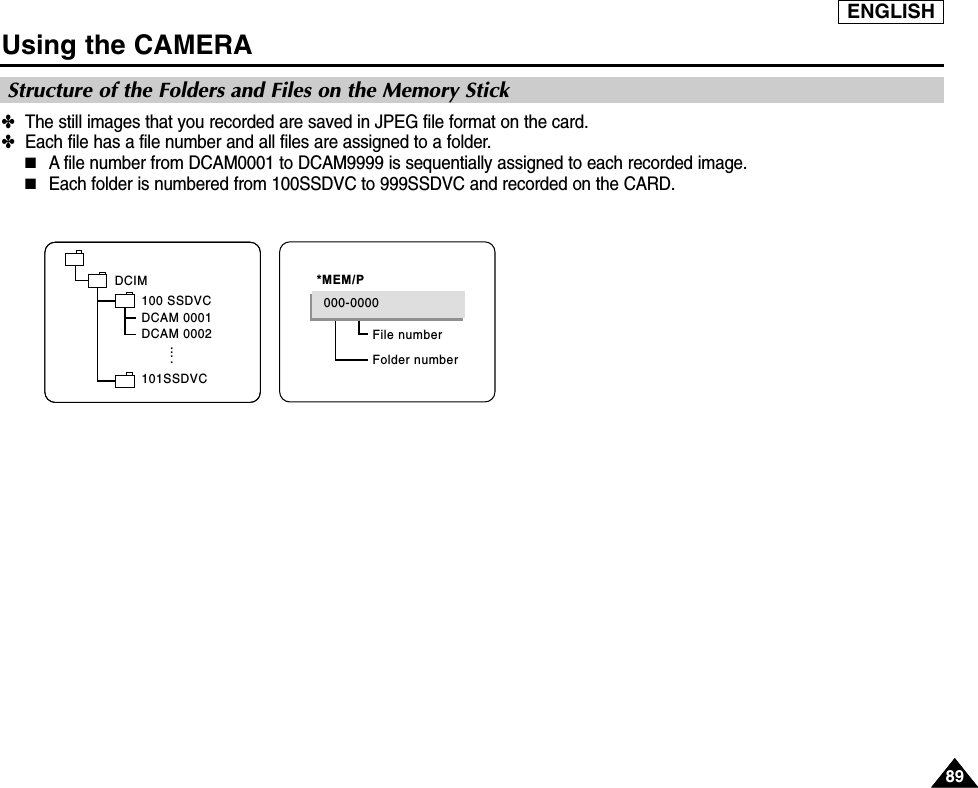
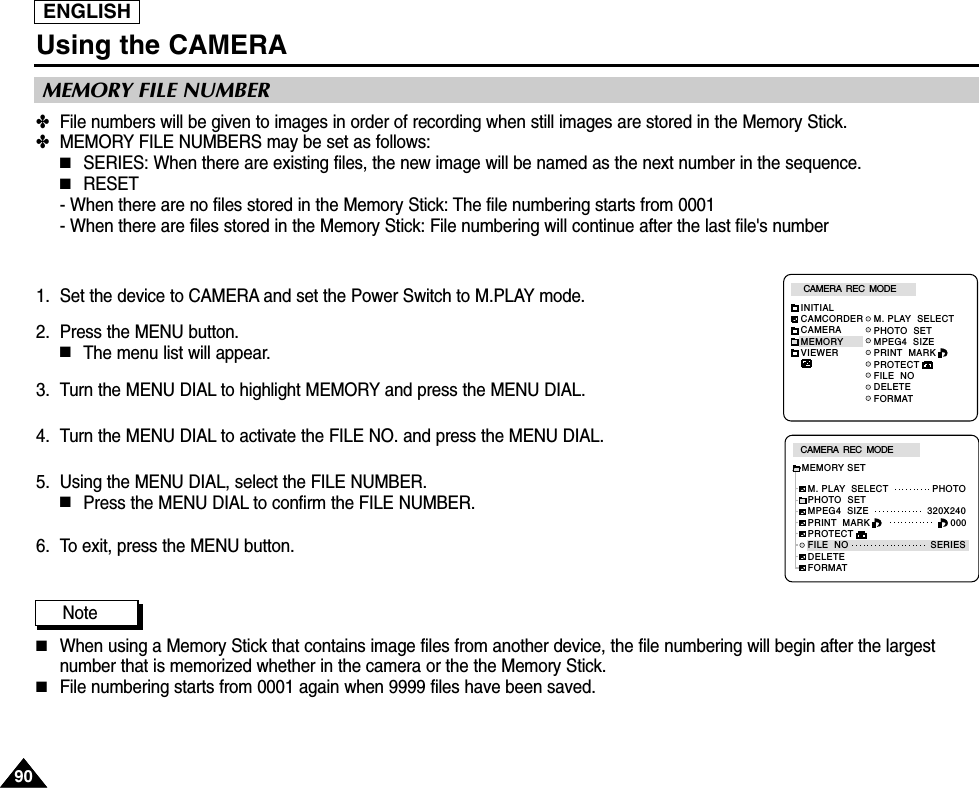
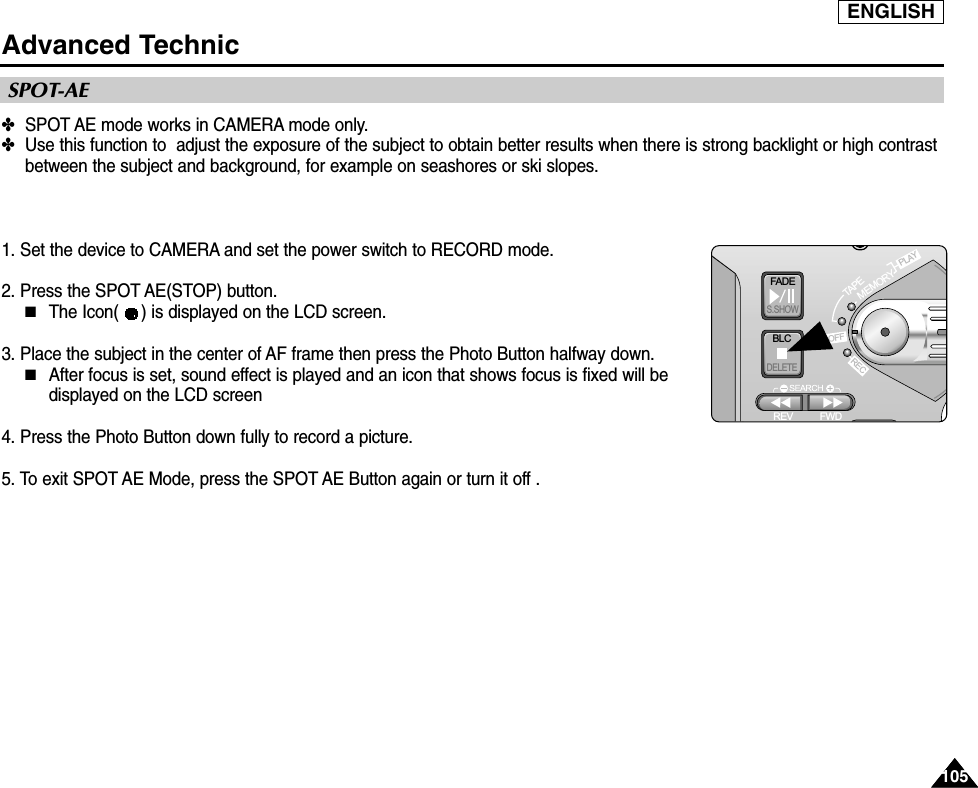
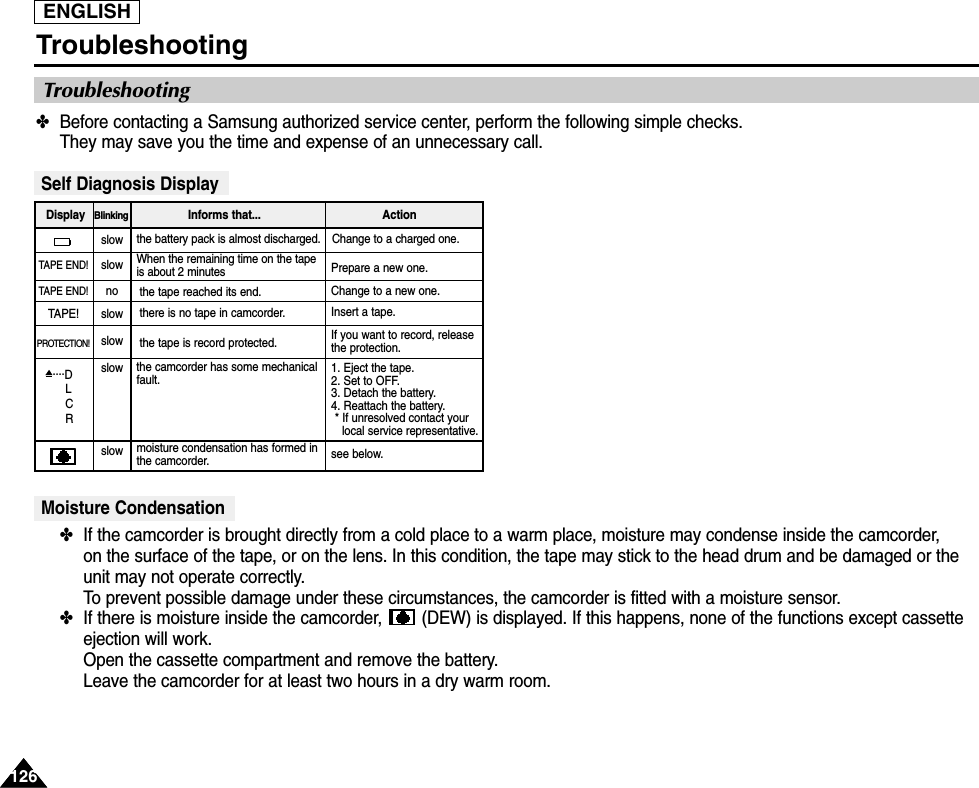
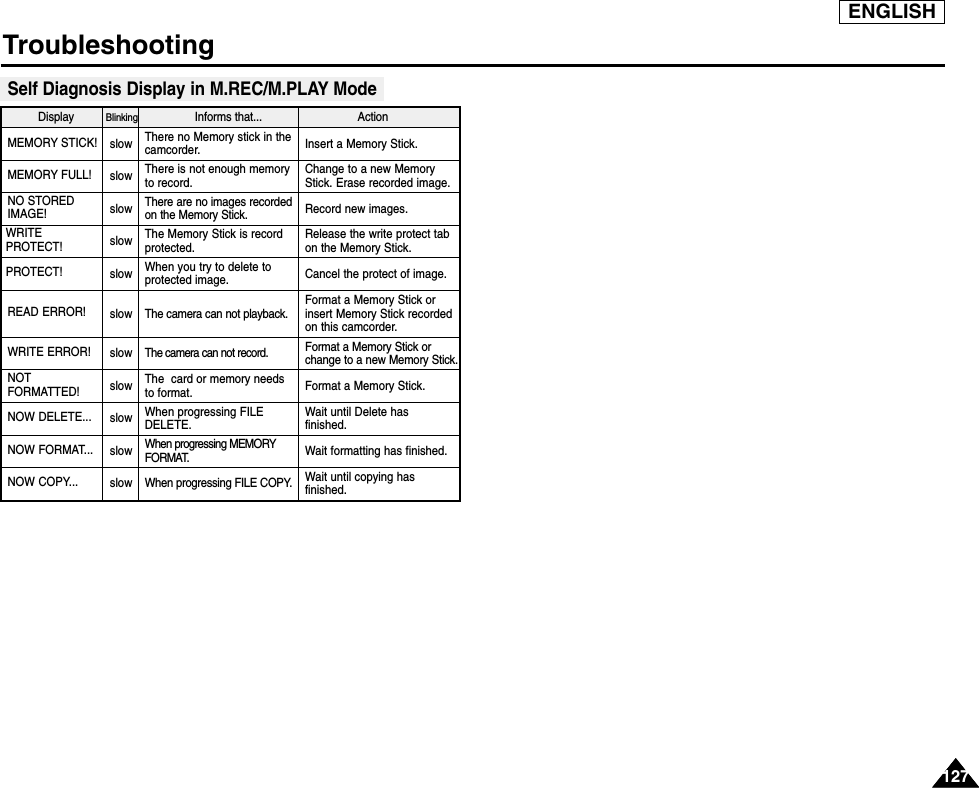
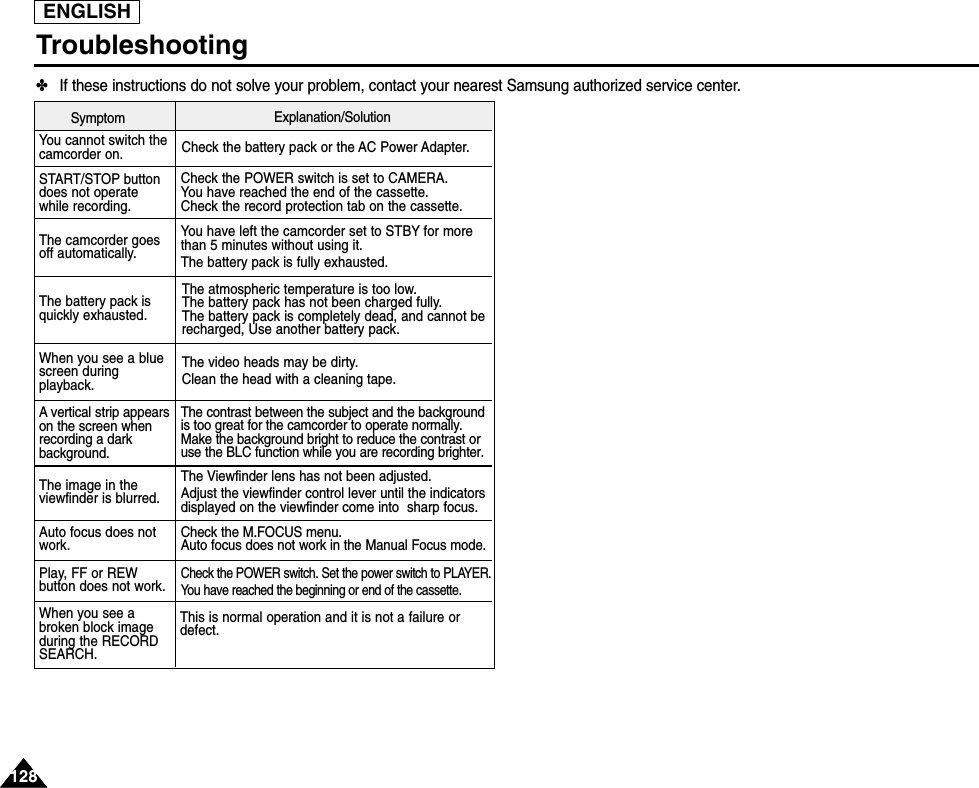
![ENGLISHUsing the CAMCORDER - Advance Recording7373Dubbed Audio Playback1. Insert the dubbed tape and press the MENU button.2. Turn the MENU DIAL to highlight CAMCORDER.3. Press the MENU DIAL to enter the sub-menu.4. Select PLAY SET and press the MENU DIAL.5. Use the MENU DIAL to select AUDIO SELECT from the sub-menu. 6. Press the MENU DIAL to enter the sub-menu.7. Using the MENU DIAL, select the AUDIO playback channel. ■Press the MENU DIAL to confirm the audio playback channel.- SOUND1 : play the original sound.- SOUND2 : play the dubbed sound.- MIX(1+2) : play back with SOUND1 and 2 equally mixed.8. To exit, press the MENU button.9. Press the (PLAY/STILL) button to playback the dubbed tape.NoteWhen you playback added sound (SOUND2 or MIX mode), you may experience some loss of sound quality.TAPE PLAY MODEAUDIO SELECTPLAY SETSOUND[1]SOUND[2]MIX [1+2]CAMCORDER SETRECORD SETPLAY SETTAPE PLAY MODETAPE PLAY MODEINITIALRECORD SETPLAY SETCAMCORDERCAMERAMEMORYVIEWERTAPE PLAY MODECAMCORDER SET PLAY SET PB DSE SELECT PHOTO SEARCH PHOTO COPY AUDIO SELECT SOUND1](https://usermanual.wiki/Samsung-Electronics-Co/GAMMA.Users-Manual-2/User-Guide-326051-Page-4.png)