Samsung Electronics Co GTY3300 Cellular/ PCS WCDMA/ GSM/ EDGE Module User Manual 3
Samsung Electronics Co Ltd Cellular/ PCS WCDMA/ GSM/ EDGE Module 3
UserManual.wiki
>
Samsung Electronics Co
>
GTY3300 User Manual
>
User Manual 3
Contents
1.
Supplemental Users Manual
2.
User Manual 1
3.
User Manual 2
4.
User Manual 3
5.
User Manual 4
6.
User Manual 5
7.
User Manual
User Manual 3
Navigation menu
Upload a User Manual
Namespaces
Wiki Guide
HTML
PDF
Info
Views
User Manual
Discussion / Help
Navigation


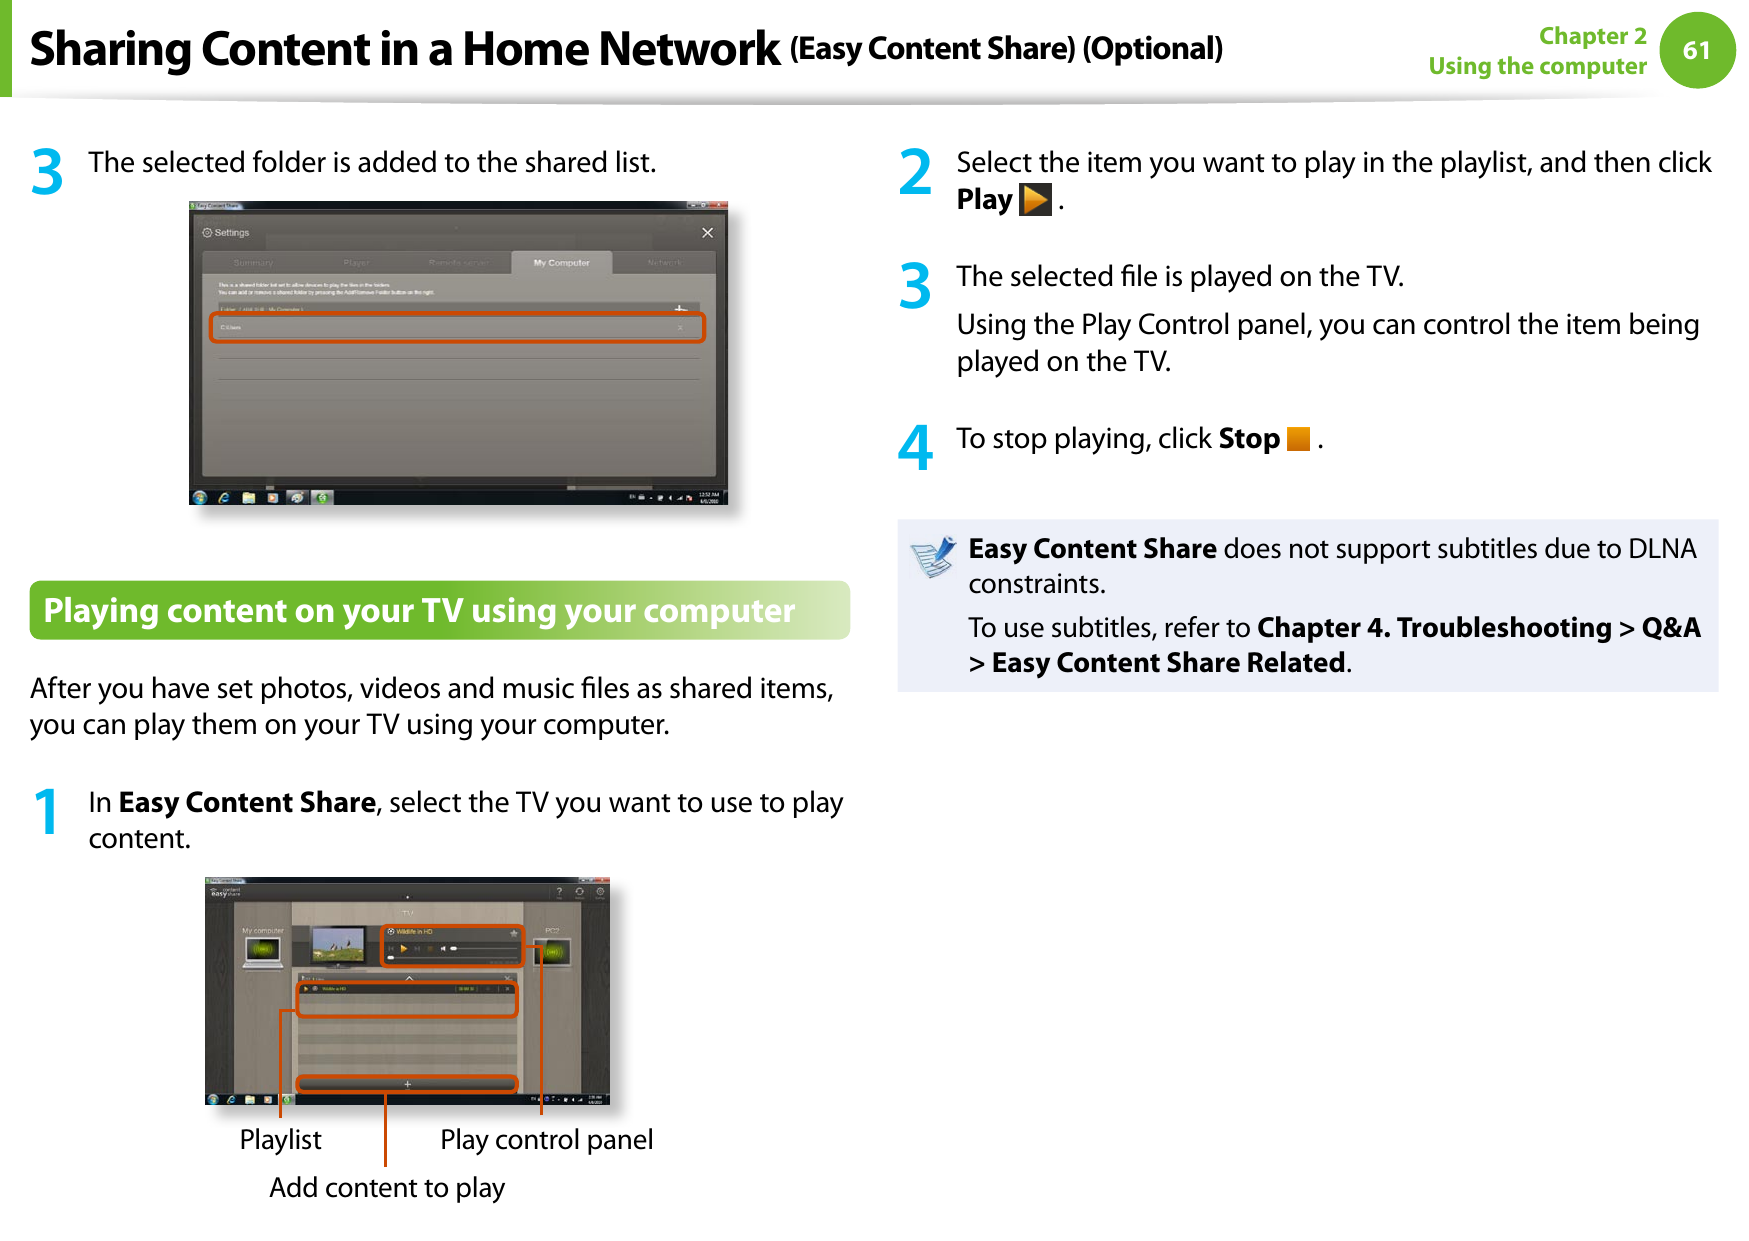
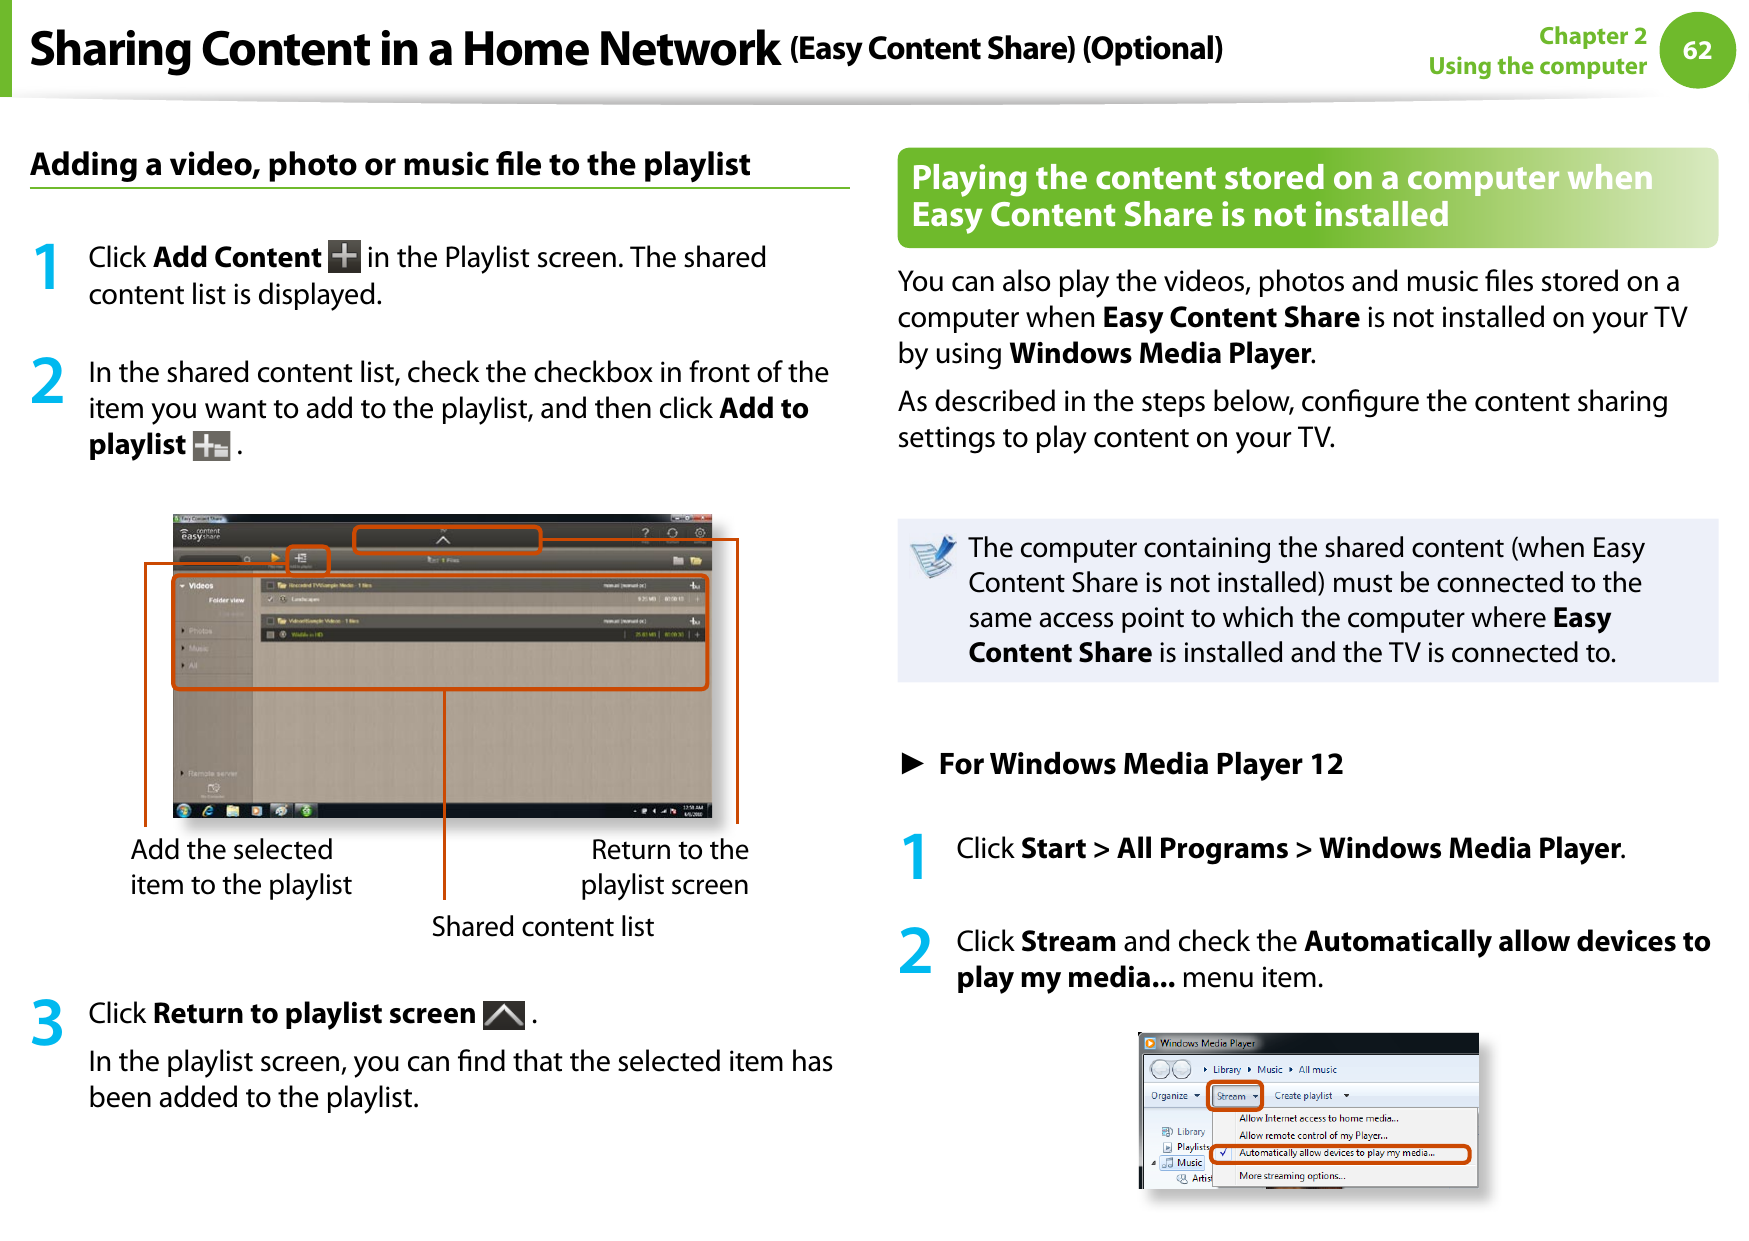
![5859Chapter 2 Using the computerSharing Content in a Home Network (Easy Content Share) (Optional)Easy Content Share is a DLNA application that allows you to play photos, videos and music les on your TV.These descriptions are for Windows 7 and for supported • models only. The Digital Living Network Alliance (DLNA) aligns industry • leaders in the CE, mobile, and PC industries through digital interoperability, and DLNA-certied devices allow users to play videos, photos and music les stored on a computer on a TV. To play content using DLNA technology, both your • computer and TV must be DLNA certied. For information on whether a product supports DLNA, refer to the respective user manuals.To play videos, photos and music les stored on a computer, congure the settings in the order as shown below.1. Conguring the network settings for your computer and TV2. Adding shared content on your computer3. Playing content on your TV using your computerConguring the network settings for your computer and TVTo share content, all shared devices must be connected to the same access point.Congure the network settings by following the steps below.1 Connect your computer and TV to an access point through a wired or wireless LAN connection, as shown in the gure below.[Network connection diagram]2 Congure the IP address settings for your computer and TV.You must check the Obtain an IP address automatically (DHCP) checkbox.](https://usermanual.wiki/Samsung-Electronics-Co/GTY3300.User-Manual-3/User-Guide-1300091-Page-9.png)


![74Chapter 3 Settings and UpgradeChanging the Boot PriorityThis computer is congured to boot from an external-type ODD rst. As an example, the procedures to change the highest boot priority device to the hard disk drive are described below.The screen images in this document may dier from actual product.1 Select the Boot menu in the BIOS Setup.2 Press <Enter> on the Boot Device Priority item.XXXXXXXX3 Press the down key (↓) to move to the AHCI HDD itemand press the F6 key to move up to the top item.Boot Device Priority[Boot priority order]1. AHCI CD : N/A2. AHCI HDD : XXXXXXXXXXXXXXXX3. USB KEY : N/A4. USB CD : XXXXXXXXXXXXXX5. USB FDD : N/A6. USB HDD : N/A7. PCI BEV : N/A8. - PCI SCSI : N/A- USB ZIP : N/A- USB LS120 : N/A- Legacy Network Card- Legacy [Excluded from boot order]4 Press the F10 key to save the settings and exit Setup. The highest boot priority device is now set to the Hard Drive.](https://usermanual.wiki/Samsung-Electronics-Co/GTY3300.User-Manual-3/User-Guide-1300091-Page-24.png)