Samsung Electronics Co HPN5039 50-inch PDP TV Monitor User Manual 3
Samsung Electronics Co Ltd 50-inch PDP TV Monitor Users Manual 3
Contents
- 1. Users Manual 1
- 2. Users Manual 2
- 3. Users Manual 3
Users Manual 3

PLASMA DISPLAY PANEL
Picture Control
Customizing the Picture ................................................................40
Using Automatic Picture Settings ....................................................41
Selecting the Color Tone................................................................42
Viewing the Picture-in-Picture..........................................................43
Changing the Screen Size ............................................................49
Freezing the Picture ......................................................................50
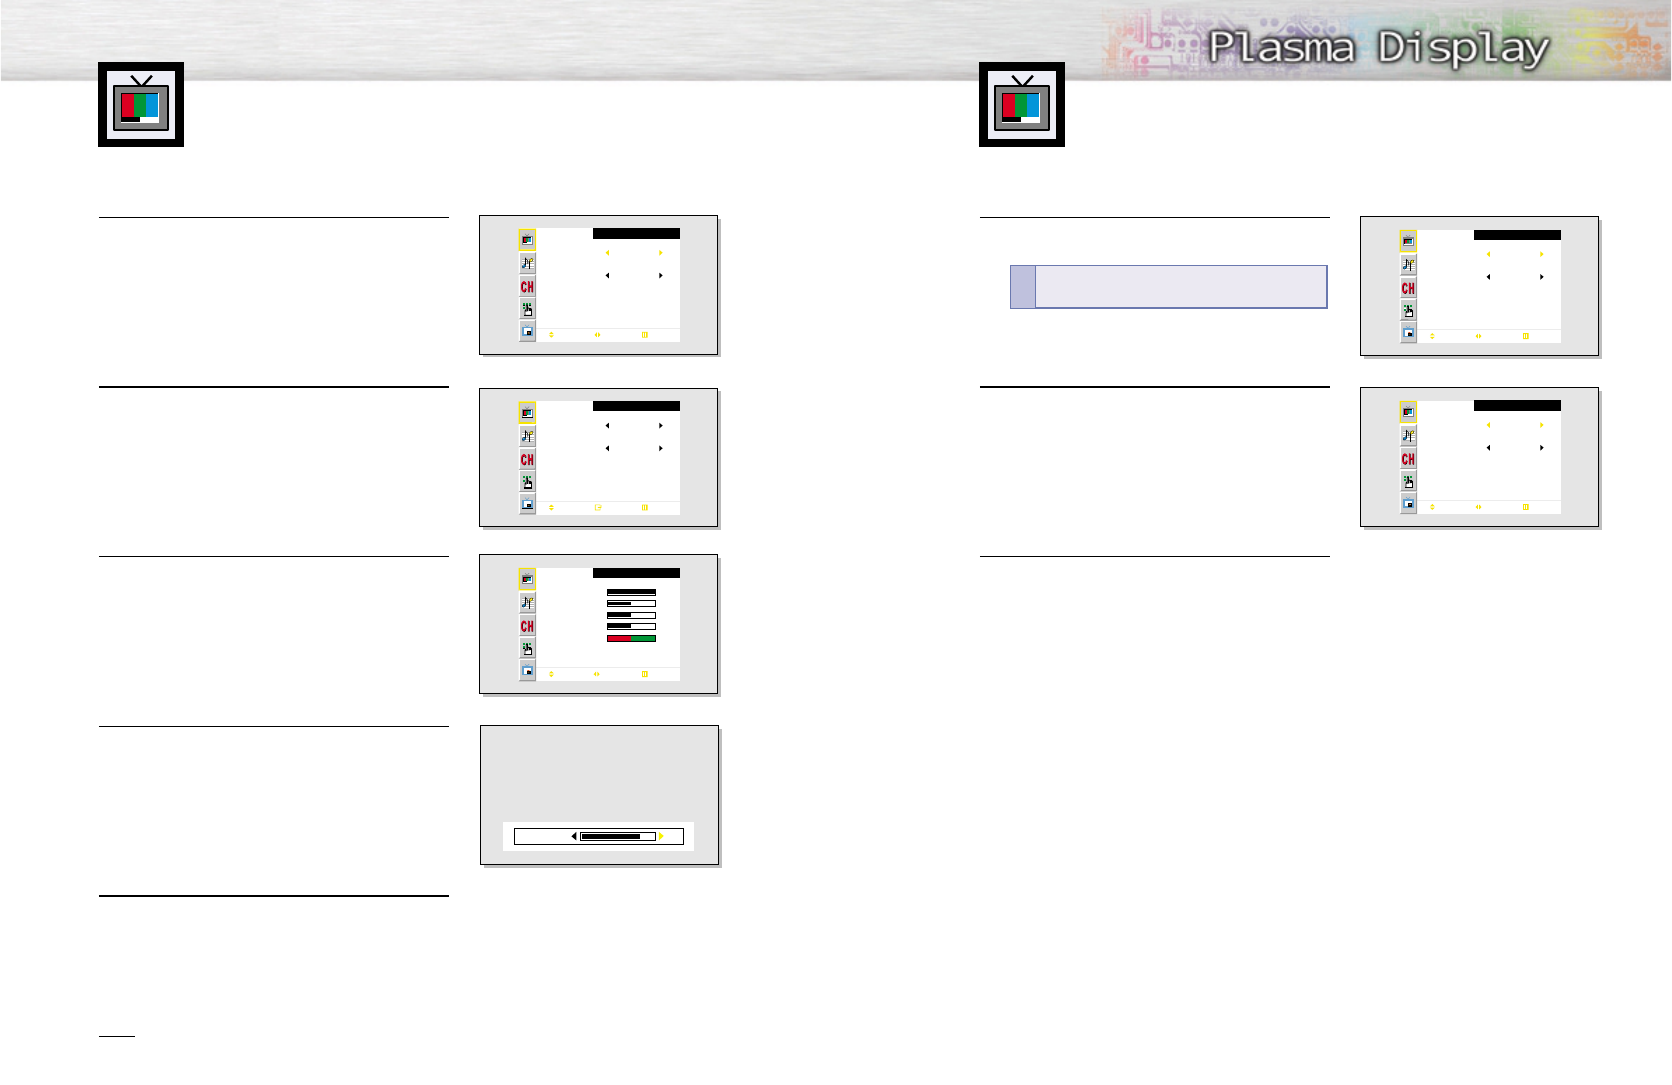
Customizing the Picture
You can use the on-screen menus to change the Contrast, Brightness, Sharpness, Color,
and Tint settings of your PDP.
41
1 Press the Menu button, then press the joystick to
enter.
2 Move the joystick left or right to select “Custom”,
“Dynamic”, “Standard” or “Movie” picture setting.
• You can select “High”, “Middle”, “Low” or
“Custom” in PC/DVI mode.
3 Press the Menu button to exit.
Using Automatic Picture Settings
Your PDP has automatic picture settings that allow you to adjust the video display easily.
Picture
Mode
Adjust
Color Tone
Move Select Exit
Custom
Custom
Picture
Mode
Adjust
Color Tone
Move Select Exit
Dynamic
Custom
40
1 Press the Menu button, then press the joystick to
enter.
2 Move the joystick up or down to select “Adjust”,
then press the joystick to enter.
You will also see the items “Contrast”, “Brightness”,
“Sharpness”, “Color” and “Tint”.
3 Move the joystick up or down to select the item you
wish to change.
4 Move the joystick left or right to change the value of
the item.
5 Press the Menu button to exit.
Note
• In the PC/DVI mode, you can’t adjust the Sharpness, Color and Tint.
• The Tint doesn’t operate in Component(480p, 720p, 1080i) mode.
Picture
Mode
Adjust
Color Tone
Move Select Exit
Custom
Custom
Picture
Mode
Adjust
Color Tone
Move Enter Exit
Custom
Normal
Adjust
Contrast
Brightness
Sharpness
Color
Tint R 50 G 50
Move Adjust Exit
80
50
50
50
82Contrast
Quick way to access the picture setting:
Just
press the “P.Mode” button on the remote control.
!
4342
Selecting the Color Tone
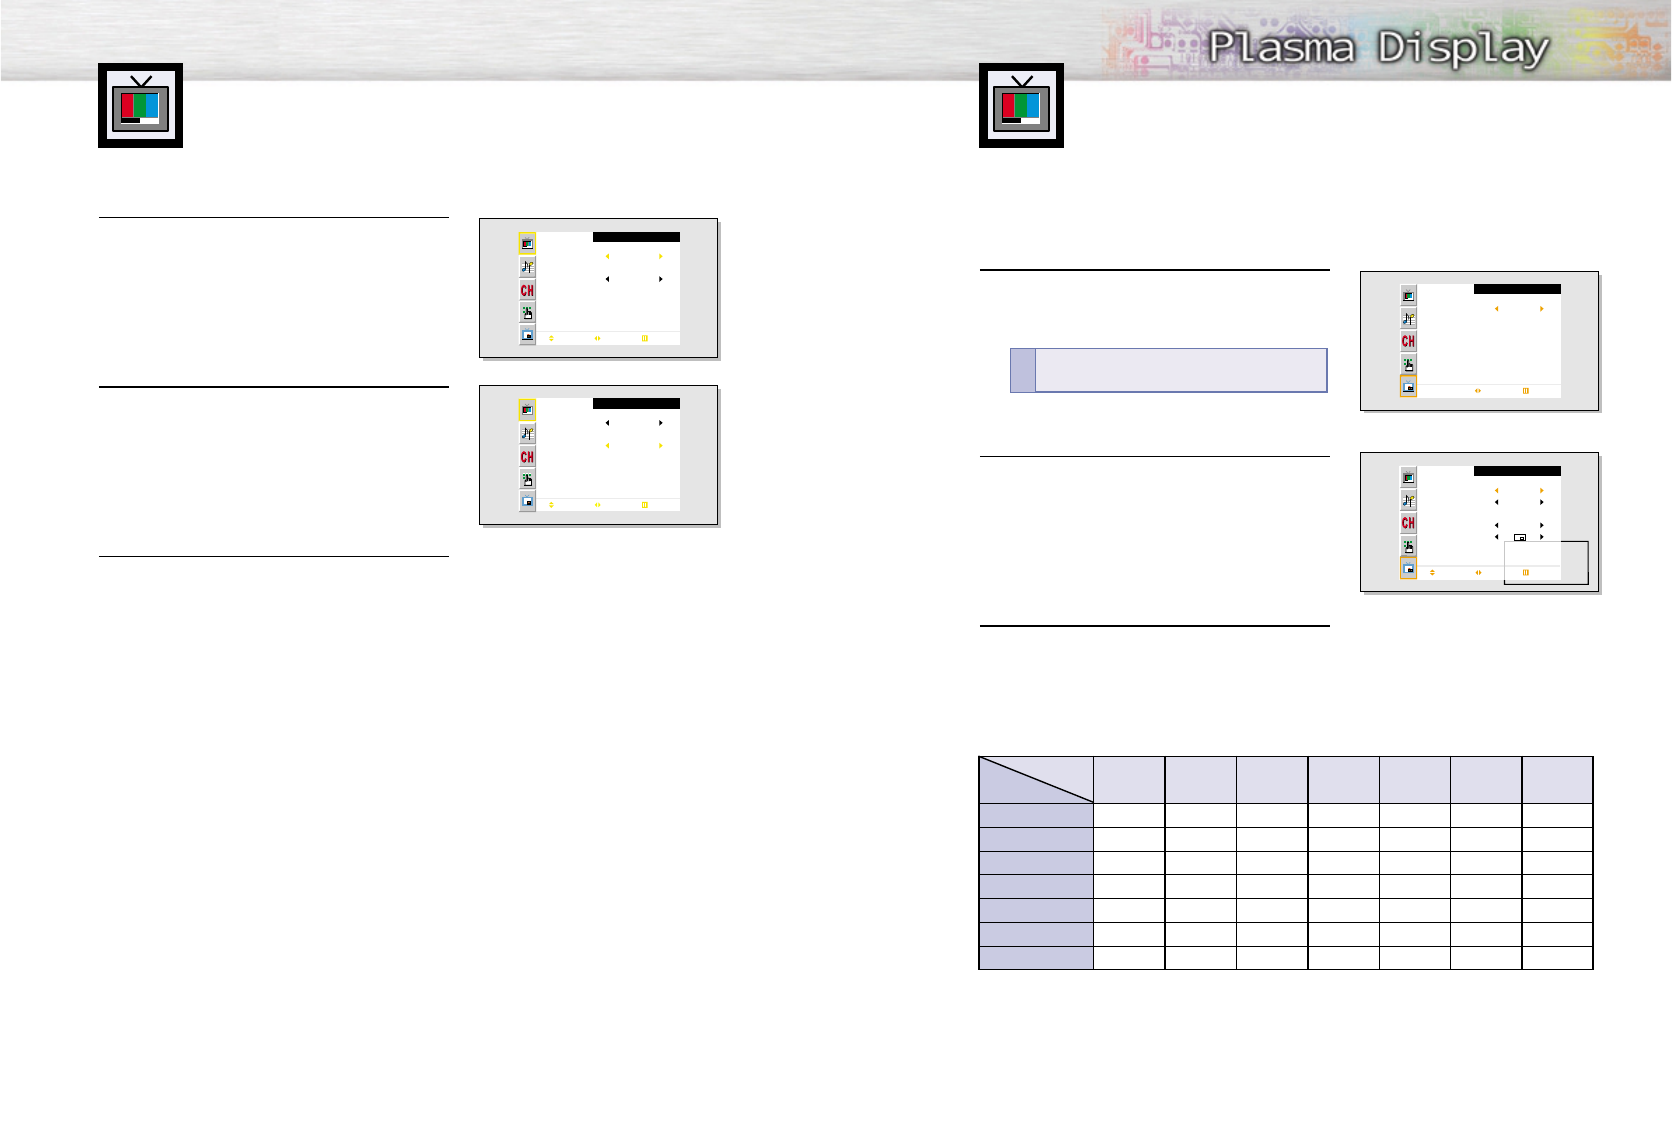
1 Press the Menu button, then press the joystick to
enter.
2 Move the joystick up or down to select “Color
Tone”, then move the joystick left or right to select
“Normal”, “Warm1”, “Warm2”, “Cool2” or
“Cool1”.
• You can select “Custom”, “Color1”, “Color2” or
“Color3” in PC mode.
• You can select “Color1”, “Color2” or “Color3” in
DVI mode.
3 Press the Menu button to exit.
.
Picture
Mode
Adjust
Color Tone
Move Select Exit
Custom
Custom
Picture
Mode
Adjust
Color Tone
Move Select Exit
Custom
Normal
Viewing the Picture-in-Picture
Selecting the PIP Screen
1 Press the Menu button. Move the joystick up or
down to select “PIP”, then press the joystick to
enter.
2 Move the joystick left or right to select “On”.
The PIP image will appear in the corner of the
screen.
3 Press the Menu button to exit.
PIP Settings
PIP
Select
Select Exit
Off
PIP
Select
Source
Swap
Size
Locate
Ant/CATV
Channel
Move Select Exit
On
TV
Large
Ant
Ant 5
Quick way to access the PIP: Just press the
“PIP” button on the remote control.
!
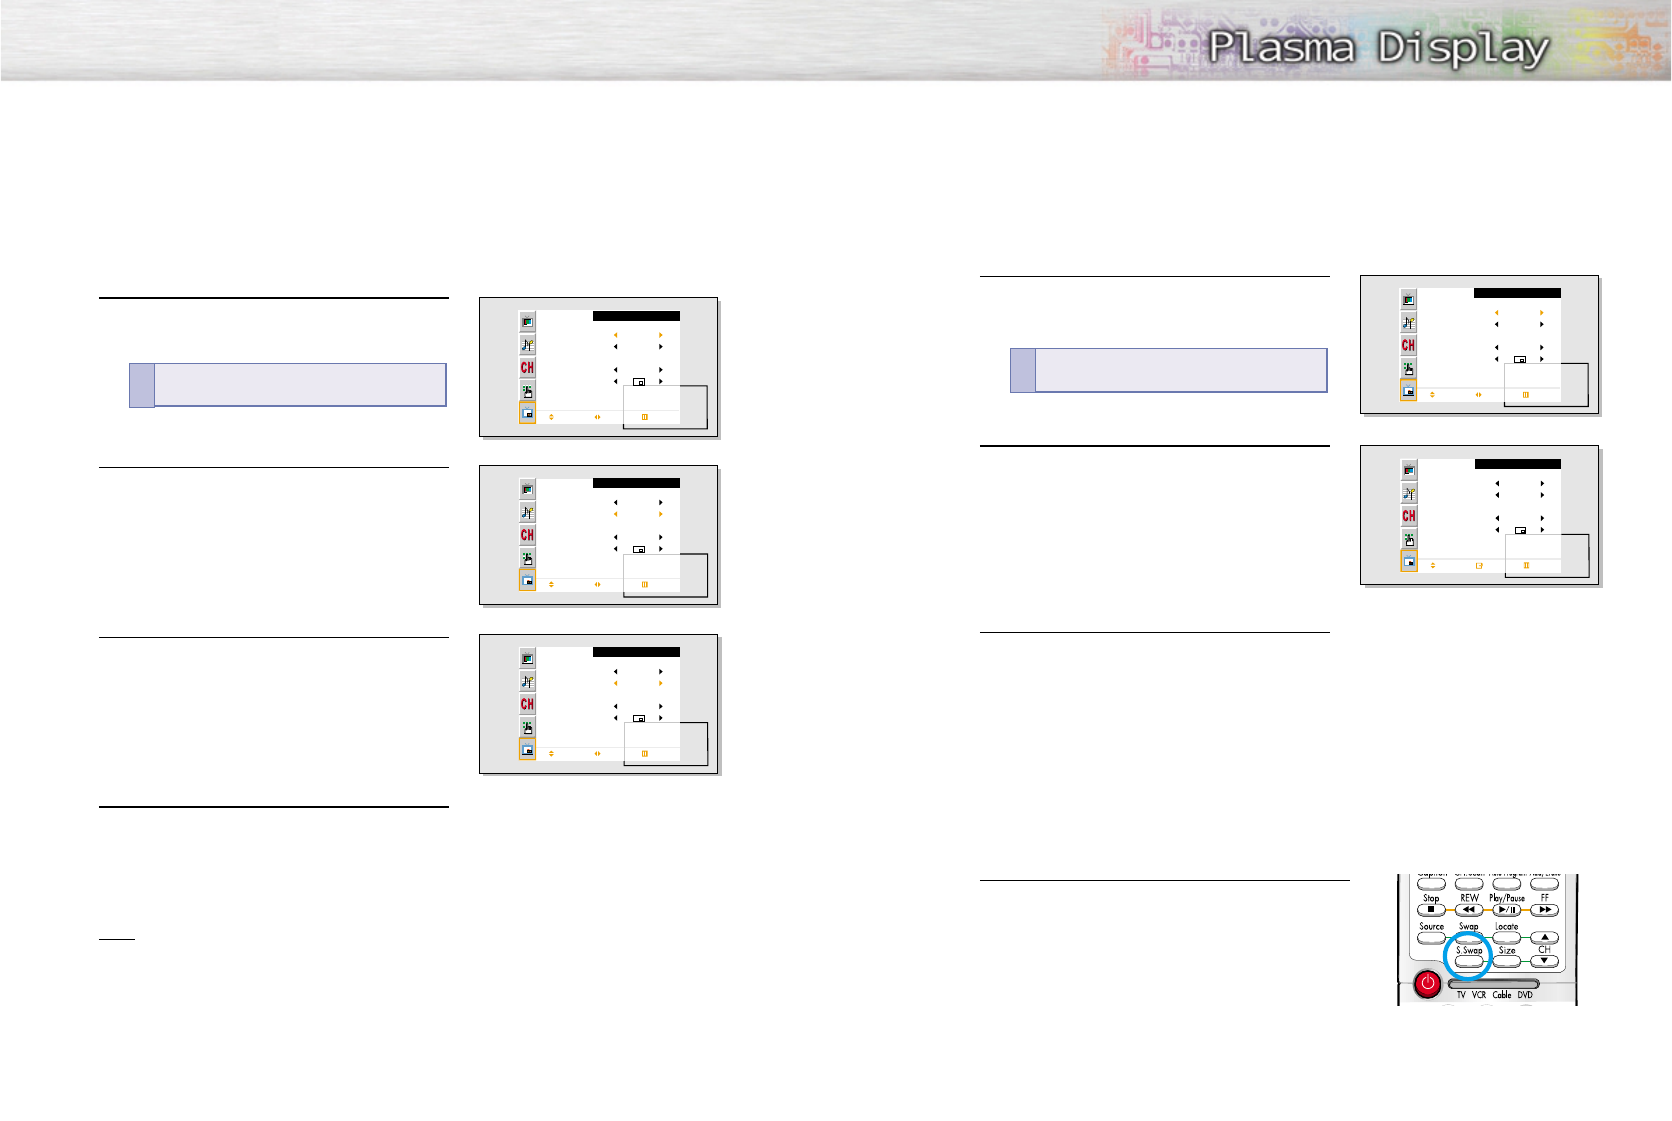
PIP screenMain screen TV Video S-Video Component 1 Component 2 PC DVI
TV
O
O
O
O
O
O
O
O
X
O
O
O
O
O
O
O
X
O
O
O
O
O
O
O
X
X
X
X
O
O
O
X
X
X
X
O
O
O
X
X
X
X
O
O
O
X
X
X
X
Video
S-Video
Component 1
Component 2
PC
DVI
O:
PIP and Swap Operate
X:
PIP doesn’t Operate
4544
Selecting an External Signal
You can use PIP to view a signal from an external source, such as a VCR.
1 Press the Menu button. Move the joystick up or
down to select “PIP”, then press the joystick to
enter.
2 Move the joystick up or down to select “Source”.
3 Move the joystick left or right to cycle through
all of the available signal sources:
“TV”, “Video”, “S-Video”, “Component 1”,
“Component 2”, “PC” and “DVI”.
The signal from these inputs will not appear if you
have not connected any equipment to the PDP’s
input jacks.
4 Press the Menu button to exit.
Note
• The PIP function operates in Wide screen.
• Using Multi-Screen in the Normal, Zoom1 or Zoom2 screen will change the size of the main screen
to Wide screen.
PIP
Select
Source
Swap
Size
Locate
Ant/CATV
Channel
Move Select Exit
On
TV
Large
Ant
Ant 5
PIP
Select
Source
Swap
Size
Locate
Ant/CATV
Channel
Move Select Exit
On
TV
Large
Ant
Ant 5
PIP
Select
Source
Swap
Size
Locate
Move Select Exit
On
Video
Large
Quick way to access the PIP source:
Just press
“Source” button in the cover on the remote control.
!
Swapping the Contents of the PIP Image and Main Image
1 Press the Menu button. Move the joystick up or
down to select “PIP”, then press the joystick to
enter.
2 Move the joystick up or down to select “Swap”,
then press the joystick to enter.
• The image in the PIP window will appear on the
main screen, and vice versa.
3 Press the Menu button to exit.
Selecting the Sound Source
S.Swap
Press the S.Swap button to switch between the Main or Sub
(PIP) audio source.
PIP
Select
Source
Swap
Size
Locate
Ant/CATV
Channel
Move Select Exit
On
TV
Large
Ant
Ant 5
PIP
Select
Source
Swap
Size
Locate
Ant/CATV
Channel
Move Enter Exit
On
TV
Large
Ant
Ant 5
Quick way to access swapping: Just press the
“Swap” button on the remote control.
!
46 47
Changing the Size of the PIP Window
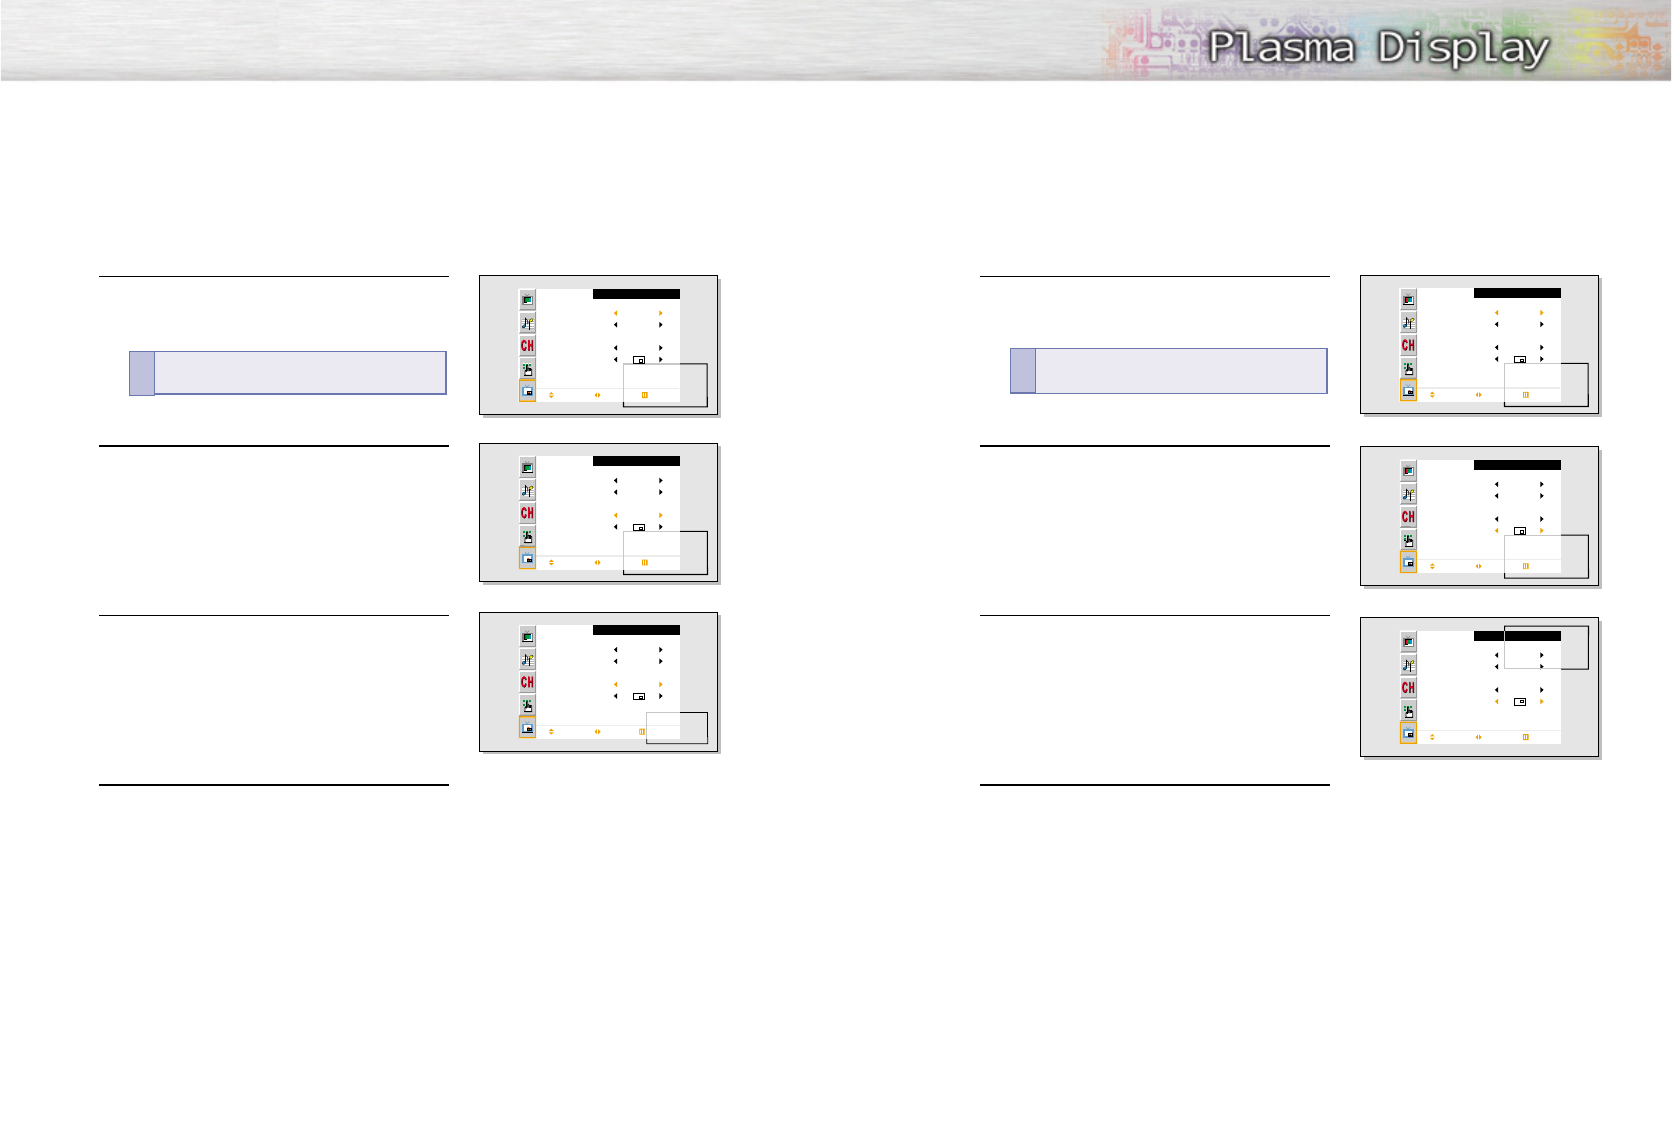
1 Press the Menu button. Move the joystick up or
down to select “PIP”, then press the joystick to
enter.
2 Move the joystick up or down to select “Size”.
3Move the joystick left or right to select “Small”,
“Double” or “Large”.
4 Press the Menu button to exit.
PIP
Select
Source
Swap
Size
Locate
Ant/CATV
Channel
Move Select Exit
On
TV
Large
Ant
Ant 5
PIP
Select
Source
Swap
Size
Locate
Ant/CATV
Channel
Move Select Exit
On
TV
Large
Ant
Ant 5
PIP
Select
Source
Swap
Size
Locate
Ant/CATV
Channel
Move Select Exit
On
TV
Small
Ant
Ant 5
Quick way to access the PIP size:
Just press the
“Size” button in the cover on the remote control.
!
Changing the Location of the PIP Image
1 Press the Menu button. Move the joystick up or
down to select “PIP”, then press the joystick to
enter.
2 Move the joystick up or down to select “Locate”.
3 Move the joystick left or right to move the PIP screen
where you want.
4 Press the Menu button to exit.
PIP
Select
Source
Swap
Size
Locate
Ant/CATV
Channel
Move Select Exit
On
TV
Large
Ant
Ant 5
PIP
Select
Source
Swap
Size
Locate
Ant/CATV
Channel
Move Select Exit
On
TV
Large
Ant
Ant 5
PIP
Select
Source
Swap
Size
Locate
Ant/CATV
Channel
Move Select Exit
On
TV
Large
Ant
Ant 5
Quick way to access the PIP location: Just press
the “Locate” button on the remote control.
!
49
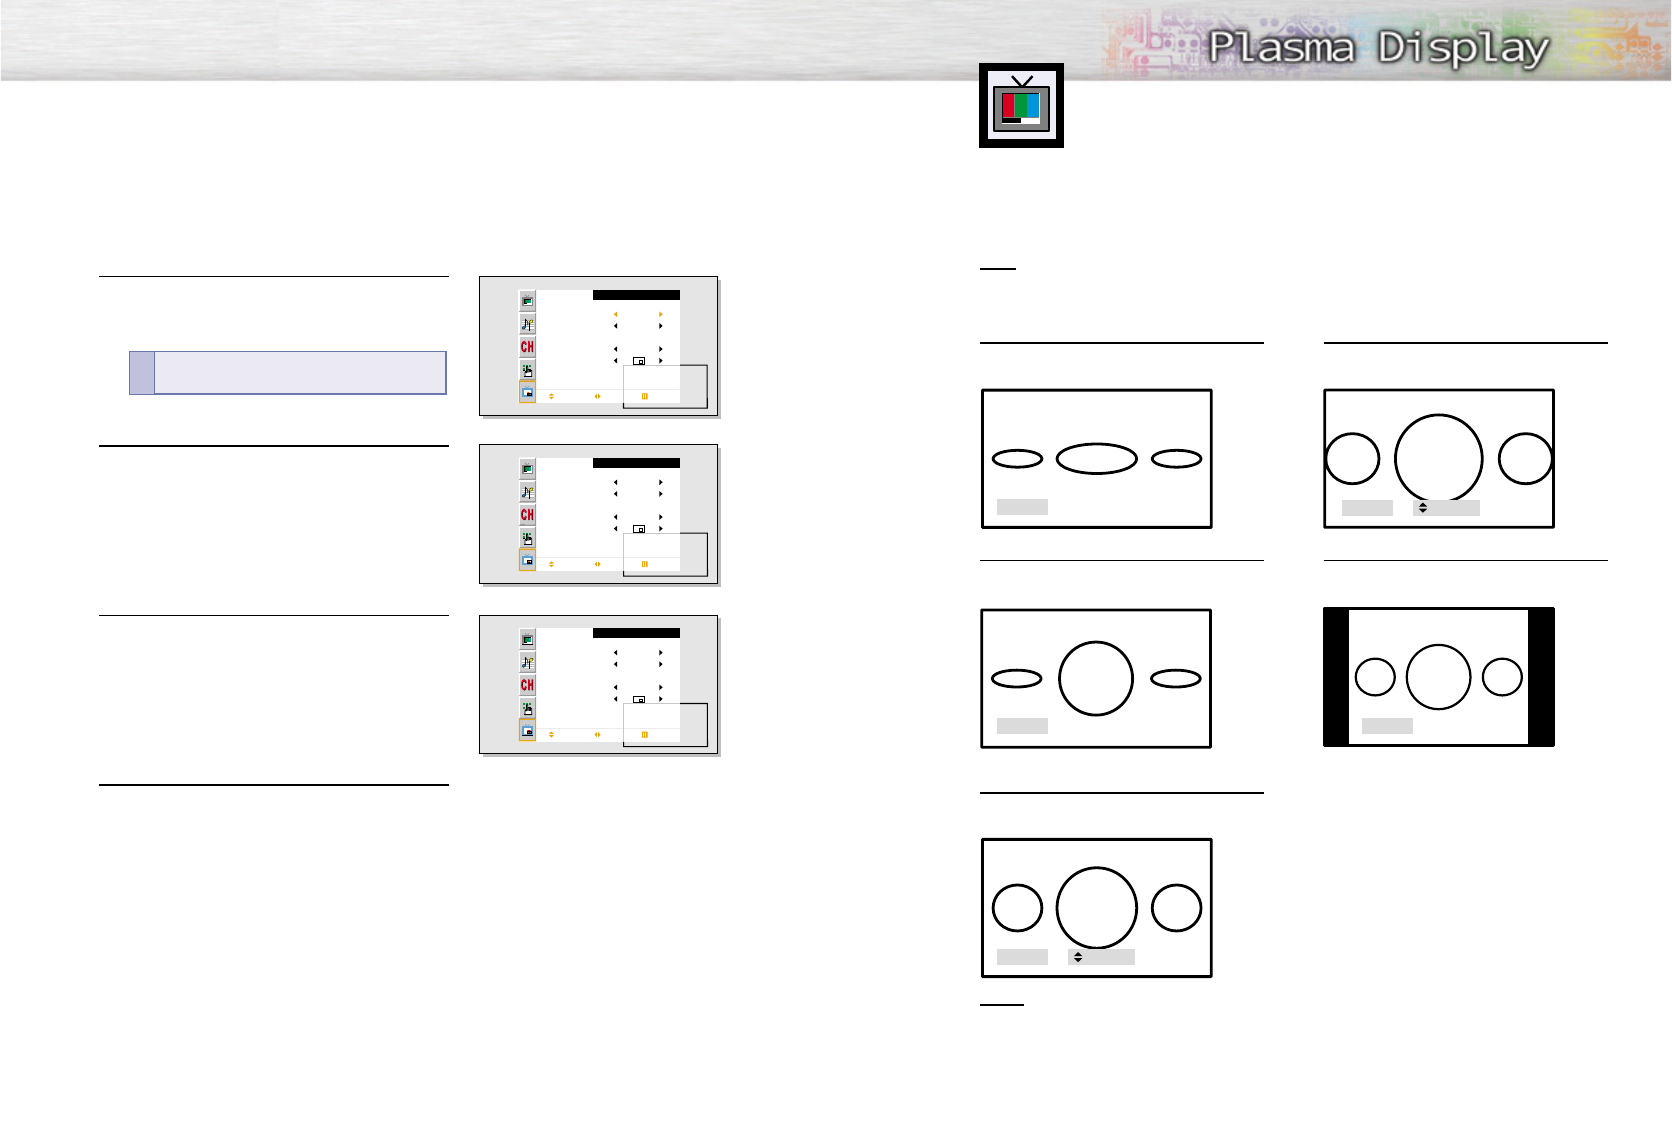
Changing the Screen Size
48
W
Wide
ide
Sets the picture to 16:9 wide mode.
Panorama
Converts regular 4:3 aspect ratio screen to
wide screen.
Zoom1
The screen size when Wide screen is vertically
enlarged
Zoom2
The screen size when the Zoom1 screen is
vertically enlarged.
Normal (4:3)
Sets the picture to 4:3 normal mode.
Notes
• In TV, VIDEO, S-VIDEO and Component(480i) modes, all screen modes can be selected.
(Wide ➝ Panorama ➝ Zoom1 ➝ Zoom2 ➝ Normal).
• In PC/DVI mode, only Wide & Normal modes can be selected.
• In Component(480p, 720p. 1080i) modes, Panorama mode can’t be selected.
• In Component(480p, 720p. 1080i) modes, you can move the picture on screen pressing
the Up▲or Down▼button. (All screen modes)
• Changing the screen size to Normal, Zoom1 or Zoom2 during PIP mode will cause the PIP
window to disappear.
When you press the Aspect button on the remote control, the PDP’s screen mode should appear in
sequence. The screen displays in this order: Wide, Panorama, Zoom1, Zoom2, Normal.
Note
• If you watch a still image or the Normal (4:3) mode for a long time (over 2 hours) on image may be
burned on to the screen, view the monitor in Wide or Panorama mode as much as possible.
Changing the PIP Channel
1 Press the Menu button. Move the joystick up or
down to select “PIP”, then press the joystick to
enter.
2 Move the joystick up or down to select “Ant/CATV”.
Move the joystick left or right to select “Ant”, “STD”,
“HRD” or “IRC”.
3 Move the joystick up or down to select “Channel”.
Move the joystick left or right to change the channel
that appears in the PIP window. You can also press
PIP CH▲, ▼buttons on the remote control.
4 Press the Menu button to exit.
PIP
Select
Source
Swap
Size
Locate
Ant/CATV
Channel
Move Select Exit
On
TV
Large
Ant
Ant 5
PIP
Select
Source
Swap
Size
Locate
Ant/CATV
Channel
Move Select Exit
On
TV
Large
STD
STD 5
PIP
Select
Source
Swap
Size
Locate
Ant/CATV
Channel
Move Select Exit
On
TV
Large
STD
STD 9
Wide
Panorama
Normal
Zoom1 Up/Down
Zoom2 Up/Down
Quick way to change the PIP channel: Just press the
“CH▲,▼” buttons under the cover of the remote control.
!
50
PLASMA DISPLAY PANEL
Sound Control
Customizing the Sound ................................................................52
Using Automatic Sound Settings ....................................................53
Choosing a Multi-Channel Sound (MTS)Soundtrack ..........................54
Using the Auto Volume..................................................................55
Using Dolby Virtual ......................................................................56
Using a Subwoofer ......................................................................57
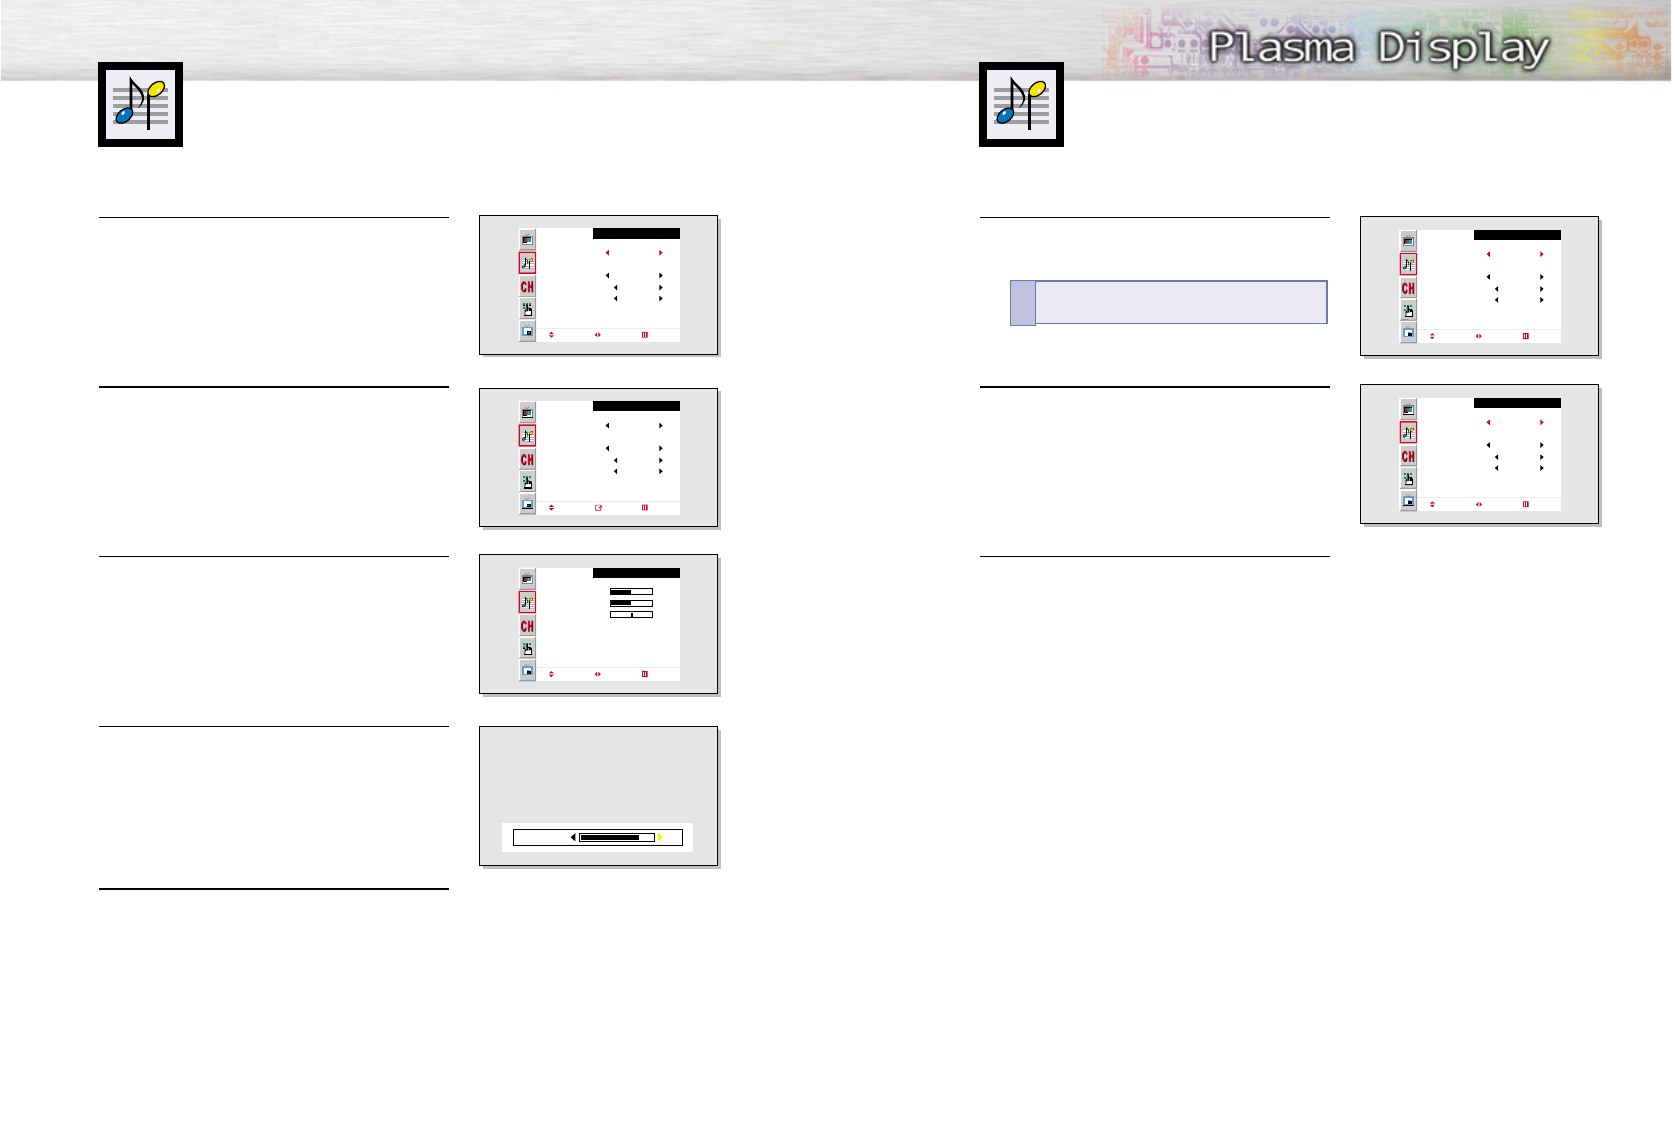
Freezing the Picture
Still
Press the Still button on the remote control to freeze a
moving picture. Press again to cancel.
53
Customizing the Sound
52
1 Press the Menu button. Move the joystick up or
down to select “Sound”, then press the joystick
to enter.
2 Move the joystick left or right to select “Custom”,
“Standard”, “Music”, “Movie” or “Speech” sound
setting.
3 Press the Menu button to exit.
Using Automatic Sound Settings
Sound
Mode
Adjust
MTS
Auto Volume
Dolby Virtual
Woofer
Move Select Exit
Custom
Mono
Off
Off
Sound
Mode
Adjust
MTS
Auto Volume
Dolby Virtual
Woofer
Move Select Exit
Music
Off
Off
1 Press the Menu button. Move the joystick up or
down to select “Sound”, then press the joystick
to enter.
2 Move the joystick up or down to select “Adjust”,
then press the joystick to enter.
You will also see the items “Bass”, “Treble” and
“Balance”.
3Move the joystick up or down to select the item you
wish to change.
4 Move the joystick left or right to change the value of
the item.
5 Press the Menu button to exit.
Sound
Mode
Adjust
MTS
Auto Volume
Dolby Virtual
Woofer
Move Select Exit
Custom
Mono
Off
Off
Sound
Mode
Adjust
MTS
Auto Volume
Dolby Virtual
Woofer
Move Enter Exit
Custom
Mono
Off
Off
Adjust
Bass
Treble
Balance
Move Adjust Exit
50
50
R 50
L 50
82Bass
Quick way to access the sound setting:
Just
press the “S.Mode” button on the remote control.
!
55
Choosing a Multi-Channel Sound (MTS)
Soundtrack
Depending on the particular program being broadcast, you can listen to stereo, mono,
or a Separate Audio Program. (SAP audio is usually a foreign-language translation.
Sometimes SAP has unrelated information like news or weather.)
54
1 Press the Menu button. Move the joystick up or
down to select “Sound”, then press the joystick
to enter.
2 Move the joystick up or down to select “MTS”.
3 Move the joystick left or right to select “Mono”,
“Stereo” or “SAP”.
4 Press the Menu button to exit.
Sound
Mode
Adjust
MTS
Auto Volume
Dolby Virtual
Woofer
Move Select Exit
Custom
Mono
Off
Off
Sound
Mode
Adjust
MTS
Auto Volume
Dolby Virtual
Woofer
Move Select Exit
Standard
Mono
Off
Off
Sound
Mode
Adjust
MTS
Auto Volume
Dolby Virtual
Woofer
Move Select Exit
Standard
Stereo
Off
Off
Quick way to access the MTS menu: Just press
the “MTS” button on the remote control.
!
Using the Auto Volume
Each broadcasting station has its own signal conditions, which can make it necessary to
adjust the volume every time the channel is changed. “Auto volume” lets you automatically
adjust the volume of the desired channel by lowering the sound output when the modula-
tion signal is high or by raising the sound output when the modulation signal is low.
1 Press the Menu button. Move the joystick up or
down to select “Sound”, then press the joystick
to enter.
2 Move the joystick up or down to select “Auto
Volume”.
3 Move the joystick right to select “On”.
4 Press the Menu button to exit.
Sound
Mode
Adjust
MTS
Auto Volume
Dolby Virtual
Woofer
Move Select Exit
Custom
Mono
Off
Off
Sound
Mode
Adjust
MTS
Auto Volume
Dolby Virtual
Woofer
Move Select Exit
Standard
Mono
Off
Off
Sound
Mode
Adjust
MTS
Auto Volume
Dolby Virtual
Woofer
Move Select Exit
Standard
Mono
On
Off
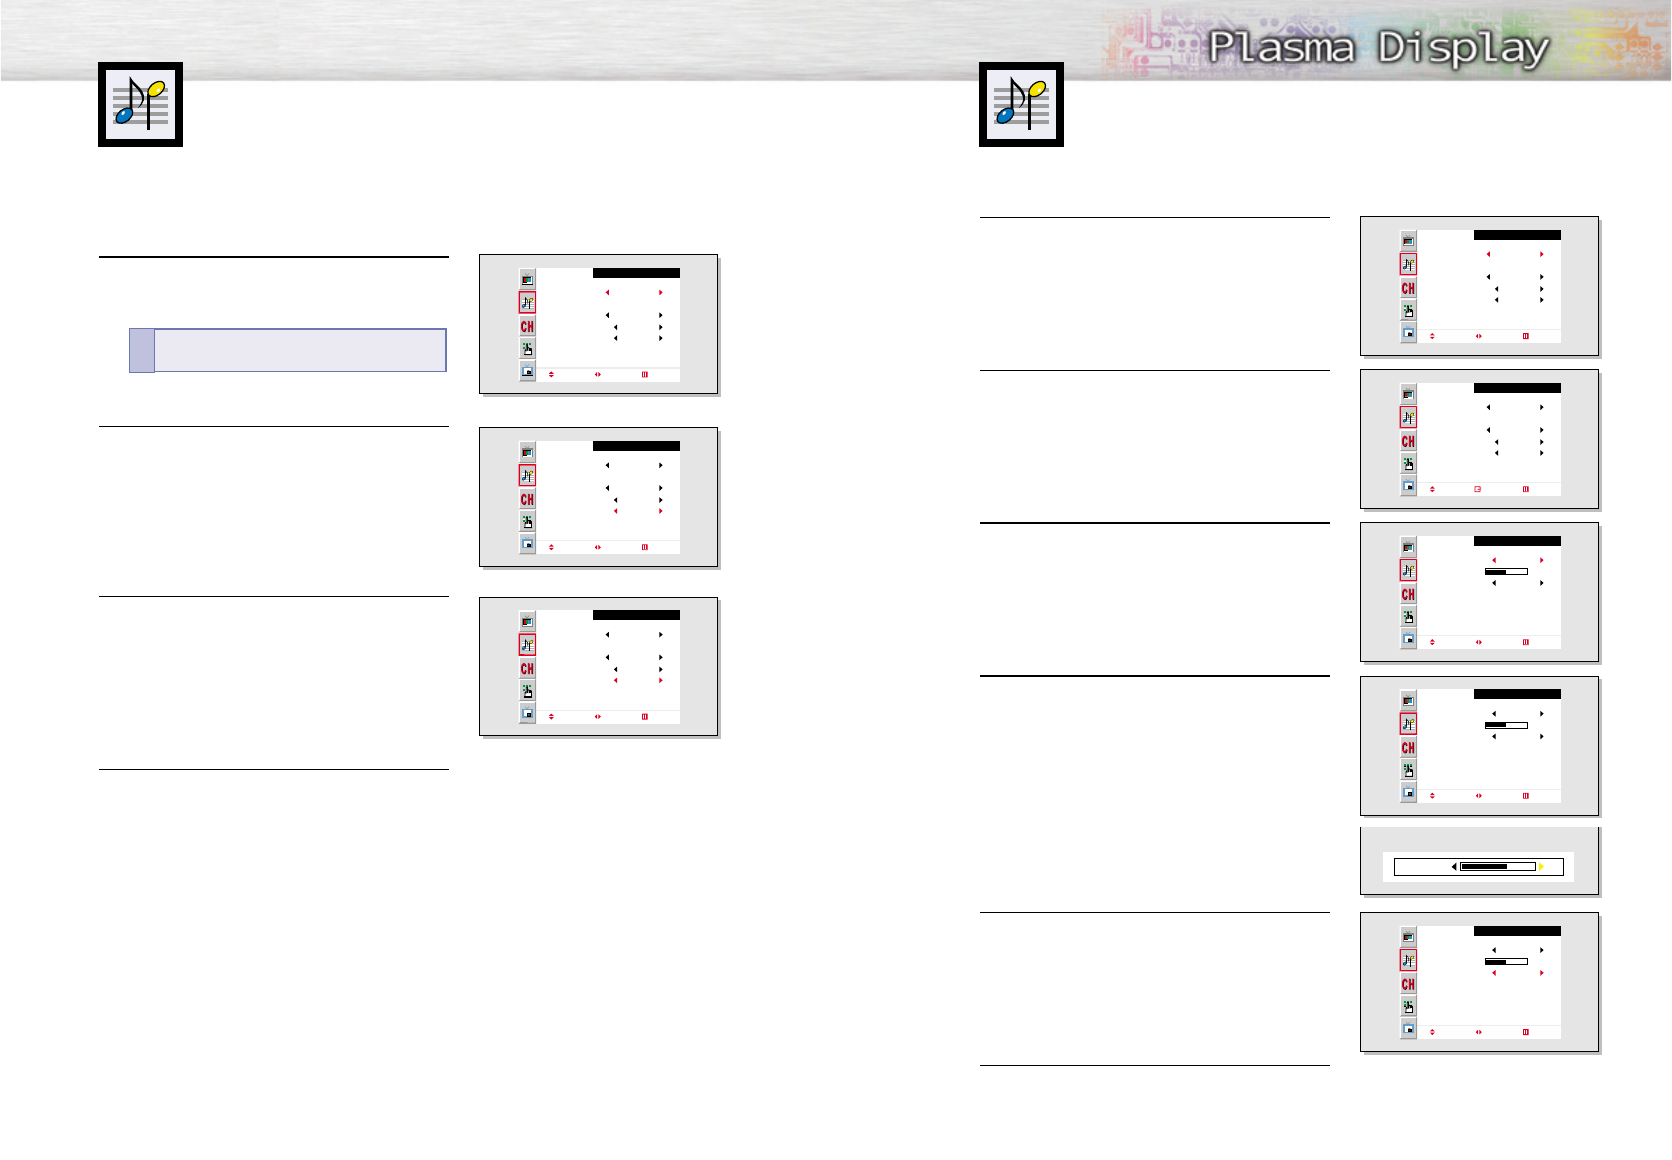
• Choose Stereo
Stereo for channels that are broadcasting in stereo.
• Choose Mono
Mono for channels that are broadcasting in mono, or if you are having difficulty receiving
a stereo signal.
• Choose SAP
SAP to listen to the Separate Audio Program, which is usually a foreign-language translation.
Note
• The MTS function operates in TV mode only.
Using Dolby Virtual
This feature allows the PDP’s optional L/R speakers to provide a Home Theater-like Dolby
effect. The center and surround sounds are mixed into the L/R speakers.
Using a Subwoofer
56 57
1 Press the Menu button. Move the joystick up or
down to select “Sound”, then press the joystick
to enter.
2 Move the joystick up or down to select “Woofer”,
then press the joystick to enter.
3 Move the joystick left or right to select “On”.
4Move the joystick up or down to select “Volume”,
then move the joystick left or right to adjust the
value of the item.
This sets the volume for the subwoofer.
5 Move the joystick up or down to select “Cutoff
Freq.”, then move the joystick left or right to adjust
the value of the item.
This sets the cutoff frequency for the subwoofer.
For example, if you set the cutoff frequency at
130Hz, the subwoofer will reproduce frequencies
of 130Hz and lower.
6 Press the Menu button to exit.
Sound
Mode
Adjust
MTS
Auto Volume
Dolby Virtual
Woofer
Move Select Exit
Custom
Mono
Off
Off
Sound
Mode
Adjust
MTS
Auto Volume
Dolby Virtual
Woofer
Move Enter Exit
Standard
Mono
Off
Off
Woofer
Woofer
Volume
Cutoff Freq.
Move Select Exit
On
50
120Hz
Woofer
Woofer
Volume
Cutoff Freq.
Move Adjust Exit
On
50
120Hz
65Volume
Woofer
Woofer
Volume
Cutoff Freq.
Move Adjust Exit
On
50
130Hz
1 Press the Menu button. Move the joystick up or
down to select “Sound”, then press the joystick
to enter.
2 Move the joystick up or down to select “
Dolby
Virtual
”.
3 Move the joystick left or right to select “On”.
4 Press the Menu button to exit.
Sound
Mode
Adjust
MTS
Auto Volume
Dolby Virtual
Woofer
Move Select Exit
Custom
Mono
Off
Off
Sound
Mode
Adjust
MTS
Auto Volume
Dolby Virtual
Woofer
Move Select Exit
Standard
Mono
Off
Off
Sound
Mode
Adjust
MTS
Auto Volume
Dolby Virtual
Woofer
Move Select Exit
Standard
Mono
Off
On
Quick way to access the Dolby Virtual: Just press
the “Dolby Virtual” button on the remote control.
!

PLASMA DISPLAY PANEL
Channel Control
Fine Tuning Channels....................................................................60
LNA (Low Noise Amplifier)............................................................61
61
Fine Tuning Channels
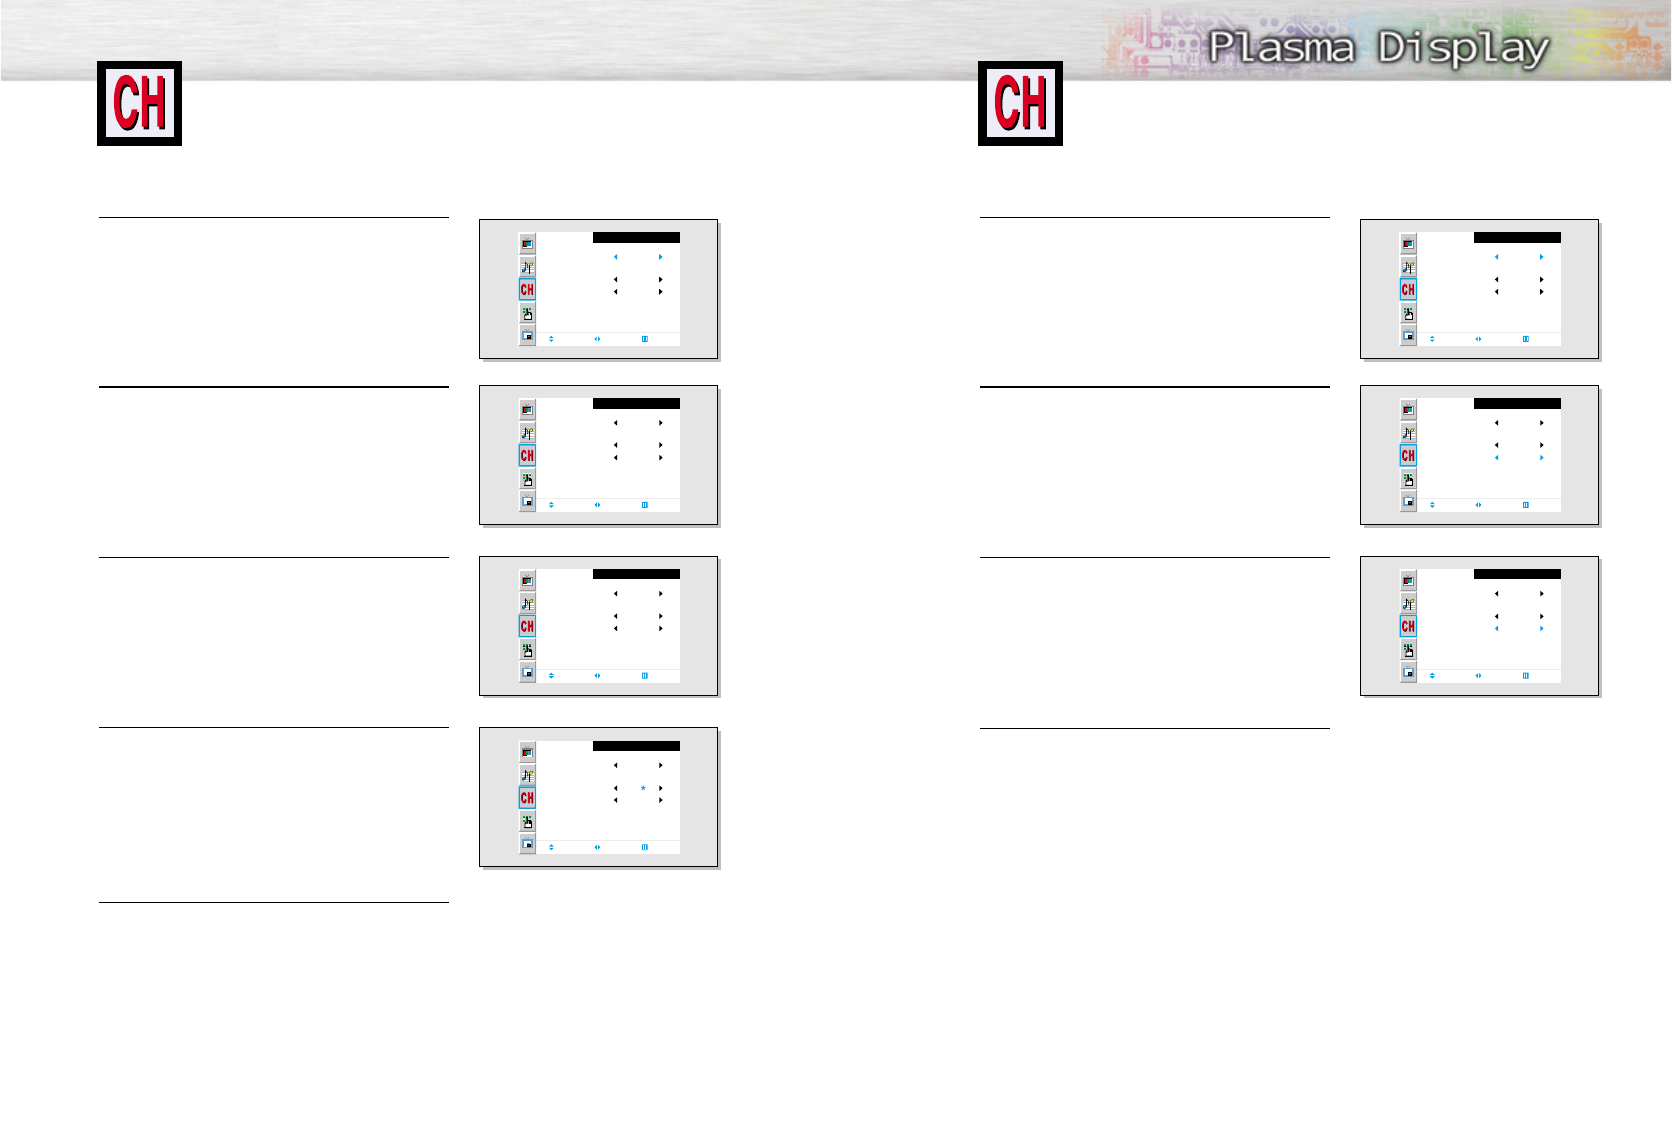
Use fine tuning to manually adjust a particular channel for optimal reception.
60
1 Press the Menu button. Move the joystick up or
down to select “Channel”, then press the joystick to
enter.
2 Move the joystick up or down to select “Fine Tune”.
3 Move the joystick left or right to adjust the fine
tuning.
4To store the fine tuning setting in the TV’s memory,
move the joystick up. (A star icon<*>will appear.)
To reset the fine tuning to “0”, move the joystick
down.
5 Press the Menu button to exit.
Channel
Ant/ CATV
Auto Program
Fine Tune
LNA
Move Select Exit
Ant
Off
0
Channel
Air / CATV
Auto Program
Fine Tune
LNA
Move Adjust Exit
Air
Off
0
Channel
Air / CATV
Auto Program
Fine Tune
LNA
Add/Erase Adjust Exit
Air
Off
+3
Channel
Air / CATV
Auto Program
Fine Tune
LNA
Add/Erase Adjust Exit
Air
Off
+3
LNA (Low Noise Amplifier)
If the TV is operating in a weak-signal area, sometimes the LNA function can improve
the reception (a low-noise preamplifier boosts the incoming signal).
1 Press the Menu button. Move the joystick up or
down to select “Channel”, then press the joystick to
enter.
2 Move the joystick up or down to select “LNA”.
3Move the joystick left or right to select LNA “On.”
•Moving the joystick left or right will alternate
between “On” and “Off.”
4 Press the Menu button to exit.
Channel
Ant/ CATV
Auto Program
Fine Tune
LNA
Move Select Exit
Ant
Off
0
Channel
Air / CATV
Auto Program
Fine Tune
LNA
Move Select Exit
Air
Off
0
Channel
Air / CATV
Auto Program
Fine Tune
LNA
Move Select Exit
Air
On
0

PLASMA DISPLAY PANEL
Connecting a PC and Operation
Connecting to a PC......................................................................64
Adjusting the PC Screen................................................................68
Changing the Position of the Image................................................69
Changing the Size of the Image ....................................................70
Information..................................................................................71
Picture Quality Adjustment ............................................................72
65
Connecting to a PC
Connection to a Macintosh PC may require an adaptor that fits the PC terminal.
64
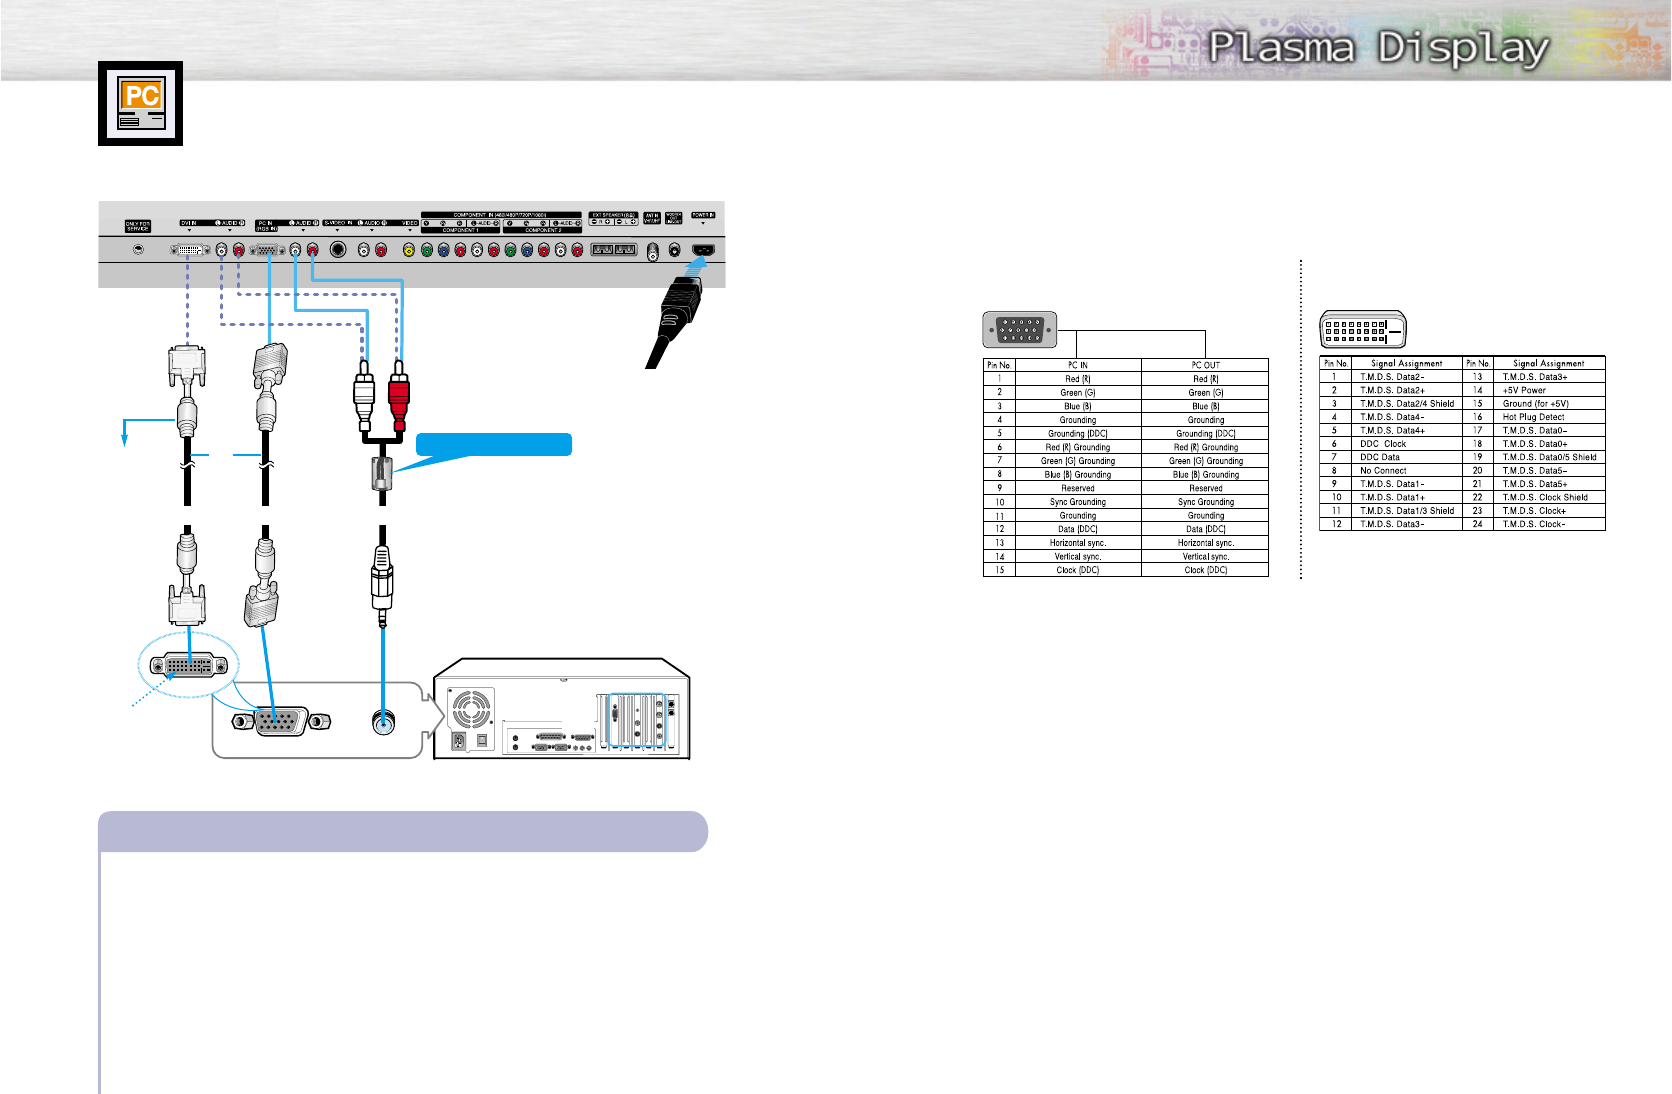
Connect a PC (15pin) cable between the Video Output jack(or DVI jack) on the PC and the
RGB IN(or DVI IN) Input jack (15p D-SUB) on the PDP.
Connect a Audio cable between the Audio (RGB or DVI) on the PC and the Audio L/R (RGB
or DVI) input jacks on the PDP.
To watch the PC screen:
1. Turn on your PDP, and press the Source button on the remote control.
2. Move the joystick up or down to select the “PC”, then press the joystick to enter.
3. Turn on PC and check for PC system requirements. (Refer to pages 66 and 67
for PC system requirements.)
3. Adjust the PC screen. (Refer to pages 68 and 74.)
Connecting a PC to the PDP
Audio CableVideo CableDVI Cable
Power Plug
1
2
Pin Configuration
D-Sub Cable
DVI-D Cable (Digital-Only Connector)
• 15Pin Signal Cable (based on protruded pin)
Setting up Your PDP (Plug and Play)
Our adoption of the new VESAPlug and Play solution eliminates complicated and time consuming
setup. It allows you to install your monitor in a Plug and Play compatible system, without the usual
setup hassles and confusion. Your PC system can easily identify and configure itself for use with your
display. This monitor automatically tells the PC system its Extended Display Identification data (EDID)
using Display Data Channel (DDC) protocols.
DVI jack
(The actual config-
uration on your PC
may be different,
depending on the
model.)
PDP
PC
or
Use the DVI-D
connection cable.
(sold separately)
Ferrite Cores
(3301-001110)
6766
How to Set up Your PC Software (Windows only)
The Windows display-settings for a typical computer are shown below. However, the actual screens
on your PC will probably be different, depending upon your particular version of Windows and your
particular video card. But even if your actual screens look different, the same, basic set-up information
will apply in almost all cases. (If not, contact your computer manufacturer or Samsung Dealer.)
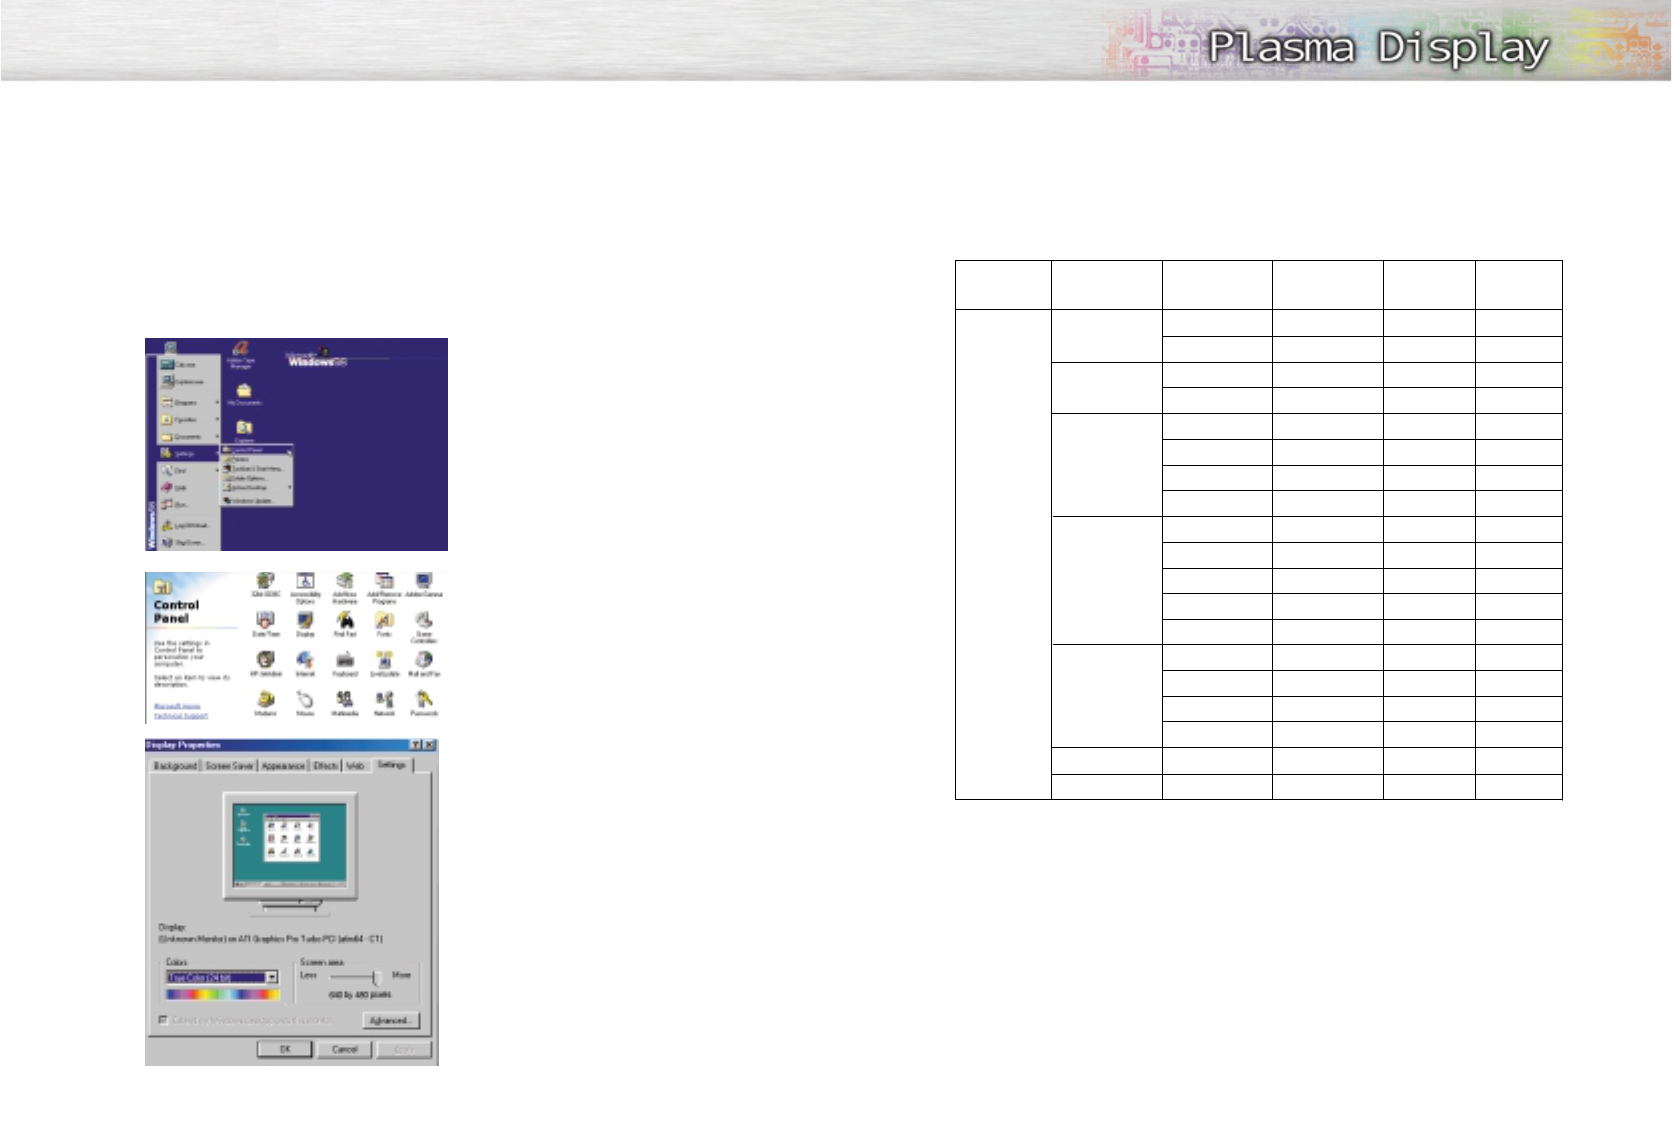
On the windows screen, select in the following
sequence : Start ➝ Settings ➝ Control Panel.
When the control panel screen appears, click on
“Display” and a display dialog-box will appear.
Select the “Settings” tab in the display dialog-
box.
The two key variables that apply the PDP-PC
interface are “resolution” and “colors”.
The correct settings for these two variables are:
• Size (sometimes called “resolution”):
640 x 480 pixels.
• Color: “24-bit” color (might also be expre-
ssed as “16 million colors”)Shown at left is
a typical screen for “Display” dialog box.
If a vertical-frequency option exists on your
display settings dialog box, the correct value is
“60” or “60 Hz.” Otherwise, just click “OK”
and exit the dialog box.
Continued...
Notes:
Both screen position and size will vary, depending on the type of PC monitor and its resolution.
The table below shows all of the display modes that are supported:
• The interlace mode is not supported.
• The PDP operates abnormally if a non-standard video format is selected.
Notes:
• When this PDP is used as a PC display, 32-bit color is supported.
• Depending on the manufacturer, your PC display screen might appear different.
(and depending on your particular version of Windows).
Check your PC instruction book for information about connecting your PC to a PDP.
• If a vertical and horizontal frequency-select mode exists, select 60Hz (vertical) and 31.5kHZ
(horizontal).
• In some cases, abnormal signals (such as stripes) might appear on the screen when the PC power
is turned off (or if the PC is disconnected). If so, press the Source button to enter the VIDEO mode.
Also, make sure that the PC is connected.
• Connect only a PC monitor to the monitor output port while viewing the PC screen. (Otherwise,
random signals might appear).
Video signal Dot X Line
640 X 350
720 X 400
640 X 480
800 X 600
1024 X 768
1280 X 1024*
1366 X 768*
70.086
85.080
70.087
85.039
59.940
72.809
75.000
85.008
56.250
60.317
72.188
75.000
85.061
60.004
70.069
75.029
84.997
60.020
60.000
31.469
37.861
31.469
37.927
31.469
37.861
37.500
43.269
42.925
37.879
48.077
46.875
53.674
48.363
56.476
60.023
68.677
63.981
48.200
N
N
P
P
P
N
N
N
N/P
P
P
P
P
N
N
P
P
P
N
P
P
N
N
N
N
N
N
N/P
P
P
P
P
N
N
P
P
P
N
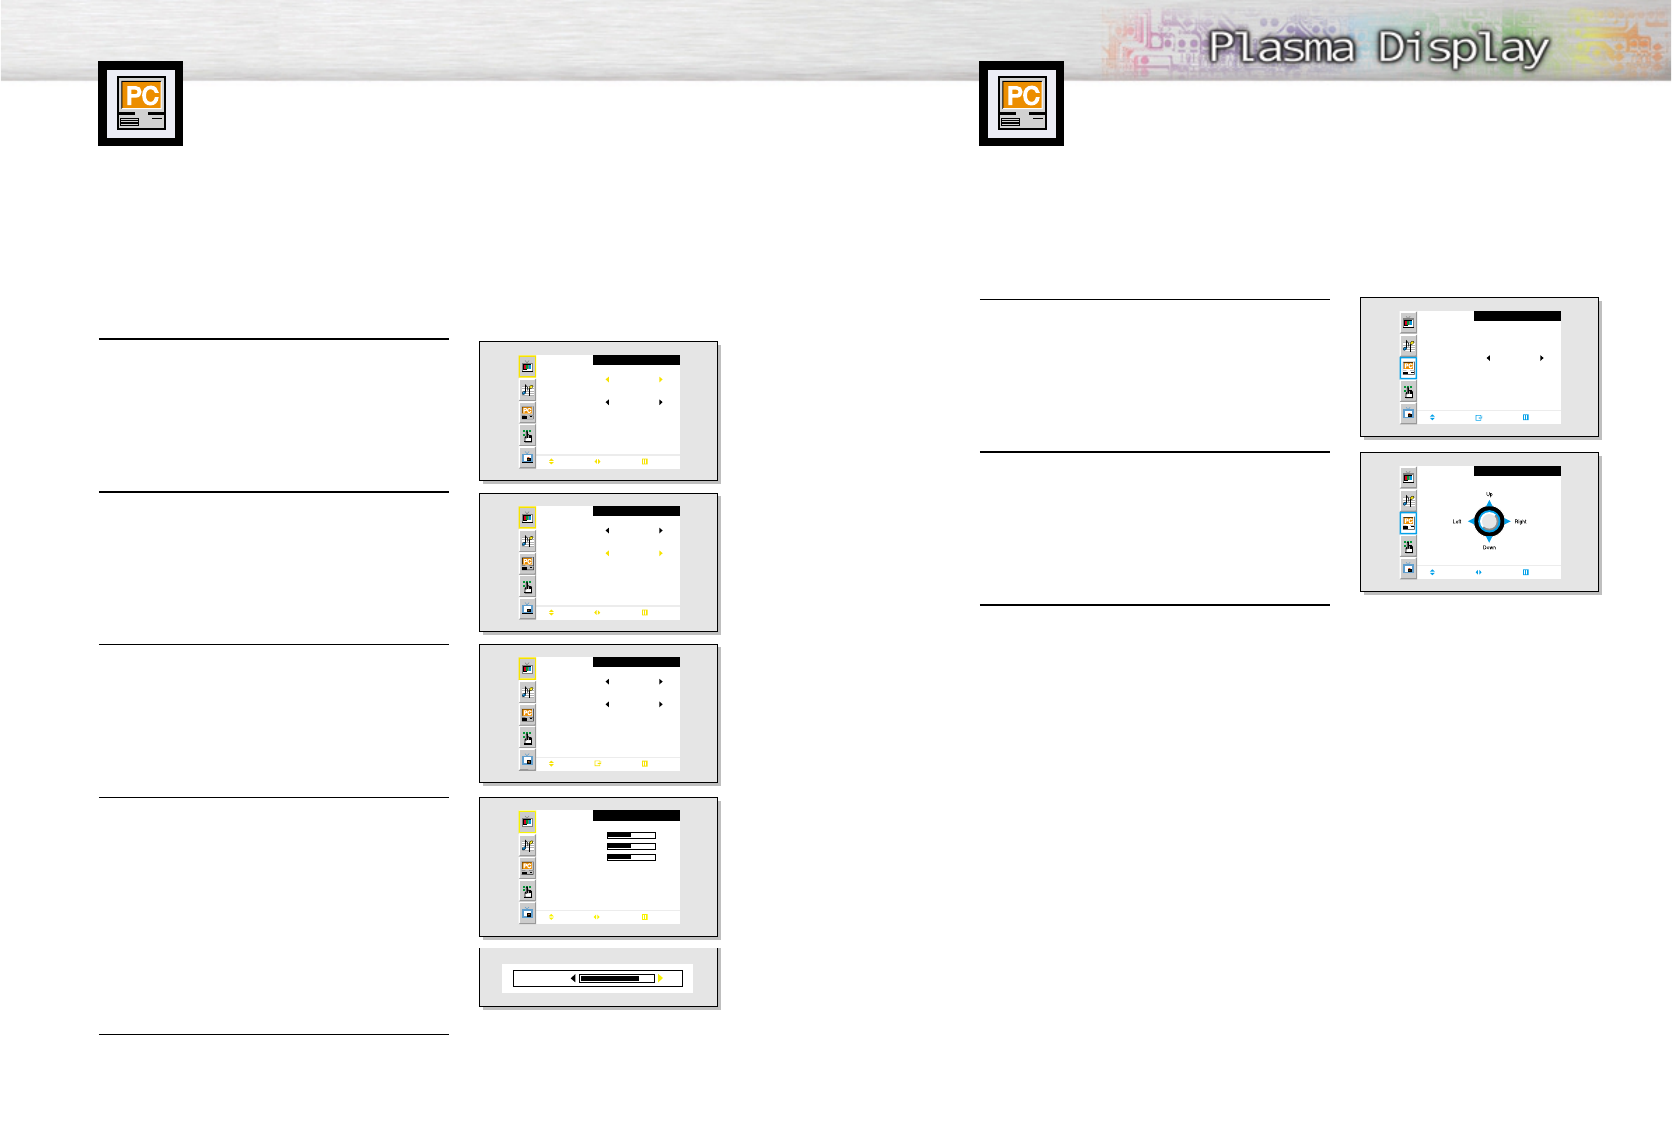
Vertical
Frequency (Hz) Horizontal
Frequency (KHz) Vertical
polarity Horizontal
polarity
IBM PC / AT
Compatible
69
Adjusting the PC Screen
68
Adjusting the R.G.B
Preset:
•Press the Source button, then move the joystick up or down to select PC. Press the joystick to select PC mode.
1 Press the Menu button, then press the joystick to
enter.
2 Move the joystick up or down to select “Color
Tone”, then move the joystick left or right to select
“Custom”. When “Custom” is selected, the word
“Color Adjust” will appear on the screen.
3 Move the joystick up or down to select “Color
Adjust”, then move the joystick to enter.
4 Move the joystick up or down to select the item you
want to change, then move the joystick right or left
to change the value of the item, using the on-screen
gauge as your guide.
5 Press the Menu button to exit.
Picture
Mode
Adjust
Color Tone
Color Adjust
Move Select Exit
Custom
Custom
Picture
Mode
Adjust
Color Tone
Color Adjust
Move Select Exit
Custom
Custom
Picture
Mode
Adjust
Color Tone
Color Adjust
Move Enter Exit
Custom
Custom
Adjust
Red
Green
Blue
Move Adjust Exit
50
50
50
82Red
Changing the Position of the Image
After connecting the PDP to your PC, adjust the position of the screen if it is not well-aligned.
Preset:
•Press the Source button, then move the joystick up or down to select PC. Press the joystick to select PC mode.
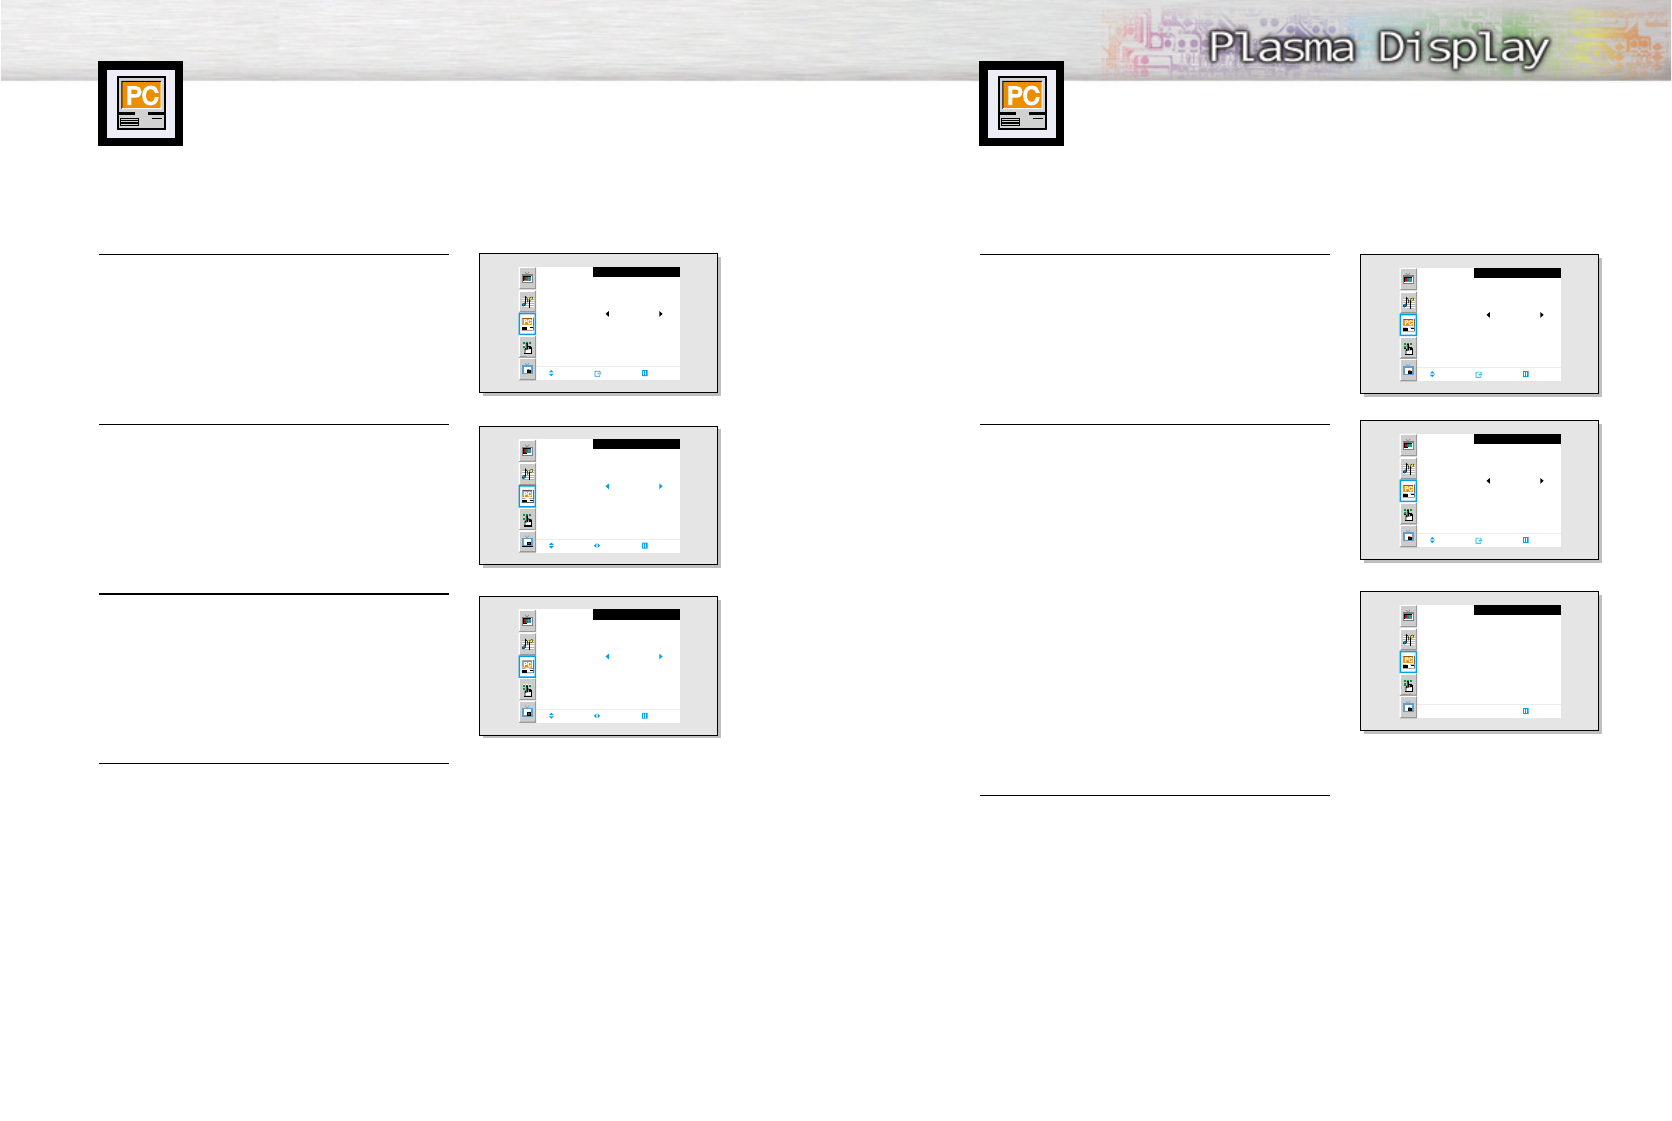
1 Press the Menu button. Move the joystick up or
down to select “PC”, then press the joystick to enter.
2 Press the joystick to enter, then adjust the screen
position by using the joystick button.
3 Press the Menu button to exit.
PC
Position
Adjust
Scaling
Information
Auto Adjust
Move Enter Exit
Wide
Position
Move Move Exit
71
Changing the Size of the Image
70
Preset:
•Press the Source button, then move the joystick up or down to select PC. Press the joystick to select PC mode.
1 Press the Menu button. Move the joystick up or
down to select “PC”, then press the joystick to enter.
2 Move the joystick up or down to select “Scaling”.
3 Move the joystick left or right to select “Wide”
or “Normal”.
4 Press the Menu button to exit.
PC
Position
Adjust
Scaling
Information
Auto Adjust
Move Enter Exit
Wide
PC
Position
Adjust
Scaling
Information
Auto Adjust
Move Select Exit
Wide
PC
Position
Adjust
Scaling
Information
Auto Adjust
Move Select Exit
Normal
Information
Preset:
•Press the Source button, then move the joystick up or down to select PC. Press the joystick to select PC mode.
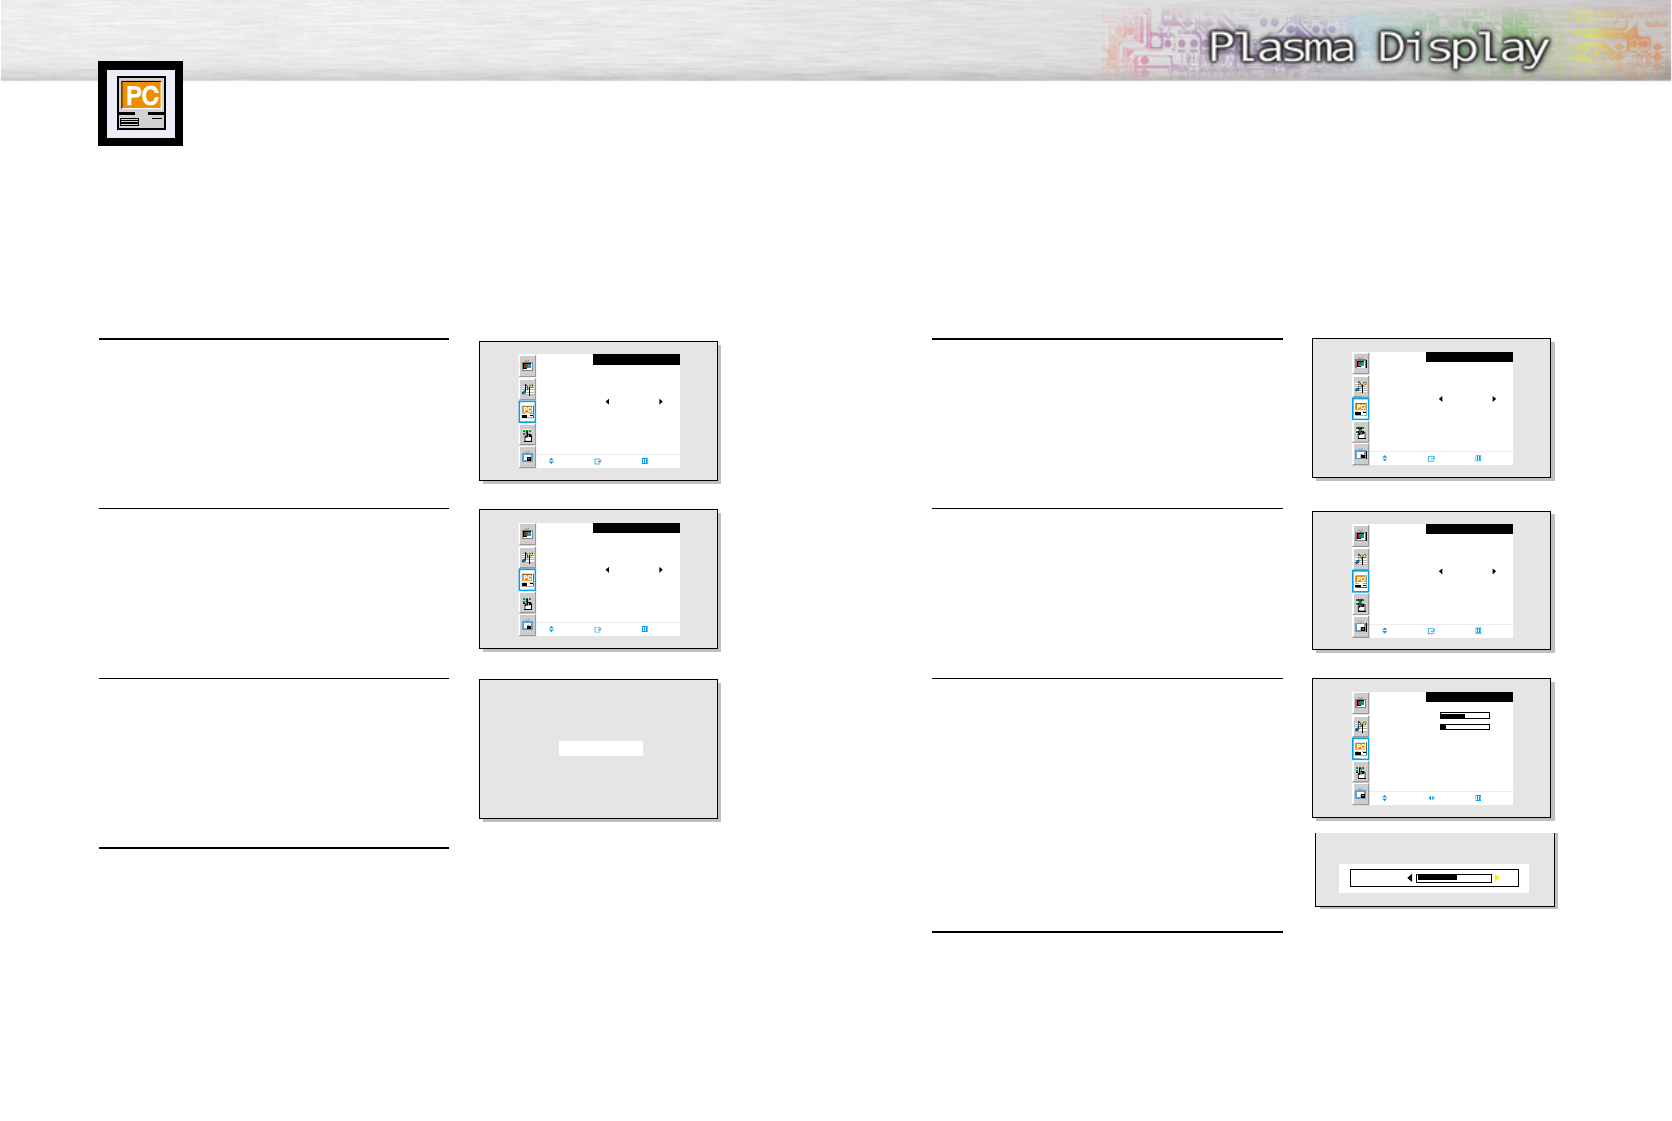
1 Press the Menu button. Move the joystick up or
down to select “PC”, then press the joystick to enter.
2 Move the joystick up or down to select “Informa-
tion”, then press the joystick to enter.
The vertical, horizontal frequencies and resolution
appear.
3 Press the Menu button to exit.
PC
Position
Adjust
Scaling
Information
Auto Adjust
Move Enter Exit
Wide
PC
Position
Adjust
Scaling
Information
Auto Adjust
Move Enter Exit
Wide
Information
Resolution : 1024 * 768
H-Frequency : 48.52 KHz
V-Frequency : 60.21 Hz
Exit
73
Coarse Adjustment
Preset:
•Press the Source button, then move the joystick up or down to select PC. Press the joystick to select PC mode.
1 Press the Menu button, move the joystick up or
down to select “PC”, then press the joystick to enter.
2 Move the joystick up or down to select “Adjust”,
then move the joystick left or right to enter.
3 Move the joystick up or down to select “Coarse”.
Remove picture noise (vertical stripes) on the screen
by moving the joystick left or right. (If Coarse is
not set properly, vertical stripes will appear on the
screen.)
4 Move the Menu button to exit.
PC
Position
Adjust
Scaling
Information
Auto Adjust
Move Enter Exit
Wide
PC
Position
Adjust
Scaling
Information
Auto Adjust
Move Enter Exit
Wide
Adjust
Corase
Fine
Move Adjust Exit
50
7
53Coarse
72
Picture Quality Adjustment
Picture Automatic Adjustment
Preset:
•Press the Source button, then move the joystick up or down to select PC. Press the joystick to select PC mode.
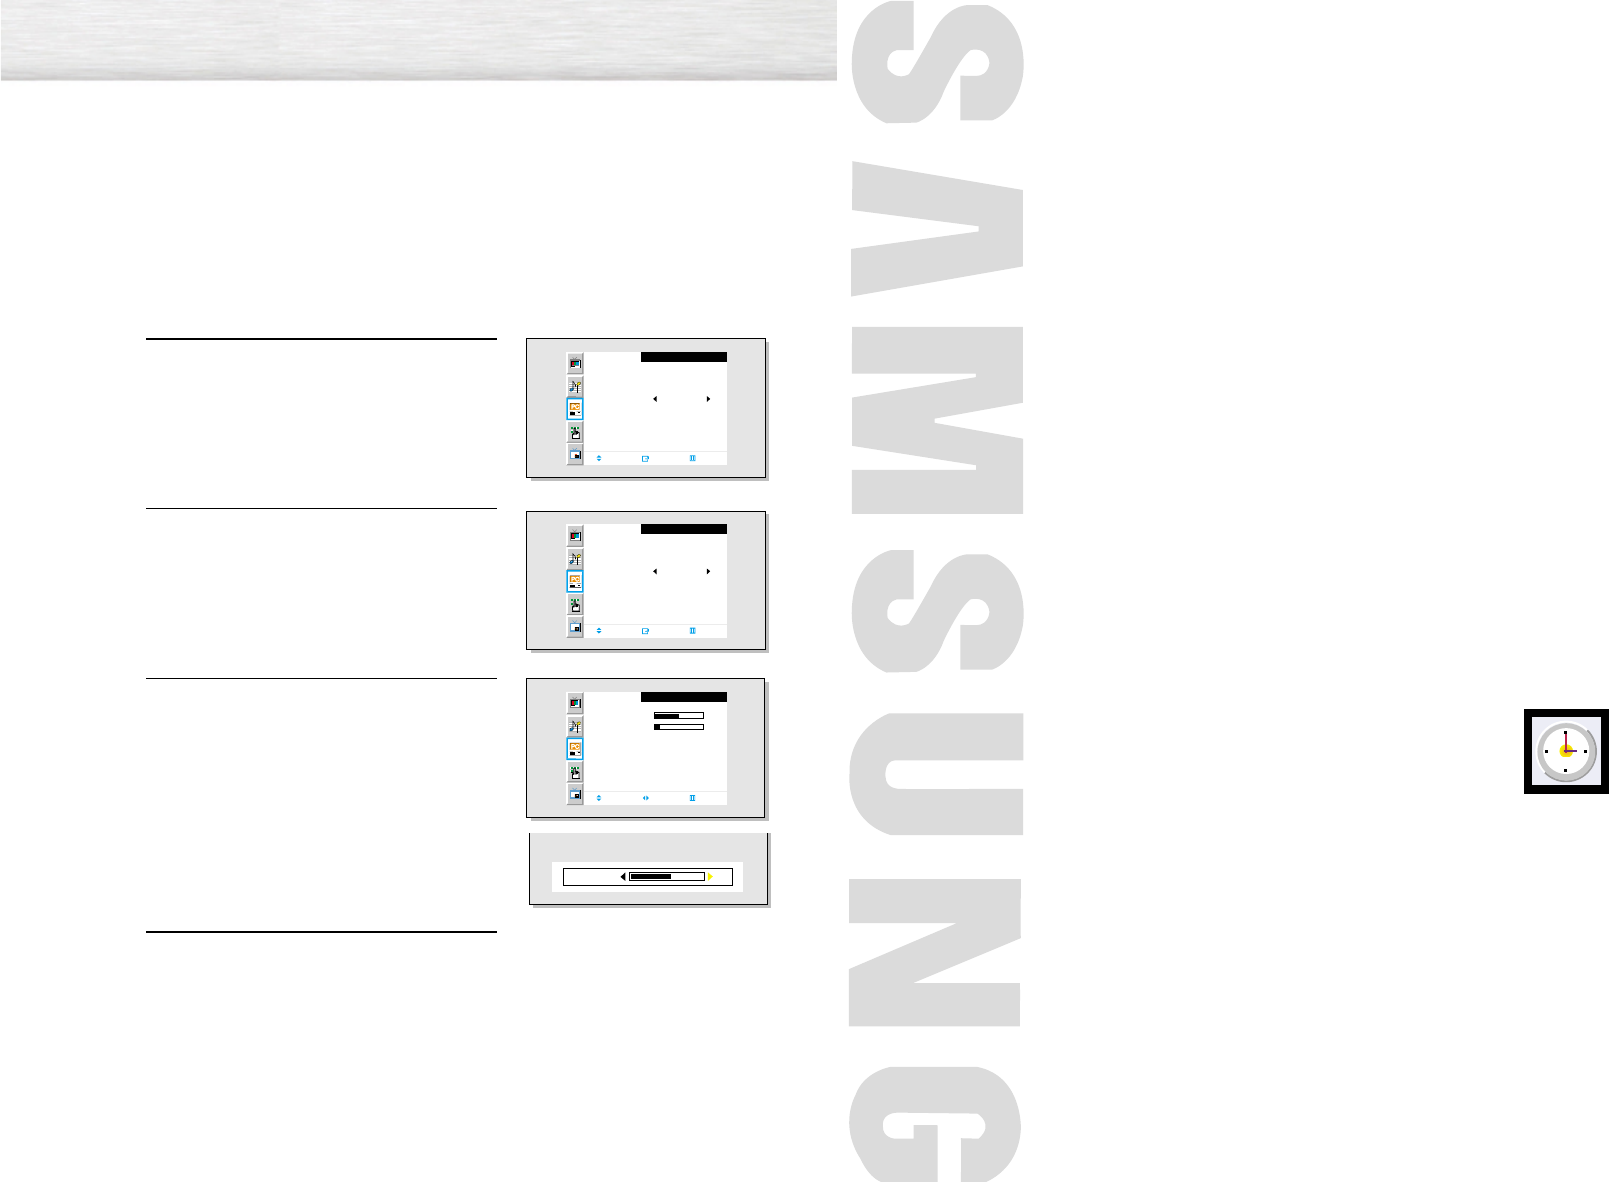
1 Press the Menu button. Move the joystick up or
down to select “PC”, then press the joystick to enter.
2 Move the joystick up or down to select “Auto
Adjust”, then move the joystick left or right to enter.
3The message “Auto Adjust” appears on the screen
and the picture adjustments are automatically
activated.
4 Press the Menu button to exit.
PC
Position
Adjust
Scaling
Information
Auto Adjust
Move Enter Exit
Wide
PC
Position
Adjust
Scaling
Information
Auto Adjust
Move Enter Exit
Wide
Auto Adjust
74
PLASMA DISPLAY PANEL
Time Setting
Setting the Clock.......................................................................76
Setting the Sleep Timer...............................................................77
Setting the Timers......................................................................78
Setting the Preferred Channel and Volume Level............................80
Fine Tuning (Fine)
Preset:
• Press the Source button, then move the joystick up or down to select PC. Press the joystick to select PC mode.
1 Press the Menu button. Move the joystick up or
down to select “PC”, then press the joystick to enter.
2 Move the joystick up or down to select “Adjust”,
then move the joystick left or right to enter.
3 Move the joystick up or down to select “Fine”.
Remove picture noise (vertical stripes) on the screen
by moving the joystick left or right. (If Fine is
not set properly, vertical stripes will appear on the
screen.)
4 Move the Menu button to exit.
PC
Position
Adjust
Scaling
Information
Auto Adjust
Move Enter Exit
Wide
PC
Position
Adjust
Scaling
Information
Auto Adjust
Move Enter Exit
Wide
Adjust
Corase
Fine
Move Adjust Exit
50
7
53Fine
7776
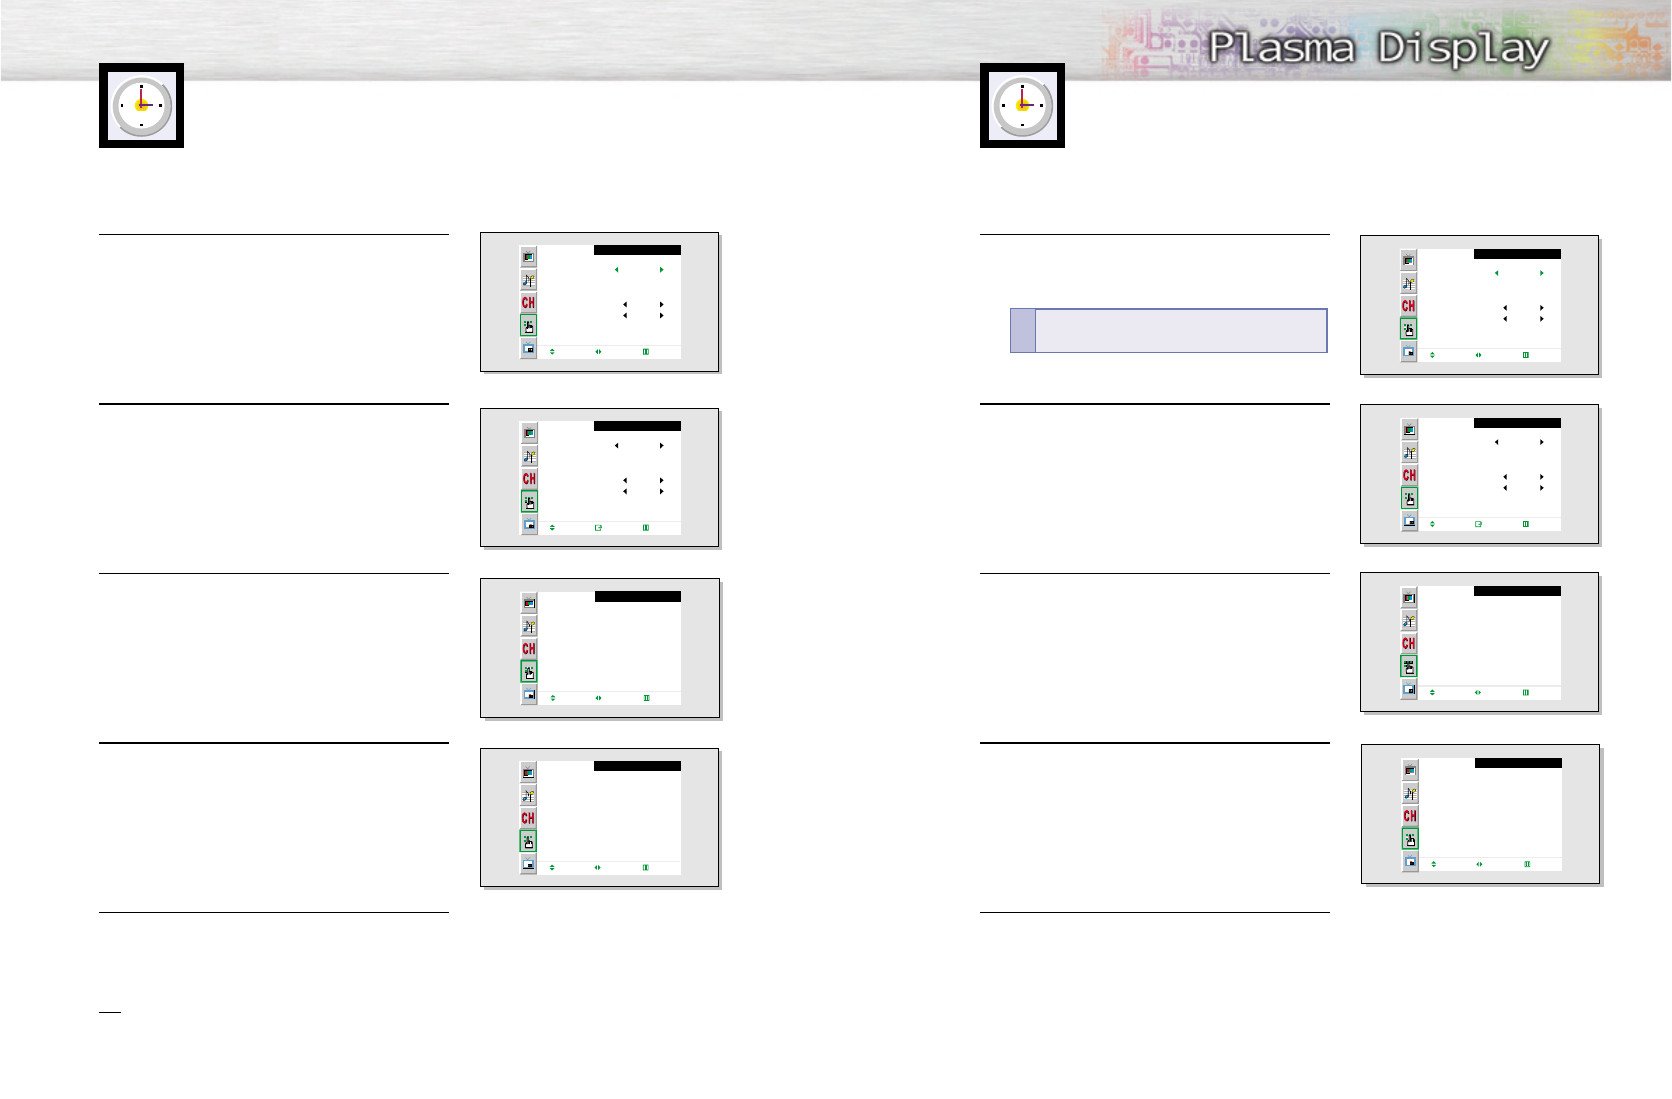
Setting the Clock
You can set your PDP to automatically turn off after a preset interval.
1 Press the Menu button. Move the joystick up or
down to select “Function”, then press the joystick
to enter.
2 Move the joystick up or down to select “Time”, then
press the joystick to enter.
3 Move the joystick up or down to select “Sleep”.
4 Move the joystick left or right to select the time inter-
val for the PDP to stay on. The interval ranges from
10 to 180 minutes.
5 Press the Menu button to exit.
Setting the Sleep Timer
Function
Language
Time
Caption
NR
Auto Power Off
V-Chip
Move Select Exit
English
Off
Off
Time
Clock
On Time
Off Time
Sleep
On Time Volume
On Time Channel
Move Select Exit
10 : 30
am
- -
:
- -
am
- -
:
- -
am
Off
Off
Off
10
3
Function
Language
Time
Caption
NR
Auto Power Off
V-Chip
Move Enter Exit
English
Off
Off
Time
Clock
On Time
Off Time
Sleep
On Time Volume
On Time Channel
Move Select Exit
10 : 30
am
- -
:
- -
am
- -
:
- -
am
Off
Off
30
10
3
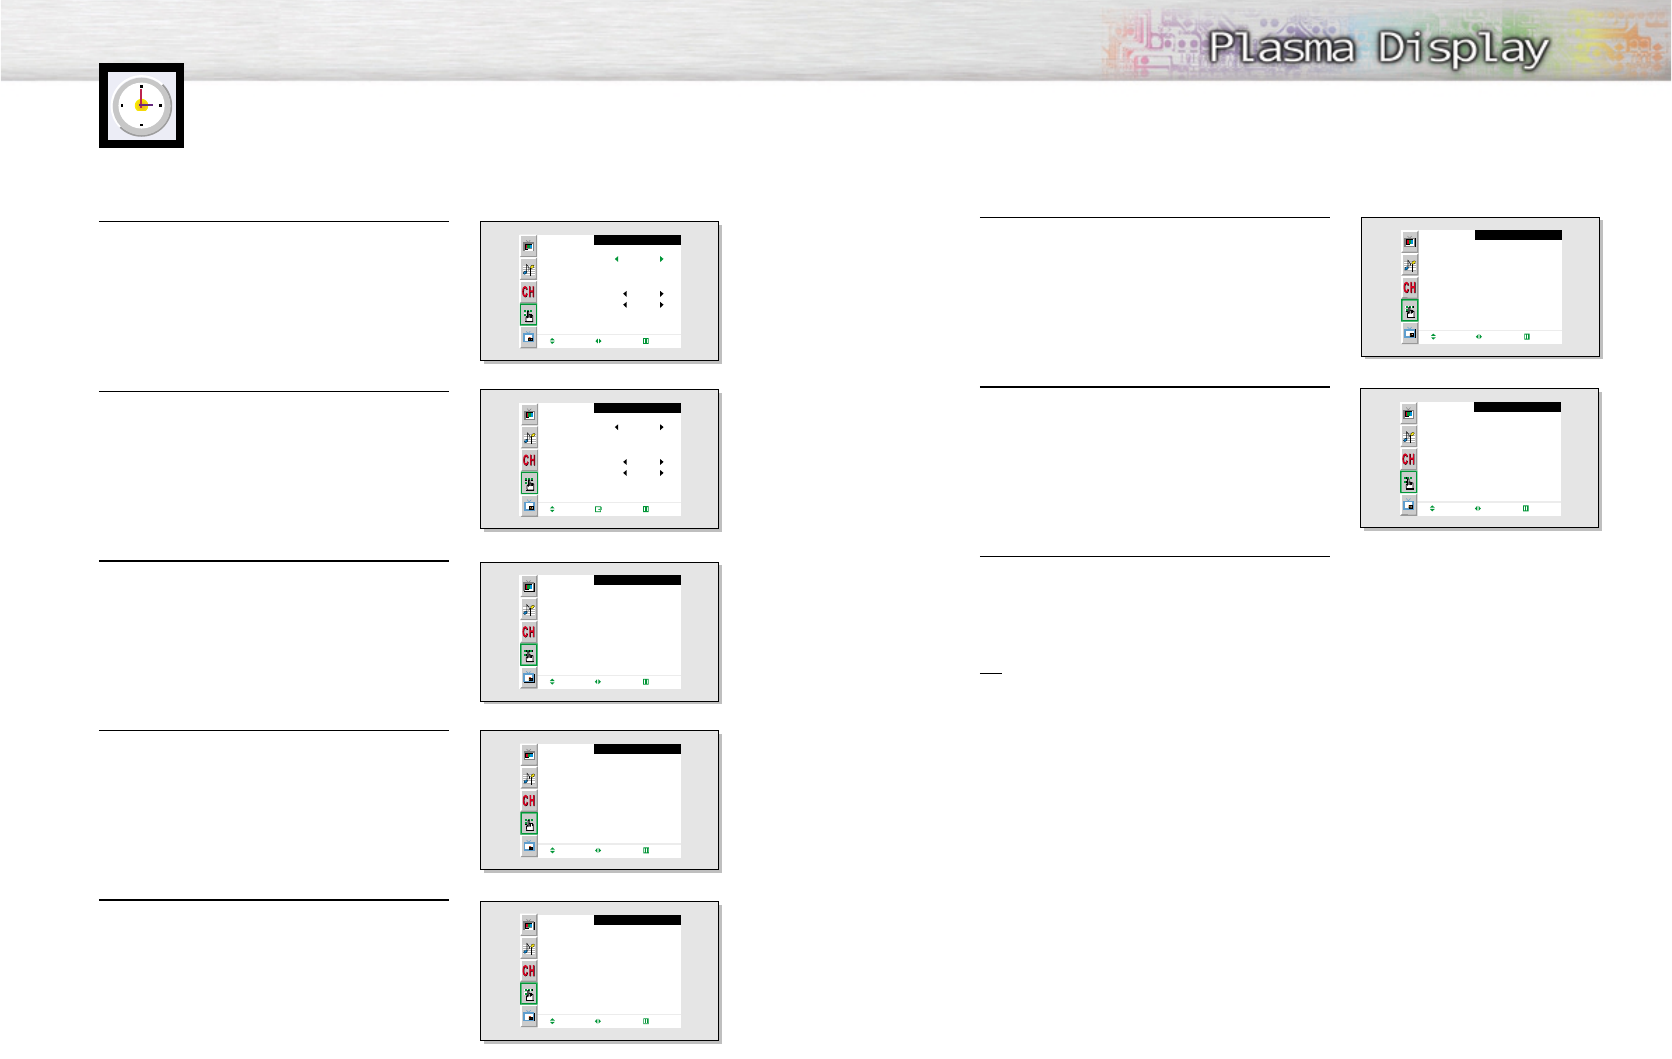
1 Press the Menu button. Move the joystick up or
down to select “Function”, then press the joystick
to enter.
2 Move the joystick up or down to select “Time”, then
press the joystick to enter.
3 Move the joystick left or right to select hour, then
move the joystick up or down to select the correct
hour.
4 Move the joystick left or right to select minute, then
move the joystick up or down to select the correct
minute.
5 Press the Menu button to exit.
Note
• Time setting will be reset when you pull out the Power cord if the PDP is ON.
(If you want to keep the time setting, turn the PDP off using the Power button on the remote control
or the Front Panel.)
Function
Language
Time
Caption
NR
Auto Power Off
V-Chip
Move Enter Exit
English
Off
Off
Function
Language
Time
Caption
NR
Auto Power Off
V-Chip
Move Select Exit
English
Off
Off
Time
Clock
On Time
Off Time
Sleep
On Time Volume
On time Channel
Adjust Move Exit
10 :
- -
am
- -
:
- -
am
- -
:
- -
am
Off
Off
Off
10
3
Time
Clock
On Time
Off Time
Sleep
On Time Volume
On time Channel
Adjust Move Exit
10 : 30
am
- -
:
- -
am
- -
:
- -
am
Off
Off
Off
10
3
Quick way to access the sleep timer: Just press
the “Sleep” button on the remote control.
!
7978
Setting the Timers
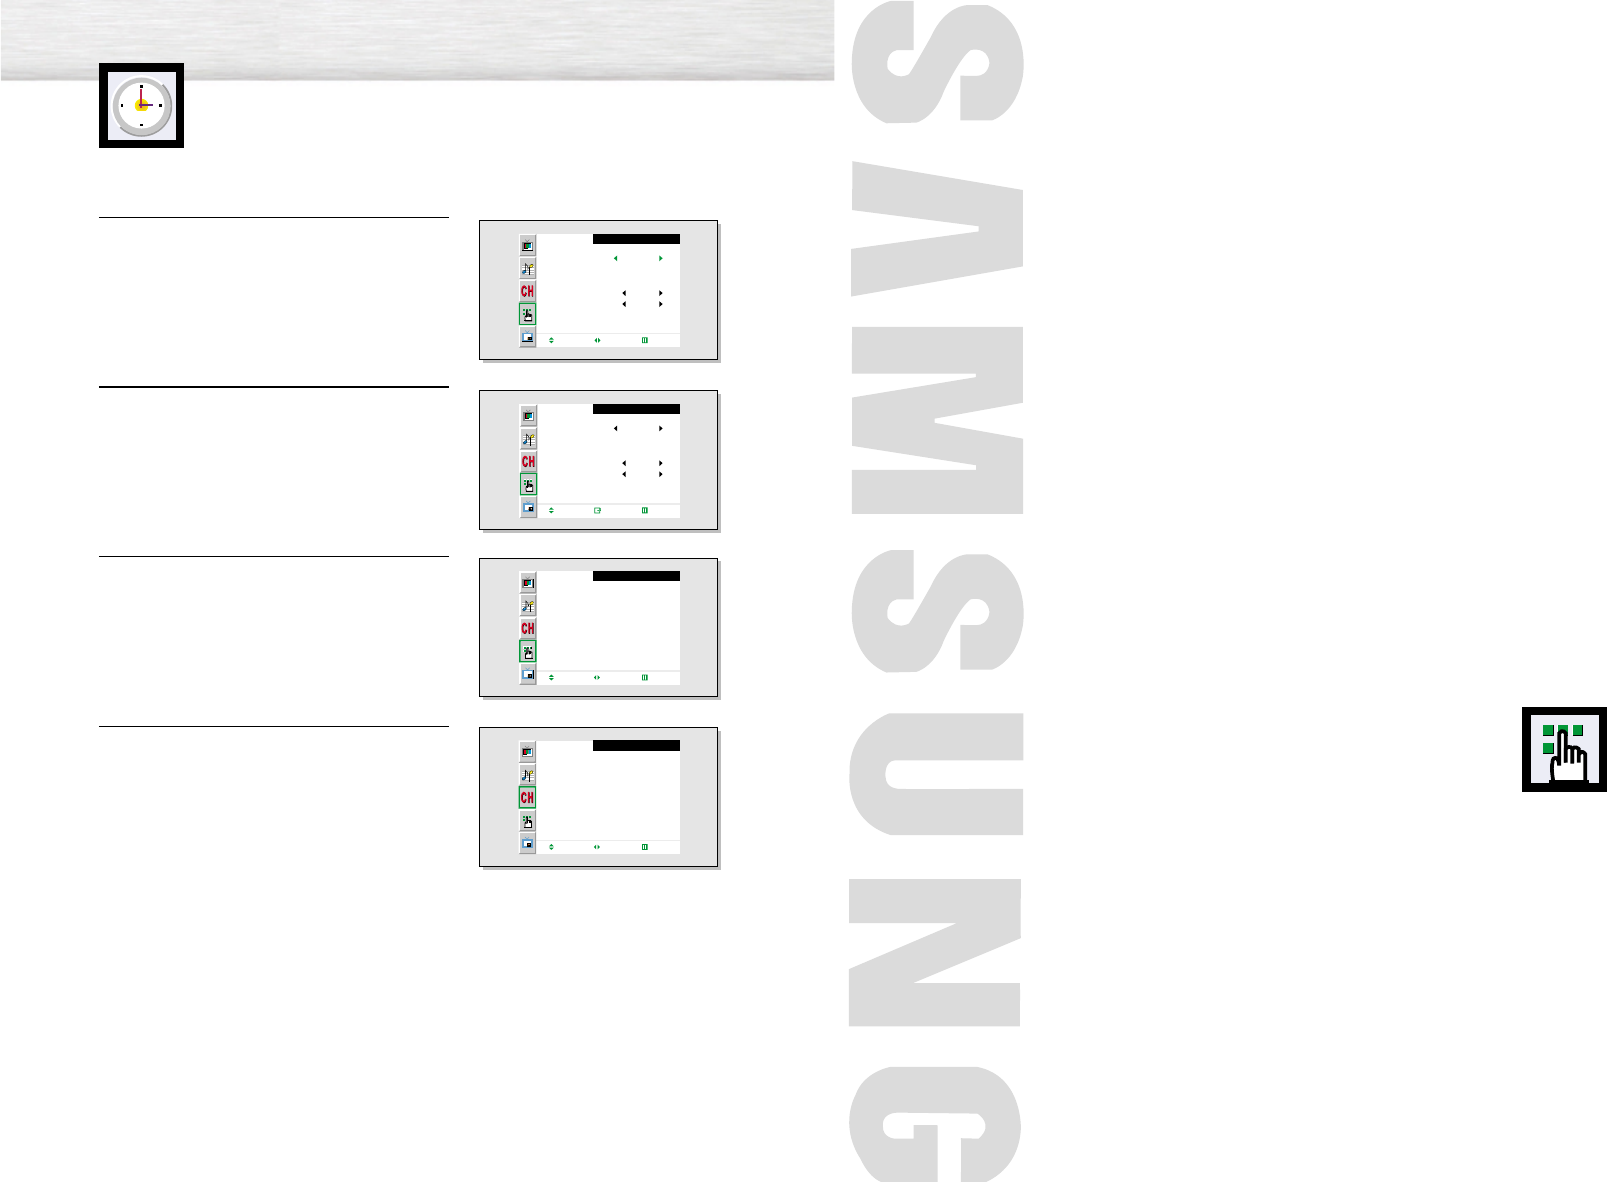
This PDP can be set to turn on or off automatically at specific times that you choose. Before
using the timers, you must set the PDP’s clock, as described previously.
6 Move the joystick left or right to select “Off” or
“On”, then move the joystick up down to select
“Off” or “On”.
7 If you want to set Off Time, move the joystick down
to select the “Off Time”.
Set the “Off Time” just as you set “On Time”.
8 Press the Menu button to exit.
Note
• If you set to On Time or Off Time, the Power Indicator on the Front Panel is changed to Green.
Setting the On/Off Timer
1 Press the Menu button. Move the joystick up or
down to select “Function”, then press the joystick
to enter.
2 Move the joystick up or down to select “Time”, then
press the joystick to enter.
3 Move the joystick up or down to select “On Time”.
4 Move the joystick left or right to select hour, then
move the joystick up or down to select the correct
hour.
5 Move the joystick left or right to select minute, then
move the joystick up or down to select the correct
minute.
Function
Language
Time
Caption
NR
Auto Power Off
V-Chip
Move Select Exit
English
Off
Off
Function
Language
Time
Caption
NR
Auto Power Off
V-Chip
Move Enter Exit
English
Off
Off
Time
Clock
On Time
Off Time
Sleep
On Time Volume
On time Channel
Move Select Exit
10 : 30
am
- -
:
- -
am
- -
:
- -
am
Off
Off
Off
10
3
Time
Clock
On Time
Off Time
Sleep
On Time Volume
On time Channel
Adjust Move Exit
10 : 30
am
7 :
- -
am
- -
:
- -
am
Off
Off
Off
10
3
Time
Clock
On Time
Off Time
Sleep
On Time Volume
On time Channel
Adjust Move Exit
10 : 30
am
7 : 30
am
- -
:
- -
am
Off
Off
Off
10
3
Time
Clock
On Time
Off Time
Sleep
On Time Volume
On time Channel
Adjust Move Exit
10 : 30
am
7 : 30
am
- -
:
- -
am
On
Off
Off
10
3
Time
Clock
On Time
Off Time
Sleep
On Time Volume
On Time Channel
Move Select Exit
12 : 00
am
7 : 30
am
- -
:
- -
am
On
Off
Off
10
3
Selecting a Menu Language .....................................................82
Viewing Closed Captions.........................................................83
Digital Noise Reduction ...........................................................84
Setting Auto Power Off ...........................................................85
Using the V-Chip .....................................................................86
PLASMA DISPLAY PANEL
Function Description
80
Setting the Preferred Channel
and Volume Level
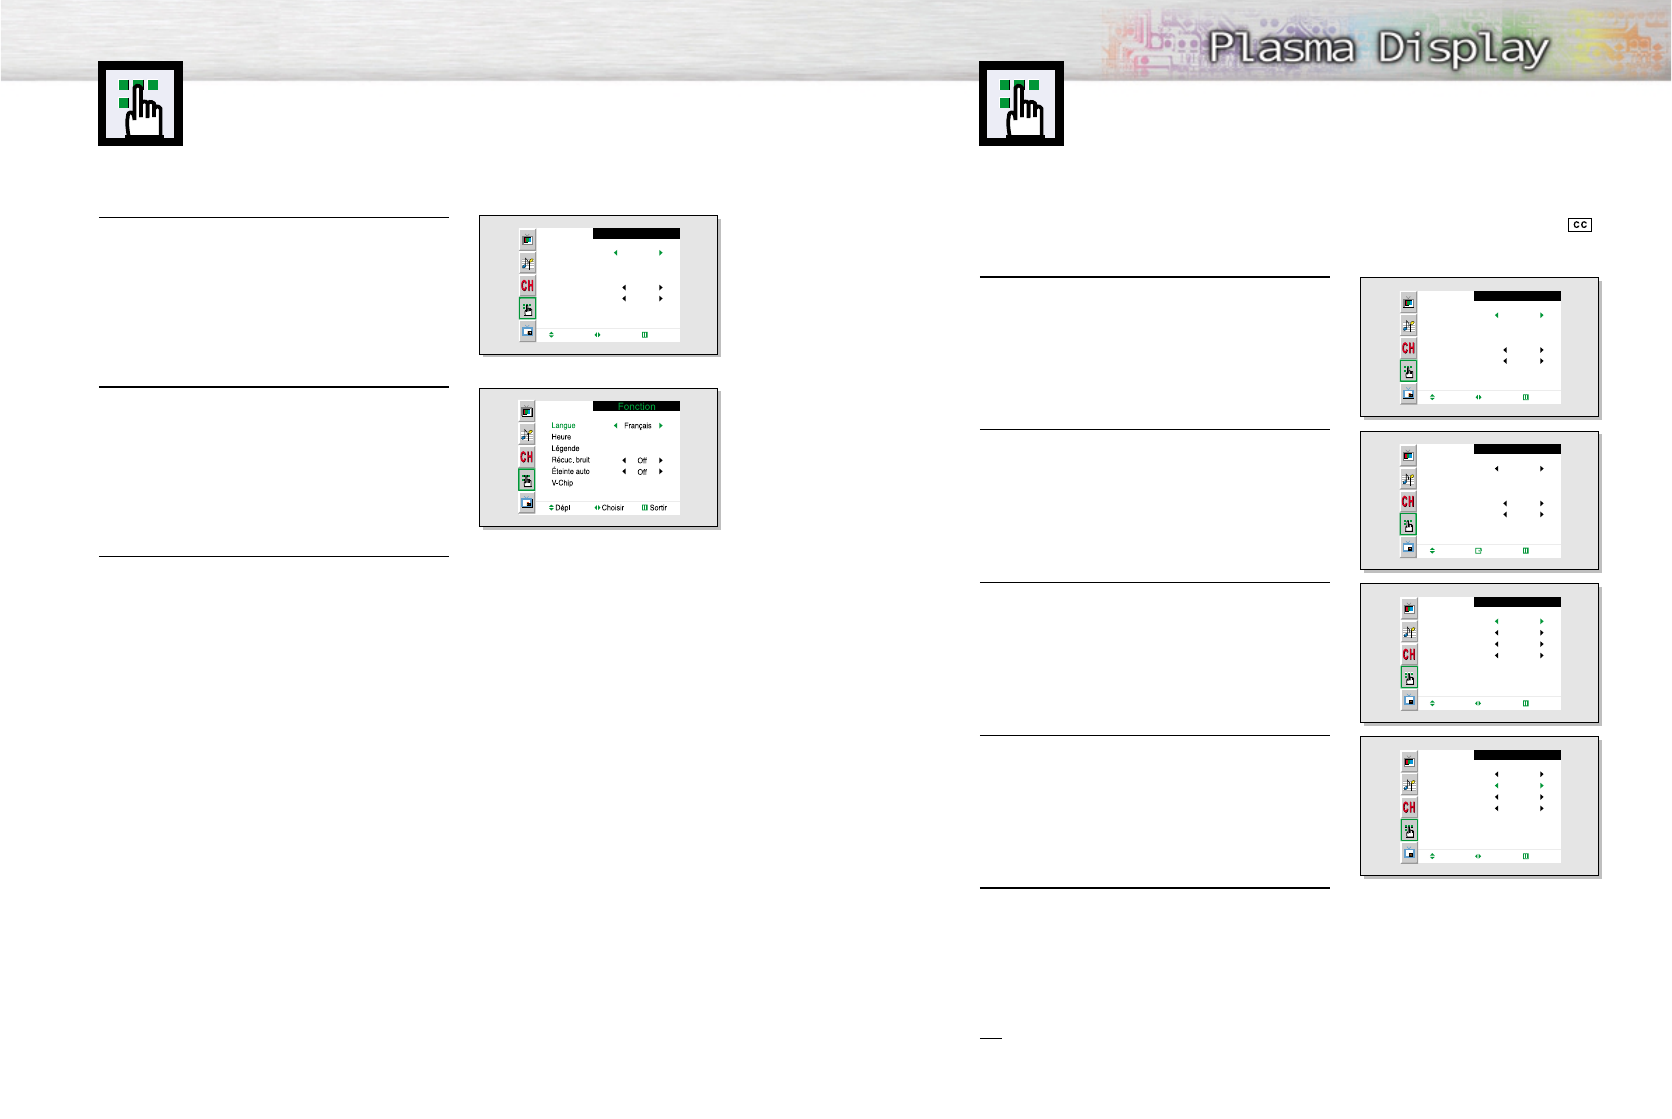
The preferred channel and volume can be set for when the timer automatically turns on the TV.
1 Press the Menu button. Move the joystick up or
down to select “Function”, then press the joystick
to enter.
2 Move the joystick up or down to select “Time”, then
press the joystick to enter.
3 Move the joystick up or down to select “On Time
Volume”.
Move the joystick left or right to adjust volume level.
4Move the joystick up or down to select “On Time
Channel”.
Move the joystick left or right to select channel.
Function
Language
Time
Caption
NR
Auto Power Off
V-Chip
Move Select Exit
English
Off
Off
Function
Language
Time
Caption
NR
Auto Power Off
V-Chip
Move Enter Exit
English
Off
Off
Time
Clock
On Time
Off Time
Sleep
On Time Volume
On Time Channel
Move Select Exit
- -
:
- -
am
- -
:
- -
am
- -
:
- -
am
Off
Off
Off
10
3
Time
Clock
On Time
Off Time
Sleep
On Time Volume
On Time Channel
Move Select Exit
- -
:
- -
am
- -
:
- -
am
- -
:
- -
am
Off
Off
Off
10
3
Selecting a Menu Language
8382
1 Press the Menu button. Move the joystick up or
down to select “Function”, then press the joystick
to enter.
2Move the joystick up or down to select “Caption”,
then press the joystick to enter.
3Move the joystick left or right to turn closed caption-
ing on/off.
4Move the joystick up or down to select “Mode”, then
move the joystick left or right to select “Caption” or
“Text.”
5Depending on the particular broadcast, it might be
necessary to make changes to “Channels” and
“Field”: Move the joystick up, down, left and right
to make the changes. (Follow the same procedure
as in steps 3~4 above.)
Press the Menu button to exit.
Note
• Different channels and fields display different information: Field 2 carries additional information
that supplements the information in Field 1. (For example, Channel 1 may have subtitles in English,
while Channel 2 has subtitles in Spanish.
Function
Language
Time
Caption
NR
Auto Power Off
V-Chip
Move Select Exit
English
Off
Off
Function
Language
Time
Caption
NR
Auto Power Off
V-Chip
Move Enter Exit
English
Off
Off
Caption
Caption
Mode
Channel
Field
Move Select Exit
On
Caption
2
1
Caption
Caption
Mode
Channel
Field
Move Select Exit
On
Text
2
1
1 Press the Menu button. Move the joystick up or
down to select “Function”, then press the joystick
to enter.
2 Move the joystick left or right to select the appropri-
ate language : English, Français or Español.
3 Press the Menu button to exit.
Function
Language
Time
Caption
NR
Auto Power Off
V-Chip
Move Select Exit
English
Off
Off
Viewing Closed Captions
Your TV decodes and displays the closed captions that are broadcast with certain
TV shows. These captions are usually subtitles for the hearing impaired or foreign-
language translations. All VCRs record the closed caption signal from television
programs, so home-recorded video tapes also provide closed captions. Most pre-
recorded commercial video tapes provide closed captions as well. Check for the
closed caption symbol in your television schedule and on the tape’s packaging: .
Note: The Caption feature does not work with DVD or DTV signals.
1 Press the Menu button. Move the joystick up or
down to select “Function”, then press the joystick
to enter.
2Move the joystick up or down to select “Auto Power
Off”.
3Move the joystick left or right to select “On”.
4 Press the Menu button to exit.
Note
• If the Off timer is set, Auto Power Off will not function.
• The power will be turned off automatically after 15 minutes if the PDP is ON and there is no input
signal. (For instance, if you select a channel without a signal while in TV mode or when there is no
input signal after selecting an output signal)
8584
Digital Noise Reduction
If the broadcast signal received by your TV is weak, you can activate the Digital Noise
Reduction feature to help reduce any static and ghosting that may appear on the screen.
1 Press the Menu button. Move the joystick up or
down to select “Function”, then press the joystick
to enter.
2Move the joystick up or down to select “NR”.
3Move the joystick left or right to select “On”.
4 Press the Menu button to exit.
Function
Language
Time
Caption
NR
Auto Power Off
V-Chip
Move Select Exit
English
Off
Off
Function
Language
Time
Caption
NR
Auto Power Off
V-Chip
Move Select Exit
English
Off
Off
Function
Language
Time
Caption
NR
Auto Power Off
V-Chip
Move Select Exit
English
On
Off
Function
Language
Time
Caption
NR
Auto Power Off
V-Chip
Move Select Exit
English
Off
Off
Function
Language
Time
Caption
NR
Auto Power Off
V-Chip
Move Select Exit
English
Off
Off
Function
Language
Time
Caption
NR
Auto Power Off
V-Chip
Move Select Exit
English
Off
On
Setting Auto Power Off
The PDP can be set to turn off automatically if no buttons are pressed for 3 hours
after the PDP turns on automatically by the on timer.
8786
Using the V-Chip
The V-Chip feature automatically locks out programs that are deemed inappropriate
for children. The user must enter a PIN (personal ID number) before any of the V-Chip
restrictions are set up or changed.
Note : When the V-chip feature is activated, the PIP and channel-auto program features
do not function.
Setting Up Your Personal ID Number (PIN)
1 Press the Menu button. Move the joystick up or
down to select “Function”, then press the joystick
to enter.
2Move the joystick up or down to select “V-Chip”,
then press the joystick to enter.
3 The message "Enter Pin" will appear. Enter your
4-digit PIN number.
Note: The default PIN number of a new TV set is
“0-0-0-0.”
4The “V-chip” screen will appear. Move the joystick
up or down to select “Change Pin,” then press the
joystick to enter.
5The Change pin screen will appear. Choose any
4-digits for your PIN and enter them.
As soon as the 4 digits are entered, the “Confirm
New Pin” screen appears. Re-enter the same 4
digits. When the Confirm screen disappears, your
PIN has been memorized.
6 Press the Menu button to exit.
Note
• If you forget the PIN, press the remote-control buttons in the following sequence, which resets the pin
to 0-0-0-0 : Power Off ➔ Mute ➔8 ➔2 ➔4 ➔Power On.
Function
Language
Time
Caption
NR
Auto Power Off
V-Chip
Move Select Exit
English
Off
Off
Function
Language
Time
Caption
NR
Auto Power Off
V-Chip
Move Enter Exit
English
Off
On
V-Chip
Enter Pin
Enter Pin :
----
V-Chip
V-Chip Lock
TV GuideLines
MPAA Rating
Change Pin
No
Move Enter Exit
V-Chip
Change Pin
Enter New Pin :
----
V-Chip
Confirm New Pin
Confirm New Pin :
-
How to Enable/Disable the V-Chip
1 Press the Menu button. Move the joystick up or
down to select “Function”, then press the joystick
to enter.
2Move the joystick up or down to select “V-Chip”,
then press the joystick to enter.
3 The message "Enter Pin" will appear. Enter your
4-digit PIN number.
4The “V-chip” screen will appear.
To enable the V-Chip feature, move the joystick to
the right so that the “V-Chip Lock” field is Yes.
(Move the joystick to the left or right will alternate
between Yes and No.)
5 Press the Menu button to exit.
Function
Language
Time
Caption
NR
Auto Power Off
V-Chip
Move Select Exit
English
Off
Off
Function
Language
Time
Caption
NR
Auto Power Off
V-Chip
Move Enter Exit
English
Off
On
V-Chip
Enter Pin
Enter Pin :
----
V-Chip
V-Chip Lock
TV GuideLines
MPAA Rating
Change Pin
Yes
Move Select Exit
8988
How to Set up Restrictions Using the “TV guidelines”
First, set up a personal identification number (PIN), and enable the V-Chip. (See previous section.)
Parental restrictions can be set up using either of two methods: The TV guidelines or the MPAA rating.
1 Press the Menu button. Move the joystick up or
down to select “Function”, then press the joystick
to enter.
2Move the joystick up or down to select “V-Chip”,
then press the joystick to enter.
3 The message "Enter Pin" will appear. Enter your
4-digit PIN number.
4The “V-chip” screen will appear.
Move the joystick up or down to select “TV Guide-
lines”, press the joystick to enter.
5 The “TV guidelines” screen will appear. Move the
joystick up or down to select one of the six age-
based categories:
TV-Y Young children
TV-Y7 Children 7 and over
TV-G General audience
TV-PG Parental guidance
TV-14 Viewers 14 and over
TV-MA Mature audience
Function
Language
Time
Caption
NR
Auto Power Off
V-Chip
Move Select Exit
English
Off
Off
Function
Language
Time
Caption
NR
Auto Power Off
V-Chip
Move Enter Exit
English
Off
On
V-Chip
Enter Pin
Enter Pin :
----
V-Chip
V-Chip Lock
TV GuideLines
MPAA Rating
Change Pin
No
Move Enter Exit
6At this point, one of the TV-Ratings is selected.
Move the joystick to the right: Depending on your existing setup, a letter “U” or “B” will start
blinking.
(U= Unblocked, B= Blocked)
While the “U” or ”B” is blinking, move the joystick up or down to block or unblock the
category.
Move the joystick to the right to save the TV guidelines. A TV-Rating will be selected,
and no letters will blink.
To select a different TV-Rating, move the joystick up or down and then repeat the process.
Note 1: The TV-Y7, TV-PG, TV-14 and TV-MA have additional options. See the next step to
change any of the following sub-ratings:
FV: Fantasy violence
D: Dialog
L: L
S: Sexual situation
V: Violence
Note 2: The V-Chip will automatically block certain categories that are “more restrictive”.
For example, if you block “TV-Y” category, then TV-Y7 will automatically be blocked.
Similarly, if you block the TV-G category, then all the categories in the “young adult” group
will be blocked (TV-G, TV-PG, TV-14 and TV-MA). The sub-ratings (D, L, S, V) work together
similarly. (See next section.)
7How to set the FV, D, L, S and V sub-ratings.
First, select one of these TV-Ratings: TV-Y7, TV-PG, TV-14 or TV-MA (See Step 4, on
previous page).
Next, while the TV-Rating is selected, repeatedly move the joystick to the right.
This will cycle through the available sub-ratings (FV,L, S, D or V).
A blinking letter (“U” or “B”) will be displayed for each sub-rating. While the “U” or “B” is
blinking, move the joystick up or down to change the sub-rating.
Move the joystick to the right to save the TV guidelines. A TV-Rating will be selected and no
letters will select. To select a different TV-Rating, move the joystick up or down and then
repeat the process.
Note: The V-chip will automatically block certain categories that are “More restrictive”.
For example, if you block “L” sub-rating in TV-PG, then the “L” sub-ratings in TV-14 and
TV-MA will automatically be blocked.
8Press the Menu button to clear all the screens. (Or proceed to the next section, and set up
additional restrictions based on the MPAA codes).
Note
• Note: These categories consist of two separate groups: TV-Y and TV-Y7 (young children
through age 7), and TV-G through TV-MA (everybody else). The TV-Y and TV-Y7 categories
are colored blue.
The restrictions for these two groups work independently: If a household includes very young
children as well as young adults, the TV guidelines must be set up separately for each age
group. (See next step.)
TV GuideLines
B : Blocked
U : Unblocked
TV-Y
TV-Y7
TV-G
TV-PG
TV-14
TV-MA
All
U
U
U
U
U
U
FV
U
V
U
U
U
S
U
U
U
L
U
U
U
D
U
U
Move Select Exit

9190
How to Set up Restrictions using the MPAA Ratings: G, PG, PG-13, R, NC-17, X
The MPAA rating system uses the Motion Picture Association of America (MPAA) system, and its main application is
for movies. When the V-Chip lock is on, the TV will automatically block any programs that are coded with objection-
able ratings (either MPAA or TV-Ratings).
1 Press the Menu button. Move the joystick up or
down to select “Function”, then press the joystick
to enter.
2Move the joystick up or down to select “V-Chip”,
then press the joystick to enter.
3 The message "Enter Pin" will appear. Enter your
4-digit PIN number.
4
The “V-chip” screen will appear. Move the joystick down
to select “MPAA Rating,” press the joystick to enter.
5
The “MPAA rating” screen will appear. MPAA category.
Moving the joystick up or down will cycle through the
MPAA categories:
While a particular category is selected, move the joystick to the right to activate it.
A selected letter (“U” or “B”) will be displayed. Move the joystick up or down to select “U” or”B”.
Move the joystick to the right to save the settings.
Note: The V-Chip will automatically block any category that is “more restrictive.” For example,
if you block the “PG-13” category, then “R,” “NC-17,” and “X” will automatically be blocked also.
How to Reset the TV after the V-Chip Blocks a Channel (“Emergency Escape”)
If the TV is tuned to a restricted channel, the V-Chip will block it. The screen will go blank
and the following message will appear: “Excessive rating.”
To resume normal viewing, tune to a different channel using the number buttons.
Under certain conditions (depending on the rating of the local TV programs) the V-Chip might
lock out all the channels. In this case, use the V.Chip function for an “emergency escape”:
1 Press the Menu button.
2Move the joystick up or down to select “V-Chip”, then press the joystick to enter.
3Enter your PIN number, and move the joystick to the right to temporarily disable
the V-Chip Lock.
Function
Language
Time
Caption
NR
Auto Power Off
V-Chip
Move Select Exit
English
Off
Off
Function
Language
Time
Caption
NR
Auto Power Off
V-Chip
Move Enter Exit
English
Off
On
V-Chip
Enter Pin
Enter Pin :
----
V-Chip
V-Chip Lock
TV GuideLines
MPAA Rating
Change Pin
No
Move Enter Exit
MPAA Rating
G
PG
PG-13
R
NC-17
X
NR
U
U
U
U
U
U
U
Move Enter Exit
B : Blocked
U : Unblocked
GGeneral audience (no restrictions).
PG Parental guidance suggested.
PG-13 PG-13 (Parents strongly cautioned).
R
R (Restricted. Children under 17 should be accompanied by an adult).
NC-17 No children under age 17.
XX (Adults only).
NR Not rated.

PLASMA DISPLAY PANEL
Appendix
Troubleshooting............................................................................94
Care and Maintenance ................................................................95
Specifications ..............................................................................96
9594
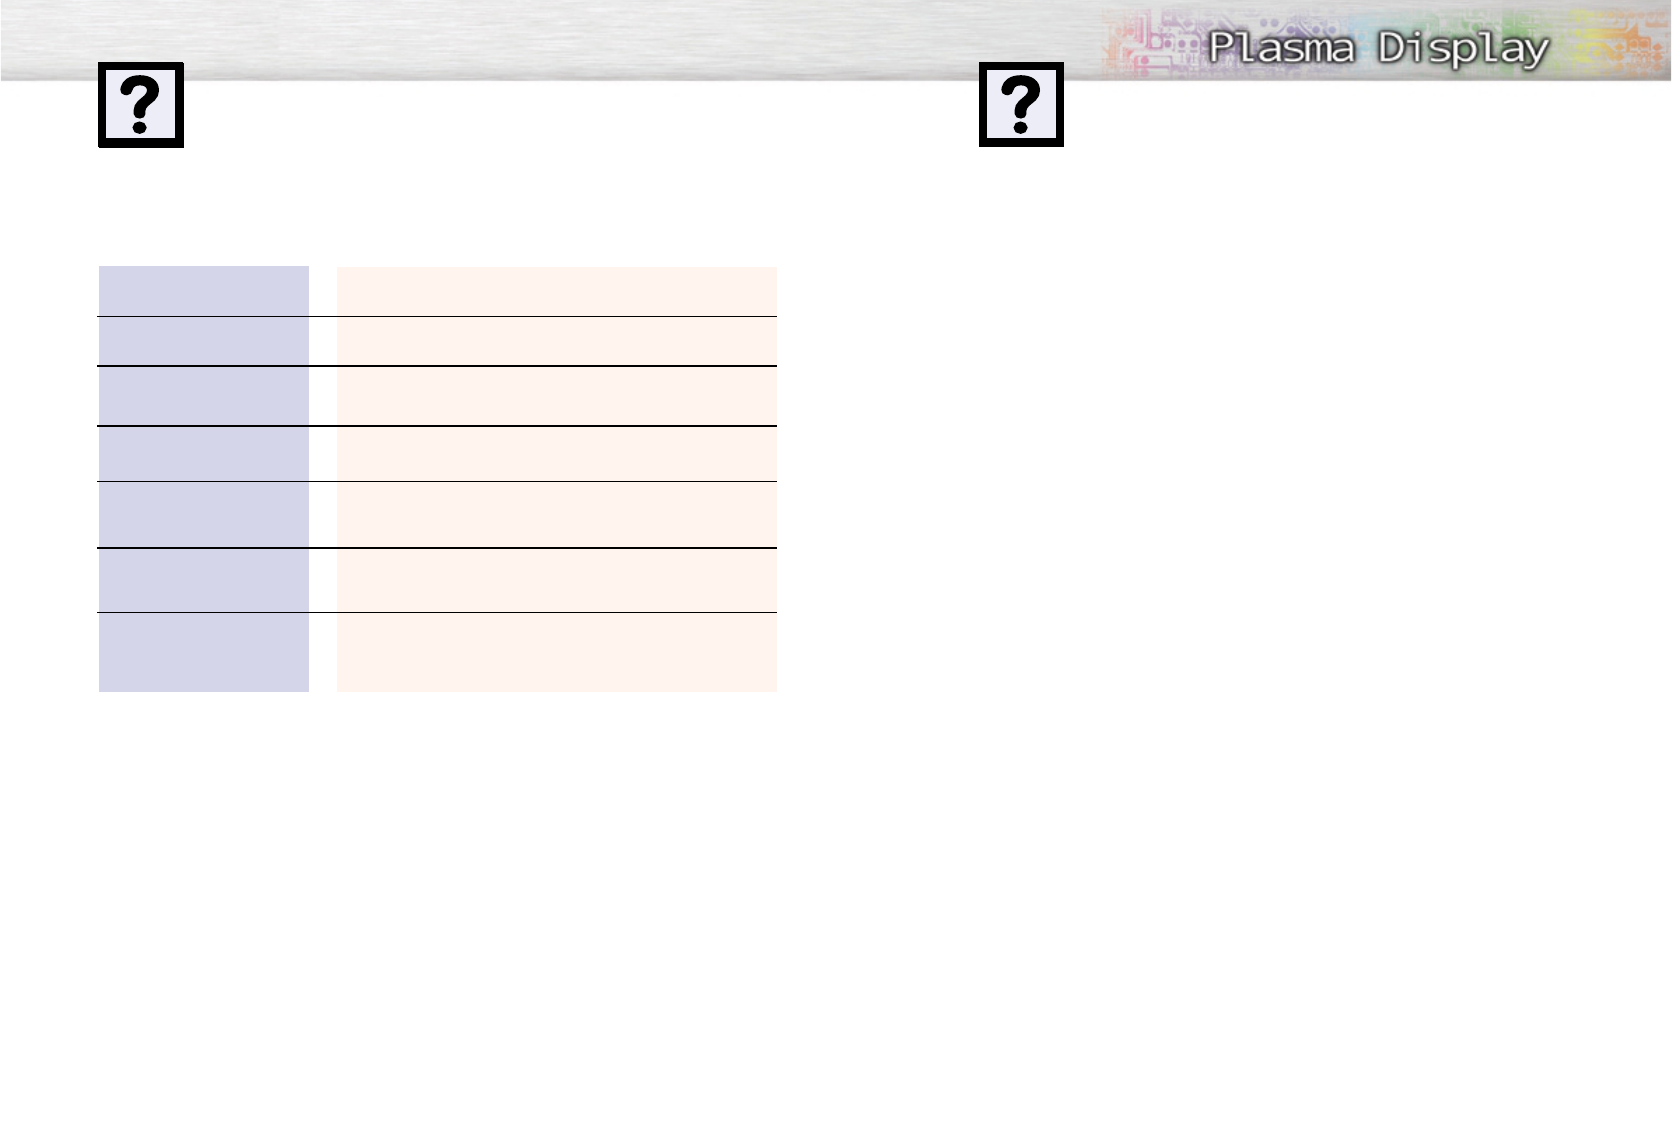
Troubleshooting
Problem
Poor picture.
Your Remote control does not
operate the PDP.
The PDP won’t turn on.
There is no screen image.
The image is too light or
too dark.
The image is too large or
too small.
Before you call a service technician, please scan this list of problems and possible solutions. It may save you
time and money.
Possible Solution
Check all wire connections.
Press the “Mode” button to put your remote control in the “TV”
mode.
Check if the power plug is connected.
Check to see that both the PDP and the source are plugged in
and turned on.
Adjust the Brightness or Contrast settings.
Adjust the Size settings.
With proper care, your PDP will give you many years of service. Please follow these guidelines to get
the maximum performance from your PDP.
Identifying Problems
• Do not put the PDP near extremely hot, cold, humid or dusty places.
• Do not put the PDP near appliances that create magnetic fields.
• Keep the ventilation openings clear.
• Do not place the PDP on a rough and slanted surface, such as cloth or paper.
Liquids
• Do not place liquids near or on the PDP.
Cabinet
• Never open the cabinet or touch the parts inside.
• Wipe your PDP with a clean, dry cloth. Never use water, cleaning fluids, wax, or chemicals.
• Do not put heavy objects on top of the cabinet.
Temperature
• If your PDP is suddenly moved from a cold to a warm place, unplug the power cord for at least two
hours so that moisture that may have formed inside the unit can dry completely.
Care and Maintenance
9796
MemoSpecifications
HPN5039 (TYPE NO: AX50P3)
1204.6(W) X 79(D) X 724(H) mm; 47.43(W) X 3.11(D) X 28.5(H) inches
54 (W) X 31.5 (D) X 220 (H) mm ; 2.13 (W) X 1.24 (D) X 8.66 (H) inches
43 kg ; 94.79 lbs {48 kg ; 105.82 lbs (with stand)}
150g (including batteries) ; 0.33lbs
120V~, 60Hz
400 Watts
1366(H) X 768(V)
127 cm/50 inches
VHF, UHF (75Ωunbalanced)
VIDEO
S-VIDEO
COMPONENT 1 - 480i / 480p / 720p / 1080i
COMPONENT 2 - 480i / 480p / 720p / 1080i
RGB : D-SUB 15P
DVI
VIDEO / S-VIDEO
COMPONENT 1
COMPONENT 2
PC (RGB)
DVI
10W + 10W (8 Ω)
Subwoofer (500mv RMS at 1KHz)
Model
Dimensions Display
Remote Control
Weight Display
Remote Control
Voltage
Power Consumption
Number of Pixels
Screen Size
ANTENNA input
VIDEO input
AUDIO input
AUDIO output
Exterior design and product specifications are subject to change without prior notice to improve
the performance of this product.
This PDP applies to Class B digital device.
(Note: Class B system is for home use.)
This PDP has been registered for residential use in terms of EMI. So it can be used in all areas as
well as residential areas.