Samsung Electronics Co ML2955W Mono Laser Printer User Manual kingbird basic english
Samsung Electronics Co Ltd Mono Laser Printer kingbird basic english
UserManual.wiki
>
Samsung Electronics Co
>
ML2955W User Manual
>
Users Manual 2
Contents
1.
Users Manual 1
2.
Users Manual 2
Users Manual 2
Navigation menu
Upload a User Manual
Namespaces
Wiki Guide
HTML
PDF
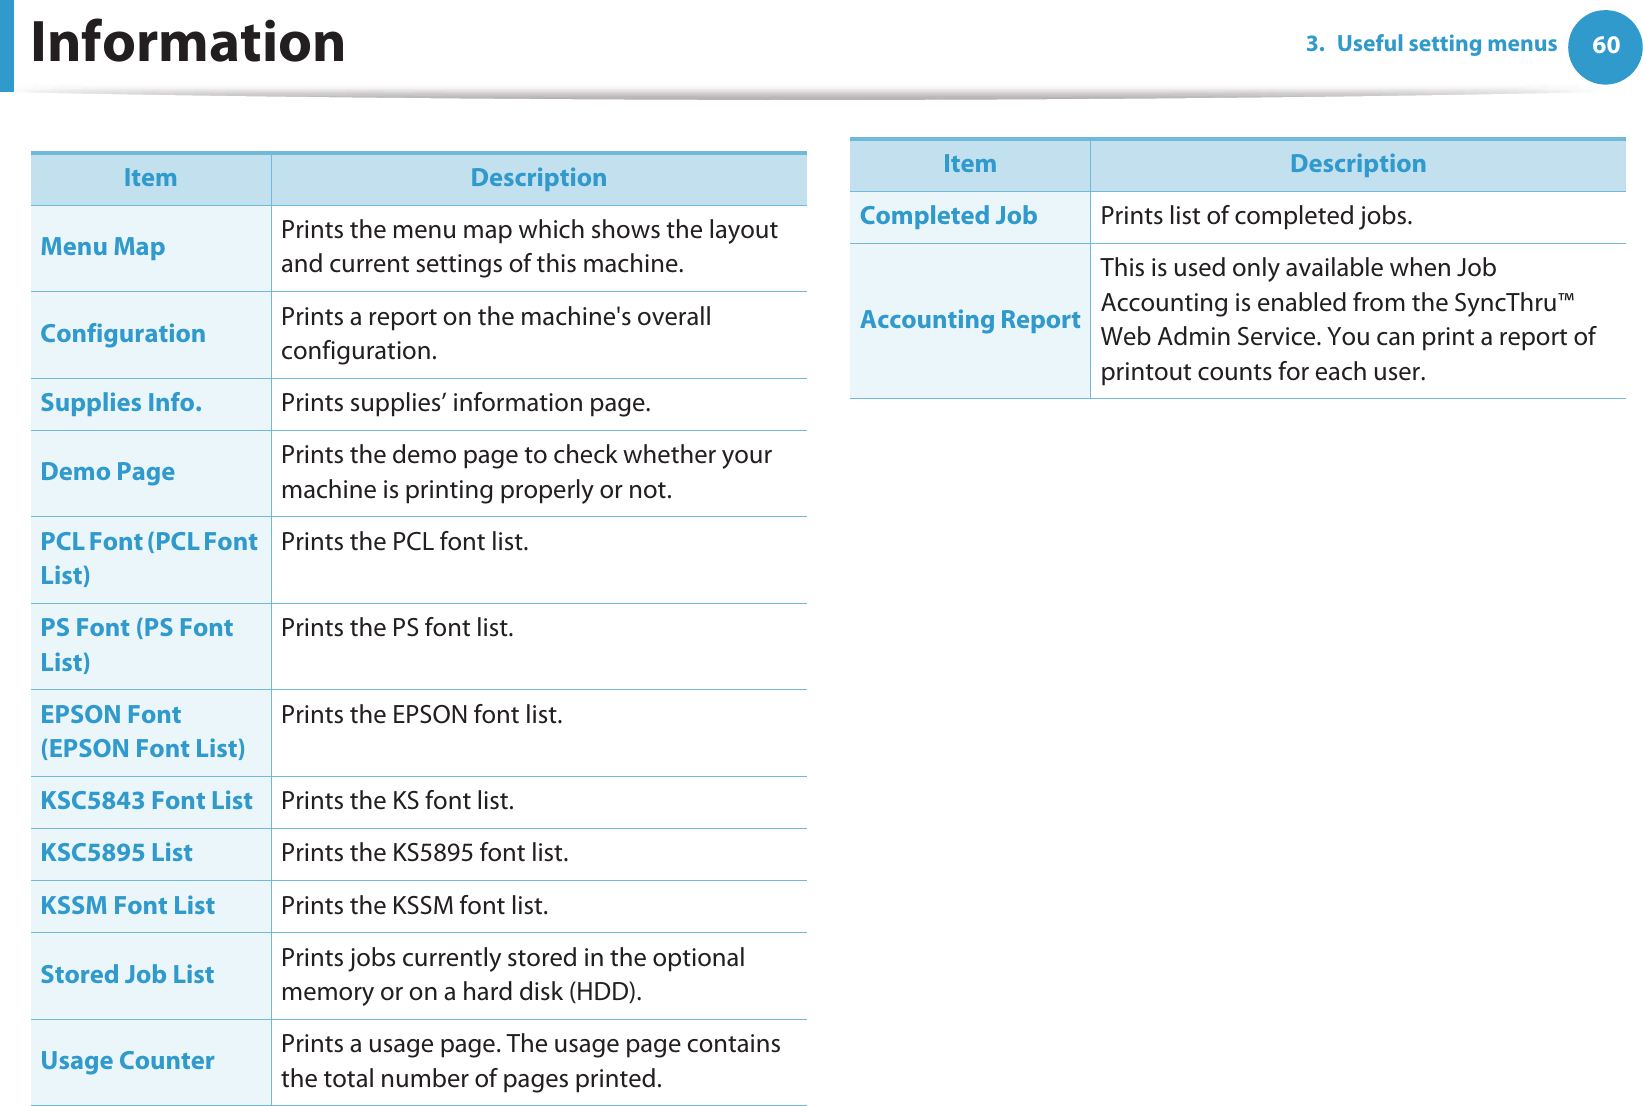
Info
Views
User Manual
Discussion / Help
Navigation

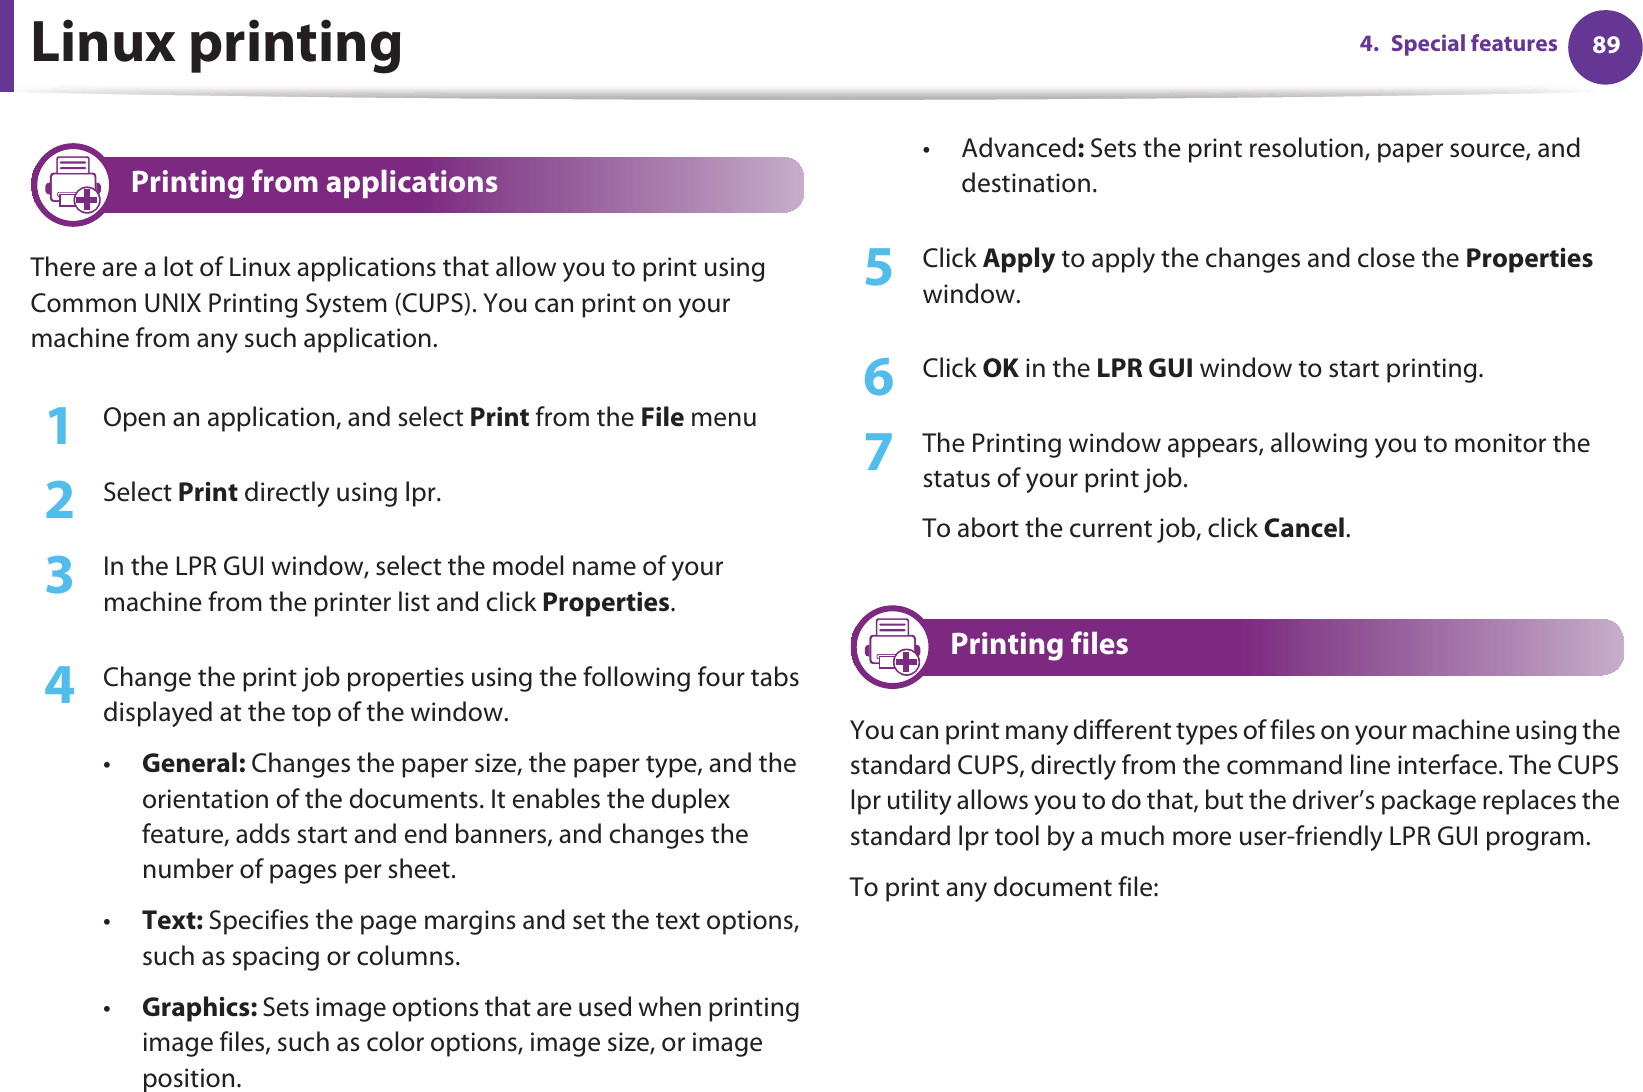
![101. Software installationReinstallation for LinuxIf the printer driver does not work properly, uninstall the driver and reinstall it.1Make sure that the machine is connected to your computer and powered on.2 When the Administrator Login window appears, type “root” in the Login field and enter the system password.You must log in as a super user (root) to uninstall the printer driver. If you are not a super user, ask your system administrator.3 Click the icon at the bottom of the desktop. When the Terminal screen appears, type in the following.[root@localhost root]#cd /opt/Samsung/mfp/uninstall/[root@localhost uninstall]#./uninstall.sh4 Click Uninstall.5 Click Next.6 Click Finish.](https://usermanual.wiki/Samsung-Electronics-Co/ML2955W.Users-Manual-2/User-Guide-1480608-Page-10.png)


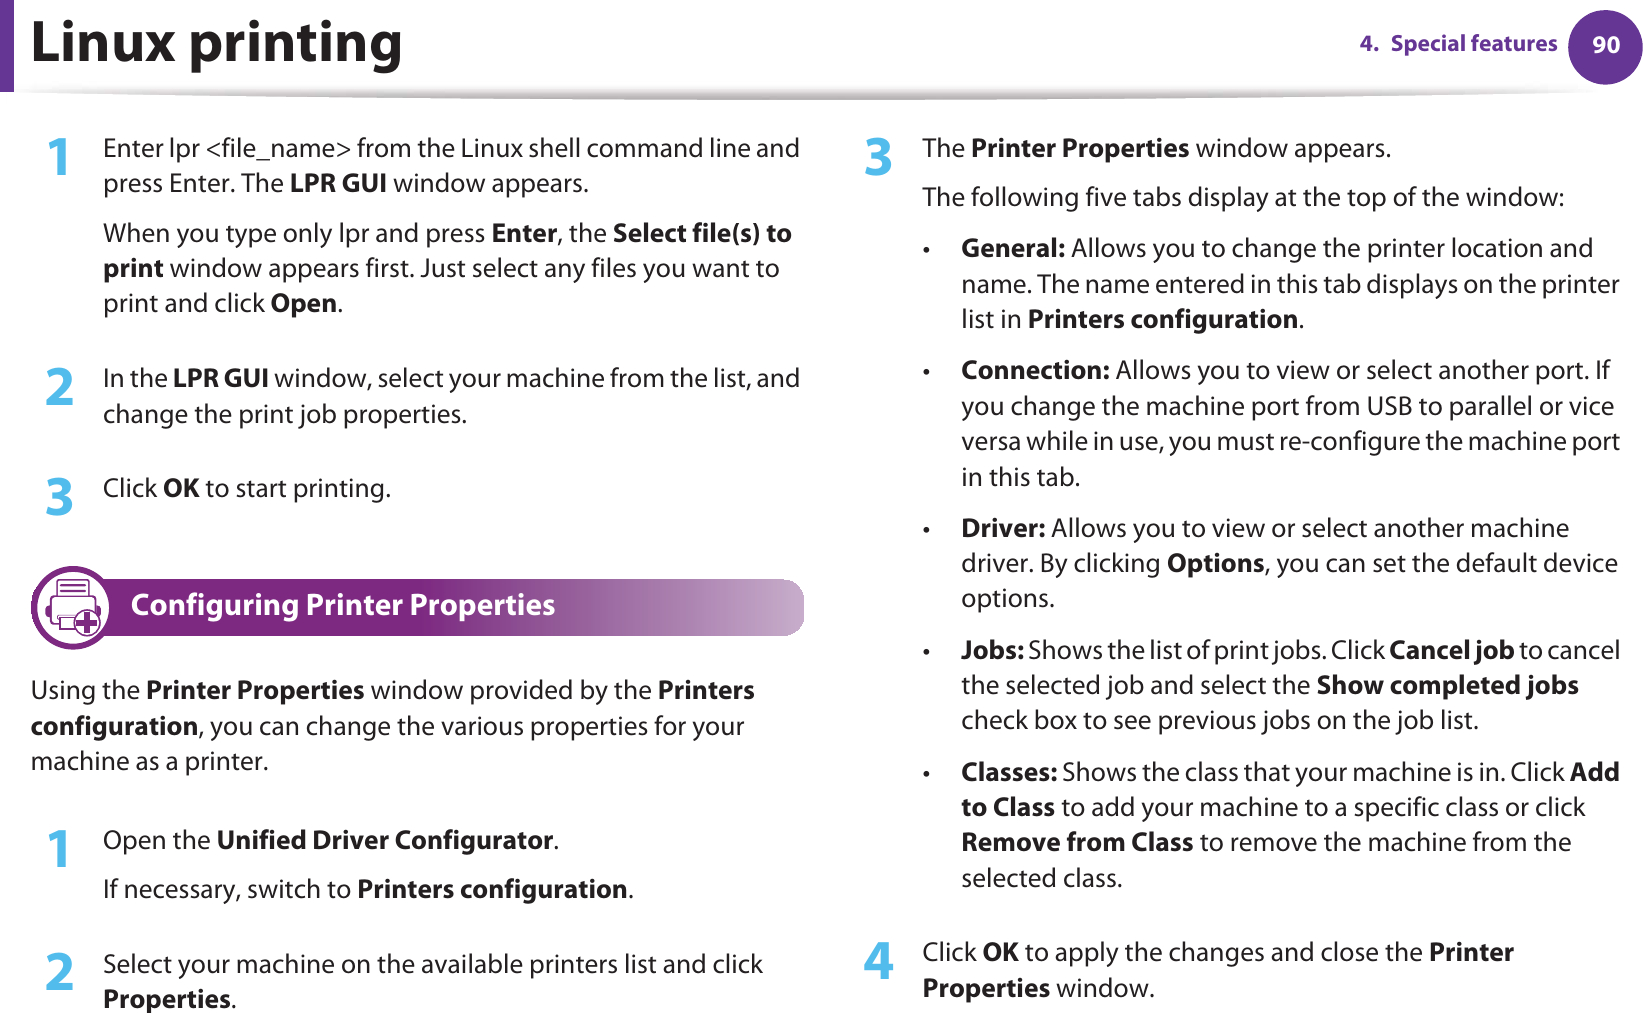
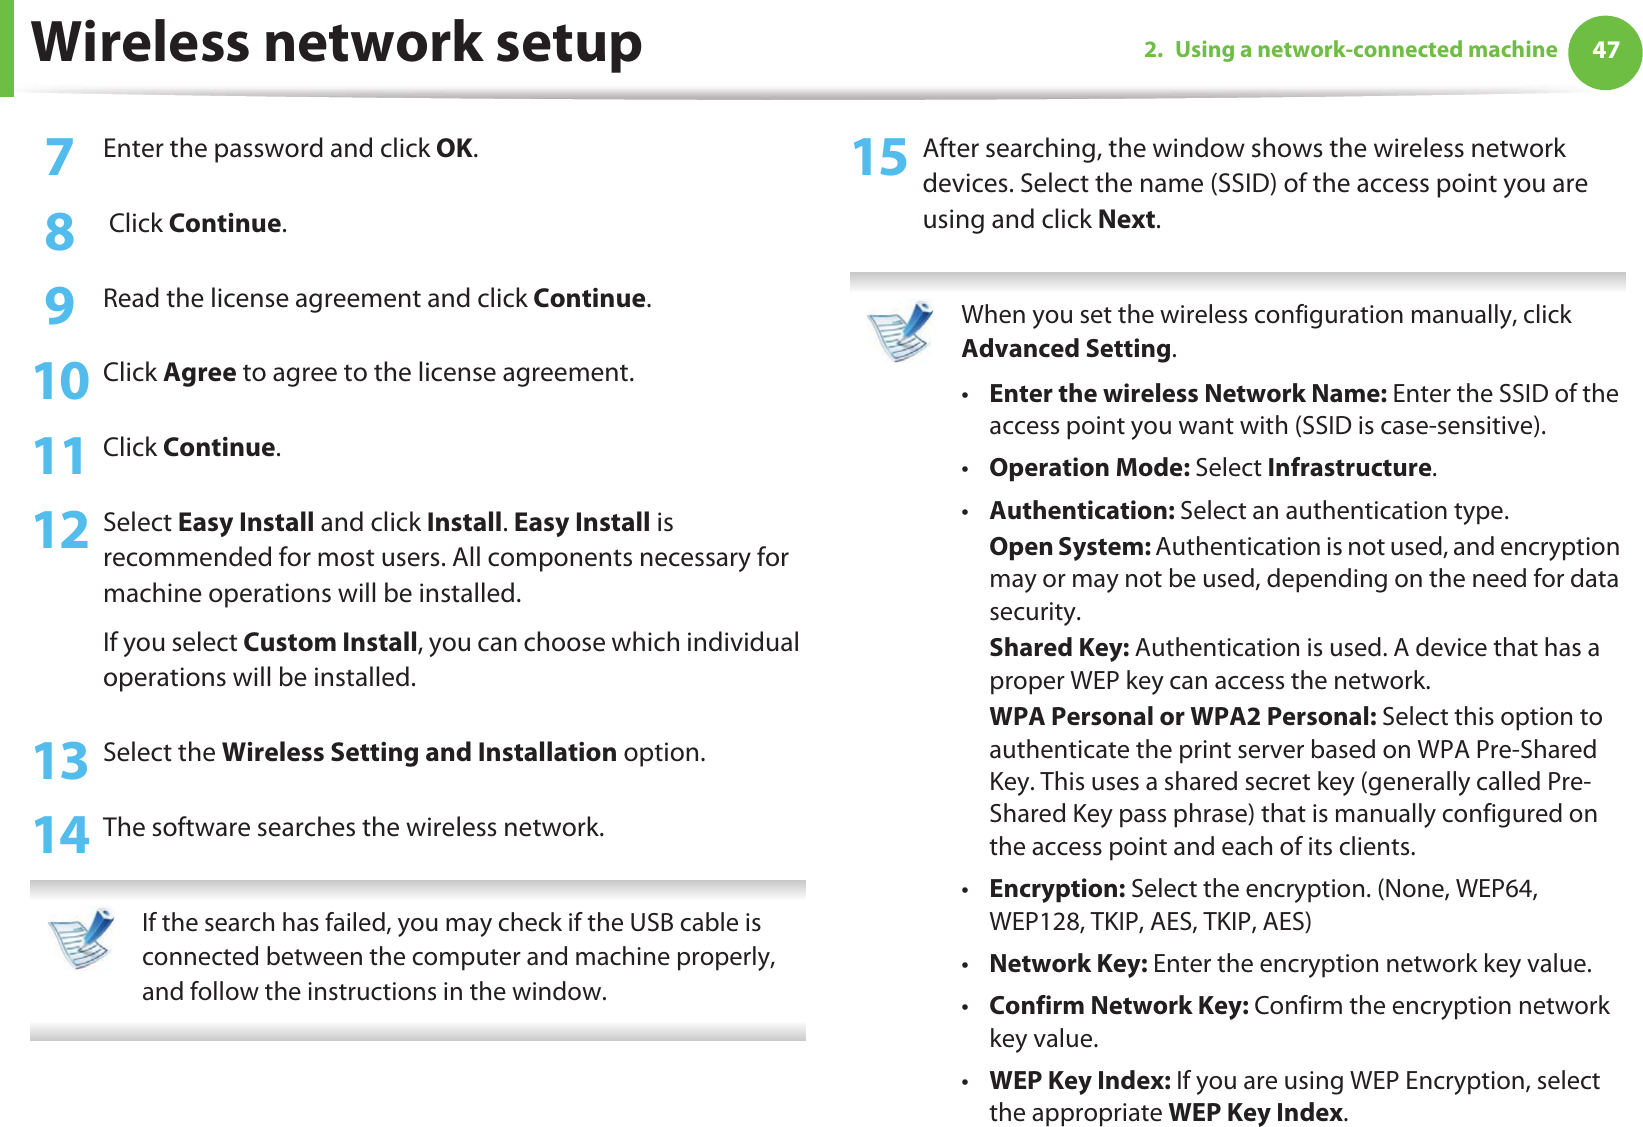
![IPv6 configuration 302. Using a network-connected machine12 Using SyncThru™ Web Service1Start a web browser, such as Internet Explorer, that supports IPv6 addressing as a URL.2 Select one of the IPv6 addresses (Link-local Address, Stateless Address, Stateful Address, Manual Address) from Network Configuration Report (see "Printing a network configuration report" on page 13).3 Enter the IPv6 addresses (e.g.,: http://[FE80::215:99FF:FE66:7701]). Address must be enclosed in '[ ]' brackets.](https://usermanual.wiki/Samsung-Electronics-Co/ML2955W.Users-Manual-2/User-Guide-1480608-Page-30.png)


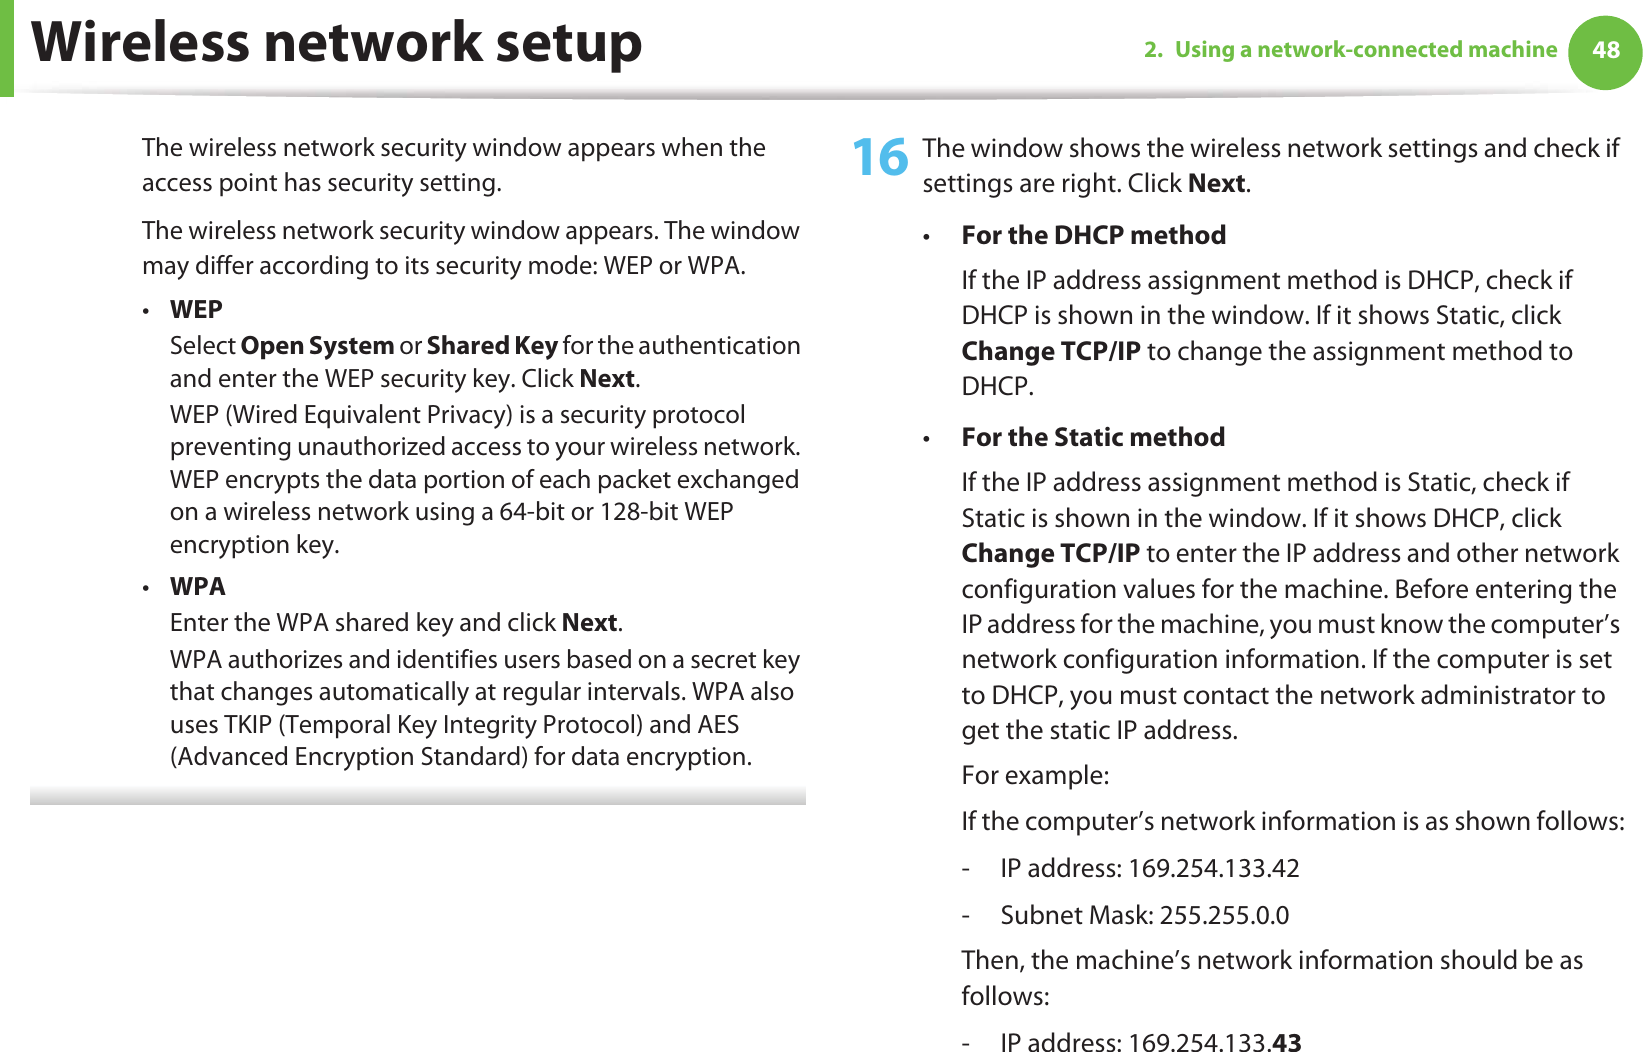
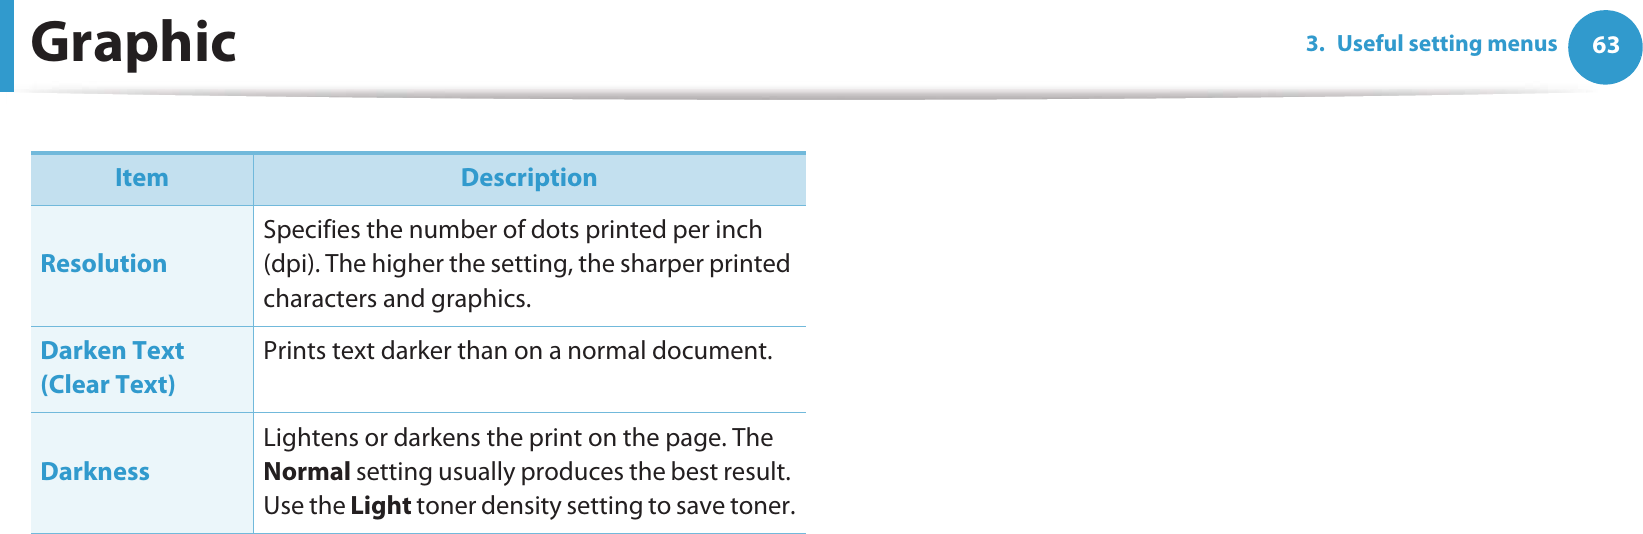
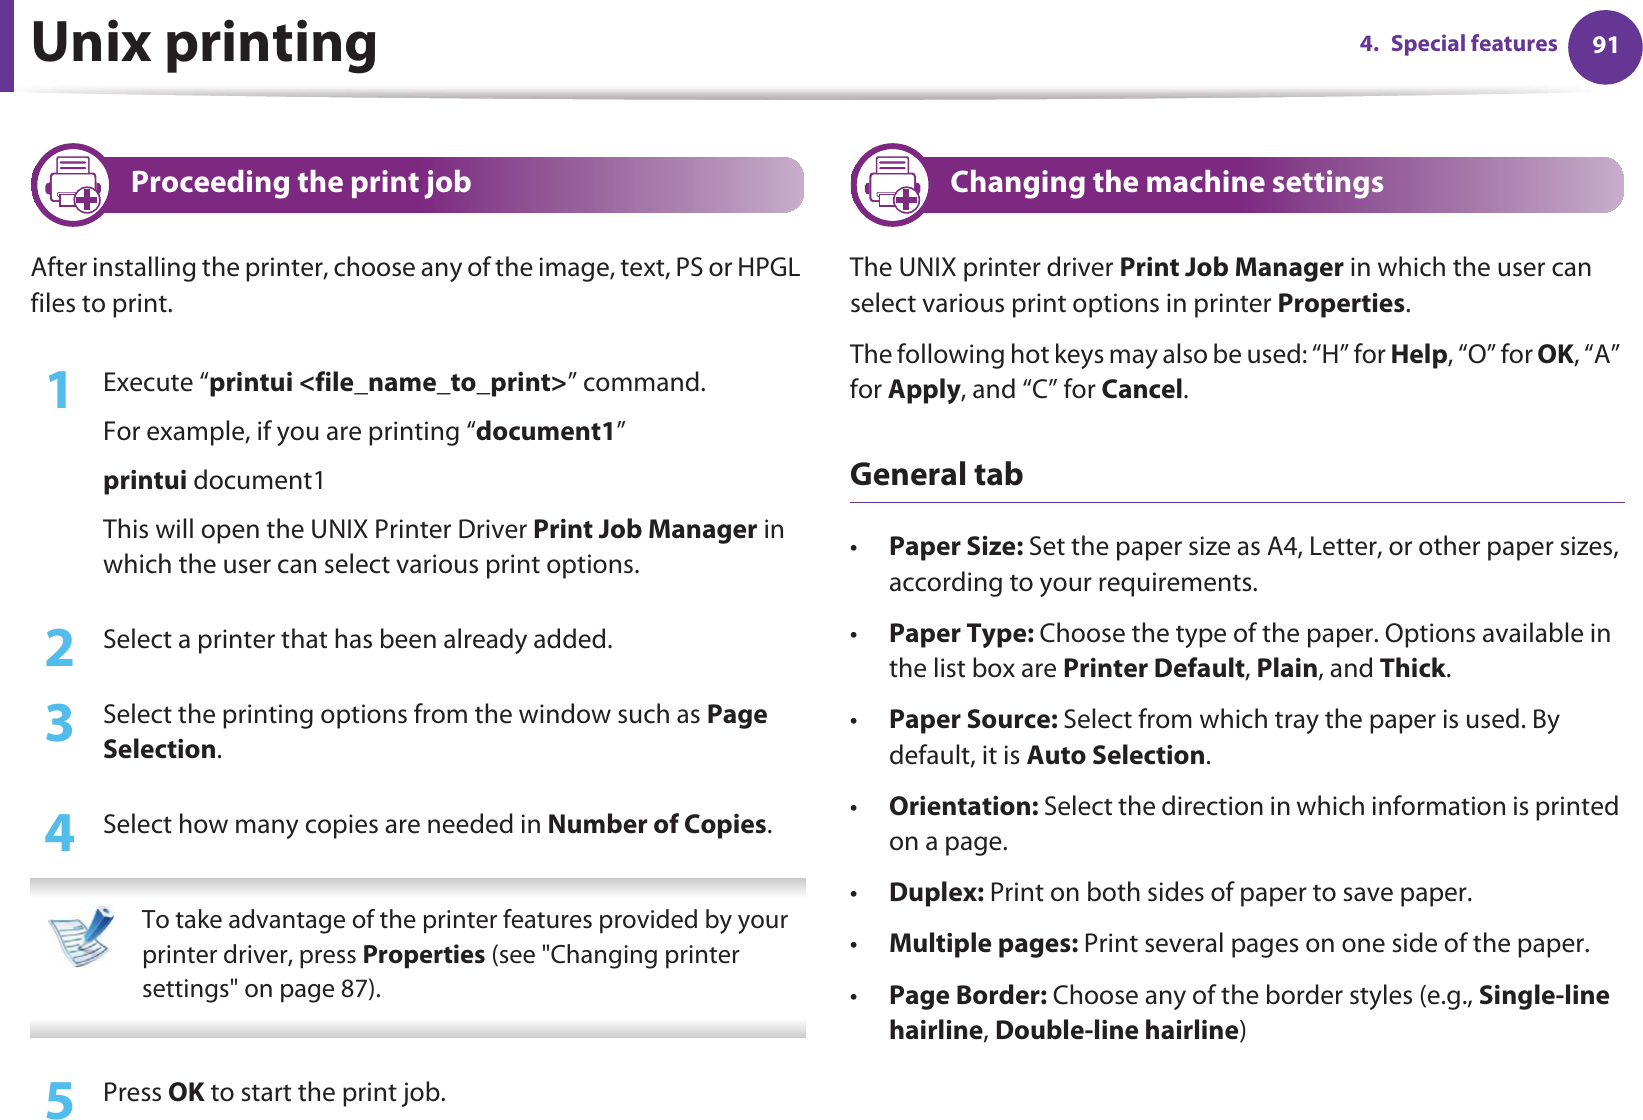
![623. Useful setting menusPaperItem DescriptionCopies Selects the number of copies.MP Tray / [Tray<x>]•Paper Size: Selects the default paper size. •Paper Type: Selects the paper type currently loaded in the tray.Paper Source Sets from which tray to use paper.Tray Chaining (Auto Tray Switch)When you select any other value except Auto from Paper Source and the selected tray is empty, you can set the machine to automatically print from other trays. If you select Auto from Paper Source, this message does not appear. Tray ConfirmActivates the tray confirmation message. If you open and close a tray, a window asking you whether to set the paper size and type for the tray just opened appears.](https://usermanual.wiki/Samsung-Electronics-Co/ML2955W.Users-Manual-2/User-Guide-1480608-Page-62.png)