Samsung Electronics Co SCX4100 Digital Laser Multi Function Printer User Manual 4100
Samsung Electronics Co Ltd Digital Laser Multi Function Printer 4100
UserManual.wiki
>
Samsung Electronics Co
>
SCX4100 User Manual
>
Users Manual 2
Contents
1.
Users Manual 1
2.
Users Manual 2
3.
Users Manual 3
Users Manual 2
Navigation menu
Upload a User Manual
Namespaces
Wiki Guide
HTML
PDF
Info
Views
User Manual
Discussion / Help
Navigation


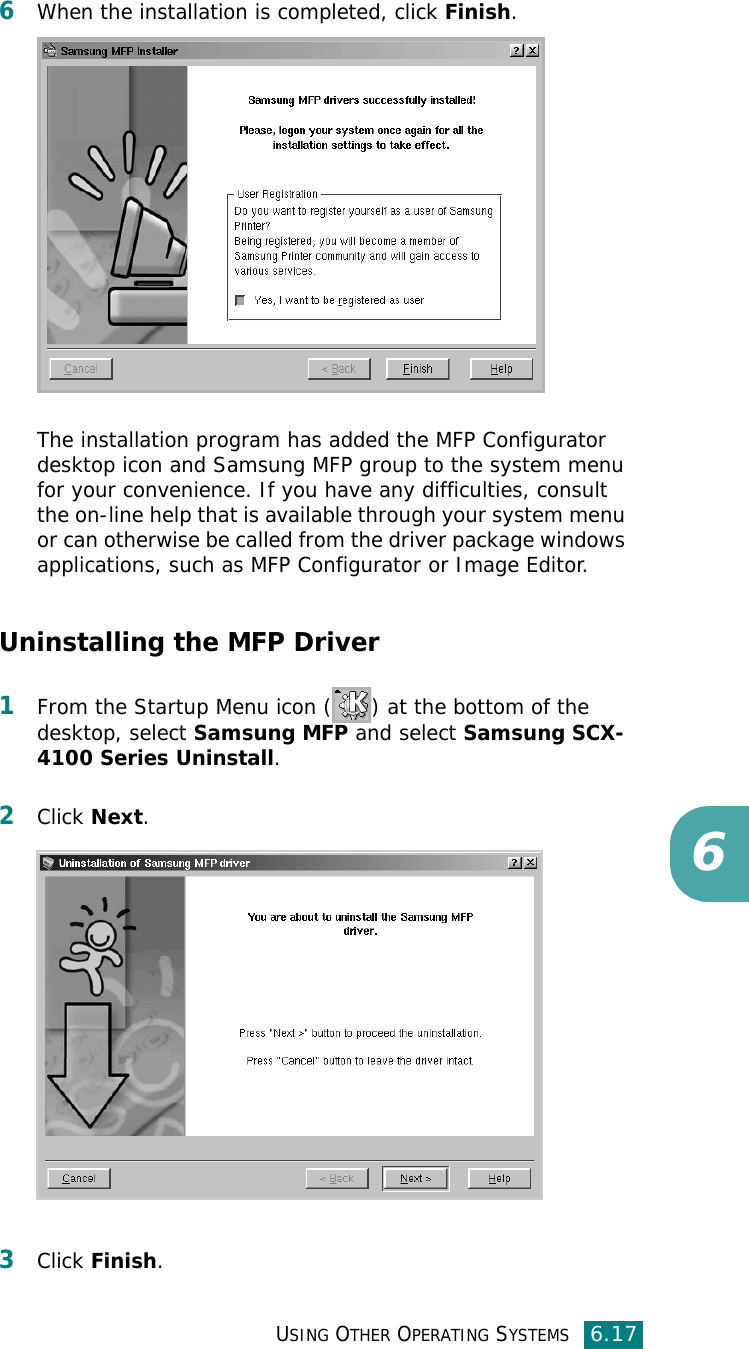
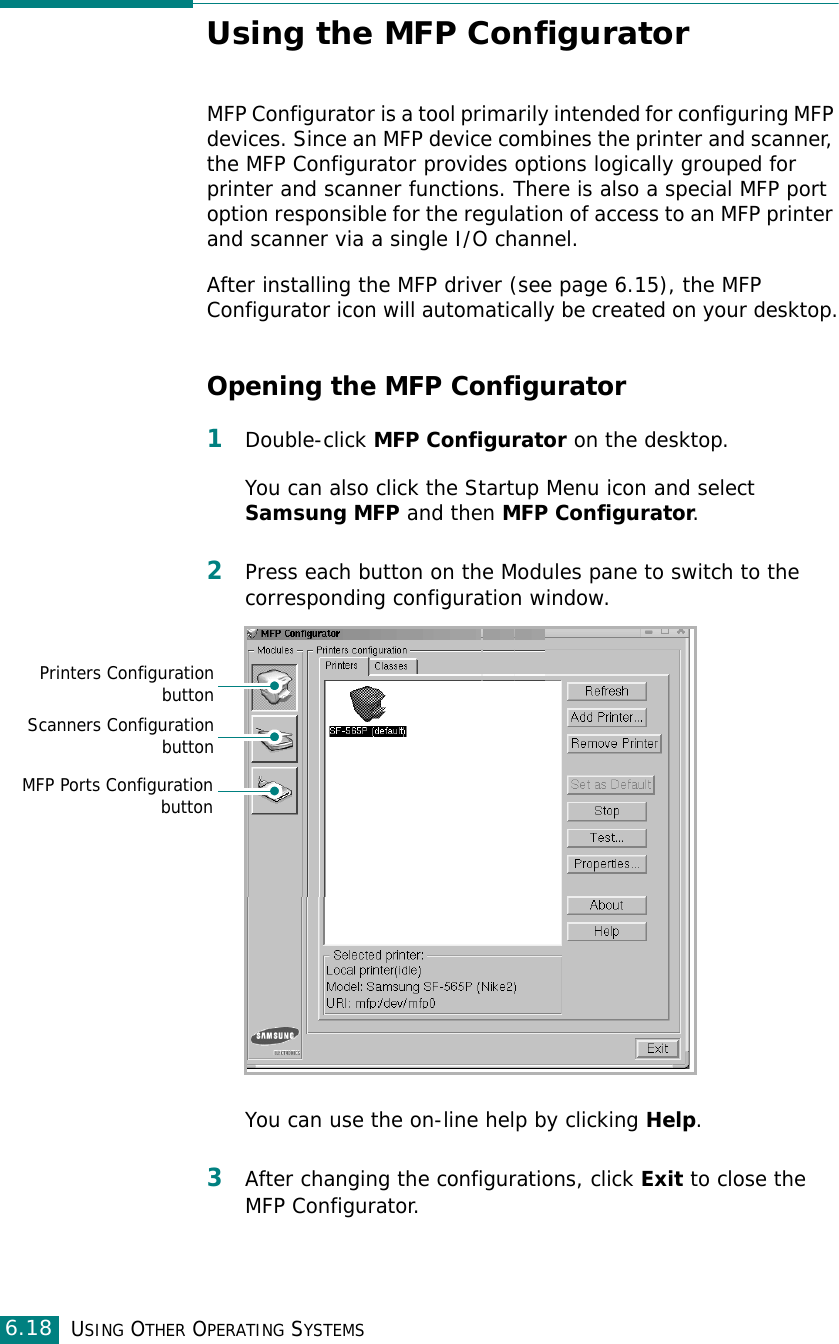
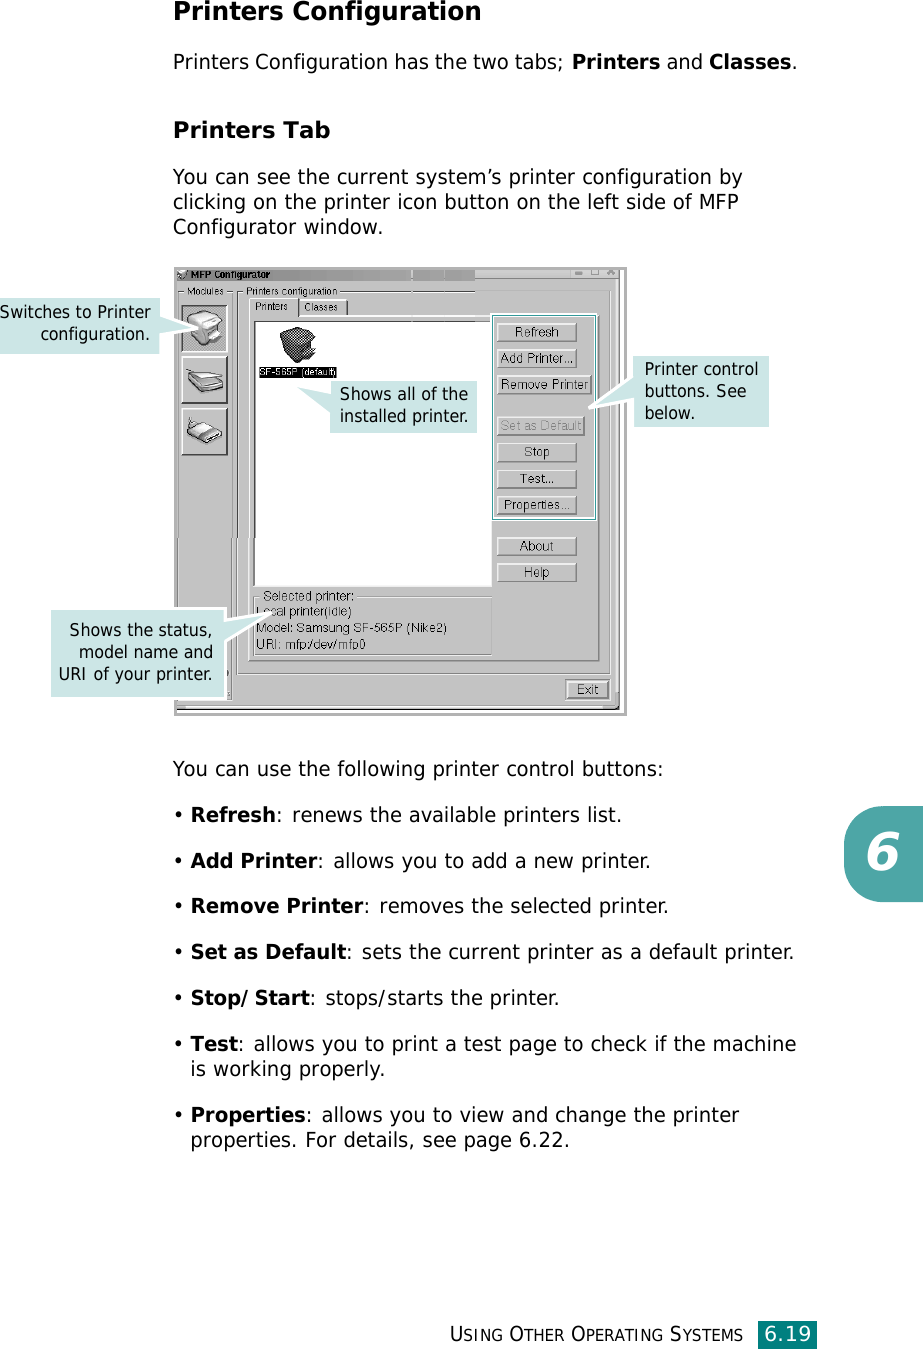
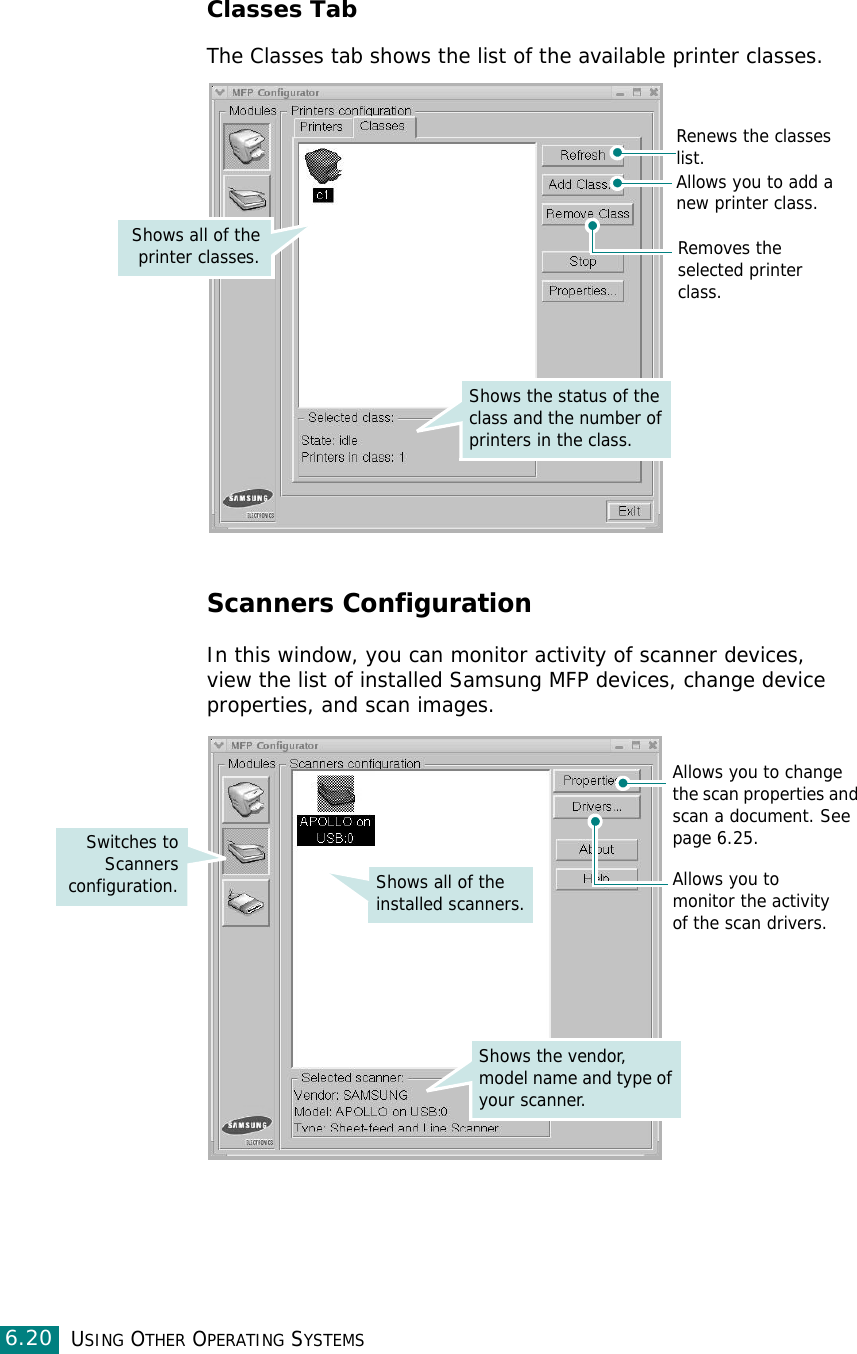
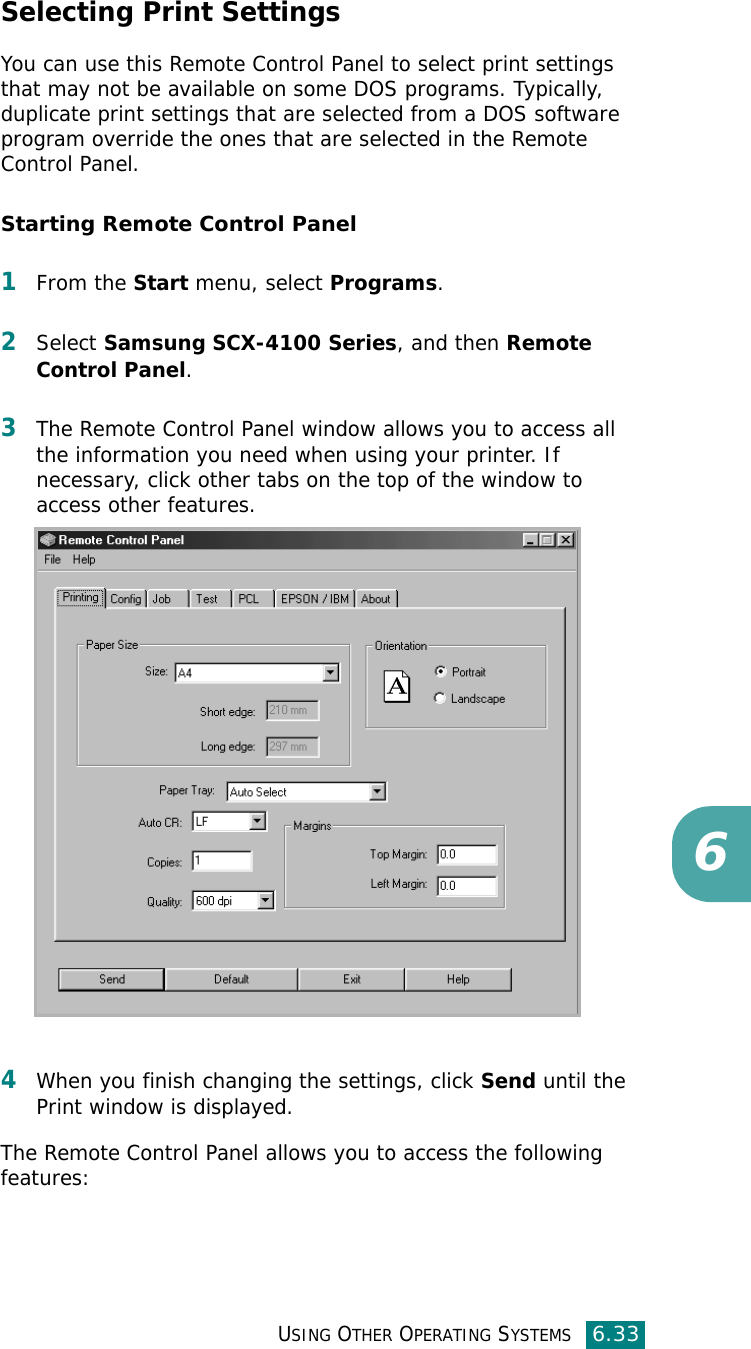
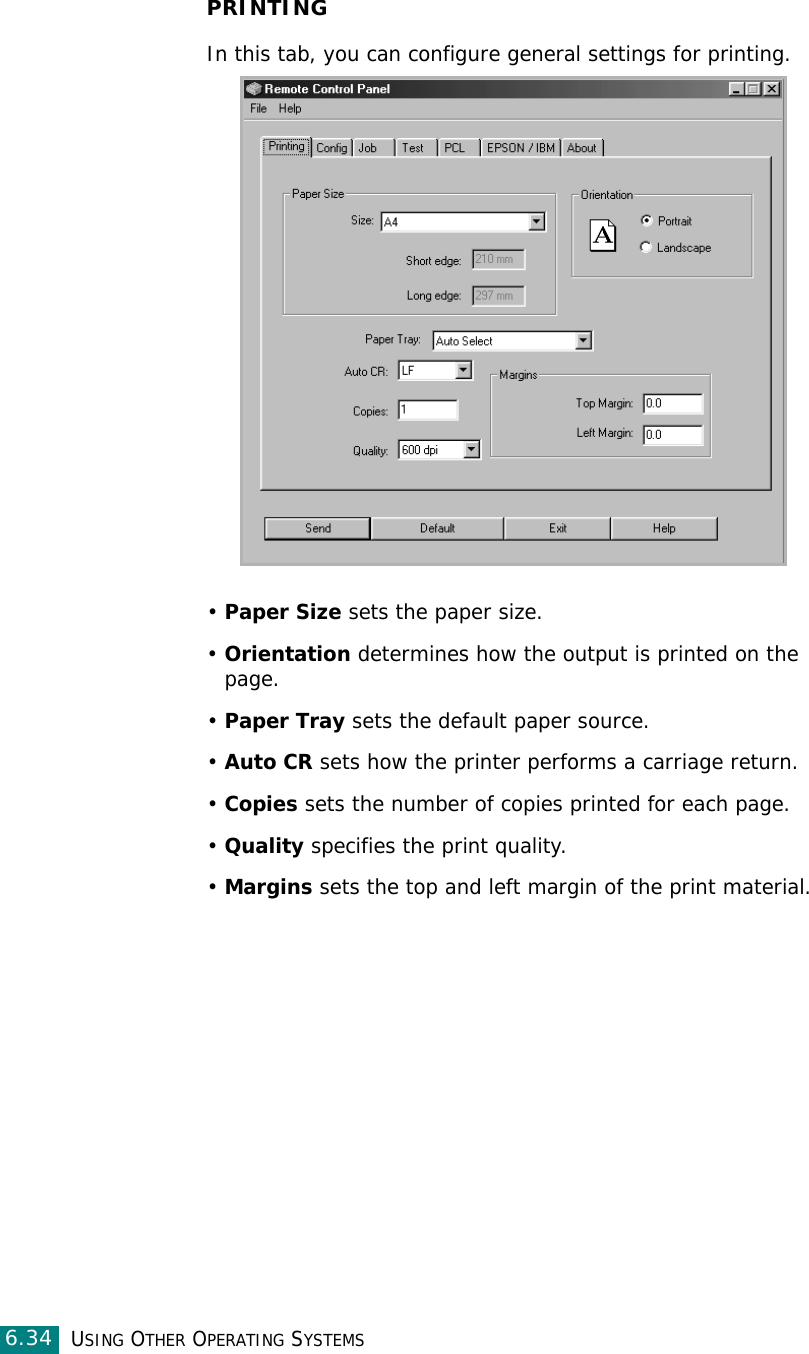
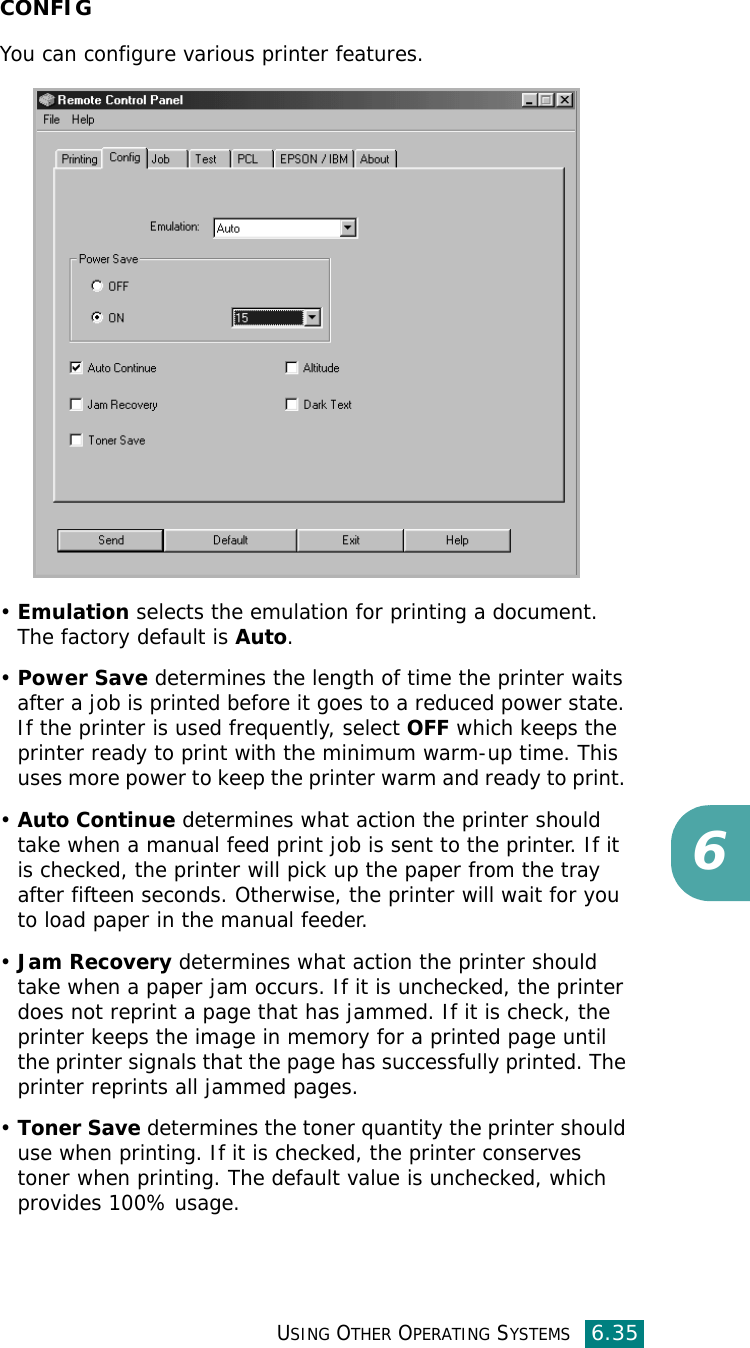
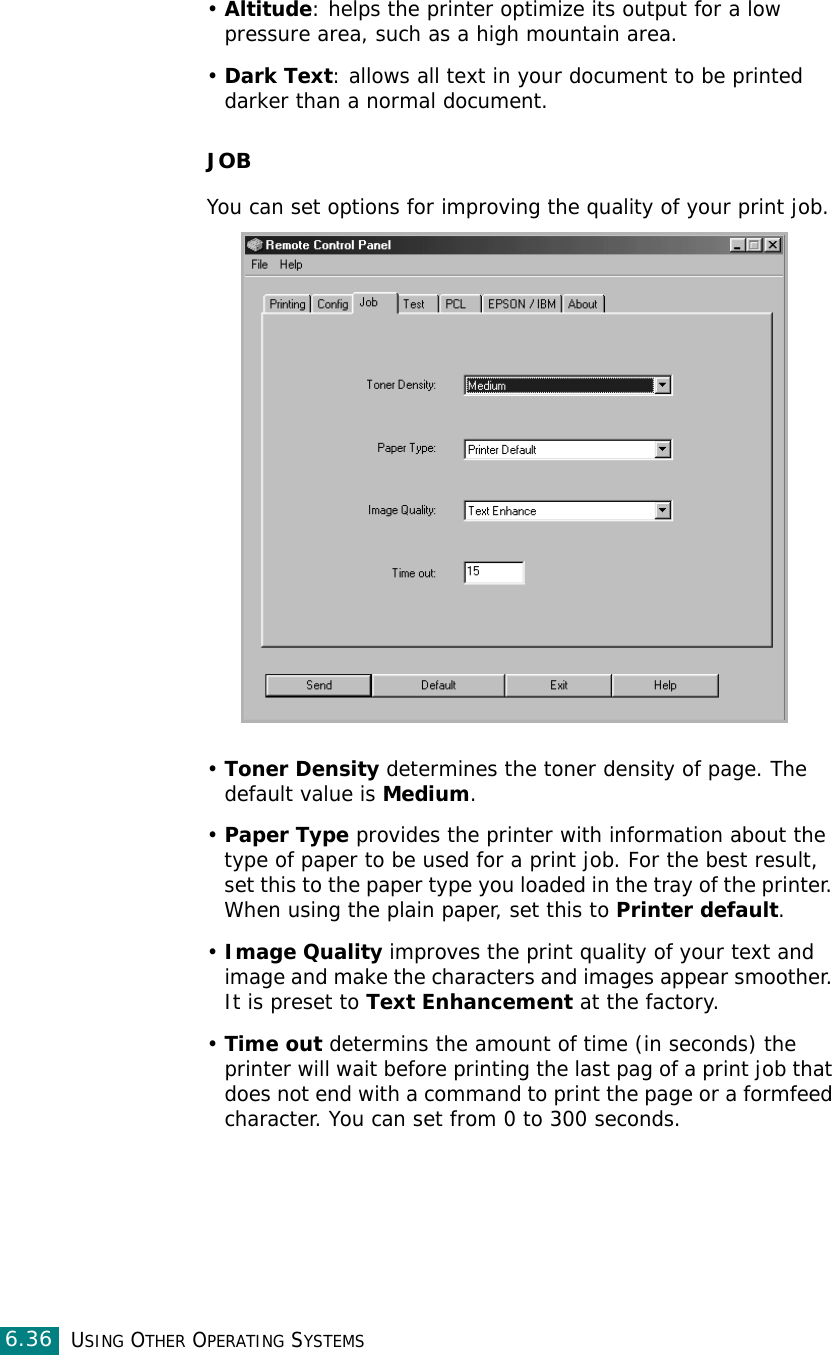
![USING OTHER OPERATING SYSTEMS6.16Installing the MFP Driver1Make sure that you connect your machine to your computer. Turn both the computer and the machine on.2When the Administrator Login window appears, type in root in the Login field and enter the system password.NOTE: You must log in as a super user (root) to install the printer software. If you are not a super user, ask your system administrator.3Insert the printer software CD-ROM. The CD-ROM will automatically run.If the CD-ROM does not automatically run, click the icon at the bottom of the desktop. When the Terminal screen appears, type in:[root@localhost root]#cd /mnt/cdrom/Linux[root@localhost root]#./install.sh NOTE: The installation program runs automatically if you have an autorun software package installed and configured.4Click Install.5When the welcome screen appears, click Next.](https://usermanual.wiki/Samsung-Electronics-Co/SCX4100.Users-Manual-2/User-Guide-422528-Page-21.png)