Samsung Electronics Co SCX4100 Digital Laser Multi Function Printer User Manual 4100
Samsung Electronics Co Ltd Digital Laser Multi Function Printer 4100
Contents
- 1. Users Manual 1
- 2. Users Manual 2
- 3. Users Manual 3
Users Manual 2
S
CANNING
5.2
Scanning Basics
Your machine offers two ways to scan:
• From the Samsung SmarThru software: Launch Samsung
SmarThru and open the Scan Wizard to begin scanning. See
below.
• From TWAIN-compliant software: You can use other software
including Adobe PhotoDeluxe and Adobe Photoshop. See
page 5.6.
N
OTES
:
• To scan with your machine, you must install the MFP driver.
• Scanning is done through the same LPT or USB port currently
assigned for your printer port.
Scanning Using Samsung SmarThru
Samsung SmarThru is the accompanying software for your
machine. With the SmarThru, scanning becomes a pleasure.
Follow these steps to start scanning using the SmarThru:
1
Make sure that your machine and computer are turned on
and properly connected to each other.
2
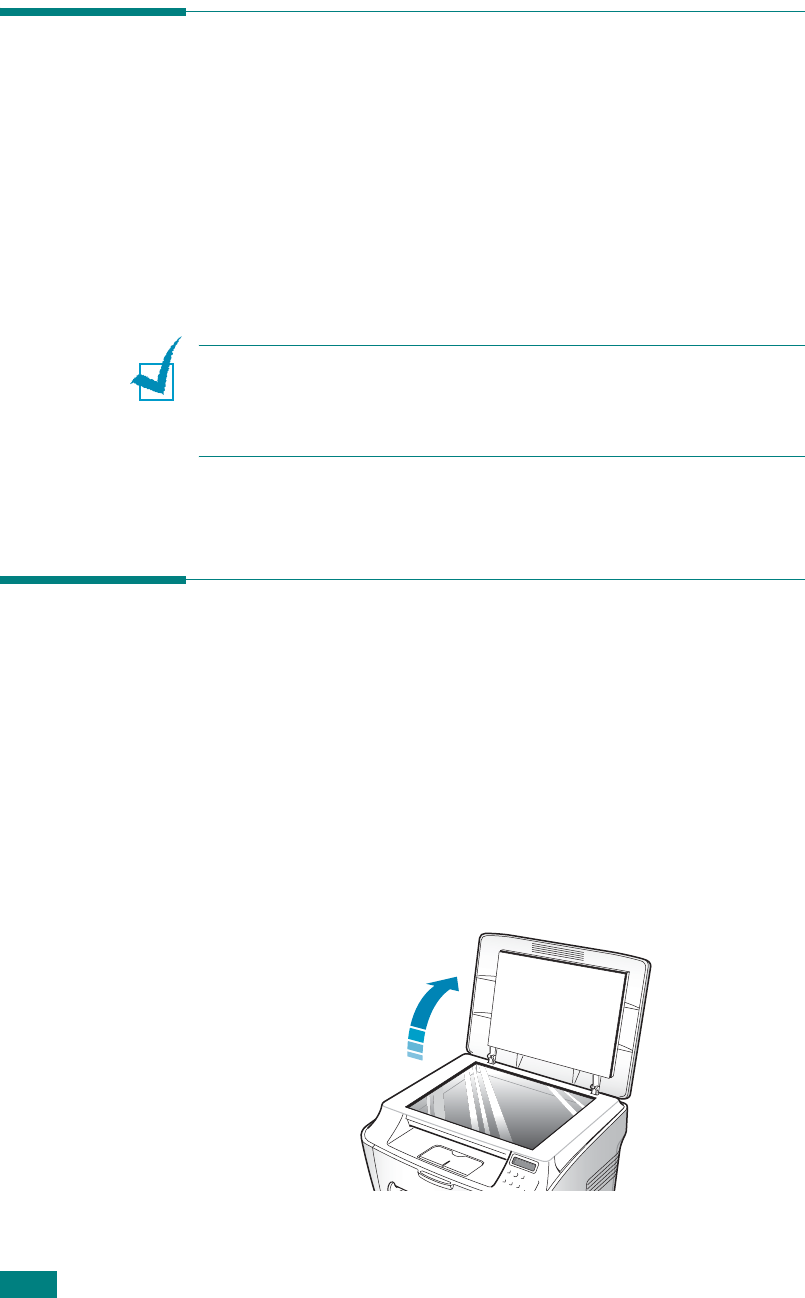
Lift the document cover.

S
CANNING
5.3
5
3
Load the document to be scanned
face down
on the glass
and align it with document guides on the left top corner of
the glass.
4
Close the document cover.
5
Once you have installed Samsung software, you see the SmarThru
icon on the desktop. Double-click the
SmarThru 4
icon.
The SmarThru 4 window opens.
Double-click this icon.
S
CANNING
5.4
6
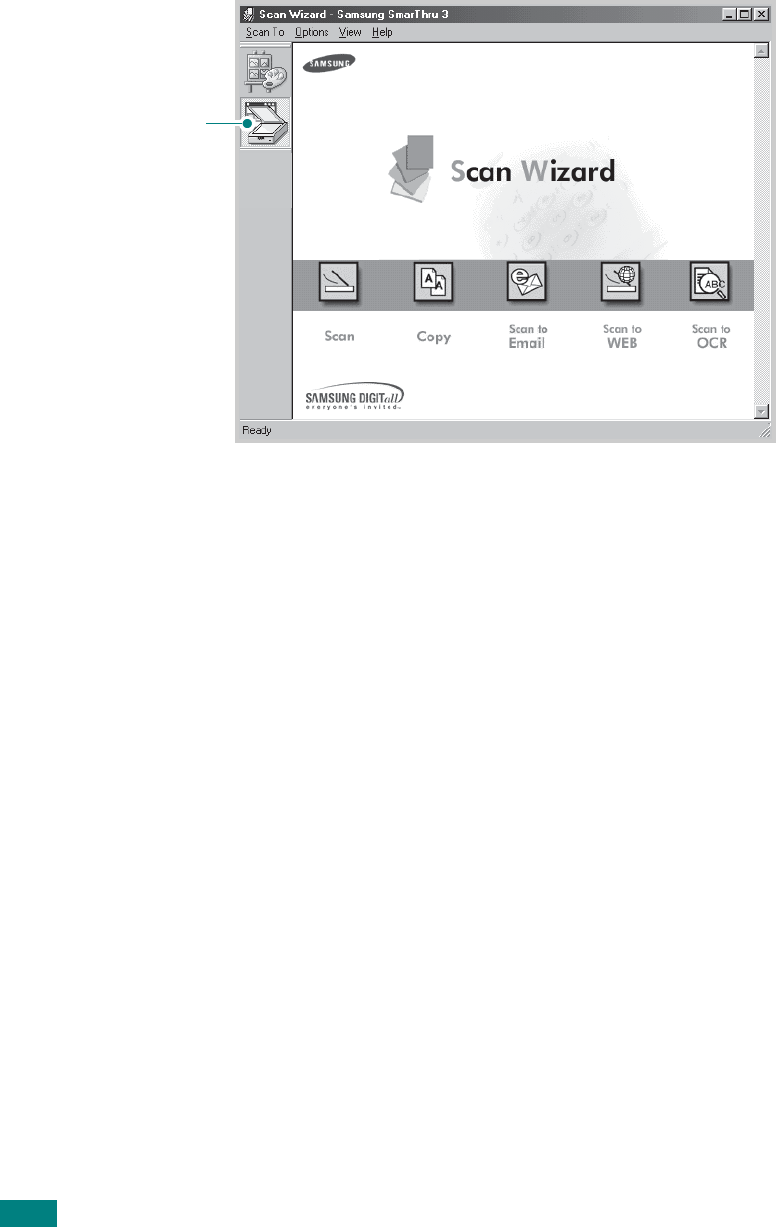
To open the Scan Wizard, click the
Scan Wizard
icon in the
plug-in bar on the left of the SmarThru 4 window.
The Scan Wizard lets you use the following services:
•
Scan
Lets you scan the original documents and save them in
the Image Manager of the Samsung SmarThru system.
The Image Manager is an image database manager and
image editor program.
•
Copy
Lets you use your machine to produce professional
quality copies. You can adjust the image size and select
advanced settings.
•
Scan to Email
Lets you scan the original documents and then launches
a default mail program of your system, such as Microsoft
Outlook Express, so that you can send the scanned image
attached to a new mail. To send e-mail using the
Samsung SmarThru system, you need to enable the
Internet Gate and configure an e-mail account in
SmarThru Configuration. Refer to the SmarThru User’s
Guide.
•
Scan to FAX
Lets you scan the original documents and then launches
a New Fax form which helps you to send them as a fax
image. This service is available only when you enable and
configure the Fax Gate in SmarThru Configuration. Refer
to the SmarThru User’s Guide.
Scan Wizard icon.

S
CANNING
5.5
5
•
Scan to WEB
Lets you scan the original documents for further
publishing to the Web.
•
Scan to OCR
Lets you scan the original documents and pass them to
the OCR program. OCR (Optical Character Recognition) is
the process of converting a scanned image into text that
you can edit in a word processing program. After you
scan your document, the software processes or
“recognizes” it. Then you can change it and either save
the file or open it in any word processing program on
your computer.
7
Click the service icon according to your job.
8
The Samsung Scan Manager opens for the selected service.
Adjust the scan settings. You can use the
Help
button to
receive on-line help.
9
To start scanning, click
Scan
.
For more information, please refer to the SmarThru User’s
Guide which came with your machine.
N
OTE
: If you want to cancel the scan job, press the
Stop/Clear
button on the control panel.

S
CANNING
5.6
Scanning Process with TWAIN-
enabled Software
If you want to scan documents using other software, you will
need to use TWAIN-compliant software, such as Adobe
PhotoDeluxe or Adobe Photoshop. The first time you scan with
your machine, select it as your TWAIN source in the application
you use.
The basic scanning process involves a number of steps:
• Place your photograph or page on the document glass. See
page 5.2.
• Open an application, such as PhotoDeluxe or Photoshop.
• Open the TWAIN window and set the scan options.
• Scan and save your scanned image.
You need to follow the program’s instructions for acquiring an
image. Please refer to the user’s guide of the application.

6USING OTHER OPERATING
SYSTEMS
This chapter gives you information about how to use your
machine in the Macintosh or Linux system.
This chapter includes:
• Using Your Printer in Macintosh
• Using Your Printer in Linux

U
SING
O
THER
O
PERATING
S
YSTEMS
6.2
Using Your Printer in
Macintosh
Installing Software in Macintosh
Your machine Macintosh systems with a built-in USB interface.
When you print a file from a Macintosh computer, you can use
the SPL driver to support your machine’s major printing
features.
System Requirements
To use your machine and its software with a Macintosh, your
system should have:
Macintosh Hardware Requirement:
• One of the following Macintosh models:
- Power Macintosh series
- Power Macintosh G3, G4
- iMac series
- PowerBook series
- iBook series
•USB interface
Macintosh System Requirement:
Mac OS 8.6 or later
N
OTES
:
• Mac OS 10.0 version is not supported.
• Your printer must be connected directly to your Macintosh using
a USB cable.
• The Samsung SCX-4100 does not support Postscript printing.
Ensure that the application you are using does not expect to be
able to use Postscript.

U
SING
O
THER
O
PERATING
S
YSTEMS
6.3
6
Installing Software
Mac OS 8.6 ~ 9.x
1
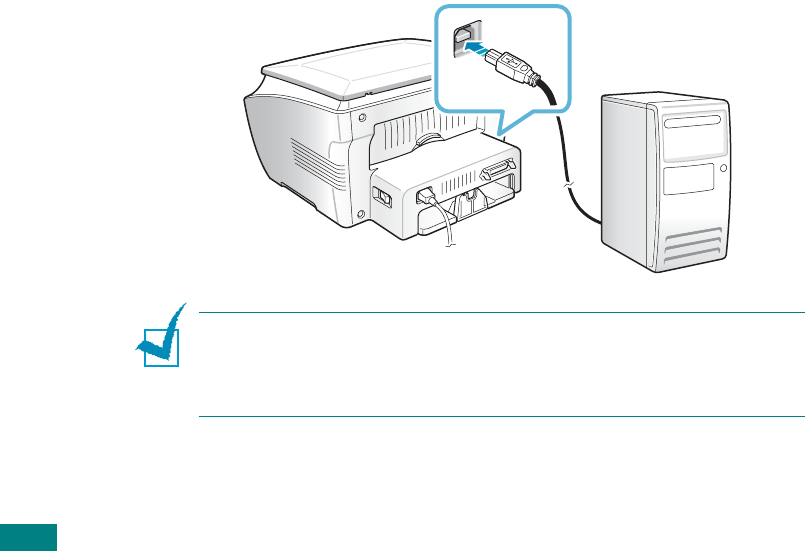
Turn the machine and computer off and plug the supplied
USB cable into your machine’s USB connector.
You must use a USB 1.1 compliant cable that is no more
than 3 m length.
N
OTE
: When you are using a USB hub, connect the machine’s
cable to the first tier of the hub, or the machine may malfunction.
If the machine doesn’t work with the hub, connect it directly to the
USB port.
2
Turn on your computer and machine.
3
Insert the CD-ROM which came with your machine into the
CD-ROM drive.
4
Double-click
SAMSUNG_MFP
on your Macintosh desktop.
5
Double-click the
Classic
folder.
6
Double-click the
West
folder.
7
Double-click the
Samsung Laser Printer installer
icon
next to each language to select the correct one.
8
Click
Continue
and then click
Continue
.
U
SING
O
THER
O
PERATING
S
YSTEMS
6.4
9
The Samsung Laser Printer installer window opens. Select
the installation type.
The window provides the following two options for software
installation:
•
Easy Install
(recommended method): This option
installs the SPL driver.
•
Custom Install
: This option allows you to choose which
components will be installed, the SPL driver or the Adobe
Acrobat Reader program for opening the user’s guide.
10
Click
Install
.
When other programs are operating, the alert message
appears. Click
Continue
to install the software or click
Cancel
, close other programs and install the software.
11
After the installation is finished, click
Restart
.
Mac OS 10.x
Mac OS 10.0 version is not supported.
1
Turn the machine and computer off and plug the supplied
USB cable into your machine’s USB connector.
You must use a USB 1.1 compliant cable that is no more
than 3m length.
N
OTE
: When you are using a USB hub, connect the machine’s
cable to the first tier of the hub, or the machine may malfunction.
If the machine doesn’t work with the hub, connect it directly to the
USB port.

U
SING
O
THER
O
PERATING
S
YSTEMS
6.5
6
2
Turn on your computer and machine.
3
Insert the CD-ROM which came with your machine into the
CD-ROM drive.
4
Double-click
SAMSUNG_MFP
on your Macintosh desktop.
5
Double-click the
OS X
folder.
6
For Mac OS 10.1, double-click the
Installer for 10.1
icon.
For Mac OS 10.2.X, double-click the
Installer for 10.2 or
later
icon.
7
Click
Continue
, and then click
Continue
.
8
When the Easy Install window appears, click
Install
.
If you already installed the Samsung SPL II printer driver,
click
Update
.
9
Click
Continue Installation
.
10
After installation is completed, click
Restart
.

U
SING
O
THER
O
PERATING
S
YSTEMS
6.6
Setting Up Your Printer
Mac OS 8.6 ~ 9.x
1
From the
Apple
menu, select
Chooser
.
2
From the left pane of the Chooser window, click
SAMSUNG
SPL II
. Your printer name appears on the right pane of the
Chooser window.
3
Click
Samsung SCX-4100 Series
and close the Chooser
window.
4
The message window indicating that you have changed
your current printer appears. Click
OK
.
A SAMSUNG SPL II printer icon is created on your desktop.
Mac OS 10.x
1
Click
Printer Center
.
2
Select
Samsung SCX-4100 Series
and then
Make
Default
.
If you cannot find the Samsung SCX-4100 printer, click
Add
to
add the printer. Then make sure that your computer and
machine are connected to the USB cable and the machine is
turned on.
U
SING
O
THER
O
PERATING
S
YSTEMS
6.7
6
Printing a Document
When you print with a Macintosh computer, you need to check
the printer software setting in each application you use. Follow
these steps to print from a Macintosh:
1
Open a Macintosh application and select a file you want to
print.
2
Open the
File
menu, and click
Page Setup
(
Document
Setup
in some applications).
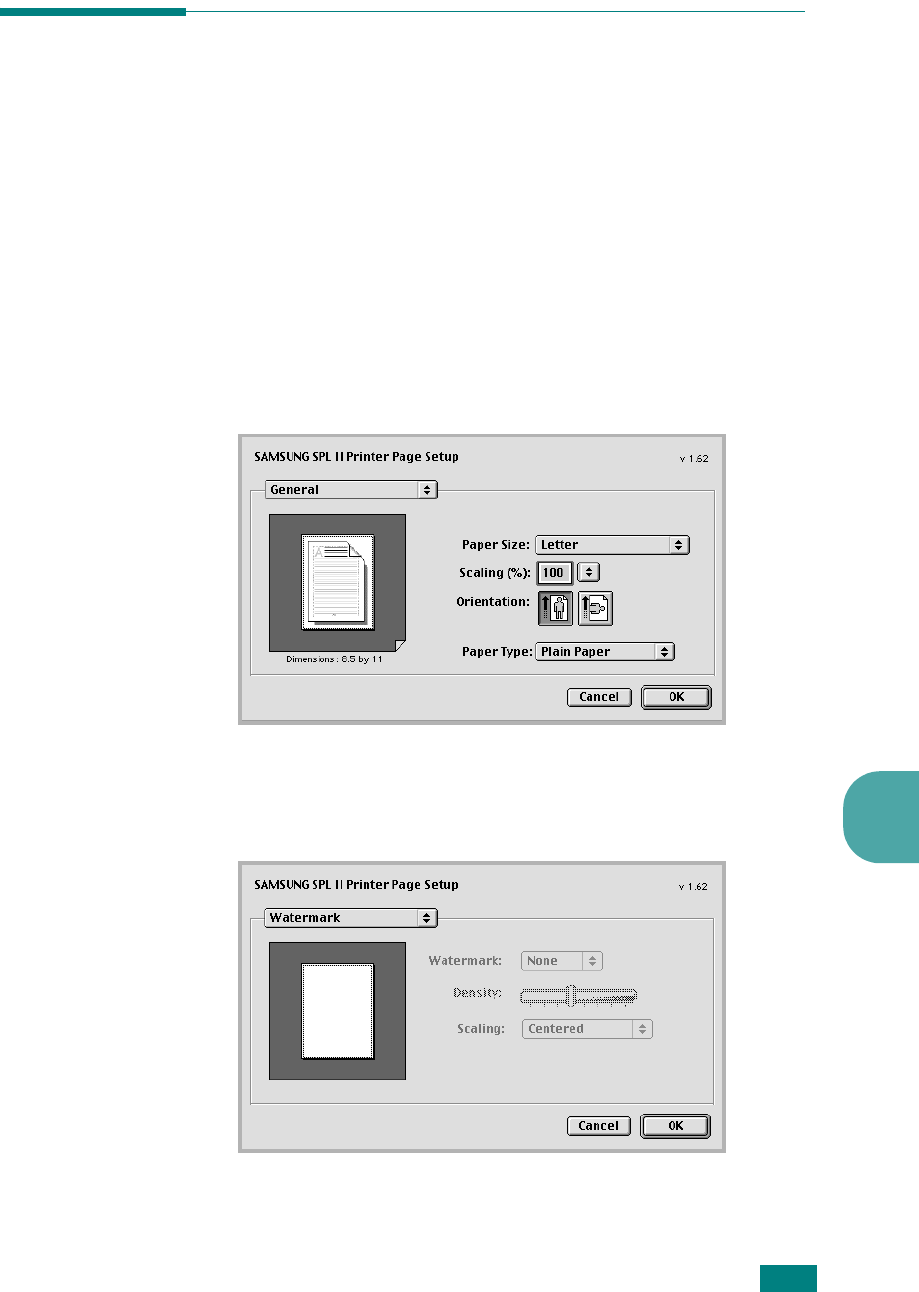
3
Choose your paper size, orientation, paper type, and other
options, and click
OK
.
Choose
Watermark
to add a watermark to each page in
your document to emphasize its purpose or indicate how it
should be handled. For details about watermark options,
see page 3.15.
Mac OS 9.2

U
SING
O
THER
O
PERATING
S
YSTEMS
6.8
For Mac OS 10.x, select
Samsung SCX-4100 Series
in
the
Format for
option.
N
OTE
: The Watermark feature is not supported on Mac OS 9.1 or
higher.
4
Open the
File
menu and click
Print
. The SAMSUNG SPL II
Printer window appears.
5
Choose the number of copies and indicate which pages you
want to print.
Mac OS 10.1
For advanced printing
features, select an option.
For details, see page 6.9.
Restores the default
settings.
Saves the current
settings for later use.
Mac OS 9.2

U
SING
O
THER
O
PERATING
S
YSTEMS
6.9
6
6
Click
Print
when you finish setting the options.
Using Advanced Printing Features
Mac OS 8.6 ~ 9.x
The SAMSUNG SPL II Printer window contains five categories of
advanced properties. Listed below is the name of each property.
- Darkness/Quality
- Layout
- Color
- Background Printing
- Paper Source
The figures on the next pages display each property in the
SAMSUNG SPL II Printer window:
For advanced printing
features, select the option
you want. For details, see
below.
Converts the
document to PDF.
Mac OS 10.2

U
SING
O
THER
O
PERATING
S
YSTEMS
6.10
Darkness/Quality
Layout
Color
Select the
print
darkness.
Select the print
resolution.
Select the number of pages
you want to print on one
sheet of paper. The pages
are smaller and arranged on
the sheet.
To print the border
of each page, check
this box.
Select the grayscale mode.
Black&White
Grayscale
U
SING
O
THER
O
PERATING
S
YSTEMS
6.11
6
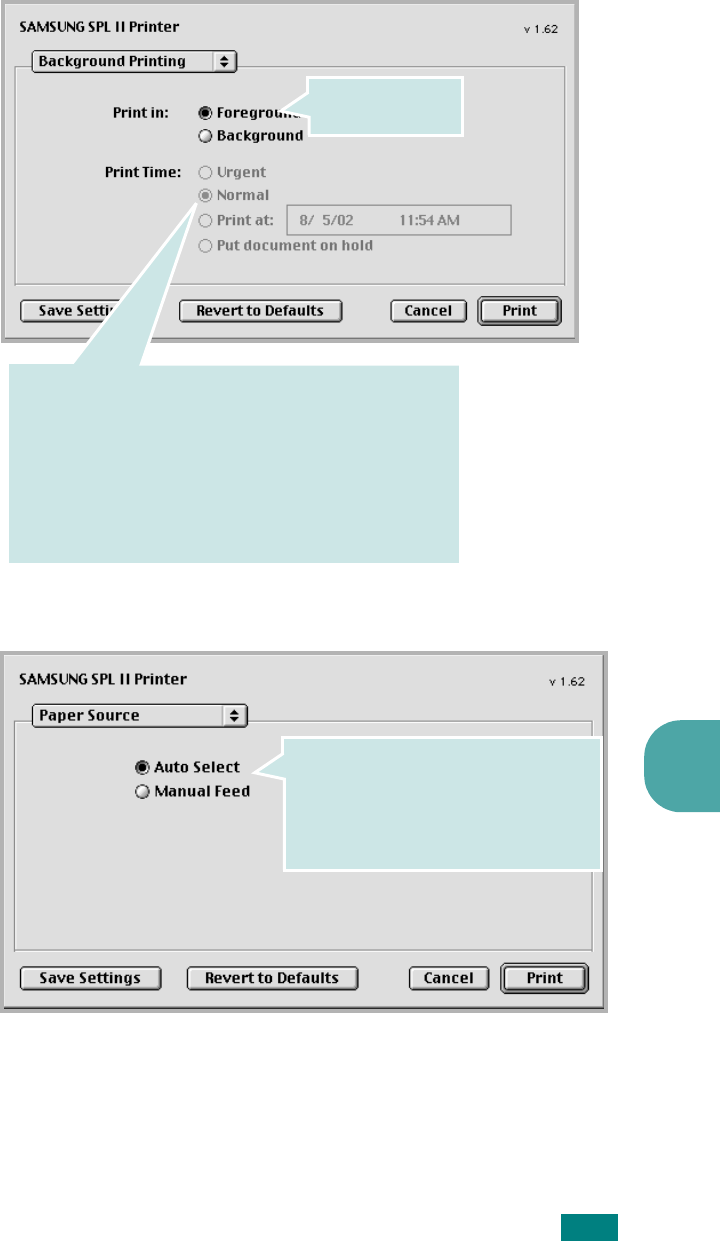
Background Printing
Paper Source
Turns background
printing on or off.
To select priority for your print job in the queue of jobs
waiting to print, click one of the following:
•
Urgent
: to print before any Normal priority job.
•
Normal
: to print in the order the job is received.
•
Print at
: to print at the specific time you enter in the day
and time fields to the right.
•
Put document on hold
: to hold the print job in the print
queue until you are ready to release it.
Select the corresponding paper source.
If
Auto Select
is set, the machine
automatically selects the print material
from the paper tray, in the following
order: the manual feeder and the paper
tray.
U
SING
O
THER
O
PERATING
S
YSTEMS
6.12
Mac OS 10.x
The Samsung SPL II Print window contains five categories of
advanced properties. Listed below is the name of each property.
- Layout
- Output Option
- Print Quality
- Paper Source
- Summary
N
OTE
: Some of feature are not supported on Mac OS 10.X such as
Paper Type, Grayscale and Back & White.
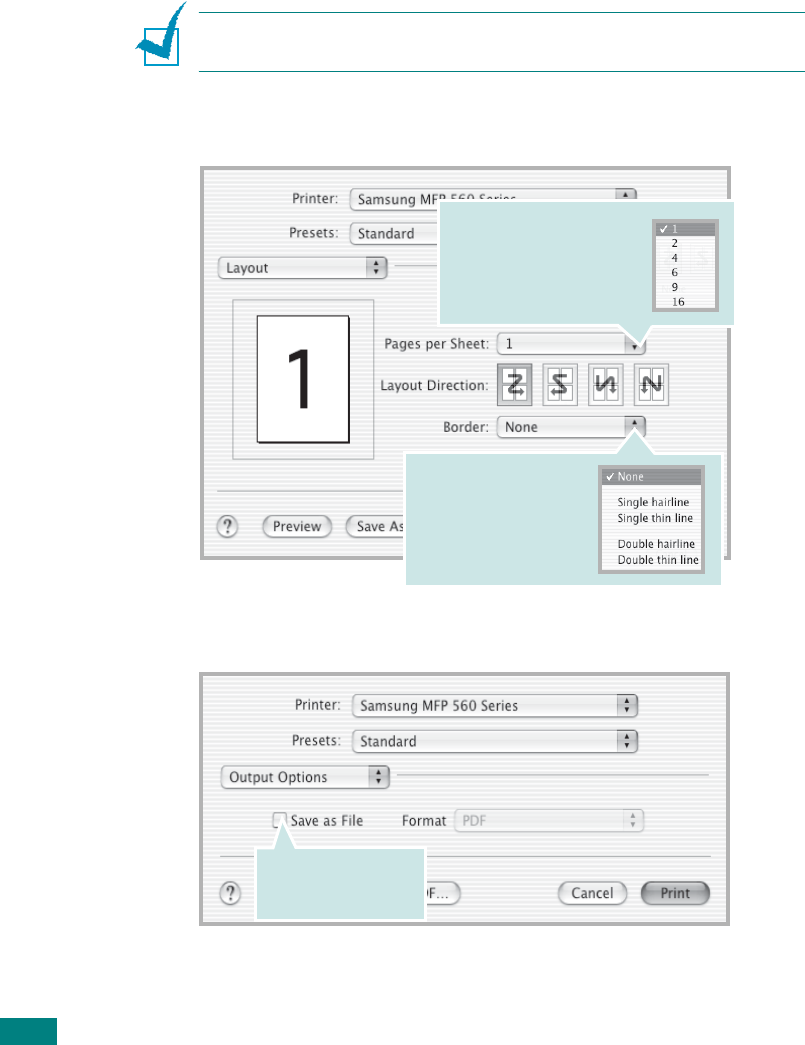
Layout
Output Option
Select the number of pages
you want to print on one
sheet of paper. The pages
are smaller and arranged
on the sheet.
To print the border of
each page, select the
option you want from the
drop-down list.
To save the document
as a PDF document,
select this box.

U
SING
O
THER
O
PERATING
S
YSTEMS
6.13
6
Print Quality
Paper Source
Summary
Select the print
resolution.
Select the corresponding paper source.
If
Auto Select
is set, the machine
automatically selects the print material
from the paper tray, in the following
order: the manual feeder and the paper
tray.
Shows the
summary of your
print settings.

U
SING
O
THER
O
PERATING
S
YSTEMS
6.14
Using Your Printer in
Linux
Getting Started
The supplied CD-ROM provides you with Samsung’s MFP driver
package for using your machine with a Linux computer.
Samsung’s MFP driver package contains printer and scanner
drivers, providing the ability to print documents and scan
images. The package also delivers powerful applications for
configuring your machine and further processing of the scanned
documents.
After the driver is installed on your Linux system, the driver
package allows you to monitor a number of MFP devices via fast
ECP parallel ports and USB simultaneously. The acquired
documents can then be edited, printed on the same local MFP or
network printers, sent by e-mail, uploaded to a FTP site or
transferred to an external OCR system.
The MFP driver package is supplied with a smart and flexible
installation program. You don't need to search for additional
components that might be necessary for the MFP software: all
required packages will be carried onto your system and installed
automatically; this is possible on a wide set of the most popular
Linux clones.

U
SING
O
THER
O
PERATING
S
YSTEMS
6.15
6
Installing the MFP Driver
System Requirements
Supported OS
• Redhat 7.1 and above
• Linux Mandrake 8.0 and above
• SuSE 7.1 and above
• Caldera OpenLinux 3.1 and above
• Turbo Linux 7.0 and above
• Slackware 8.1 and above
Recommended Hardware Requirements
• Pentium II or higher
• RAM 64 MB or higher
• HDD 200 MB or higher
N
OTES
:
• It’s also necessary to claim swap partition of 200 MB or larger for
working with large scanned images.
• The Linux scanner driver supports the optional resolution at
maximum. see “Scanner and Copier Specifications” on page A.3.
Software
• Linux Kernel 2.4 or higher
• Glibc 2.2 or higher
•CUPS
• SANE 1.4 or higher
U
SING
O
THER
O
PERATING
S
YSTEMS
6.16
Installing the MFP Driver
1
Make sure that you connect your machine to your computer.
Turn both the computer and the machine on.
2
When the Administrator Login window appears, type in
root
in the Login field and enter the system password.
N
OTE
: You must log in as a super user (root) to install the printer
software. If you are not a super user, ask your system
administrator.
3
Insert the printer software CD-ROM. The CD-ROM will
automatically run.
If the CD-ROM does not automatically run, click the icon
at the bottom of the desktop. When the Terminal screen
appears, type in:
[root@localhost root]#cd /mnt/cdrom/Linux
[root@localhost root]#./install.sh
N
OTE
: The installation program runs automatically if you have an
autorun software package installed and configured.
4
Click
Install
.
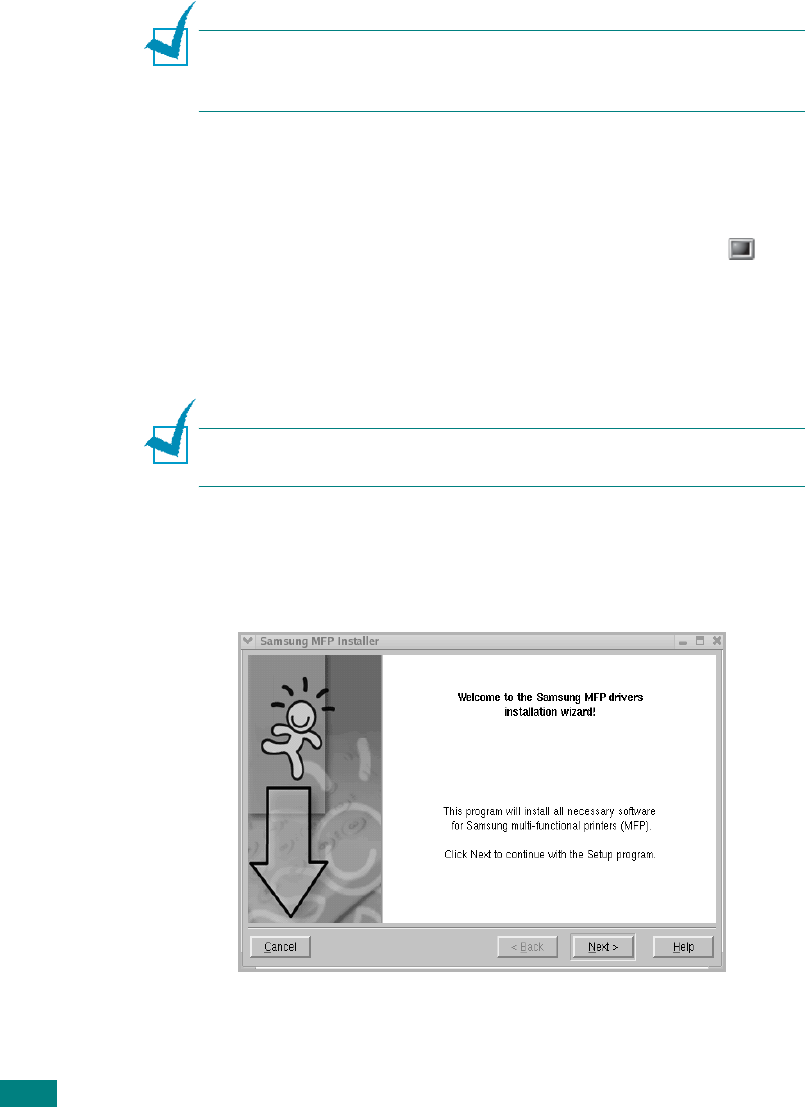
5
When the welcome screen appears, click
Next
.
U
SING
O
THER
O
PERATING
S
YSTEMS
6.17
6
6
When the installation is completed, click
Finish
.
The installation program has added the MFP Configurator
desktop icon and Samsung MFP group to the system menu
for your convenience. If you have any difficulties, consult
the on-line help that is available through your system menu
or can otherwise be called from the driver package windows
applications, such as MFP Configurator or Image Editor.
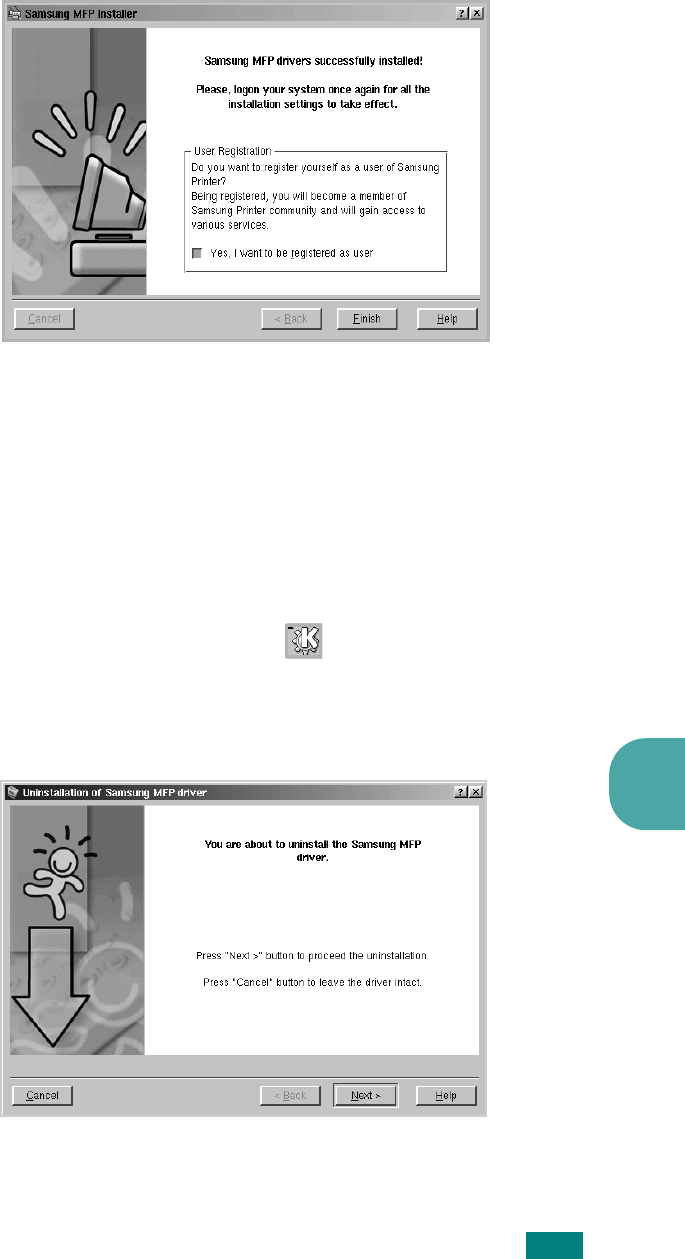
Uninstalling the MFP Driver
1
From the Startup Menu icon ( ) at the bottom of the
desktop, select
Samsung MFP
and select
Samsung SCX-
4100 Series
Uninstall
.
2
Click
Next
.
3
Click
Finish
.
U
SING
O
THER
O
PERATING
S
YSTEMS
6.18
Using the MFP Configurator
MFP Configurator is a tool primarily intended for configuring MFP
devices. Since an MFP device combines the printer and scanner,
the MFP Configurator provides options logically grouped for
printer and scanner functions. There is also a special MFP port
option responsible for the regulation of access to an MFP printer
and scanner via a single I/O channel.
After installing the MFP driver (see page 6.15), the MFP
Configurator icon will automatically be created on your desktop.
Opening the MFP Configurator
1
Double-click
MFP Configurator
on the desktop.
You can also click the Startup Menu icon and select
Samsung MFP
and then
MFP Configurator
.
2
Press each button on the Modules pane to switch to the
corresponding configuration window.
You can use the on-line help by clicking
Help
.
3
After changing the configurations, click
Exit
to close the
MFP Configurator.
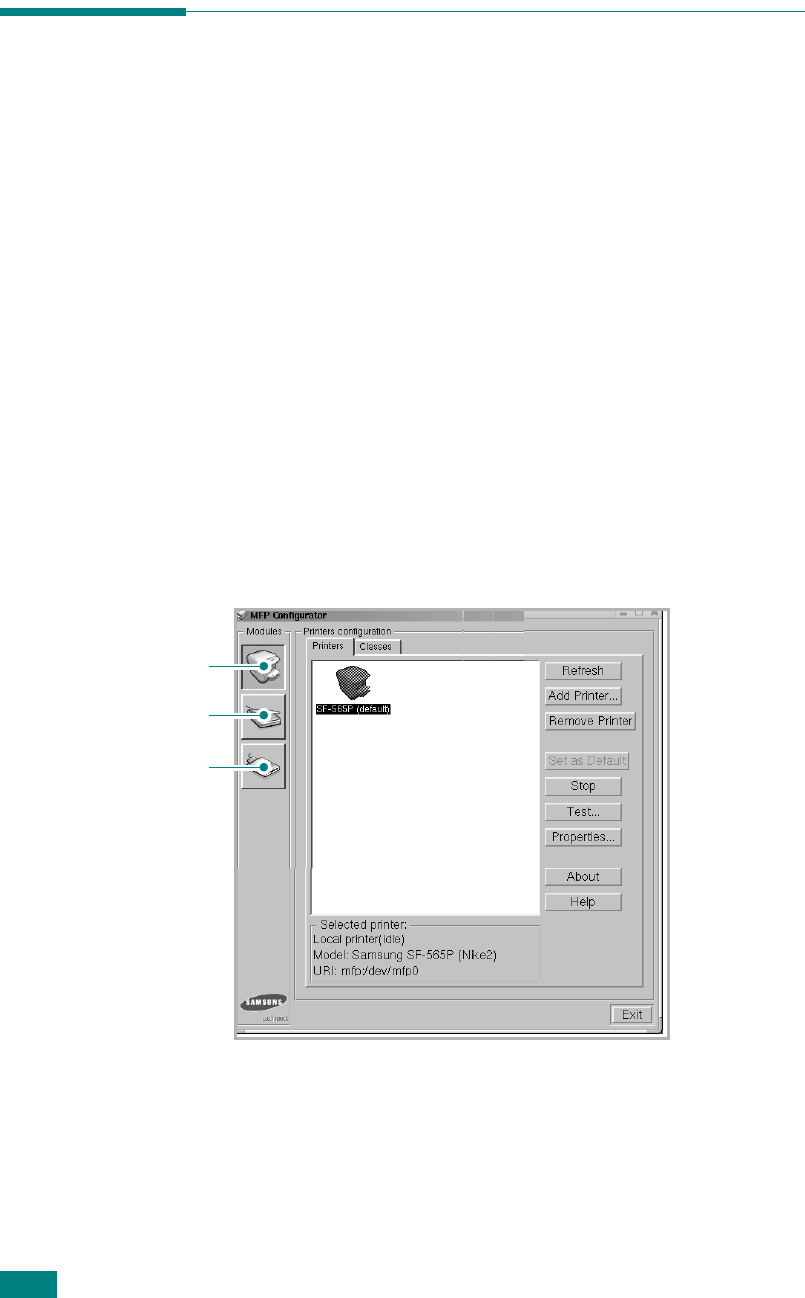
Printers Configuration
button
Scanners Configuration
button
MFP Ports Configuration
button
U
SING
O
THER
O
PERATING
S
YSTEMS
6.19
6
Printers Configuration
Printers Configuration has the two tabs;
Printers
and
Classes
.
Printers Tab
You can see the current system’s printer configuration by
clicking on the printer icon button on the left side of MFP
Configurator window.
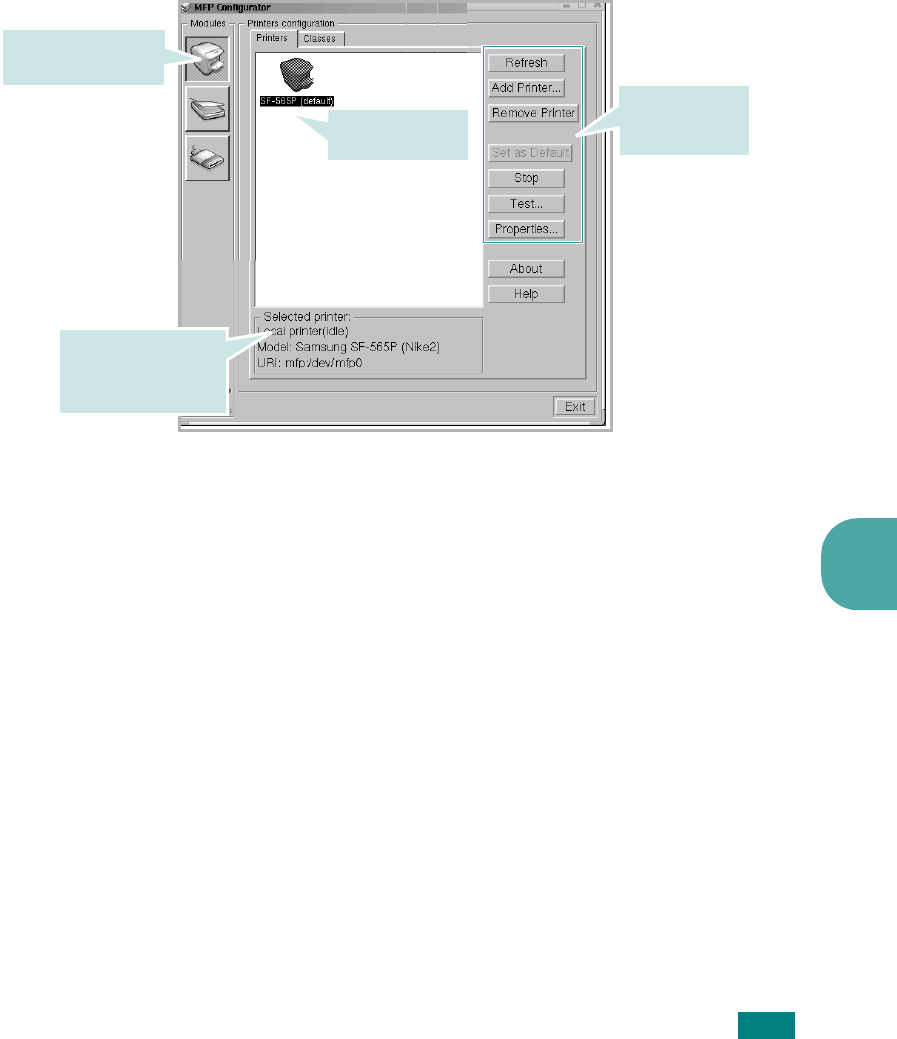
You can use the following printer control buttons:
•
Refresh
: renews the available printers list.
•
Add Printer
: allows you to add a new printer.
•
Remove Printer
: removes the selected printer.
•
Set as Default
: sets the current printer as a default printer.
•
Stop/Start
: stops/starts the printer.
•
Test
: allows you to print a test page to check if the machine
is working properly.
•
Properties
: allows you to view and change the printer
properties. For details, see page 6.22.
Printer control
buttons. See
below.
Shows all of the
installed printer.
Switches to Printer
configuration.
Shows the status,
model name and
URI of your printer.
U
SING
O
THER
O
PERATING
S
YSTEMS
6.20
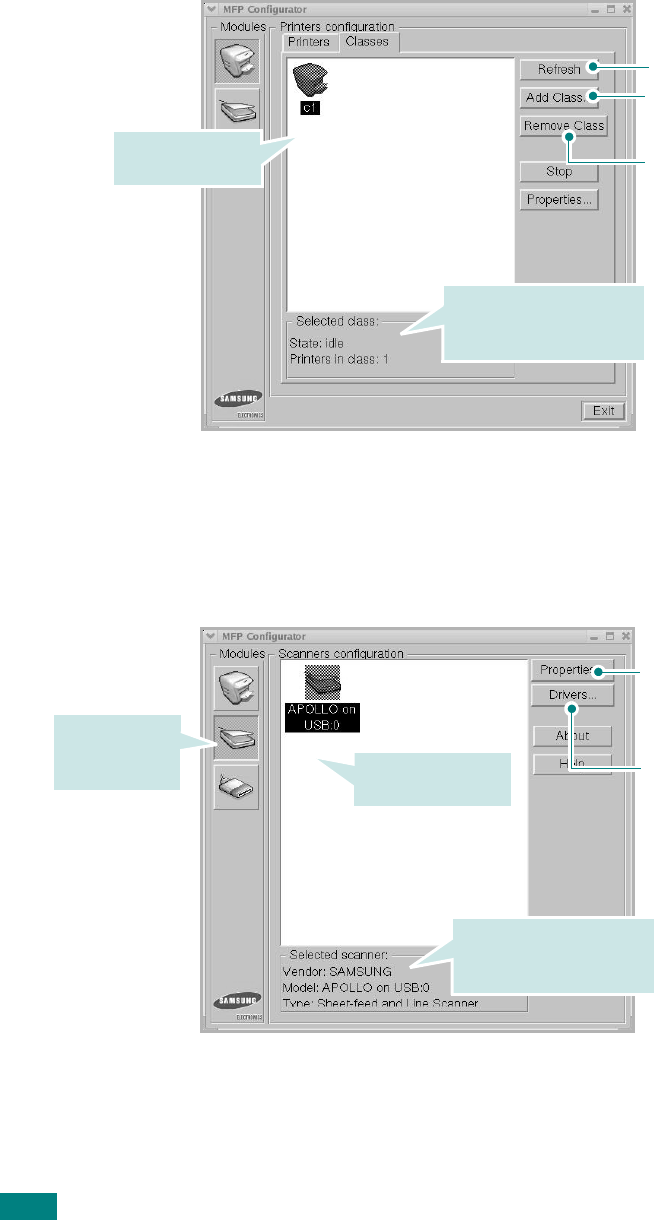
Classes Tab
The Classes tab shows the list of the available printer classes.
Scanners Configuration
In this window, you can monitor activity of scanner devices,
view the list of installed Samsung MFP devices, change device
properties, and scan images.
Shows all of the
printer classes.
Shows the status of the
class and the number of
printers in the class.
Renews the classes
list.
Allows you to add a
new printer class.
Removes the
selected printer
class.
Allows you to
monitor the activity
of the scan drivers.
Allows you to change
the scan properties and
scan a document. See
page 6.25.
Shows all of the
installed scanners.
Switches to
Scanners
configuration.
Shows the vendor,
model name and type of
your scanner.
U
SING
O
THER
O
PERATING
S
YSTEMS
6.21
6
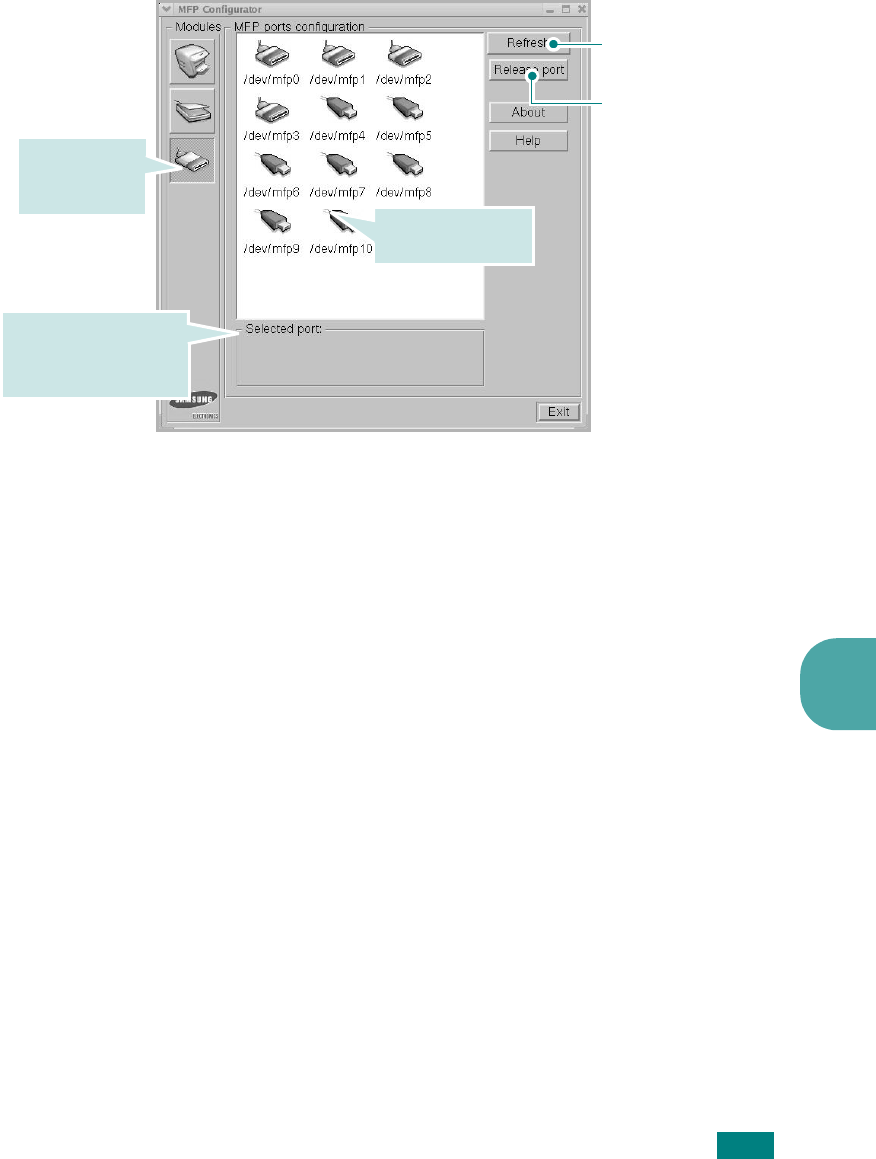
MFP Ports Configuration
In this window, you can view the list of available MFP ports,
check the status of each port and release a port that is stalled
in busy state when its owner is terminated for any reason.
Sharing Ports Between Printers and Scanners
Your machine may be connected to a host computer via the
parallel port or USB port. Since the MFP device contains more
than one device (printer and scanner), it is necessary to
organize proper access of “consumer” applications to these
devices via the single I/O port.
The Samsung MFP driver package provides an appropriate port
sharing mechanism that is used by Samsung printer and
scanner drivers. The drivers address their devices via so-called
MFP ports. The current status of any MFP port can be viewed via
the MFP Ports Configuration. The port sharing prevents you from
accessing one functional block of the MFP device, while another
block is in use.
When you install a new MFP printer onto your system, it is
strongly recommended you do this with the assistance of an MFP
Configurator. In this case you will be asked to choose I/O port
for the new device. This choice will provide the most suitable
configuration for MFP’s functionality. For MFP scanners I/O ports
are being chosen by scanner drivers automatically, so proper
settings are applied by default.
Releases the selected
port.
Renews the
available ports list.
Shows all of the
available ports.
Switches to
MPF ports
configuration.
Shows the port type,
device connected to
the port and status

U
SING
O
THER
O
PERATING
S
YSTEMS
6.22
Configuring Printer Properties
Using the properties window provided by the Printers
configuration, you can change the various properties for your
machine as a printer.
1
Open the MFP Configurator.
If necessary, switch to Printers configuration.
2
Select your machine on the available printers list and click
Properties
.
3
The Printer Properties window opens.
The following five tabs display at the top of the window:
•
General
: allows you to change the printer location and
name. The name entered in this tab displays on the
printer list in Printers configuration.
•
Connection
: allows you to view or select another port. If
you change the printer port from USB to parallel or vice
versa while in use, you must re-configure the printer port
in this tab.
•
Driver
: allows you to view or select another printer
driver. By clicking
Options
, you can set the default
device options.
•
Jobs
: shows the list of print jobs. Click
Cancel job
to
cancel the selected job and select the
Show completed
jobs
check box to see previous jobs on the job list.
•
Classes
: shows the class that your printer is in. Click
Add to Class
to add your printer to a specific class or
click
Remove from Class
to remove the printer from the
selected class.
4
Click
OK
to apply the changes and close the Printer
Properties Window.
U
SING
O
THER
O
PERATING
S
YSTEMS
6.23
6
Printing a Document
Printing from Applications
There are a lot of Linux applications that you are allowed to print
from using Common UNIX Printing System(CUPS). You can print
on your machine from any such application.
1
From the application you are using, select
Print
from the
File
menu.
2
Select
Print
directly using
lpr
.
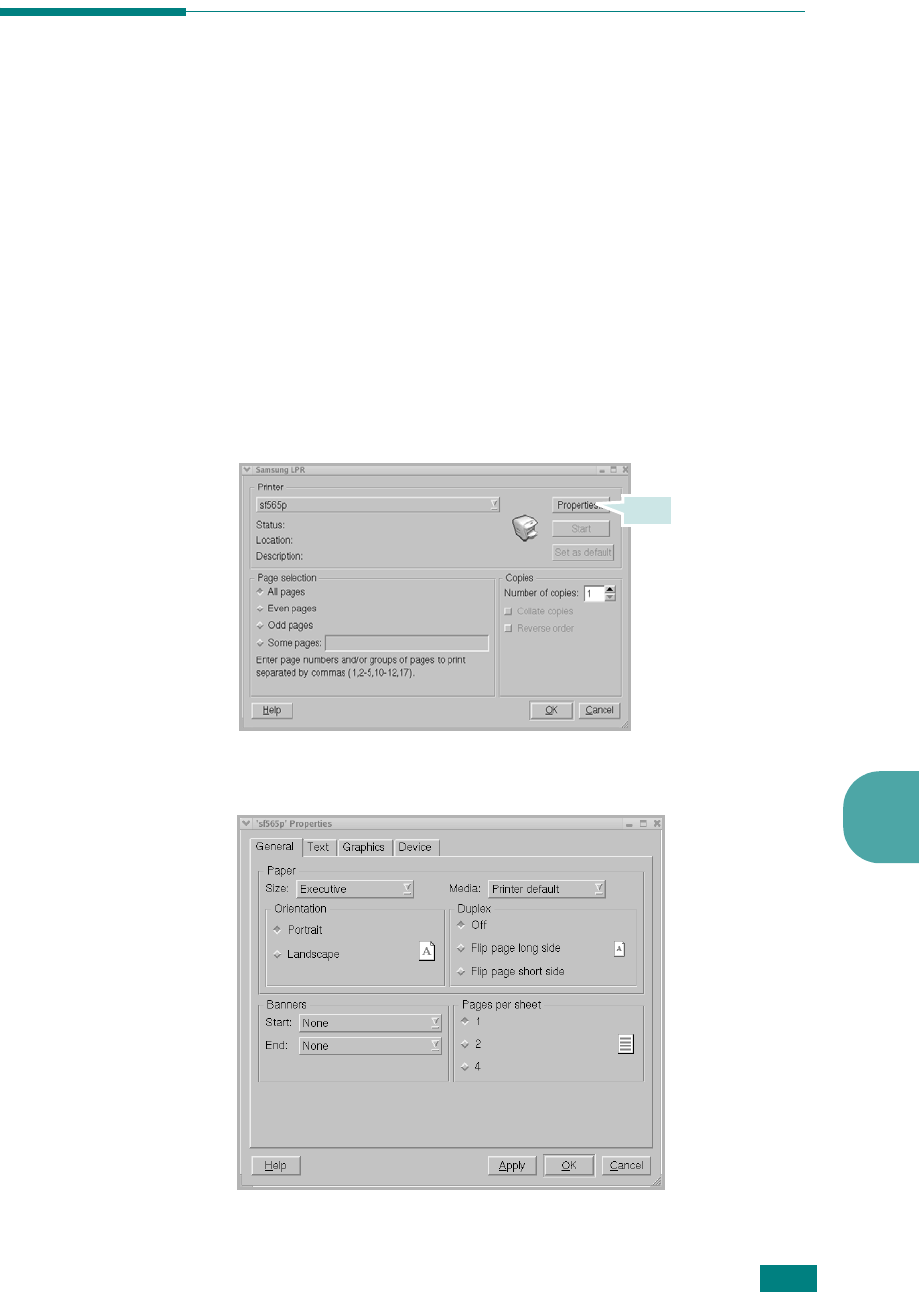
3
In the Samsung LPR window, select the model name of
your machine from the Printer list and click
Properties
.
4
Change the printer and print job properties.
Click

U
SING
O
THER
O
PERATING
S
YSTEMS
6.24
The following four tabs display at the top of the window.
•
General
- allows you to change the paper size, the paper
type and the orientation of the documents, enables the
duplex feature, adds start and end banners and changes
the number of pages per sheet.
•
Text
- allows you to specify the page margins and set the
text options, such as spacing or colums.
•
Graphics
- allows you to set image options that are used
when printing images/files, such as color options, image
size or image position.
•
Device
: allows you to set the print resolution, paper
source and destination.
5
Click
OK
to apply the changes and close the sf565p
Properties window.
6
Click
OK
in the Samsung LPR window to start printing.
7
The Printing window appears to allow you to monitor the
status of your print job.
To abort the current job, click
Cancel
.
Printing Files
You can print many different types of files on the Samsung MFP
device using the standard CUPS way - directly from the
command line interface. The CUPS lpr utility allows you do that.
But the drivers package replaces the standard lpr tool by a much
more user-friendly Samsung LPR program.
To print any document file:
1
Type
lpr <file_name>
from the Linux shell command line
and press
Enter
. The Samsung LPR window appears.
When you type only
lpr
and press
Enter
, the Select file(s)
to print window appears first. Just select any files you want
to print and click
Open
.
2
In the Samsung LPR window, select your printer from the
list, and change the printer and print job properties.
For details about the properties window, see page 6.23.
3
Click
OK
to start printing.
U
SING
O
THER
O
PERATING
S
YSTEMS
6.25
6
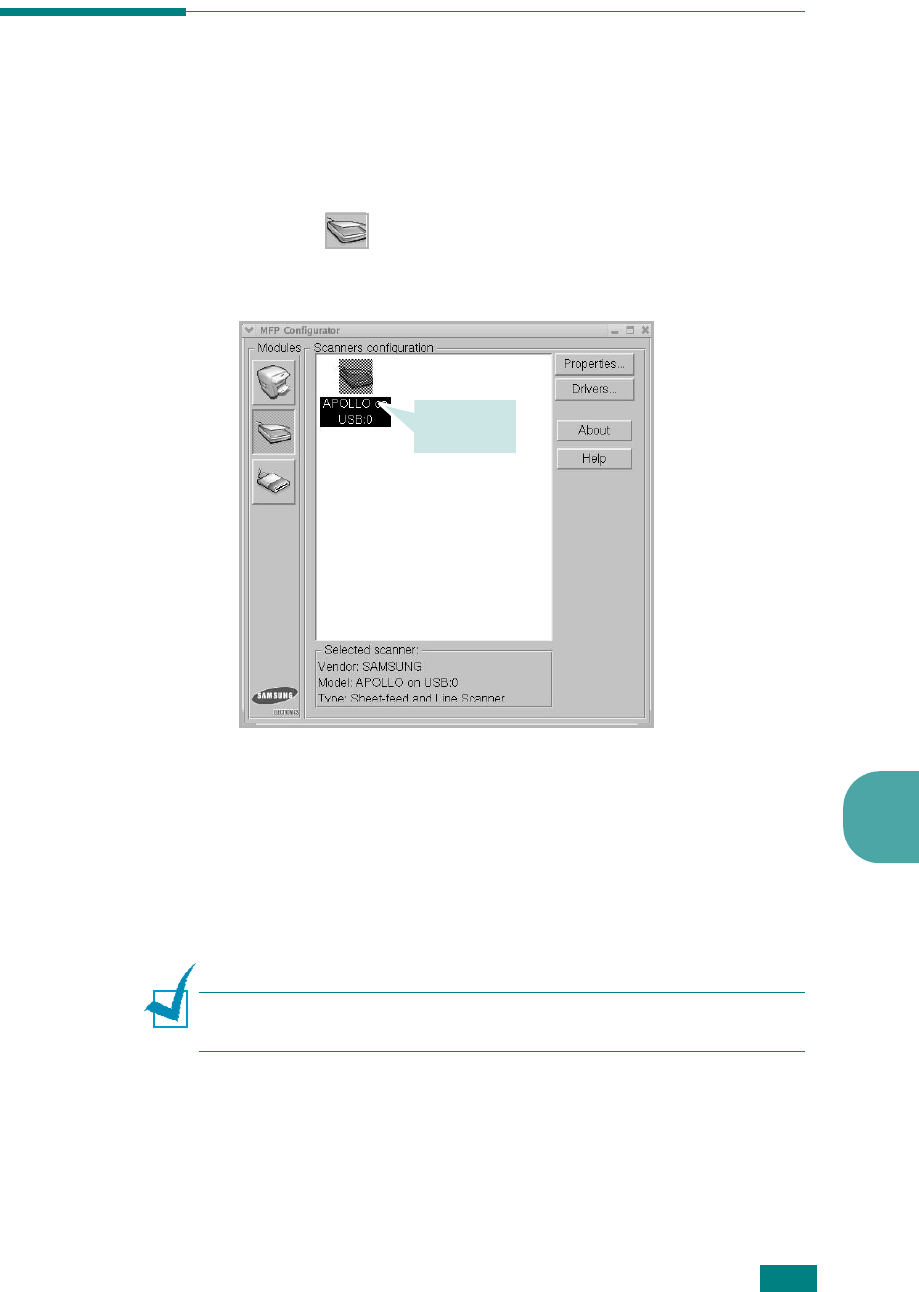
Scanning a Document
You can scan a document using the MFP Configurator window.
1
Double-click the MFP Configurator on your desktop.
2
Click the button to switch to Scanners Configuration.
3
Select the scanner on the list.
When you have only one MFP device and it is connected to
the computer and turned on, your scanner appears on the
list and is automatically selected.
If you have two or more scanners attached to your
computer, you can select any scanner to work at any time.
For example, while acquisition is in progress on the first
scanner, you may select the second scanner, set the device
options and start the image acquisition simultaneously.
N
OTE
: The scanner name shown in Scanners configuration can be
different from the device name.
4
Click
Properties
.
Click your
scanner.
U
SING
O
THER
O
PERATING
S
YSTEMS
6.26
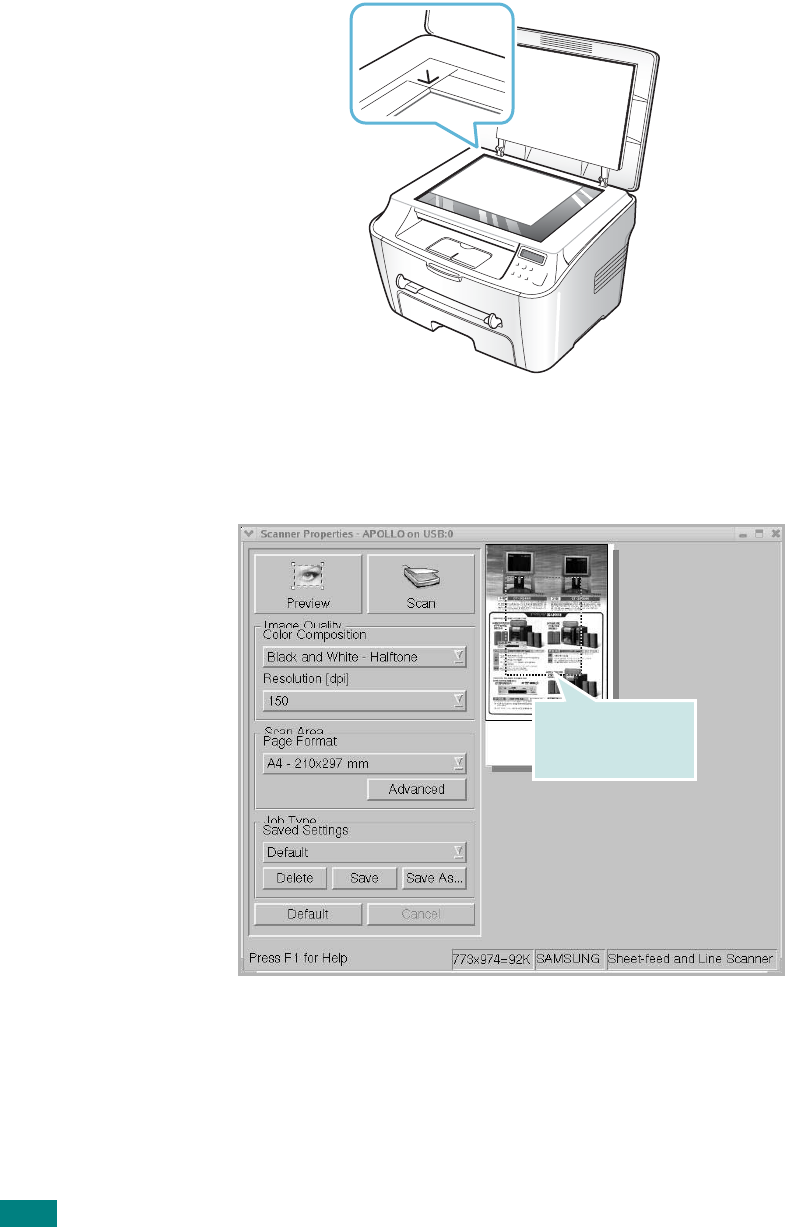
5
Load the document to be scanned
face down
on the
document glass.
6
Click
Preview
in the Scanner Properties window.
The document is scanned and the image preview appears in
the Preview Pane
.
Drag the pointer to
set the image area
to be scanned.
U
SING
O
THER
O
PERATING
S
YSTEMS
6.27
6
7
Change the scan options in the Image Quality and Scan
Area sections.
•
Image Quality
: allows you to select the color
composition and the scan resolution for the image.
•
Scan Area
: allows you to select the page size. The
Advanced
button enables you to set the page size
manually.
If you want to use one of the preset scan option settings,
select from the Job Type drop-down list. For details about
the preset Job Type settings, see page 6.28.
You can restore the default setting for the scan options by
clicking
Default
.
8
When you have finished, press
Scan
to start scanning.
The status bar appears on the bottom left of the window to
show you the scanning progress. To cancel scanning, press
Cancel
.
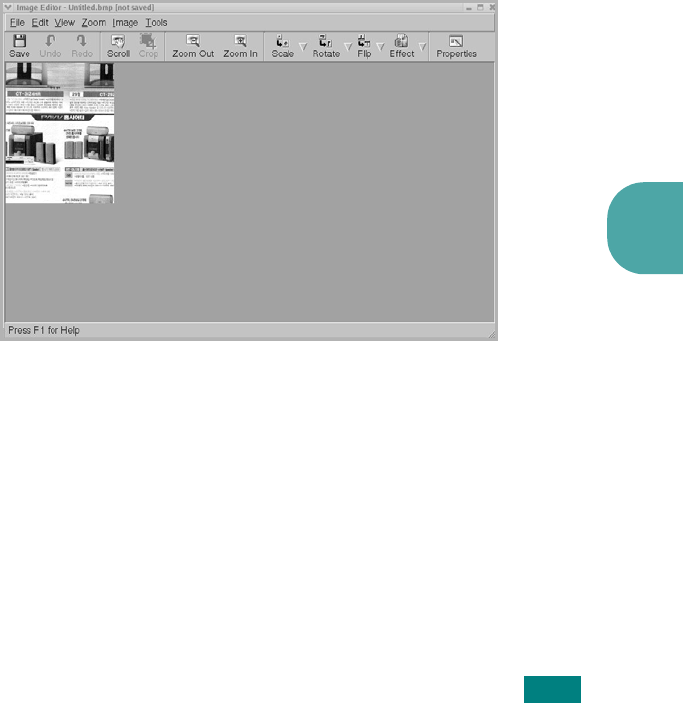
9
The scanned image appears in the new Image Editor
window.
If you want to edit the scanned image, use the toolbar. For
further details about editing the image, see page 6.29.
10
When you are finished, click
Save
on the toolbar.
11
Select the file directory where you want to save the image
and enter the file name.
12
Click
Save
.

U
SING
O
THER
O
PERATING
S
YSTEMS
6.28
Using Preset Job Type Settings
You can save your scan option settings to retrieve for a later
scanning.
To save a new Job Type setting:
1
Change the options from the Scanner Properties window.
2
Click
Save As
.
3
Enter the name for your setting.
4
Click
OK
.
Your setting is added to the Saved Settings drop-down list.
To save a Job Type setting for the next scan job:
1
Select the setting you want to use from the Job Type drop-
down list.
2
Click
Save
.
The next time you open the Scanner Properties window, the
saved setting is automatically selected for the scan job.
To delete a Job Type setting:
1
Select the setting you want to delete from the Job Type
drop-down list.
2
Click
Delete
.
The setting is deleted from the list.
U
SING
O
THER
O
PERATING
S
YSTEMS
6.29
6
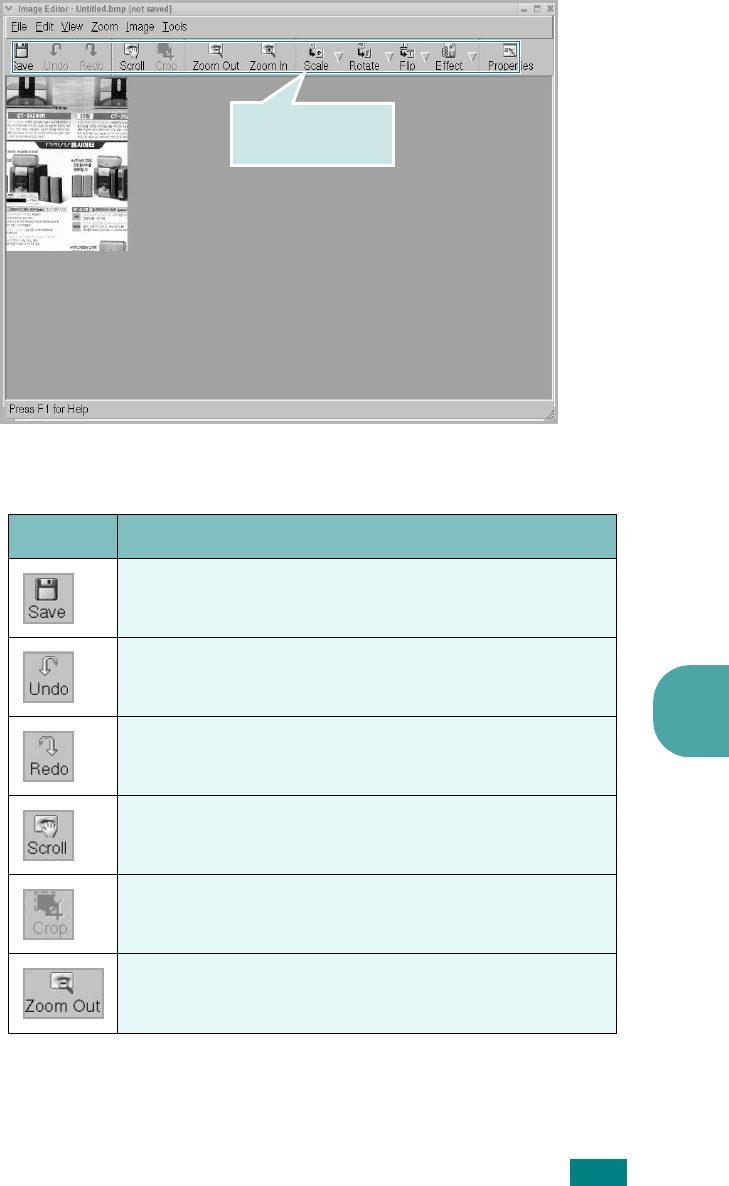
Using the Image Editor
The Image Editor window provides you with menu commands
and tools to edit your scanned image.
You can use the following tools to edit the image:
Use these tools to
edit the image.
Tools Function
Saves the image.
Cancels your last action.
Restores the action you canceled.
Allows you to scroll through the image.
Crops the selected image area.
Zooms the image out.
U
SING
O
THER
O
PERATING
S
YSTEMS
6.30
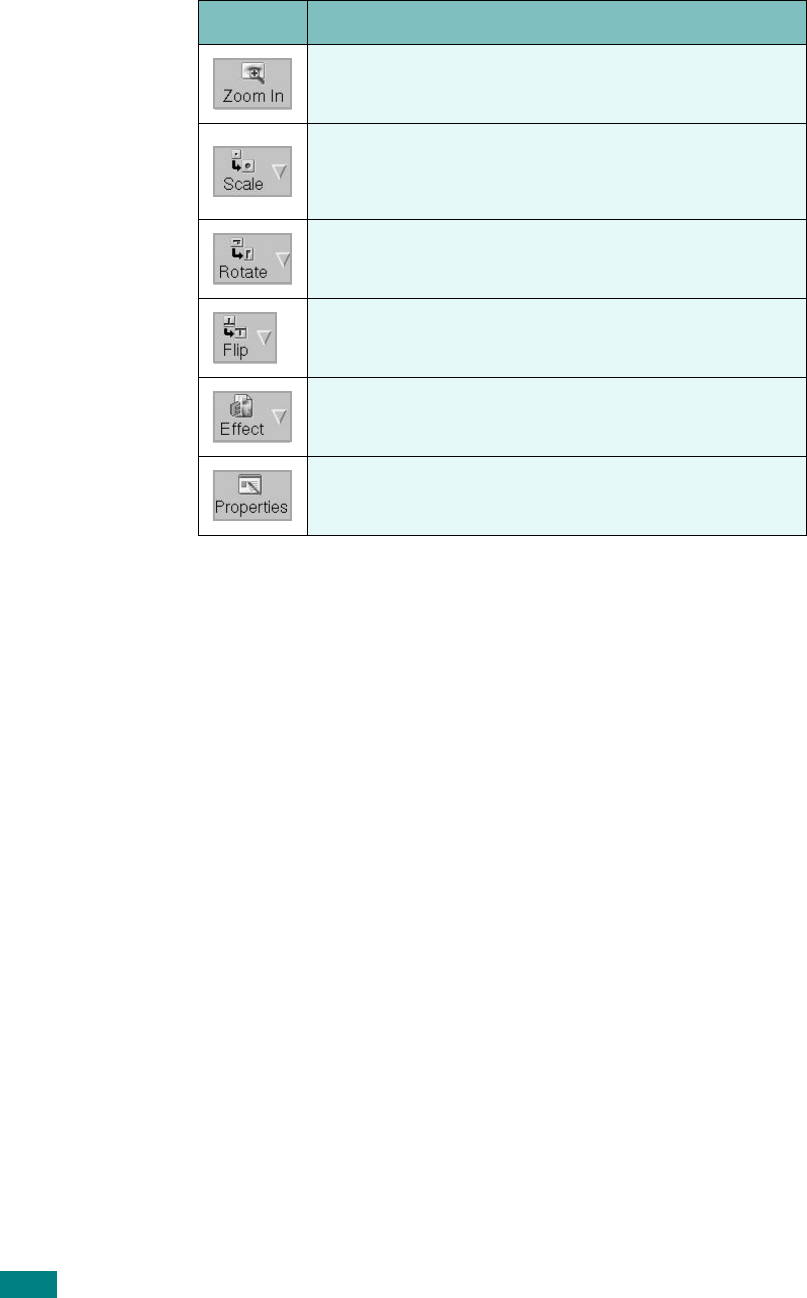
For further details about the Image Editor program, refer to the
on-line help.
Zooms the image in.
Allows you to scale the image size; you can enter
the size manually, or set the rate to scale
portionally, vertically or horizontally.
Allows you to rotate the image; you can select the
number of degrees from the drop-down list.
Allows you to flip the image vertically or
horizontally.
Allows you to adjust the brightness or contrast of
the image, or to invert the image.
Shows the properties of the image.
Tools Function

U
SING
O
THER
O
PERATING
S
YSTEMS
6.31
6
Printing from DOS Applications
While your printer is primarily a Windows printer, you can also
print from a DOS software program using the Remote Control
Panel utility provided in the supplied software CD-ROM.
About the Remote Control Panel
DOS users have access to many printer features through specific
DOS printer drivers; however, many software manufactures do
not develop printer drivers for their software programs. The
printer provides the software control panel for improved printer
control when DOS printer drivers are not available or when
certain print settings are not available through DOS software
programs.
N
OTE
: The printer’s Remote Control Panel is not a printer driver. It
should be used to set print settings that are not available through
DOS software programs. Printer drivers are supplied by the
manufacturers of your DOS software programs. If your DOS
software program does not include a printer driver for your printer,
contact the manufacturer of the software program or use one of
the alternate printer drivers.
Installing the Remote Control Panel
The Remote Control Panel utility is provided on the printer
software CD-ROM.
1
Place the CD-ROM in the CD-ROM drive. Installation will
start automatically.
If the CD-ROM drive does not automatically run:
Select
Run
from the
Start
menu, and type
x:\setup.exe
in the Open box (where
x
is the drive letter for the CD-ROM
drive), and click
OK
.
U
SING
O
THER
O
PERATING
S
YSTEMS
6.32
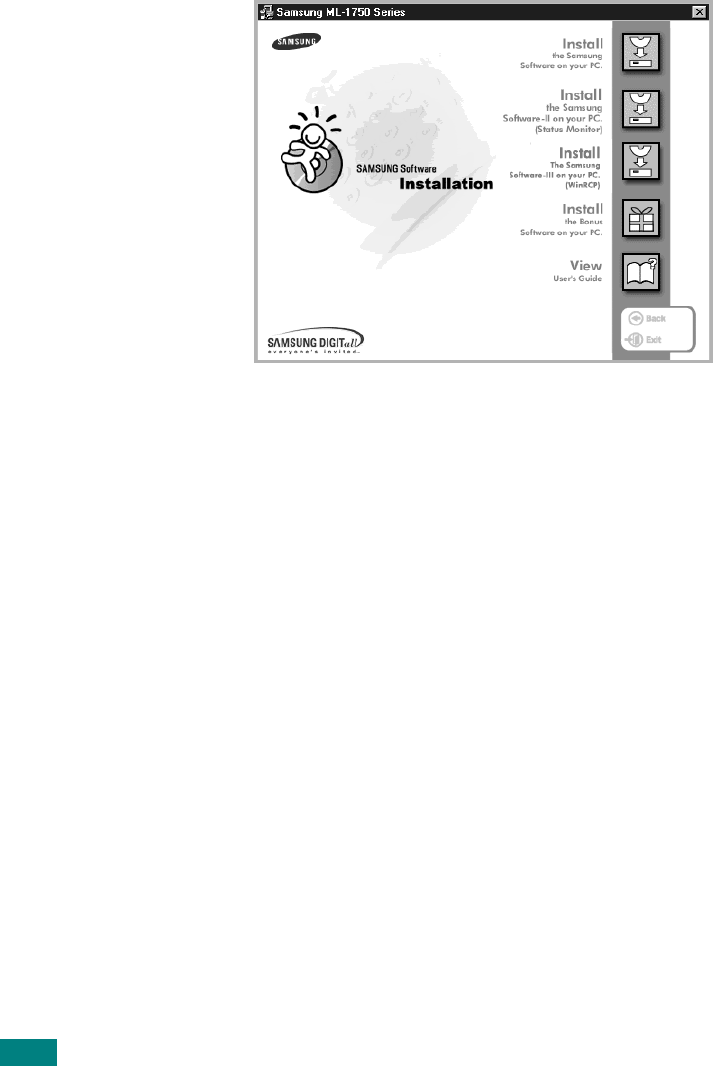
2
When the language selection window appears, select the
appropriate language.
If you can’t find the desired language from the screen,
scroll through the window using the scroll button on the
bottom right of the window.
3
Click
Install the Samsung Software-III on your PC
(WinRCP)
.
4
Click
Next
.
The files are copied into the appropriate directory.
5
After the installation is completed, click
Finish
.
Uninstalling the Remote Control Panel
The Uninstall icon in the Samsung SCX-4100 Series program
group allows you to select and remove any or all of the Samsung
SCX-4100 printing system components.
1
From the
Start
menu, select
Programs
.
2
Select
Samsung SCX-4100 Series
, and then
Uninstall
Remote Control Panel
.
3
Click
OK
.
The Samsung SCX-4100 Series Remote Control Panel and
all of its components are removed from your computer.
4
Click
Finish
.
U
SING
O
THER
O
PERATING
S
YSTEMS
6.33
6
Selecting Print Settings
You can use this Remote Control Panel to select print settings
that may not be available on some DOS programs. Typically,
duplicate print settings that are selected from a DOS software
program override the ones that are selected in the Remote
Control Panel.
Starting Remote Control Panel
1
From the
Start
menu, select
Programs
.
2
Select
Samsung SCX-4100 Series
, and then
Remote
Control Panel
.
3
The Remote Control Panel window allows you to access all
the information you need when using your printer. If
necessary, click other tabs on the top of the window to
access other features.
4
When you finish changing the settings, click
Send
until the
Print window is displayed.
The Remote Control Panel allows you to access the following
features:

U
SING
O
THER
O
PERATING
S
YSTEMS
6.34
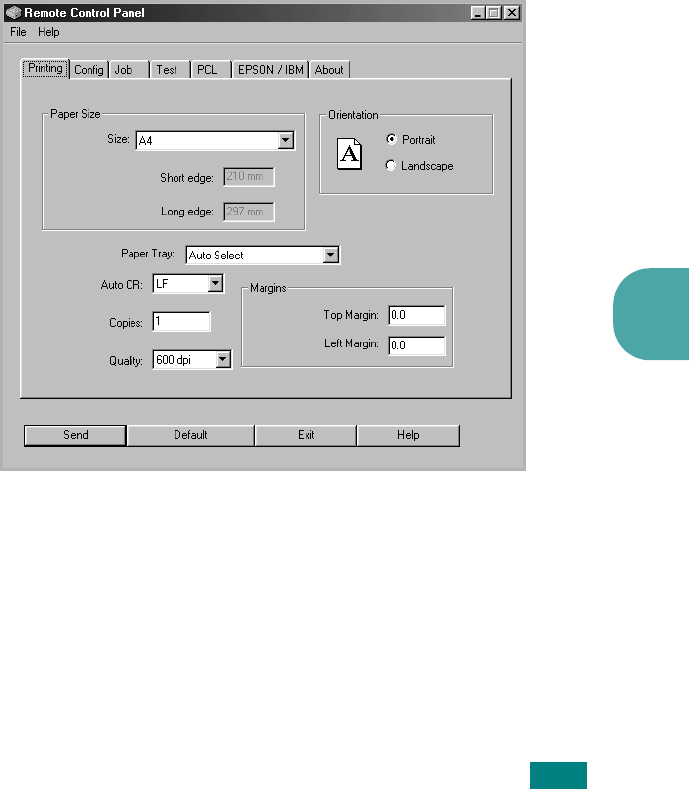
PRINTING
In this tab, you can configure general settings for printing.
•
Paper Size
sets the paper size.
•
Orientation
determines how the output is printed on the
page.
•
Paper Tray
sets the default paper source.
•
Auto CR
sets how the printer performs a carriage return.
•
Copies
sets the number of copies printed for each page.
•
Quality
specifies the print quality.
•
Margins
sets the top and left margin of the print material.

U
SING
O
THER
O
PERATING
S
YSTEMS
6.35
6
CONFIG
You can configure various printer features.
•
Emulation
selects the emulation for printing a document.
The factory default is
Auto
.
•
Power Save
determines the length of time the printer waits
after a job is printed before it goes to a reduced power state.
If the printer is used frequently, select
OFF
which keeps the
printer ready to print with the minimum warm-up time. This
uses more power to keep the printer warm and ready to print.
•
Auto Continue
determines what action the printer should
take when a manual feed print job is sent to the printer. If it
is checked, the printer will pick up the paper from the tray
after fifteen seconds. Otherwise, the printer will wait for you
to load paper in the manual feeder.
•
Jam Recovery
determines what action the printer should
take when a paper jam occurs. If it is unchecked, the printer
does not reprint a page that has jammed. If it is check, the
printer keeps the image in memory for a printed page until
the printer signals that the page has successfully printed. The
printer reprints all jammed pages.
•
Toner Save
determines the toner quantity the printer should
use when printing. If it is checked, the printer conserves
toner when printing. The default value is unchecked, which
provides 100% usage.
U
SING
O
THER
O
PERATING
S
YSTEMS
6.36
•
Altitude
: helps the printer optimize its output for a low
pressure area, such as a high mountain area.
•
Dark Text
: allows all text in your document to be printed
darker than a normal document.
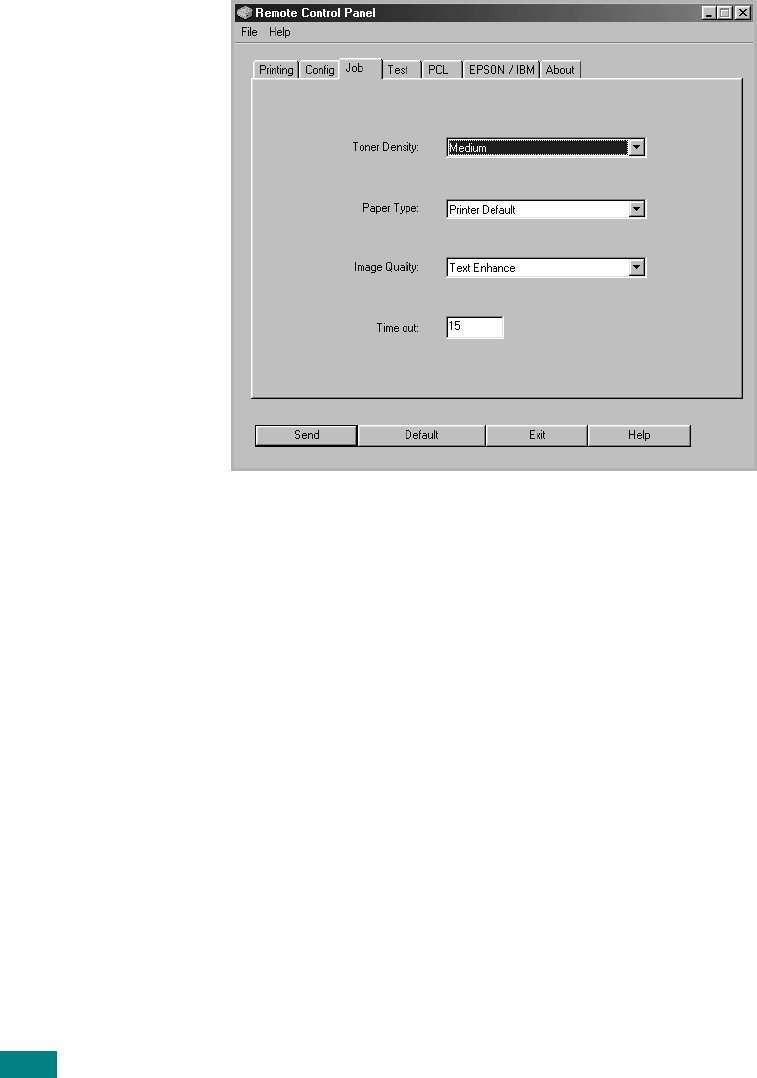
JOB
You can set options for improving the quality of your print job.
•
Toner Density
determines the toner density of page. The
default value is
Medium
.
•
Paper Type
provides the printer with information about the
type of paper to be used for a print job. For the best result,
set this to the paper type you loaded in the tray of the printer.
When using the plain paper, set this to
Printer default
.
•
Image Quality
improves the print quality of your text and
image and make the characters and images appear smoother.
It is preset to
Text Enhancement
at the factory.
•
Time out
determins the amount of time (in seconds) the
printer will wait before printing the last pag of a print job that
does not end with a command to print the page or a formfeed
character. You can set from 0 to 300 seconds.

U
SING
O
THER
O
PERATING
S
YSTEMS
6.37
6
TEST
This tab allows you to print a resident page to test your printer’s
performance.
•
Self Test
prints a configuration sheet. A list of the user
default settings and the amout of printer memory available
prints.
•
Demo Page
prints a demonstration page. It shows the
printer features and specifications.
U
SING
O
THER
O
PERATING
S
YSTEMS
6.38
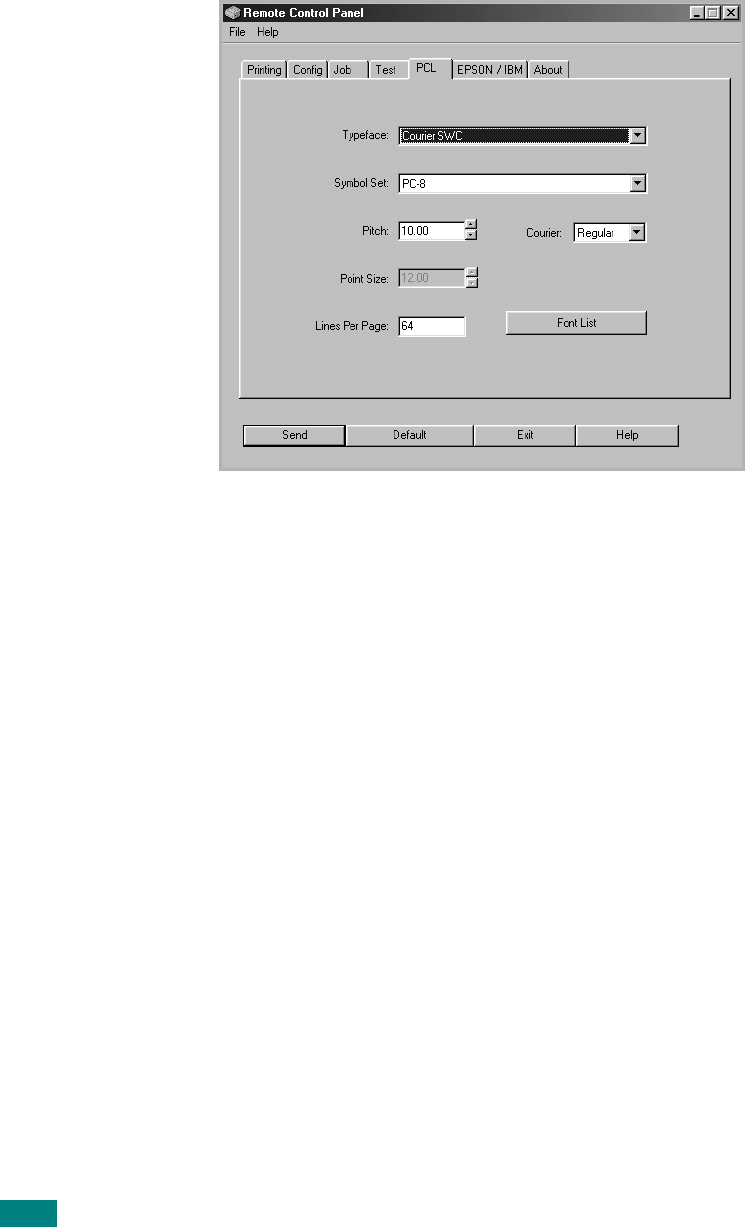
PCL
In this tab, you can configure various settings for PCL emulation.
•
Typeface
allows you to select the desired typeface. This
setting is ignored when the software application specifies a
font.
•
Symbol Set
determines the symbol set. A symbol set is a set
of alphabetic and numeric characters, punctuation, and special
symbols used when printing with a selected font.
•
Pitch
sets the font pitch (only if you have selected a scalable
monospaced font). Pitch refers to the number of fixed-space
characters in a horizontal inch of type.
•
Point Size
sets the font point size (only if you have selected
a scalable typographic font). Point size refers to the height of
the characters in the font. One point equals approximately
1/72 of an inch. You can select point sizes from 4.0 to 999.75
in increments of 0.25 points.
•
Lines Per Page
sets the number of lines that print on each
page. The setting can range from 5 to 128 lines per page.
•
Courier
determines the courier font type:
Regular
or
Dark
.
•
Font List
prints a font list showing all the fonts available for
PCL emulation.
U
SING
O
THER
O
PERATING
S
YSTEMS
6.39
6
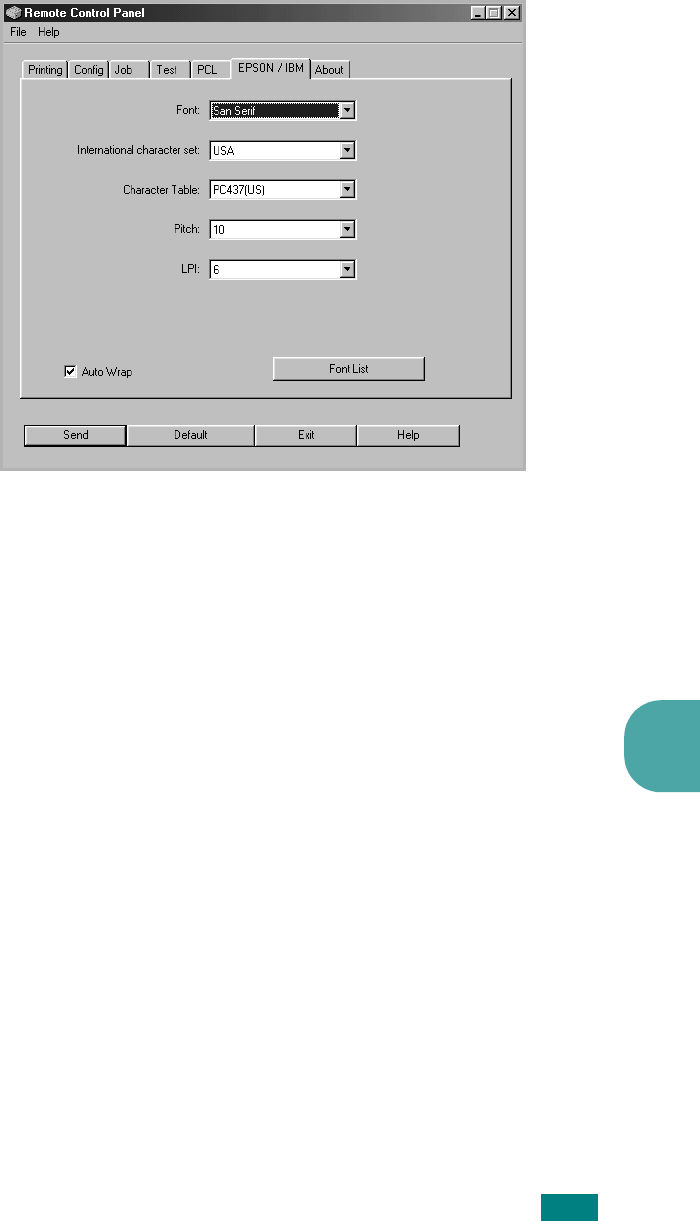
EPSON/IBM
You can configure various settings for EPSON emulation.
•
Font
allows you to select the desired font.
•
International character set
allows you to select a
character set of the desired language.
•
Character Table
selects the character sets.
•
Pitch
sets the font pitch. Pitch refers to the number of fixed-
space characters in a horizontal inch of type.
•
LPI
sets the number of lines printed a vertical inch. You can
select 6 or 8 lines.
•
Auto Wrap
determines whether or not the printer
automatically performs line feed when the data overflows the
printable area of the print material.
•
Font List
prints a font list showing all the fonts available for
EPSON emulation.

U
SING
O
THER
O
PERATING
S
YSTEMS
6.40
M
EMO