Samsung Electronics Co SGHD307 Dual-Band GSM Phone w/ BlueTooth User Manual D307
Samsung Electronics Co Ltd Dual-Band GSM Phone w/ BlueTooth D307
Contents
- 1. Users Manual
- 2. Users Manual 1
- 3. Users Manual 2
- 4. Users Manual 3
- 5. Users Manual 4
Users Manual 3
Section 7: Messaging 129
Viewing a Message
Section 7
• Callback: allows you to dial the number from which the
message was originated.
• Move to My Folder: allows you to move this sent message to a
folder you have previously created.
• Extract Address: allows you to extract the recipient or sender’s
number or address, and URL, email addresses or phone
numbers from the message text so that you can make a call,
send a message, or save them in your phone’s memory.
• Save Contents: allows you to save the Picture, Video, or Sound
from the message received.
• Properties: shows you information about the message.
Managing Your Own Message Folders
You can create up to 5 message folders to store messages
separately from the default message folders.
Creating a Message Folder
1. In Idle mode, press the Menu ( ) soft key to access
Menu mode.
2. Select Messaging and press the Select soft key or the
key.
3. Highlight My Messages and press the Select soft key or
the key
4. Use the Up () or Down ( ) Navigation key to
highlight My Folders and press the key. The
Create Folder pop up appears in the display. Press the
Yes soft key to confirm folder creation.
Alternatively, press the Options soft key and select
Create Folder.
D307.book Page 129 Thursday, September 29, 2005 3:50 PM
130
Section 7
5. Enter a folder name and press the OK soft key or the
key.
6. When you have finished, press the key.
Moving a Message to a Folder
1. In Idle mode, press the Menu ( ) soft key to access
Menu mode.
2. Select Messaging and press the Select soft key or the
key.
3. Highlight My Messages and press the Select soft key or
the key.
4. Select Inbox and press the Select soft key or the
5. Select the message you want to move and press the
Options soft key.
6. Select Move to My Folder and press the key.
7. Select one of the folders you have defined and press the
key. The message is moved to the folder.
8. When you have finished, press the key.
Renaming a Message Folder
1. In Idle mode, press the Menu ( ) soft key to access
Menu mode.
2. Select Messaging. Highlight My Messages and select
My Folders. The folder list opens.
3. Scroll to the folder you want to rename.
4. Press the Options soft key and select Rename Folder.
5. Clear the current name and enter a new name.
6. Press the OK soft key or the key.
D307.book Page 130 Thursday, September 29, 2005 3:50 PM
Section 7: Messaging 131
Deleting Messages
Section 7
7. When you have finished, press the key.
Deleting a Message Folder
1. In Idle mode, press the Menu ( ) soft key to access
Menu mode.
2. Select Messaging. Highlight My Messages and select
the My Folders. The folder list opens.
3. Scroll to the folder you want to delete.
4. Press the Options soft key and select Delete Folder.
5. Press the Yes soft key or the key to confirm the
deletion.
6. When you have finished, press the key.
Deleting Messages
You can delete the messages in each message folder one by
one or all at one time. You can also delete all of your
messages at one time.
1. In Idle mode, press the Menu ( ) soft key to access
Menu mode.
2. Select Messaging. Highlight Delete All and press the
Select soft key or the key.
3. Scroll to the message folder you want to delete and place
a check mark by pressing the key. Repeat this step
to select more message folders.
To delete all of the messages in the folder, select All
Messages.
4. Press the Delete soft key.
D307.book Page 131 Thursday, September 29, 2005 3:50 PM
132
Section 7
5. A “Delete All” confirmation message displays. Press the
key to mark the “Include Protection” option. Press
the Yes soft key to confirm the deletion.
6. A message “Are you Sure?” displays, press the Yes soft
key or the key.
7. When you have finished, press the key.
Changing Message Settings
You can set up various options for using messaging
services.
1. In Idle mode, press the Menu ( ) soft key to access
Menu mode.
2. Select Messaging and highlight Settings. Press the
Select soft key or the key.
3. Select the type of messages for which you want to
change. Press the Select soft key or the key.
IM
The following options are available:
• Default Community: allows you to select the community you
want to join by default.
• Profile: allows you to choose the profile information required to
access the instant message utility.
Text Message
The following options are available:
• Sending Profile: allows you to set the options for sending text
messages.
D307.book Page 132 Thursday, September 29, 2005 3:50 PM

Section 7: Messaging 133
Changing Message Settings
Section 7
• Reply Path: allows the recipient of your message to send you a
reply through your message center, if your network supports
this service.
• Delivery Report: allows you to activate or deactivate the report
function. When this function is activated, the network informs
you whether or not your message has been delivered.
• Bearer Selection: allows you to select either GSM or GPRS,
depending on your network.
• Preferred Memory (Sent, Outbox, Draft): allows you to select
a default memory where your outgoing messages are stored.
Choose from In Card or In Phone.
Multimedia Message
The following options are available:
• Delivery Report: when this option is enabled, the network
informs you whether or not your message has been delivered.
• Read Reply: when this option is enabled, your phone sends a
request for a reply along with your message to the recipient.
• Auto Download: you can set whether or not your phone
retrieves new incoming messages from the MMS server
without notifications.
• Message Acceptance: you can specify the category of
messages you want to receive.
• Expiry Date: you can select the length of time your messages
are stored in the message center after they are sent.
• Delivery Time: you can set a time delay before the phone
sends your messages.
• Priority: you can select the priority level of your messages.
• Report Allowed: when this option is enabled, the sender of an
incoming message receives a delivery report from the
network.
D307.book Page 133 Thursday, September 29, 2005 3:50 PM

134
Section 7
• Page Duration: you can set the length of time one page of an
outgoing message displays on the message presentation
screen. After a specified time, the display automatically scrolls
to the next page.
• Profile: you can select a connection profile to be used for
sending and receiving MMS messages.
Push Message
The following options are available:
• Receive: you can select whether the phone receive or reject
push-messages from the WAP server. Choose from Never,
Always, or Only White List.
• White List: allows only users on your contact list to push
messages.
Broadcast
The following options are available:
• Receive: allows you to enable or disable the reception of
broadcast messages.
• Channel List: allows you to indicate the channels from which
you wish to receive broadcast messages. The following options
are available:
• Select: use to enable or disable channels on the list by
marking or unmarking them, respectively. A check mark
displays in front of each selected channel.
• Add Channel: use to enter the ID and title for a new channel.
• Delete: use to remove a channel from the list.
• Edit: use to change the ID and title of an existing channel.
• Language: allows you to select your preferred language in
which to display cell broadcast messages.
Please contact your service provider for further details.
D307.book Page 134 Thursday, September 29, 2005 3:50 PM

Section 7: Messaging 135
Checking Memory Status
Section 7
Default Text Input Mode
• VoiceMode: allows you to set the default text entry mode to
VoiceMode.
• Predictive Text Mode: allows you to set the default text entry
mode to Predictive Text (T9) Mode.
• Alphabet Mode: allows you to set the default text entry mode
to Alphabet Mode (ABC or abc) Mode.
Checking Memory Status
Memory Status, allows you to check the amount of
memory being used and available for storing Text
messages, Multimedia messages, Push messages and
Note messages.
D307.book Page 135 Thursday, September 29, 2005 3:50 PM

136
Section 7
D307.book Page 136 Thursday, September 29, 2005 3:50 PM

Section 8
Section 8: Changing Your Settings 137
Section 8: Changing Your Settings
Topics Covered
•Time & Date
• Phone Settings
• Display Settings
• Sound Settings
• Network Services
• Bluetooth
• Voice Recognition
•Security
• Connection Settings
• Reset Settings
This section explains the menu navigation for your
phone. It also includes an outline of all the available
menus associated with your phone.
D307.book Page 137 Thursday, September 29, 2005 3:50 PM

Section 8
138
Time & Date
Allows you can change the settings for the time and date
that appears in the display.
1. In Idle mode, press the Menu ( ) soft key to access
Menu mode.
2. Select Settings and highlight Time & Date. Press the
Select soft key or the key.
3. Select a menu and then change the setting. If the menu
has submenus, repeat as necessary.
4. When you have finished, press the key.
Set Time
You can enter the current time. You can choose the time
format in the Time Format menu.
Note: Before setting the time, you must specify your time zone in the
World Time menu.
Set Date
You can enter the month, day, and year.
Time Format
You can change the time format to 12 Hours or 24 Hours.
Auto Update
You can receive time information from your service
provider’s network.
• Off: you need to manually set the time and date according to
the current time zone using the Set Time menu.
D307.book Page 138 Thursday, September 29, 2005 3:50 PM
Section 8: Changing Your Settings 139
Phone Settings
Section 8
• On: the phone automatically updates the time and date
according to the current time zone using the network
service.
• Confirm First: the phone asks for a confirmation before the
update.
Note: Automatic updates of time and date does not change the time you
have set for alarm settings or calendar memos.
Phone Settings
To customize the settings for your phone use the
following steps:
1. In Idle mode, press the Menu ( ) soft key to access
Menu mode.
2. Select Settings and highlight Phone Settings. Press the
Select soft key or the key.
3. Select a menu and then change the setting. If the menu
has submenus, repeat as necessary.
4. When you have finished, press the key.
Language
You can select a display language. When the language
option is set to Automatic, the language is automatically
selected according to the language of the SIM card used.
Note: Depending on your country, service provider, or software version of
the phone, the Automatic option may not display.
D307.book Page 139 Thursday, September 29, 2005 3:50 PM
Section 8
140
Greeting Message
This menu allows you to set a greeting to be displayed
briefly when the phone is switched on.
Short Cut
The Navigation keys can be used as shortcut keys. In Idle
mode, they allow you to access specific menus directly.
To assign a shortcut to a key:
1. From the Phone Settings menu, select Short Cut.
2. Select the key to be used as a shortcut key.
3. Select the menu to be assigned to the key.
Note: To deactivate a shortcut key, select the None option.
Extra Settings
You can turn the automatic redialing or answering
features on or off.
1. To turn a feature on, press the On soft key or the
key. A check mark displays in front of the option.
2. To turn a feature off, press the Off soft key or the
key. The check mark no longer displays.
The following options are available:
• Auto Redial: when this option is checked, the phone makes
up to ten attempts to redial a phone number after an
unsuccessful call.
• Active Folder: when this option is checked, incoming calls
are answered when opening the folder.
D307.book Page 140 Thursday, September 29, 2005 3:50 PM
Section 8: Changing Your Settings 141
Display Settings
Section 8
Note: The interval between call attempts varies.
• Anykey Answer: when this option is checked, you can
answer an incoming call by pressing any key, except the
key or the Reject soft key. To reject the calls, press the
key or the Reject soft key.
When this option is unchecked, you must press the key
or Accept soft key to answer a call.
TTY Settings*
TTY (also known as a TDD or Text Telephone) is a
telecommunications device that allows people who are
deaf or hard of hearing, or who have speech or language
disabilities, to communicate via a telephone.
Note: The TTY is automatically detected when TTY adaptor is inserted into
your phone.
For additional technical support you may access the
following website or call 1-888-987-4357.
http://www.samsungtelecom.com/contact_us/accessibility.asp
Display Settings
To customize the settings for the display use the following
steps:
1. In Idle mode, press the Menu ( ) soft key to access
Menu mode.
2. Select Settings and highlight Display Settings and
press the Select or key.
D307.book Page 141 Thursday, September 29, 2005 3:50 PM

Section 8
142
3. Select a menu and then change the setting. If the menu
has submenus, repeat this step.
For the details of each menu, see the next sections.
4. When you have finished, press the key.
Wallpaper
This menu allows you to change the background image in
Idle mode. The following options are available:
• Shop Graphics
• Default Wallpapers
• Downloaded Graphics
Note: You can scroll to other images by pressing the Up () or
Down ( ) Navigation key from the image preview screen.
Front LCD Display
This menu allows you to adjust the external LCD clock
display and LCD Brightness.
You can choose from Digital Clock or Analog Clock.
You can set the front LCD brightness by using the
Left () Navigation key to decrease brightness or the
Right
() to increase brightness. Press the OK soft key to
save changes.
Text Display
This menu allows you to specify whether or not the phone
displays the time and date on the Idle screen. Choose
Enable or Disable.
D307.book Page 142 Thursday, September 29, 2005 3:50 PM

Section 8: Changing Your Settings 143
Display Settings
Section 8
Text Color
This menu allows you to select the color of the text to be
displayed on the Idle screen. This option is available
when the text display is enabled. Use the Up () or
Down () Navigation key to make your selection.
Dialing Font Color
This menu allows you to select numeric font color that
appears in the display when making a call. Choose basic
or rainbow.
Menu Style
This menu allows you to select the menu display style.
You can choose either Grid Style, Page Style, or Bar Style.
Back Light
You can select the length of time the backlight is on. The
backlight turns on when you press a key, when you open
the phone or you receive a call or message, and remains on
for the specified length of time.
Graphic Logo
This menu allows you to display a service provider’s logo
when using another service provider’s SIM card. This
menu is SIM specific.
• Off: the service provider’s name displays in the Idle mode.
• On: the service provider’s logo stored on your SIM card
displays in Idle mode; if no logo has been stored, the service
provider’s name appears in the display.
D307.book Page 143 Thursday, September 29, 2005 3:50 PM

Section 8
144
Sound Settings
You can customize the settings related to various sounds
for the phone, such as the call ringer, key tone, power on/
off tone, folder tone, and so on.
1. In Idle mode, press the Menu ( ) soft key to access
Menu mode.
2. Select Settings. Highlight Sound Settings and press the
Select soft key or the key.
3. Select a menu and then change the setting. If the menu
has submenus, repeat as necessary.
4. When you have finished, press the key.
Ring Tone
This menu allows you to select a ring melody. You can
choose between many different melodies and tones. If
you have downloaded sounds from the Internet, you can
access them in this menu.
• Shop Ringtones: allows you to access the web site preset
by your service provider to download melodies. Once you
have downloaded melodies, they are saved in the Audio
folder.
• Default Ringtones: allows you to choose from preset
ringtones provided by your service provider.
• Downloaded Ringtones: allows you to choose from
ringtones you have downloaded.
• Ring Volume: allows you to adjust the ring volume to one of
5 levels. Use the Up ( ) or Down ( ) Navigation keys or
the Up and Down keys on the side of the phone to adjust the
volume.
D307.book Page 144 Thursday, September 29, 2005 3:50 PM
Section 8: Changing Your Settings 145
Sound Settings
Section 8
• Alert Type: allows you to specify how you are to be
informed of incoming calls. The following options are
available:
• Melody: the phone rings using the ring melody selected in the
Ring Tone menu.
• Vibration: the phone vibrates but does not ring.The icon
appears in the top line of the display.
• Vibration + Melody: the phone first vibrates three times and
then starts ringing. The icon appears in the top line of the
display.
Keypad Tone
This menu allows you to select the To n e Ty p e and Vol ume
of the tone that the phone sounds when you press a key. To
turn off the sound, select Off.
If the Tone Type option is set to off, your phone does not
transmit the DTMF (Dual Tone Multi-Frequency) tones of
the keys, which allows you to press keys without hearing
key tones during a call.
Note: To communicate with answering machines or computerized
telephone systems, a Tone Type must be selected.
Message Tone
This menu allows you to select how the phone informs
you that a new SMS and MMS message has been received.
For each message tone, the following options are
available:
• Tone: allows you to select a message tone.
• Mode: allows you to select a type of message alert.
D307.book Page 145 Thursday, September 29, 2005 3:50 PM
Section 8
146
• Off: the phone does not sound when you have received a SMS
message.
• Tone: the phone sounds the selected message tone.
• Vibration: the phone vibrates.
• Repetition: you can select how often the phone informs you
of a new message.
• Once: the phone alerts you to a new message just once at the
time of its receipt.
• Periodic: the phone alerts you to a new message every 2
minutes until you open the message.
Power On/Off
This menu allows you to select the melody that the phone
sounds when it is switched on and off. To turn off the
sound, select Off.
Folder Tone
This menu allows you to select the tone the phone sounds
when you open or close the phone. To turn off the sound,
select Off.
Alerts on Call
The following options are available:
• Off: the phone doesn’t actively alert you to incoming messages
or alarms. It only displays the corresponding notification.
• On: the phone alerts you with a beep and displays the
corresponding notification.
Quiet Mode
This menu allows you to select how you are notified when
silent mode is activated. You can select Vibration All or
Silent All.
D307.book Page 146 Thursday, September 29, 2005 3:50 PM
Section 8: Changing Your Settings 147
Sound Settings
Section 8
The following options are available:
• Vibration All: the phone will vibrate in silent mode.
• Silent All: the phone mutes the sound of an incoming call in
silent mode.
In idle mode press and hold the key, to activate or
deactivate Silent All or Vibration All.
Alternatively, in idle mode press the Volume/Menu
Browse key (See "Open View of Your Phone" on page 21)
until the Silent All or Vibration All message appears in
the display. The icon associated with the setting appears
in the top line of the display.
When Silent All is active on your handset the icon
appears in the top line of the display.
Note: When Silent All is activated your keypad tones are muted. This
feature should not be used when you access automated services that
require you to enter numbers (such as your voice mail password).
When Vibration All is active on your handset the icon
appears in the top line of the display.
Extra Tones
You can customize additional tones for the phone.
1. To turn a given tone on, press the On soft key or the
key. A check mark displays in front of the option.
2. To turn a given tone off, press the Off soft key or the
key. The check mark no longer displays.
The following options are available:
• Error Tone: sets whether or not the phone informs you when
you have a make a mistake.
D307.book Page 147 Thursday, September 29, 2005 3:50 PM
Section 8
148
• Minute Minder: sets whether or not the phone beeps every
minute during an outgoing call to keep you informed of the
length of your call.
• Connect Tone: sets whether or not the phone beeps when
your call is connected to the system.
Network Services
You can customize the settings for network features, such
as call forwarding, call barring, and call waiting.
1. In Idle mode, press the Menu ( ) soft key to access
Menu mode.
2. Select Settings and highlight Network Services. Press
the Select soft key or the key.
3. Select a menu and then change the setting. If the menu
has submenus, repeat as necessary.
4. When you have finished, press the key.
Call Forwarding
This network service enables incoming calls to be
rerouted to the number that you specify.
For example, you may wish to forward your business calls
to a colleague while you are on vacation.
1. From the Network Services menu screen, select Call
Forwarding.
2. Select one of the following call forwarding options.
• Forward Always: all calls are forwarded
• Busy: calls are forwarded when you are already on another
call
• No Reply: calls are forwarded when you do not answer the
phone.
D307.book Page 148 Thursday, September 29, 2005 3:50 PM
Section 8: Changing Your Settings 149
Network Services
Section 8
• Unreachable: calls are forwarded when you are not in an
area covered by your service provider or when your phone
is switched off.
• Cancel All: all call forwarding options are canceled.
3. Select the type of calls, Voice Calls or Data Calls.
The current status displays. If the option has already
been set, the number to which the calls are forwarded
displays.
4. Press the Activate soft key or the key.
Enter the number to which the calls are to be forwarded
and press the OK soft key ore the key.
To enter an international code, press and hold the 0 key
until the + sign appear in the display.
5. If you selected No Reply in step 1, select the time delay
the network waits before forwarding a call.
The phone sends your settings to the network and the
network’s acknowledgement displays.
D307.book Page 149 Thursday, September 29, 2005 3:50 PM

Section 8
150
Call Barring (SIM dependent)
The call barring network service allows you to restrict
your calls. This option is SIM dependent and requires a
subscription. For more information, contact your service
provider.
Setting Call Barring Options
1. From the Network Services menu screen, select Call
Barring.
2. Select one of the following call barring options:
• All Outgoing: calls cannot be made.
• International: international calls cannot be made.
• International Except to Home: when abroad, calls can be
made only to numbers within the current country and to your
home country, which is the country where your home
network provider is located.
• All Receiving: calls cannot be received.
• Receiving While Abroad: calls cannot be received when you
are using your phone outside of your home country.
• Cancel All: all call barring settings are deactivated; calls can
be made and received normally.
• Change Barring Password: you can set and change the call
barring password obtained from your service provider.
3. Select the type of calls, Voice Calls or Data Calls.
4. Press the Activate soft key or the key.
5. Enter your call barring password supplied by your service
provider.
The phone sends your settings to the network and the
network’s acknowledgement displays.
D307.book Page 150 Thursday, September 29, 2005 3:50 PM
Section 8: Changing Your Settings 151
Network Services
Section 8
Deactivating Specific Call Barring Settings
1. From the Network Services menu screen, select Call
Barring.
2. Select the call barring option to be deactivated.
3. Select the type of calls to which this option applies.
4. Press the Deactivate soft key or the key.
5. Enter your call barring password supplied by your
service provider.
The phone sends our settings to the network and the
network’s acknowledgment displays.
Changing the Barring Password
1. From the Network Services menu screen, select Call
Barring.
2. Select Change Barring Password.
3. Enter the current password and press the OK soft key or
the key.
4. Enter a new password and press the OK soft key or the
key.
5. Enter the new password to confirm and press the OK soft
key or the key.
The phone sends your settings to the network and the
network’s acknowledgement displays.
D307.book Page 151 Thursday, September 29, 2005 3:50 PM

Section 8
152
Call Waiting
This network service informs you when someone is trying
to reach you during another call.
You can specify individual call waiting options for voice
calls and/or data calls.
Setting Call Waiting Options
1. From the Network Services menu screen, select Call
Waiting.
2. Select the type of calls, Voice Calls or Data Calls.
The screen informs you whether call waiting is activated
or deactivated.
Press the Activate soft key or the key to activate the
call waiting feature.
The phone sends your settings to the network and the
network’s acknowledgement displays.
Deactivating Call Waiting Settings
1. From the Network Services menu screen, select Call
Waiting.
2. Select the type of calls, Voice Calls or Data Calls.
The screen informs you whether call waiting is activated
or deactivated.
3. Press the Deactivate soft key or the key.
The phone sends your settings to the network and the
network’s acknowledgement displays.
D307.book Page 152 Thursday, September 29, 2005 3:50 PM

Section 8: Changing Your Settings 153
Network Services
Section 8
Network Selection (SIM Dependent)
The Network Selection feature enables you to
automatically or manually select the network used when
roaming outside of your home area.
Note: You can select a network other than your home network only if there
is a valid roaming agreement between the two.
1. From the Network Services menu screen, select
Network Selection.
2. Select the options you want.
If you select Automatic, you are connected to the first
available network when roaming.
If you select Manual, go to step 3.
3. Select the network you want. The phone will scan for
that network and you will be connected.
Caller ID
You can prevent your phone number from being
displayed on the phone of the person you are calling.
Note: Some networks do not allow you to change this setting.
The following options are available:
• Default: the default setting provided by the network is used.
• Hide Number: you number does not display on the other
person’s phone.
• Send Number: your number is sent each time you make a
call.
D307.book Page 153 Thursday, September 29, 2005 3:50 PM

Section 8
154
Closed User Group (SIM Dependent)
This network service allows incoming and outgoing calls
to be restricted to a selected user group. you can create up
to 10 user groups.
For details about how to create and use a closed user
group, contact your service provider.
Example: A company lends SIM cards to its employees and wants to
restrict outgoing calls to members of the same team.
If you select the Closed User Group menu, you can enter
the CUG function. You can now access the following
options:
• Index List: lets you list, add, or delete CUG index numbers.
If there is no CUG index stored, you are prompted to add a
new index when you select this option. Once you have added
a CUG index, the list of current CUG indexes appears.
Add a new CUG index as advised by your service provider, or
delete a group.
• Outside Access: lets you enable or disable calls to numbers
other than those in the CUG. This feature depends on the
nature of your CUG subscription. Please check with your
service provider.
• Default Group: you may set a default CUG with your service
provider. If you have done so, you can enable the Default
Group option on your phone. When making a call, you are
given the option of using your default CUG, instead of
selecting one from the list.
D307.book Page 154 Thursday, September 29, 2005 3:50 PM
Section 8: Changing Your Settings 155
Bluetooth
Section 8
• Deactivate: deactivates the CUG function. This menu
appears only when the default group is enabled or a CUG
index is selected.
Band Selection
For the phone to make and receive phone calls, it must
register with an available network. Your phone can
handle any of the following types of networks:
• GSM 1800
• Combined GSM 850/1900
The country where you purchased your phone
determines the default band that it uses. When you travel
abroad, you must remember to change to an appropriate
band.
1. From the Network Services menu screen, select Band
Selection.
2. Select the appropriate option, and press the OK soft key
or the key.
3. When the display confirms the network band you
selected, press the Yes soft key or the key.
To cancel the selection, press the No soft key.
Bluetooth
Bluetooth is a short-range wireless communications
technology capable of exchanging information over a
distance of about 30 feet without requiring a physical
connection.
Unlike infrared, you don't need to line up the devices to
beam information with Bluetooth. If the devices are
within a range of one another, you can exchange
D307.book Page 155 Thursday, September 29, 2005 3:50 PM

Section 8
156
information between them, even if they are located in
different rooms.
The Bluetooth wireless technology settings menu
provides the ability to view and change the device name,
show the visibility, and set the security for the device.
Activation
When the Bluetooth is turned on, you can use the
Bluetooth features available. When the Bluetooth is
turned off, you cannot send or receive information via
Bluetooth. To save battery life or in situations where
Bluetooth use is prohibited, such as airline traveling, you
can turn off the Bluetooth wireless technology headset.
My Devices
This menu provides a list of Bluetooth wireless
technology devices discovered by your handset.
1. Highlight My Devices and press the Select soft key or
the key.
2. To search for the Bluetooth device(s), highlight Search
New Device and press the Select soft key or the
key.
Connecting to a Bluetooth Device
From the Device list,
1. Highlight the device and press the Select soft key or the
key.
2. Enter the PIN for the device.
If connecting to a Bluetooth wireless device consult your
Bluetooth device user manual for your assigned PIN.
D307.book Page 156 Thursday, September 29, 2005 3:50 PM

Section 8: Changing Your Settings 157
Bluetooth
Section 8
If connecting to another handset, enter a user-defined
four to eight digit PIN.
Note: The first time you try to pair with a handset, you and the owner of
the other handset must enter the same PIN.
Once the handsets are paired, you will not need to use the PIN again.
3. Press the OK soft key or the key.
4. If you are unable to pair with the device a popup appears
in the display. Press the Yes soft key to retry.
My Phone’s Visibility
Allows other users to see your accessibility. Select On for
other devices to see your device, or Off for no visibility.
My Phone’s Name
Shows the handset name. You may change this name enter
the text and press the key.
Secure Mode
Secure Mode feature enables you to restrict other
Bluetooth enable devices from discovering your device.
Bluetooth Services
Actually, the Bluetooth specification is a protocol that
describes how the short-range wireless technology
works, whereas individual profiles describe the services
supported by individual devices. Profiles reduce the
chance that different devices will not work together.
D307.book Page 157 Thursday, September 29, 2005 3:50 PM

Section 8
158
Your phone supports the following profile services:
• Headset: enables outgoing and incoming calls.
• Handsfree: the remote carkit enables outgoing and incoming
calls.
• Serial Port: the remote bluetooth device acts as a virtual
serial port.
• Dial-up: the remote bluetooth device enables internet
access through a phone modem.
• File Transfer: the remote bluetooth device enables users to
transfer files from their handset to another.
Voice Recognition
Voice recognition allows your handset to be operated by
spoken words. See "VoiceSignal" on page 49 for detailed
information.
Security Settings
The Security feature enables you to restrict to use of your
phone by others and to restrict the types of calls.
1. In Idle mode, press the Menu ( ) soft key to access
Menu mode.
2. Select Settings. Highlight Security and press the Select
soft key or the key.
3. Select a menu and then change the setting. If the menu
has submenus, repeat as necessary.
4. When you have finished, press the key.
PIN Check
When the PIN Check feature is enabled, you must enter
your PIN each time you switch on the phone.
D307.book Page 158 Thursday, September 29, 2005 3:50 PM

Section 8: Changing Your Settings 159
Security Settings
Section 8
Consequently, any person does not have your PIN cannot
use your phone without your approval.
Note: Before disabling the PIN Check feature, you must enter your PIN.
The following options are available:
• Disable: the phone connects directly to the network when
you switch it on.
• Enable: you must enter the PIN each time the phone is
switched on.
Change PIN
This feature allows you to change your current PIN,
provided that the PIN Check feature is enabled. You must
enter the current PIN before you can specify a new one.
Once you have entered a new PIN, you are asked to
confirm it by entering it again.
Phone Lock
When the Phone Lock feature is enabled, the phone is
locked and you must enter the 4- 8 digit phone password
each time the phone is switched on.
The password it preset to “00000000” at the factory. To
change the phone password, see the following Change
Password option.
Once the correct password has been entered, you can use
the phone until you switch it off.
The following options are available:
• Disable: you are not asked to enter the phone password
when you switch on the phone.
D307.book Page 159 Thursday, September 29, 2005 3:50 PM

Section 8
160
• Enable: you are required to enter the phone password when
you switch on the phone.
Change Password
The Change Password feature allows you to change your
current phone password to a new one.You must enter the
current phone password before you can specify a new
one.
The password is preset to “00000000” at the factory. Once
you have entered a new password, you are asked to
confirm it by entering it again.
Privacy
Using this menu, you can lock your phone’s contents
requiring the phone’s password to access the associated
all functions except placing a call.
1. From the Security Menu, press Privacy.
2. Select Enable to lock and press the key. Enter your
password and press the OK soft key.
3. Select Disable to unlock. Enter your password and press
the OK soft key.
Note: This password is preset to “00000000” at the factory. To change this
password, see "Change Password" on page 160.
SIM Lock
When the SIM Lock feature is enabled, your phone only
works with the current SIM. You must enter the SIM lock
code to unlock the SIM so you can use a different SIM card.
Once you have entered the lock code, you are asked to
confirm your entry.
D307.book Page 160 Thursday, September 29, 2005 3:50 PM
Section 8: Changing Your Settings 161
Connection Settings
Section 8
FDN Mode (SIM Dependent)
FDN (Fixed Dial Number) mode, if supported by your
SIM card, allows you to restrict your outgoing calls to a
limited set of phone numbers.
The following options are available:
• Disable: you can call any number
• Enable: you can only call phone numbers stored in the
Address Book. You must enter your PIN2.
Note: Not all SIM cards have a PIN2. If your SIM card does not, this menu
does not display.
Change PIN2 (SIM Dependent)
The Change PIN2 feature allows you to change your
current PIN2 to a new one. You must enter the current
PIN2 before you can specify a new one. Once you have
entered a new PIN2, you are asked to confirm it by
entering it again.
Connection Settings
You can customize the profiles containing the settings for
connecting your phone to the network. These settings are
used for the WAP browser or Instant Messenger, or
sending MMS messages or emails.
Note: Your phone connects to the network by default. If you change the
MMS settings without first checking with your service provider, the WAP,
MMS and Email features may not work properly.
1. In Idle mode, press the Menu ( ) soft key to access
Menu mode.
D307.book Page 161 Thursday, September 29, 2005 3:50 PM
Section 8
162
2. Select Settings and highlight Connection Settings.
Press the Select soft key or the key.
3. Select the profile you want to change.
For each profile, the following options are available:
• Profile Name: enter a name that you wish to assign to the
profile.
• Homepage URL: enter the address of the WAP homepage of
your service provider.
• Bearer: select the network bearer type for data
transmission, either GPRS or DATA.
• Proxy Setting: enter the IP address of the proxy server.
• User Name: enter the user ID required to connect to the
network.
• Password: enter the password required to connect to the
network.
• APN: enter the access point name used for the address of
the network.
• Proxy Status: activate or deactivate the proxy server.
• Primary DNS: enter the primary DNS (Domain Name
System) address.
• Secondary DNS: enter the secondary DNS address.
4. When you have finished, press the key.
D307.book Page 162 Thursday, September 29, 2005 3:50 PM
Section 8: Changing Your Settings 163
Reset Settings
Section 8
Reset Settings
You can easily reset your phone to its’ default settings.
1. In Idle mode, press the Menu ( ) soft key to access
Menu mode.
2. Select Settings. Highlight Reset Settings and press the
Select soft key or the key.
3. Enter the 4 to 8-digit password and press the OK soft
key or the key.
Note: The password is preset to “00000000”. To change this password,
see "Change Password" on page 160.
D307.book Page 163 Thursday, September 29, 2005 3:50 PM

Section 8
164
D307.book Page 164 Thursday, September 29, 2005 3:50 PM
Section 9: Personal Organizer 165
Section 9
Section 9: Personal Organizer
Topics Covered
• Setting Alarms
• Using the Calendar
• Consulting the Calendar
• Using the To Do List
• Using the Calculator
• Record Audio
• Using the Currency Converter
•World Time
The topics covered in this section allow you to schedule
appointments, view the calendar, create To-Do lists, set
an alarm, and perform simple math calculations.
D307.book Page 165 Thursday, September 29, 2005 3:50 PM
166
Section 9
Setting Alarms
You can set the alarm to ring at a specific time and set the
weekly time frame. You can also set the phone to power on
automatically and ring the alarm even if the phone is
switched off.
Setting an Alarm
1. In Idle mode, press the Menu ( ) soft key to access
the menu mode.
2. Select Games & Apps. Highlight Alarm and press the
Select soft key or key.
3. Select an alarm type
• Wake-up Call: the alarm rings to wake you up at the
specified time.
• Single Use Alarm: the alarm rings only once and is then
deactivated.
• Daily Alarm: the alarm rings every day at the same time.
• Remove Alarm: removes all alarm settings.
• Autopower: the alarm rings even when the phone is turned
off.
4. Enter the time for the alarm to sound.
Note: Your phone is preset to a 12-hour format.
To change the alarm tone, press the Options soft key
and select Alarm Tone. Select an alarm tone from the
list.
5. Press the OK soft key or the key.
6. If applicable, select AM or PM.
D307.book Page 166 Thursday, September 29, 2005 3:50 PM
Section 9: Personal Organizer 167
Setting Alarms
Section 9
7. If you select Wake-up Call in step 3, select a repeat
option, Monday to Friday or Monday to Saturday.
8. When you have finished, press the key.
When the time for an alarm comes, press any key to stop
the alarm.
Setting Autopower Alarms
You can set the alarm to ring even if the phone is powered
off.
1. In Idle mode, press the Menu ( ) soft key to access
Menu mode.
2. Select Games & Apps. Highlight Alarm and press the
Select soft key or key.
3. Select Autopower.
4. Select Enable to activate the Autopower feature. The
phone will automatically switch on to ring the alarm
when the alarm time comes.
If the menu option is set to Disable, and the phone is
switched off at the specified time, the alarm does not
ring.
5. When you have finished, press the key.
Deactivating Alarms
1. In Idle mode, press the Menu ( ) soft key to access
menu mode.
2. Select Games & Apps. Highlight Alarm and press the
Select soft key or key
3. Highlight Remove Alarm and press the Select soft key
or the key.
D307.book Page 167 Thursday, September 29, 2005 3:50 PM

168
Section 9
4. Press OK to remove alarm or Cancel to exit.
5. When you have finished, press the key.
Using the Calendar
With the Calendar feature, you can:
• write memos to keep track of your schedule.
• consult the calendar and check your memos.
• set an alarm to act as a reminder.
Writing a Memo
You can create up to 100 memos with a maximum of 40
characters (including spaces) for the calendar. More than
one memo can be made for one day.
1. In Idle mode, press the Menu ( ) soft key to access
Menu mode.
2. Select Games & Apps. Highlight Calendar and press the
Select soft key or the key.
The calendar displays with today’s date highlighted.
3. Scroll to a date on the calendar by pressing the
Navigation keys and press the key.
Alternatively, press the Options soft key and select Go to
Date. You can enter manually a specific date and press
the key.
Note: To skip to the previous or next month, press the Volume keys on the
left side of the phone.
An empty memo screen appears in the display allowing
you to enter your memo.
D307.book Page 168 Thursday, September 29, 2005 3:50 PM

Section 9: Personal Organizer 169
Using the Calendar
Section 9
4. Enter your memo and then press the OK soft key or the
key.
5. If you want an alarm to ring on the chosen day, press the
Yes soft key or the key. If not, press the No soft key
to save the memo.
6. Enter the time for the alarm and press the key.
Note: Your phone is preset to a 12-hour format.
You can also select the melody for the alarm by pressing
the Melody soft key.
7. If applicable, select AM or PM.
The color of the date on the calendar changes to green to
indicate that a memo exists for that date.
8. When you have finished, press the key.
When the time for a memo comes and the phone plays the
selected alarm melody, press the View soft key or the
key to access the memo. Alternatively, press the Exit soft
key or the key to stop the alarm.
D307.book Page 169 Thursday, September 29, 2005 3:50 PM
170
Section 9
Consulting the Calendar
Viewing Memos on the Selected Date
1. In Idle mode, press the Menu ( ) soft key to access
Menu mode.
2. Select Games & Apps. Highlight Calendar and press the
Select soft key or the key.
3. Select the date you want to view its memo(s).
If there is more than one memo for that date, the latest
memo appears in the display.
4. Press the Up () or Down ( ) Navigation key to
scroll to the previous or next memo.
If you want to make a new memo for that date, press the
New soft key.
5. To access the memo options, press the Options soft key.
• Edit: allows you to change the memo text.
• Alarm: allows you to set an alarm to ring at a specified time
to remind you of the memo. If you have already set an alarm
for that memo, you can change or delete the alarm.
• Delete: allows you to delete the memo.
• Copy to: allows you to copy the memo to another date.
• Move to: allows you to change the date of the memo.
6. When you have finished, press the key.
Viewing All of the Memos on the Calendar
1. In Idle mode, press the Menu ( ) soft key to access
menu mode.
2. Select Games & Apps. Highlight Calendar and press the
Select soft key or the key.
D307.book Page 170 Thursday, September 29, 2005 3:50 PM
Section 9: Personal Organizer 171
Consulting the Calendar
Section 9
3. Press the Options soft key and select Search All. The
phone displays the first memo. You can view all of the
memos, starting with the oldest, regardless of the day.
4. To scroll through the memos, press the Up () or
Down () Navigation key.
5. When you have finished, press key.
Deleting Memos
You can delete memos on the calendar one by one or all at
one time.
1. In Idle mode, press the Menu ( ) soft key to access
menu mode.
2. Select Games & Apps. Highlight Calendar and press the
Select soft key or the key.
3. Select the date for the memo you wish to delete and
press the key.
4. Press the Options soft key and select Delete.
5. Press the Yes soft key to confirm the deletion.
6. When you have finished, press the key.
Deleting All Memos
1. In Idle mode, press the Menu ( ) soft key to access
menu mode.
2. Select Games & Apps. Highlight Calendar and press the
Select soft key or the key.
3. Press the Options soft key and select Delete All.
4. Press the Yes soft key to confirm the deletion.
5. When you have finished, press the key.
D307.book Page 171 Thursday, September 29, 2005 3:50 PM
172
Section 9
Using the To Do List
The To Do List allows you to:
• enter a list of tasks to be done
• assign a priority and a deadline to each task
• sort the tasks by priority and status
Creating the To Do List
1. In Idle mode, press the Menu ( ) soft key to access
menu mode.
2. Select Games & Apps. Highlight To Do List and press
the Select soft key or the key.
3. Press the New soft key or the .
4. Enter the first task.
5. Press the OK soft key or the .
6. Select a priority level of high, normal, or low.
7. Enter your deadline and press the key.
If you don’t want to set a deadline, press the Skip soft
key.
The first task is added to the To Do List.
8. When you have finished, press the key.
Adding Tasks to the To Do List
1. In Idle mode, press the Menu ( ) soft key to access
menu mode.
2. Select Games & Apps. Highlight To Do List and press
the Select soft key or the key.
D307.book Page 172 Thursday, September 29, 2005 3:50 PM
Section 9: Personal Organizer 173
Using the To Do List
Section 9
3. Press the Options soft key and select New. Continue
using steps in "Creating the To Do List" on page 172.
Viewing the To Do List
1. In Idle mode, press the Menu soft key to access menu
mode.
2. Select Games & Apps. Highlight To Do List and press
the Select soft key or the key.
The tasks display with a check mark, indicating a task
has been done, and its priority level indicator; for
High, for Normal, and for low.
Note: You can change the status of a specific task by pressing the * key.
The task is marked as completed as of the current time and date.
3. Scroll to a task from the list and press the key to
view the details for the task.
You can use the To Do List options by pressing the
Options soft key.
4. You can scroll through the tasks using Up () or
Down ( ) Navigation key, if necessary.
5. When you have finished, press the key.
Using To Do List Options
You can access the following options by pressing the
Options soft key:
• New: allows you to create a new task.
• Mark: allows you to change the status of a task. Select the
appropriate status (Done or Undo).
• Edit: allows you to edit a task. You can change the text,
priority, and/or deadline for the task.
D307.book Page 173 Thursday, September 29, 2005 3:50 PM

174
Section 9
• Sort: allows you to sort the existing tasks by priority or
status. Select the sort criterion (High, Low, Done, or Undo).
• Copy: allows you to copy a task.
• Copy to Calendar: allows you to copy a task to the calendar
as a memo.You can also change the text and deadline for the
task and/or set the alarm.
• Delete: deletes a task.
• Delete All: allows you to delete all tasks.
• Exit: allows you to exit the To do list menu and returns the
phone to Idle mode.
Using the Calculator
You can use the phone as a calculator. The calculator
provides basic arithmetic functions: addition,
subtraction, multiplication, and division.
1. In Idle mode, press the Menu ( ) soft key to access
menu mode.
2. Select Games & Apps. Highlight Calculator and press
the Select soft key or the key.
3. Enter the first number using the numeric keys.
Note: To include a decimal point or a bracket, press the Left soft key until
the symbol you want displays.
4. Enter the operation for your calculation by pressing the
Navigation keys, according to the illustration on the
display.
5. Enter the second number.
6. To view the result, press the key.
7. Repeat steps 3 to 6 as many times as required.
D307.book Page 174 Thursday, September 29, 2005 3:50 PM
Section 9: Personal Organizer 175
Using Record Audio
Section 9
8. When you have finished, press the key.
Using Record Audio
You can record voice memos. After recording, you can
send the memo to other people via the Multimedia
Message Service.
Record Audio
1. In Idle mode, press the Menu ( ) soft key to access
the Menu mode.
2. Select Games & Apps. Highlight Record Audio, press
the Select soft key or the key.
3. Highlight the Record option and press the Select soft
key or the key.
4. Press the Record soft key or the key. The display
shows a 30-second timer. Press the to return.
5. Record a memo by speaking into the microphone.
6. When you press the Stop soft key or the key, or if
the recording time expires, the following options display:
• Replay: plays back your memo
• Re-record: discards the memo and enables you to record
another one
• Save: allows you to save the memo
• Quit: cancels your recording and exits the Record menu
7. To save the memo, choose Save and press the Select
soft key or the key.
Press the key to clear the default name, if necessary
and enter a name for the memo.
Press the OK soft key or the key.
D307.book Page 175 Thursday, September 29, 2005 3:50 PM

176
Section 9
The memo is saved and then the display shows the
memo information.
You can press the Options soft key or the key to
access the following memo options:
• Send: allows you to send the memo to other people by using
the Multimedia Message feature.
• Rename: allows you to change the memo’s name.
• Delete: allows you to delete the memo.
8. When you have finished, press the key.
Audio List
Reviewing Voice Memos
1. In Idle mode, press the Menu ( ) soft key to access
the Menu mode.
2. Select Games & Apps. Highlight Record Audio, press
the Select soft key or the key.
3. Select Audio List. A list of voice memos displays.
4. Scroll to a memo and press the Options soft key or the
key. The following options are available:
• Play: plays the memo.
• Send: allows you to send the memo to other people by using
the Multimedia or Email feature.
• Rename: allows you to change the memo’s name
• Properties: displays information about the memo, such as
the name, the date the memo was created, recording length,
recording format and memory size.
• Delete: allows you to delete the memo.
5. Select Play to review the memo.
6. After playback, the display returns the memo list.
D307.book Page 176 Thursday, September 29, 2005 3:50 PM
Section 9: Personal Organizer 177
Using Record Audio
Section 9
7. When you have finished, press the key.
Delete All
You can delete your voice memos one by one or all at one
time.
Deleting A Voice Memo
1. In Idle mode, press the Menu ( ) soft key to access
the Menu mode.
2. Select Games & Apps. Highlight Record Audio, press
the Select soft key or the key.
3. Access the Audio List and scroll to the memo you want
to delete.
4. Press the Options soft key or the key and then
select Delete.
5. Press the Yes soft key or the key to confirm the
deletion.
6. When you have finished, press the key.
Deleting All Voice Memos
1. In Idle mode, press the Menu ( ) soft key to access
the Menu mode.
2. Select Games & Apps. Highlight Record Audio, press
the Select soft key or the key.
3. Select Delete All and press the key.
4. Press the Yes soft key or the key to confirm the
deletion.
5. When you have finished, press the key.
D307.book Page 177 Thursday, September 29, 2005 3:50 PM

178
Section 9
Memory Status
Checking the Memory Status
1. In Idle mode, press the Menu ( ) soft key to access
the Menu mode.
2. Select Games & Apps. Highlight Record Audio, press
the Select soft key or the key.
3. Select Memory Status.
This display shows the Total, Used, and Free memory
amount and at the bottom of the screen is a sliding scale
that shows the proportion of the amount of memory
being used and available.
4. When you have finished, press the key.
Using the Currency Converter
You can figure out currency conversions.
1. In Idle mode, press the Menu ( ) soft key to access
Menu mode.
2. Select Games & Apps. Highlight Currency Conversion
and press the Select soft key or the key.
3. Enter the Exchange Rate amount and press the OK soft
key or the key.
Note: You can insert a decimal point by pressing the # key.
4. Enter the local currency amount and press the OK soft
key or the key.
The Exchange Rate, Local Currency and Foreign
Currency values display.
D307.book Page 178 Thursday, September 29, 2005 3:50 PM
Section 9: Personal Organizer 179
World Time
Section 9
5. When you have finished, press the key.
World Time
You can find out what time it is another part of world,
using the Left () or Right ( ) Navigation key.
The screen shows the:
• city name and time difference between the selected city and the
city you have set your home time zone
• current time and date
• city selected as your time zone
Selecting the Home Time Zone
1. From the world map, select the city corresponding to
your time zone by pressing the Left () or Right ()
Navigation key. The local date and time in the selected
city display.
2. Press the Set soft key or the key.
D307.book Page 179 Thursday, September 29, 2005 3:50 PM
180
Section 9
D307.book Page 180 Thursday, September 29, 2005 3:50 PM
Section 10:WAP 181
Section 10
Section 10:WAP
Topics Covered
• Launching the WAP Browser
• Accessing a WAP site
• Navigating the WAP Browser
• Using Favorites
• Downloading Multimedia Files
• Clearing the Cache
• Changing the WAP Profiles
Your phone is equipped with a WAP (Wireless
Application Protocol) browser which allows you to access
Internet specified for mobile phones. This section
explains how to access the WAP services of your service
provider and navigate the WAP browser.
D307.book Page 181 Thursday, September 29, 2005 3:50 PM
182
Section 10
Launching the WAP Browser
1. In Idle mode, press the key to launch the WAP
browser.
You can also press the Menu ( ) soft key to access
menu mode.
2. Highlight MEdia Net and press the Select soft key or the
key. Select MEdia Net Home.
your phone is connected to the network and loads the
homepage of the Wireless Web service provider. The
content of the start-up homepage depends on your
Wireless Web service provider.
3. To scroll through the screen, use the Up () or
Down ( ) Navigation key.
4. To exit the browser at any time, simply press the
key and press the Yes soft key to confirm exit.
Accessing a WAP Site
There are several ways to access a WAP site:
• Selecting a link on the browser
• Using a bookmark item in the Favorites folder; use the
Bookmarks option on the browser menu list or Favorites menu.
• Entering a URL address manually; use the Go To URL option on
the browser menu list or http:// menu.
Navigating the WAP Browser
1. To scroll through browser items, press the Up () or
Down ( ) Navigation key.
D307.book Page 182 Thursday, September 29, 2005 3:50 PM
Section 10:WAP 183
Navigating the WAP Browser
Section 10
2. To select a browser item, press the key or press the
Options soft key, choose Select and press the OK soft
key.
3. To select a numbered item, press the corresponding
numeric key.
4. To return to the previous page, press the key, or
press the Options soft key and choose Back.
5. To access the browser menu list, press the Menu soft
key.
6. To return to the start-up homepage, press the Menu soft
key and select the Home option.
Entering Text in the WAP Browser
When you are prompted to enter text, the currently active
text input mode is indicated on the screen. To change the
text input mode, press the key one or more times.
The following modes are available:
• Upper-Case Alphabet Mode (A): allows you to enter upper-
case characters.
• Lower-Case Alphabet Mode (a): allows you to enter lower-
case characters.
Note: You can enter symbols in upper or lower case alphabet mode by
pressing the 1 key.
• T9 Mode (T9): allows you to enter characters by pressing one
key per letter. In this mode, you can use only the key to
display alternative words. To change case, press the key.
• Number Mode (1): allows you to enter numbers.
D307.book Page 183 Thursday, September 29, 2005 3:50 PM
184
Section 10
Selecting and Using Menu Options
Various menus are available when you are using the WAP
Browser to navigate the Wireless Web.
To access a menu option, press the menu soft key. A menu
list displays.
Note: The menus may vary, depending on your version of the WAP
Browser.
The following options are available:
• Favorite: shows the bookmarks list. You can bookmark the
current page or access previously book marked pages.
• Reload: reloads the current page.
• Home: takes you back at any time to the homepage of the
Wireless Web service provider.
• Go to URL: allows you to manually enter the URL address of
a WAP site. After entering an address, press the OK soft key
to go there directly.
• Show URL: displays the URL address of the page to which
you are currently connected. It also enables you to set the
current site as the startup homepage.
• Clear Cache: deletes the information stored in the cache.
The cache stores the most recently accessed pages.
• Inbox: allows you to read messages received from a WAP
server.
• Show Images: shows the image on the current page. Press
the Next soft key to view the next images.
• Text Messages: allows you to send messages using the
WAP server.
D307.book Page 184 Thursday, September 29, 2005 3:50 PM
Section 10:WAP 185
Using Favorites
Section 10
• Certificates: shows the security information when you
access the Wireless Web with the secured WAP setting
activated.
Using Favorites
While navigating the WAP browser, you can bookmark
the site to quickly and easily access it at a future time. The
URL addresses of the bookmarked sites are stored in the
Favorites folder, wherein you can use the 10-preset URL
addresses and store your favorite URL addresses.
Accessing a WAP Site Using Favorites
1. In Idle mode, press the Menu ( ) soft key to access
Menu mode.
2. Highlight MEdia Net and press the Select soft key or the
key.
3. Select Favorites.
4. Select a bookmark item on the Favorite list.
5. Press the Options soft key and select Goto URL. You are
accessed to the corresponding WAP site.
Storing a URL Address
1. In Idle mode, press the Menu ( ) soft key to access
Menu mode.
2. Highlight MEdia Net and press the Select soft key or the
key.
3. Select Favorites.
4. Select an empty location and press the Options soft key
or the key
D307.book Page 185 Thursday, September 29, 2005 3:50 PM
186
Section 10
5. Enter the address and press the OK soft key or key.
6. Enter a name for the bookmark and press the OK soft key
or the key. The name displays in the Favorites list.
7. When you have finished, press the key.
Editing a Bookmark
1. From the Favorite list, select the bookmark you want to
change.
2. Press the Options soft key and select Edit.
3. Change the address and the name, as you would when
storing a new one.
4. When you have finished, press the key.
Deleting a Bookmark
1. From the Favorites list, select the bookmark you want to
delete.
2. Press the Options soft key and select Delete.
3. Press the Yes soft key or the key to confirm the
deletion.
4. When you have finished, press the key.
Downloading Multimedia Files
You can buy a variety of multimedia files, such as
ringtones, graphics, applications, MMS contents, and so
on from the WAP browser and download them to your
phone’s memory. Your phone has embedded links to the
WAP site, providing you with download services, preset
by your service provider.
D307.book Page 186 Thursday, September 29, 2005 3:50 PM
Section 10:WAP 187
Clearing the Cache
Section 10
1. In Idle mode, press the Menu ( ) soft key to access
Menu mode.
2. Select MEdia Mall. Highlight Shop Ringtones, Shop
Games, Shop Graphics, Shop Multimedia, or Shop
Applications depending on the type of items you want to
buy.
To access homepage of the online shopping mall, select
MEdia Home.
3. Find the item you want to download and follow the
instructions on the screen to purchase it.
Note: This content is delivered to you in MMS messages. You can retrieve
the messages from the server and then save the items in your phone’s
memory. you cannot forward these messages to other people or add the
saved items to an MMS message.
Clearing the Cache
The cache is the phone’s temporary memory in which the
most recently accessed WAP pages are stored. You can
clear the cache at anytime.
1. In Idle mode, press the Menu ( ) soft key to access
Menu mode.
2. Highlight MEdia Net and press the Select soft key or the
key.
3. Select Clear Cache.
4. Press the Yes soft key or the key to confirm the
deletion.
5. When you have finished, press the key.
D307.book Page 187 Thursday, September 29, 2005 3:50 PM
188
Section 10
Changing the WAP Profiles
You can set up 10 server profiles for the WAP browser.
1. In Idle mode, press the Menu ( ) soft key to access
Menu mode.
2. Select Settings. Highlight Connection Settings and
press the Select soft key or the key.
3. Select the profile you want.
The following options are available:
• Profile Name: enter a name that you wish to assign to the
HTTP proxy server.
• Homepage URL: set the address of your startup homepage.
When the default homepage displays, you can delete it using
the key and enter your own choice.
• Bearer: select the bearer to be used for each type of network
address accessed: GPRS or DATA. The remaining options
depend on the Bearer setting.
When the bearer is set to GPRS:
• Proxy Setting: enter the WAP gateway address required to
connect to the Internet.
• User Name: enter the User ID required to connect to the
GPRS network.
• Password: enter the password required to connect to the
GPRS network.
• APN: enter the access point name used for the address of
the GPRS network gateway.
• Proxy Status: allows you to activate and deactivate the
proxy status.
When the bearer is set to Data:
D307.book Page 188 Thursday, September 29, 2005 3:50 PM
Section 10:WAP 189
Changing the WAP Profiles
Section 10
• Proxy Setting: enter the WAP gateway address required to
connect to the Internet.
• Login Name: enter the PPP server login ID.
• Password: enter the PPP server password.
• Dial-up Number: enter the PPP server phone number
• Data Call Type: select a data call type: Analog or ISDN.
• Proxy Status: allows you to activate and deactivate the
proxy status.
Note: The WAP settings may vary depending on the service provider.
D307.book Page 189 Thursday, September 29, 2005 3:50 PM
190
Section 10
D307.book Page 190 Thursday, September 29, 2005 3:50 PM

Section 11
Section 11: Landscape Mode 191
Section 11: Landscape Mode
Topics Covered
• Selecting and Using the Home Screen Function
• Selecting and Using Options
•Note
• SMS Messages
• Managing Your Message Folders
•Call Log
• Answering a Call in Landscape Mode
• Address Book
• Using the Calendar
• Using the To Do List
•List
•Search
• Bluetooth
•IM
•Quick Tip
• Settings
• About
This section outlines the functions associated with
Landscape mode.
D307.book Page 191 Thursday, September 29, 2005 3:50 PM

Section 11
192
Selecting and Using the Home Screen Function
The Home Screen function allows you to move directly to
a message list or IM application. This function also allows
you to set a message list or IM application as the default
screen that appears in the display when you open your
handset in Landscape mode.
1. Open your handset in Landscape mode.
Alternatively, press the Space Bar ( ) key to display
the Home Screen selection screen.
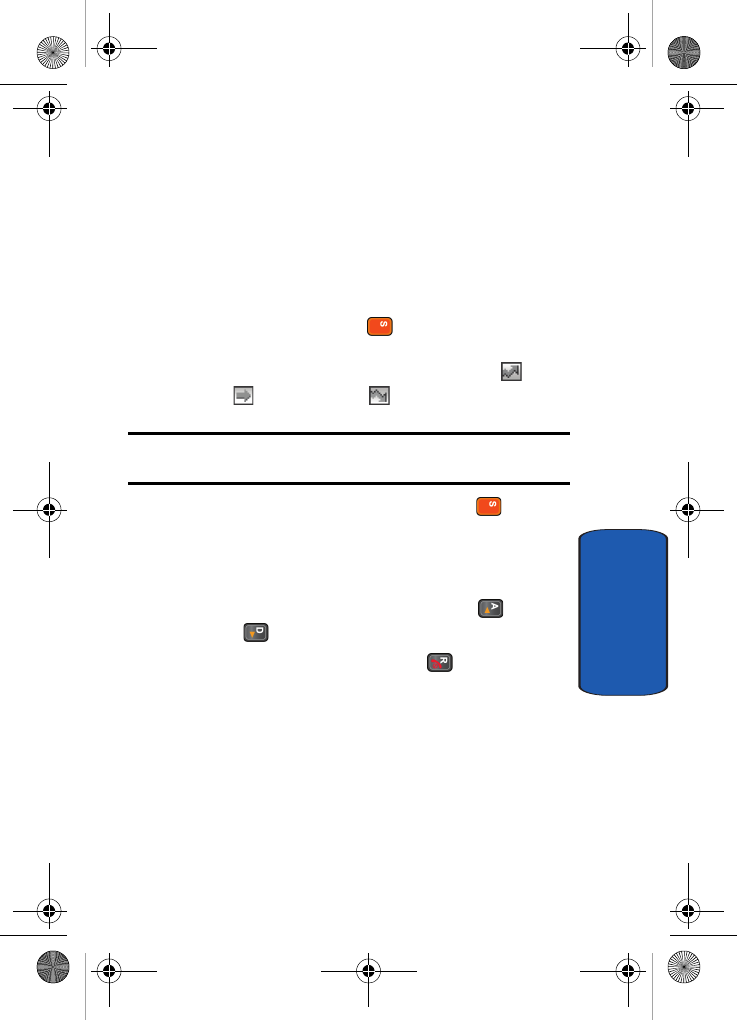
The following icons appear in the display.
Use the Left ( ) or Right ( ) Navigation key to
highlight a menu selection and press the key.
Alternatively, if you want your menu selection to be the
first item to display when you open your handset in
Landscape mode, press the Spacebar () key
again, a red arrow (home screen selection arrow)
appears in the display.
Use the Spacebar ( ) key to highlight a menu
selection and press the key.
D307.book Page 192 Thursday, September 29, 2005 3:50 PM