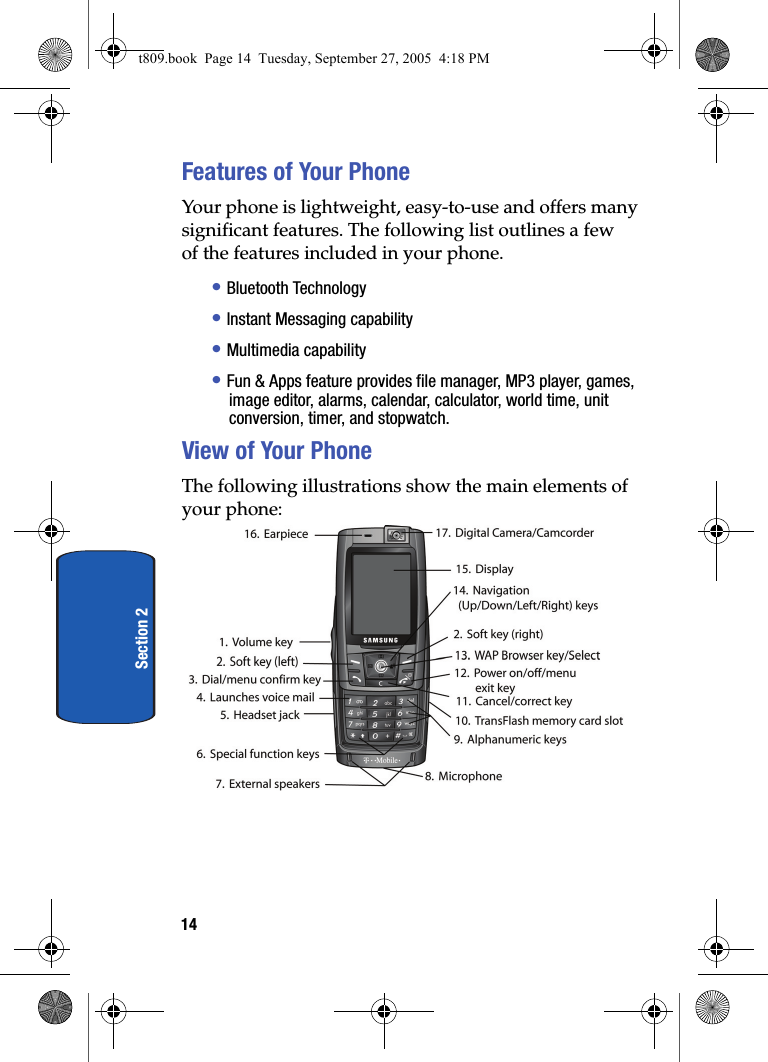
Samsung Electronics Co SGHT809 Dual-Band GSM/ EDGE Phone with Bluetooth User Manual 1 1 D820 RF block diagram

Samsung Electronics Co Ltd Dual-Band GSM/ EDGE Phone with Bluetooth 1 1 D820 RF block diagram
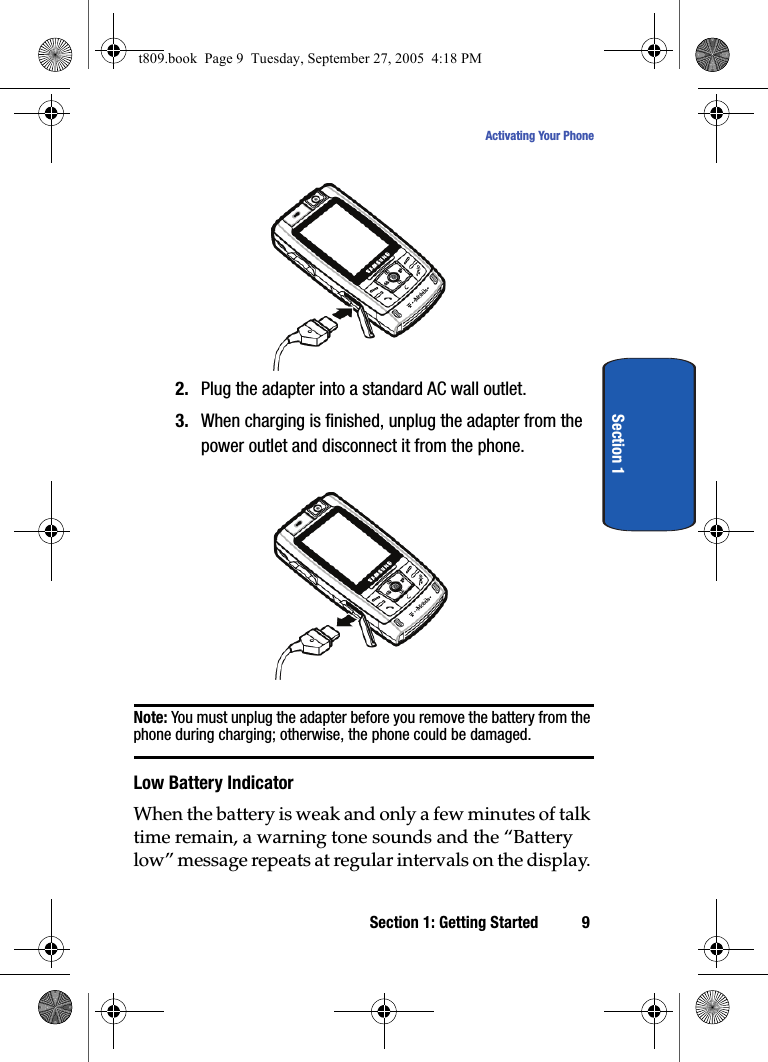
Contents

Users Manual 1

UVEI7_1.3_WCt809_092705_F4 SGH-T809PORTABLE Quad-BandTELEPHONEUser GuidePlease read this manual before operating yourphone, and keep it for future reference.t809.book  Page 1  Tuesday, September 27, 2005  4:18 PM
Intellectual PropertyAll Intellectual Property, as defined below, owned by or which is otherwise the property of Samsung or its respective suppliers relating to the SAMSUNG Phone, including but not limited to, accessories, parts, or software relating there to (the “Phone System”), is proprietary to Samsung and protected under federal laws, state laws, and international treaty provisions. Intellectual Property includes, but is not limited to, inventions (patentable or unpatentable), patents, trade secrets, copyrights, software, computer programs, and related documentation and other works of authorship. You may not infringe or otherwise violate the rights secured by the Intellectual Property. Moreover, you agree that you will not (and will not attempt to) modify, prepare derivative works of, reverse engineer, decompile, disassemble, or otherwise attempt to create source code from the software. No title to or ownership in the Intellectual Property is transferred to you. All applicable rights of the Intellectual Property shall remain with SAMSUNG and its suppliers.Samsung Telecommunications America (STA), Inc.Headquarters: Customer Care Center:1301 E. Lookout Drive 1000 Klein St.Richardson, TX  75082 Plano, TX  75074Tel: 972.761.7000 Toll Free Tel: 1.888.987.HELP (4357)Internet Address: http://www.samsungusa.com©2005 Samsung Telecommunications America, Inc. is a registered trademark of Samsung Electronics America, Inc. and its related entities.t809.book  Page 2  Tuesday, September 27, 2005  4:18 PM
 Printed in Korea.GH68-07931AOpenwave® is a registered Trademark of Openwave, Inc.RSA® is a registered Trademark RSA Security, Inc.Disclaimer of Warranties; Exclusion of LiabilityEXCEPT AS SET FORTH IN THE EXPRESS WARRANTY CONTAINED ON THE WARRANTY PAGE ENCLOSED WITH THE PRODUCT, THE PURCHASER TAKES THE PRODUCT "AS IS", AND SAMSUNG MAKES NO EXPRESS OR IMPLIED WARRANTY OF ANY KIND WHATSOEVER WITH RESPECT TO THE PRODUCT, INCLUDING BUT NOT LIMITED TO THE MERCHANTABILITY OF THE PRODUCT OR ITS FITNESS FOR ANY PARTICULAR PURPOSE OR USE; THE DESIGN, CONDITION OR QUALITY OF THE PRODUCT; THE PERFORMANCE OF THE PRODUCT; THE WORKMANSHIP OF THE PRODUCT OR THE COMPONENTS CONTAINED THEREIN; OR COMPLIANCE OF THE PRODUCT WITH THE REQUIREMENTS OF ANY LAW, RULE, SPECIFICATION OR CONTRACT PERTAINING THERETO. NOTHING CONTAINED IN THE INSTRUCTION MANUAL SHALL BE CONSTRUED TO CREATE AN EXPRESS OR IMPLIED WARRANTY OF ANY KIND WHATSOEVER WITH RESPECT TO THE PRODUCT. IN ADDITION, SAMSUNG SHALL NOT BE LIABLE FOR ANY DAMAGES OF ANY KIND RESULTING FROM THE PURCHASE OR USE OF THE PRODUCT OR ARISING FROM THE BREACH OF THE EXPRESS WARRANTY, INCLUDING INCIDENTAL, SPECIAL OR CONSEQUENTIAL DAMAGES, OR LOSS OF ANTICIPATED PROFITS OR BENEFITS.t809.book  Page 3  Tuesday, September 27, 2005  4:18 PM
t809.book  Page 4  Tuesday, September 27, 2005  4:18 PM
Table of Contents 1Table of ContentsTable of ContentsSection 1: Getting Started  . . . . . . . . . . . . . . . . . . 5Activating Your Phone  . . . . . . . . . . . . . . . . . . . . . . . . . . . .  6Switching the Phone On or Off . . . . . . . . . . . . . . . . . . . . . 10Setting Up Your Voice Mail   . . . . . . . . . . . . . . . . . . . . . . . 10Section 2: Understanding Your Phone  . . . . . . . 13Features of Your Phone  . . . . . . . . . . . . . . . . . . . . . . . . . .  14View of Your Phone  . . . . . . . . . . . . . . . . . . . . . . . . . . . . .  14Keys  . . . . . . . . . . . . . . . . . . . . . . . . . . . . . . . . . . . . . . . . 15Display Layout   . . . . . . . . . . . . . . . . . . . . . . . . . . . . . . . .  17Get More Help  . . . . . . . . . . . . . . . . . . . . . . . . . . . . . . . . . 19Section 3: Call Functions . . . . . . . . . . . . . . . . . . 21Making a Call   . . . . . . . . . . . . . . . . . . . . . . . . . . . . . . . . . 22Adjusting the Call Volume  . . . . . . . . . . . . . . . . . . . . . . . .  24Answering a Call  . . . . . . . . . . . . . . . . . . . . . . . . . . . . . . . 24Call Records  . . . . . . . . . . . . . . . . . . . . . . . . . . . . . . . . . . 25Silent mode . . . . . . . . . . . . . . . . . . . . . . . . . . . . . . . . . . . 28Selecting Functions and Options  . . . . . . . . . . . . . . . . . . . 29Section 4: Menu Navigation   . . . . . . . . . . . . . . . 37Menu Navigation  . . . . . . . . . . . . . . . . . . . . . . . . . . . . . . . 38Menu Outline   . . . . . . . . . . . . . . . . . . . . . . . . . . . . . . . . . 39Section 5: Entering Text   . . . . . . . . . . . . . . . . . . 45Changing the Text Input Mode . . . . . . . . . . . . . . . . . . . . .  46Using ABC Mode  . . . . . . . . . . . . . . . . . . . . . . . . . . . . . . . 47Using T9 Mode  . . . . . . . . . . . . . . . . . . . . . . . . . . . . . . . . 49Using Number Mode  . . . . . . . . . . . . . . . . . . . . . . . . . . . . 51Using Symbol Mode   . . . . . . . . . . . . . . . . . . . . . . . . . . . .  51Section 6: Understanding Your Phonebook  . . . 53Storing a Number in the SIM Card  . . . . . . . . . . . . . . . . . . 54Storing a Number in the Phone’s Memory  . . . . . . . . . . . .  55t809.book  Page 1  Tuesday, September 27, 2005  4:18 PM
Table of Contents2Finding a Phonebook Entry  . . . . . . . . . . . . . . . . . . . . . . . .57Dialing a Number from Phonebook  . . . . . . . . . . . . . . . . . .59Speed Dialing . . . . . . . . . . . . . . . . . . . . . . . . . . . . . . . . . .59Editing a Caller Group . . . . . . . . . . . . . . . . . . . . . . . . . . . .60Dialing a Number from the SIM Card   . . . . . . . . . . . . . . . .62Copying all SIM Phonebook Entries . . . . . . . . . . . . . . . . . .62Deleting all of the Phonebook Entries  . . . . . . . . . . . . . . . .63My Name Card  . . . . . . . . . . . . . . . . . . . . . . . . . . . . . . . . .64Finding My Own Phone Number  . . . . . . . . . . . . . . . . . . . .64FDN List  . . . . . . . . . . . . . . . . . . . . . . . . . . . . . . . . . . . . . .65Management  . . . . . . . . . . . . . . . . . . . . . . . . . . . . . . . . . .65Section 7: Messages . . . . . . . . . . . . . . . . . . . . . .69Voice Notes   . . . . . . . . . . . . . . . . . . . . . . . . . . . . . . . . . . .70Text Messages  . . . . . . . . . . . . . . . . . . . . . . . . . . . . . . . . .72Picture Messages . . . . . . . . . . . . . . . . . . . . . . . . . . . . . . .75Inbox  . . . . . . . . . . . . . . . . . . . . . . . . . . . . . . . . . . . . . . . .78Sentbox  . . . . . . . . . . . . . . . . . . . . . . . . . . . . . . . . . . . . . .85Outbox  . . . . . . . . . . . . . . . . . . . . . . . . . . . . . . . . . . . . . . .86Drafts . . . . . . . . . . . . . . . . . . . . . . . . . . . . . . . . . . . . . . . .87Templates   . . . . . . . . . . . . . . . . . . . . . . . . . . . . . . . . . . . .88Voice Mail Messages  . . . . . . . . . . . . . . . . . . . . . . . . . . . .89Delete All  . . . . . . . . . . . . . . . . . . . . . . . . . . . . . . . . . . . . .89Settings  . . . . . . . . . . . . . . . . . . . . . . . . . . . . . . . . . . . . . .90Broadcast Messages (SIM Dependent)  . . . . . . . . . . . . . . .91Instant Messaging   . . . . . . . . . . . . . . . . . . . . . . . . . . . . . .91Memory Status . . . . . . . . . . . . . . . . . . . . . . . . . . . . . . . . .93Section 8: Changing Your Settings   . . . . . . . . . .95Time & Date Settings  . . . . . . . . . . . . . . . . . . . . . . . . . . . .96Phone Settings  . . . . . . . . . . . . . . . . . . . . . . . . . . . . . . . . .97Display Settings  . . . . . . . . . . . . . . . . . . . . . . . . . . . . . . . .99Sound Settings . . . . . . . . . . . . . . . . . . . . . . . . . . . . . . . .103Network Services Settings  . . . . . . . . . . . . . . . . . . . . . . .106t809.book  Page 2  Tuesday, September 27, 2005  4:18 PM
Table of Contents 3Table of ContentsBluetooth   . . . . . . . . . . . . . . . . . . . . . . . . . . . . . . . . . . .  109Security Settings . . . . . . . . . . . . . . . . . . . . . . . . . . . . . .  111Memory Status  . . . . . . . . . . . . . . . . . . . . . . . . . . . . . . . 114Reset Settings . . . . . . . . . . . . . . . . . . . . . . . . . . . . . . . . 115Section 9: Fun & Apps  . . . . . . . . . . . . . . . . . . . 117File Manager . . . . . . . . . . . . . . . . . . . . . . . . . . . . . . . . .  118MP3 Player  . . . . . . . . . . . . . . . . . . . . . . . . . . . . . . . . . .  126Games   . . . . . . . . . . . . . . . . . . . . . . . . . . . . . . . . . . . . . 127Image Editor  . . . . . . . . . . . . . . . . . . . . . . . . . . . . . . . . . 128Organizer   . . . . . . . . . . . . . . . . . . . . . . . . . . . . . . . . . . .  129Section 10: Camera and Camcorder . . . . . . . . 141Using the Camera and Camcorder  . . . . . . . . . . . . . . . . .  142Take and Send  . . . . . . . . . . . . . . . . . . . . . . . . . . . . . . .  142Record Video . . . . . . . . . . . . . . . . . . . . . . . . . . . . . . . . . 146My Photos . . . . . . . . . . . . . . . . . . . . . . . . . . . . . . . . . . . 149My Videos  . . . . . . . . . . . . . . . . . . . . . . . . . . . . . . . . . . . 151My Album  . . . . . . . . . . . . . . . . . . . . . . . . . . . . . . . . . . .  153My Journal  . . . . . . . . . . . . . . . . . . . . . . . . . . . . . . . . . . 154Section 11: t-zones  . . . . . . . . . . . . . . . . . . . . . 155t-zones  . . . . . . . . . . . . . . . . . . . . . . . . . . . . . . . . . . . . . 156Section 12: Health and Safety Information . . . 161Health and Safety Information  . . . . . . . . . . . . . . . . . . . . 162Consumer Information on Wireless Phones  . . . . . . . . . .  164Road Safety   . . . . . . . . . . . . . . . . . . . . . . . . . . . . . . . . . 174Operating Environment  . . . . . . . . . . . . . . . . . . . . . . . . . 176Using Your Phone Near Other Electronic Devices . . . . . . 176Potentially Explosive Environments  . . . . . . . . . . . . . . . . 179Emergency Calls  . . . . . . . . . . . . . . . . . . . . . . . . . . . . . . 180FCC Notice and Cautions . . . . . . . . . . . . . . . . . . . . . . . . 181Other Important Safety Information  . . . . . . . . . . . . . . . . 182Product Performance   . . . . . . . . . . . . . . . . . . . . . . . . . . 183Availability of Various Features/Ring Tones  . . . . . . . . . . 184t809.book  Page 3  Tuesday, September 27, 2005  4:18 PM
Table of Contents4Battery Standby and Talk Time . . . . . . . . . . . . . . . . . . . .185Battery Precautions   . . . . . . . . . . . . . . . . . . . . . . . . . . . .185Care and Maintenance  . . . . . . . . . . . . . . . . . . . . . . . . . .187Section 13: Warranty Information  . . . . . . . . . .189Standard Limited Warranty . . . . . . . . . . . . . . . . . . . . . . .190Intellectual Property Statement . . . . . . . . . . . . . . . . . . . .196Samsung Telecommunications America (STA), Inc. . . . . .197Index  . . . . . . . . . . . . . . . . . . . . . . . . . . . . . . . . .199t809.book  Page 4  Tuesday, September 27, 2005  4:18 PM
Section 1: Getting Started 5Section 1Section 1: Getting StartedTopics Covered• Activating Your Phone• Switching the Phone On or Off• Setting Up Your VoicemailThis section allows you to start using your phone by activating your service and setting up your voice mail. t809.book  Page 5  Tuesday, September 27, 2005  4:18 PM
6Section 1Activating Your PhoneWhen you subscribe to a cellular network, you are provided with a plug-in SIM card loaded with your subscription details, such as your PIN, any optional services available, and many others.Installing the SIM CardImportant! The plug-in SIM card and its contacts can be easily damaged by scratching or bending, so be careful when handling, inserting, or removing the card.Keep all SIM cards out of reach of small children.If necessary, switch off the phone by holding down the key until the power-off image displays.1. Remove the back cover. To do so, slide the back cover off in the direction of the arrow (1).2. Lift the back cover away, as shown (2).t809.book  Page 6  Tuesday, September 27, 2005  4:18 PM
Section 1: Getting Started 7Activating Your PhoneSection 13. Remove the battery. Grasp the bottom of the battery (1) and lift up. Pull the battery out and away (2).4. Slide the SIM card into the SIM card socket so that the card locks into place. Make sure the gold contacts of the card face into the phone.Note: When you need to remove the SIM card, slide it, as shown, and take it out of the socket.t809.book  Page 7  Tuesday, September 27, 2005  4:18 PM
8Section 15. Place the battery so that the 3 brass tabs on the end align with the 3 brass prongs at the bottom of the battery compartment (1). Press the battery down until it clicks into place (2). 6. Replace the back cover. Make sure that the battery is properly installed before switching on the phone.Charging a BatteryYour phone is powered by a rechargeable Li-ion battery. A travel adapter comes with your phone for charging the battery. Use only approved batteries and chargers. Ask your local Samsung dealer for further details.You can use the phone while the battery is charging, but this causes the phone to charge more slowly.Note: You must fully charge the battery before using your phone for the first time. A discharged battery recharges fully in approximately 200 minutes.1. With the battery in position in the phone, plug the connector of the travel adapter into the jack at the bottom of the phone.t809.book  Page 8  Tuesday, September 27, 2005  4:18 PM
Section 1: Getting Started 9Activating Your PhoneSection 1 2. Plug the adapter into a standard AC wall outlet.3. When charging is finished, unplug the adapter from the power outlet and disconnect it from the phone. Note: You must unplug the adapter before you remove the battery from the phone during charging; otherwise, the phone could be damaged.Low Battery IndicatorWhen the battery is weak and only a few minutes of talk time remain, a warning tone sounds and the “Battery low” message repeats at regular intervals on the display. t809.book  Page 9  Tuesday, September 27, 2005  4:18 PM
10Section 1When this happens, your phone turns off the backlight to conserve the remaining battery power. When the battery level becomes too low, the phone automatically turns off.Switching the Phone On or Off 1. Slide the phone open. 2. Press and hold the   key until the phone switches on.3. If the phone asks for a PIN, enter the PIN and press the OK soft key or the   key. For further details, see "PIN check" on page 111.The phone searches for your network and after finding it, the Idle screen appears. Now, you can make or receive calls.Note: The display language is preset to English at the factory. To change the language, use the Language menu. For further details, see "Language" on page 97.4. When you wish to switch off the phone, press and hold the   key until the power-off image displays.Setting Up Your Voice MailFor new users, follow the instructions below to set up voicemail:1. Open your phone to access the keypad.2. In Idle mode, press and hold the   key on the keypad.3. Follow the tutorial to create a password, a greeting, and your name.t809.book  Page 10  Tuesday, September 27, 2005  4:18 PM
Section 1: Getting Started 11Setting Up Your Voice MailSection 1Note: These steps may be different depending on your network.Accessing Your Voice MailYou can access your Voice Mail by pressing the   key on the keypad or by going to the menu. To access Voice Mail using the menu:1. In Idle mode, press the Menu soft key to access Menu mode.2. Highlight Messages and press the Select soft key or the  key.3. Highlight Voice mail and press the Select soft key or the  key.4. Highlight Call voice mail and press the Select soft key or the   key. Your phone dials the specified voice mail number.5. When connected, follow the voice prompts from the voice mail center.Changing the Voice Mail NumberYour SIM card gives you the default service number of the voice mail center. However, should you need to change the number, use the following procedures:1. In Idle mode, press the Menu soft key to access the Menu mode.2. Highlight Messages and press the Select soft key or the  key.3. Highlight Voice mail and press the Select soft key or the  key.t809.book  Page 11  Tuesday, September 27, 2005  4:18 PM
12Section 14. Highlight Voice server number and press the Select soft key or the   key. Highlight Empty and press the Options soft key. 5. Highlight Edit and press the Select soft key or the   key. Or, you may highlight Delete to delete the number.6. Edit the name if desired, and then press the Down Navigation key to edit the number.7. Press the Options soft key, highlight the Save option, and press the Select soft key or the   key.8. Press the   key to return to Idle mode.t809.book  Page 12  Tuesday, September 27, 2005  4:18 PM
Section 2: Understanding Your Phone 13Section 2Section 2: Understanding Your PhoneTopics Covered• Features of Your Phone• View of Your Phone•Keys• Display Layout•Get More HelpThis section outlines some key features of your phone. It also displays the screen and the icons that are displayed when the phone is in use.t809.book  Page 13  Tuesday, September 27, 2005  4:18 PM
14Section 2Features of Your PhoneYour phone is lightweight, easy-to-use and offers many significant features. The following list outlines a few of the features included in your phone.• Bluetooth Technology• Instant Messaging capability• Multimedia capability• Fun & Apps feature provides file manager, MP3 player, games, image editor, alarms, calendar, calculator, world time, unit conversion, timer, and stopwatch.View of Your PhoneThe following illustrations show the main elements of your phone:t809.book  Page 14  Tuesday, September 27, 2005  4:18 PM
Section 2: Understanding Your Phone 15KeysSection 2KeysThe following list correlates to the illustrations.1. During a call, adjusts the earpiece volume.In Idle mode with the phone open, adjusts the ring volume. With the phone closed, turns on the external display when held down.2. Performs the functions indicated by the screen text on the bottom line of the display.3. Makes or answers a call.In Idle mode, recalls the last number dialed or received when held down.4. In Idle mode, accesses voice mail when held down.5. The headset jack is used for the hands-free headset.6. Enters special characters. Performs various functions.7. External speakers allow you to hear sounds and music.8. The microphone used during phone calls and voice note recordings.9. Enters numbers, letters, and some special characters.10. TransFlash memory card slot. This expansion slot allows you to insert a TransFlash memory card to add additional memory and storage capacity.11. The Cancel key deletes characters from the display. In Menu mode, it returns you to the previous menu level.t809.book  Page 15  Tuesday, September 27, 2005  4:18 PM
16Section 212. Ends a call. Also switches the phone on and off when held down. In Menu mode, cancels your input and returns the phone to Idle mode.13. In Idle mode, launches the WAP (Wireless Application Protocol) browser. In Menu mode, selects the highlighted menu options.When the Left soft key shows Options, it is the short-cut key to select the first option in the options list.14. In Menu mode, scrolls through the menus and Phonebook. In Idle mode:ⅷDown key: allows you to access the Phonebook Search menu directly. ⅷUp key: allows you to access the Camera or Camcorder feature directly. ⅷLeft key: allows you to access Text messaging directly.ⅷRight key: allows you to access the Voice notes feature directly. When entering text, moves the cursor to the left or right, depending on which side you press.15. Display area where text and graphics are displayed.16. Used to listen to audio from your phone.17. The built-in digital camera/camcorder has video capture capabilities.t809.book  Page 16  Tuesday, September 27, 2005  4:18 PM
Section 2: Understanding Your Phone 17Display LayoutSection 2Display LayoutThe display has 4 areas:IconsShows the received signal strength. The greater the number of bars, the stronger the signal.Appears when a TransFlash memory card has been inserted.Appears when a new text message has been received.Appears when a new voice mail has been received.Appears when a new multimedia message has been received.Appears when you set an alarm to ring at a specified time. For details, see page "Alarm" on page 130.Appears when you are out of your service area.Appears when a call is in progress.Appears when the Call Forwarding feature is active. For details, see page "Call forwarding" on page 106.t809.book  Page 17  Tuesday, September 27, 2005  4:18 PM
18Section 2Appears when Alert type is vibration or you set the phone to vibrate when you receive a call. Appears when Silent Mode is active.Appears when Mute is active.Shows the level of your battery. The more bars you see, the more power you have remaining.Bluetooth: appears when Bluetooth wireless technology is active.BacklightA backlight illuminates the display and the keypad. When you press any key or slide the phone open, the backlight comes on. It goes off when no keys are pressed within a given period of time, depending on the setting in the Backlight menu. The display turns off after one minute to conserve battery power. The On setting is how long the keypad backlight is on. You can select 15 seconds, 30 seconds, 1 minute, 3 minutes, or 10 minutes.The Dim option is how much longer after the keypad backlight goes off that the display remains lit. You can select Off, 5 seconds, 15 seconds, 30 seconds, 1 minute, or 3 minutes.To specify your Backlight settings: 1. In Idle mode, press the Menu soft key to access Menu mode.2. Using the Navigation keys, scroll to the Settings icon. Press the Select soft key or the   key to enter the menu.t809.book  Page 18  Tuesday, September 27, 2005  4:18 PM
Section 2: Understanding Your Phone 19Get More HelpSection 23. Highlight the Display settings option and press the Select soft key or the   key.4. Highlight the Backlight option and press the Select soft key or the   key.5. Highlight the On option. Use the Left or Right Navigation key to select the time that the backlight is on. You may choose between 15 seconds, 30 seconds, 1 minute, 3 minutes, or 10 minutes.6. Press the Down key to take you to the Dim option. Use the Left or Right Navigation key to select the time that Dimming mode is on. You may choose between Off, 5 seconds, 15 seconds, 30 seconds, 1 minute, or 3 minutes.7. Press the Save soft key to save your settings.Get More HelpGet More Help is designed to show you some of the features of your phone using t-zones. You can search help files on the fly while traveling, at home or anywhere, using help.wap.t-mobile.com.1. In Idle mode, press the Menu soft key to access Menu mode.2. Using the Navigation keys, scroll to the Get More Help icon. Press the Select soft key or the   key.3. You will enter t-zones and the Get More Help menu will be displayed.The following options are available:t809.book  Page 19  Tuesday, September 27, 2005  4:18 PM
20Section 2• Browse Help Topics: this option gives you a list of different topics that you can select.• Enter a Search: this option allows you to enter a keyword to search on.• About: this option offers general information about Get More Help including concept and site design, copyright information, and contact email address.To access the browser options menu:1. Press the Menu soft key to see the Browser Options. 2. Make a selection and press the Select soft key or the   key.Note: The menus may vary, depending on your version of t-zones.For more information on browser options, see "Selecting and Using Menu Options" on page 158.t809.book  Page 20  Tuesday, September 27, 2005  4:18 PM
Section 3: Call Functions 21Section 3Section 3: Call FunctionsTopics Covered• Making a Call• Adjusting the Call Volume• Answering a Call•Call Records• Silent Mode• Selecting Functions and OptionsThis section describes how to make or answer a call. It also includes information on the features and functionality associated with making or answering a call.t809.book  Page 21  Tuesday, September 27, 2005  4:18 PM
22Section 3Making a CallWhen the idle screen displays, enter the number you wish to dial and press the   key.Note: When you activate the Auto redial option in the Extra settings menu, the phone will automatically redial up to 10 times when the person does not answer the call or is already on the phone, provided your call is not sent to voice mail. See page "Extra settings" on page 99 for further details.Making an International Call1. Press and hold the   key. The + character appears.2. Enter the country code, area code, and phone number and press the   key.Correcting the Number1. To clear the last digit displayed, press the   key.2. To clear any other digit in the number, press the Left or Right key until the cursor is immediately to the right of the digit to be cleared. Press the   key. You can also enter a missing digit.3. To clear the whole display, press and hold the   key. Ending a CallWhen you want to finish your call, briefly press the   key.Redialing the Last NumberThe phone stores the numbers of the calls you’ve dialed, received, or missed if the caller is identified.To recall any of these numbers:t809.book  Page 22  Tuesday, September 27, 2005  4:18 PM
Section 3: Call Functions 23Making a CallSection 31. If you have typed characters on the display, press the  key to return to Idle mode. 2. Press the   key to display a list of the most recent numbers used in the order you dialed or received them.3. Use the Up and Down keys to scroll through the numbers and highlight the number you want.4. To dial the number, press the   key.Before you dial the number, you may press the Options soft key for the following options:• Details: Displays details of the number including name, number, and dates and times of calls.• Call back: Places a call back to the number.•Store to phonebook: Stores the number in your phonebook.• Send message: Allows you to send a text message, picture message, or voice notes to the number.•Delete: Allows you to delete the number or delete all call records.Making a Call from the PhonebookYou can store phone numbers that you use regularly on the SIM card or in the phone’s memory. These entries are collectively called the Phonebook. Once you have stored a number in the Phonebook, you can dial it by pressing a few keys. You can also assign your most frequently-used numbers to number keys using the Speed Dial feature. For further details about the Phonebook feature, see "Section 6: Understanding Your Phonebook" on page 53.t809.book  Page 23  Tuesday, September 27, 2005  4:18 PM
24Section 3Adjusting the Call VolumeDuring a call, if you want to adjust the earpiece volume, use the Volume keys on the left side of the phone.Press the   key to increase the volume level and the   key to decrease the level.In Idle mode, you can also adjust the ring volume using these keys while the phone is open.Answering a CallWhen somebody calls you, the phone rings and displays the incoming call image.The caller’s phone number, or name if stored in Phonebook, displays.1. If necessary, slide the phone open. Press the   key or the Accept soft key to answer the incoming call.If the Anykey answer option in the Extra Settings menu is activated, you can press any key to answer a call except for the   key and the Reject soft key.t809.book  Page 24  Tuesday, September 27, 2005  4:18 PM
Section 3: Call Functions 25Call RecordsSection 3Note: To reject an incoming call, press the Reject soft key or   key. 2. End the call by closing the phone or pressing the   key.Note: You can answer a call while using the Phonebook or menu features. After ending the call, the phone returns to the function screen you were using.Call RecordsAll incoming, outgoing and missed calls are listed in the Call Records. You can also view Call time records.1. In Idle mode, press the Menu soft key to access Menu mode.2. Using the Navigation keys, scroll to the Call records icon. Press the Select soft key or the   key to enter the menu.Note: You can also access the call records of incoming, outgoing, and missed calls by pressing the   key in Idle mode.The following Call Record options are available:All callsThis menu lets you view the 90 most recent calls you received, sent, and missed.The number or name, if already stored in your Phonebook, displays with the number of occurrences of each number.t809.book  Page 25  Tuesday, September 27, 2005  4:18 PM
26Section 3Note: at any time while you are in Call Records, you may use the Left or Right Navigation key to scroll between All calls, Missed calls, Incoming calls, and Outgoing calls.Missed callsThis menu lets you view the 30 most recent calls you received, but did not answer. The number and name, if already stored in your Phonebook, displays with the number of occurrences of each number.Viewing Missed CallsWhen you are unable to answer a call for any reason, you can find out who is calling you, if this service is available, so that you can call the person back. The number of calls you have missed displays on the idle screen immediately after a call is missed.To view a missed call immediately:1. If the phone is closed, slide the phone open.2. Press the View soft key.The number corresponding to the most recent missed call displays, if available.3. To scroll through the missed calls, press the Up or Down Navigation key.4. To call the number displayed, press the   key.5. Press the Options soft key for the following options:•Details: Displays details of the number including name, number, and dates and times of calls.t809.book  Page 26  Tuesday, September 27, 2005  4:18 PM
Section 3: Call Functions 27Call RecordsSection 3•Call back: Places a call back to the number.•Store to phonebook: Stores the number in your phonebook.•Send message: Allows you to send a text message, picture message, or voice notes to the number.•Delete: Allows you to delete the number or delete all call records.You can press the  key at any time to exit the Missed Call feature.Incoming callsThis menu lets you view the 30 most recent calls you received. The number and name, if already stored in your Phonebook, displays with the number of occurrences of each number.Outgoing callsThis menu lets you view the 30 most recent calls you dialed.The number and name, if already stored in your Phonebook, displays with the number of occurrences of each number.Delete allThis menu allows you to delete all of the records in each call record separately, or you can delete all of your call records at one time.1. Highlight the type of calls you want to delete and press the   key to make a check mark. 2. Press the Delete soft key to delete the calls.t809.book  Page 27  Tuesday, September 27, 2005  4:18 PM
28Section 33. When a confirmation message displays, press the Yes soft key or   key to confirm.Call timeThis menu lets you view the time log for calls made and received. Note: The actual time invoiced by your service provider may differ from times displayed due to network features and service plan.The following time logs are available:• Last call time: shows the length of your last call.• Total incoming: shows the total length of all calls you have received since the timer was last reset.• Total outgoing: shows the total length of all calls you have made since the timer was last reset.• Life time: shows the total length of time for incoming and outgoing calls. The length of call time must be at least 1 minute to increment this field. This information cannot be cleared.• Reset timers: allows you to reset the call timers. At the Are you sure? prompt, press the Yes soft key. Enter the phone password and then press the OK soft key or   key.Note: The password is preset to “00000000” at the factory. To change this password, see "Change password" on page 113. Silent modeSilent mode is convenient when you wish to stop the phone from making noise, in a theater for example.In Idle mode, press and hold the   key until the “Silent Mode On” message and the Silent mode icon ( ) display.t809.book  Page 28  Tuesday, September 27, 2005  4:18 PM
Section 3: Call Functions 29Selecting Functions and OptionsSection 3In Silent mode, instead of sounds, your phone will vibrate.To exit and reactivate the previous sound settings, press and hold the   key again until “Exit Silent Mode” message appears. The Silent mode icon ( ) no longer displays.Selecting Functions and OptionsYour phone offers a set of functions that allow you to customize it. These functions are arranged in menus and sub-menus, accessed using the two soft keys. Each menu and sub-menu allows you to view and alter the settings of a particular function.Soft KeysThe roles of the soft keys vary depending on the function you are currently using. The labels on the bottom line of the display just above each key indicate their current role.Press the left soft key for Menu mode.Press the right soft key to access the Phonebook menu.t809.book  Page 29  Tuesday, September 27, 2005  4:18 PM
30Section 3Selecting OptionsTo view the various functions and options available and to select the one you want:1. Press the appropriate soft key.2. To select the function displayed or the option highlighted, press the Select soft key or the   key.3. To view the next function or highlight the next option on a list, press the Down Navigation key.4. To move back to the previous function or option on a list, press the Up key.5. To move back up one level in the menu structure, press the Back soft key.6. To exit the menu structure without changing the settings, press the   key.When you access a list of options, your phone highlights the currently active option. If, however, there are only two options, such as On/Off or Enable/Disable, your phone highlights the option that is not currently active, so that you can select it directly.Options During a CallYour phone provides a number of control functions that you can use during a call.Putting a Call on HoldYou can place the current call on hold whenever you want. You can make another call while you have a call in progress if your network supports this service.t809.book  Page 30  Tuesday, September 27, 2005  4:18 PM
Section 3: Call Functions 31Selecting Functions and OptionsSection 3To place a call on hold, simply press the Options soft key, highlight the Hold option, then press the Select soft key or the   key. You can reactivate the call whenever you want, by pressing the Resume soft key.To make a call while you have a call in progress:1. Enter the phone number that you wish to dial or look it up in the Phonebook.2. Press the   key to dial the second call. The first call is automatically put on hold.Or:1. Press the Options soft key and select Hold.2. Make the second call in the normal way.When you have an active call and a call on hold, you may switch between the two calls, changing the one on hold to active and placing the other on hold.To switch between the two calls, simply press the Options soft key and select Swap.The current call is placed on hold and the call on hold is reactivated so that you can continue conversing with that person.When you want to finish, end each call normally by pressing the  key.Switching off the Microphone (Mute)You can temporarily switch your phone’s microphone off, so that the other person cannot hear you.t809.book  Page 31  Tuesday, September 27, 2005  4:18 PM
32Section 3Example: You wish to say something to a person in the room but do not want the person on the phone to hear you.To switch the microphone off temporarily:1. Press the Options soft key and highlight the Mute option.2. Press the Select soft key or the   key. The other person can no longer hear you. The Mute icon is displayed.To switch the microphone back on:1. Press the Options soft key and highlight the Unmute option.2. Press the Select soft key or the   key. The other person can hear you again.Using the SpeakerphoneWhile on a call, you can use your Speakerphone by following these steps:1. Press the Spkr on soft key to turn the Speakerphone on.2. To turn the Speakerphone off, press the Spkr off soft key.Muting or Sending Key TonesThese options allow you to turn the key tones off or on. If the Mute keys option is selected, your phone does not transmit the DTMF (Dual Tone Multi-Frequency) tones of the keys, which allows you to press keys without hearing annoying key tones during a call.t809.book  Page 32  Tuesday, September 27, 2005  4:18 PM
Section 3: Call Functions 33Selecting Functions and OptionsSection 3Note: To communicate with answering machines or computerized telephone systems, the Send keys option must be selected.Send DTMFYou can use the Send DTMF option to send a key string or number during a phone call. For example, you can send a ca llin g card numb er by  DTMF  whil e on a  call .  Sel ect t he Send DTMF option and enter a number. Press the OK soft key and the number is sent.Searching for a Number in PhonebookYou can search for a number in Phonebook during a call.1. Press the Options soft key.2. Press the Down key to highlight the Phonebook option and press the Select soft key or the   key.3. Press the Down key to highlight the Contact list option and press the Select soft key or the   key.The Phonebook entries are listed.4. Enter the name that you wish to find in the textbox located above the entries. If you enter the first few letters of the name, the Phonebook entries are listed starting with the first entry matching your input. Or, use the Up or Down Navigation key to highlight the contact that you desire.5. To view the highlighted entry, press the Options soft key.6. Highlight the View option and press the Select soft key or the   key. The Contact is displayed.t809.book  Page 33  Tuesday, September 27, 2005  4:18 PM
34Section 3For further details about the Phonebook feature, see "Finding a Phonebook Entry" on page 57.Call WaitingYou can answer an incoming call while you have a call in progress, if this service is supported by the network and you have set the Call waiting menu to Activate. You are notified of an incoming call by a call waiting tone.To answer a call while you have a call in progress:1. Press the   key to answer the incoming call. The first call is automatically put on hold.2. To switch between the two calls, press the Options soft key, highlight Swap and press the Select soft key or the  key.To end a call on hold, press the Options soft key and select the End held call option. Then press the Select soft key or the  key.To end the current call, press the  key.Making a Multi-Party CallA multi-party call is a network service that allows up to six people to take part simultaneously in a multi-party or conference call.For further details about subscribing to this service, contact your service provider.Setting up a Multi-Party Call1. Call the first participant in the normal way. 2. Call the second participant in the normal way. The first call is automatically put on hold.t809.book  Page 34  Tuesday, September 27, 2005  4:18 PM
Section 3: Call Functions 35Selecting Functions and OptionsSection 33. To join the first participant to the multi-party call, press the Options soft key or the   key and select Join. Press the Select soft key or the   key.4. To add a new person to the multi-party call, call the new person in the normal way and then press the Options soft key or the   key. Select the Join option and press the Select soft key or the   key.You can add incoming callers by answering the call and pressing the Options soft key or the   key, and selecting Join. Repeat as required.Having a Private Conversation With One Participant1. Press the Options soft key or the   key and choose the Split option. Press the Select soft key or the   key.The list of call participants appears.2. Highlight a person you wish to talk privately with by pressing the Up or Down Navigation key, and press the Select soft key or the   key.Now you can talk only to that person. The other participants can continue to converse with each other.3. To return to the multi-party call, press the Options soft key or the   key and select Join. Press the Select soft key or the   key.All of the multi-party call participants can now hear each other.Dropping One Participant1. Press the Options soft key or the   key and choose the Split option. Press the Select soft key or the   key.t809.book  Page 35  Tuesday, September 27, 2005  4:18 PM
36Section 3The list of call participants appears.2. Highlight the person you want to keep. Press the Options soft key and highlight End held multiparty. Press the Select soft key or the   key.The call with the participant on hold will end, but you can continue to talk to the other participants.3. When you want to end the multi-party call, close the phone or press the   key.t809.book  Page 36  Tuesday, September 27, 2005  4:18 PM
Section 4Section 4: Menu Navigation 37Section 4: Menu NavigationTopics Covered• Menu Navigation• Menu OutlineThis section explains the menu navigation for your phone. It also includes an outline of all the available menus associated with your phone.t809.book  Page 37  Tuesday, September 27, 2005  4:18 PM
Section 438Menu NavigationYou can tailor the phone’s range of functions to your needs using menus and sub-menus. Menus and sub-menus can be accessed by scrolling using the Navigation keys or by using the shortcuts.Accessing a Menu Function by Scrolling1. In Idle mode, press the Menu soft key to access Menu mode.2. Scroll using the Navigation keys to reach a main menu, Settings for example. Press the Select soft key or the  key to enter the menu. 3. If the menu contains sub-menus, Security for example, you can access them by pressing the Select soft key or the   key after the sub-menu has been highlighted.If the menu that you have selected contains further options, repeat this step.4. To scroll through the menus, press the Up or Down Navigation keys.5. To confirm the chosen setting, press the Select soft key, or the   key.6. To return to the previous menu level, press the Back soft key, or the   key.7. To exit the menu without changing the settings, press the  key.Using ShortcutsThe menu items, such as menus, sub-menus, and options, are numbered and can be accessed quickly by using their t809.book  Page 38  Tuesday, September 27, 2005  4:18 PM
Section 4: Menu Navigation 39Menu OutlineSection 4shortcut numbers. For the main menus, you can access any one of them by pressing the number keys (1 to 0) corresponding to their location on the screen.Example: Accessing the Security menu.1. Press the Menu soft key.2. Press the   key for Settings.3. Press the   key for Security.Menu OutlineThe following list shows the menu structure and indicates the number assigned to each option.1Voice notes2 Call records2.1 All calls2.2 Missed calls2.3 Incoming calls2.4 Outgoing calls2.5 Delete all2.6 Call time2.6.1 Last call time2.6.2 Total incoming2.6.3 Total outgoing2.6.4 Life time2.6.5 Reset timers3t-zones3.1 Homet809.book  Page 39  Tuesday, September 27, 2005  4:18 PM
Section 4403.2 Favorites3.3 Go to URL3.4 Clear cache4 Instant messaging4.1 AIM4.1.1 Sign on4.1.2 Saved conversations4.1.3 Offline conversations4.1.4 Settings4.1.5 Help4.2 ICQ4.2.1 Connect4.2.2 Saved conversations4.2.3 Offline conversations4.2.4 Settings4.2.5 Help4.3 Yahoo!4.3.1 Sign In4.3.2 Saved conversations4.3.3 Offline conversations4.3.4 Settings4.3.5 Help5 Messages5.1 Create new5.1.1 Text message5.1.2 Picture message5.1.3 Voice note5.2 Inbox5.3 Sentbox5.4 Outbox5.5 Draftst809.book  Page 40  Tuesday, September 27, 2005  4:18 PM
Section 4: Menu Navigation 41Menu OutlineSection 45.6 Templates5.6.1 Text template5.6.2 Picture message template5.7 Voice mail5.7.1 Call voice mail5.7.2 Voice server number5.8 Delete all5.9 Settings5.9.1 Text message5.9.2 Picture message5.0 Broadcast messages*5.* Memory status6Fun & Apps6.1 File manager6.1.1 Sounds6.1.2 Images6.1.3 Videos6.1.4 Music6.1.5 Other files6.1.6 Memory card6.1.7 Memory status6.2 MP3 player6.3 Games6.4 Image editor6.5 Organizer6.5.1 Alarm6.5.2 Calendar6.5.3 Calculator6.5.4 World Time6.5.5 Unit conversion6.5.6 Timert809.book  Page 41  Tuesday, September 27, 2005  4:18 PM
Section 4426.5.7 Stopwatch7 Get More Help8Camera8.1 Take and send8.2 Record video8.3 My photos8.4 My videos8.5 My Album8.6 My Journal9 Settings9.1 Time & Date9.2 Phone settings9.2.1 Language9.2.2 Greeting message9.2.3 Slide settings9.2.4 Volume key9.2.5 USB settings9.2.6 Extra settings9.3 Display settings9.3.1 Wallpaper9.3.2 Main menu style9.3.3 Info display9.3.4 Interior display9.3.5 Brightness control9.3.6 Backlight9.3.7 Dialing display9.3.8 Calendar9.3.9 Show caller information9.4 Sound settings9.4.1 Incoming callt809.book  Page 42  Tuesday, September 27, 2005  4:18 PM
Section 4: Menu Navigation 43Menu OutlineSection 49.4.2 Keypad tone9.4.3 Message tone9.4.4 Power on/off9.4.5 Slide tone9.4.6 Silent mode9.4.7 Extra tones9.5 Network services9.5.1 Call forwarding9.5.2 Call barring*9.5.3 Call waiting9.5.4 Network selection9.5.5 Caller ID9.6 Bluetooth9.6.1 Turn Bluetooth On/Off9.6.2 My devices9.6.3 My visibility9.6.4 My phone name9.6.5 Security modes9.6.6 Features9.6.7 Help9.7 Security9.7.1 PIN check9.7.2 Change PIN9.7.3 Phone lock9.7.4 Change password9.7.5 Privacy9.7.6 FDN mode9.7.7 Change PIN29.8 Memory status9.8.1 Shared memory9.8.2 Messages9.8.3 File manager9.8.4 Calendar9.8.5 Phonebook9.8.6 Gamest809.book  Page 43  Tuesday, September 27, 2005  4:18 PM
Section 4449.9 Reset settings* Shows only if supported by your SIM card.t809.book  Page 44  Tuesday, September 27, 2005  4:18 PM
Section 5: Entering Text 45Section 5Section 5: Entering TextTopics Covered• Changing the Text Input Mode• Using ABC Mode• Using T9 Mode• Using Number Mode• Using Symbol ModeThis section outlines how to select the desired text input mode when entering characters into your phone. This section also describes how to use the T9 predictive text entry system to reduce the number of key strokes associated with entering text.t809.book  Page 45  Tuesday, September 27, 2005  4:18 PM
46Section 5Changing the Text Input ModeWhen using your phone, you will often need to enter text, such as when storing a name in your Phonebook, creating your personal greeting or scheduling events on your calendar. You can enter alphanumeric characters by using your phone’s keypad.Your phone has the following text input modes:• ABC mode: this mode allows you to enter letters by pressing the key labeled with the letter you want. How many times you press the key determines which letter or number appears.• T9 mode: this mode allows you to enter words with only one keystroke per letter. Each key on the keypad has more than one letter; for example, pressing   can enter J, K, or L. However, the T9 mode automatically compares the series of keystrokes you make with an internal linguistic dictionary to determine the most likely word, thus requiring far fewer keystrokes than the traditional ABC mode.• Number mode: this mode allows you to enter numbers.• Symbol mode: this mode allows you to enter symbols, such as punctuation marks.When you are in a field that allows characters to be entered, you will notice the text input mode indicator on the display.Example: Writing a text message.t809.book  Page 46  Tuesday, September 27, 2005  4:18 PM
Section 5: Entering Text 47Using ABC ModeSection 51. To change the text input mode, press the Right soft key.2. Each time you press the Right soft key, a different Text input mode indicator will be displayed at the lower right corner of your display. The following options are available:: T9 mode : Number mode: Symbol mode: ABC mode 3. When the text input mode indicator that you desire is displayed, you may enter text in the text message box using the selected text input mode.Using ABC ModeTo use ABC mode, use the number keys to enter your text. 1. Press the key labeled with the letter you want:•Once for the first letter•Twice for the second lettert809.book  Page 47  Tuesday, September 27, 2005  4:18 PM
48Section 5•And so on2. Select the other letters in the same way.•To enter periods or hyphens, press the   key. ABC mode applies grammar rules to ensure that correct punctuation is used. •To shift case in ABC mode, use the   key. There are 3 cases: Initial capital, Capital lock, and Lower case.•You can move the cursor by using the Navigation keys. To delete letters, press the   key. Press and hold the   key to clear the display.Note: The cursor moves to the right when you press a different key. When entering the same letter twice or a different letter on the same key, just wait for a few seconds for the cursor to move to the right automatically, and then select the next letter.Keys            t809.book  Page 48  Tuesday, September 27, 2005  4:18 PM
Section 5: Entering Text 49Using T9 ModeSection 5            Using T9 ModeT9 is a predictive text input mode that allows you to key in any character using single keystrokes. This text input mode is based on a built-in dictionary.To enter a word in T9 mode:1. When you are in T9 mode, start entering a word by pressing the 2 to 9 keys. Press each key only once for each letter. Example: To enter “Hello” in T9 mode, press the 4, 3, 5, 5, and 6 keys. t809.book  Page 49  Tuesday, September 27, 2005  4:18 PM
50Section 5The word that you are typing appears on the display. It may change with each key that you press.2. Enter the whole word before editing or deleting the keystrokes.3. When the word displays correctly, go to step 4.If the word doesn’t display correctly, press the   key to display alternative word choices for the keys that you have pressed. Example: Both “Of” and “Me” have the 6 and 3 keys. The phone displays the most commonly used choice first.4. Insert a space by pressing the   key and start entering the next word.To add a new word into the T9 dictionary:1. After pressing the keys corresponding to the word you want to add, press the   key to display the alternative words.2. When you press the   key at the last alternative word, the display shows Spell on the bottom line. Press the Spell soft key or the   key.3. Enter the word you want to add using ABC mode.4. Press the OK soft key or the   key.The word is added to the T9 dictionary and becomes a word for the associated keypress series.Note: This feature may not be available for some languages.t809.book  Page 50  Tuesday, September 27, 2005  4:18 PM
Section 5: Entering Text 51Using Number ModeSection 5• To enter periods, hyphens, or apostrophes, press the   key. T9 mode applies grammar rules to ensure that correct punctuation is used. • To shift case in T9 mode, use the   key. There are 3 cases: Initial capital, Capital lock, and Lower case.• You can move the cursor by using the Navigation keys. To delete letters, press the   key. Press and hold the   key to clear the display.Using Number ModeNumber mode enables you to enter numbers into a text message. Press the keys corresponding to the digits you want to enter.Using Symbol ModeSymbol mode enables you to insert symbols and punctuation marks into text.1. To select a symbol, press the corresponding number key.2. To display more symbols, press the Up or Down Navigation key.3. To clear the symbol(s), press the   key. When the input field is empty, this key returns the display to the previous mode.4. To insert the symbol(s) into your message, press the OK soft key or the   key.t809.book  Page 51  Tuesday, September 27, 2005  4:18 PM
52Section 5t809.book  Page 52  Tuesday, September 27, 2005  4:18 PM
Section 6: Understanding Your Phonebook 53Section 6Section 6: Understanding Your PhonebookTopics Covered• Storing a Number in the SIM Card• Storing a Number in the Phone’s Memory• Finding a Phonebook Entry• Dialing a Number from Phonebook• Speed Dialing• Editing a Caller Group• Dialing a Number from SIM Card• Copying all SIM Phonebook Entries• Deleting all of the Phonebook Entries•My Name Card• Finding My Phone Number•FDN List• ManagementThis section allows you to manage your contacts by storing their name and number in your Phonebook. Phonebook entries can be sorted by name, entry, or group.t809.book  Page 53  Tuesday, September 27, 2005  4:18 PM
54Section 6Storing a Number in the SIM Card1. At the Idle screen, press the Phonebook soft key. 2. Scroll to Add new contact by pressing the Up or Down Navigation key and press the Select soft key or the   key.3. Highlight SIM card and press the Select soft key or the  key.Note: You can set the Default saving option to SIM card, Phone memory or Ask on saving in the Management menu. So if you always want to save your new contacts to your phone, for example, this step of the procedure will be eliminated in the future. See "Default Saving" on page 65 for more information.4. Enter a name in the Name text box. Tab to the next text box by pressing the Down key. For further details about how to enter characters, see "Using ABC Mode" on page 47.5. Enter a number you want to store and press the Save soft key or the   key. The number is saved in your SIM card.After storing, the phone displays the Phonebook entry you just created.6. To use the entry options before saving the number, press the Options soft key. The following options are available:•Save: saves the number in the SIM card.•Language select: allows you to select between English, French, or Spanish.t809.book  Page 54  Tuesday, September 27, 2005  4:18 PM
Section 6: Understanding Your Phonebook 55Storing a Number in the Phone’s MemorySection 6•Cancel: cancels the Add New Contact screen and returns you to the previous menu.7. To use the entry options after saving the number, press the Options soft key. The following options are available:•Edit: allows you to edit the name and number fields in the entry.•Send message: allows you to send a message to the selected number. You may choose between Text messages, Picture messages, or Voice notes.•Call: allows you to call the number.•Assign speed dial: allows you to assign a speed dial key number to the selected Phonebook entry.•Copy to: allows you to copy the number to your Phone, SIM card or FDN.•Send name card via: allows you to send your name card via Text message, Picture message, or Bluetooth.•Delete: allows you to delete the name and number from Phonebook. You are asked to confirm that you wish to delete the name and number by pressing the Yes soft key. To cancel, press the No soft key.8. To return to the Idle screen, press the   key.Storing a Number in the Phone’s MemoryIf you want to store a number in your phone’s memory, you have 2 different options. You can save it to your SIM card and then copy it to your phone, or you can change your Default Saving option to Phone so that all your new contacts will be saved to Phone. See "Default Saving" on page 65 for information on how to change this setting.t809.book  Page 55  Tuesday, September 27, 2005  4:18 PM
56Section 6Note: When you copy a phone number from your SIM card to your phone, the number will appear twice in your Contact list.1. At the Idle screen, press the Phonebook soft key. 2. Scroll to Add new contact by pressing the Up or Down Navigation key and press the Select soft key or the   key.3. Highlight Phone and press the Select soft key or the   key.Note: You can set the Default saving option to SIM card, Phone memory or Ask on saving in the Management menu. So if you always want to save your new contacts to your phone, for example, this step of the procedure will be eliminated in the future. See "Default Saving" on page 65 for more information.4. Enter a first name in the Name text box. Tab to the next text box by pressing the Down key. For further details about how to enter characters, see "Using ABC Mode" on page 47.5. Enter a last name in the text box.6. Highlight a number Type by pressing the Up or Down Navigation key, then enter a number in the text box.The following types are available:•Mobile: assigns the number entered to the Mobile entry.•Home: assigns the number entered to the Home entry.•Office: assigns the number entered to the Office entry.•Fax: assigns the number entered to the Fax entry.t809.book  Page 56  Tuesday, September 27, 2005  4:18 PM
Section 6: Understanding Your Phonebook 57Finding a Phonebook EntrySection 6•Other: allows you to enter more detailed information for the entry. 7. Continue to scroll down using the Down Navigation key to enter Email address, Picture ID, Ringtone, Group, and Notes if desired.8. Press the Save soft key or press the Options soft key and highlight the Save option and press the Select soft key or the   key. The number is saved to your phone and the new contact information is displayed.9. To return to the Idle screen, press the   key.Finding a Phonebook EntryYou can store phone numbers and their corresponding names in your SIM card and phone’s memories. They are physically separate but are used as a single entity, called Phonebook.Depending on your particular SIM card, the maximum number of phone numbers the SIM card can store may differ.1. When the idle screen displays, press the Phonebook soft key. 2. Highlight Contact list and press the Select soft key or the  key.3. Enter the first few letters of the name in the text box.The Phonebook entries are listed, starting with the first entry matching your input.4. If needed, press the Up or Down Navigation key until the entry you want is highlighted.t809.book  Page 57  Tuesday, September 27, 2005  4:18 PM
58Section 65. Once you have found the entry, press the   key to dial the number, or press the Options soft key to access the following Phonebook entry options:•View: shows details of the Phonebook entry.•Send message: allows you to send a message to the selected number. You may choose between Text messages, Picture messages, or Voice notes.•New contact: takes you to the New Contact menu.•Call: places a call to the number.•Delete: allows you to delete the selected name and number from your Phonebook or delete all numbers. You are asked to confirm that you wish to delete the name and number by pressing the Yes soft key. To cancel, press the No soft key.•Assign speed dial: allows you to assign a speed dial key number to the selected Phonebook entry.•Language select: allows you to select between English, French, or Spanish.6. If you select the View option, press the Options soft key after the contact information is displayed, for these additional options:•Edit: allows you to edit the name and number fields in the entry. You can also add email address and notes.•Send message: allows you to send a message to the selected number. You may choose between Text messages, Picture messages, or Voice notes.•Call: allows you to call the number.•Assign speed dial: allows you to assign a speed dial key number to the selected Phonebook entry.•Copy to: allows you to copy the number to your phone, SIM card or FDN.t809.book  Page 58  Tuesday, September 27, 2005  4:18 PM
Section 6: Understanding Your Phonebook 59Dialing a Number from PhonebookSection 6•Send name card via: allows you to send your name card via Text message, Picture message, or Bluetooth.•Delete: allows you to delete the name and number from Phonebook. You are asked to confirm that you wish to delete the name and number by pressing the Yes soft key. To cancel, press the No soft key.After viewing one Phonebook entry, you can scroll through all Phonebook entries by pressing the Right or Left Navigation keys.Dialing a Number from PhonebookOnce you have stored phone numbers in the Phonebook, you can dial them easily and quickly by using the location numbers that were assigned to them in the Phonebook. Note: If you cannot remember a location number, you must go into the Contact list menu in the Phonebook menu to search for the entry by name. For details, "Finding a Phonebook Entry" on page 57.Speed DialingOnce you have stored phone numbers from your Phonebook list, you can set up to 8 speed dial entries and then dial them easily whenever you want, simply by pressing the associated numeric key.In Idle mode, to speed dial the numbers assigned to keys (2 to 9), press and hold the appropriate key. Setting Up Speed Dial Entries1. When the Idle screen displays, press the Phonebook soft key.t809.book  Page 59  Tuesday, September 27, 2005  4:18 PM
60Section 62. Scroll to Speed dial by pressing the Up or Down Navigation key and press the Select soft key or the   key.3. Use the Up or Down Navigation key to select the number key to which you wish to assign the speed-dialing number. Select from the 2 to 9 keys, and press the Add soft key. 4. Highlight Contact list or FDN list and press the Select soft key or the   key.5. Highlight the entry that you want to assign the speed dial number to and press the Select soft key or the   key.Note: Memory location 1 is reserved for your Voice mail server number and cannot be changed.Editing a Caller Group1. When the idle screen displays, press the Phonebook soft key.2. Highlight the Group option and press the Select soft key or the  key.3. Scroll through the group list by pressing the Up or Down Navigation key.4. Highlight the group you want and press the Options soft key.5. Highlight the Edit option and press the Select soft key or the  key.6. To edit the Caller group name, modify the text in the Name text box.t809.book  Page 60  Tuesday, September 27, 2005  4:18 PM
Section 6: Understanding Your Phonebook 61Editing a Caller GroupSection 67. To change the image associated with the Caller group, press the Down key to highlight the Picture ID icon. Press the   key.The following options are available:•Take Photo: allows you to take a picture with your camera.•My photos: allows you to choose a photo from My photos folder.•Downloaded images: allows you to choose a photo from your downloaded images folder.•Icons: allows you to choose from pre-defined icons•My videos: allows you to choose a video from your My videos folder.•Downloaded videos: allows you to choose a video from your Downloaded videos folder.•Not assigned: removes any image that was previously used and sets to Not assigned status.8. To change the ringtone associated with the Caller group, press the Down key to highlight the Ringtone icon. Press the   key.The following options are available:•Default melodies: allows you to choose between 25 different melodies.•Voice list: allows you to assign a Ringtone from your Voice list.•My sounds: allows you to assign a Ringtone from your My sounds folder.•Music: allows you to assign a Ringtone from your Music list.9. When you are finished, press the Save soft key. Your Caller group settings will be saved.t809.book  Page 61  Tuesday, September 27, 2005  4:18 PM
62Section 610. Press the   key to return to Idle mode.Dialing a Number from the SIM Card1. In Idle mode, enter the location number for the phone number you want to dial and press the   key or the  key.The entry associated with the location number will be displayed.2. If you don’t know the location number, press    and the first location number will be displayed.You can then press the Left or Right key to find other numbers in the list.3. Press the Dial soft key, the   key, or the   key when you have selected the number you want to dial.Copying all SIM Phonebook EntriesYou can copy all SIM entries to the Phone using this option. When you copy entries to the phone, duplicate entries are created in your Phonebook. 1. Press Phonebook soft key.2. Highlight Management and press the Select soft key or the  key.3. Highlight Copy all to phone and press the Select soft key or the   key.4. After receiving the Sure to copy all? confirmation message, press the Yes soft key.t809.book  Page 62  Tuesday, September 27, 2005  4:18 PM
Section 6: Understanding Your Phonebook 63Deleting all of the Phonebook EntriesSection 6Note: Options are available for phone entries that are not available when stored to the SIM card. For details see "Storing a Number in the Phone’s Memory" on page 55. Deleting all of the Phonebook EntriesYou can delete all your entries from your phone’s memory, your SIM card, or both. Important! Once Phonebook entries have been deleted, they cannot be recovered.1. When the idle screen displays, press the Phonebook soft key.2. Highlight Management and press the Select soft key or the  key.3. Scroll to Delete all by pressing the Up or Down Navigation key and press the Select soft key or the   key.4. Press the   key to place a check mark by the memory location you want to empty; All, Phone, SIM Card, or SIM Card (FDN).You can remove the check mark by pressing the   key again.5. Press the Delete soft key to delete the entries in the selected memory location.6. When the Delete? confirmation message appears, press the Yes soft key or the   key.7. To cancel the deletion, press the No soft key.t809.book  Page 63  Tuesday, September 27, 2005  4:18 PM
64Section 68. When you are finished, press the   key to return to Idle mode.My Name CardMy Name Card allows you to create a virtual business card. Once completed, you can send the card to recipients as a V-card attachment.1. When the idle screen displays, press the Phonebook soft key.2. Highlight My name card and press the Select soft key or the  key.3. My Name Card opens with the Name field highlighted.4. Enter information in each of the fields as desired. Use the Navigation keys to move between fields, then use the keypad to enter information.5. When finished, press the Save soft key or press the Options soft key and highlight the Save option. Press the Select soft key or the   key.Finding My Own Phone NumberThis function is a memory aid, which you can use to check your own phone number if you need to do so.You can assign a name to each of your own phone numbers registered on your SIM card. You can also edit the names and numbers. Any changes made here do not in any way affect the actual subscriber numbers on your SIM card.1. When the idle screen displays, press the Phonebook soft key.t809.book  Page 64  Tuesday, September 27, 2005  4:18 PM
Section 6: Understanding Your Phonebook 65FDN ListSection 62. Select the Own number option by pressing the Up or Down Navigation key and press the Select soft key or the  key.3. Highlight the Empty option and press the Options soft key or the   key. Your phone number is displayed. You may edit the number if you wish. Press the Save soft key or the   key.FDN ListFDN (Fixed Dial Number) mode, if supported by your SIM card, allows you to restrict your outgoing calls to a limited set of phone numbers.The FDN List allows you to set up a list of numbers that your phone may dial. FDN mode must first be enabled in the Security settings. See "FDN mode" on page 113 for more information on changing this setting.To enable FDN mode, a PIN2 number is required. You can obtain your PIN2 from your service provider.ManagementThe Management menu allows you to select where your contacts will be saved, copy your SIM contacts to your phone, delete your contacts, or check your memory status.Default SavingThe Default Saving option allows you to choose where your contacts will be saved. The following options are available:t809.book  Page 65  Tuesday, September 27, 2005  4:18 PM

Navigation menu