Samsung Electronics Co SIT200EMRB OFFICESERV SOHO User Manual USERS MANUAL 1 OF 2
Samsung Electronics Co Ltd OFFICESERV SOHO USERS MANUAL 1 OF 2
Contents
- 1. USERS MANUAL 1 OF 2
- 2. USERS MANUAL 2 OF 2
USERS MANUAL 1 OF 2
User Guide
2 © SAMSUNG Electronics Co., Ltd.
SAFETY CONCERNS
For product safety and correct operation, the following information must be given to the
operator/user and shall be read before the installation and operation.
Conventions
WARNING
Provides information or instructions that you should follow in order to avoid personal
injury or fatality.
CAUTION
Provides information or instructions that you should follow in order to avoid a service
failure or damage to your phone.
NOTE
Indicates additional information for reference.
Symbols
Caution
Indication of a general caution
Restriction
Indication for prohibiting an action for a product
Instruction
Indication for commanding a specifically required action
© SAMSUNG Electronics Co., Ltd. 3
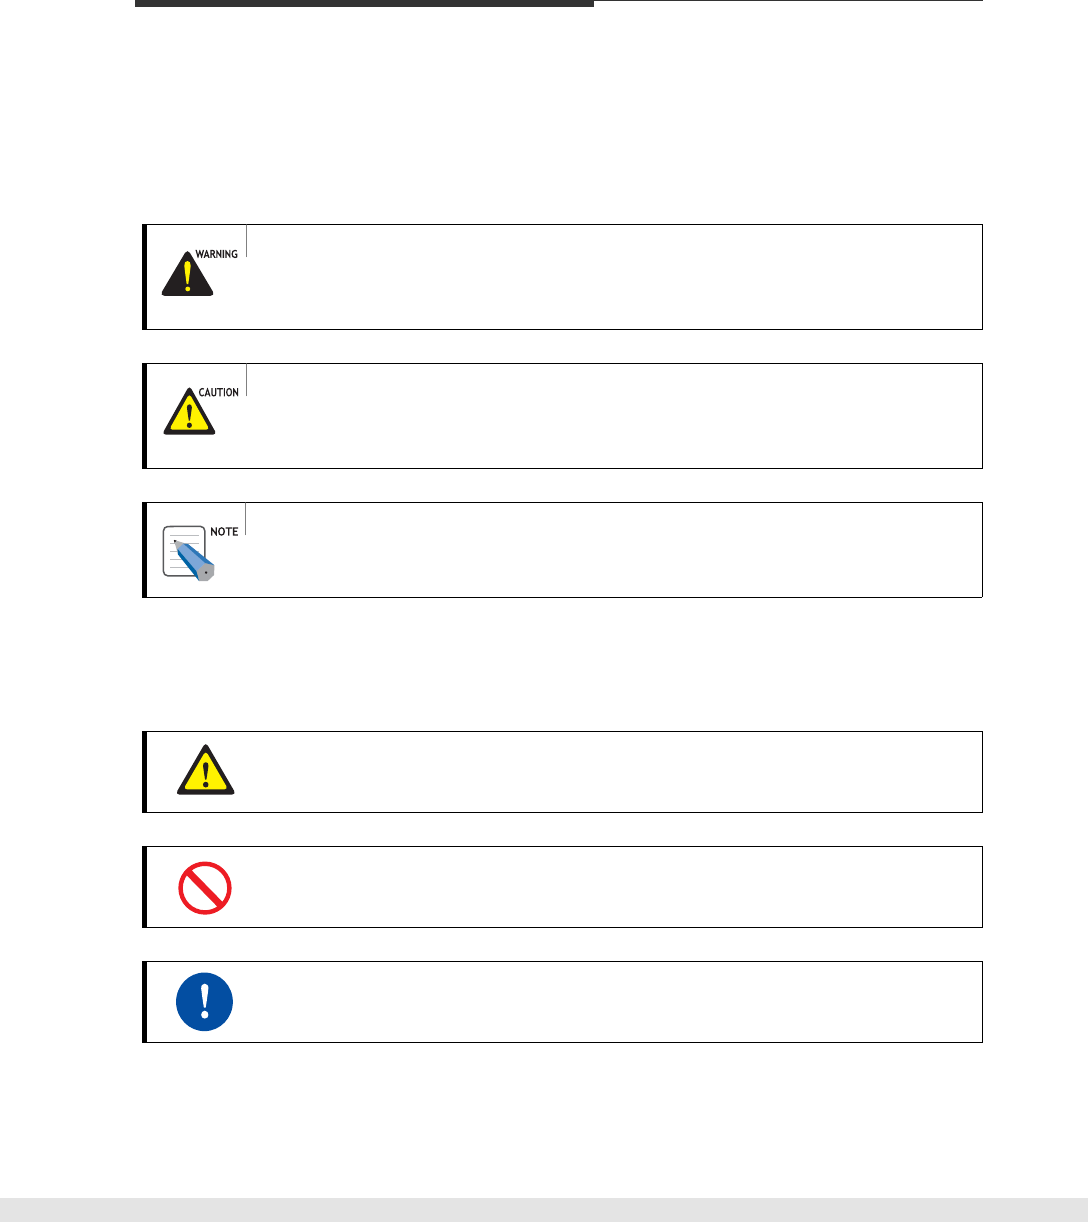
WARNING
Connect the power adapter provided with the
product, to the power connection port.
Using adapters other than that provided may seriously
damage the product or cause fire or electrocution.
Insert power cord tightly and fully into the outlet.
This is to prevent fires.
Fix OfficeServ SOHO and power adapter by using
screws after connecting the power adapter.
Failing to do so can cause fire or electrocution.
Be careful not to drop the product.
This is to prevent product damage and injuries.
Do not pull or excessively bend the power cord, and
do not touch the power plug with wet hands.
This prevents power cord damage, fire and electrocution.
Adapter Fixing Screw
4 © SAMSUNG Electronics Co., Ltd.
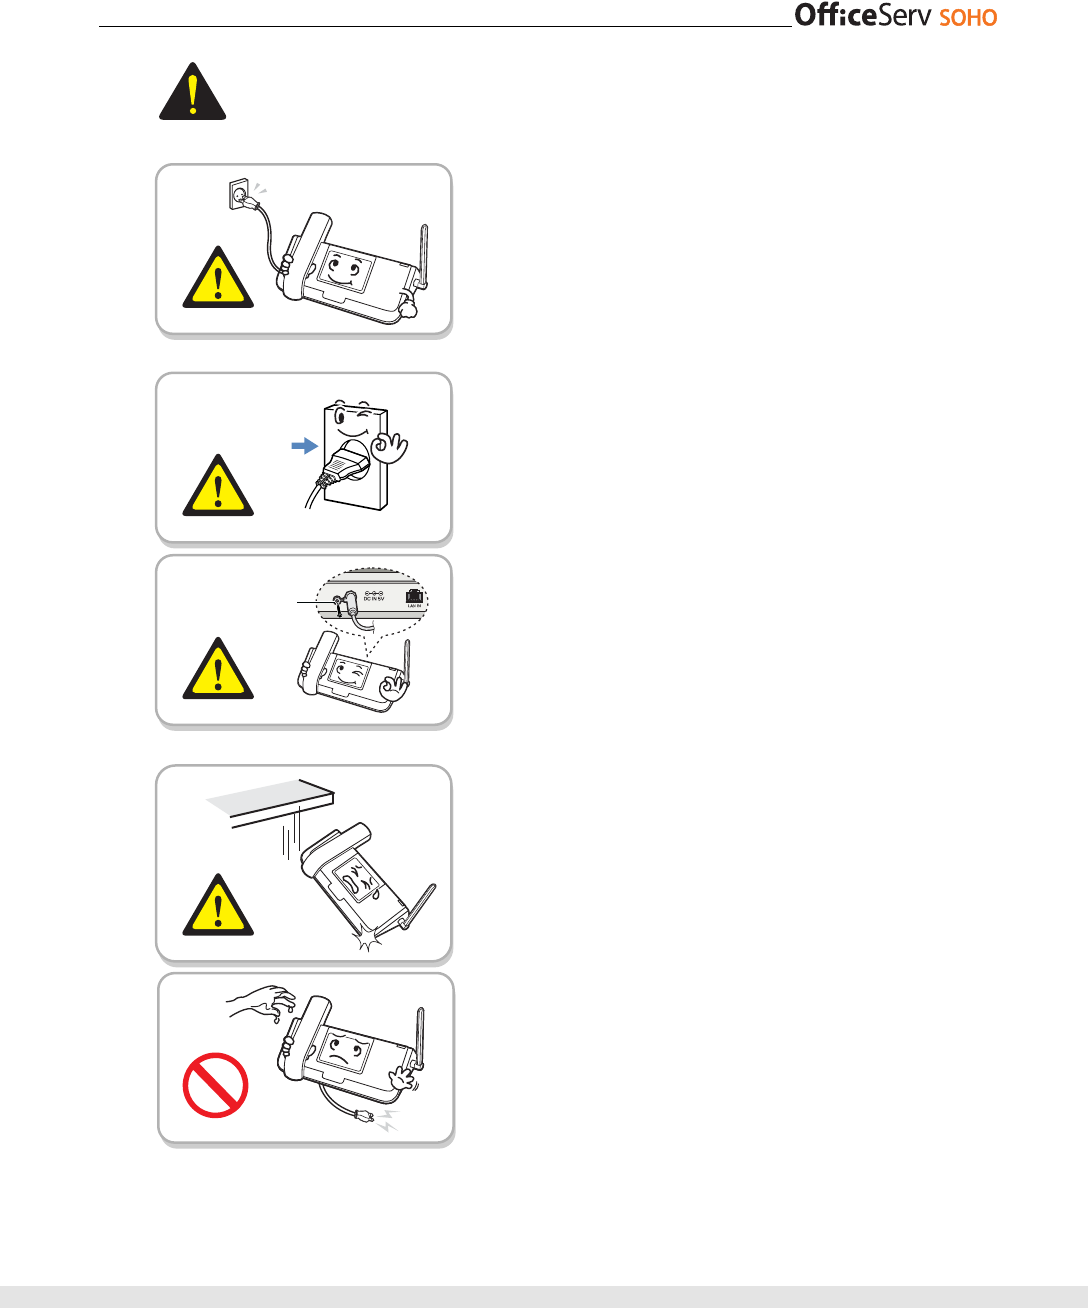
Do not use damaged power plugs and cords,
or loose outlets.
Failing to do so can cause fire or electrocution.
Do not connect many devices to a single outlet.
This is to prevent fires.
Do not place the product in dusty areas or in
environments with extreme thermal differences.
Failing to do so can cause fire or electrocution.
Do not place the product near items that can start a
fire(e.g., cigarette fire, heaters).
Failing to do so can cause fire or electrocution.
Do not place the product under direct sunlight.
The product may not operate properly due to damaged
components.
© SAMSUNG Electronics Co., Ltd. 5
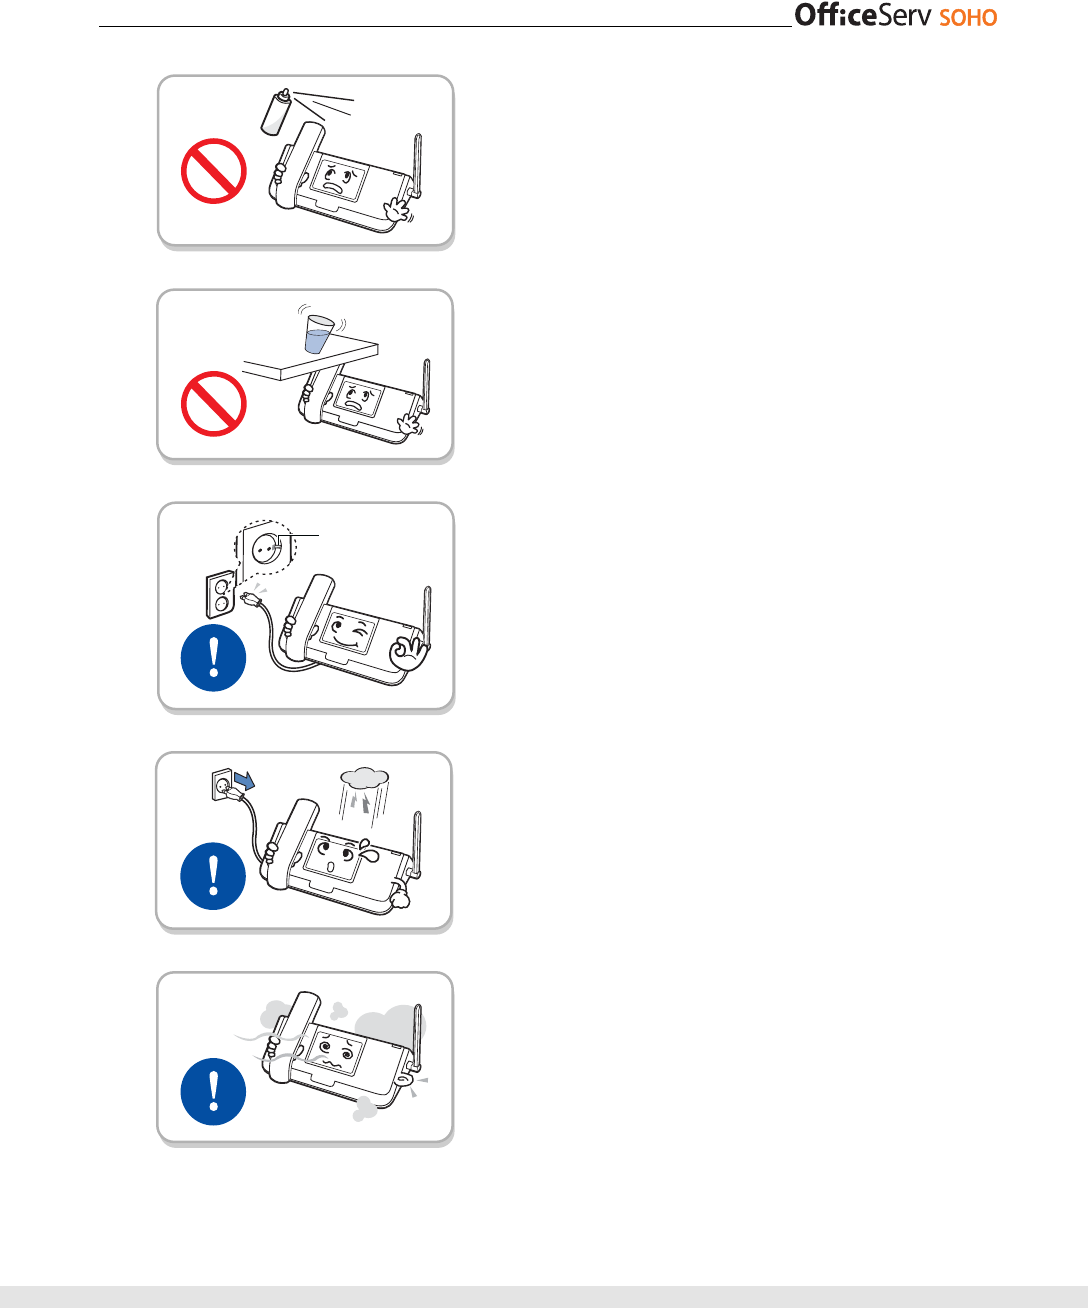
Do not use or store inflammable sprays or material
near the product.
Failing to do so can cause fire or electrocution.
Do not place vases, flowerpots, cups, cosmetics,
or medicine, which contain water, near the product.
Failing to do so can cause fire or electrocution.
The power cable must be connected to an outlet
equipped with a grounding terminal.
This is to prevent fires and electrocution.
Unplug the power cable when lighting and thunder
is expected.
This is to prevent fires and electrocution.
If the product makes strange sound, smell, or
smoke, unplug the cord immediately and contact
the service center.
Failing to do so can cause fire or electrocution.
Grounding terminal
6 © SAMSUNG Electronics Co., Ltd.
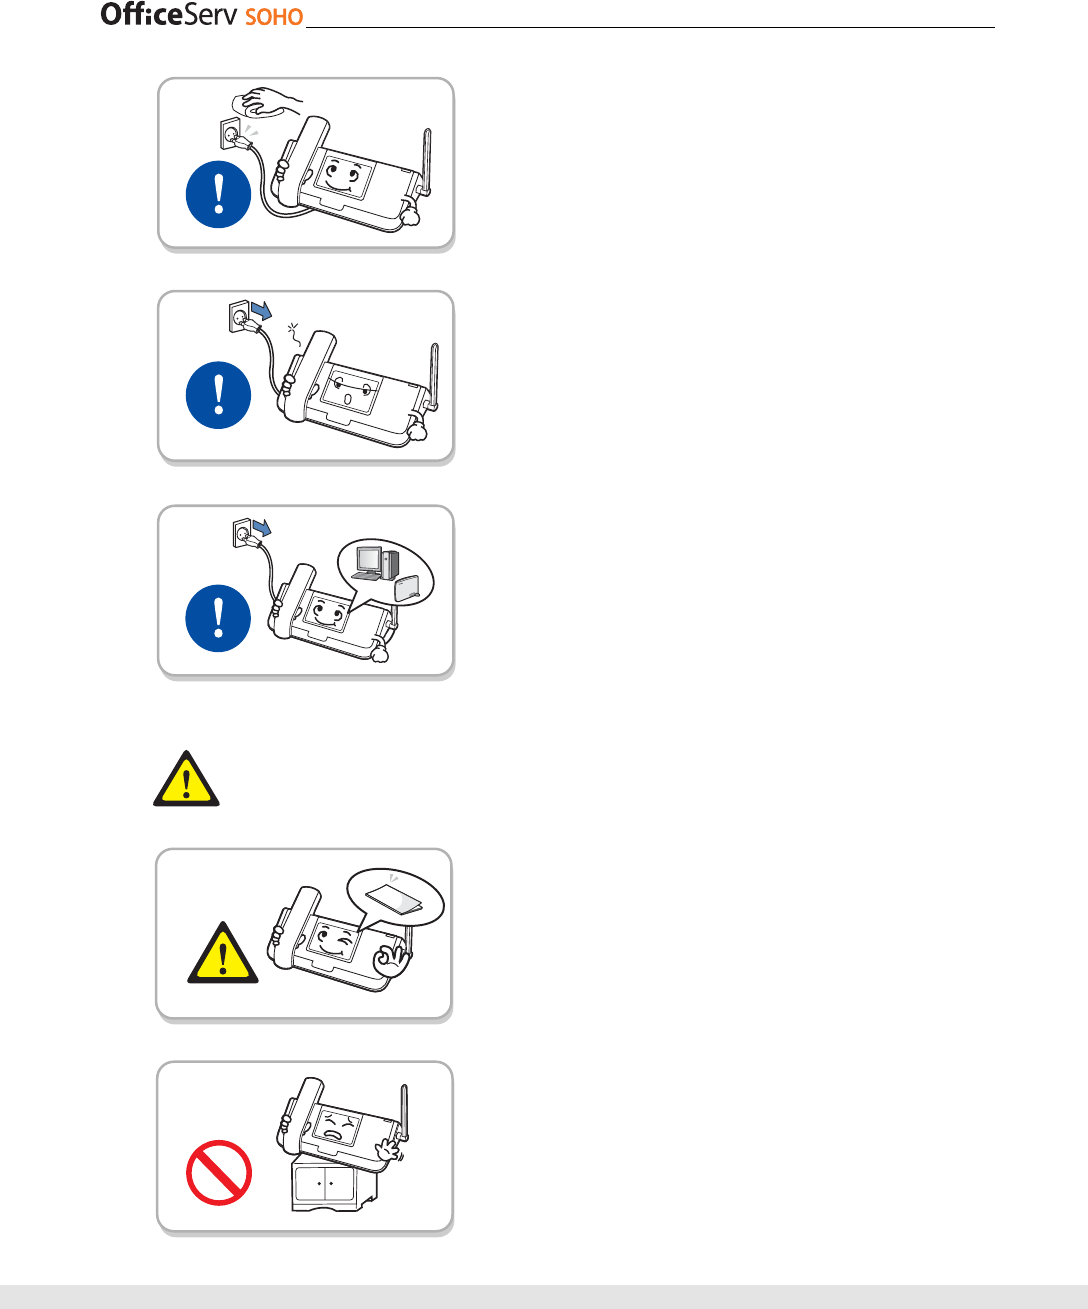
If dust or water is on the pin or the touching surface
of the power plug, unplug the cord and clean the
plug with cloth. If the substance cannot be cleaned,
contact the service center.
Failing to do so can cause fire or electrocution.
Unplug the power cord when not using the product
for a long time.
This is to prevent fire or electrocution.
To connect an external device(e.g., PC, modem,
facsimile) to the product, turn off the power of both
the product and the device before connecting the
cable.
This is to prevent fire or electrocution.
CAUTION
Accurately install and properly use the product
according to the user guide.
This is to prevent malfunctions and reductions in product
lifetime.
Do not install the product on unstable places.
This is to protect the product from falling.
© SAMSUNG Electronics Co., Ltd. 7
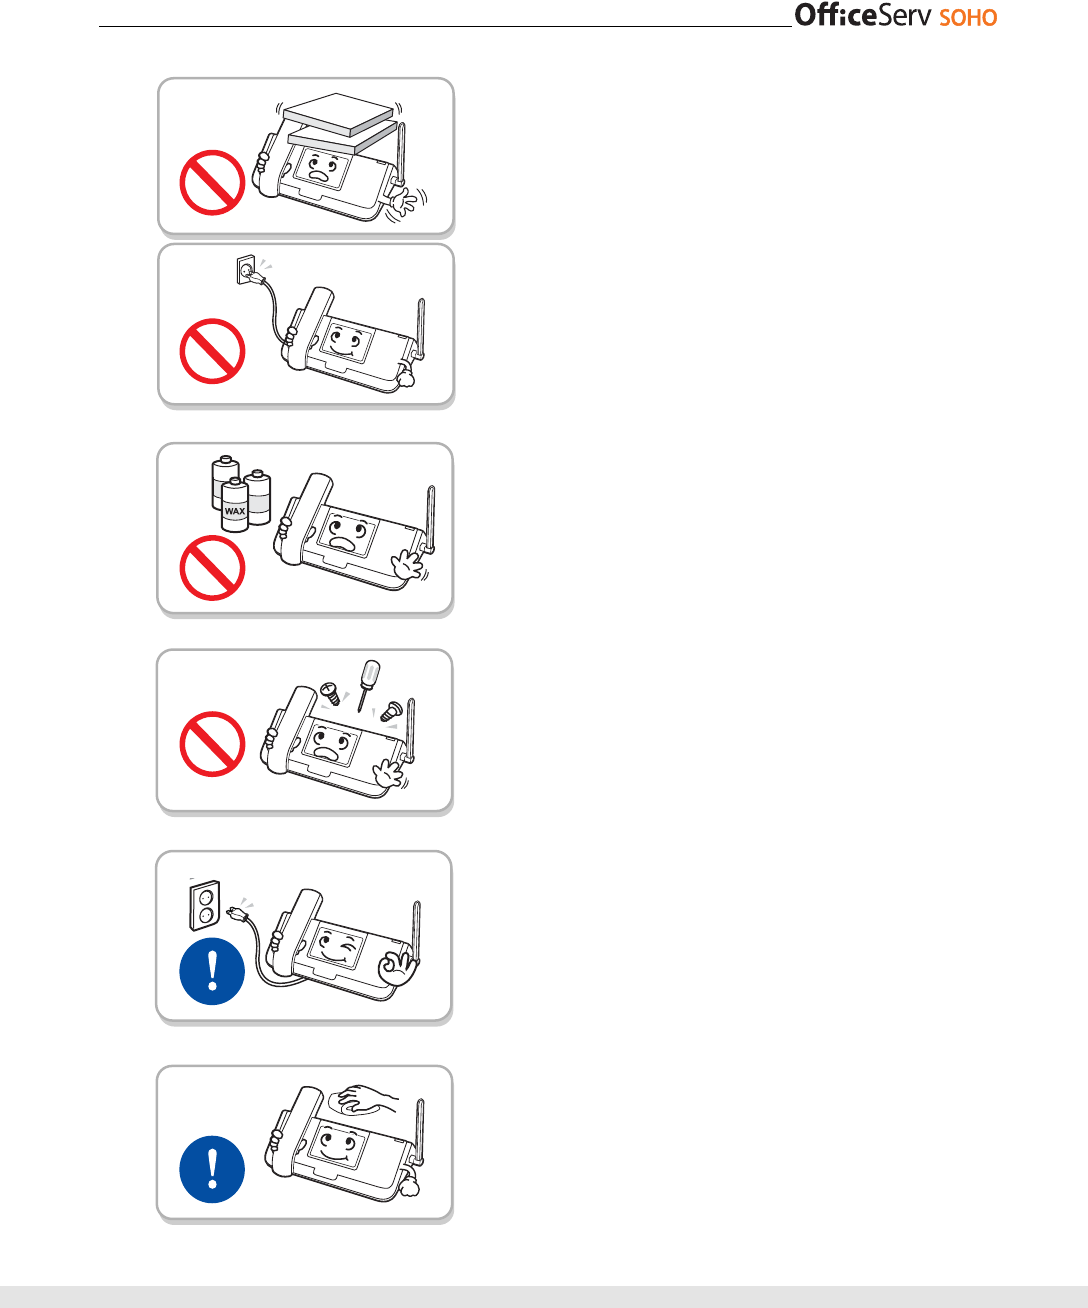
Do not place heavy items over the product.
Components of the product can be damaged.
Do not turn off the power while the product is
upgrading its software.
Turning off the power during upgrade will cancel the
upgrade.
Do not clean the product with chemicals such as
wax, benzene, alcohol, thinner, insecticide, air
freshener, and detergent.
This is to protect the product from bleach or damage.
Do not disassemble, repair, or modify the product
without permission.
Contact your dealer or the service center to repair the
product.
Do not connect the power cable to the improper AC
power outlet.
The power adapter type may be various depending on
countries. The product may not operate normally if the
voltage is improper.
Clean the produce with a dry cloth after unplugging
the power cord.
This is to protect the product from damage.
8
© SAMSUNG Electronics Co., Ltd.
TABLE OF CONTENTS
TUSAFETY CONCERNSUT 2
TUConventionsUT ................................................................................................................2
TUSymbolsUT .......................................................................................................................2
TUWARNINGUT ....................................................................................................................3
TUCAUTIONUT .....................................................................................................................6
TUPREPARATIONUT 13
TUMain FeaturesUT ...........................................................................................................13
TUProduct ContentUT .......................................................................................................15
TUFront PanelUT ................................................................................................................16
TUINSTALLATIONUT 18
TUEnvironment DescriptionUT .........................................................................................19
TUNetwork Configuration DiagramUT ....................................................................................... 19
TUCheck the following network environment:UT ...................................................................... 20
TUChecking External Network Environment of UserUT ............................................................ 21
TUOfficeServ SOHO Connection (ISDN Type)UT ............................................................22
TUOfficeServ SOHO Connection (PSTN Type)UT ...........................................................24
TUEasy Installation of OfficeServ SOHOUT ....................................................................25
TUEasy InstallUT ...................................................................................................................... 26
TUConnecting OfficeServ SOHO with Desktop / Laptop ComputersUT ......................30
TUConnecting Desktop / Laptop Computer to OfficeServ SOHO WirelesslyUT ....................... 30
TUConnecting Desktop / Laptop Computer to OfficeServ SOHO by LAN CableUT.................. 32
TUTHINGS YOU SHOULD KNOWUT 34
TUScreensUT ......................................................................................................................34
TUMain ScreenUT .................................................................................................................... 34
© SAMSUNG Electronics Co., Ltd. 9
TUStation Status Display ScreenUT .......................................................................................... 35
TUMenus During Call ScreenUT ............................................................................................... 35
TUMenu ScreenUT ................................................................................................................... 36
TUEntering CharactersUT .................................................................................................36
TUSelecting Entry ModeUT ...................................................................................................... 37
TUEntering CharactersUT ......................................................................................................... 37
TUEntering NumbersUT ............................................................................................................ 38
TUEntering Special CharactersUT ............................................................................................ 38
TUMAKING CALLSUT 39
TUBefore Making a CallUT ................................................................................................39
TUCalling MethodUT ................................................................................................................. 39
TUMaking Intercom CallsUT .............................................................................................40
TUMaking an Intercom CallUT .................................................................................................. 40
TUCallbackUT ........................................................................................................................... 43
TUMaking External CallsUT ..............................................................................................44
TUMaking an External CallUT ................................................................................................... 44
TUMaking Calls Using PauseUT ............................................................................................... 47
TUAuto RedialUT ...................................................................................................................... 48
TUCALLBACK (CCBS / CCNR) (ISDN Only)UT ....................................................................... 49
TUNew Call (PSTN Only)UT ..................................................................................................... 50
TUMaking Intercom / External CallsUT ............................................................................50
TUDialing The Most Recent Dialed NumberUT ......................................................................... 50
TUDialing Using Recent Call LogUT ......................................................................................... 51
TUSpeed DialingUT .................................................................................................................. 52
TUDialing Numbers Saved in [M](Memory) ButtonUT ............................................................... 53
TUDialling using the PhoneBookUT .......................................................................................... 54
TUANSWERING CALLSUT 55
TUBefore Answering CallsUT ...........................................................................................55
TUAnswering MethodUT ........................................................................................................... 55
TUCall Refusal / Call DeflectionUT ........................................................................................... 56

10 © SAMSUNG Electronics Co., Ltd.
TUAnswering Intercom CallsUT .......................................................................................57
TUAnswering from OfficeServ SOHOUT .................................................................................. 57
TUAnswering from WLAN phoneUT ......................................................................................... 58
TUAnswering External CallsUT ........................................................................................59
TUAnswering from OfficeServ SOHOUT .................................................................................. 59
TUAnswering from MobileUT .................................................................................................... 60
TUCall Pick UpUT ...............................................................................................................61
TUFUNCTIONS USED DURING CALLSUT 62
TUDuring Intercom CallUT ................................................................................................62
TUCall TransferUT .................................................................................................................... 62
TUMuteUT ................................................................................................................................63
TUDuring External CallsUT ...............................................................................................64
TUCall TransferUT .................................................................................................................... 64
TUTrunk FlashUT ...................................................................................................................... 65
TUKEYPAD facility (ISDN Only)UT ........................................................................................... 66
TUMalicious call tracing (malicious call identification, MCID)(ISDN Only)UT ............................ 66
TUParking a call (ISDN Only)UT ............................................................................................... 67
TUCall WaitingUT ..................................................................................................................... 67
TUConference during Intercom / External CallsUT ........................................................68
TUCONVENIENT FEATURESUT 69
TUCalling Line Identification Presentation (CLIP)UT .....................................................69
TUConferenceUT ................................................................................................................70
TUGroup ConferenceUT ........................................................................................................... 70
TUEach ConferenceUT ............................................................................................................. 71
TUDo Not Disturb (DND)UT ...............................................................................................72
TUSetting DNDUT..................................................................................................................... 72
TUCanceling DNDUT ................................................................................................................ 73
TUGroup ListeningUT ........................................................................................................74T

© SAMSUNG Electronics Co., Ltd. 11
UMENUU 75
UMain MenuU.................................................................................................................75
USMSU............................................................................................................................77
UInboxU................................................................................................................................78
UOutboxU............................................................................................................................. 78
UTemplatesU........................................................................................................................ 80
USMS SettingsU................................................................................................................... 81
UPhoneBookU................................................................................................................83
UFind NumberU.................................................................................................................... 83
UOutgoing CallU................................................................................................................... 86
UIncoming CallU................................................................................................................... 86
UMissed CallU...................................................................................................................... 87
UNew EntryU........................................................................................................................ 87
UEdit GroupU....................................................................................................................... 88
URegister Memory ButtonU.................................................................................................. 88
UDelete AllU......................................................................................................................... 89
UE-DiaryU.......................................................................................................................90
UWakeup CallU.................................................................................................................... 90
UAlarmU............................................................................................................................... 91
USchedulerU........................................................................................................................ 91
UMemoU.............................................................................................................................. 92
UCalculatorU........................................................................................................................ 92
UWorld TimeU...................................................................................................................... 93
UD-DayU.............................................................................................................................. 93
UUnit ChangeU..................................................................................................................... 94
USoundU.........................................................................................................................95
URing ToneU........................................................................................................................ 95
UKeyToneU........................................................................................................................... 95
UVolumeU............................................................................................................................. 96
UServicesU.....................................................................................................................97
UPhone SetupU..............................................................................................................99
UMy PhoneU........................................................................................................................ 99
12 © SAMSUNG Electronics Co., Ltd.
UMobile SetupU.................................................................................................................. 103
Ua/b port SetupU................................................................................................................ 104
UNetwork SetupU............................................................................................................... 106
UGlobal SetupU...................................................................................................................110
UResetU..............................................................................................................................117
UEasy InstallU.....................................................................................................................118
UAuto AttendantU................................................................................................................118
UVoIP SetupU..................................................................................................................... 120
ULeast Cost RoutingU........................................................................................................ 124
UTROUBLESHOOTINGU 125
UWEB MANAGEMENTU 127
UWhat is Web Management System?U.....................................................................127
ULoginU........................................................................................................................128
UDataU..........................................................................................................................130
UNetworkU......................................................................................................................... 130
UWLANU............................................................................................................................ 134
USecurityU.......................................................................................................................... 136
UTelephone & PhonebookU............................................................................................... 142
UEaasy InstallU.................................................................................................................. 143
UDB ConfigU...................................................................................................................... 143
UUpgradeU......................................................................................................................... 144
UPasswordU....................................................................................................................... 144
UStatusU............................................................................................................................. 145
UANNEXU 146
UWhat is OfficeServ SOHO CRM?U...........................................................................146
USpecificationU...........................................................................................................147
© SAMSUNG Electronics Co., Ltd. 13
PREPARATION
Main Features
Wide LCD Screen
Convenient Direction Button
Easy Installation
Redial
Users can use the direction button to move between menus or to
select a menu.
The installation wizard enables users to easily set the time and network
mode and to easily register WLAN phone.
Users can redial a number selected from the call list.
In addition, the auto-redial function repeatedly attempts connection to
a busy line for a certain time period.
Various functions of the phone are shown on the LCD. Users can use
functions easily by finding and selecting a menu from the LCD screen.
14 © SAMSUNG Electronics Co., Ltd.
Hold
DND
Wireless Data Service
Clean Office
No Power Operation
Users can use the DND(Do Not Disturb) function to prevent the
phone from ringing even if a call arrives.
Users can put the caller on hold to attend to an urgent matter or to
connect another line, and can later reconnect to the original caller.
This product supports interface with communication devices(e.g., PC,
PDA) that include WLAN modules, enabling data communication service
via wireless LAN.
Wireless data service enables a clean office without cables.
You can make or receive external calls using the handset even during
power failures.(Only PSTN 1 is supported. However, other functions will
be disabled.)
© SAMSUNG Electronics Co., Ltd. 15
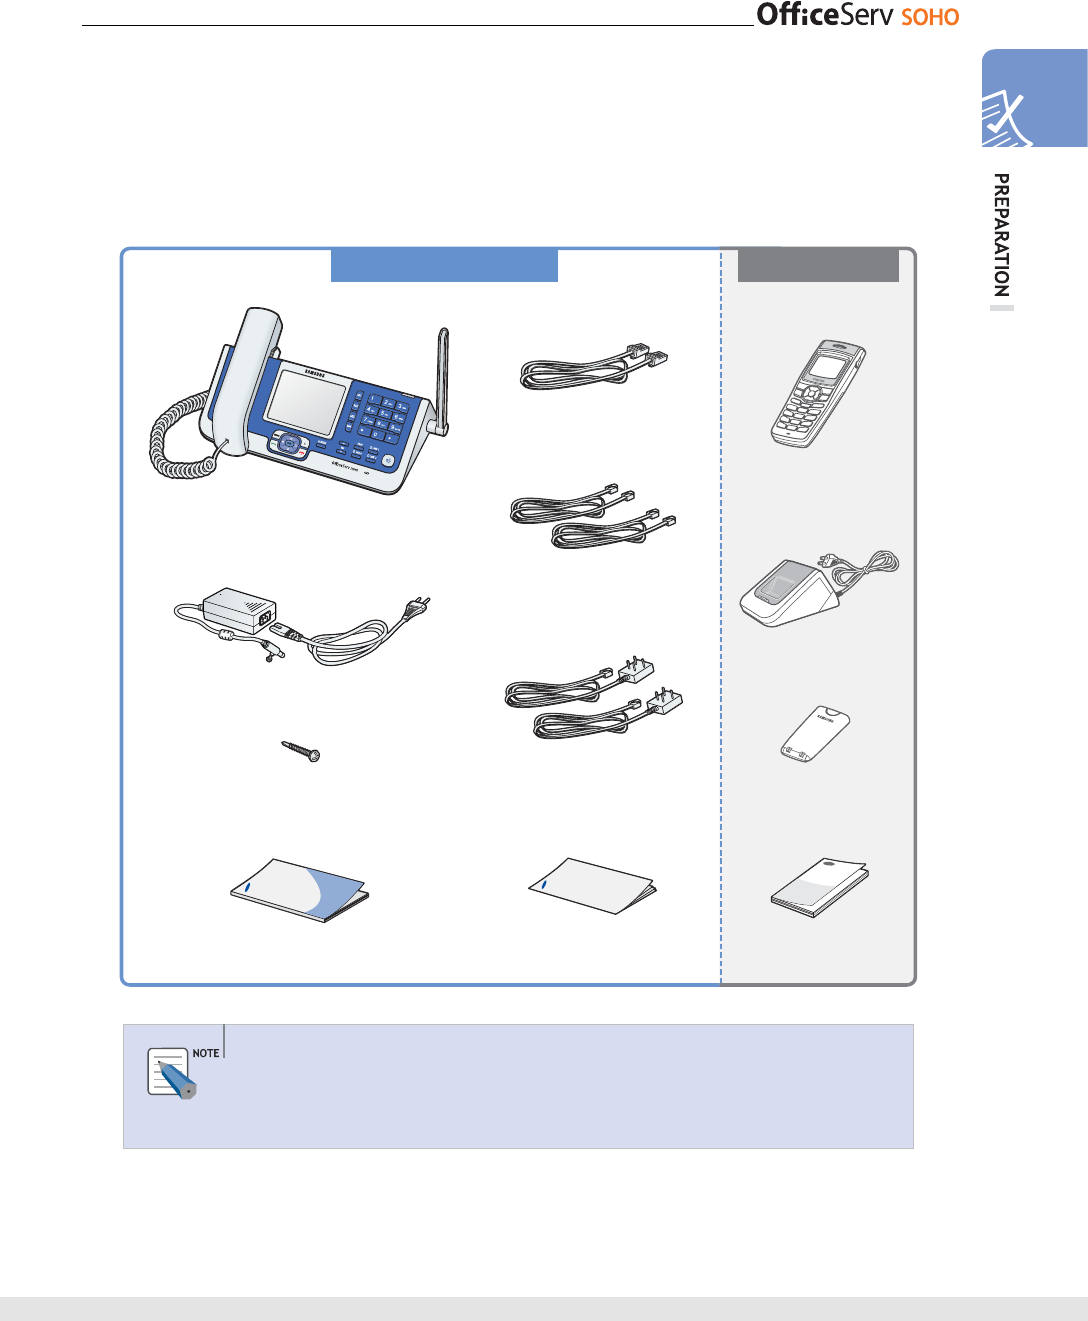
Product Content
After purchasing this product, check if the items below are all included in the package.
If an item is missing or is damaged, contact your dealer. The cable type and quantity may
be various depending on countries.
WIP-5000M Mobile Phone
For descriptions on the WIP-5000M WLAN phone, provided with OfficeServ SOHO,
refer to the ‘WIP-5000M User Guide’.
LAN Cable
Dual-Modular Phone
Cables(2)
Power Adapter
Fixing Screw(1)
Power Adapter
4-Port
Phone Jack Cables(2)
User Guide Quick Installation Guide
WIP-5000M
WLAN phone
Charger
Battery
(1 Standard Type)
User Guide
OfficeServ SOHO
OfficeServ SOHO WIP-5000M
16 © SAMSUNG Electronics Co., Ltd.
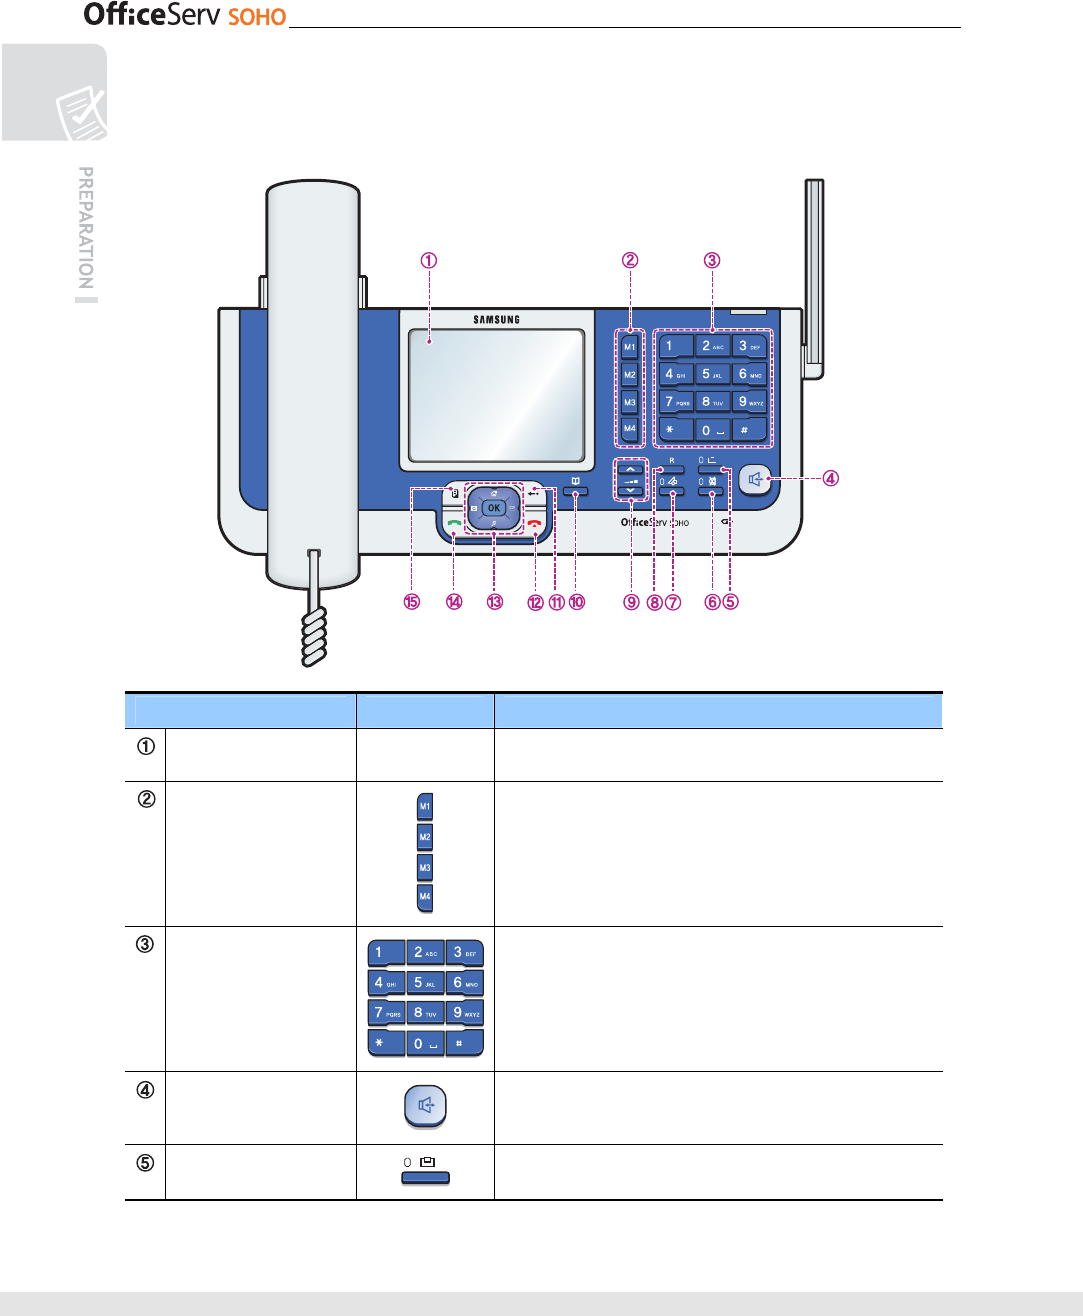
Front Panel
Buttons on the front panel of the OfficeServ SOHO are described below:
Name Button Function
LCD Screen - Display the status, phone number, menu, and various
massages.
M1~M4(Memory)
Button
Frequently used numbers are saved as Memory buttons.
Dial Button
Button used for entering numbers and characters.
Speaker Button
Button used for making calls through the speakerphone.
Internal Call Button
Used for making internal calls.

© SAMSUNG Electronics Co., Ltd. 17
Name Button Function
Mute Button
Used to switch off the microphone.
Services Button
Button used for Special Services according to Service
Provider.
R Button
Button used for holding/transferring a connected call.
Volume Button
Button used for adjusting the ring volume.
Button used for adjusting the volume during a call.
PhoneBook Button
Button used for viewing the phonebook.
Cancel Button
- Used when moving to the previous step in menu mode.
- Used to exit the menu mode.
- Used to delete an entered character/number after the
character/number is entered.
End Button
- Used when terminating a call during a call.
- Used to exit the menu mode.
Direction Button/
OK Button
- Direction button: Used when editing characters/numbers
or moving a menu item.
- OK button: Used when selecting/saving the item where a
cursor is in the menu mode.
Send Button
- Used when making a call(Press [Send] button after
entering number.)
- Used for checking recent outgoing/incoming(including no
answer) call or for dialing the corresponding number.
- Used when receiving an incoming call.
- Used when pressing the dial button for over a certain
time period to make a call to the most recent dialed
number.
- Press the send button in a standby state to retrieve the
list of recent calls.
Menu Button
Used for using menu functions such as: SMS, PhoneBook,
E-Diary, Sound, Services, Phone Setup.
18 © SAMSUNG Electronics Co., Ltd.
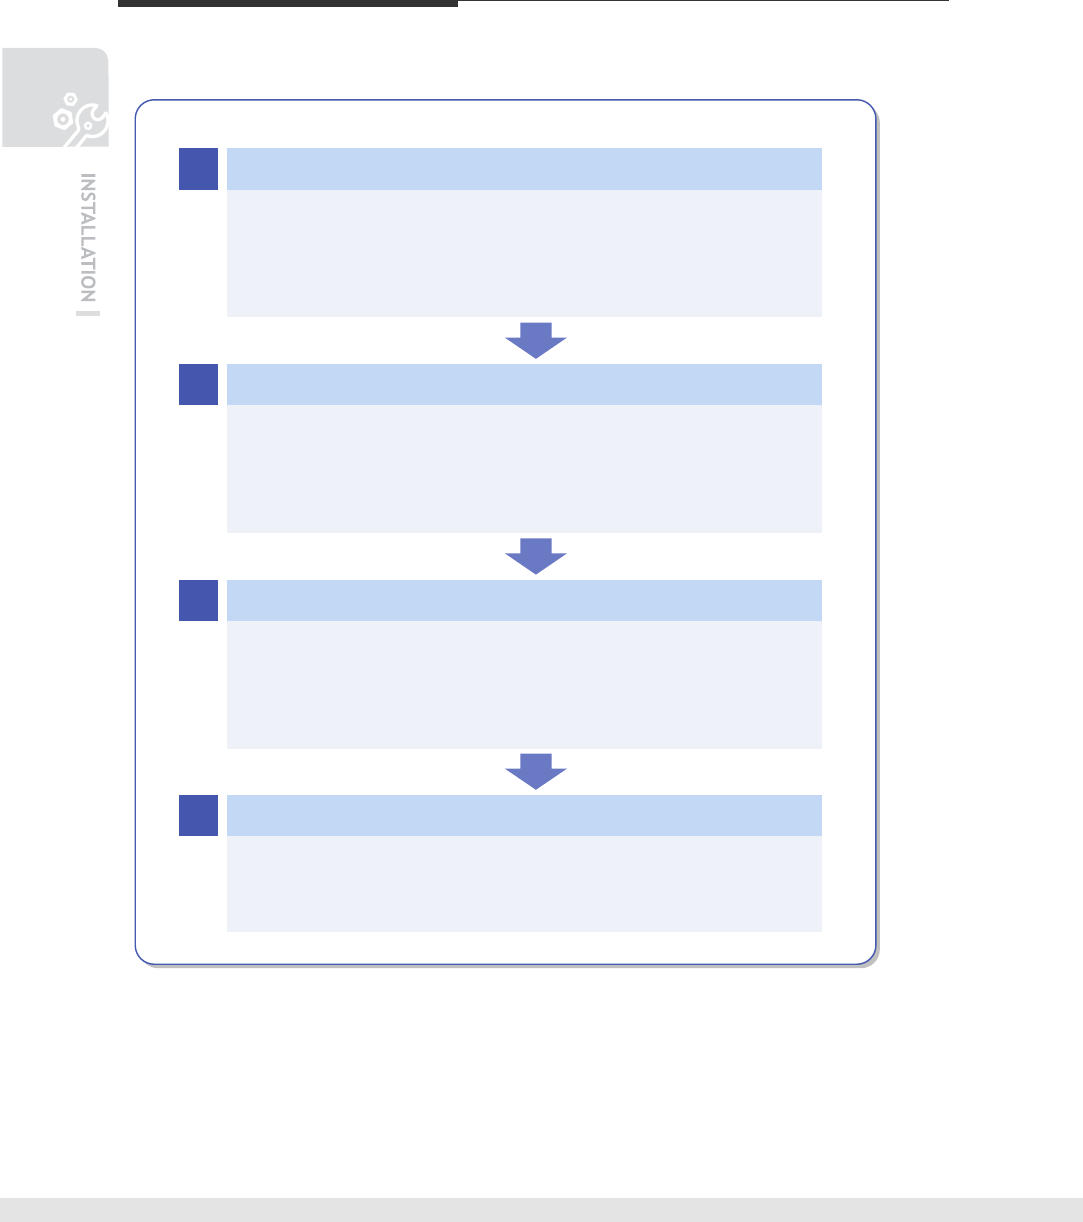
INSTALLATION
The installation procedure of OfficeServ SOHO is described below:
Check Installation Environment
1
- Check network configuration
- Check connecting system of internal/external network
OfficeServ SOHO connect
2
- Basic Connection: Handset, trunk cable, Internet cable,
and Power cable
- Option: FAX and PC or PDA
Configure Network 3
- Mandatory Setting: Time, date
- Network Mode setting
- Register WLAN phone
Configure User PC
4
Configure Network Environment of User PC
(Windows 98/ME, Windows 2000, Windows XP)
© SAMSUNG Electronics Co., Ltd. 19
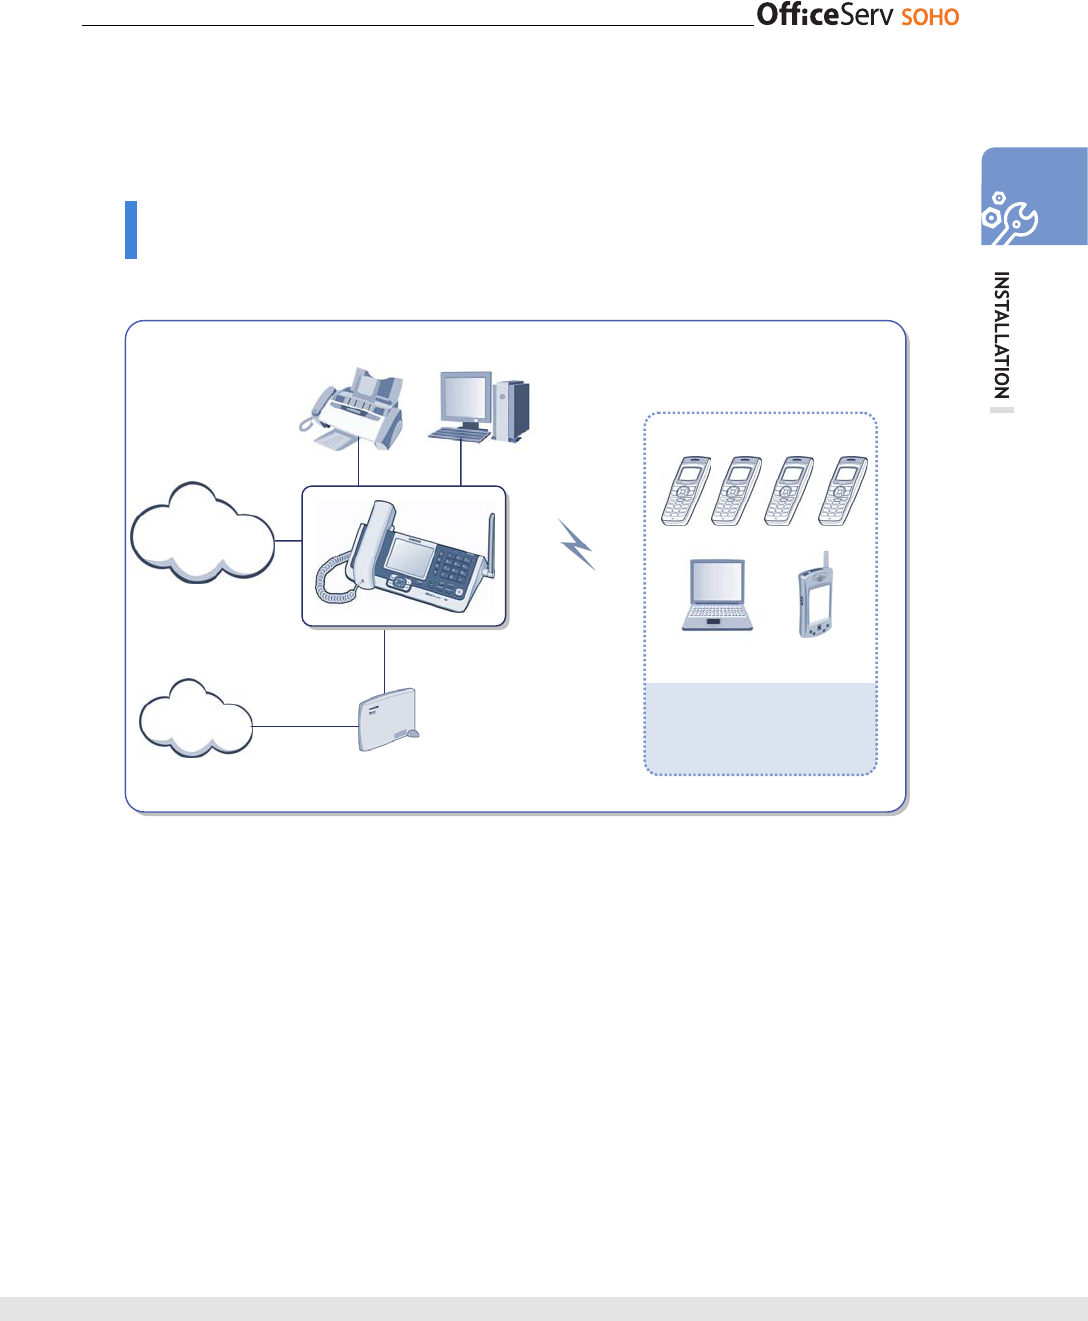
Environment Description
This section describes the user environment before installing OfficeServ SOHO.
Network Configuration Diagram
The network configuration diagram of OfficeServ SOHO is shown below:
WLAN phone
External Modem
(xDSL/Cable)/LAN
Internal Network Configuration
PSTN or IDSN
(C.O. line)
Internet
External Network
Configuration
PC
Laptop
Computer
Wireless Internet
(IEEE802.11 b/g)
Enter a same value for the
SSID of mobile device to
configure a single wireless cell.
FAX
PDA
20 © SAMSUNG Electronics Co., Ltd.
Check the following network environment:
1.
PC Environment:
Check the type of OS(e.g., Windows 95/98/ME/2000/XP) of the PC and whether a
LAN card is equipped on the PC. The Internet setup procedure differs depending on
the type of OS. There are two ways to check the type of OS.
• Clicking [Start] will open a menu tab. You can verify the version from the Windows
information displayed on the left section of the menu tab.
• Right click [My Computer] on your desktop and select [Properties] to check the system
information.
2.
LAN Environment of PC:
The OfficeServ SOHO can be connected only to PCs that have a LAN card. Check if
a LAN/WLAN card is equipped on the PC.
3.
Types and number of terminals
- Mobile terminal: WLAN phone(WIP-5000M), Laptop computer, PDA
- Wired terminal: PC, FAX
4.
External Network:
Check the connecting method and network information(Refer to the next page).
© SAMSUNG Electronics Co., Ltd. 21
Checking External Network Environment of User
Check the external network environment of the user before installing OfficeServ SOHO.
When using static IP
When using a static IP assigned by the ISP, set to Static, and enter the assigned IP
address, gateway, subnet mask, and DNS address.
When using dynamic IP
If your ISP supports DHCP or you are connecting through a dynamic IP address, set
to DHCP. Once the DHCP is set, an IP address is automatically assigned to
OfficeServ SOHO.
When using an IP address assigned through user ID and password
If you are connected to the Internet through a DSL line, check with your ISP to see if
they use PPPoE. If they do, you will have to enable PPPoE and enter the user ID and
password provided by the ISP instead of entering an IP address, gateway, subnet
mask, and DNS address.
When using an IP address assigned through a PPTP server of ISP
PPTP is used instead of PPPoE by some European ISPs. Enter the server address,
ID, and password.
22 © SAMSUNG Electronics Co., Ltd.
OfficeServ SOHO Connection (ISDN Type)
Before proceeding with the installation of the OfficeServ SOHO please read carefully the
instructions below:
Turn off the power of the external modem, OfficeServ SOHO, and PC(or facsimile) before
installation.
1.
Handset Connection:
Connect the handset to the connection port on the left side of the OfficeServ SOHO.
2.
ISDN Network Connection:
Connect the BRI to the ISDN port of the OfficeServ SOHO by using the ISDN access
cable.
LAN PC ISDN FAX
or
SLT
© SAMSUNG Electronics Co., Ltd. 23
3.
Single Line Telephone Connection:
Connect the facsimile, Answering Device or Single line Telephone to the port of the
OfficeServ SOHO by using a phone cable.(RJ-11).
4.
PC Connection:
Connect the LAN port of the PC to the LAN port of the OfficeServ SOHO by using a
LAN cable.(RJ-45).
5.
LAN Connection:
Connect the LAN port of the external modem to the WAN port of the OfficeServ
SOHO by using a LAN cable.(This is not applicable to an internal ADSL modem.)
6.
Power Connection:
Connect the power port of the OfficeServ SOHO to the power outlet by using a
power adapter for +5 V.
After installation, turn on the power of the external modem, OfficeServ SOHO, and PC(or
facsimile) in sequence.
24 © SAMSUNG Electronics Co., Ltd.
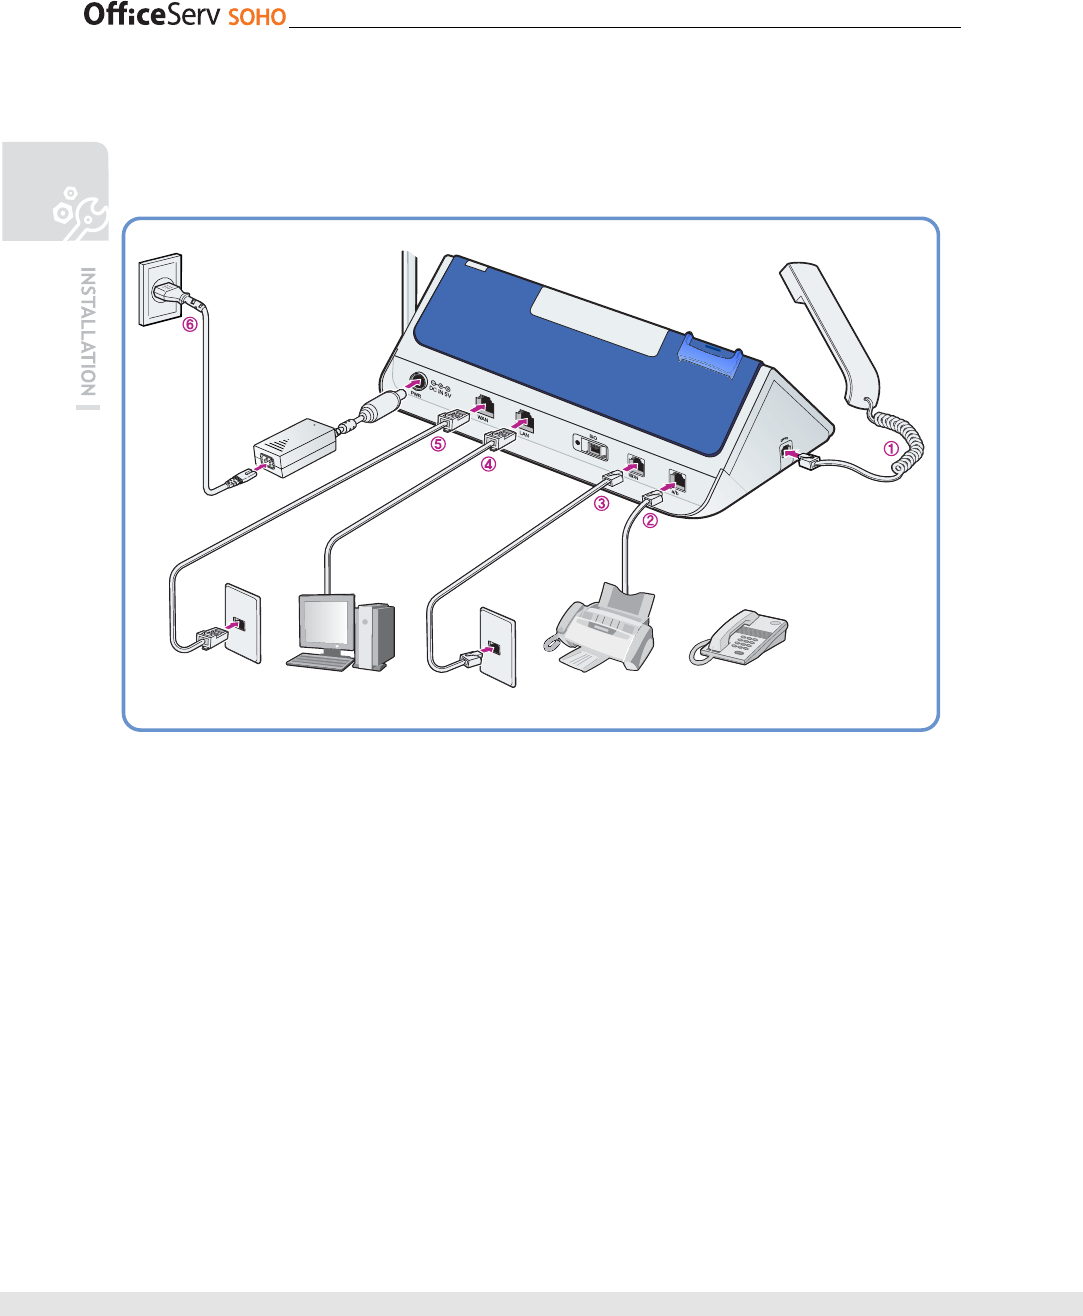
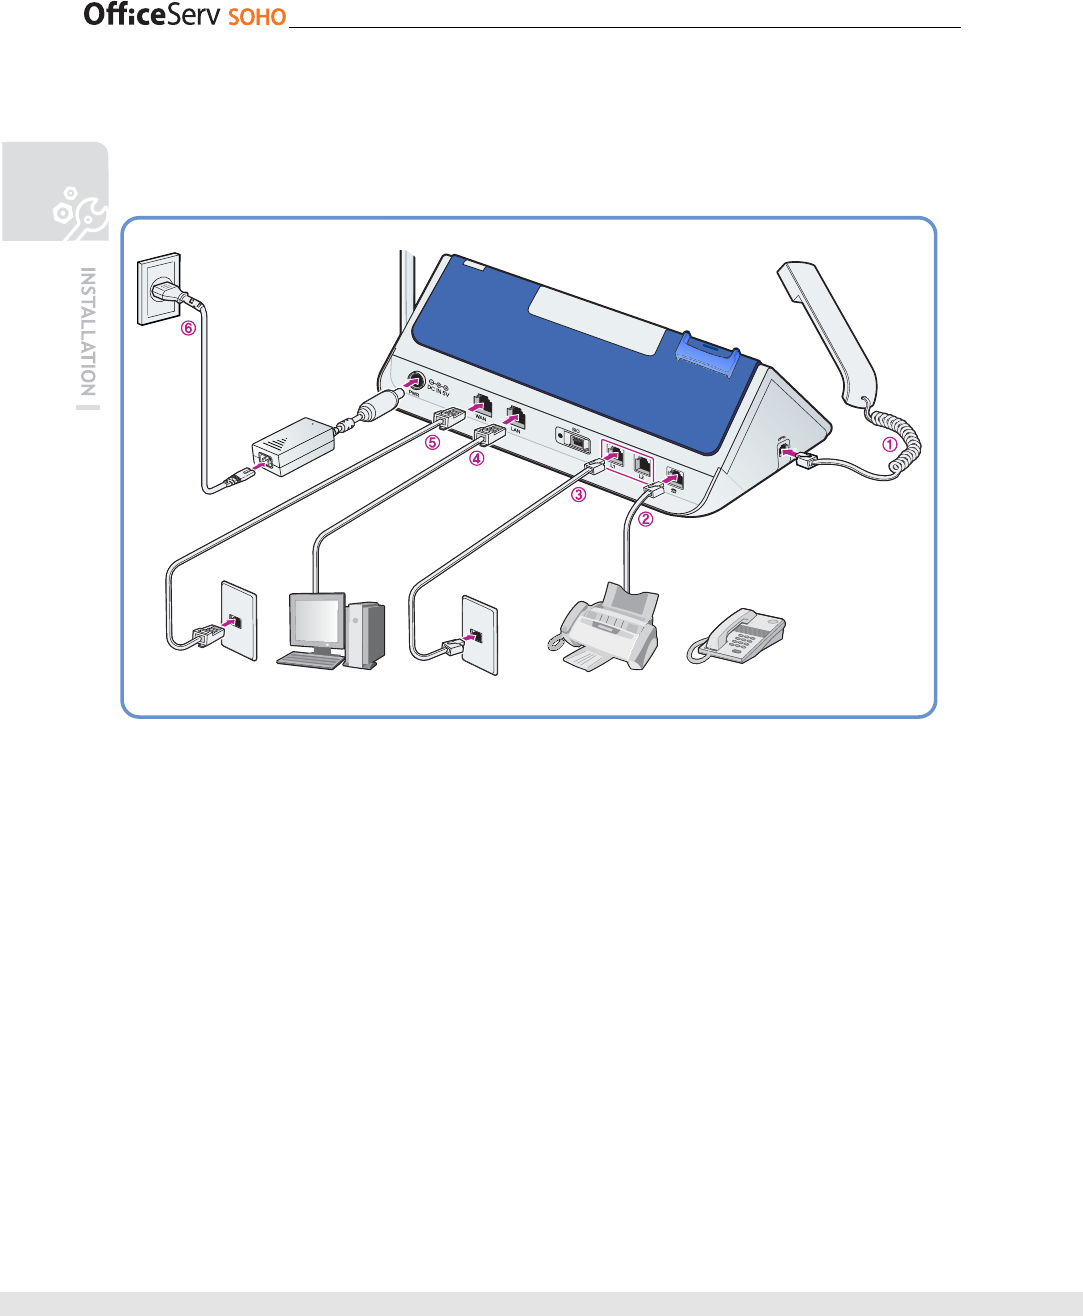
OfficeServ SOHO Connection (PSTN Type)
Before proceeding with the installation of the OfficeServ SOHO please read carefully the
instructions below:
Turn off the power of the external modem, OfficeServ SOHO, and PC(or facsimile) before
installation.
1.
Handset Connection:
Connect the handset to the connection port on the left side of the OfficeServ SOHO.
2.
Single Line Telephone Connection:
Connect the facsimile, Answering Device or Single line Telephone to the port of the
OfficeServ SOHO by using a phone cable.(RJ-11).
3.
PSTN Line Connection:
Connect the L1(Line1), L2(Line2) to the analog trunk port of the OfficeServ SOHO by
using the RJ-11 dual moduala cable.S
LAN PC PSTN FAX
or
SLT
© SAMSUNG Electronics Co., Ltd. 25
4.
PC Connection:
Connect the LAN port of the PC to the LAN port of the OfficeServ SOHO by using a
LAN cable.(RJ-45).
5.
LAN Connection:
Connect the LAN port of the external modem to the WAN port of the OfficeServ
SOHO by using a LAN cable.(This is not applicable to an internal ADSL modem.)
6.
Power Connection:
Connect the power port of the OfficeServ SOHO to the power outlet by using a
power adapter for +5 V.
After installation, turn on the power of the external modem, OfficeServ SOHO, and PC(or
facsimile) in sequence.
Easy Installation of OfficeServ SOHO
Once the power of the OfficeServ SOHO is turned on, the green LEDs of the [Internal Call]
and [Mute] buttons on the front panel of the OfficeServ SOHO blink in turns.
Within a short time, the loading screen and the [EasyInstall] screen will appear in sequence
on the LCD of the OfficeServ SOHO.
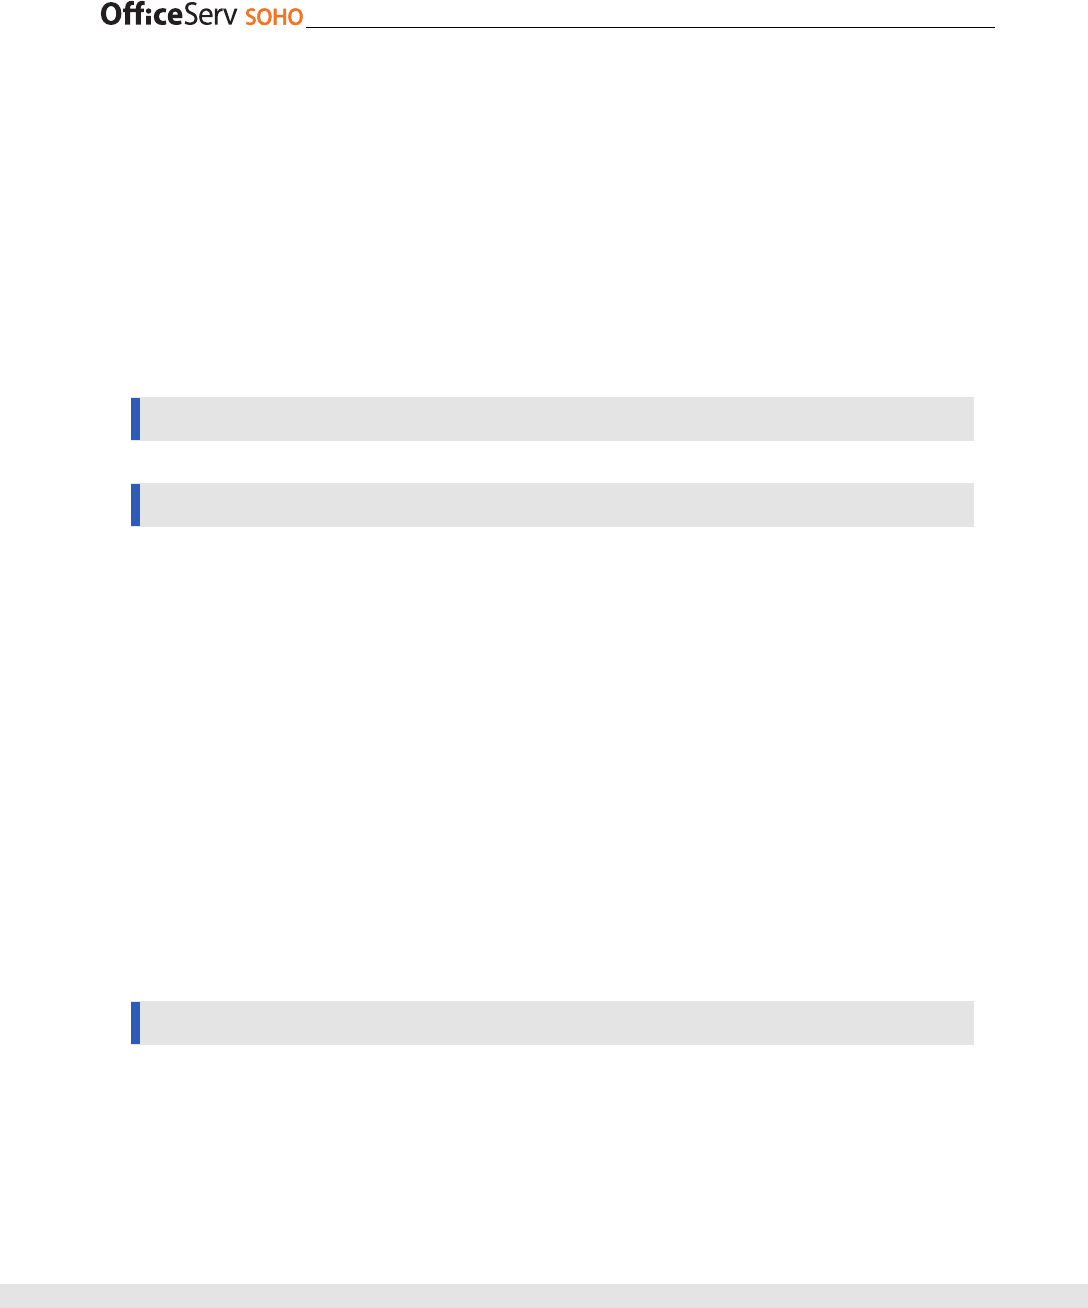
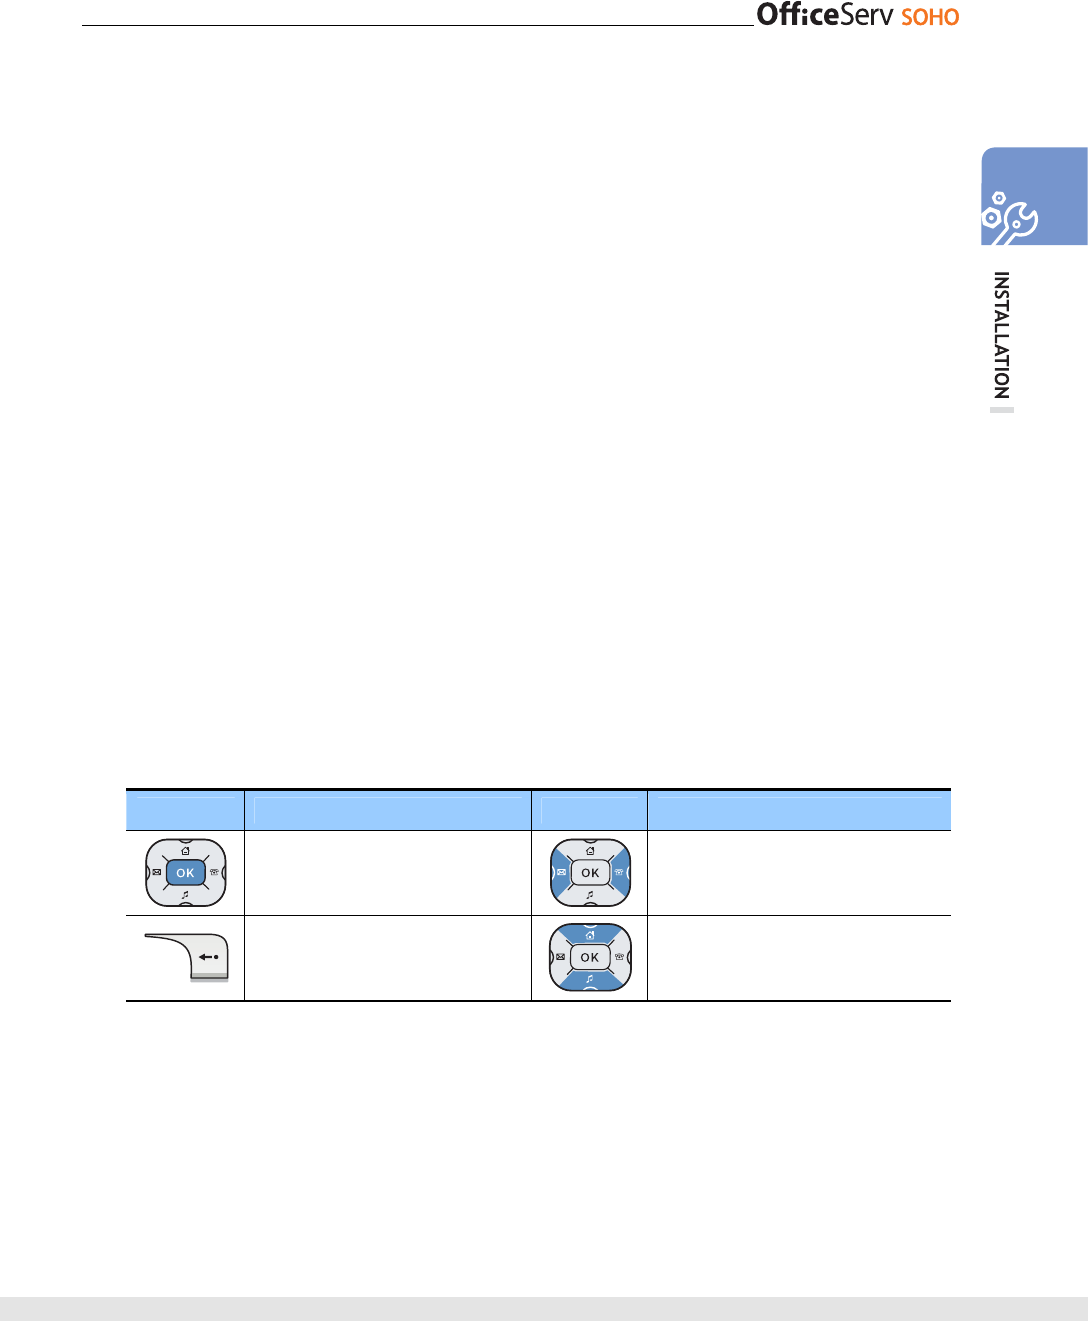
The use of the buttons for menu settings is described below:
Button Description Button Description
The [OK] button is used after text is
entered or to set the menus.
The direction buttons are used to
move the cursor left or right or to
search the menus.
The [Cancel] button is used to delete
entries or to return to the previous
step.
The direction buttons are used to
move the cursor up or down.
Press the [OK] button to move to the next step after the menu settings or press the [Cancel]
button to return to the previous step.
In case of problems with the Internet connection or with the registration of a WLAN phone,
please refer to the ‘Troubleshooting’ section in User Guide. The procedure for easy installation
of the OfficeServ SOHO is as follows:
26 © SAMSUNG Electronics Co., Ltd.
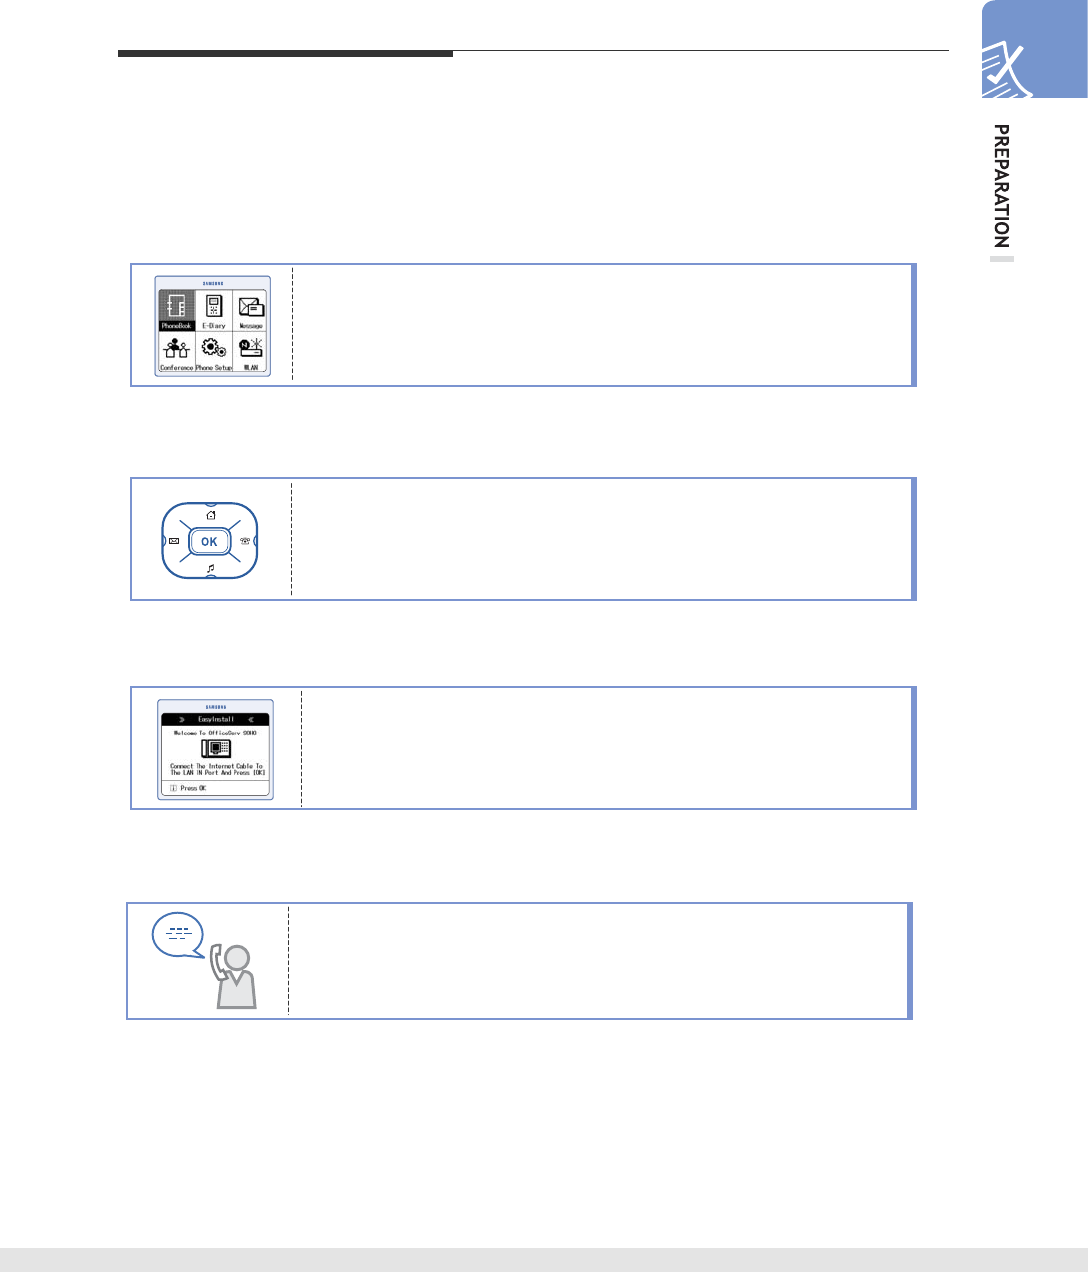
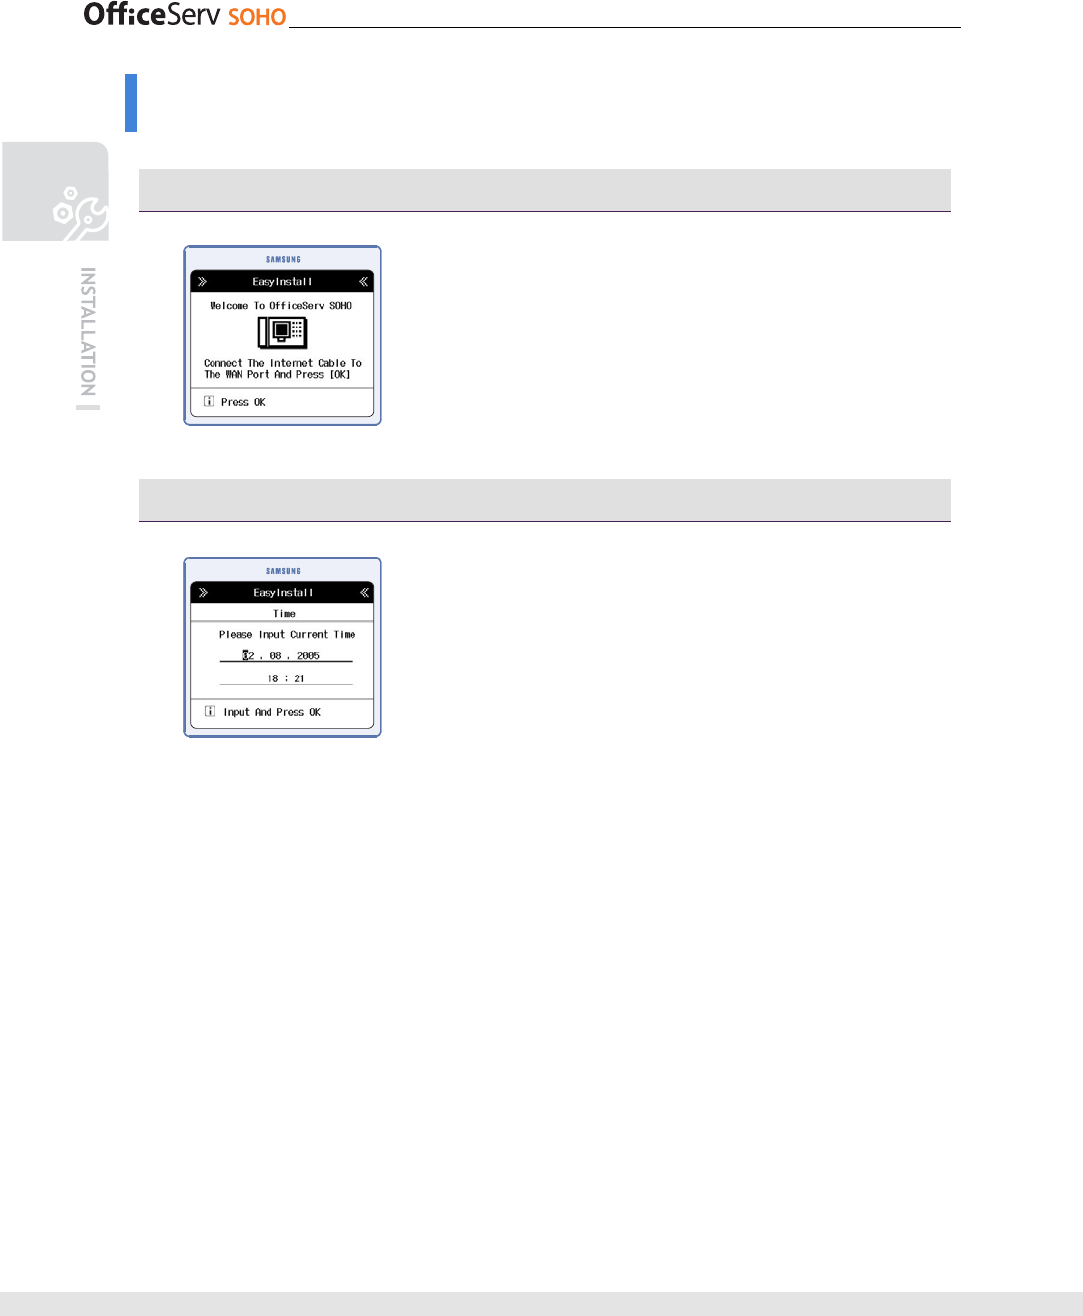
Easy Install
Start Easy Install
Connect the Internet cable(LAN cable) to the
OfficeServ SOHO and press [OK] to start the
installation.
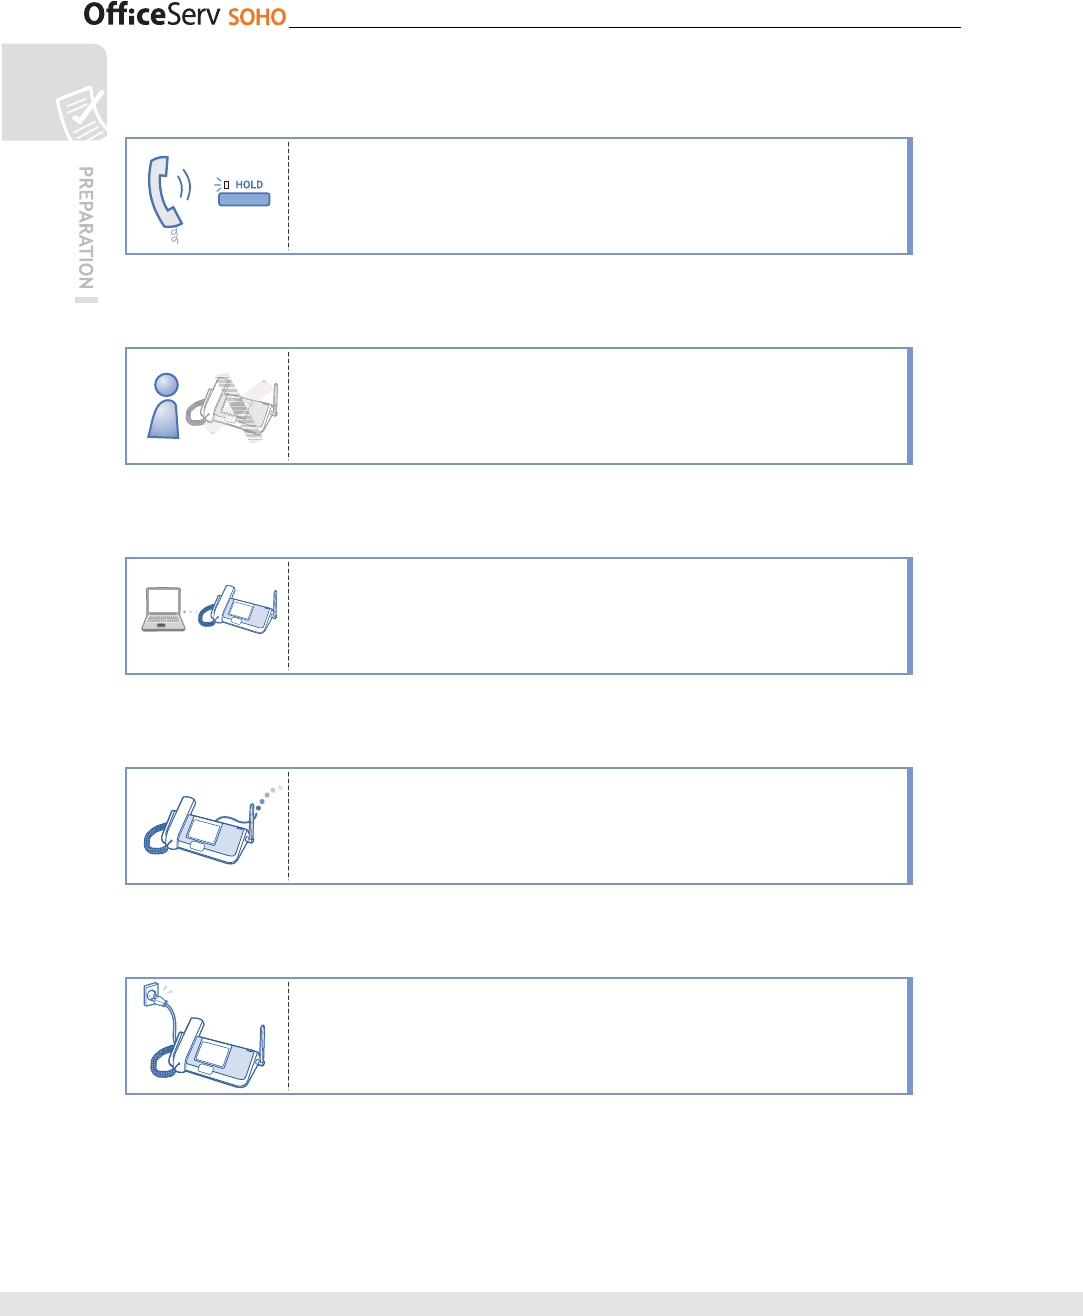
Time Setup: This is only for PSTN Type (Model: SIT200EM)
Enter the current date and time and press [OK].
© SAMSUNG Electronics Co., Ltd. 27
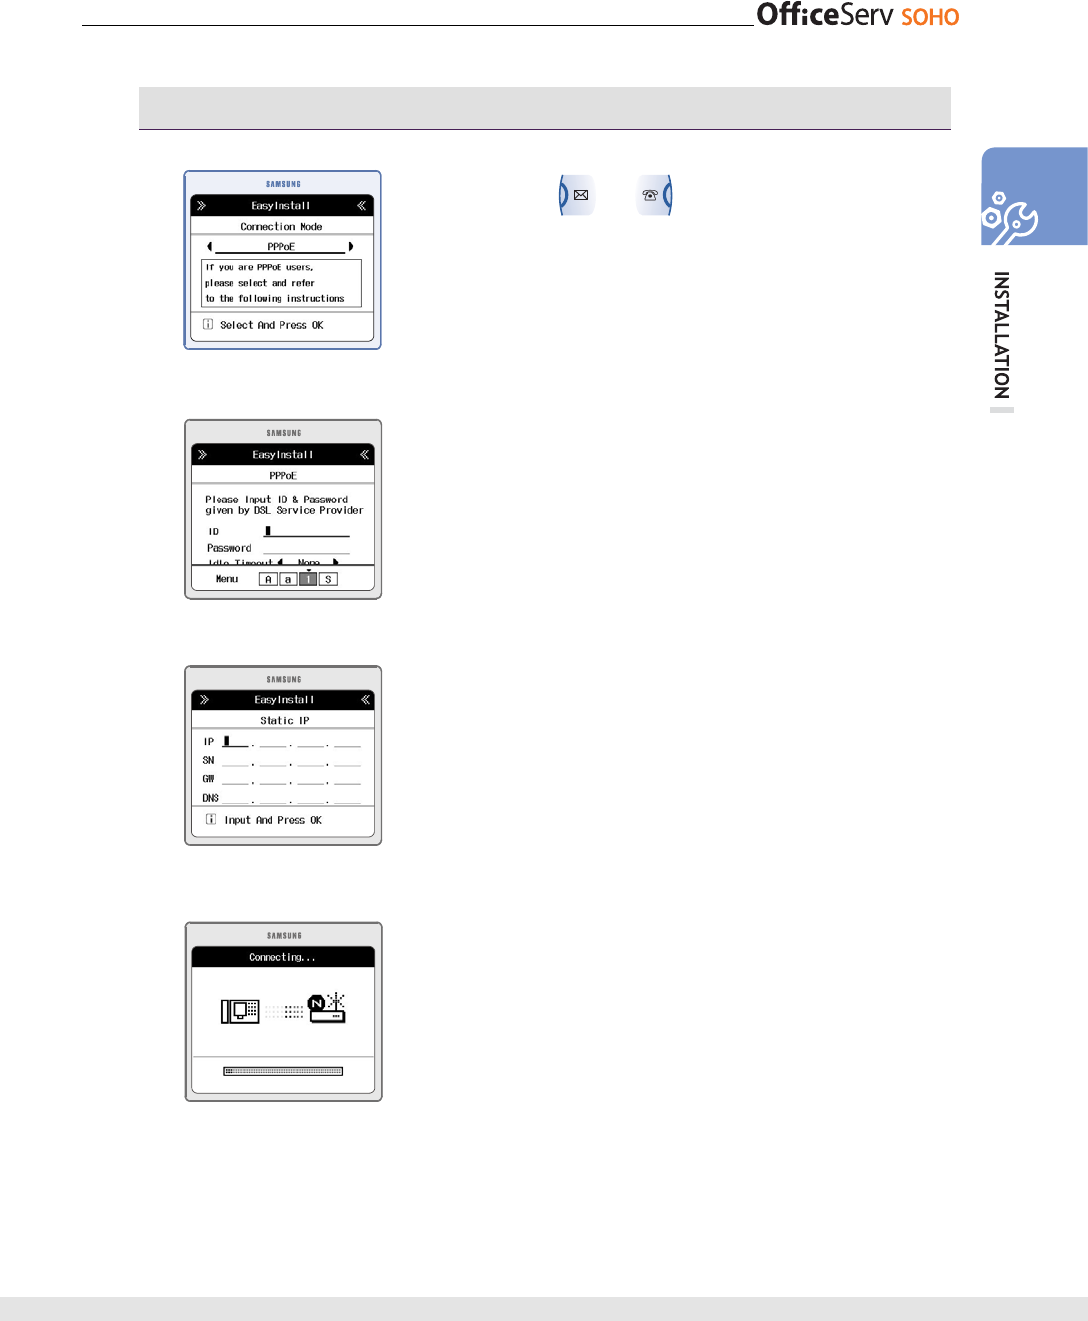
Network Mode
Use the or button to select your
Internet service system among PPPoE, Static,
DHCP, and Setup Later, and press [OK].
Items are described below:
1. PPPoE
Select this item if you are a PPPoE user.
Enter the ID and Password provided by the ISP
and press [OK].
• Contact your ISP if you have forgotten the ID or
password.
2. Static
Select this item if you are a Static IP user.
Enter the address provided by ISP and press [OK].
• IP: Enter IP address
• SN: Enter Subnet Mask
• GW: Enter Gateway address
• DNS: Enter DNS(Domain Name Server) address
3. DHCP
Select this item if you are a DHCP user.
Press [OK] to set up the Internet automatically.
4. Setup Later
To skip Internet setup, select this item and press [OK].
28 © SAMSUNG Electronics Co., Ltd.
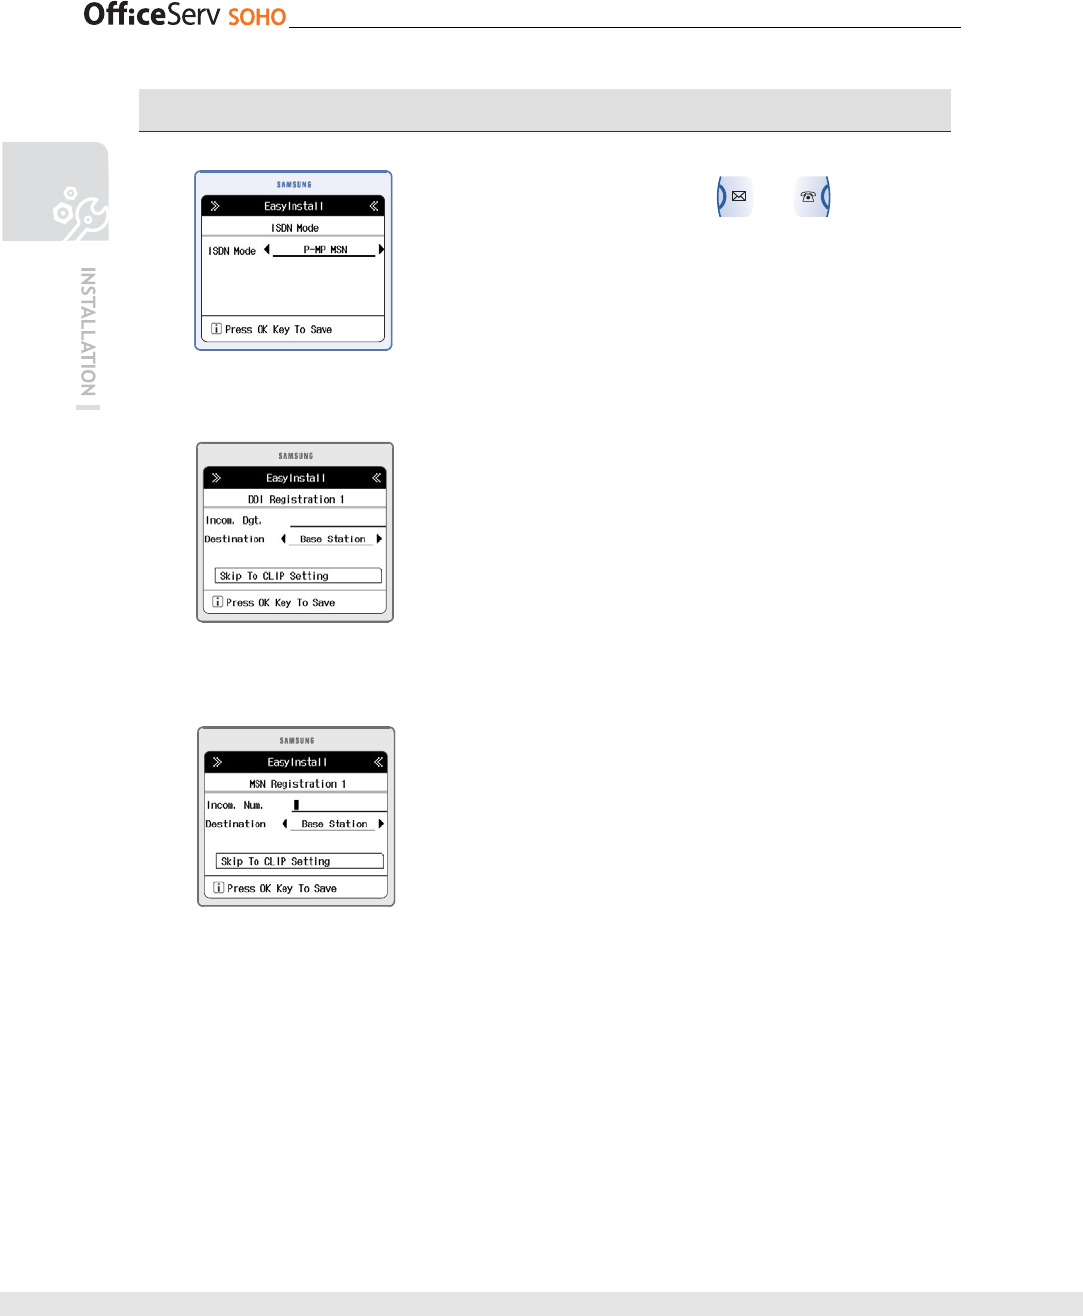
ISDN Settings (This is only for ISDN Type (Model: SIT200EI))
Use the navigation button or to
Select the ISDN connection mode between DDI
and P-MP Multinumber and press [OK].
The items are described below:
5. DDI
Select this item if you have a point-to-point ISDN
subscription.
Enter your main telephone number
(e.g., 0292189777) and select the destination of
the incoming calls, then press [OK].
6. P-MP Multinumber
Select this item if you have a point-to-multipoint
ISDN subscription.
Enter the main telephone number and if
necessary any additional telephone number
(e.g., 0292189765) and select, per each of them,
the destination of the incoming calls, by pressing
[OK] to confirm each entry.
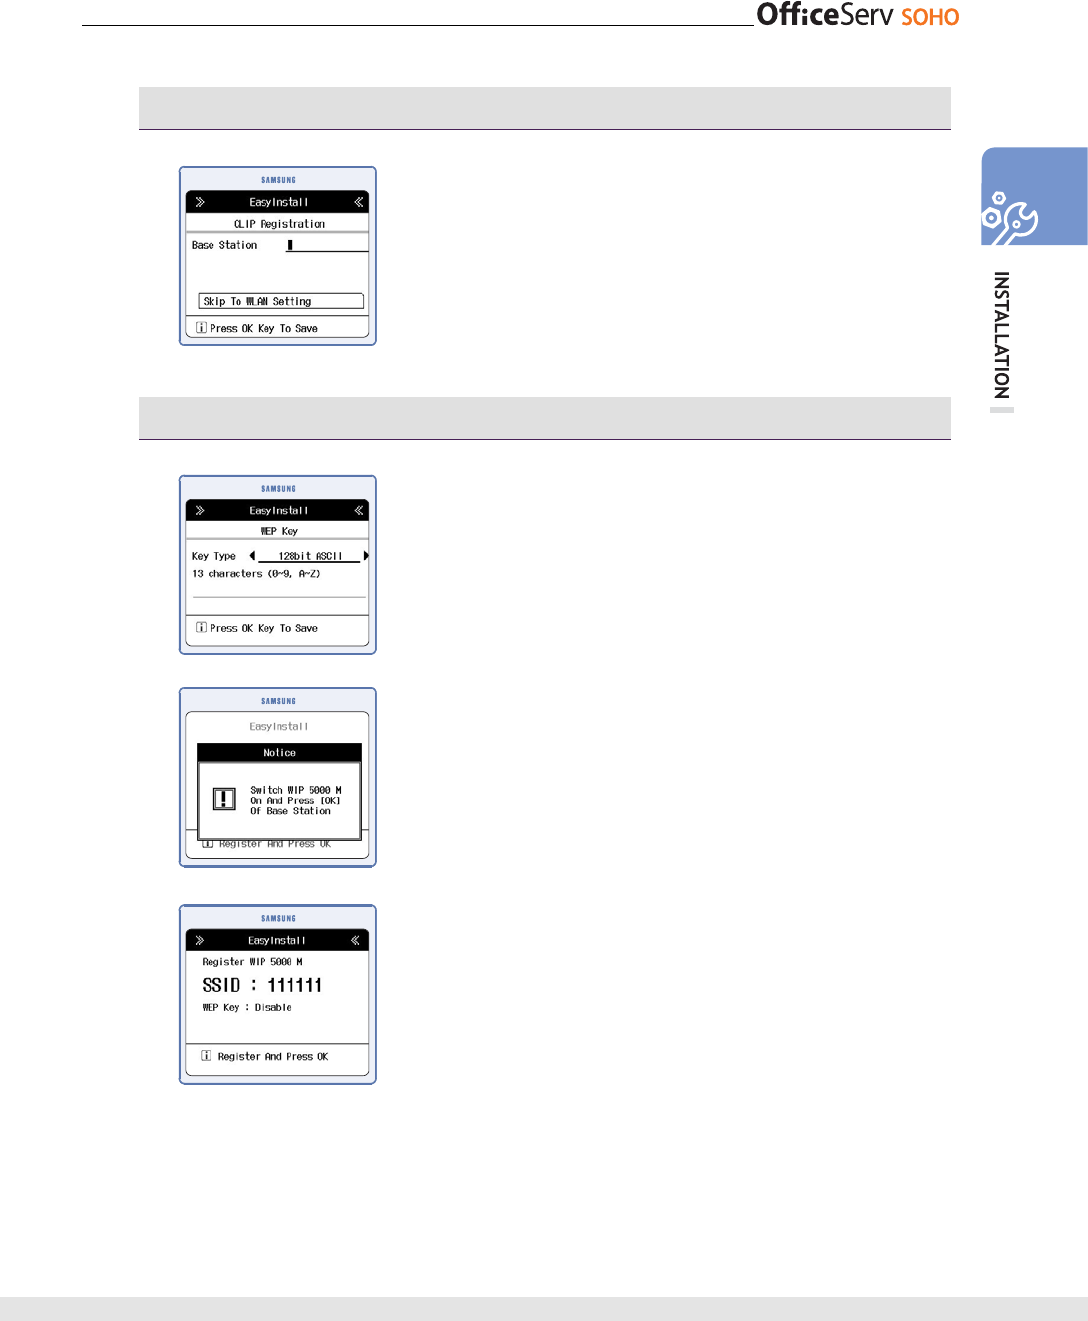
To continue, once the ISDN setting procedure is concluded, select Go to CLIP
Settings and press [OK].
© SAMSUNG Electronics Co., Ltd. 29
CLIP Settings (This is only for ISDN type (Model: SIT200EI))
Enter, per each extension, the telephone number,
among those received from your network
operator(e.g.,: 0292189765), that you want to
display to the person called.
To continue, select Go to WLAN settings and
press [OK].
Register WLAN phone
Enter a 13 characters WEP key
• Entering a WEP key(Wireless Equivalence Privacy) is
optional. To skip this entry, press the [OK] button.
Turn on the WLAN WIP-5000M phone and press
the [OK] button of the OfficeServ SOHO.
Register the WLAN WIP-5000M phone according
to the procedure described in the section ‘Easy
Registration(38page)’ inherent to the WIP-5000M
and press [OK].
30 © SAMSUNG Electronics Co., Ltd.
Connecting OfficeServ SOHO with Desktop /
Laptop Computers
You can use the Internet on a desktop or a laptop computer using OfficeServ SOHO.
You can connect a desktop or a laptop computer to OfficeServ SOHO in a wireless
method(using a WLAN card) or in a wired method(using a wired LAN card and a LAN
cable).
Connecting Desktop / Laptop Computer to
OfficeServ SOHO Wirelessly
- A wireless connection can be made only if a WLAN card is installed in the desktop or
laptop computer. If a wired LAN card is installed, refer to the wired connection
method.
- You can set up a WLAN by using an extra program provided by the WLAN card
manufacturer. It is recommended that you configure the WLAN using such program.
For information on how to set up a WLAN, refer to the user guide of the program.
- You can also set up a WLAN by using the WLAN connection service of Windows XP.
Setting up a WLAN in Windows 2000/ME/98
Windows 2000/ME/98 do not provide WLAN setting menus.
Use programs provided by the manufacturer to set up a WLAN.
Checking Windows Version
Here are two ways to check the version(e.g. Windows XP, Windows 2000, Windows
98) of the Windows OS running on your computer
- Clicking [Start] will open a menu tab. You can verify the version from the
Windows information displayed on the left section of the menu tab.
- Right click [My Computer] on your desktop and select [Properties] to check the
system information.
© SAMSUNG Electronics Co., Ltd. 31
Using WLAN Card Program
A WLAN card or a WLAN adapter is provided with an extra program for WLAN setup. To
set up a WLAN, refer to the user guide of the program.
Enter the same SSID set in the OfficeServ SOHO.
To check the SSID of the OfficeServ SOHO, refer to the procedure described in the
‘Note’ paragraph on the next page.
Wireless Laptop Network Configuration
1.
Click [Start] to select [Control Panel].
2.
Double-click [Network Connection] in Control Panel.
• If the Control Panel does not have [Network Connection], select [Switch to Classic View]
at the upper left corner of the Control Panel.
3.
If [Wireless Network Connection] is set to [Disabled], right-click [Wireless Network
Connection] and select [Enabled].
• Even if a message, ‘A wireless connection is not available’ appears after selecting
[Enabled], proceed to the next step.
4.
Right-click [Wireless Network Connection] to select [Properties], and select
[Show icon in notification area when connected]. Click [OK].
5.
Right-click [Wireless Network Connection] and select [View Available
Wireless Networks].
6.
From the list of [View Available Wireless Networks], select the same SSID of
OfficeServ SOHO. To check the SSID of the OfficeServ SOHO, refer to the
procedure described in the ‘NOTE’ below. Select [Allow Access to the Selected
Wireless Network Regardless of Security] and click the [Connect] button.
Verifying SSID
From the OfficeServ SOHO, press [Menu] [2. WLAN Setup]
[Enter Password(default: 0000)] [OK] [4. WLAN Information] to verify
the SSID.

32 © SAMSUNG Electronics Co., Ltd.
Connecting Desktop / Laptop Computer to
OfficeServ SOHO by LAN Cable
If the computer has been connected to the Internet before, additional setting is not
required. Check the Internet connection(LAN cable status) by referring to ‘OfficeServ
SOHO connection’, and execute the Internet Explorer. If the computer is not
connected to the Internet, follow the steps below:
For Windows 98/ME
1.
Select [Start] [Settings] [Control Panel] [Network].
2.
Double-click [TCP/IP].
3.
Select ‘Obtain an IP address automatically’ and click [OK]. Restart the computer.
For Windows 2000
1.
Select [Start] [Settings] [Control Panel] [Network and Dial-up
Connections].
2.
Right-click [Local Area Connection] and select [Properties].
3.
Double-click [Internet Protocol(TCP/IP)].
4.
Select ‘Obtain an IP address automatically’ and ‘Obtain DNS server address
automatically’ and click [OK].
© SAMSUNG Electronics Co., Ltd. 33
For Windows XP
1.
Press [Start] and select [Control Panel].
2.
Double-click [Network Connection].
3.
Right-click [Local Area Connection] and select [Properties].
4.
Double-click [Internet Protocol(TCP/IP)].
5.
Select [Obtain an IP address automatically] and [Obtain DNS address
automatically]. Click [OK] to finish the setting.
34
© SAMSUNG Electronics Co., Ltd.
THINGS YOU SHOULD KNOW
Screens
Major screens that are displayed on the LCD of OfficeServ SOHO are described below:
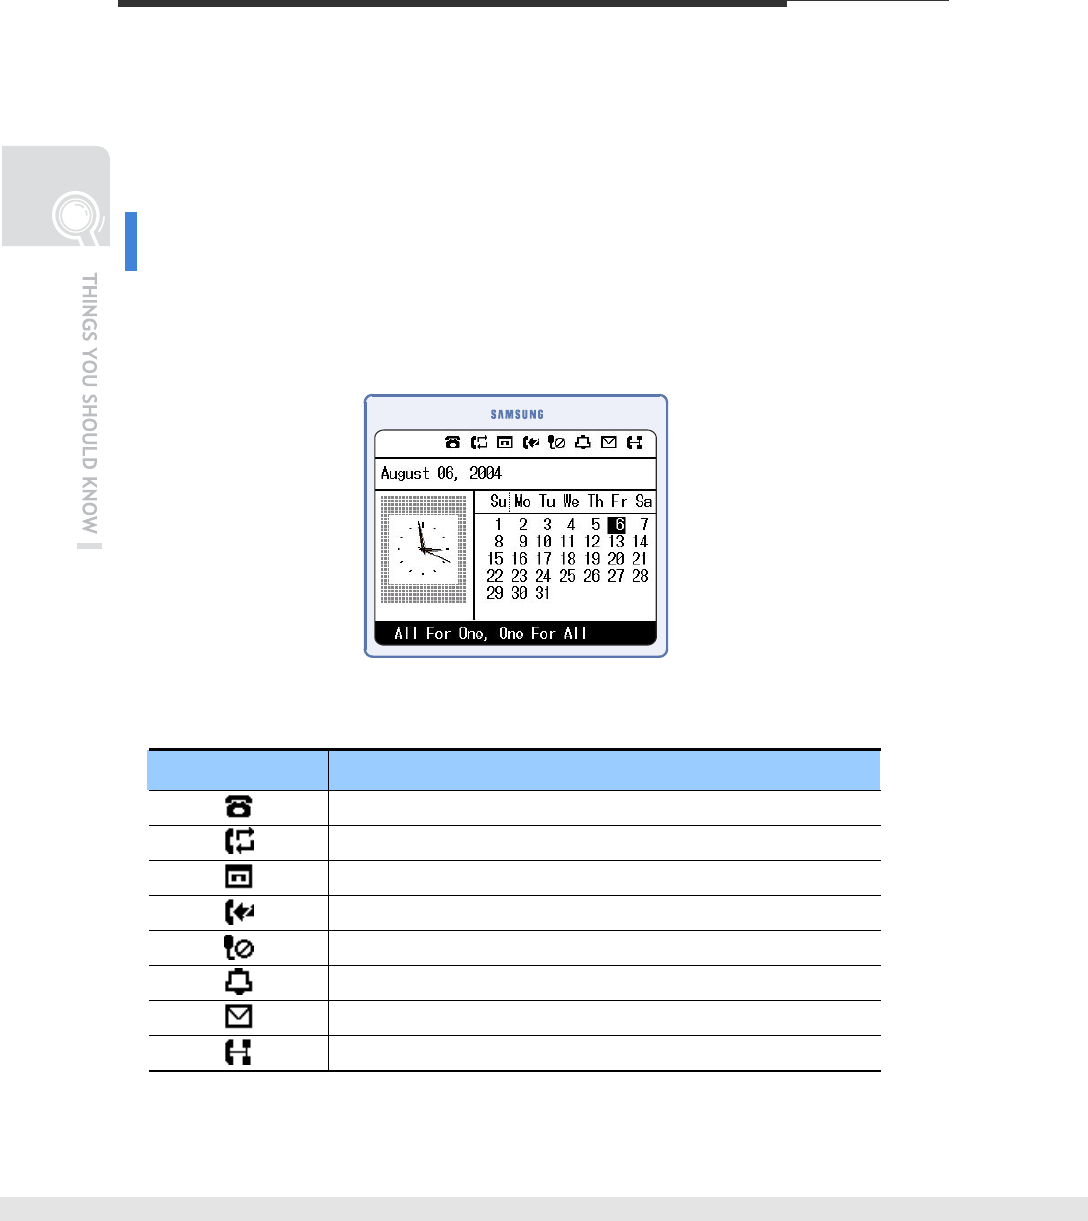
Main Screen
The default background screen of the main screen is shown below.
The background screen can be changed by pressing [Menu] button and selecting
[Phone Setup] [1. My Phone] [1. Select Background].
Icons of the background screen are described below:
Icon Function
Station Message
Call forward
Answer mode
DND
Mute
Alarm
Message
Network connection
© SAMSUNG Electronics Co., Ltd. 35
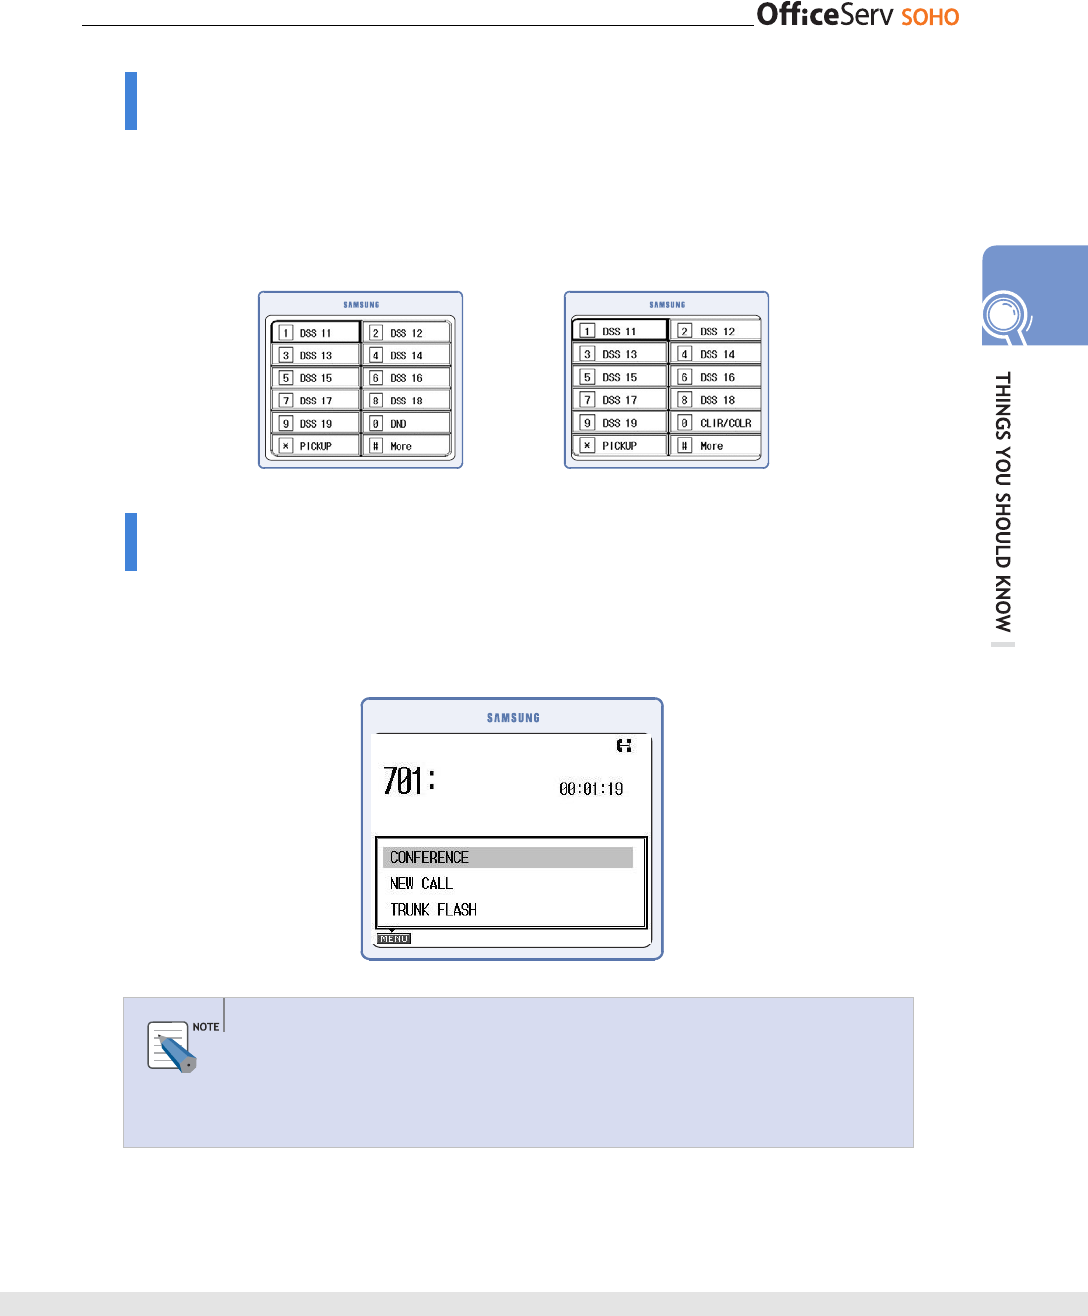
Station Status Display Screen
You can display this screen by pressing the [SCREEN] button while in standby mode
or during a call. Statuses of stations and DND, and System Speed Dial are displayed
as icons. You can use a function by moving to the corresponding menu and pressing
the [OK] button.
Menus During Call Screen
You can display menus available during a call by pressing the [Menu] button. Various
functions that can be used during a call are displayed in this screen. You can use a
function by moving to the corresponding menu and pressing the [OK] button.
Menus Displayed During a Call
Available menus may differ depending on the system version. You can use
direction buttons to view menus that are not shown on the screen. ‘RETRY’ menu
is not displayed during intercom calls.
<PSTN Type> <ISDN Type>
36 © SAMSUNG Electronics Co., Ltd.
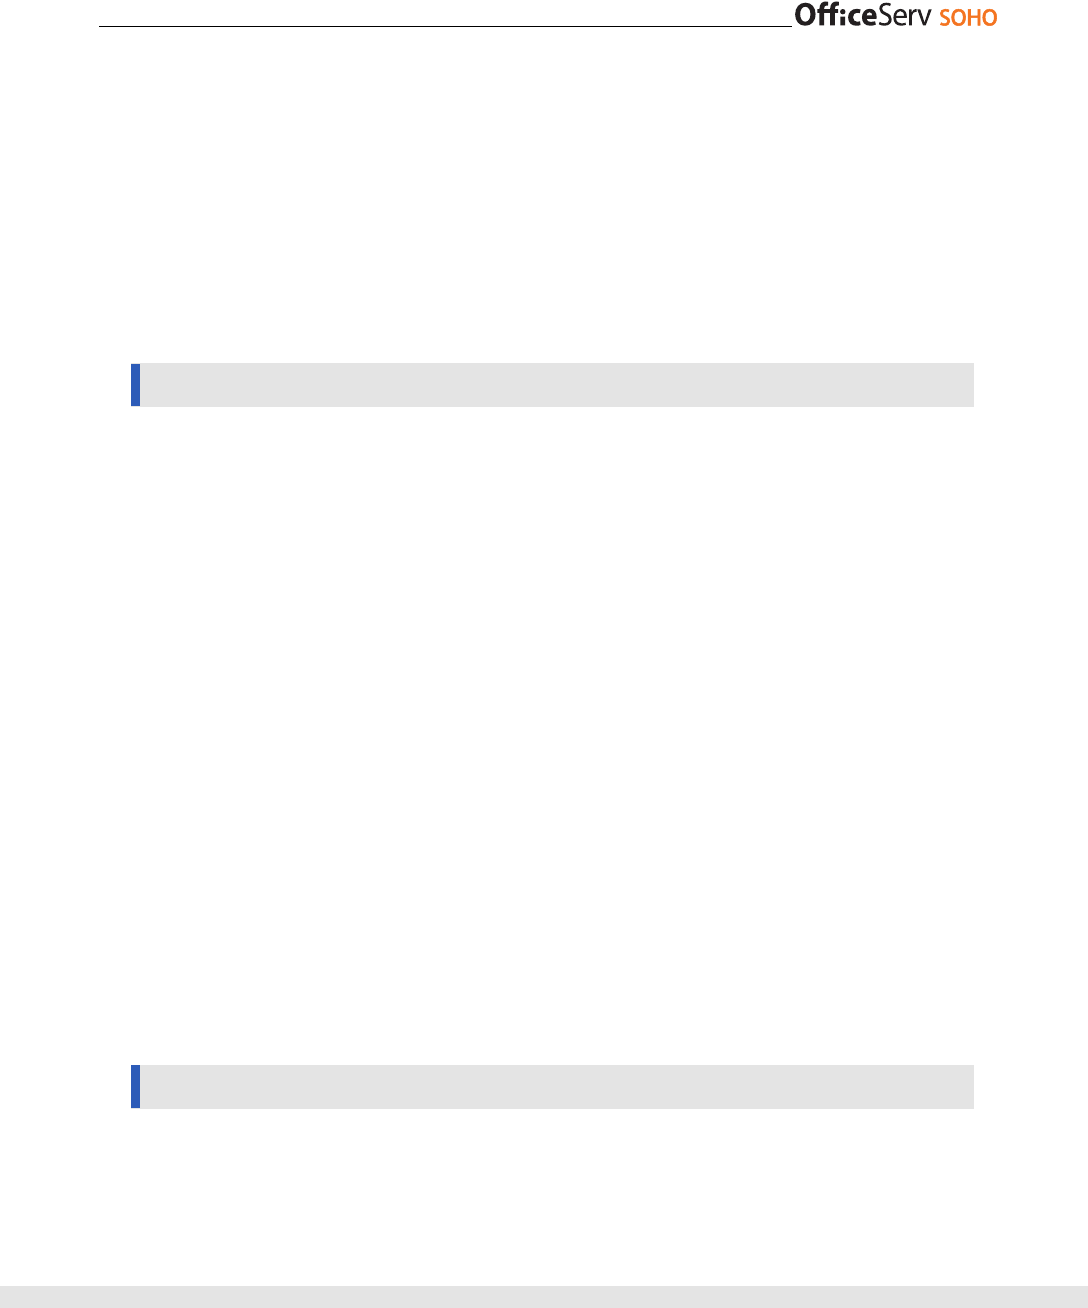
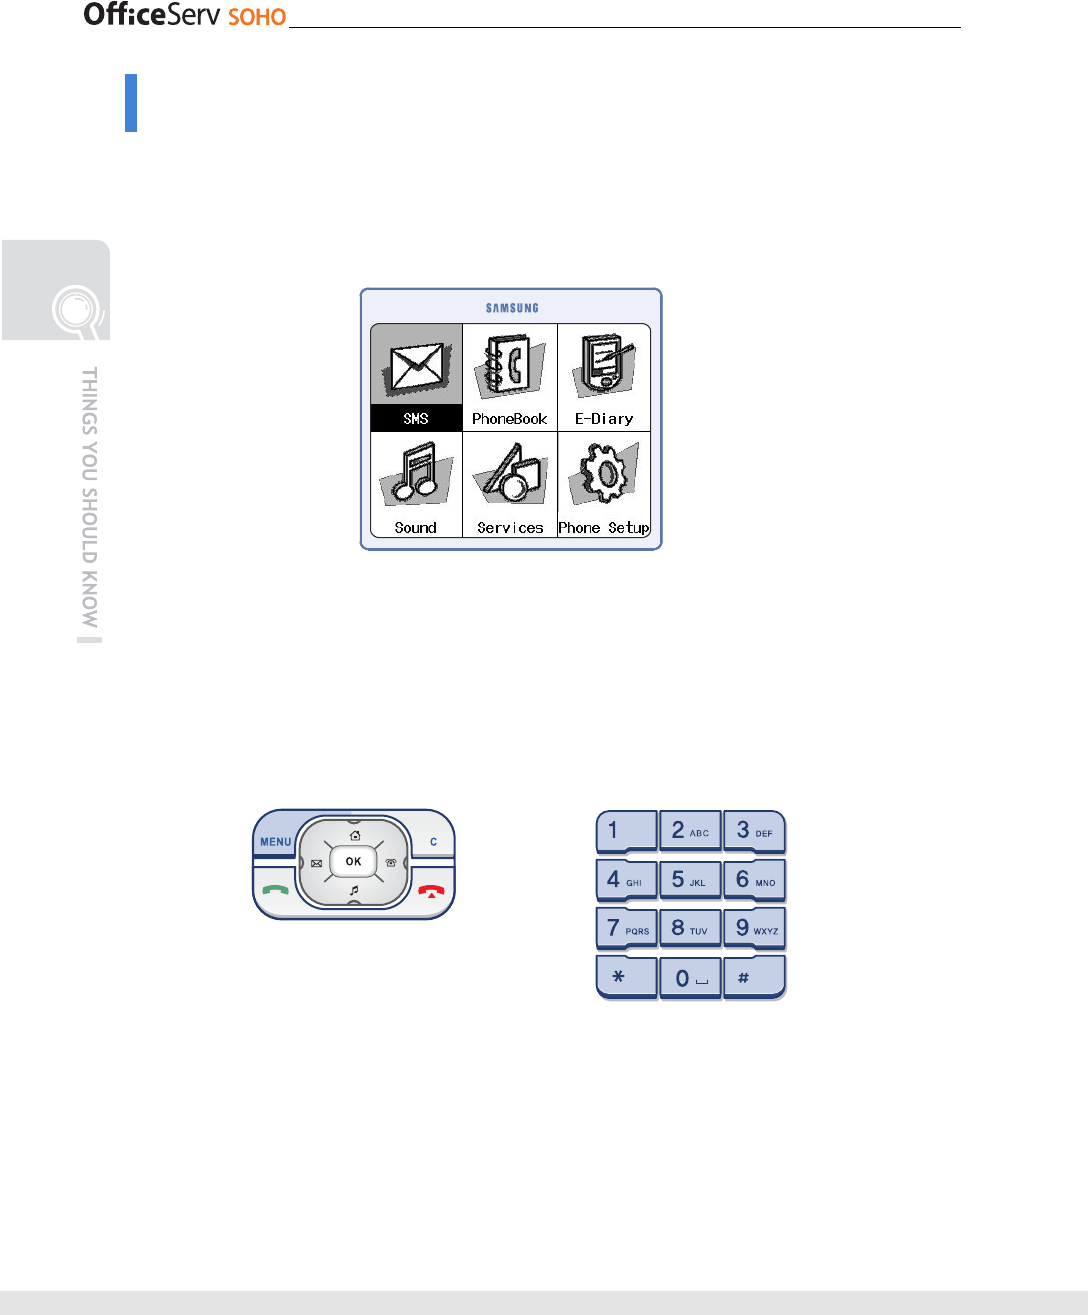
Menu Screen
You can display the Menu screen by pressing the [Menu] button while the OfficeServ
SOHO is in standby mode.
The Menu screen displays PhoneBook, E-Diary, Message, Conference, Phone Setup,
and WLAN functions as icons. This menu may be different according to the country.
Entering Characters
You can use the dial button and the [Menu] button of OfficeServ SOHO to enter or edit
letters, numbers, and special characters.
Dial Button
MENU Button
© SAMSUNG Electronics Co., Ltd. 37
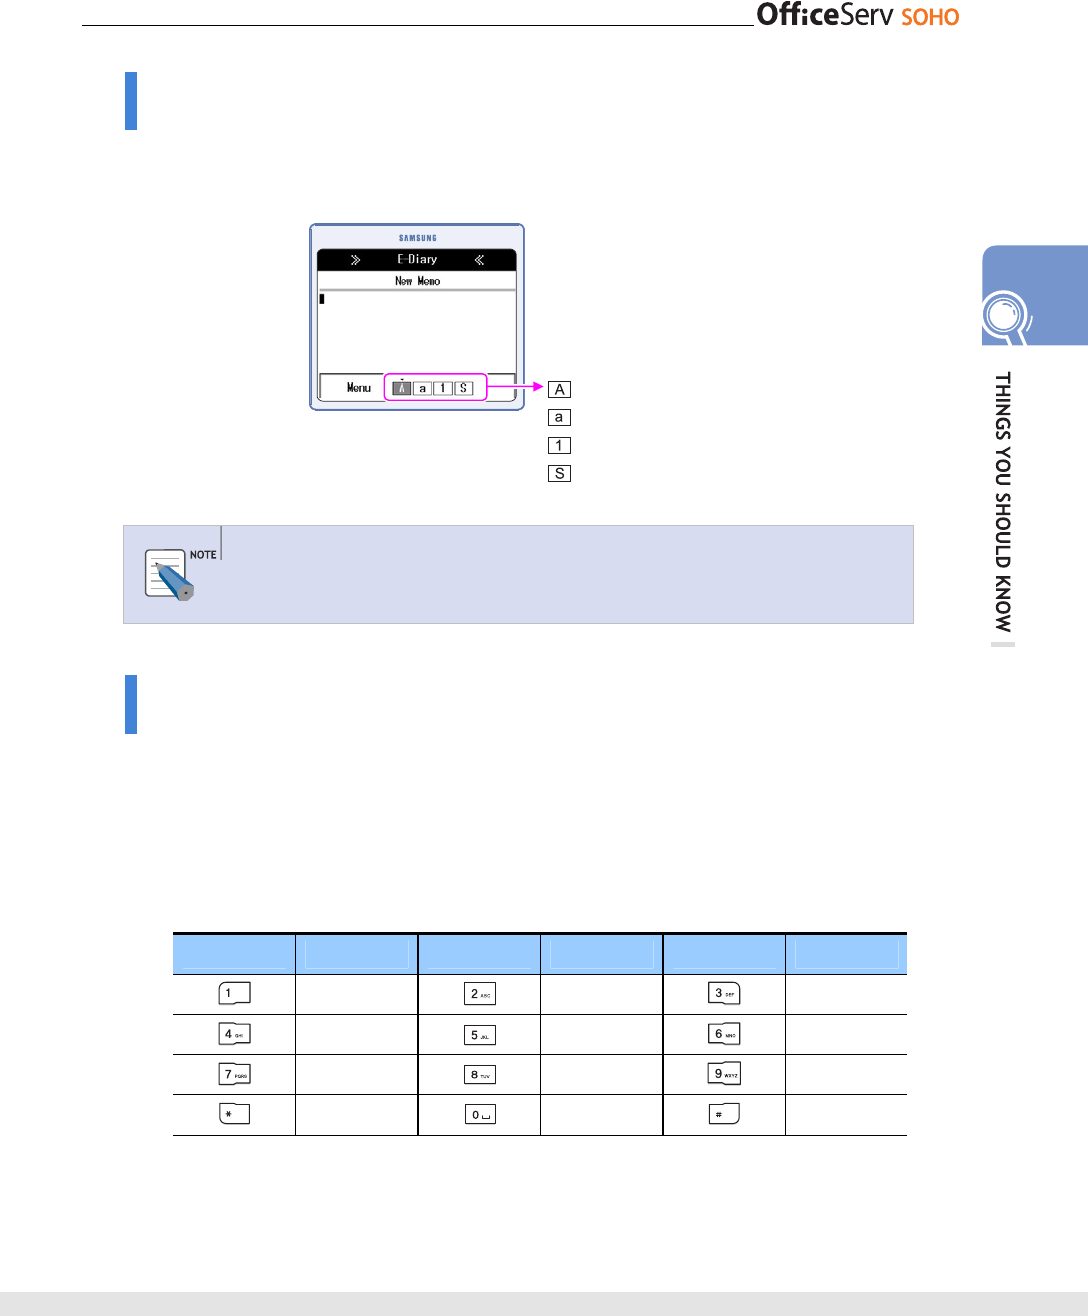
Selecting Entry Mode
Press the [Menu] button when the character input screen appears. Repeat pressing
[Menu] button until the cursor moves to the desired entry mode.
Character Entry Mode
Character entry mode is set to ‘Capital Alphbet’ by default.
Entering Characters
1.
Press the [Menu] button and select the capital/small alphabet mode.
2.
Press the dial button to enter or edit characters.
(For uppercase)
Dial Button Character Dial Button Character Dial Button Character
A B C D E F
G H I J K L M N O
P Q R S T U V W X Y Z
* / . space # @ -
: Capital Alphabet
: Small Alphabet
: Number
: Special Character
38 © SAMSUNG Electronics Co., Ltd.
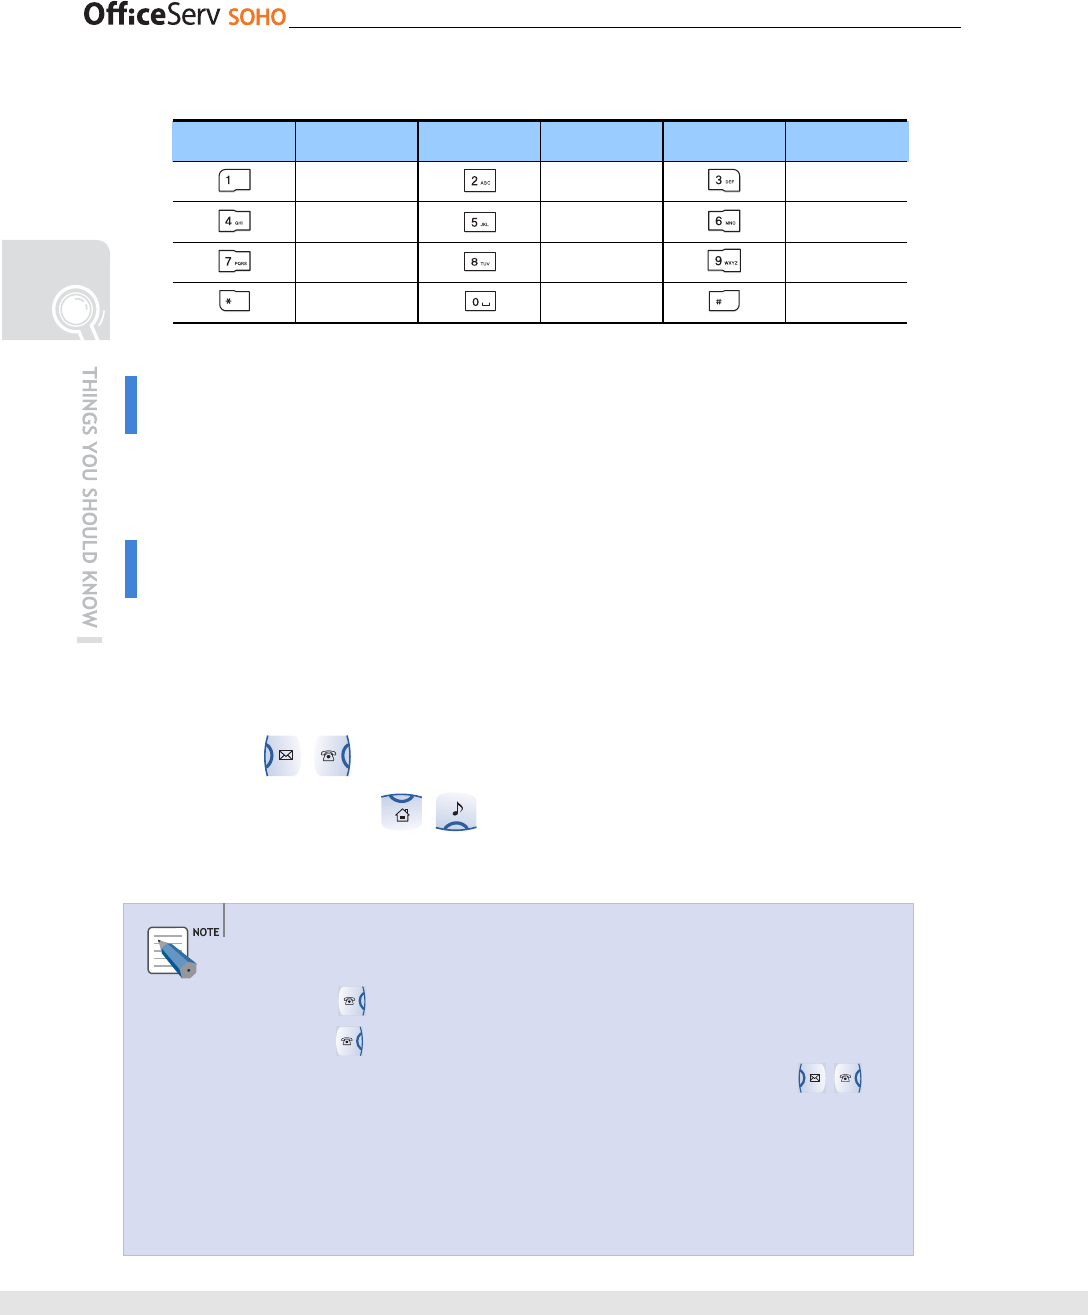
(For lowercase)
Dial Button Character Dial Button Character Dial Button Character
a b c d e f
g h i j k l m n o
p q r s t u v w x y z
* / . space # @ -
Entering Numbers
Select number entry mode by pressing [Menu] button, and press the corresponding
dial button.
Entering Special Characters
1.
Press the [Menu] button and select the special character mode. Available special
characters will appear below the entry screen.
2
.
Press direction buttons to select a special character and press
[OK] button. Press direction buttons to select another type of
special character.
Entering Characters
- If the character to be entered is same as the character immediately entered,
press the button and move the cursor one space to the right.
- Press the button to enter a space.
- To enter a space between two characters already entered, press the
direction button to move to the character that should be right after the space
and press the [0] button.
- Press the [C] button to erase an entered character. Press the [C] button briefly to
erase characters one by one, or press and hold the button to erase all
characters.
© SAMSUNG Electronics Co., Ltd. 39
MAKING CALLS
Before Making a Call
The means and features for making calls are summarized in the table below.
For procedures on using the functions, refer to the corresponding descriptions.
Category Intercom Call External Call
Call method Handset, speakerphone
- Making intercom calls
- Callback
- Making external calls
- Auto Redial
- Callback
- New Call
Feature
- Dialing the most recent dialed number
- Dialing using the recent call log
- Speed dialing
- Dialing numbers saved in [M](memory) button
- Dialling using the PhoneBook
- Dialling using the LCR function
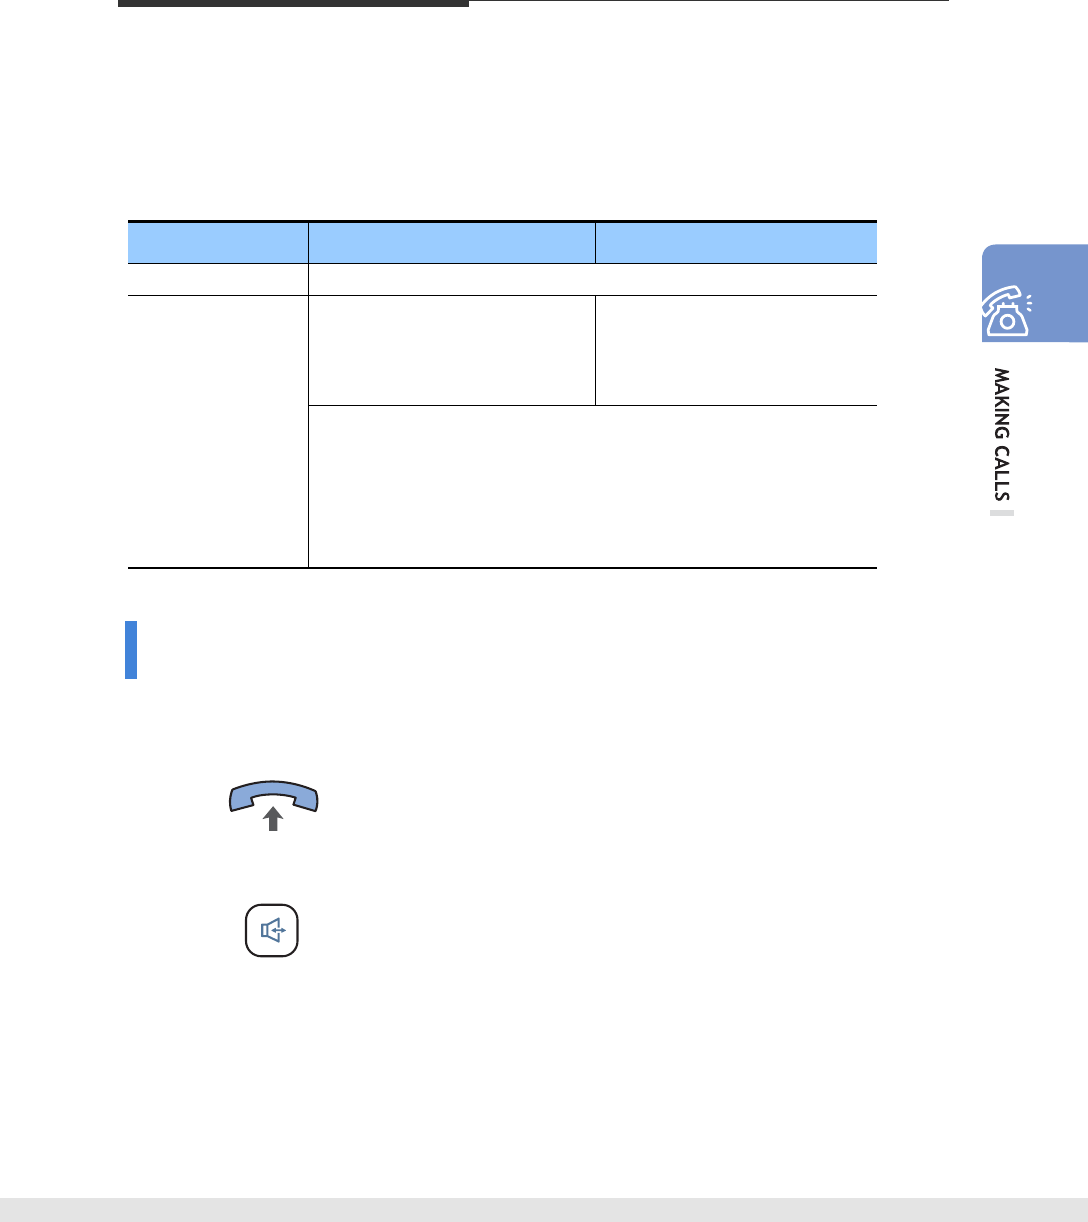
Calling Method
Calls can be made by using the handset or speakerphone.
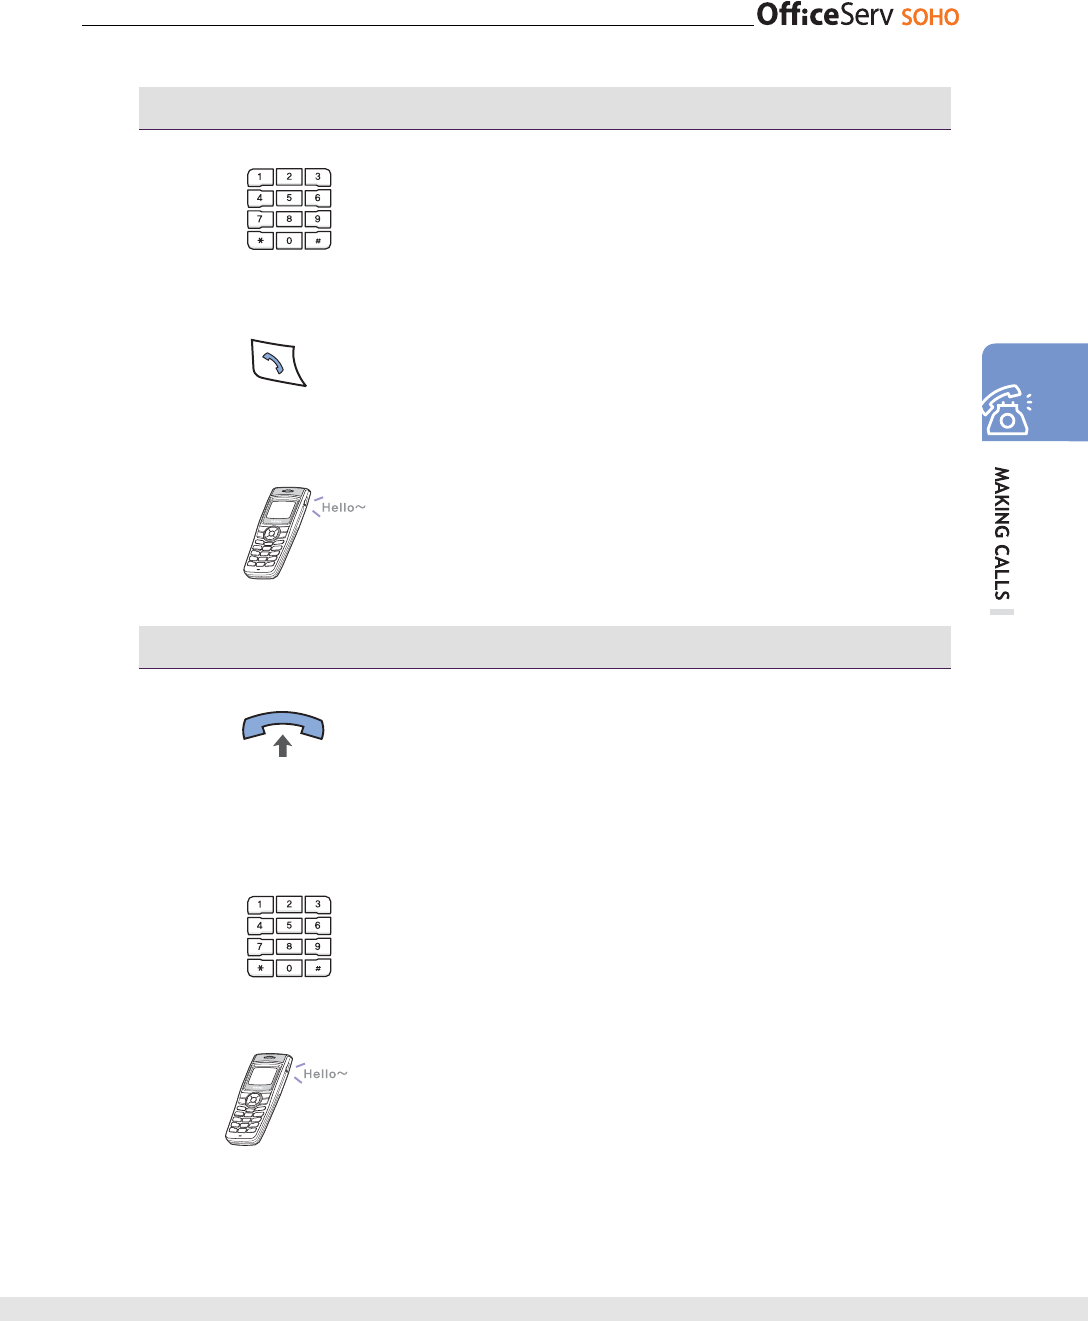
Using Handset
Lift the handset and enter the phone number.
Then press [Send] button.
Using Speakerphone
Press [Speaker] button, enter a phone number,
and then press [Send] button without lifting the
handset to make a call. Listen to the voice and
speak to the microphone. Press [Speaker] button
again to end the call.
• You can lift the handset while speaking through
the speakerphone to continue the call by using the
handset.
40 © SAMSUNG Electronics Co., Ltd.
Making Intercom Calls
This section describes how to make an internal call.
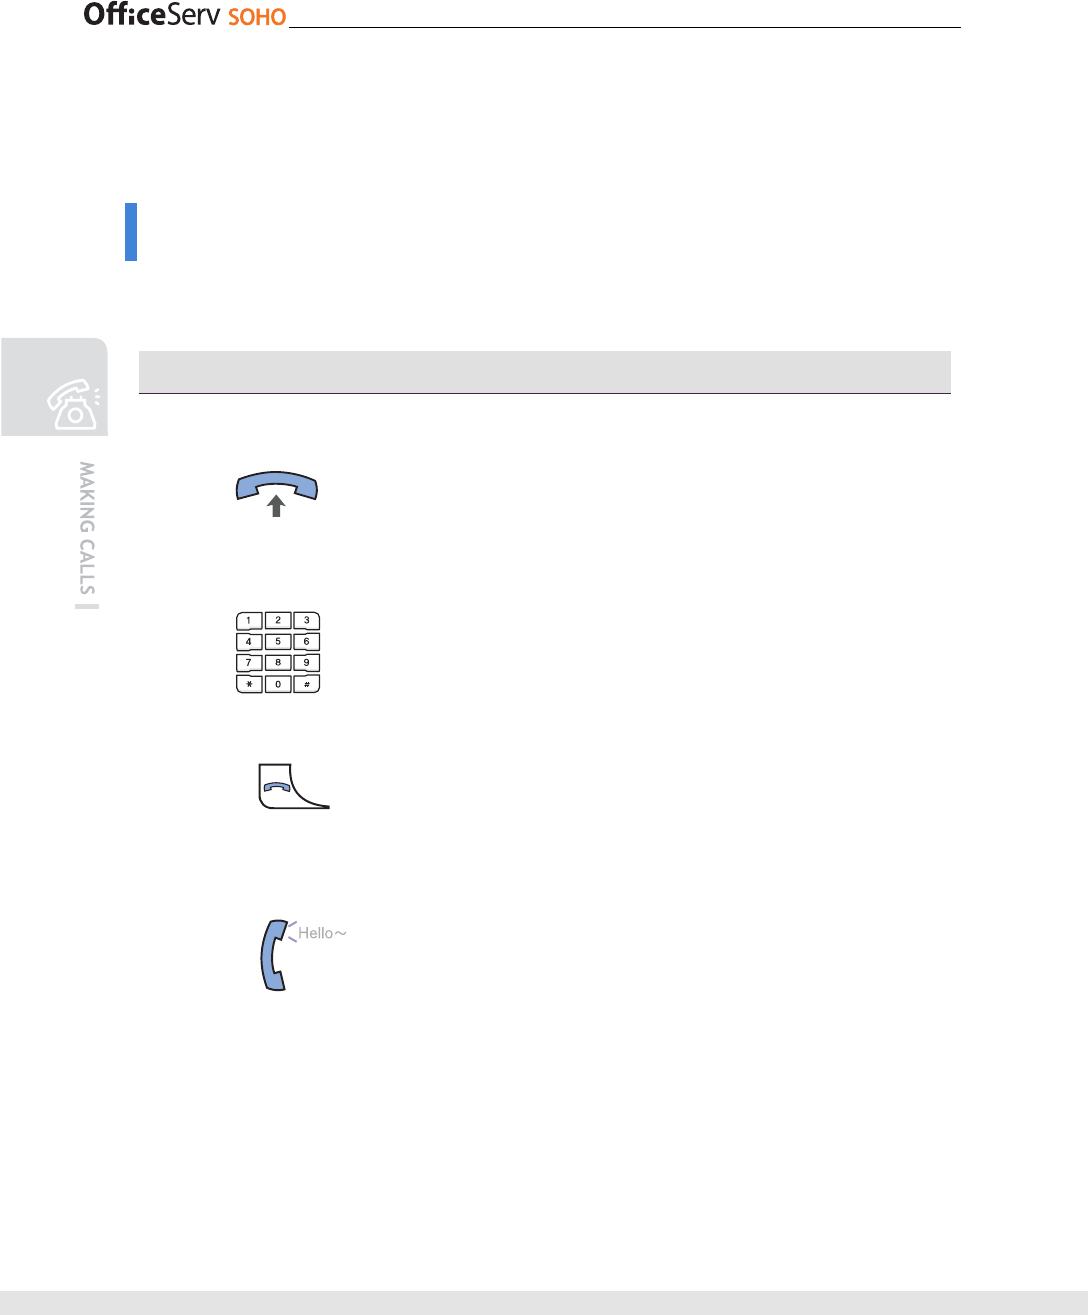
Making an Intercom Call
This function is used for making an internal call from OfficeServ SOHO to a WLAN phone
or vice versa.
Calling From OfficeServ SOHO to WLAN phone
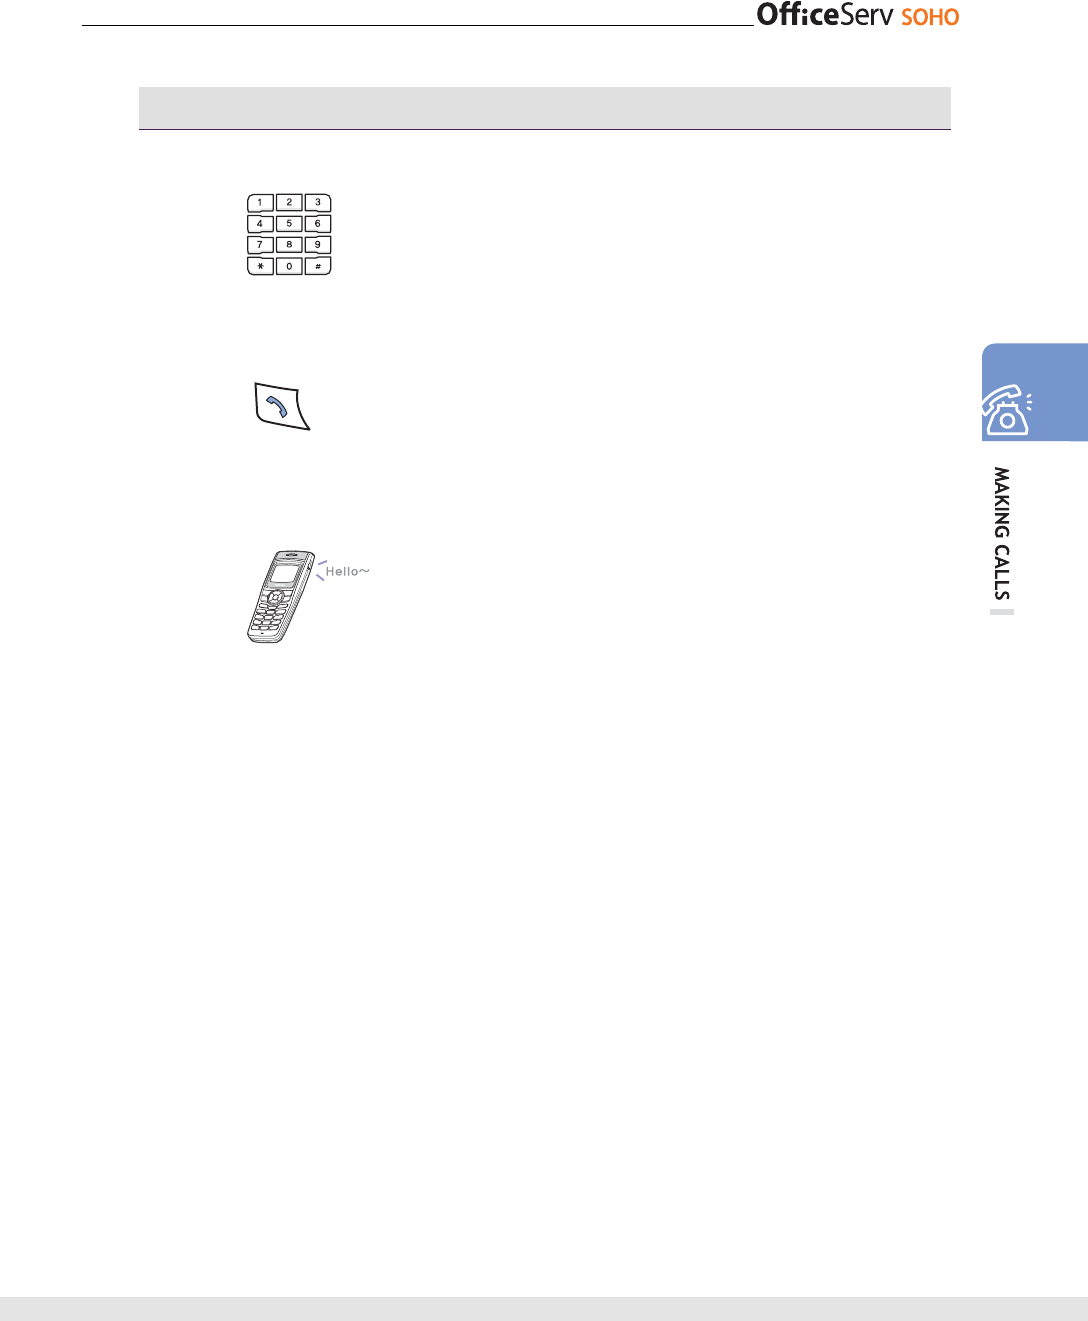
1.
Lift the handset.
• Press [Speaker] button to speak through the
speakerphone.
2.
Press the number of the recipient’s station.
3.
Press the [Send] button.
A connecting tone will be played.
4.
Start conversation when the recipient answers.
© SAMSUNG Electronics Co., Ltd. 41
Calling from WLAN phone to OfficeServ SOHO or to Another WLAN phone
1.
Press the number of the recipient’s station.
2.
Press the [Send] button to hear a connecting tone.
3.
Start conversation when the recipient answers.
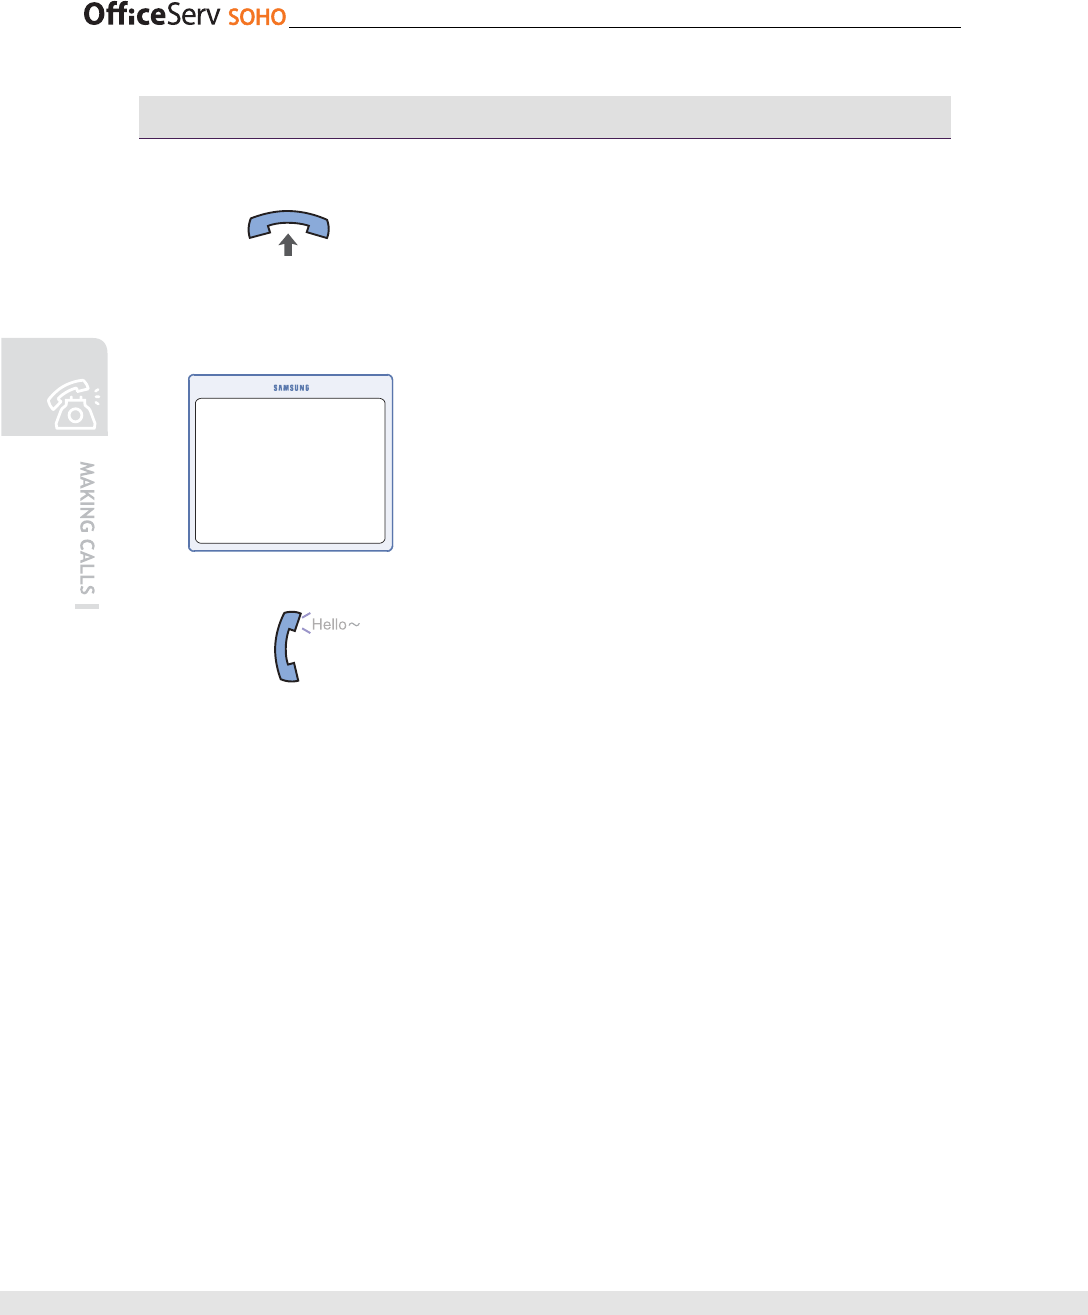
Calling from a/b port phone to OfficeServ SOHO or to WLAN phone
1.
Lift the handset of the a/b port Phone
2.
Press the number of the recipient’s station.
3.
Start conversation when the recipient answers.
42 © SAMSUNG Electronics Co., Ltd.
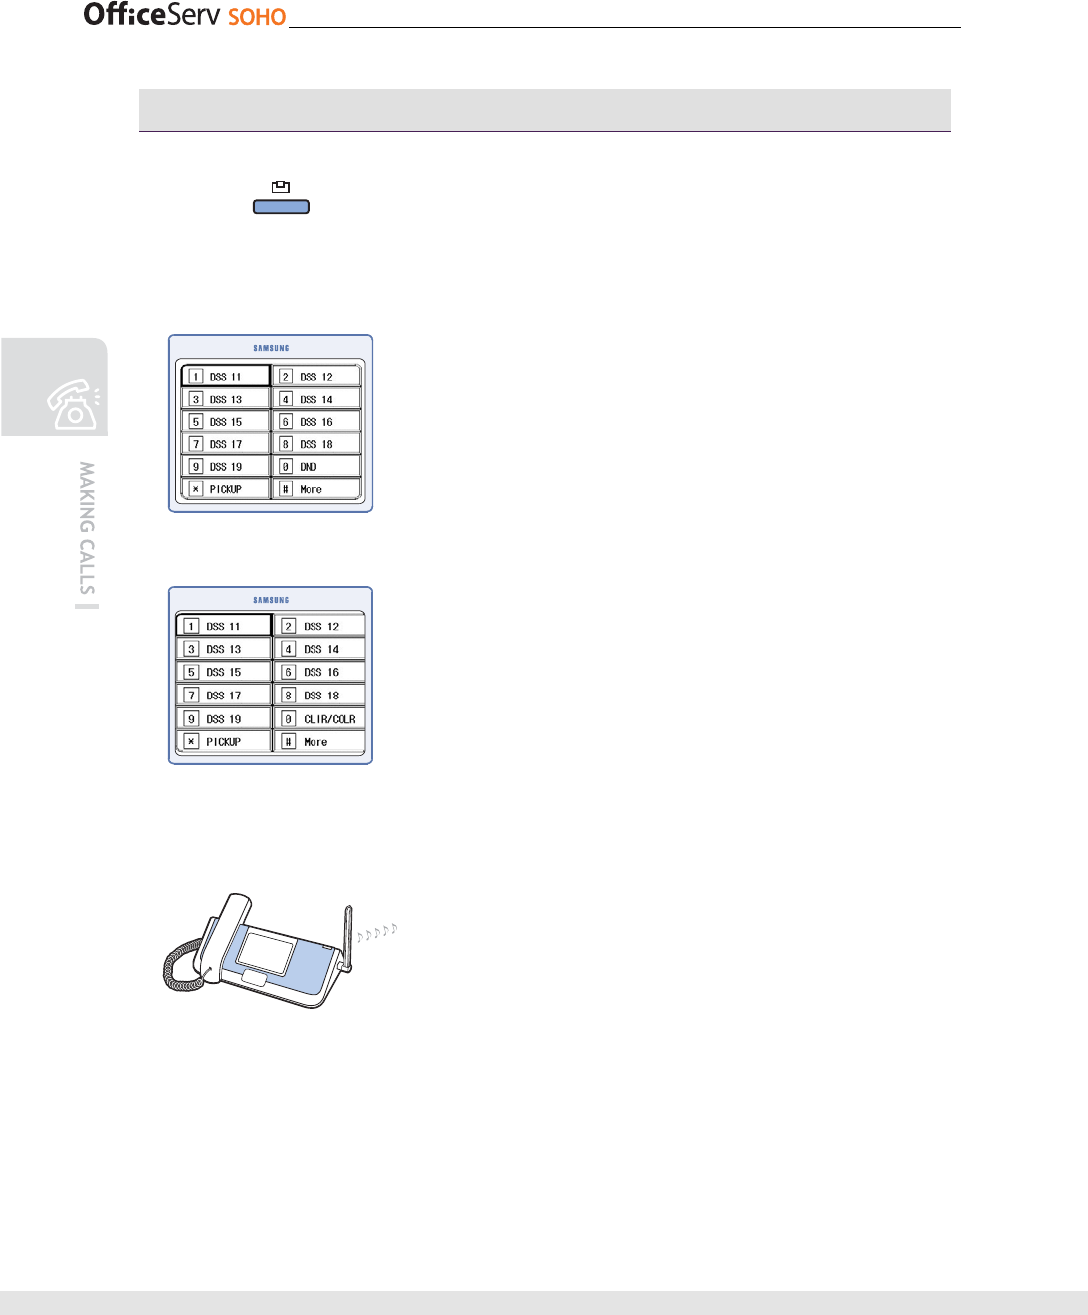
Calling from [Station Status Display Screen] of OfficeServ SOHO
1.
Press the [Internal Call] button while the phone
is in standby mode.
2.
Select a WLAN phone from the ‘Station Status
Display Screen’.
3.
Press the [OK] button to dial the selected station.
• In case an unregistered WLAN phone is selected the
‘Plug out’ message appears.
<PSTN Type>
<ISDN Type>
© SAMSUNG Electronics Co., Ltd. 43
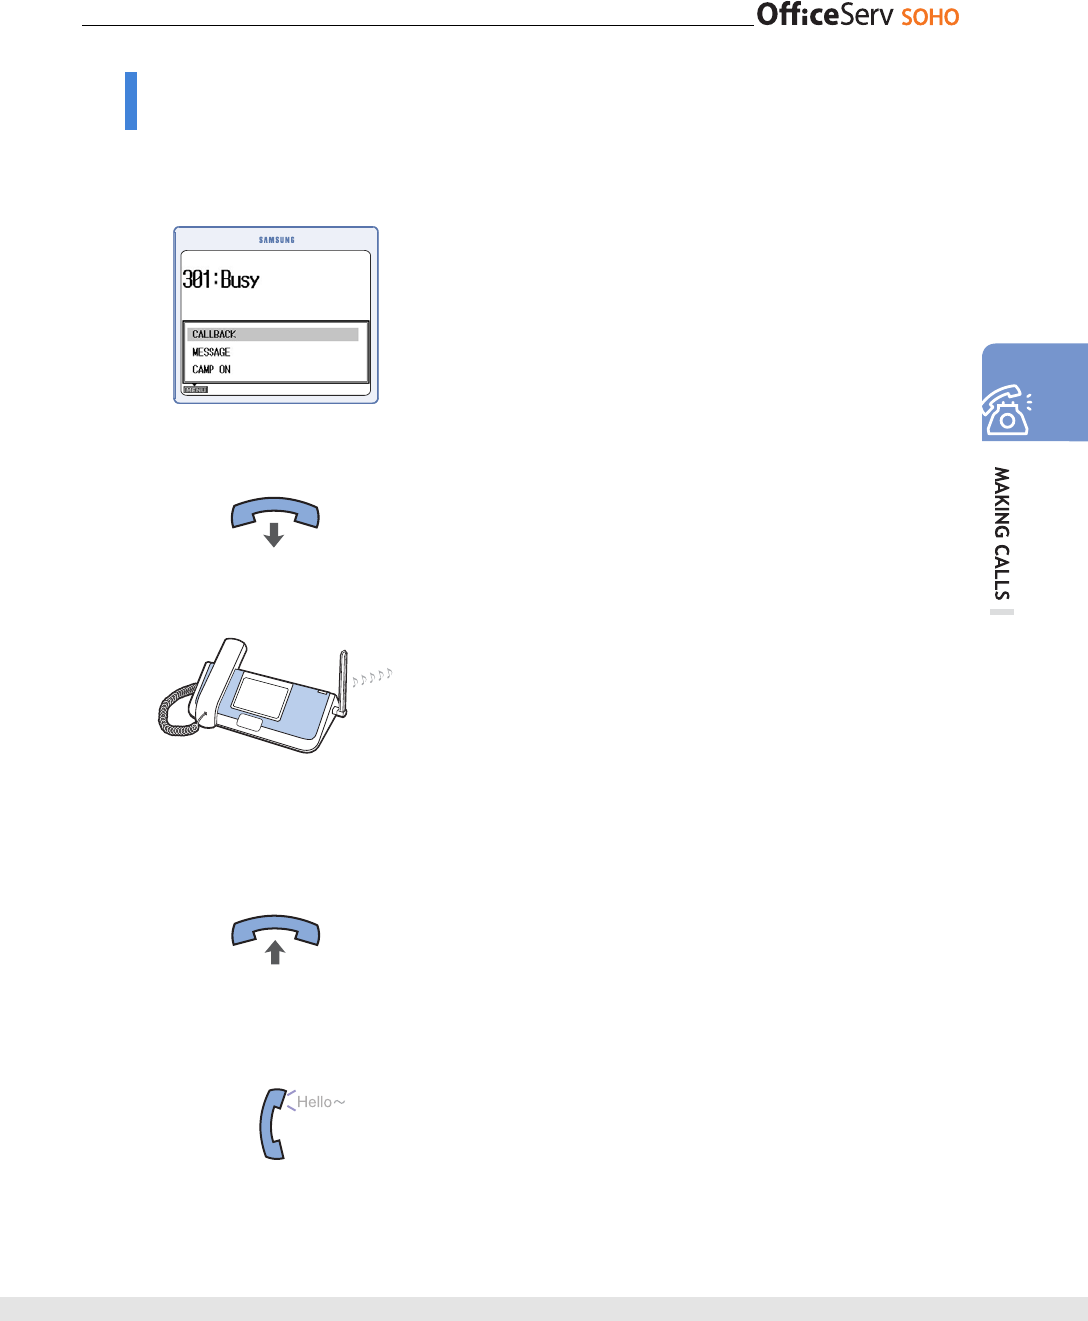
Callback
When you make an internal call but if the recipient is busy, you can reserve a call on the
recipient’s station.
1.
If you hear a busy tone on making a call, press
[Menu] button and select [CALLBACK].
2.
On hearing the confirmation tone, replace the
handset.
3.
Your phone rings when the recipient finishes the
earlier call.
• A message indicating callback is displayed on the
LCD.
4.
Lift the handset and the recipient’s station will ring.
5.
Start conversation when the recipient answers.
44 © SAMSUNG Electronics Co., Ltd.
Making External Calls
This chapter describes how to make an external call from OfficeServ SOHO or a WLAN
phone.
Making an External Call
This function is used for making an external call from OfficeServ SOHO or a WLAN phone.
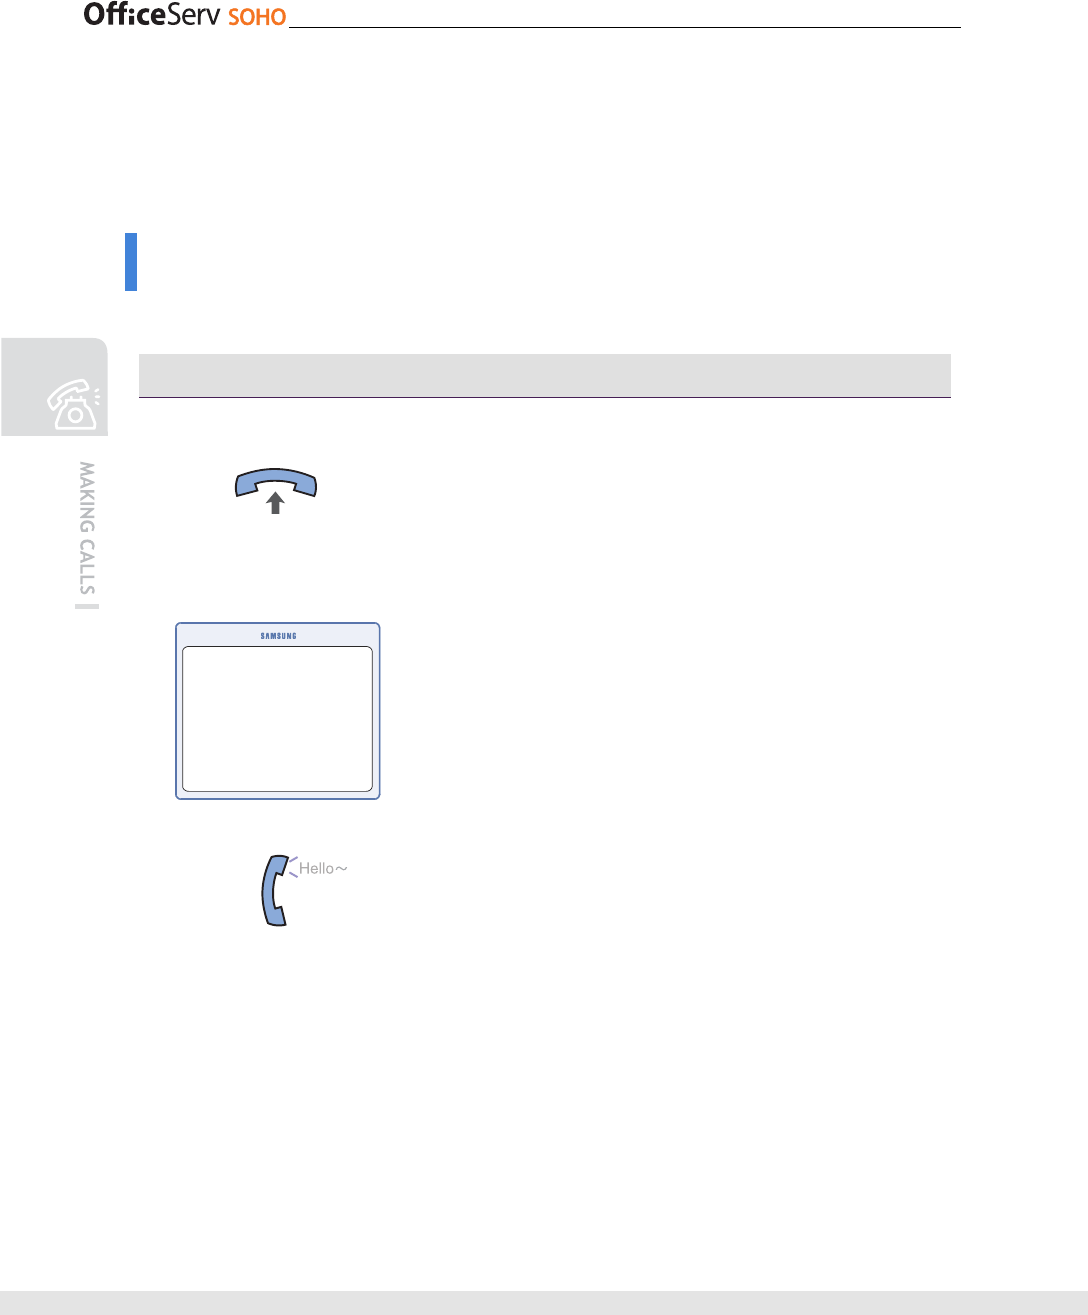
Calling from OfficeServ SOHO
1.
Lift the handset.
• Press [Speaker] button to call through the
speakerphone.
2.
When the ‘Please Dial’ message appears on the
LCD, enter the recipient’s number.
3.
Start conversation when the recipient answers.
Please Dial
© SAMSUNG Electronics Co., Ltd. 45
Calling from Mobile
1.
Enter an external phone number.
2.
Press the [Send] button to hear a connecting tone.
3.
Start conversation when the recipient answers.
46 © SAMSUNG Electronics Co., Ltd.
Calling from a/b port phone
1.
Lift the handset of a/b port phone.
2.
Enter the Trunk Access Number first, and enter
the recipient’s number.
3.
Start conversation when the recipient answers.
Please Dial
© SAMSUNG Electronics Co., Ltd. 47
Making Calls Using Pause
You can use the pause function when making a call from the OfficeServ SOHO or from a
WLAN phone to an Automatic Response System(ARS).
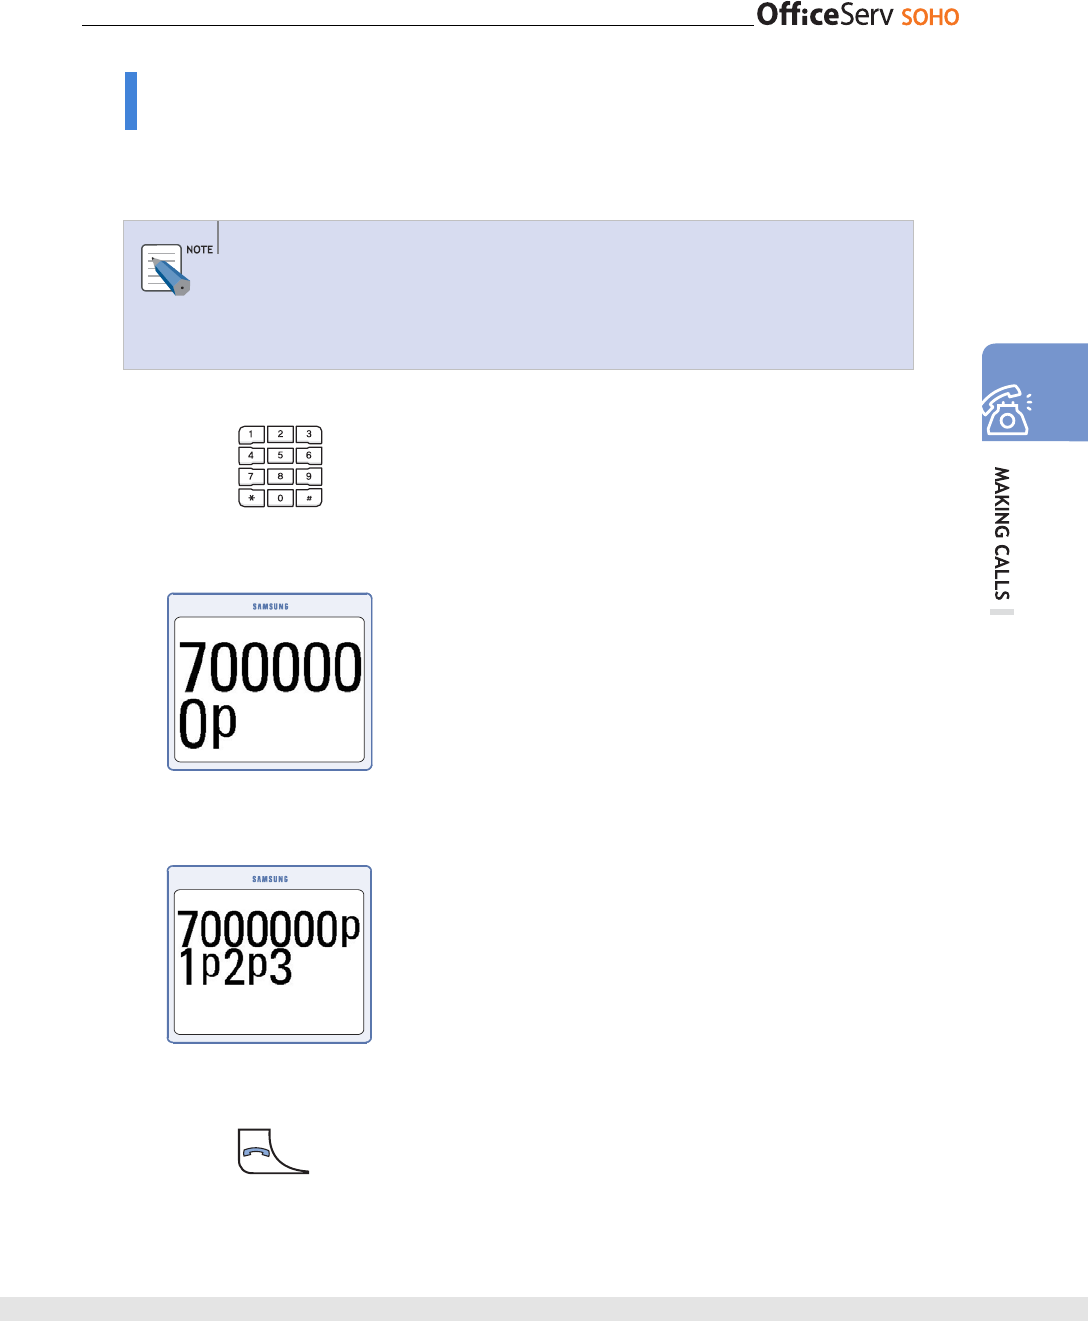
Pause Function
Pause function refers to using the pause character when dialing numbers for
making a call to an Automatic Response System(ARS) such as telebanking. Note
that some ARS may not be able to recognize electronic dialing.
1.
Enter an ARS number(e.g., Telebanking).
2
.
Press [Menu] and enter the pause character ‘p’.
3.
Enter the function numbers to be used for the
ARS.
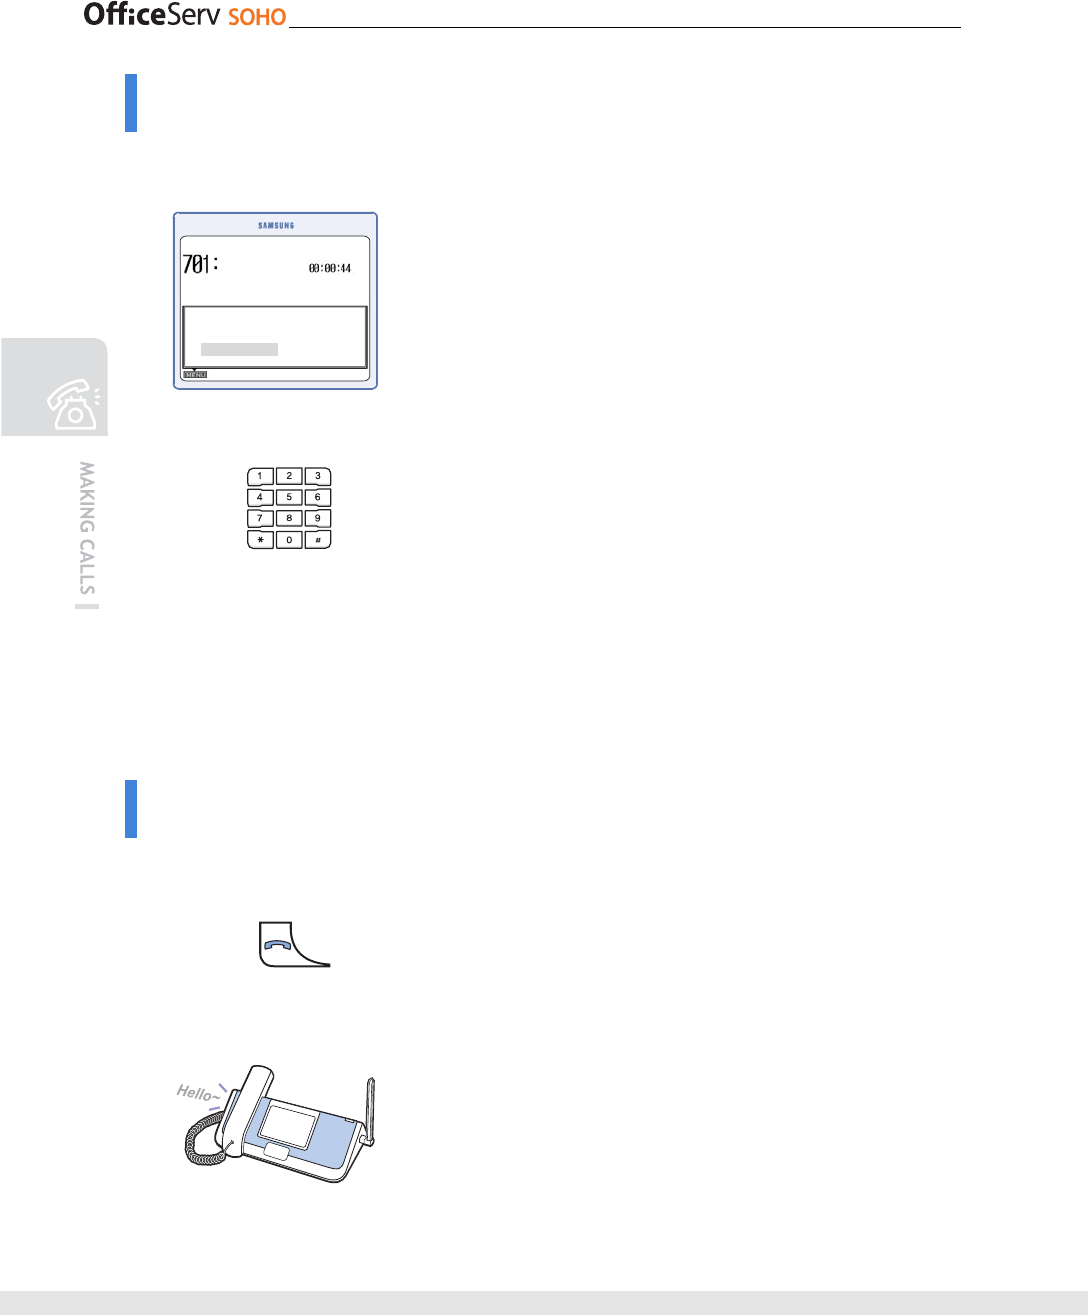
4.
Press [Send] to connect to the ARS and to
automatically execute the functions
corresponding to the entered function numbers.

48 © SAMSUNG Electronics Co., Ltd.
Auto Redial
When you make an external call but if the recipient is busy, you can use this function to
redial the same number periodically until the recipient answers the call.
1.
If you hear a busy tone on making a call, press
[Menu] button and select [RETRY].
2.
Replace the handset and wait until the call is
connected. The ‘wait for redial’ message is
displayed on the LCD, and the number is
redialled periodically.
• If the recipient continues to be on the phone,
auto redial will be performed up to 99 times,
and then the auto redial mode will be released.
3.
When the recipient answers the call, lift the
handset or press the [Speaker] button to start
conversation.
• The Speaker LED is blinked until answering the call.
Canceling Auto Redial
To cancel the auto redial function, press dial button, [Speaker] button or lift and
replace the handset.
RETRY
NEW CALL
TRUNK FLASH
<PSTN Type>
USER BUSY
RETRY
<ISDN Type>

© SAMSUNG Electronics Co., Ltd. 49
CALLBACK (CCBS / CCNR) (ISDN Only)
If the external called does not answer(CCNR) or is busy(CCBS), you can reserve the call
pressing [CALL BACK] in soft menu. This function is serviced ISDN network.
1.
Press [Menu] [CALL BACK], if the external
called does not answer of is busy.
2.
On hearing the confirmation tone, replace the
handset.
3.
When the called is IDLE state, OfficeServ SOHO
is called the reserved number automatically.
50 © SAMSUNG Electronics Co., Ltd.
New Call (PSTN Only)
This function allows you to make another call immediately after the current call.
1.
During a call, press [Menu] button and select
[NEW CALL].
2.
Press the target phone number on hearing
the dial tone.
Making Intercom / External Calls
This chapter describes how to make an external or intercom call from OfficeServ SOHO
or a WLAN phone.
Dialing The Most Recent Dialed Number
This function is used to dial the most recently dialed internal/external number.
1.
Press the [Send] button for at least 2 seconds.
2.
Speak through the speakerphone or handset.
Long~
RETRY
NEW CALL
TRUNK FLASH
© SAMSUNG Electronics Co., Ltd. 51
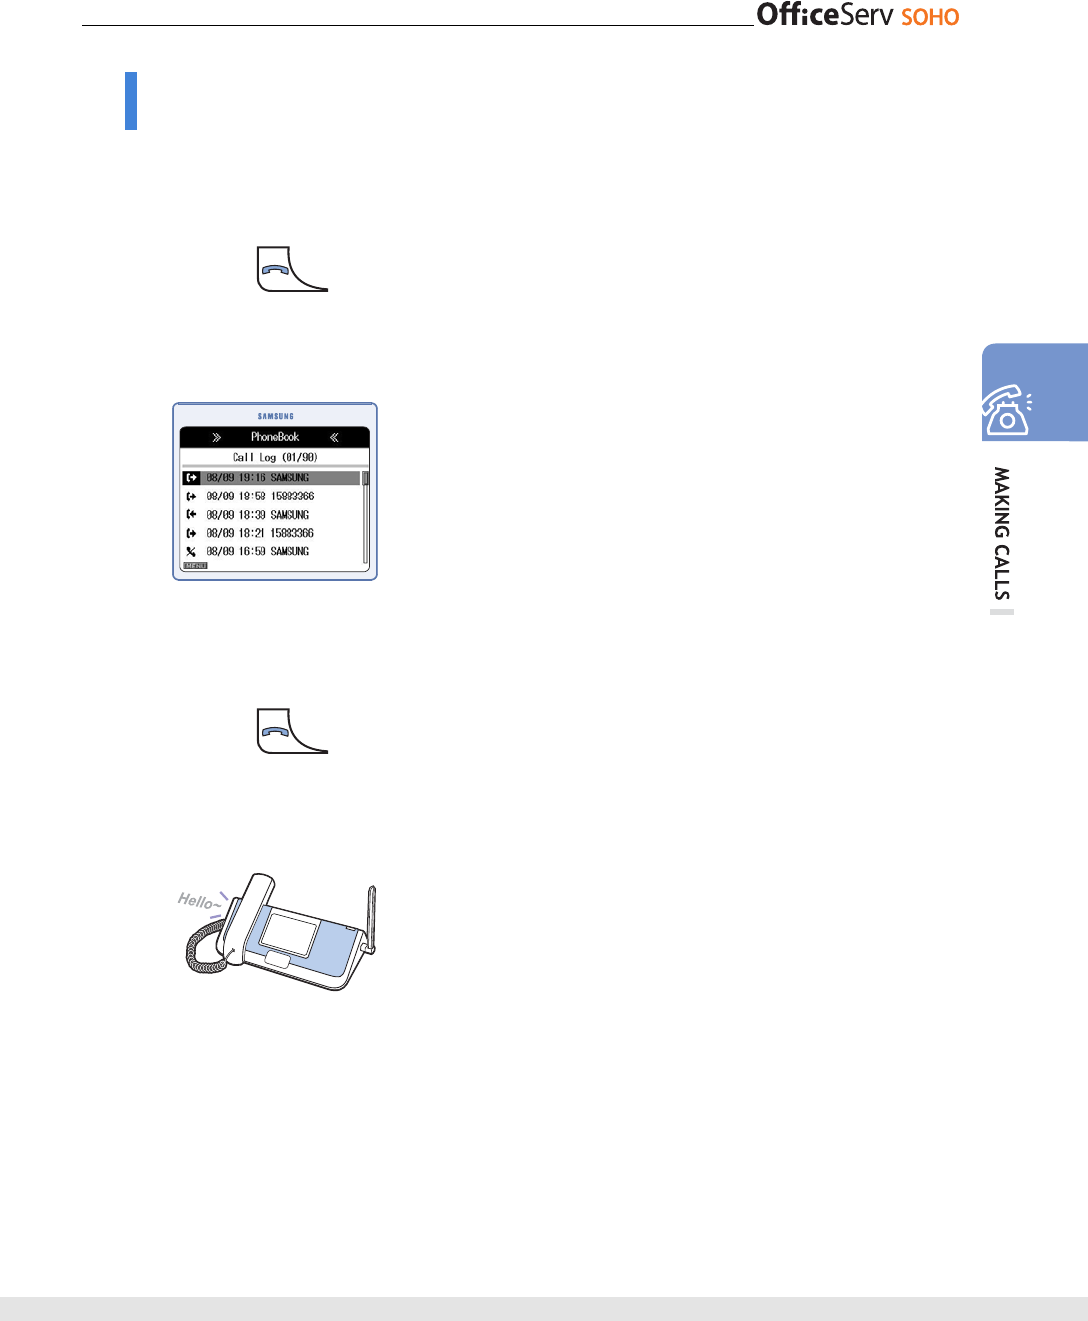
Dialing Using Recent Call Log
This function is used for making an internal or external call using a list of numbers
recently dialed.
1.
Press [Send] button while in standby mode.
• Press the [Send] button briefly to display the call
log, or press and hold the button to dial the most
recently dialed number.
2.
Recently outgoing, incoming, and missed calls
are each displayed up to 32 numbers. Use
direction buttons and move to the intended
number.
• Press the [OK] button to display the user name,
registered to the phonebook, the call time, and call
duration.
3.
Press [Send] button to dial the selected number.
4.
Speak through the speakerphone or handset.

52 © SAMSUNG Electronics Co., Ltd.
Speed Dialing
By registering frequently used numbers to dialing buttons, you can dial a phone number
conveniently only by pressing the corresponding dialing button without entering the full
number. Dial buttons must be kept pressed to dial corresponding numbers.
1.
While in standby mode, press and hold the last
one of the speed dial buttons registered in the
phonebook for at least 2 seconds.
2.
A call is made to the corresponding phone
number and the recipient’s phone rings.
3.
Start conversation when the recipient answers.
Registering Speed Dial Number
For procedure on registering a speed phone number, a speed phone number,
refer to the ‘PhoneBook’ section of ‘MENU’.
© SAMSUNG Electronics Co., Ltd. 53
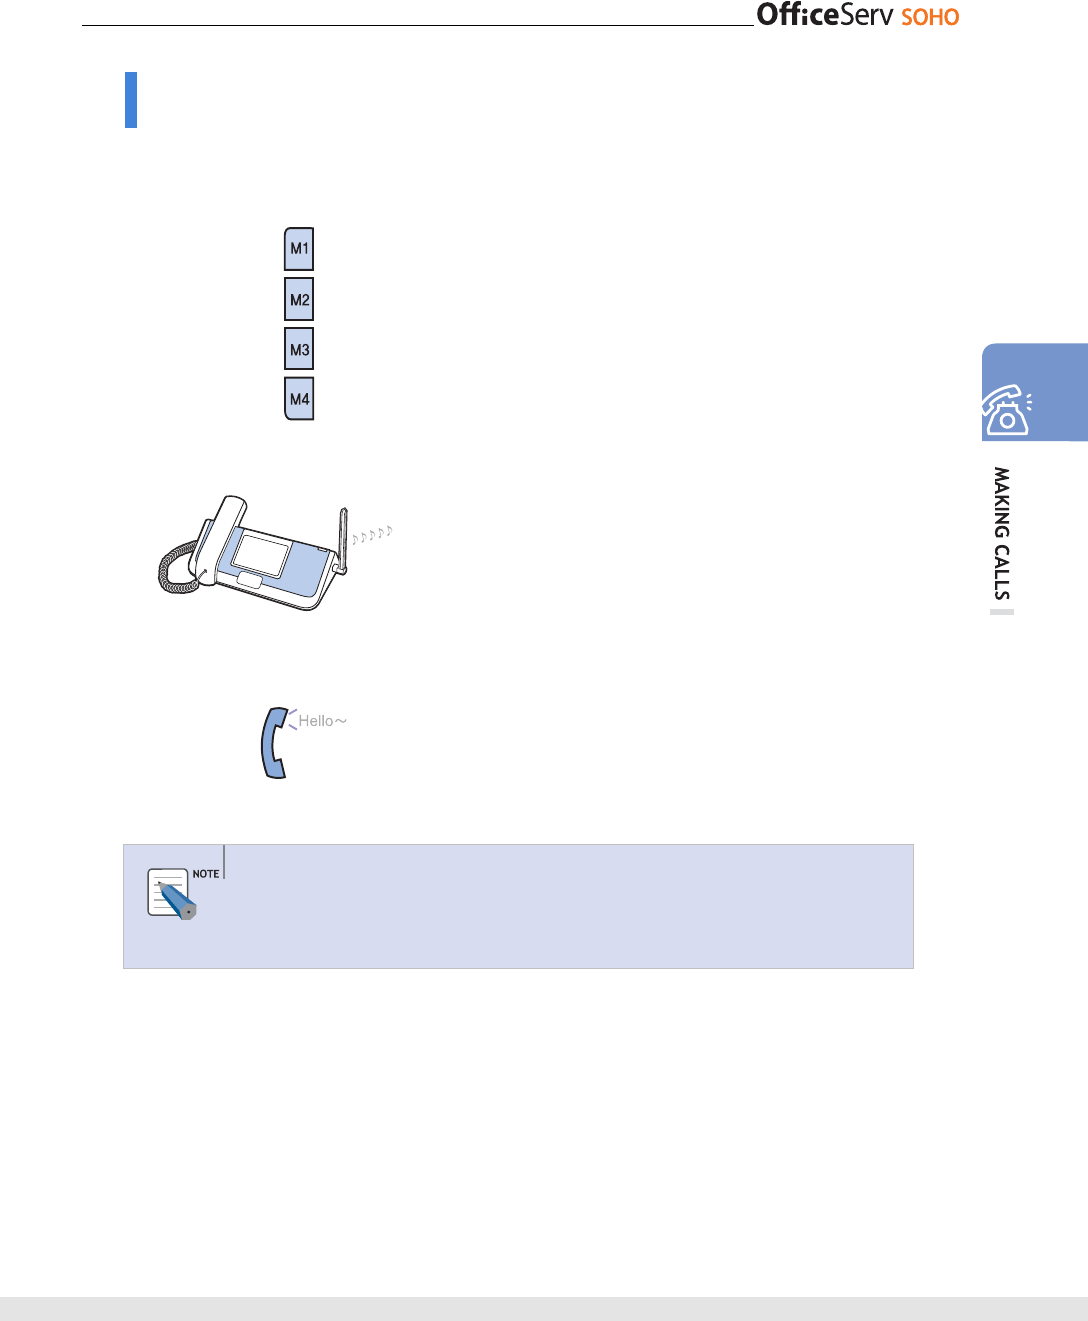
Dialing Numbers Saved in [M](Memory) Button
By registering a frequently used number to memory button, you can dial the number
conveniently only by pressing the memory button without entering the full number.
1.
Select the [M](Memory) button where the target
number is saved.
2.
A call is made to the corresponding phone
number and the recipient’s phone rings.
3.
Start conversation when the recipient answers.
Registering a Phone Number to [M](Memory) Button
For procedure on registering a number to a [M](memory) button, refer to the
‘PhoneBook’ section of ‘MENU’.
54 © SAMSUNG Electronics Co., Ltd.
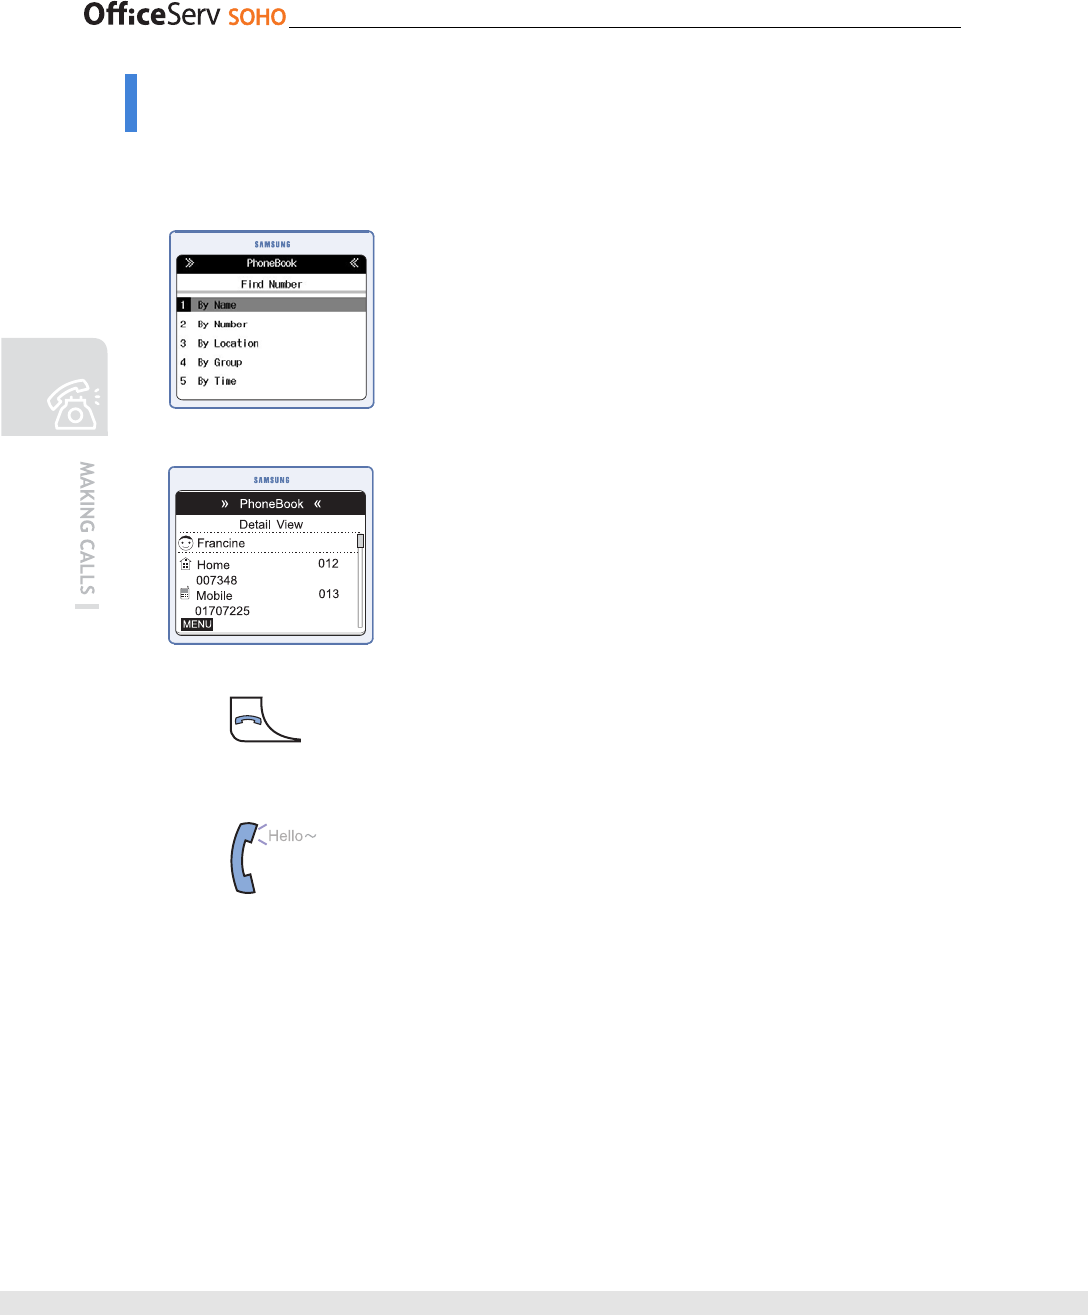
Dialing using the PhoneBook
You can save the names of up to 250 contacts in your PhoneBook. You can search for the
required telephone number using various criteria.
1.
[Menu] [Phone book] [1. Find Number].
Select the finding option.
• Options are By Name/ By Number/ By Location/ By
Group/ By Time
2.
Enter the information according to the option, and
select the number,
3.
Press [Send] button to dial the selected number.
4.
Start conversation when the recipient answers.
© SAMSUNG Electronics Co., Ltd. 55
ANSWERING CALLS
Before Answering Calls
The means and features for answering calls are summarized in the table below.
For procedures on using the functions, refer to the corresponding descriptions.
Category Intercom Call External Call
Call method Handset, speakerphone
Answering intercom calls Answering external calls Function
Call pickup
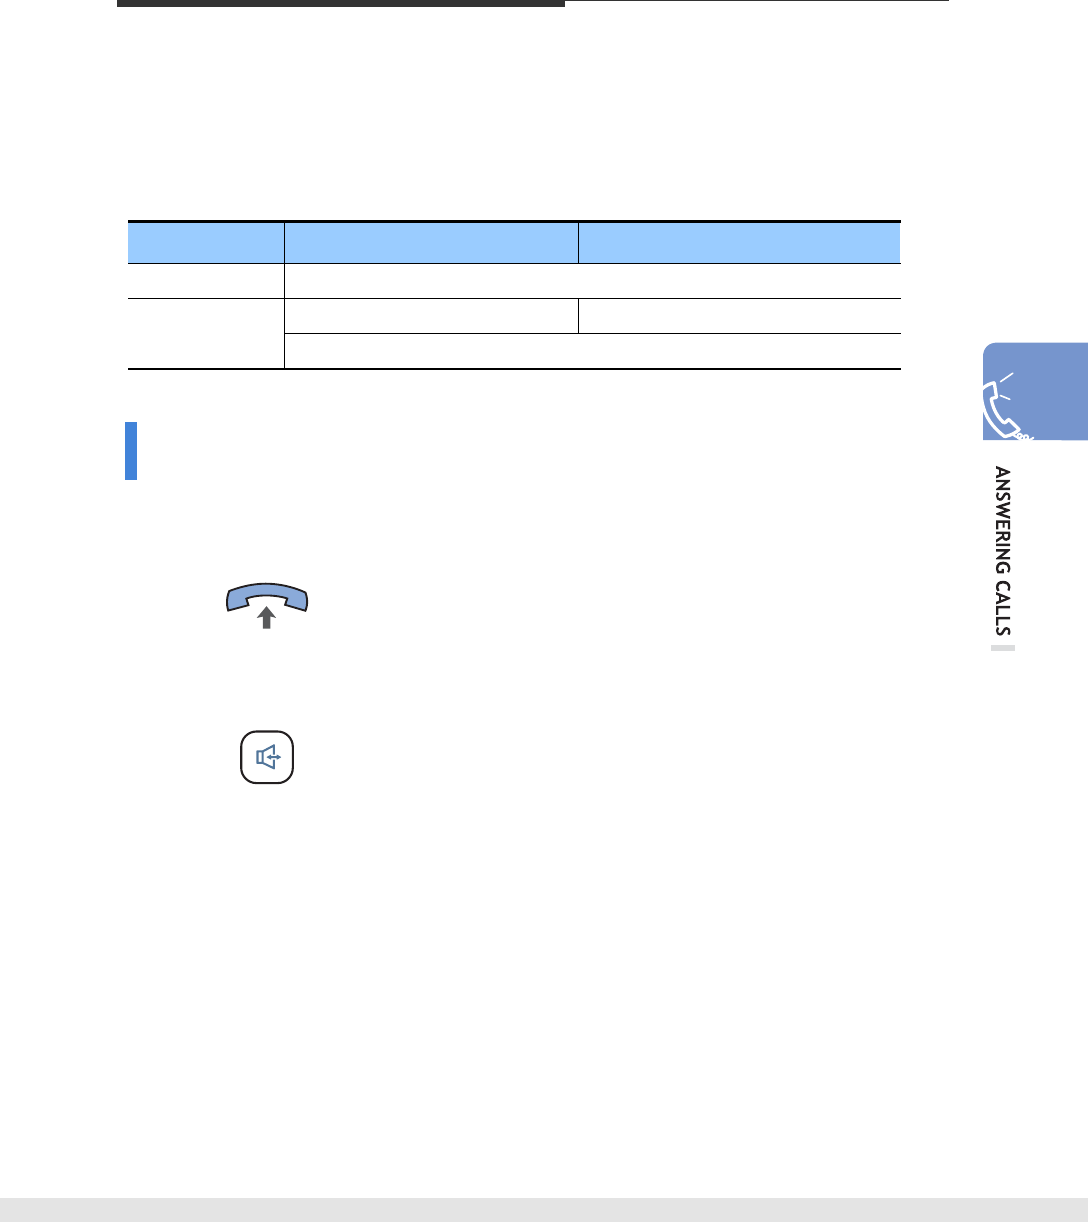
Answering Method
Calls can be answered by using the handset or speakerphone.
Using handset
Lift the handset to answer a call.
Using speakerphone
Press [Speaker] button without lifting the handset to
answer a call. You can hear the caller’s voice(or the
other party’s voice) through speaker and speak
through the microphone. Press the [Speaker]
button again to hang up.
• You can lift the handset while speaking through the
speakerphone to continue the call by using the
handset.
56 © SAMSUNG Electronics Co., Ltd.
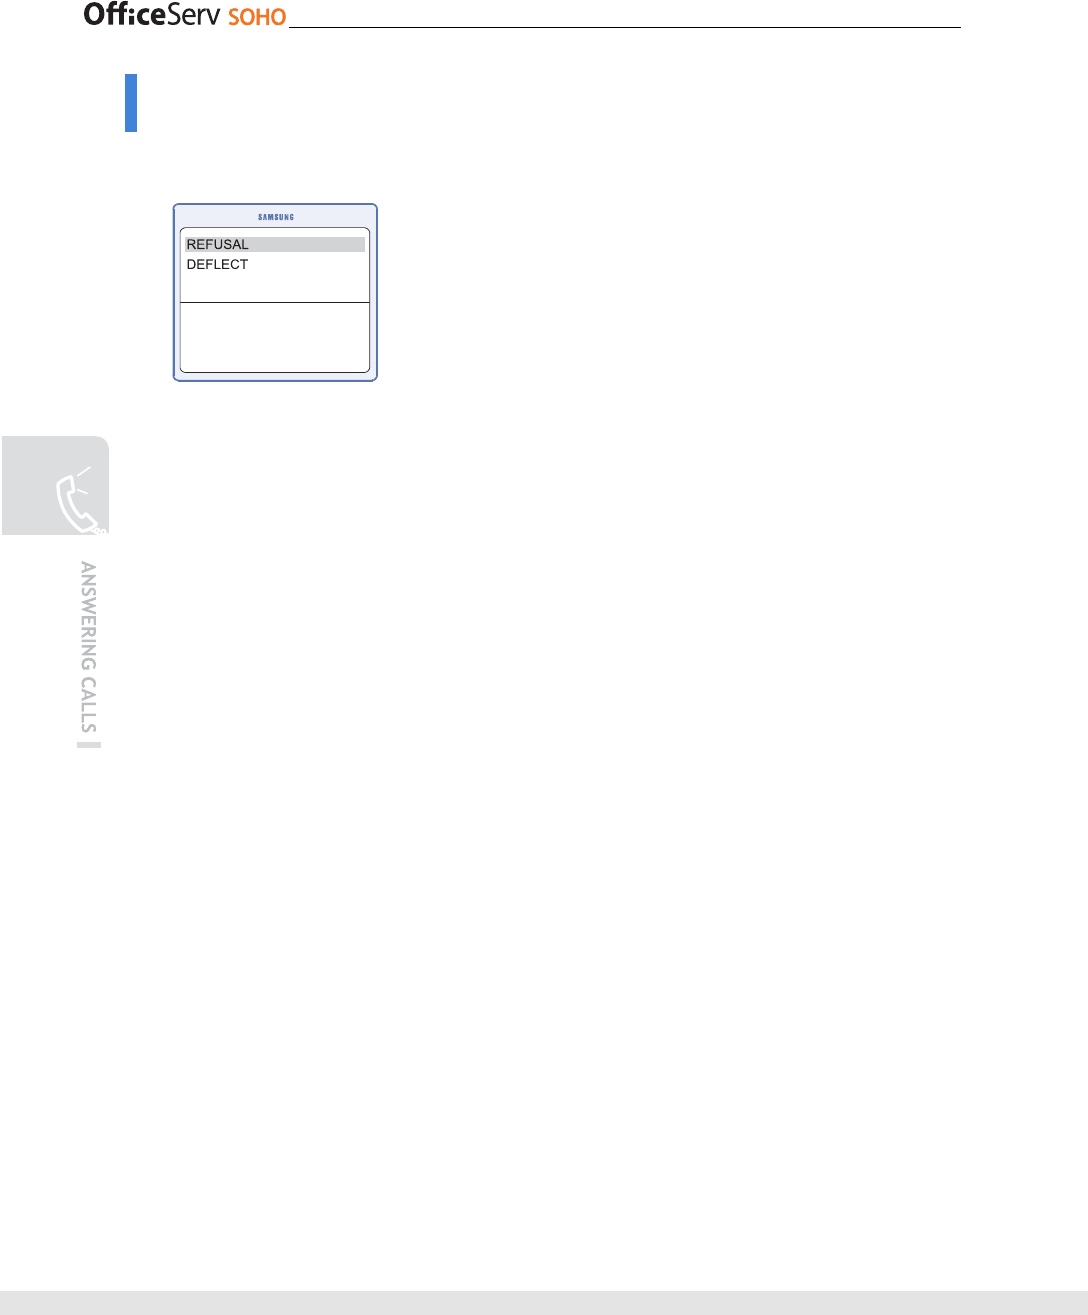
Call Refusal / Call Deflection
You can refusal or deflect the call you would not like to answer.
1.
The base station is ringing. The display shows
you the number of the caller. Select ‘REFUSAL’
or ‘DEFLECT’. And press [OK].
2.
If you select the DEFLECT, Enter the station
number you want the call diverted to. And press
‘#’ or [OK] button. If you press the ‘*’, it is cleared
the number you enter.
© SAMSUNG Electronics Co., Ltd. 57
Answering Intercom Calls
This function allows you to answer internal calls incoming to OfficeServ SOHO or a WLAN
phone.
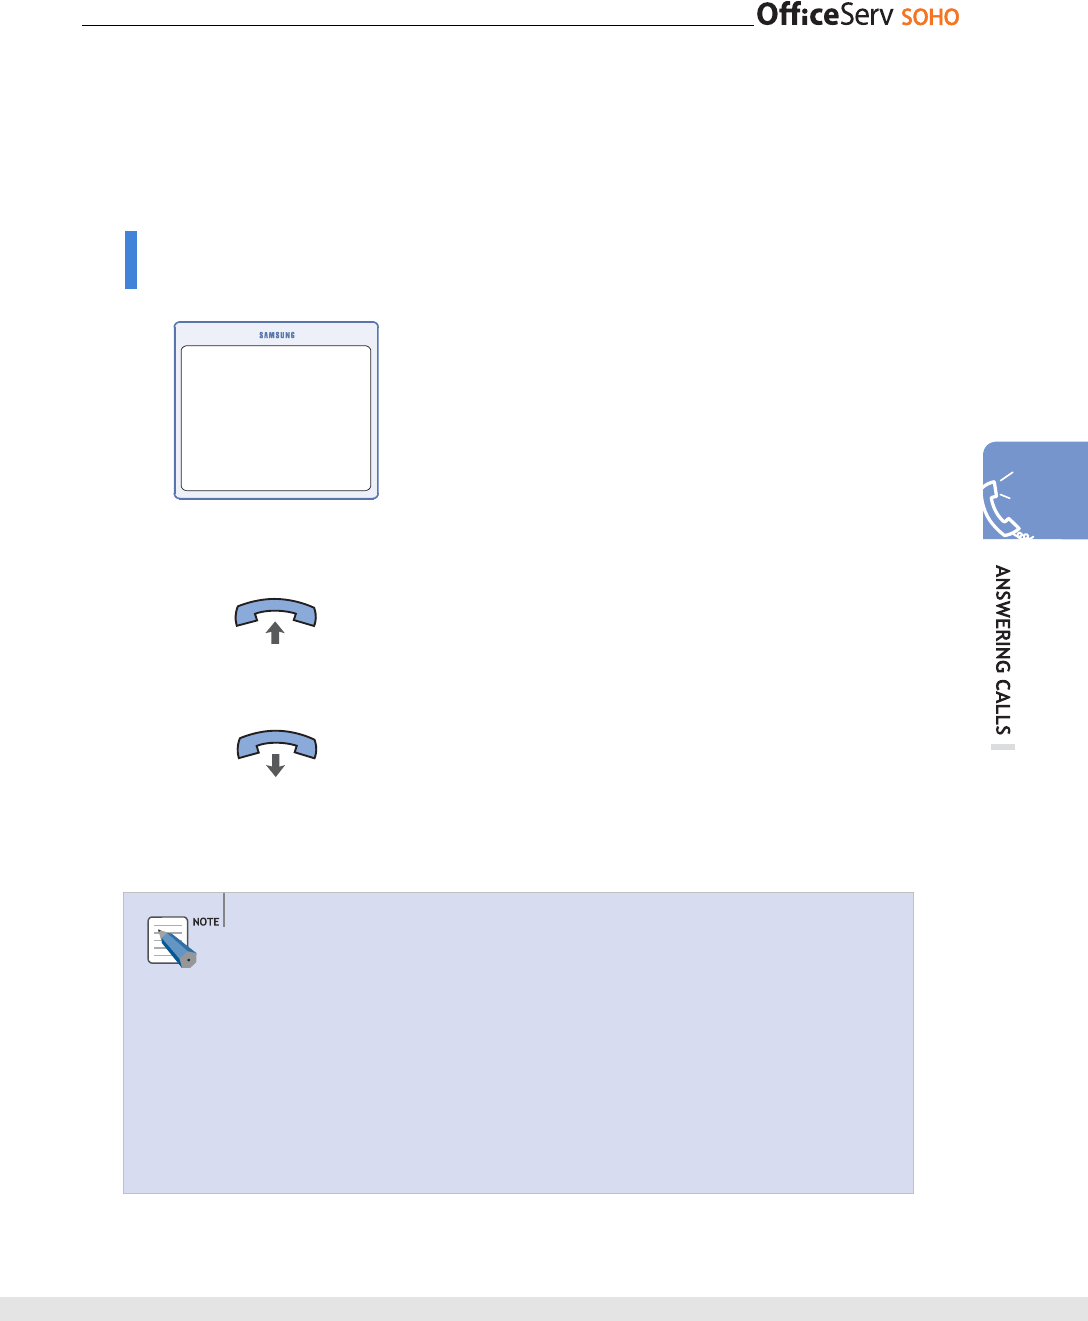
Answering from OfficeServ SOHO
1.
On receiving a call, the bell rings and an incoming
message is displayed on the LCD.
2.
Lift the handset to answer the call.
• Press the [Speaker] button to speak through
the speakerphone.
3.
Replace the handset to disconnect the call.
• Press the [Speaker] button again when using the
speakerphone.
Answering from OfficeServ SOHO
Press the [▼Vol▲] button while the bell is ringing to adjust the bell volume. If the
volume is set to mute, an incoming message is displayed on the LCD but the bell
does not ring.
Auto Answering setting
- PSTN: [Menu] [Phone Setup] [1. My Phone] [1. Feature On/Off] [2.Auto
Answer]에서 [Auto Answer] Set to ‘On’
- ISDN: [Menu] [Phone Setup] [1. My Phone] [1. Feature On/Off]
[3.Auto Answer] Set the Internal to ‘On’.
Call from
11
58 © SAMSUNG Electronics Co., Ltd.
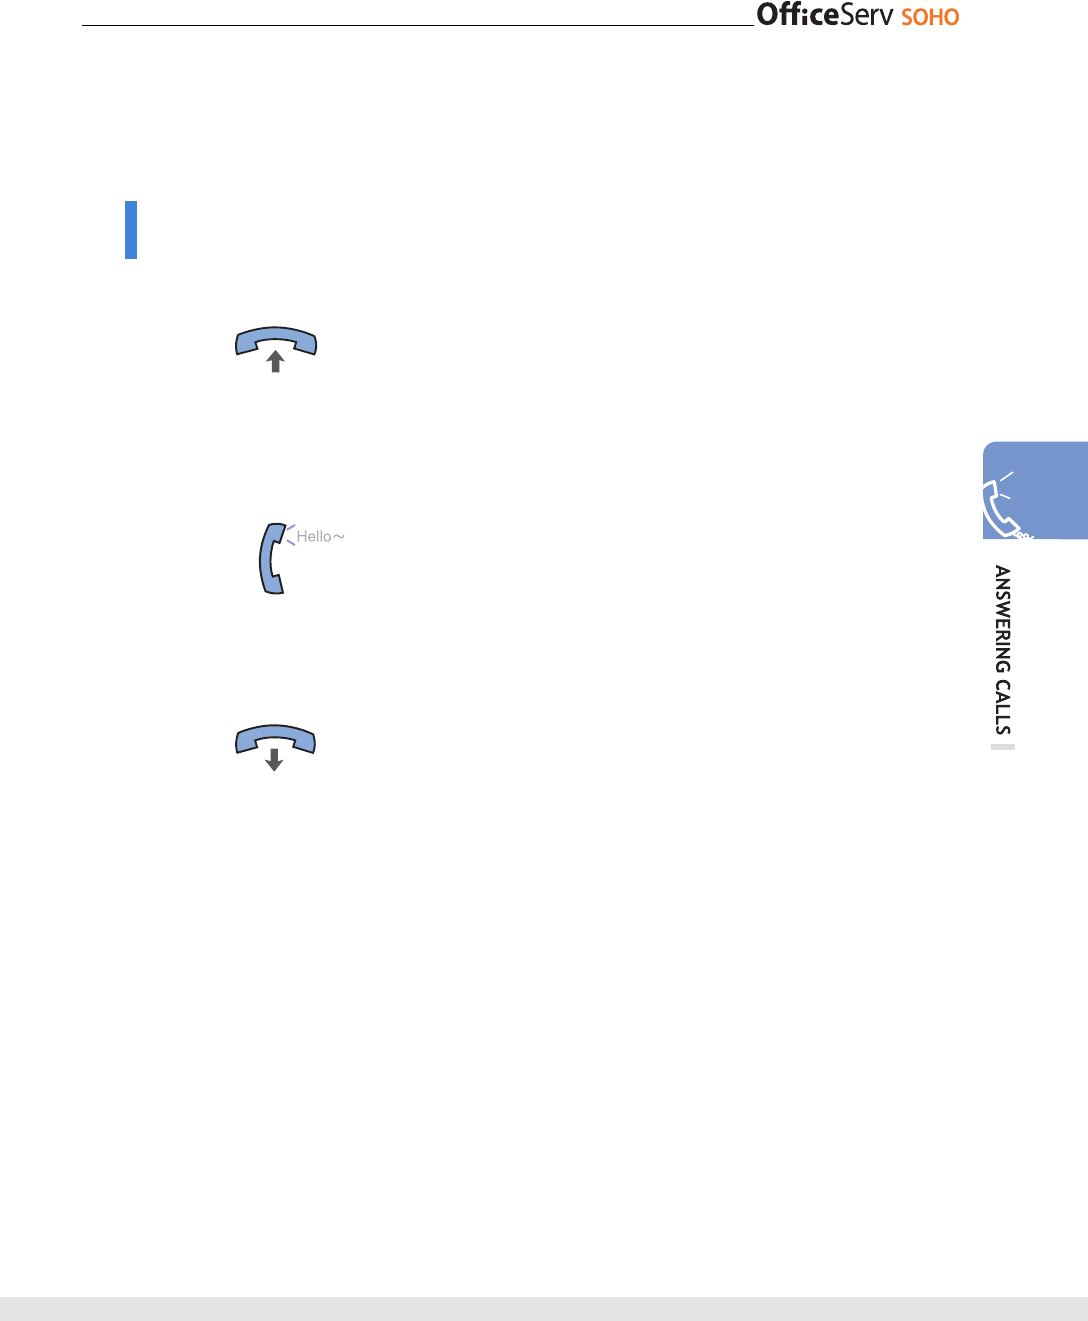
Answering from WLAN phone
1.
On receiving a call, the bell rings and an incoming
message is displayed on the LCD.
2.
Press the [Send] button to answer the call.
3.
Press the [End] button to disconnect the call.
Call from
123456789
© SAMSUNG Electronics Co., Ltd. 59
Answering External Calls
This section describes how to answer an external call.
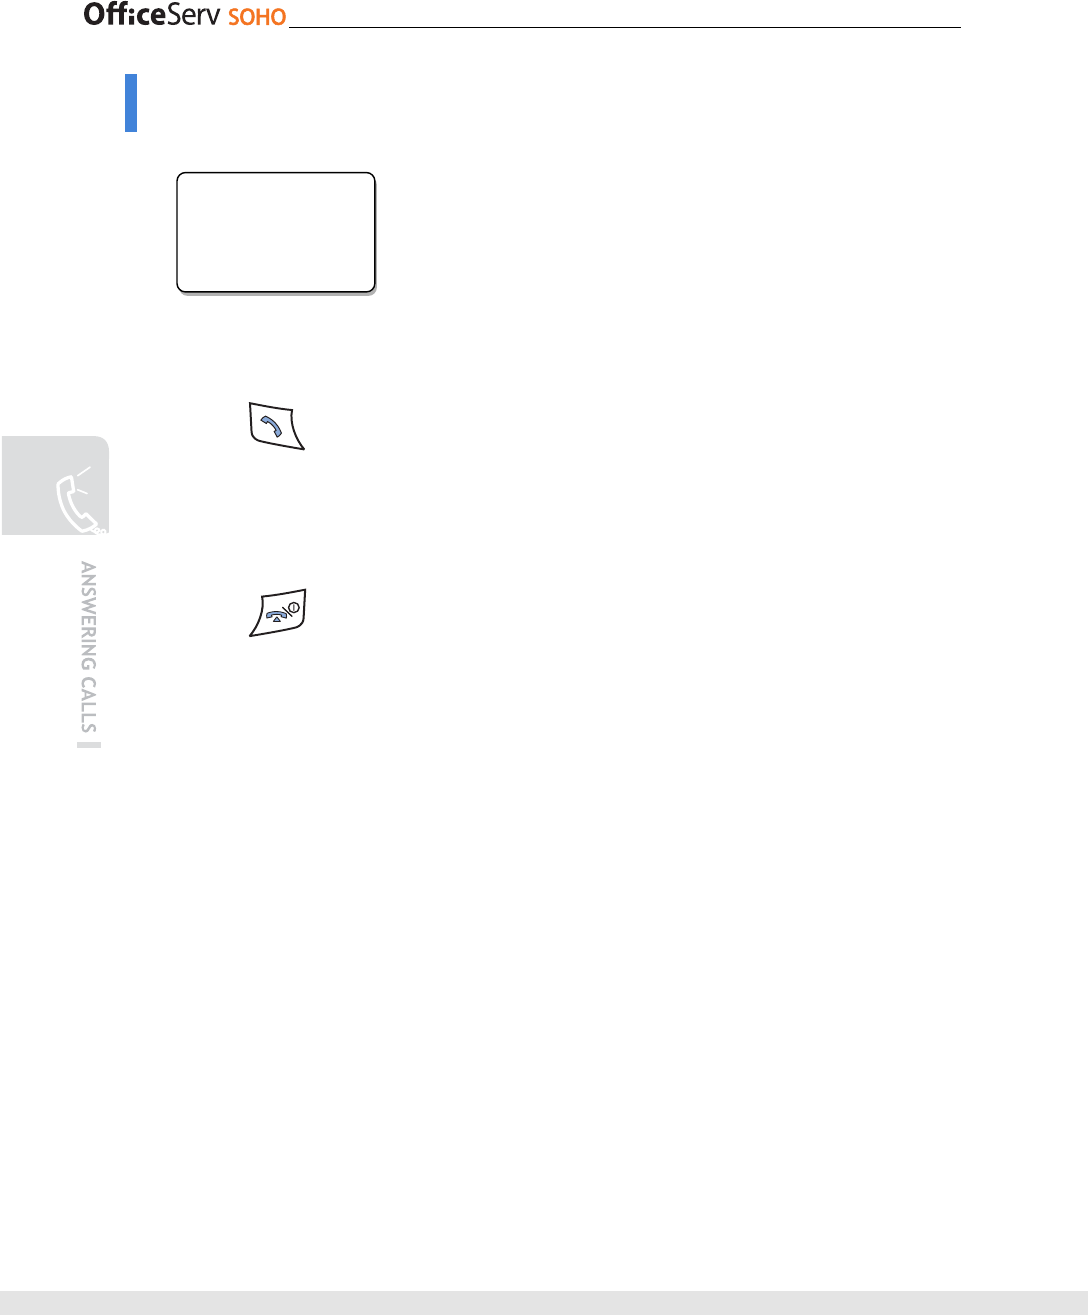
Answering from OfficeServ SOHO
1.
On receiving an external call, the phone rings and
a green lamp lights on the corresponding C.O.
line button. Lift the handset to answer the call.
• Press the [Speaker] button to answer using the
speakerphone.
2.
Start conversation.
3.
Replace the handset to disconnect the call.
• Press the [Speaker] button again when using the
speakerphone.
60 © SAMSUNG Electronics Co., Ltd.
Answering from Mobile
1.
On receiving a call, the bell rings and an incoming
message appears on the LCD.
C
2.
Press the [Send] button to answer the call.
3.
Press the [End] button to disconnect the call.
Call from
11
© SAMSUNG Electronics Co., Ltd. 61
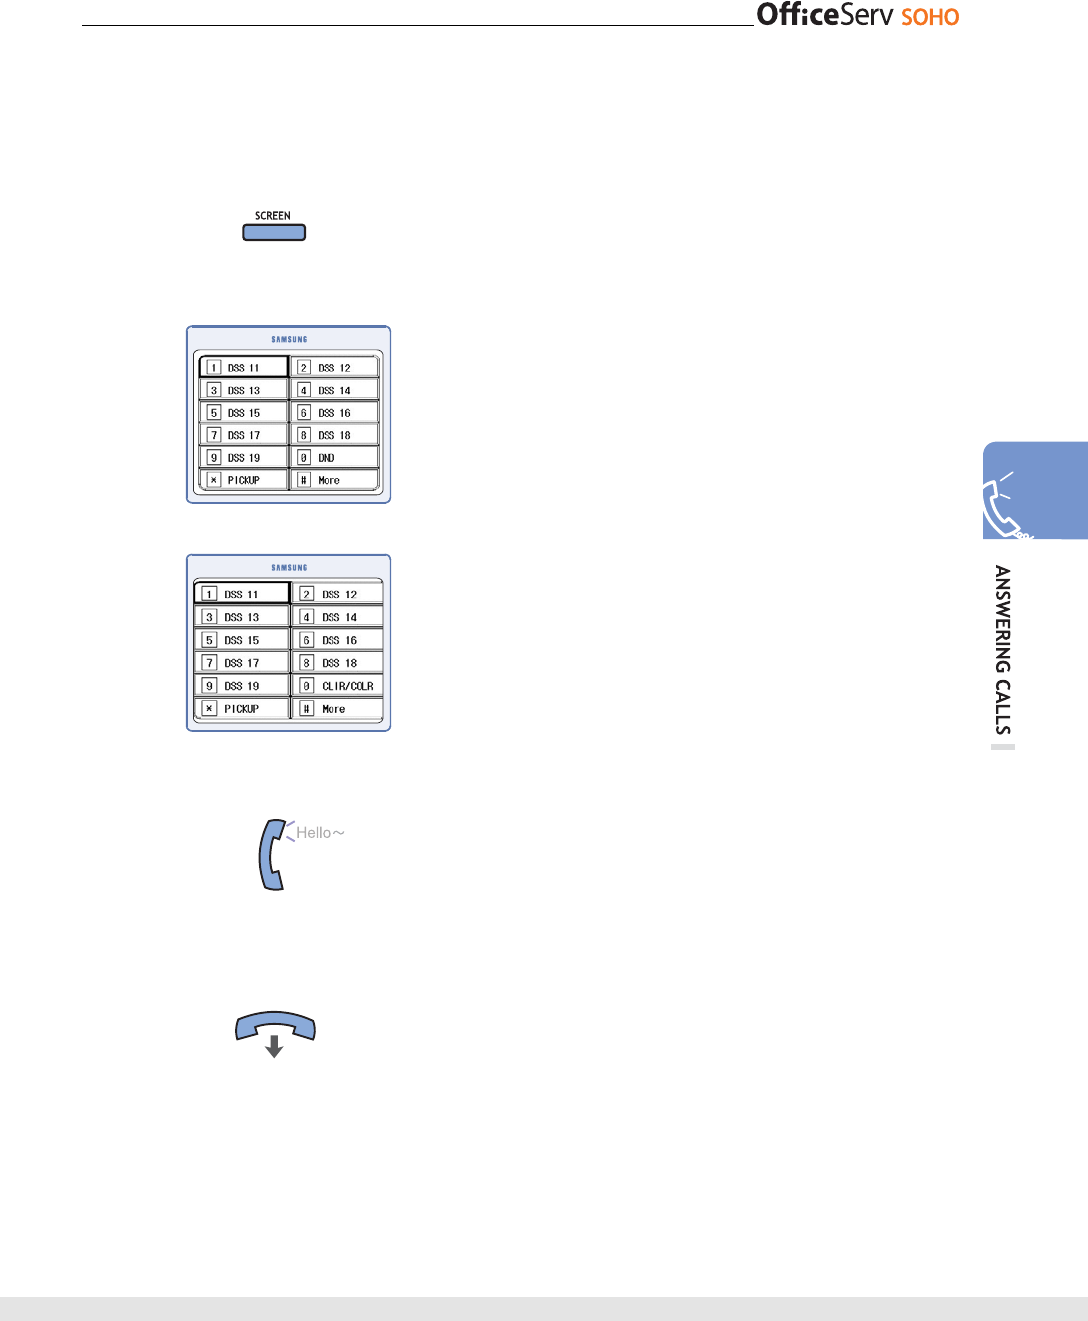
Call Pick Up
This function is used to pick up a call incoming to another station.
1.
When another station rings, press the [SCREEN]
button of your phone.
2.
Select the flashing station number from the
screen.
3.
Start conversation.
4.
Replace the handset to disconnect the call.
• Press the [Speaker] button again when using the
speakerphone.
<PSTN Type>
<ISDN Type>
62
© SAMSUNG Electronics Co., Ltd.
FUNCTIONS USED DURING CALLS
During Intercom Call
This section describes some functions during intercom calls.
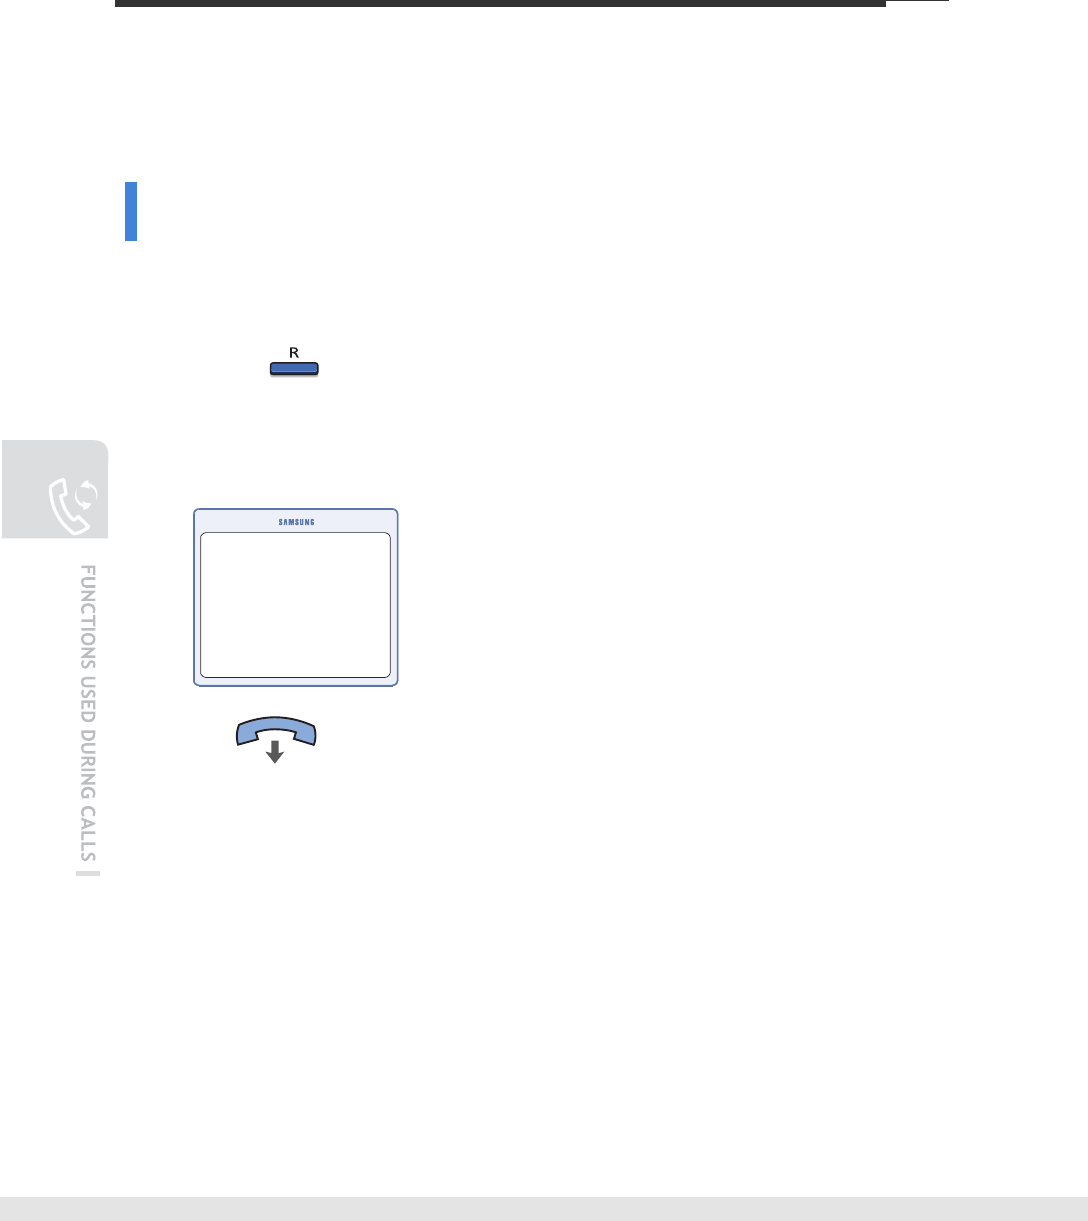
Call Transfer
This function is used for transferring a connected internal call to another intercom user
or external user.
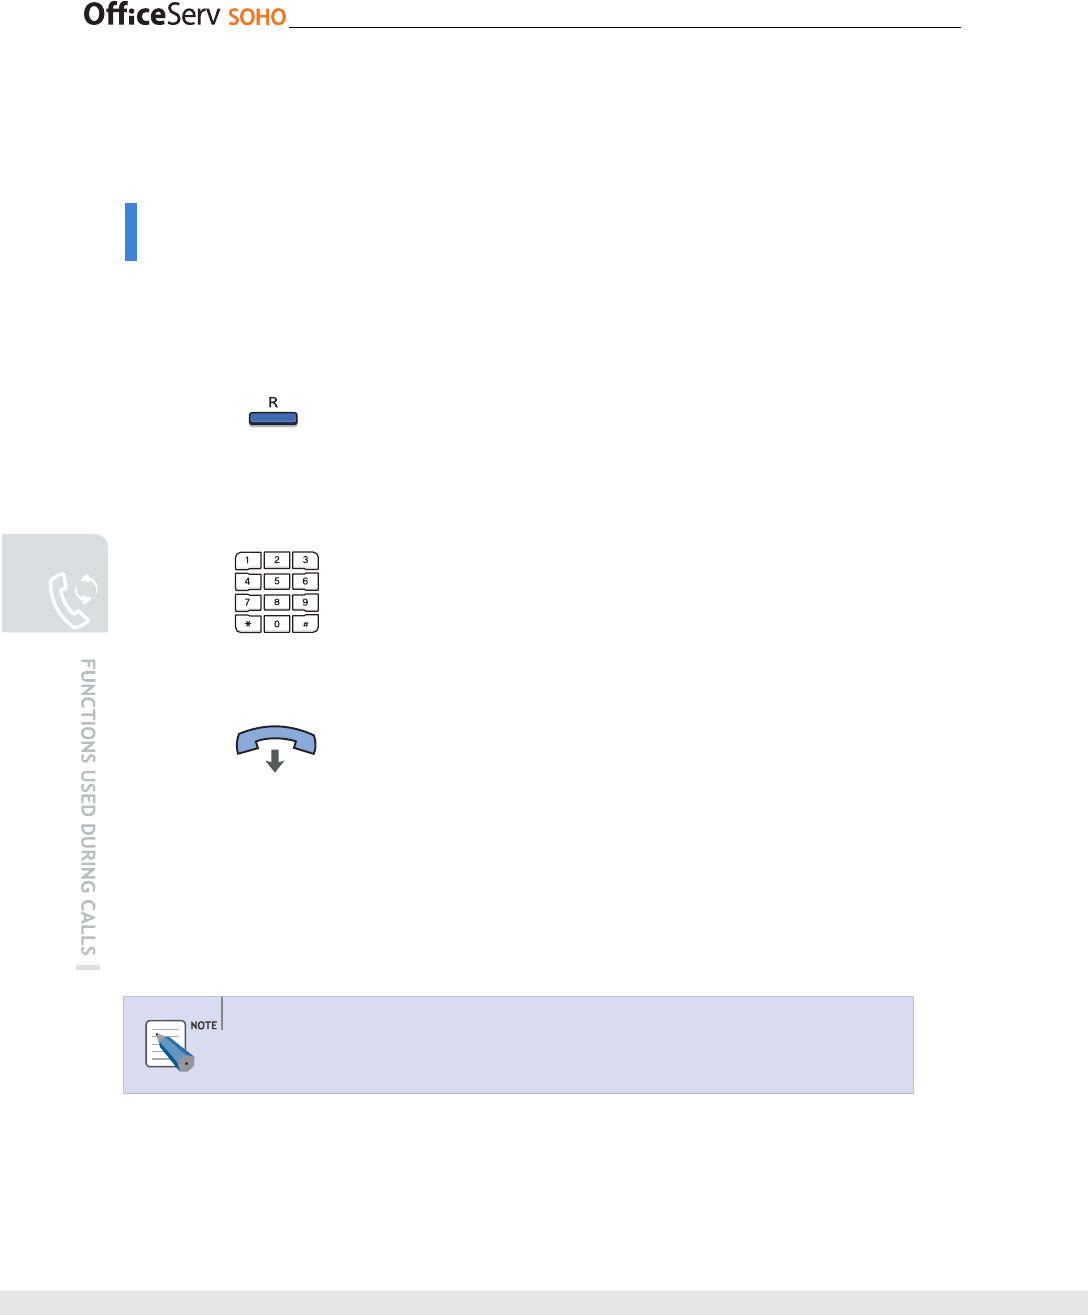
1.
Press the [R] button during an internal call.
2.
Press the destination number.
3.
Replace the handset when the handset answers
the call.
• Replace the handset while the transfer tone is
ringing to transfer the call unconditionally.
Otherwise, wait until the destination user answers
the call to transfer the call after consulting the user.
HOLD
Please dial
© SAMSUNG Electronics Co., Ltd. 63
Mute
When this function is used, you can hear what the other party is saying but the other
party cannot hear any voice or sound from your phone.
1.
Press [Mute] key during the call, [Mute] LED is
changed to RED. Mute function is enable.
2.
Press [Mute] key again, [Mute] LED is off. Mute
function is disable.
64 © SAMSUNG Electronics Co., Ltd.
During External Calls
This section describes some functions during external calls.
Call Transfer
This function is used for transferring a connected external call to another intercom user
or internal call to external call. In case of ISDN, it’s available to transfer a connected
external call to another external call.
1.
Press the [R] button during an external call.
2.
Press the destination station number.
3.
Replace the handset when the handset answers
the call.
• Replace the handset while the transfer tone is
ringing to transfer the call unconditionally.
Otherwise, wait until the destination user answers
the call to transfer the call after consulting the
user.
Call Transfer
On successful transfer, the color of the C.O. line lamp changes from green to red.
© SAMSUNG Electronics Co., Ltd. 65
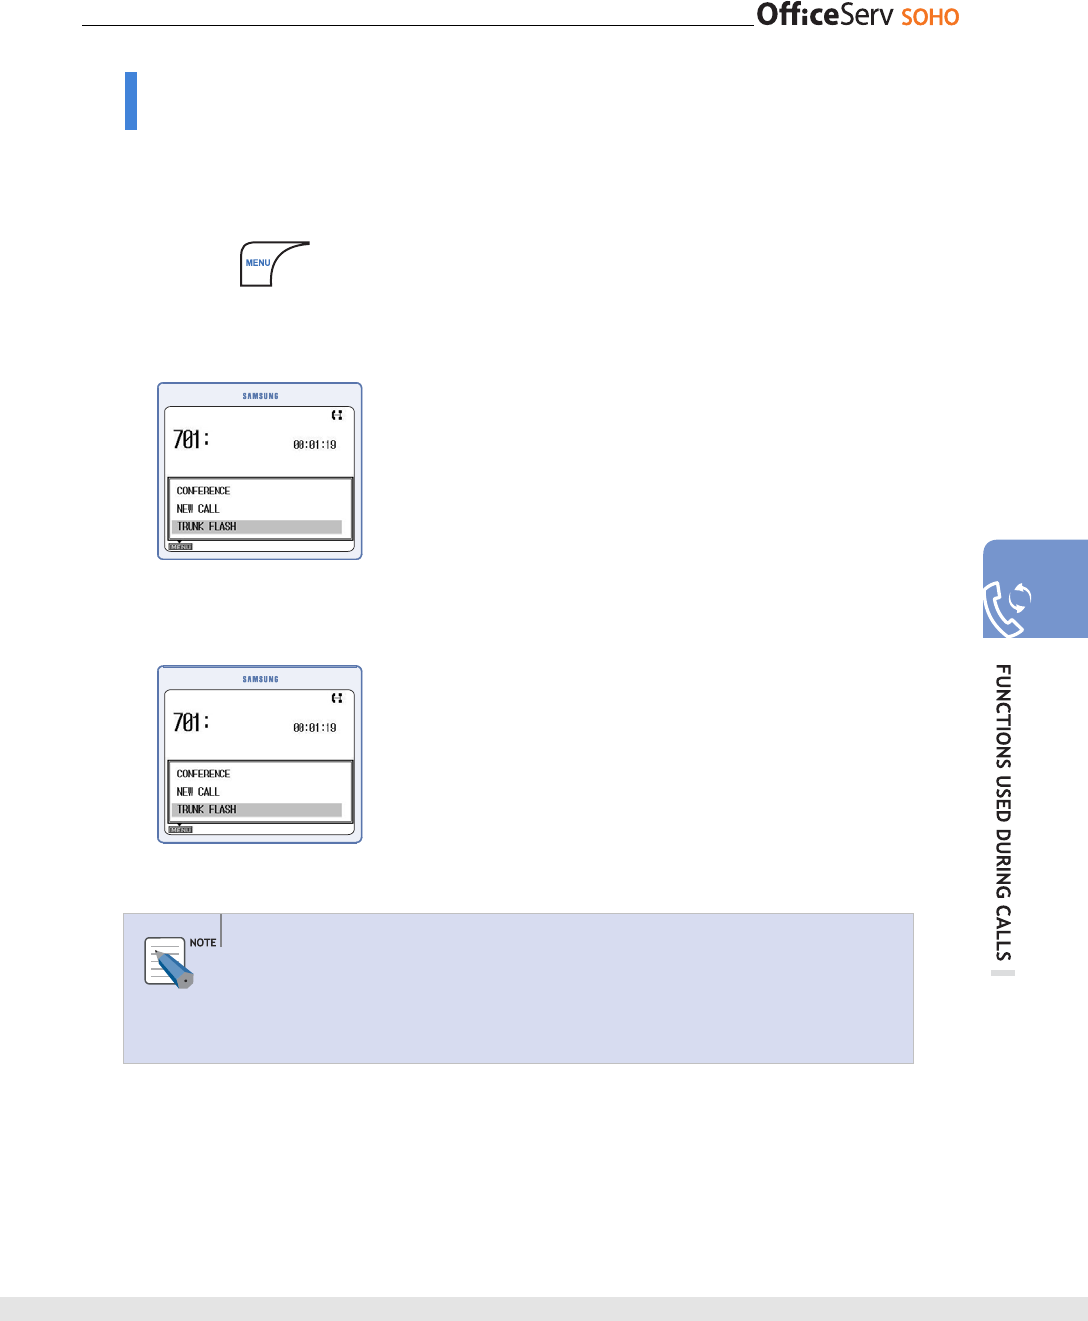
Trunk Flash
If OfficeServ is under other PBX system, this function allows you to be used features that
the upper PBX system is serviced.
1.
If an external call arrives while you are already
answering another external call, press [Menu].
2.
Select [TRUNK FLASH] to answer the new call.
The previous caller will remain on hold.
3.
Select [TRUNK FLASH] again to return to the
previous caller on hold.
Trunk Flash
The trunk flash function is a additional function of a trunk switch connected to
the OfficeServ SOHO and will only be provided if the trunk switch supports the
function.

66 © SAMSUNG Electronics Co., Ltd.
KEYPAD facility (ISDN Only)
Keypad information is data in the form of characters of the telephone keypad (e.g.
numbers, star key, hash key) which are converted into particular functions in an
integrated services private branch exchange, a remote station or in the switching centre
of your network operator. The keypad facility can be switched on or off via the menu.
( [Menu] [Phone Setup] [1. Feature On/Off] [1. Keypad facility On/Off], Set to ON.)
1.
Press [KEYPAD] button during an external call to
activate the KEYPAD facility. When KEYPAD
facility is activated, the [KEYPAD] button will be
changed to [DTMF] button.
2.
Press [DTMF] button during an external call to
deactivate the KEYPAD facility.
Service charges
You may have to apply for this service from your network operator and it might
incur additional charges.
Malicious call tracing
(malicious call identification, MCID)(ISDN Only)
If you receive malicious phone calls and the caller's number is not shown on the display,
you can still find out the number via the switching centre. This is achieved by means of
an intercept function.
1.
Press [Menu] Button during the external call. And
select ‘MCID’. The switching centre will then trace
back the call to its point of origin
© SAMSUNG Electronics Co., Ltd. 67
To Service
(contact with your network operator, firstly.)
The caller’s network does not support CLIP (Calling Line Identification
Presentation = identification of the oncoming call). In this case, the call cannot be
traced.
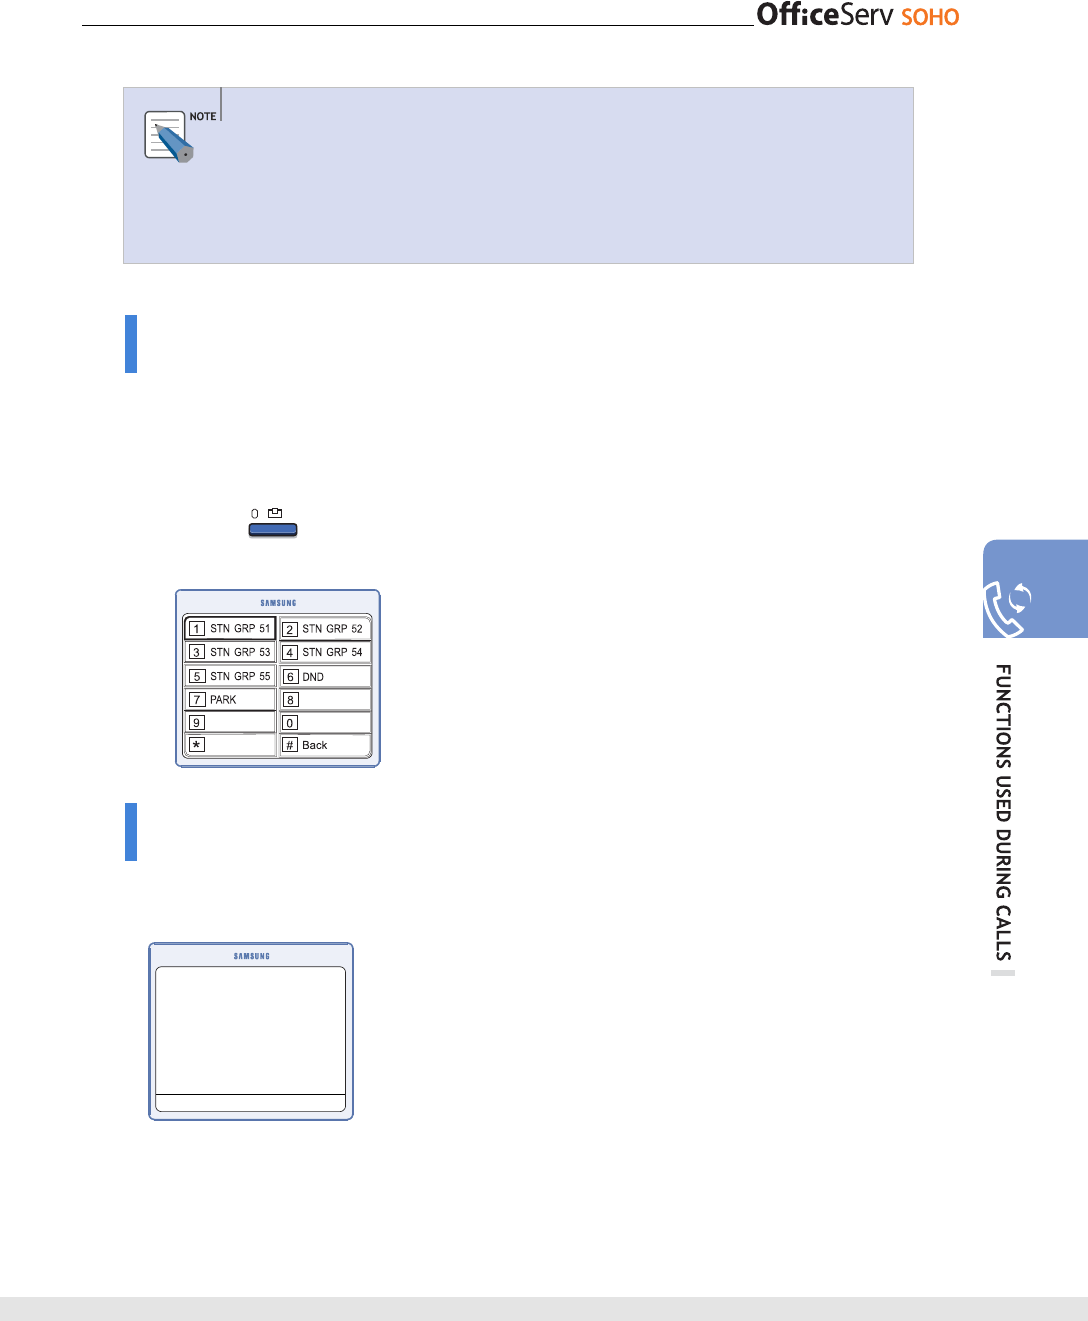
Parking a call (ISDN Only)
You are holding a conversation and you would like to continue the call in another room.
In this other room there is also an ISDN wall socket. However, you can also unpark the
call with another telephone, e.g., a mobile handset.
1.
Press [Intern] Key when you would like continue
the call somewhere else.
2.
Select the ‘PARK’. And enter the number to park.
Call Waiting
If the other call is incoming when you are holding a conversation, the incoming call
number is displayed on LCD and indication tone is listened periodically.
- Press [Menu] [ANSWER] or [R], You can answer the other call.
- If you would like to refuse the other call, Press [Menu] [REFUSAL].
- If you would like the deflect the other call, press [Menu] [DEFLECT].
CAMP
2224444
Jone
68 © SAMSUNG Electronics Co., Ltd.
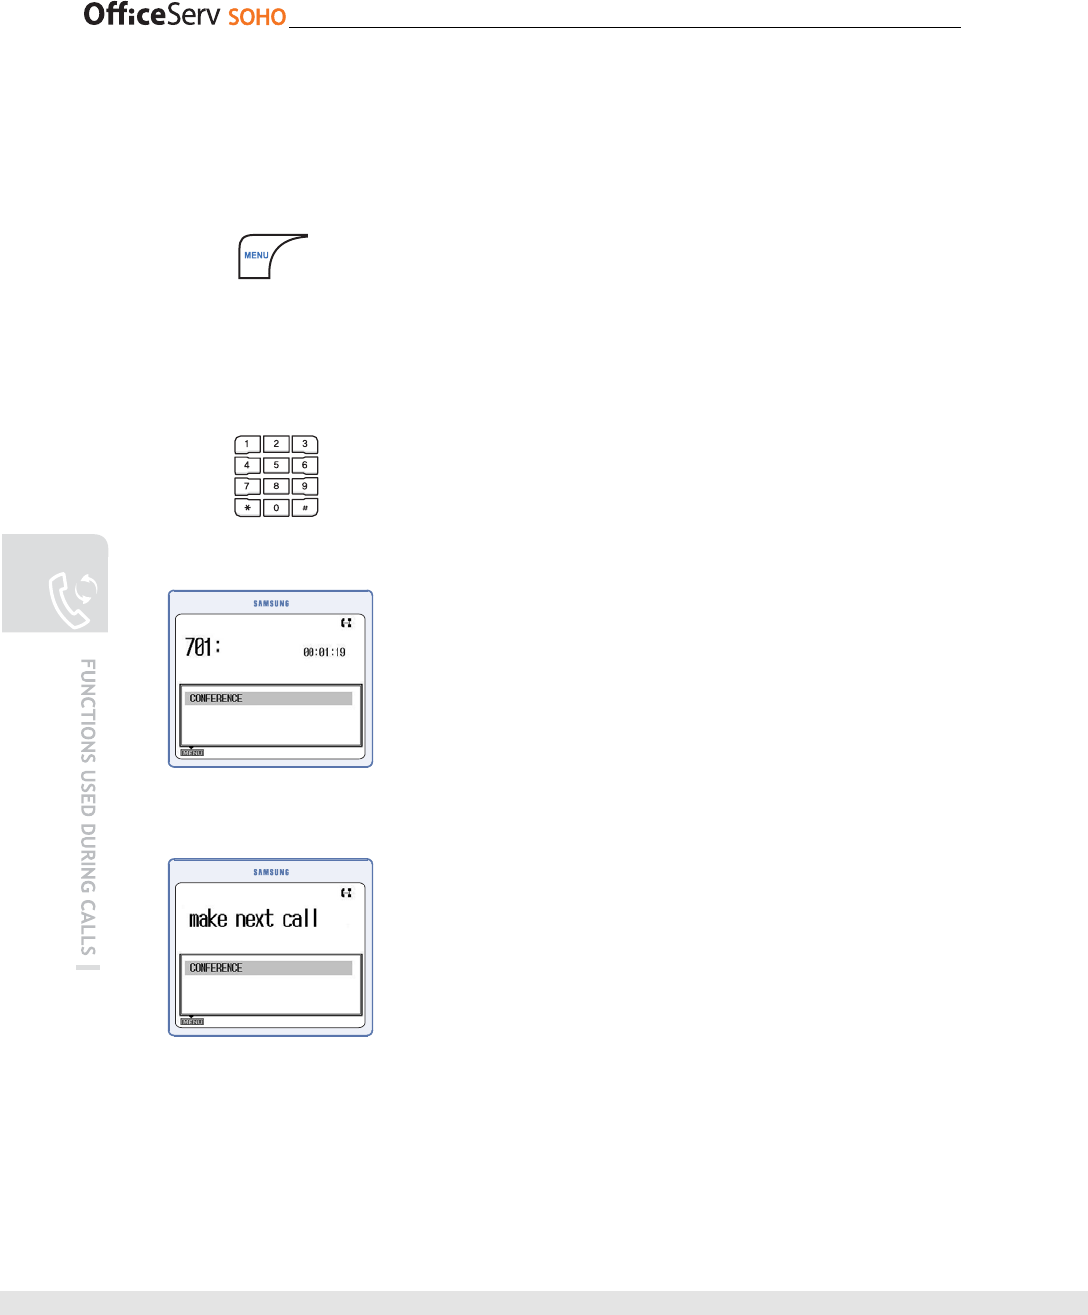
Conference during Intercom / External Calls
This function is used for organizing a conference call between up to three
parties(internal/external) during a call.
1.
Press [Menu] during a call.
2.
Enter the phone number of a third party to add to
the conference.
3.
When the third party answers the call, press
[Menu] and select [CONFERENCE].
4.
Conference member numbers appears.
• To remove a member from the conference, enter
the phone number of the member while the ‘Make
Next Call’ message is displayed.
© SAMSUNG Electronics Co., Ltd. 69
CONVENIENT FEATURES
Calling Line Identification Presentation (CLIP)
This function displays the caller ID on the LCD of the phone.
CLIP is a pay service provided by the telephone company. Such information may not be
provided in the following cases:
- Caller requested the telephone company not to disclose his/her ID.
- Call was made from an area where the CLIP service is not provided(e.g., international
calls).
- Call was made from a public phone.
- Caller information provided by the telephone company is damaged.
- The telephone company does not serve CLIP.
[PSTN]
Select [Menu] [Phone Setup] [5. Global Setup] [1. Feature On.Off] [3. CID
Detection] to display Caller ID.
[ISDN]
It is not need the additional settings, CID is displayed if the network is serviced the CLIP
70 © SAMSUNG Electronics Co., Ltd.
Conference
This section describes two functions of conference. Up to three members, including the
caller, can participate in a conference call.
Group Conference
This function allows you to make a conference call with members registered to a group.
Up to five groups can be assigned to a group conference.
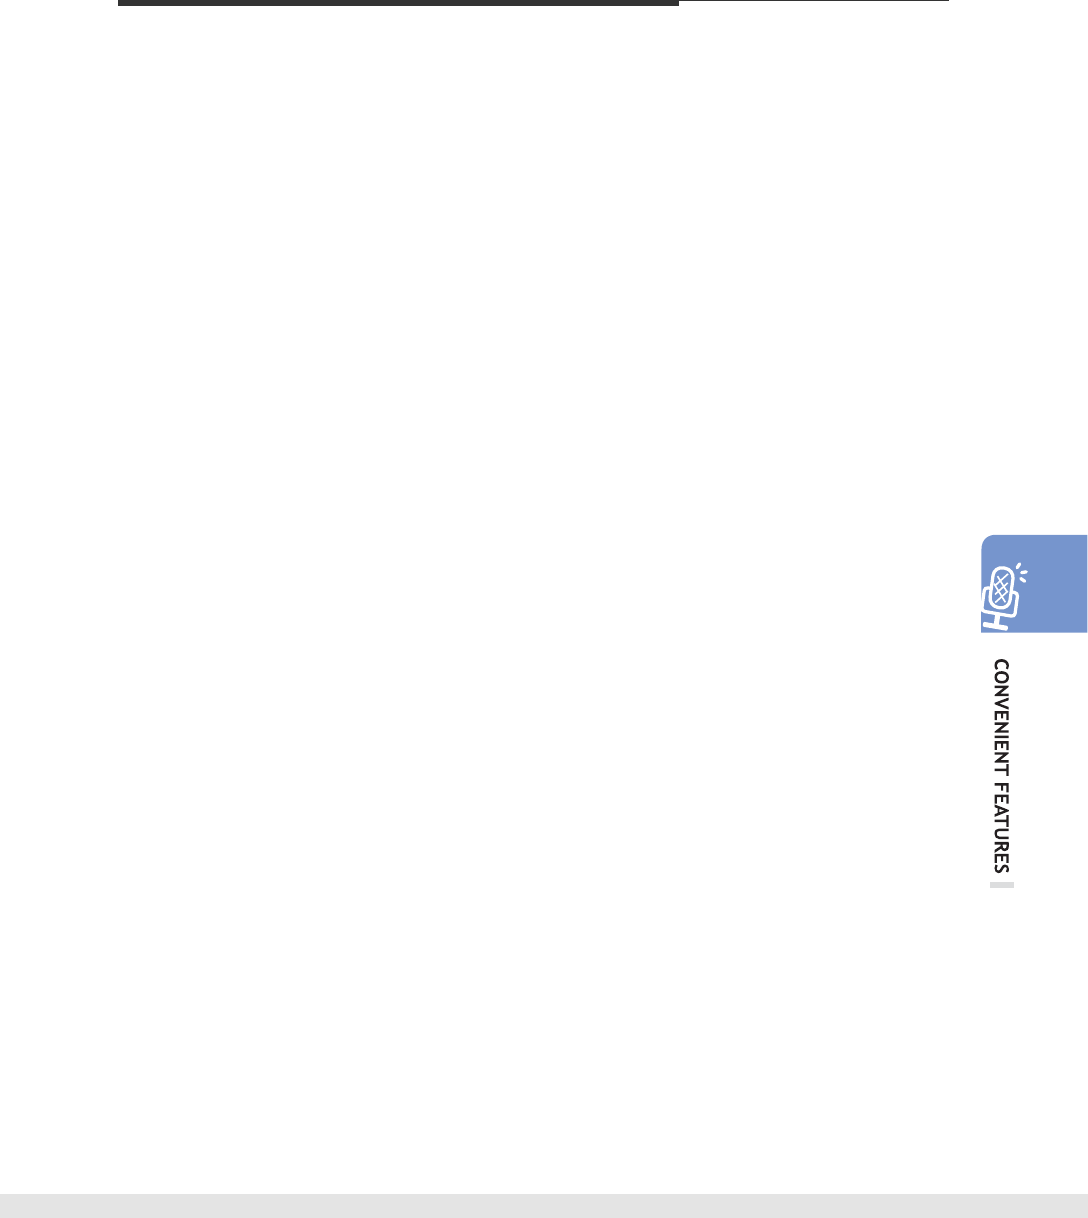
1.
Press the [Menu] button while the phone is in a
standby mode.
2.
Select [Services] [2. Conference]
[1. Group Conference] by using the direction
button.
3.
Move to the target group and press the [OK]
button. Then, the phone number list of the target
group is displayed.
• If no group is registered, the screen for registering
a group is displayed. Register the target group and
select the group to make a conference call.
• Move the curser to the target group and press the
[Menu] button to edit or delete the group.
4.
Press the [Send] button to make a call to the
recipient.
© SAMSUNG Electronics Co., Ltd. 71
Each Conference
This function allows you to call the recipient directly for a conference call, and to make a
conversation.
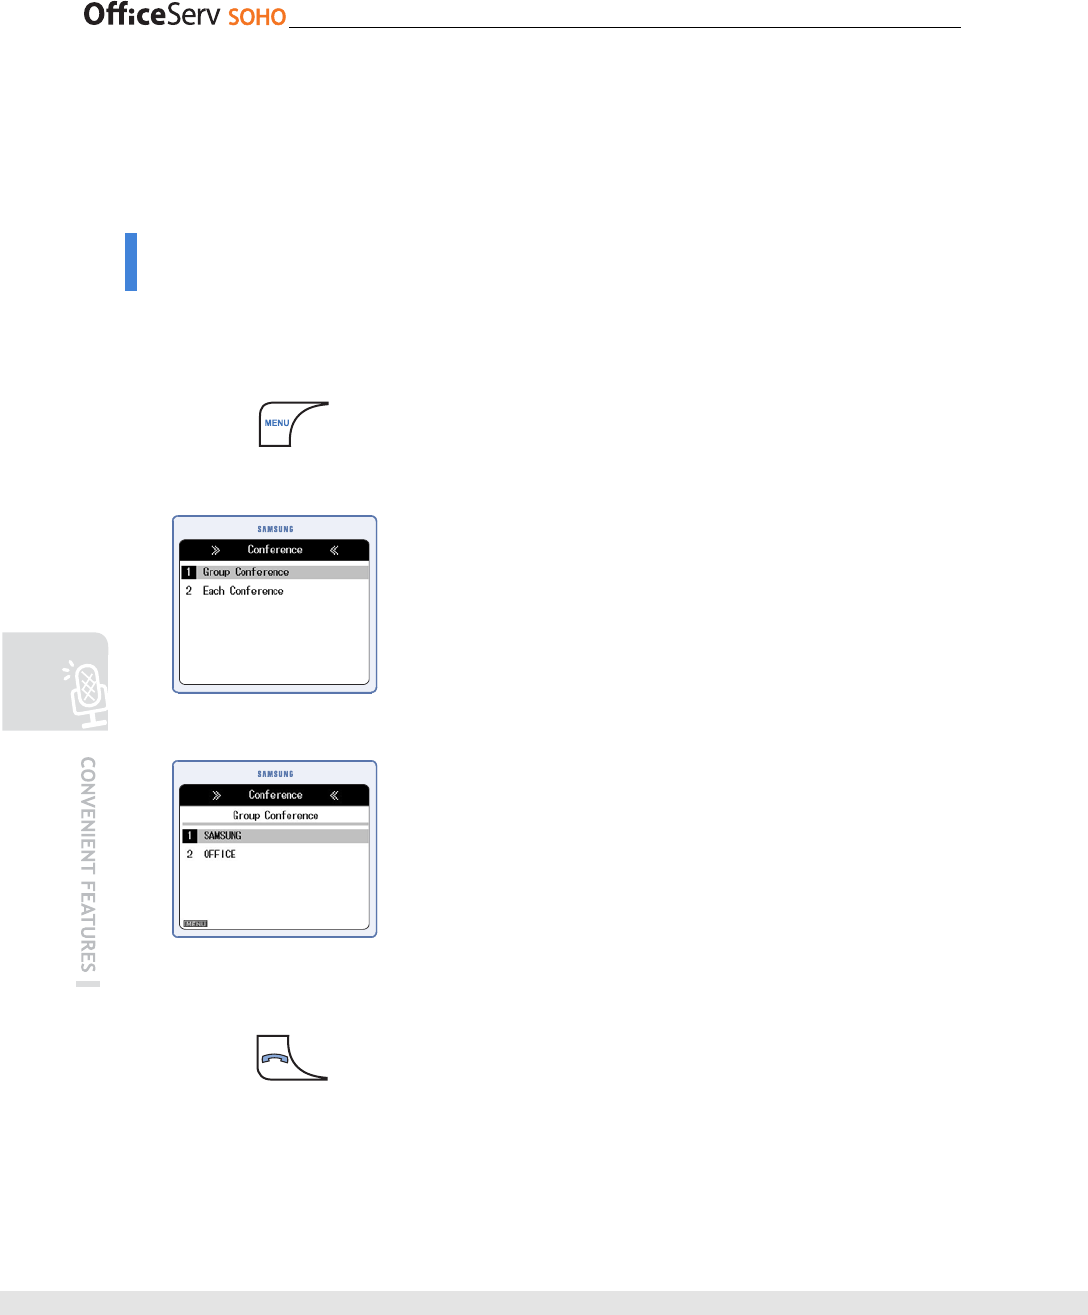
1.
Press the [Menu] button while the phone is in
a standby mode.
2.
Select [Services] [2. Conference]
[2. Each Conference] by using the direction
button
3.
Enter the target phone number and press the
[Send] button to connect the recipient.
• Press the [Menu] button and select the [Sending]
menu. Then, the call is connected to the recipient.
4.
Once the recipient answers the phone, the
conference call starts.
72 © SAMSUNG Electronics Co., Ltd.
Do Not Disturb (DND)
This sections describes how to use DND function.
Setting DND
This function allows you to block calls to your phone even if the calls arrive.
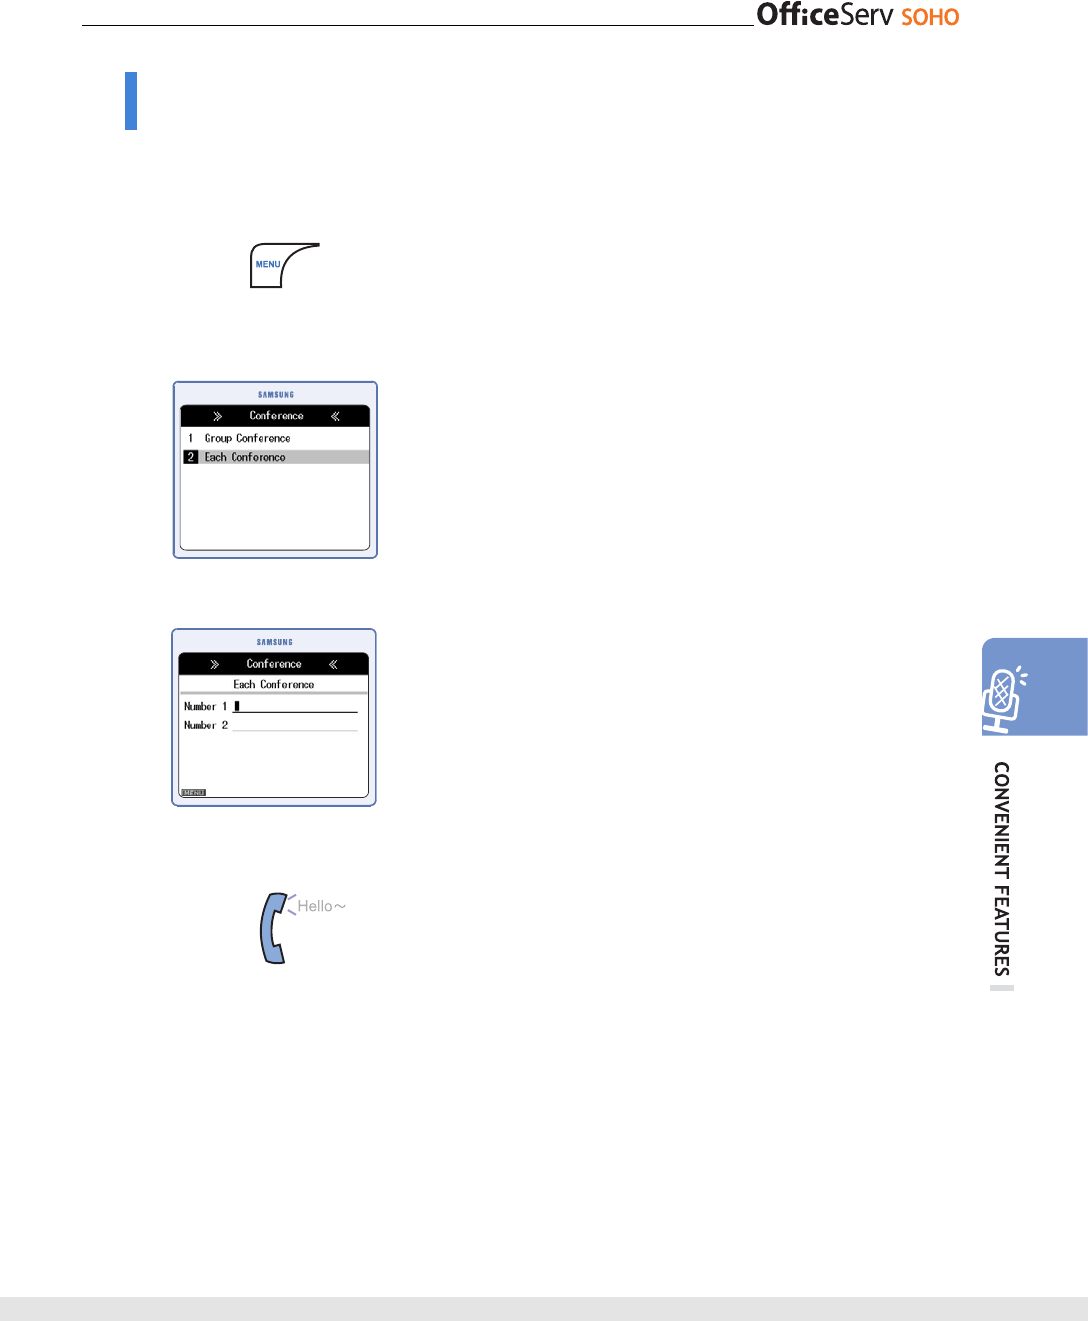
1.
Press the [SCREEN] button while the phone is in
a standby mode.
2.
Select [9. DND] from the [Station Status Display
Screen].
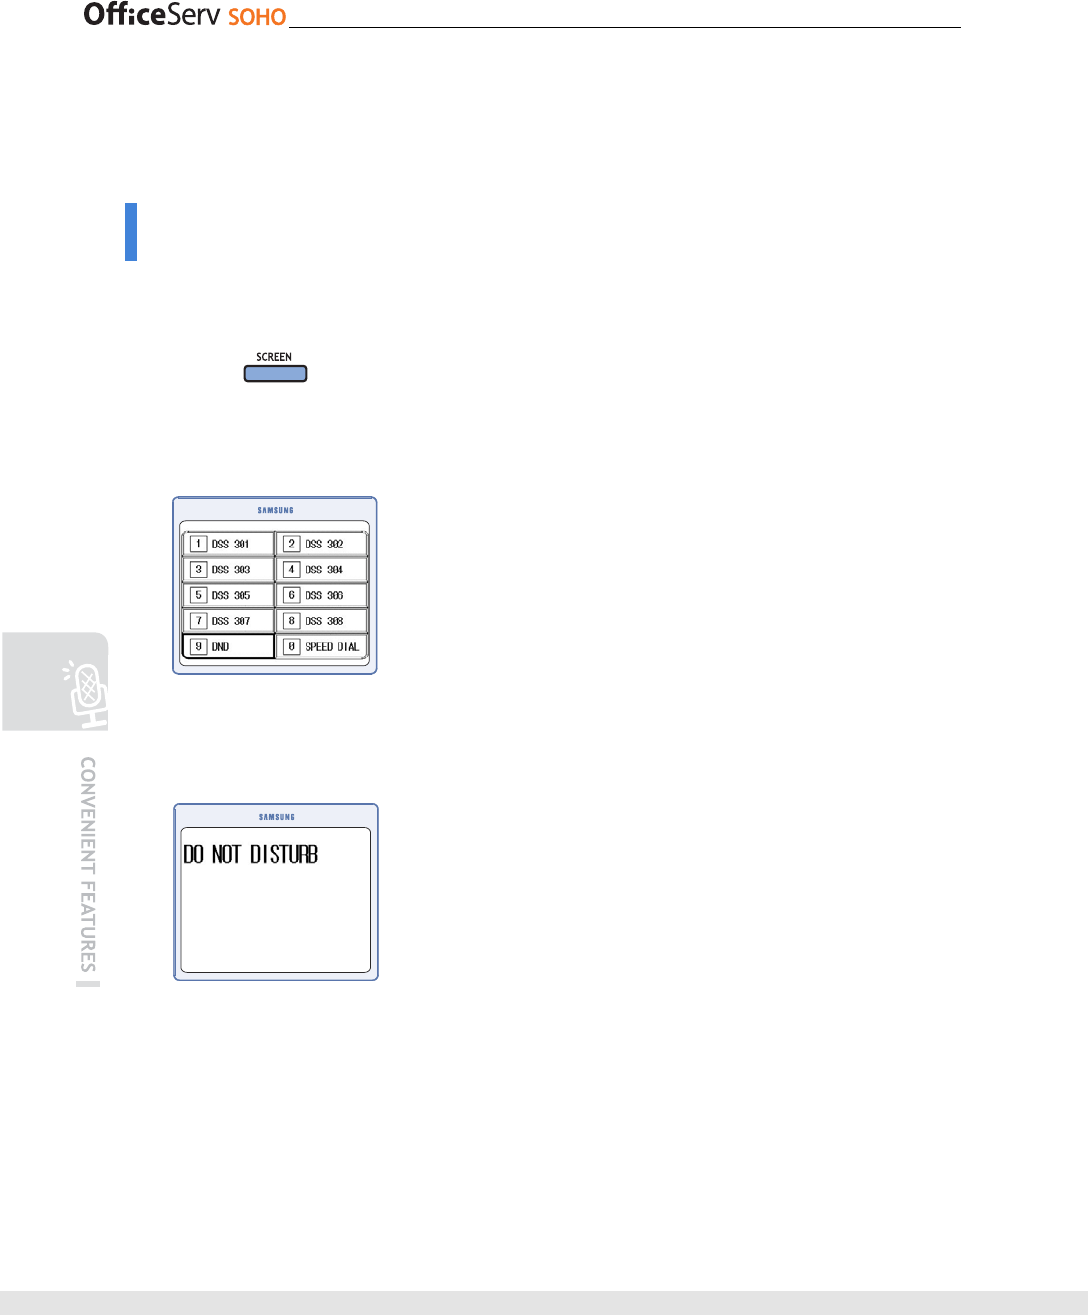
3.
DND function is set and the ‘DO NOT DISTURB’
message is displayed on the main screen.
• When DND function is set, the DND icon is
displayed on the main screen, and the DND button
of the [Station Status Display Screen] is expressed
in black.
© SAMSUNG Electronics Co., Ltd. 73
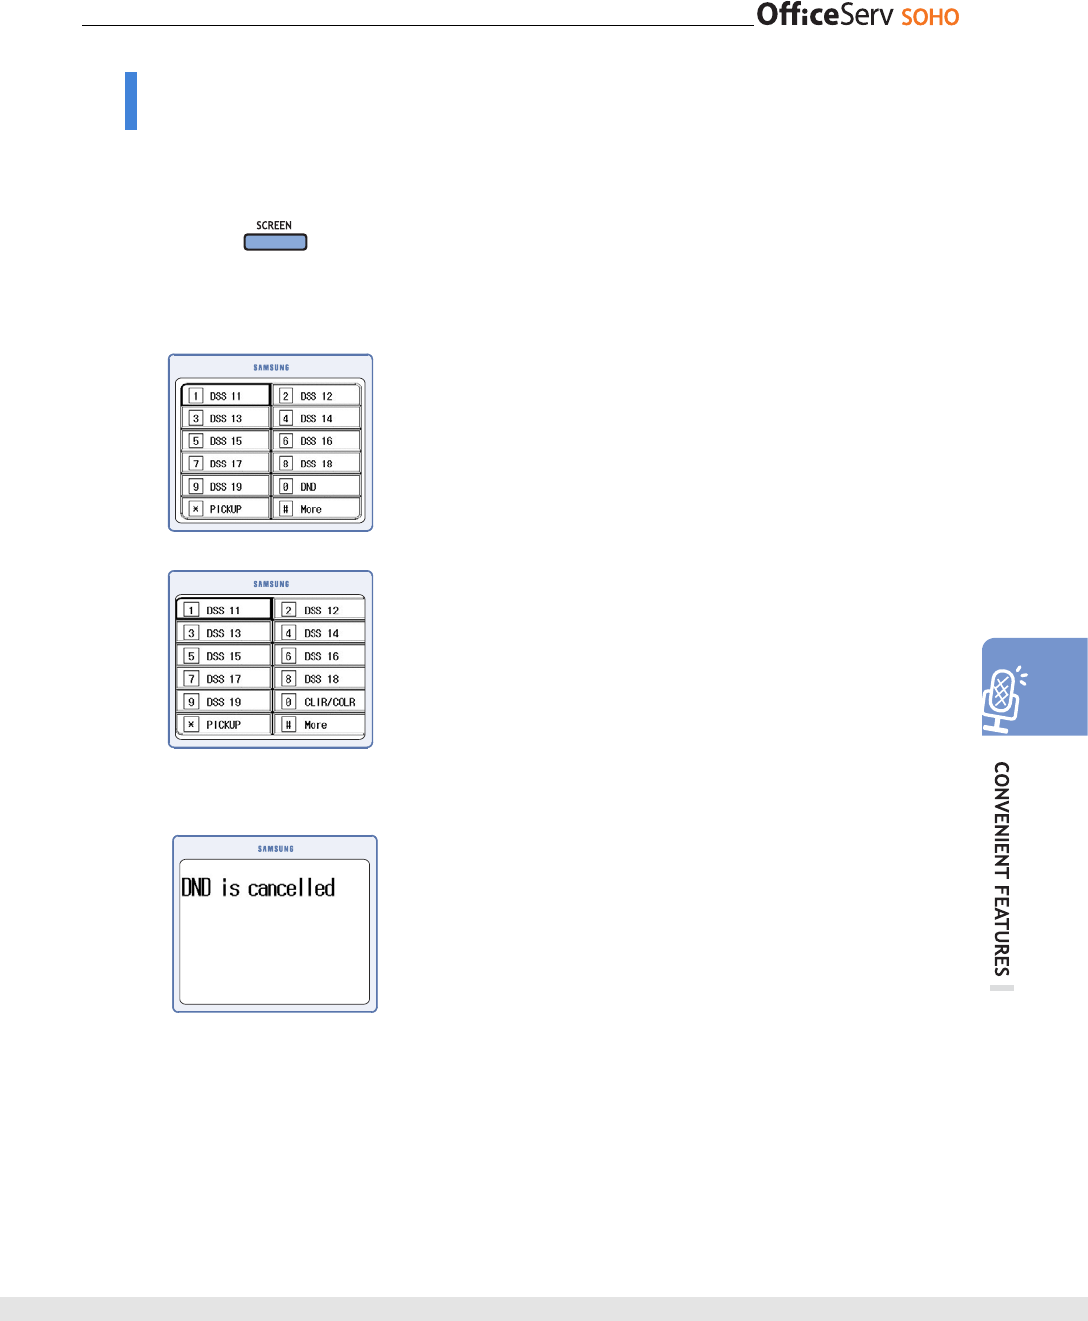
Canceling DND
This function allows you to cancel DND.
1.
Press the [SCREEN] button while the phone is in
a standby mode.
2.
Select [9. DND] from the [Station Status Display
Screen].
• When DND function is set, the DND button is
expressed in black.
3.
DND is cancelled, and the ‘DND is cancelled’
message is displayed on the main screen.
• When DND function is cancelled, the DND icon
disappears from the main screen.
<PSTN Type>
<ISDN Type>

74 © SAMSUNG Electronics Co., Ltd.
Group Listening
You can enable others to hear the conversation of a call through the speaker.
The microphone is disabled.
1.
Press the [Speaker] button during a call.
2.
Other people can hear the conversation.
3.
Press the [Speaker] button to turn off the
speaker.
© SAMSUNG Electronics Co., Ltd. 75
MENU
This section describes how to set various menus of OfficeServ SOHO. You can select a menu
either by using the direction key to move to an item and pressing the [OK] button or by
entering the item number.
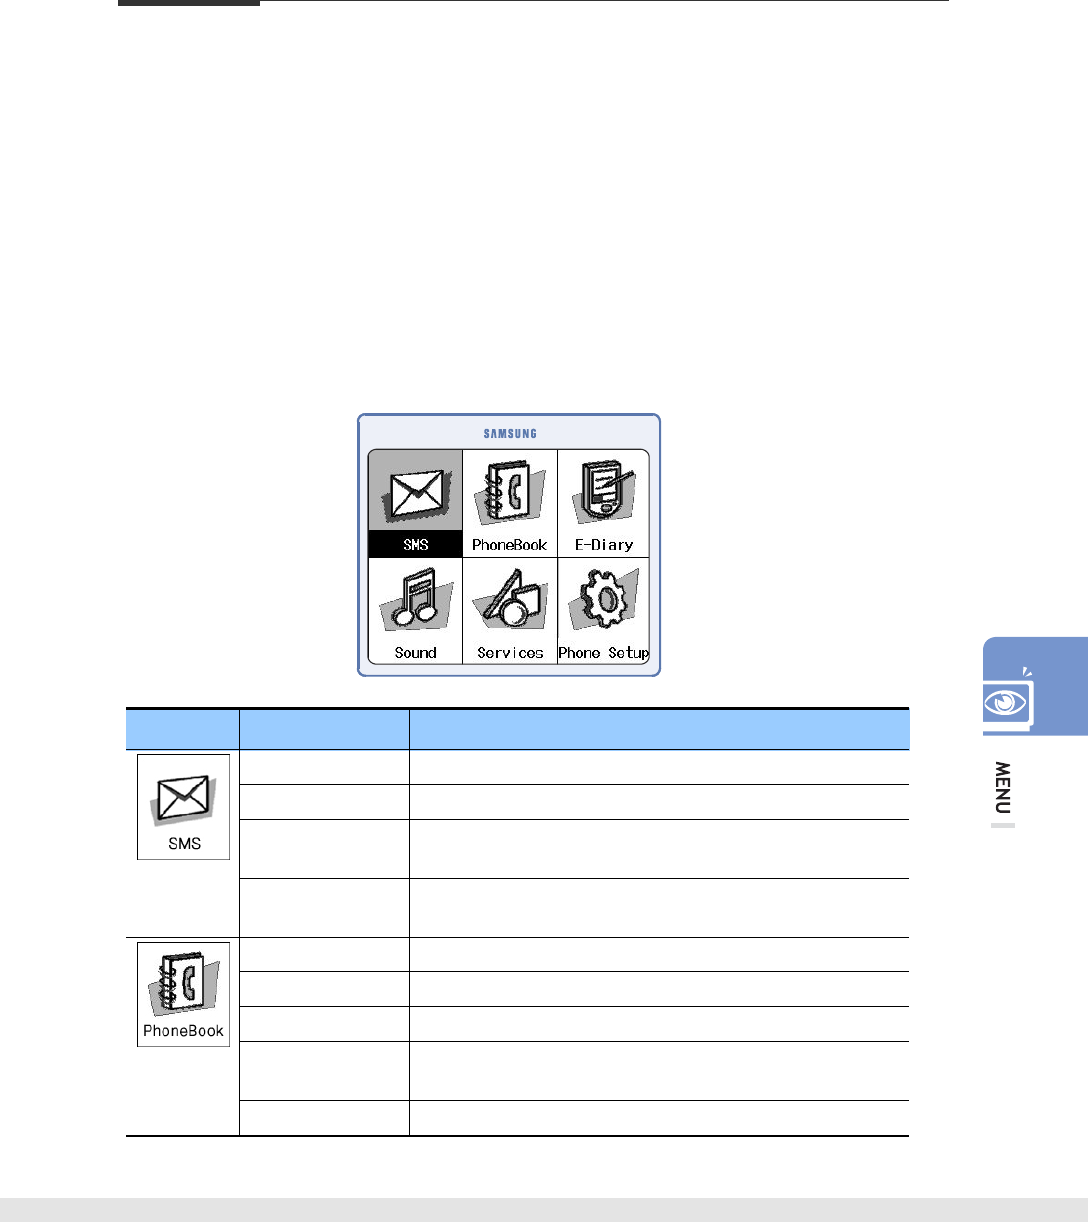
Main Menu
Press the [Menu] button to display the following main menu on the LCD screen when the
OfficeServ SOHO is in a standby mode.
The Menu screen displays the SMS, PhoneBook, E-Diary, Sound, Services and Phone
Setup as icons.
Menu Item Description
Inbox Lists the received messages
Outbox Send new messages and lists the messages sent
Templates Stores the most frequently used messages to use them as
templates
SMS Settings Configuration of the SMS service(Service Centre, notification,
Display)
Find Number Search an item in the Phonebook(per number, name, position, etc.)
Outgoing calls Lists the outgoing calls and allows recalling the relevant numbers
Incoming calls Lists the received calls and allows recalling the relevant numbers
Missed calls Lists the calls with no answer and allows recalling the relevant
numbers
New Entry To add a name into the Phonebook