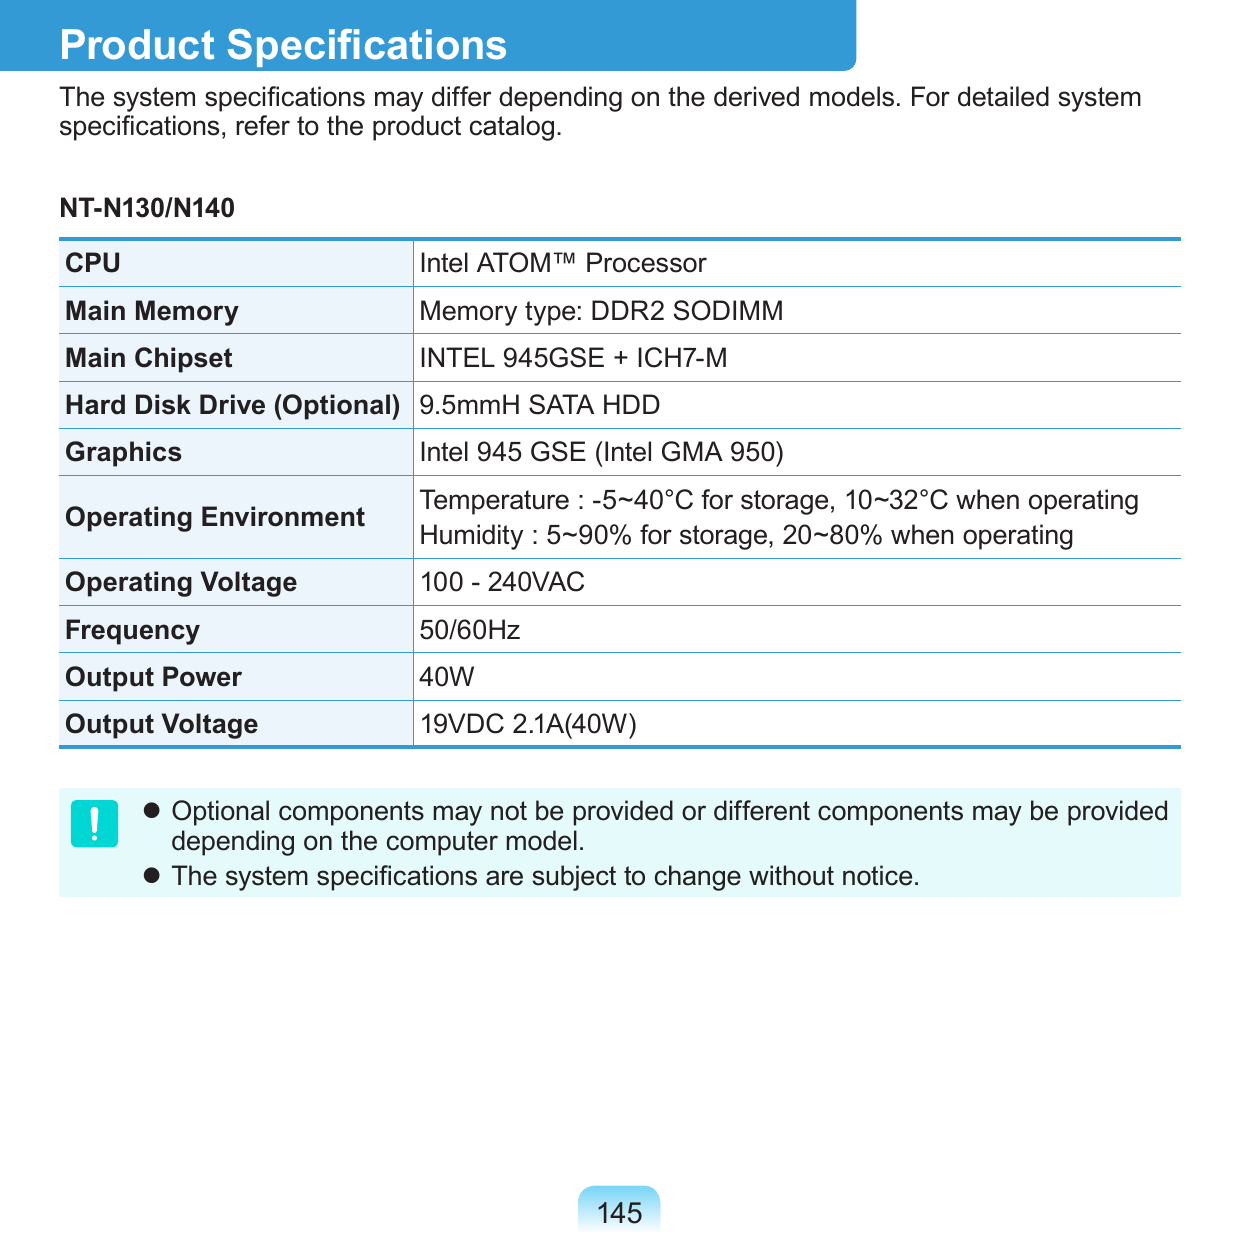
Samsung Electronics Co SWDY3100 Cell/PCS GSM/EDGE/WCDMA Mini PCI Transmitter Card User Manual Springfield N130 XP eng indb
Samsung Electronics Co Ltd Cell/PCS GSM/EDGE/WCDMA Mini PCI Transmitter Card Springfield N130 XP eng indb
Contents
- 1. Users Manual
- 2. Manual
- 3. User Manual 1
- 4. User Manual 2
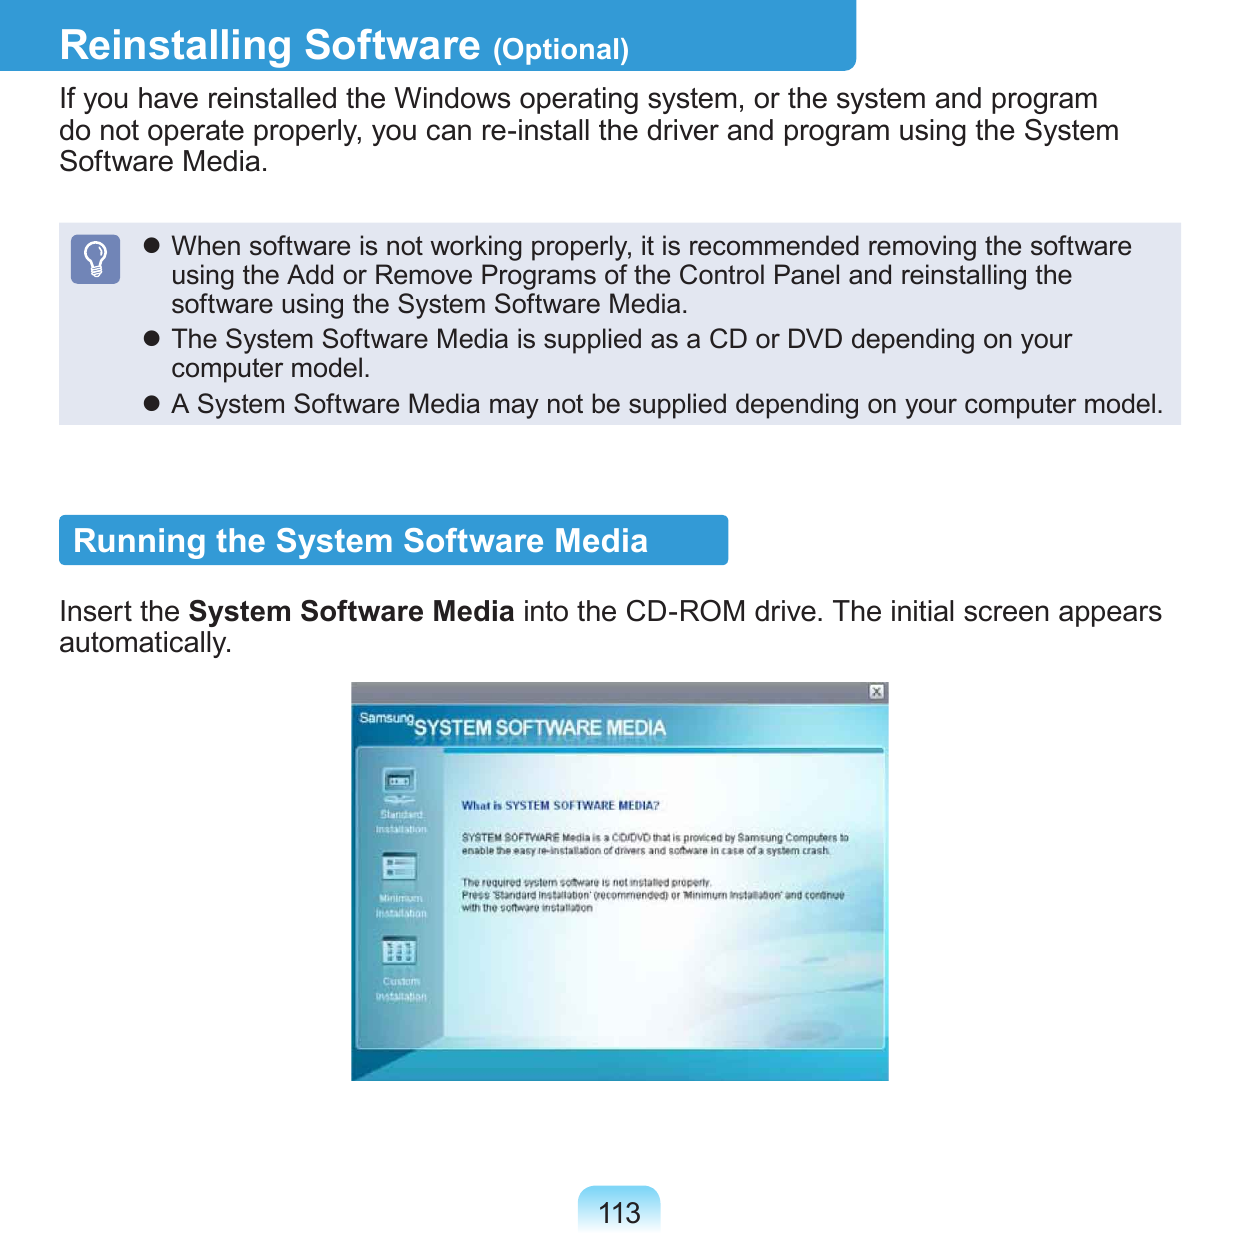
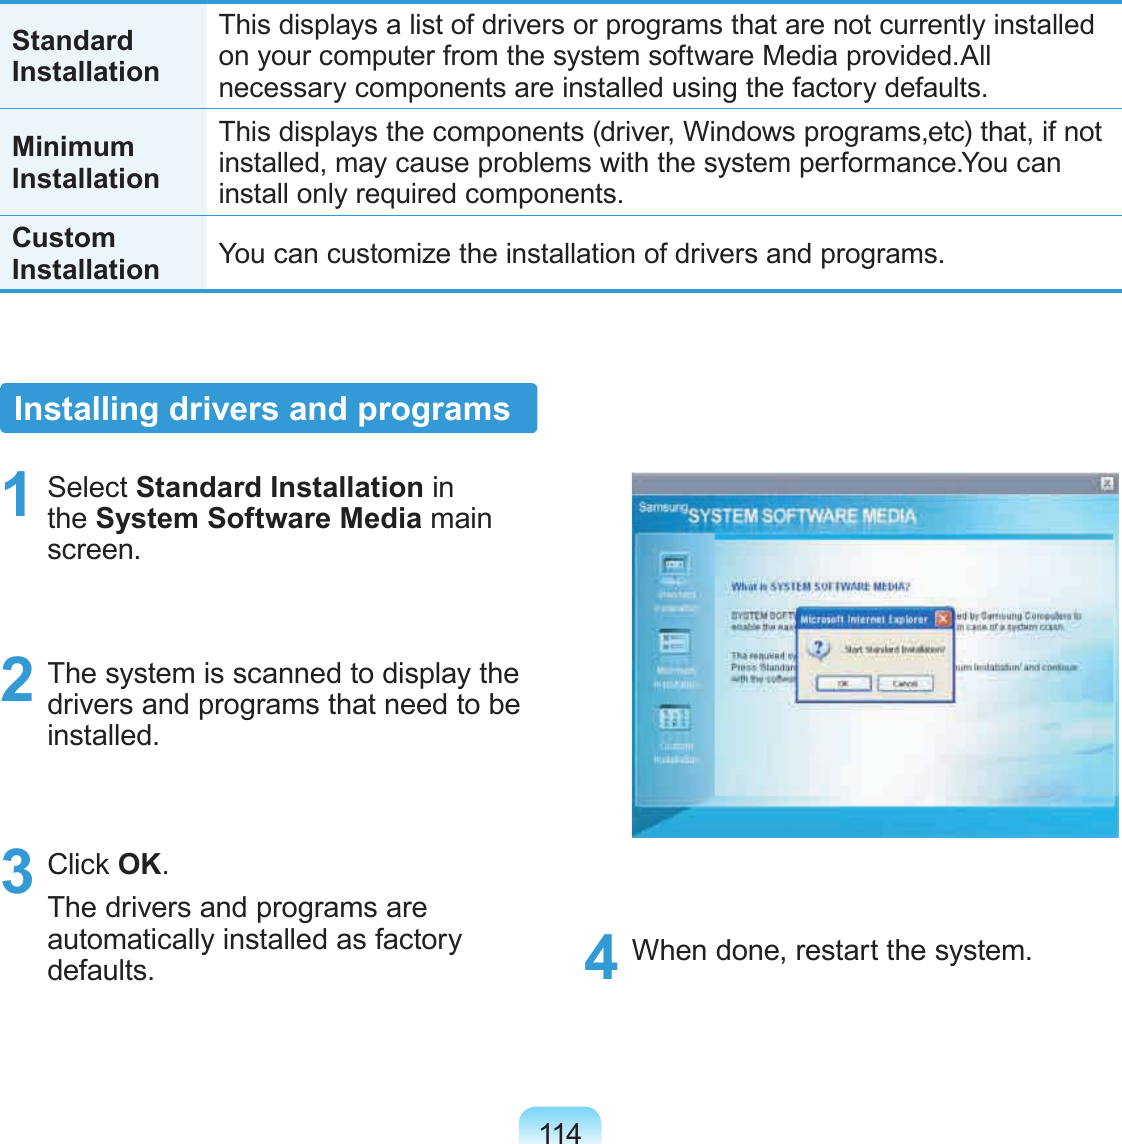
User Manual 2


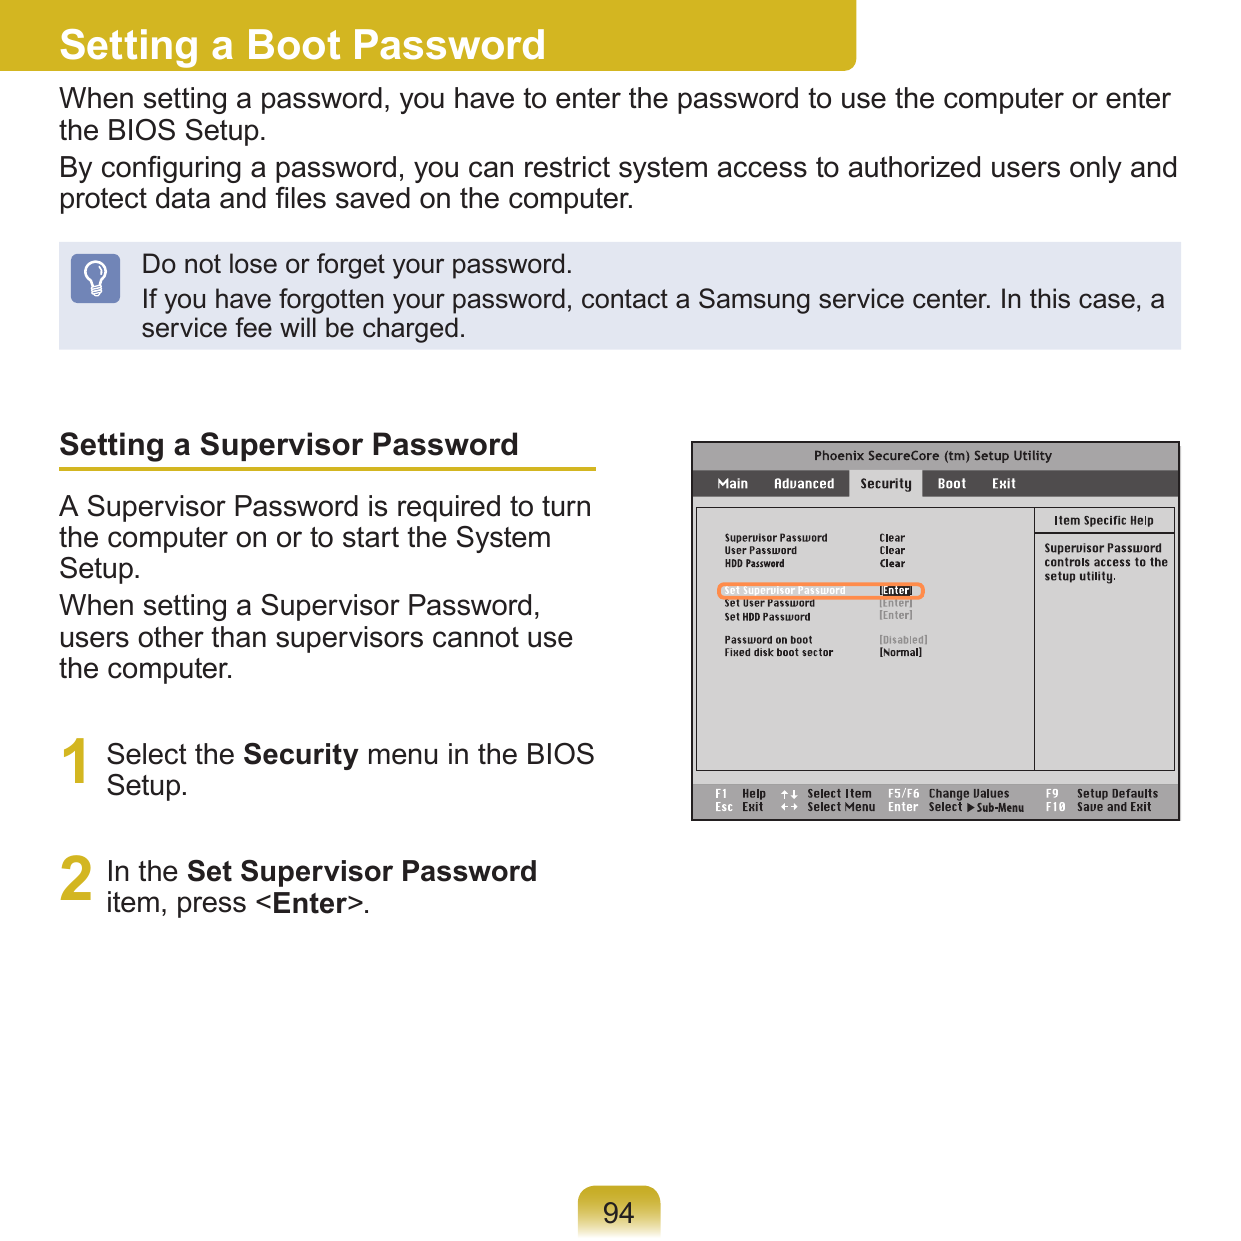
![913 After a moment, the BIOS setup screen appears. The items in the BIOS setup may differ depending on the product.System Time [10:21:53]System Date [07/30/200X]IDE Channel 0 Master XXXXXXXXCPU Type XXXXXXXXCPU Speed X.XX GHzTotal Memory XXX MBGraphics Memory [Auto : Shared]BIOS Version XXXXXXXXMICOM Version XXXXXXXXSetup MenuSetup ItemsHelpHelp for the selected item appears automatically.](https://usermanual.wiki/Samsung-Electronics-Co/SWDY3100.User-Manual-2/User-Guide-1185696-Page-11.png)
![92The BIOS Setup ScreenSystem Time [10:21:53]System Date [07/30/200X]IDE Channel 0 Master XXXXXXXXCPU Type XXXXXXXXCPU Speed X.XX GHzTotal Memory XXX MBGraphics Memory [Auto : Shared]BIOS Version XXXXXXXXMICOM Version XXXXXXXXMenu DescriptionMain Used to change the basic system and environment settings.Advanced Used to congure advanced functions on your computer for devices and chipsets.Security Used to congure security functions, including passwords.Boot Used to set the boot priority and other boot optionsExit Used to exit the Setup either saving the changes or not.](https://usermanual.wiki/Samsung-Electronics-Co/SWDY3100.User-Manual-2/User-Guide-1185696-Page-12.png)
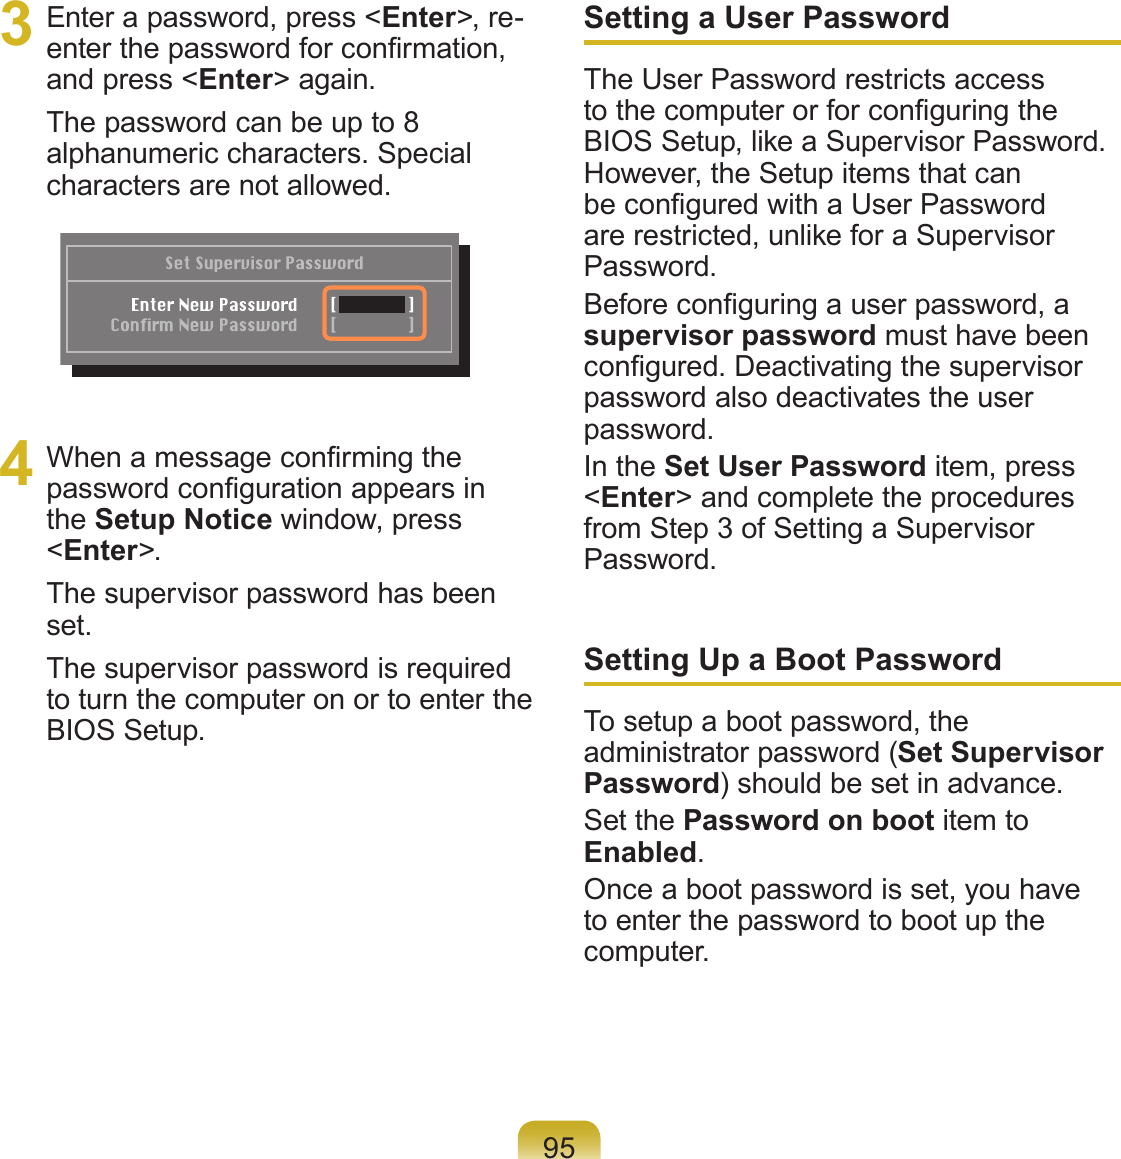
![971 Select the Boot menu in the BIOS Setup.2 Press <Enter> on the Boot Device Priority item.3 Press the down key (↓) to move to the IDE HDD item and press the F6 key to move the item to the top.[Boot priority order] 1. USB CD : N/A 2. IDE HDD : XXXXXXXX 3. PCI BEV : N/A 4. USB FDD : N/A 5. USB KEY : N/A 6. USB HDD : XXXXXXXX 7. 8.[Excluded from boot order] - USB ZIP : N/A - USB LS120 : N/A - PCI SCSI : N/A - Other USB : N/A - PCI : N/ABoot Device Priority4 Press the F10 key to save the settings and exit Setup. The highest boot priority device is now set to the Hard Drive.Changing the Boot PriorityThis computer is congured to boot from an external-type ODD rst.This chapter describes how to change the boot priority so that the computer boots from the hard disk drive rst.PXE OPROM [Only with F12]](https://usermanual.wiki/Samsung-Electronics-Co/SWDY3100.User-Manual-2/User-Guide-1185696-Page-17.png)

![1053 Move to the Boot > Smart Battery Calibration item using the direction keys and press <Enter>.4 Highlight Yes in the Battery Calibration Conrmation window and press <Enter>.The Battery Calibration function is activated and the battery is forcefully discharged. To stop the operation, press the <Esc> button.This operation requires 3~5 hours depending on the battery capacity and the remaining battery charge.PXE OPROM [Only with F12]](https://usermanual.wiki/Samsung-Electronics-Co/SWDY3100.User-Manual-2/User-Guide-1185696-Page-25.png)


![135Q I have congured both wired and wireless connections with the same IP address, but the network connections do not work properly.A You cannot use the same IP address for wired and wireless connections. To use only one IP address for both wired and wireless connections, you must disable one of them according to your requirements in Network Connections in the Control Panel.Q After installing the Wireless LAN Setting program, the “AEGIS Protocol (IEEE 802.1x)” protocol appears in the [Local Area Connect Properties] window.A The protocol is a security authentication protocol that is automatically installed when the Wireless LAN Settings program is installed and does not affect the program operation.Q (For Intel PROSet) Although I have turned the wireless LAN off using the Turn Off Wireless LAN button in PROSet, the Wireless LAN LED is still on.A This is normal. The Turn Off Wireless LAN button in PROSet just turns off the wireless LAN software. The wireless LAN hardware is not affected by this operation.Q (For Intel PROSet) After installing PROSet, I cannot manage my wireless network in Windows.A When clicking Use Microsoft Client in the Tools menu of the PROSet, you can manage wireless network in Windows. Thereafter, if you wish to manage your wireless network, click Activate Intel PROSet/Wireless in the Tools menu of the PROSet.](https://usermanual.wiki/Samsung-Electronics-Co/SWDY3100.User-Manual-2/User-Guide-1185696-Page-55.png)