Sharp DMR0169 Microwave Oven User Manual R CD1800 CD2200 indd
Sharp Corporation Microwave Oven R CD1800 CD2200 indd
UserManual.wiki
>
Sharp
>
DMR0169 User Manual
Users Manual
Navigation menu
Upload a User Manual
Namespaces
Wiki Guide
HTML
PDF
Info
Views
User Manual
Discussion / Help
Navigation
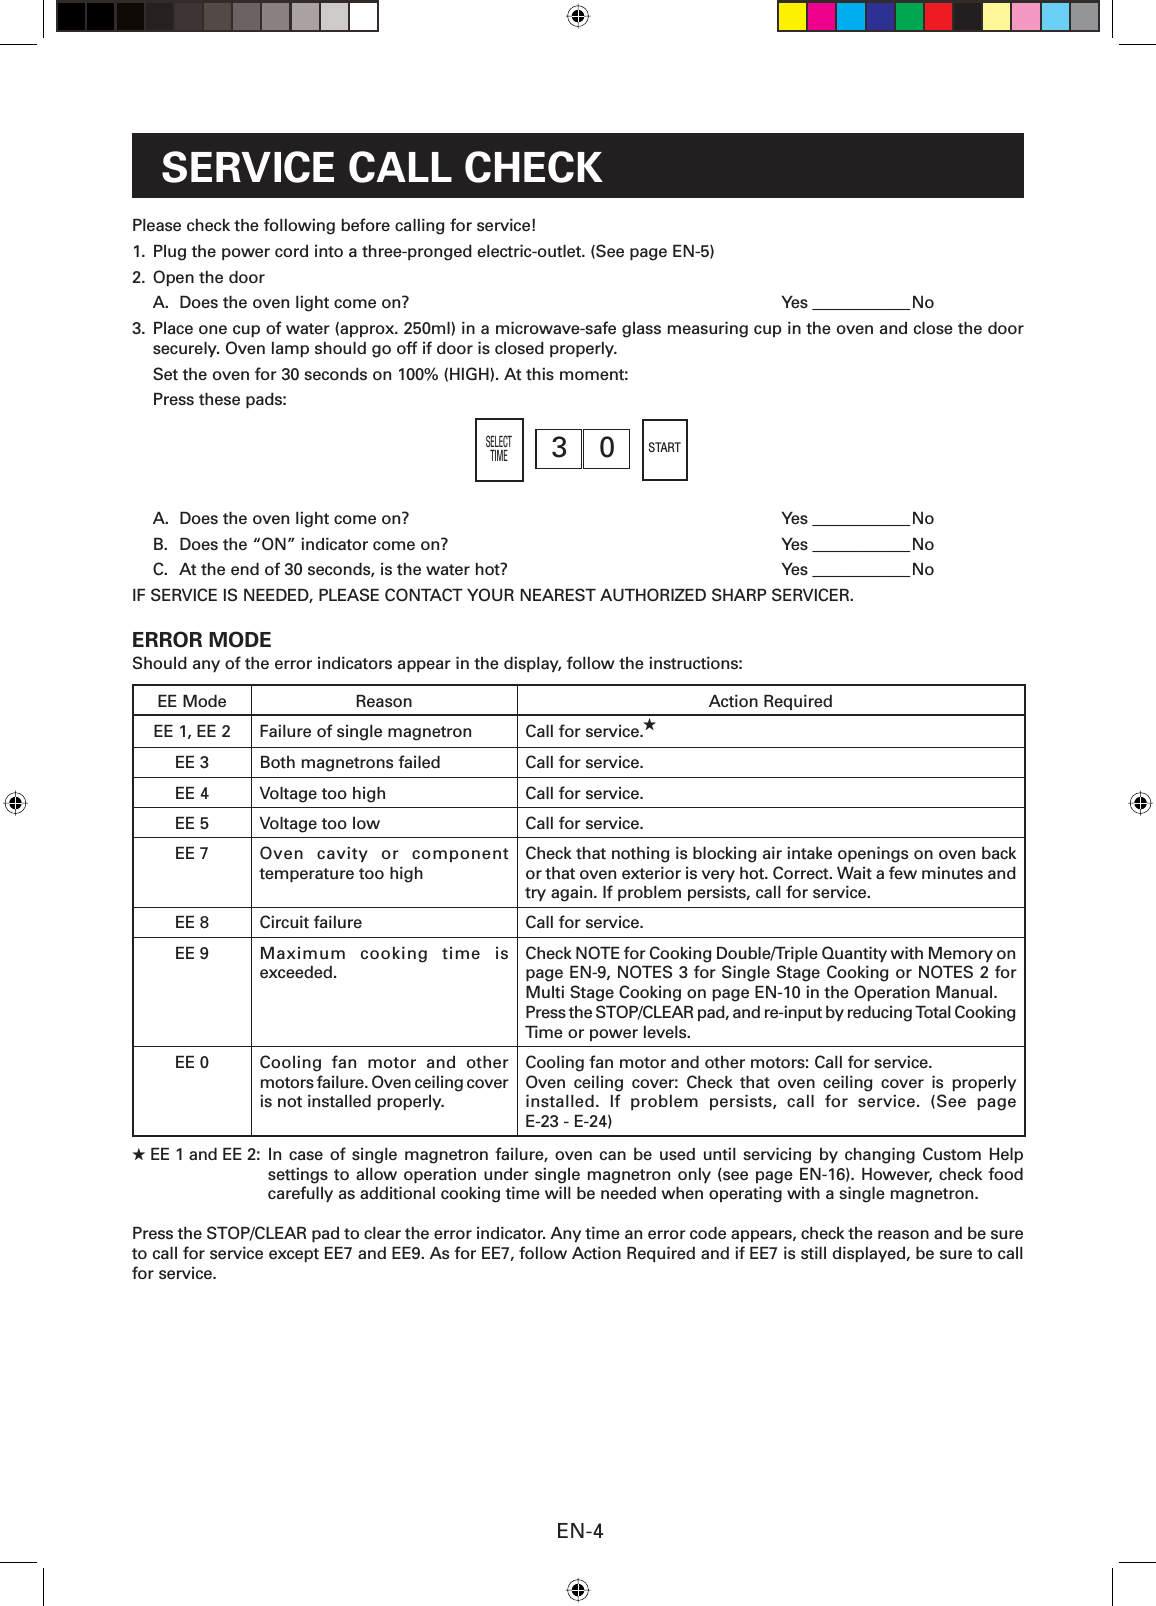
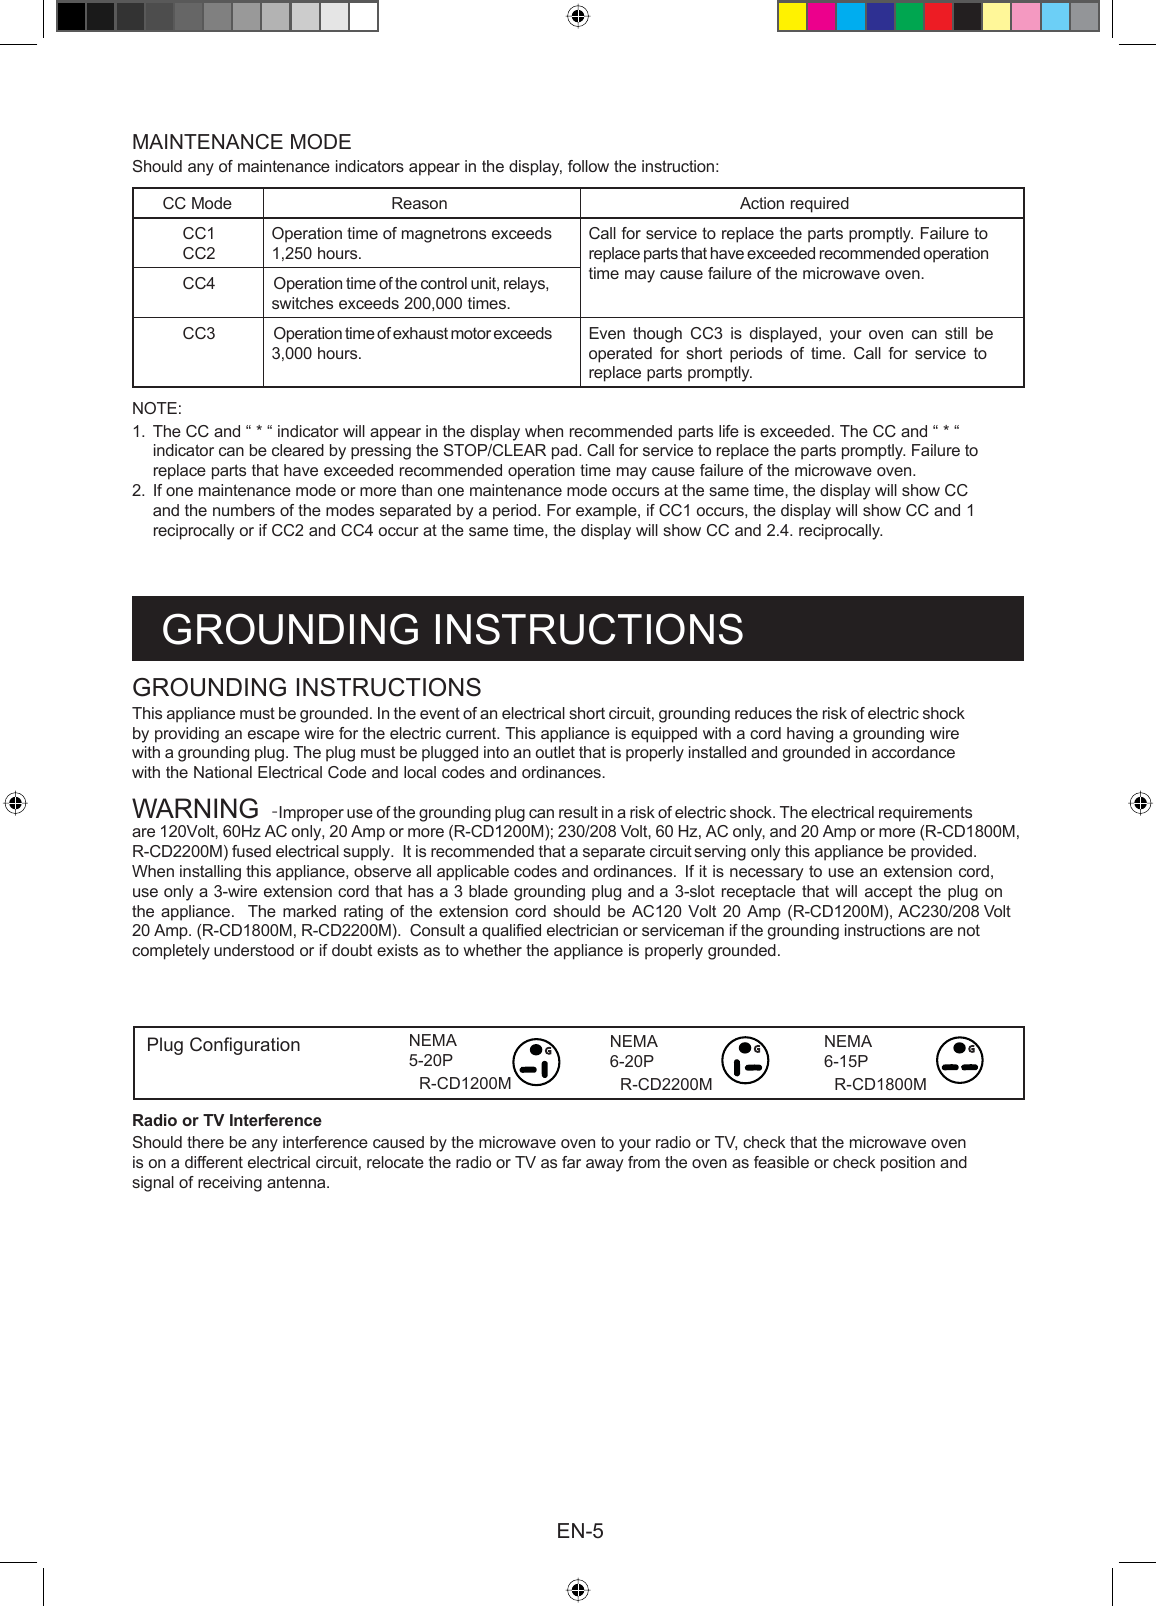
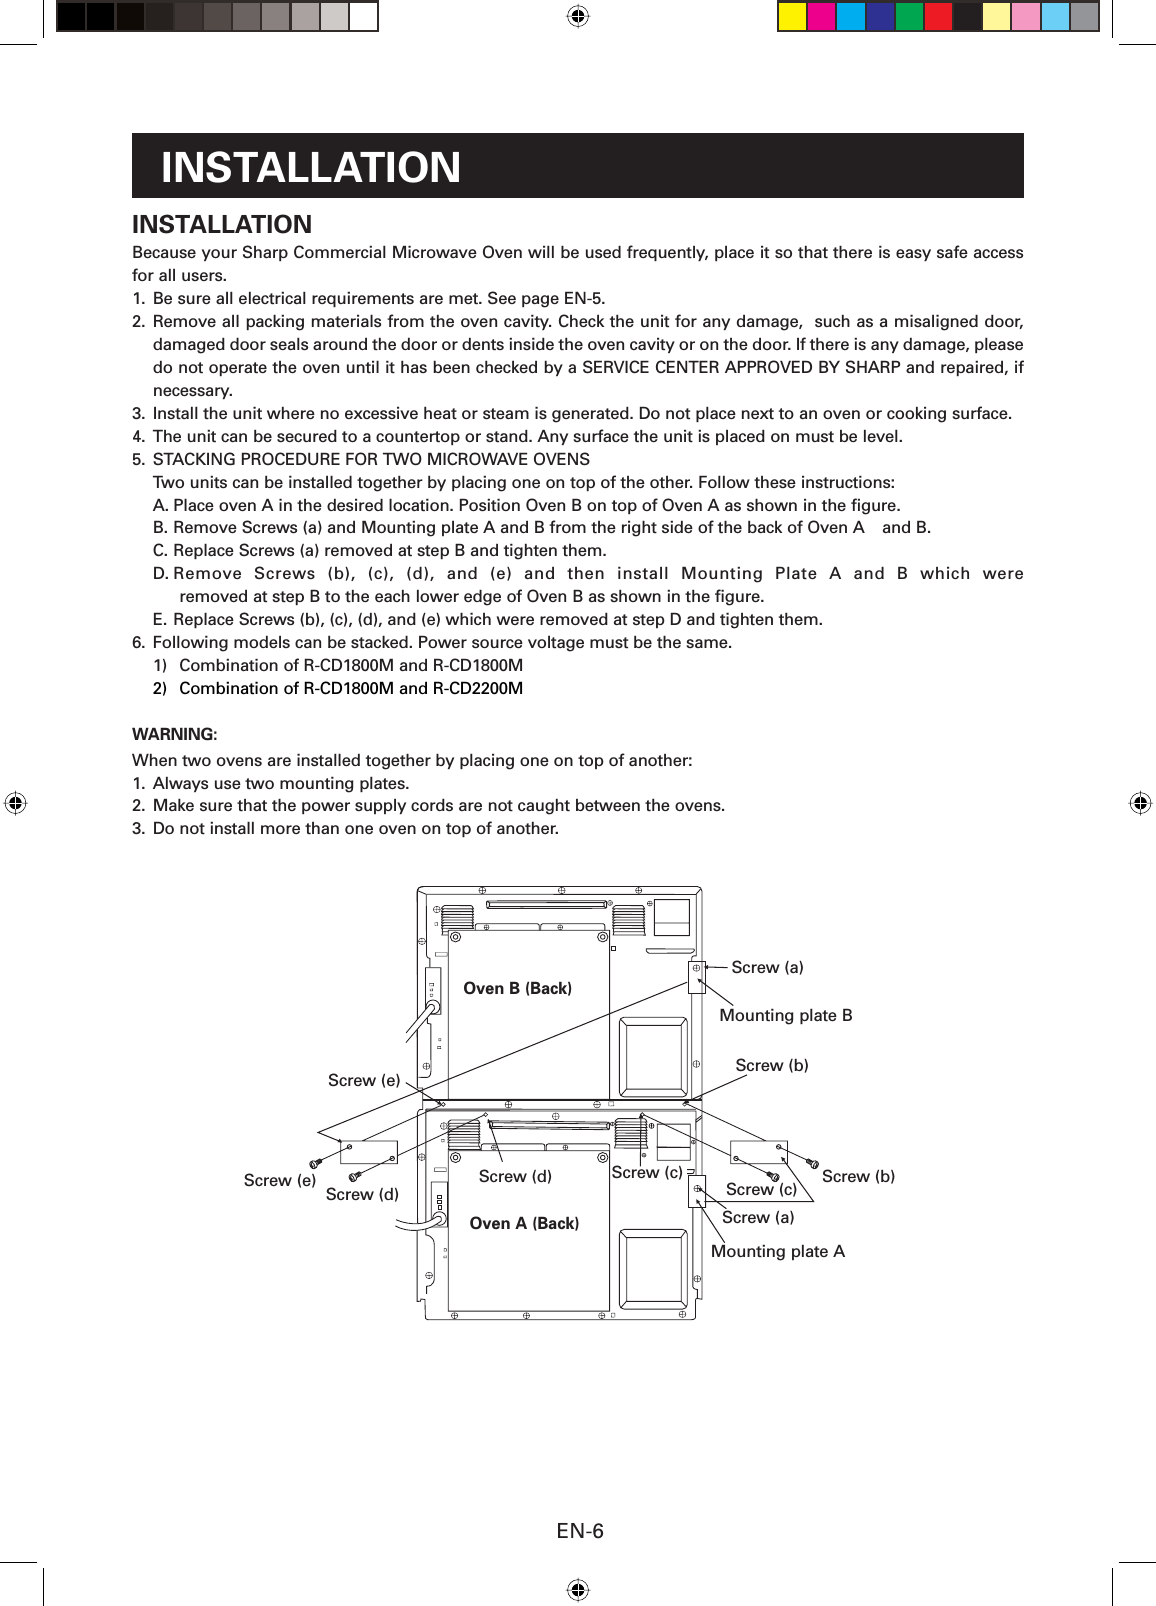
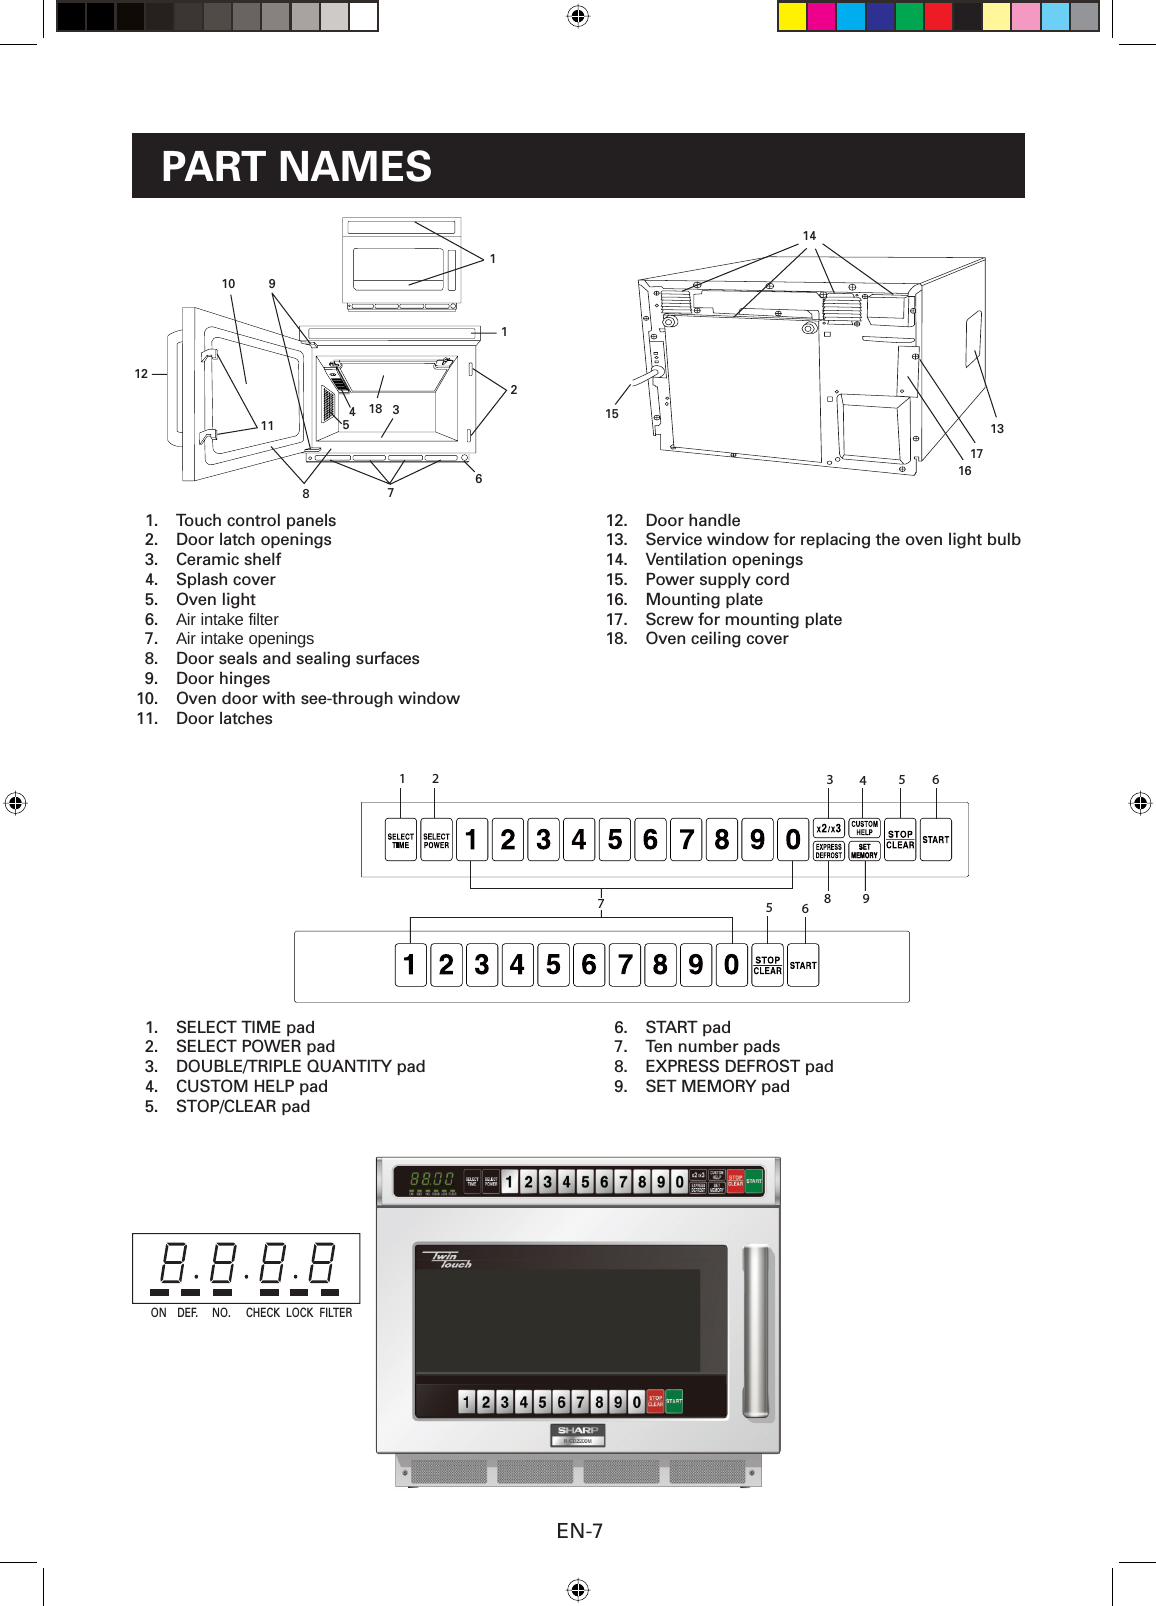
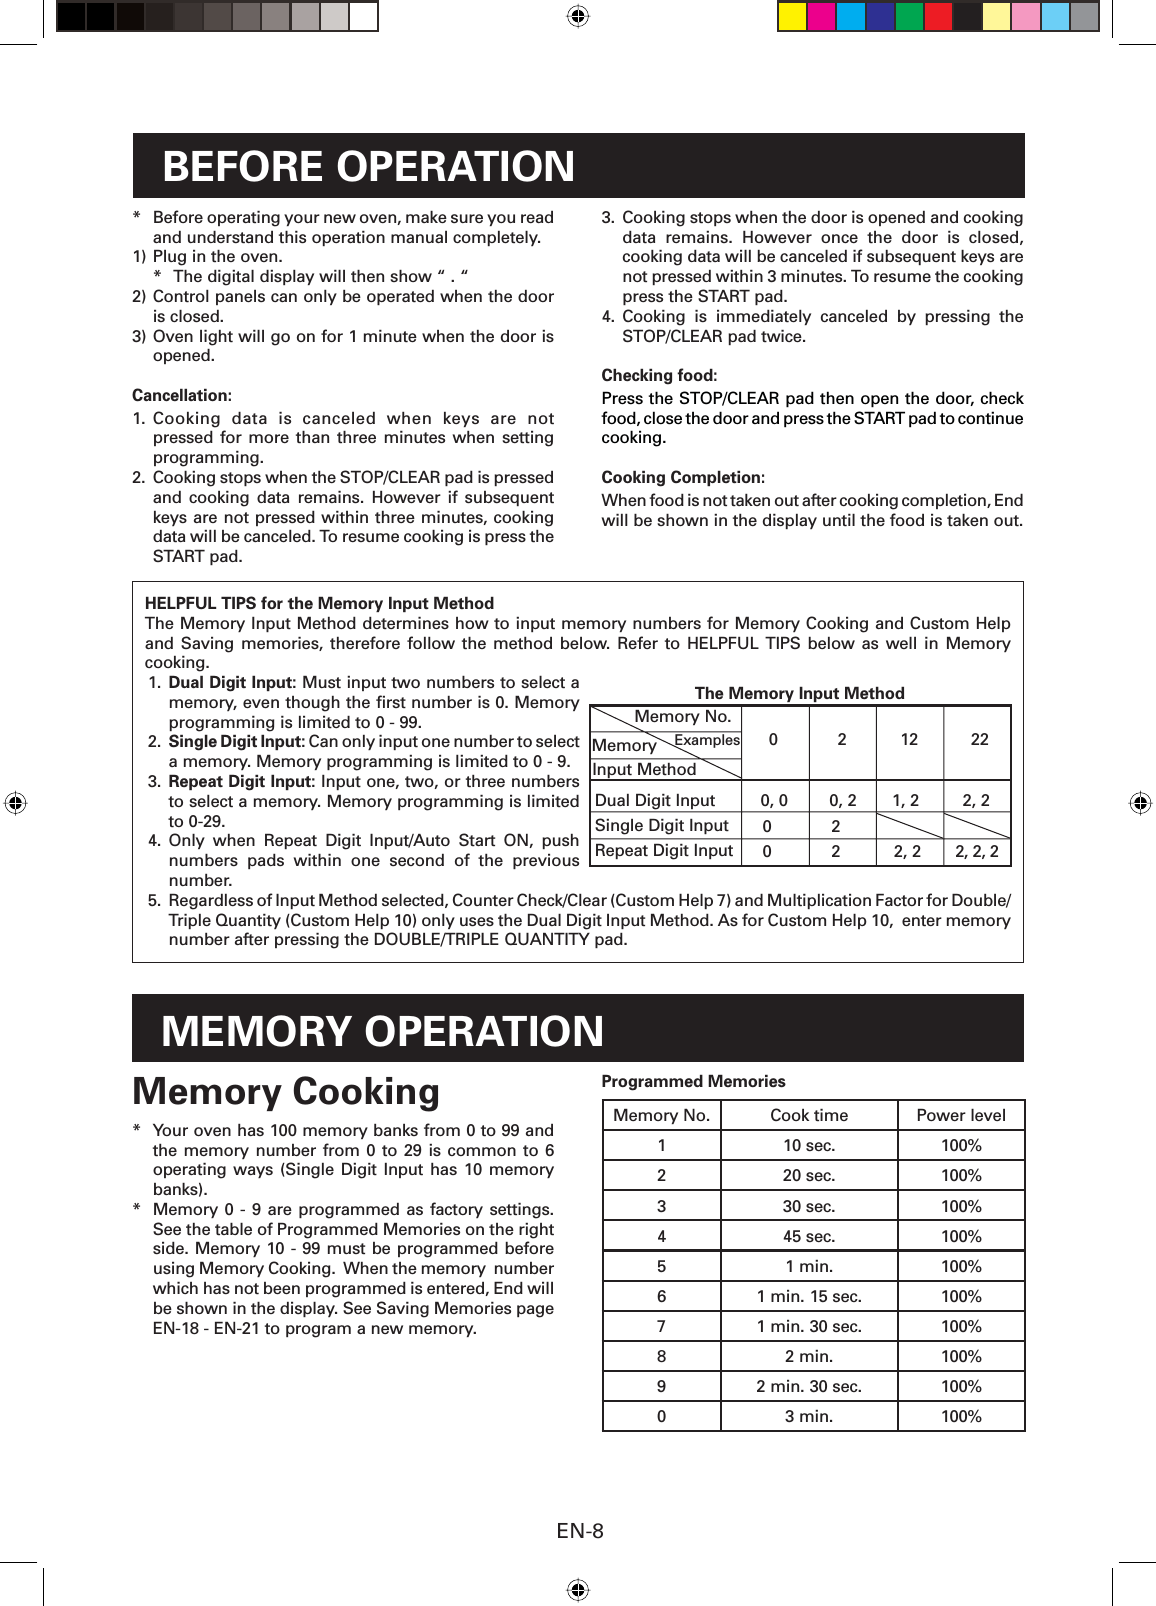
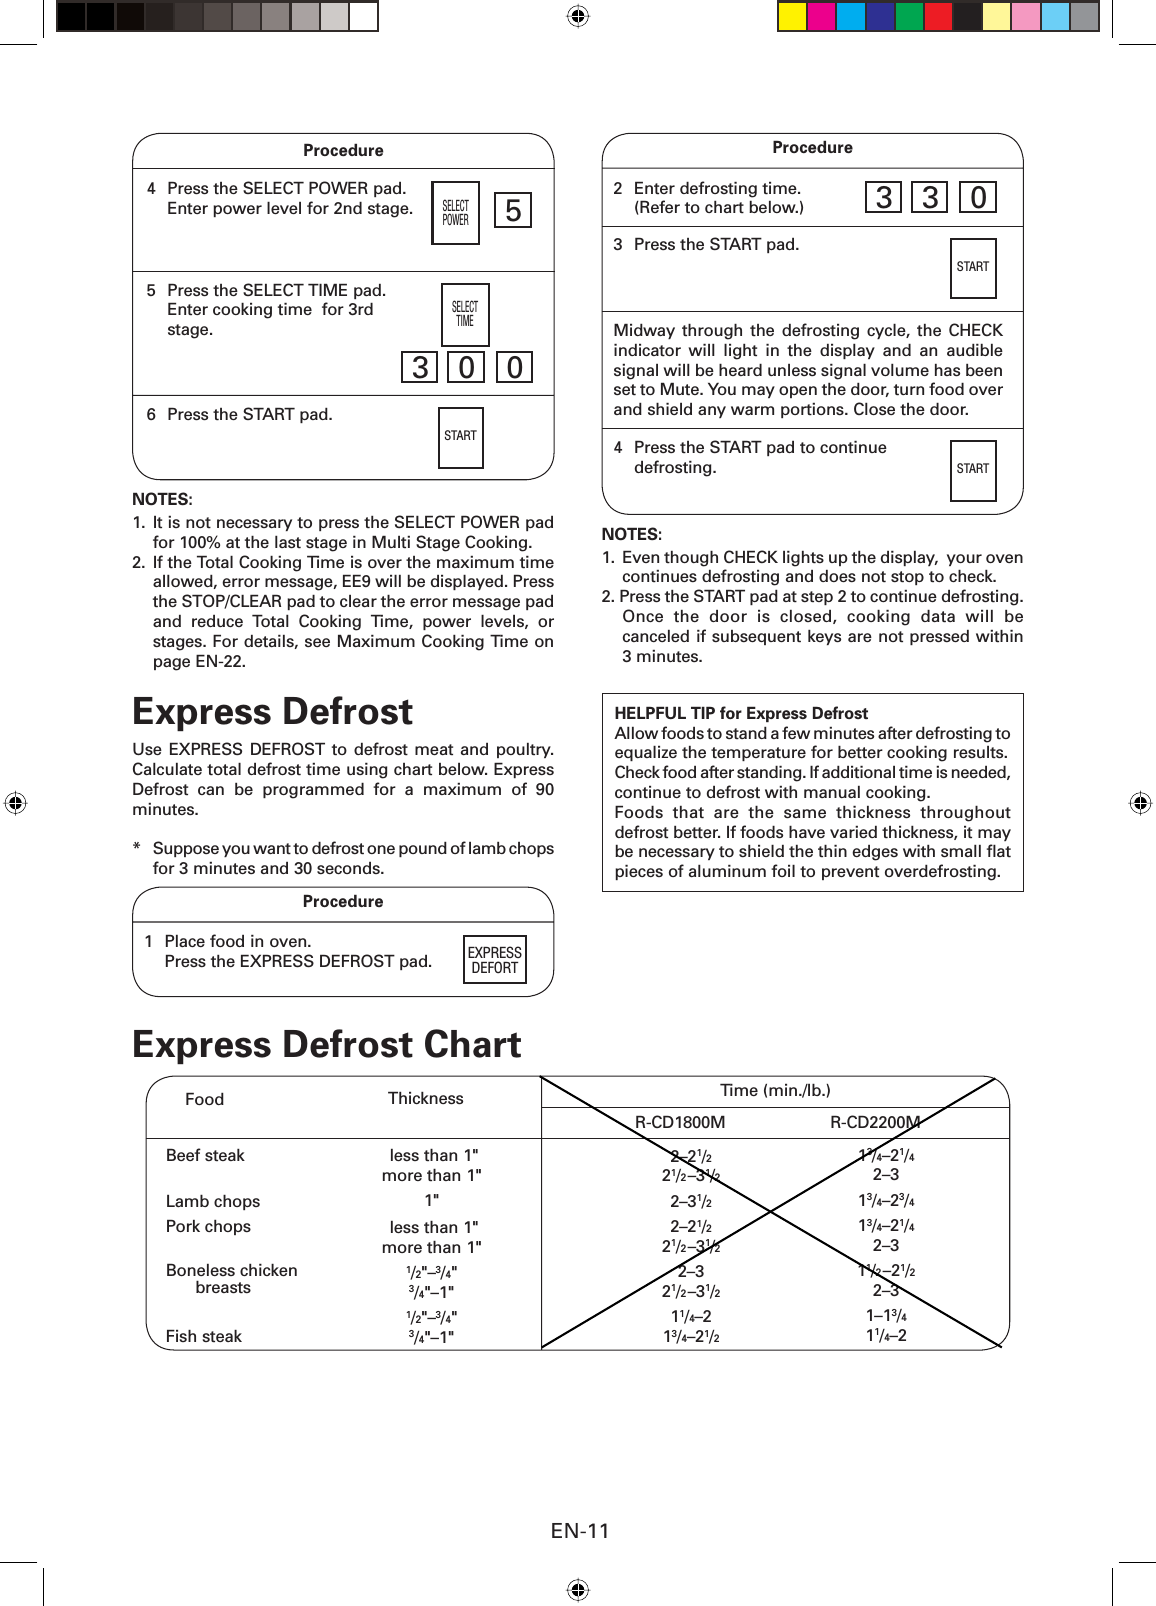
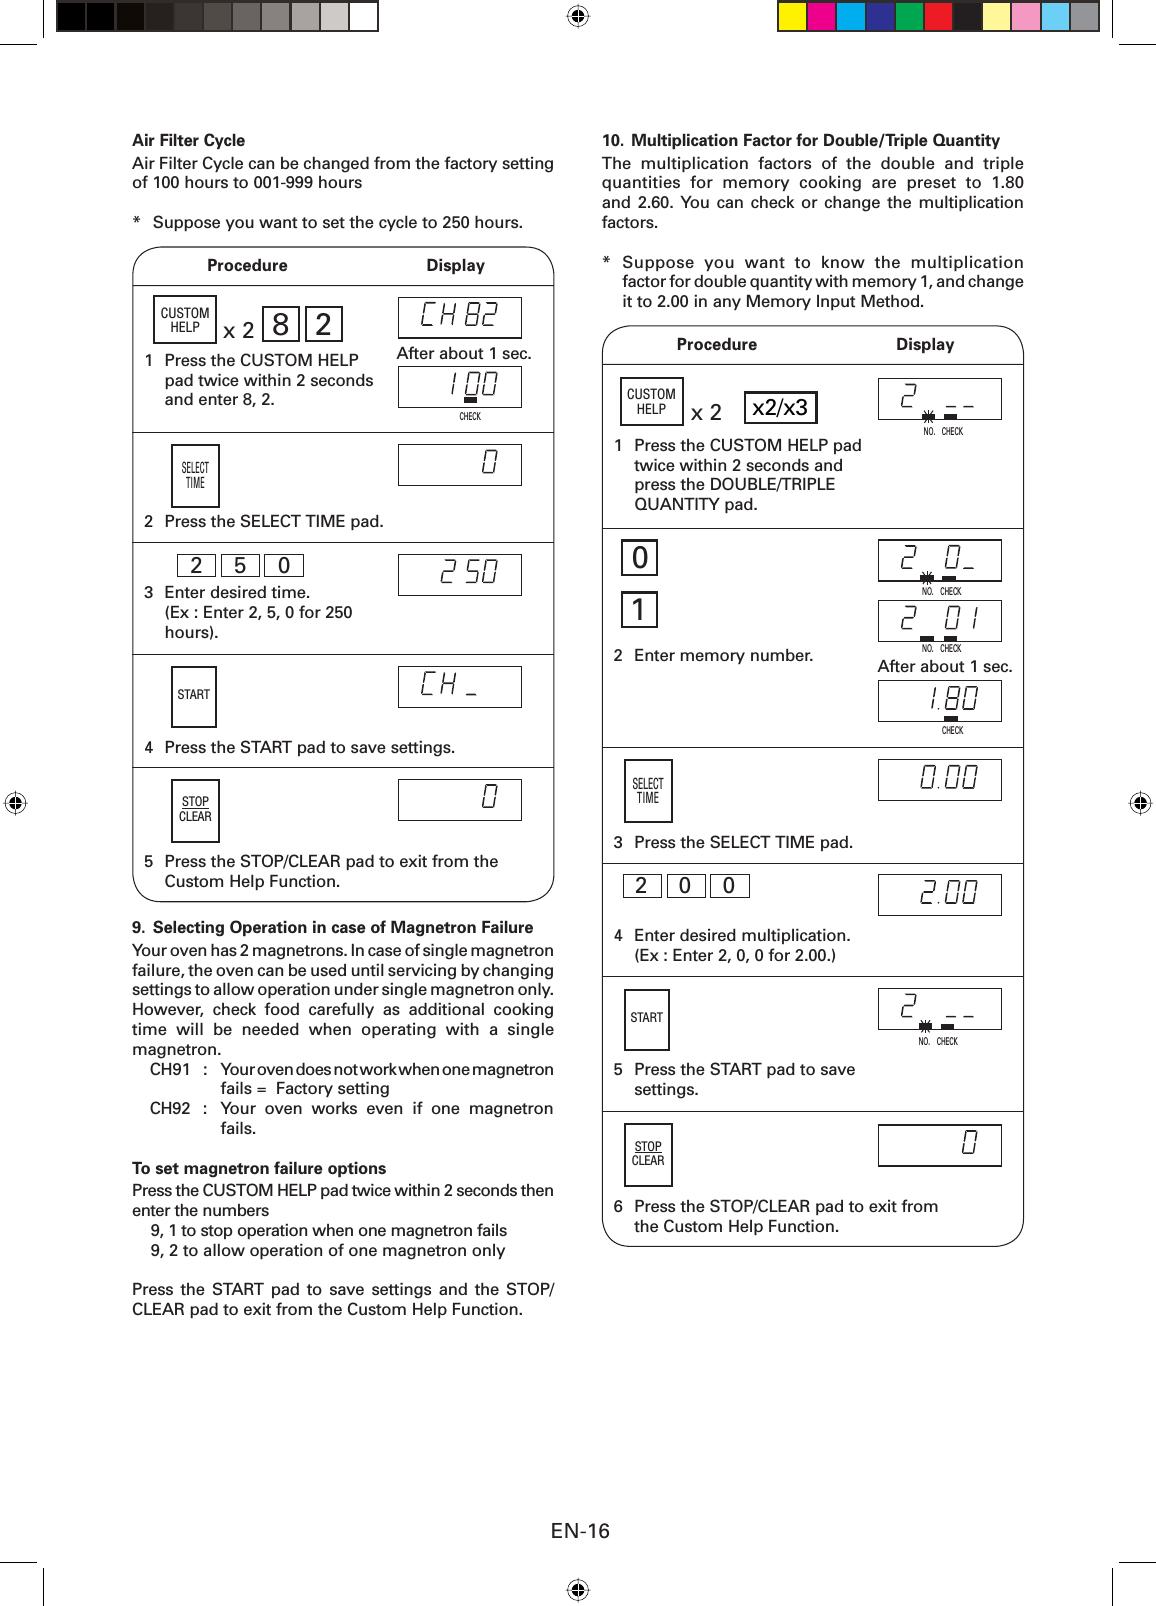
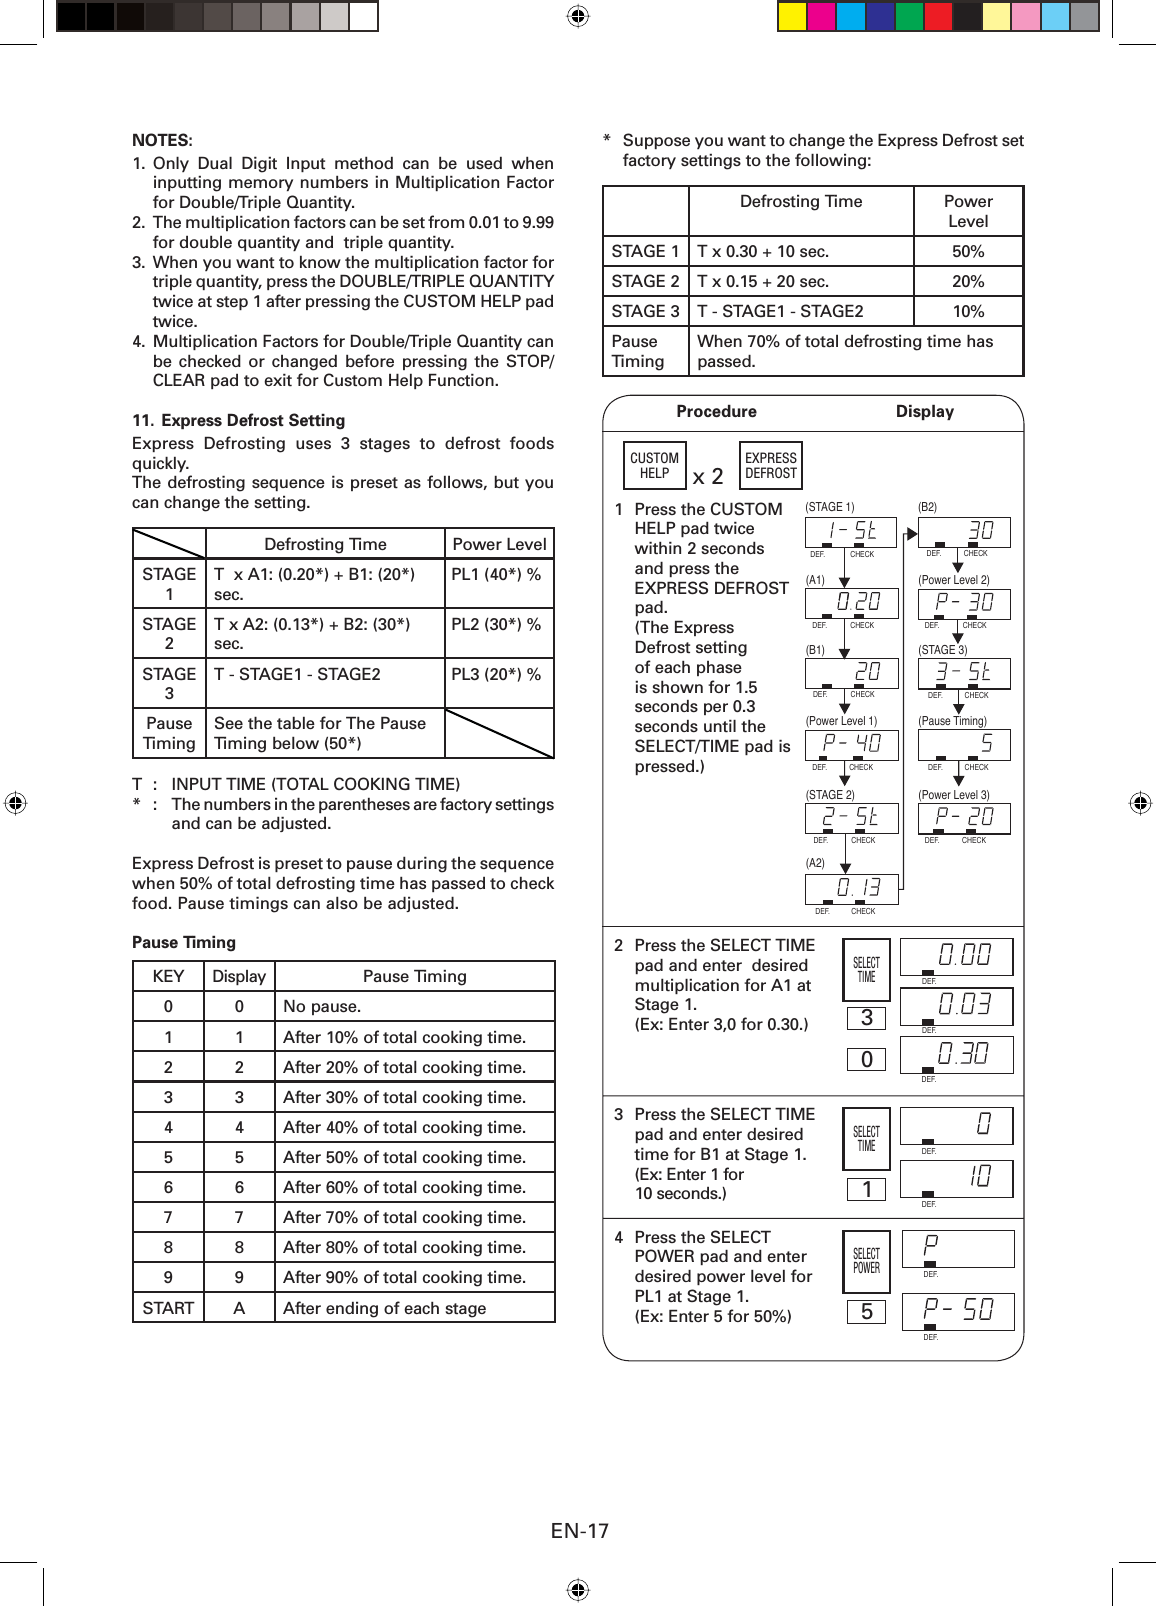
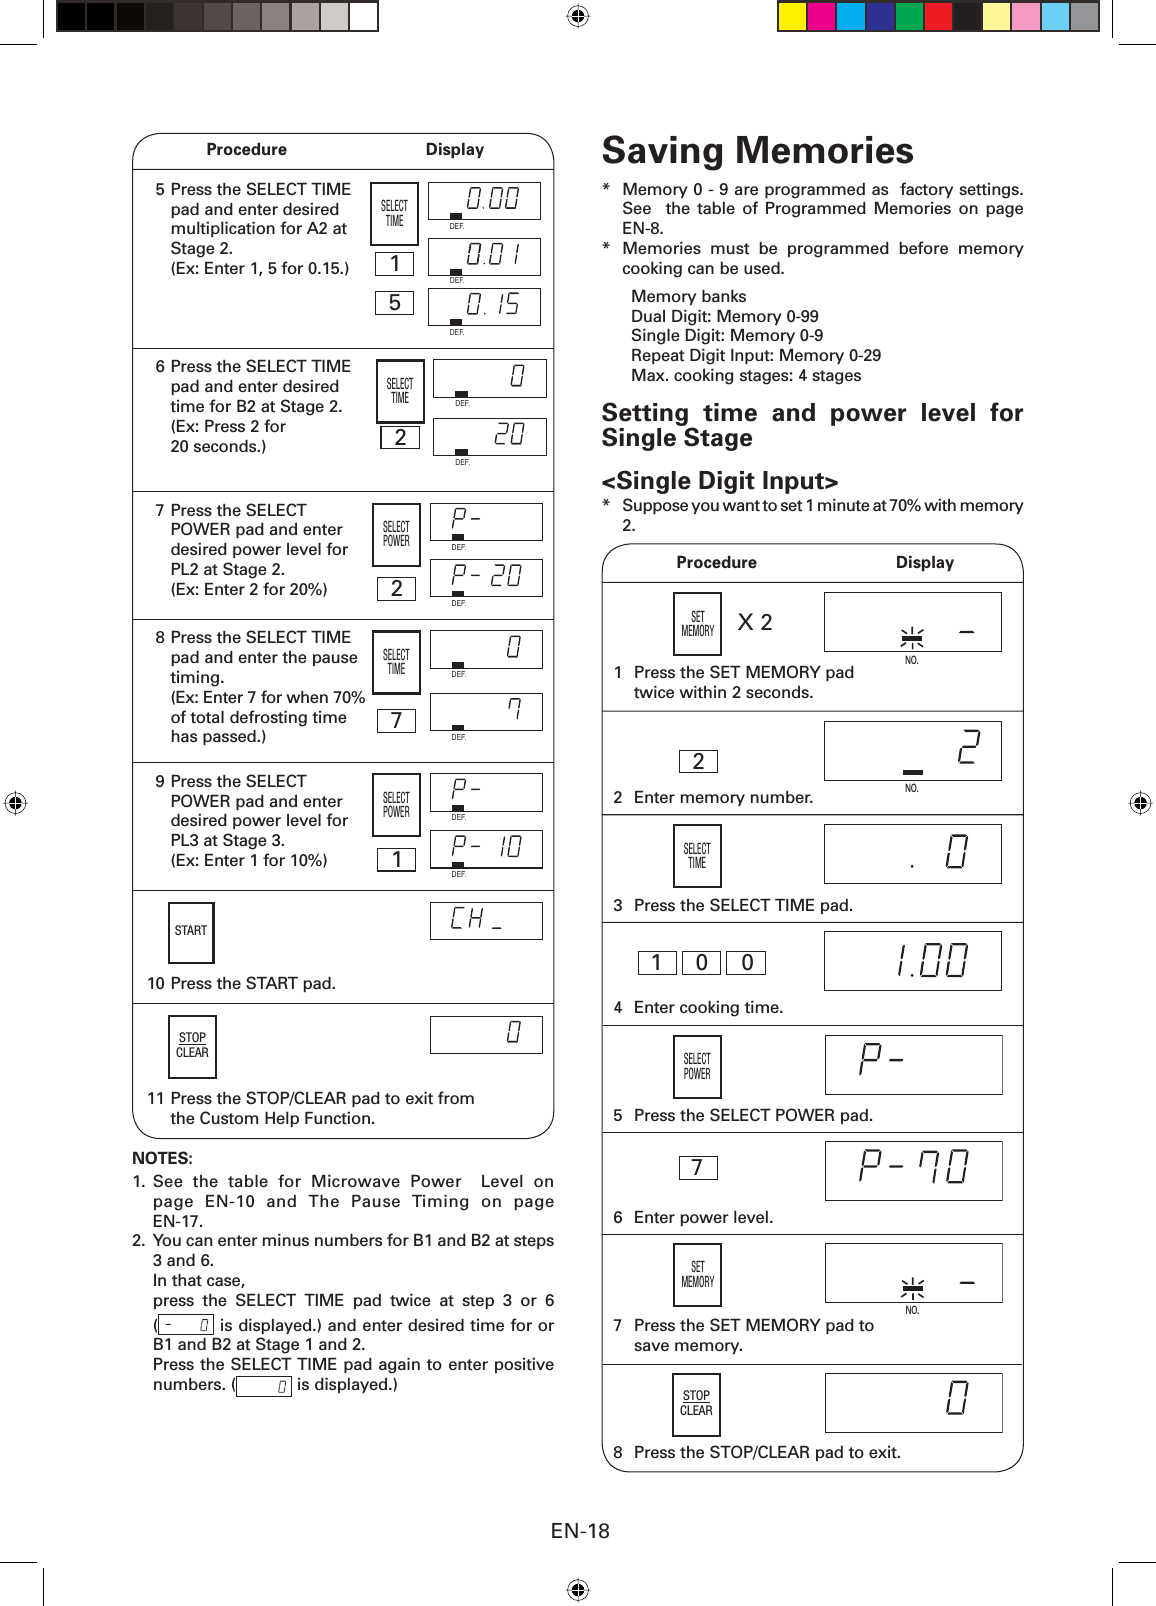
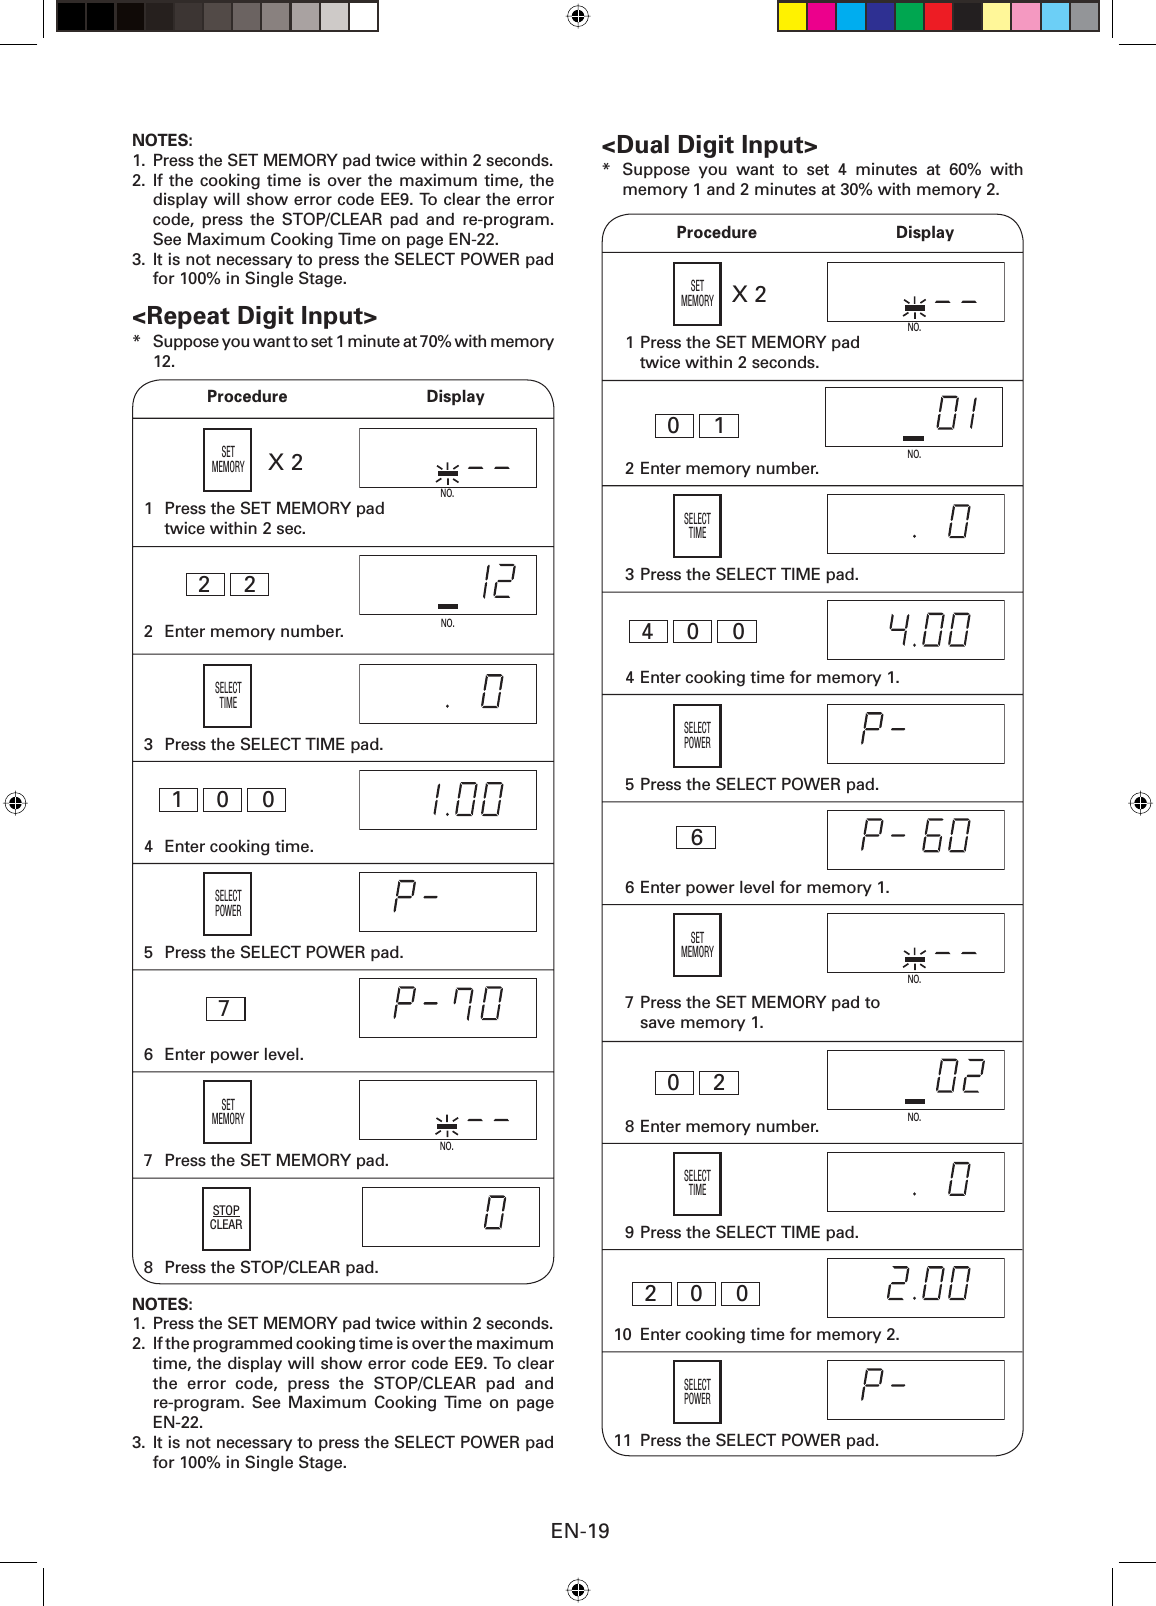
![EN-22Maximum Cooking Time 1. 100%~60% power level : The Total Cooking Time of all cooking stages is maximum 60 minutes.2. 50%~10% power level : The Total Cooking Time of all cooking stages is maximum 120 minutes.3. Multi Stage Cooking : The Maximum Cooking Time is limited by the following calculation. Each stage has 100~60% power level or 50~10% power level.Maximum Cooking Time Calculation* Suppose you want to cook 5 minutes at 100% for 1st stage, 15 minutes at 80% for 2nd stage, 40 minutes at 30% for 3rd stage and 20 minutes at 10% for 4th stage. In this case actual Cooking Time is 80 minutes, and the calculated time is 50 minutes, see the calculation below. [5min + 15min] + [(40min + 20min)/2] 60 min.4. 0% power level : Maximum 99 minutes and 99 seconds can be input at one stage (Max. 4 stages).5. Express Defrost : The Maximum Defrosting Time is 90 minutes. See Maximum Cooking Time Calculation above.Total Cooking Time of 100~60% Power Level 60 minutes2+ Total Cooking Time of 50~10% Power Level](https://usermanual.wiki/Sharp/DMR0169/User-Guide-897658-Page-23.png)