Sharp HRO00024 Cordless Telephone System User Manual 1
Sharp Corporation Cordless Telephone System Users Manual 1
UserManual.wiki
>
Sharp
>
HRO00024 User Manual
>
Users Manual 1
Contents
1.
Users Manual 1
2.
Users Manual 2
3.
Users Manual 3
4.
Users Manual for Handset
5.
Revised User Manual
Users Manual 1
Navigation menu
Upload a User Manual
Namespaces
Wiki Guide
HTML
PDF
Info
Views
User Manual
Discussion / Help
Navigation

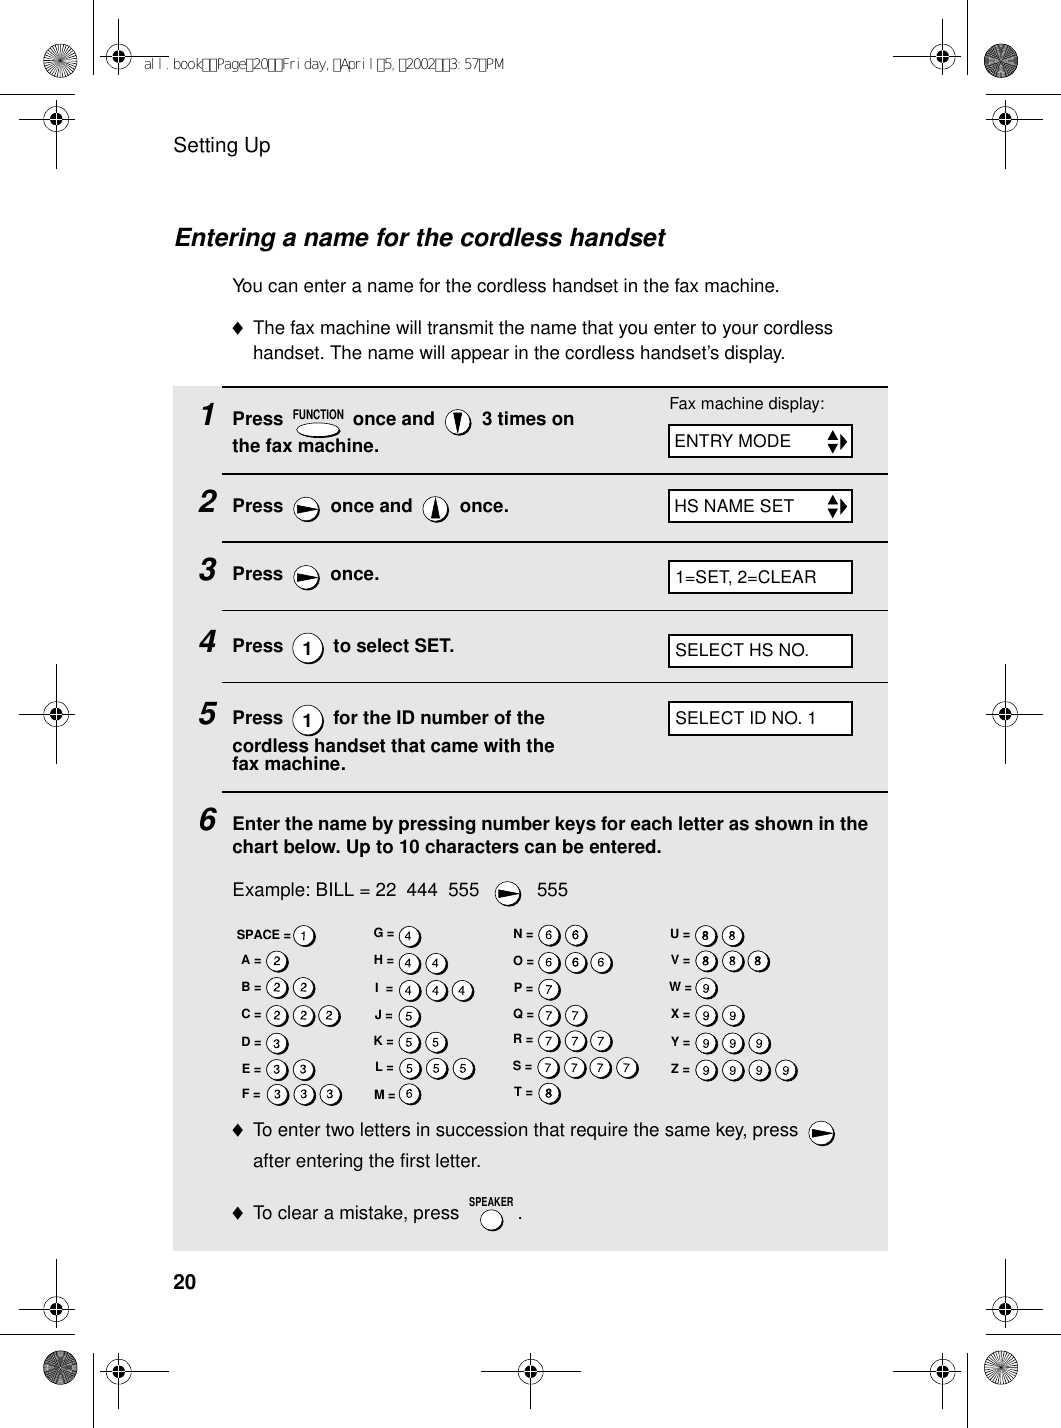
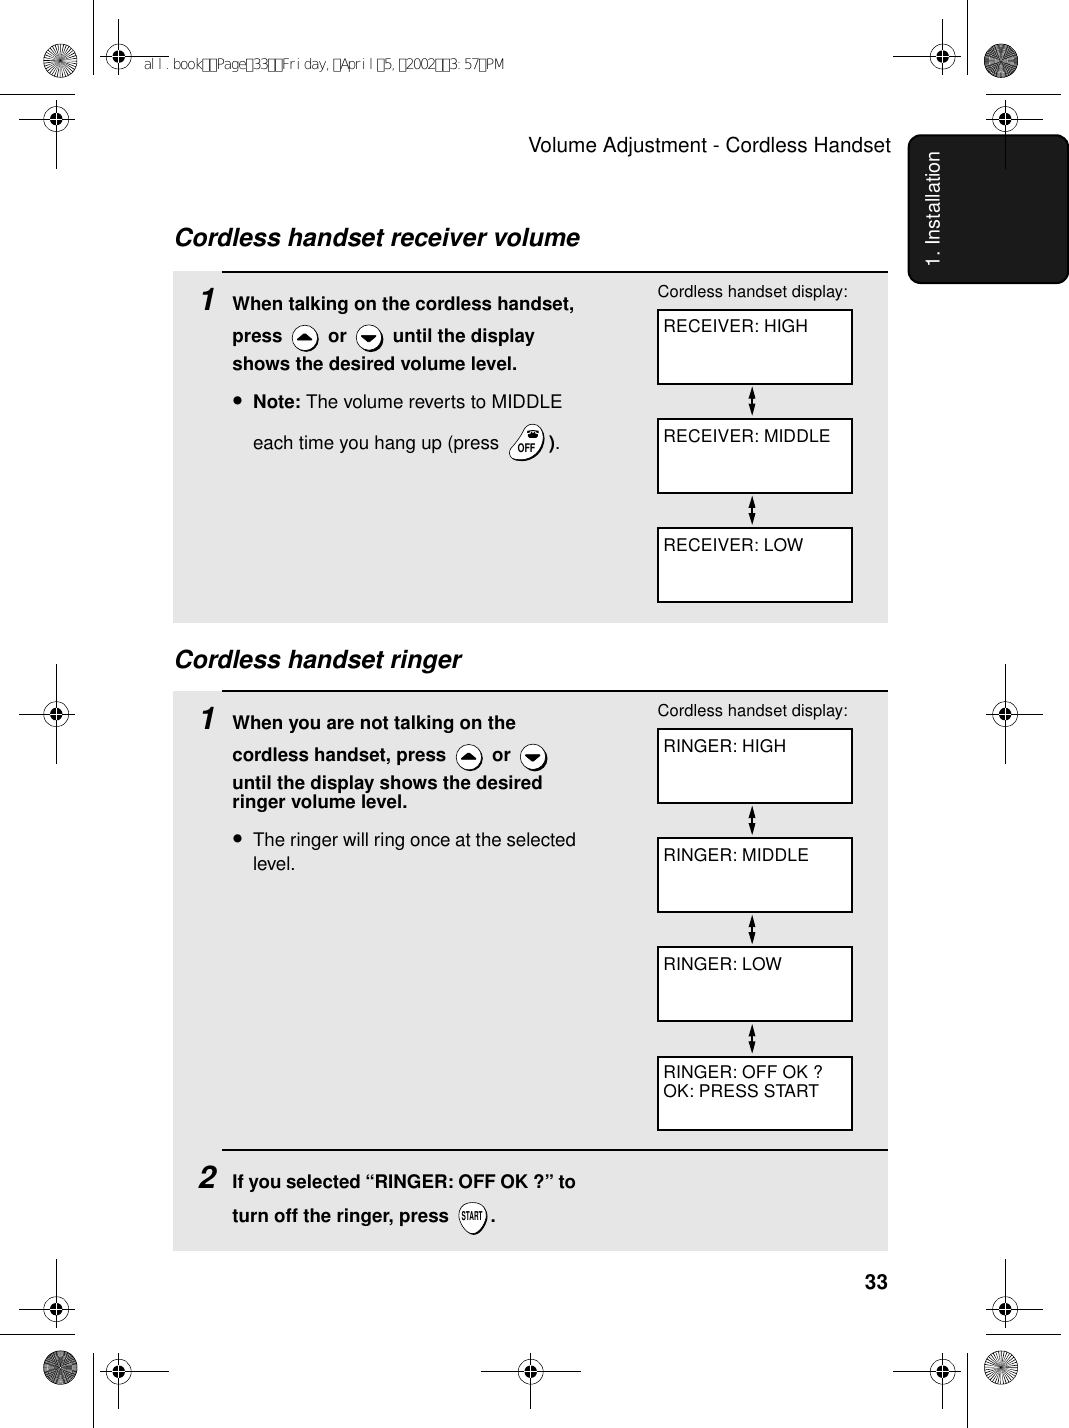
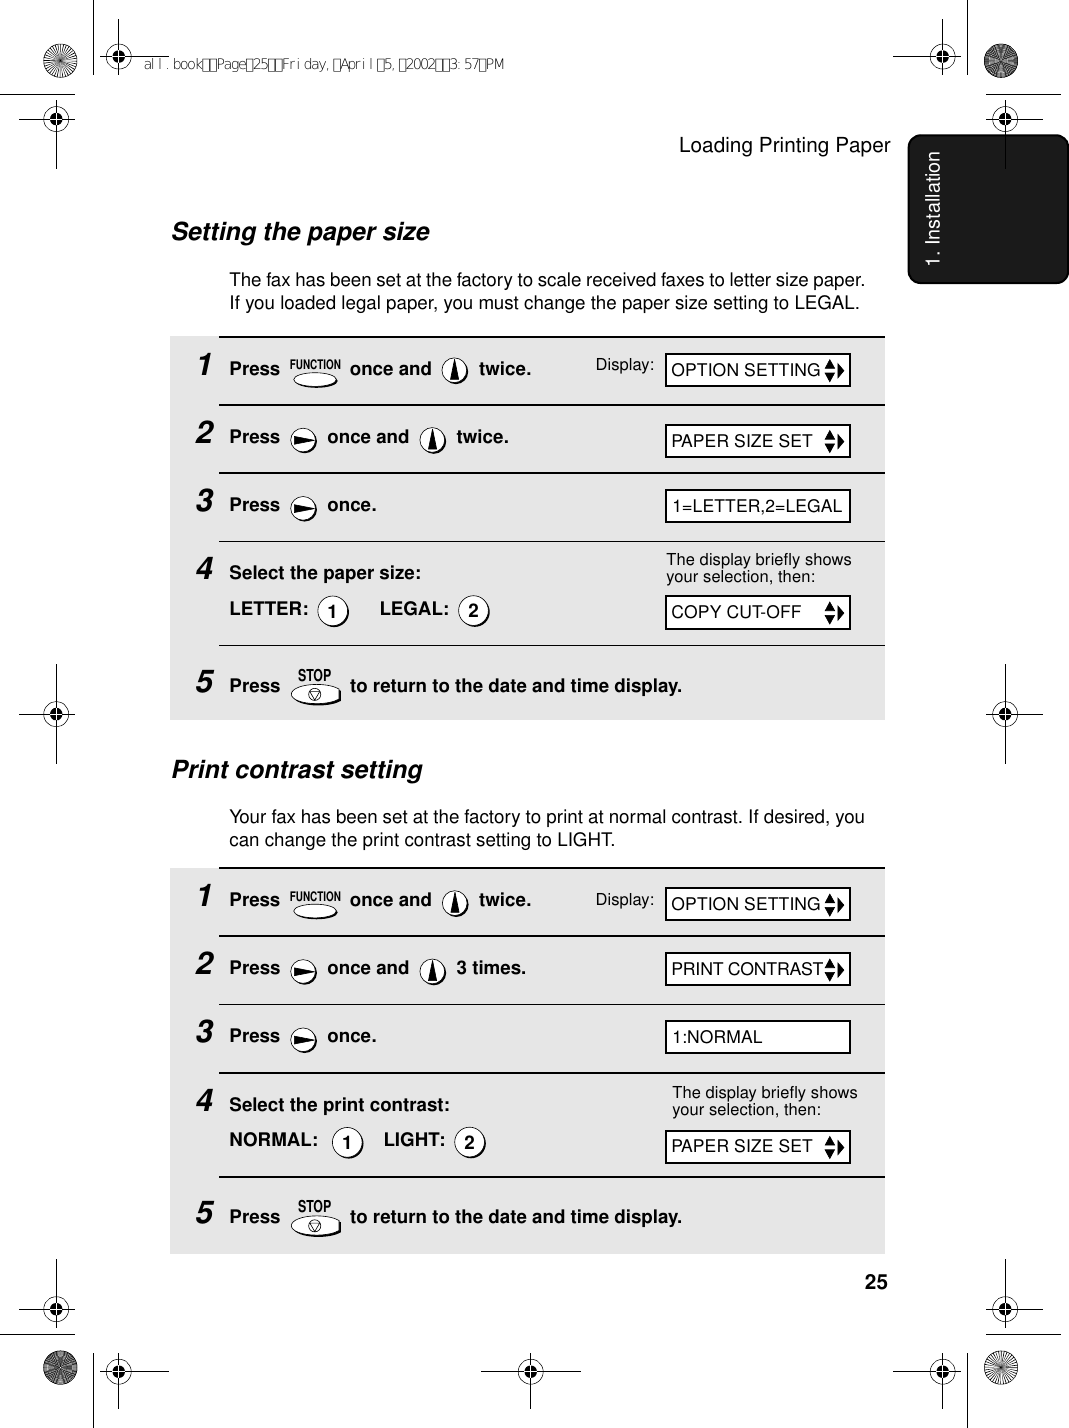
![Setting Up211. Installation♦To enter a lower case letter, continue pressing the key for the letter until the lower case letter appears. ♦To enter one of the following symbols, press or repeatedly:. / ! " # $ % & ’ ( ) + + , - : ; < = > ? @ [ ¥ ] ^ _ ' { | } ) (7Press to store the name. 8Press to exit.START/MEMORYSTOPConnecting a headsetYou can connect a headset (purchased separately) to the headset jack. Remove the cap and insert the connector as shown.Accessory cordless handsetsYou can use up to 3 accessoryUX-K01 cordless handsets with the fax machine. For information on setting up an accessory cordless handset for use with the fax machine, see the manual that accompanies the accessory handset.Please purchase accessory UX-K01 handsets at your dealer or retailer.OWN NUMBER SET Display:HANDSET1BILLThe handset number and name appear in the standby display of the cordless handsetall.bookPage21Friday,April5,20023:57PM](https://usermanual.wiki/Sharp/HRO00024.Users-Manual-1/User-Guide-238910-Page-23.png)
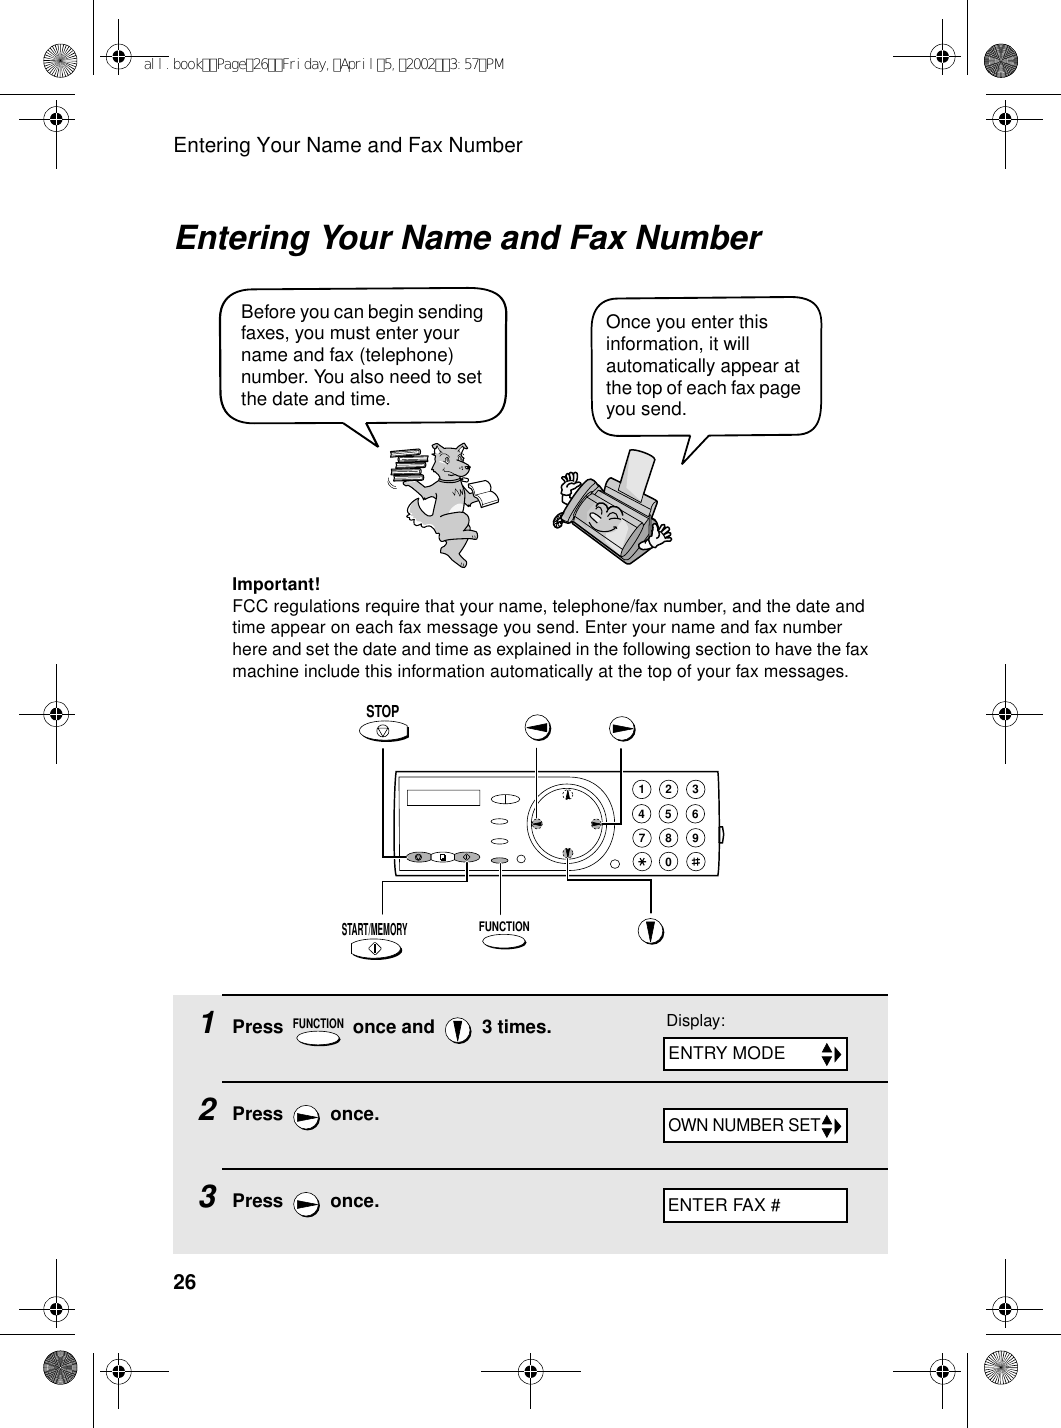
![Entering Your Name and Fax Number271. Installation4Enter your fax number by pressing the number keys (max. 20 digits). •To insert a space between digits, press . •To clear a mistake, press .5Press to enter the fax number in memory.6Enter your name by pressing number keys for each letter as shown in the chart below. Up to 24 characters can be entered.Example: SHARP = 7777 44 2 777 7♦To enter two letters in succession that require the same key, press after entering the first letter. ♦To clear a mistake, press .♦To enter a lower case letter, continue pressing the key for the letter until the lower case letter appears. To enter one of the following symbols, press or repeatedly: . / ! " # $ % & ’ ( ) + + , - : ; < = > ? @ [ ¥ ] ^ _ ' { | } ) (7Press .8Press to return to the date and time display.SPEAKERSTART/MEMORYSPEAKERSTART/MEMORYSTOPDisplay:DATE&TIME SETA =B =C =D =E =F =G =H =I =J =K =L =M =N =O =P =Q =R =S =T =U =V =W =X =Y =Z =SPACE =all.bookPage27Friday,April5,20023:57PM](https://usermanual.wiki/Sharp/HRO00024.Users-Manual-1/User-Guide-238910-Page-29.png)