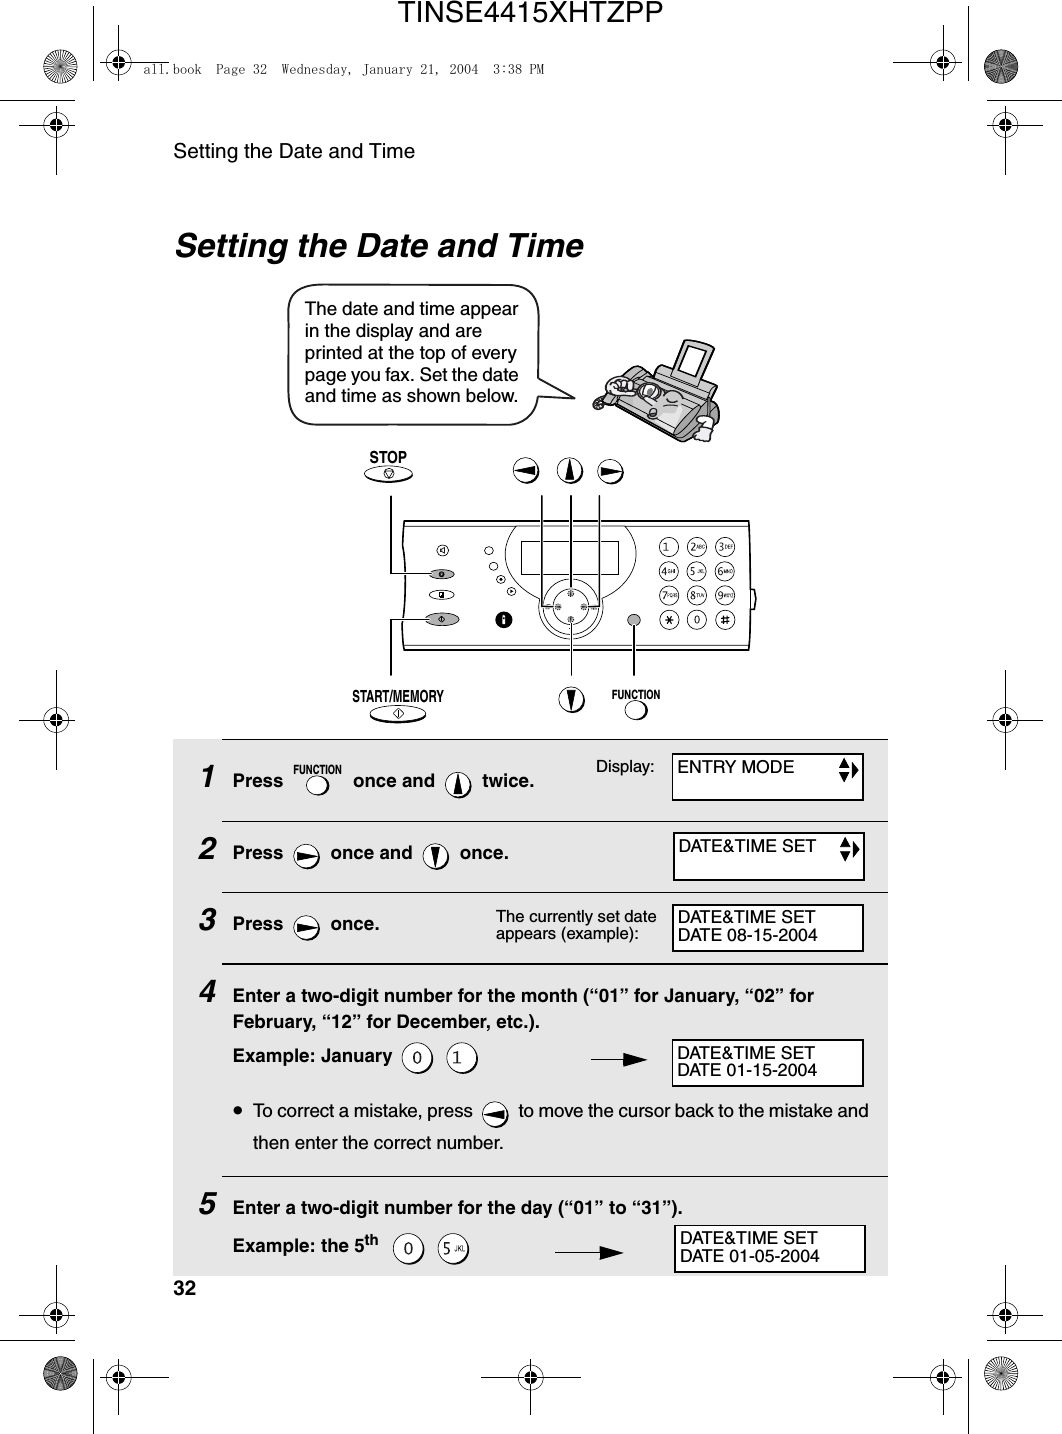
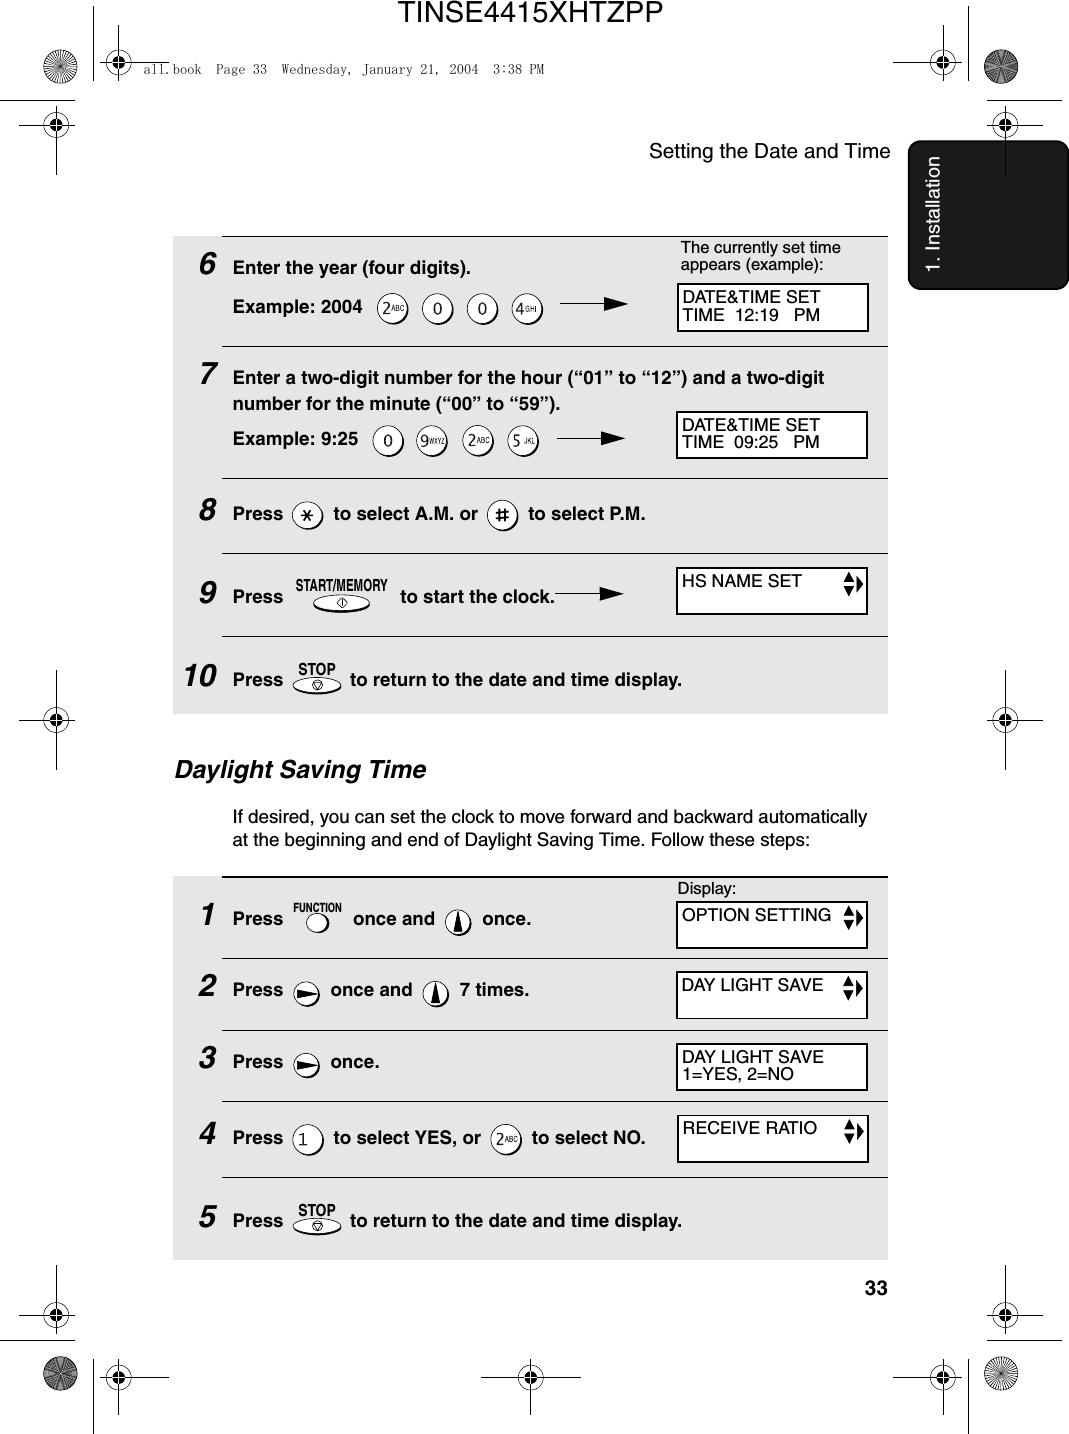
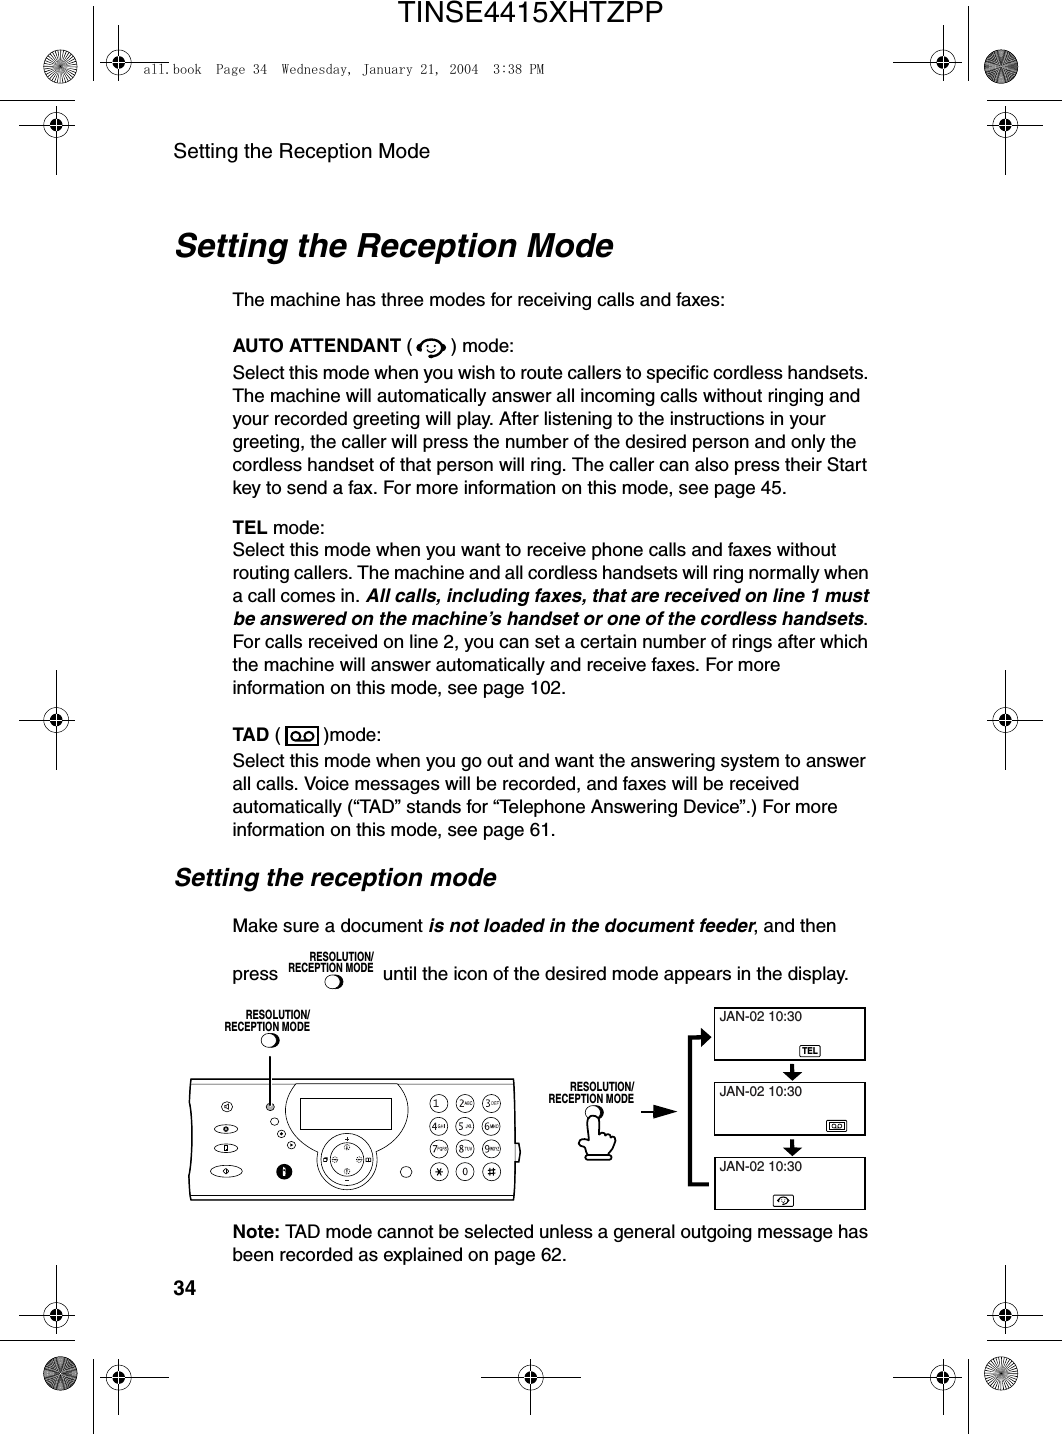
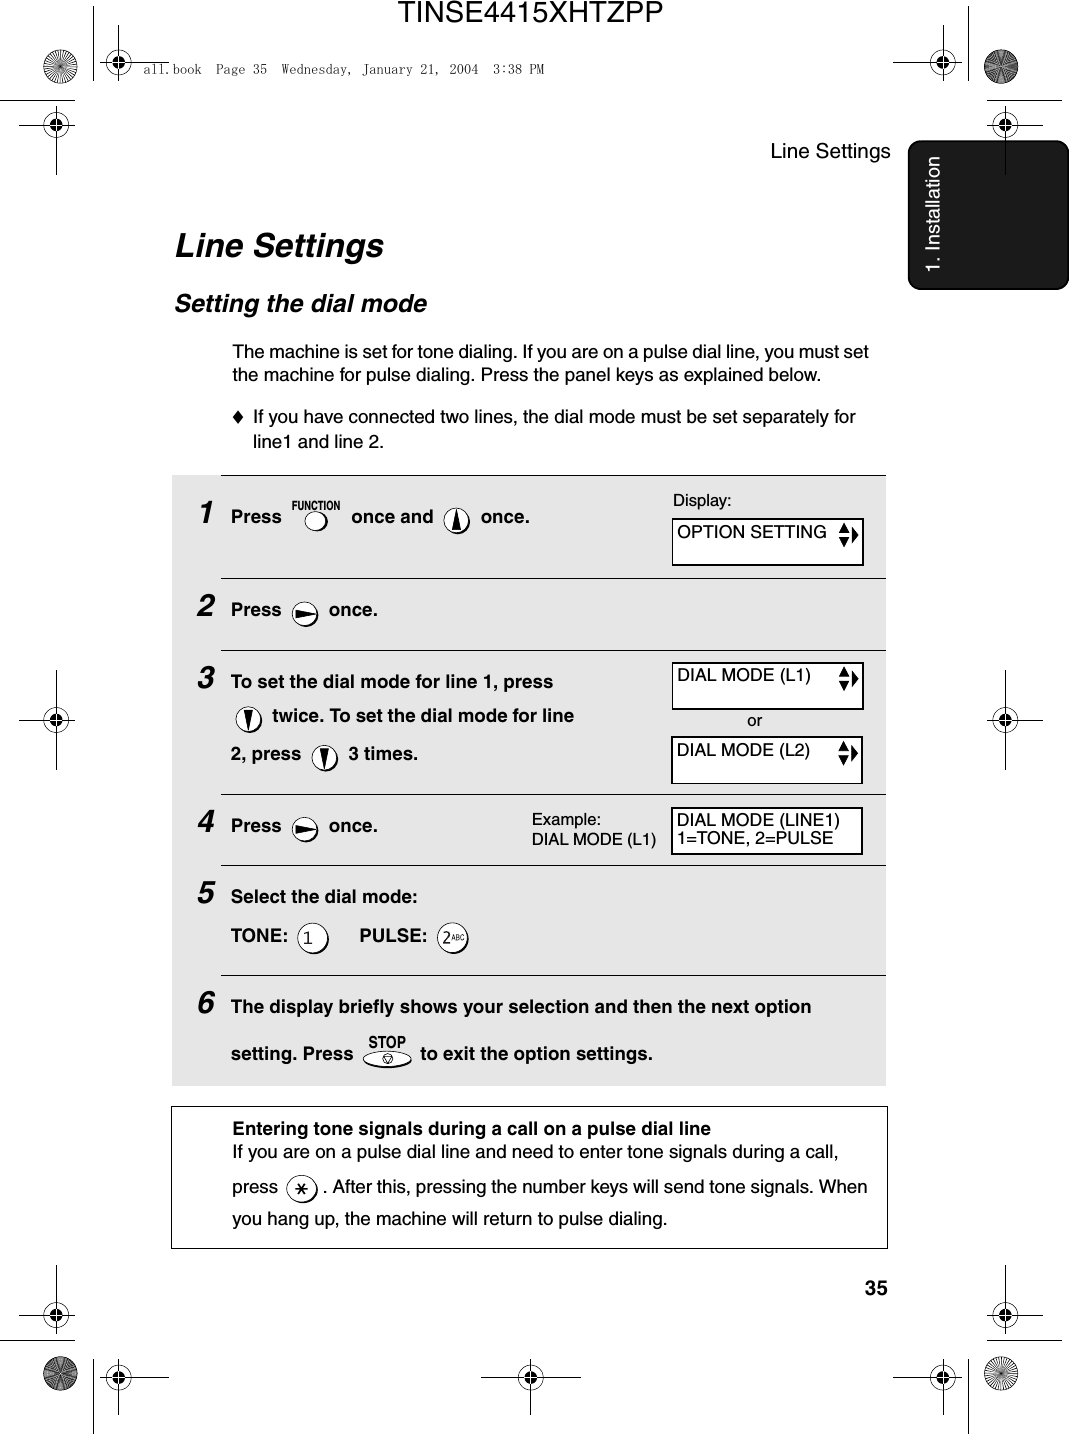
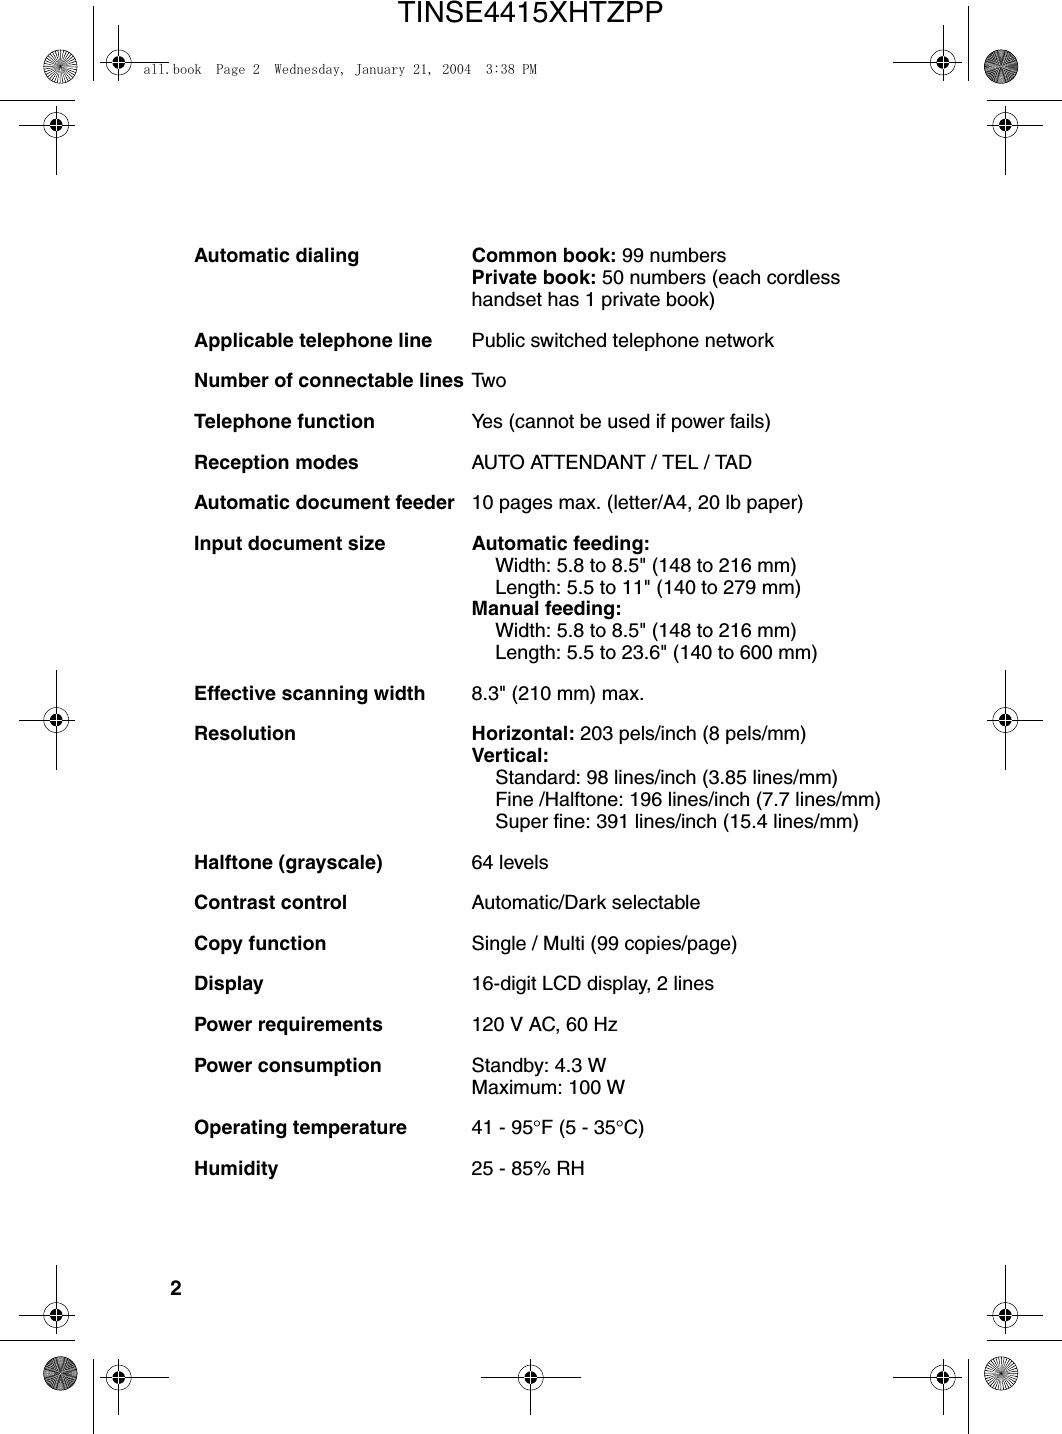
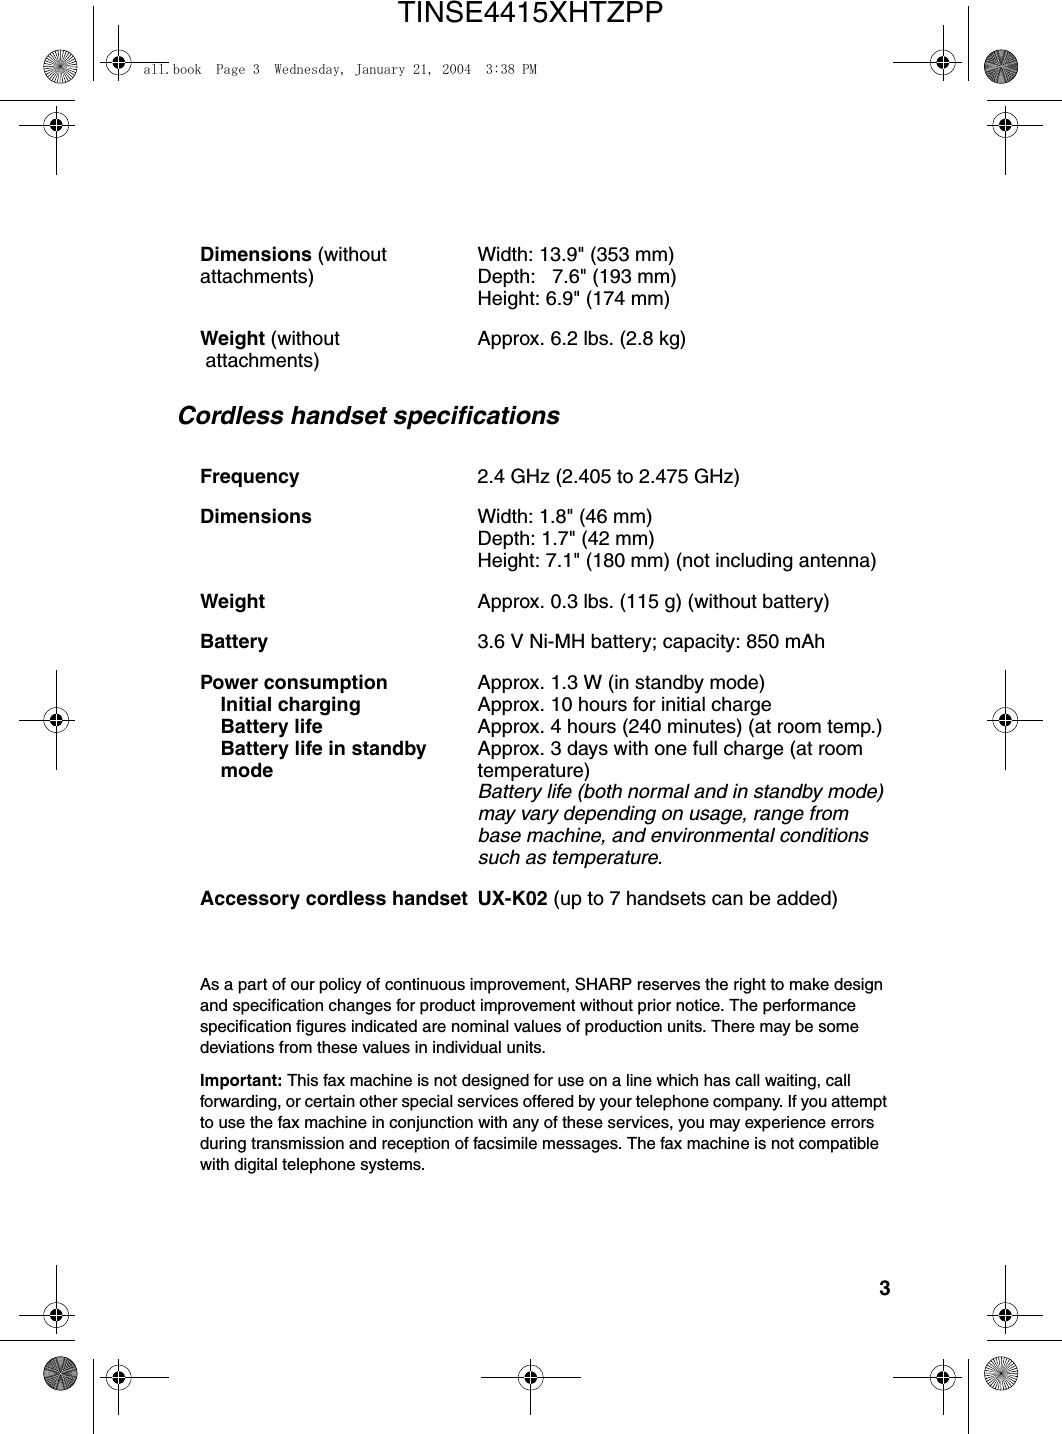
Sharp HRO00034 Facsimile Equipment w/ Cordless Handsets User Manual
Sharp Corporation Facsimile Equipment w/ Cordless Handsets
Sharp >
Contents
- 1. Manual pages 1 to 50
- 2. Manual pages 51 to 100
- 3. Manual pages 101 to end
- 4. Manual cordless hanset unit
Manual pages 1 to 50

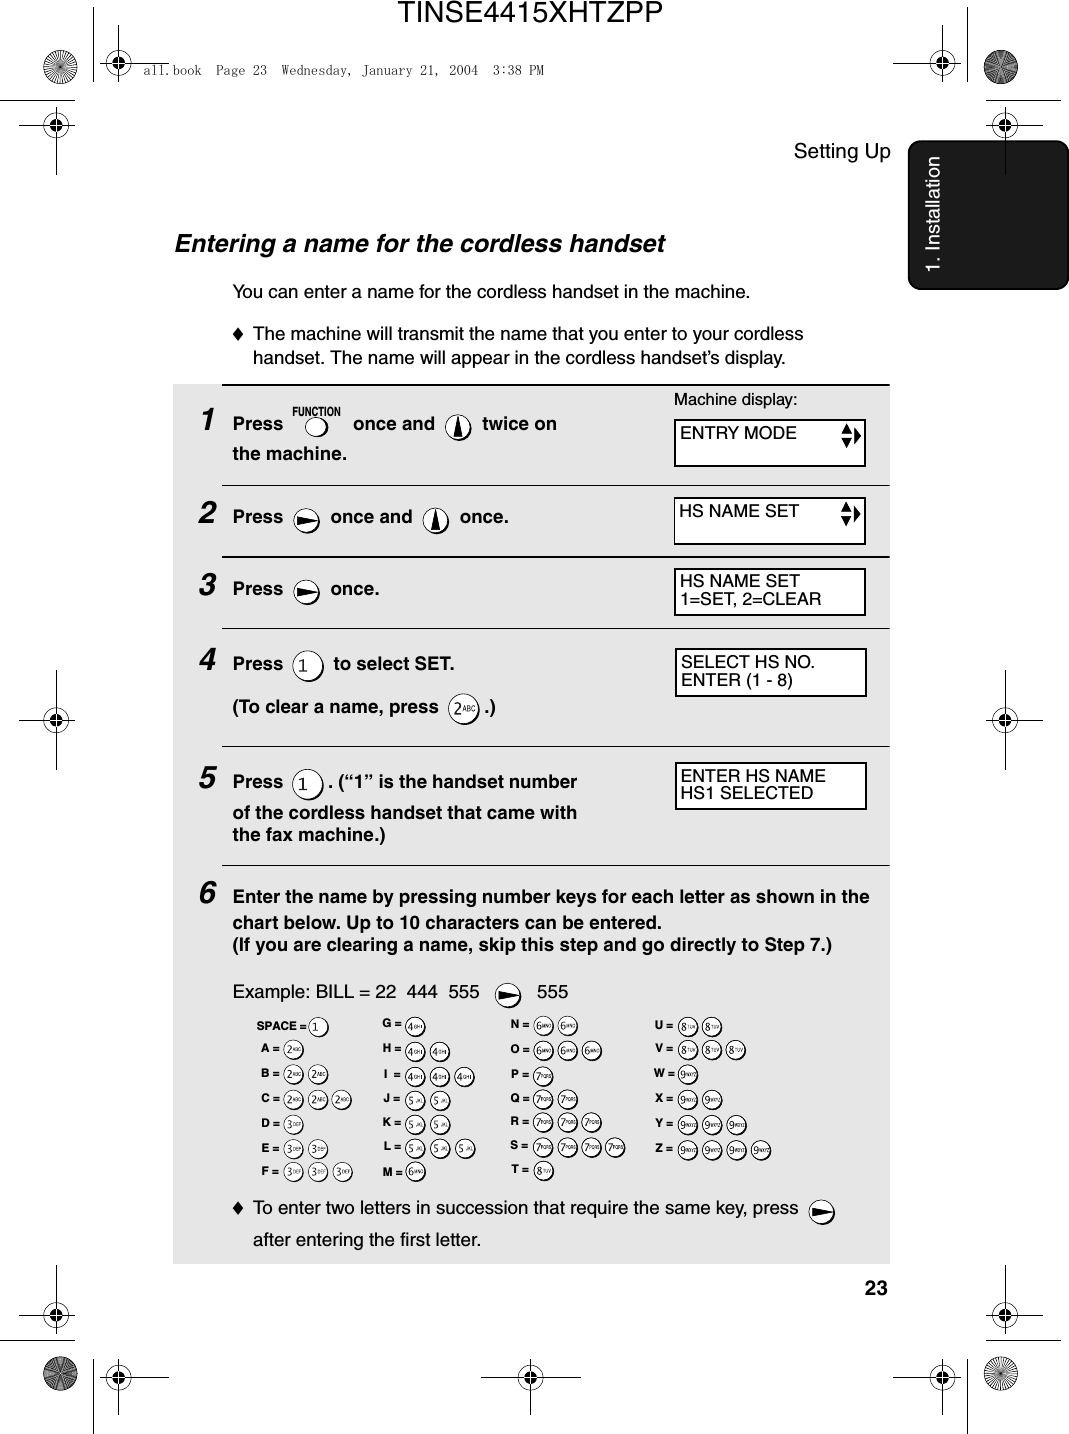
![Setting Up24♦To clear a mistake, press .♦To enter a lower case letter, continue pressing the key for the letter until the lower case letter appears. ♦To enter one of the following symbols, press or repeatedly:. / ! " # $ % & ’ ( ) + + , - : ; < = > ? @ [ ¥ ] ^ _ ' { | } ) (7Press to store the name.8Press to exit.Note: Should you need to change the name, clear it (press “2” in Step 4 on the previous page and then follow Steps 5, 7, and 8), and then repeat the name entry procedure to enter the new name.SPEAKERSTART/MEMORYSTOPDisplay:HANDSET1BILLThe handset number and name appear in the standby display of the cordless handsetOWN NUMBER SETall.book Page 24 Wednesday, January 21, 2004 3:38 PMTINSE4415XHTZPP](https://usermanual.wiki/Sharp/HRO00034.Manual-pages-1-to-50/User-Guide-396875-Page-26.png)
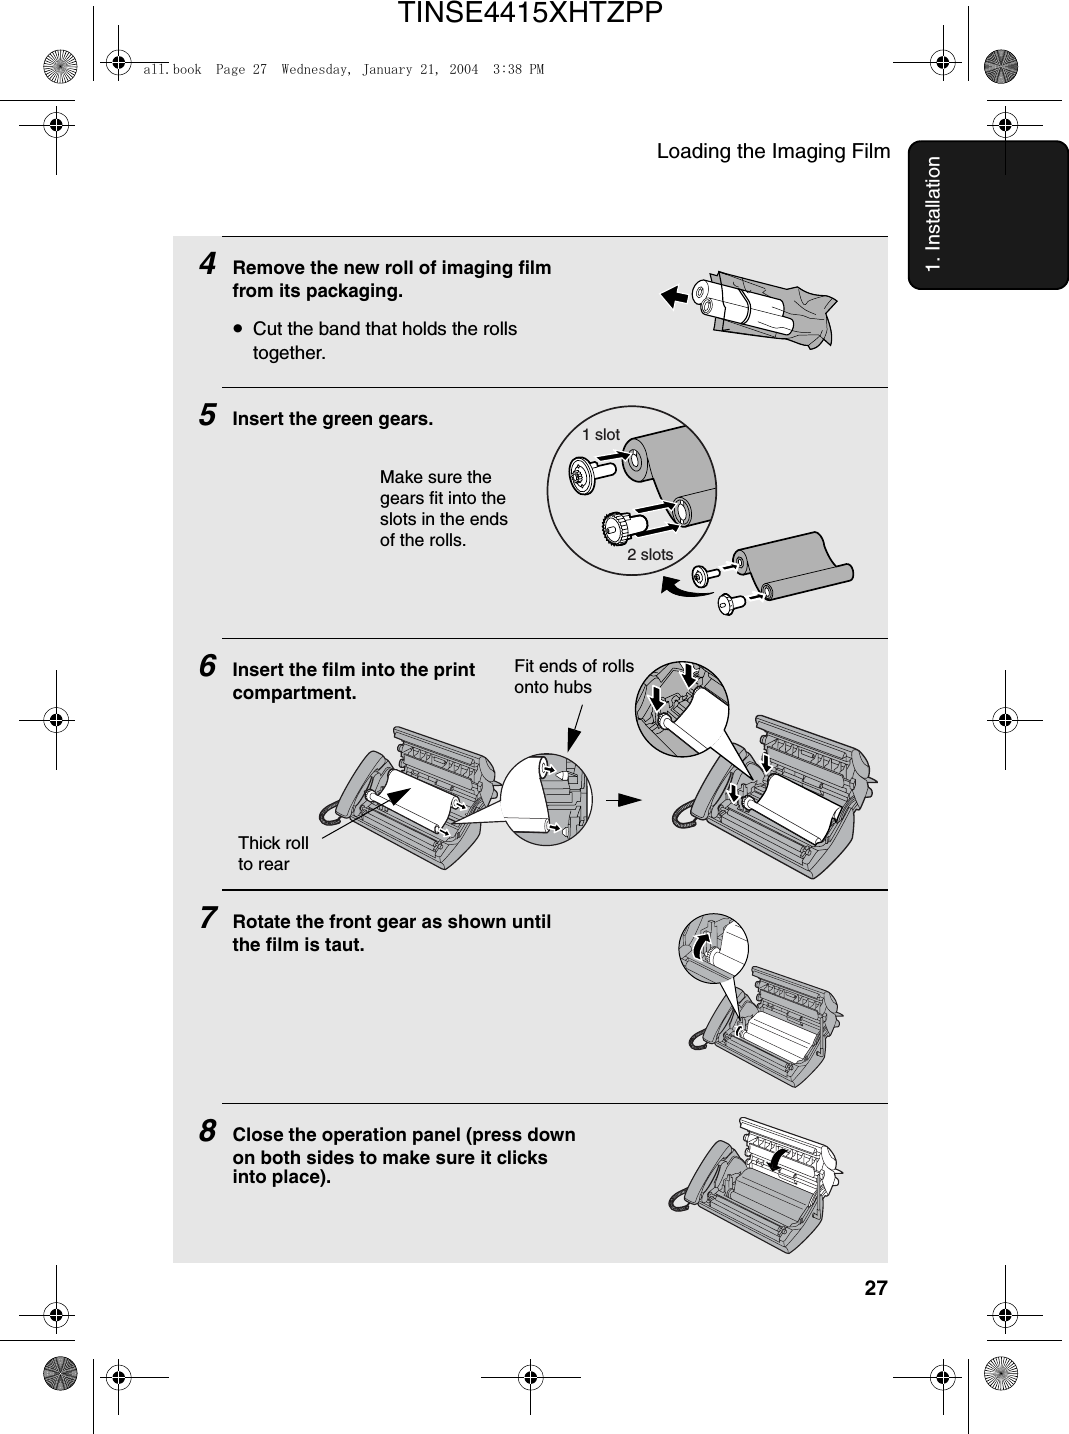
![Entering Your Name and Fax Number311. Installation4Enter your fax number by pressing the number keys (max. 20 digits). •To insert a space between digits, press . •To clear a mistake, press .5Press to enter the fax number in memory.6Enter your name by pressing number keys for each letter as shown in the chart below. Up to 24 characters can be entered.Example: SHARP = 7777 44 2 777 7♦To enter two letters in succession that require the same key, press after entering the first letter. ♦To clear a mistake, press .♦To enter a lower case letter, continue pressing the key for the letter until the lower case letter appears. To enter one of the following symbols, press or repeatedly: . / ! " # $ % & ’ ( ) + + , - : ; < = > ? @ [ ¥ ] ^ _ ' { | } ) (7Press .8Press to return to the date and time display.SPEAKERSTART/MEMORYSPEAKERSTART/MEMORYSTOPDisplay:A =B =C =D =E =F =G =H =I =J =K =L =M =N =O =P =Q =R =S =T =U =V =W =X =Y =Z =SPACE =DATE&TIME SETall.book Page 31 Wednesday, January 21, 2004 3:38 PMTINSE4415XHTZPP](https://usermanual.wiki/Sharp/HRO00034.Manual-pages-1-to-50/User-Guide-396875-Page-33.png)