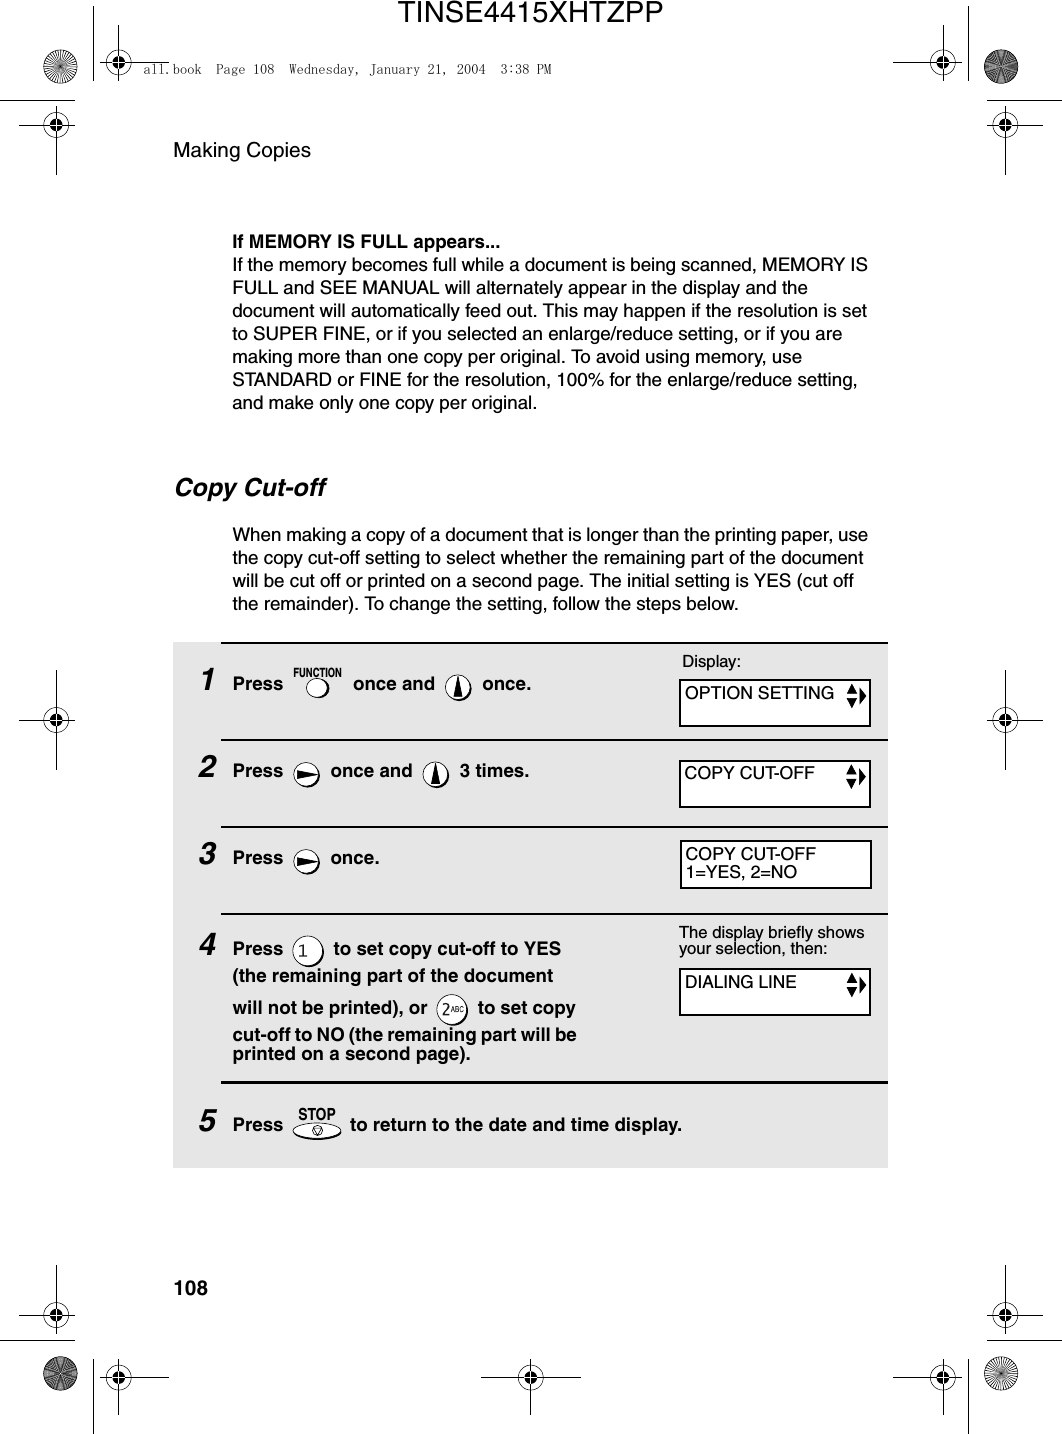
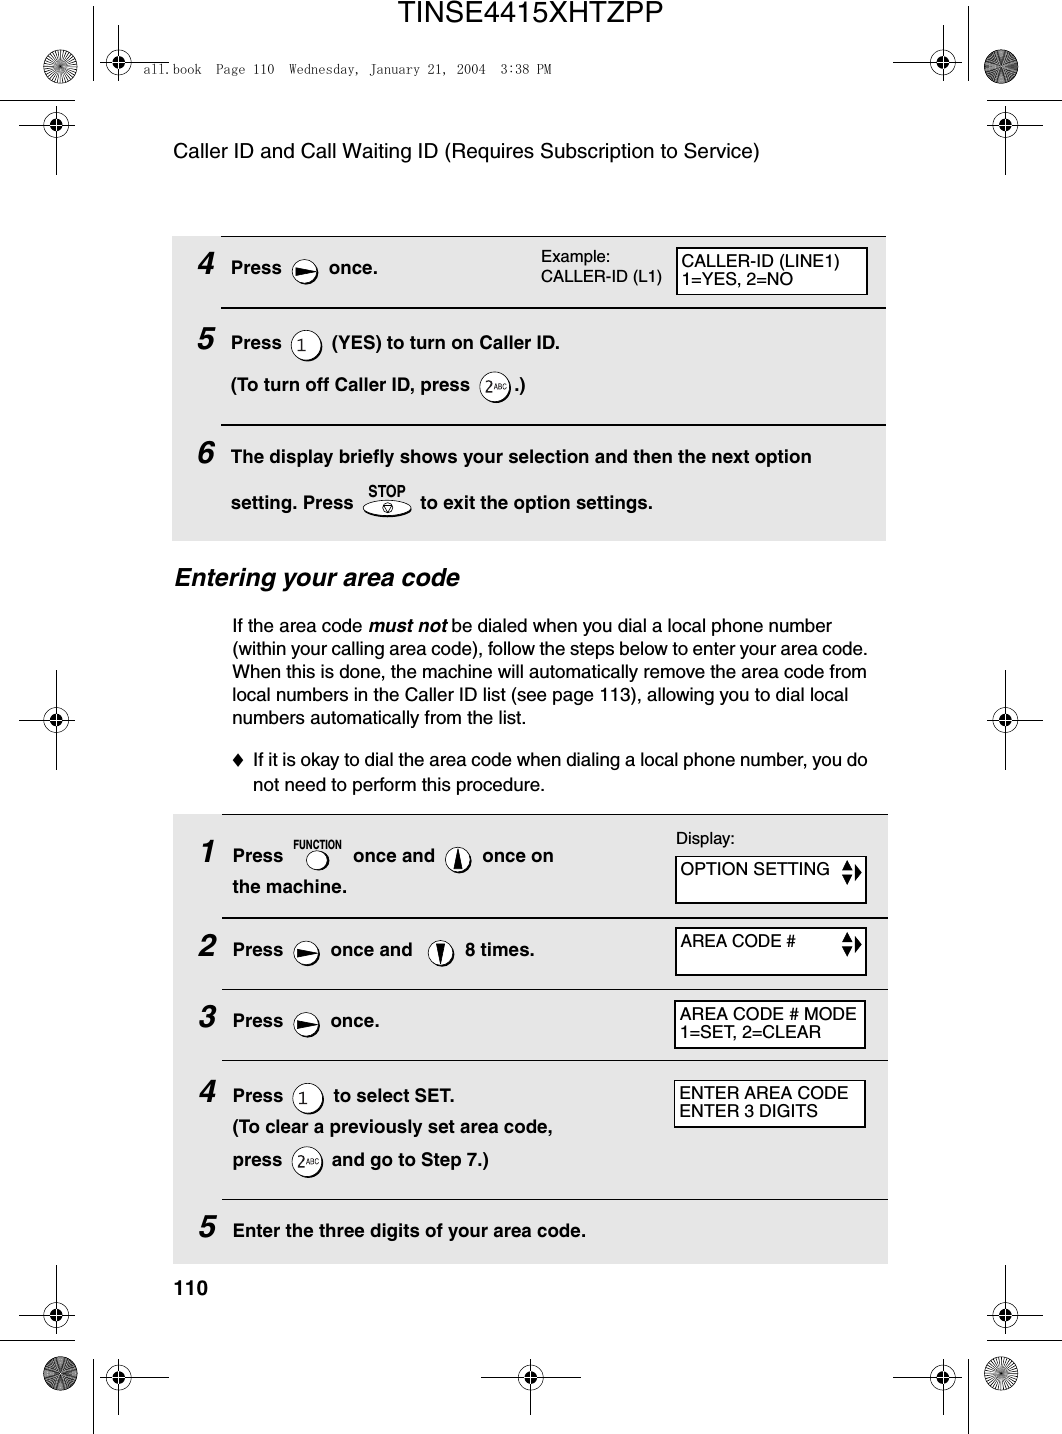
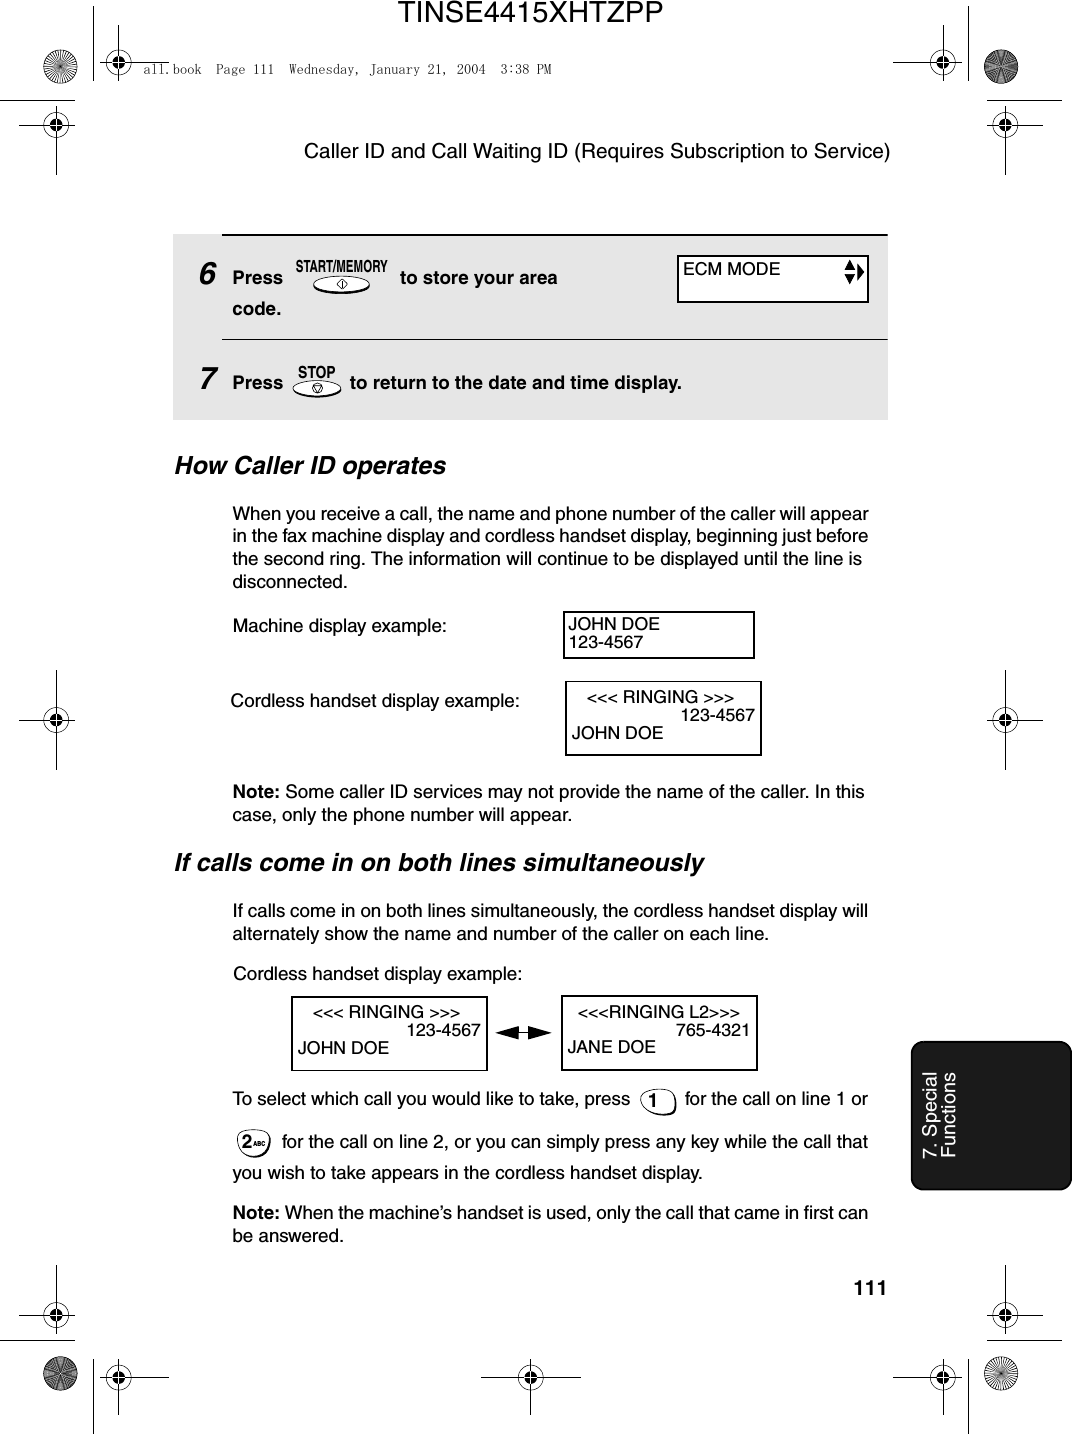
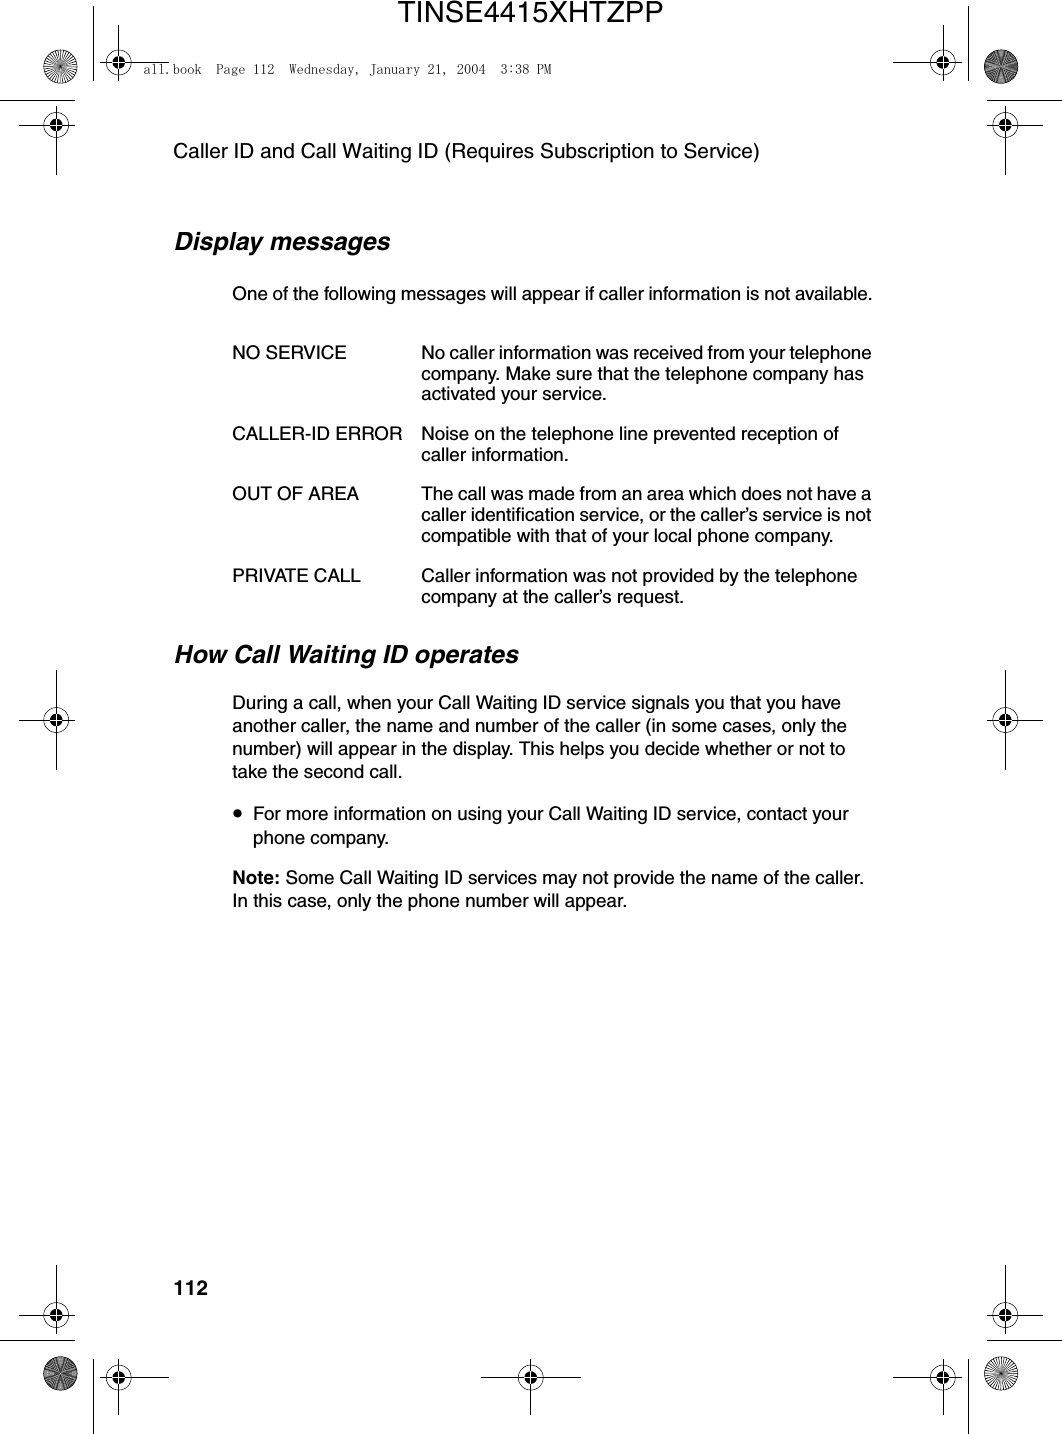
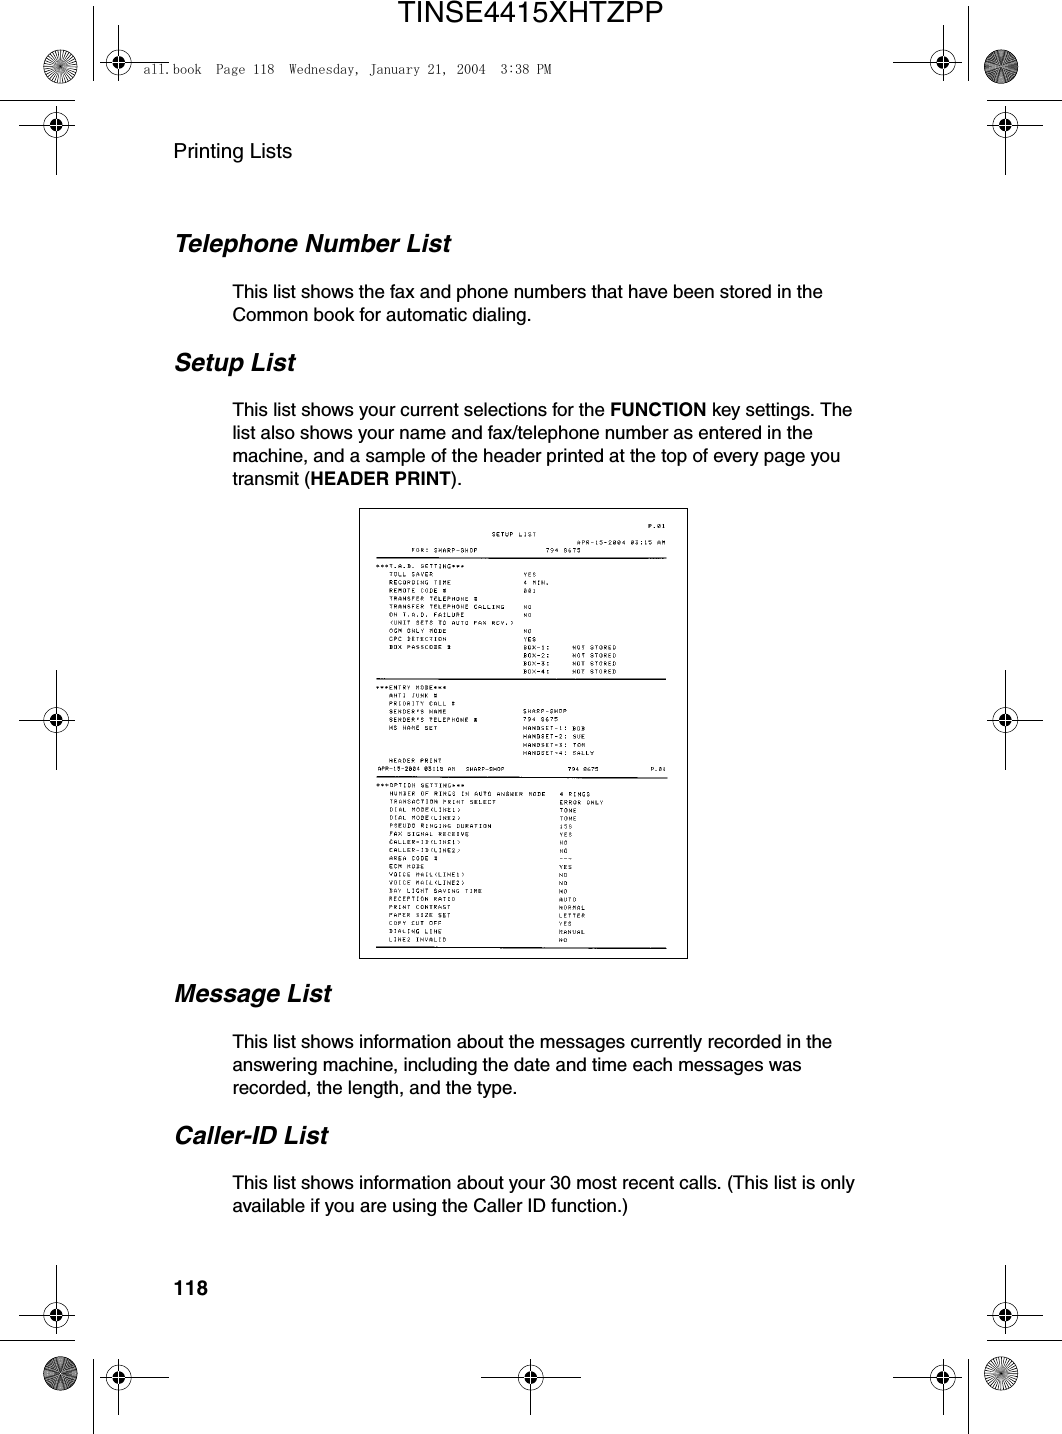
Sharp HRO00034 Facsimile Equipment w/ Cordless Handsets User Manual
Sharp Corporation Facsimile Equipment w/ Cordless Handsets
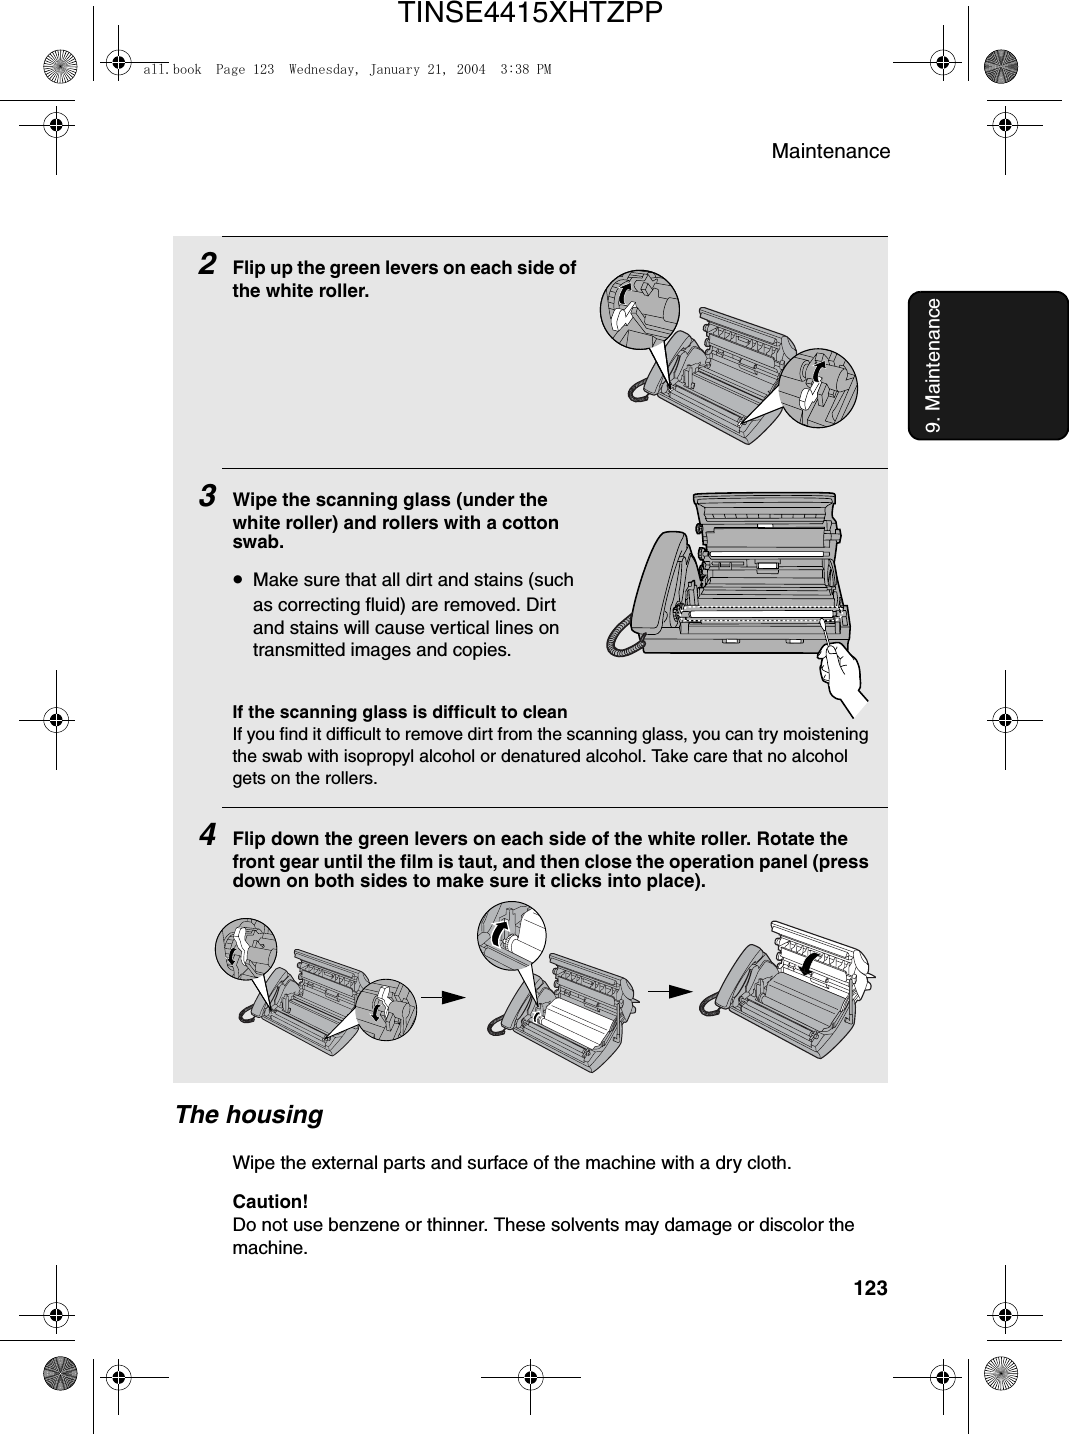
Sharp >
Contents
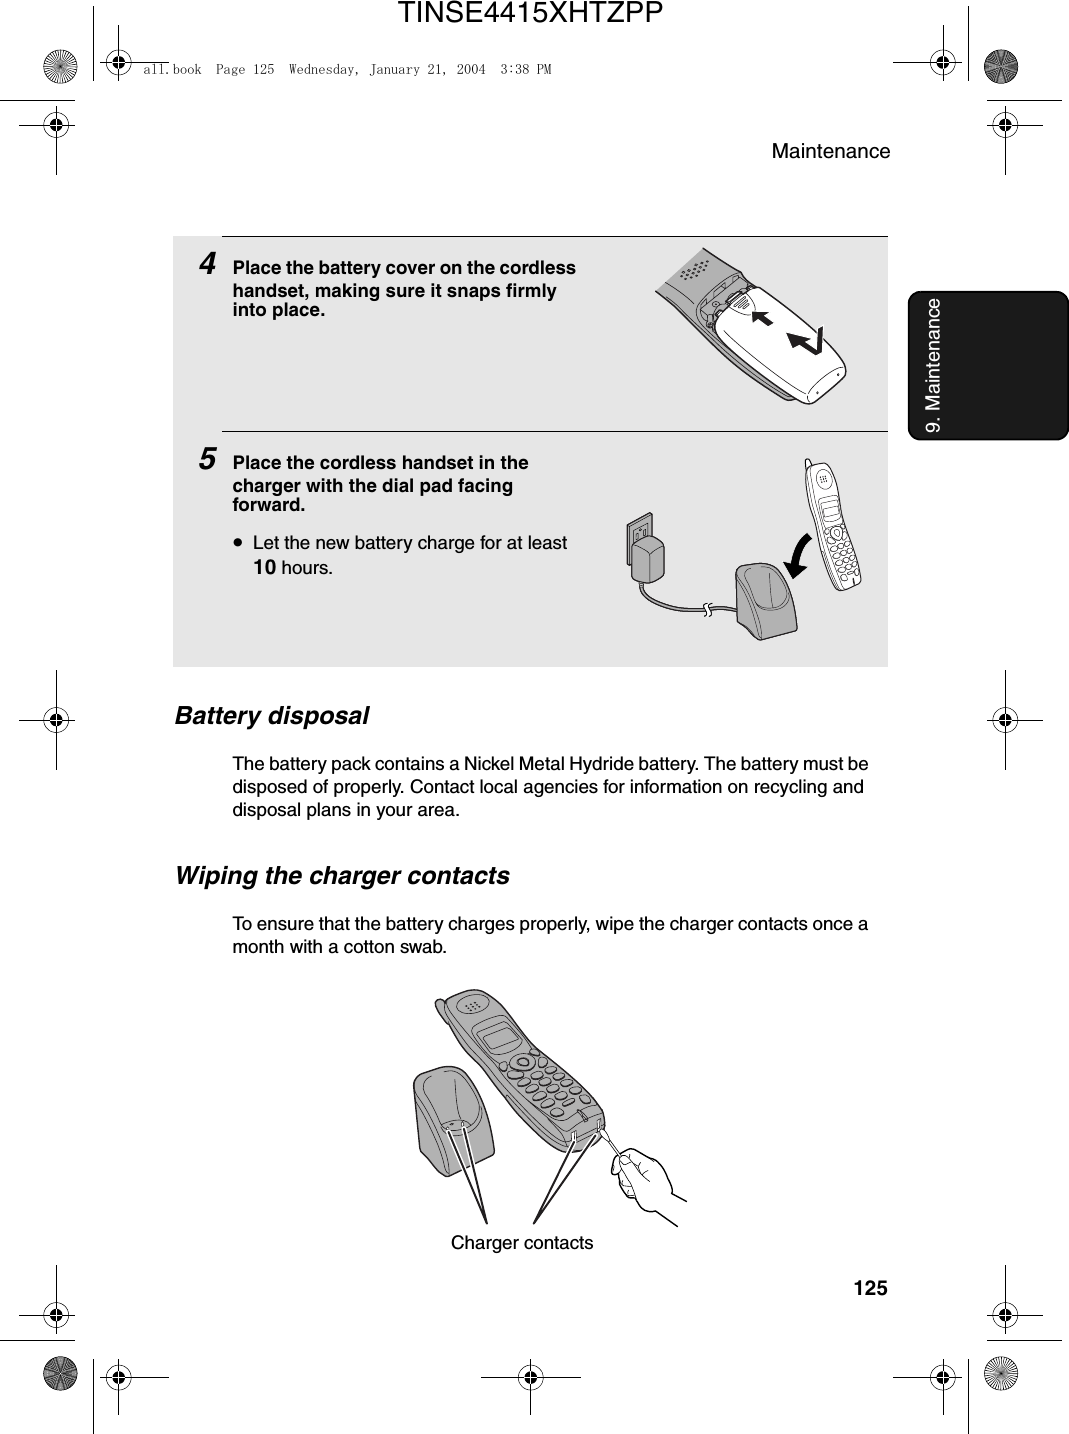
- 1. Manual pages 1 to 50
- 2. Manual pages 51 to 100
- 3. Manual pages 101 to end
- 4. Manual cordless hanset unit
Manual pages 101 to end