Sharp HRO00039 GSM-WCDMA Mobile-Phone / Bluetooth Enable User Manual 1 of 4
Sharp Corporation GSM-WCDMA Mobile-Phone / Bluetooth Enable 1 of 4
Sharp >
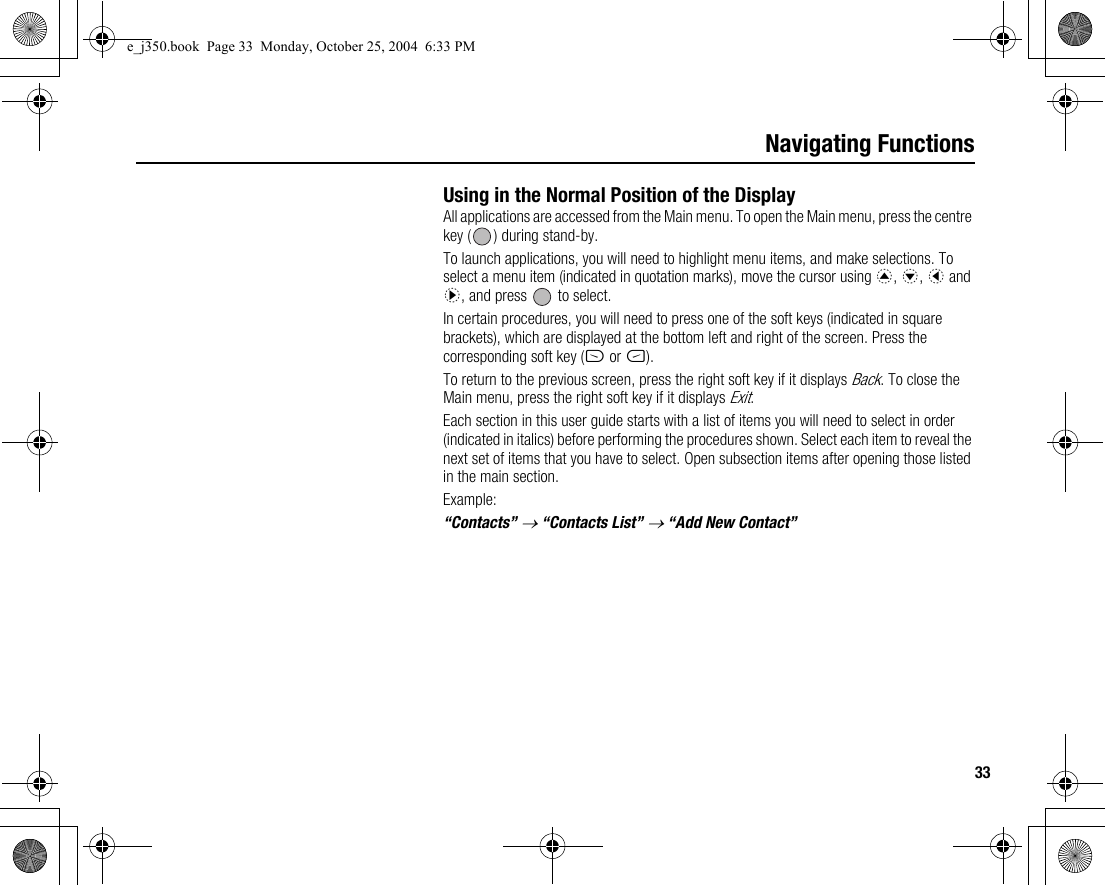
Contents
- 1. User Manual 1 of 4
- 2. User Manual 2 of 4
- 3. User Manual 3 of 4
- 4. User Manual 4 of 4
User Manual 1 of 4

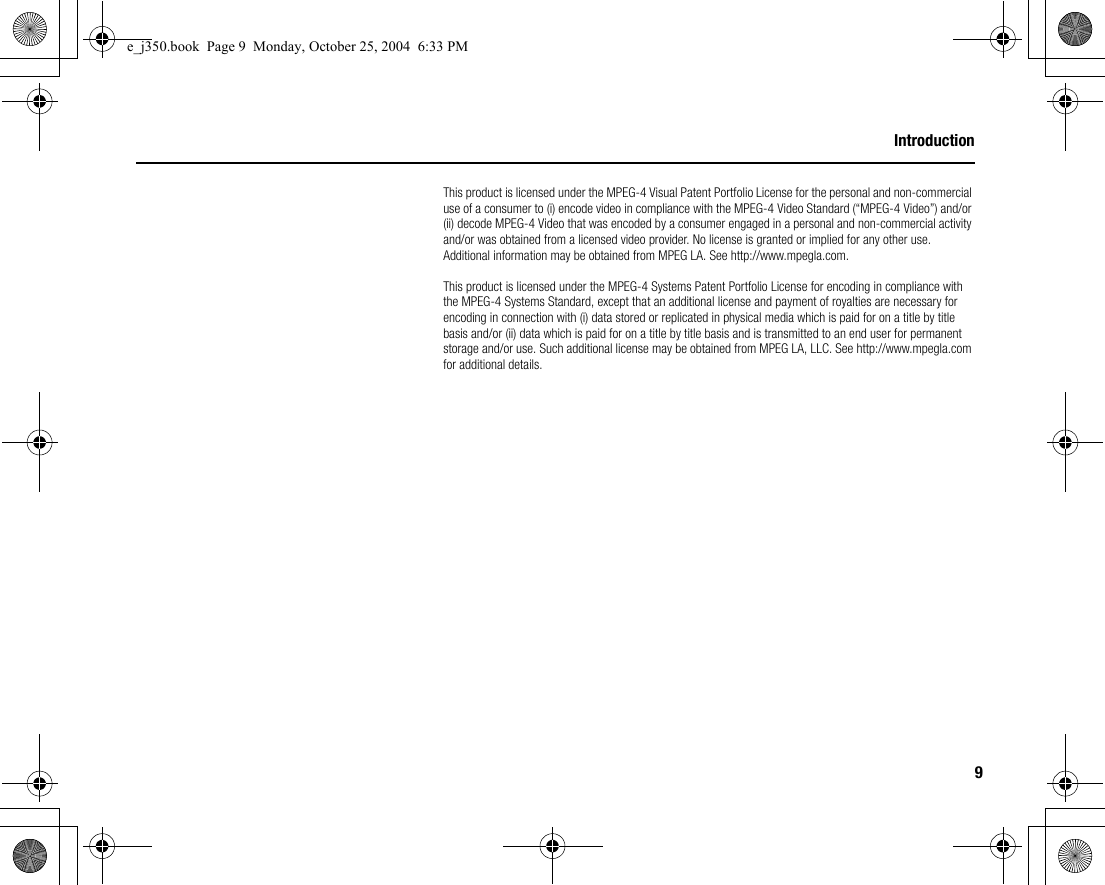

![29Getting StartedDisplay Indicators1. / : Strength of received signal/Service out of range: 3G (UMTS)/GPRS: GSM/GPRS: Roaming outside network2. : Offline mode [enabled]3. : Data exchange with external device4. / : Connection to the server [established/communicating]5. : Memory card inserted6. / : Voice call [incoming/in progress]7. / / : Video call communication mode enabled8. : Diverts set to “Voice calls” of “All Calls”9. : Secure WAP page displayed10. / / : Alerts [text message/multimedia message/email]01.01.05 12:00Indicator areaRight soft keyLeft soft keyCentre keyIndicator areae_j350.book Page 29 Monday, October 25, 2004 6:33 PM](https://usermanual.wiki/Sharp/HRO00039.User-Manual-1-of-4/User-Guide-483840-Page-30.png)
![30Getting Started11. /////:Connection status[USB cable/IrDA ON/IrDA exchanging information/Bluetooth wireless setting [enabled (during stand-by or except during stand-by)/exchanging information/talking with the Bluetooth headset]]12. / : Java™ application [executed (colour)/suspended (grey)]13.(No display)/////:Current profile [Normal/Meeting/Activity/Car/Headset/Silent]14. ////:Silent/vibration setting [silent/increasing volume/vibration enabled/silent and vibration enabled/increasing volume and vibration enabled]15. / / : Speaker mode [speaker phone/speaker activated/microphone muted]16. / / / : Battery level [sufficiently charged/charging recommended/charging required/empty]17: : Mobile light enabled18. : Daily alarm enabled19. / : Schedule entry enabled [with/without reminder alarm]20. : Outbox contains unsent messages [text message/multimedia/email]e_j350.book Page 30 Monday, October 25, 2004 6:33 PM](https://usermanual.wiki/Sharp/HRO00039.User-Manual-1-of-4/User-Guide-483840-Page-31.png)
![31Getting Started21. / / : WAP/OTA provisioning alerts [WAP alert/OTA provisioning alert/WAP and OTA provisioning alerts]22. : Voicemail message alert23. : Connection status [1st IrDA communication [enabled/exchanging information]]24. : Phone Lock enabled25. : Keypad Lock enabled26. /(blank): IrDA setting [enabled/disabled]27. 12:00: Clock28. 01.01.05: Date29. (Operator name)30. (Cell Broadcasts information)Soft Key IndicatorsTo execute the operation indicated, press the corresponding key.31. Area at the lower left of the screen:Display the operation executed by the left soft key.32. Area at the lower right of the screen:Display the operation executed by the right soft key.e_j350.book Page 31 Monday, October 25, 2004 6:33 PM](https://usermanual.wiki/Sharp/HRO00039.User-Manual-1-of-4/User-Guide-483840-Page-32.png)
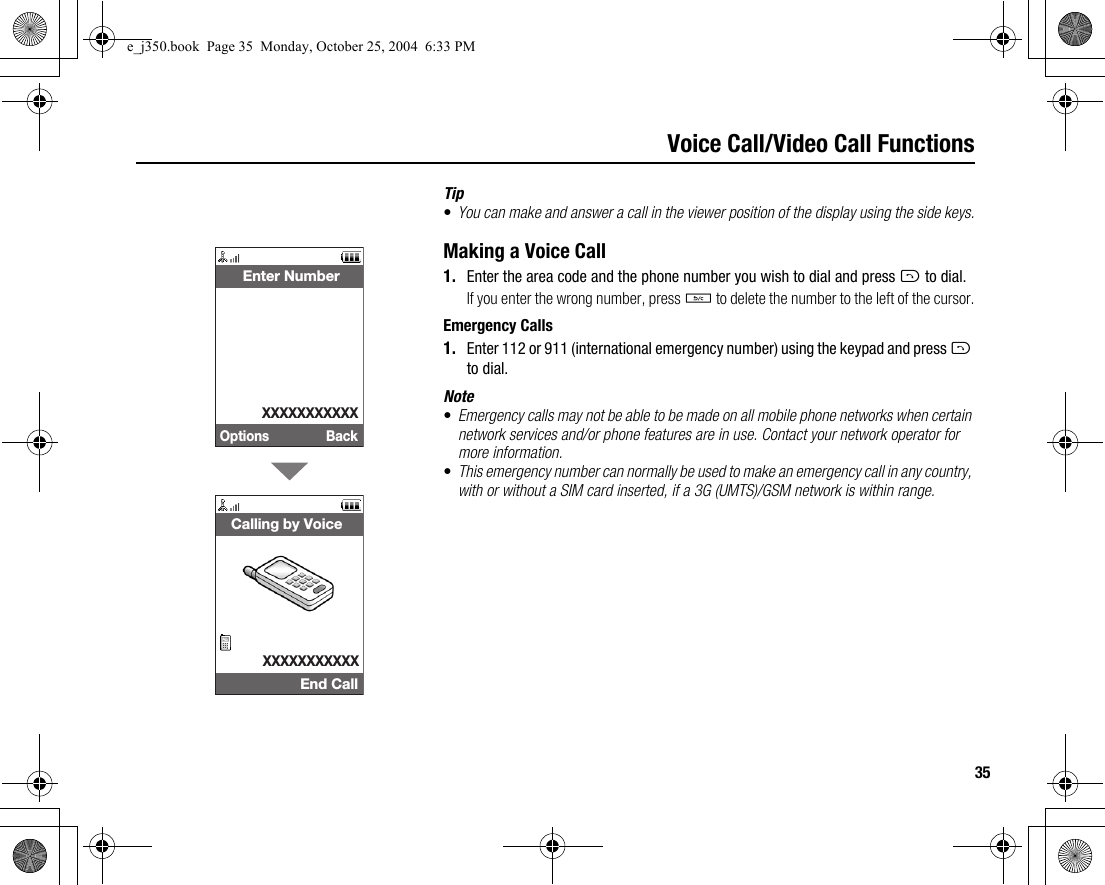
![36Voice Call/Video Call FunctionsInternational Calls1. Press and hold Q until a + (international dialling prefix) sign is displayed.2. Enter the country code, followed by the area code (without the leading zero) and the phone number, and press D to dial.Adding an Entered Phone Number to the Contacts List1. After entering a phone number, press [Options] and select “Save Number”.For details on creating a new entry, see “Add New Contact” on page 59.Showing or Hiding My Phone Number on the Display of the Called Party1. After entering a phone number, press [Options] and select “Hide My ID” or “Show My ID”.Speed DiallingUp to 8 phone numbers from the Contacts List memory (Handset and SIM) can be assigned to speed dials. You can call the numbers using the digit keys (G to O). The phone number of the Voice mail centre is assigned to G.For details on setting the speeddial list, see “Speeddial List” on page 65.1. To dial a number using the speed dial, press and hold any of the digit keys (G to O).The phone number saved in the speeddial list is dialled.e_j350.book Page 36 Monday, October 25, 2004 6:33 PM](https://usermanual.wiki/Sharp/HRO00039.User-Manual-1-of-4/User-Guide-483840-Page-37.png)
![37Voice Call/Video Call FunctionsRediallingYou can redial numbers in the call log. Select from specific categories or “All Calls”. Specific categories contain up to 10 numbers and the “All Calls” list contains up to 30.1. Press D during stand-by.2. Select the category from “All Calls”, “Dialled Numbers”, “Missed Calls” or “Received Calls”.To switch logs, press c or d.3. Highlight the phone number you wish to call.4. Press D to redial the call.Answering a Voice CallWhen an incoming call is detected, the phone rings.1. Press D or [Answer] to answer the call.Or press any key except F, , U and [Busy] when the “Any Key Answer” function is enabled. Set the Any Key Answer function in the profile of each mode (p. 174).e_j350.book Page 37 Monday, October 25, 2004 6:33 PM](https://usermanual.wiki/Sharp/HRO00039.User-Manual-1-of-4/User-Guide-483840-Page-38.png)
![38Voice Call/Video Call FunctionsTip•If you have subscribed to the Calling Line Identification (CLI) service and the caller’s network sends the number, the caller’s number is displayed on the screen. If the caller’s name and number are saved in the Contacts List, the caller’s name and phone number are displayed on the screen.•If the number is a restricted number, the display shows “Withheld”.•When you receive a call from the person whose picture is registered in the Contacts List, the picture, name and phone number are displayed.Rejecting an Incoming Call1. Press F while the phone is ringing to reject a call you do not wish to answer.Letting the Caller Know You are Unavailable1. Press [Busy] while the phone is ringing to send a busy tone to the caller of an incoming call letting them know that you cannot answer the call.e_j350.book Page 38 Monday, October 25, 2004 6:33 PM](https://usermanual.wiki/Sharp/HRO00039.User-Manual-1-of-4/User-Guide-483840-Page-39.png)
![39Voice Call/Video Call FunctionsIncall Menu (Voice Call)Your phone has additional functions available while a call is in progress.Adjusting the Earpiece VolumeDuring a call, you can adjust the earpiece volume (and handsfree volume, if connected).1. During a call, press the side-up or side-down key to display the Earpiece Volume screen.2. Press the side-up key (or a/d) to increase the volume of the call or press the side-down key (or b/c) to decrease the volume.Five levels (level 1 to 5) can be selected.3. Press when the volume is set to the desired level.The phone returns to the in-call screen automatically if left unoperated.Turning the Speaker On and OffYou can talk via the loud speaker on the back of the phone by turning it on.1. During a call, press [Options] and select “Loud Speaker On”.e_j350.book Page 39 Monday, October 25, 2004 6:33 PM](https://usermanual.wiki/Sharp/HRO00039.User-Manual-1-of-4/User-Guide-483840-Page-40.png)
![40Voice Call/Video Call FunctionsPutting a Call on HoldThis function allows you to manage two calls at the same time. If you wish to make another call while you are talking to someone, you can put the current call on hold to call someone else.To Make Another Call during a Call1. During a call, press [Options] and select “Hold”.The current call is put on hold.2. Press [Options] and select “Dial New Number”.3. Enter the phone number you wish to make another call to, then press D.Tip•You can also make another call by entering the phone number during a call instead of step 1. The current call is automatically put on hold.Accessing SMS/MMS Menu during a Call1. During a call, press [Options] and select “Send Message”.The following options are available: “Create Messages” to make an SMS and MMS, or “Inbox”, “Sent” or “Drafts” to access these folders. For details on SMS, see “SMS” and “MMS” on page 85.e_j350.book Page 40 Monday, October 25, 2004 6:33 PM](https://usermanual.wiki/Sharp/HRO00039.User-Manual-1-of-4/User-Guide-483840-Page-41.png)
![41Voice Call/Video Call FunctionsCall WaitingThis service notifies you of another incoming call while you have a call in progress.1. During a call, press [Options] and select “Hold & Answer” to answer the second call.The first call is put on hold and you can now talk to the second caller.2. Press [Options] and select “Release & Answer” to end the current call and return to the held call.Note•You need to set “Call Waiting” to “On” if you use the Call Waiting service (p. 184).•Call Waiting service may not be available on all networks. Contact your network operator for more information.•If you do not wish to answer the second call, press [Options] and select “Busy” in step 1. If “Reject” is selected, the log of the second call is saved as a missed call.Conference CallConference call is a call with more than 2 participants. You may include up to 5 participants in a conference call.To Make a Conference CallYou must have one active call and one held call.1. During a call, press [Options] and select “Multi Party”.2. Select “Conference All” to join the conference call.3. Press F to end the conference call.e_j350.book Page 41 Monday, October 25, 2004 6:33 PM](https://usermanual.wiki/Sharp/HRO00039.User-Manual-1-of-4/User-Guide-483840-Page-42.png)
![42Voice Call/Video Call FunctionsNote•The conference call service may not be available on all networks. Contact your network operator for more information.•You have more options for the Conference call in step 2:•To put all participants on hold, select “Hold All”.•To put all participants except the current call on hold, select “Private”.•To end the call with all participants, select “End Active Call(s)” or “End Held Call(s)”.•To reject adding more participants to the current party, press [Options] and select “Reject”, or you can send the busy tone by selecting “Busy”.To Add New Participants to the Conference Call1. Press [Options] and select “Dial New Number”.2. Enter the number you wish to include in the conference call and press D to dial.3. Press [Options] and select “Multi Party”.4. Select “Conference All” to join the conference call.If you wish to add other participants, repeat steps 1 to 4.To End the Call with a Conference Call Participant1. During a conference call, highlight the person that you wish to disconnect from the conference call.2. Press [Options] and select “End Active Call(s)” or “End Held Call(s)”.e_j350.book Page 42 Monday, October 25, 2004 6:33 PM](https://usermanual.wiki/Sharp/HRO00039.User-Manual-1-of-4/User-Guide-483840-Page-43.png)
![43Voice Call/Video Call FunctionsTo Have a Private Conversation with One of the ParticipantsIf you wish to have a private conversation with one of the participants, you may select the participant from the conference list and put the other participants on hold.1. During a conference call, select the person that you wish to talk to.2. Press [Options] and select “Multi Party”.3. Select “Private”.4. Once you have finished the private conversation, press [Options] and select “Multi Party”.5. Select “Conference All” to return to the conference call.Muting the Microphone1. During a call, press [Mute] to mute the microphone.To unmute the microphone, press [Unmute].e_j350.book Page 43 Monday, October 25, 2004 6:33 PM](https://usermanual.wiki/Sharp/HRO00039.User-Manual-1-of-4/User-Guide-483840-Page-44.png)
![44Voice Call/Video Call FunctionsMaking a Video CallNote•Use this function with only the video call enabled phones.•Make sure that the battery is fully charged and the signal length is greater before using this function.•Use a switch-equipped earphone microphone or handsfree kit so that you can talk while looking at the video call screen on the display.Status Indicators1. Sub screen for your image2. Elapsed time (hour:minute:second)3. Main screen for the calling party’s screen4. Calling party’s name5. Calling party’s phone numberMaking a Video Call1. Enter the area code and the phone number you wish to dial and press [Options] and select “Video Call” to dial.If you enter the wrong number, press U to delete the number to the left of the cursor.When the line is connected, the image of the called party is displayed upper on the screen, and yours lower left.Options Mute Video Call 0:00:02 xxxxXXXXXXXXXXX23451e_j350.book Page 44 Monday, October 25, 2004 6:33 PM](https://usermanual.wiki/Sharp/HRO00039.User-Manual-1-of-4/User-Guide-483840-Page-45.png)
![45Voice Call/Video Call FunctionsTip•If the called party’s phone is not video call enabled, you can press F and enter the phone number again to make a voice call.•When the call ends, the last call cost is displayed.Answering a Video CallWhen an incoming call is detected, the phone rings.1. Press D to answer the call by video or A [Answer] to answer the voice only.Tip•When the call is ended, the call cost is displayed.•If you have subscribed to the Calling Line Identification (CLI) service and the caller’s network sends the number, the caller’s number is displayed on the screen. If the caller’s name and number are saved in the Contacts List, the caller’s name and phone number are displayed on the screen.Rejecting an Incoming Call1. Press F while the phone is ringing to reject a call you do not wish to answer.Letting the Caller Know You are Unavailable1. Press [Busy] while the phone is ringing to send a busy tone to the caller of an incoming call letting them know that you cannot answer the call.e_j350.book Page 45 Monday, October 25, 2004 6:33 PM](https://usermanual.wiki/Sharp/HRO00039.User-Manual-1-of-4/User-Guide-483840-Page-46.png)
![46Voice Call/Video Call FunctionsIncall Menu (Video Call)Muting the Microphone1. During a video call, press [Mute] to mute a microphone.To unmute the microphone, press [Unmute].Swapping ImagesYou can swap images between the main and sub screens.1. During a video call, press [Options] and select “Swap Images”.Changing the Image of Yourself1. During a video call, press [Options] and select “Camera Picture”.2. Select from “Internal Camera”, “External Camera” or “Alternative Image”.“Internal Camera”: The image through the internal camera is displayed and sent to the party.“External Camera”: The image through the external camera is displayed and sent to the party.“Alternative Image”: The camera is turned off and the image selected in “Alternative Image” of “Video Call Settings” (p. 189) is used.Select BackVideo CallOptionsSwap ImagesCamera PictureLoud Speaker OffEnable DTMFVideo Call Settingse_j350.book Page 46 Monday, October 25, 2004 6:33 PM](https://usermanual.wiki/Sharp/HRO00039.User-Manual-1-of-4/User-Guide-483840-Page-47.png)
![47Voice Call/Video Call FunctionsTurning the Speaker On and OffYou can talk via the loud speaker on the back of the phone by turning it on.1. During a call, press [Options] and select “Loud Speaker On”.Note•In a high-noise environment, you may not be able to continue a call, or make a clear call. We recommend that you use the Stereo Headset and Handsfree Microphone Unit.•With this option, you may not be able to continue a call without interruption if you increase the earpiece volume. We recommend that you decrease the earpiece volume or use the Stereo Headset and Handsfree Microphone Unit.Video Call SettingsTo Change the Quality of the Incoming ImageYou can adjust the quality of the called party’s image.1. During a video call, press [Options] and select “Video Call Settings”.2. Select “Incoming Format”.3. Select “Normal”, “Quality Prio.” or “Frame Rate Prio.”.“Normal”: The standard quality is used.“Quality Prio.”: The quality of the picture takes precedence over the frame rate.“Frame Rate Prio.”: The frame rate takes precedence over the quality.e_j350.book Page 47 Monday, October 25, 2004 6:33 PM](https://usermanual.wiki/Sharp/HRO00039.User-Manual-1-of-4/User-Guide-483840-Page-48.png)
![48Voice Call/Video Call FunctionsTo Turn the Backlight On or OffYou can turn on the backlight of your screen.1. During a video call, press [Options] and select “Video Call Settings”.2. Select “Backlight”.3. Select from “On”, “As Normal Setting” or “Off”.When “On” is selected, the backlight will always be on during a video call.When “As Normal Setting” is selected, the backlight will time out depending on the Backlight setting (p. 178).To Adjust the Video Exposure1. During a video call, press [Options] and select “Video Call Settings”.2. Select “Exposure”.3. Press a (Light) or b (Dark).e_j350.book Page 48 Monday, October 25, 2004 6:33 PM](https://usermanual.wiki/Sharp/HRO00039.User-Manual-1-of-4/User-Guide-483840-Page-49.png)