Sharp HRO00039 GSM-WCDMA Mobile-Phone / Bluetooth Enable User Manual 2 of 4
Sharp Corporation GSM-WCDMA Mobile-Phone / Bluetooth Enable 2 of 4
Sharp >
Contents
- 1. User Manual 1 of 4
- 2. User Manual 2 of 4
- 3. User Manual 3 of 4
- 4. User Manual 4 of 4
User Manual 2 of 4
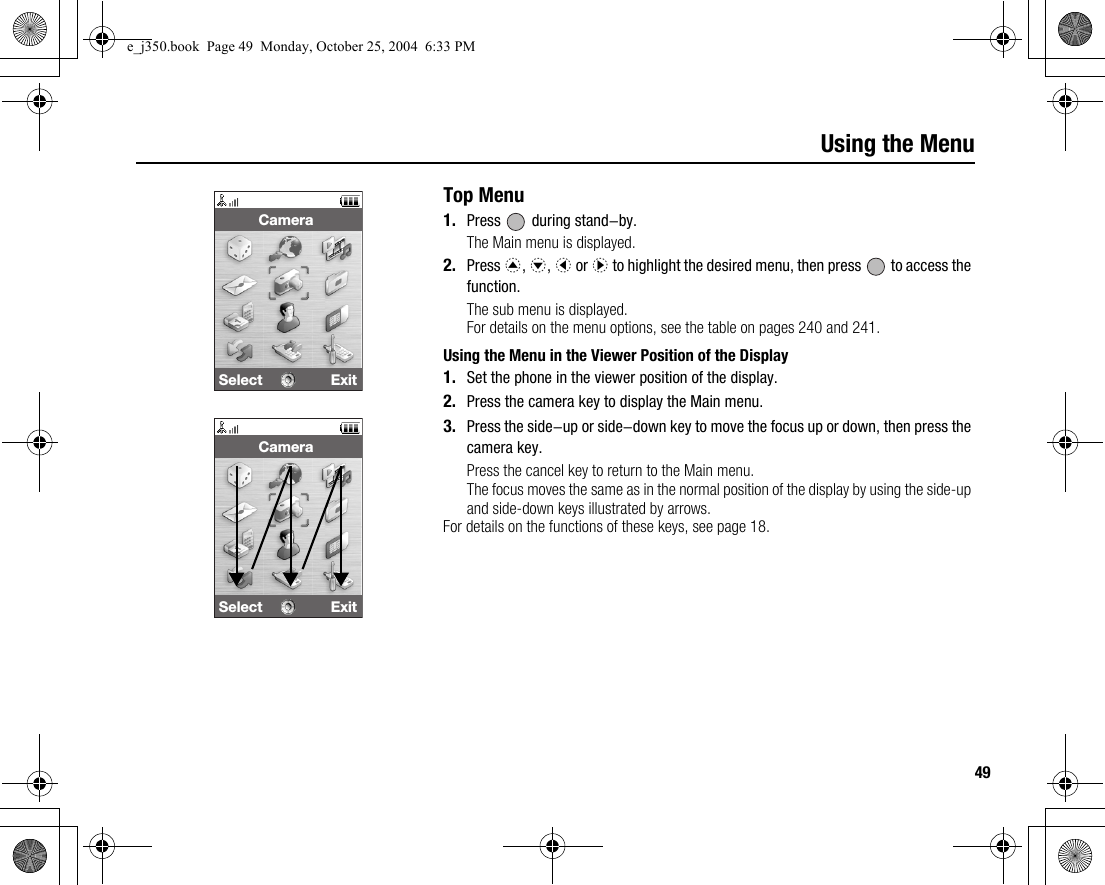
![50Using the MenuShortcutsYour phone has a shortcut key (assigned to the shortcut key: S) with which you can access the desired menu quickly. The default shortcuts are as follows, which you can later customise:• Dialled Numbers• Received Calls•Calendar•Calculator• Voice RecorderTo Use the Shortcuts1. Press the shortcut key.2. Select the desired item.To Customise the Shortcuts1. Press the shortcut key.2. Press [Options] and select “Assign”.The list of the available items is displayed.3. Select the desired item.Note•To move the item in the list that appears in step 1, highlight the item, press [Options] and select “Move”.Then press a or b to the desired location and press .e_j350.book Page 50 Monday, October 25, 2004 6:33 PM](https://usermanual.wiki/Sharp/HRO00039.User-Manual-2-of-4/User-Guide-483841-Page-2.png)
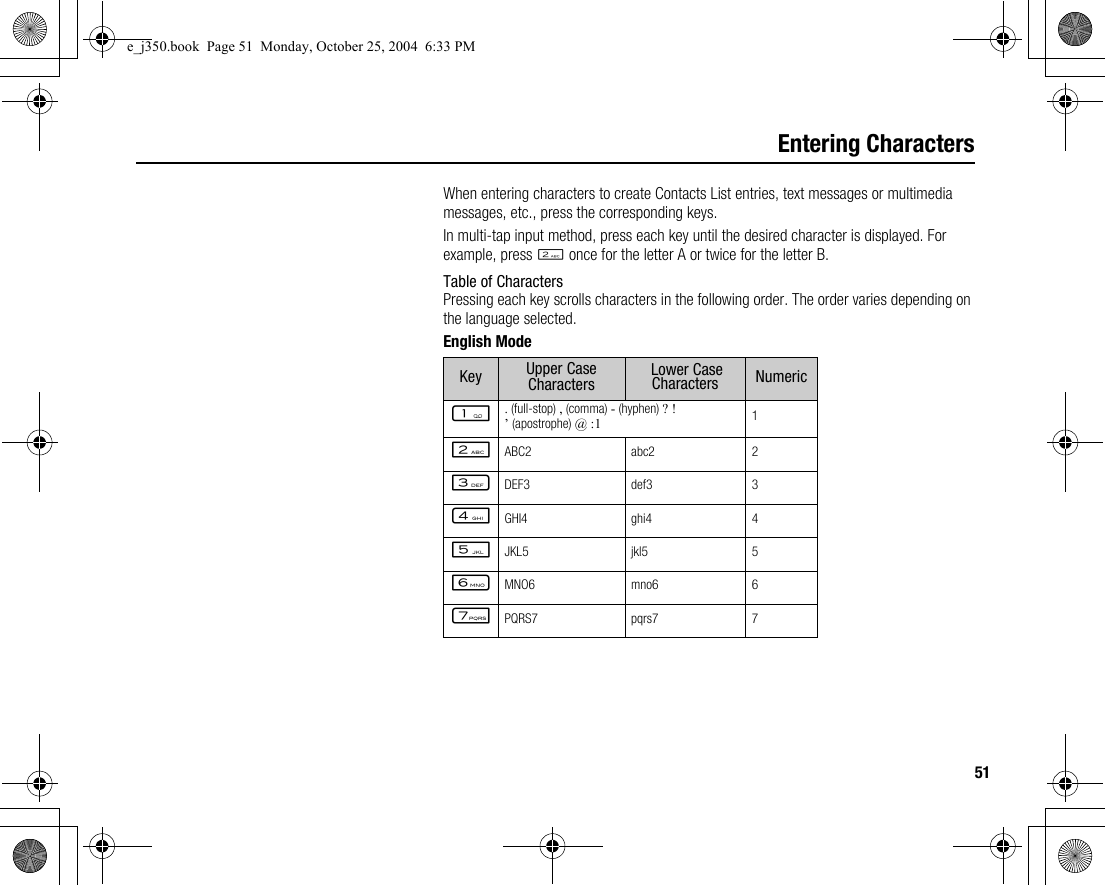
![52Entering CharactersNTUV8 tuv8 8OWXYZ9 wxyz9 9Q(space) + = < > € £ $ ¥ % & 0 0PSwitches character case between four modes: Abc, ABC, 123 and abc.R.,?!:;-+#∗@' " ( ) _&€£$%/ ˜<>§=\ | ¥¿¡^[ ]{ }¤ÅÄÆåäæàÇÉèé ìÑñÖØöøòßÜüù∆ΦΓΛΩΠΨΣΘΞ (space) ↵G-O:QPress and hold to enter 0 - 9 numbers.P: Press and hold to shift between multi-tap and T9 mode.R: Press and hold to display the Input Language screen.Key Upper Case Characters Lower Case Characters Numerice_j350.book Page 52 Monday, October 25, 2004 6:33 PM](https://usermanual.wiki/Sharp/HRO00039.User-Manual-2-of-4/User-Guide-483841-Page-4.png)
![53Entering CharactersChanging the Input LanguagesYou can change the input language on the text entry screen.1. On the text entry screen, press [Options] and select “Input Language”.2. Select the desired language.Changing the Input ModeT9 Text InputT9 text input method is a shortcut to enter text easily and quickly.1. On the text entry screen, press and hold P to enter T9 mode.2. Press [Options] and select “Input Mode”.3. Select the input mode (Abc, ABC, abc, 123).4. Press each key once for any letter you require on that key.To enter the word “How”, press J L O.5. If the word shown isn’t the one you want, press a or b until you highlight the correct one.6. Press to select the word.Note•If the correct word is not shown in step 5, enter the correct word again after switching to the multi-tap input method.e_j350.book Page 53 Monday, October 25, 2004 6:33 PM](https://usermanual.wiki/Sharp/HRO00039.User-Manual-2-of-4/User-Guide-483841-Page-5.png)
![54Entering CharactersTip•If you press Q instead of step 6, a space is inserted next to the selected word.Symbols and Punctuation1. On the text entry screen, press [Options] and select “Add Symbol”.2. Select the desired symbol.My DictionaryYou can create your own word list for T9 text input.1. On the text entry screen in T9 mode, press [Options] and select “My Dictionary”.2. Select “Add New Word” and enter a new word.To edit a word in the list1. On the text entry screen in T9 mode, press [Options] and select “My Dictionary”.2. Highlight the desired word.3. Press [Options] and select “Edit”.4. Modify the word.e_j350.book Page 54 Monday, October 25, 2004 6:33 PM](https://usermanual.wiki/Sharp/HRO00039.User-Manual-2-of-4/User-Guide-483841-Page-6.png)
![55Entering CharactersUsing TemplatesYou can use the sentences registered in Text Templates when entering characters.For details on creating the text template, see “Adding Phrases to Text Templates” on page 136.1. On the text entry screen, move the cursor to the point you wish to insert the template.2. Press [Options] and select “Advanced”.3. Select “Insert Template”.4. Select the desired text template.The selected text template is inserted.Copying, Cutting and Pasting TextBy using these options, you can carry out editing smoothly.To Copy and Cut Text1. On the text entry screen, press [Options] and select “Advanced”.2. Select “Copy” or “Cut”.3. Move the cursor to the first letter to be copied or to be cut, then press .4. Move the cursor to the last letter to highlight the area, then press .e_j350.book Page 55 Monday, October 25, 2004 6:33 PM](https://usermanual.wiki/Sharp/HRO00039.User-Manual-2-of-4/User-Guide-483841-Page-7.png)
![56Entering CharactersTo Paste Text1. On the text entry screen, move the cursor to the point you wish to paste the letters.2. Press [Options] and select “Advanced”.3. Select “Paste”.The saved text is pasted.e_j350.book Page 56 Monday, October 25, 2004 6:33 PM](https://usermanual.wiki/Sharp/HRO00039.User-Manual-2-of-4/User-Guide-483841-Page-8.png)
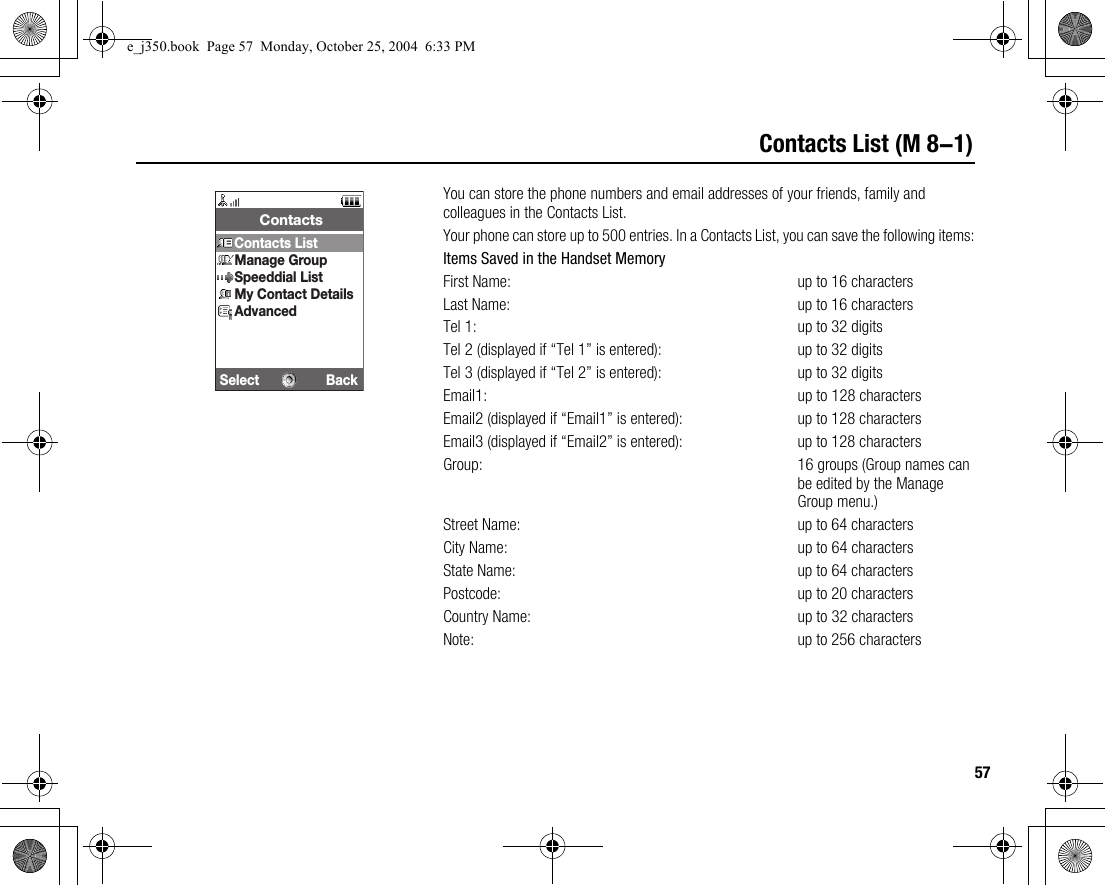
![59Contacts ListSelecting the Storage Memory“Contacts” → “Advanced” → “Save New Contact to”1. Select the Contacts location from “Handset”, “SIM” or “Choice”.Tip•“Choice” prompts you to choose the memory every time you save a new entry.Changing the Contacts List OrderYou can change the listing order of the Contacts List entries between by alphabet order or by group.“Contacts” → “Advanced” → “View Contacts”1. Select “By Alphabet” or “By Group”.Add New ContactYou can choose either the phone or SIM card memory locations to store the new entry. For switching locations, see “Selecting the Storage Memory”.The amount of phone numbers that you can store to the SIM card is dependent on its capacity. Contact your network operator for details.“Contacts” → “Contacts List” → “Add New Contact”If you select the “Choice” option for the memory to be used, the selection is between “To Handset” and “To SIM”.1. Select the field you wish to fill in, and enter the relevant information.2. Press [Save] when finished.e_j350.book Page 59 Monday, October 25, 2004 6:33 PM](https://usermanual.wiki/Sharp/HRO00039.User-Manual-2-of-4/User-Guide-483841-Page-11.png)
![60Contacts ListTip•To create an entry, at least one field must be filled (“First Name”, “Last Name”, “Tel 1” or “Email1” for the handset memory; “Name”, “Tel 1” or “Email1” for the SIM memory).Adding a Thumbnail to Entries“Contacts” → “Contacts List”1. Highlight the desired entry.2. Press [Options] and select “Edit”.3. Select “Picture:”.4. Select “Assign Picture”.5. Select the desired picture.6. Press [Save] when finished.Note•If you delete a picture in the handset memory, the corresponding thumbnail is also deleted.Viewing My Contact DetailsYou can register and edit your own contact as other Contacts List entries.“Contacts” → “My Contact Details” (M 8-4)e_j350.book Page 60 Monday, October 25, 2004 6:33 PM](https://usermanual.wiki/Sharp/HRO00039.User-Manual-2-of-4/User-Guide-483841-Page-12.png)
![62Contacts ListTip•If more than one phone number is registered for the entry, highlight the desired phone number after step 1 and press D.•You can also dial from the details screen of the Contacts List. On the details screen, select the desired phone number and press D.Editing Contacts List Entries“Contacts” → “Contacts List”1. Highlight the entry you wish to edit.2. Press [Options] and select “Edit”.3. Modify the information.4. Press [Save] when finished.Deleting Contacts List EntriesDeleting All Contact Entries“Contacts” → “Advanced” → “Delete All Entries”1. Select “Handset Entries” or “SIM Entries”.2. Enter your handset code.The default handset code is “9999”. For details on changing the handset code, see “To Change the Handset Code” on page 192.e_j350.book Page 62 Monday, October 25, 2004 6:33 PM](https://usermanual.wiki/Sharp/HRO00039.User-Manual-2-of-4/User-Guide-483841-Page-14.png)
![63Contacts ListDeleting a Contact Entry“Contacts” → “Contacts List”1. Highlight the desired entry.2. Press [Options] and select “Delete”.Manage GroupDifferent ringtones can be set for each group. If you do not change a group ringtone, the ringtone assigned in the Settings menu is used.“Contacts” → “Manage Group”1. Highlight the desired group.2. Press [Options] and select “Assign Tone/Video”.3. Select from “For Voice Call”, “For Video Call” or “For New Message”.4. Select “Assign Tone” or “Assign Video”.When selecting “Assign Video”, go to step 6.5. Select “Preset Sounds” or “My Sounds”.6. Select the desired tone or video clip.For details on selecting a ringtone or a ring video clip in the Settings menu, see “Assigning a Ringtone” on page 170 or “Assigning a Ring Video Clip File” on page 171.Note•You can only edit group names in the SIM card. You cannot edit the ringtone or ring video settings. (M 8-2)e_j350.book Page 63 Monday, October 25, 2004 6:33 PM](https://usermanual.wiki/Sharp/HRO00039.User-Manual-2-of-4/User-Guide-483841-Page-15.png)
![64Contacts ListEditing the Group NameYou can edit group names to be assigned to the Contacts List entries. First, change the Contacts List displayed (p. 58).“Contacts” → “Manage Group”1. Highlight the desired group name.2. Press [Options] and select “Edit Name”.3. Modify the name.Assigning a Ringtone or a Ring Video Clip to Each Contacts List EntryA specified ringtone or vibration setting can be associated to a pre-registered entry.“Contacts” → “Contacts List”1. Highlight the desired entry.2. Press [Options] and select “Edit”.3. Select “Assign Tone/Video”.4. Select “For Voice Call”, “For Video Call” or “For New Message”.5. Select “Assign Tone” or “Assign Video”.When selecting “Assign Video”, go to step 7.6. Select “Preset Sounds” or “My Sounds”.e_j350.book Page 64 Monday, October 25, 2004 6:33 PM](https://usermanual.wiki/Sharp/HRO00039.User-Manual-2-of-4/User-Guide-483841-Page-16.png)
![65Contacts List7. Select the desired tone or video clip.For details on selecting a ringtone or a ring video clip in the Settings menu, see “Assigning a Ringtone” on page 170 or “Assigning a Ring Video Clip File” on page 171.8. Press [Save] when finished.Memory StatusThis function helps you to check the memory used in the Contacts List.“Contacts” → “Advanced” → “Memory Status”Speeddial ListYou can set a maximum of 8 phone numbers in the speeddial list (p. 36).Setting Contacts List Entries in the Speeddial List“Contacts” → “Contacts List”1. Select the desired entry.2. Highlight the desired phone number.3. Press [Options] and select “Add to Speeddial”.4. Select the desired location.Tip•The nine digit keys correspond to list numbers.•To view the speeddial list, see “Speed Dialling” on page 36. (M 8-3)e_j350.book Page 65 Monday, October 25, 2004 6:33 PM](https://usermanual.wiki/Sharp/HRO00039.User-Manual-2-of-4/User-Guide-483841-Page-17.png)
![66Contacts ListTo Edit the Speeddial List“Contacts” → “Speeddial List”1. Highlight the entry you wish to edit.2. Press [Options] and select the desired option.“Re-Assign” (displayed when a phone number is already assigned):Displays the Contacts List entries. Select (Reassign) other entries.“Assign” (displayed when no phone number is assigned):Displays the Contacts List entries. Select (assign) the desired entry.“View”: Displays the assigned phone number.“Delete”: Deletes the selected phone number from the speeddial list.“Clear All”: Clears all phone numbers from the speeddial list.Sending a Contacts List Entry“Contacts” → “Contacts List”1. Highlight the desired entry.2. Press [Options] and select “Send Contact”.3. Select “As Message”, “Via Bluetooth” or “Via Infrared”.e_j350.book Page 66 Monday, October 25, 2004 6:33 PM](https://usermanual.wiki/Sharp/HRO00039.User-Manual-2-of-4/User-Guide-483841-Page-18.png)
![67Contacts ListFor “As Message”For details, see “MMS” on page 85.For “Via Bluetooth”For details, see “Bluetooth” on page 200.For “Via Infrared”For details, see “Infrared” on page 205.Receiving a Contacts List EntryWhen the phone receives a Contacts List entry, a confirmation message is displayed during stand-by.1. Press [Yes].The received entry is saved in the Contacts List. Press [No] to reject.Tip•For details on making Infrared or Bluetooth wireless settings, see “Connectivity” on page 200.•For details on making MMS settings, see “MMS Settings” on page 101.e_j350.book Page 67 Monday, October 25, 2004 6:33 PM](https://usermanual.wiki/Sharp/HRO00039.User-Manual-2-of-4/User-Guide-483841-Page-19.png)
![68Camera (M 5)Your phone has an integrated digital camera.This allows you to shoot and send pictures and video clips wherever you are.Taking Pictures“Camera”1. Press to take the picture.The shutter sounds and the still image of the taken picture is displayed.2. Press [Save].To cancel, press [Cancel].The taken picture is saved in My Items.Note•Press the camera key instead of in the viewer position of the display.•When the digital camera is not activated, press [Options] and select “Go to Photo Camera”, or press c.Taking a Self-PortraitYou can take a self-portrait while looking at the display.1. Rotate the display 180° clockwise from the normal position.2. Press the camera key on the side of the phone.Save Save CancelCancelSave Cancele_j350.book Page 68 Monday, October 25, 2004 6:33 PM](https://usermanual.wiki/Sharp/HRO00039.User-Manual-2-of-4/User-Guide-483841-Page-20.png)
![70CameraSelecting the Picture SizeYou can select the size of pictures. All taken pictures are saved in the JPEG format.“Camera” → [Options] → “Picture Settings” → “Picture Size”1. Select the desired size.Picture Sizes: 960 ×1280 dots768 ×1024 dots480 ×640 dots240 ×320 dots120 ×160 dots120 ×128 dotsAdjusting the Exposure“Camera” → [Options] → “Picture Settings” → “Exposure”1. Press a (Bright) or b (Dark).Picture brightness (exposure level) indicators: (Bright → Normal → Dark)Once the phone has returned to the stand-by screen, the brightness settings return to default.e_j350.book Page 70 Monday, October 25, 2004 6:33 PM](https://usermanual.wiki/Sharp/HRO00039.User-Manual-2-of-4/User-Guide-483841-Page-22.png)
![71CameraMobile LightTo Change the Light ColourYou can take a picture in various colour modes.“Camera” → [Options] → “Picture Settings” → “Mobile Light” → “Light Colour”1. Select the desired light colour.Light Colours: White/Red/Yellow/Green/Blue/Violet/Light Blue/DiscoTo Change the Mobile Light ModeSet the mobile light according to your purpose.“Camera” → [Options] → “Picture Settings” → “Mobile Light” → “Switch On/Off”1. Select the desired mode.“On” ( ): The light is always on.“Auto” ( ): The light turns on if the phone detects that the conditions are dark.“Low Light” ( ): Select this mode for macro shooting.“Off”: The light is always off.The corresponding indicator is displayed on the screen. Select “Off” to turn it off.e_j350.book Page 71 Monday, October 25, 2004 6:33 PM](https://usermanual.wiki/Sharp/HRO00039.User-Manual-2-of-4/User-Guide-483841-Page-23.png)
![72CameraUsing the Timer (Timer)“Camera” → [Options] → “Camera Modes” → “Timer”1. Select “On” or “Off”.“ ” is displayed on the screen when you select “On”.Selecting the SceneYou can select the appropriate mode by scene when you take the picture.“Camera” → [Options] → “Picture Settings” → “Scene”1. Select the desired scene.e_j350.book Page 72 Monday, October 25, 2004 6:33 PM](https://usermanual.wiki/Sharp/HRO00039.User-Manual-2-of-4/User-Guide-483841-Page-24.png)
![73CameraContinuous ShootYou can take continuous shoots in various options.“Camera” → [Options] → “Camera Modes” → “Continuous Shoot”1. Select the desired mode.The following continuous shoot modes are available:“Off”: The continuous shoots are cancelled.“4 Pictures”/“9 Pictures”: Takes 4 or 9 pictures continuously.After selecting this mode, select the desired speed from the following:“Very Fast”“Fast”“Normal”“Slow”“Very Slow”“Manual” “Bracket”: Takes 9 continuous pictures with various colours and brightness levels.After selecting this mode, press then select “Fast” or “Normal”. “Overlapped”: Overlaps continuous pictures into one picture and makes an afterimage.After selecting this mode, press then select “Fast” or “Normal”.e_j350.book Page 73 Monday, October 25, 2004 6:33 PM](https://usermanual.wiki/Sharp/HRO00039.User-Manual-2-of-4/User-Guide-483841-Page-25.png)
![74CameraNote•When you select “Manual” to take continuous pictures, press or the camera key (in the viewer position of the display) manually in the desired speed.•When the Timer and Continuous Shoot functions are simultaneously set, “ ” (for “4 Pictures”, for example) is displayed instead.Selecting a FrameYou can select the frame from preset patterns. You can also select a frame in Saved Pictures.“Camera” → [Options] → “Camera Modes” → “Photo Frame”1. Select “Preset Frames” or “My Pictures”.2. Select the desired frame.The selected frame is confirmed on the display.3. Press .Note•Images larger than 240 dots [W] × 320 dots [H] cannot be used.Switching to the Video Camera ModeYou can switch from the camera mode to the video camera mode. You can also switch between these two modes by pressing d.“Camera” → [Options] → “Go to Video Camera”e_j350.book Page 74 Monday, October 25, 2004 6:33 PM](https://usermanual.wiki/Sharp/HRO00039.User-Manual-2-of-4/User-Guide-483841-Page-26.png)
![75CameraUsing the Full ScreenYou can display the preview on the full screen without the soft key area and indicator area.“Camera” → [Options] → “Advanced”1. Select “Full Viewfinder”.To return to the normal viewfinder, select “Normal Viewfinder”.Selecting the Picture Quality“Camera” → [Options] → “Picture Settings” → “Picture Quality”1. Select the desired picture quality.Picture quality indicators:Super Fine:Fine:NormalSelecting the Shutter SoundYou can select the shutter sound from 3 preset patterns.“Camera” → [Options] → “Advanced” → “Shutter Sound”1. Select the desired shutter sound.Note•Continuous Shoot uses the specialised shutter sound that cannot be changed from the above settings.e_j350.book Page 75 Monday, October 25, 2004 6:33 PM](https://usermanual.wiki/Sharp/HRO00039.User-Manual-2-of-4/User-Guide-483841-Page-27.png)
![76CameraSelecting the Storage MemoryYou can select the location to save the taken pictures in.“Camera” → [Options] → “Advanced” → “Save New Pictures to”1. Select the desired location from “Handset Memory”, “Memory Card” or “Choice”.Note•If you select “Choice”, select the desired location every time you save.e_j350.book Page 76 Monday, October 25, 2004 6:33 PM](https://usermanual.wiki/Sharp/HRO00039.User-Manual-2-of-4/User-Guide-483841-Page-28.png)
![77CameraAuto SaveYou can set the phone to save pictures automatically.“Camera” → [Options] → “Advanced” → “Auto Save”1. Select “On”.Select “Off” to disable.Using the Help Function“Camera” → [Options] → “Help”Exiting from the Viewer Position of the DisplayCarry out the following operation when you want to go back from the viewer position of the display to the normal position.1. Press and hold the cancel key in the viewer position.e_j350.book Page 77 Monday, October 25, 2004 6:33 PM](https://usermanual.wiki/Sharp/HRO00039.User-Manual-2-of-4/User-Guide-483841-Page-29.png)
![80CameraUsing the Zoom FunctionTo Adjust the Zooming Ratio1. In the viewfinder mode, press a or b.Adjusting the Exposure“Camera” → [Options] → “Video Settings” → “Exposure”1. Press a (Bright) or b (Dark).Picture brightness (exposure level) indicators: (Bright → Normal → Dark)Once the phone has returned to the stand-by screen, the brightness settings return to default.Mobile LightYou can record a video clip in various colour modes.“Camera” → [Options] → “Video Settings” → “Mobile Light” → “Light Colour”1. Select the desired light colour.Light Colours: White/Red/Yellow/Green/Blue/Violet/Light Blue/Discoe_j350.book Page 80 Monday, October 25, 2004 6:33 PM](https://usermanual.wiki/Sharp/HRO00039.User-Manual-2-of-4/User-Guide-483841-Page-32.png)
![81CameraTo Change the Mobile Light ModeSet the mobile light according to your purpose.“Camera” → [Options] → “Picture Settings” → “Mobile Light” → “Switch On/Off”1. Select the desired mode.“On” ( ): The light is always on.“Auto” ( ): The light turns on if the phone detects that the conditions are dark.“Off”: The light is always off.The corresponding indicator is displayed on the screen. Select “Off” to turn it off.Selecting the Recording Time“Camera” → [Options] → “Video Settings” → “Record Time”1. Select “Extended Video” or “For Message”.For Message: Limits the size to send a message depending on service providers.Extended Video: Less than 30 minutes (depending on the memory).Note•If you select “For Message” for the recording time, the file size is limited depending on the service provider. Therefore, the quality is also limited for the setting.•“Save and Send” is not displayed after recording in the Extended Video mode.•When you select “Extended Video”, you can select the video format from “QCIF or SubQCIF” or “QVGA(MPEG4)”.e_j350.book Page 81 Monday, October 25, 2004 6:33 PM](https://usermanual.wiki/Sharp/HRO00039.User-Manual-2-of-4/User-Guide-483841-Page-33.png)
![82CameraSwitching to the Photo Camera ModeYou can switch to the digital camera mode. You can also switch to the photo camera mode by pressing c.“Camera” → [Options] → “Go to Photo Camera”Selecting Video Quality“Camera” → [Options] → “Video Settings” → “Video Quality”1. Select the desired video quality.Video quality indicators:Super Fine:Fine:NormalNote•The better quality you select, the larger file size is needed.Recording Video Clips with the SoundTo record a video clip with the sound, the microphone needs to be activated.“Camera” → [Options] → “Video Settings” → “Microphone”1. Select “On” or “Off”.Note•The microphone is already turned on in the default setting. Select “Off” to record a video clip without the sound.e_j350.book Page 82 Monday, October 25, 2004 6:33 PM](https://usermanual.wiki/Sharp/HRO00039.User-Manual-2-of-4/User-Guide-483841-Page-34.png)
![83CameraTip•The file size of a video clip can be reduced if the sound is not recorded.Changing the Picture SizeYou can change the picture size during playback/recording.“Camera” → [Options] → “Advanced” → “Picture Size”1. Select “Large(QCIF)” or “Small(SubQCIF)”.Selecting the Storage MemoryYou can select the location to save the recorded video clips.“Camera” → [Options] → “Advanced” → “Save New Videos to”1. Select the desired location from “Handset Memory”, “Memory Card” or “Choice”.Note•If you select “Choice”, select the desired location every time you save.e_j350.book Page 83 Monday, October 25, 2004 6:33 PM](https://usermanual.wiki/Sharp/HRO00039.User-Manual-2-of-4/User-Guide-483841-Page-35.png)
![84CameraTo Use the Help Function“Camera” → [Options] → “Help”Video Encoding“Camera” → [Options] → “Advanced” → “Video Encode”1. Select the appropriate format.Exiting from the Viewer Position of the DisplayCarry out the following operation when you want to go back from the viewer position of the display to the normal position.1. Press and hold the cancel key in the viewer position.e_j350.book Page 84 Monday, October 25, 2004 6:33 PM](https://usermanual.wiki/Sharp/HRO00039.User-Manual-2-of-4/User-Guide-483841-Page-36.png)
![86Messages2. (Email/MMS)Press [Options] and select “Insert Item”, if you wish to attach files.3. (Email/MMS)Select the desired item. Details are given in the following sections.“Pictures”: Attaches picture files.“Sounds”: Attaches sound files.“Videos”: Attaches video clip files.“Attach Contact”: Attaches Contacts List entries.“Attach Appointment”: Attaches Schedule entries.4. Select “Send”.5. (MMS)Enter or select the email address or phone number from the Contacts List.(SMS)Enter or select the phone number from the Contacts List.(Email)Enter the email address from the Contacts List.To add multiple email addresses or phone numbers (up to 20), highlight the recipient field, press [Options], select “Edit & Add Recipients”, then select “Add Recipient”.Enter or select the email address or phone number, or select from the existing Contacts List.Up to 20 digits (MMS/SMS) or 128 characters (Email/MMS) can be entered for each email address or phone number.To change the recipient types, press [Options], select “Edit Recipients” and select “Change to TO”, “Change to CC” or “Change to BCC” (Email/MMS).e_j350.book Page 86 Monday, October 25, 2004 6:33 PM](https://usermanual.wiki/Sharp/HRO00039.User-Manual-2-of-4/User-Guide-483841-Page-38.png)
![88MessagesNote•The current message size displayed while you are creating the message is an approximation.•If a message cannot be sent for some reason, the message stays in the Outbox and the “ ” is displayed during stand-by.Tip•To save the message without sending, select [Options] and select “Save to Drafts” in step 2.•You can send the following items attached to multimedia messages. Details are given in the following sections.•My Items data•Contacts List entry•File (Schedule entry created by Calendar, Contacts List entry), etc.•You can use the template option to help you compose messages. For details on using this option, see “Using Templates” on page 55.To Attach My Items Data1. In step 3 in “Creating a New Message” on page 85, select from “Pictures”, “Sounds” or “Videos”.e_j350.book Page 88 Monday, October 25, 2004 6:33 PM](https://usermanual.wiki/Sharp/HRO00039.User-Manual-2-of-4/User-Guide-483841-Page-40.png)
![90MessagesTo Add a Slide Show1. In step 2 in “Creating a New Message” on page 85, select “Options” and select “Add Slide”.If you wish to add more slides, select “Add Slide Before” or “Add Slide After”.2. Enter the message.If you wish to set the duration of each slide, press [Options] and select “Slide duration”, then select the desired duration.Tip•You can create messages up to 300 KB. Each slide can contain one picture and/or one sound file or video clip.To Remove or Replace Attachments1. In step 3 in “Creating a New Message” on page 85, press [Options] and select the corresponding remove option for each attachment.Sending a Message in the Drafts BoxA → “Drafts”1. Select the desired tab, SMS/MMS or Email.2. Press [Options] and select “Edit & Send”.3. Modify the message, if necessary.4. Select “Send”.5. Highlight “Send”, then press to send.e_j350.book Page 90 Monday, October 25, 2004 6:33 PM](https://usermanual.wiki/Sharp/HRO00039.User-Manual-2-of-4/User-Guide-483841-Page-42.png)
![91MessagesReading MMSMessages you receive are saved in the Inbox.To View Messages Before DownloadingThe MMS indicator ( ) is displayed when you are receiving an incoming message.A → “Inbox”1. Select the message alert you wish to view.Tip•The volume varies depending on the Application Volume settings (p. 143). The sound is deactivated when “Application Volume” is set to “Silent”.Storing the Phone Number of a Sender in the Contacts ListA → “Inbox”1. Highlight the message from which you wish to store the phone number or email address.2. Press [Options] and select “Save address”.The new Contacts List entry screen including the phone number is displayed. For details on creating a new Contacts List entry, see “Add New Contact” on page 59.Calling the Phone Number of a Sender Embedded in the MessageA → “Inbox”1. Highlight the message including the phone number you wish to dial.2. Press [Options] and select “Call Sender”.e_j350.book Page 91 Monday, October 25, 2004 6:33 PM](https://usermanual.wiki/Sharp/HRO00039.User-Manual-2-of-4/User-Guide-483841-Page-43.png)
![92MessagesDownloading a Single MMSA → “Inbox”1. Highlight the message alert ( ) you wish to download.2. Press [Options] and select “Download”.The downloading starts and the indicator becomes .Tip•You can download multiple messages at the same time. See the next section.Downloading Multiple MMSA → “Inbox”1. Press [Options] and select “Advanced”.2. Select “Multiple Select”.3. Select the desired message alert using the “Select/Unselect” or “Select All” option.4. Select “Download”.The selected messages are downloaded at the same time.Replying to a Message or to All AddressesA → “Inbox”1. Highlight the message the sender of which you wish to reply to.2. Press [Options] and select “Reply” or “Reply all”.3. Enter the message.4. Press “Send”.5. Highlight “Send” then press to send.e_j350.book Page 92 Monday, October 25, 2004 6:33 PM](https://usermanual.wiki/Sharp/HRO00039.User-Manual-2-of-4/User-Guide-483841-Page-44.png)
![93MessagesForwarding a MessageA → “Inbox”1. Highlight the message you wish to forward.2. Press [Options] and select “Forward”.3. Perform steps 2 to 9 in “Creating a New Message” on page 85.Remote ForwardYou can transfer your email messages saved in the mail server directly to other recipients.A → “Inbox”1. Highlight the message alert ( ) you wish to transfer.2. Press [Options] and select “Forward”.3. Perform steps 2 to 5 in “Creating a New Message” on page 85.Sorting the Messages in the ListA → “Inbox”1. Press [Options] and select “Advanced”.2. Select “Sort”.3. Select the desired sort type.Locking or Unlocking the MessagesA → “Inbox”1. Highlight the message you wish to lock or unlock.2. Press [Options] and select “Advanced”.3. Select “Lock/Unlock”.e_j350.book Page 93 Monday, October 25, 2004 6:33 PM](https://usermanual.wiki/Sharp/HRO00039.User-Manual-2-of-4/User-Guide-483841-Page-45.png)
![94MessagesSending a Picture File with PostcardYour phone allows you to send multimedia messages to a Vodafone specific Postcard service centre that prints the picture and mails it to the recipient’s home address specified in the MMS message. (Your phone is initially provided with the address of a Vodafone specific Postcard service centre, and its address cannot be changed.)Note•This service is not available with some service providers. Please contact your service provider for more information.To Create a New PostcardA→ “Create New” → “live! Postcard”1. Select a picture you wish to send.2. Enter your message.3. Press [OK].4. Enter the following information for the recipient.See the note below for details.•“Name”• “Additional Information”• “Address”•“City”•“Post Code”• “County”• “Country”• “Send Postcard”e_j350.book Page 94 Monday, October 25, 2004 6:33 PM](https://usermanual.wiki/Sharp/HRO00039.User-Manual-2-of-4/User-Guide-483841-Page-46.png)
![95Messages5. Press [Options] and select “Send”.Note•The items “Name”, “Address” and “City” are necessary to complete sending Postcards.•Information for a recipient“Name” (mandatory):Name of the recipient for a postcard up to 50 characters“Additional Information” (optional):Additional information of the recipient up to 50 characters“Address” (mandatory):Street and number up to 50 characters“City” (mandatory):City up to 50 characters“Post Code” (optional):Postal code up to 20 characters“County” (optional):State, province and region up to 50 characters“Country” (optional):Country up to 20 characters•The items displayed differ according to the service. Please contact your service provider for more information. The item “Country” may not be displayed, so you cannot send Postcards overseas from your phone.•Files in Animation GIF format cannot be used for the Postcard service.•The picture quality of Postcards varies depending on the picture size.e_j350.book Page 95 Monday, October 25, 2004 6:33 PM](https://usermanual.wiki/Sharp/HRO00039.User-Manual-2-of-4/User-Guide-483841-Page-47.png)
![96MessagesCell BroadcastsYou can receive cell broadcast messages or general messages such as weather forecasts and traffic reports. This information is broadcast to subscribers in certain network areas.This function may not be available on all mobile phone networks. Contact your network operator for more information.Enabling/Disabling Cell Broadcasts“Messages” → “Cell Broadcasts” → “Switch On/Off”1. Select “On” or “Off”.Reading Cell Broadcast Messages“Messages” → “Cell Broadcasts” → “Read Messages”1. Select the desired subject.2. Scroll the screen to read the message.3. Press [Back].Setting LanguagesYou can select your preferred language for the cell broadcast message display.“Messages” → “Cell Broadcasts” → “Settings” → “Language”The current language is displayed.1. Press .The language list is displayed. (M 4-10)e_j350.book Page 96 Monday, October 25, 2004 6:33 PM](https://usermanual.wiki/Sharp/HRO00039.User-Manual-2-of-4/User-Guide-483841-Page-48.png)
![97Messages2. Select the desired language.3. Press [Save].Subscribing to Cell BroadcastsSelect the page of the cell broadcast message that you want.“Messages” → “Cell Broadcasts” → “Settings” → “Set Info Subjects” → [Options]1. Select “Add/Remove”.2. Select the desired page.3. Press [Back].Tip•If the desired page is not in the list that appears in step 2, select “Create Subject” in step 1, then enter the subject code to add a page. For details on the subject code, contact your service provider.e_j350.book Page 97 Monday, October 25, 2004 6:33 PM](https://usermanual.wiki/Sharp/HRO00039.User-Manual-2-of-4/User-Guide-483841-Page-49.png)