Sharp HRO00039 GSM-WCDMA Mobile-Phone / Bluetooth Enable User Manual 4 of 4
Sharp Corporation GSM-WCDMA Mobile-Phone / Bluetooth Enable 4 of 4
Sharp >
Contents
- 1. User Manual 1 of 4
- 2. User Manual 2 of 4
- 3. User Manual 3 of 4
- 4. User Manual 4 of 4
User Manual 4 of 4
![174SettingsExternal Light ColourYou can select from 7 colours and 1 pattern for each profile and change it during an incoming call.“Settings” → “Profiles”1. Highlight the profile you wish to customise.2. Press [Options] and select “Personalise”.3. Select “External Light”.4. Select “For Voice Call”, “For Video Call” or “For New Message”.5. Select the desired colour or “Off”.Tip•If you select “Disco” in step 5, all 7 colours flash in order during an incoming call.Any Key AnswerYou can answer a call by pressing any key except F, , U and [Busy]. For details, see page 37.“Settings” → “Profiles”1. Highlight the profile you wish to customise.2. Press [Options] and select “Personalise”.3. Select “Any Key Answer”.4. Select “On” or “Off”.e_j350.book Page 174 Monday, October 25, 2004 6:33 PM](https://usermanual.wiki/Sharp/HRO00039.User-Manual-4-of-4/User-Guide-483843-Page-1.png)
![175SettingsSetting the DisplayYou can change the settings of the display.WallpaperFor the stand-by screen, 5 pictures are provided.Pictures taken with the digital camera or images downloaded from a WAP site can be used for wallpapers.Setting My Pictures“Settings” → “Display Settings” → “Wallpaper”1. Select “My Pictures”.2. Select the desired picture.3. After displaying the picture, press .Note•Some pictures cannot be used because of their picture and data types.•If the picture in My Pictures is already set, it is displayed in step 1. Press [Change] and select the desired picture. (M 12-2)e_j350.book Page 175 Monday, October 25, 2004 6:33 PM](https://usermanual.wiki/Sharp/HRO00039.User-Manual-4-of-4/User-Guide-483843-Page-2.png)
![176SettingsAssigning the PicturesPictures can be displayed when turning the power on or off, when receiving an incoming call, or when operating the alarm.Pictures taken with the digital camera or images downloaded from a WAP site can be used.To Set Built-in Pictures“Settings” → “Display Settings” → “System Graphics”1. Select the desired scene to set the picture to.2. Select “Preset Animation” when you select “Power On” or “Power Off” in step 1.Select “Pattern 1”, “Pattern 2” or “Pattern 3” when you select “Incoming Call” or “Alarm” in step 1.To Set My Pictures“Settings” → “Display Settings” → “System Graphics”1. Select the desired scene to set the picture to.2. Select “My Pictures”.3. Select the desired picture.4. After displaying the picture, press .5. Specify the area you wish to display using the navigation keys.Note•Some pictures cannot be used because of their picture and data types.•If the picture in My Pictures is already set, it is displayed in step 2. Press [Change] and select the desired picture.e_j350.book Page 176 Monday, October 25, 2004 6:33 PM](https://usermanual.wiki/Sharp/HRO00039.User-Manual-4-of-4/User-Guide-483843-Page-3.png)
![181SettingsSetting the Time Zone“Settings” → “Time & Date” → “Set Time Zone”1. Press c or d to select the home city to set.2. Press .Customising the Time Zone“Settings” → “Time & Date” → “Set Time Zone” → [Options] → “Set Custom Zone”1. Enter the city name.2. Enter the time-zone differences using the digit keys.Press a or b to switch between – and +.3. Press .Setting the Calendar Format“Settings” → “Time & Date” → “Calendar Format”1. Select “Sunday-Saturday” or “Monday-Sunday”.e_j350.book Page 181 Monday, October 25, 2004 6:33 PM](https://usermanual.wiki/Sharp/HRO00039.User-Manual-4-of-4/User-Guide-483843-Page-8.png)
![187SettingsFixed Dialling No.When the Fixed Dialling No. is enabled, you can only call pre-registered numbers.To Enable Fixed Dialling No.“Settings” → “Call Settings” → “Restrict Calls” → “Fixed Dialling No.” → “Switch On/Off”1. Select “On” to enable this function.To Add a New Name“Settings” → “Call Settings” → “Restrict Calls” → “Fixed Dialling No.” → “Edit Dial List”1. Highlight the blank entry, press [Options], then select “Add New Dial”.2. Enter your PIN2 code.3. Add a name and a phone number.For details on adding a name and a phone number, see “Add New Contact” on page 59.4. Press [Save].Rejecting an Incoming CallYou can register phone numbers you do not wish to answer.To Reject the Registered Number“Settings” → “Call Settings” → “Restrict Calls” → “Rejected Numbers” → “Switch On/Off”1. Select “On” or “Off”.e_j350.book Page 187 Monday, October 25, 2004 6:33 PM](https://usermanual.wiki/Sharp/HRO00039.User-Manual-4-of-4/User-Guide-483843-Page-14.png)
![194SettingsMemory SettingsViewing the Memory Status“Settings” → “Memory Settings” → “Memory Status”1. Select from “Handset” or “Memory Card”.The memory status of the selected item is displayed.Formatting Memory Card“Settings” → “Memory Settings” → “Format Card”1. Enter your handset code.The default handset code is “9999”. For details on changing the handset code, see “To Change the Handset Code” on page 192.2. Press [Yes] to start formatting.Master ResetYou can reset M5 and M12 settings or all settings from M1 to M12 and all created data.Resetting M5 and M12 Settings“Settings” → “Master Reset” → “Reset Settings”1. Enter your handset code.The default handset code is “9999”. For details on changing the handset code, see “To Change the Handset Code” on page 192. (M 12-9) (M 12-10)e_j350.book Page 194 Monday, October 25, 2004 6:33 PM](https://usermanual.wiki/Sharp/HRO00039.User-Manual-4-of-4/User-Guide-483843-Page-21.png)
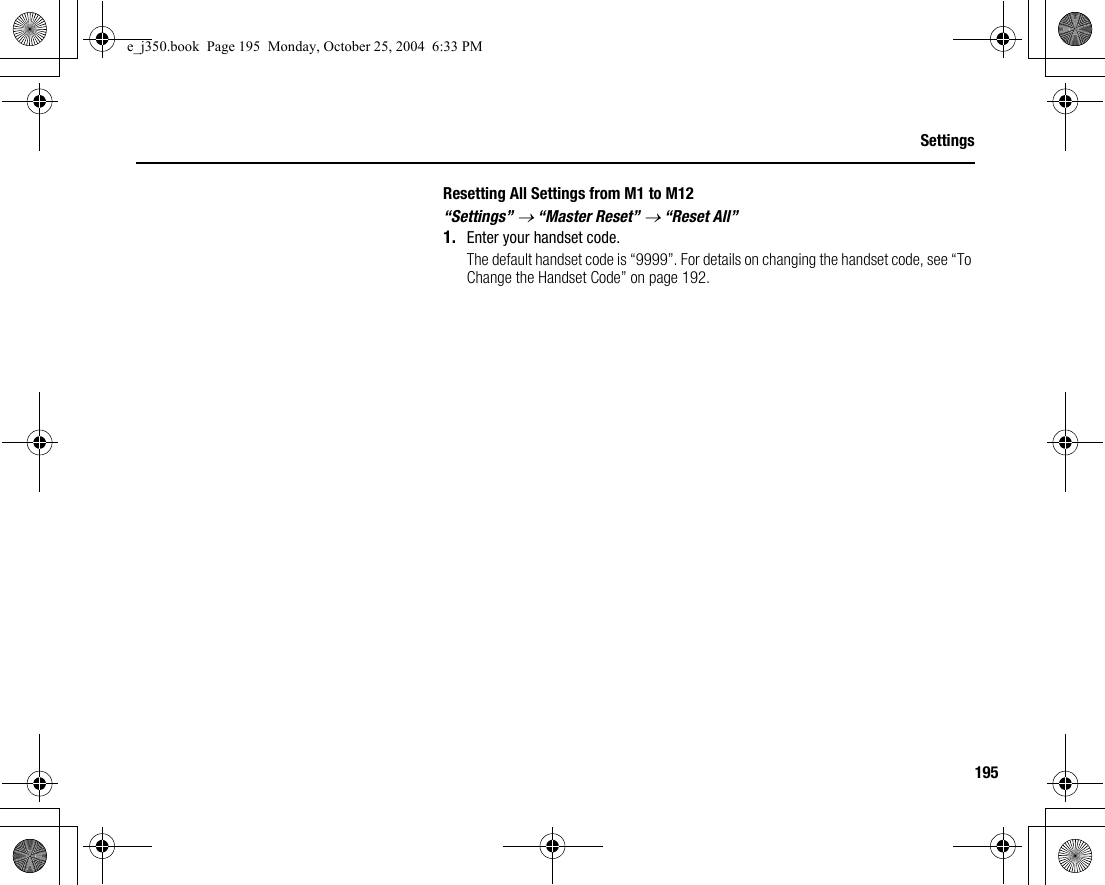
![196Call Log (M 11)The phone will record the last 10 missed calls, received calls and dialled numbers.Viewing Call Log“Call Log”1. Select from “All Calls”, “Dialled Numbers”, “Missed Calls” or “Received Calls”.The selected call log list is displayed.To switch logs, press c or d.2. Select the phone number you wish to view.If you wish to dial the number, press .Tip•You can also confirm call logs by pressing D during stand-by.Sending Messages1. In the call log list, highlight the call log you wish to send a message to.2. Press [Options] and select “Create Message”.For details on creating a message, see “Creating a New Message” on page 85.Note•The Postcard service is not available with some service providers. Please contact your service provider for more information.Select BackCall LogAll CallsMissed CallsReceived CallsDialled NumbersCall TimersCall Costse_j350.book Page 196 Monday, October 25, 2004 6:33 PM](https://usermanual.wiki/Sharp/HRO00039.User-Manual-4-of-4/User-Guide-483843-Page-23.png)
![197Call LogDeleting a Call Log1. In the call log list, press [Options] and select “Delete”.Call TimersThis function lets you check the duration of your calls.Checking the Duration of the Last Call and All Calls“Call Log” → “Call Timers”1. Select “Received Calls” or “Dialled Numbers”.The duration of the last call and all calls is displayed.Resetting Call Timers“Call Log” → “Call Timers” → “Clear Timers”1. Enter your handset code.The default handset code is “9999”. For details on changing the handset code, see “To Change the Handset Code” on page 192. (M 11-5)e_j350.book Page 197 Monday, October 25, 2004 6:33 PM](https://usermanual.wiki/Sharp/HRO00039.User-Manual-4-of-4/User-Guide-483843-Page-24.png)
![202ConnectivityTip•You can save battery power by turning the Bluetooth wireless function off while it is not in use. Turn the Bluetooth wireless function off in “To Turn On or Off” on page 200 or in “To Turn Off Automatically” on page 204.•During a call, you can divert voice calls to the paired device. Press [Options] and select “Enable Bluetooth” or “Disable Bluetooth”. If you wish to disconnect the paired device, select “Off”.To Rename a Device“Connectivity” → “Bluetooth” → “Handsfree Devices”1. Highlight the device you wish to rename.2. Press [Options] and select “Change Name”.3. Rename the device.To Clear a Device Name“Connectivity” → “Bluetooth” → “Handsfree Devices”1. Highlight the device you wish to clear.2. Press [Options] and select “Delete”.e_j350.book Page 202 Monday, October 25, 2004 6:33 PM](https://usermanual.wiki/Sharp/HRO00039.User-Manual-4-of-4/User-Guide-483843-Page-29.png)
![203ConnectivityPaired DevicesYou can rename and delete the paired device in the list.“Connectivity” → “Bluetooth” → “Paired Devices”1. Highlight the desired device.2. Press [Options].3. Select “Change Name” or “Delete”.You can rename or delete by pressing after selecting desired device.To Send All Data to Other DevicesYou can send all the data for applications such as Contacts List, Calendar, Tasks or etc. to selected devices.“Connectivity” → “Bluetooth” → “Send All”1. Select the desired device.If a device is not specified, searching starts automatically.2. Enter your handset code.The default handset code is “9999”. For details on changing the handset code, see “To Change the Handset Code” on page 192.3. Enter the device passcode for unpaired devices.4. Select the desired data to send.Note•If the handsfree device is connected, the confirmation screen to deactivate the handsfree function is displayed. Press [Yes] to deactivate.e_j350.book Page 203 Monday, October 25, 2004 6:33 PM](https://usermanual.wiki/Sharp/HRO00039.User-Manual-4-of-4/User-Guide-483843-Page-30.png)
![211ConnectivityTo Activate the WAP/MMS/Email/Streaming Profile“Connectivity” → “Internet Settings” → “Application”1. Select from “WAP Settings”, “MMS Settings”, “Email Settings” or “Streaming Settings”.2. Highlight the desired profile.3. Press [Options] and select “Activate”.To Edit the WAP/MMS/Email/Streaming Profile“Connectivity” → “Internet Settings” → “Application”1. Select from “WAP Settings”, “MMS Settings”, “Email Settings” or “Streaming Settings”.2. Highlight the desired profile.3. Press [Options] and select “Edit”.4. Edit the desired item.To Copy the WAP/MMS/Email/Streaming Profile“Connectivity” → “Internet Settings” → “Application”1. Select from “WAP Settings”, “MMS Settings”, “Email Settings” or “Streaming Settings”.2. Highlight the desired profile.3. Press [Options] and select “Copy”.4. Edit the new profile name.e_j350.book Page 211 Monday, October 25, 2004 6:33 PM](https://usermanual.wiki/Sharp/HRO00039.User-Manual-4-of-4/User-Guide-483843-Page-38.png)
![212ConnectivityTo Delete the WAP/MMS/Email/Streaming Profile“Connectivity” → “Internet Settings” → “Application”1. Select from “WAP Settings”, “MMS Settings”, “Email Settings” or “Streaming Settings”.2. Highlight the desired profile.3. Press [Options] and select “Delete”.4. Press [Yes].Backup/RestoreWith a memory card inserted in your phone, you can make backup files of Bookmarks, Text, Contacts, Calendar and Tasks in the handset memory card to the memory card. You can also restore the backup data from the memory card.Making a Backup File on the Memory Card“Connectivity” → “Backup/Restore” → “Backup”1. Enter your handset code.The default handset code is “9999”. For details on changing the handset code, see “To Change the Handset Code” on page 192.2. Press [OK].3. Select the desired item to backup. (M 10-5)e_j350.book Page 212 Monday, October 25, 2004 6:33 PM](https://usermanual.wiki/Sharp/HRO00039.User-Manual-4-of-4/User-Guide-483843-Page-39.png)
![213ConnectivityTo Backup All Files“Connectivity” → “Backup/Restore” → “Backup”1. Enter your handset code.2. Press [OK].3. Select “Select All”.Restoring a Backup File“Connectivity” → “Backup/Restore” → “Restore”1. Enter your handset code.2. Press [OK].3. Select the desired item.4. Select the desired file to restore.A confirmation message indicates deletion from the memory card is displayed on the screen.5. Press [Yes].To Restore All Files“Connectivity” → “Backup/Restore” → “Restore”1. Enter your handset code.2. Press [OK].3. Select “Select All”.A confirmation message indicating deletion from the memory card is displayed on the screen.4. Press [Yes].e_j350.book Page 213 Monday, October 25, 2004 6:33 PM](https://usermanual.wiki/Sharp/HRO00039.User-Manual-4-of-4/User-Guide-483843-Page-40.png)
![214ConnectivityTo Delete a Backup File“Connectivity” → “Backup/Restore” → “Restore”1. Enter your handset code.2. Press [OK].3. Select the desired item.4. Highlight the desired file.5. Press [Options] and select “Delete”.A confirmation message to delete the selected file is displayed on the screen.6. Press [Yes].e_j350.book Page 214 Monday, October 25, 2004 6:33 PM](https://usermanual.wiki/Sharp/HRO00039.User-Manual-4-of-4/User-Guide-483843-Page-41.png)
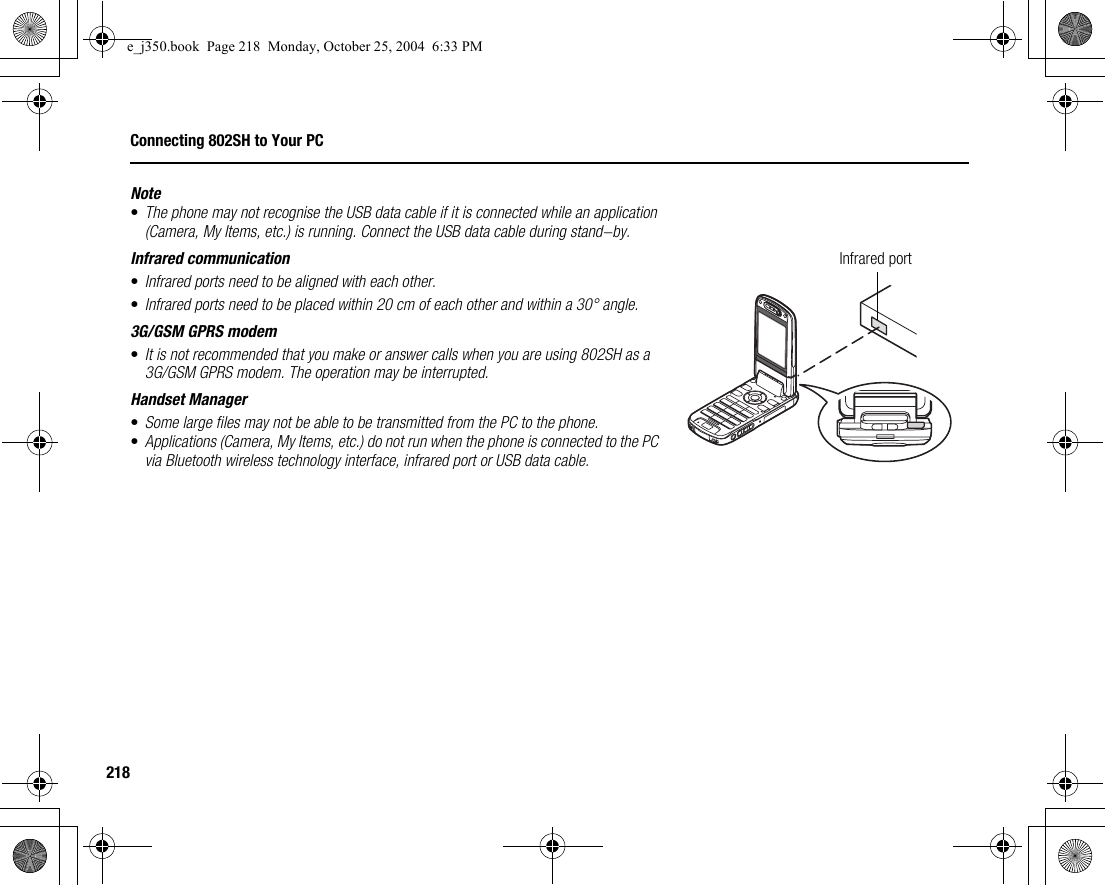
![217Connecting 802SH to Your PCHandset ManagerYou can transmit the following items between your phone and your PC, and can use Contacts List entries on your PC:• My Items files (pictures/sounds/video clips/Other Documents data)• Contacts List entries• Schedule entriesTo use the Handset Manager function, see “Connecting 802SH to Your PC” on page 215 and set your phone to Data Transfer mode.For details on software support, refer to the following site:http://www.sharp-mobile.comSoftware Installation1. Insert the supplied CD-ROM into your CD-ROM drive.The 802SH CD-ROM screen is displayed.If the 802SH CD-ROM screen is not displayed, double-click [Launcher.exe] in your CD-ROM.2. Press the desired button.The installation starts.3. Follow the on-screen instructions to complete installation.e_j350.book Page 217 Monday, October 25, 2004 6:33 PM](https://usermanual.wiki/Sharp/HRO00039.User-Manual-4-of-4/User-Guide-483843-Page-44.png)