Sharp HRO00039 GSM-WCDMA Mobile-Phone / Bluetooth Enable User Manual 3 of 4
Sharp Corporation GSM-WCDMA Mobile-Phone / Bluetooth Enable 3 of 4
Sharp >
Contents
- 1. User Manual 1 of 4
- 2. User Manual 2 of 4
- 3. User Manual 3 of 4
- 4. User Manual 4 of 4
User Manual 3 of 4

99
Messages
• “Roam. Download” (“Always download”, “Always defer”):
Controls message download timing when roaming outside of your network.
“Always download”: Downloads messages immediately from the server.
“Always defer”: Defers message download.
• “Delivery Report”:
Enables or disables Delivery Report request.
• “Read Report”:
Enables or disables Read Report request.
• “Expiry Time”:
This indicates the number of days and hours for which a message you send may
remain undelivered to the message recipient. During this period, the message
service centre will continually try to deliver the message to the recipient.
Select the validity period.
• “Delivery Rep. Allow”:
Enables or disables Delivery Report when receiving a message, which applies to the
Delivery Report function.
• “Auto Delete” (“None”, “Inbox”, “Sent”, “Both”):
Deletes the oldest message automatically, when the Inbox, Sent or both (Inbox and
Sent) is full.
• “Edit Signature”:
Opens the screen to enter the signature.
• “Reply History” (“Yes”, “No”):
Disables or enables whether the message will be added to your reply message or not.
e_j350.book Page 99 Monday, October 25, 2004 6:33 PM

100
Messages
SMS Settings
“Messages”
→
“Settings”
→
“SMS Settings”
1. Select the item you wish to set up.
• “Message Centre”:
Enter the centre phone number.
If you wish to enter a country code for a message to an international number, press
and hold Q until a + sign is displayed.
• “Reply Path”:
Accepts or rejects the same reply path with the send path when receiving the reply
message for your message.
• “Message Format”:
Select the message format to be used when creating a new message.
• “Optimisation”:
When set “On” (default), double-byte characters such as European characters with
an accent are converted into single-byte characters and sent.
When “Off”, double-byte characters are sent as displayed.
Please note that you may be charged double for double-byte characters sent in an
SMS when Optimisation is set “Off”.
Select “On” or “Off”.
e_j350.book Page 100 Monday, October 25, 2004 6:33 PM

101
Messages
MMS Settings
“Messages”
→
“Settings”
→
“MMS Settings”
1. Select the item you wish to set up.
• “Slide Duration”:
Sets the duration of the slide.
• “Max Message Size”:
Defines the maximum size of messages that are downloaded.
• “Creation Mode” (“Free”, “Restricted”):
When set to “Free”, you can attach files of any format to the mail. When set to
“Restricted”, only certain formats can be attached.
Email Settings
“Messages”
→
“Settings”
→
“Email Settings”
1. Select the item you wish to set up.
• “Download Interval”:
Sets the download interval.
• “Max Message Size”:
Defines the maximum size of messages that are downloaded.
e_j350.book Page 101 Monday, October 25, 2004 6:33 PM

102
Vodafone live! (M 2)
Your phone is already configured to access Vodafone live! and the mobile internet*.
Vodafone live! is a new mobile internet portal which is your gateway to a new world of
information, games, music and services.
Because your phone uses 3G (UMTS), it has a system that is much faster than previous ways
of getting mobile information. Also, the connection is ‘always on’ which means there is no
need to wait for dialling up. You only have to pay for the data you send or receive, not how
long you’re connected.
* If you have problems getting connected, please phone Vodafone Customer Support.
Your phone contains a WAP browser used for surfing on the Mobile Internet, where you can
get a lot of useful information. Normally, pages are designed for a mobile phone.
Your phone is already setup to Vodafone site for WAP/MMS Settings.
e_j350.book Page 102 Monday, October 25, 2004 6:33 PM

103
Vodafone live!
Starting the WAP Browser
1. Press C during stand-by.
To Exit the WAP Browser
1. Press F to exit the browser.
Navigating a WAP Page
•a b c d:
Move the highlights around in the screen.
• : Executes the option displayed in the lower centre of the screen.
•A: Launches the browser option menu.
•C: Selects an action displayed in the lower right of the screen.
Used to access “Vodafone live!” by opening the browser.
•F(short press):
Exits the browser.
(press and hold):
Turns off the phone.
e_j350.book Page 103 Monday, October 25, 2004 6:33 PM

104
Vodafone live!
Browser Menu
To Edit Favourites
C
→
[Options]
→
“Bookmarks”
1. Select the desired URL, and press [Options].
You can edit the list of Bookmarks by the following options:
“Select”: Selects a bookmark.
“Details”: Displays detailed information of the WAP page.
“Send page”: Sends the URL address to recipients.
“New”: Creates new folders or bookmarks.
“Rename”: Renames bookmarks.
“Edit URL”: Edits URL address of the bookmarks.
“Move”: Moves Bookmarks to another location.
“Delete”: Deletes bookmarks.
“Delete All”: Deletes all bookmarks.
e_j350.book Page 104 Monday, October 25, 2004 6:33 PM

105
Vodafone live!
The Browser Options
You can use various options of the WAP browser.
C
→
[Options]
“Select”: Selects a WAP page.
“Home”: Goes to the homepage.
“Bookmarks”: (See page 104.)
“Mark Page”: Marks the selected WAP page.
“Save items”: Saves items from WAP pages.
“Go to URL”: Goes to the WAP page that you enter the URL address.
“Access History”: Shows the history where you have browsed.
“Forward”: Goes to the next page of the pages displayed.
“Reload Page”: Reloads the WAP page again to get new information.
“Advanced”: Displays the advanced menus.
“Exit”: Exits the browser.
The Advanced Options
C
→
[Options]
→
“Advanced”
“My Saved Page”: Displays the bookmarked pages.
“Save this page”: Saves the WAP page as the local file.
“Send page”: Sends the WAP page data.
“Details”: Shows detailed information of the WAP page.
“Browser Data”: Edits the browser data. You can clear the cache/cookies/
history.
“Search This Page”: Searches specific words in the WAP page.
e_j350.book Page 105 Monday, October 25, 2004 6:33 PM

106
Vodafone live!
“Alert Inbox”: Displays WAP Push alerts.
“Copy Text”: Copies the text on the web page.
“Settings”: Displays the Settings menus.
“Restart browser”: Restarts the browser.
“About”: Displays the browser information.
Browser Settings
C
→
[Options]
→
“Advanced”
→
“Settings”
“Send Referrer”: Enables or disables the notification of the referrer.
“Cookies”: Adjusts the setting of cookies.
“Downloads”: Categorises downloading data from the images/sounds/
objects.
“Security”: Adjusts the security prompt level.
“IMEI Notification”: Enables or disables the notification of mobile phone
identification.
“Scroll step”: Sets the speed of scrolling.
“Font Size”: Sets the size of the browsing font.
e_j350.book Page 106 Monday, October 25, 2004 6:33 PM

107
Media Player (M 3)
Media Player can play sound files and video clip files by switching between two applications:
Music Player and Video Player. These applications can handle files in MP4 and 3gp (video
clip, sound) format. While playing back sound files in the background, you can use other
menus.
Switching between Music Player and Video Player
When you start the Media Player for the first time, the Music Player is started.
“Media Player”
The list of the last-launched player (All Videos or All Music) is displayed.
1. When the desired playlist is not displayed, press [Options] and select “Open Video”
or “Open Music”.
2. Select “Handset Memory” or “Memory Card”.
Music Player
Playing Back Sound Files
“Media Player”
1. Select the desired file.
To pause playback, press .
Note
•You are asked whether or not to play sounds when the Silent mode is activated.
e_j350.book Page 107 Monday, October 25, 2004 6:33 PM

108
Media Player
Tip
•You can return to the Main menu screen while playing back the file in the background.
•You can create your playlist listing only the desired files (p. 110).
•You can make tone adjustment in step 1. Press [Options] and select “Tone Control”.
Select from “Normal” or “Bass”.
•You can select the playback pattern in step 1. Press [Options] and select “Playback
Pattern”.
“Normal”: Plays back all files in the selected folder once and stops playback.
“Repeat”: Continues to play back the selected file.
“Repeat All”: Plays back all files in the selected folder.
“Random”: Plays back files in the selected folder at random.
Searching a File to Be Played Back
“Media Player”
1. Press [Options] and select “Search”.
2. Enter the first few letters of the title.
Search results are displayed in alphabetical order and the matching file is highlighted.
Adding a File to the Playlist
You can create a playlist registering desired files.
“Media Player”
1. Highlight the file you wish to add to the playlist.
e_j350.book Page 108 Monday, October 25, 2004 6:33 PM

109
Media Player
2. Press [Options] and select “Add to Playlist”.
The playlists are displayed. For details on adding a playlist, see “Adding a New Playlist”
on page 110.
3. Select the desired folder.
4. Press .
The file highlighted in step 1 is saved.
To delete the playlist, highlight the playlist and press [Options]. Then select “Delete
Playlist”.
Streaming
You can play back sound files while downloading them from the mobile network.
You can also register the address of the Web site as a bookmark.
“Media Player”
1. Press [Options] and select “Streaming”.
2. Select from “Enter URI”, “Favourites” or “Access Log”.
“Enter URI”: Enter the desired address of the Web site. The browser opens, starts
downloading and plays back.
“Favourites”: The address of the Web site is registered.
“Access Log”: Shows the logs of the Web site you accessed. From the log you can
start streaming.
e_j350.book Page 109 Monday, October 25, 2004 6:33 PM
110
Media Player
Adding a New Playlist
“Media Player”
1. Press [Options] and select “Open Music”.
2. Select “Handset Memory” or “Memory Card”.
3. Press [Options] and select “Add New Playlist”.
4. Enter the desired playlist name.
5. Press .
Video Player
Playing Back Video Clip Files
“Media Player”
1. Select the desired file.
To pause playback, press .
To stop playback, press C.
Tip
•You can create your playlist listing only the desired files (p. 112).
e_j350.book Page 110 Monday, October 25, 2004 6:33 PM

111
Media Player
Searching a File to Be Played Back
“Media Player”
1. Press [Options] and select “Search”.
2. Enter the first few letters of the title.
Search results are displayed in alphabetical order and the matching file is highlighted.
Adding a File to the Playlist
You can create a playlist registering desired files.
“Media Player”
1. Highlight the file you wish to add to the playlist.
2. Press [Options] and select “Add to Playlist”.
The playlists are displayed. For details on creating a playlist, see “Adding a New Playlist”
on page 112.
3. Select the desired folder.
4. Press .
The file highlighted in step 1 is saved.
To delete files from the playlist, highlight the playlist and press [Options]. Then select
“Delete from Playlist”.
e_j350.book Page 111 Monday, October 25, 2004 6:33 PM

112
Media Player
Streaming
You can play back video clip files while downloading them from the mobile network.
You can also register the address of the Web site as a bookmark.
“Media Player”
1. Press [Options] and select “Streaming”.
2. Select from “Enter URI”, “Favourites”, “Access Log” or “Display Size”.
“Enter URI”: Enter the desired address of the Web site. The browser opens, starts
downloading and plays back.
“Favourites”: The address of the Web site is registered.
“Access Log”: Shows the logs of the Web site you accessed. From the log you can
start streaming.
“Display Size”: Select the display size when playing back video clip files.
Adding a New Playlist
“Media Player”
1. Press [Options] and select “Open Video”.
2. Select “Handset Memory” or “Memory Card”.
3. Press [Options] and select “Add New Playlist”.
4. Enter the desired playlist name.
5. Press .
e_j350.book Page 112 Monday, October 25, 2004 6:33 PM

113
Media Player
Editing the Video Clip File
“Media Player”
1. Select the file you wish to edit.
2. Press [Options] and select “Edit”.
3. Select the desired option.
“Crop”: Select the desired area to be cropped.
“Subtitle”: Create a subtitle to add to the file.
Backlight
“Media Player”
1. Select the file the backlight of which you wish to adjust.
2. Press [Options] and select “Settings”.
3. Select “Backlight:”.
4. Select from “Always On”, “Always Off” or “Normal Settings”.
“Always On”: Lit while the file is played back.
“Always Off”: Unlit while the file is played back even if a key is pressed.
“Normal Settings”: Works with the backlight setting (p. 178).
e_j350.book Page 113 Monday, October 25, 2004 6:33 PM
114
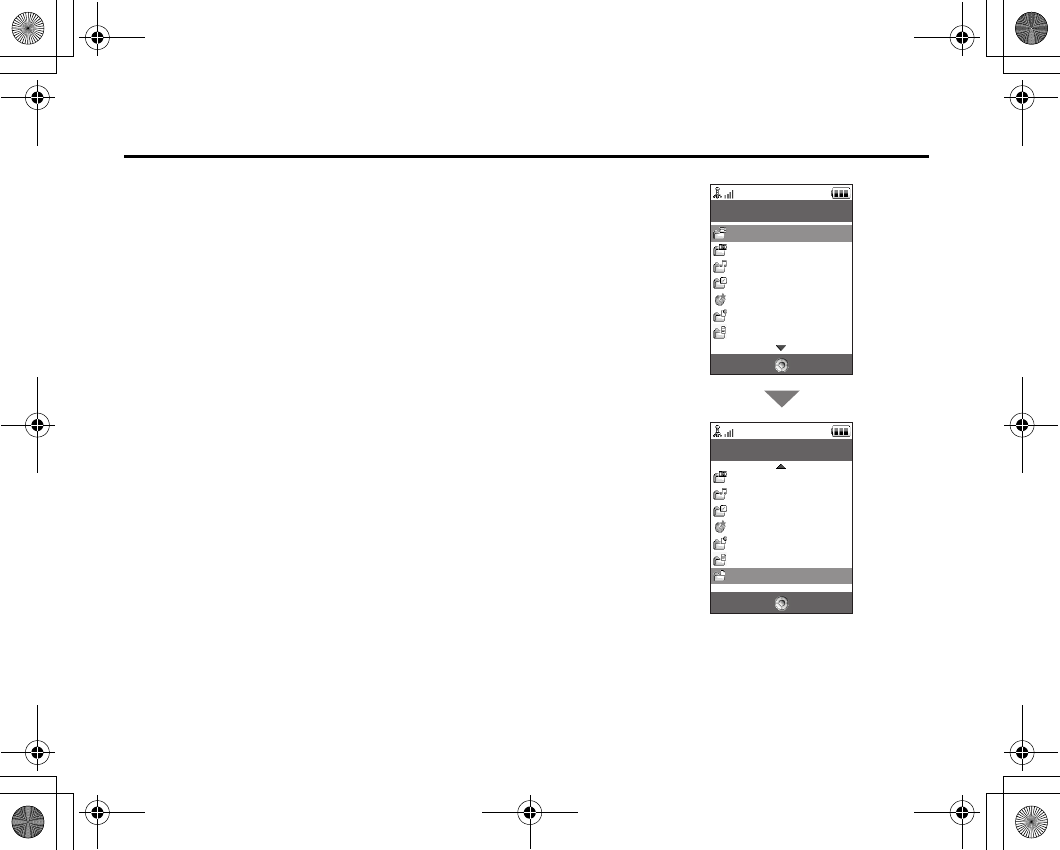
My Items (M 6)
My Items contains several types of picture, sound and video clip data. Also included in My
Items are frequently used text message phrases and accessed WAP pages (addresses)
which you can use. You can also transmit picture, sound and video clip data via infrared or
Bluetooth
wireless technology to OBEX-enabled phones.
Select Back
My Items
Pictures
Videos
Sounds & Ringtones
Games & More
Bookmarks
My Saved Page
Text Templates
Select Back
My Items
Other Documents
Videos
Sounds & Ringtones
Games & More
Bookmarks
My Saved Page
Text Templates
e_j350.book Page 114 Monday, October 25, 2004 6:33 PM
115
My Items
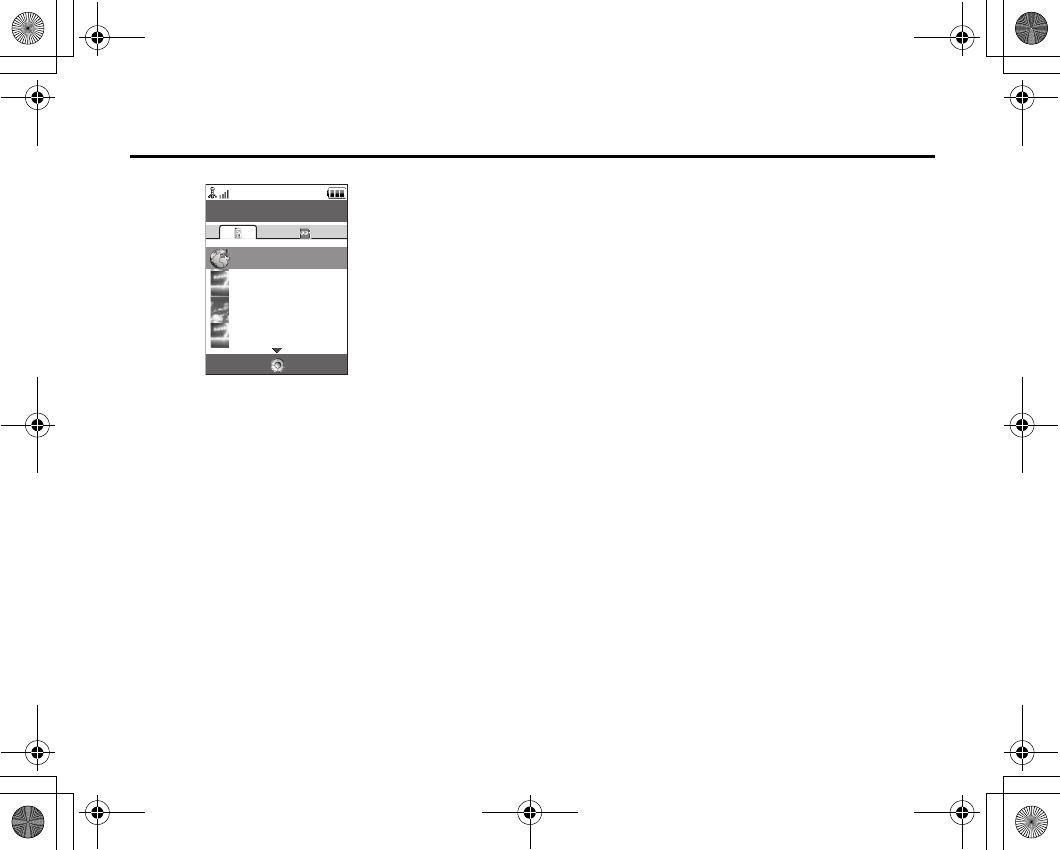
Pictures
Pictures that are taken by a digital camera or images that are downloaded from mobile
Internet sites can be managed. You can register pictures in the following formats: JPEG,
PNG, WBMP and GIF.
Viewing Pictures
“My Items”
→
“Pictures”
1. Select the file you wish to view.
The selected picture is displayed.
Switching the Memory Source
“My Items”
→
“Pictures”
1. Press d.
The tab switches and the list is displayed from the memory card. To go back to the
handset memory, press c.
2. Select the picture file you wish to view.
Using Images as Wallpaper
“My Items”
→
“Pictures”
1. Highlight the file you wish to use as wallpaper.
2. Press [Options] and select “Set as Wallpaper”.
(M 6-1)
Options Back
Pictures
Get new
20KB
01/01/00 00:00
04-09-30_09…
5KB
01/01/00 00:00
04-09-30_09…
8KB
01/01/00 00:00
04-09-30_09…
e_j350.book Page 115 Monday, October 25, 2004 6:33 PM

116
My Items
Saving an Image to Contacts List Entries
You can use this option only for pictures saved in the handset memory.
“My Items”
→
“Pictures”
1. Highlight the file you wish to add to Contacts List.
2. Press [Options] and select “Add to Contact”.
To overwrite, select the data you wish to save.
To save as a new entry, select “As New Contact”.
For details on entering a name, see “Add New Contact” on page 59.
Editing Pictures
“My Items”
→
“Pictures”
1. Highlight the file you wish to edit.
2. Press [Options] and select “Picture Editor”.
3. Select the desired option.
Note
•The size of pictures that you can retouch is 52 dots [W]
×
52 dots [H] minimum.
e_j350.book Page 116 Monday, October 25, 2004 6:33 PM

117
My Items
Adjusting the Size
You can adjust the picture to an appropriate size depending on the scene.
“My Items”
→
“Pictures”
1. Highlight the file you wish to adjust the size of.
2. Press [Options] and select “Resize”.
3. Select the desired option.
Each option resizes the picture for each use.
“To Wallpaper”
“Power On/Off”
“For Incoming Call”
“Alarm”
“Cut”
Note
•“Resize” may not be available depending on the original picture and copyright issued.
Sending a Picture File
“My Items”
→
“Pictures”
1. Highlight the file you wish to send.
2. Press [Options] and select “Send”.
3. Select the desired option.
For details on creating a message, see “Creating a New Message” on page 85.
e_j350.book Page 117 Monday, October 25, 2004 6:33 PM
118
My Items
Note
•The Postcard service is not available with some service providers. Please contact your
service provider for more information.
•Some pictures protected with a copyright may not be sent attached to a message.
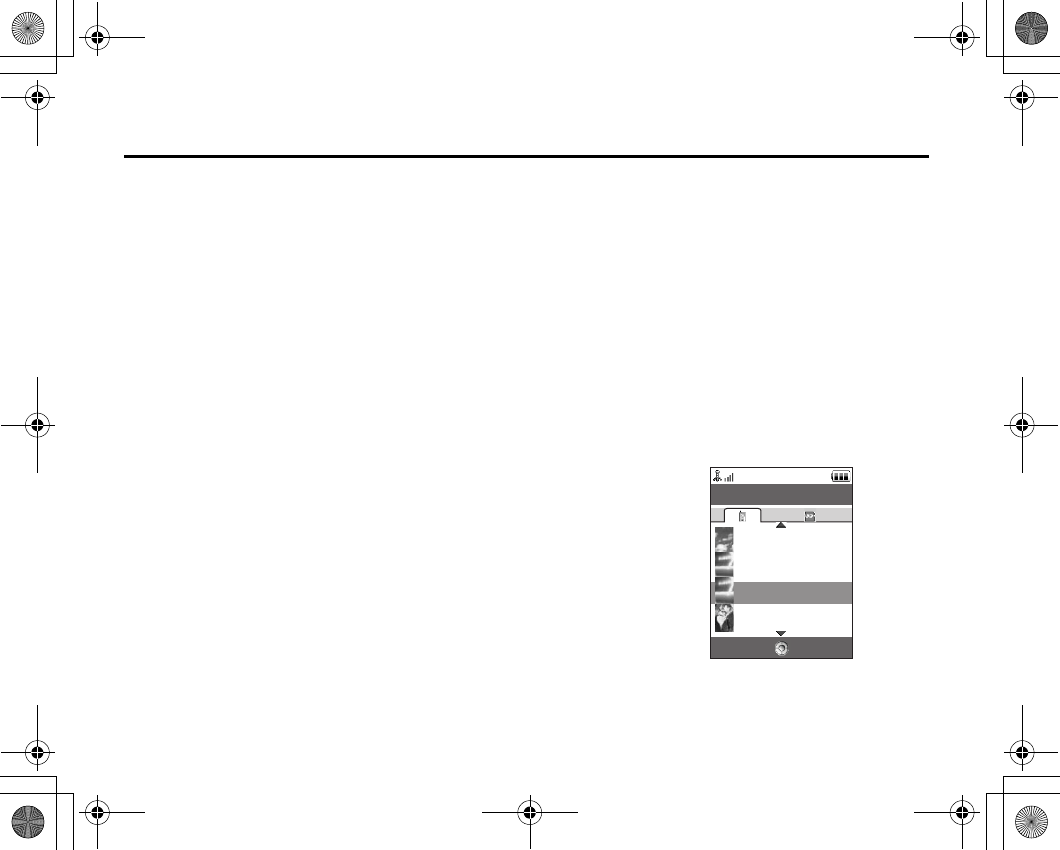
Operating the Files
You can copy, move, sort, rename, and delete the saved pictures.
“My Items”
→
“Pictures”
1. Highlight the desired file.
2. Press [Options] and select “Advanced”.
Select the desired option according to your purpose.
“Move”: Moves the files to another folder. Select the desired folder to
move.
“Copy”: Copies the file. Select the desired folder to copy.
“Create Folder”: Creates a new folder.
Using Multiple Select
You can select more than one file for moving, copying and deleting.
Note
•The following procedure applies when the entries other than “Get new” are highlighted.
“My Items”
→
“Pictures”
→
[Options]
→
“Advanced”
→
“Multiple Select”
1. Select the desired file names.
2. Press [Options] and select the desired menu.
If you select “Delete”, a confirmation message is displayed.
Tip
•To remove the check, select the file again or select “Unselect” in step 2.
•If you wish to select all files, select “Select All” in step 2. To unselect all, select “Unselect
All”. Then press [Options] to select the desired menu.
Options Back
Pictures
5KB
10KB
01/01/00 00:00
04-09-30_09…
01/01/00 00:00
04-09-30_09…
8KB
01/01/00 00:00
04-09-30_09…
10KB
01/01/00 00:00
04-09-30_09…
e_j350.book Page 118 Monday, October 25, 2004 6:33 PM

119
My Items
To Sort the Files
Note
•The following procedure applies when the entries other than “Get new” are highlighted.
“My Items”
→
“Pictures”
→
[Options]
→
“Advanced”
→
“Sort”
1. Select the desired order.
To Rename the File
“My Items”
→
“Pictures”
1. Highlight the desired file.
2. Press [Options] and select “Rename”.
To Delete the File
“My Items”
→
“Pictures”
1. Highlight the desired file.
2. Press [Options] and select “Delete”.
To See the Picture Details
“My Items”
→
“Pictures”
1. Highlight the file of which you wish to view the detail information.
2. Press [Options] and select “Details”.
e_j350.book Page 119 Monday, October 25, 2004 6:33 PM

120
My Items
Uploading Picture Files
You can upload your pictures to the live! Studio.
Note
•This service is not available with some service providers. Please contact your service
provider for more information.
“My Items”
→
“Pictures”
1. Highlight the file you wish to upload.
2. Press [Options] and select “Send”.
3. Select “To live! Studio”.
Note
•Pictures protected with a copyright cannot be uploaded, with the exception of Separate
Delivery files.
Downloading Picture Files
“My Items”
→
“Pictures”
→
“Get new”
The picture file download site is displayed.
Tip
•For details on transmitting My Items data, see “Sending My Items Data” on page 134.
e_j350.book Page 120 Monday, October 25, 2004 6:33 PM
121
My Items
Videos
Video clips that are recorded by a video camera or video clips that are downloaded from
mobile Internet sites can be managed.
Playing Back Video Clip Files
“My Items”
→
“Videos”
1. Select the file you wish to play back.
2. Press .
To resume, press again.
To stop playback, press [Back].
Switching the Memory Source
“My Items”
→
“Videos”
1. Press d.
The tab switches and the list is displayed from the memory card. To go back to the
handset memory, press c.
2. Select the video clip you wish to view.
Sending a Video Clip File
“My Items”
→
“Videos”
1. Highlight the file you wish to send.
2. Press [Options] and select “Send”.
3. Select the desired option.
For details on creating a message, see “Creating a New Message” on page 85.
(M 6-2)
e_j350.book Page 121 Monday, October 25, 2004 6:33 PM

122
My Items
Note
•Video clips protected with a copyright cannot be sent attached to a message, with the
exception of Separate Delivery files.
To Record a Video
You can record a video also from My Items.
Note
•The following procedure applies when the entries other than “Get new” are highlighted.
“My Items”
→
“Videos”
→
[Options]
→
“Record Video”
The video camera application launches. To record a video, see “Recording Video Clips” on
page 78.
Operating the Files
You can copy, move, sort, rename, and delete the saved video clips.
“My Items”
→
“Videos”
1. Highlight the desired file.
2. Press [Options] and select “Advanced”.
Select the desired option according to your purpose.
“Move”: Moves the files to another folder. Select the desired folder to
move.
“Copy”: Copies the file. Select the desired folder to copy.
“Create Folder”: Creates a new folder.
e_j350.book Page 122 Monday, October 25, 2004 6:33 PM

123
My Items
Using Multiple Select
You can select more than one file for moving, copying and deleting.
Note
•The following procedure applies when the entries other than “Get new” are highlighted.
“My Items”
→
“Videos”
→
[Options]
→
“Advanced”
→
“Multiple Select”
1. Select the desired file names.
2. Press [Options] and select the desired menu.
If you select “Delete”, a confirmation message is displayed.
Tip
•To remove the check, select the file again or select “Unselect” in step 2.
•If you wish to select all files, select “Select All” in step 2. To unselect all, select “Unselect
All”. Then press [Options] to select the desired menu.
To Sort the Files
Note
•The following procedure applies when the entries other than “Get new” are highlighted.
“My Items”
→
“Videos”
→
[Options]
→
“Advanced”
→
“Sort”
1. Select the desired order.
To Rename the File
“My Items”
→
“Videos”
1. Highlight the desired file.
2. Press [Options] and select “Rename”.
e_j350.book Page 123 Monday, October 25, 2004 6:33 PM

124
My Items
To Delete the File
“My Items”
→
“Videos”
1. Highlight the desired file.
2. Press [Options] and select “Delete”.
To See the Video Clip Details
“My Items”
→
“Videos”
1. Highlight the file of which you wish to view the detail information.
2. Press [Options] and select “Details”.
Uploading Video Clip Files
You can upload your video clips to the live! Studio.
Note
•This service is not available with some service providers. Please contact your service
provider for more information.
“My Items”
→
“Videos”
1. Highlight the file you wish to upload.
2. Press [Options] and select “Send”.
3. Select “To live! Studio”.
Note
•Video clips protected with a copyright cannot be uploaded, with the exception of Separate
Delivery files.
e_j350.book Page 124 Monday, October 25, 2004 6:33 PM

125
My Items
Downloading Video Clip Files
“My Items”
→
“Videos”
→
“Get new”
The video clip file download site is displayed.
Setting a Ring Video
You can set your video clip to play back when the phone rings.
“My Items”
→
“Videos”
1. Highlight the desired video clip.
2. Press [Options] and select “Set as Ring Video”.
e_j350.book Page 125 Monday, October 25, 2004 6:33 PM

126
My Items
Sounds & Ringtones
The downloaded sound files and the AMR data recorded by Voice Recorder are managed in
Sounds & Ringtones. The default ringtones are not contained within Sounds & Ringtones.
Only the sound files you can play back with the phone are stored in Sounds & Ringtones.
Playing Back Sound Files
“My Items”
→
“Sounds & Ringtones”
1. Select the file you wish to play back.
To stop playback, press .
Note
•This option may not be available in all regions.
Switching the Memory Source
“My Items”
→
“Sounds & Ringtones”
1. Press d.
The tab switches and the list is displayed from the memory card. To go back to the
handset memory, press c.
2. Select the desired sound file.
(M 6-3)
e_j350.book Page 126 Monday, October 25, 2004 6:33 PM

127
My Items
Using the Sound Files as a Ringtone
“My Items”
→
“Sounds & Ringtones”
1. Highlight the file you wish to use as a ringtone.
2. Press [Options] and select “Set as Ringtone”.
Note
•The formats that can be used for ringtones are SMAF, MIDI (SMF, SP-MIDI), MP3, MP4
and XMF. Other formats cannot be used.
Sending a Sound File
“My Items”
→
“Sounds & Ringtones”
1. Highlight the file you wish to send.
2. Press [Options] and select “Send”.
3. Select the desired option.
For details on creating a message, see “Creating a New Message” on page 85.
Note
•Sounds protected with a copyright cannot be sent attached to a message, with the
exception of Separate Delivery files.
e_j350.book Page 127 Monday, October 25, 2004 6:33 PM

128
My Items
Operating the Files
You can copy, move, sort, rename, and delete the saved sound files.
“My Items”
→
“Sounds & Ringtones”
1. Highlight the desired file.
2. Press [Options] and select “Advanced”.
Select the desired option according to your purpose.
“Move”: Moves the files to another folder. Select the desired folder to
move.
“Copy”: Copies the file. Select the desired folder to copy.
“Create Folder”: Creates a new folder.
Using Multiple Select
You can select more than one file for moving, copying and deleting.
Note
•The following procedure applies when the entries other than “Get new” are highlighted.
“My Items”
→
“Sounds & Ringtones”
→
[Options]
→
“Advanced”
→
“Multiple
Select”
1. Select the desired file names.
2. Press [Options] and select the desired menu.
If you select “Delete”, a confirmation message is displayed.
Tip
•To remove the check, select the file again or select “Unselect” in step 2.
•If you wish to select all files, select “Select All” in step 2. To unselect all, select “Unselect
All”. Then press [Options] to select the desired menu.
e_j350.book Page 128 Monday, October 25, 2004 6:33 PM

129
My Items
To Sort the Files
Note
•The following procedure applies when the entries other than “Get new” are highlighted.
“My Items”
→
“Sounds & Ringtones”
→
[Options]
→
“Advanced”
→
“Sort”
1. Select the desired order.
To Rename the File
“My Items”
→
“Sounds & Ringtones”
1. Highlight the desired file.
2. Press [Options] and select “Rename”.
To Delete the File
“My Items”
→
“Sounds & Ringtones”
1. Highlight the desired file.
2. Press [Options] and select “Delete”.
To See the Sound Details
“My Items”
→
“Sounds & Ringtones”
1. Highlight the file of which you wish to view the detail information.
2. Press [Options] and select “Details”.
e_j350.book Page 129 Monday, October 25, 2004 6:33 PM

130
My Items
Uploading Sound Files
You can upload your sounds to the live! Studio.
Note
•This service is not available with some service providers. Please contact your service
provider for more information.
“My Items”
→
“Sounds & Ringtones”
1. Highlight the file you wish to upload.
2. Press [Options] and select “Send”.
3. Select “To live! Studio”.
Note
•Sounds protected with a copyright cannot be uploaded, with the exception of Separate
Delivery files.
Downloading Sound Files
“My Items”
→
“Sounds & Ringtones”
→
“Get new”
The sound file download site is displayed.
e_j350.book Page 130 Monday, October 25, 2004 6:33 PM

131
My Items
Games & More
Along with the preloaded application, downloaded applications are saved in Applications.
Using Applications
Various kinds of Vodafone specific applications can be used on this phone.
To use applications, download the applications via the mobile Internet.
Some applications offer the ability to connect to a network either within a game or a network
based application.
Note
•Applications may be both localised (no connectivity) and network based (using the mobile
Internet to update information/play games). The network may charge you more for using
network-based applications. Please contact your service provider for more information.
Downloading Applications
Confirmation Screen
Before downloading the application you are asked to confirm what you are about to receive.
After checking the information on the confirmation screen, the application can be
downloaded.
Note
•User authentication may be required before downloading the application on some
information screens.
(M 6-4)
e_j350.book Page 131 Monday, October 25, 2004 6:33 PM

132
My Items
Executing Applications
“My Items”
→
“Games & More”
Downloaded applications are sequentially displayed from the latest one.
1. Select the title of the application you wish to execute.
The selected application is executed. When using network connection type applications,
connection to the network can be selected.
2. To end the application, press F and select “End”.
To Set a Screensaver Application
“My Items”
→
“Games & More”
1. Highlight the desired screensaver application.
2. Press .
The confirmation screen to set a screensaver is displayed.
3. Select [Yes].
e_j350.book Page 132 Monday, October 25, 2004 6:33 PM
133
My Items
More Games
“My Items”
→
“Games & More”
→
“More Games”
1. Select the application you wish to download.
The confirmation screen is displayed after various WAP browser screens.
2. Press to start downloading.
3. Press when finished.
Activating Files with Copyright Protection (DRM)
Some pictures, sound files, and video clips have a digital copy protection program, which is
called DRM (Digital Rights Management). You need to activate the digital licence permission
to open the files. Files protected with DRM are displayed with .
“My Items”
1. Select the desired menu from “Pictures”, “Sounds & Ringtones” or “Videos”.
2. Highlight the file you wish to activate.
3. Press [Options] and select “Activate”.
Note
•Some pictures with DRM may not open even when an attempt is made to activate it.
•Pictures with DRM cannot be sent attached to a message, with the exception of Separate
Delivery files.
e_j350.book Page 133 Monday, October 25, 2004 6:33 PM

134
My Items
Sending My Items Data
Choose the appropriate menu.
“My Items”
→
“Pictures”
“My Items”
→
“Sounds & Ringtones”
“My Items”
→
“Videos”
“My Items”
→
“Other Documents”
1. Highlight the desired file.
2. Press [Options] and select “Send”.
3. Select “Via Bluetooth” or “Via Infrared”.
For “Via Bluetooth”
For details, see “Bluetooth” on page 200.
For “Via Infrared”
For details, see “Infrared” on page 205.
Note
•Pictures/Sounds/Video clips protected with a copyright cannot be sent, with the exception
of Separate Delivery files.
•When pairing, you need to enter your passcode when establishing contact with a
Bluetooth wireless technology enabled device for the first time.
e_j350.book Page 134 Monday, October 25, 2004 6:33 PM

135
My Items
Receiving the My Items Data
When the phone receives the My Items data, a confirmation message is displayed during
stand-by.
1. Press [Yes].
The received data is saved in the corresponding My Items folder.
Tip
•For details on Infrared or Bluetooth wireless settings, see “Connectivity” on page 200.
Bookmarks
You can store desired (or frequently used) pages (addresses) in Bookmarks. It can save you
time in accessing WAP pages. For details, see “Vodafone live!” on page 102.
“My Items”
→
“Bookmarks”
1. Select the page you wish to browse.
My Saved Page
You can save the WAP page as a screenshot.
“My Items”
→
“My Saved Page”
1. Select the desired file to view.
(M 6-5)
(M 6-6)
e_j350.book Page 135 Monday, October 25, 2004 6:33 PM
136
My Items
Text Templates
You can register up to 50 text templates for use in text messages and multimedia
messages. The maximum capacity of the text templates is 100 KB.
Adding Phrases to Text Templates
“My Items”
→
“Text Templates”
→
“Add New Template”
1. Enter the text and press .
Editing Text Templates
“My Items”
→
“Text Templates”
1. Highlight the text template you wish to edit.
2. Press [Options] and select “Edit”.
3. Modify the text and press .
Viewing Text Templates
“My Items”
→
“Text Templates”
The list of Text Templates is displayed.
1. Highlight the text template you wish to view.
2. Press [Options] and select “View”.
Deleting Text Templates
“My Items”
→
“Text Templates”
1. Highlight the text template you wish to delete.
2. Press [Options] and select “Delete”.
(M 6-7)
e_j350.book Page 136 Monday, October 25, 2004 6:33 PM

137
My Items
Sending Text Templates
“My Items”
→
“Text Templates”
1. Highlight the text template you wish to send.
2. Press [Options] and select “Send Template”.
Other Documents
Some types of files excluding picture files are stored in the Other Documents folder of the
phone. You can edit and use these files as My Items data.
Opening the Document File
“My Items”
→
“Other Documents”
1. Select the desired file.
Sending the Document File
“My Items”
→
“Other Documents”
1. Highlight the file you wish to send.
2. Press [Options] and select “Send”.
3. Select the desired option.
(M 6-8)
e_j350.book Page 137 Monday, October 25, 2004 6:33 PM

138
My Items
Operating the Files
You can copy, move, sort, rename, and delete the saved documents.
“My Items”
→
“Other Documents”
1. Highlight the desired file.
2. Press [Options] and select “Advanced”.
Select the desired option according to your purpose.
“Move”: Moves the files to another folder. Select the desired folder to
move.
“Copy”: Copies the file. Select the desired folder to copy.
“Create Folder”: Creates a new folder.
Using Multiple Select
You can select more than one file for moving, copying and deleting.
“My Items”
→
“Other Documents”
→
[Options]
→
“Advanced”
→
“Multiple
Select”
1. Select the desired file names.
2. Press [Options] and select the desired menu.
If you select “Delete”, a confirmation message is displayed.
Tip
•To remove the check, select the file again or select “Unselect” in step 2.
•If you wish to select all files, select “Select All” in step 2. To unselect all, select “Unselect
All”. Then press [Options] to select the desired menu.
e_j350.book Page 138 Monday, October 25, 2004 6:33 PM

139
My Items
To Sort the Files
“My Items”
→
“Other Documents”
→
[Options]
→
“Advanced”
→
“Sort”
1. Select the desired order.
To Rename the File
“My Items”
→
“Other Documents”
1. Highlight the desired file.
2. Press [Options] and select “Rename”.
To Delete the File
“My Items”
→
“Other Documents”
1. Highlight the desired file.
2. Press [Options] and select “Delete”.
To See the Document Details
“My Items”
→
“Other Documents”
1. Highlight the file of which you wish to view the detail information.
2. Press [Options] and select “Details”.
e_j350.book Page 139 Monday, October 25, 2004 6:33 PM
140
Games & More (M 1)
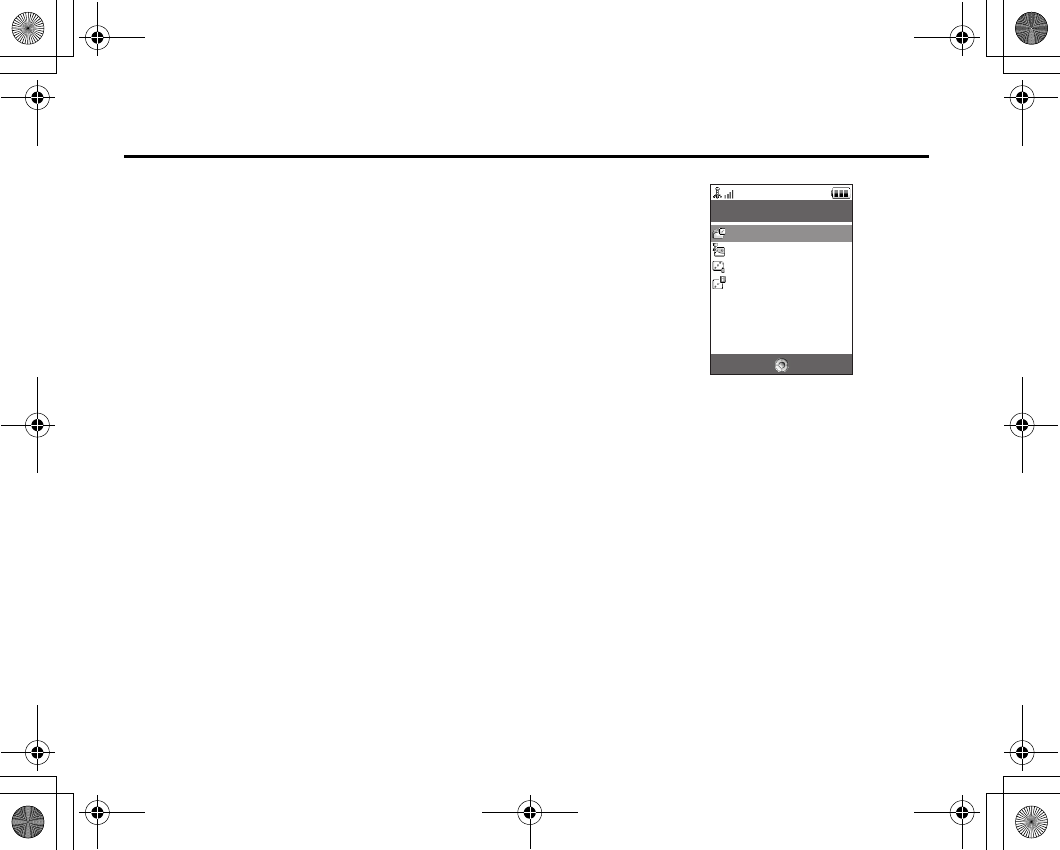
Games
The list of Java™ applications is displayed.
Downloaded applications are displayed in order starting from the latest one.
Executing Applications
For details on executing applications, see “Executing Applications” on page 132.
Setting Security Level
You can set the security level for selected Java™ applications.
“Games & More”
→
“Games”
1. Highlight the desired Java™ application.
2. Press [Options] and select “Security Level”.
3. Select one of the following options:
“Network Access”: Sets security to access the network.
“Messaging”: Sets security to perform MMS and SMS messaging.
“Auto Run”: Sets security to perform the Auto Run function.
“Local Connection”: Sets security to access local contents.
“Read User Data”: Sets security to read user data, such as Contacts List entries,
mailbox (Inbox) and My Items data.
(M 1-1)
Select Back
Games & More
Games
Screensavers
Settings
Java™ Information
e_j350.book Page 140 Monday, October 25, 2004 6:33 PM

141
Games & More
“Write User Data”: Sets security to write entries in your phone, such as Contacts List
entries, mailbox (Inbox) and My Items data.
“Use Multimedia”: Sets security to use the barcode scanning function.
“Location Access”: Sets security to update the positioning function.
“Reset”: Clears all the above settings.
4. Select one of the following options:
“Session”: The confirmation message is not displayed until you exit the
application, while execution of the API of the specified function
group is authorised.
“Oneshot”: The confirmation message is displayed every time the API of the
specified function group is executed.
“Blanket”: The confirmation message is not displayed until the application is
deleted or you change the settings, while execution of the API of
the specified function group is authorised.
“No”: Execution of the API of the specified function group is not
authorised.
Setting Network Access
In order to download Java™ applications, you need to set the network access.
“Games & More”
→
“Games”
→
[Options]
→
“Security Level”
→
“Network
Access”
1. Select “Session”, “Oneshot”, “Blanket” or “No”.
e_j350.book Page 141 Monday, October 25, 2004 6:33 PM

142
Games & More
Viewing Application Information
You can check the information of Java™ applications.
“Games & More”
→
“Games”
1. Highlight the desired Java™ application.
2. Press [Options] and select “Information”.
Deleting an Application
You can delete an application from the handset memory.
“Games & More”
→
“Games”
1. Highlight the desired Java™ application.
2. Press [Options] and select “Delete”.
Screensavers
You can download screensaver applications for the stand-by screen.
Switching the Screensaver On or Off
“Games & More”
→
“Screensavers”
→
“Switch On/Off”
1. Select “On” or “Off”.
Note
•If you select “On” and a screensaver application is not set, a list displaying available
screensavers is displayed, asking you to make a selection.
(M 1-2)
e_j350.book Page 142 Monday, October 25, 2004 6:33 PM

143
Games & More
Set Applications
“Games & More”
→
“Screensavers”
→
“Set Applications”
The downloaded applications are displayed.
1. Select the desired screensaver application.
Settings
Application Volume
You can set the volume of the application such as the sound effect to one of the five levels
or silent. When “Application Volume” is set to “Silent”, this setup has priority.
“Games & More”
→
“Settings”
→
“Application Volume”
The current volume level is displayed.
1. Press a (or d) to increase the volume or press b (or c) to decrease the volume
and then press .
Backlight
“Games & More”
→
“Settings”
→
“Backlight”
→
“Switch On/Off”
1. Select from “Always On”, “Always Off” or “Normal Settings”.
“Always On”: Lit while the application is operated. Blinks when the blink setting
is on.
“Always Off”: Unlit while the application is operated even if a key is pressed.
“Normal Settings”: Works with the backlight setting (p. 178). Blinks when the blink
setting is on.
(M 1-3)
e_j350.book Page 143 Monday, October 25, 2004 6:33 PM

144
Games & More
To Set the Blinking Operation
This setting enables the backlight to be controlled by the application. If set to “Off”, the
backlight cannot be turned on from the application.
“Games & More”
→
“Settings”
→
“Backlight”
→
“Blink”
1. Select “On” or “Off”.
Vibration
When the vibrator is set in the application, you can choose whether the operation is enabled
or disabled.
When a SMAF file is specified in the application, you can operate the vibrator set in the
SMAF file.
Note
•SMAF (Synthetic music Mobile Application Format) is a music data format for mobile
phones.
“Games & More”
→
“Settings”
→
“Vibration”
1. Select from “On”, “Link to Sound” or “Off”.
When you set “Link to Sound”, the vibration is synchronised with the sound of SMAF file
in the application.
e_j350.book Page 144 Monday, October 25, 2004 6:33 PM

145
Games & More
Calls & Alarms
You can set the priority of incoming calls and alarms while an application is operating.
“Games & More”
→
“Settings”
→
“Calls & Alarms”
1. Select “Incoming Call”, “Video Call”, “Incoming Message” or “Alarm”.
2. Select the desired method.
• “Call Priority”, “Message Priority” or “Alarm Priority”:
The application is suspended automatically, and you can receive a call or a message, or
the alarm will sound. After finishing the call or the message, or the alarm ends, the
suspend indicator ( ) is displayed letting you know there is a suspended application.
• “Call Notice”, “Message Notice” or “Alarm Notice”:
The marquee (character scrolls) is displayed on the first line of the screen while the
application continues. If you press D, the application is suspended, and you can receive
a call or a message. After finishing the call or the message, the suspend indicator ( )
is displayed letting you know there is a suspended application.
Java™ Information
The information about the licences belonging to Java™ is displayed.
(M 1-4)
e_j350.book Page 145 Monday, October 25, 2004 6:33 PM

146
Organiser (M 7)
Calendar
Calendar allows you to easily schedule appointments or events, which are associated with
the date and time.
These entries can also be sent via infrared or
Bluetooth
wireless technology to a PC to share
the same schedules. When you exchange entries with other devices, the date and time
displayed may be different to that of the original data depending on the data format of the
receiving device.
Creating a New Entry
“Organiser”
→
“Calendar”
1. Select the desired day to which you want to add an event.
2. Select “Add New Entry”.
3. Enter the subject.
4. Enter the location.
5. Select the desired category.
6. Enter the start date and then enter the start time.
7. Select the duration.
8. Select the reminder time or date.
(M 7-1)
e_j350.book Page 146 Monday, October 25, 2004 6:33 PM

147
Organiser
9. Select “Repeat” and select the desired option.
10. Select “Description” and enter a memo for the schedule entry.
11. Select “Secret” and select “On” or “Off” to make it secret data.
12. Press [Save].
Note
•If the date and time settings have not been made, the date and time entry screen is
displayed (p. 180).
•The reminder will not sound when “Ringer Volume” (p. 169) is set to “Silent”.
Sending a Schedule Entry
“Organiser”
→
“Calendar”
1. Select the day including schedule entries you wish to send.
2. Press [Options] and select “Send”.
3. Select “As Message”, “Via Bluetooth” or “Via Infrared”.
For “Via Bluetooth”
For details, see “Bluetooth” on page 200.
For “Via Infrared”
For details, see “Infrared” on page 205.
Note
•When pairing, you need to enter your passcode when establishing contact with a
Bluetooth wireless technology enabled device for the first time.
e_j350.book Page 147 Monday, October 25, 2004 6:33 PM
148
Organiser
Receiving a Schedule Entry
When the phone receives a schedule entry, a confirmation message is displayed during
stand-by.
1. Press [Yes].
The received entry is saved in the Calendar.
Press [No] to reject.
Tip
•For details on making Infrared or Bluetooth wireless settings, see “Connectivity” on
page 200.
Viewing a Schedule Entry
“Organiser”
→
“Calendar”
1. Select the day you wish to view.
The daily view is displayed.
To Search By Date
1. In the monthly or daily view, press [Options] and select “Go to”.
2. Select “Today” to display today or “Enter Date” to enter the desired date.
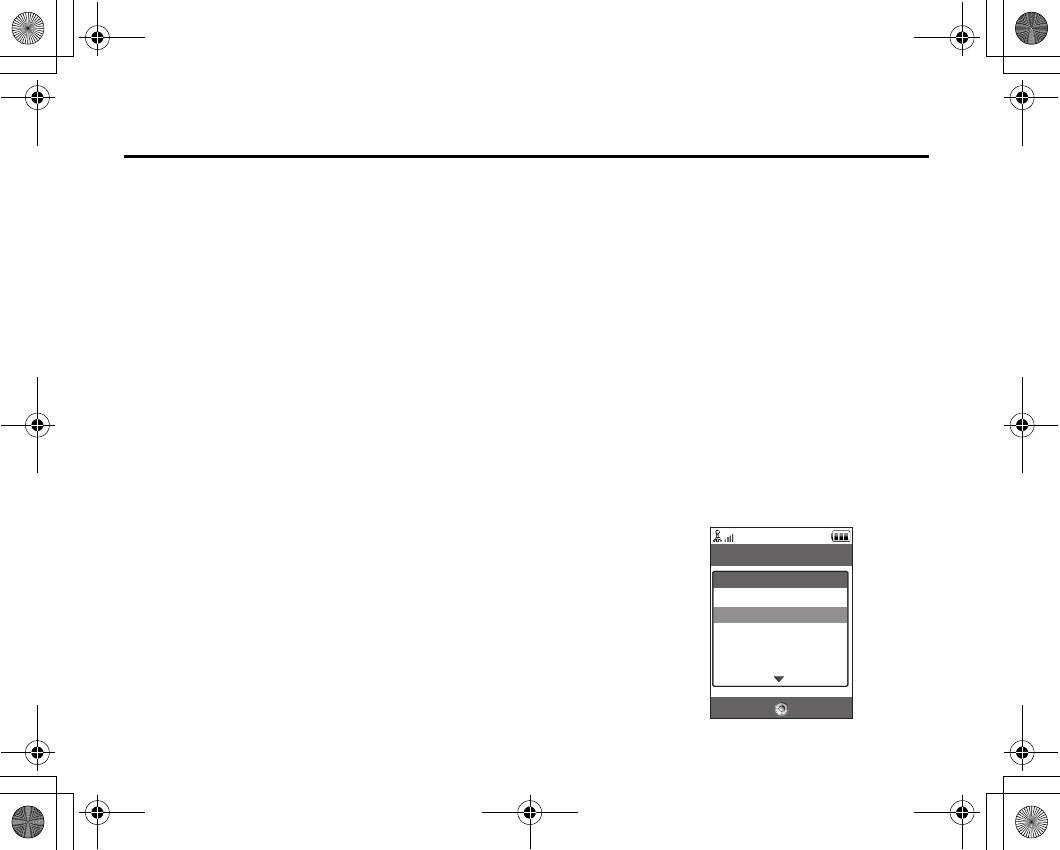
Editing a Schedule Entry
“Organiser”
→
“Calendar”
1. Select the day you wish to edit.
The daily view is displayed.
Select Back
20.02.2005
Options
Select
Edit
Add New Entry
Send
Go to
e_j350.book Page 148 Monday, October 25, 2004 6:33 PM

149
Organiser
2. Press [Options] and select “Edit”.
3. Select the desired item and modify the entry.
4. Press [Save].
Deleting Schedule Entries
1. In the monthly or daily view, press [Options] and select “Delete”.
2. Select the desired option.
“This Appointment” (daily view only):
Deletes the selected appointment.
“All This Day”: Deletes all entries for the selected day.
“All This Month” (monthly view only):
Deletes all entries for the selected month.
“Up to Last Month” (monthly view only):
Deletes all entries before this month.
“All Appointments” (monthly view only):
Deletes all entries in this application.
Viewing the Memory Status
1. In the monthly or daily view, press [Options] and select “Memory Status”.
The current memory status is displayed.
e_j350.book Page 149 Monday, October 25, 2004 6:33 PM

150
Organiser
Alarms
Setting the Alarms
The alarm function allows you to be alerted at a specified time.
Note that you need to set the current date and time before setting the alarm function if it
has not been done already.
Note
•The alarm will not ring when “Ringer Volume” (p. 169) is set to “Silent”.
“Organiser”
→
“Alarms”
1. Select the blank setting.
2. Enter the desired time.
3. Select the repeat option.
To Change the Type of Alarm Tone
1. On the Set Alarm screen, select “Assign Tone/Video”.
2. Select “Assign Alarm Tone”.
3. Select “Preset Sounds” or “My Sounds”.
4. Select the desired tone.
For details on selecting a tone, see “Assigning a Ringtone” on page 170.
(M 7-2)
e_j350.book Page 150 Monday, October 25, 2004 6:33 PM

151
Organiser
To Change the Type of Video
1. On the Set Alarm screen, select “Assign Tone/Video”.
2. Select “Assign Alarm Video”.
3. Select the desired video.
To Change the Snooze of the Alarm Tone
1. On the Set Alarm screen, select “Snooze”.
2. Select the desired snooze option.
To Change the Alarm Volume
1. On the Set Alarm screen, select “Alarm Volume”.
2. Press a (or d) to increase the volume or press b (or c) to decrease the volume.
To Change the Vibration of Alarm Tone
1. On the Set Alarm screen, select “Vibration”.
2. Select “On”, “Link to Sound” or “Off”.
For details on selecting a vibration, see “Vibration” on page 173.
To Change the Duration of the Alarm Tone
1. On the Set Alarm screen, select “Duration”.
2. Select the desired duration.
e_j350.book Page 151 Monday, October 25, 2004 6:33 PM
152
Organiser
Resetting an Alarm Setting
“Organiser”
→
“Alarms”
1. Highlight the alarm you wish to reset.
2. Press [Options] and select “Reset Alarm”.
Resetting All Alarm Settings
“Organiser”
→
“Alarms”
→
“Clear All”
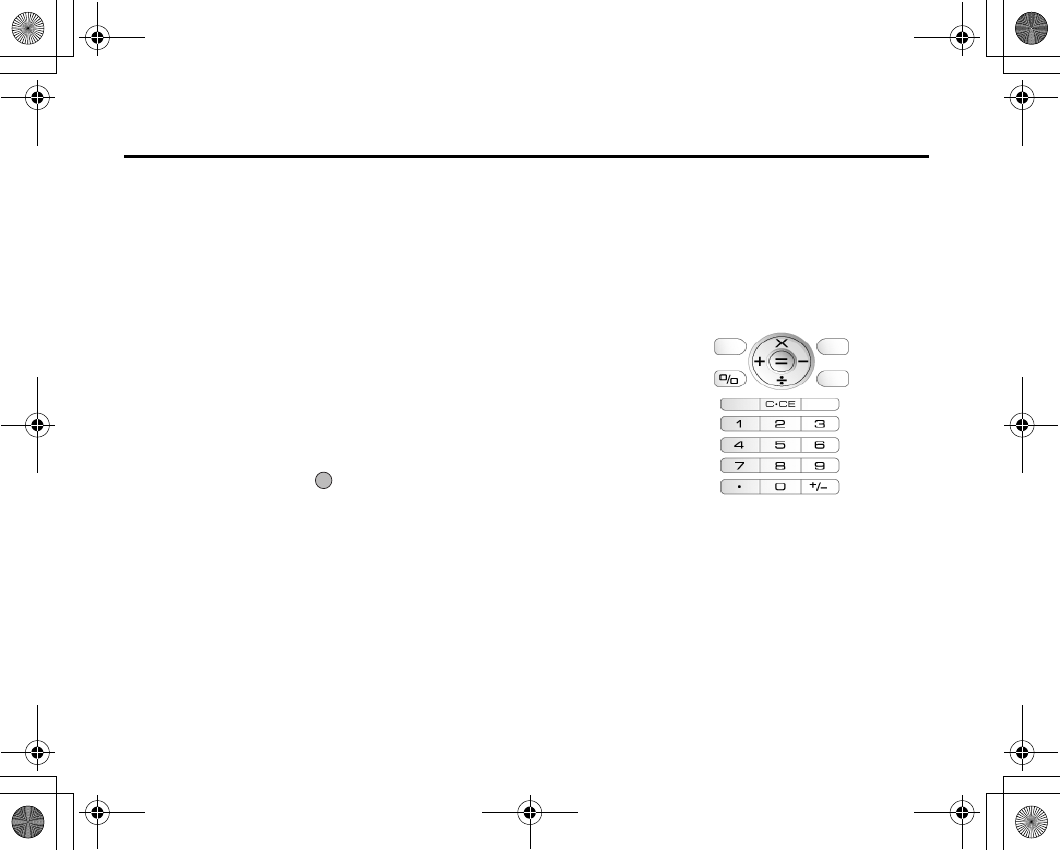
Calculator
The calculator function performs the 4 arithmetic calculations using up to 12 digits.
“Organiser”
→
“Calculator”
The calculator is displayed on the display.
Key operations for calculation are as follows:
To enter a decimal point, press P.
To clear the entered number or function, press U.
To do the calculations, press .
To start a new calculation, press U.
(M 7-3)
e_j350.book Page 152 Monday, October 25, 2004 6:33 PM

153
Organiser
Rate Conversion
You can also use the calculator as a currency calculator to convert from/to a home currency
using a conversion rate that you enter.
To Set a Currency Conversion Rate
“Organiser”
→
“Calculator”
→
[Options]
→
“Currency Converter”
→
“Exchange
Rate”
1. Select “Domestic” or “Foreign”.
2. Enter the currency conversion rate.
To delete a digit, press U.
To Convert a Value
“Organiser”
→
“Calculator”
1. Enter the value to be converted.
2. Press [Options] and select “Currency Converter”.
3. Select “Convert to Domestic” or “Convert to Foreign”.
The result is displayed.
e_j350.book Page 153 Monday, October 25, 2004 6:33 PM
154
Organiser
Voice Recorder
This allows you to record a voice clip, which can be used to remind you of schedule entries
or be sent within a multimedia message. The recorded voice clip is saved in Saved Sounds.
Voice clips are saved in .amr format.
Recording a Voice Clip
“Organiser”
→
“Voice Recorder”
1. Press to start recording.
To stop recording before the recording time is over, press .
2. Select “Save” to save the voice clip.
Note
•Press a (or the side-up key) or b (or the side-down key) to adjust the sound volume
when playing back the recorded file.
Sending Voice Clips
“Organiser”
→
“Voice Recorder”
1. Press to start recording.
2. Press to stop recording.
3. Select “Save and Send”.
For details on creating a message, see “Creating a New Message” on page 85.
(M 7-4)
e_j350.book Page 154 Monday, October 25, 2004 6:33 PM

155
Organiser
Viewing Record Time
“Organiser”
→
“Voice Recorder”
→
[Options]
→
“Record Time”
1. Select “For Message” or “Extended Voice”.
When selecting “Extended Voice”, you can save the voice clip only in a memory card
automatically.
Selecting Storage Memory
“Organiser”
→
“Voice Recorder”
→
[Options]
→
“Save Recording To”
1. Select the desired location.
When selecting “Choice”, you can select the location when saving a voice clip.
Scanner
With the built-in digital camera, you can read texts and barcodes in Jan format and QR
codes, and create QR codes. The scanned data can be saved as a Contacts List entry, URL,
email address and text.
Note
•When scanning does not place it may be for one of the following reasons: type or size of
barcode, scratches, dirt, damage, print quality, light reflection, etc.
Reading Barcodes
“Organiser”
→
“Scanner”
→
“Scan Barcode”
1. Display the barcode using the external camera.
2. Press .
The scanning starts and the scanned result is displayed.
(M 7-5)
e_j350.book Page 155 Monday, October 25, 2004 6:33 PM

156
Organiser
3. Select the desired option.
The options vary depending on the scanned data.
“Open Link”: The browser opens the URL.
“Copy URL”: The URL is copied.
“Send Massage”: The result is sent as SMS or MMS.
“Copy”: The result is copied.
Using the Scanning Options
1. In the scanning mode, press [Options] and select the desired option.
“Scan” Scanning is performed.
“Saved Files” The saved files are displayed.
“Continuous Scan”: The continuous scanning is turned on.
“Mobile Light”: The mobile light is turned on or off.
“Exposure”: The exposure is adjusted in the following steps: +2, +1, 0, −
1, −2.
“Help”: The Help for using the scan function is displayed.
e_j350.book Page 156 Monday, October 25, 2004 6:33 PM
157
Organiser
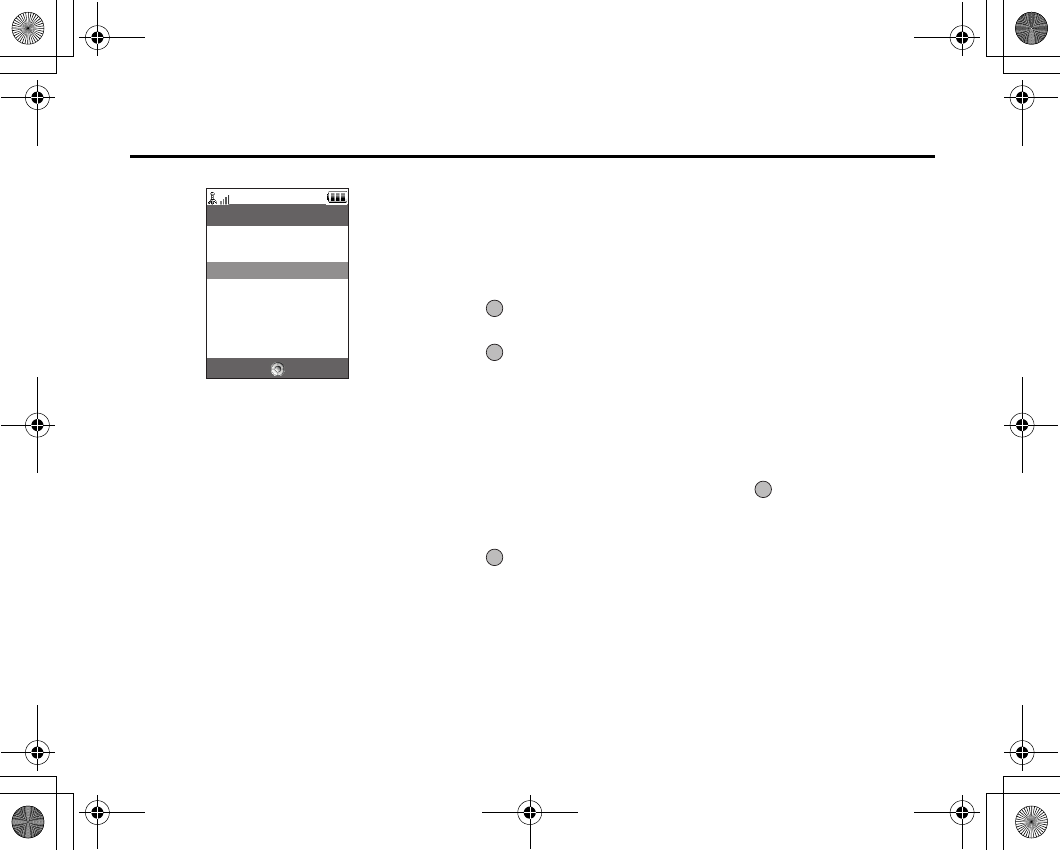
Creating QR Codes
You can create QR codes using texts and My Items data.
“Organiser”
→
“Scanner”
→
“Create QR Code”
1. Select the desired option.
“Text Input”: Create a QR code using the text you enter.
“My Items”: Create a QR code using the My Items data.
2. Press .
Creation of the barcode starts and is displayed on the screen.
3. Press .
Tip
•You can save the QR code in PNG format. Press [Options] and select “Save”.
Scanning Texts
“Organiser”
→
“Scanner”
→
“Scan Text”
1. Display the text using the external camera.
2. When the bar under the scanned text is blue, press .
The scanning starts and the scanned result is displayed.
3. Press a or b to select the desired text.
4. Press .
Select Back
Scanner
Scan Barcode
Open Barcode
Create QR Code
Scan Text
Scanned Results
e_j350.book Page 157 Monday, October 25, 2004 6:33 PM

158
Organiser
5. Press [Options] and select the desired option.
“OK”: The scanned result is in the text entry screen.
“Select/Edit”: The scanned result can be modified.
“Change Mode”: The scanned result can be converted to a web address, mail
address, phone number or to roman text.
Using the Scanning Options
1. In the scanning mode, press [Options] and select the desired option.
“Scan”: Scanning is performed.
“Saved Files”: The saved files are displayed.
“Reversed Text”: Select the desired option from “Auto”, “Normal” or
“Reversed”.
“Mobile Light”: The mobile light is turned on or off.
“Exposure”: The exposure is adjusted in the following steps: +2, +1, 0, −
1, −2.
“Help”: The Help for using the scan function is displayed.
Deleting the Scanned Data
“Organiser”
→
“Scanner”
→
“Scanned Results”
1. Highlight the data you wish to delete.
2. Press [Options] and select “Delete”.
e_j350.book Page 158 Monday, October 25, 2004 6:33 PM
159
Organiser
Renaming the Scanned Data
“Organiser”
→
“Scanner”
→
“Scanned Results”
1. Highlight the data you wish to rename.
2. Press [Options] and select “Rename”.
Checking the Information of the Scanned Data
“Organiser”
→
“Scanner”
→
“Scanned Results”
1. Highlight the data the information of which you wish to check.
2. Press [Options] and select “Information”.
Stopwatch
You can store 4 lap times when using the stopwatch function.
“Organiser”
→
“Stopwatch”
1. Press to start.
Press [LAP] to view the lap time before the stopwatch stops. Last 4 lap times are saved.
2. Press to stop.
Tip
•You can save a record of lap time and stop time in Text Templates by pressing [Options]
and selecting “Save to Templates”.
Resetting Time
1. After stopping the stopwatch, press [Options] and select “Reset”.
(M 7-6)
e_j350.book Page 159 Monday, October 25, 2004 6:33 PM

160
Organiser
Tasks
You can register your schedule as task entries which are associated with the date and time.
Creating a New Entry
“Organiser”
→
“Tasks”
1. Select “Add New Entry”.
2. Enter the subject.
3. Enter the due date and then due time.
4. Select the reminder option.
When selecting “Other”, enter the desired reminder date and time.
5. Select “Description” and enter a memo for the task entry.
6. Select “Secret” and select “On” or “Off” to make it a secret data.
7. Press [Save].
Note
•If the date and time settings have not been made, the date and time entry screen is
displayed (p. 180).
Setting the Alarms
You can set the alarm at a specified time on the entry.
“Organiser”
→
“Tasks”
1. Highlight the desired entry.
2. Press [Options] and select “Edit”.
3. Select “Reminder” and select “Reminder Time”.
4. Select the desired reminder time.
(M 7-7)
e_j350.book Page 160 Monday, October 25, 2004 6:33 PM

161
Organiser
To Change the Type of Alarm Tone
1. On the Reminder screen, select “Assign Tone/Video”.
2. Select “Assign Tone”.
3. Select “Preset Sounds” or “My Sounds”.
4. Select the desired tone.
For details on selecting a tone, see “Assigning a Ringtone” on page 170.
To Change the Type of Video
1. On the Reminder screen, select “Assign Tone/Video”.
2. Select “Assign Video”.
3. Select the desired video clip file.
To Change the Duration of Alarm Tone or Video
1. On the Reminder screen, select “Duration”.
2. Select the desired duration.
Editing the Task Entry
“Organiser”
→
“Tasks”
1. Highlight the desired entry.
2. Press [Options] and select “Edit”.
3. Modify the entry.
e_j350.book Page 161 Monday, October 25, 2004 6:33 PM

162
Organiser
Sending a Task Entry
“Organiser”
→
“Tasks”
1. Highlight the task entry you wish to send.
2. Press [Options] and select “Send”.
3. Select the desired option.
“As Message”: Sends the entry as a message.
“Via Bluetooth”: Sends the entry through Bluetooth connection.
“Via Infrared”: Sends the entry through Infrared connection.
For “Via Bluetooth”
For details, see “Bluetooth” on page 200.
For “Via Infrared”
For details, see “Infrared” on page 205.
Note
•When pairing, you need to enter your passcode when establishing contact with a
Bluetooth wireless technology enabled device for the first time.
Viewing the Memory Status
“Organiser”
→
“Tasks”
1. Highlight the task entry you wish to view the memory status of.
2. Press [Options] and select “Memory Status”.
The current memory status is displayed.
e_j350.book Page 162 Monday, October 25, 2004 6:33 PM

163
Organiser
Deleting Entries
“Organiser”
→
“Tasks”
→
[Options]
→
“Delete”
1. Select the desired option.
“This Task”: Deletes the selected entry.
“All Completed Tasks”: Deletes all checked entries.
“All Tasks”: Deletes all entries.
World Clock
Setting the Time Zone
“Organiser”
→
“World Clock”
1. Press [Edit].
2. Select “Set Time Zone”.
The current time zone is indicated on the world map.
3. Press c or d to change the time zone.
4. Press .
To Set the Custom Time Zone
“Organiser”
→
“World Clock”
1. Press [Edit].
2. Select “Set Time Zone”.
The current time zone is indicated on the world map.
3. Press [Options] and select “Set Custom Zone”.
4. Enter the desired city name and time.
(M 7-8)
e_j350.book Page 163 Monday, October 25, 2004 6:33 PM
164
Organiser
Setting the Daylight Saving
“Organiser”
→
“World Clock”
1. Press [Edit].
2. Select “Daylight Saving”.
3. Select “On” or “Off”.
Countdown Timer
“Organiser”
→
“Countdown Timer”
1. Enter the time to count.
You can set the time from 1 second to 60 minutes.
2. Press to start counting.
3. Press to pause.
Press again to continue counting.
4. If the countdown has finished, press [Cancel] and then press to start the
countdown again.
Editing the Countdown Time
1. In the countdown start screen, press [Options] and select “Edit”.
2. Modify the desired time.
(M 7-9)
e_j350.book Page 164 Monday, October 25, 2004 6:33 PM

165
Organiser
Expenses Memo
You can record an expenses memo with predefined or edited categories.
Recording in the Expenses Memo
“Organiser”
→
“Expenses Memo”
→
“Add New Expense”
1. Enter the expenses using the digit keys.
2. Select the desired category.
Expenses memo is registered.
Viewing Totals
“Organiser”
→
“Expenses Memo”
→
“Totals”
Recorded expenses are displayed on the screen.
To Change Amount
1. In the total view, select the desired item.
2. Press [Options] and select “Change Amount”.
3. Enter the desired amount using the digit keys.
To Delete a Recorded Item
1. In the total view, select the desired item.
2. Press [Options] and select “Delete Item”.
The selected item is deleted from the list.
(M 7-10)
e_j350.book Page 165 Monday, October 25, 2004 6:33 PM

166
Organiser
To Delete All Items
1. In the total view, select the desired item.
2. Press [Options] and select “Delete All”.
Editing the Category Name
“Organiser”
→
“Expenses Memo”
→
“Edit Category”
1. Select the desired category name.
2. Modify the name.
Phone Help
You can view the help list and use it to guide you in the phone’s functions.
“Organiser”
→
“Phone Help”
1. Press a or b.
(M 7-11)
e_j350.book Page 166 Monday, October 25, 2004 6:33 PM

167
SIM Application (M 9)
You can refer to the information on the SIM/USIM. Contact your service provider for further
details.
e_j350.book Page 167 Monday, October 25, 2004 6:33 PM
168
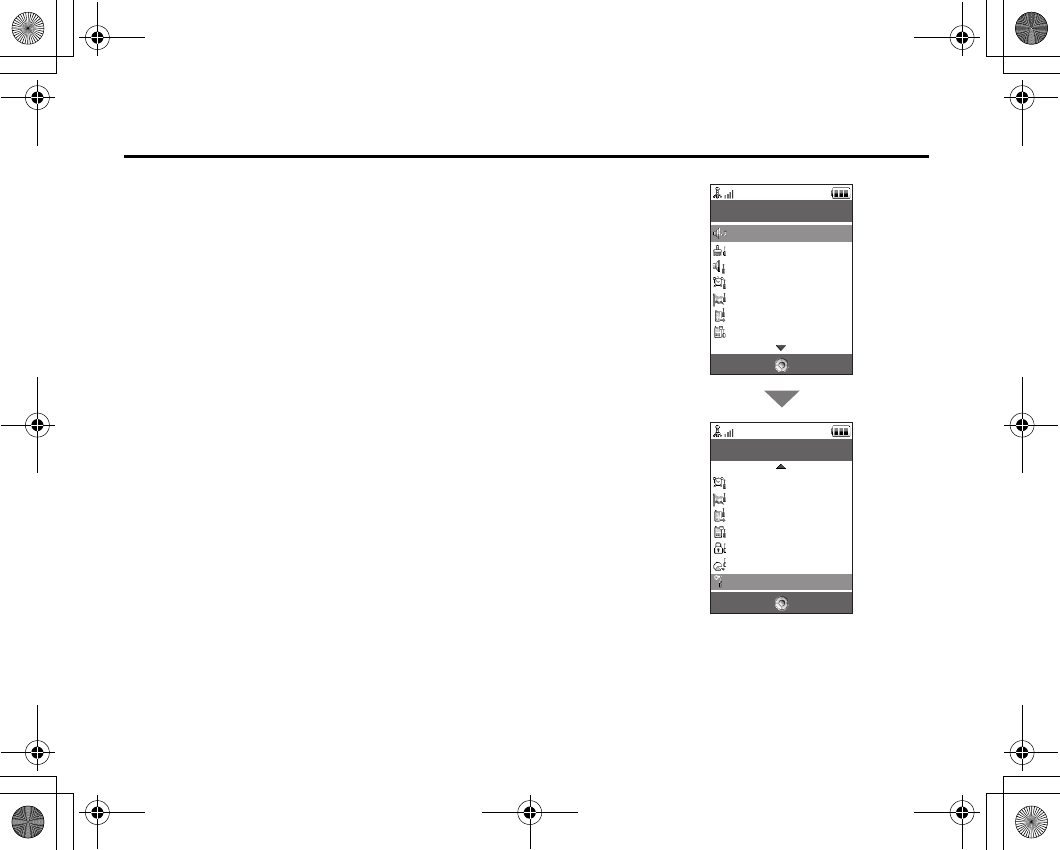
Settings (M 12)
Profiles
The tone sound and vibration settings can be customised for each profile according to your
environment.
There are 6 profiles: “Normal”, “Meeting”, “Activity”, “Car”, “Headset” and “Silent”.
Activating a Profile
“Settings”
→
“Profiles”
1. Select the desired profile.
Note
•When a profile is set, the corresponding indicator described on page 29 is displayed
during stand-by.
Tip
•Press and hold R to switch Profiles settings between the mode most recently activated
and Silent mode during stand-by.
Customising Profiles
“Settings”
→
“Profiles”
1. Highlight the profile you wish to customise.
2. Press [Options] and select “Personalise”.
3. Select the setting you wish to customise and change as desired.
For details on settings, see pages 169 to 174.
(M 12-1)
Select Back
Settings
Profiles
Display Settings
Sound Settings
Time & Date
Language
Call Settings
Video Call Settings
Select Back
Settings
Time & Date
Language
Call Settings
Video Call Settings
Security Settings
Memory Settings
Master Reset
e_j350.book Page 168 Monday, October 25, 2004 6:33 PM

169
Settings
Resetting Profile Settings
“Settings”
→
“Profiles”
1. Highlight the profile you wish to reset.
2. Press [Options] and select “Set to Default”.
3. Enter your handset code.
The default handset code is “9999”. For details on changing the handset code, see “To
Change the Handset Code” on page 192.
Ringer Volume
You can adjust the ringer volume to one of six levels or to an increasing volume.
“Settings”
→
“Profiles”
1. Highlight the profile you wish to customise.
2. Press [Options] and select “Personalise”.
3. Select “Volume”.
The current volume level is displayed.
4. Press a (or d) to increase the ringer volume or press b (or c) to decrease the
ringer volume and then press .
To select “Increasing Volume”, press a (or d) at level 5.
To select “Silent”, press b (or c) at level 1.
e_j350.book Page 169 Monday, October 25, 2004 6:33 PM

170
Settings
Tip
•You can select from two levels or an increasing volume, when selecting the “Silent”
profile.
Assigning a Ringtone
You can select the ringtone from 28 tones including 5 patterns,13 sound effects and 10
melodies. You can also select a sound in Saved Sounds as the default ringtone excluding
the AMR or WAVE format.
“Settings”
→
“Profiles”
1. Highlight the profile you wish to customise.
2. Press [Options] and select “Personalise”.
3. Select “Ringtone/Ringvideos”.
4. Select “For Voice Call” or “For Video Call”.
5. Select “Assign Tone”.
6. Select “Preset Sounds” or “My Sounds”.
7. Highlight the ringtone you wish to use.
To hear the demo play, press [Options] and select “Play”.
8. Press [Options] and select “Assign”.
e_j350.book Page 170 Monday, October 25, 2004 6:33 PM

171
Settings
Note
•Even if you delete a ringtone that uses a sound in Saved Sounds, the setting remains the
same and the default ringtone sounds. If you delete a ringtone assigned for the ringtone,
the default ringtone is set.
Assigning a Ring Video Clip File
You can select a video clip file in Saved Videos as the default ring video clip file.
“Settings”
→
“Profiles”
1. Highlight the profile you wish to customise.
2. Press [Options] and select “Personalise”.
3. Select “Ringtone/Ringvideos”.
4. Select “For Voice Call” or “For Video Call”.
5. Select “Assign Video”.
6. Highlight the ring video clip file you wish to use.
To preview the file, press [Options] and select “Play”.
7. Press [Options] and select “Select”.
e_j350.book Page 171 Monday, October 25, 2004 6:33 PM

172
Settings
Message Notification
When receiving messages, your phone will notify you of their arrival with the ringtone or ring
video you specify.
“Settings”
→
“Profiles”
1. Highlight the profile you wish to customise.
2. Press [Options] and select “Personalise”.
3. Select “Ringtone/Ringvideos”.
4. Select “For New Message”.
5. Select “Assign Tone” or “Assign Video”.
If “Assign Tone” is selected, select “Preset Sounds” or “My Sounds”.
6. Highlight the desired ringtone or ring video clip.
For details on selecting a ringtone or a ring video, see “Assigning a Ringtone” on
page 170 or “Assigning a Ring Video Clip File” on page 171.
7. Press [Options] and select “Assign” (for a ringtone) or “Select” (for a video clip).
8. Select “For New Message” and select “Duration”.
9. Enter the desired duration.
Keypad Tones
When the keypad tone is set on, you will hear a confirmation tone each time you press any
keys.
“Settings”
→
“Profiles”
1. Highlight the profile you wish to customise.
2. Press [Options] and select “Personalise”.
e_j350.book Page 172 Monday, October 25, 2004 6:33 PM
173
Settings
3. Select “System Sounds”.
4. Select “Keypad Tones”.
5. Highlight the desired tone pattern.
6. Press [Options] and select “Assign”.
Vibration
When the vibrator option is set on, the phone will vibrate for incoming calls regardless of the
ringer volume and ringtone settings.
“Settings”
→
“Profiles”
1. Highlight the profile you wish to customise.
2. Press [Options] and select “Personalise”.
3. Select “Vibration”.
4. Select “On”, “Link to Sound” or “Off”.
Tip
•When the “Link to Sound” option is selected in step 4, the vibrator synchronises with your
selected melody to pulse in time with the melody. Please note that not all melodies
support the “Link to Sound” option.
•When you select “On” or “Link to Sound” in step 4, “ ” is displayed during stand-by.
e_j350.book Page 173 Monday, October 25, 2004 6:33 PM