Contents
- 1. Users Manual 1
- 2. Users Manual 2
- 3. Users Manual 3
- 4. Users Manual 4
Users Manual 4
e02_dv65_7e.fm
[55/56]
55
Continued on next page
Before Using the Handset
When items that have not been set remain, the setting screen appears
every time the power is turned on.
Alternatively, select [Settings]/[Initial setting] in the Custom menu to
display the setting screen.
1Set the date and time (nP. 55).
2Register a terminal security code (nP. 113).
3Set the Key/Touch sound (nP. 94).
4Set GPS Location provision ON/OFF (nP. 304).
5Set the font size collectively (nP. 109).
:When the initial settings are complete, the software update function
confirmation screen appears. Read the description and select
[Agree] (When the initial settings are made from the menu or the
software update is set to other than [auto-update], the confirmation
screen does not appear).
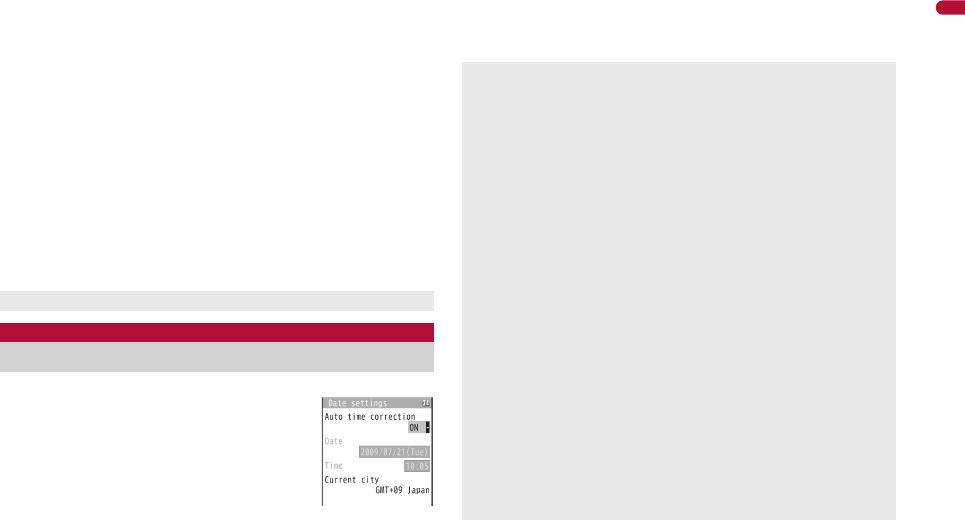
Set the date and time on the FOMA terminal.
1In the Custom menu, select
[Settings]/[General settings]/[Date
settings].
2Select the [Auto time correction] field/t/select the
setting.
;Select [ON]/i.
;Select [OFF]/select the [Date] field/t/enter the date/t/
select the [Time] field/t/enter the time (24-hour format)/
t/i.
• When entering month, day and time, add 0 before numbers one
through nine (example: 01, 02, 03, etc.).
• Set the date and time from 00:00 January 1, 2001 to 23:59
December 31, 2050.
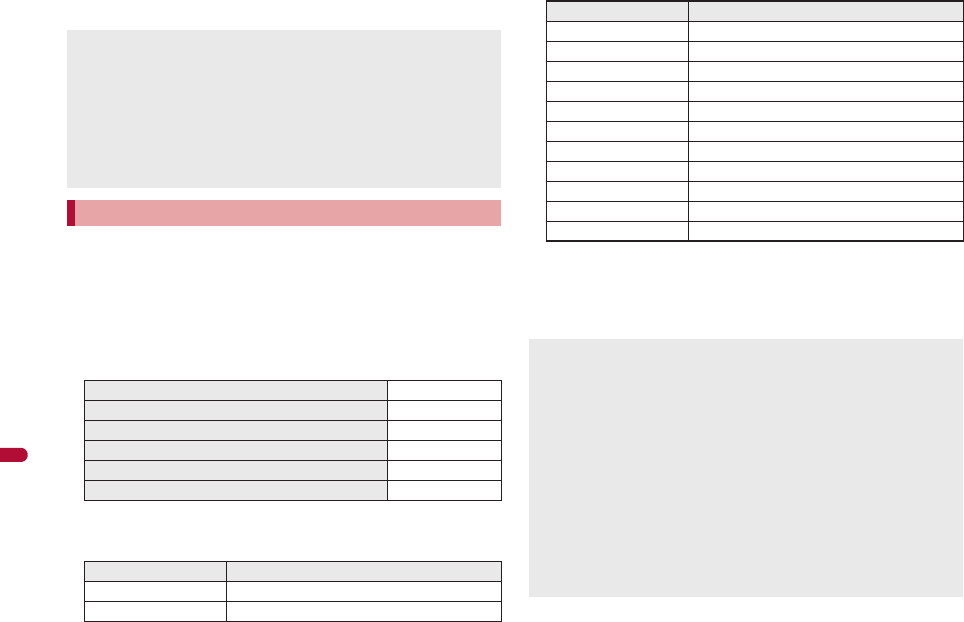
Date and time settings Change terminal security code
Key/Touch sound Location request menu
Set all font size
Press H to cancel the initial settings.
Date settings
Setting date and time
When Limit settings is set to [Enable], the terminal security code must
be entered in the Date settings.
The date and time that are set are saved even if the battery pack is
removed, but if the battery pack remains removed for approximately 30
seconds or more, the settings are reset. Also, if the battery remains
empty, the settings may be reset. When this happens, set again after
charging the battery.
If the date and time are not set correctly, the following functions cannot
be used properly.
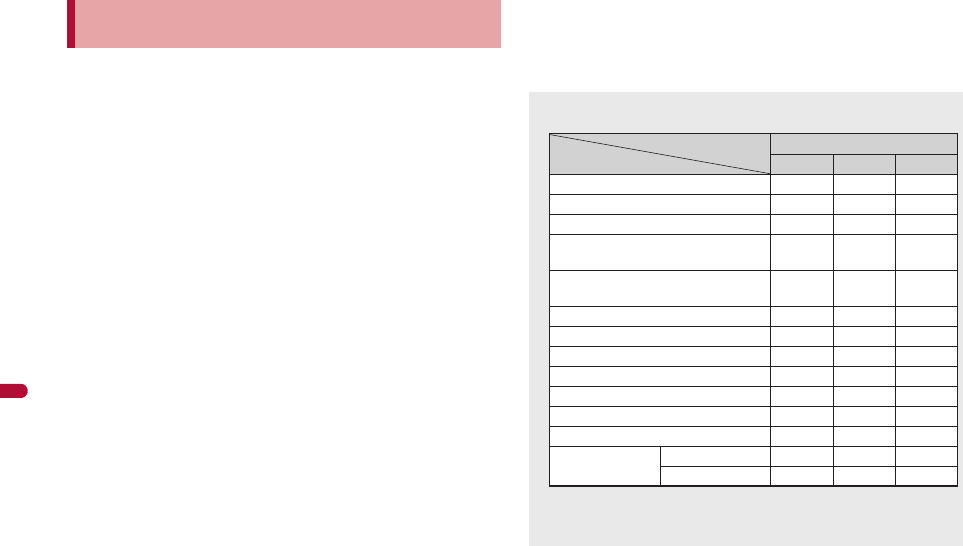
Redial, Received calls Auto power ON/OFF
Alarm Schedule
SSL/TLS (authentication) i-appli Auto start
Starting i-appliDX Reception, Recording
Machi-chara Software update
Pattern definitions update
Record message (voice), Record message (Videophone calls)
Camera image titles/shooting date
Playback of i-motion or music data with expiration date/period for
replay
View of e-books/e-dictionaries/e-comics with expiration date/period
for browse
When [Auto time correction] is set to [ON]
When the power is turned on, the FOMA terminal adjusts the time by
connecting to the network’s time information.
If the FOMA terminal does not adjust the time even when the power is
turned on, turn off the power and restart.
Time may not be adjusted depending on the signal status.
Time may be off by a few seconds.
e02_dv65_7e.fm 55 ページ 2009年3月20日 金曜日 午後5時28分

56
e02_dv65_7e.fm
[56/56]
Before Using the Handset
■Changing time zone manually <City>
1In the Date settings screen, select the [Auto time
correction] field/t/[OFF]/C.
2Select a time zone/t.
3Select a city/t/i.
Display your number (caller ID) on the other party’s phone
(display) when making a voice/Videophone call.
Handset number (caller ID) is important personal information. Be very
careful about your caller ID setting.
The Notify caller ID function is available only on compatible phone
devices.
1In the Custom menu, select [Settings]/[NW
Services]/[Notify caller ID].
2Select [Activate/Deactivate].
:To check the setting: Select [Check setting].
3Select the setting.
:To notify caller ID: Select [Yes].
:To not notify caller ID: Select [No].
When checking your own phone number during a call nP. 60
1In the Custom menu, press 0.
:Alternatively, select [Phone]/[Own number] (or [Settings]/
[General settings]/[Check status]/[Own number]).
:To switch between Number A and Number B (when 2in1 [Dual mode]
is used): Press i.
When time difference is adjusted overseas, the local time and date and
[!] appear in Redial, Received calls, Received/Sent messages history
(SMS only), received/sent mails list and location history list. The
received/sent mails are not displayed in order of the displayed time and
date but the mail reception/send.
[!] does not appear in the Unsent messages for mail messages. If the
date order display is set for the Unsent messages, unsent mails are
displayed in the order of the displayed time and date.
Time correction may not be performed depending on the overseas
network.
During overseas use, Japan time and local time (or time set in City)
appear in the dual display except for the following cases.
When Auto time correction is set to [ON] and time correction
information is not being received from an overseas network
When Auto time correction is set to [OFF] and City is set to the city in
the same time zone as Japan
Notify caller ID
Notifying the other party of your phone
number
Setting Notify caller ID/No caller ID in advance
Notify caller ID setting cannot be set from outside the service area.
Own number
Checking your own phone number
When changing the Number B of 2in1, use any of the following methods
to obtain the correct Number B.
Set 2in1 function OFF and then perform 2in1 setting again to set
2in1 function ON
Check the 2in1 subscription
When a FOMA card exchange (2in1 subscriber b 2in1 nonsubscriber)
is performed, set 2in1 function OFF.
When a FOMA card exchange (2in1 subscriber b 2in1 subscriber) is
performed, check the 2in1 subscription.
For details on Owner information nP. 381
e02_dv65_7e.fm 56 ページ 2009年3月20日 金曜日 午後5時28分
364
e16_dv65_7e.fm
[364/374]
Data Management
Use the Ir communication function from running i-appli.
Activating i-appli from Ir communication is also possible.
For details on activating Ir communication from i-appli nP. 292
During Ir communication, if a signal to activate i-appli is received from
devices supporting Ir communication, software can be activated.
1In the Custom menu, select [LifeKit]/[Receive Ir
data]/[Receive]/[Yes].
:The FOMA terminal waits to receive data. Software is activated when
signal to activate i-appli is received from the sender’s FOMA
terminal.
Use the FOMA terminal’s Infrared port from i-appli software to
operate equipment supporting the infrared remote control such
as TVs and VCRs.
To use the infrared remote control function, download compatible i-appli
software.
Start i-appli software that supports Ir remote control functions, point the
FOMA terminal’s Ir port to the front of the remote control sensor on the TV,
VCR or other device to operate, and perform remote control operations.
Actual operational methods will differ with each i-appli software
application.
Control devices from a distance of up to approximately 4 m (Distance will
vary depending on the device, the ambient brightness and other factors).
Use iC communication to send and receive data to and from other
FOMA terminals which also support iC communication function.
During iC communication, the FOMA terminal status is the same as
when outside the service area, such that making/receiving calls, i-mode,
and data communications are not possible.
iC communication is not available while a call is in progress or the IC
card is locked.
Using Ir communication with i-appli
Activating i-appli from Ir communication
When i-appli To is set to [No], i-appli is not activated from Ir
communication.
Cannot be activated as i-appli stand-by.
Infrared remote control
Using infrared remote control function
Remote control operation
When in the Self mode, the Ir remote control function cannot be used.
Depending on the device, operation may not run properly.
Remote control operation may not run properly directly under
fluorescent lights, near other equipment using infrared signals, or in
areas of direct sunlight.
iC communication
15°
Approx. 4 m
15°
Infrared port
dv65_E.book 364 ページ 2009年4月10日 金曜日 午前9時6分
365
e16_dv65_7e.fm
[365/374]
Data Management
For an image, i-motion, Melody, PDF, or Decome-Anime Template in the
Data box, Sending and receiving all data items is not available. For other
than those above, data that can be sent and received or operations when
various lock functions are set are same as for Ir communication
(nP. 360).
For details on starting iC communication from i-appli nP. 292
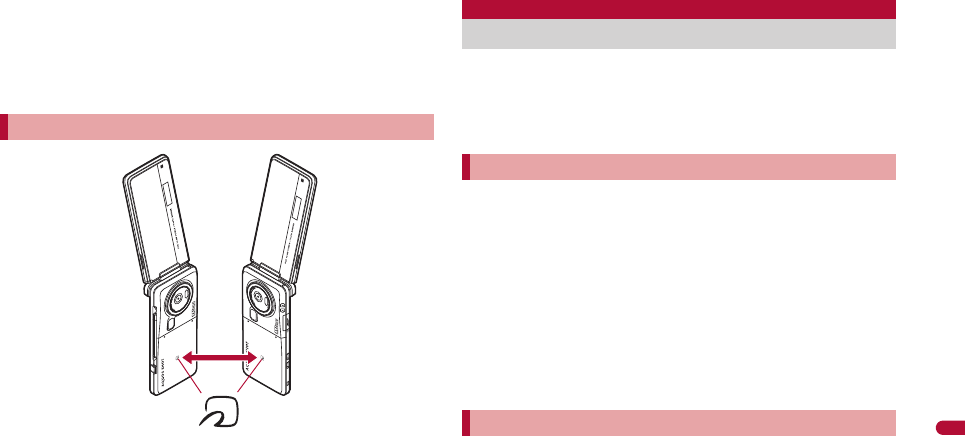
Use while placing the b mark of receiver’s FOMA terminal on that of
sender’s FOMA terminal as shown.
Do not move the FOMA terminal until all data are sent and received.
Sending and receiving data may be difficult depending on the other
party’s FOMA terminal. In such case, make the clearance between the
b mark closer or farther, or move them up/down/left/right alternately.
During iC communication, FOMA terminal called LED flashes
(nP. 111).
Data communication via iC communication is not available while
charging.
Terminal security code and authentication password entry are required
for sending or receiving all data items. The authentication password is a
password exclusively for iC communication. Before starting data transfer,
the sender and receiver must enter the same user-specified four-digit
password.
Example: Phonebook
1In stand-by, press a.
2Select a name/C/[Send data]/[iC transmission].
3Select the sending method.
;Select [Send].
;Select [Send all]/enter the terminal security code/t/enter
the authentication password/t.
4Select [Yes].
5Place the b mark on that of the other party’s FOMA
terminal.
1In stand-by, place the b mark on that of the other
party’s FOMA terminal.
2Select [Yes].
:When receiving all data items: Select [Yes]/enter the terminal
security code/t/enter the same authentication password
entered on the sender’s FOMA terminal/t/[Yes].
• To cancel Receive: While receiving data, press C.
Precautions for using iC communication function
b mark
Sending and receiving data
Sending data <Send/Send all>
Receiving data <Receive/Receive all>
dv65_E.book 365 ページ 2009年4月10日 金曜日 午前9時6分
e17_dv65_7e.fm
[395/404]
395
Continued on next page
Convenient Functions
Receive voice/Videophone calls.
1Connect the Stereo Earphone Set.
2When a call is received, press the switch for 2+
seconds.
:Set the location to which the ring tone is output (nP. 100).
3Press the switch for 2+ seconds to finish call.
Automatically answer voice/Videophone calls received while the
Stereo Earphone Set 01 (sold separately), etc. is connected.
When the Stereo Earphone Set is not connected, Auto answer setting is
not available even if set to [ON].
1In the Custom menu, select [Settings]/[Phone
settings]/[Incoming settings]/[Auto answer
setting].
2Select [ON]/enter a ring time/t.
Connect the FOMA terminal to Bluetooth devices wirelessly.
Wireless communications with all the Bluetooth devices are not
completely guaranteed.
Supported version
Bluetooth specification Ver. 2.0+EDR*1
Supported profiles*2 (Supported services)
HSP (Headset Profile)
HFP (Hands Free Profile)
A2DP (Advanced Audio Distribution Profile)
AVRCP (Audio/Video Remote Control Profile)
HID (Human Interface Device Profile)
DUN (Dial-up Networking Profile)
OPP (Object Push Profile)
SPP (Serial Port Profile)
*1 The FOMA terminal and all Bluetooth function-installed devices have
ensured that they conform to the Bluetooth specification according to
the rules that the Bluetooth SIG defines, and are all authenticated.
However, operating methods might differ, or data might not be
exchanged even when they are connected wirelessly, depending on the
features or specifications of connecting devices.
*2 Standardizes the communication procedures of Bluetooth device per
feature of a device.
Calls may be made accidentally if the FOMA terminal is carried in a bag
with the Stereo Earphone Set connected. Disconnect when not in use.
Calls may be made if an earphone/microphone without switch is rapidly
inserted and removed.
Receiving calls with switch
Calls may be answered accidentally if the earphone/microphone with
switch is connected while the ring tone sounds. Disconnect when not in
use.
Auto answer setting
Receiving a call automatically when an
earphone is connected
Calls are answered without ringing or vibrating when the ring time is set
to “0 seconds”.
Calls from other parties set for Reject calls are not answered.
Set different Auto answer setting and Record message ring times.
If both Voice Mail Service and Auto answer setting are enabled, and the
same number of seconds is set for both services, then Voice Mail
Service may take priority. To prioritize Auto answer setting, set a
shorter ring time than that set for the Voice Mail Service (This also
applies to the Call Forwarding Service).
Bluetooth
Using Bluetooth function
Supported version and supported profiles
dv65_E.book 395 ページ 2009年4月10日 金曜日 午前9時6分
396
e17_dv65_7e.fm
[396/404]
Convenient Functions
If the FOMA terminal is already connected to Bluetooth devices,
searching the Bluetooth device may not be available depending on the
status of the FOMA terminal.
■Talking with Headset/Hands-free (HSP/HFP)
Connect commercially available Bluetooth compatible Headset to the FOMA
terminal to talk wirelessly.
Connect a commercially available Bluetooth compatible hands-free device
such as a car navigation system to the FOMA terminal to talk during
hands-free operation using the car navigation system.
■Playing on Audio device (A2DP/AVRCP)
Connect Wireless Earphone Set 02 (sold separately) or commercially
available Bluetooth compatible audio device to the FOMA terminal to play
music or sound of 1Seg wirelessly. Also, remote control operation may be
available from Bluetooth devices. However, some devices do not support
sounds of 1Seg, videos, or moving pictures in the [Link with recorder] folder
in i-motion/Movie of Data box.
■Using Bluetooth compatible keyboard or PC (HID)
Connect commercially available Bluetooth compatible keyboard to the
FOMA terminal to enter text in the keyboard. Usual screen operations are
available using Cursor key/Enter key/Esc key/Function key/Numeric key. In
addition, operate commercially available Bluetooth compatible PC using
presentation assist.
■Making Dial-up connection wirelessly (DUN)
Connect a Bluetooth compatible PC to the FOMA terminal to make packet
transmission or 64K data communication using the FOMA terminal as a
modem.
Refer to “Manual for PC Connection” in the accompanying CD-ROM for
details.
■Sending/Receiving data (File transfer) (OPP)
Send or receive phonebook entries, schedule, mails, text memos,
bookmarks, location service clients, or ToruCa with the Bluetooth device.
■Using Bluetooth communication from i-appli (SPP)
Connect with another mobile phone or Bluetooth device to play a match
game and manage data.
■Cooperating with Bluetooth compatible car navigation
system (SPP)
Connect with a car navigation system complying with ++フォトリモ@ナビ
standard to transmit location information to a car navigation system or send
a mail transferred from a car navigation system with the FOMA terminal.
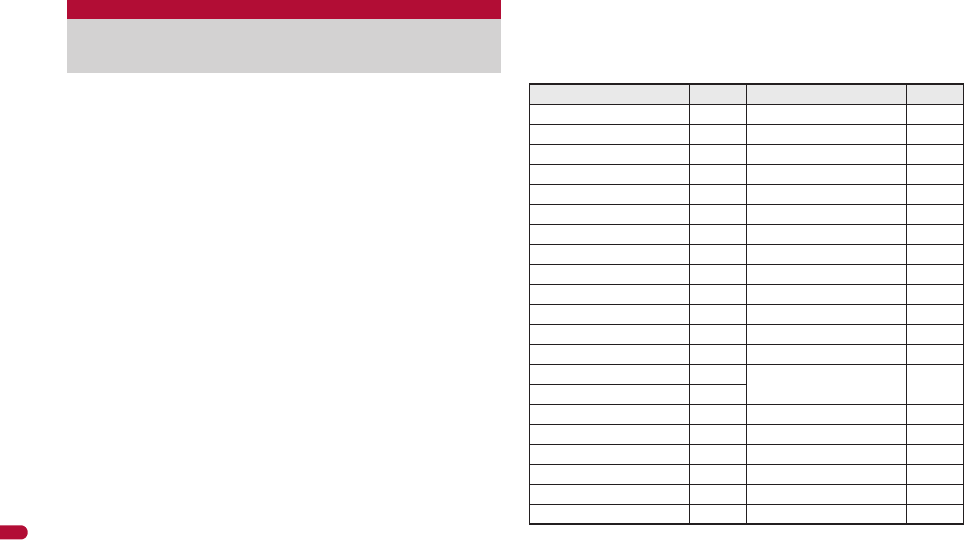
What can be performed using Bluetooth
connection
The following sounds are output from the Bluetooth device or the FOMA
terminal depending on the connected service.
A: Output from the Bluetooth device.
B: Sounds from the FOMA terminal instead of outputting from the
Bluetooth device.
Connected services
HSP HFP A2DP
Voice call dial tone A A B
Voice/Videophone call ring tone A*1, 2 A*2 B
Calling tone at voice/Videophone call A A B
The other party’s voice at voice/
Videophone call A A B
Caller’s voice from Record message
at voice call A A B
Sounds of 1Seg programs B B A*3
i-motion playback tone B B A*4, 5
Video playback tone B B A*3
Movie playback tone B B A*5
MUSIC Player playback tone B B A*5
Music&Video Channel playback tone B B A
Alarm tone B B B
Mail ring tone Notice first B B B
Operation first B*6 B*6 B*6
dv65_E.book 396 ページ 2009年4月10日 金曜日 午前9時6分

397
e17_dv65_7e.fm
[397/404]
Convenient Functions
*1 The ring tone sounds from both the Bluetooth device and the FOMA
terminal when Headset setting is set to [Headset + speaker].
*2 The ring tone sounds from the FOMA terminal when Forward Ring
Tone is set to [OFF].
*3 Play only on an A2DP compatible Bluetooth device protected by
copyright in the SCMS-T.
*4 Play moving pictures in the [Link with recorder] folder in i-motion/
Movie of Data box, only on an A2DP compatible Bluetooth device
protected by copyright in the SCMS-T.
*5 The tone does not sound for activating the player from sites or Ring
tone.
*6 The mail ring tone does not sound when a screen other than
stand-by is shown.
Some Bluetooth devices may not work as those specified above.
The ring tone sounds from the Bluetooth device even while the Manner
mode is set.
Some commercially available Bluetooth compatible earphones or
headphones may not conform to the Bluetooth specification. In this
case, the audio noise may affect earphones or headphones.
Refer to the manual for the Bluetooth device as well.
Precautions for handling the Bluetooth device
Note the following when using the Bluetooth device.
Note the following to make good connection.
The distance between the FOMA terminal and another Bluetooth
device keep within approximately 10 m with no obstructions in sight.
The distance that can make connection may be shorter when there
are obstructions between them or depending on the conditions of
the surroundings (such as walls or furniture) and the structure of a
building. Especially when there is a wall or floor of reinforced
concrete between them, they may be unable to connect with each
other. Note the above mentioned distance is not guaranteed.
Move the FOMA terminal and another Bluetooth device as far away
as possible from home electric appliances, AV devices, OA
devices, etc. before connection. The Bluetooth device is liable to be
adversely affected by a microwave oven so move as far away as
possible from the microwave oven while using it. Otherwise, normal
connection cannot be performed when electric devices are
powered on or Bluetooth devices may cause noises or reception
failure on a TV or radio set (TV images may degrade for specific
channels of UHF or satellite broadcasting).
Move the Bluetooth device to a place that connection is possible
when there is a broadcast station or radio near a Bluetooth device,
and the FOMA terminal cannot be connected to the device. Strong
radio waves may prevent connection between Bluetooth devices.
Wireless connection is available with Bluetooth device put in a bag
or pocket. However, lowering of communication speed or noise
may result when the Bluetooth device and the FOMA terminal are
separated by your body.
The Bluetooth device use the same frequency band (2.4 GHz) as
wireless LANs (IEEE802.11 b/g). Therefore, using the Bluetooth
device near a wireless LAN device may cause the radio interference,
lowering of communication speed, noise, or connection fail. In this
case, turn off the wireless LAN device or keep the FOMA terminal and
the Bluetooth device at least approximately 10 m away from the
wireless LAN.
Electromagnetic signals from the Bluetooth device may affect the
operation of electronic medical equipment. As some cases may result
in accident, turn off the FOMA terminal and another Bluetooth device
in the following place.
On trains On airplanes In hospitals
Nearby automatic doors or fire alarms
In places such as gas stations where flammable gas is generated
dv65_E.book 397 ページ 2009年4月10日 金曜日 午前9時6分
398
e17_dv65_7e.fm
[398/404]
Convenient Functions
■Using Bluetooth devices simultaneously
Connect Bluetooth simultaneously, for example, listening to the music on
the Bluetooth device while composing mail with a Bluetooth compatible
keyboard. For details on the combinations of functions that can be used
simultaneously nP. 478
For Hands-free and Headset services, the profile connected first takes
priority. However, they can be simultaneously switched to connection
stand-by.
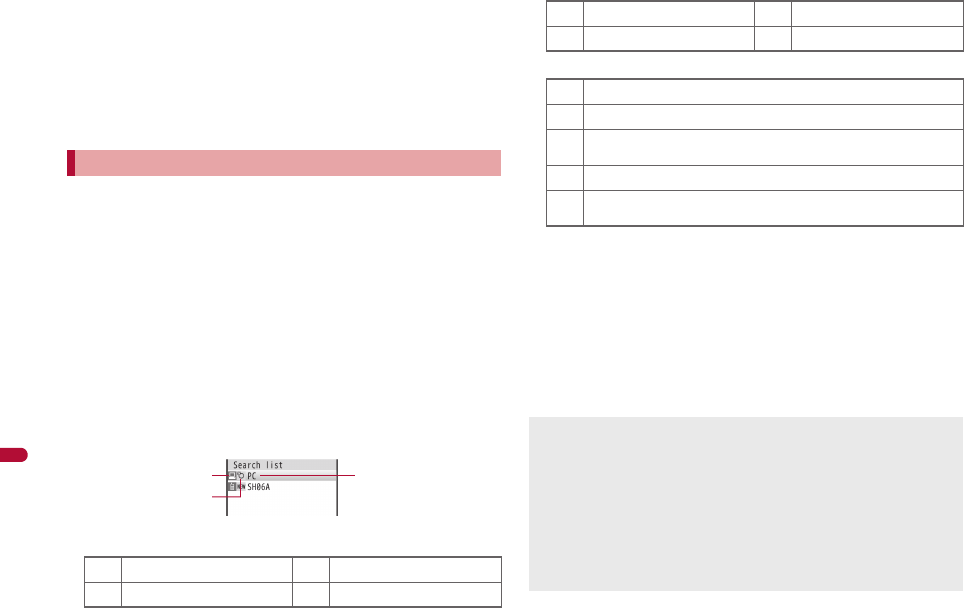
Search for the Bluetooth device to connect and register the device to the
FOMA terminal. Register up to ten Bluetooth devices.
To register a Bluetooth device, the Bluetooth passkey must be entered.
Before starting the registration, enter the same user-specified 4- to
16-digit number on the FOMA terminal and the other party’s Bluetooth
device.
Switch the other party’s Bluetooth device to the registration stand-by
status in advance.
1In the Custom menu, select [LifeKit]/[Bluetooth]/
[List/cnnct/discnnct].
:When any Bluetooth devices have already been registered, the
device list screen appears. Press i and proceed to step 3.
2Select [Yes].
:Search the Bluetooth device around the FOMA terminal. Searched
devices are displayed on the list.
1Device category icon
2Classification icon
3Device name
3Select a Bluetooth device to register/C/[Register
Devices].
:Alternatively, select a Bluetooth device to register and press t.
:To search again: Press i.
4Enter the Bluetooth passkey/t.
:If a device is the one supported by Audio service, the default
connection device setting screen appears. When [Yes] is selected,
the device is set to default connection device.
Registering Bluetooth device
/Computer :Peripheral
*Phone +Imaging device
3
1
2
Search list
,LAN -Wearable terminal
;Audio device _Other
(Unregistered device that has been newly found
)Already registered device that has been found
$Already registered device that has been found and is set to
default connection device
&Already registered and connected device that has been found
%Already registered and connected device that is set to default
connection device
Entering the Bluetooth passkey may not be required depending on the
operations of the other party’s Bluetooth device.
When ten Bluetooth devices are already registered, the confirmation
screen for overwriting appears. When [Yes] is selected, the Bluetooth
devices are overwritten starting with the oldest communication date and
time.
When the already registered Bluetooth device is selected to register
again, it cannot be registered again during the connection.
For details on the operations of the other party’s Bluetooth device, refer
to the manuals of the Bluetooth device to be used.
dv65_E.book 398 ページ 2009年4月10日 金曜日 午前9時6分
399
e17_dv65_7e.fm
[399/404]
Convenient Functions
■Submenu operations for search list screen
[Register Devices] nP. 398
■Searching only unregistered devices to register
1In the Custom menu, select [LifeKit]/[Bluetooth]/
[Register new device].
2Register.
:For details on registering nstep 3 of “Registering Bluetooth device”
on P. 398
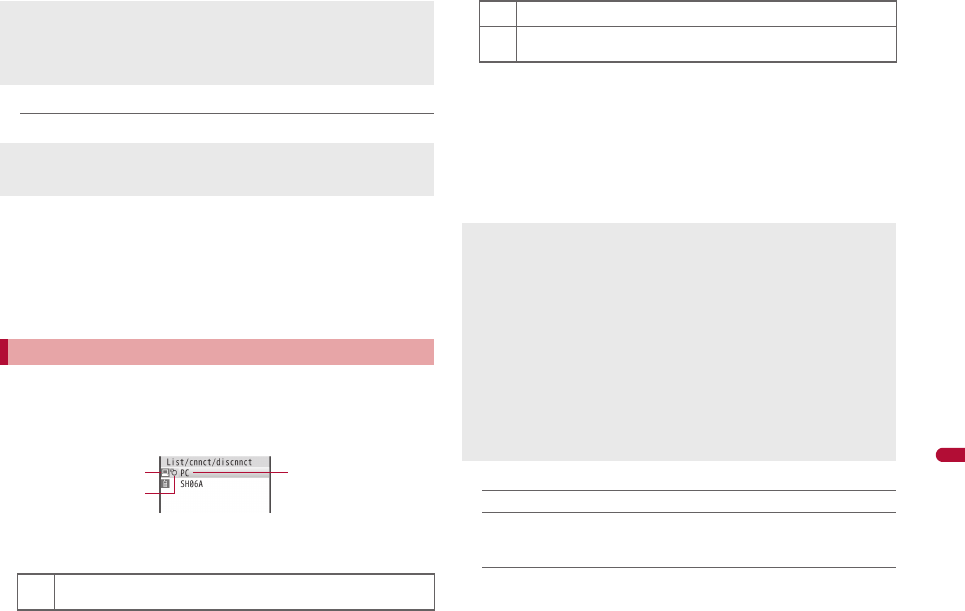
Connect to registered Bluetooth devices.
1In the Custom menu, select [LifeKit]/[Bluetooth]/
[List/cnnct/discnnct].
:To update the information: Press a.
1Device category icon (nP. 398)
2Classification icon
3Device name
2Select a Bluetooth device to connect to/t.
:Select a service and connect: Select a Bluetooth device to connect
to/m/select a service/t/C.
:[H] flashes at approximately 0.5-second intervals when the
connection is completed.
:To disconnect the Bluetooth device: Select a Bluetooth device to
disconnect/t/[Yes].
■Submenu operations for device list screen
[Delete]/[Yes]
[Def cnnctn dev]/[Yes]
Set a device that is automatically connected when a Bluetooth
compatible function is activated.
[Connection info]
To edit the device name: Press C/edit the device name/t.
Searching is not available in the following cases.
While 1Seg or MUSIC Player is activated with connection made
using Audio service
While receiving a call or during a voice/Videophone call with
connection made using Headset service or Hands-free service
[Connection info]
Enter up to 32 single-byte (16 double-byte) characters for a device
name.
Connecting to Bluetooth devices
$Already registered and unconnected device that is set to default
connection device
3
1
2
Device list
&Already registered device that is being connected
%Already registered and connected device that is set to default
connection device
If a Bluetooth device is turned off during the connection or
disconnection processing or there is no response from the Bluetooth
device, it takes up to approximately 20 seconds for the processing.
If the FOMA terminal is disconnected from a Bluetooth device while
being connected, the connected service is switched to connection
stand-by. Also, if the FOMA terminal is turned off while being connected
or in connection stand-by, the connection or connected service will be
switched to connection stand-by when the power is turned on next time.
When connection to the registered Bluetooth device is failed, delete the
registration once and register the device again. It may be able to
connect.
Entering the Bluetooth passkey may be required depending on the
other party’s Bluetooth device when connecting, updating information,
or sending via Bluetooth communication.
dv65_E.book 399 ページ 2009年4月10日 金曜日 午前9時6分

400
e17_dv65_7e.fm
[400/404]
Convenient Functions
Switch to receive a registration request/connection request from other
Bluetooth devices in stand-by display.
1In the Custom menu, select [LifeKit]/[Bluetooth]/
[Accept Registered].
:[H] flashes at approximately 1-second intervals.
:Register devices within approximately 5 minutes after switching the
FOMA terminal to connection stand-by. After approximately 5
minutes, [H] becomes illuminating.
:To select the service to switch to the connection stand-by: Select
[Accept Registered]/i/select a service/t/C.
:Turn off the Bluetooth power when disabling the stand-by status.
■When accepting a registration request from Bluetooth
device or connection request from unregistered Bluetooth
device
1Registration request/Connection request from the
other party in stand-by/[Yes]/register.
:For details on registering nstep 4 of “Registering Bluetooth device”
on P. 398
■When accepting a connection request from registered
Bluetooth device
Automatically connect and [L] becomes flashing at approximately
0.5-second intervals.
Turn on/off the Bluetooth power of the FOMA terminal.
If the Bluetooth power is turned off, all services that are connecting or in
connection stand-by are stopped. If the Bluetooth power is turned on,
services that are previously connecting or in connection stand-by are
switched to connection stand-by.
1In the Custom menu, select [LifeKit]/[Bluetooth]/
[Bluetooth Power ON]/[Bluetooth Power OFF]/[Yes].
Switching to registration stand-by/connection
stand-by <Accept Registered>
Connection does not start when the other party’s Bluetooth device is
already in connection stand-by after the connection is ended. In this
case, connect from the FOMA terminal.
If connection stand-by is set when multiple Bluetooth devices are
registered, the FOMA terminal may be connected to a Bluetooth device
other than the one to be connected.
While in connection stand-by, even if a connection request from a
Bluetooth device is received, connection may not be made depending
on the signal strength, etc.
When accepting a connection request from already connected service,
or when there are two connecting Bluetooth devices, connection is not
available.
Turning on/off Bluetooth power on the FOMA
terminal <Bluetooth Power ON/Bluetooth Power OFF>
With the following operations, Bluetooth is automatically turned on.
Connection/connection stand-by Search
Bluetooth reception/send
Bluetooth output from Bluetooth compatible functions (1Seg,
i-motion, Video player, Music&Video Channel, MUSIC Player,
Internet movie player)
Activating Bluetooth functions from i-appli
Device registration/Connection from presentation assist
Also, Bluetooth remains on after the completion of the above
processing. However, for Bluetooth communication from i-appli, if there
is no Bluetooth function being used when i-appli ends, Bluetooth is
turned off.
While the FOMA terminal is turned off or in the Self mode, Bluetooth
power is forcibly turned off. However, when the FOMA terminal is
turned on or the Self mode is disabled, the original status (connection
stand-by) is recovered.
dv65_E.book 400 ページ 2009年4月10日 金曜日 午前9時6分
e17_dv65_7e.fm
[401/404]
401
Continued on next page
Convenient Functions
1Connect a Bluetooth device using Headset service or
Hands-free service.
2Make/Receive a call via the Bluetooth device.
:[M] appears during a call via the Bluetooth device.
:To switch between call on the Bluetooth device and FOMA terminal:
Press t (for 1+ seconds) during a call.
• When a connection is being made using the Headset service and
the call is being made with the FOMA terminal, the connection can
be switched only from the Bluetooth device.
• Alternatively, press t for 1+ seconds to switch while calling,
receiving a call, holding a call, responding to a recorded message/
recording message or on hold.
1Connect a Bluetooth device using Audio service.
2Activate and watch/play 1Seg, MUSIC Player, etc.
1In the Custom menu, select [LifeKit]/[Bluetooth]/
[Bluetooth setting]/[Music auto start].
2Select the setting/t.
Connect to the Bluetooth device that is set to the default connection
device setting.
1While 1Seg, video player, etc. is being activated, press
C/[Bluetooth output]/[ON].
1While 1Seg, video player, etc. is being activated, press
C/[Bluetooth output]/[Startup auto cnnct].
Making a call using Bluetooth devices
During a call on the Bluetooth device, adjust the volume on the
Bluetooth device.
During a call on the Bluetooth device, the call continues when the
FOMA terminal is closed regardless of Set when closed.
If the FOMA terminal is disconnected from a Bluetooth device during a
call, the call is finished.
Playing audio and music of 1Seg and MUSIC
Player using Bluetooth devices
During a Bluetooth outputting, adjust the volume on the Bluetooth
device.
Remote control operations are available even while playing MUSIC
Player or Music&Video Channel player (program with voice only) in the
background. However, remote control operations are not available
when Submenu, etc. is displayed even in the player screen.
Depending on the conditions of Bluetooth device or operations from the
FOMA terminal, playing sound or music may be interrupted.
If a voice or music is stopped from a Bluetooth device during the
playback, the FOMA terminal may be outside the Bluetooth area or the
Bluetooth device is turned off. Check the FOMA terminal and Bluetooth
device. In this case, the Audio service may be disconnected depending
on the Bluetooth device. To play the voice or music from the Bluetooth
device again, reconnect the Audio service.
When connecting the Wireless Earphone Set 02 (sold separately),
connect it from the FOMA terminal.
Some music data in AMR format may not be played depending on the
car navigation.
Setting Auto start of MUSIC Player
<Music auto start>
When Music auto start is [ON], if an Audio service is connected from a
Bluetooth device with the Audio service in connection stand-by, MUSIC
Player is automatically activated. However, it is not activated while a
screen other than stand-by appears.
Outputting with voice from a Bluetooth device
after each function is activated <Bluetooth output>
Connecting automatically to a Bluetooth device
when each function is activated <Startup auto cnnct>
dv65_E.book 401 ページ 2009年4月10日 金曜日 午前9時6分
402
e17_dv65_7e.fm
[402/404]
Convenient Functions
2Select the setting/t.
1Connect a Bluetooth compatible keyboard using
Presentation/Keyboard service.
2In the text input screen, input text from keyboard.
:Input method is automatically set to [Romaji method] and Quick
conversion and Direct conversion are set to [OFF].
■Bluetooth compatible keyboard
Convenient operations in the text input screen are shown below.
Keys of the Bluetooth compatible keyboard correspond to the operation
keys of the FOMA terminal as below. Corresponding keys can be
operated same as the FOMA terminal.
*1 Press in the compose message screen to send.
*2 When in the viewer position, press in the stand-by display to display
the Touch menu. However, when the stock icon is displayed, the
stock icon message appears.
*3 Press in the text input screen to insert [K] (line breaks).
When Startup auto connection is [ON] and there are some Bluetooth
devices that are set to the default connection device setting, just
activate 1Seg or MUSIC Player to automatically make it connect to the
Bluetooth devices without connecting to the Audio service in advance.
Connection is not available when 1Seg is activated by the time for
starting or recording and Wakeup TV.
When there is no Bluetooth device that is set to the default connection
device setting, Startup auto connection cannot be set to [ON].
The setting becomes valid from next start.
Using Bluetooth compatible keyboard
To select text Shift+Cursor key
To copy the selection Ctrl+C
To cut the selection Ctrl+X
To paste Ctrl+V
To cancel operations (UNDO function) Ctrl+Z
To change the range of characters to be converted Shift+c, Shift+b
FOMA terminal Bluetooth compatible keyboard
cBS or DEL
HEsc
sCtrl+Esc
iF1*1
CF2
mF3
aF4
1 to 9, 01 to 9, 0
** “Shift+: (colon)”
## “Shift+3”
o, p, q, rd, e, c, b
tEnter*2, 3 (Text input screen: Ctrl+Enter)
$/
Some keys, such as numeric keypad, cannot be inputted.
When in the horizontal view with the viewer position, a menu
corresponding to the function keys of the Bluetooth compatible
keyboard appears on the bottom of the text input screen. Perform the
same operations as those of the FOMA terminal such as the text input
mode switching, Kana/English conversion, and 1 kanji conversion.
Text input is not available with the FOMA terminal during the operation
with Bluetooth compatible keyboard. Switch the Input method to
[5-touch]/[2-touch] for inputting the text with FOMA terminal
(nP. 414). In this case, the operation with Bluetooth compatible
keyboard is not available.
The terminal security code cannot be entered using a Bluetooth
compatible keyboard.
If the text box is selected during i-mode/Full Browser, the text input
screen appears and text can be entered.
FOMA terminal Bluetooth compatible keyboard
dv65_E.book 402 ページ 2009年4月10日 金曜日 午前9時6分

e17_dv65_7e.fm
[403/404]
403
Continued on next page
Convenient Functions
In addition to Hands-free service, etc., Serial port service is available for
connecting the FOMA terminal with a Bluetooth compatible car navigation
system to use various functions.
Refer to the following website for compatible models.
http://k-tai.sharp.co.jp/peripherals/bluetooth/sh-06a.html
1Connect with a Bluetooth compatible car navigation
system using Serial port service.
2Send and receive data with car navigation system.
■Sending location information to Bluetooth compatible car
navigation system
Send location information to a cooperated Bluetooth compatible car
navigation system from still pictures with location information or location
history.
Example: Still picture
1In the Custom menu, select [Data box]/[My picture].
2Select an image/C/[Send data]/[Send location
info].
3Select the sending method/t.
:When Bluetooth compatible car navigation system is not cooperated,
location information is saved as send reservation data in the FOMA
terminal. When the send reservation data is already saved, the
confirmation screen asking whether to overwrite appears. The saved
send reservation data is sent when Bluetooth compatible car
navigation system is cooperated. Send reservation data is sent
regardless of Function lock settings.
■Deleting send reservation data <Del send res data>
1In the Custom menu, select [LifeKit]/[Bluetooth]/
[Del send res data]/[Yes].
■Checking missed calls or mail reception of the FOMA
terminal with Bluetooth compatible car navigation system
Check missed calls or mail reception of the FOMA terminal with Bluetooth
compatible car navigation system.
■Sending a mail transferred from a Bluetooth compatible
car navigation system with the FOMA terminal
If a phonebook in which other party’s mail address is saved is transferred to
a Bluetooth compatible car navigation system, a mail transferred from a
Bluetooth compatible car navigation system can be sent with the FOMA
terminal.
Connect a Bluetooth device to the FOMA terminal with the File transfer
service to send and receive data.
While sending and receiving data through Bluetooth communication, the
FOMA terminal status is the same as when outside the service area,
such that making/receiving calls, i-mode, and data communications are
not available.
Sending and receiving data via Bluetooth communication is not available
during a call.
Images, i-motion, Melody and PDF of Data box or Decome-Anime
Template cannot be sent or received. Other data that can be sent and
received or operations for when various lock functions are set are same
as for Ir communication (nP. 360).
If Session number setting is set to [ON], the terminal security code and
authentication password entry are required to send all data.
Authentication password is a password exclusively for Bluetooth. Before
starting to send, the sender and receiver must enter the same
user-specified four-digit password.
■Sending data items <Send/Send all>
Example: Phonebook
1In stand-by, press a.
2Select a name/C/[Send data]/[Send via
Bluetooth].
Connecting with a Bluetooth compatible car
navigation system using Serial port service
Sending and receiving data
dv65_E.book 403 ページ 2009年4月10日 金曜日 午前9時6分
404
e17_dv65_7e.fm
[404/404]
Convenient Functions
3Select the send method.
;Select [Send].
;Select [Send all]/enter the terminal security code/t.
:Set the receiving Bluetooth device to receive data.
4Select [Yes].
5Select a Bluetooth device to connect to/t.
■Receiving data items <Receive Bluetooth>
1In the Custom menu, select [LifeKit]/[Bluetooth]/
[Receive Bluetooth]/[Yes].
:The FOMA terminal waits to receive data. Data is automatically
received when data is sent from sender’s Bluetooth device.
2Select [Yes].
:To receive all data items: Select [Yes]/enter the terminal security
code/t/[Yes].
• To cancel Receive: While receiving data, press C.
■Checking Bluetooth information <Bluetooth info>
1In the Custom menu, select [LifeKit]/[Bluetooth]/
[Bluetooth setting]/[Bluetooth info].
:To edit the device name: Press C/edit the device name/t.
• Enter up to 32 single-byte (16 double-byte) characters for a device
name.
■Setting time to search Bluetooth device
<Time-out To Search>
1In the Custom menu, select [LifeKit]/[Bluetooth]/
[Bluetooth setting]/[Time-out To Search].
2Enter the search time/t.
■Setting whether to perform Bluetooth authentication
<Set Authentications>
1In the Custom menu, select [LifeKit]/[Bluetooth]/
[Bluetooth setting]/[Set Authentications].
2Select the setting/t.
■Setting whether to perform Encryptions <Set Encryptions>
1In the Custom menu, select [LifeKit]/[Bluetooth]/
[Bluetooth setting]/[Set Encryptions].
2Select the setting/t.
■Setting whether to forward ring tone to Bluetooth devices
<Forward Ring Tone>
1In the Custom menu, select [LifeKit]/[Bluetooth]/
[Bluetooth setting]/[Forward Ring Tone].
2Select the setting/t.
■Setting whether to enter authentication password
<Session no. setting>
When sending all data via Bluetooth communication, set whether to enter
the authentication password.
1In the Custom menu, select [LifeKit]/[Bluetooth]/
[Bluetooth setting]/[Session no. setting].
2Select the setting/t.
Setting Bluetooth function <Bluetooth setting>
Pictograms in the device name may not appear correctly for the other
party’s Bluetooth device.
The setting cannot be made when [H] appears.
The setting cannot be made when Set Authentications is set to [No].
The setting cannot be made when [H] appears.
The setting cannot be made while connecting Hands-free or Headset
services.
dv65_E.book 404 ページ 2009年4月10日 金曜日 午前9時6分

e20_dv65_7e.fm
[425/434]
425
Overseas Use
Outline of international roaming (WORLD WING) . . . . . . . . . . . . . . . . .426
Available services overseas . . . . . . . . . . . . . . . . . . . . . . . . . . . . . . . . . .427
Before use overseas . . . . . . . . . . . . . . . . . . . . . . . . . . . . . . . . . . . . . . . .428
Making a call at your country of stay. . . . . . . . . . . . . . . . . . . . . . . . . . . .430
Receiving a call overseas . . . . . . . . . . . . . . . . . . . . . . . . . . . . . . . . . . . .431
Setting network communication system . . . . . . . . . . <3G/GSM setting>431
Setting a search method of telecommunications carrier
. . . . . . . . . . . . . . . . . . . . . . . . . . . . . . . . . . . <Network search mode>432
Setting a telecommunications carrier to preferentially connect to
. . . . . . . . . . . . . . . . . . . . . . . . . . . . . . . . . . . . . . . . . . <PLMN setting>432
Displaying a telecommunications carrier during roaming
. . . . . . . . . . . . . . . . . . . . . . . . . . . . . . . . . . . . .<Operator name disp>433
Activating roaming guidance. . . . . . . . . . . . . . . . .<Roaming guidance>433
Setting incoming call to reject during roaming . . . . . . . . <Call barring>433
Using Missed Call Notice function during roaming
. . . . . . . . . . . . . . . . . . . . . . . . . . . . . . . . . . . . . .<Missed Call Notice>433
Using network services during roaming . . . . . . . . . . . . .<Int’l services>434
e20_dv65_7e.fm 425 ページ 2009年3月20日 金曜日 午前10時42分
426
e20_dv65_7e.fm
[426/434]
Overseas Use
~~~~~ ~~~~~ ~~~~~ ~~~
International roaming (WORLD WING) is a service that enables
you, using overseas telecommunications carrier’s networks, to
make calls and use i-mode.
Use this FOMA terminal for voice/Videophone calls, i-mode and
SMS with the phone number and mail address used in Japan.
Network services such as Voice Mail and Call Forwarding
Services can also be used.
This service is available in the 3G network and GSM/GPRS network
service areas. Refer to the DOCOMO “International Services website” for
details on the area.
By default, the FOMA terminal is set to automatically switch networks
(nP. 432).
Refer to the following before using the FOMA terminal overseas.
“Mobile Phone User’s Guide [International Services]”
“Mobile Phone User’s Guide [Network Services]”
PDF file “海外ご利用ガイド” pre-installed in [My Documents] of Data
box
Country codes of major countries
The following shows “Country code” used when making international calls
(nP. 66) or setting International dial assist (nP. 67).
For other country codes and details, refer to the DOCOMO “International
Services website”.
Outline of international roaming
(WORLD WING)
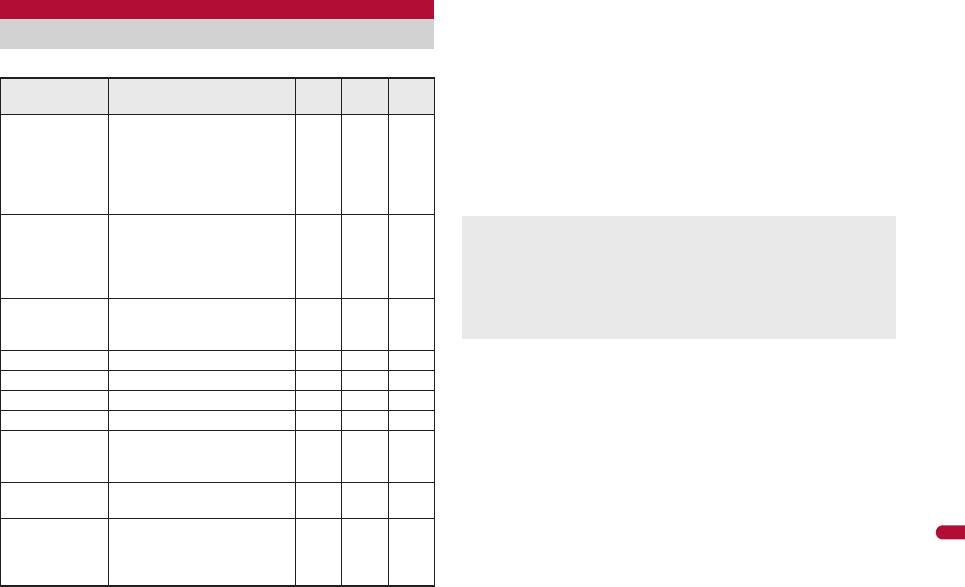
Country/Region Code Country/Region Code
Australia 61 Maldives 960
Austria 43 Netherlands 31
Belgium 32 New Caledonia 687
Brazil 55 New Zealand 64
Canada 1 Norway 47
China 86 Peru 51
Czech 420 Philippines 63
Egypt 20 Russia 7
Fiji 679 Singapore 65
Finland 358 South Korea 82
France 33 Spain 34
Germany 49 Sweden 46
Greece 30 Switzerland 41
Hong Kong 852 Tahiti
(French Polynesia)
689
Hungary 36
India 91 Taiwan 886
Indonesia 62 Thailand 66
Italy 39 Turkey 90
Japan 81 U.K. 44
Macau 853 U.S.A. 1
Malaysia 60 Vietnam 84
e20_dv65_7e.fm 426 ページ 2009年3月20日 金曜日 午前10時42分
427
e20_dv65_7e.fm
[427/434]
Overseas Use
The available communication services overseas are as follows.
*1 When the 2in1 is used, calling from Number B is not available overseas.
*2 When Multi Number is used, calling from Additional Number is not
available overseas.
*3 Overseas use settings for i-mode is required.
*4 i-Channel setting is required. Packet transmission charges are incurred
for each i-Channel reception (including Basic channel).
*5 Overseas use settings for i-concier is required. Packet transmission
charges are incurred for each information reception.
*6 Setting for i-Widget roaming is required. Multiple Widget appli may
attempt transmission when i-Widget screen appears. In such case,
packet transmission charges are incurred for each transmission.
*7 Each time the present location is checked, charges are incurred
(nP. 300).
*8 Unable to use 64K data communication by connecting a PC, etc.
Available services overseas
Communication
service Explanation 3G GSM GPRS
Voice call*1, 2 Make or receive calls in your
country of stay or make
international calls to Japan or
to other countries with the
same phone number as used
in Japan while abroad.
AAA
Videophone*1, 2 Make international Videophone
calls to users of the specified
3G telecommunications
carriers overseas and FOMA
users in Japan.
ABB
i-mode mail Send or receive i-mode mail
overseas with the same
address as used in Japan.
ABA
i-mode*3 Use i-mode overseas. ABA
i-Channel*3, 4 Use i-Channel overseas. ABA
i-concier*5 Use i-concier overseas. ABA
i-Widget*6 Use i-Widget overseas. ABA
SMS Send or receive SMS overseas
with the same phone number
as used in Japan.
AAA
GPS position
location*7 –ABA
Packet
transmission by
connecting a PC,
etc.*8
Use packet transmission
overseas. ABA
Some services are not available depending on the telecommunications
carrier or network. Refer to the DOCOMO “International Services
website” for information on available countries and regions, and
telecommunications carriers.
Overseas packet transmission charges differ from those in Japan.
日英版しゃべって翻訳 for SH (J-E Speech Translation for SH) is
available overseas (nP. 270).
e20_dv65_7e.fm 427 ページ 2009年3月20日 金曜日 午前10時42分
428
e20_dv65_7e.fm
[428/434]
Overseas Use
~~~~~ ~~~~~ ~~~~~ ~~~
The following items must be checked before departure, at your
country of stay, and after homecoming.
Prepare below in Japan before using the FOMA terminal overseas.
■About contract
If subscribed to the FOMA service after September 1, 2005, a
subscription for “WORLD WING” is not required. However, if a
subscription for “WORLD WING” is canceled at or after a subscription for
the FOMA service, a subscription for “WORLD WING” is required again.
If subscribed to the FOMA service before August 31, 2005 but not
subscribed to “WORLD WING”, a subscription for “WORLD WING” is
required. Some payment plans are not available.
Insert the WORLD WING compatible FOMA card (green/white) to the
FOMA terminal (nP. 47).
■About charging batteries
Precautions for handling the AC adapter nP. 16
Methods for charging the AC adapter nP. 49
■About browsing i-mode sites
To browse i-mode site overseas, the settings for overseas use must be
made from iMenu in advance.
i-mode site: Select [iMenu]/[English]/[Options]/[International
Settings]/[i-mode services Settings].
Refer to “Mobile Phone User’s Guide [International Services]” and
“Mobile Phone User’s Guide [i-mode] FOMA version” for details.
iMenu cannot be displayed by pressing i in the stand-by display
overseas. If Set i-mode button is set to [iMenu/Search], the message
stating that i-mode menu is displayed appears when i is pressed for
the first time overseas. i-mode menu appears from the next time.
■About setting network service
If subscribed to network services, Voice Mail Service, Call Forwarding
Service or other services can be used overseas.
Some network services may not be set or checked depending on
overseas telecommunications carrier. In addition, some network services
are available only in Japan. Refer to “Mobile Phone User’s Guide
[International Services]” and “Mobile Phone User’s Guide [Network
Services]” before departure.
To use network services overseas, set Remote Control (nP. 417,
P. 434) to “Activate” in advance.
■About inquiries overseas
For lost, stolen, and cost settlement, or malfunction of the FOMA terminal
overseas, refer to “Loss or theft FOMA terminal or payment of cumulative
cost overseas” or “Failures encountered overseas” on the back of this
manual. Note that any call or transmission charges incurred after the FOMA
terminal is lost or stolen are charged to the subscriber.
When the FOMA terminal is lost or stolen overseas, promptly contact
DOCOMO and conduct a procedure for canceling the use of service.
Add the “International call access codes for major countries (table 1)” or
“International prefix numbers for the universal number (table 2)” that is
assigned to your country of stay, to the head of your phone number for
inquiries.
For the latest information of the international call access code and the
international prefix number for the universal number, refer to the
DOCOMO “International Services website”.
Before use overseas
Preparation before departure
e20_dv65_7e.fm 428 ページ 2009年3月20日 金曜日 午前10時42分
429
e20_dv65_7e.fm
[429/434]
Overseas Use
International call access codes for major countries (table 1)
The following shows the International call access codes for major countries.
Communication charges to Japan will apply.
International prefix numbers for the universal number (table 2)
The following shows the International prefix number for the universal
number of each country.
Communication charges or other charges to your country of stay will
apply.
Communication charges to your country of stay will apply when calling
from the mobile phone.
Some codes may not be used.
Note that the universal number may not be used for calls from a mobile
phone, payphone or hotel.
The universal number can be used only for countries listed on table 2.
Calling from a hotel may cost you extra call charges requested by the
hotel (You are responsible for the call charges). Confirm with the hotel
before making calls.
Country/Region Code Country/Region Code
Australia 0011 Monaco 00
Belgium 00 Netherlands 00
Brazil 0021/
0014
New Zealand 00
Norway 00
Canada 011 Philippines 00
China 00 Poland 00
Czech 00 Portugal 00
Denmark 00 Russia 810
Finland 00 Singapore 001
France 00 South Korea 001
Germany 00 Spain 00
Greece 00 Sweden 00
Hong Kong 001 Switzerland 00
Hungary 00 Taiwan 002
India 00 Thailand 001
Indonesia 001 Turkey 00
Ireland 00 U.A.E. 00
Italy 00 U.K. 00
Luxemburg 00 U.S.A. 011
Macau 00 Vietnam 00
Malaysia 00
Country/Region Code Country/Region Code
Argentina 00 Luxemburg 00
Australia 0011 Malaysia 00
Austria 00 Netherlands 00
Belgium 00 New Zealand 00
Brazil 0021 Norway 00
Bulgaria 00 Peru 00
Canada 011 Philippines 00
China 00 Portugal 00
Columbia 009 Singapore 001
Denmark 00 South Africa 09
Finland 990 South Korea 001
France 00 Spain 00
Germany 00 Sweden 00
Hong Kong 001 Switzerland 00
Hungary 00 Taiwan 00
Ireland 00 Thailand 001
Israel 014 U.K. 00
Italy 00 U.S.A. 011
e20_dv65_7e.fm 429 ページ 2009年3月20日 金曜日 午前10時42分

430
e20_dv65_7e.fm
[430/434]
Overseas Use
~~~~~ ~~~~~ ~~~~~ ~~~
The service is available in the 3G network and GSM/GPRS network service areas.
The FOMA terminal is set to automatically search for the network when the
power is turned on, and to be connected to the available
telecommunications carrier in your country of stay.
When Auto time correction (nP. 55) is set to [ON], if information with
time and time differences is received from overseas telecommunications
carrier which is being connected, time and time differences on the FOMA
terminal clock are corrected. The correction timing differs depending on
the telecommunications carrier.
Auto time correction may not be available overseas. In such case,
correct the time manually (nP. 55).
If the connected telecommunications carrier is changed when Auto time
correction is set to [ON], a screen notifying that time difference is
adjusted may appear.
When Operator name display (nP. 433) is set to [Display on], the
telecommunications carrier connected appears in stand-by.
When Clock display (nP. 99) is set to [ON(Large)], the local time and
Japan time appear (excluding regions keeping the same standard time
as Japan time). The local time appears on the sub display.
Talk time or stand-by time may be reduced to half the normal time
depending on the network condition of your country of stay.
By default, the FOMA terminal is set to automatically search for the network
and to be connected to the FOMA network when the power is turned on
after homecoming.
If the Network search mode is set to [Manual], switch to the FOMA
network (DOCOMO) manually or change to [Auto].
Set the 3G/GSM setting to [AUTO] or [3G].
Make a call from overseas using the international roaming service.
Make a call from your country of stay to Japan or other countries.
1In stand-by, enter + (press 0 for 1+ seconds),
country code, area code (city code) and other party’s
phone number.
:When the area code (city code) begins with 0, omit the 0 when
dialing (Include 0 when making a call to some countries or regions
such as Italy).
2Press s (Phone)/i (V.phone).
■Making an international call outside your country of stay
using Country code conversion
Set Country code conversion (nP. 67) to [ON] and set the country code
frequently called to easily make an international call.
0 at the beginning of a phone number is automatically converted to the
country code set in Country code conversion.
Example: Make a call from phonebook
1In stand-by, press a/select the other party.
2Press s (Phone)/i (V.phone).
3Select [Call].
:To dial a phone number as stored in the phonebook: Select [Original
number].
■Making a call to the phone in country saved in Set country
code
Save a country code using Set country code (nP. 68) to select a country
code before making an international call.
The following operation is available overseas only.
Using at your country of stay
Setting after homecoming
Making a call at your country of stay
Making a call outside your country of stay
(including Japan)
e20_dv65_7e.fm 430 ページ 2009年3月20日 金曜日 午前10時42分
e20_dv65_7e.fm
[431/434]
431
Continued on next page
Overseas Use
1In stand-by, enter a phone number/C/[Add prefix
setting]/[International Call].
2Select the country code/t.
3Press s (Phone)/i (V.phone).
Make a domestic call at your country of stay in the same way as you do in Japan.
1In stand-by, enter a phone number.
2Press s (Phone)/i (V.phone).
:Always dial the area code (city code), even when the number is in the
same area.
:When making a domestic call at your country of stay using the
phonebook, select [Original number] in step 3 of “Making an
international call outside your country of stay using Country code
conversion” on P. 430.
When making a call to a “WORLD WING” subscriber overseas, make an
international call to Japan regardless of your country of stay.
1In stand-by, enter + (press 0 for 1+ seconds),
country code 81 (Japan), the other party’s mobile
phone number excluding 0.
2Press s (Phone)/i (V.phone).
Receive a call overseas in the same way as you do in Japan.
1Press s to receive an incoming call.
:Speak to the caller.
■Having calls made to your FOMA terminal from Japan
To receive an international call from Japan, have your phone number dialed
just as a domestic call in Japan.
090 (or 080)-XXXX-XXXX
Calling from Received calls may not be available since the phone
number may not be displayed correctly.
■Having calls made to your FOMA terminal from countries
other than Japan
Have the international call access code and 81 (Japan) added to the
beginning of your phone number, and 0 excluded as an international call to
Japan regardless of your country of stay.
International call access code of the country of the caller-81-90 (or
80)-XXXX-XXXX
Set the communication system supporting your area and
telecommunications carrier.
Making a call in your country of stay
Refer to the DOCOMO “International Services website” for details on
available countries, country codes and telecommunications carriers.
Even when Notify caller ID of the network service (nP. 56) is set to
“Send ID”, [Unavailable] or [User unset] appears depending on the
telecommunications carrier, and the caller ID may not be displayed
correctly.
Making a call to a WORLD WING subscriber
overseas
Receiving a call overseas
Even when a caller tried to notify of caller ID, it might not be notified
depending on the used telecommunications carrier.
When a call is received during international roaming, the call is
forwarded from Japan. Call charges to Japan are incurred by the caller
and receiving charges by the receiver.
Having calls to your FOMA terminal
3G/GSM setting
Setting network communication system
e20_dv65_7e.fm 431 ページ 2009年3月20日 金曜日 午前10時42分

432
e20_dv65_7e.fm
[432/434]
Overseas Use
~~~~~ ~~~~~ ~~~~~ ~~~
1In the Custom menu, select [Settings]/[Phone
settings]/[Other settings]/[International Roam.]/
[3G/GSM setting].
2Select the communication method/t.
Set to manually select a telecommunications carrier.
Re-search a network to set another telecommunications carrier.
Check that the Network search mode is set to [Auto] when [A] appears
even after homecoming.
If telecommunications carrier is selected with [Manual] set overseas,
manually set to the FOMA network (DOCOMO) again or change to [Auto]
after homecoming.
1In the Custom menu, select [Settings]/[Phone
settings]/[Other settings]/[International Roam.]/
[Network search mode].
2Select the setting.
;Select [Auto]/[Yes].
• When [Auto] is set: Select [Auto].
;Select [Manual]/select a telecommunications carrier/t.
• The telecommunications carrier is changed.
;Select [Network re-search].
• The host network is changed automatically if the Network search
mode is set to [Auto]. If set to [Manual], select a
telecommunications carrier and press t.
Check the status whether making a call, data transmission or packet
transmission is available.
1In the Custom menu, select [Settings]/[Phone
settings]/[Other settings]/[In-area status]/[Agree].
Specify the priority order of telecommunications carriers
connected to when the Network search mode is set to [Auto].
Save up to 20.
1In the Custom menu, select [Settings]/[Phone
settings]/[Other settings]/[International Roam.]/
[Network search mode]/[PLMN setting].
:To check the saved telecommunications carrier’s detailed
information, select the telecommunications carrier.
2Select the number of the priority order/C.
3Select the saving method.
;Select [PLMN manual select]/enter a country code (MCC)/
t/enter a network code (MNC)/t/select a communication
method/t.
;Select [UPLMN by list]/select a telecommunications carrier/
t/select a communication method/t.
• To search a telecommunications carrier from country name: Select
[UPLMN by list]/C/select a country name/t/select a
telecommunications carrier/t/select a communication
method/t.
;Select [Set VPLMN to PLMN].
• Save the telecommunications carrier currently connected to.
;Select [Change priority]/select a destination/t.
;Select [Delete]/[Delete one].
;Select [Delete]/[Delete all]/enter the terminal security code/
t.
4Select [Yes].
Network search mode
Setting a search method of
telecommunications carrier
Checking available communication services
<In-area status>
PLMN setting
Setting a telecommunications carrier to
preferentially connect to
e20_dv65_7e.fm 432 ページ 2009年3月20日 金曜日 午前10時42分
433
e20_dv65_7e.fm
[433/434]
Overseas Use
Set whether to display a telecommunications carrier name
currently connected to in stand-by during international roaming.
1In the Custom menu, select [Settings]/[Phone
settings]/[Other settings]/[International Roam.]/
[Operator name disp].
2Select the setting/t/[Yes].
■When displaying a telecommunications carrier
Set whether to play the guidance stating that international roaming
is activated when a call is received during international roaming.
Make this setting while still in Japan.
1In the Custom menu, select [Settings]/[Other NW
Services]/[Roaming guidance].
2Select an item/t.
3Select [Yes].
Set the FOMA terminal to reject calls during roaming. Select
whether to bar all incoming calls or only the Videophone calls.
Depending on the overseas telecommunications carrier, the setting
cannot be made.
Unable to use 64K data communication overseas.
1In the Custom menu, select [Settings]/[Phone
settings]/[Other settings]/[International Roam.]/
[Call barring].
2Select an item.
;Select [Activate]/[Yes]/select the barring method/t/enter
the network security code/t.
;Select [Deactivate]/[Yes]/enter the network security code/
t.
;Select [Check setting].
When the FOMA terminal is outside the service area, turned off,
or a received call cannot be answered during international
roaming, the information of the call (received date and time or
caller ID) is notified with SMS.
For details on setting at your country of stay nP. 434
1In the Custom menu, select [Settings]/[Phone
settings]/[Other settings]/[International Roam.]/
[Missed Call Notice].
2Select an item.
;Select [Activate]/[Yes].
;Select [Deactivate]/[Yes].
;Select [Check setting].
Operator name disp
Displaying a telecommunications
carrier during roaming
Roaming guidance
Activating roaming guidance
Call barring
Setting incoming call to reject during
roaming
Telecommunications
carrier name
Bar all incoming All incoming calls are barred.
Bar V.phone/64K Only the Videophone calls are barred.
Missed Call Notice
Using Missed Call Notice function
during roaming
e20_dv65_7e.fm 433 ページ 2009年3月20日 金曜日 午前10時42分

434
e20_dv65_7e.fm
[434/434]
Overseas Use
~~~~~ ~~~~~ ~~~~~ ~~~
Use network services such as Voice Mail and Call Forwarding
Services from overseas.
Depending on the overseas telecommunications carrier, the setting
cannot be made.
Voice Mail and Call Forwarding Services subscription are required to use
Voice Mail (Int.) and Call Forward (Int.).
To use network services overseas, set Remote Control (nP. 417) to
“Activate” in advance.
If operated from overseas, international call charges for your country of
stay are incurred.
1In the Custom menu, select [Settings]/[Phone
settings]/[Other settings]/[International Roam.].
2Select [Voice Mail(Int.)]/select an item of Voice Mail
Service/t.
3
Select [Yes]
/
operate according to the voice guidance.
1In the Custom menu, select [Settings]/[Phone
settings]/[Other settings]/[International Roam.].
2Select [Call Forward (Int.)]/select an item of Call
Forwarding Service/t.
3
Select [Yes]
/
operate according to the voice guidance.
1In the Custom menu, select [Settings]/[Phone
settings]/[Other settings]/[International Roam.].
2Select [Roam. guidance(Int.)].
3
Select [Yes]
/
operate according to the voice guidance.
1In the Custom menu, select [Settings]/[Phone
settings]/[Other settings]/[International Roam.].
2Select [Roam. guidance(Int.)].
3
Select [Yes]
/
operate according to the voice guidance.
1In the Custom menu, select [Settings]/[Phone
settings]/[Other settings]/[International Roam.].
2Select [Caller ID req (Int.)].
3
Select [Yes]
/
operate according to the voice guidance.
1In the Custom menu, select [Settings]/[Phone
settings]/[Other settings]/[International Roam.].
2Select [MissedCallNoticeInt.].
3
Select [Yes]
/
operate according to the voice guidance.
Int’l services
Using network services during roaming
Operating Voice Mail Service in country you stay
<Voice Mail(Int.)>
Operating Call Forwarding Service in country
you stay <Call Forward (Int.)>
Operating roaming guidance in country you stay
<Roam. guidance(Int.)>
Setting remote control in country you stay
<Remote access (Int.)>
Operating Caller ID Request Service in country
you stay <Caller ID req (Int.)>
Setting Missed Call Notice setting in country you
stay <MissedCallNoticeInt.>
e20_dv65_7e.fm 434 ページ 2009年3月20日 金曜日 午前10時42分

472
e22_dv65_7e.fm
[472/512]
Appendix/Troubleshooting
Combine the FOMA terminal with various optional accessories
(sold separately) for expanded personal and business use.
Some products may not be available in certain areas. Contact a
docomo Shop or retailer for details.
Refer to the user’s guide of each product for more details.
*1 Refer to P. 49 for details on charging with an AC adapter.
*2 Connect Earphone Plug Adapter for External connector terminal 01 and
Earphone Plug Adapter to use these options and related devices.
*3 Connect Earphone Plug Adapter for External connector terminal 01 to
use these options and related devices.
*4 The use of USB HUB may not work correctly.
*5 For use only in Japan.
*6 FOMA In-Car Hands-Free Cable 01 is required to charge.
*7 Activate Side key lock to use the In-Car Holder 01.
Play moving pictures saved on microSD Cards on the FOMA
terminal by using supported external devices.*
microSD Cards are sold separately. Purchase microSD Cards at
home electronics shops (nP. 335).
For details on compatible devices, refer to http://k-tai.sharp.co.jp/
support/d/sh-06a/. Or, contact the number below.
Play i-motion created on external devices (including music data in AAC
format) on the FOMA terminal (nP. 253).
* Some moving pictures cannot be played depending on the file format or
the type of external device.
Check the phone number carefully before dialing.
QuickTime™ Player (Free) ver. 6.4 or later (or ver. 6.3+3GPP) provided by
Apple Computer, Inc. is required to play moving pictures on a PC.
QuickTime™ Player can be downloaded from the following web page.
http://www.apple.com/jp/quicktime/download/
To download, a PC connected to the Internet is required. Additional
transmission fees are charged for downloading.
Refer to the Apple Computer, Inc. web page for details on the operating
environment, downloading, and usage instructions.
Introduction of options and related
devices
FOMA AC Adapter 01*1/02*1
Battery Pack SH22
Back Cover SH31
Desktop Holder SH26
Earphone Terminal P001*2
Flat-plug Stereo Earphone Set
P01*3
Flat-plug Earphone/Microphone
with Switch P01*3/P02*3
Stereo Earphone Set P001*2
Earphone/Microphone with Switch
P001*2/P002*2
Earphone/Microphone 01
Stereo Earphone Set 01
Earphone Plug Adapter P001*3
Earphone Plug Adapter for
External connector terminal 01
Earphone Plug Adapter 01
FOMA USB Cable*4
Wireless Earphone Set 02
FOMA AC Adapter 01 for Global
use*1
FOMA DC Adapter 01/02
FOMA Indoor Booster Antenna*5
In-Car Hands-Free Kit 01*6
FOMA In-Car Hands-Free Cable
01
In-Car Holder 01*7
FOMA Dry Battery Adapter 01
Carry Case L 01
Bone conduction microphone/
receiver 01*3/02
FOMA USB Cable with Charge
Function 02*4
FOMA Portable Charging Adapter
01
FOMA Indoor Booster Antenna
(Stand Type)*5
Interfacing to external devices
About moving picture player software
Sharp Data Communication Support Center
TEL: 03-5396-2351
Hours: 10:00 A.M. to 12:00 noon, 1:00 P.M. to 5:00 P.M.,
Monday through Friday
(Closed on weekends, national holidays, and company
holidays)
e22_dv65_7e.fm 472 ページ 2009年3月20日 金曜日 午前11時50分

506
e22_dv65_7e.fm
[506/512]
Appendix/Troubleshooting
This model phone SH-06A meets the MIC’s* technical regulation
for exposure to radio waves.
The technical regulation established permitted levels of radio frequency
energy, based on standards that were developed by independent scientific
organizations through periodic and thorough evaluation of scientific studies.
The regulation employs a unit of measurement known as the Specific
Absorption Rate, or SAR. The SAR limit is 2 watts/kilogram (W/kg)**
averaged over ten grams of tissue. The limit includes a substantial safety
margin designed to assure the safety of all persons, regardless of age and
health. The value of the limit is equal to the international guidelines
recommended by ICNIRP***.
All phone models should be confirmed to comply with the regulation, before
they are available for sale to the public. The highest SAR value for this
model phone is 0.337 W/kg. It was taken by the Telecom Engineering
Center (TELEC), a Registered Certification Agency on the Radio Law. The
test for SAR was conducted in accordance with the MIC testing procedure
using standard operating positions with the phone transmitting at its highest
permitted power level in all tested frequency bands. While there may be
differences between the SAR levels of various phones and at various
positions, they all meet the MIC’s technical regulation. Although the SAR is
determined at the highest certified power level, the actual SAR of the phone
during operation can be well below the maximum value.
For further information about SAR, please see the following websites:
Specific Absorption Rate (SAR) of
mobile phone
World Health Organization (WHO)
http://www.who.int/peh-emf/
ICNIRP
http://www.icnirp.de/
MIC
http://www.tele.soumu.go.jp/e/ele/body/index.htm
TELEC
http://www.telec.or.jp/ENG/Index_e.htm
NTT DOCOMO
http://www.nttdocomo.co.jp/english/product/
SHARP Corporation
http://www.sharp.co.jp/products/menu/phone/cellular/sar/index.html
* Ministry of Internal Affairs and Communications
** The technical regulation is provided in Article 14-2 of the Ministry
Ordinance Regulating Radio Equipment.
*** International Commission on Non-Ionizing Radiation Protection
European RF Exposure Information
Your mobile device is a radio transmitter and receiver. It is designed not to
exceed the limits for exposure to radio waves recommended by
international guidelines. These guidelines were developed by the
independent scientific organization ICNIRP and include safety margins
designed to assure the protection of all persons, regardless of age and
health.
The guidelines use a unit of measurement known as the Specific Absorption
Rate, or SAR. The SAR limit for mobile devices is 2 W/kg and the highest
SAR value for this device when tested at the ear was $$ W/kg
*
.
As SAR is measured utilizing the devices highest transmitting power the
actual SAR of this device while operating is typically below that indicated
above. This is due to automatic changes to the power level of the device to
ensure it only uses the minimum level required to reach the network.
The World Health Organization has stated that present scientific
information does not indicate the need for any special precautions for the
use of mobile devices. They note that if you want to reduce your exposure
then you can do so by limiting the length of calls or using a hands-free
device to keep the mobile phone away from the head.
* The tests are carried out in accordance with international guidelines for
testing.
e22_dv65_7e.fm 506 ページ 2009年3月20日 金曜日 午前11時50分
507
e22_dv65_7e.fm
[507/512]
Appendix/Troubleshooting
Information to User
This equipment has been tested and found to comply with the limits of a
Class B digital device, pursuant to Part 15 of the FCC Rules. These limits
are designed to provide reasonable protection against harmful interference
in a residential installation. This equipment generates, uses and can radiate
radio frequency energy and, if not installed and used in accordance with the
instructions, may cause harmful interference to radio communications.
However, there is no guarantee that interference will not occur in a
particular installation; if this equipment does cause harmful interference to
radio or television reception, which can be determined by turning the
equipment off and on, the user is encouraged to try to correct the
interference by one or more of the following measures:
1. Reorient/relocate the receiving antenna.
2. Increase the separation between the equipment and receiver.
3. Connect the equipment into an outlet on a circuit different from that to
which the receiver is connected.
4. Consult the dealer or an experienced radio/TV technician for help.
FCC RF Exposure Information
Your handset is a radio transmitter and receiver.
It is designed and manufactured not to exceed the emission limits for
exposure to radio frequency (RF) energy set by the Federal
Communications Commission of the U.S. Government.
The guidelines are based on standards that were developed by independent
scientific organisations through periodic and thorough evaluation of
scientific studies. The standards include a substantial safety margin
designed to assure the safety of all persons, regardless of age and health.
The exposure standard for wireless handsets employs a unit of
measurement known as the Specific Absorption Rate, or SAR. The SAR
limit set by the FCC is 1.6 W/kg.
The tests are performed in positions and locations (e.g., at the ear and worn
on the body) as required by the FCC for each model. The highest SAR
value for this model handset when tested for use at the ear is 0.509 W/kg and
when worn on the body, as described in this user guide, is 0.753 W/kg.
Body-worn Operation; This device was tested for typical body-worn
operations with the back of the handset kept 1.5 cm from the body. To
maintain compliance with FCC RF exposure requirements, use accessories
that maintain a 1.5 cm separation distance between the user’s body and the
back of the handset. The use of beltclips, holsters and similar accessories
should not contain metallic components in its assembly.
The use of accessories that do not satisfy these requirements may not
comply with FCC RF exposure requirements, and should be avoided.
The FCC has granted an Equipment Authorization for this model handset
with all reported SAR levels evaluated as in compliance with the FCC RF
emission guidelines. SAR information on this model handset is on file with
the FCC and can be found under the Display Grant section of http://
www.fcc.gov/oet/fccid after searching on FCC ID APYHRO00095.
Additional information on Specific Absorption Rates (SAR) can be found on
the Cellular Telecommunications & Internet Association (CTIA) Website at
http://www.phonefacts.net.
FCC Notice
This device complies with part 15 of the FCC Rules.
Operation is subject to the following two conditions:
(1) This device may not cause harmful interference, and (2) this device
must accept any interference received, including interference that may
cause undesired operation.
Changes or modifications not expressly approved by the manufacturer
responsible for compliance could void the user’s authority to operate the
equipment.
Hereby, Sharp Telecommunications of Europe Ltd, declares
that this SH-06A is in compliance with the essential
requirements and other relevant provisions of Directive
1999/5/EC.
A copy of the original declaration of conformity can be
found at the following Internet address:
http://www.sharp.co.jp/k-tai/
Declaration of Conformity
e22_dv65_7e.fm 507 ページ 2009年3月20日 金曜日 午前11時50分

508
e22_dv65_7e.fm
[508/512]
Appendix/Troubleshooting
The Japan Export Administration Regulations (“Foreign
Exchange and International Trade Law” and its related laws) will
be applied to this product and its accessories under certain
conditions. The Export Administration Regulations are also
applied. To export or reexport this terminal and its accessories,
conduct all legally required procedures at your own risk and
expense. For details on the procedures, contact the Ministry of
Economy, Trade and Industry or the US Department of
Commerce.
Data with third party copyrights such as text, images, music and software
that is downloaded or acquired via Internet web pages, shot by the
FOMA terminal, or acquired from TV or other video cannot be duplicated,
altered or publicly transmitted without rightful party’s consent. Only
duplicating, quoting, etc. for personal use is permitted under copyright
laws.
Even if for personal use, filming and recording may be prohibited for
demonstrations, performances and exhibitions.
Also, shooting another’s image or posting another’s image on Internet
web pages without their consent may constitute a violation of one’s right
to their image.
“FOMA”, “mova”, “ToruCa”, “mopera”, “mopera U”, “FirstPass”,
“Chara-den”, “Deco-mail”, “Chaku-motion”, “i-motion mail”, “i-appli”,
“i-appliDX”, “i-motion”, “i-mode”, “i-Channel”, “iD”, “DCMX”, “WORLD
WING”, “Public mode”, “DoPa”, “WORLD CALL”, “Dual Network”,
“visualnet”, “V-live”, “Security Scan”, “musea”, “sigmarion”, “OFFICEED”,
“IMCS”, “i-area”, “2in1”, “Chokkan Game”, “docomo PRIME series”, the
“i-mode” logo, the “FOMA” logo, the “i-appli” logo, the “DCMX” logo, the
“iD” logo, the “HIGH-SPEED” logo are trademarks or registered
trademarks of NTT DOCOMO, INC.
Free Dial logo mark is a registered trademark of NTT Communications
Corporation.
Export Administration Regulations Intellectual property rights
Copyrights and rights of portrait
Registered trademarks and trademarks
e22_dv65_7e.fm 508 ページ 2009年3月20日 金曜日 午前11時50分
e22_dv65_7e.fm
[509/512]
509
Continued on next page
Appendix/Troubleshooting
Catch Phone (Call Waiting) is a registered trademark of Nippon
Telegraph and Telephone Corporation.
Multitask is a registered trademark of NEC Corporation.
This product is equipped with NetFront Browser, NetFront Sync Client
and NetFront Browser DTV Profile Wireless Edition by ACCESS Co., Ltd.
for an internet browser or other application software.
This product adopts Media: specifications of ACCESS CO., Ltd. for
activating broadcasting contents.
Copyright © 1996-2009 ACCESS CO., LTD.
ACCESS, NetFront and Media: are trademarks or registered trademarks
of ACCESS Co., Ltd. in the United States, Japan and other countries.
Microsoft®, Windows®, Windows Vista®, PowerPoint® and Windows
Media® are trademarks or registered trademarks of Microsoft
Corporation in the U.S.A. and other countries.
Microsoft Excel and Microsoft Word are product names of Microsoft
Corporation in the U.S.A.
Java and all Java-based trademarks and logos are trademarks or
registered trademarks of Sun Microsystems, Inc. in the U.S.A. and other
countries.
QuickTime is a registered trademark of Apple Inc., in the US and other
countries.
QR code is a registered trademark of Denso Wave Inc.
microSDHC Logo is a trademark.
Powered by JBlend™ Copyright 2002-2009 Aplix Corporation.
All rights reserved.
JBlend and JBlend related trademarks are registered
trademarks or trademarks of Aplix Corporation in Japan and
other countries.
“AXIS Font” is a trademark of AXIS Inc., and the “AXIS” font is a font
developed by Type Project Inc.
This handset features LCFONT, developed by Sharp Corporation, to
make the LCD easier to view and read. LCフォント/LCFONT and
are registered trademarks of Sharp Corporation.
DynaFont is a registered trademark of DynaComware Taiwan Inc.
McAfee® is registered trademarks or trademarks of McAfee, Inc. and/or
its affiliates in the U.S.A. and other countries.
Gガイド, G-GUIDE, Gガイドモバイル, G-GUIDE
MOBILE and the G-GUIDE related logos are registered
trademarks of Gemstar-TV Guide International, Inc. and/
or its affiliates in Japan.
Google and Google Map for Mobile are trademarks of Google Inc.
IrSimple™, IrSS™ or IrSimpleShot™ are trademarks of Infrared Data
Association®.
“CROSS YOU” is a trademark of Sony Corporation.
FeliCa, which uses non-contact IC card technology, was created
by Sony Corporation.
FeliCa is a registered trademark of Sony Corporation.
b is a registered trademark of FeliCa Networks, Inc.
Napster is a registered trademark of Napster, LLC. and/or its affiliates in
the US and/or other countries.
Manufactured under license from Dolby Laboratories. Dolby and the
double-D symbol are trademarks of Dolby Laboratories.
This product includes software licensed from Symbian
Software Ltd.
Symbian, Symbian OS and other associated Symbian marks are all
trademarks of Symbian Software Ltd.
© 1998-2008 Symbian Software Ltd. All rights reserved.
Document Viewer is powered by Picsel
Technologies.
Picsel, Picsel Powered, Picsel Viewer, Picsel
Document Viewer and the Picsel cube logo are trademarks or registered
trademarks of Picsel Technologies and/or its affiliates.
e22_dv65_7e.fm 509 ページ 2009年3月20日 金曜日 午前11時50分

510
e22_dv65_7e.fm
[510/512]
Appendix/Troubleshooting
FlashFX® Pro™ is a trademark or registered trademark of the Datalight,
Inc. in the US.
(U.S.Patent Office 5,860,082/6,260,156)
PhotoSolid®, FaceSolid®, FrameSolid®, PhotoScouter™, and
ImageSurf™ are the trademarks or the registered trademarks of Morpho,
Inc.
「Chizu Talk」 is a trademark of ZENRIN DataCom CO.,LTD.
“TOUCH CRUISER”, “Desktop clock”, “VeilView”, “Egao focus shutter”,
“Furimuki shutter”, “Shotdeco”, “Wakeup TV”, “Long Touch Menu”,
“Quick Settings”, and “Quick Stand-by Display Setting” are trademarks or
registered trademarks of Sharp Corporation.
All other company names and product names are trademarks or
registered trademarks of the respective companies.
Under the MPEG-4 Visual Patent Portfolio License, customers have
licensed permission for the following use of this product to engage in
non-profit personal use. Other uses are not permitted.
Encoding MPEG-4 standard video (henceforth referred to as MPEG-4
video).
Decoding an MPEG-4 video that a customer not engaged in personal
commercial activities has encoded.
Decoding an MPEG-4 video obtained from a licensed provider.
For details on other intended uses, contact MPEG LA, LLC.
This product is licensed under the MPEG-4 Systems Patent Portfolio
License for encoding in compliance with the MPEG-4 Systems Standard.
An additional license and payment of royalties are necessary in the
following cases.
Data stored or replicated in physical media which is paid for on a title
by title basis.
Data which is paid for on a title by title basis and is transmitted to an
end user for permanent storage and/or use.
Such additional license may be obtained from MPEG LA, LLC. Contact
MPEG LA, LLC for additional details.
This product is licensed under the AVC patent portfolio license for the
personal and noncommercial use of a consumer to (i) encode video in
compliance with the AVC standard (henceforth referred to as AVC video)
and/or (ii) decode AVC video that was encoded by a consumer engaged
in a personal and noncommercial activity and/or was obtained from a
video provider licensed to provide AVC video. No license is granted or
shall be implied for any other use. Additional information may be
obtained from MPEG LA, L.L.C.
See HTTP://WWW.MPEGLA.COM
This product is licensed under the VC-1 Patent Portfolio License for the
personal and noncommercial use of a consumer to (i) encode video in
compliance with the VC-1 standard (henceforth referred to as VC-1
video) and/or (ii) decode VC-1 video that was encoded by a consumer
engaged in a personal and noncommercial activity and/or was obtained
from a video provider licensed to provide VC-1 video. No license is
granted or shall be implied for any other use. Additional information may
be obtained from MPEG LA, L.L.C.
See HTTP://WWW.MPEGLA.COM
Contains Adobe® Flash® Lite™ and Adobe Reader®
LE technology by Adobe Systems Incorporated
Adobe Flash Lite Copyright © 2003-2008 Adobe
System Incorporated. All rights reserved.
Adobe Reader LE Copyright © 1993-2007 Adobe Systems Incorporated.
All rights reserved.
Adobe, Adobe Reader, Flash, and Flash Lite are either registered
trademarks or trademarks of Adobe Systems Incorporated in the United
States and/or other countries.
This product includes modules developed by the Independent JPEG
Group.
This product uses the GestureTek technology.
Copyright © 2006-2009, GestureTek, Inc. All Rights Reserved.
Others
e22_dv65_7e.fm 510 ページ 2009年3月20日 金曜日 午前11時50分

511
e22_dv65_7e.fm
[511/512]
Appendix/Troubleshooting
This product is equipped with “Fugue” by Kyoto Software Research, Inc.
for a file system function.
Fugue ©1999-2008 Kyoto Software Research, Inc. All rights reserved.
Bluetooth software stack of this product is developed by TOSHIBA
CORPORATION, and contains Toshiba Embedded Bluetooth Stack for
Symbian with the copyright of TOSHIBA CORPORATION.
Content owners use Windows Media digital rights management
(WMDRM) technology to protect their intellectual property, including
copyrights. This device uses WMDRM software to access
WMDRM-protected contents. If the WMDRM software fails to protect the
content, content owners may ask Microsoft to revoke the software’s
ability to use WMDRM to play or copy protected content. Revocation
does not affect unprotected content. When you download licenses for
protected content, you agree that Microsoft may include a revocation list
with the licenses. Content owners may require you to upgrade WMDRM
to access their content. If you decline an upgrade, you will not be able to
access content that requires the upgrade.
CP8 PATENT
This manual refers to each OS (Japanese version) as follows.
Windows Vista is an abbreviation of Windows Vista® (Home Basic,
Home Premium, Business, Enterprise, Ultimate).
Windows XP is an abbreviation of Microsoft® Windows® XP
Professional operating system or Microsoft® Windows® XP Home
Edition operating system.
Windows 2000 is an abbreviation of Microsoft® Windows® 2000
Professional operating system.
The Bluetooth word mark and logos are owned by Bluetooth SIG, Inc.
and any use of such marks by NTT DOCOMO, INC. is under license.
Other trademarks and trade names are those of their respective owners.
Internet dictionary embedded in this product uses the BSD license.
Copyright © 2002,2003, Stefan Haustein, Oberhausen, Rhld., Germany
All rights reserved
• Redistribution and use in source and binary forms, with or without
modification, are permitted provided that the following conditions
are met:
• Redistributions of source code must retain the above copyright
notice, this list of conditions and the following disclaimer.
Redistributions in binary form must reproduce the above copyright
notice, this list of conditions and the following disclaimer in the
documentation and/or other materials provided with the distribution.
• Neither the name of the <ORGANIZATION> nor the names of its
contributors may be used to endorse or promote products derived
from this software without specific prior written permission.
THIS SOFTWARE IS PROVIDED BY THE COPYRIGHT HOLDERS
AND CONTRIBUTORS “AS IS” AND ANY EXPRESS OR IMPLIED
WARRANTIES, INCLUDING, BUT NOT LIMITED TO, THE IMPLIED
WARRANTIES OF MERCHANTABILITY AND FITNESS FOR A
PARTICULAR PURPOSE ARE DISCLAIMED. IN NO EVENT SHALL
THE COPYRIGHT OWNER OR CONTRIBUTORS BE LIABLE FOR
ANY DIRECT, INDIRECT, INCIDENTAL, SPECIAL, EXEMPLARY, OR
CONSEQUENTIAL DAMAGES (INCLUDING, BUT NOT LIMITED TO,
PROCUREMENT OF SUBSTITUTE GOODS OR SERVICES;
LOSS OF USE, DATA, OR PROFITS; OR BUSINESS INTERRUPTION)
HOWEVER CAUSED AND ON ANY THEORY OF LIABILITY,
WHETHER IN CONTRACT, STRICT LIABILITY, OR TORT
(INCLUDING NEGLIGENCE OR OTHERWISE) ARISING IN ANY WAY
OUT OF THE USE OF THIS SOFTWARE, EVEN IF ADVISED OF THE
POSSIBILITY OF SUCH DAMAGE.
e22_dv65_7e.fm 511 ページ 2009年3月20日 金曜日 午前11時50分
526
e24_dv65_7e.fm
[526/537]
Index/Quick Manual
~~~~~ ~~~~~ ~~~~~ ~~~~
Remove the Quick Manual attached to the end of this manual by cutting along the perforations and fold it as shown below.
Carry the Quick Manual “Overseas Use” when the mobile phone is used with the International Roaming (WORLD WING) overseas.
■Folding Quick Manual
Be careful of injuries when cutting out the Quick Manual.
Quick Manual
How to use Quick Manual
(Completed)
<Cut here>
Cut along the perforations.
This manual is produced using recyclable material. Please recycle when no longer needed.
e24_dv65_7e.fm 526 ページ 2009年3月20日 金曜日 午後5時36分

<Cut here>
General Inquiries <docomo Information Center>
※Service available in: English, Portuguese, Chinese, Spanish, Korean.
※Available from mobile phones and PHSs.
From DOCOMO mobile phones
(In Japanese only)
※Unavailable from land-line phones, etc.
From land-line phones
(In Japanese only)
※Available from mobile phones and PHSs.
Please confirm the phone number before you dial.
From DOCOMO mobile phones
(In Japanese only)
※Unavailable from land-line phones, etc.
From land-line phones
(In Japanese only)
※Available from mobile phones and PHSs.
Please confirm the phone number before you dial.
1In stand-by, press a (for 1+ seconds)/[Phone].
2Enter a name/t/[9]/enter a phone
number/t/select a phone type icon/t/
[S]/enter a mail address/t/select a mail
address type icon/t/i/t.
■Other save items
Q: Group ;: Secret
a: Company/school F: Secret code
J: Company/school (Reading) <: Select ring tone
q: Department V: Mail ring tone
r: Title q: Called LED color
N: Postal code -: Called LED pattern
O: Postal address :: Mail/Message LED color
j: Location info +: Mail LED pattern
P: Birthday 8: Picture call set
G: Memo 1: Substitute image
1In stand-by, press r (I)/q (M)/select a
phone number/C/[Add to phonebook]/
[Save new to phone]/add to the phonebook.
1In stand-by, press a/select a name/C/
[Edit data]/[Edit]/select an item/t/edit.
Quick Manual
Registration/Contacts
s0120-005-250 (toll free)
r(No prefix) 151 (toll free)
s0120-800-000 (toll free)
SH-06
A
If you have problems with your FOMA
r(No prefix) 113 (toll free)
s0120-800-000 (toll free)
Adding entries to phonebook
(FOMA terminal handset) Adding entries to phonebook from
Redials/Received calls
Editing phonebook entries
1In the text input screen, press a/select the
input mode.
1Enter a character/*.
1Move the cursor to the text and press c.
:To delete all text: At the end of the message, press c
(for 1+ seconds).
1In the text input screen, press a (for 1+
seconds)/select a phrase/t/t.
1In the text input screen, press i.
:To switch between pictogram and Deco-mail
pictogram: Press i.
:To switch between single- and double-byte symbols:
Press C.
1In the text input screen, press m (for 1+
seconds)/select an emoticon/t.
1In the text input screen, move the cursor to the
start position/C/[Copy]/[Cut(HoldS)]/t.
2Move the cursor to the end position/t.
3Move the cursor to the paste position/* (for
1+ seconds).
Ex.) 今日のテニス3時t
1In the text input screen,
press 2 (twice)/p/[今
日].
:As each hiragana character is
entered, conversion
candidates appear and they
can be selected.
Text input
Changing input mode
Switching upper/lower case
Deleting text
Using phrases
Entering pictograms/symbols
Entering emoticons
Cutting/Copying/Pasting text
Text input example
–1– –2–
–4––3– –5–
e24_dv65_7e.fm 527 ページ 2009年3月20日 金曜日 午後5時36分
<Cut here>
2Press p/[の].
3Press 453/o/[テニス].
:Use o for One-touch conversion.
4Press a (five times)/3.
:Press a (five times) for single-byte numeric mode.
5Press a (twice)/3 (twice)/*/p/[時].
:Use * for dakuten mark.
6Press i/[t].
1In the Custom menu, select [Settings]/[Disp/
LED/Power saver]/[Font style]/[Font style
setting]/select the font/t.
1In the Custom menu, select [Settings]/[Disp/
LED/Power saver]/[Font style]/[Font size]/
[Individual setting]/select the [Input] field/
t/select the font size/t/[Yes].
:To change collectively: In stand-by, press 5 (for 1+
seconds).
1In stand-by, press C/t/t.
■Shooting panoramic pictures
1In the still picture shooting screen, press C/
[Select size]/[Panorama(2560×640)]/t/
move the FOMA terminal to either direction of
left or right/t/t.
1In the Custom menu, select [Camera]/[Shoot
movie]/t/t/[Save].
1In the Custom menu, select [Data box]/[My
picture]/select a still picture/t.
Changing font (font style)
Changing font size
Camera
Shooting still pictures
Shooting moving pictures
Displaying still pictures
1In the Custom menu, select [Data box]/
[i-motion/Movie]/select a moving picture/t.
1In the Custom menu, select [1Seg]/[Channel
setting].
2Select the number to save/C/[Auto channel
set]/[Yes].
3
Select an area
/t/
select a prefecture/district
/
t/t/
[Yes]
/
[Yes].
1In the Custom menu, select [1Seg]/[Channel
setting]/select a channel list/t.
1In stand-by, press C (for 1+ seconds).
:To record a video of 1Seg programs: While watching
1Seg, press i (for 1+ seconds)/(record)/i.
:To record 1Seg programs as a still picture: While
watching 1Seg, press i.
1In the Custom menu, select [Data box]/[1Seg].
2Select the [Video] folder/select a video/t.
1In the Custom menu, select [Data box]/
[MUSIC]/select music data/t.
1In stand-by, press m (for
1+ seconds)/select the
[To] field/t/select the
input method.
;Select [Search
phonebook]/select a
recipient/t.
Playing moving pictures
Watching 1Seg
Performing Automatic channel setting
Selecting a channel list
Watching 1Seg
Watching videos
Music playback
Using MUSIC Player
Key operations for MUSIC Player
To pause/play t
To stop m
To adjust the volume u
To play previous song/return to
the beginning of song
q
To play next song r
To end MUSIC Player H/[Yes]
Mail
Composing and sending i-mode mail
–7–
–10–
–6– –8–
–11––9–
e24_dv65_7e.fm 528 ページ 2009年3月20日 金曜日 午後5時36分
<Cut here>
;Select [Sent messages]/select a recipient/t.
;Select [Rcvd messages]/select a recipient/t.
;
Select [Mail members]
/
select a mail member
/t
.
;Select [Direct input]/enter an address/t.
;Select [++ブログ/SNS投稿先]/select a posting
site/i.
2Select the [Sub] field/t/enter a subject/
t/[Msg]/enter the message/t/i.
1In the text input screen, press C/[Decorate
mail]/select a decoration type/t/specify
decoration/t/input text/t/i.
1In the compose message screen press m (for 1+
seconds)/select the attachment field (No
attachment)/t/select the file to attach.
;Select [Image]/select an image/i.
;Select [Melody]/select a melody/i.
;Select [i-motion]/select i-motion/i.
;Select [ToruCa]/select a ToruCa/i.
;Select [PDF]/select a PDF/i.
;Select [Phonebook]/select a save destination/
t/select a name/t.
;Select [Schedule]/select a save destination/t
(/select a day/i)*/select a schedule/t.
* No operation is needed if [microSD] is selected as the
save destination.
;Select [Bookmark]/select a save destination/
t/select a bookmark/t.
;Select [Document]/select a file/i.
;Select [Other]/select a file/t.
;Select [Start cam (still)]/t/t.
;Select [Start cam (movie)]/t/t/[Save].
1In stand-by, press m/[Compose SMS]/select
the [To] field/t/[Direct input]/enter an
address/t/[Msg]/enter the message/t/
i.
1Mail is automatically received.
2Select [Mail]/select the mail/t.
1In stand-by, press m/[Check new messages].
:SMS: Press m/[Check new SMS].
1In the received mail details screen, press C/
[Reply/Forward].
2Select the reply method/t.
3Compose and send a mail.
1In the received mail details screen, press C/
[Reply/Forward]/[Forward].
2Enter an address and send a mail.
Sending Deco-mail
Attaching a file Composing and sending SMS
Receiving mail automatically
Checking new i-mode mail
Replying to i-mode mail
Forwarding i-mode mail
1In the Custom menu/Basic menu, press a.
1In the Basic menu, enter a function number.
Menu list
Switching between the Custom menu/Basic menu
Recalling a function number
USnd/Vibrator/Manner
USelect volume Received call volume, phone ring vol,
Mail ring vol, Key/Touch sound,
Standby i-motion, Charge start sound,
Charge end sound, Timer sound, GPS
volume
VSelect sound Select ring tone, Select mail tone,
Shutter sound, Timer sound, GPS tone
WVibrator Vibration mode, Mail vibration, GPS
vibrator, Touch vibrator
XManner mode ON (Normal, Silent, Original), OFF
YHeadset setting
ZRing time
setting
Mail ring time set, GPS ring time set
[Set mute ring time
\Hold/On hold
tone
Set on hold tone, Set hold tone
]Sound
playback
Melody stereo fx, Melody equalizer,
Pref playback sound
USnd/Vibrator/Manner VDisp/LED/Power saver
USet screen Stand-by display, Clock display,
Calendar display, Stand-by memo
disp, Stdby toch lnch disp, Desktop
clock, Scrn rotation set, Sub) Caller ID
disp, Sub) Clock display
VFont style Font style setting, Font size
WThemes Kisekae Tool, Call/Rcv display, Send/
Rcv display, Dial image set, Animate
notices, Signal/batt/s clock,
Machi-chara, Color theme setting
XLED settings Called LED, Mail LED, Notice LED,
In-call LED, Alarm/Timer LED, IC card
LED, Open/close LED, GPS LED
YDisplay img
quality
Vibrant image mode, Control by scene
–13– –14–
–16––15– –17–
–12–
e24_dv65_7e.fm 529 ページ 2009年3月20日 金曜日 午後5時36分

<Cut here>
ZLight/Power
saver
Norm (auto bright), Norm (fixed bright),
Eco mode (Pwr saver), Original Eco
mode
[VeilView Linked manner, Display pattern,
Density/View angle
\Menu priority
WGeneral settings
UCheck status Own number, Check memory, Check
settings
VText input
setting
User dictionary, Dwnld dictionary, Edit
phrase, Clear memory terms, Input
method
WAuto power
ON/OFF
Auto power ON, Auto power OFF, Link
alarm/power ON
XDate settings
YSelect language
VDisp/LED/Power saver
ZTOUCH
CRUISER set
Usage settings, Pointer speed, Scroll
speed
[USB mode setting
\Scanning
function
Update, Set auto-update, Set scan,
Version
]Software update
TReset settings
XNW Services
UVoice Mail Check messages, Play Messages,
Activate VoiceMail, Set ring time,
Deactivate VoiceMail, Check setting,
Voice Mail setting, Notification setting,
Notification, V.phone Voice Mail
WGeneral settings
VCall waiting Activate, Deactivate, Check setting
W
Call Forwarding
Activate, Deactivate, Register number,
If FWD number busy, Check setting
XNuis. call
blocking
Register caller, Register selected No,
Delete all entries, Delete last entry,
Check No of entries
YNotify caller ID Check setting, Activate/Deactivate
ZCaller ID
request
Activate, Deactivate, Check setting
[Talk time/cost
XNW Services
\2in1 setting Mode switching, Phonebook 2in1 set,
Stand-by display, Set call/receive No.,
2in1 function OFF, Receive avoidance
]In-call arrival
act
Set arrival act, Arrival Call Act
YOther NW Services
URemote
Control
Activate, Deactivate, Check setting
VDual network Switching, Check setting
WEnglish
guidance
Guidance setting, Check setting
XService
Numbers
ドコモ故障問合せ,
ドコモ総合案内・受付
YAdditional
service
USSD, Reply message
ZMulti number Set multi number, Check setting,
Number setting
XNW Services
[Chaku-moji Create message, Message display
\Roaming
guidance
Activate, Deactivate, Check setting
ZPhone settings
UIn-call settings Noise reduction, Reconnect signal,
Quality alarm
VHeadset sw to call
WIncoming
settings
Any key answer, Auto answer setting,
Melody Call setting
XVideophone set Redial voice call, Set sending image,
Display setting, Subscreen position,
Visual preference, Notify switch mode,
Hands-free V.phone, V.phone while
packet
YOther NW Services
YRecord
message
Record message, Answering duration,
Reply message, V.phone reply image
ZSet when folded
[Self mode
\Other settings Int’l prefix, Sub address, Int’l dial
assist, International Roam., In-area
status
ZPhone settings
–19–
–22–
–18– –20–
–23––21–
e24_dv65_7e.fm 530 ページ 2009年3月20日 金曜日 午後5時36分
<Cut here>
[Security
USecret mode
VUIM Settings PIN1 code input set, Change PIN1
code, Change PIN2 code
WAccept/Reject
calls
Accept calls, Reject calls, Reject
unknown, User unset, Reject
payphone, Reject not support
XShow call/
received
Show rcvd calls, Show redial
YShow sent/
received
Show sent messages,
Show rcvd messages
ZLock settings All lock, Keypad dial lock,
Function lock, Multi lock set,
IC card lock, Multi lock auto-set
[Change security code
\Writing authentic
]Delete all data Delete user data, Del secret data
\i-concier settings
UIncoming
settings
Select volume, Select sound, Vibrator,
Ring time setting, LED setting
VInformation display
]Battery
UBattery level
VSelf-check
Other settings
TOwn number
RInitial setting
Other functions
Manner mode enable/disable # (for 1+ seconds)
Public mode (Drive mode)
activate/deactivate
* (for 1+ seconds)
Display the Lock selection t (for 1+ seconds)
Show i-Channel list c (J)
Show iMenu i
Show i-appli software list screen i (,) (for 1+
seconds)
Activate Quick search $
Activate Multi Assistant
(Multitask)
$ while using a
function
Display Shortcut menu p
Display i-Widget screen o
Display Received messages
history
q (for 1+ seconds)
Display Sent massages history r (for 1+ seconds)
VeilView ON/OFF $ (for 1+ seconds)
Position location y (for 1+ seconds)
※When the confirmation screen appears, select [Yes].
Voice Mail Service is a paid option (monthly fees apply) that
requires subscription.
1In the Custom menu, select [Settings]/[NW
Services]/[Voice Mail].
2Select [Activate VoiceMail]/[Activate
VoiceMail].
:To deactivate: Select [Deactivate VoiceMail].
:To play messages: Select [Play Messages]/
[Play(voice call)]/[Play(videophone)].
:To check messages: Select [Check messages].
Call Waiting is a paid option (monthly fees apply) that requires
subscription.
1In the Custom menu, select [Settings]/[NW
Services]/[Call waiting].
2Select [Activate].
:To deactivate: Select [Deactivate].
:To check settings: Select [Check setting].
Call Forwarding Service is a free option (no monthly fees) that
requires subscription.
1In the Custom menu, select [Settings]/[NW
Services]/[Call Forwarding].
2Select [Activate]/[Activate].
:To deactivate: Select [Deactivate].
:To check settings: Select [Check setting].
Subscription is not required (no monthly fees).
1In the Custom menu, select [Settings]/[NW
Services]/[Caller ID request].
2Select [Activate].
:To deactivate: Select [Deactivate].
:To check settings: Select [Check setting].
Network services
Voice Mail Service
Call Waiting
Call Forwarding Service
Caller ID Request Service
–25– –26–
–28––27– –29–
–24–
e24_dv65_7e.fm 531 ページ 2009年3月20日 金曜日 午後5時36分
<Cut here>
※Icons are shown in the order of Main display and Sub display.
Icon list
Main display
12345 7 b c
pmlkjihgnq or fe
s
<zy
d
vw
u
6 a98
x
t
Sub display
1s tu hi 82 b 2
kl > 2 <
c
1]/aSignal status
2"/bBattery level
37=IJAABNO i-mode/Full Browser
4oSSL/TLS
5GNIQ i-appli
6AB GPS
7J#Ntu Ir communication/Bluetooth
communication/External device
8UhHv[/xi-mode mail/SMS/Area Mail
received
9ABJMessage R/F received
aWGIX
STKL Storage status of i-mode center
b^ (gray)/mmicroSD Card is inserted
^ (pink)/lmicroSD Card is being used
a/rmicroSD Card cannot be
recognized
cClock display
da1Seg being recorded
※Refer to P. 28 to P. 32 of the manual for detailed explanations
of displayed icons.
e]
D to PkRecord message
f[Silent
gbVibrator
hZ/fManner mode
i_/dPublic mode (Drive mode)
jai-appli call
kH/cIC card lock
lRSTUVW
KX/ie Restriction
m;Hands-free
lMute in progress (only when
rotated the display)
MBluetooth hands-free
n\Alarm
o0Music&Video Channel program
reservation
p=; i-mode mail send reservation
qsEarphone/Microphone connection
rxUSB mode
sR/jFOMA card is malfunctioning or not
inserted
B/hNon-FOMA card is inserted
tg/gSelf mode
uL/yBluetooth
vPVeilView
w SQRVUT 3G/GSM
xIH Status of Comics setting
yQToruCa
zCReceiving information
<Multitask
>wOperation in progress
<Emergency contacts in case of
loss or other accidents>
Omakase Lock
※Omakase Lock is a paid service. However, if Omakase
Lock is subscribed while or at the same time as when
the use of FOMA terminal is suspended, or if the user is
a member of docomo Premier Club, the usage fee of
Omakase Lock is not charged. Additionally, if Keitai
Anshin Pack (Mobile Phone Security Package) is
subscribed, Omakase Lock is available for a flat-rate.
Enable/Disable Omakase Lock
s
0120-524-360 Office hours: 24hours
Other contacts
<Contacts: >
<Contacts: >
<Contacts: >
※Please confirm the phone number before you dial.
–31–
–34–
–30– –32–
–35––33–
e24_dv65_7e.fm 532 ページ 2009年3月20日 金曜日 午後5時36分
<Cut here>
From DOCOMO mobile phones
※
If you use SH-06A, you should dial the number +81-3-5366-3114
(to enter “+”, press the “0” key for 1+ seconds).
From land-line phones
<Universal number>
※See P.19 to P.20 and P.21 to P.22 for international call access
codes for major countries (table 1) and international prefix
numbers for the universal number (table 2).
From DOCOMO mobile phones
※
If you use SH-06A, you should dial the number +81-3-6718-1414
(to enter “+”, press the “0” key for 1+ seconds).
From land-line phones
<Universal number>
※See P.19 to P.20 and P.21 to P.22 for international call access
codes for major countries (table 1) and international prefix
numbers for the universal number (table 2).
Refer to the following before using the FOMA terminal overseas.
“Mobile Phone User’s Guide [International Services]”
“Mobile Phone User’s Guide [Network Services]”
PDF file “海外ご利用ガイド” (Guide for overseas use)
pre-installed in [My Documents] of Data box
■Setting in Japan
1In the Custom menu, select [i-mode]/[iMenu/
Search]/[English]/[Options]/[International
Settings]/[i-mode services Settings]/[Yes]/
select the [Enter i-mode Password] field/t/
enter the i-mode password/t/[OK].
Quick Manual “Overseas Use”
Loss or theft FOMA terminal or payment of cumulative
cost overseas <docomo Information Center>
(available 24 hours a day)
International call access code
for the country you stay (table 1)
-81-3-5366-3114* (toll free)
*
You are charged a call fee to Japan when calling from a land-line phone, etc.
International prefix number for
the universal number (table 2)
-800-0120-0151*
* You might be charged a domestic call fee according to the call rate
for the country you stay.
SH-06
A
Failures encountered overseas
<Network Technical Operation Center>
(available 24 hours a day)
International call access code
for the country you stay (table 1)
-81-3-6718-1414* (toll free)
*
You are charged a call fee to Japan when calling from a land-line phone, etc.
International prefix number for
the universal number (table 2)
-800-5931-8600*
* You might be charged a domestic call fee according to the call rate
for the country you stay.
Preparing for overseas use
Setting i-mode
■Setting in overseas
1In the Custom menu, select [i-mode]/[iMenu/
Search]/[English]/[International Settings]/
[i-mode services Settings]/[Yes]/select the
[Enter i-mode Password] field/t/enter the
i-mode password/t/[OK].
■Setting in Japan
1In the Custom menu, select [Settings]/[Other
NW Services]/[Remote Control]/[Activate]/
[Yes].
■Setting in overseas
1In the Custom menu, select [Settings]/[Phone
settings]/[Other settings]/[International
Roam.]/[Remote access (Int.)]/[Yes]/operate
according to the voice guidance.
1In the Custom menu, select [Settings]/[General
settings]/[Date settings]/select the [Auto time
correction] field/t/[ON]/i.
1In the Custom menu, select [Settings]/[General
settings]/[Date settings]/select the [Auto time
correction] field/t/[OFF]/C.
2Select a time zone/t/select a city/t/i.
1In the Custom menu, select [Settings]/[Phone
settings]/[Other settings]/[International
Roam.]/[3G/GSM setting]/select the
communication method/t.
Setting remote access
Correcting date and time automatically
Setting time zone manually
Available network
3G network Available
GSM network Available
GPRS network Available
Setting network communication system
–1– –2–
–4––3– –5–
e24_dv65_7e.fm 533 ページ 2009年3月20日 金曜日 午後5時36分
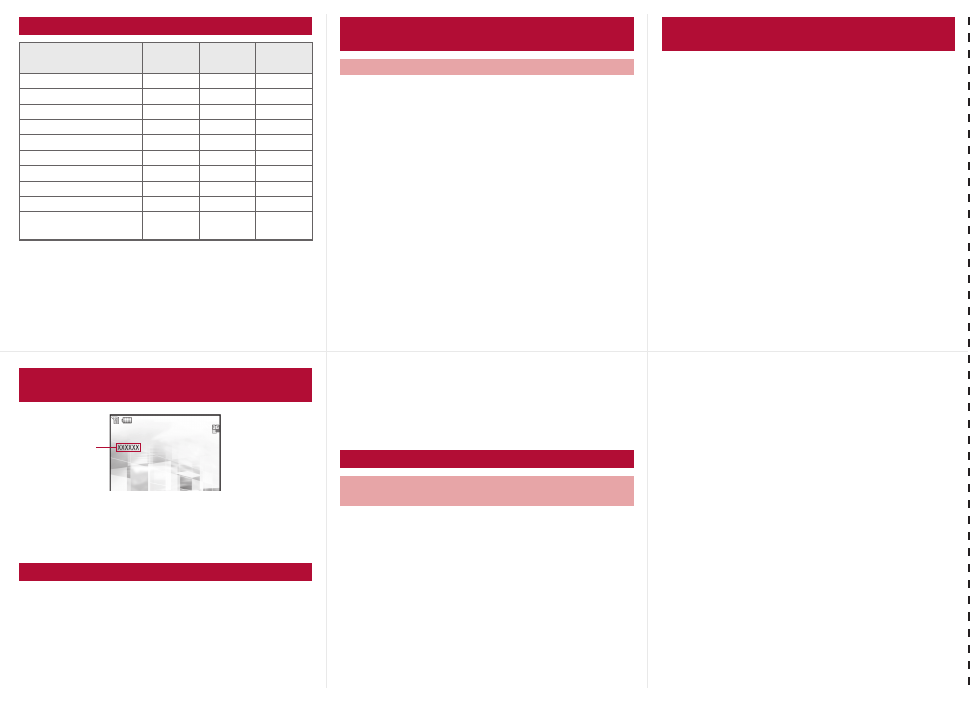
<Cut here>
Unable to use 64K data communication by connecting a PC,
etc. overseas.
Default setting: Auto (Automatically switches telecommunications
carriers)
1In the Custom menu, select [Settings]/[Phone
settings]/[Other settings]/[International
Roam.]/[Network search mode].
2Select [Auto]/[Yes].
:To manually switch telecommunications carriers:
Select [Manual]/select a telecommunications
carrier/t.
:To re-search for the host network: Select [Network
re-search].
1In the Custom menu, select [Settings]/[Phone
settings]/[Other settings]/[International
Roam.]/[Network search mode]/[PLMN
setting]/select the number of the priority
order/C.
2Select [PLMN manual select]/enter a country
code (MCC)/t/enter a network code (MNC)/
t/select a communication method/t/
[Yes].
:To save from a telecommunications carrier list: Select
[UPLMN by list]/select a telecommunications
carrier/t/select a communication method/t/
[Yes].
:To save the telecommunications carrier currently
connected to: Select [Set VPLMN to PLMN]/[Yes].
:To change the priority: Select [Change priority]/
select a destination/t/[Yes].
Available services overseas
Communication
service 3G GSM GPRS
Voice call AAA
Videophone ABB
i-mode mail ABA
i-mode ABA
i-Channel ABA
i-concier ABA
i-Widget ABA
SMS AAA
GPS position location ABA
Packet transmission by
connecting a PC, etc. ABA
Setting a search method of
telecommunications carrier
Network search mode
Setting a telecommunications carrier to
preferentially connect to
1In the Custom menu, select [Settings]/[Phone
settings]/[Other settings]/[International
Roam.]/[Operator name disp]/[Display on]/
[Yes].
If Network search mode is set to [Auto], reset Network search
mode to the FOMA network (DOCOMO) automatically when the
power is turned on after homecoming.
■Setting to FOMA network (DOCOMO) manually
1In the Custom menu, select [Settings]/[Phone
settings]/[Other settings]/[International
Roam.]/[Network search mode]/[Manual]/
[DOCOMO].
■Using + to make an international call
1In stand-by, press 0 (for 1+ seconds)/enter
the country code, area code (city code) and other
party’s phone number/s (Phone)/i
(V.phone).
:When the area code (city code) begins with 0, omit the
0 when dialing (Include 0 when making a call to some
countries or regions such as Italy).
■Making a call outside your country of stay using
country code conversion
0 at the beginning of a phone number is automatically converted to
the country code set in Country code conversion.
Example: Make a call from the phonebook
1In stand-by, press a/select the other party/
s (Phone)/i (V.phone)/[Call].
■Making an international call
Save a country number using Set country code to select a country
code before making an international call.
The following operation is available overseas only.
1In stand-by, enter a phone number/C/[Add
prefix setting]/[International Call]/select the
country code/t/s (Phone)/i (V.phone).
Displaying a telecommunications carrier
name in stand-by
Setting after homecoming
Telecommu-
nications
carrier name
Making a call
Making a call outside your country of stay
(including Japan)
–7–
–10–
–6– –8–
–11––9–
e24_dv65_7e.fm 534 ページ 2009年3月20日 金曜日 午後5時36分
<Cut here>
1In stand-by, enter a phone number/s (Phone)/
i (V.phone).
■Making a call to the phone in your country of
stay using phonebook
1In stand-by, press a/select the other party/
s (Phone)/i (V.phone)/[Original number].
■
Making a call to a WORLD WING subscriber overseas
Even when making a call to the phone in your country of stay,
make an international call to Japan if the call recipient is a
“WORLD WING” subscriber overseas.
1In stand-by, press 0 (for 1+ seconds)/81/
enter the other party’s mobile phone number
excluding the first 0/s (Phone)/i (V.phone).
1Press s to answer an incoming call.
■Having calls made to your FOMA terminal from
Japan
Enter the phone number in the same way as it is entered in Japan
and make a call.
■Having calls made to your FOMA terminal from
countries other than Japan
Enter international call access code of the country of the
caller-81-user’s phone number excluding the first 0 and make a
call.
Make this setting while still in Japan.
Depending on the overseas telecommunications carrier, the
setting cannot be made.
※When the confirmation screen appears, select [Yes].
1In the Custom menu, select [Settings]/[Other
NW Services]/[Roaming guidance].
2Select [Activate].
:To deactivate: Select [Deactivate].
:To check settings: Select [Check setting].
Depending on the overseas telecommunications carrier, the
setting cannot be made.
1In the Custom menu, select [Settings]/[Phone
settings]/[Other settings]/[International
Roam.]/[Call barring].
2Select [Activate]/[Yes]/select the barring
method/t/enter the network security code/
t.
:To deactivate: Select [Deactivate]/[Yes]/enter the
network security code/t.
:To check settings: Select [Check setting].
For details on setting at your country of stay nP. 16
1In the Custom menu, select [Settings]/[Phone
settings]/[Other settings]/[International
Roam.]/[Missed Call Notice].
2Select [Activate]/[Yes].
:To deactivate: Select [Deactivate]/[Yes].
:To check settings: Select [Check setting].
Making a call in your country of stay
Receiving calls
Setting roaming guidance
Call barring
Missed Call Notice
To use network service overseas, set Remote Control to
“Activate” in advance.
※When the confirmation screen appears, select [Yes].
※Operate according to the voice guidance.
1In the Custom menu, select [Settings]/[Phone
settings]/[Other settings]/[International
Roam.]/[Voice Mail(Int.)].
2Select [Activate Voice Mail].
:To deactivate: Select [Deactivate].
:To play messages: Select [Play Messages].
:To set the service: Select [Voice Mail settings].
1In the Custom menu, select [Settings]/[Phone
settings]/[Other settings]/[International
Roam.]/[Call Forward (Int.)].
2Select [Activate].
:To deactivate: Select [Deactivate].
:To set the service: Select [Settings].
1In the Custom menu, select [Settings]/[Phone
settings]/[Other settings]/[International
Roam.]/[Roam. guidance(Int.)].
1In the Custom menu, select [Settings]/[Phone
settings]/[Other settings]/[International
Roam.]/[MissedCallNoticeInt.].
The following shows “Country code” used when making
international calls or setting International dial assist.
Using network service
Voice Mail (Int.)
Call Forward (Int.)
Roaming guidance (Int.)
Missed Call Notice (Int.)
Country codes of major countries
Country/Region Code Country/Region Code
Australia 61 Hong Kong 852
Austria 43 Hungary 36
Belgium 32 India 91
Brazil 55 Indonesia 62
Canada 1 Italy 39
China 86 Japan 81
Czech 420 Macau 853
Egypt 20 Malaysia 60
Fiji 679 Maldives 960
Finland 358 Netherlands 31
France 33 New Caledonia 687
Germany 49 New Zealand 64
Greece 30 Norway 47
–13– –14–
–16––15– –17–
–12–
e24_dv65_7e.fm 535 ページ 2009年3月20日 金曜日 午後5時36分
<Cut here>
※For other country codes and details, refer to the DOCOMO
“International Services website”.
The following shows the International call access codes for major
countries.
Peru 51 Tahiti
(French Polynesia)
689
Philippines 63
Russia 7 Taiwan 886
Singapore 65 Thailand 66
South Korea 82 Turkey 90
Spain 34 U.K. 44
Sweden 46 U.S.A. 1
Switzerland 41 Vietnam 84
Country/Region Code Country/Region Code International call access codes for major
countries (table 1)
Country/Region Code Country/Region Code
Australia 0011 Hungary 00
Belgium 00 India 00
Brazil 0021/
0014
Indonesia 001
Ireland 00
Canada 011 Italy 00
China 00 Luxemburg 00
Czech 00 Macau 00
Denmark 00 Malaysia 00
Finland 00 Monaco 00
France 00 Netherlands 00
Germany 00 New Zealand 00
Greece 00 Norway 00
Hong Kong 001 Philippines 00
Poland 00 Taiwan 002
Portugal 00 Thailand 001
Russia 810 Turkey 00
Singapore 001 U.A.E. 00
South Korea 001 U.K. 00
Spain 00 U.S.A. 011
Sweden 00 Vietnam 00
Switzerland 00
Country/Region Code Country/Region Code
The following shows the International prefix number for the
universal number of each country.
For lost, stolen, and cost settlement, or
malfunction of the FOMA terminal overseas,
refer to “Loss or theft FOMA terminal or
payment of cumulative cost overseas” on the
cover of Quick Manual “Overseas Use” or
“Failures encountered overseas” on P.1. Note
that transmission/calling charges after the
FOMA terminal is lost or stolen are incurred to
the subscriber.
When the FOMA terminal is lost or stolen overseas,
promptly contact DOCOMO and conduct a
procedure for canceling the use of service.
Add the “International call access codes for major
countries (table 1)” or “International prefix numbers
for the universal number (table 2)” that is assigned
to your country of stay, to the head of your phone
number for inquiries.
International prefix numbers for the
universal number (table 2)
Country/Region Code Country/Region Code
Argentina 00 Hong Kong 001
Australia 0011 Hungary 00
Austria 00 Ireland 00
Belgium 00 Israel 014
Brazil 0021 Italy 00
Bulgaria 00 Luxemburg 00
Canada 011 Malaysia 00
China 00 Netherlands 00
Columbia 009 New Zealand 00
Denmark 00 Norway 00
Finland 990 Peru 00
France 00 Philippines 00
Germany 00 Portugal 00
Singapore 001 Switzerland 00
South Africa 09 Taiwan 00
South Korea 001 Thailand 001
Spain 00 U.K. 00
Sweden 00 U.S.A. 011
Country/Region Code Country/Region Code About inquiries overseas
–19–
–22–
–18– –20–
–23––21–
e24_dv65_7e.fm 536 ページ 2009年3月20日 金曜日 午後5時36分
e24_dv65_7e.fm
[537/537] ~~~~~ ~~~~~ ~~~~~ ~~~
When using your FOMA terminal, please be considerate of those
around you.
■When in an area where use is prohibited
There are places where the use of mobile phones is prohibited. Be sure to turn
off your FOMA terminal in the following places.
★On an aircraft ★In a hospital
※There are people outside hospital wards who also use electric medical
equipment. Please make sure that your FOMA terminal is turned off in the
lobby and waiting room.
■While driving
Using a mobile phone in hand while driving is regarded as a punishable act.
※If there is no choice but to receive a call, use hands-free and tell the caller
that you will “call back”, and then pull over to a safe place to make a call.
■When in crowded places such as rush-hour trains in case
somebody nearby is using an implanted cardiac pacemaker or
implanted cardioverter-defibrillator
Your FOMA terminal may affect the operation of such equipment.
■When in public places such as theaters, movie theaters, or
museums
Use of your FOMA terminal in quiet public places will annoy others.
■When using your FOMA terminal in a restaurant or a hotel
lobby, lower your voice.
■
In crowded places, be careful not to obstruct other pedestrians.
Check/Change the subscription, apply for various services, and request various information materials online.
iMenu
/
お客様サポート
(user support)
/
お申込・お手続き
(Applications/Procedures)
/
各種お申込・お手続き
(Various Applications/Procedures)
My docomo (http://www.mydocomo.com/)/各種お申込・お手続き (Various Applications/Procedures)
※You will need your “Network Security Code” to access the site from i-mode.
※No packet communication charges are incurred when accessing the site from i-mode. Accessing from overseas will incur charges.
※You will need your “docomo ID/Password” to access the site from PC.
※If you do not have or you have forgotten your “Network Security Code” or “docomo ID/Password”, contact the number listed in General Inquiries on the back of this manual.
※The site may not be available depending upon the content of your subscription.
※You may not be able to access some site services due to system maintenance, etc.
From i-mode
Packet communication charges free
From a PC
Please follow proper etiquette
Turn off your FOMA terminal in the following places
Be careful of where you use your FOMA terminal and the
volume of your voice and the ring tone
Be considerate of the privacy of the individuals around you
tPlease be considerate of the privacy of individuals around
you when taking and sending images using a
camera-enabled mobile phones.
The following functions will help you to keep your
manners in public
There are useful functions you can use to set your FOMA
terminal not to answer incoming calls, and to silence all sounds.
●Manner mode (nP. 96)/Original manner mode (nP. 97)
Silences the Key/Touch sound and all the sounds from the FOMA terminal,
and Record message is set (Manner mode). When in the Manner mode,
automatically set functions (Record message, Vibrator, Mic sensitivity up,
Ring tone, Mail ring tone, alarm tone, Key/Touch sound and Low battery
alarm) can be set to ON (enable)/OFF (disable) (Original manner mode).
●Public mode (Drive mode/Power OFF) (nP. 72, P. 73)
The caller hears a guidance message stating that the receiver is driving, or
in the place where the receiver should refrain from using the mobile phone
or turn off the power. The call is disconnected.
●Vibration mode (nP. 95)
Notifies incoming calls by vibration.
●Record message (nP. 74)
When you are unable to answer a call, the Record message function
records the caller’s message.
※You can also use optional services such as Voice Mail Service
(nP. 410) and Call Forwarding Service (nP. 412).
e24_dv65_7e.fm 537 ページ 2009年3月20日 金曜日 午後5時36分
FCC Notice
This device complies with part 15 of the FCC Rules.
Operation is subject to the following two conditions:
(1) This device may not cause harmful interference, and (2) this device
must accept any interference received, including interference that may
cause undesired operation.
Changes or modifications not expressly approved by the manufacturer
responsible for compliance could void the user's authority to operate the
equipment.
Information to User
This equipment has been tested and found to comply with the limits of a
Class B digital device, pursuant to Part 15 of the FCC Rules. These limits
are designed to provide reasonable protection against harmful interference
in a residential installation. This equipment generates, uses and can
radiate radio frequency energy and, if not installed and used in accordance
with the instructions, may cause harmful interference to radio
communications.
However, there is no guarantee that interference will not occur in a
particular installation; if this equipment does cause harmful interference to
radio or television reception, which can be determined by turning the
equipment off and on, the user is encouraged to try to correct the
interference by one or more of the following measures:
1. Reorient/relocate the receiving antenna.
2. Increase the separation between the equipment and receiver.
3. Connect the equipment into an outlet on a circuit different from that to
which the receiver is connected.
4. Consult the dealer or an experienced radio/TV technician for help.
FCC RF Exposure Information
Your handset is a radio transmitter and receiver.
It is designed and manufactured not to exceed the emission limits for
exposure to radio frequency (RF) energy set by the Federal
Communications Commission of the U.S. Government.
The guidelines are based on standards that were developed by
independent scientific organisations through periodic and thorough
evaluation of scientific studies. The standards include a substantial safety
margin designed to assure the safety of all persons, regardless of age and
health.
The exposure standard for wireless handsets employs a unit of
measurement known as the Specific Absorption Rate, or SAR. The SAR
limit set by the FCC is 1.6 W/kg.
The tests are performed in positions and locations (e.g., at the ear and
worn on the body) as required by the FCC for each model. The highest
SAR value for this model handset when tested for use at the ear is 0.509
W/kg and when worn on the body, as described in this user guide, is 0.753
W/kg.
Body-worn Operation; This device was tested for typical body-worn
operations with the back of the handset kept 1.5 cm from the body. To
maintain compliance with FCC RF exposure requirements, use
accessories that maintain a 1.5 cm separation distance between the user's
body and the back of the handset. The use of beltclips, holsters and similar
accessories should not contain metallic components in its assembly.
The use of accessories that do not satisfy these requirements may not
comply with FCC RF exposure requirements, and should be avoided. Note
that the highest SAR value when worn on the body using the supplied
carrying case (Type No.: Frame Holder 01) is 1.01 W/kg.
The FCC has granted an Equipment Authorization for this model handset
with all reported SAR levels evaluated as in compliance with the FCC RF
emission guidelines. SAR information on this model handset is on file with
the FCC and can be found under the Display Grant section of http://
www.fcc.gov/oet/fccid after searching on FCC ID APYHRO00095.
Additional information on Specific Absorption Rates (SAR) can be found
on the Cellular Telecommunications & Internet Association (CTIA) Website
at http://www.phonefacts.net.
The extract of the additional operation manual when the
carrying case (Type No.:Frame Holder 01) will be attached.