Sharp TCG037 Video Cassette Recorder w/ Remote Locator Transmitter User Manual Manual b
Sharp Corporation Video Cassette Recorder w/ Remote Locator Transmitter Manual b
Sharp >
Contents
- 1. revised manual part 1
- 2. revised manual part 2
revised manual part 2
Connecting the VCR
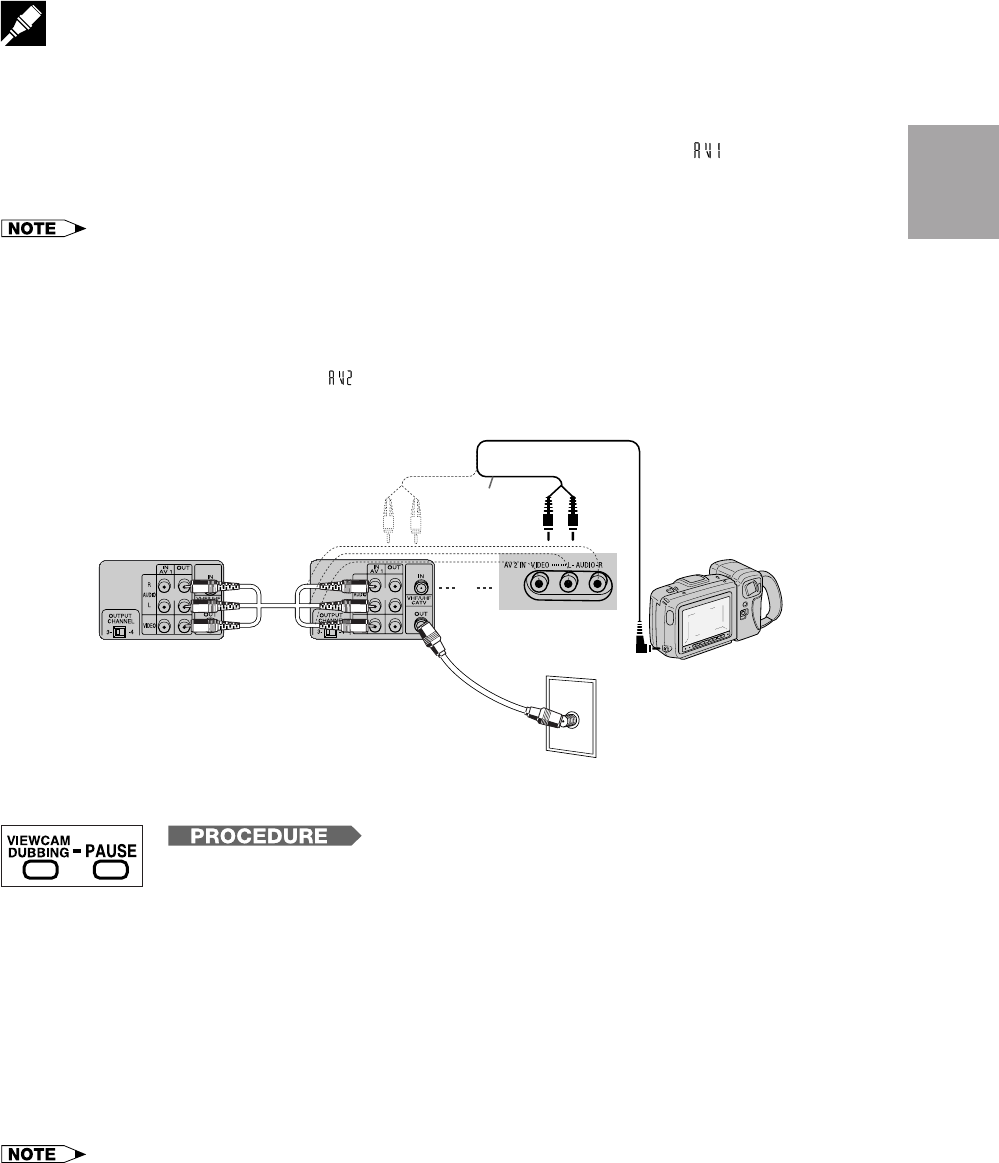
Tape Dubbing
Your VCR can dub (copy) video material from another video device. It can also output video and audio signals
for recording on other video or audio equipment.
!Switch your VCR to the auxiliary input by pressing INPUT on the remote control. lights up on the multi-
function display. (You can also use CHANNEL ∂/ƒ on the VCR or CH ∂/ƒ on the remote control.)
@Begin recording on the dubbing VCR and playback on the source VCR simultaneously.
•When using special playback functions (still picture, video search, frame advance, and variable slow motion) during
dubbing, a blue screen may appear.
Set BLUE SCREEN mode on the dubbing VCR (for recording) to OFF. (See Mode Selection.)
•To use the TV as a monitor while dubbing, press TV/VCR to “VCR” on the dubbing VCR.
•Use an RCA pin–type connection cable (not supplied with VCR, but supplied with VIEWCAM) to connect source VCR to
dubbing VCR.
•Refer to the manual of the VCR connected to this unit when dubbing a tape.
•You can also use the front AV jacks. Select “ ” (Aux. 2 input) by pressing INPUT twice.
•If source VCR is a monaural mode, connect the audio cable to “AUDIO-L” on the front AV jacks of the dubbing VCR.
Setting Up
Auto VIEWCAM Dubbing
!Connect the AV cable to the front AV jacks on the VCR when the VCR is off. The VCR
will automatically turn on and enter the external input mode (AV2).
@When using a Sharp VIEWCAM as the dubbing source, press VIEWCAM DUBBING
on the remote control. The VIEWCAM will automatically begin playback and the VCR
will begin recording.
#To pause dubbing, press PAUSE on the remote control. VIEWCAM playback will
enter still mode and VCR recording will enter pause mode.
$When you are finished dubbing, press STOP on the VCR and VIEWCAM, and remove
the cassette.
%To dub another scene from a different part of the VIEWCAM tape, fast forward the
VIEWCAM tape to the desired scene and set the VIEWCAM in STILL mode. Then
press VIEWCAM DUBBING to begin dubbing.
• If the AV cable is connected to the front AV jacks when the VCR is on, the VCR will automatically enter the external input
mode (AV2).
• Before using the VIEWCAM DUBBING function, place the VIEWCAM next to the VCR with the VIEWCAM photoreceptor
facing in the direction of the infrared transmitter on the VCR remote control.
• A few seconds of video at the beginning of the VIEWCAM tape may be lost when dubbing to the VCR tape.
• To begin dubbing at an exact point on the tape, set the VIEWCAM in STILL mode at the desired scene to be recorded and
set the VCR in REC PAUSE at the point on the tape to begin recording, then press VIEWCAM DUBBING.
ANT/CABLE
TV Rear
Source VCR
(for playback) Sharp Viewcam
(for playback)
To Front
Dubbing VCR
(for recording)
or
Audio/Video
cable (supplied
with Viewcam)
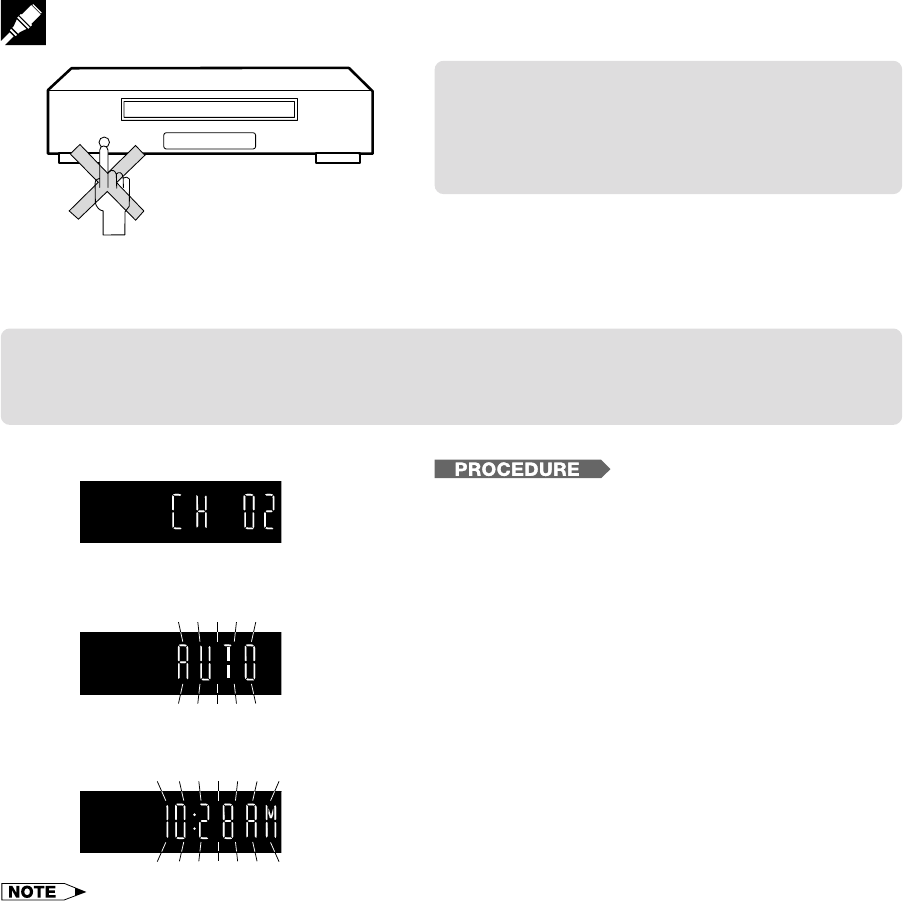
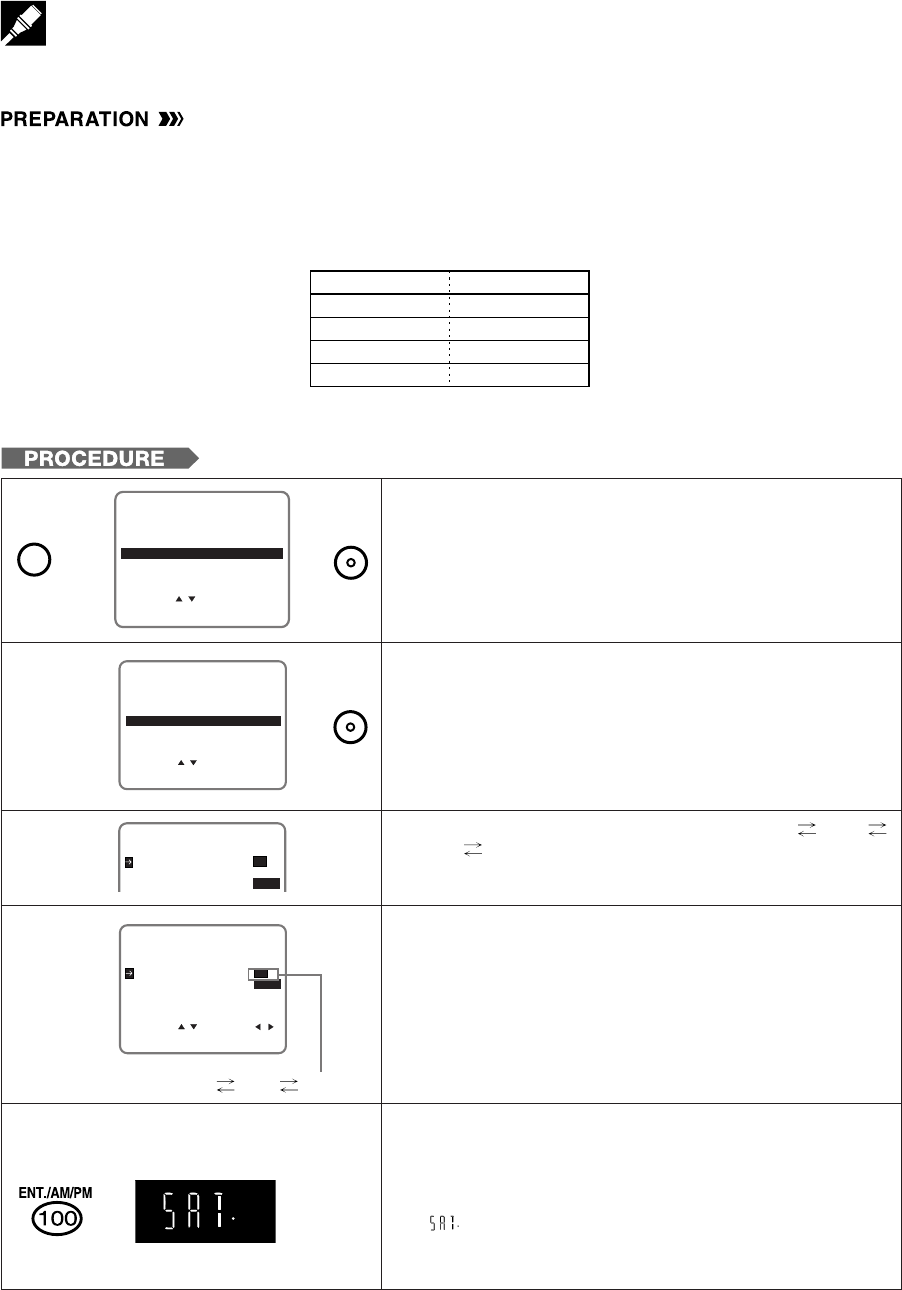
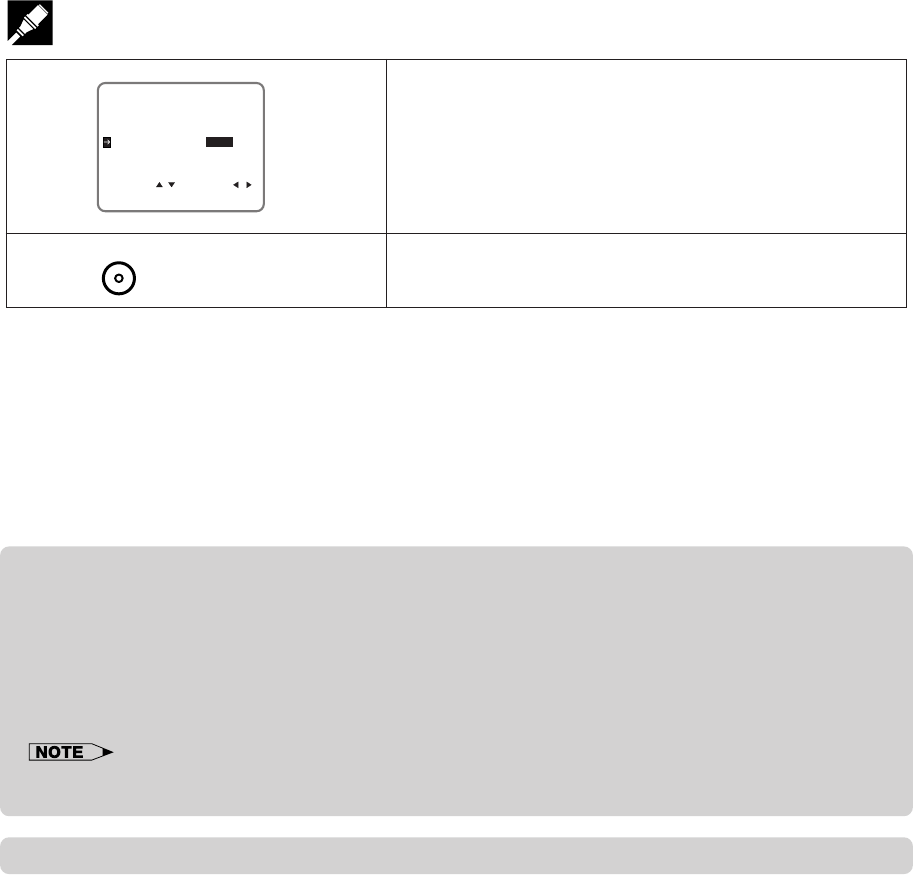
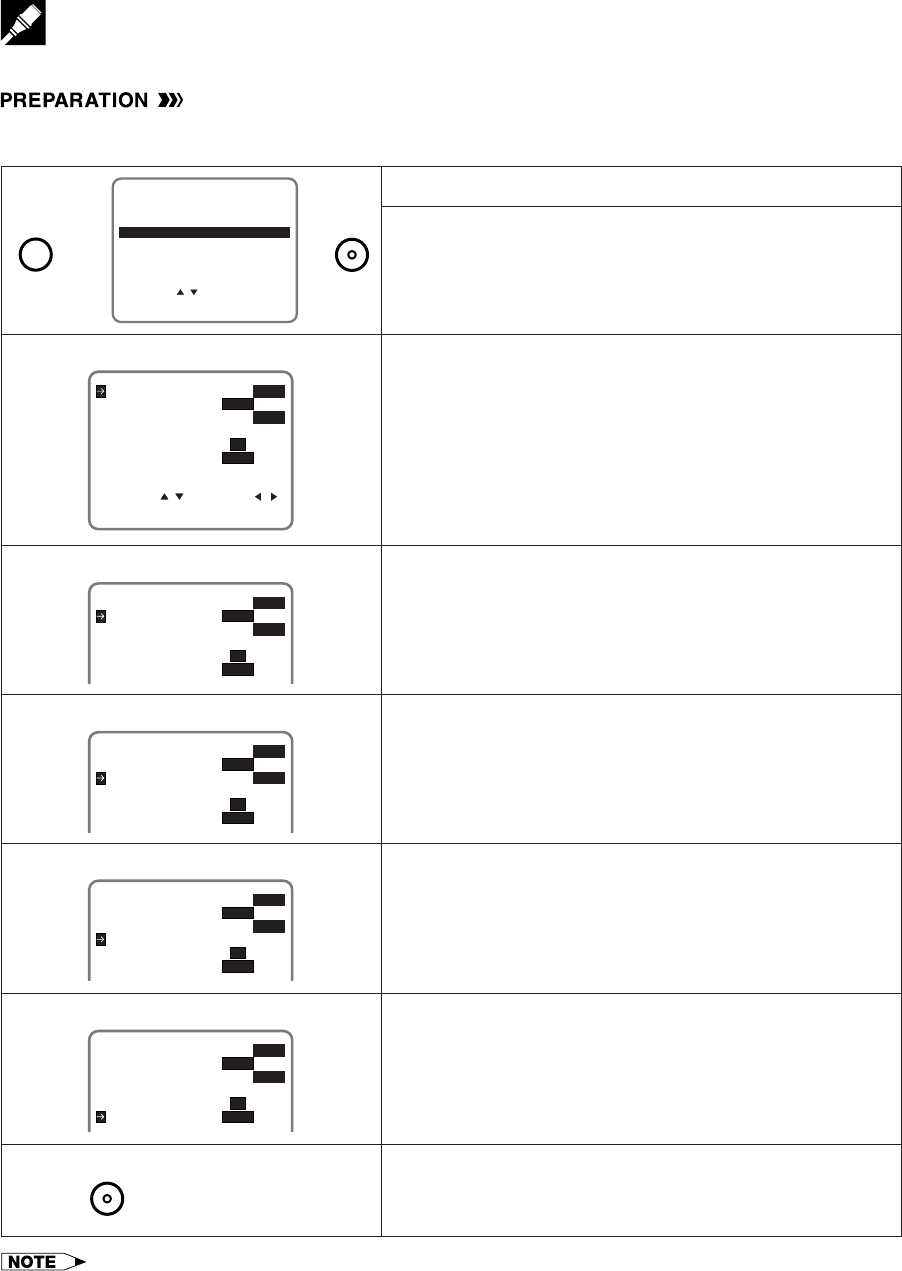
EZ Set Up (With Auto Clock Setting)
The EZ Set Up function automatically sets the tuner channels and clock when the antenna cable is connected to
the rear of the VCR and the power plug is then connected to an AC outlet.
IMPORTANT (Caution during EZ Set Up):
• Do not press the POWER button on the
VCR or remote control.
• Do not insert a video cassette into the VCR.
IMPORTANT:
When using a cable box:
•See Cable TV Connections and Cable Box Set-up Function.
•Leave POWER on the cable box turned on.
TIMER
REC
VCR
S
PEP
During Auto Channel Setting
EZ Set Up complete
!Make sure that the antenna cable is connected. For
connection configuration, refer to Connecting the
VCR.
@Connect the VCR power plug to an AC outlet.
#The tuner channels and clock will automatically be
set.
•This VCR can monitor and use time-signals (EDS
signals), which are provided by some TV stations, to
automatically adjust the VCR clock. This VCR
automatically searches EDS signals, but if you are in
a hurry to use timer recording or know the channel
of the EDS signal carrier in your area, follow the
procedure in Auto Clock Setting or Manual Clock
Setting.
•If power is supplied to the VCR before the cable is connected. EZ Set Up will not be able to preset the channels into
memory. If this occurs unplug the VCR from the power source and wait a few minutes. Check the cable /antenna connection
and supply power to the VCR. EZ Set Up will automatically begin again.
•If the power is turned on during EZ Set Up, the Auto Channel setting will be interrupted and the tuner channels will not be
able to be preset.
•Auto Clock Setting may take several minutes.
•If the Auto Clock Setting is not completed within 30 minutes, there may be no channels with EDS signals. In this case, set the
clock manually. (See Manual Clock Setting.)
•If the antenna signal is weak, the Auto Clock Setting function may not operate.
•During initial channel setting, the channels are set into the AIR channel setting. To watch a cable TV channel, select “CATV”
on the CHANNEL PRESET screen. (See Setting the Channels.)
During Auto Clock Setting
f
f
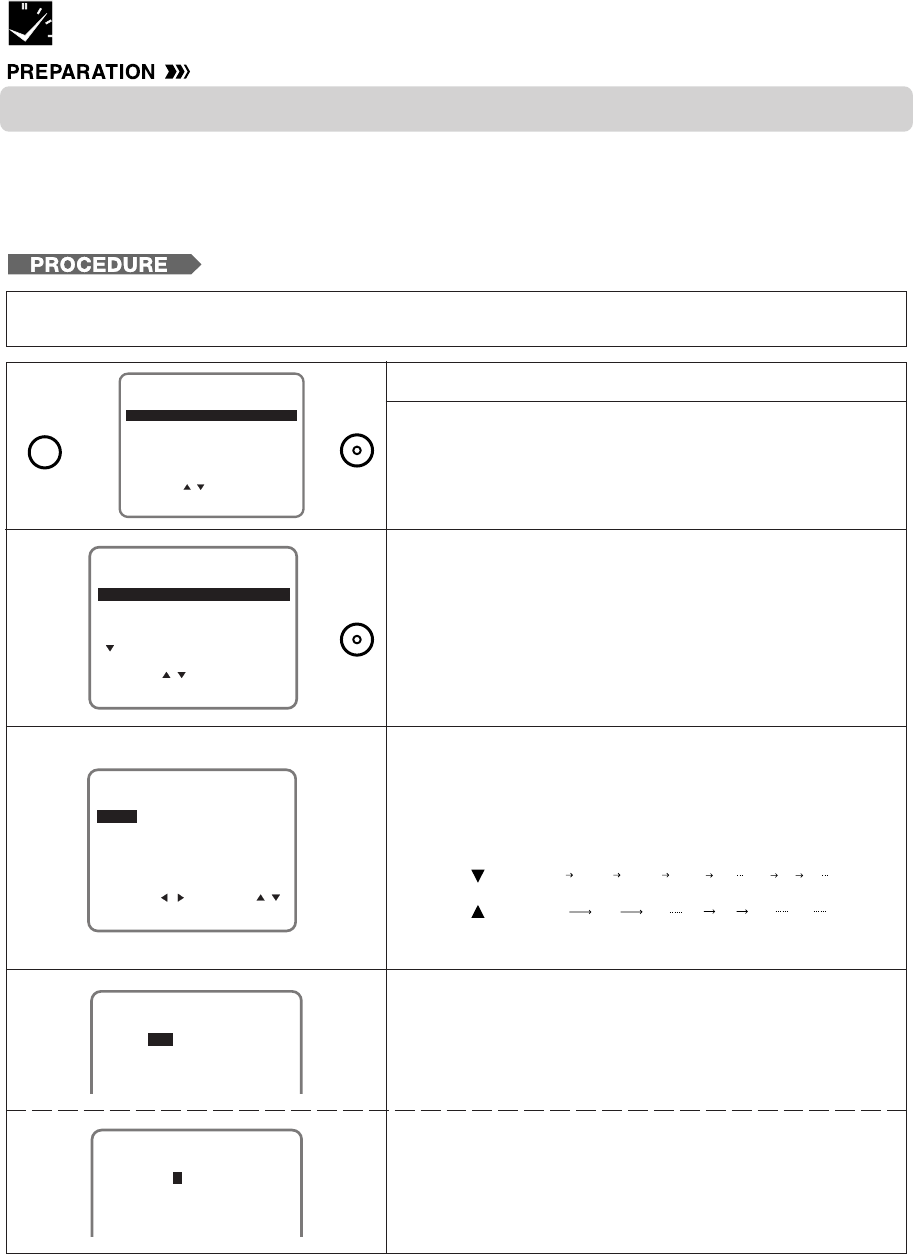
Setting the Language
When you use the VCR for the first time or the power is
interrupted for more than 20 seconds (power failure, etc.),
you should set the language to be used for the MENU
screen.
•Turn on your TV and select the video channel.
(See Setting the 3 ↔ 4 Output Channel Selector.)
•Press POWER and then TV/VCR to select “VCR”.
(“VCR” will light on the multi-function display.)
g
!Press MENU.
LANGUAGE screen will appear.
@Select the language with ∂/ƒ.
Ex.: ENGLISH
#Press SET to enter. The screen returns to normal.
ESPANOL
LANGUAGE
ENTER :SET EXIT :MENU
FRANÇAIS
SELECT :
ENGLISH
∂
ƒ
Normal
Screen
g
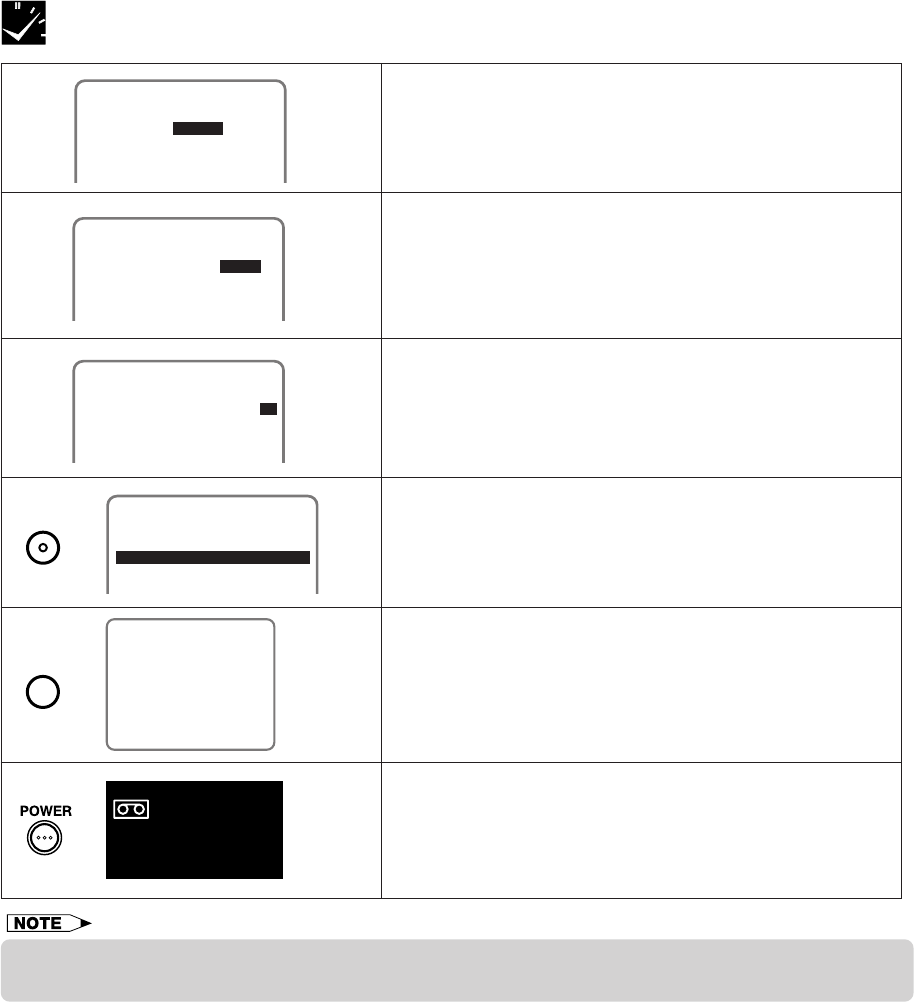
Setting the Clock
Auto Clock Setting (If you DO know a channel that carries EDS signals)
•Make sure that the antenna cable is connected and connect the power cord.
•Turn on your TV and select the video channel. (See Setting the 3 ↔ 4 Output Channel Selector.)
•Press POWER and then TV/VCR to select “VCR”. (“VCR” will light on the multi-function display.)
!Press MENU.
Select “CLOCK” with ∂/ƒ and then press SET.
@Select “AUTO” with ∂/ƒ and then press SET.
#Set EDS CH SET mode to “MANUAL” with ß/©
and then press ƒ.
MANUAL
CLOCK
AUTO
∂
ƒ
EDS CH SET AUTO MANUAL
EDS CH 02
AL
ß
©g
g
ƒ
ƒ
∂
MENU ©
ß
SET
•If you press MENU to exit the LANGUAGE screen in Step #, the data will not be stored.
•You can also use the ∂ (CHANNEL ∂), ƒ (CHANNEL ƒ), © (FF ), ß (REW ), MENU or SET buttons on the VCR to
set the On Screen Display (OSD).
(Remote Control)
g
∂
ƒ
g
SET UP
MENU
ENTER :SET EXIT :MENU
CHANNELS
SELECT :
CLOCK
LANGUAGE
TIMER
VCR PLUS+
MENU
SET
IMPORTANT:
When using a cable box:
•See Cable TV Connections and Cable Box Set-up Function.
•Leave POWER on the cable box turned on.
MENU SET
SET
Setting the Clock
$Select a channel that carries EDS signals with ß/©.
Ex.: 07
•The number of channels that can be selected depends
on the mode setting on the CHANNEL PRESET screen.
See NOTE.
%Press SET to enter. The screen returns to normal.
Press POWER to turn off the VCR.
The Auto Clock Setting function will automatically set the
clock.
Normal
Screen
gg
•If the EDS CH SET mode is set to MANUAL mode in Step # and a channel that does not carry EDS signal is selected in
Step $, the Auto Clock Setting function will not operate.
•In Step $, the number of channels that can be selected depends on the mode setting on the CHANNEL PRESET screen.
See the table below.
EDS CH SET AUTO MANUAL
EDS CH 07
ß
©
!Press MENU.
Select “CLOCK” with ∂/ƒ and then press SET.
@Select “MANUAL” with ∂/ƒ and then press SET.
∂
ƒ
g
SET UP
MENU
ENTER :SET EXIT :MENU
CHANNELS
SELECT :
CLOCK
LANGUAGE
TIMER
VCR PLUS+
g
SET
∂
ƒg
SELECT :
MANUAL
CLOCK
ENTER :SET EXIT :MENU
AUTO
When using a cable box:
•If you turn off the VCR when the CLOCK mode is set to “AUTO”, the cable box will select a broadcasting channel with the
EDS signal automatically.
•In Step !, if you press MENU when operating the screen setting for the first time or after a power failure of more than 20
seconds, the LANGUAGE screen will appear.
•If you entered incorrect data during the setting procedure, re-enter the correct data in the following manner:
1Use ß/© to select the data to be corrected.
2Set the correct data with ∂/ƒ.
3After correcting the data in Step 2, press SET to enter.
•If you press MENU in Step %, the data will not be stored.
•If a button is not pressed within 3 minutes during the setting procedure, the screen will return to the normal screen.
Manual Clock Setting
•Turn on your TV and select the video channel. (See Setting the 3 ↔ 4 Output Channel Selector.)
•Press POWER and then TV/VCR to select “VCR”. (“VCR” will light on the multi-function display.)
AIR/CATV Channels to be selected
AIR
USE CABLE BOX
NO
YES
CATV
—
02 03 04 68 69 02
01 02 03 124 125 01
01 02 03 98 99 01
SET
MENU
SET
Setting the Clock
%If the data is correct, press SET to enter.
The screen returns to normal.
Normal
Screen
g
•Press ENT. /AM/PM (100) to select AM or PM during time setting.
•Numbered buttons can be used instead of ∂/ƒ to set the time and date.
•In Step !, if you press MENU when operating the screen setting for the first time or after the power is interrupted for more
than 20 seconds, the LANGUAGE screen will appear.
•If you entered incorrect data during the setting procedure, re-enter the correct data in the following manner:
1Use ß/© to select the data to be corrected.
2Set the correct data with ∂/ƒ.
3After correcting the data in Step 2, press SET to enter.
•If you press MENU to exit the CLOCK screen in Step %, the data will not be stored.
•If a button is not pressed within 3 minutes during the setting procedure, the screen will return to the normal screen.
SELECT : CHANGE:
10:28AM 7/04SAT 98 ON
CLOCK
ENTER :SET EXIT :MENU
TIME DATE YEAR DST
ß/©
and
∂/ƒ
#Select “TIME” with ß/© and set time by holding ∂/ƒ.
Ex.: 10:28 AM
$Select and set “DATE”, “YEAR” and “DST” in turn, in the
same manner as in Step #.
•See Automatic Daylight Saving–Time (D.S.T.) Adjust-
ment.
Ex.: Jul. 4, 1998, DST: ON
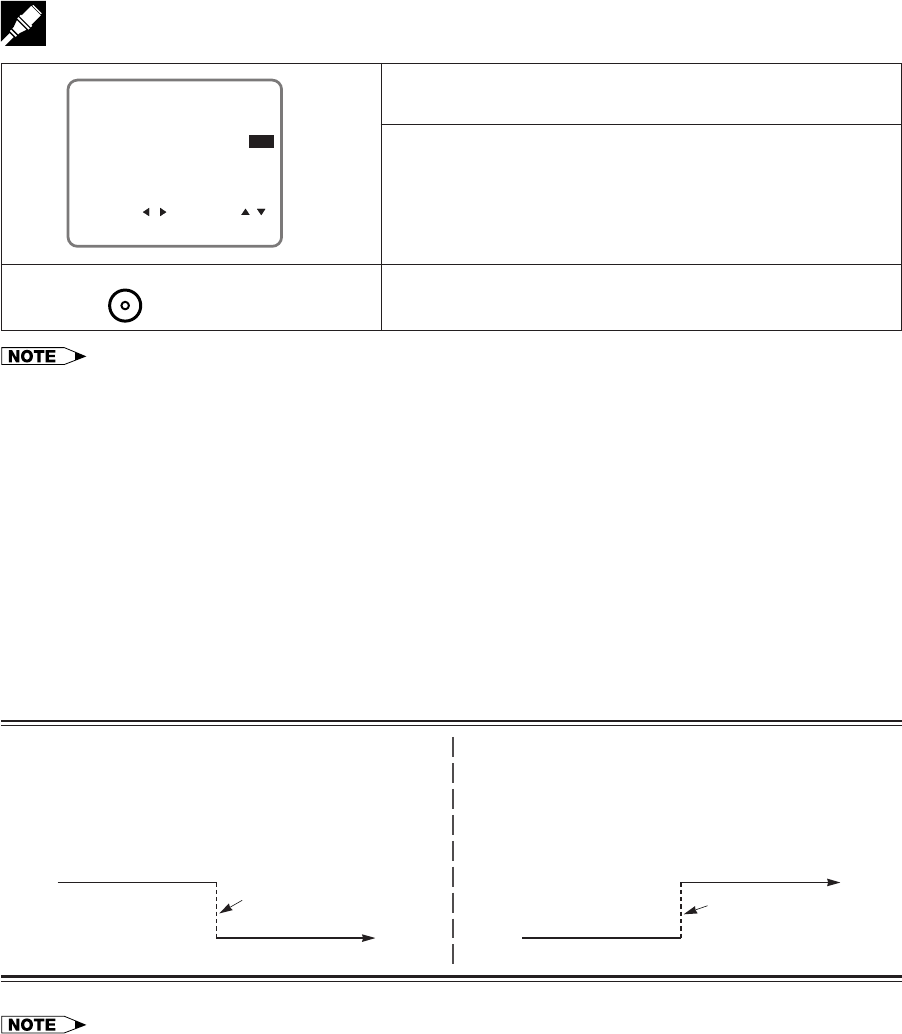
Automatic Daylight Saving–Time (D.S.T.) Adjustment
This VCR is equipped with an internal Automatic Daylight Saving–Time Adjustment function. In spring (first
Sunday in April) and autumn (last Sunday in October), the time is adjusted as shown below. This function has
been preset to ON at the factory. Set the D.S.T. mode in the clock setting screen.
Spring
Programmed timer recording set within this time frame (2:00
AM to 3:00 AM) will not be carried out.
First Sunday in April (D.S.T. is ON)
Autumn
Because there will be two time frames from 1:00 AM to 2:00
AM, timer programming set between these times will be
influenced by the time change.
Last Sunday in October (D.S.T. is ON)
The clock is automatically
advanced 1 hour.
v
vv
v
3:00 AM
1:00 AM 2:00 AM
4:00 AM
The clock is automatically
set back 1 hour.
v
vv
v
2:00 AM
2:00 AM1:00 AM
1:00 AM
SET
•If the timer recording program is affected by the D.S.T. time change, check your TV listing and find out when it reflects the
time change. Some TV listings will indicate the time change in the same manner as is programmed in this VCR, but others
do not show the time change until the next morning. In that case, when programming a timer, use the CLOCK screen to set
the D.S.T. mode to OFF so the time change will not be carried out.
Your VCR can receive a maximum of 181 channels as shown below by presetting the channels into memory.
(VHF: 2 to 13, UHF: 14 to 69, CATV: 1 to 125)
•Make sure that the cable (antenna or CATV) is connected to the IN terminal on the rear of the VCR.
Setting the Channels
SET UP
MENU
ENTER :SET EXIT :MENU
CHANNELS
SELECT :
CLOCK
LANGUAGE
TIMER
VCR PLUS+
g
∂
ƒ
g
!Press MENU.
Select “CHANNELS” with ∂/ƒ and then press SET.
@Select “CHANNEL PRESET” with ∂/ƒ and then press
SET.
#Select “AIR” or “CATV” with ß/© and then press ƒ.
Ex.: AIR
• To watch cable TV after EZ Set Up, select “CATV”,
press SET and then press MENU.
$Set “CH SET” to “AUTO” with ß/© and then press SET.
%The auto tuning will start.
The channel display will count up, and when finished, the
screen returns to normal.
AIR/CATV AIR CATV
CHANNEL PRESET
CHANNEL PRESET
CH SET AUTO MANUAL
ß
©gƒ
CHANNEL PRESET
CHANNELS
CABLE BOX SET UP
SATELLITE SET UP
g
∂
ƒ
g
AIR/CATV AIR CATV
CS
CH SET AUTO MANUAL
ß
©
gNormal
Screen
AUTOMATIC TUNING.
02
PLEASE WAIT.
•Automatic tuning will not start unless the arrow is at “CH SET-AUTO” position.
•If a button is not pressed within 3 minutes during the setting procedure, the screen will return to normal.
•If the power is interrupted for more than 20 seconds, AIR / CATV selection must be set again.
MENU
SET
SET
SET
ß /©
Adding Channel Memory/Erasing Channel Memory
Use this function to manually add or erase channels to/from the memory.
Setting the Channels
SET UP
MENU
ENTER :SET EXIT :MENU
CHANNELS
SELECT :
CLOCK
LANGUAGE
TIMER
VCR PLUS+
g
∂
ƒ
g
MENU SET
!Select the channel to be added with the numbered buttons and the channel to be erased with
the CH ∂/ƒ or numbered buttons.
@Press MENU. Select “CHANNELS” with ∂/ƒ and press
SET.
#Select “CHANNEL PRESET” with ∂/ƒ and then press
SET.
$Select “CH SET” with ∂/ƒ and then select “MANUAL”
with ß/©. Then press SET.
%Select “ADD” if you want to add the channel memory or
“ERASE” if you want to erase the channel memory with
ß/©.
^Press MENU to return to the normal screen.
CHANNEL PRESET
CHANNELS
CABLE BOX SET UP
SATELLITE SET UP
AIR/CATV AIR CATV
CHANNEL PRESET
CH SET AUTO MANUAL
∂
ƒg
∂
ƒ
ß
©g
CHANNEL SELECT :
ADD 03
ADD/ERASE :
EXIT :MENU
[ADD]
[ERASE]
ERASE 03
Normal
Screen
g
•If the power is interrupted for more than 20 seconds, the channel memory may be erased. If this happens, reset the
channels again and reset AIR/CATV selection.
•If a button is not pressed within 3 minutes during the setting procedure, the screen will return to normal.
MENU
SET
SET
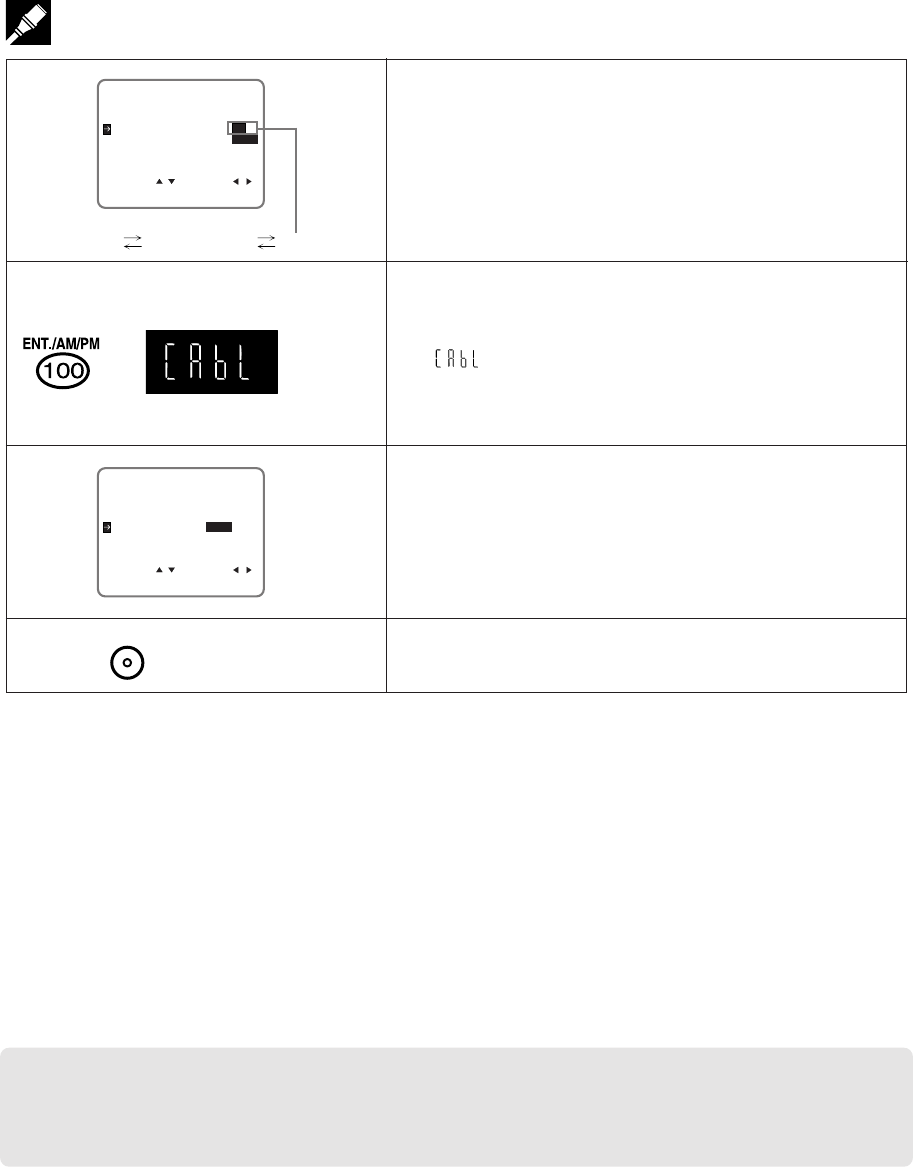
If your VCR is connected to a CATV network requiring a cable box, follow this section. (Connection type B or C.
See Cable TV Connections.) This allows you to select the channel you wish to record in Timer-Controlled or
VCR PLUS+ programming system mode, by transmitting an infrared signal from the VCR to the cable box.
Cable Box Set-up Function
!Press MENU. Select “CHANNELS” with ∂/ƒ and press
SET.
@Select “CABLE BOX SET UP” with ∂/ƒ and press SET.
#Select “BOX OUTPUT CH” with ß/© (03 04
02 03) and then press ƒ.
g
SET UP
MENU
ENTER :SET EXIT :MENU
CHANNELS
SELECT :
CLOCK
LANGUAGE
TIMER
VCR PLUS+
g
SELECT :
CHANNEL PRESET
CHANNELS
ENTER :SET EXIT :MENU
CABLE BOX SET UP
SATELLITE SET UP
∂
ƒ
BOX OUTPUT CH 03
CABLE BOX SET UP
USE CABLE BOX YES NO
BOX CODE 01
•There may be some Cable Boxes that cannot be operated with this function.
g∂
ƒ
ƒ
g
•Turn on your cable box and select channel 02.
•Turn on your TV and select the video channel. (See Setting the 3 ↔ 4 Output Channel Selector.)
•Press POWER and then TV/VCR to select “VCR”. (“VCR” lights up on the multi-function display.)
•If your cable box is remote-controllable, check the code number corresponding to your cable box brand.
The brand name of your cable box can be found on the bottom or back panel.
•If the wall or other surface for reflecting the signal is too distant, or if there is signal-absorbing material (curtains, etc.) at the
reflecting location, the signal transmitted from the VCR may not reach the cable box.
Brand
Archer
Eagle
GE
General Instrument
Hamlin
Jerrold
Macom
NSC
Code Number(s)
28,29,30,31,49,50
37,38,39,40,41
43
01,02,03,04,05,06,07,08
26,27
01,02,03,04,05,06,07,08
42
33,34,35
Brand
Oak
Panasonic
Philips
Pioneer
RCA
Regal
Regency
Scientific Atlanta
Code Number(s)
19,20
22,23
24,25
16,17,18
22,23
21
32
09,10,11,12,13
Brand
Sylvania
Teknica
Telecaption
Tocom
Toshiba
Universal
Vid Tek
Zenith
Code Number(s)
44
48
45
36
47
46
51
14,15
ß
©
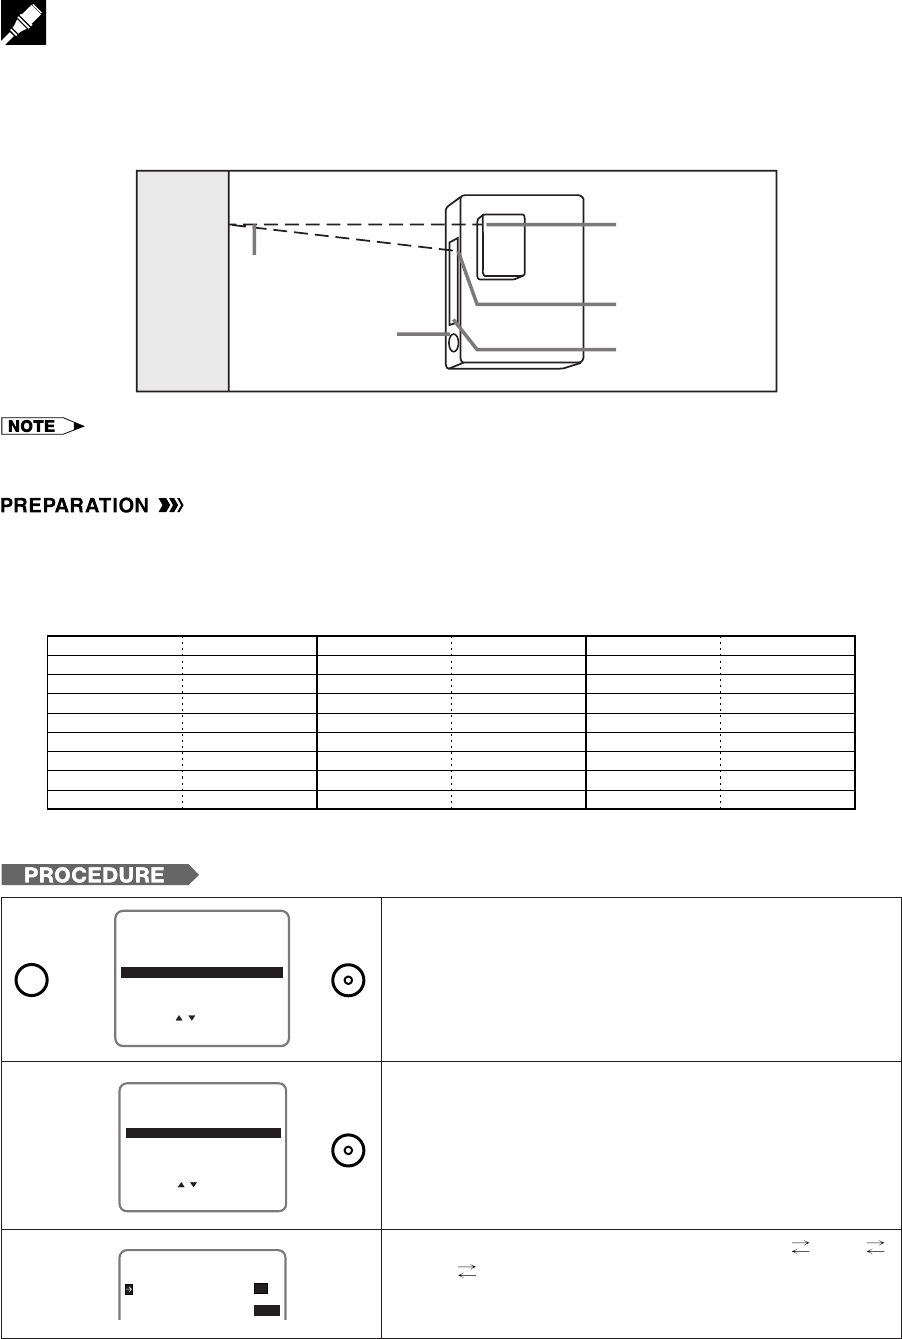
Setting Up the Cable Box (Overhead View)
SET
SET
MENU
Infrared sensor window
on the front of cable box
Cable box control
commands are
transmitted through
this window.
Multi-Function Display
Window
Infrared signal
from VCR
Front of VCR
WALL
Cable Box Set-up Function
$Select “BOX CODE” with ∂/ƒ and set the code number
with ß/©.
See the code list in PREPARATION.
%Press 100 to check if the setting is completed.
If the selected code matches the brand of your cable
box, the VCR will automatically send a signal to change
the channel of your cable box from 02 to 09.
“” is displayed on the multi-function display. This
indicates that the setting is successful.
Press ƒ.
^Set “USE CABLE BOX” to “YES” with ß/©.
&Press SET to enter.
The screen returns to normal.
SELECT : CHANGE:
CHECK :PRESS 100 KEY
BOX OUTPUT CH 03
CABLE BOX SET UP
ENTER :SET EXIT :MENU
USE CABLE BOX YES NO
BOX CODE 01
∂
ƒ
01 02 ... 51 01
SELECT : CHANGE:
BOX OUTPUT CH 03
CABLE BOX SET UP
ENTER :SET EXIT :MENU
USE CABLE BOX YES NO
BOX CODE 01
ß
©
Normal
Screen
g
When using a remote-controllable cable box
•If you found two or more codes for the brand of your cable box in the code list, try each of these codes until
the channel of the cable box changes to 09.
•If none of the codes work, try the following:
1. This VCR emits a high-frequency infrared signal to the cable box. By repositioning your cable box and VCR
closer and/or within the line of sight of each other, the signal may successfully travel from the VCR to the
cable box. Reposition the cable box and/or VCR and test by setting the code number again.
2. Another code number may be the correct one for your cable box. Proceed by setting and testing each code
(01 through 51) until you find the one that works. Start with the ones listed under the same brand as your
cable box.
3. Even if solutions 1 and 2 do not work, your VCR will still work with the VCR Plus+ system. Set USE CABLE
BOX to “NO” in Step ^. Since the VCR will not change the cable box channel, keep your cable box power
on and the box tuned to the channel you wish to record.
4. Your local cable company may offer a choice of cable boxes. You should request an alternate brand or
model of cable box, and exchange your present one for one compatible with your new VCR.
Before Timer Recording Starts:
Remote-Controllable Cable Box
•Turn ON the cable box.
Non Remote-Controllable Cable Box
•Turn ON the cable box and select the channel you wish to record.
ß
©
gƒ
g
(on the multi-
function display)
SET
ANT/CABLE
VHF
UHF
U/V IN
UHF VHF
MODE SELECTION
Digital Satellite Receiver Set-up Function
If your VCR is connected to a digital satellite network requiring a digital satellite receiver, follow this section. This
allows you to select the channel you wish to record in Timer-Controlled mode, by transmitting an infrared signal
from the VCR to the digital satellite receiver.
•If the wall or other surface for reflecting the signal is too distant, or if there is signal-absorbing material
(curtains, etc.) at the reflecting location, the signal transmitted from the VCR may not reach the digital satellite
receiver.
Connection
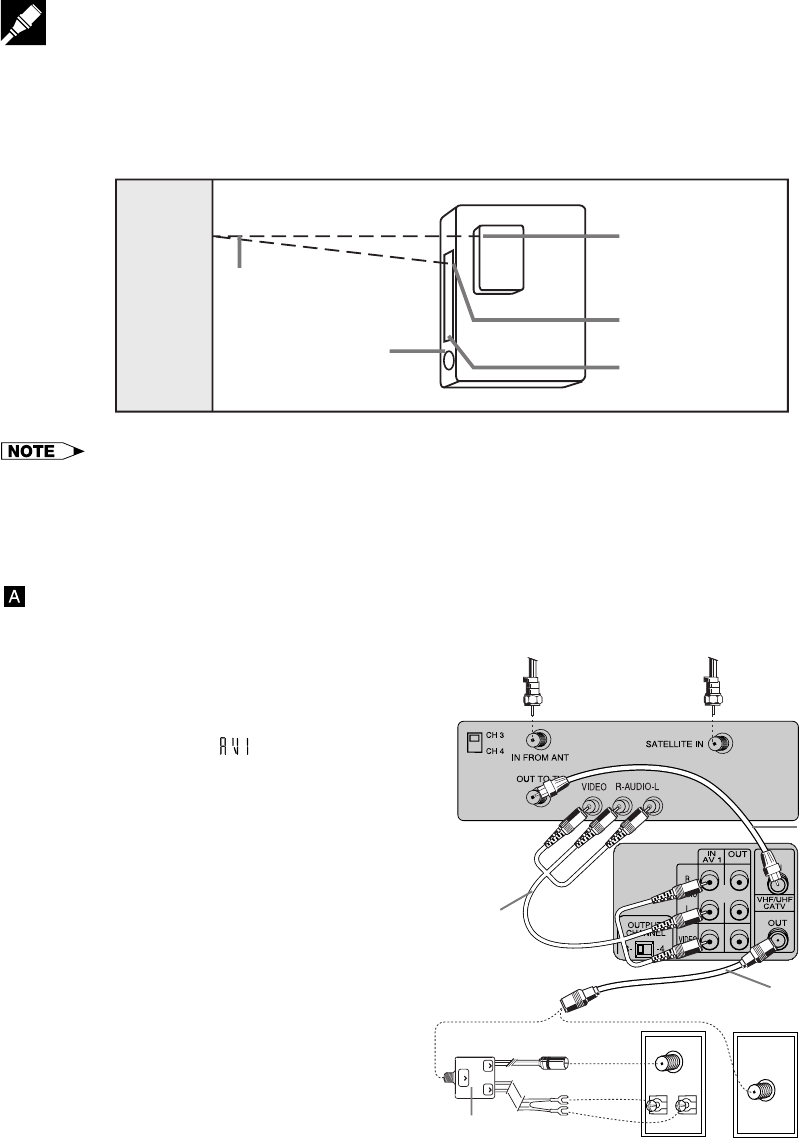
Basic Connection
•Use this connection if your TV does not have audio/video jacks.
!Set the CH3 CH4 switch on the rear
of the digital satellite receiver to
either channel 3 or 4.
You will tune the VCR to this channel
or its auxiliary input ( ) to record
from the digital satellite receiver.
To watch the digital satellite receiver,
turn off the VCR.
If you want to watch or record the
signal from your antenna, cable, or
cable box, make sure the digital
satellite receiver is turned off.
@Set the 3 ↔ 4 OUTPUT CHANNEL
selector on the rear of the VCR to 3
or 4. (Factory preset: 3) (See Setting
the 3 ↔ 4 Output Channel Selec-
tor.) Tune the TV to this channel and
press TV/VCR to watch the VCR.
#Connect as shown.
Then go to “After the Connection”.
Setting Up the Digital Satellite Receiver (Overhead View)
From
Satellite
Dish
Digital
Satellite
Receiver
Rear
From Cable,
Cable Box or
Antenna
VCR Rear
Coaxial cable
(Not supplied)
Coaxial
cable (Supplied)
Audio/Video cables
(Not supplied)
TV Rear
or
Separator
(Not supplied)
Infrared sensor window
on the front of digital
satellite receiver
Digital satellite receiver
control commands are
transmitted through
this window.
Multi-Function Display
Window
Infrared signal
from VCR
Front of VCR
WALL
Digital Satellite Receiver Set-up Function
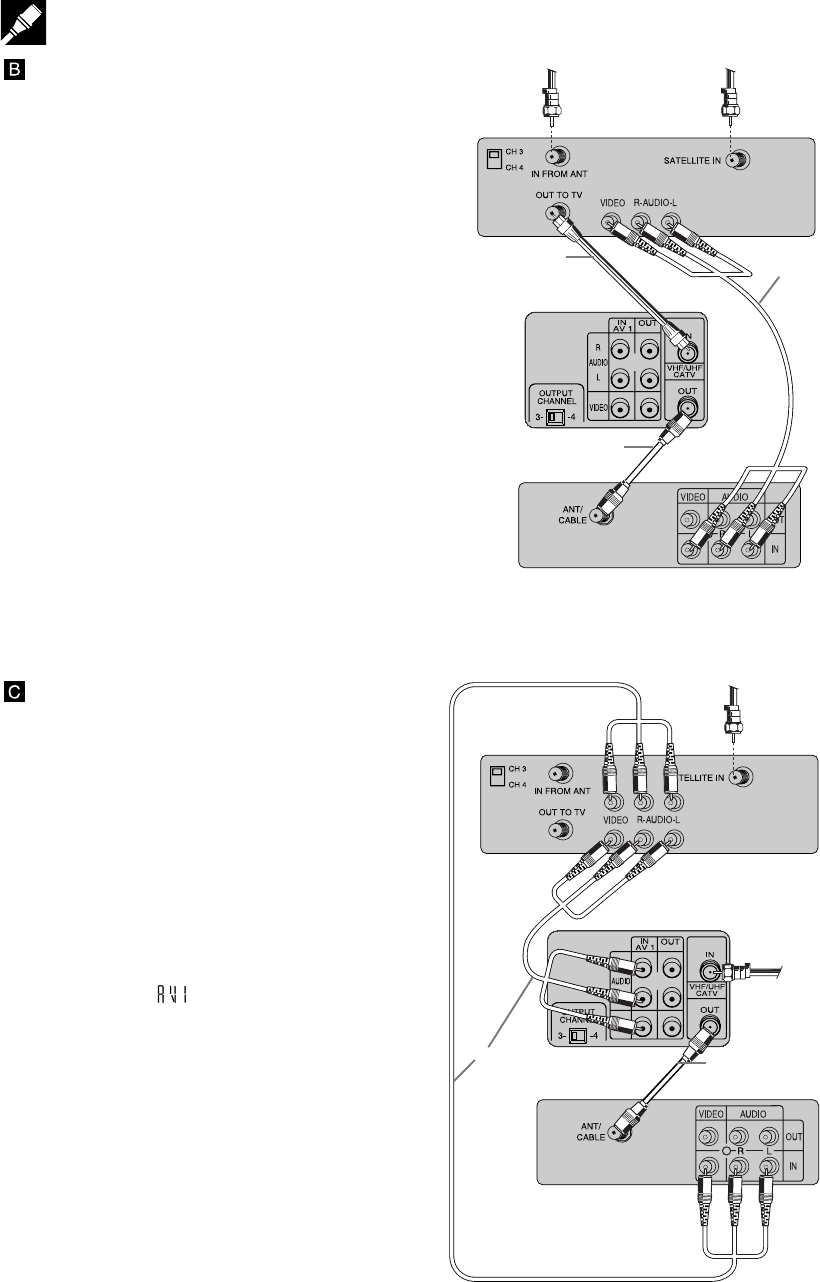
Advanced Connection
•Use this connection if your TV has audio/
video jacks and your receiver has one
set of audio/video jacks.
!Set the CH3 CH4 switch on the rear
of digital satellite receiver to either
channel 3 or 4.
You will tune the VCR to this channel
to record from the digital satellite
receiver.
To watch the digital satellite receiver,
tune your TV to its video input chan-
nel.
If you want to watch or record the
signal from your antenna, cable, or
cable box, make sure the digital
satellite receiver is turned off.
@Set the 3 ↔ 4 OUTPUT CHANNEL
selector on the rear of the VCR to 3
or 4. (Factory preset: 3) (See Setting
the 3 ↔ 4 Output Channel Se-
lector.) Tune the TV to this channel
and press TV/VCR to watch the VCR.
#Connect as shown.
Then go to “After the Connection”.
Advanced Connection with
a Deluxe Digital Satellite
Receiver
•Use this connection if your TV has audio/
video jacks and your receiver has two
sets of audio/video jacks.
!Set the 3 ↔ 4 OUTPUT CHANNEL
selector on the rear of the VCR to 3
or 4.
You will tune the TV to this channel
and use TV/VCR to watch the VCR.
To record from the digital satellite
receiver, you will tune the VCR to its
auxiliary input ( ).
To watch the digital satellite receiver,
tune your TV to its video input
channel.
@Connect as shown.
Then go to “After the Connection”.
After the Connection
Plug in the power cords of the VCR, TV
and digital satellite receiver. Then, go to
How to Remote-Control the Digital Sat-
ellite Receiver.
From
Satellite
Dish
From
Cable,
Cable Box
or Antenna
Audio/Video
cables
(Not
supplied)
Coaxial cable
(Supplied)
Digital
Satellite
Receiver
Rear
VCR Rear
TV Rear
Coaxial cable
(Not supplied)
Digital Satellite
Receiver Rear
From Cable,
Cable Box
or Antenna
VCR Rear
Audio/Video cables
(Not supplied)
TV
Rear
Coaxial cable
(Supplied)
From
Satellite
Dish
Digital Satellite Receiver Set-up Function
How to Remote-control the Digital Satellite Receiver
•Turn on your digital satellite receiver and select DSS® mode.
•Turn on your TV and select the video channel. (See Setting the 3 ↔ 4 Output Channel Selector.)
•Press POWER and then TV/VCR to select “VCR”. (“VCR” lights up on the multi-function display.)
•If your digital satellite receiver is remote-controllable, check the code number corresponding to your digital
satellite receiver brand.
The brand name of your digital satellite receiver can be found on the bottom or back panel.
!Press MENU. Select “CHANNELS” with ∂/ƒ and press
SET.
@Select “SATELLITE SET UP” with ∂/ƒ and press SET.
#Select “SAT. OUTPUT CH” with ß/© (03 04
AV1 03) and then press ƒ.
$Select “SAT. CODE” with ∂/ƒ and set the code number
with ß/©.
See the code list in PREPARATION.
%Press 100 to check if the setting is completed.
If the selected code matches the brand of your digital
satellite receiver, the VCR will automatically send a signal
to change the channel of your digital satellite receiver to
200.
“” is displayed on the multi-function display. This indi-
cates that the setting is successful.
Press ƒ.
g
SET UP
MENU
ENTER :SET EXIT :MENU
CHANNELS
SELECT :
CLOCK
LANGUAGE
TIMER
VCR PLUS+
g∂
ƒ
SELECT : CHANGE:
SAT. OUTPUT CH 03
SATELLITE SET UP
ENTER :SET EXIT :MENU
USE SATELLITE YES NO
SAT. CODE 01
CHECK :PRESS 100KEY
ß
©
∂
ƒ
Brand
GE
ProScan
RCA
SONY
Code Number(s)
01
01
01
02
•There may be some digital satellite receiver that cannot be operated with this function.
(on the multi-
function display)
ƒ
gg
ß
©ƒ
g
g
SELECT :
CHANNEL PRESET
CHANNELS
ENTER :SET EXIT :MENU
CABLE BOX SET UP
SATELLITE SET UP
∂
ƒ
01 02 01
MENU SET
SET
SAT. OUTPUT CH 03
SATELLITE SET UP
USE SATELLITE YES NO
SAT. CODE 01
Digital Satellite Receiver Set-up Function
^Set “USE SATELLITE” to “YES” with ß/©.
&Press SET to enter.
The screen returns to normal.
SELECT : CHANGE:
SAT. OUTPUT CH 03
SATELLITE SET UP
ENTER :SET EXIT :MENU
USE SATELLITE YES NO
SAT. CODE 01
ß
©
Normal
Screen
g
When using a remote-controllable digital satellite receiver.
•If none of the codes work, try the following:
1. This VCR emits a high-frequency infrared signal to the digital satellite receiver. By repositioning your digital
satellite receiver and VCR closer and/or within the line of sight of each other, the signal may successfully
travel from the VCR to the digital satellite receiver. Reposition the digital satellite receiver and/or VCR and
test by setting the code number again.
2. Another code number may be the correct one for your digital satellite receiver. Proceed by setting and
testing each code (01 or 02) until you find the one that works.
3. Even if solutions 1 and 2 do not work, your VCR will still work with VCR Plus+ system. Set “USE SATELLITE”
to “NO” in Step ^ and see Non Remote-Controllable Digital Satellite Receiver below.
Before Timer Recording Starts:
Remote-Controllable Digital Satellite Receiver
1. Select the DSS® mode on the digital satellite receiver.
2. Turn OFF the digital satellite receiver.
Non Remote-Controllable Digital Satellite Receiver
1. Turn ON the digital satellite receiver.
2. Select the DSS® mode and select the channel you wish to record on the digital satellite receiver.
3. Set the timer recording channel to the output channel of the digital satellite receiver (03, 04 or AV (AV1)) on
the timer setting screen).
• You cannot simultaneously set timer recording for a satellite broadcast program and other programs
received by conventional VHF-UHF antenna or Cable TV.
*DSS® is a registered trademark of Directv. inc., a unit of GM Hughes Electronics.
SET
•If the clock is not set, the time and date will not be displayed.
How to Display Indicators
Each time ON SCREEN is pressed, the screen changes as follows:
AUTO Display
When an operation button, numbered button, or CH ∂/ƒ is pressed, the current function status or the number
of the channel will be displayed in the upper section of the TV screen for about 3 seconds.
•When the VCR power is turned off, the display mode is retained in memory.
•When you record a video signal output from this VCR on another VCR, press ON SCREEN to select Display Off. (If the
function status is displayed on the screen, it is also recorded on the tape.)
MENU screen is a home screen used to select various screen functions.
!Turn on the TV and select the video channel. (See Setting the 3 ↔ 4 Out-
put Channel Selector on page 10.)
@Press POWER, and then TV/VCR to select “VCR” (“VCR” will light on the
multi-function display).
#Press MENU to display the MENU screen.
The following 6 items can be set by using the MENU screen.
VCR PLUS+...................... Setting a timer recording using VCR PLUS+ pro-
gramming system. (See page 33.)
TIMER............................... Setting a timer recording (and checking it). (See page 35.)
SET UP ............................. VCR operating conditions are set according to the broadcast reception and tape
playback conditions. (See page 25.)
CHANNELS ...................... Setting the channels, cable box code and digital satellite receiver code. (See
pages 16–23.)
CLOCK............................. Setting the present time. (See pages 13–15.)
LANGUAGE ..................... Selection of language to be used for the MENU screen. (See page 13.)
$Press ∂/ƒ and then SET. The screen changes to the one which you have selected.
%To cancel the MENU screen, press MENU.
Menu Screen
SET UP
MENU
ENTER :SET EXIT :MENU
CHANNELS
SELECT :
CLOCK
LANGUAGE
TIMER
VCR PLUS+
To facilitate the operation and check the current VCR mode information, the following OSD (On Screen Display)
will appear on the TV screen when using this VCR.
OSD (On Screen Display)
STOP 123
FRI 4/25 DPSS 19
S. PICTURE ON STEREO
10:00AM -1:59.59
SP STOP 11:30AM SAPSAP
L R
Program channel position
Real time counter
Tape speed
Clock display
Calendar display
Simple Recording Timer
Display example
Sharp Super Picture
DPSS
Audio Output mode
Stereo/SAP mode
- - - - - - - Function status
PLAY
FF
REW
STOP
REC
PAUSE
Play
Fast
forward
Rewind
Stop
Rec
Rec
pause
Recorded Section
Auto Repeat
PLAY
REC 09
(When you press
REC while you are
receiving CH 9.)
(When you press
PLAY)
! AUTO Display @ FULL Display # COUNTER Display $ Display off
MODE SELECTION
Mode Selection
You can use the SET UP–selection screen to select the mode for basic features.
•Turn on the TV and select the video channel. Press POWER and then TV/VCR to select “VCR” (“VCR” will light
on the multi-function display).
!Press MENU.
@Select “SET UP” with ∂/ƒ and then press SET.
#Set AUTO REPEAT mode to ON or OFF with ß/©. Then
press ƒ.
(See Recorded Section Auto Repeat.)
$Set BLUE SCREEN mode to ON or OFF with ß/©. Then
press ƒ.
(See Blue Screen Noise Elimination.)
%Set SAP (Separate Audio Program) mode to ON or OFF
with ß/©. Then press ƒ.
(See Recording MTS (Multi-channel TV sound)
Broadcasts.)
^Set AUDIO OUTPUT mode to MONO, LR, L or R with
ß/©.
(See Audio Output Mode.)
&Set R/C CALL to ON or OFF with ß/©.
(See Remote Pager.)
*Press SET to enter.
The screen returns to normal.
ƒ
SELECT : CHANGE:
BLUE SCREEN ON OFF
AUTO REPEAT ON OFF
ENTER :SET EXIT :MENU
AUDIO OUTPUT
SAP ON OFF
MONO LR L R
R/C CALL ON OFF
SET UP
MENU
ENTER :SET EXIT :MENU
CHANNELS
SELECT :
CLOCK
LANGUAGE
TIMER
VCR PLUS+
BLUE SCREEN ON OFF
AUTO REPEAT ON OFF
AUDIO OUTPUT
SAP ON OFF
MONO LR L R
R/C CALL ON OFF
BLUE SCREEN ON OFF
AUTO REPEAT ON OFF
AUDIO OUTPUT
SAP ON OFF
MONO LR L R
R/C CALL ON OFF
BLUE SCREEN ON OFF
AUTO REPEAT ON OFF
AUDIO OUTPUT
SAP ON OFF
MONO LR L R
R/C CALL ON OFF
∂
ƒ
g
g
g
ƒ
g
ß
©
ƒ
g
ß
©
ß
©
[AUTO REPEAT]
[BLUE SCREEN]
[SAP]
[AUDIO OUTPUT]
ß
©
SET
MENU
BLUE SCREEN ON OFF
AUTO REPEAT ON OFF
AUDIO OUTPUT
SAP ON OFF
MONO LR L R
R/C CALL ON OFF
ß
©
[R/C CALL]
Normal
Screen
g
SET
•If you press MENU to exit the mode selection screen in Step *, the data will not be stored. Be sure to press SET to store
the data.
•SAP is used for bilingual broadcasting. Check your local broadcast station or cable company.
Playback
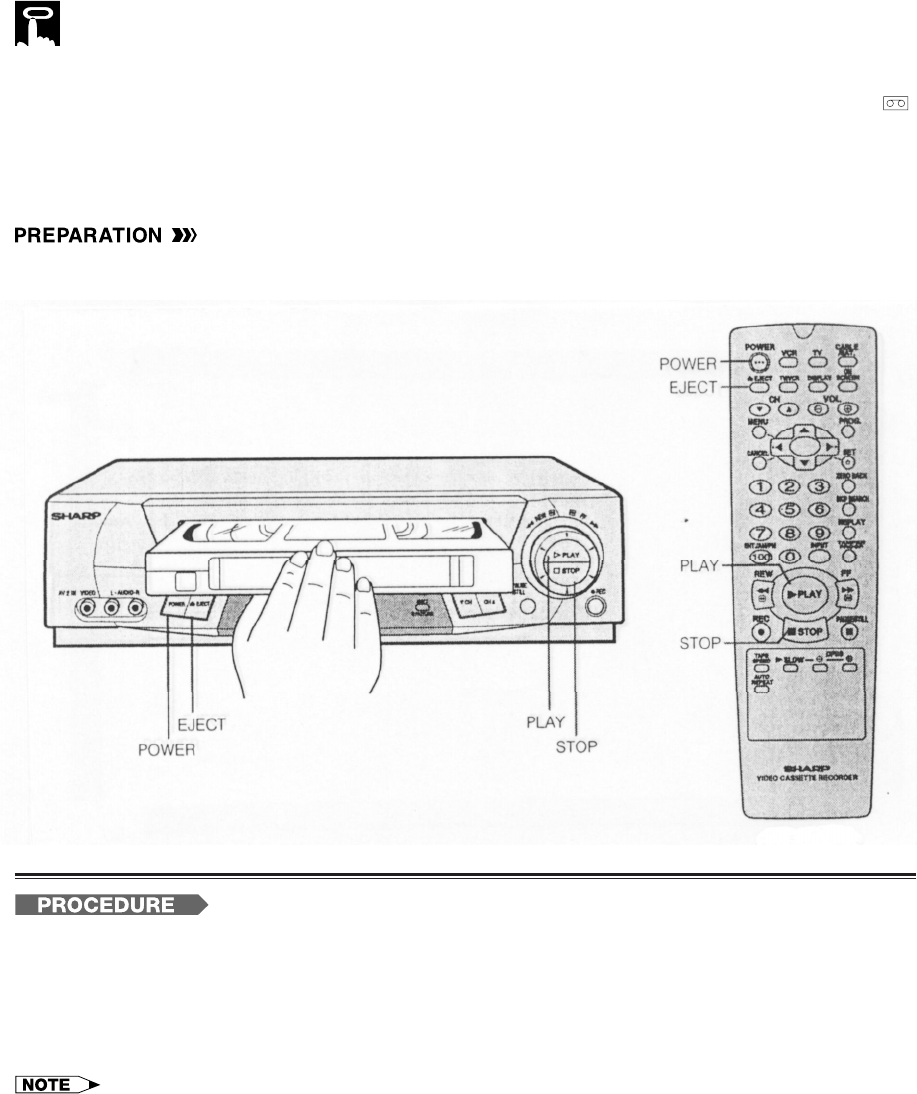
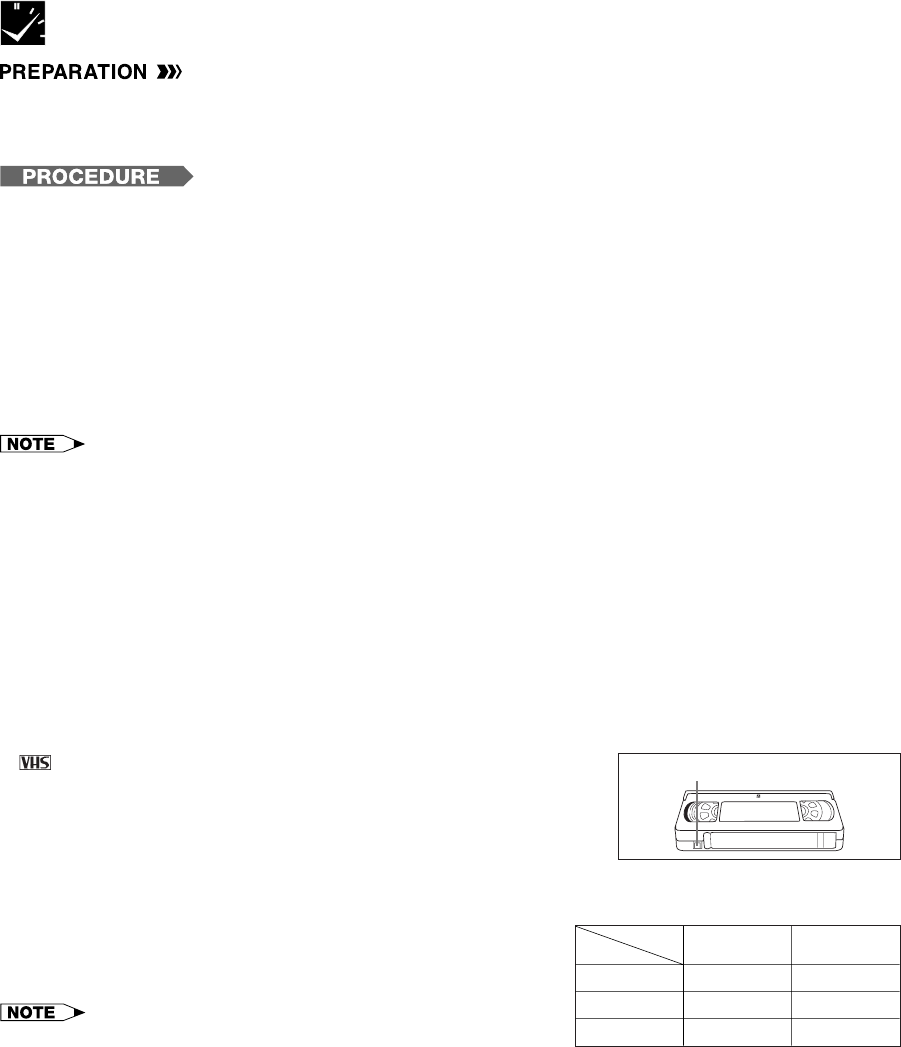
Inserting a Video Cassette
Gently insert the video cassette into the cassette compartment. The VCR turns on automatically and “ ”
appears on the multi-function display. If the cassette is inserted incorrectly, the loading system will not function.
Do not force the cassette into the VCR.
To remove the cassette, press EJECT during stop mode.
Playback
•Turn on the TV and select the video channel. (See Setting the 3 ↔ 4 Output Channel Selector.)
!Press POWER to turn on the VCR.
@Insert a cassette.
#Press PLAY. (The automatic tracking control system engages and “PLAY” flashes on the TV screen for a
few seconds.)
$To stop playback, press STOP. (If the tape reaches its end, the VCR will automatically rewind the tape to
the beginning, eject the cassette, and turn off the power.)
•If noise should remain on the TV screen after tracking adjustment has been completed by the Automatic Tracking Control
System, use the manual tracking mode.
•Press CH ∂/ƒ during playback mode to change to manual tracking mode. Adjust the tracking using CH ∂/ƒ until the
noise is minimized or eliminated.
•For tapes recorded in EP on another VCR that still have vertical jitter even after manual adjustment, hold down PLAY for
about 2 seconds. (On screen display may be blurred.) Ejecting the tape or turning off the power will return playback to its
normal mode.
Playback
Built-in Shuttle Control System
The shuttle system lets you control all the basic playback functions using just the shuttle ring.
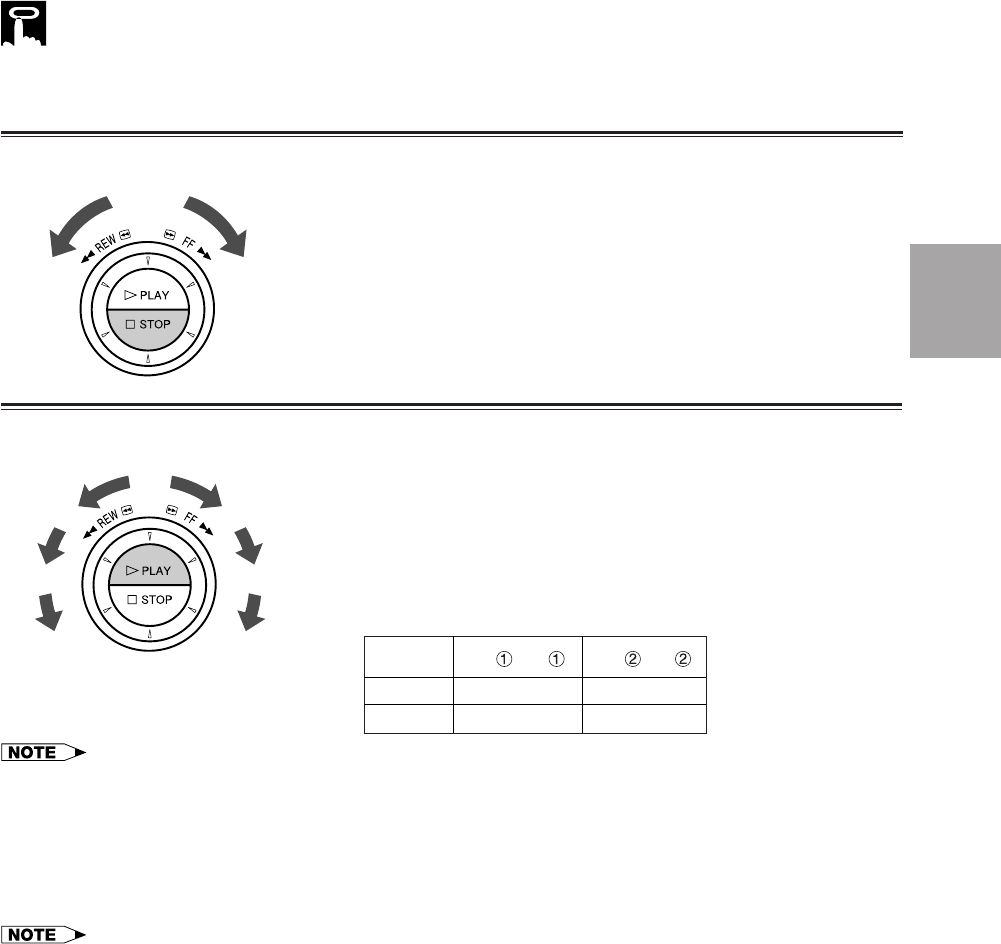
Fast Forward and Rewind (During STOP Mode)
!Turn the ring either to the right or the left and release it. (The
shuttle ring will return to center.)
@Press STOP to halt fast forward or rewind.
Video Search (During PLAY [or STILL] Mode)
•The shuttle ring does not rotate 3607.
•Turn the ring to the left or the right to enter VSF (Video Search
Forward), or VSR (Video Search Rewind) mode. Select from two
speeds by turning the ring. Release the ring (the shuttle ring re-
turns to center) to return to playback.
•Turning the ring all the way to the left or right holds the VCR in
VSF (Video Search Forward), or VSR (Video Search Rewind)
mode. Press PLAY to return to normal playback.
TAPE SPEED
SP/LP
EP
VSF /VSR
23
25
VSF /VSR
25
215
TURBOWIND (360 2 Rewind Speed) to Fast Forward and Rewind
!When the VCR is in stop mode, press FF or REW to fast forward or rewind the cassette. (The picture cannot
be viewed in this mode.)
@Press STOP to halt fast forward or rewind.
•The FF and REW speeds may be slower for cassette tapes other than T-60, T-90, or T-120.
•After rewinding the T-120 cassette tape for about 60 seconds, you can fast forward the cassette tape.
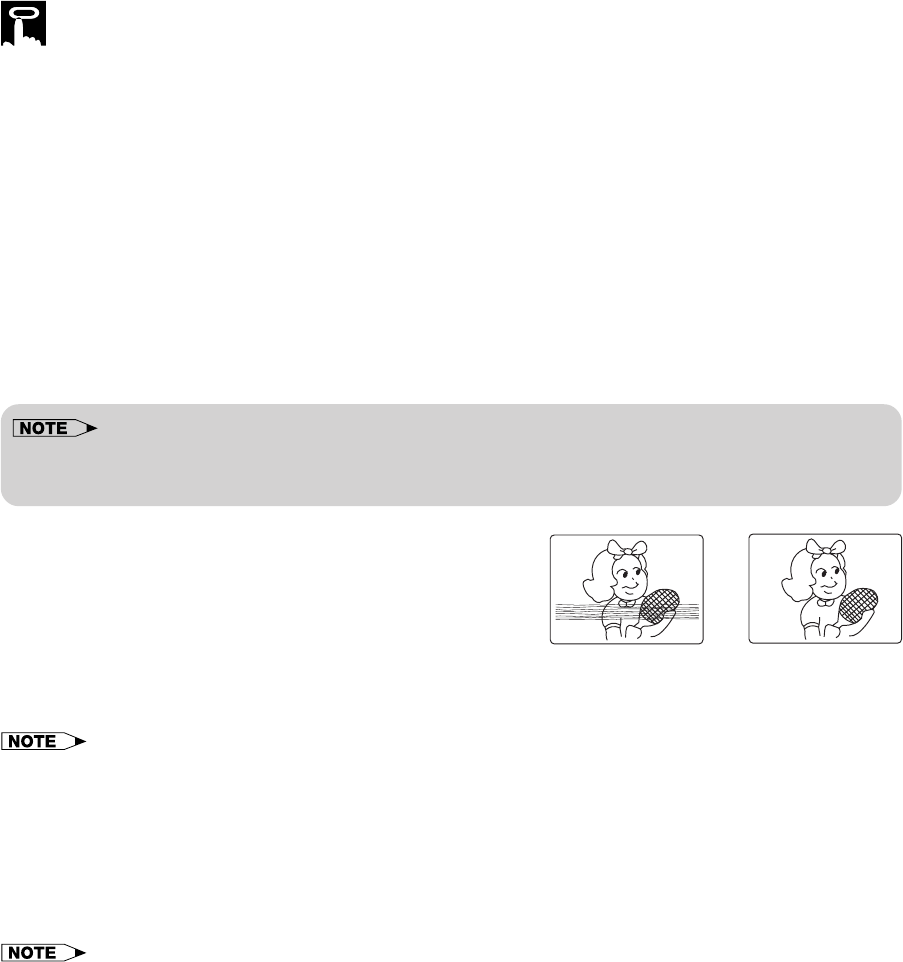
Video Search
Use the following procedure to quickly find the section you want, while viewing the picture.
!During playback, press FF for forward video search, or REW for reverse video search.
There are 2 search speeds in each direction. The VCR switches between them each time the button is
pressed.
@Press PLAY to resume normal playback.
(Rewind) (Fast
forward)
(VSR1)
(VSR2)
(VSR2
hold)
(VSF1)
(VSF2)
(VSF2
hold)
Basic
Operations
Slow Motion Playback (only with the remote control)
!Press SLOW during playback.
@Press SLOW j/k (to the right of SLOW) to vary the slow motion playback speed between 1⁄5 and 1⁄30 of the
normal playback speed.
If noise bars appear on the screen, use CH ∂/ƒ.
#Press PLAY to resume normal playback.
Still Picture and Frame Advance
!Press PAUSE/STILL during playback. This will freeze the picture on your TV.
@If the picture vibrates vertically during still mode, use CH ∂/ƒ to adjust for minimum distortion. If noise bars
appear on the screen during still mode, set your VCR to the slow mode and press CH ∂/ƒ to make the
noise disappear. Then press PAUSE/ STILL again.
#Press PAUSE/STILL during still mode for frame advance.
$Press PLAY again to resume normal playback.
•Sound is muted during still picture, video search, frame advance, and variable slow motion.
•The picture quality in still picture, video search, frame advance, and variable slow motion is best with tapes recorded in SP
or EP mode.
Automatic Tracking Control System
This function automatically adjusts the tracking to match the
recorded tape. Auto tracking engages in the following cases:
•When you insert the cassette and begin playback.
•When you press CH ∂/ƒ at the same time.
•When the VCR has been playing back an unrecorded
section of tape, and then reaches a recorded tape segment.
When auto tracking engages, “PLAY” on the TV screen flashes for a few seconds.
•When a poorly recorded tape is played back or the VCR is near an electrical or magnetic field, auto tracking may not
operate normally. In this event, manually adjust the tracking with CH ∂/ƒ to make any noise disappear.
Blue Screen Noise Elimination
Set the BLUE SCREEN mode to ON on the SET UP–selection screen. (See Mode Selection.) This function
eliminates monitor noise and mutes sound during playback of unrecorded portions of a tape, and when
receiving a non-broadcasting channel. Blue Screen will also appear if the VCR is set to the Auxiliary mode but
no video signal is fed to the VCR. (The BLUE SCREEN mode is set to ON at the factory.)
•Blue Screen does not function during still picture, variable slow motion and video search.
•Blue Screen may not function properly if the broadcast signal is too strong or too weak.
•Blue Screen does not function during playback of a tape with noise recorded.
•If the antenna signal is weak while recording a TV program, or if the input signal is weak while tape dubbing, the monitor
screen may turn blue since the unit may not recognize whether or not a proper signal is being received. In this event, set the
BLUE SCREEN mode to OFF.
Playback
g
Poor Tracking Normal Picture
Quick Start with Full Loading Mechanism
Your VCR has a standby function (Full Loading Mechanism) to allow immediate recording and playback.
After pressing REC or PLAY, it takes about 2 seconds until recording or playback is engaged when in the
standby mode.
Full Automatic Playback
The Full Automatic Playback lets you enjoy playback with ease. When you insert a cassette with the erasure
protection tab removed, your VCR automatically turns on the power and plays back the tape. When the tape
reaches its end, the VCR automatically rewinds the tape, ejects it and turns off the power.
•If the erasure protection hole is covered, press PLAY after the power turns on automatically.
Automatic Head Cleaning System
When the tape is inserted, or ejected, this system automatically cleans the drum and heads with a special
roller before recording or playback begins, protecting the heads and drum from dirt and preserving beautiful
sound and picture quality.
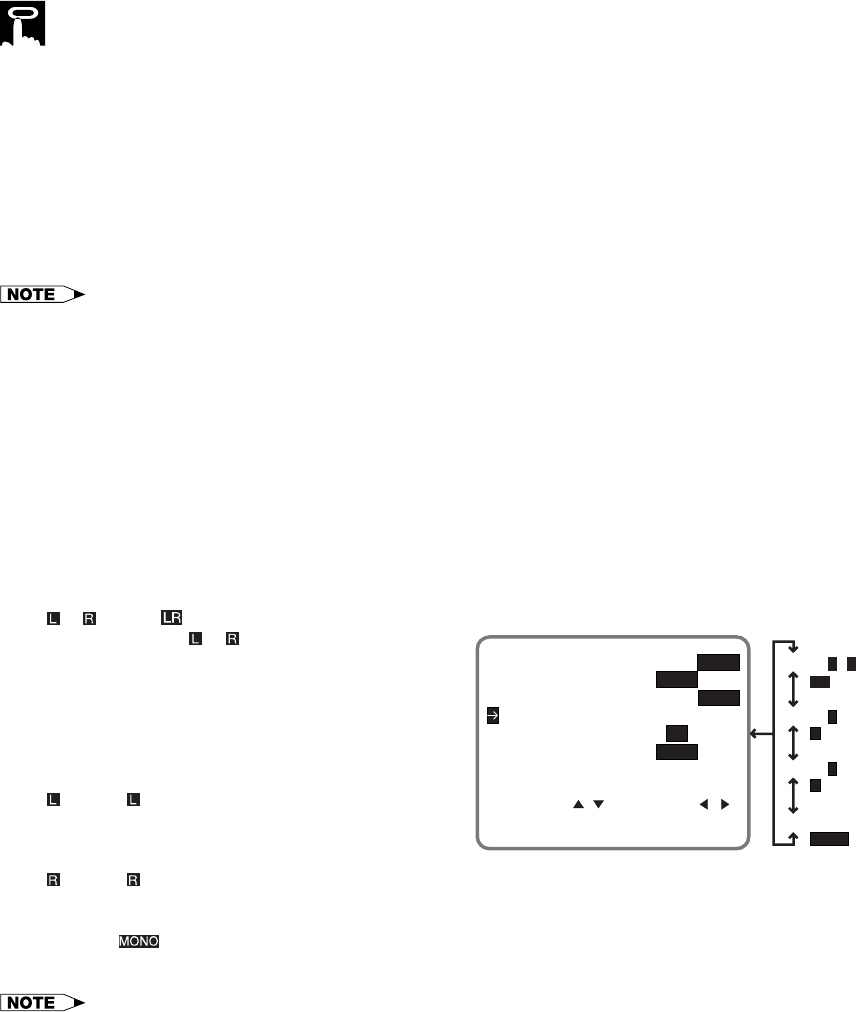
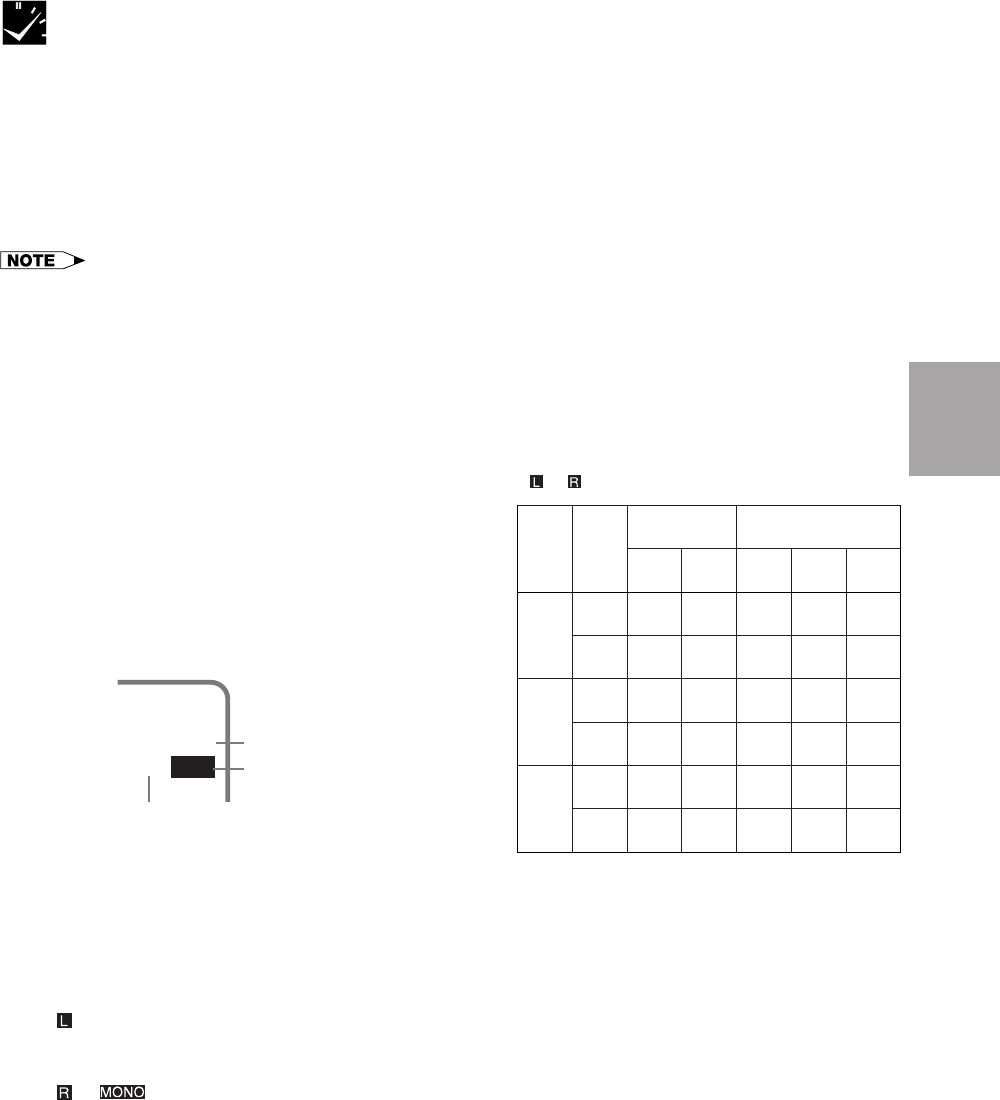
Audio Output Mode
Your VCR has 3 channels for audio recording (2 on the Hi-Fi track and 1 on the linear track). You can select the
audio output channels in playback mode on the SET UP–selection screen. The following shows which audio
channels will be heard when a stereo Hi-Fi video cassette is played back while a stereo system is properly
connected to the VCR.
(See Mode Selection.)
Hi-Fi ` mode:
Normally, select Hi-Fi ` mode on the SET UP–
selection screen: both the left (L) and right (R) audio
channels will be taken from the Hi-Fi audio track.
Normally you will not have to change to another
mode.
(See Recording MTS (Multi-channel TV Sound)
Broadcasts.)
Hi-Fi mode:
The left channel of the Hi-Fi audio track will be played
back through both speakers.
Hi-Fi mode:
The right channel of the Hi-Fi audio track will be played back through both speakers.
Linear mode:
The audio signal recorded on the linear audio track will be played back through both speakers.
•When video cassettes recorded on a non-Hi-Fi VCR are played back or the Hi-Fi audio output level is poor, the audio signal
recorded on the linear audio track will automatically be played back regardless of the audio output mode.
Playback
Hi-FiL+Rmode
Hi-FiLmode
LR
L
R
Linear mode
MONO
Hi-FiRmode
SELECT : CHANGE:
BLUE SCREEN ON OFF
AUTO REPEAT ON OFF
ENTER :SET EXIT :MENU
AUDIO OUTPUT
SAP ON OFF
MONO LR L R
R/C CALL ON OFF
•Turn on the TV and select the video channel. (See Setting the 3 ↔ 4 Output Channel Selector.)
•Press POWER and then TV/VCR to select “VCR” (“VCR” will light on the multi-function display).
•If necessary, set “SAP” on the SET UP-selection screen. (See Mode Selection.)
!Insert the cassette, with the erasure protection tab covered. (See Cassette Erase Protection below.)
@Press TAPE SPEED on the remote control to set the recording speed (SP or EP). (See Recording Speeds
below.)
SP or EP will appear on the display.
#Select the desired channel with CH ∂/ƒ or the numbered buttons on the remote control.
$Press REC. (If the erasure protection tab has been removed, the cassette will be ejected.)
%To stop recording, press STOP.
* To pause recording during the REC mode, press PAUSE/STILL on the remote control. To resume recording, press PAUSE/
STILL or REC. (Pause disengages automatically after about 5 minutes to avoid damage to the tape and the VCR, and stop
mode is engaged.)
•It is not necessary to set the clock to use this recording operation.
•“PAUSE” will flash on the TV screen if PAUSE/STILL is pressed in stop mode. Press STOP to disengage the pause mode or
press REC to enter the record standby mode.
•The VCR can record a TV program even with the TV turned off.
To Watch Another TV Program While Recording
After steps ! to $ have been completed, press TV/VCR to select “TV” (the “VCR” indicator will disappear),
then select the program you wish to view using the TV tuner.
At the end of the tape, your VCR will automatically stop recording, rewind the tape, eject it and turn off the
power.
Cassette Erase Protection
A cassette has a removable tab to prevent accidental erasure of
recorded material. Removing the tab prevents recording. To record on a
video cassette with the tab removed, place adhesive tape over the tab
opening.
Recording Speeds
This VCR lets you select a recording speed (SP or EP). SP provides
a better picture, although the recording time is shorter. Select the
tape speed that best suits your needs.
•This VCR can play back tapes recorded in LP (Long Play) mode.
Recording a TV Program
ERASURE PROTECTION TAB
T-60
T-120
T-160
CASSETTE
MODE SP
(Standard Play)
1 hr.
2 hrs.
2 hrs. & 40 min.
EP
(Extended Play)
3 hrs.
6 hrs.
8 hrs.
Recording a TV Program
Recording Hi-Fi Stereo Sound
Your VCR records AUDIO signals on two types of audio tracks.
Hi-Fi:
Using specialized rotary heads, audio signals are recorded on the video track in FM format.
Multi-sound broadcasts (Stereo or SAP [Separate Audio Program]) are recorded on two channels.
Linear:
All audio signals are recorded in mono on the linear audio track.
•Video cassettes recorded on a non-Hi-Fi VCR can also be played back. However, if the audio signals are recorded on two
linear channels, stereo programs will be played back in monaural and SAP (Separate Audio Program) will be played back
with both the MAIN and SAP audio mixed together.
•Video cassettes recorded on this VCR can be played back on a non-Hi-Fi VCR. However, only the linear track will be played
back.
Recording MTS (Multi-channel TV Sound) Broadcasts
Your VCR can record stereo or SAP (Separate Audio
Program) broadcasts, where available.
If the broadcast is in stereo, the VCR automatically
records the stereo sound in dynamic Hi-Fi. If the broad-
cast is in SAP, you can record both the MAIN and the
SAP sound by using the SET UP–selection screen to set
the SAP mode to ON. If the broadcast is in stereo/SAP,
you can record either the SAP sound by using the SET
UP–selection screen to set the SAP mode to ON, or stereo
sound by setting the SAP mode to OFF. (See Mode
Selection.)
MTS/SAP RECORDING
* The monitor output listed in the table shows
that the audio output mode is in the Hi-Fi
` mode.
*Monitor Output Recording
Broad-
cast Re-
ceived
SAP
Mode
Posi-
tion
L-
Speaker R-
Speaker Hi-Fi
L-CH Hi-Fi
R-CH Linear
Track
Stereo
SAP
Stereo/
SAP
OFF
OFF
OFF
ON
ON
ON
LR
LR
MAIN
MAIN
MAIN
SAP
LR
L R SAP
L
L
MAIN
MAIN
L
L R
R
R
MAIN
SAP
R
SAP
MAIN
SAP
L R
SAP
L R
L R
On the TV screen
33
STEREO
SAPSAP
L R
Shown while receiving
SAP broadcast.
Shown while receiving
stereo broadcast.
Shown when SAP
mode is on.
Monitor Output When Receiving a SAP Broadcast
When receiving a SAP broadcast, if the SAP position is set to ON, change the audio output mode to select
Monitor Output (MAIN or SAP) with the SET UP–selection screen.
(See Mode Selection.)
When enjoying a TV program with MAIN sound:
Select on the SET UP–selection screen.
(See Audio Output Mode.)
When enjoying a TV program with SAP sound:
Select or on the SET UP–selection screen.
(See Audio Output Mode.)
Recording
The Simple Recording Timer (SRT) enables you to set the recording stop time. The SRT can be set on the TV
screen by using the remote control.
The SRT cannot be set if the clock has not been set. Make sure the clock is set before setting the SRT.
•Turn on the TV and select the video channel. (See Setting the 3 ↔ 4 Output Channel Selector.)
•Insert a cassette with the erasure protection tab opening covered. Power will turn on automatically.
•Press TV/VCR to select “VCR” (“VCR” will light on the multi-function display).
•If necessary, set “SAP” on the SET UP–selection screen. (See Mode Selection.)
SIMPLE RECORDING TIMER
Simple Recording Timer
Example: Recording a TV program in the SP mode. The program is on Channel 2, ending at 9:50 AM. The
present time is 8:43 AM.
!Select the desired channel with the numbered buttons or
CH ∂/ƒ.
Ex.: Channel
→
02
@Set the recording speed (SP or EP) with TAPE SPEED on
the remote control.
Ex.: SP
#Press REC to enter the recording mode.
Then, press REC again to enter the simple recording
timer mode. The recording stop time is displayed.
Ex.: 8:50 AM
$Each press of REC increases the stop time by 10
minutes.
Ex.: 9:50 AM
%When the stop time comes, recording is finished, and the power turns off.
02
Recording Speed
SP
SP STOP 8:50AM
02
02
SP STOP 9:50AM
•The Simple Recording Timer has priority over other
recordings.
•Ordinary timer programs will not be recorded when portions of
the time setting of the simple recording timer and of the time
setting of the ordinary timer recording overlap.
Changing the Contents of the Simple Recording Timer
!Press REC. The stop time flashes on the TV screen.
@Change the stop time as desired using REC.
Cancelling the Simple Recording Timer
!Press STOP.
Example:
9:00 10:00
Ordinary timer recording
(9:30 AM to 10:30 AM)
Simple Recording Timer
(9:00 AM to 10:00 AM)
NOT
recorded Record-
ed
Recorded
11:00
Procedure for Setting a Timer with the VCR Plus+ System
•Before using the VCR Plus+ programming system, read the Cable Box Set-up Function section.
•Turn on the TV and select the video channel.
•Insert a cassette with the erasure protection tab opening covered. Power will turn on automatically.
•Press TV/VCR to select “VCR” (“VCR” will light on the multi-function display).
•Check that the clock is displaying the correct time.
•If necessary, set “SAP” on the SET UP-selection screen. (See Mode Selection.)
Timer Recording with VCR Plus+ System
*The VCR Plus+ Programming System
The VCR Plus` Programming System allows you to program your VCR for timer recording simply by inputting
the PlusCode Programming number.
The PlusCode numbers are listed in most newspaper, TV Guide®, and local cable TV listings. Simply by in-
putting this PlusCode number, you can program your VCR for timer recording, eliminating the need to input
program start time, stop time, channel, date, and other information necessary for timer recording.
•If PlusCode numbers are not published in the listings for your area, they are sure to be introduced in the near future, so
please contact your local newspaper or cable TV station for further details.
•*VCR Plus` C3 and PlusCode are trademarks of Gemstar Development Corporation. The VCR Plus` system is manufac-
tured under license from Gemstar Development Corporation.
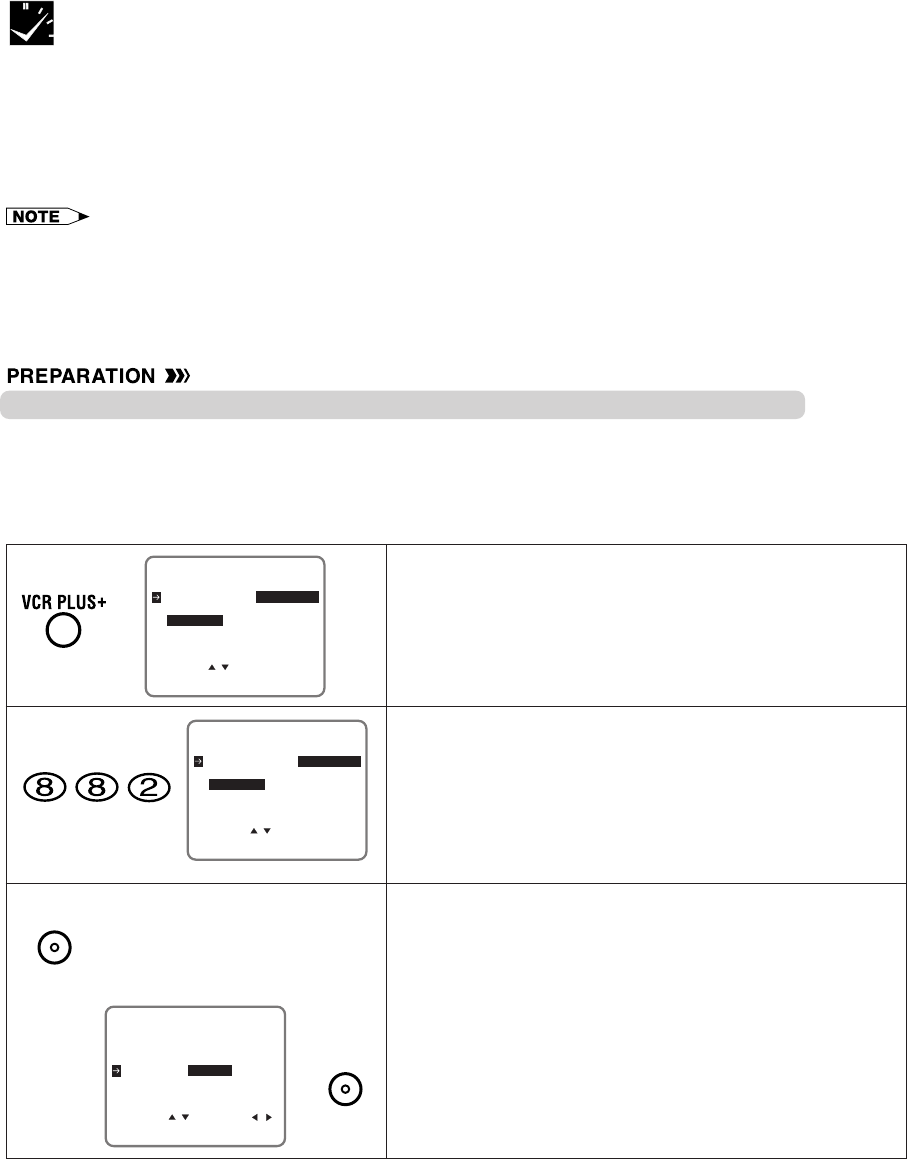
!Press VCR PLUS+.
The VCR PLUS+ system setting screen will appear.
@Enter the PlusCode number shown in your TV listings with
the numbered buttons.
Ex.: PlusCode number is 882
• If you make a mistake in entering the numbers, press
CANCEL to erase the PlusCode numbers one by one,
then re-enter the correct PlusCode numbers.
#If you want to record only once, press SET and go to
Step $.
Otherwise, press ƒ and select “WEEKLY” or “DAILY” with
ß/©. Then press SET to enter.
• ONCE: To record only once.
• WEEKLY:
To record every week at the same time.
• DAILY: To record everyday at the same time.
[ONCE]
[WEEKLY/DAILY]
gStep $
PLUSCODE -
USE NUMBER KEYS
ONCE WEEKLY DAILY
SELECT :
ENTER :SET EXIT :MENU
g
PLUSCODE 882
ONCE WEEKLY DAILY
SELECT : CHANGE:
ENTER :SET EXIT :MENU
ƒgß
©
PLUSCODE 882
USE NUMBER KEYS
ONCE WEEKLY DAILY
SELECT :
ENTER :SET EXIT :MENU
SET
SET
Timer Recording with VCR Plus+ System
SELECT : CHANGE:
8/01 02 12:00A12:30EP
1/2
ENTER :SET EXIT :MENU
-/-- --- --:-- --:----
-/-- --- --:-- --:----
-/-- --- --:-- --:----
DATE CH START STOP
TURN VCR POWER OFF
FOR TIMER RECORDING.
8/01 02 12:00A12:30SP
1/2
-/-- --- --:-- --:----
-/-- --- --:-- --:----
-/-- --- --:-- --:----
DATE CH START STOP
∂
ƒ
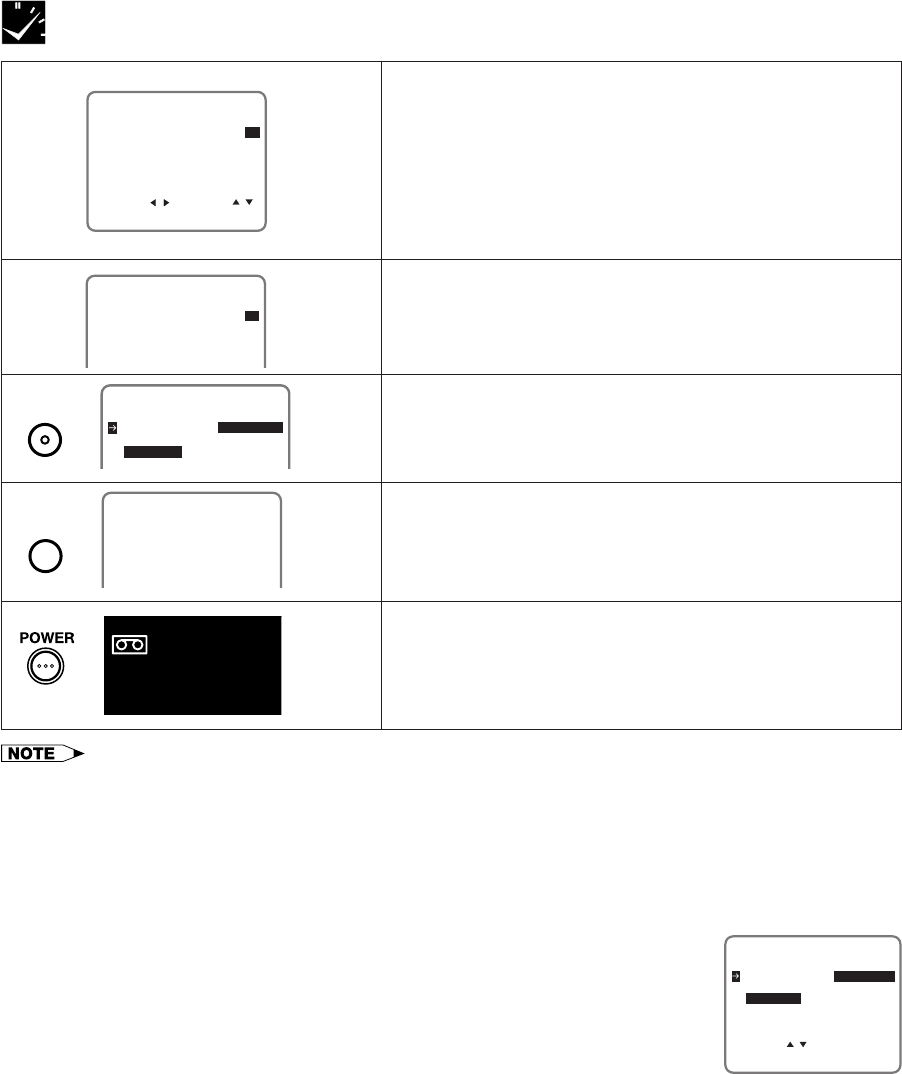
$The timer program information is shown on the TV screen.
Check the contents.
• If the channel displayed is incorrect, select the CH
position with ß/© and correct it with ∂/ƒ.
• When recording a program on a channel for the first
time, you must enter the correct channel number on the
screen, otherwise the PlusCode number will not be
successfully decoded.
%Select the tape speed with ∂/ƒ if necessary.
Ex.: SP
^Press SET. To program additional timer settings, repeat
Steps @ to ^.
&Press MENU.
The display shown to the left appears on the screen for 5
seconds, then the normal screen returns.
*Press POWER to enter the timer standby mode.
Be sure that “TIMER” is lit up on the multi-function display.
PLUSCODE -
ONCE WEEKLY DAILY
gNormal
Screen
g
•If you select “DAILY” in Step #, the VCR will record the program Monday–Sunday at the same time.
If you want to record Monday–Friday or Monday–Saturday, select “DATE” with ß/© and change it to “MO-FR” or “MO-SA”
with ∂/ƒ in Step $.
•In Step $, input the channel number you want to record. Once the preset channel has been input, you will not need to set
the preset channel for that station again.
•In Step #, if the VCR cannot decode the PlusCode number, or if the combination of PlusCode number and Program mode
does not exist, then “ERROR” will appear as shown below. To correct, press CANCEL and re-enter the PlusCode number.
Reasons for Error Message
1: PlusCode number entered is invalid.
2: Channel number is invalid.
(Used in cases when, even though the VCR TV mode on the CHANNEL PRESET screen is
set to AIR, the decoded channel number is greater than 69.)
3: PlusCode number entered for a program that has already been shown.
•You can also enter the VCR Plus+ system setting screen by selecting “VCR PLUS+” on
MENU screen.
•If you press VCR PLUS+ or select “VCR PLUS+” on MENU screen when the VCR clock
has not been set, the CLOCK screen will initially appear.
•If you press VCR PLUS+ when operating MENU screen for the first time or after a power failure of more than
20 seconds, the LANGUAGE screen will initially appear.
Checking/Cancelling the VCR Plus+ Programs System
Use the method described in Confirming/Cancelling Timer Programs to confirm or cancel program data.
PLUSCODE 123
USE NUMBER KEYS
ONCE WEEKLY DAILY
SELECT :
ENTER :SET EXIT :MENU
ERROR
MENU
g
SET
g
TIMER
•Before using the Timer Recording, read the Cable Box Set-up Function and Digital Satellite Set-up
Function sections.
•Turn on the TV and select the video channel.
•Insert a cassette with the erasure protection tab opening covered. Power will turn on automatically.
•Press TV/VCR to select “VCR” (“VCR” will light on the multi-function display).
•Check that the clock is displaying the correct time.
•If necessary, set “SAP” on the SET UP–selection screen. (See Mode Selection.)
Timer Recording (without VCR Plus+ System)
Example: Recording a TV program in the SP mode: the TV program is on channel 120 (CATV) starting at
9:05 PM and stopping at 10:35 PM on August 10th. The present time is 6:35 PM on August 10th.
SET UP
MENU
ENTER :SET EXIT :MENU
CHANNELS
SELECT :
CLOCK
LANGUAGE
TIMER
VCR PLUS+
gg
∂
ƒ
g©
∂
ƒ
2/2
1/2
ENTER :SET EXIT :MENU
-/-- --- --:-- --:----
SELECT :
-/-- --- --:-- --:----
-/-- --- --:-- --:----
DATE CH START STOP
CLEAR :CANCEL
-/-- --- --:-- --:----
1/2
8/10 120C --:-- --:--SP
-/-- --- --:-- --:----
DATE CH START STOP
-/-- --- --:-- --:----
-/-- --- --:-- --:----
g©
∂
ƒ
g
!Press MENU.
@Select “TIMER” with ∂/ƒ and then press SET.
#Press SET.
$Select the desired month/day (DATE) with ∂/ƒ and then
press ©. The cursor will move to the next column.
Ex.: August 10th
• If you want to record every day or week at the same time, hold
ƒ when you select the date.
%Select the desired channel with ∂/ƒ and then press ©.
Ex.: Channel 120 (CATV)
•If you receive both cable TV and satellite broadcasts,
you will need to specify for channels 100 to 125 whether
it is a cable or satellite channel. After selecting the
channel, select “C” for a cable channel or “S” for a
satellite channel with ∂/ƒ and then press ©.
Ex.: C
When pressing: The recording date changes in this sequence:
8/10 MO-FR MO-SA DAILY SAT SUN 8/9 8/8
8/10 8/11 8/12 8/8 8/9 SUN SAT
(next year)
(next year)(present)(tomorrow)
1/2
8/10 120C --:-- --:--SP
-/-- --- --:-- --:----
DATE CH START STOP
-/-- --- --:-- --:----
-/-- --- --:-- --:----
g©
∂
ƒ
SELECT : CHANGE:
8/10 --- --:-- --:--SP
1/2
ENTER :SET EXIT :MENU
-/-- --- --:-- --:----
-/-- --- --:-- --:----
-/-- --- --:-- --:----
DATE CH START STOP
MENU SET
SET
RECORDING WITH THE TIMER
Timer Recording (without VCR Plus+ System)
(Press SET.
•To program the additional timer settings, press SET and
repeat steps #–(.
)Press MENU to finish settings.
The display shown to the left appears on the screen for 5
seconds, after which the normal screen returns.
QPress POWER to enter the timer standby mode. Be sure
that “TIMER” is lit up on the multi-function display.
TURN VCR POWER OFF
FOR TIMER RECORDING.
gNormal
Screen
g
1/2
8/10 120C 9:05P10:35SP
-/-- --- --:-- --:----
DATE CH START STOP
-/-- --- --:-- --:----
-/-- --- --:-- --:----
∂
ƒ
1/2
8/10 120C 9:05P10:35SP
-/-- --- --:-- --:----
DATE CH START STOP
-/-- --- --:-- --:----
-/-- --- --:-- --:---- g©
∂
ƒ
&Set the recording stop time with ∂/ƒ and then press ©.
Ex.: 10:35 PM
*Select the tape speed with ∂/ƒ.
Ex.: SP
1/2
8/10 120C 9:05P--:--SP
-/-- --- --:-- --:----
DATE CH START STOP
-/-- --- --:-- --:----
-/-- --- --:-- --:----
g
∂
ƒ
^Set the recording start time (hour digits and minute digits)
with ∂/ƒ and then press ©.
Ex.: 9:05 PM
g
©
•If the power is interrupted for more than 20 seconds (power failure, etc.) during timer recording, the Auto Clock Setting will
reset the time after the power is returned (the timer indicator on the multi-function display will flash.) but the timer settings will
be cancelled.
•Press ENT. /AM/PM (100) to select AM or PM during start time setting.
•Numbered buttons can be used instead of ∂/ƒ to set the data.
•If the cassette ends before recording all the programs, the VCR will stop, eject the cassette, and turn the power off
automatically.
•In Step Q, if POWER is pressed with no cassette inserted, the TIMER indicator flashes for 5 seconds indicating that timer
recording is not possible.
•In Step Q, if the inserted cassette is without the erasure protection tab, TIMER indicator flashes and the cassette is ejected.
•To stop timer recording, press STOP.
•If a button is not pressed within 3 minutes during the setting procedure, the screen will return to the normal screen.
•There are two timer setting screens (1/2, 2/2).
1/2
8/10 120C 9:05P10:35SP
-/-- --- --:-- --:----
-/-- --- --:-- --:----
DATE CH START STOP
-/-- --- --:-- --:----
g
TIMER
SET
MENU
∂
ƒ
Confirming Timer Programs
You can see on the Timer setting screen a list of all timer programs that are already set.
•Turn on the TV and select the video channel.
•Press POWER and then TV/VCR to select “VCR” (“VCR” will light on the multi-function display).
!Press MENU.
@Select “TIMER” with ∂/ƒ and then press SET.
#TIMER screen will appear.
•Check the information displayed.
•If you want to correct the data, select the data to be
changed with ∂/ƒ and then press SET. Correct the
data as desired using ∂/ƒ/ß / ©. Then press SET.
See 2/2 screen also.
$Pressing MENU will clear the screen.
The display shown to the left appears for 5 seconds, after
which the normal screen returns.
•
After checking or correcting the program contents, press
POWER to enter the Timer Standby mode.
Timer Recording (without VCR Plus+ System)
g
∂
ƒ
SET UP
MENU
ENTER :SET EXIT :MENU
CHANNELS
SELECT :
CLOCK
LANGUAGE
TIMER
VCR PLUS+
g
g
TURN VCR POWER OFF
FOR TIMER RECORDING.
g
2/2
SELECT :
8/01 125C 12:00A12:30EP
1/2
ENTER :SET EXIT :MENU
8/10 07 9:05P10:35SP
DAILY 88 10:03P10:30EP
-/-- --- --:-- --:----
DATE CH START STOP
CLEAR :CANCEL
∂/ƒ
and
ß/©
g
2/2
SELECT :
8/01 125C 12:00A12:30EP
1/2
ENTER :SET EXIT :MENU
8/10 07 9:05P10:35SP
DAILY 88 10:03P10:30EP
-/-- --- --:-- --:----
DATE CH START STOP
CLEAR :CANCEL
∂
ƒ
2/2
SELECT :
-/-- --- --:-- --:----
1/2
ENTER :SET EXIT :MENU
8/10 07 9:05P10:35SP
DAILY 88 10:03P10:30EP
-/-- --- --:-- --:----
DATE CH START STOP
CLEAR :CANCEL
TURN VCR POWER OFF
FOR TIMER RECORDING.
g
g
g
@TIMER screen will appear.
•Select the program you wish to cancel with ∂/ƒ.
#Double-check that it is the program you wish to cancel,
and press CANCEL. It will be cleared on the screen.
$Pressing MENU will clear the screen.
The display shown to the left appears for 5 seconds, after
which the normal screen returns.
• If there are still some programs set, press POWER to enter the
Timer Standby mode.
•If you press MENU when all of the timer programs are
cancelled, the screen will return to normal.
!Follow the same procedure in Confirming Timer Programs ! @ above.
g
Cancelling Timer Programs
Perform the following procedure to cancel timer programs that have already been set.
•Turn on the TV and select the video channel.
•Press POWER and then TV/VCR to select “VCR” (“VCR” will light on the multi-function display).
MENU SET
SETSET
MENU
MENU
CANCEL
Remote Pager
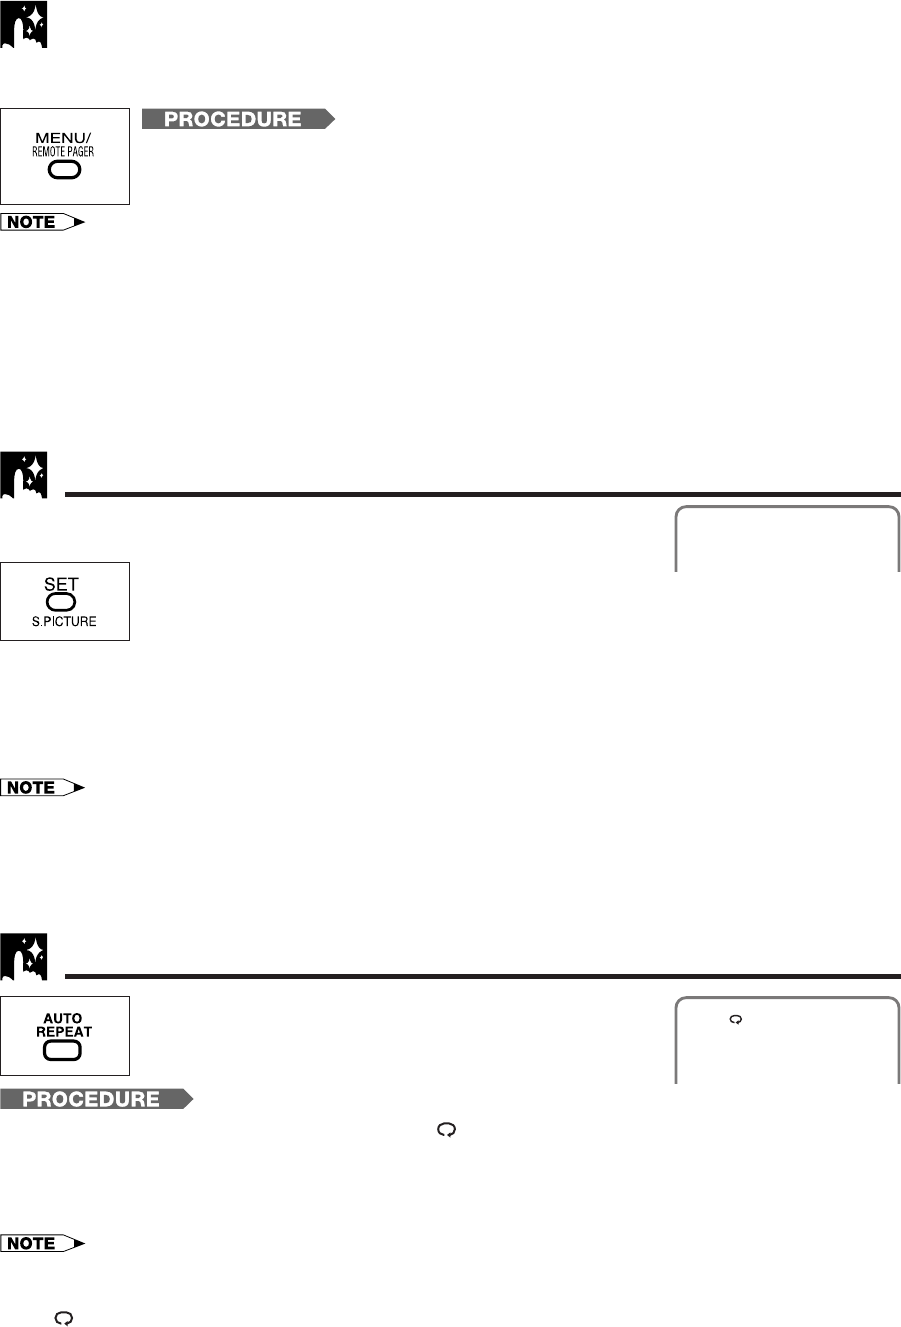
Recorded Section Auto Repeat
Press S. PICTURE on the VCR.
“S.PICTURE ON (or OFF)” will appear on the TV screen for a few seconds. Each time the
button is pressed, the mode switches between ON and OFF. (The Sharp Super Picture is
preset to ON at the factory.)
ON:
Normally leave the mode set to ON. This high picture quality function will create a clearer image during
playback.
OFF:
Set to OFF when playing back a tape on the VCR while editing or when strong noise appears on the screen.
•This function only operates during playback. It will not operate when recording or watching a TV program with the VCR
tuner.
•The ON/OFF status of the Sharp Super Picture can be checked when ON SCREEN is pressed to display OSD.
•This function can not be set to ON/OFF with the MENU screen displayed. First close the MENU screen before operating this
function.
•When the VCR power is turned off, the Sharp Super Picture setting is retained in memory.
•If power is interrupted for more than 20 seconds (power failure, etc.), the setting will return to ON.
This function creates clearer picture quality only during playback.
S. PICTURE ON
Sharp Super Picture
This function is handy for finding the remote control if it is misplaced. Press REMOTE PAGER on the VCR, and
the remote control will beep to reveal its location.
!Turn OFF the power on the VCR.
@Press REMOTE PAGER on the VCR.
The remote control will soon begin beeping for about 20 seconds, or until a button on the
remote control is pressed.
•If you do not wish to use the Remote Pager function, set the R/C CALL mode to OFF on the SET UP selection screen. (The R/
C CALL mode is preset to ON at the factory.) (See Mode Selection.)
•The Remote Pager function operates on radio waves. The effective range of radio waves sent from the VCR is a radius of 7
meters (in a straight unobstructed line), however, this may vary depending on the surrounding environment.
•The remote control may not beep in the following situations.
- When the remote control is in a different room from the VCR.
- When the remote control is placed on a metal surface.
- When the remote control is obstructed by a large object (i.e. wall, furniture).
•After REMOTE PAGER is pressed, it may take up to five seconds before the remote control beeps.
PLAY
With this feature, if the recorded portion has finished and non-
recorded portion has continued for 15 seconds, the tape will
automatically stop, rewind to the beginning and repeat
playback.
!
Press AUTO REPEAT on the remote control. The “ ” mark will appear on the screen for 3 seconds.
@When a non-recorded portion has continued for 15 seconds after the recorded portion has finished, the
tape will stop and begin rewinding.
#The tape will rewind to the beginning and repeat playback.
$To turn off the Recorded Section Auto Repeat function, press AUTO REPEAT once more.
•You can also set the Recorded Section Auto Repeat mode by selecting “ON” on the SET-UP-selection screen. (The AUTO
REPEAT mode is preset to OFF at the factory.)
•The ON/OFF status of the Recorded Section Auto Repeat can be checked when ON SCREEN is pressed to display OSD.
(The “ ” mark lights when the Recorded Section Auto Repeat is on.)
•If the Recorded Section Auto Repeat is on and the tape is rewound to the beginning with rewind or reverse video search, the
tape will automatically start playback.
DPSS (Digital Program Search System)
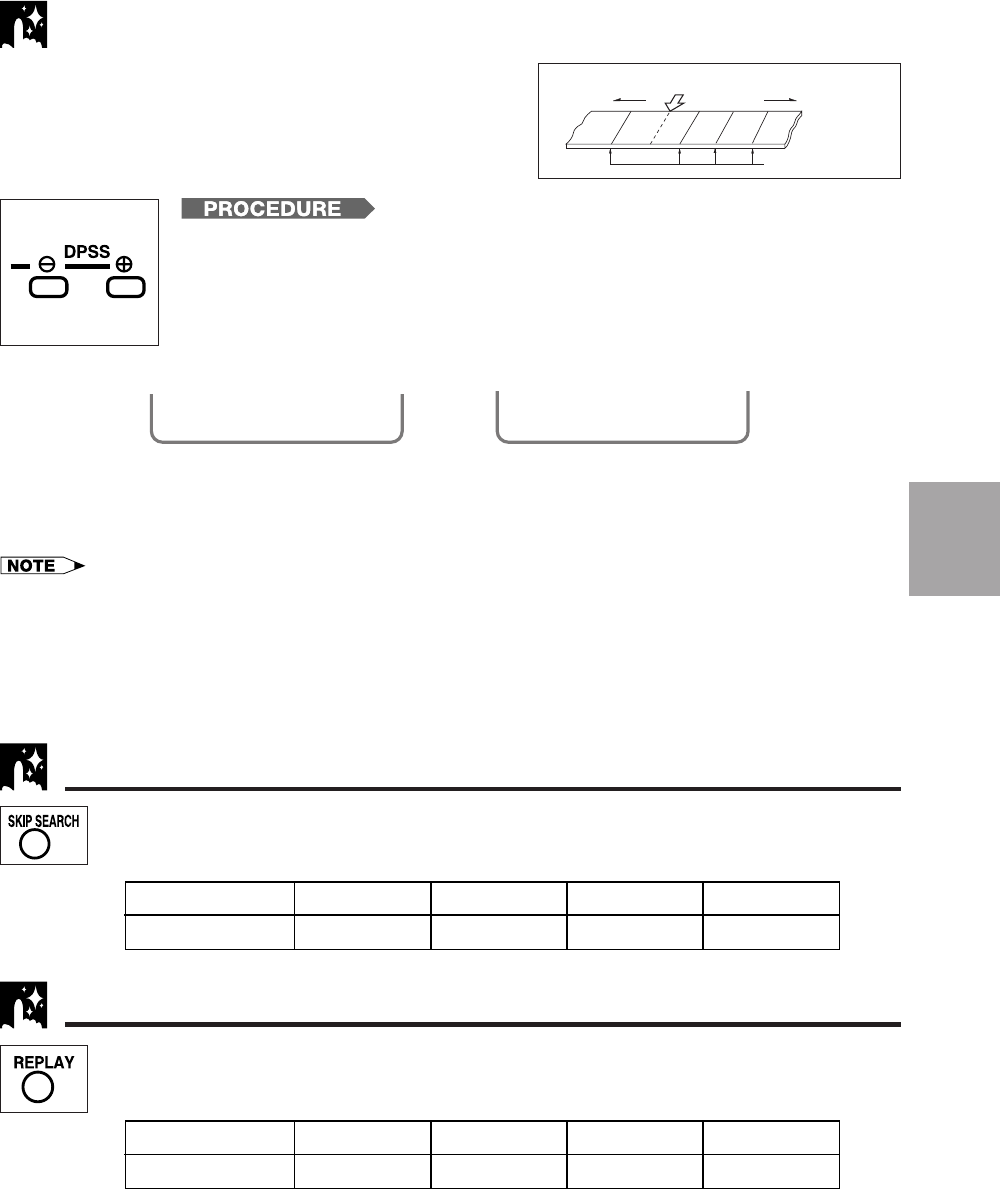
You can quickly locate a desired section of the tape with this
feature.
Index Signal
An index signal is automatically recorded on the tape at the start
of ordinary recording, simple recording timer and timer
recording.
Rewind Fast forward
1
–1 2 3
Index signals
Current tape position
!Insert a tape containing index signals.
@Select the index number of the desired program with DPSS k/j on the remote
control.
•With each press of the button, the number changes. One of 19 programs can be
selected in either direction (one of up to 38 programs).
(Ex.: DPSS 3=Third program after the current one.)
#Search starts immediately when you press DPSS k/j. (When a signal is located, the displayed number
decreases.)
$When the selected section is found, playback begins automatically.
• DPSS may not work if recordings are too close (within 3 minutes of each other).
• Press PLAY or STOP to cancel DPSS.
• If the tape reaches its end or beginning before locating the desired point, DPSS is cancelled.
• DPSS may not function for damaged or worn tapes.
• DPSS cannot be used with tapes that contain no index signals.
• The starting point of a program may vary slightly.
• DPSS does not operate during the slow, record, timer stand-by, and timer recording modes, or when there is no cassette loaded.
• Index signals for DPSS cannot be entered manually.
On the TV screen
g
DPSS 3
DPSS 2
With this feature, you can set a forward video search time to approx. 30, 60, 90 or 120 seconds of
recorded material. After searching, normal playback will resume automatically.
•Press SKIP SEARCH on the remote control during playback (ex. during commercials).
Skip Search
Number of Times Pressed 1 Time 2 Times 3 Times 4 Times
Video Search Time Approx. 30 sec. Approx. 60 sec. Approx. 90 sec. Approx. 120 sec.
With this feature, you can set a reverse video search time to approx. 20, 40, 60, or 80 seconds of
recorded material. After searching, normal playback will resume automatically.
•Press REPLAY on the remote control during playback.
Instant Replay
Number of Times Pressed 1 Time 2 Times 3 Times 4 Times
Video Search Time Approx. 20 sec. Approx. 40 sec. Approx. 60 sec. Approx. 80 sec.
Special
Functions
•During auto zero back, if the VCR rewinds (or fast forwards) the tape all the way without finding the “0:00.00” point, it will
stop at the beginning (or end) of the tape.
•The counter start point “0:00.00” may differ slightly from the starting point on the tape.
•This function is not operable during recording, recording pause, simple recording timer or timer recording.
Auto Zero Back
This function automatically forwards or rewinds the cassette to the “0:00.00” point. Use this function to return to
a recording start point.
!Reset the counter to “0:00.00” with CANCEL before recording.
@Press REC to start recording.
#After recording the desired program, press STOP to stop recording.
$Press ZERO BACK to return to the recording start point (0:00.00).
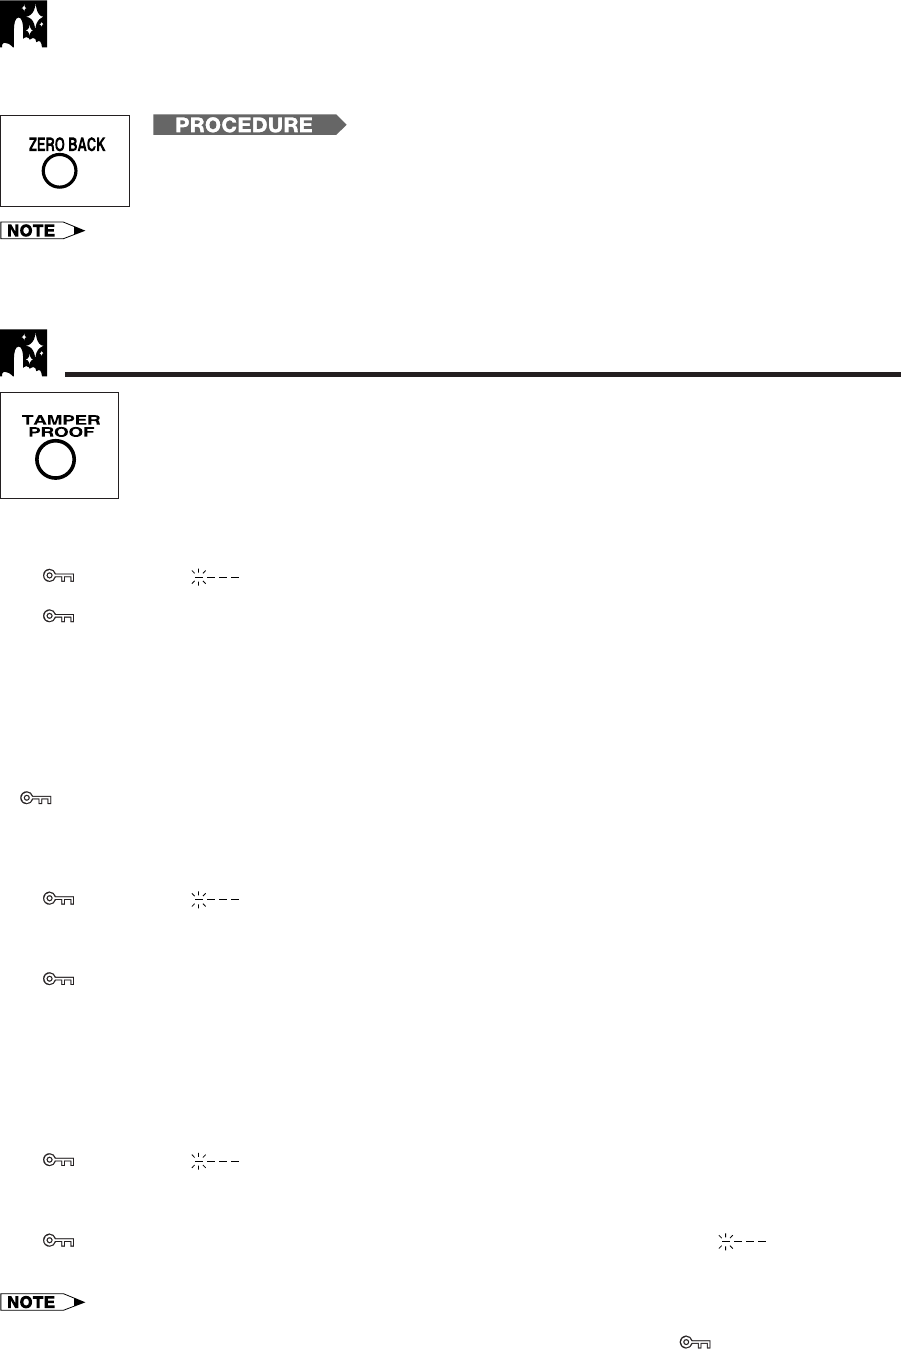
Tamper Proof
With this feature, you can lock all VCR modes to prevent accidental change.
This function works even when the VCR power is off, thus preventing children from operating
the VCR or viewing select programs while you are away from home.
Tamper Proof
!Press TAMPER PROOF on the remote control for about 2 seconds.
“ ” flashes and “ ” lights on the multi-function display.
@Press TAMPER PROOF again.
“ ” remains lit on the multi-function display confirming that Tamper Proof has been activated.
#Now regardless of what other operating buttons are touched, the VCR will continue to operate in the present
mode.
(If Tamper Proof is activated during playback, once the tape reaches its end, the VCR automatically
rewinds the tape, ejects it, and turns the power off.)
Disengaging Tamper Proof
•Press TAMPER PROOF for about 2 seconds.
“” starts flashing and then disappears. Now, Tamper Proof is disengaged.
Advanced Tamper Proof
!Press TAMPER PROOF on the remote control for about 2 seconds.
“ ” flashes and “ ” lights on the multi-function display.
@Input the personal code number (4 digit code) with the numbered buttons. The personal code number you
have input is displayed on the multi-function display.
#Press TAMPER PROOF again.
“ ” remains lit on the multi-function display confirming that Tamper Proof has been activated.
$Now regardless of what other operating buttons are touched, the VCR will continue to operate in the present
mode.
(If Tamper Proof is activated during playback, once the tape reaches its end, the VCR automatically
rewinds the tape, ejects it, and turns the power off.)
Disengaging Advanced Tamper Proof
!Press TAMPER PROOF for about 2 seconds.
“ ” flashes and “ ” lights on the multi-function display.
@Input the personal code number (4 digit code) you used to activate Advanced Tamper Proof with the
numbered buttons. The personal code number you have input is displayed on the multi-function display.
#Press TAMPER PROOF again.
“” disappears. Now, Tamper Proof is disengaged. If the code number is wrong, “ ” is displayed on
the multi-function display. Retry to input the right code number. Press TAMPER PROOF again.
•If power is interrupted for more than 20 seconds (power failure, etc.), Tamper Proof may disengage.
•If, while Tamper Proof is on, you attempt to change modes by pressing another button, the “ ” indicator will flash on the
multi-function display.

Specifications
Format: VHS NTSC Standard
Video Recording System: Rotary Two-Head Helical Scanning
Number of Video Heads: 4
Video Signal Standard: NTSC Color System
Audio Recording System: 1 Stationary Head for Linear Audio
2 Rotary Heads for Hi-Fi stereo
Tape Width: 12.7 mm (1/2 inch)
Tape Speed: (SP) 33.35 mm/sec (1.31 i.p.s.)
(LP) 16.67 mm/sec (0.66 i.p.s.) (playback only)
(EP) 11.12 mm/sec (0.44 i.p.s.)
Maximum Recording Time: (SP) 160 min (T-160)
(EP) 480 min (T-160)
Channel Coverage: VHF 2–13
UHF 14–69
CATV 1–125
Antenna Input: 75 Ohm
Video Input: 0.5 to 2.0 Vp-p, 75 Ohm unbalanced
Video Output: 1.0 Vp-p, 75 Ohm unbalanced
Audio Input: 18 dBs, 47 kOhm unbalanced (0 dBs 4 0.775 Vrms)
Audio Output: 18 dBs, 1 kOhm unbalanced (0 dBs 4 0.775 Vrms)
Hi-Fi Audio:
Dynamic Range
: 90 dB
Frequency Response
: 20 Hz–20 kHz
Memory Backup: 20 seconds
Operating Temperature: 5&C to 40&C (41&F to 104&F)
Storage Temperature: 120&C to 60&C (14&F to 140&F)
Power Source: 120 V AC, 60 Hz
Power Consumption: 20 W
Dimensions: 360 (W) 2 92 (H) 2 256 (D) mm
(14-3/16( 2 3-5/8( 2 10-5/64()
Weight: 2.7 kg (6.0 lbs)
•Specifications are subject to change without notice.
Helpful
Hints

Check this list before calling for service.
Possible Cause/Solutions
• MAKE SURE THAT THE “TAMPER PROOF” MODE IS NOT ENGAGED.
• If you forget the personal code number you have input with Advanced Tamper
Proof, input “0000” (four zeros) to disengage it.
• Make sure the power cord is plugged in.
• Check the outlet, fuse or circuit breaker.
• Use the CHANNEL PRESET screen to change from AIR mode to CATV. (See
Setting the Channels.)
• Turn on the power.
• Press EJECT several times.
• Safety device in VCR is functioning. Unplug VCR and plug it in again after a few
minutes.
• Cassette erasure protection tab is removed. Use a different cassette or place
adhesive tape over the tab opening.
• Check for a cassette loaded in the unit.
• Make sure the “TV” has been selected by pressing TV/VCR.
• Make sure all cables are connected properly.
• Make sure the VCR is not in PAUSE/STILL mode.
• Make sure the tape has not reached the end or beginning.
• Make sure the TV is set to the same channel as the VCR’s 3 ↔ 4 OUTPUT
CHANNEL selector.
• Check all connecting cables.
• Make sure there is no other cassette inside.
• Make sure the cassette is properly positioned and reinsert.
• Make sure the “TAMPER PROOF” mode is not engaged.
• Power failure may have occurred.
• If the clock display is blinking, set the clock and try again.
• Adjust the tracking manually by pressing CH ∂/ƒ.
• In some cases, with a worn or damaged tape, noise cannot be eliminated
completely.
• The VCR may not be set to external input mode.
Press INPUT to set the VCR to external input mode. (See Tape Dubbing.)
• Keep your VCR away from electrical and magnetic appliances. Be sure to
position your VCR at least 89 away from your TV or video monitor.
• Use RCA pin type connection cables (not the supplied coaxial cable) to connect
the TV to the VCR, and set the TV to external video input mode.
• Adjust the tracking, or try another Hi-Fi stereo cassette.
• Make sure the sound was recorded in Hi-Fi stereo. (Any stereo signals recorded
on the linear track will not be played back in stereo.)
Pre–Service Call Checklist
Problem
• NO OPERATION WHEN ANY BUTTON IS
PRESSED.
• No power. (Nothing on the multi-function
display.)
• VCR does not receive CATV channels.
• VCR does not operate.
• VCR does not record.
• No color or poor TV picture during normal
viewing.
• No tape movement.
• No picture appears during playback.
• Cassette cannot be loaded.
• Timer recording does not work.
• Noise appears on the screen when the
automatic tracking control system is oper-
ating.
• Cannot record a signal through the rear
external input jack.
•Picture or sound is not stable during
playback.
• Stereo TV puts out monaural sound only,
even when cassettes recorded in Hi-Fi
stereo are played back.
• Cassettes recorded in stereo mode are
not played back in stereo.
For the location of the nearest Sharp Authorized Service Center, or to obtain product literature, accessories,
supplies or customer assistance, please call 1-800-BE SHARP (1-800-237-4277).
Service Information
This unit is equipped with a microprocessor. Its performance could be adversely affected by external
electrical noise or interference. If this should happen, unplug the VCR and plug it in again after a few
minutes and reset EZ Set Up for AIR/CATV operation.
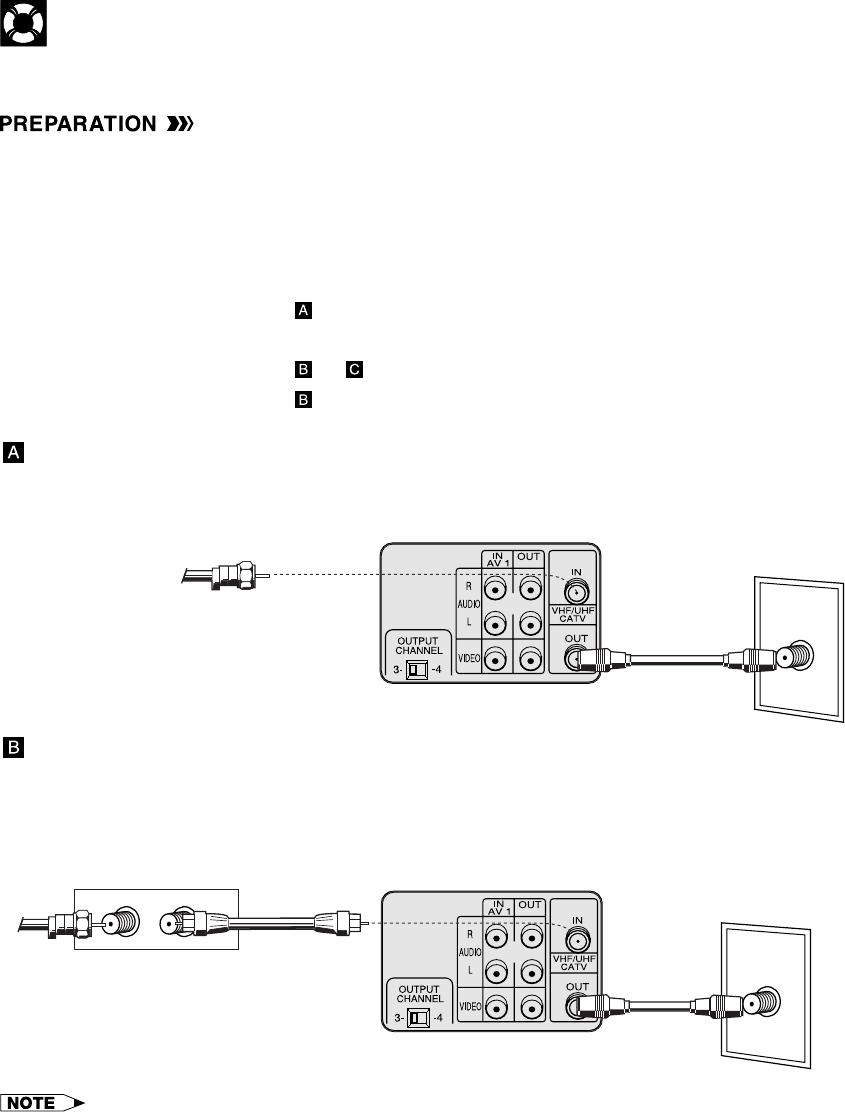
Cable TV Connections
Your VCR is capable of receiving the following non-scrambled channels.
•Scrambled channels can be received with the cable box supplied by your cable TV company.
Set the 3 ↔ 4 OUTPUT CHANNEL selector on the rear of the VCR to 3 or 4. (Factory preset: 3)
Tune the TV to this channel and press the TV/VCR button to watch the VCR.
First check your TV/CATV system
Step QDoes your CATV operator require use of cable box?
•YES →Go to Step W
•NO →Go to
Step WDoes your CATV system have some or all channels scrambled?
•YES →Go to or
•NO →Go to
Connection without a cable box
•Connect as shown. Then go to “After the Connection”.
ANT/CABLE
VCR Rear
TV Rear
From CATV system
Coaxial cable
(Supplied)
Connection with cable box
•Connect as shown. With this connection, it is possible to record descrambled CATV signals. Then go to “After
the Connection”.
•If your cable box is remote-controllable, see Cable Box Set-up Function.
ANT/CABLE
VCR Rear
Cable Box
TV Rear
OUTIN
From
CATV
system
Coaxial
cable
(Supplied)
Coaxial cable
(Not supplied)
•If the cable box is turned off, it will not output any signals, thus making it impossible to record or view a program from the
CATV system.
•In the case of the above connections, it is not possible to change channels using the VCR remote control. Only the cable
box can be used to change channels.
•Only one channel at a time can be programmed for recording programs with the timer. It is not possible to watch a TV
program different from the one being recorded.
•Depending on which terminals the TV has, a separate combiner (mixer) or separator (splitter) may be necessary.
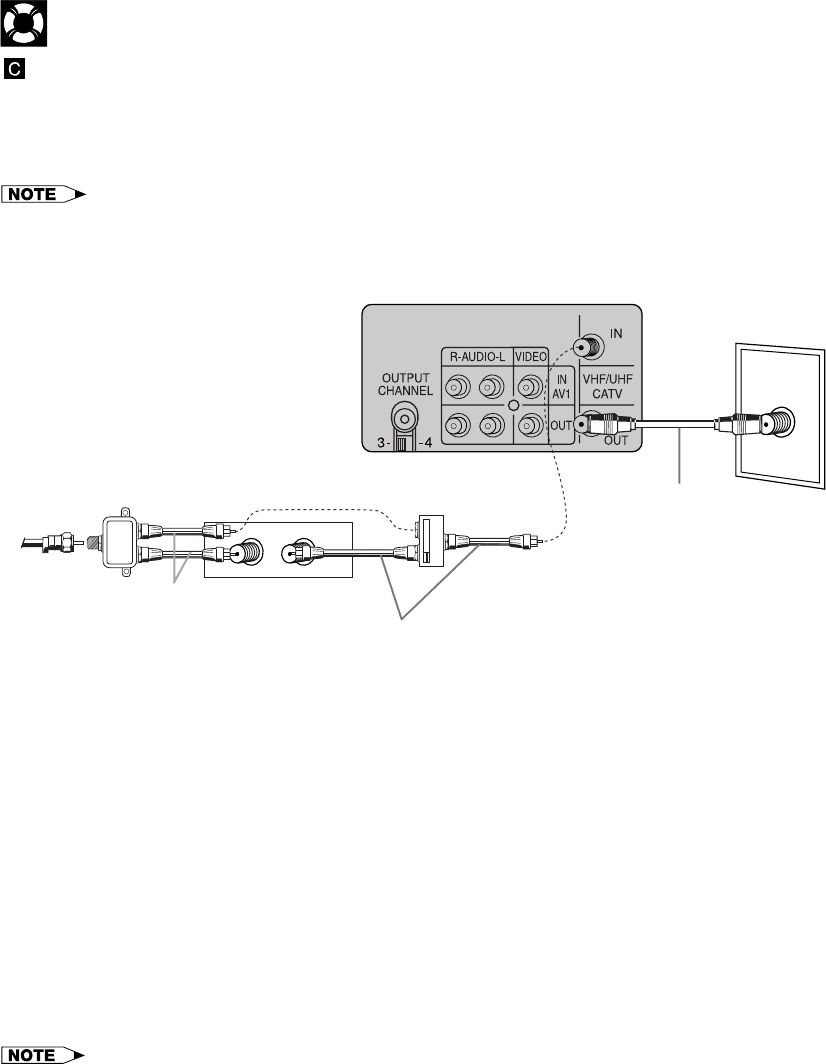
Cable TV Connections
OUTIN
ANT/CABLE
A
B
Connection with cable box, A/B switch and splitter
If the cable box is needed only for some of the channels of your CATV operator, connect the cable box to your
VCR as shown below. This type of connection requires a cable box set-up. For more details, see Cable Box
Set-up Function.
•Connect as shown. Then go to “After the Connection”.
•This connection allows you to watch a channel that does not require the cable box, while recording from a different channel.
Note, however, that you cannot view other broadcast TV channels while recording a CATV program through the cable box.
TV Rear
VCR Rear
Using the A/B switch
!Set the A/B switch to the ‘A’ position in the following situations.
Set USE CABLE BOX to “NO” on the CABLE BOX SET UP screen. (See Cable Box Set-up Function.)
a) To record and watch an unscrambled TV program (without the signal passing through the cable box).
b) To watch an unscrambled TV program when the VCR is recording another program.
c) To watch an unscrambled TV program when the VCR is turned off.
@Set the A/B switch to position B in the following situations:
When the A/B switch is set to B, the cable box requires a set-up to receive the remote control codes sent
from your VCR, which control the cable box channel. For details on the cable box set-up, see Cable Box
Set-up Function.
Set USE CABLE BOX to “YES” on the CABLE BOX SET UP screen.
a) To record and watch a scrambled or unscrambled TV program through the cable box.
b) To watch a scrambled or unscrambled TV program through the cable box when the VCR is turned off.
•If the power on the cable box is turned off, it will not output any signals, thus making it impossible to
record or view a program from the CATV system.
•If you turn off the cable box, you cannot record or view a CATV program.
•If you have questions regarding any connection procedure, please contact your cable company.
After the Connection
Plug in the power cords of the VCR, TV and cable box. Then go to the SETTING UP section.
Coaxial cable
(Supplied)
A/B switch
(Not supplied)
Coaxial cable
(Not supplied)
Coaxial cable
(Not supplied)
Splitter
(Not supplied) Cable Box
From
CATV
system
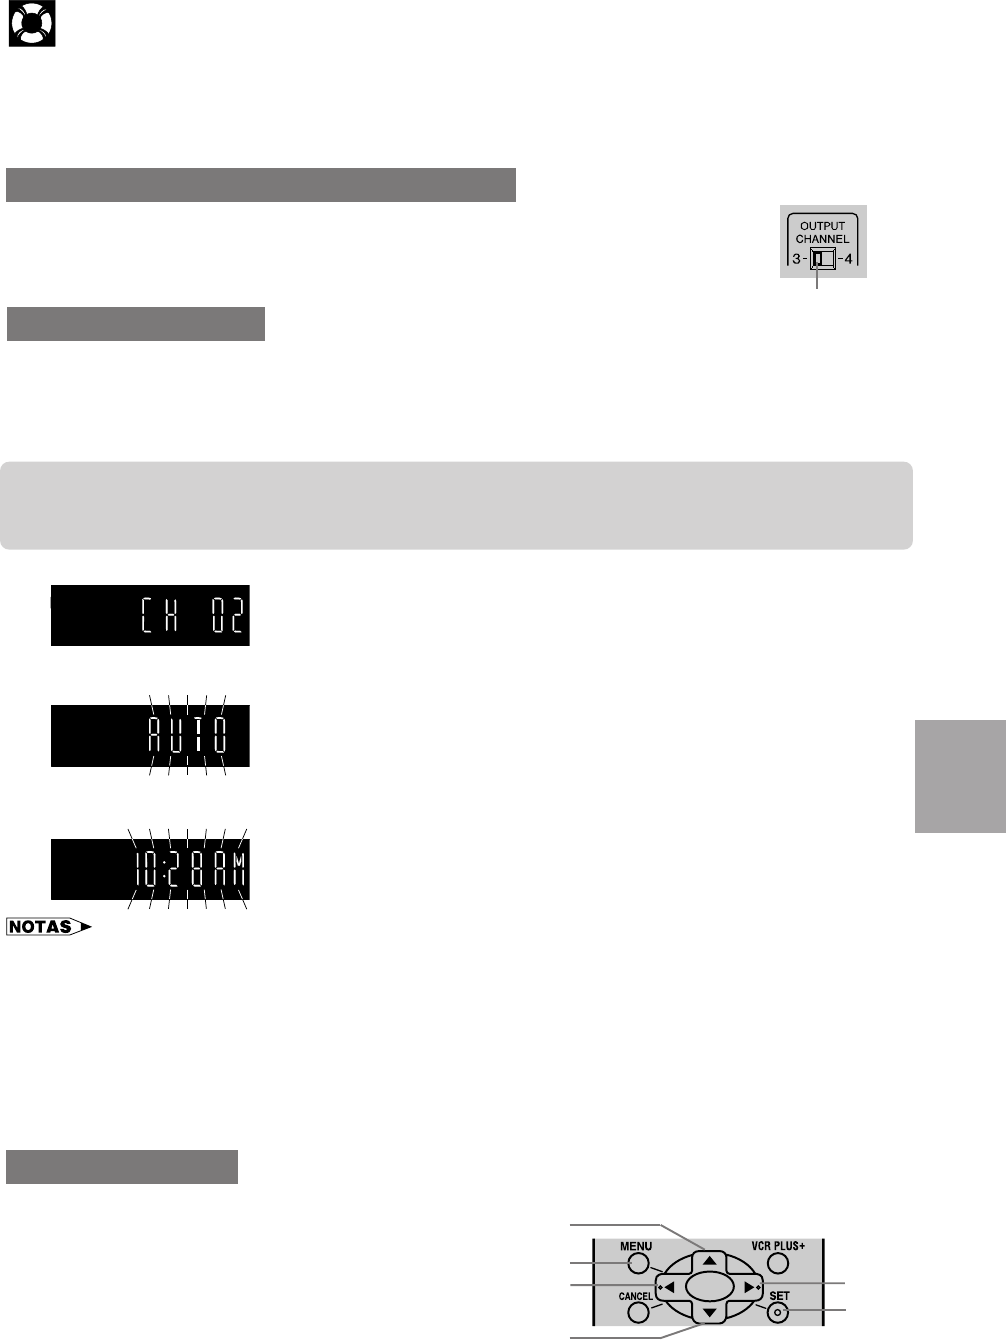
Esta es una breve guía de operación rápida preparada para ayudarle a utilizar las funciones básicas de su videograbadora.
Después de prender su videograbadora a la antena apropiada, televisor o caja de televisón por cable, utilícela siguiendo las
explicaciones dadas a continuación.
Para ver en la pantalla de su televisor lo que su videograbadora está reproduciendo o grabando, ajuste el selector 3 ↔ 4
OUTPUT CHANNEL y el canal de TV siguiendo el método descrito a continuación.
Guía de operación rápida en español
Ajuste del selector 3 ↔ 4 Output Channel
El selector 3 ↔ 4 OUTPUT CHANNEL de la parte trasera de su videograbadora cambia la salida
de la videograbadora a las señales estándar de emisión de TV. Su televisor y su videograbadora
deben estar ajustados al mismo canal (por ejemplo, el televisor en el canal 3 y el selector
OUTPUT CHANNEL de la videograbadora en el canal 3).
Parte trasera de
su videograbadora
Preparación del EZ
IMPORTANTE (Precaución durante EZ Set Up):
• No pulse el botón POWER de la videograbadora ni del control remoto.
• No inserte un videocasete en la videograbadora.
La función de EZ Set Up ajusta automáticamente el canal del sintonizador y el reloj cuando el cable de la antena está
conectado al panel trasero de la videograbadora y la clavija de alimentación se conecta luego a una toma de CA.
IMPORTANTE
Cuando se utilice un sintonizador de TV por cable:
• Consulte Conexiones de TV por cable.
• Deje conectada la alimentación del sintonizador de TV por cable.
!Asegúrese de que el cable de la antena esté conectado. Para conocer la
configuración de la conexión, consulte Conexión del vídeo.
@Conecte la clavija del cable de alimentación del vídeo a una toma de CA.
#El canal del sintonizador y el reloj se ajustarán automáticamente.
• Esta videograbadora puede monitorear y utilizar señales de tiempo
(señales EDS), proporcionadas por algunas emisoras de TV, para ajustar
automáticamente el reloj de la videograbadora. Esta videograbadora
busca automáticamente las señales EDS, pero si usted tiene prisa para
utilizar la grabación con temporizador o conocer el canal de la portadora
de señal EDS en su área, siga el procedimiento de Ajuste automático
del reloj o Ajuste manual del reloj.
Durante el ajuste automático de canales
•Si se suministra alimentación a la videograbadora nates de conectar el cable EZ Set Up no podrá preajustar canales en la
memoria. Si ocure esto, desenchufe la videograbadora de la toma e corriente y espere unos pocos minutos. Compruebe la
conexión del cable/antena y suministre alimentación a la videograbadora. EZ Set Up empezara de nuevo automáticamente.
•Si se conecta la alimentación durante EZ Set Up, el ajuste automático de los canales se interrumpirá y los canales del
sintonizador no podrán ser preajustados.
•El ajuste automático del reloj puede tardar varios minutos.
•Si el ajuste automático del reloj no se completa antes de 30 minutos, puede que no haya canales con señales EDS. En este
caso, ajuste el reloj manualmente. (Consulte Ajuste manual del reloj.)
•Si la señal de la antena es débil, la función del ajuste automático del reloj no funcionará.
•Durante el ajuste inicial de los canales, éstos se ajustarán en el canal AIR. Para ver un canal de TV por cable, seleccione
“CATV” en la pantalla PREAJ. CANAL. (Consulte Adjuste de canales.)
Cuando utilice la videograbadora por primera vez, o después de
producirse un fallo en la alimentación de más de 20 segundos,
tendrá que ajustar el idioma que vaya a utilizar en la pantalla de
visualización.
!Conecte la alimentación de su televisor y seleccione el
canal de vídeo.
(Consulte Ajuste del selector 3 ↔ 4 Output Channel.)
@Pulse POWER y luego TV/VCR para seleccionar “VCR”.
(“VCR” se encenderá en el visualizador multifuncional.)
Ajuste de idioma
Selector 3 ↔ 4
OUTPUT CHANNEL
MENU
ß©
SET
∂
ƒ
Español
TIMER
REC
VCR
S
PEP
f
f
Puesta en hora automático del reloj
EZ Set Up completo
Guía de operación rápida en español
Ajuste del reloj
#Pulse MENU.
$Seleccione el idioma con los botones ∂/ƒ y pulse SET.
La pantalla volverá al modo normal.
Ejemplo: ESPAÑOL
EN LA PANTALLA DEL TELEVISOR OPERACION
(PANTALLA EN INGLES)
ESPANOL
LANGUAGE
FRANÇAIS
ENGLISH
ESPANOL
IDIOMA
FRANÇAIS
ENGLISH
∂
ƒg
(PANTALLA EN ESPAÑOL)
Deberá poner en hora el reloj si desea utilizar las funciones del temporizador. De otra forma, este ajuste no será necesario.
Cuando la videograbadora se enchufe por primera vez a una toma de corriente, el reloj del visualizador multifuncional (--:--)
parpadeará. Lo mismo ocurrirá si la alimentación se interrumpe durante más de 20 segundos (fallo en la alimentación, etc.).
!Conecte la alimentación de su televisor y seleccione el canal de vídeo.
(Consulte Ajuste del selector 3 ↔ 4 Output Channel.)
@Pulse POWER y luego TV/VCR para seleccionar “VCR”.
(“VCR” se encenderá en el visualizador multifuncional.)
#Pulse MENU. Seleccione el item “RELOJ” con los botones
∂/ƒ y pulse SET.
$Siga las instrucciones mostradas en la pantalla e
introduzca los datos del calendario y del reloj utilizando los
botones ∂/ƒ/ß/© del control remoto.
%Si los datos introducidos son correctos, pulse SET del
control remoto para volver a la pantalla normal, y luego el
reloj empezará a funcionar.
EN LA PANTALLA DEL TELEVISOR OPERACION
PREPARAR
MENU
ENTRAR :SET SALIR :MENU
CANALES
SELEC. :
RELOJ
IDIOMA
TEMP
VCR PLUS+
g∂
ƒg
SELEC. : CAMBIO:
10:28AM 7/04SAB 98 ENC
RELOJ
ENTRAR :SET SALIR :MENU
HORA FECHA ANO DST
∂/ƒ
f
ß/©
g PANTALLA NORMAL
Reproducción
!Conecte la alimentación de su televisor y seleccione el canal de vídeo. (Consulte Ajuste del selector 3 ↔ 4 Output
Channel.)
@Pulse POWER para conectar la alimentación de la videograbadora.
#Insertando un casete, pulse PLAY.
$Para parar la reproducción, pulse STOP.
Grabación de un programa de TV
!Conecte la alimentación de su televisor y seleccione el canal de vídeo. (Consulte Ajuste del selector 3 ↔ 4 Output
Channel.)
@Pulse POWER y luego TV/VCR para seleccionar “VCR”.
(“VCR” se encenderá en el visualizador multifuncional.)
#Inserte el casete con lengüeta de protección contra borrado intacta.
$Pulse TAPE SPEED del control remoto para ajustar la velocidad de grabación (SP o EP).
%Seleccione el canal deseado con CH ∂ o ƒ, o con los botones numéricos del control remoto.
^Pulse REC.
•En el paso #, si pulsa MENU cuando opere la pantalla de visualización por primera vez, o después de producirse un fallo
en la alimentación de más de 20 segundos, la pantalla del idioma aparecerá.
•Si no se pulsa un botón antes de que pasen 3 minutos durante el procedimiento de ajuste, la pantalla volverá a la pantalla
normal.
MENU
g
SET
SET
MENU
SET
Guía de operación rápida en español
Para ver un programa de TV mientras se graba otro
!Siga los pasos ! a ^ de arriba.
@Pulse TV/VCR para seleccionar “TV” (el indicador “VCR” se apagará).
#Sintonice el canal de TV deseado.
%Pulse MENU del control remoto.
^Seleccione el modo de ajuste TEMP con los botones ∂/ƒ
y pulse SET.
&Pulse SET.
*Siga las instrucciones mostradas en la pantalla e
introduzca los datos utilizando los botones ∂/ƒ/ß/© del
control remoto.
(Pulse SET del control remoto.
Todos los datos introducidos aparecerán en la pantalla del
televisor.
EN LA PANTALLA DEL TELEVISOR OPERACION
PREPARAR
MENU
ENTRAR :SET SALIR :MENU
CANALES
SELEC. :
RELOJ
IDIOMA
TEMP
VCR PLUS+
g∂
ƒg
1/2
8/10 07 9:05P 10:35SP
FECHA CA INICIO PARADA
-/-- --- --:-- --:----
∂/ƒ
f
ß/©
1/2
FECHA CA INICIO PARADA
8/10 07 9:05P10:35SP
-/-- --- --:-- --:----
g
)Pulse MENU para terminar de hacer los ajustes.
QPulse POWER para entrar en el modo de espera del temporizador. Asegurese de que “TIMER” esté
encendido en el visualizador multifuncional.
!Conecte la alimentación de su televisor y seleccione el canal de vídeo.
@Inserte un casete con la abertura de la lengüeta de protección contra borrado tapada. La alimentación se
conectará automáticamente.
#Pulse TV/VCR para seleccionar “VCR”. (“VCR” se encenderá en el visualizador multifuncional.)
$Seleccione el canal deseado con los botones numéricos o con CH ∂ o ƒ.
%Ajuste la velocidad de grabación (SP o EP) con TAPE SPEED del control remoto.
^Pulse REC para entrar en el modo de grabación.
&Luego, pulse REC para entrar en el modo de grabación sencilla con temporizador. La hora de parada de
grabación se visualiza.
*Cada vez que pulsa REC, la hora de parada aumenta en 10 minutos. Si fuese necesario, pulse CH ∂ o ƒ para
cambiar el ajuste de los minutos.
(Cuando llegue la hora de parada, la grabación terminará y la alimentación se desconectará.
!Conecte la alimentación de su televisor y seleccione el canal de vídeo.
@Inserte un casete con la abertura de la lengüeta de protección contra borrado tapada. La alimentación se conectará
automáticamente.
#Pulse TV/VCR para seleccionar “VCR”. (“VCR” se encenderá en el visualizador multifuncional.)
$Compruebe si el reloj muestra la hora correcta.
g
Ajuste de la grabación con temporizador
Ajuste del temporizador de grabación sencilla
1/2
-/-- --- --:-- --:----
FECHA CA INICIO PARADA
-/-- --- --:-- --:----
/
MENU SET
SET
SET
SHARP ELECTRONICS CORPORATION warrants to the first consumer purchaser that this
Sharp brand product (the “Product”), when shipped in its original container, will be free from
defective workmanship and materials, and agrees that it will, at its option, either repair the
defect or replace the defective Product or part thereof with a new or remanufactured equivalent
at no charge to the purchaser for parts or labor for the period(s) set forth below.
This warranty does not apply to any appearance items of the Product nor to the additional
excluded item(s) set forth below nor to any Product the exterior of which has been damaged or
defaced, which has been subjected to improper voltage or other misuse, abnormal service or
handling, or which has been altered or modified in design or construction.
In order to enforce the rights under this limited warranty, the purchaser should follow the steps
set forth below and provide proof of purchase to the servicer.
The limited warranty described herein is in addition to whatever implied warranties may be
granted to purchasers by law. ALL IMPLIED WARRANTIES INCLUDING THE WARRANTIES OF
MERCHANTABILITY AND FITNESS FOR USE ARE LIMITED TO THE PERIOD(S) FROM THE
DATE OF PURCHASE SET FORTH BELOW. Some states do not allow limitations on how long
an implied warranty lasts, so the above limitation may not apply to you.
Neither the sales personnel of the seller nor any other person is authorized to make any
warranties other than those described herein, or to extend the duration of any warranties
beyond the time period described herein on behalf of Sharp.
The warranties described herein shall be the sole and exclusive warranties granted by Sharp
and shall be the sole and exclusive remedy available to the purchaser. Correction of defects, in
the manner and for the period of time described herein, shall constitute complete fulfillment of
all liabilities and responsibilities of Sharp to the purchaser with respect to the Product, and shall
constitute full satisfaction of all claims, whether based on contract, negligence, strict liability or
otherwise. In no event shall Sharp be liable, or in any way responsible, for any damages or
defects in the Product which were caused by repairs or attempted repairs performed by
anyone other than an authorized servicer. Nor shall Sharp be liable or in any way responsible
for any incidental or consequential economic or property damage. Some states do not allow the
exclusion of incidental or consequential damages, so the above exclusion may not apply to
you.
THIS WARRANTY GIVES YOU SPECIFIC LEGAL RIGHTS. YOU MAY ALSO HAVE OTHER
RIGHTS WHICH VARY FROM STATE TO STATE.
Warranty Period for this Product: 90 days Parts and Labor. The warranty period continues for
a total of one year from the date of purchase for parts.
Additional Items Excluded from Warranty Coverage: Non-Rechargeable Batteries.
Where to Obtain Service: For location of the nearest Sharp Authorized Service, or to obtain
product literature, accessories, supplies or customer assistance, please call 1-800-BE
SHARP.
What to Do to Obtain Service: Ship or carry in your Product to an Authorized Service Dealer
or Station. Be sure to have Proof of Purchase available; if you ship the Product, be sure it is
packaged carefully.
SHARP ELECTRONICS CORPORATION
Sharp Plaza, Mahwah, New Jersey 07430-2135
SHARP CORPORATION
Osaka, Japan Printed in Malaysia
TINS-3227AJZZ
T1749-A
8P03-MSG