Sicel Technologies DVS-R-200 Low Frequency RFID User Manual
Sicel Technologies, Inc. Low Frequency RFID
UserManual.wiki
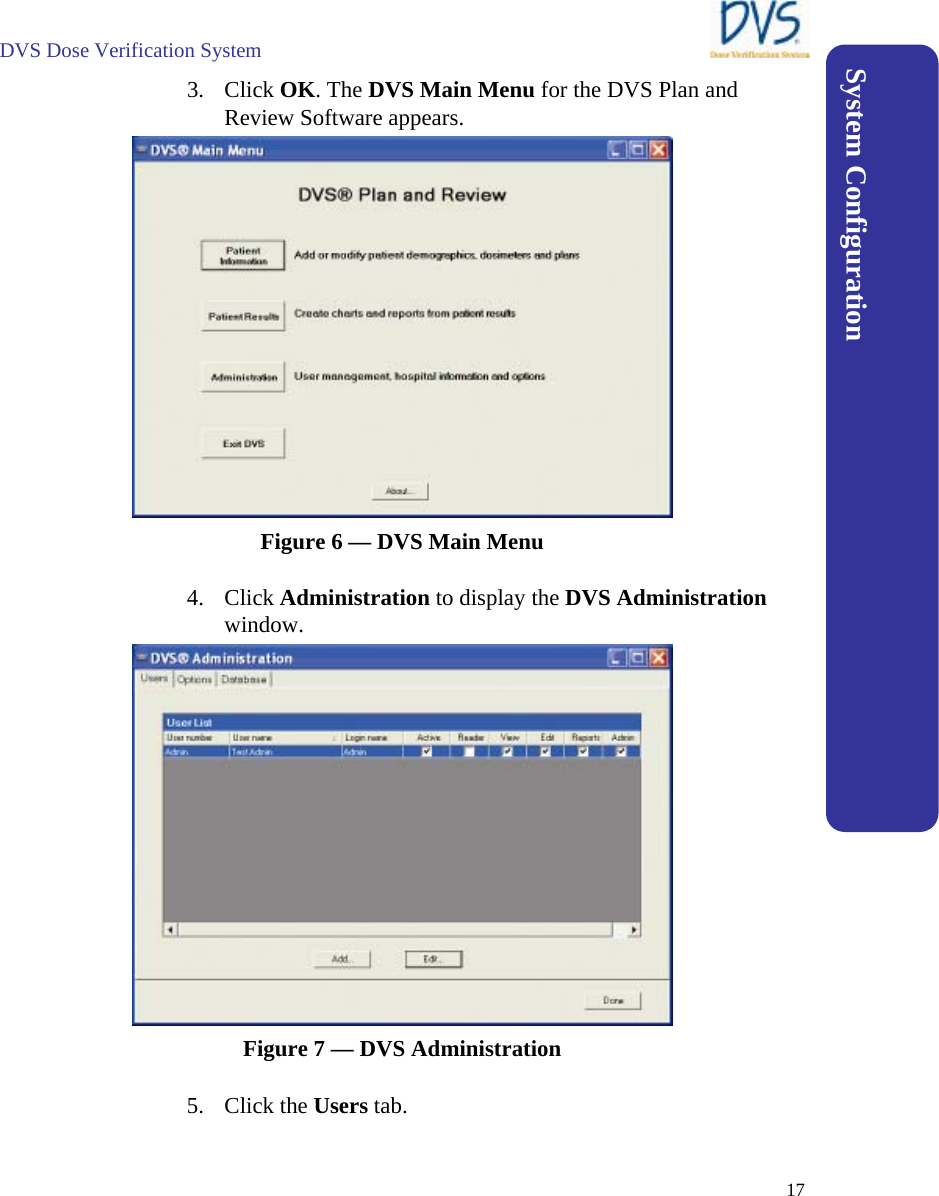
>
Sicel Technologies
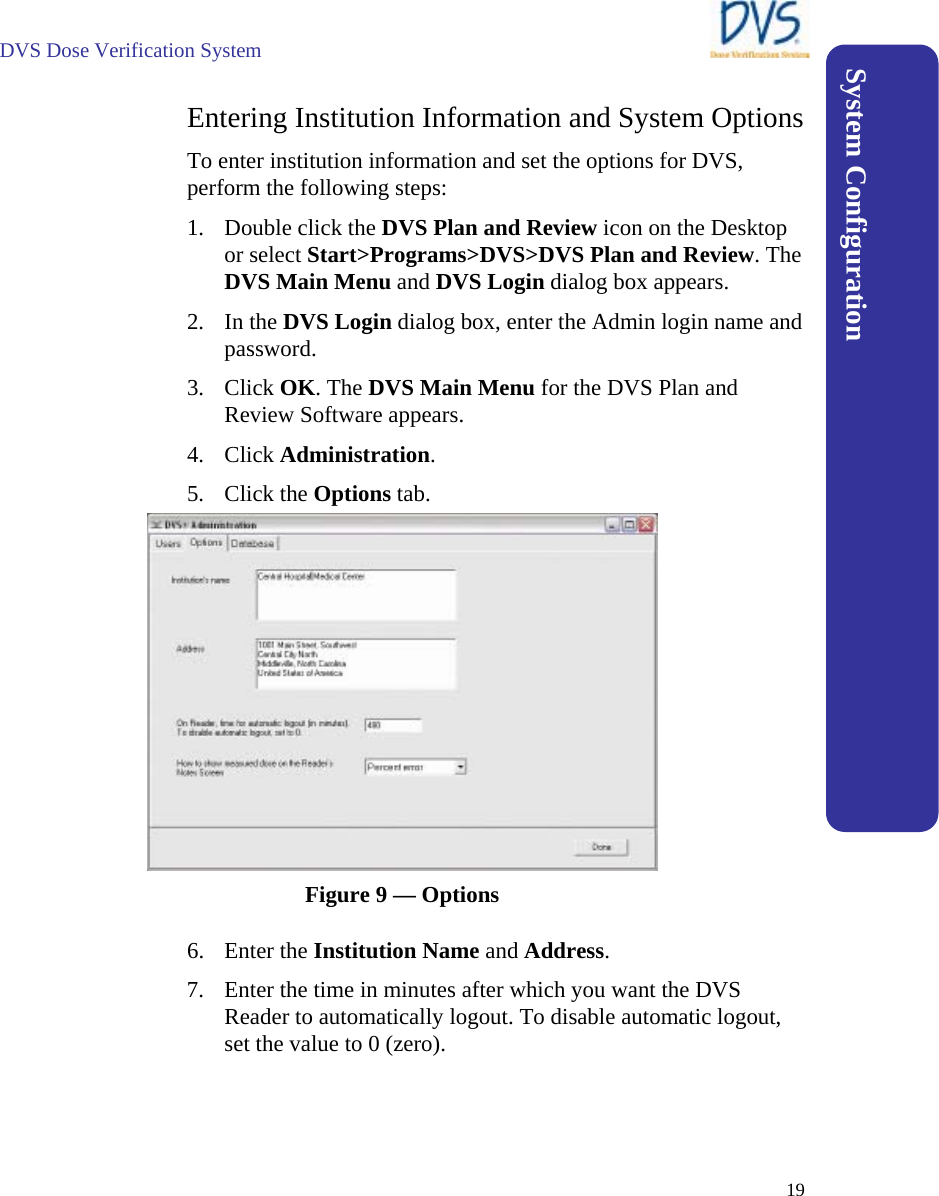
>
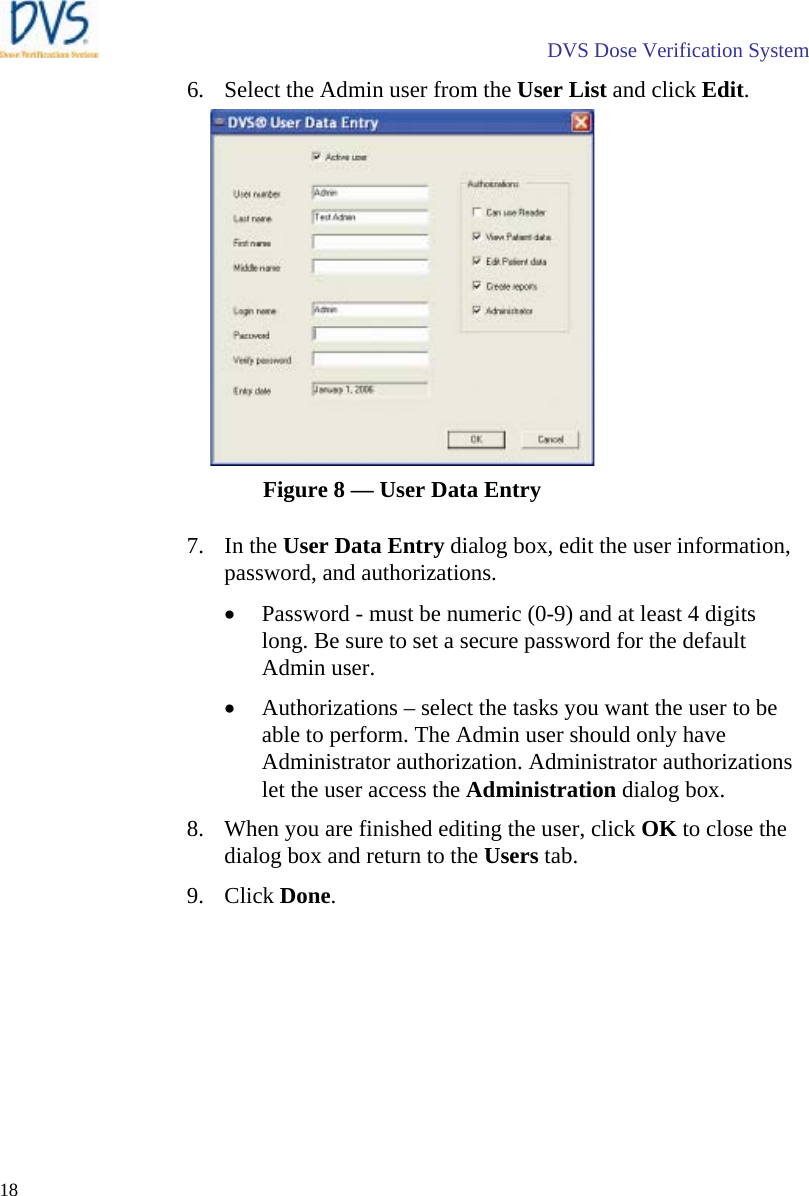
DVS-R-200 User Manual
>
User Manual
Contents
1.
Installation Manual
2.
User Manual
User Manual
Navigation menu
Upload a User Manual
Namespaces
Wiki Guide
HTML
PDF
Info
Views
User Manual
Discussion / Help
Navigation


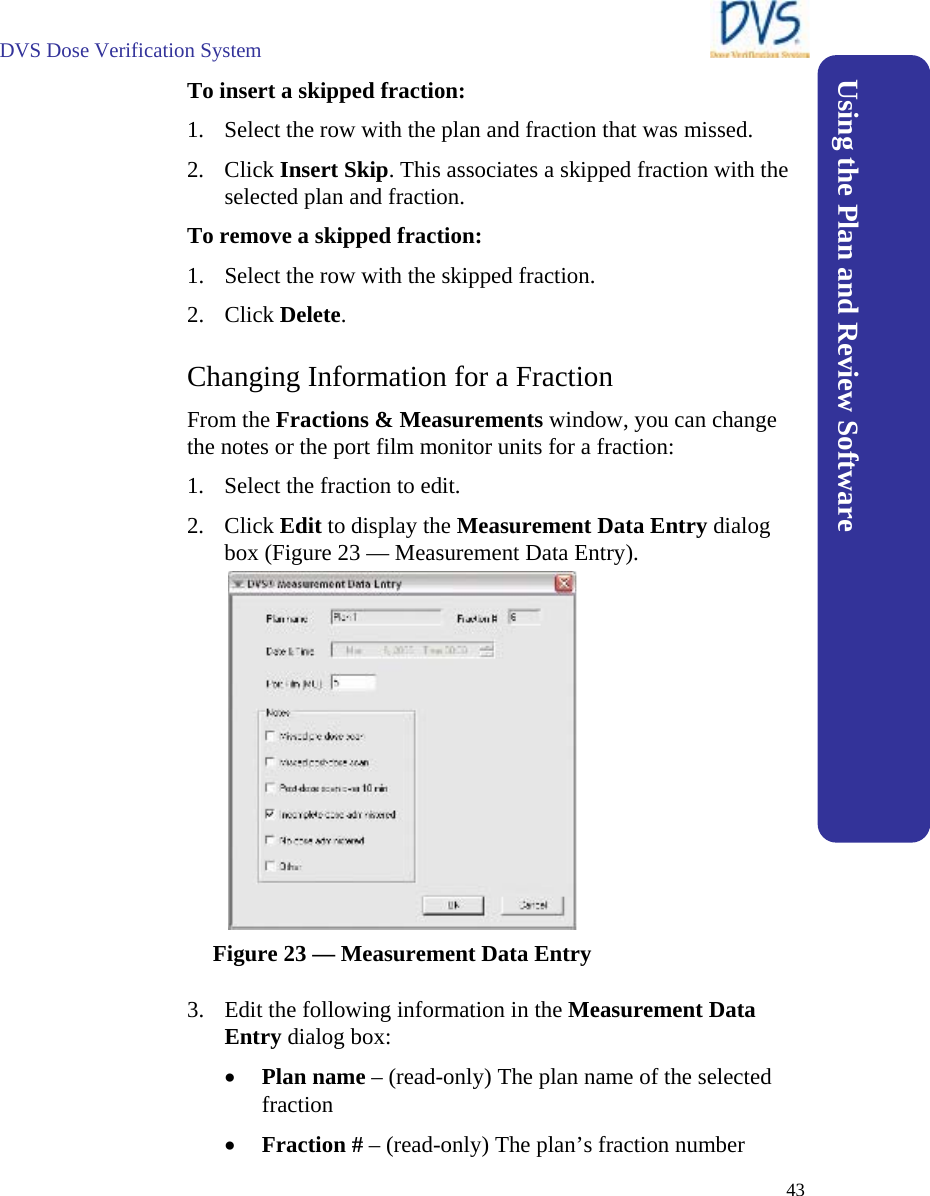
![DVS Dose Verification System 42 • Plan fraction – The plan’s fraction number. • Date – The measurement date. • Status – The measurement status for the plan and fraction: • Ready – A normal measurement was taken. • Skipped – No measurement was taken, but treatment was given. • Deleted – The measurement is marked as deleted; it is not associated with a plan and fraction. • [Blank] – No measurement or treatment has been performed yet. • Port film (MU) – The number of monitor units from port films taken during the measurement. • Notes? – Whether any notes check boxes were selected for the measurement. Yes means there are notes. Blank means there are no notes. Deleting a Fraction To mark a measurement fraction as deleted so it is not associated with a plan and fraction, perform the following steps: 1. Select the measurement. 2. Click Delete. The measurement is not actually deleted, but will not be used to calculate total dose administered. To restore a deleted measurement: 1. Select the fraction. 2. Click Undelete. Inserting Skipped Fractions Skipped fractions are used to record when treatment was given, but pre- and/or post-dose readings were not recorded. If a skipped fraction is used, the predicted dose is substituted automatically for the measured dose to approximate the cumulative dose. The dose appears in brackets [ ].](https://usermanual.wiki/Sicel-Technologies/DVS-R-200.User-Manual/User-Guide-1001285-Page-49.png)
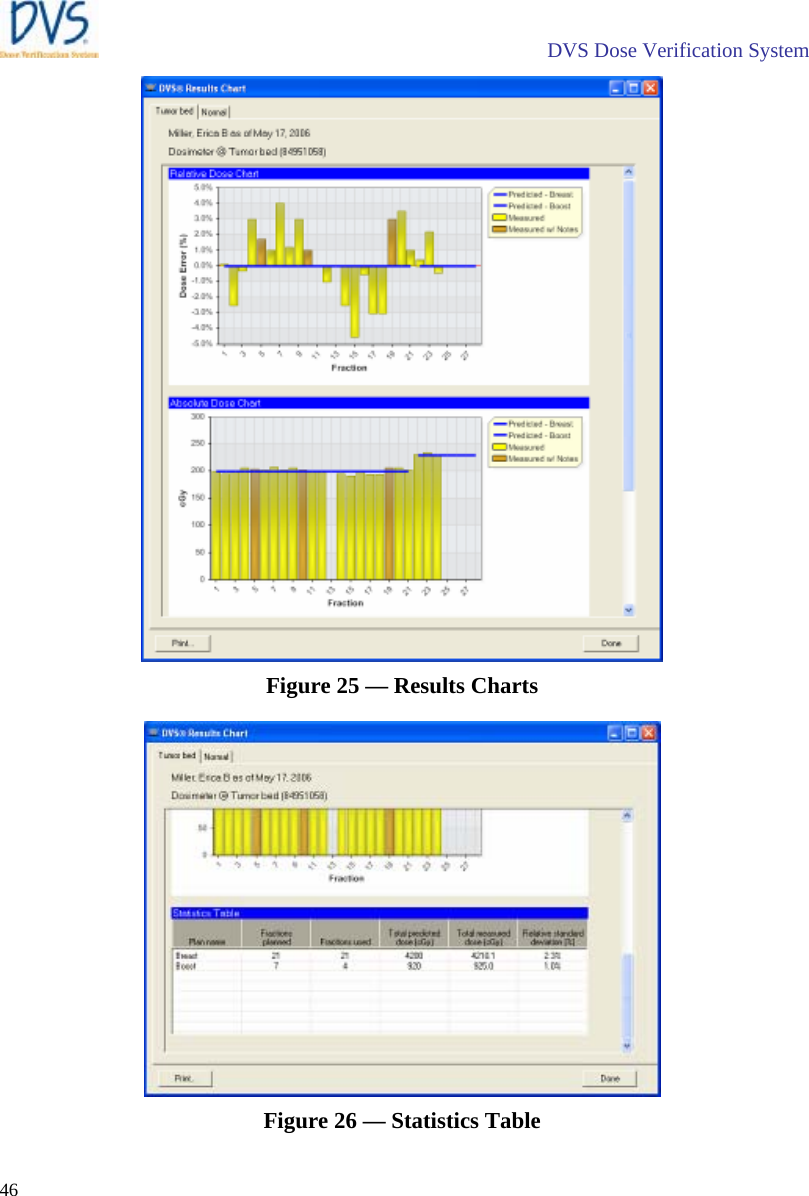

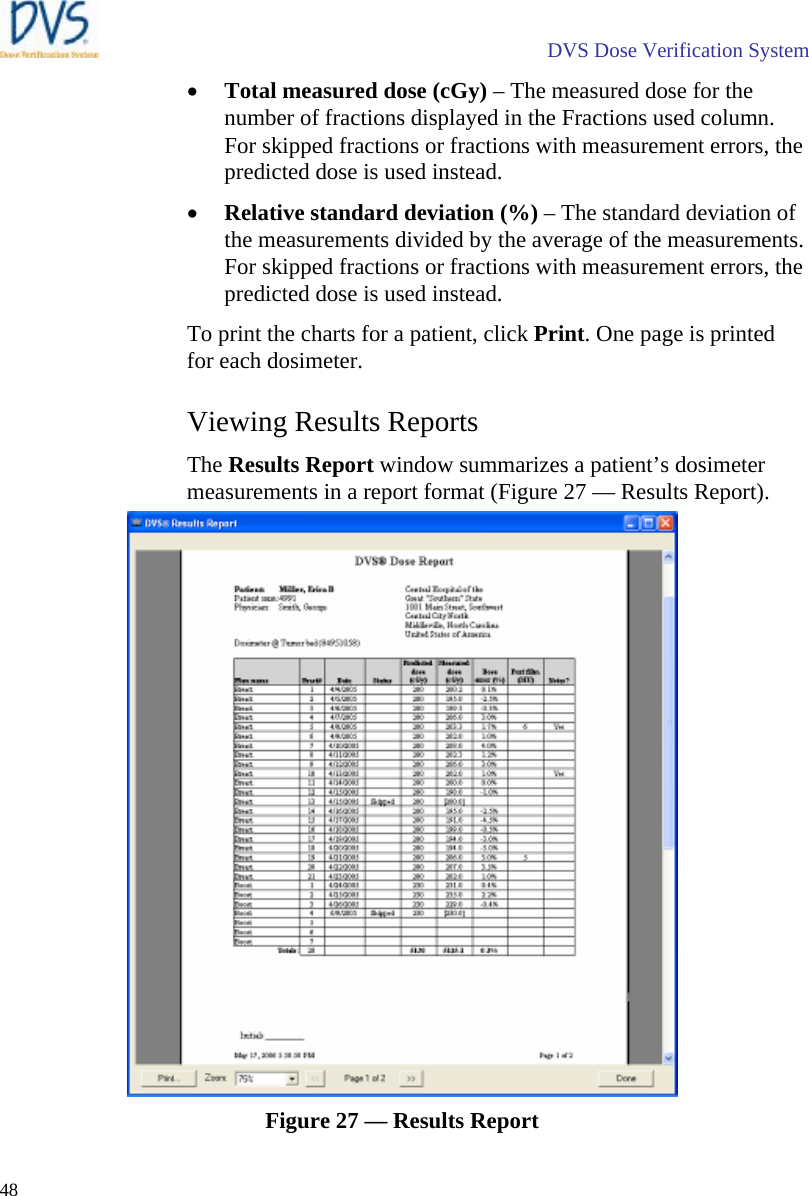
![DVS Dose Verification System 49 The report is similar to the Fractions & Measurements screen (see Working with Measurement Fractions and Skipped Fractions). However, the report also shows the dose values from each dosimeter. The measurement for each dosimeter is shown in a separate table. The columns in the tables are as follows: • Plan name – The plan’s name from the planning table. • Fract # – The plan’s fraction number. • Date – The measurement date. • Status – The measurement status for the plan and fraction. It is one of: • [Blank] – A normal measurement was taken. • Skipped – No measurement was taken, but treatment was given. • Deleted – The measurement is marked as deleted; it is not associated with a plan and fraction. • Error – An error occurred when taking the measurement from this dosimeter. • Predicted dose (cGy) – The dose from the planning table. • Measured dose (cGy) – The measured dose. • Dose error (%) – The difference between the Measured dose and the Predicted dose, divided by the Predicted dose. • Port film (MU) – The number of monitor units from port films taken during the measurement. • Notes? – Whether any notes check boxes were selected for the measurement. Yes means there are notes. Blank means there are no notes. The size of the displayed report can be changed with the Zoom selection. This does not affect the printed report. To display the next page of the report, click >>. To display the previous page, click <<. To print the report, click Print. Using the Plan and Review Software](https://usermanual.wiki/Sicel-Technologies/DVS-R-200.User-Manual/User-Guide-1001285-Page-56.png)