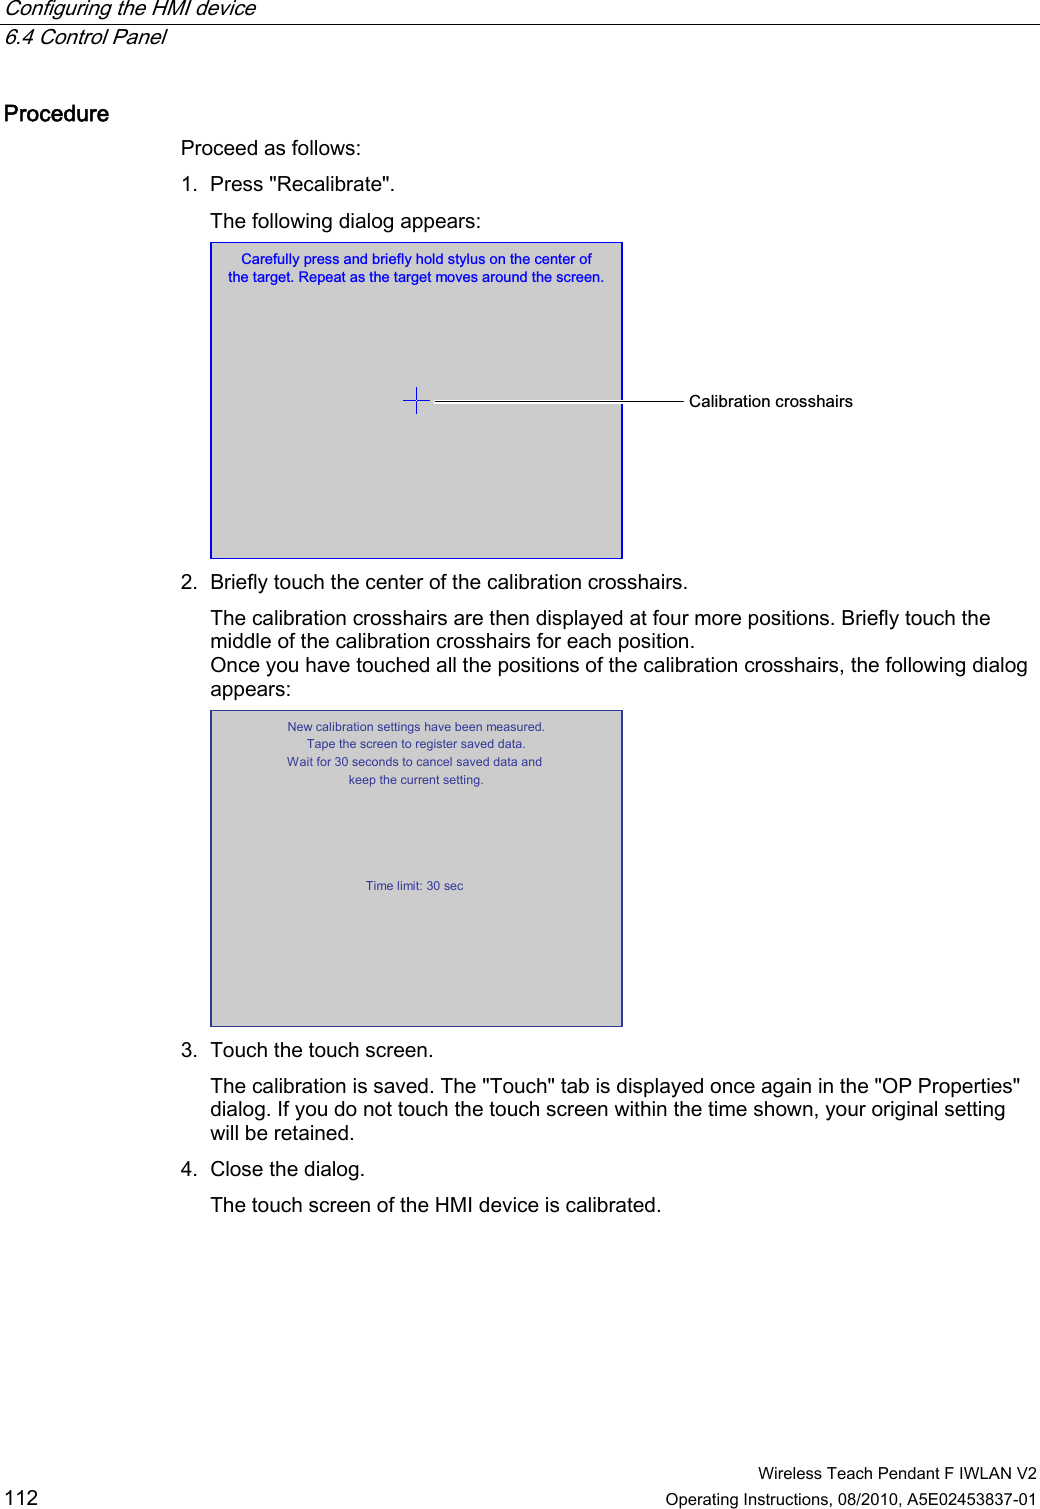
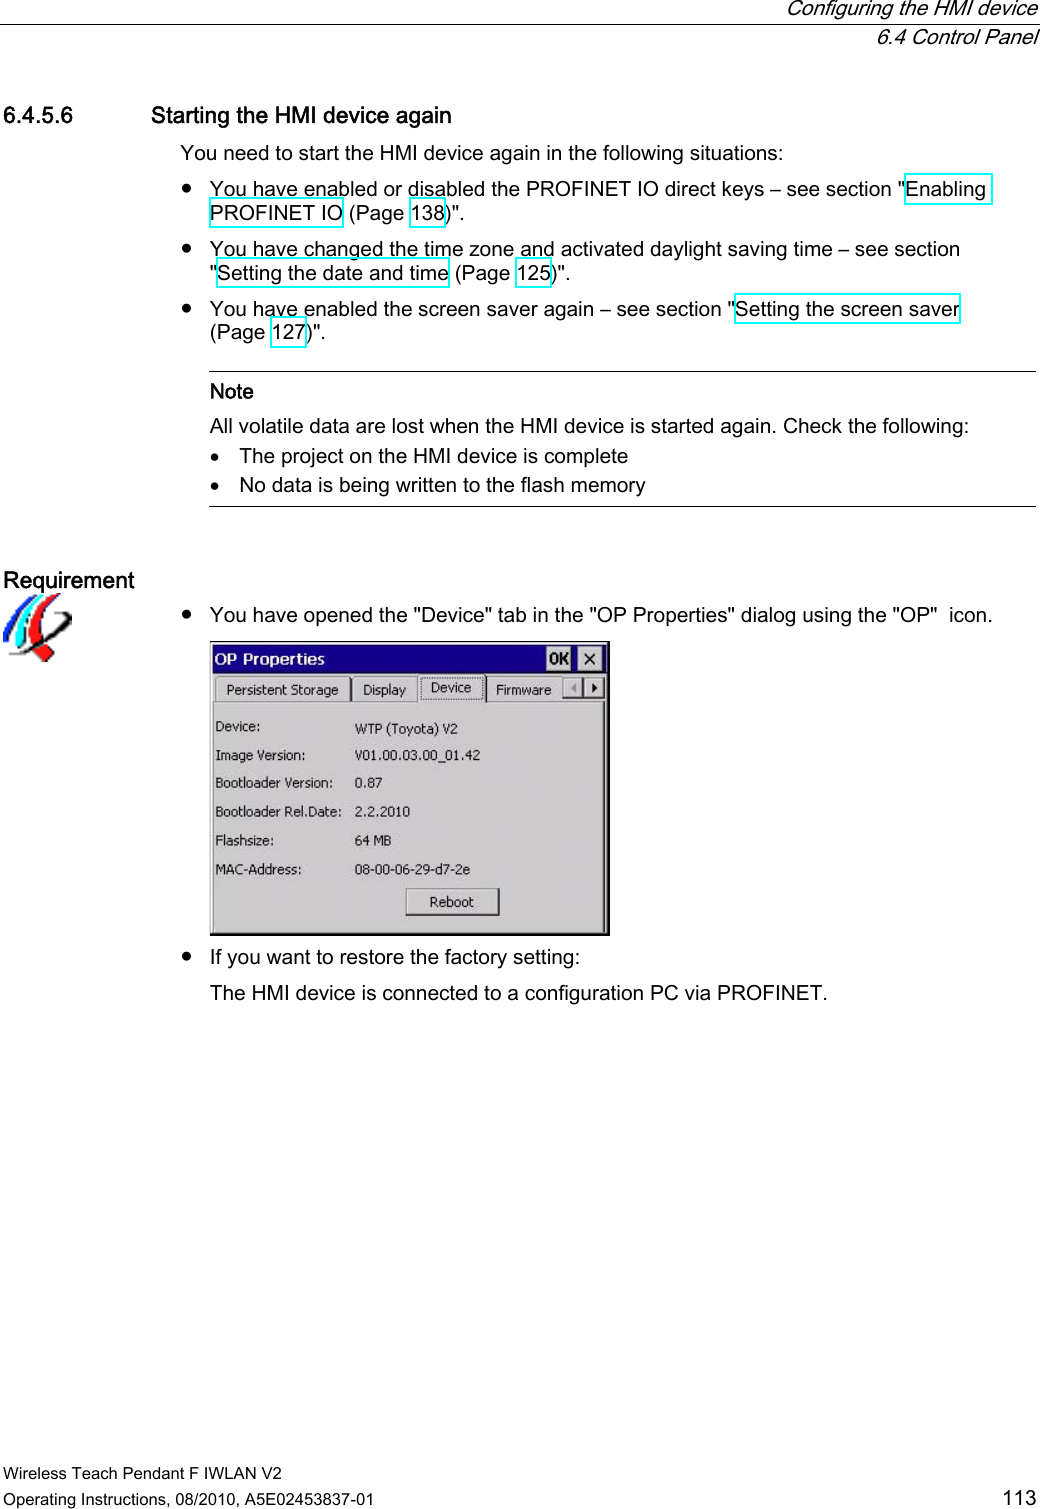
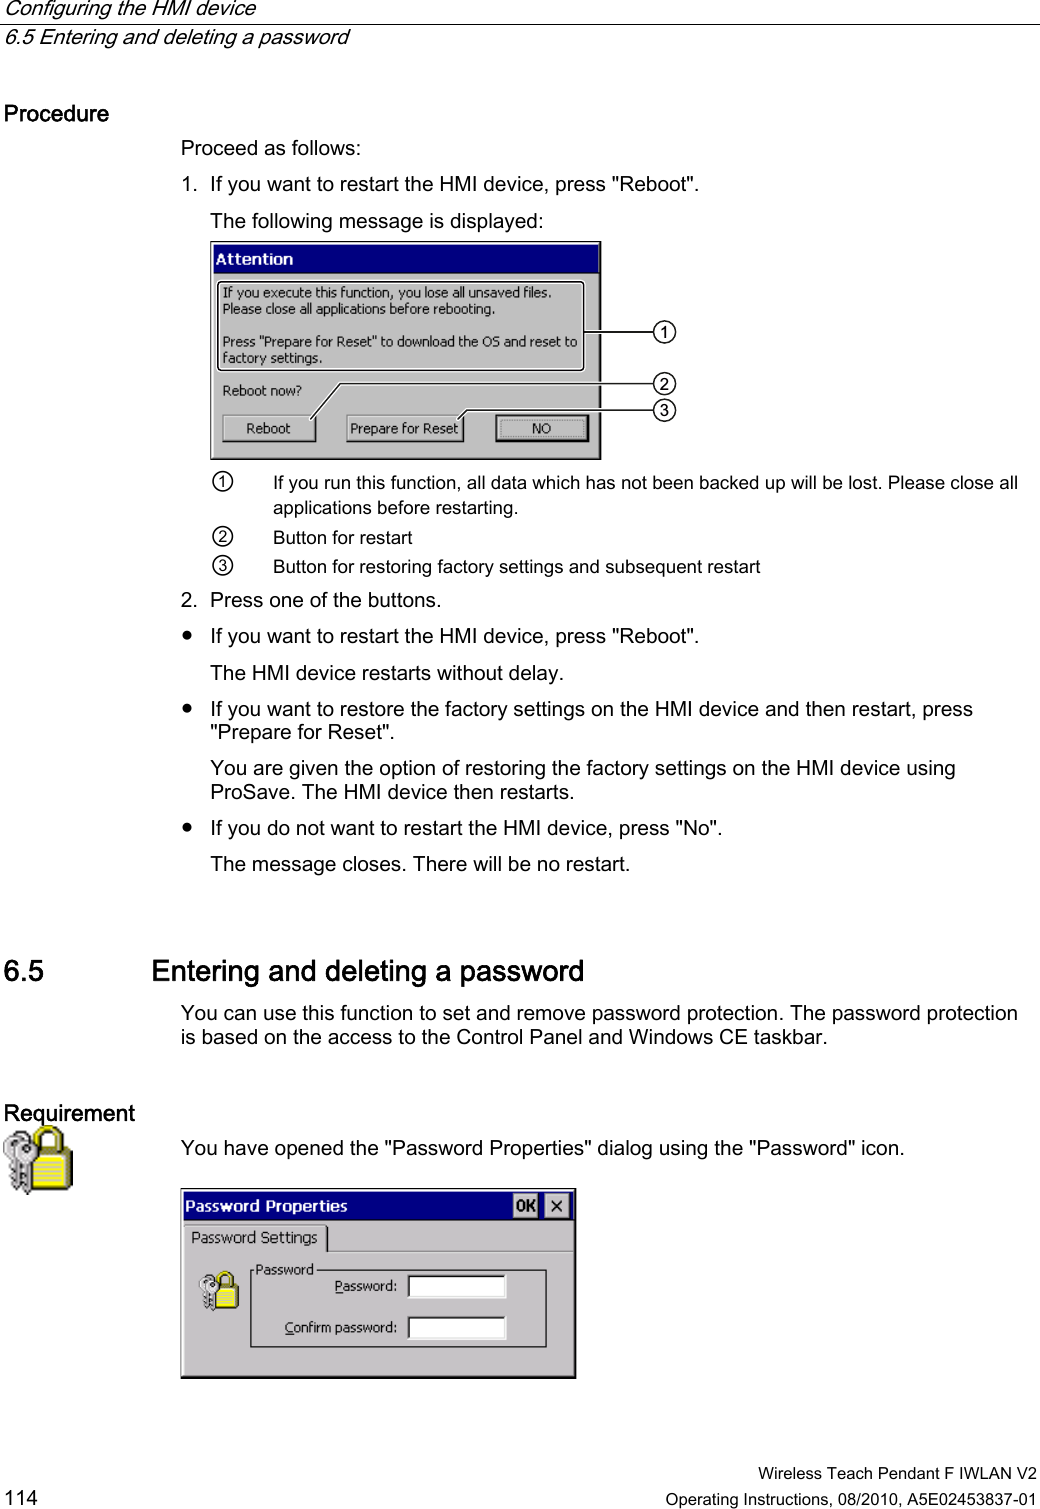
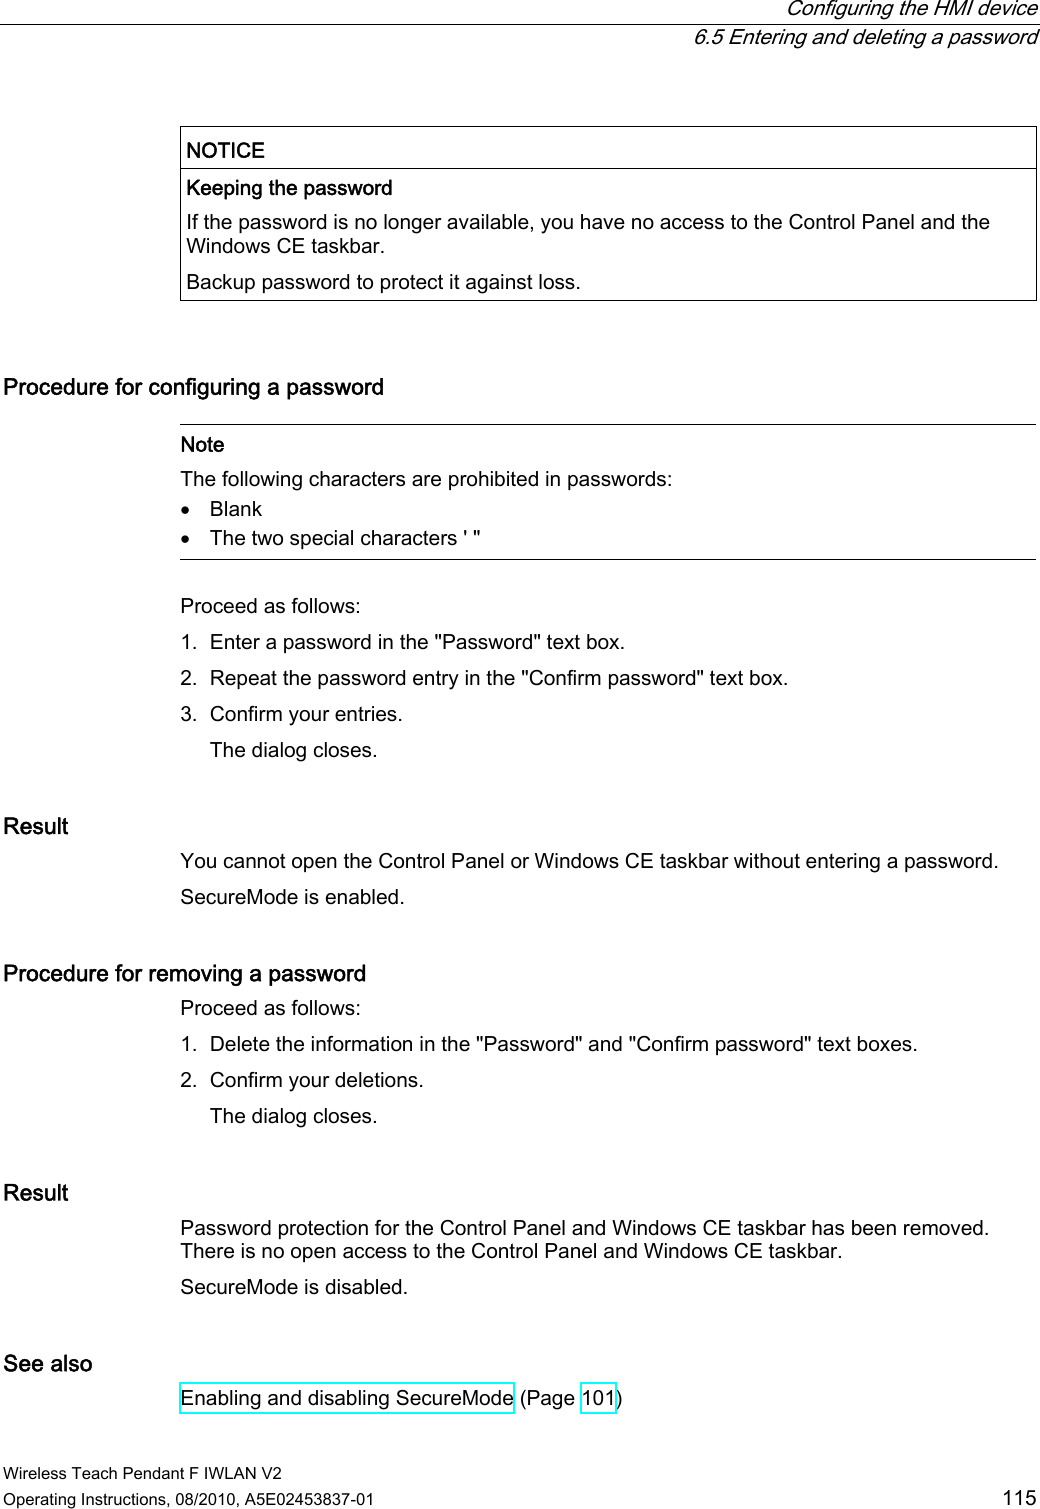
Siemens WTPIWLAN-V200 SIMATIC WTP 277F IWLAN User Manual Wireless Teach Pendant F IWLAN V2
Siemens AG SIMATIC WTP 277F IWLAN Wireless Teach Pendant F IWLAN V2
Siemens >
Contents
- 1. Users Manual p1
- 2. Users Manual p2
- 3. Users Manual p3
Users Manual p2

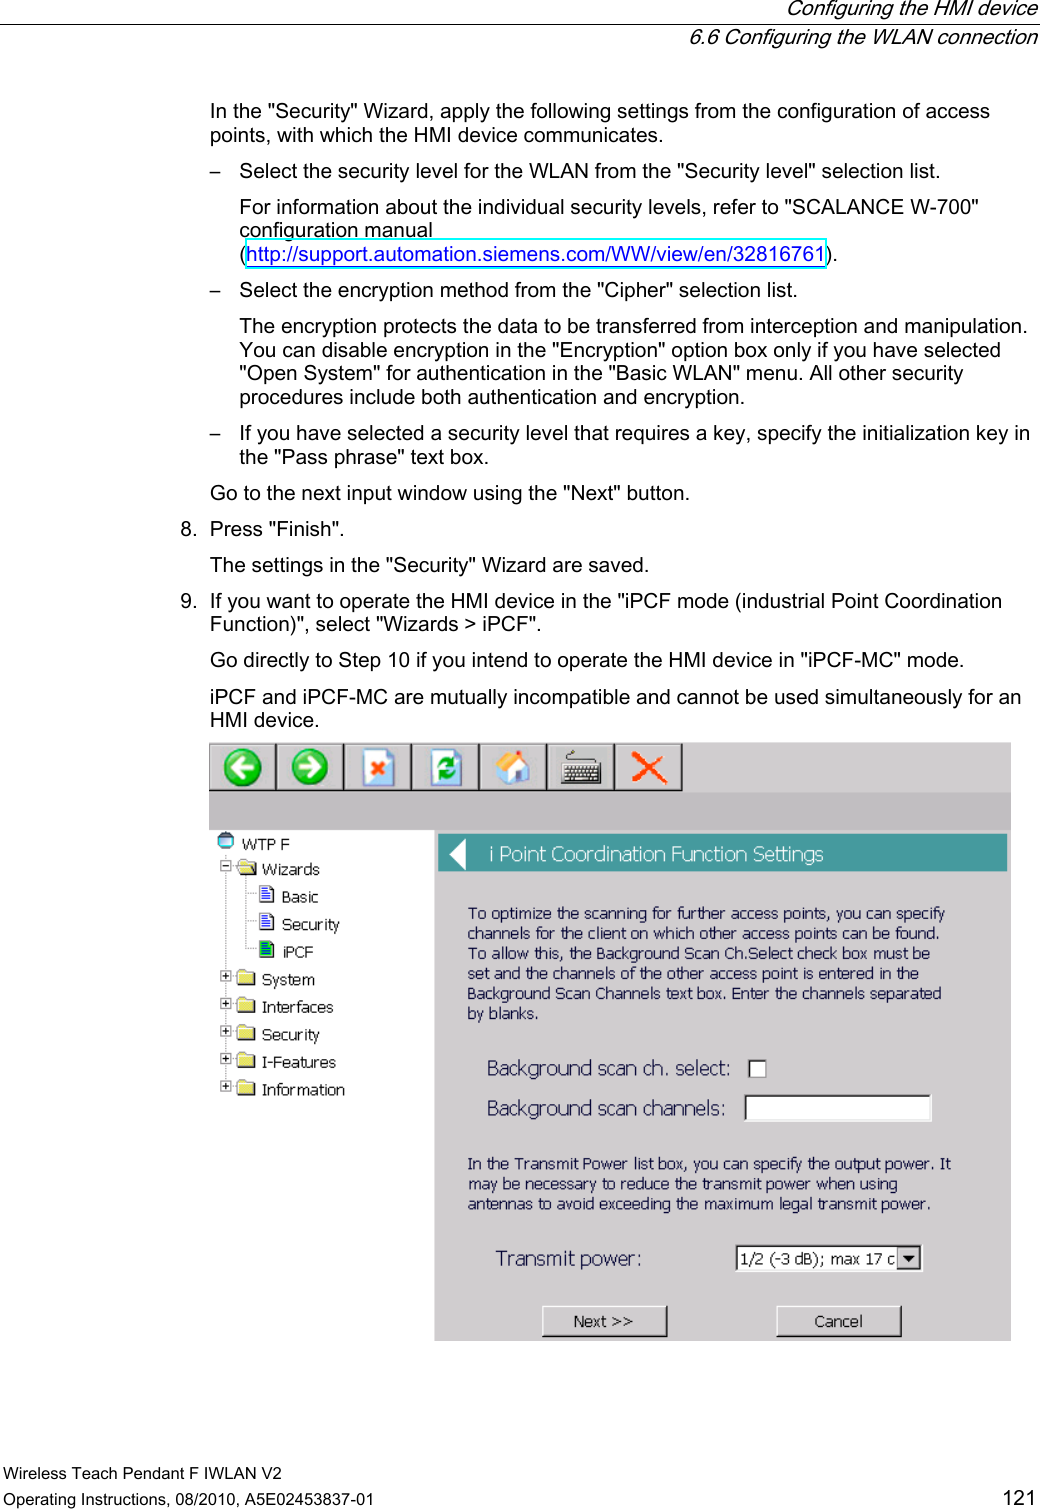
![Configuring the HMI device 6.6 Configuring the WLAN connection Wireless Teach Pendant F IWLAN V2 Operating Instructions, 08/2010, A5E02453837-01 119 The following characters are supported: – Numbers 0 to 9 – Letters abcdefghijklmnopqrstuvwxyz ABCDEFGHIJKLMNOPQRSTUVWXYZ – The special characters !$"#%&'()*+,-./:;<=>?@[\]^_`{|}~ and the space character 4. Apply the settings with the "Set Value" button. 5. Select "Wizards > Basic". Make the following settings in the "Basic" Wizard. Go to the next text window using the "Next" button. – Selection list "Country Code" Select the country in which you are operating the HMI device. The corresponding channel allocation and setting for power level is automatic. NOTICE Country code The country setting is required for operation complying with the approvals. Selecting a country that does not match the country in which the HMI device is being used can have criminal consequences. The national approvals for the HMI device are listed on the back of the device and in the product information for "Wireless Teach Pendant F IWLAN" in the Internet (http://support.automation.siemens.com/WW/view/en/30360848/133300). Under "Country code", select the country in which you are operating the HMI device. – "Connect to any SSID" check box If this box is checked, the HMI device connects to the access point which provides the best possible data transfer and to which a connection is permitted based on the security settings specified under "Security". – "SSID" text box PRELIMINARY II 1.7.2010](https://usermanual.wiki/Siemens/WTPIWLAN-V200.Users-Manual-p2/User-Guide-1313129-Page-19.png)
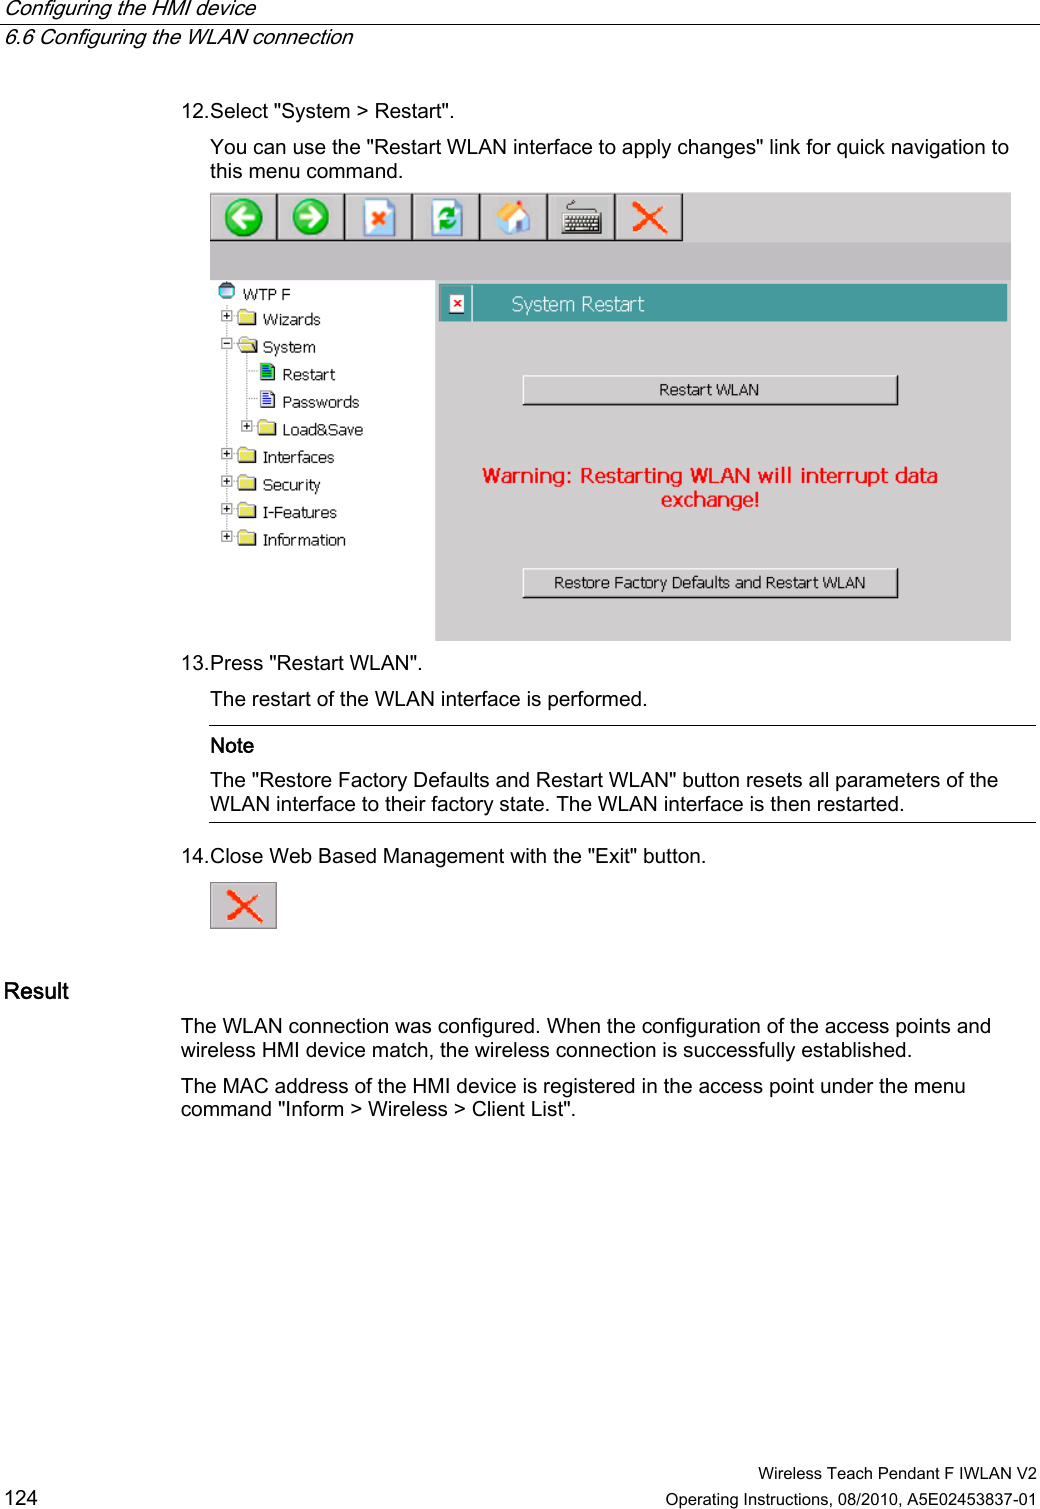
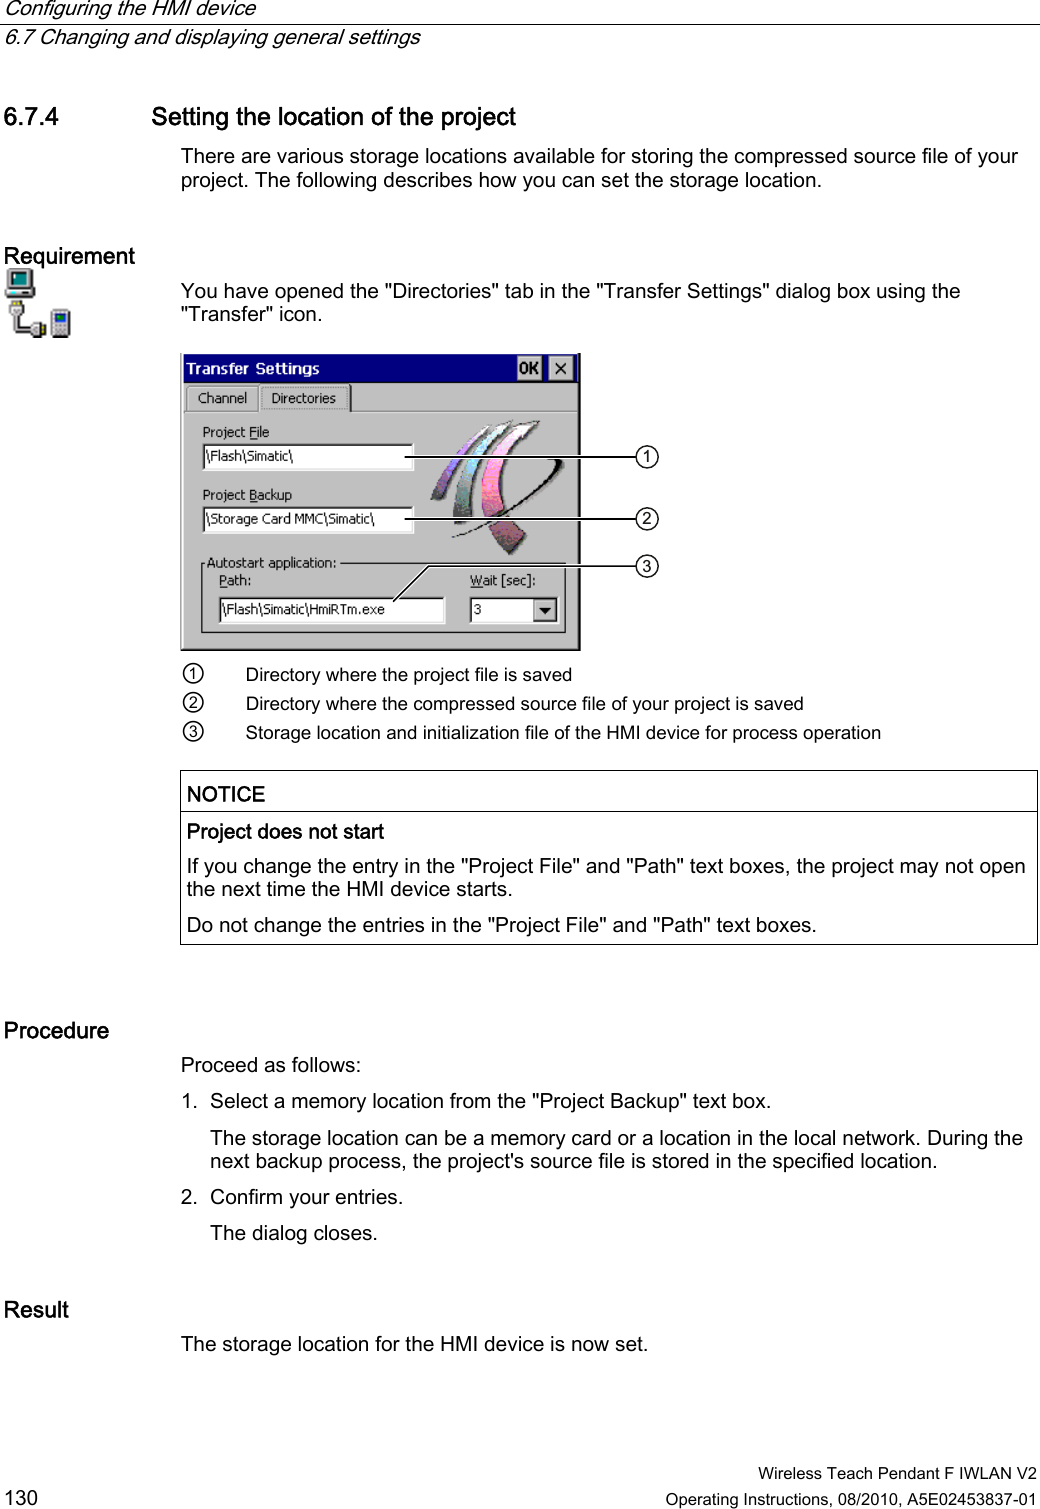
![Configuring the HMI device 6.7 Changing and displaying general settings Wireless Teach Pendant F IWLAN V2 Operating Instructions, 08/2010, A5E02453837-01 131 6.7.5 Setting the delay time for the project You can use this function to set a delay time. The delay time determines how long the loader appears after the HMI device starts and before the project opens. Requirement You have opened the "Directories" tab in the "Transfer Settings" dialog box using the "Transfer" icon. NOTICE Project does not start If you change the entry in the "Project File" and "Path" text boxes, the project may not open the next time the HMI device starts. Do not change the entries in the "Project File" and "Path" text boxes. Procedure Proceed as follows: 1. Select the desired delay time in seconds from the "Wait [sec]" selection box. The project starts immediately with the value "0". Note To launch the Loader after the project opens, an operator control must be configured in the project with the "Close project" function. 2. Confirm your entries. The dialog closes. Result The delay time for the HMI device is now set. PRELIMINARY II 1.7.2010](https://usermanual.wiki/Siemens/WTPIWLAN-V200.Users-Manual-p2/User-Guide-1313129-Page-31.png)